Metropolis Kodi Build Overview
The article will help you on how to install Metropolis Kodi Build.

Metropolis is beautifully designed with a scenic theme interface that you can find on the cMaN Repository. This build brings you not just a scenic view, but also a great lineup of content to watch for free. You can watch on their wide selection of content such as Movies, TV shows, Live TV, One-click section, and more.
The good thing is, that this build allows you to log in or integrate your Trakt account to synchronize your library. This build has a beautiful and well-organized interface that works well on Kodi 19.5 Matrix.
It also uses different Kodi add-ons to provide you with a massive collection of content. Some of the supported addons that you can see are Asgard, Balck, Apex Sports, Fen, and more. You can also ensure that this build provides you high quality streaming links as it supports Real Debrid.

How to Install Metropolis Kodi Build with Screenshot
Installing a Kodi build has a lot of processes to take. That is why we will guide you step by step on how you can install it on Kodi.
Follow the following steps below.
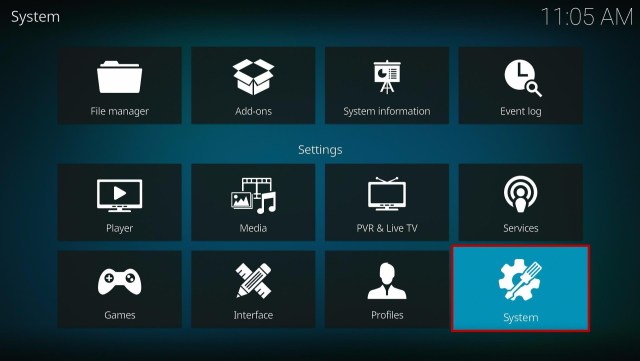
1. On your Firestick, open Kodi and go to Settings.

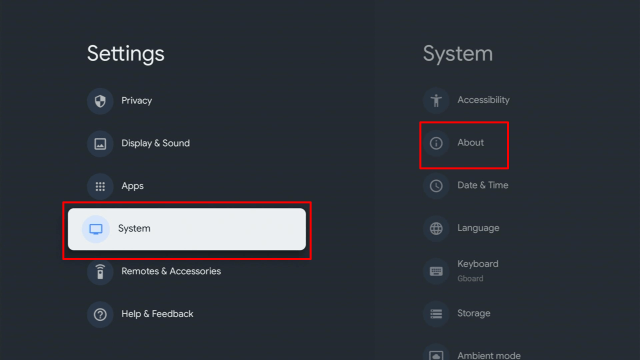
2. Select on System.
3. Click on the Add-ons menu and Turn ON the Unknown Sources.

4. Select Yes when the box appears.

5. Go back one step and click on File Manager.

6. Select the Add Source.

7. A box will pop up, so click on the ‘None’ option.

8. Now type in this URL http://cmanbuilds.com/repo and click OK.

9. Name this URL as cman and tap OK.

10. After that, go back to the system menu and select Add-ons.

11. Click Install from Zip File.

12. When a box pop up, tap the Yes button.

13. Select cman or any name you have given.

14. Choose repository.cMaNWizard.zip

15. Wait a few minutes for the addon to be installed. After that, an icon will appear at the top menu.

16. Tap the Install from Repository.

17. Then select cMaN’s Wizard Repository from the list.

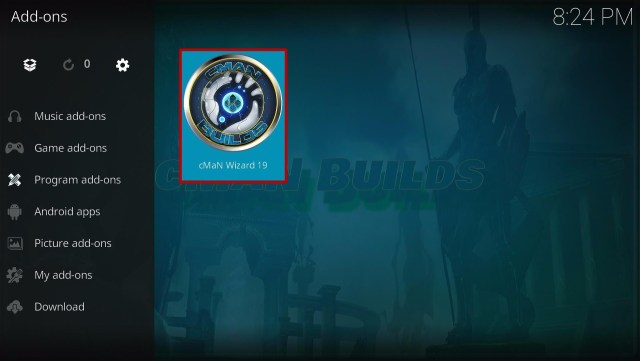
18. Select the Program add-ons.

19. Click cMaN Wizard 19.

20. Tap the Install button.

21. Wait for the cMaN Wizard 19 installed notification.

22. Wait for the Installed message to appear and click the Continue

23. Tap the Close

24. Go back to the Kodi home screen and scroll down to Addon.

25. From the Program add-ons, select cMaN Wizard 19.
26. Click the Builds

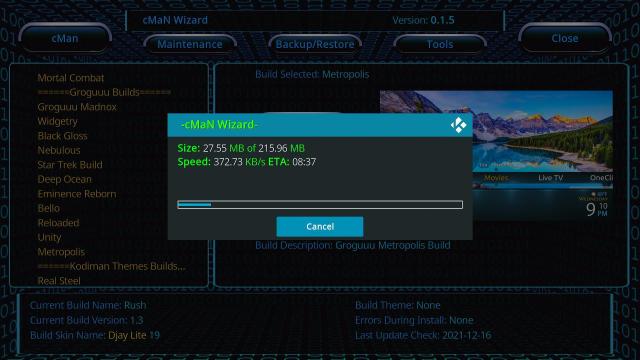
27. Scroll down and select Metropolis

28. Click Fresh Install

29. Tap on the Yes button

30. Wait for the build to download.
31. Click the OK button

32. Launch your Kodi again

33. That’s it! You have successfully installed the Metropolis Kodi Build.

ReviewVPN cannot attest to the legality, security and privacy of the applications discussed on this site. It is highly recommended that you use a VPN service while streaming or using Kodi. Currently, your IP 216.73.216.84 is visible to everyone and your Browser is being tracked by Advertisers & ISP Provider. Here are the main reasons why you must use a VPN: A VPN works be replacing your ISP-assigned IP address and creating an encrypted tunnel. We recommend the no log service offered by IPVanish. It works well on a Firestick and offers the fastest possible speeds.
YOUR INTERNET ACTIVITY IS BEING WATCHED
Legal Disclaimer: ReviewVPN.com does not encourage or endorse any illegal activity involved in the usage of services and applications referenced on this site. We do not verify the licensing agreements of services. The end-user is wholly responsible for ensuring that any media accessed through these services does not violate copyright and/or licensing laws. ReviewVPN does not promote, link to, or receive compensation from any Apps and IPTV services.
Install SurfShark on Firestick

Features of Metropolis Kodi Build
Categories and Contents
- The main categories are TV shows, Movies, Trakt, Live TV, One-click, Sports, Weather, Favourites, Settings, Addons, and Quit.
- In the Movie section, you can choose from Movies Collection, TV shows collection, Movie/TV Shows Watchlist, Your Recently watched Movies/TV Shows, and more.
- You can also see your IN progress Movies and Tv shows.
- It also gives you content recommendations based on what you have watched.
- Choose from Trending, Popular, Most Played, Anticipated, Top 10 Box Office, Liked list, and more.
- TV shows: Choose from Trending, Popular, Premiers, Top Rated, Airing Today, On The Air, Upcoming, Anticipated, In Progress TV Shows, In Progress Episodes, Oscar Winners, and more.
- Watch on Live TV, you can choose from different networks such as ABC, ACC Network, AE, AMC, Animal, BBC America, Big Ten Network, BET, Boomerang, CBS, and more.
- One-Click section contains different subcategories such as 4K one click, One-click, Non-Debrid Section, Movies, TV shows, Soaps, Documentaries, Kids, Sports, Stand Up, and more.
- Watch on Live Sports such as MMA Live, Football, Wrestling, Boxing, American Football, Formula 1, Baseball, College Football, Basketball, NASCAR, Hockey, and more.
- Support Trakt account integration to synchronize your library.
Preloaded Addons/Repos
Asgard, ApeX Sports, Black, cMan Wizard, Fen, FenomScrapers, Loop TV 1,2,3, Nixgates, Metropolis, Loop TV, Seren, SNES, The Movie Database, The Xstream, Mad Titan Sports, Magnetic Repo, and more.
Pros and Cons
Pros
- It has a beautifully designed scenic view interface.
- Brings you a massive collection of content to watch for free.
- This build uses a lot of preloaded add ons to provide you with content.
- It brings you high-quality streaming links with a maximum 4k resolution.
- Supported with Real Debrid and Trakt.tv account integration.
Cons
- Some of the provided streaming links are not working.
Should I Use a VPN?

Sometimes these third-party addons/builds are very risky because some use unknown and unprotected servers to give you free streaming links. That is why before you use or stream using the third-party builds, we suggest using a Virtual Private Network to keep you anonymous and protected from these servers by encrypting your data and keeping you unknown online.
One of the best VPNs that we highly recommend is SurfShark, This VPN has an impressive list of features to offer and some of these are the following:
- Destroys geo-block and gains access to different content globally.
- Zero logs and no IP address leaks.
- Bypass censorship and restrictions.
- A high standard of AES 256-bit encryptions will safeguard all of your data.
- Prevent ISPs from interfering with your connection and speed up your internet.
- It gives you unlimited bandwidth and makes your internet speed faster.
- Keep your identity anonymous to protect you from hackers, especially when using public wi-fi.
Note: For more information about SurfShark, please read our SurfShark REVIEW.
Click here to get the lowest price on SurfShark through our exclusive limited-time offer.
How to Install Surfshark on Firestick with Screenshots
If your Firestick still has the older interface, read this article to learn how to update it: Update Firestick Interface.
You can download Surfshark directly from the Amazon App store. It will be easy for you to find Surfshark with your Firestick’s Find feature. Refer to our screenshots below.
Follow our screenshots below to install the SurfShark VPN app on your Fire TV stick.
1. Go to the Home screen of your Firestick.

2. Navigate towards the Find tab. Press the Search button from the resulting dropdown.

3. Type in the keyword of SurfShark and select from the suggestions that will appear.

4. Click the official SurfShark icon from your search results.

5. Press the Download (You own it) button.

6. The SurfShark VPN installer will download on your device.

7. SurfShark VPN’s app will automatically install itself on your Fire TV stick.

8. Press the Open button after completing SurfShark VPN’s installation process.

9. Please wait for the SurfShark VPN to load its user interface.

10. You can now log in with your SurfShark VPN account credentials.

Learn more about Surfshark and Grab the Best Surfshark Deal Now!
Install Surfshark on Firestick


For more VPN discounts, go to ReviewVPN Deals and purchase the best VPN for you.
Alternatives for Metropolis Kodi Build
We list down some Kodi builds that you can try on your Kodi. If you want to know more about these builds, kindly read their corresponding articles. For more addon/build compatible with Kodi 19.5, visit this link What’s working on Kodi 19.5.
FAQs
Can I also get the Metropolis Kodi Build compatible with Kodi 18.9?
No, this build is only available and compatible with Kodi 19.5 Matrix.
Is the Metropolis Kodi Build safe to use?
Yes, this build is safe to use, but if you want to ensure your security, we suggest using a VPN such as SurfShark.
Is streaming on Metropolis Kodi Build for free?
Yes, this build allows you to access and stream their content for free.
Is the Metropolis Kodi Build legal?
Yes, this build is legal as long as it only offers non-copyright content.
Conclusion
Metropolis is a simple and easy-to-use build that works well on Kodi. This build is another good build with a great source of content to watch for free. The good thing is, it supports both real debrid and trakt accounts that give you a better experience in streaming. You can watch their wide selection for content in less buffering experience on Kodi.
We hope this article helps you install the Metropolis Kodi Build.