A Pirate’s Life For Me Kodi Addon
The article will help you on how to install A Pirate’s Life For Me Kodi Addon on Firestick.

Source: http://repo.rubyjewelwizard.com/
People nowadays have their own preferences on which avenue they want to watch their favorite movies or TV shows. Some watch it on paid streaming apps like Netflix, Hulu, Iflix, HOOQ, and many more. Others opt to download their content via torrents for two reasons: 1. They want to keep a copy of the show/movie. 2. They want to download it en-masse and binge-watch after that. Also, there are those that choose to watch it on free streaming sites like Couchtuner, Cucirca, The Series Online, Show Box, and many more. Imagine if you can combine all of those aspects in 1 Kodi Video Add-on. Impossible? Nope, you got it all wrong. It is possible with just one add-on and that is the Pirate’s Life For Me Video Add-on.
browse online anonymously, protect your identity and keep your historical data safe, rather than being used maliciously or simply to feed the internet advertising machine.
A Pirate’s Life for Me Kodi Addon is a unique add-on under the Diamond Wizard Repository that uses torrent sources to play Movies and TV Shows. It also has access to Direct Links which makes it very flexible. It can also be integrated into your Real-Debrid account to ensure a faster, smoother, and buffer-free run. It is very important to note that the torrents are not sent to your device but directly to your Real-Debrid account.

Key Features:
- Real-Debrid Integration
- Torrent-based streaming links (The Pirate Bay, EZTV, Glow Torrents, and recently YTS)
- Direct Links Viewing
- Regular Updates on the add-on
- A huge gallery of Movies and TV Shows to choose from
Easy Installation Guide
- Open Kodi on your device
- Click on the “Gear Icon” and select “System”
- At the add-ons menu, turn on the “Unknown Sources” by clicking “yes”
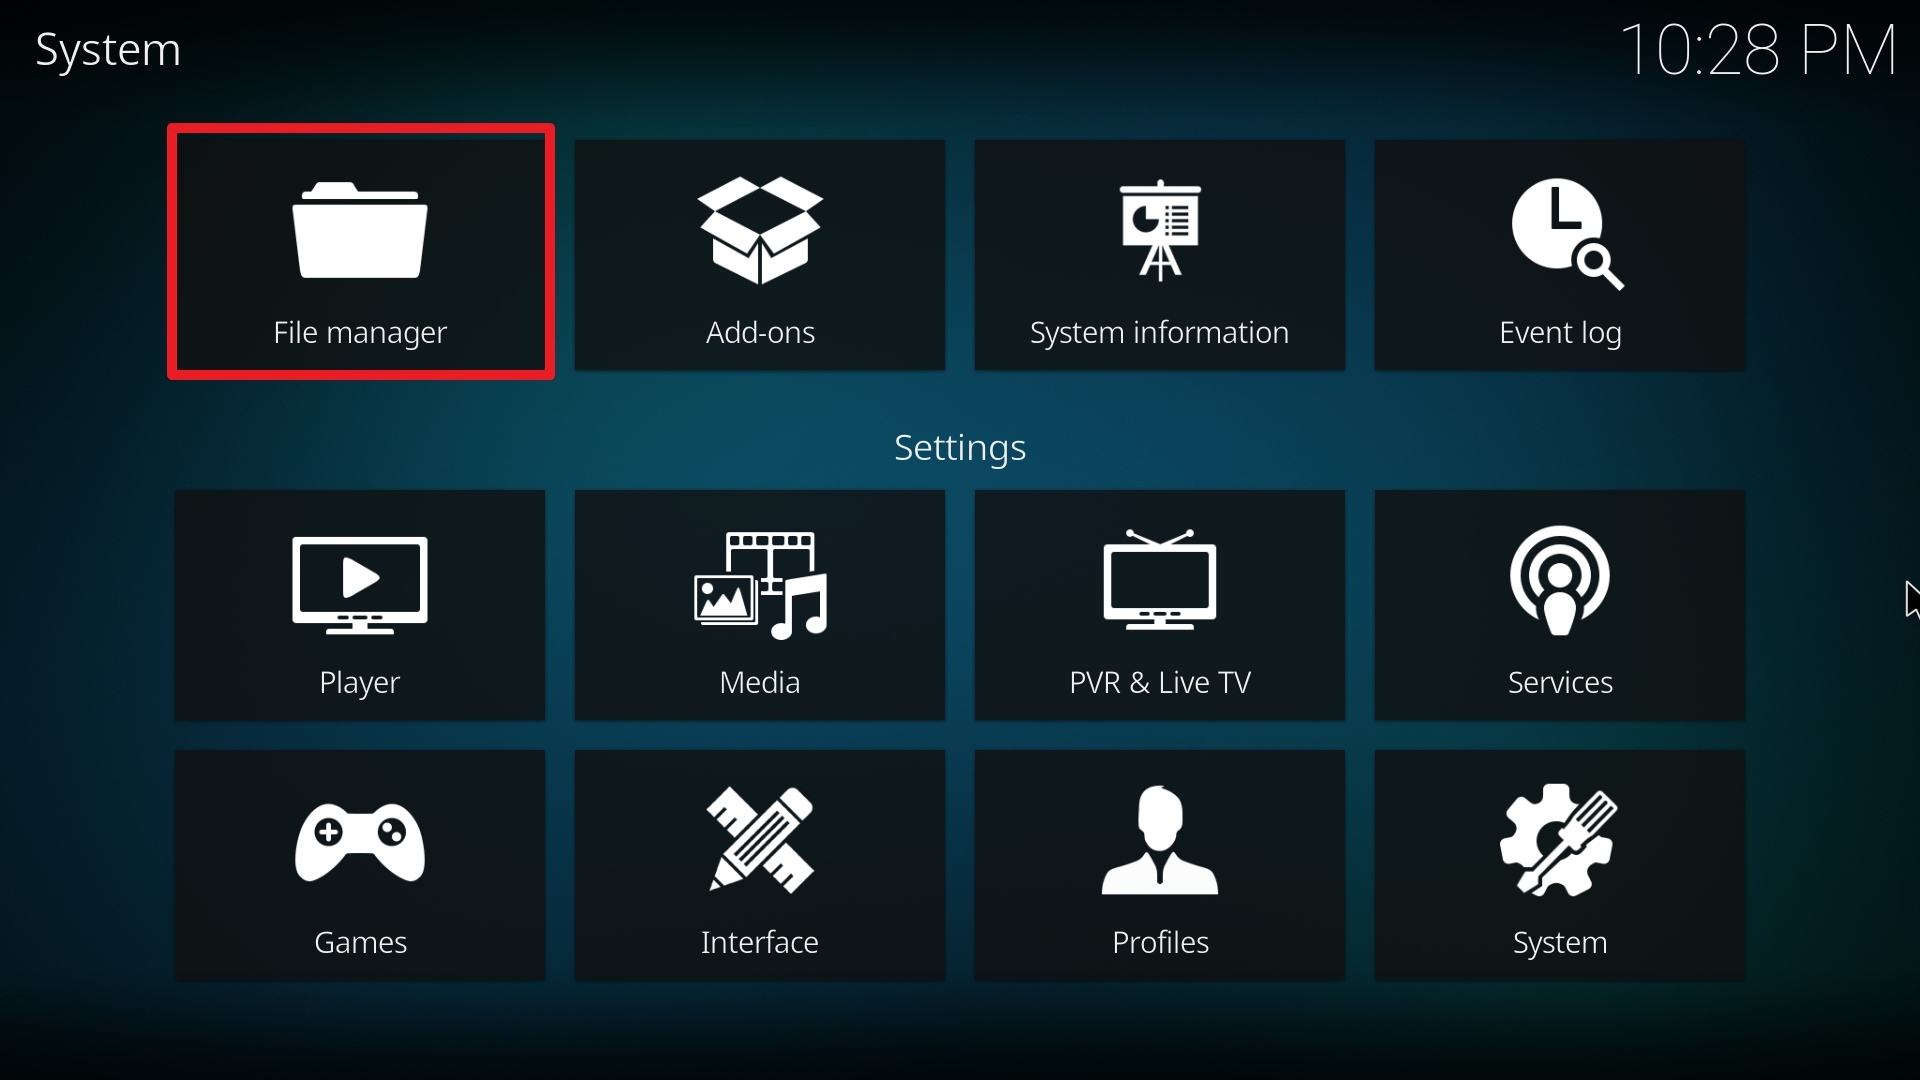
- Go back to the “systems” page and choose “File Manager”
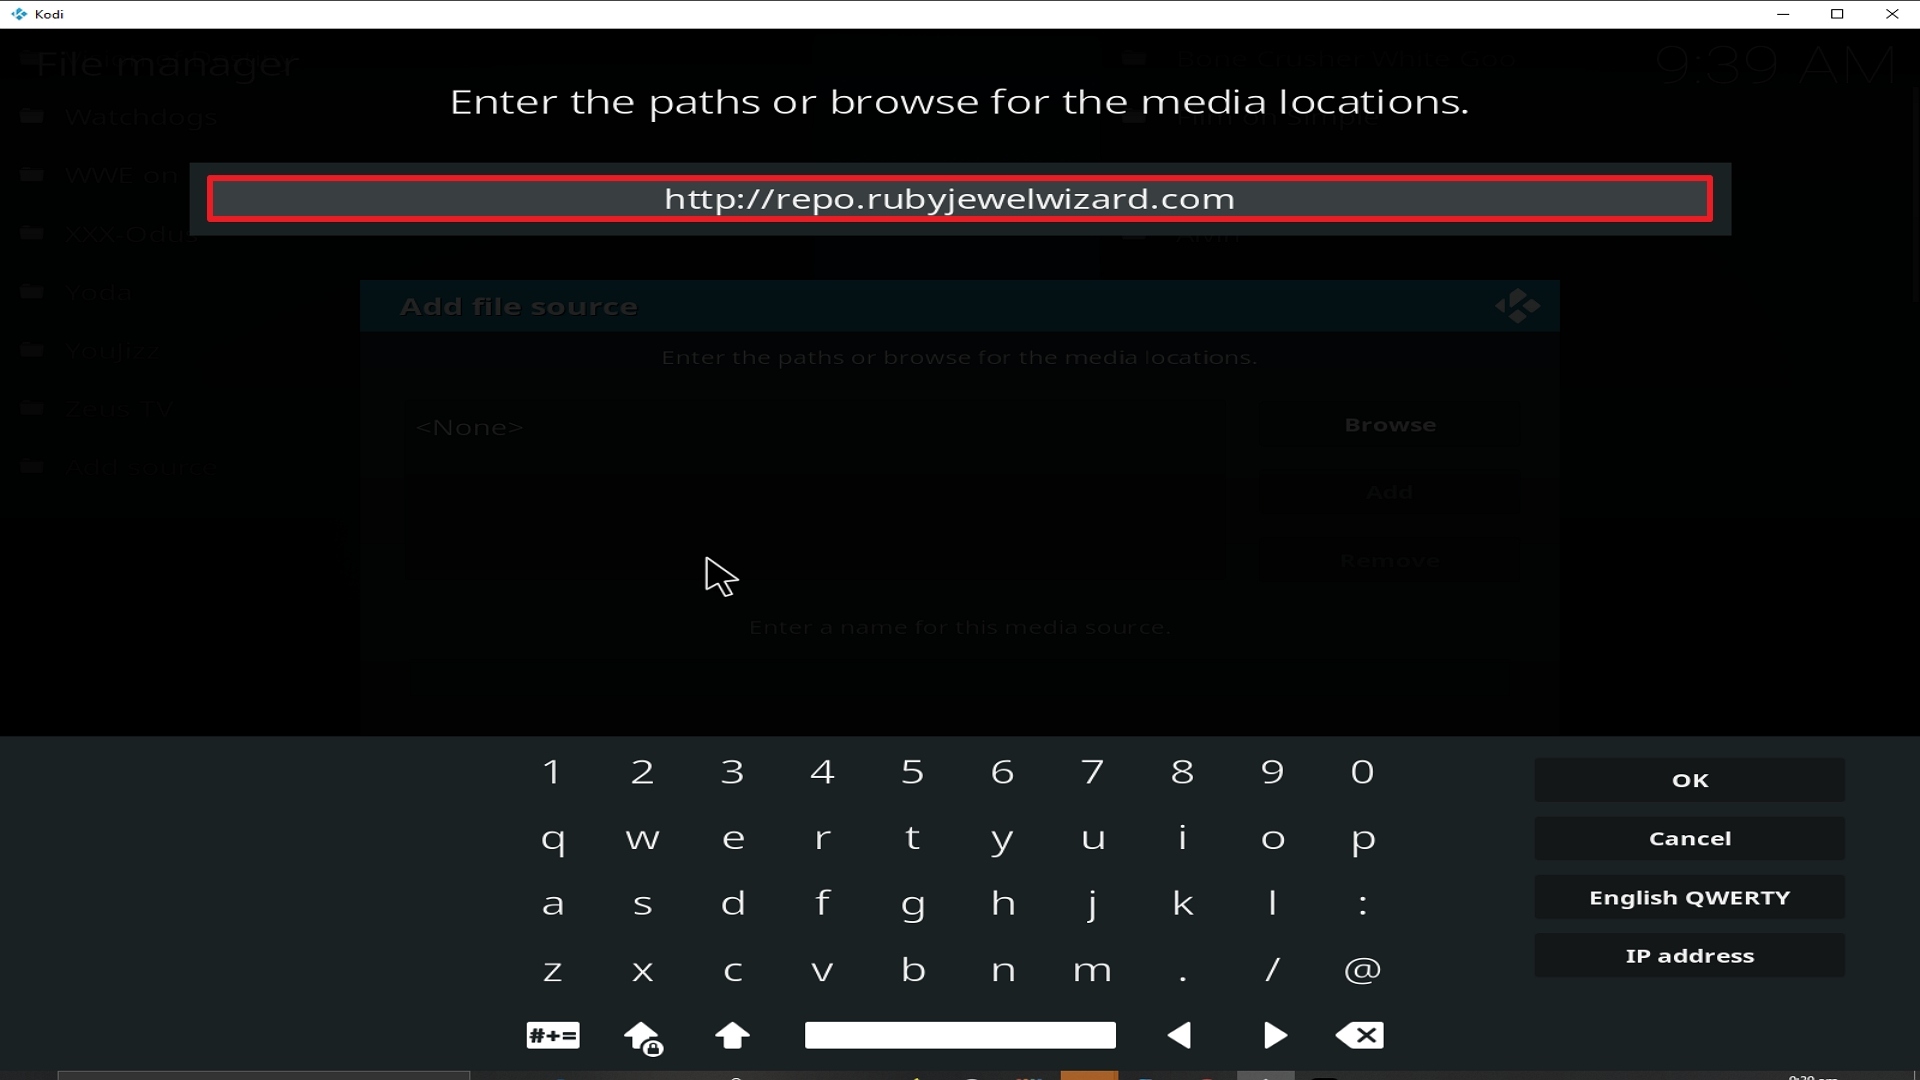
- Choose Add source and select “none”
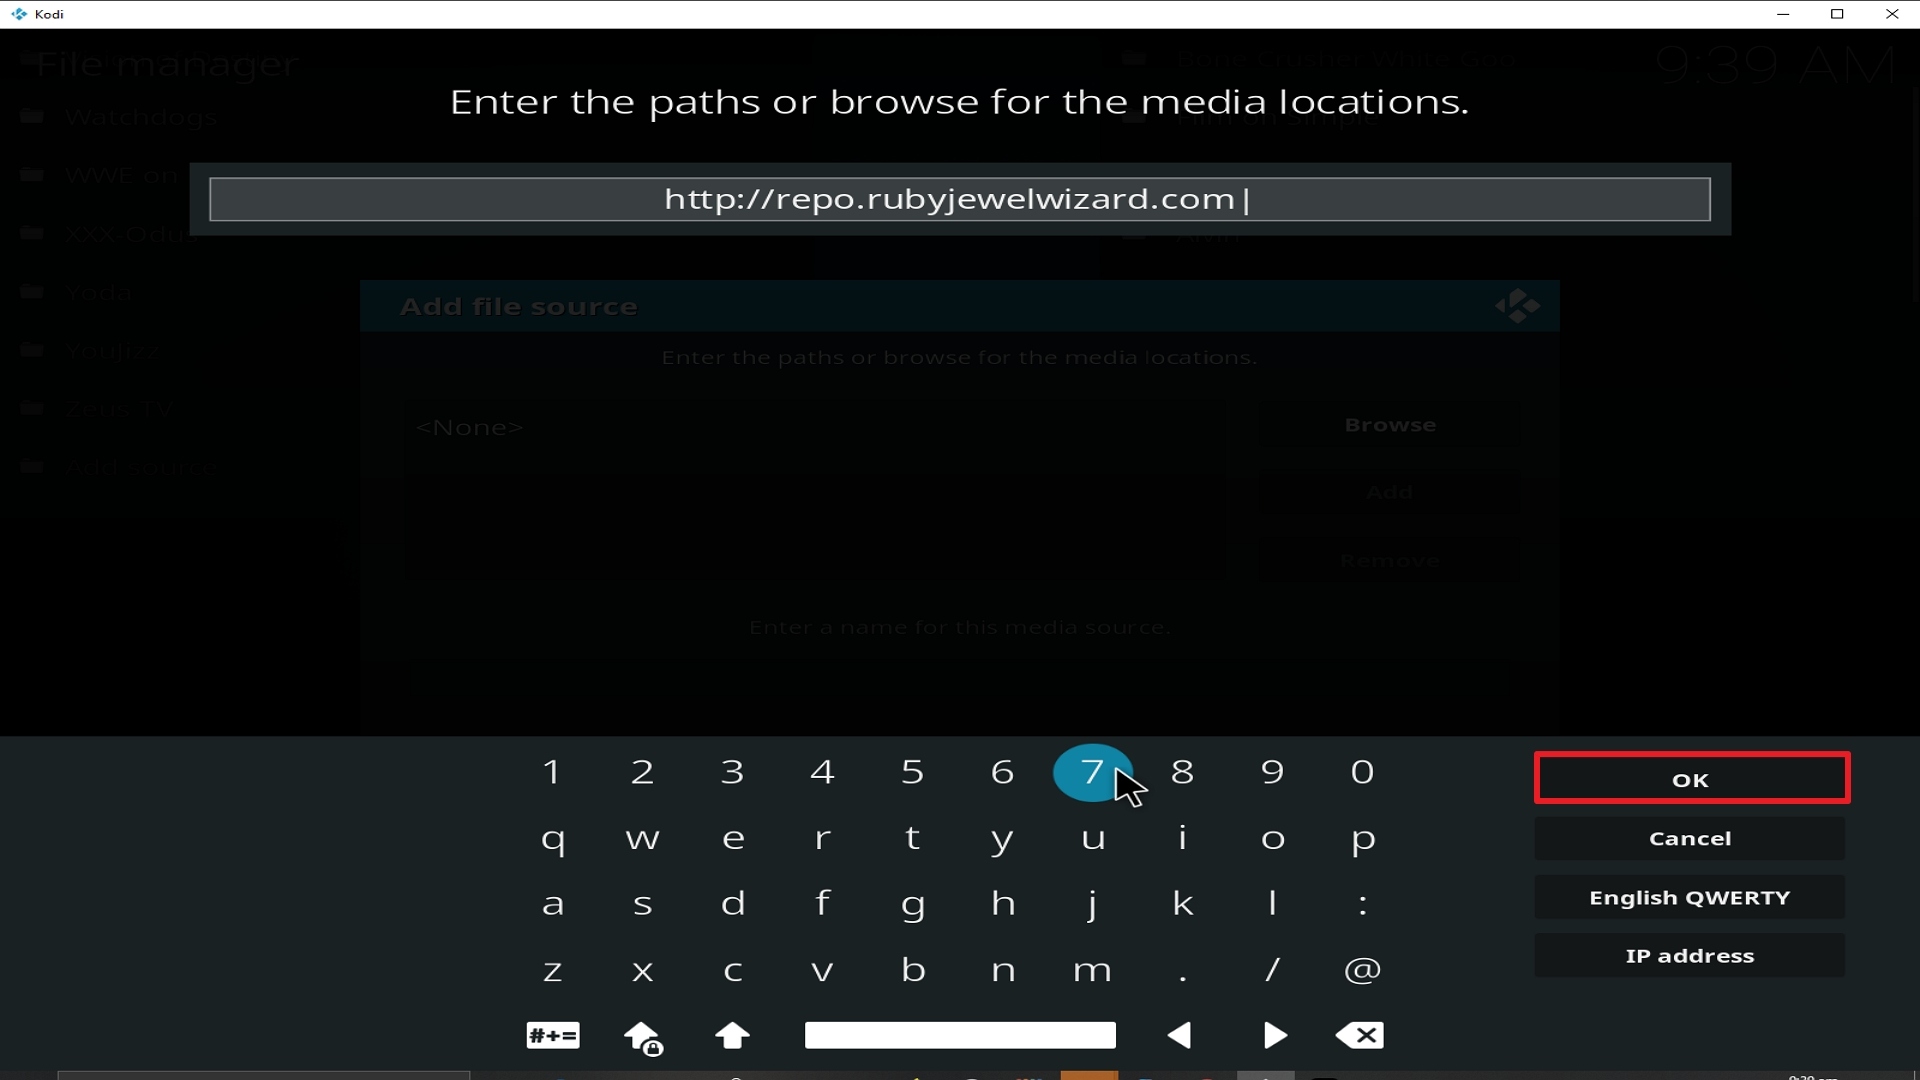
- Type in http://repo.rubyjewelwizard.com
- Highlight the source and rename it to “diamond” or any name you would like to use to identify this particular source and click “ok”
- Go back to the System Screen and click “Add-ons”
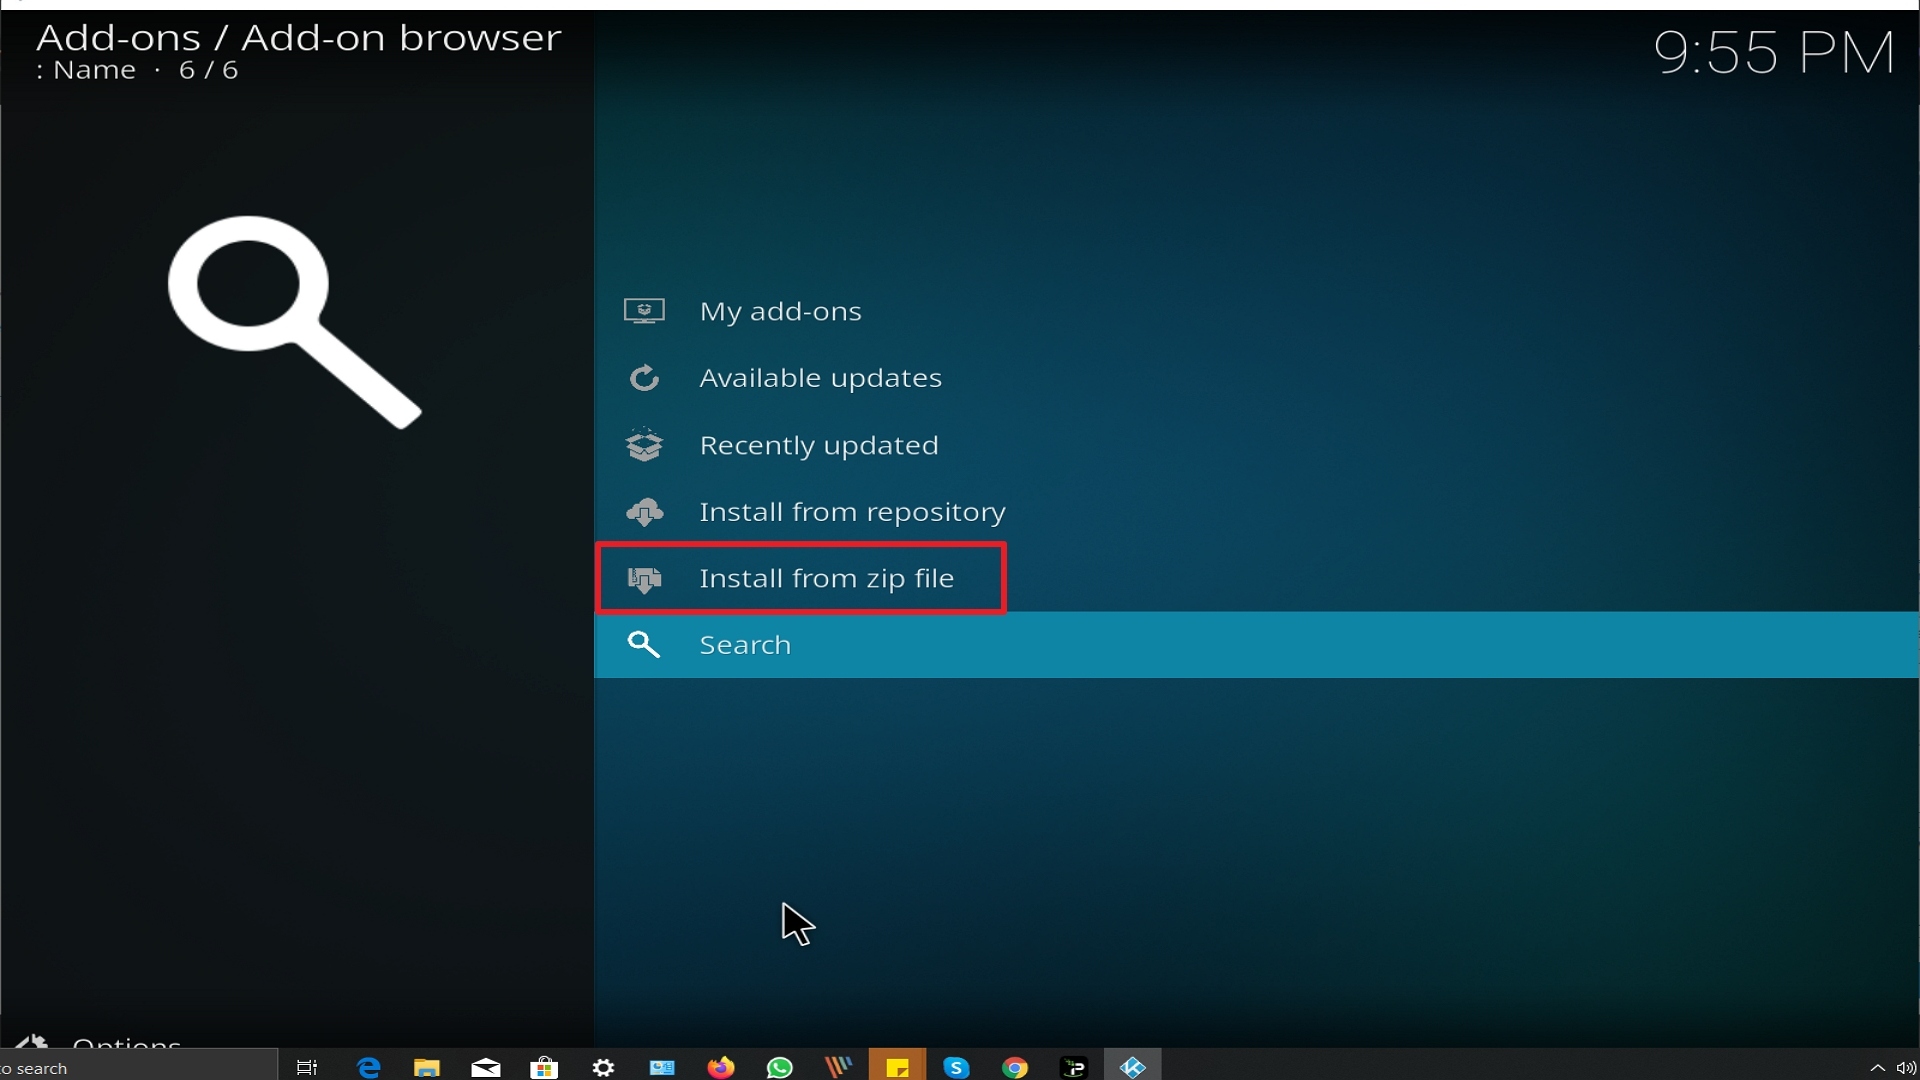
- Select “Install Zip File” choose “diamond” or whatever you renamed the file.
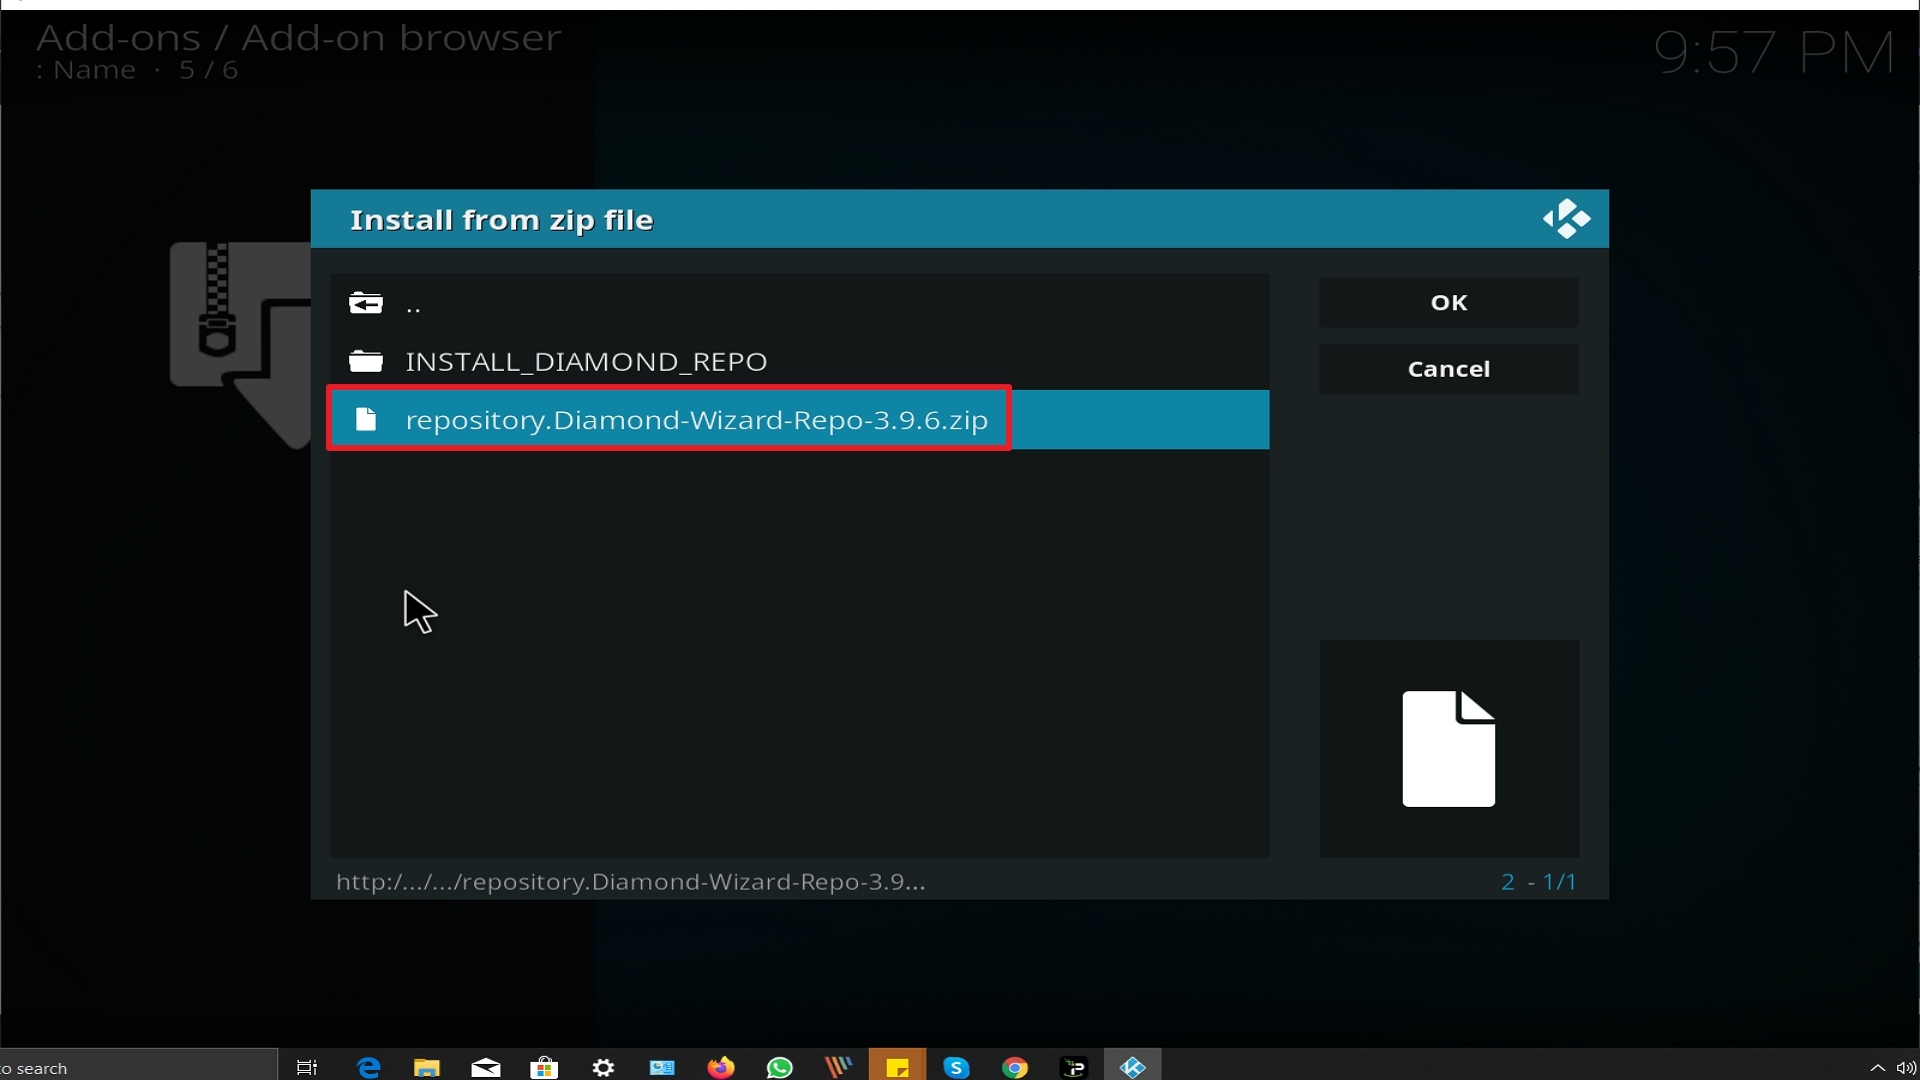
- Select the zip file URL- repository.Diamond-Wizard-Repo-3.9.6.zip
- Wait for the notification “Diamond Build Add-on Repo Installed” to appear.
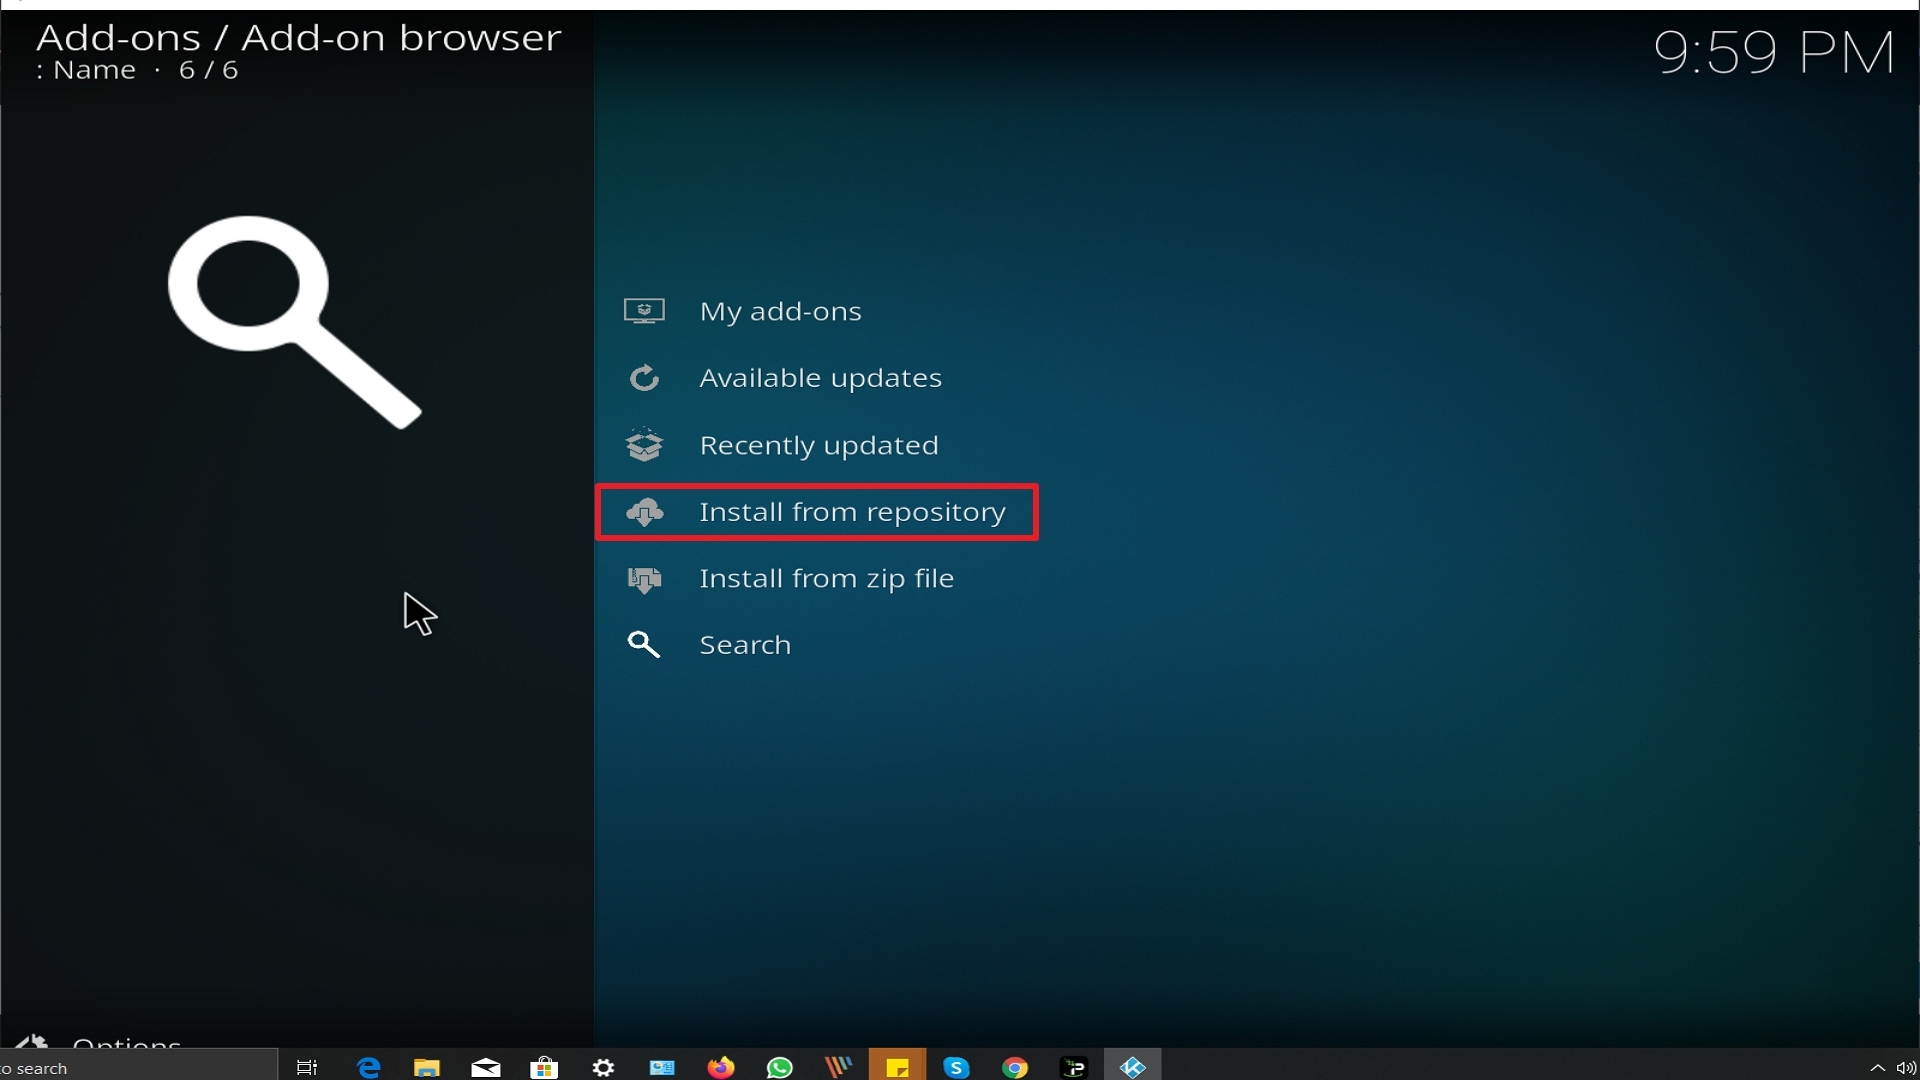
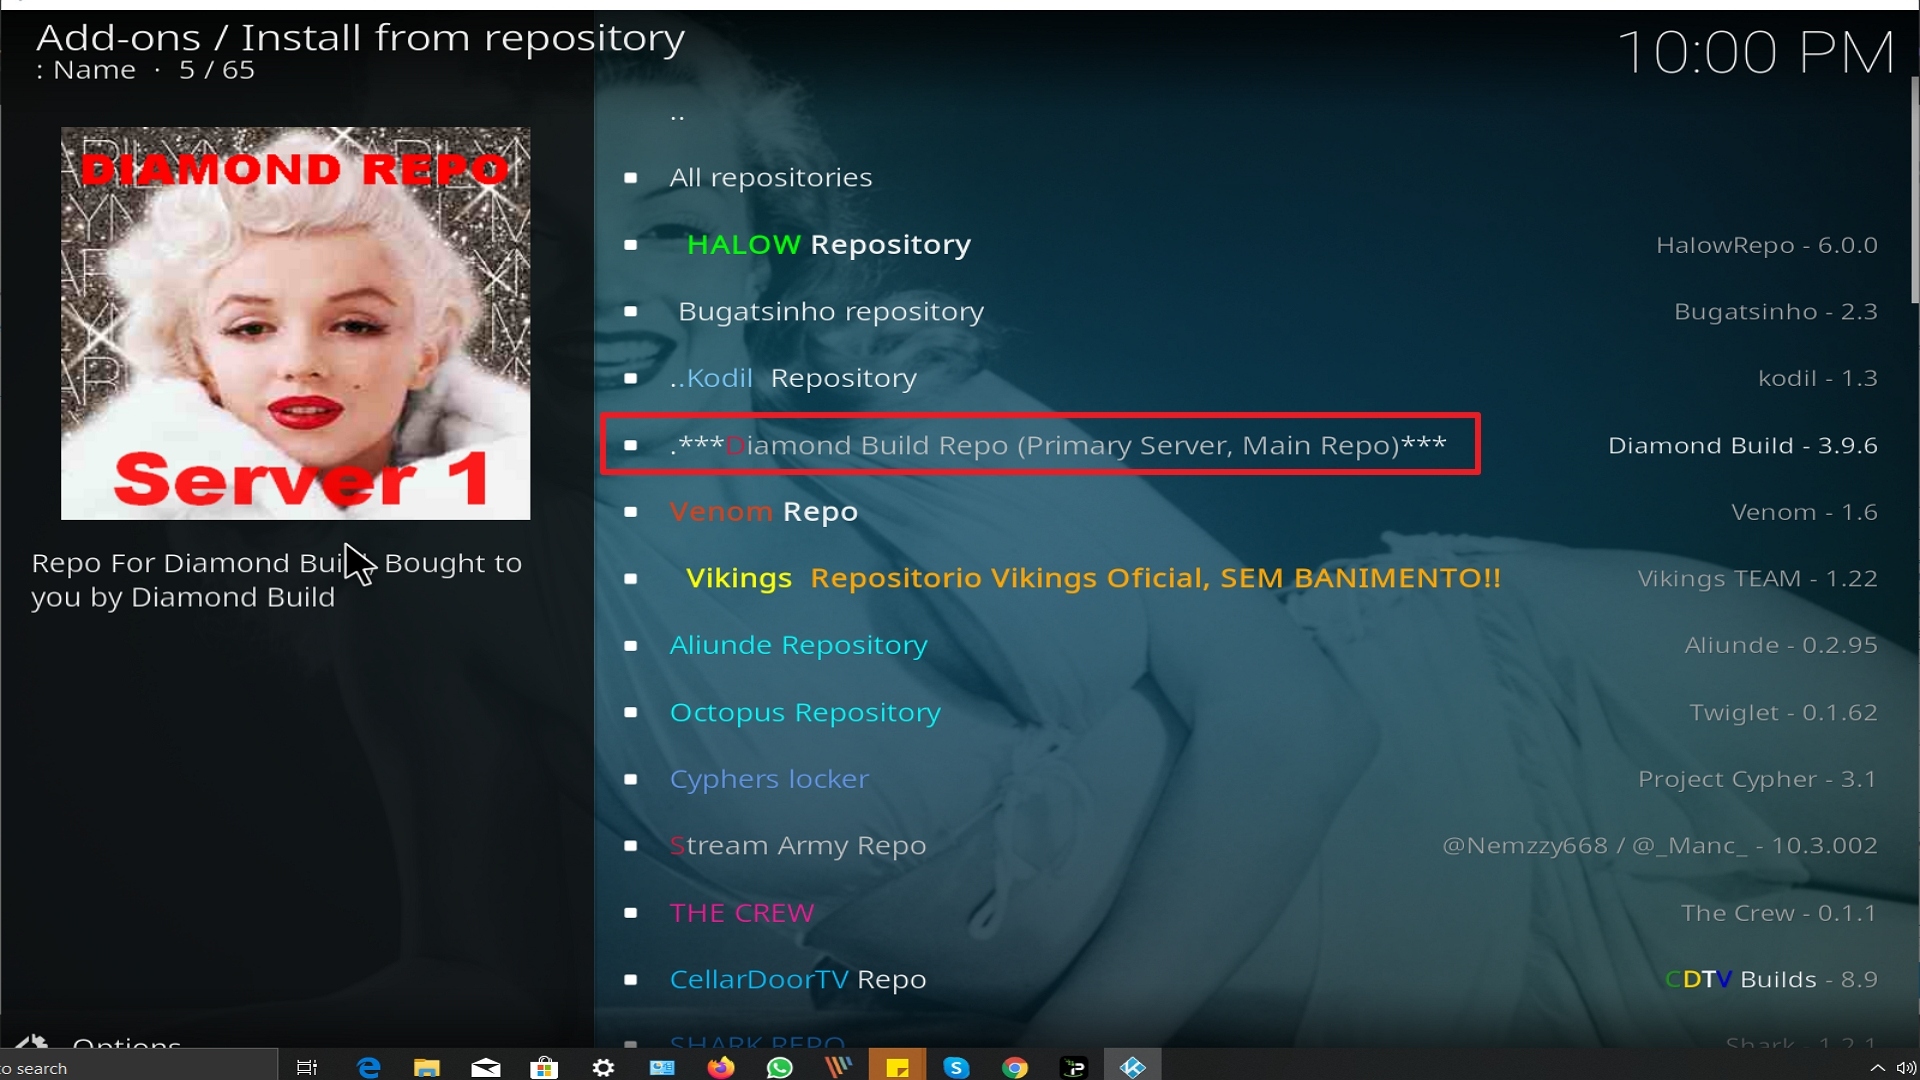
- Select “Install Repository”
- Choose “Diamond Build Repo”
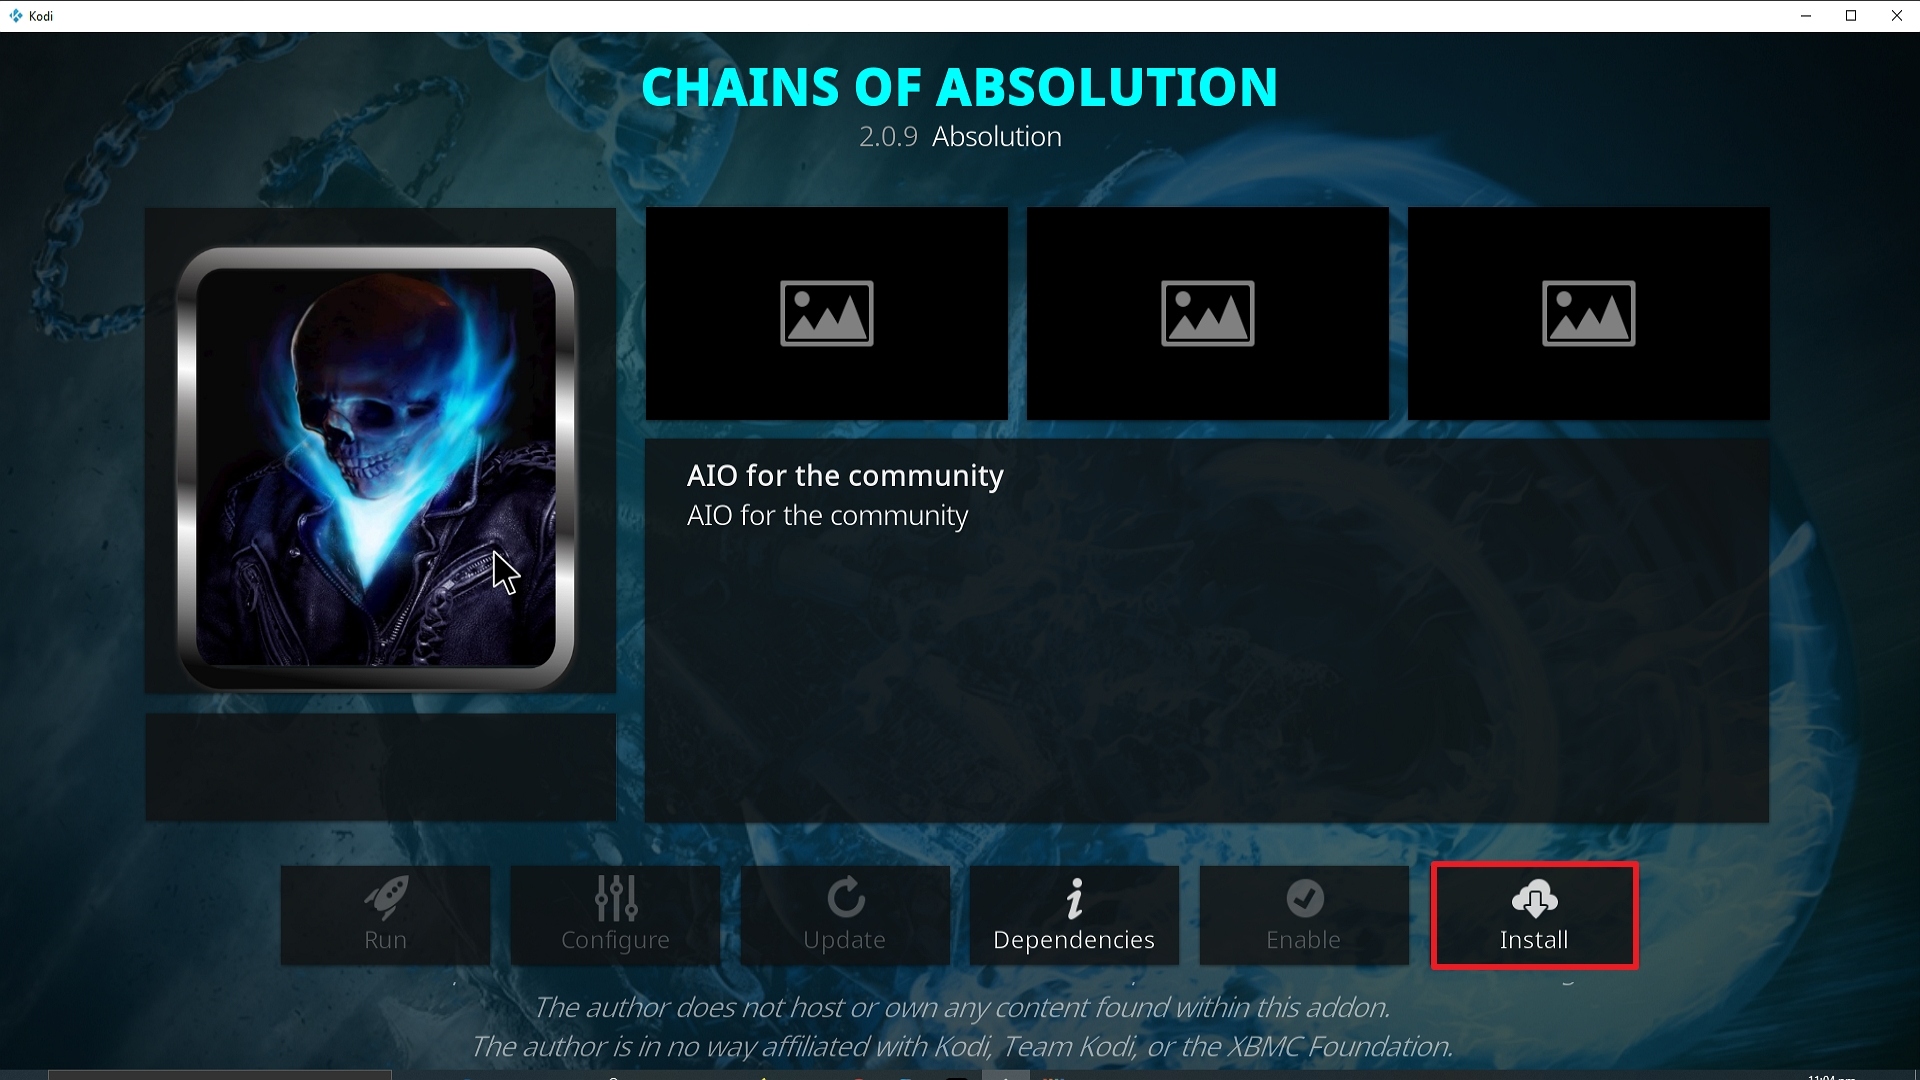
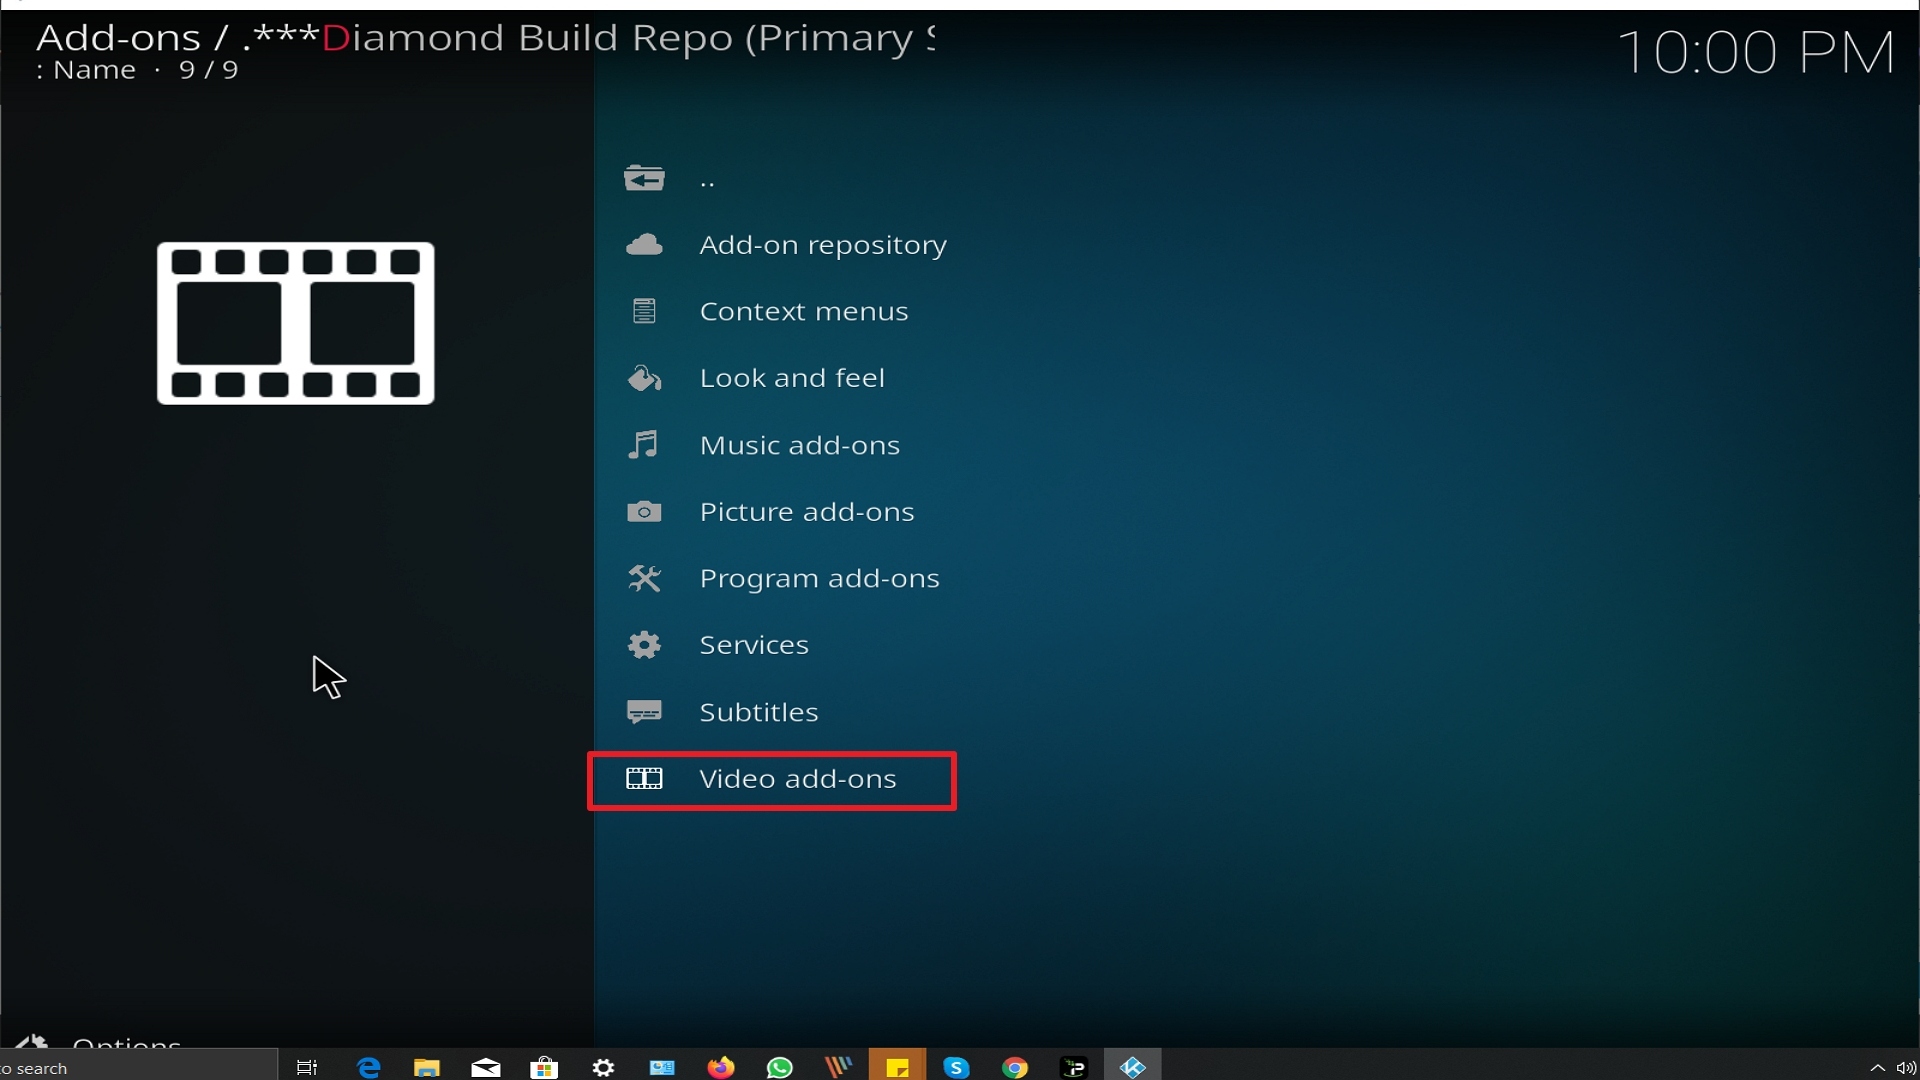
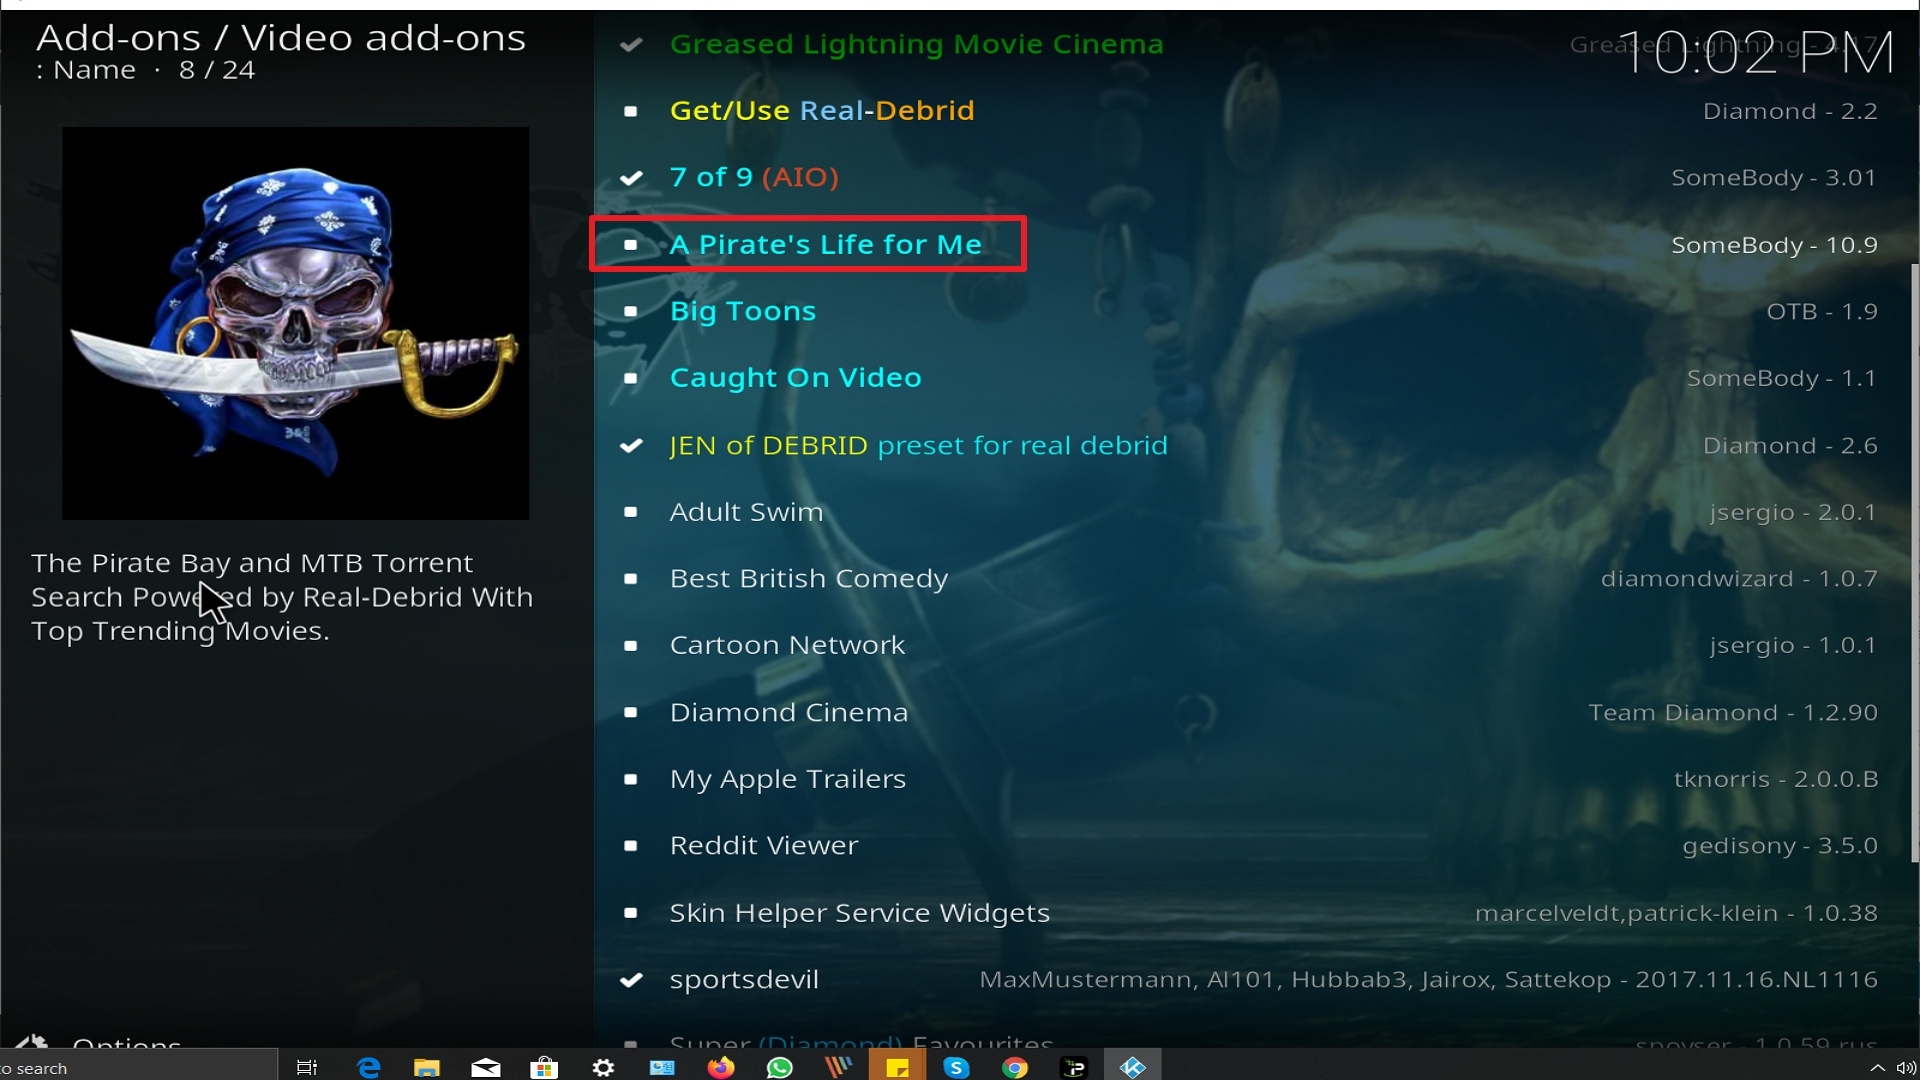
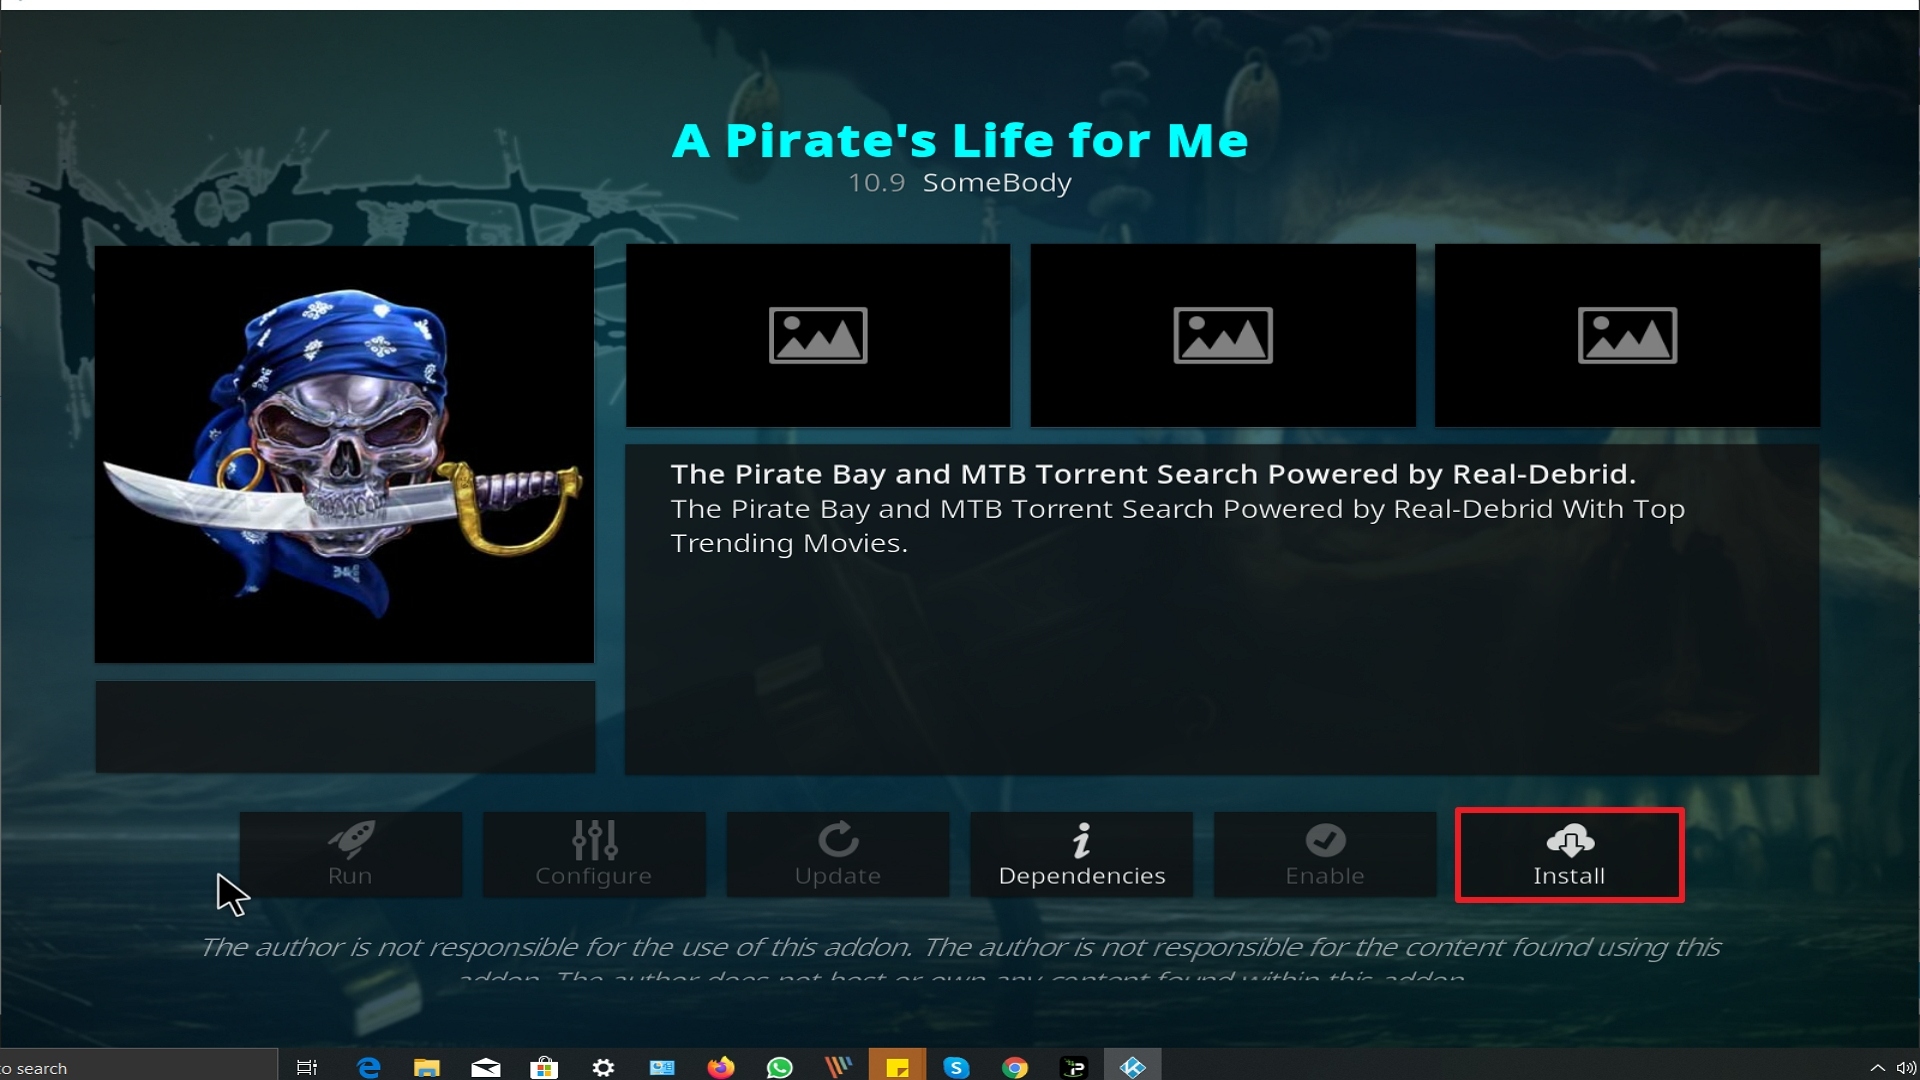
- Click on “Video Add-ons” and select “A Pirates Life For Me” and “Install”
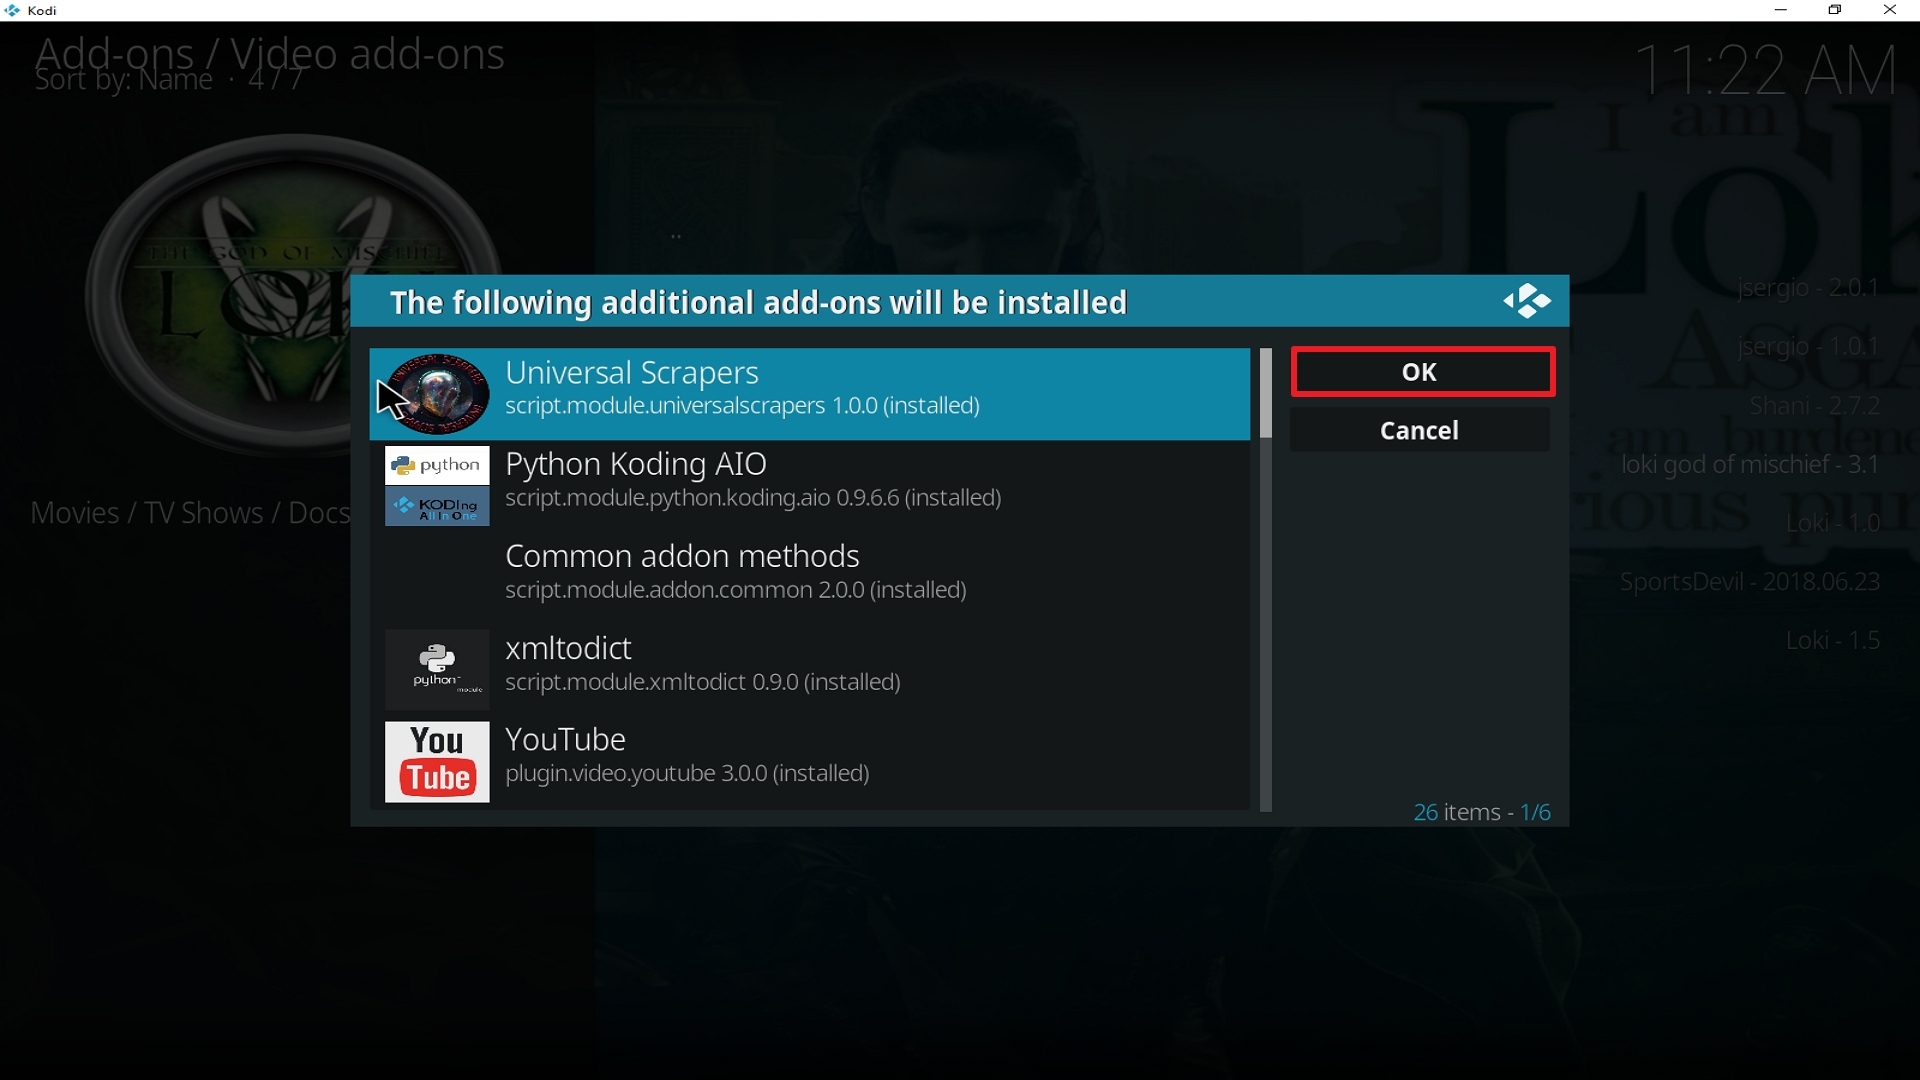
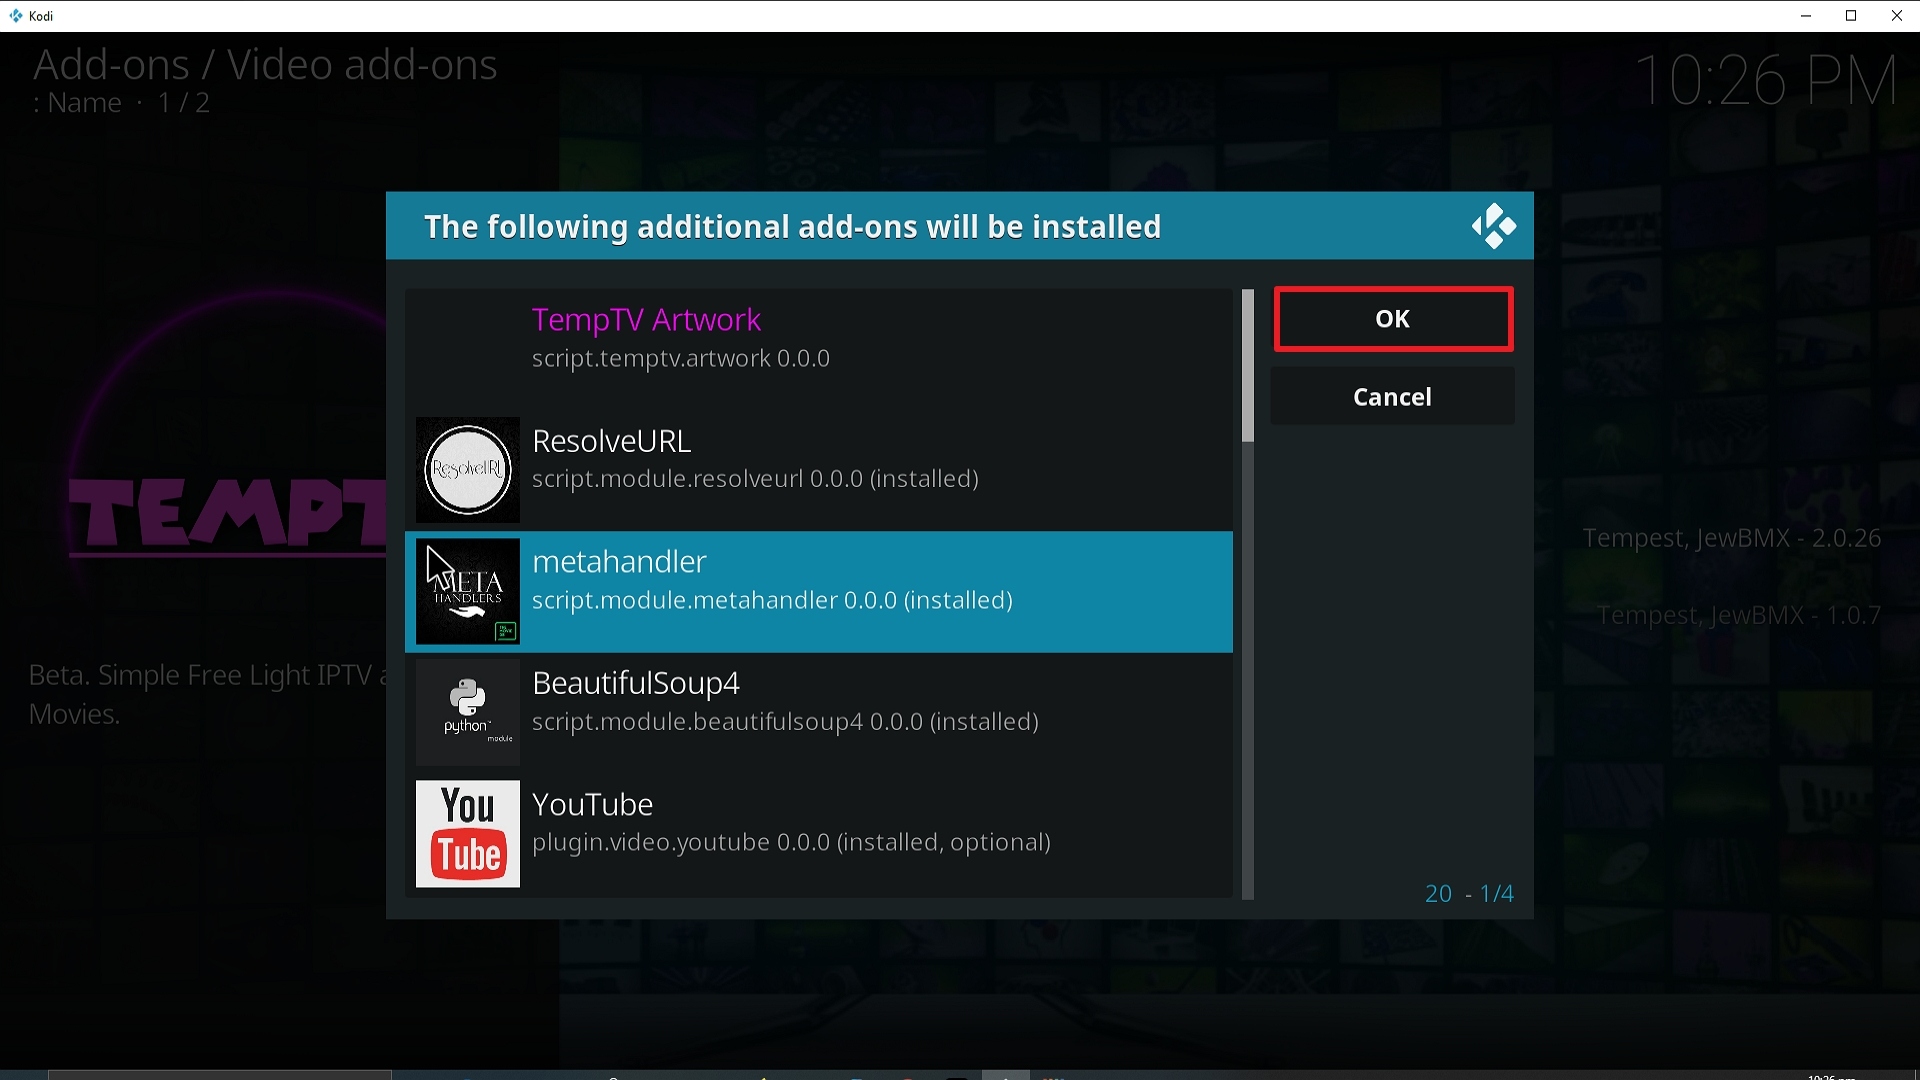
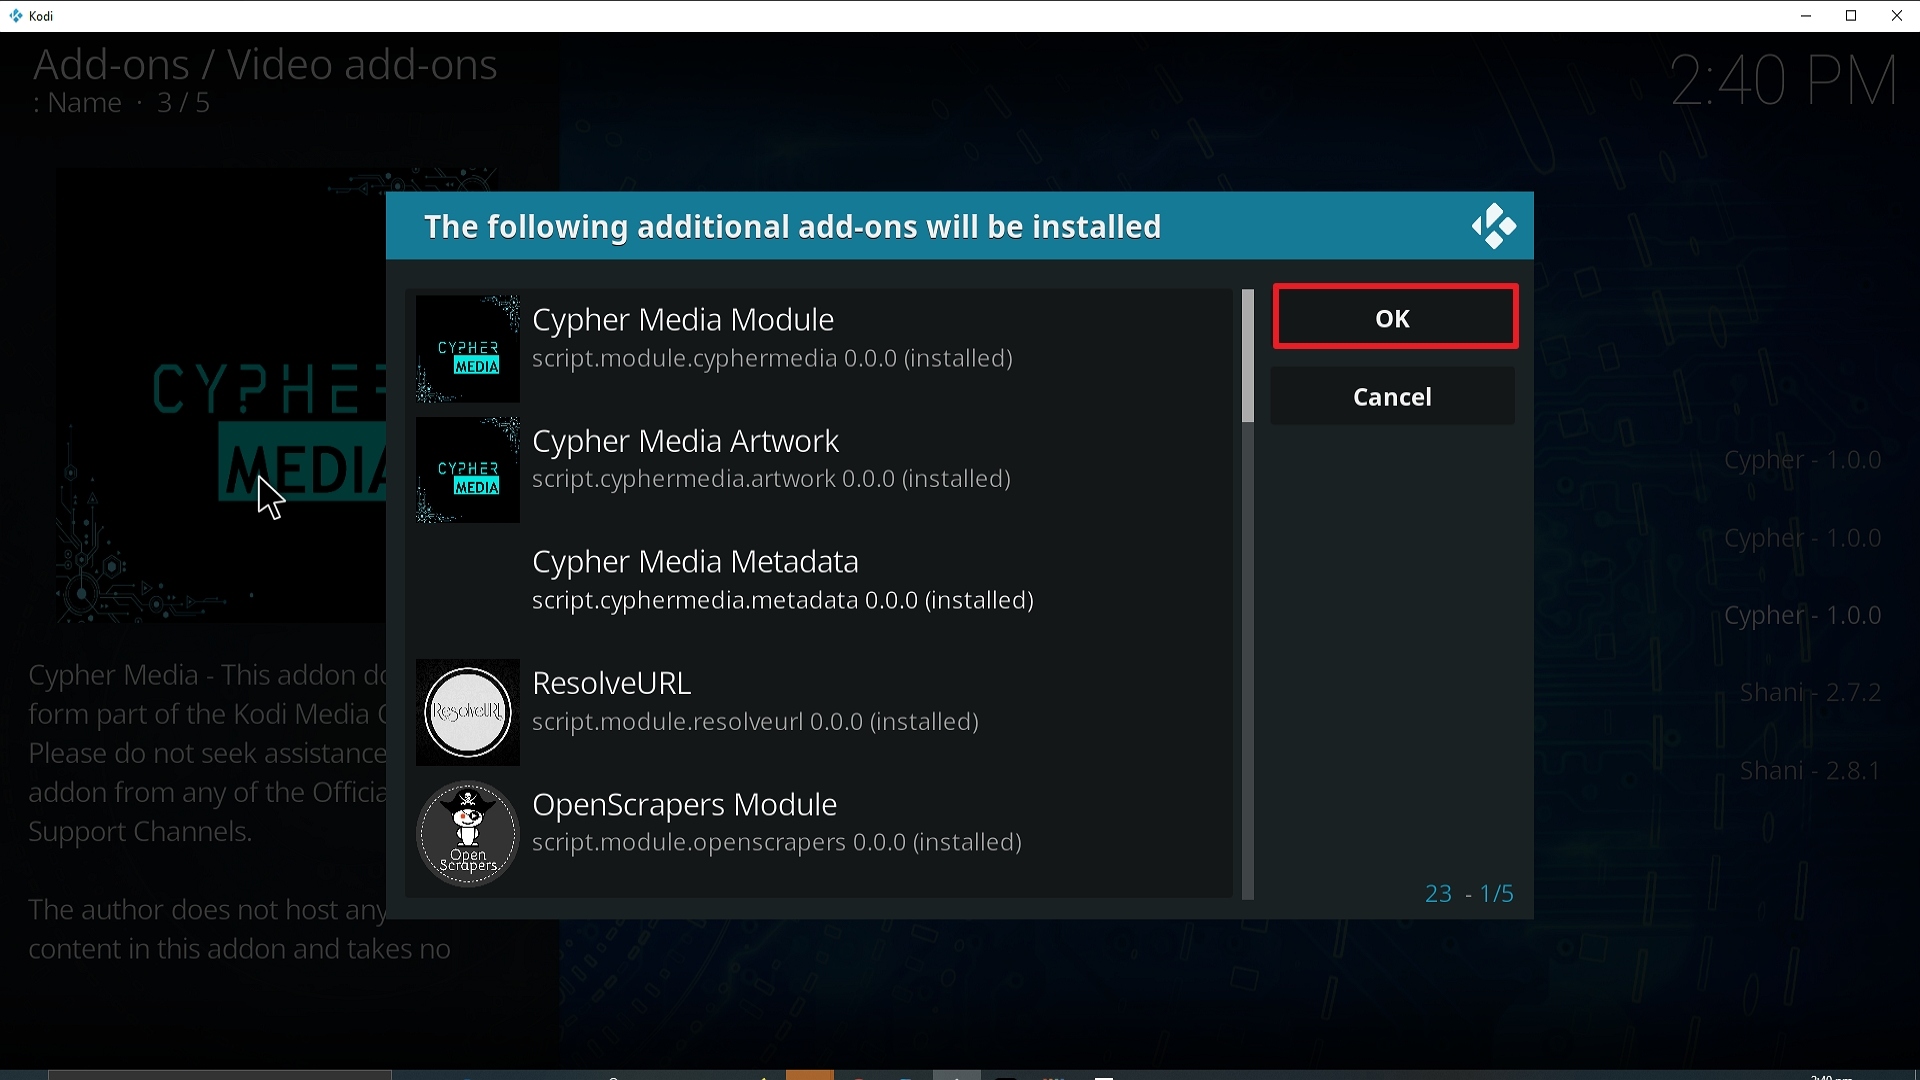
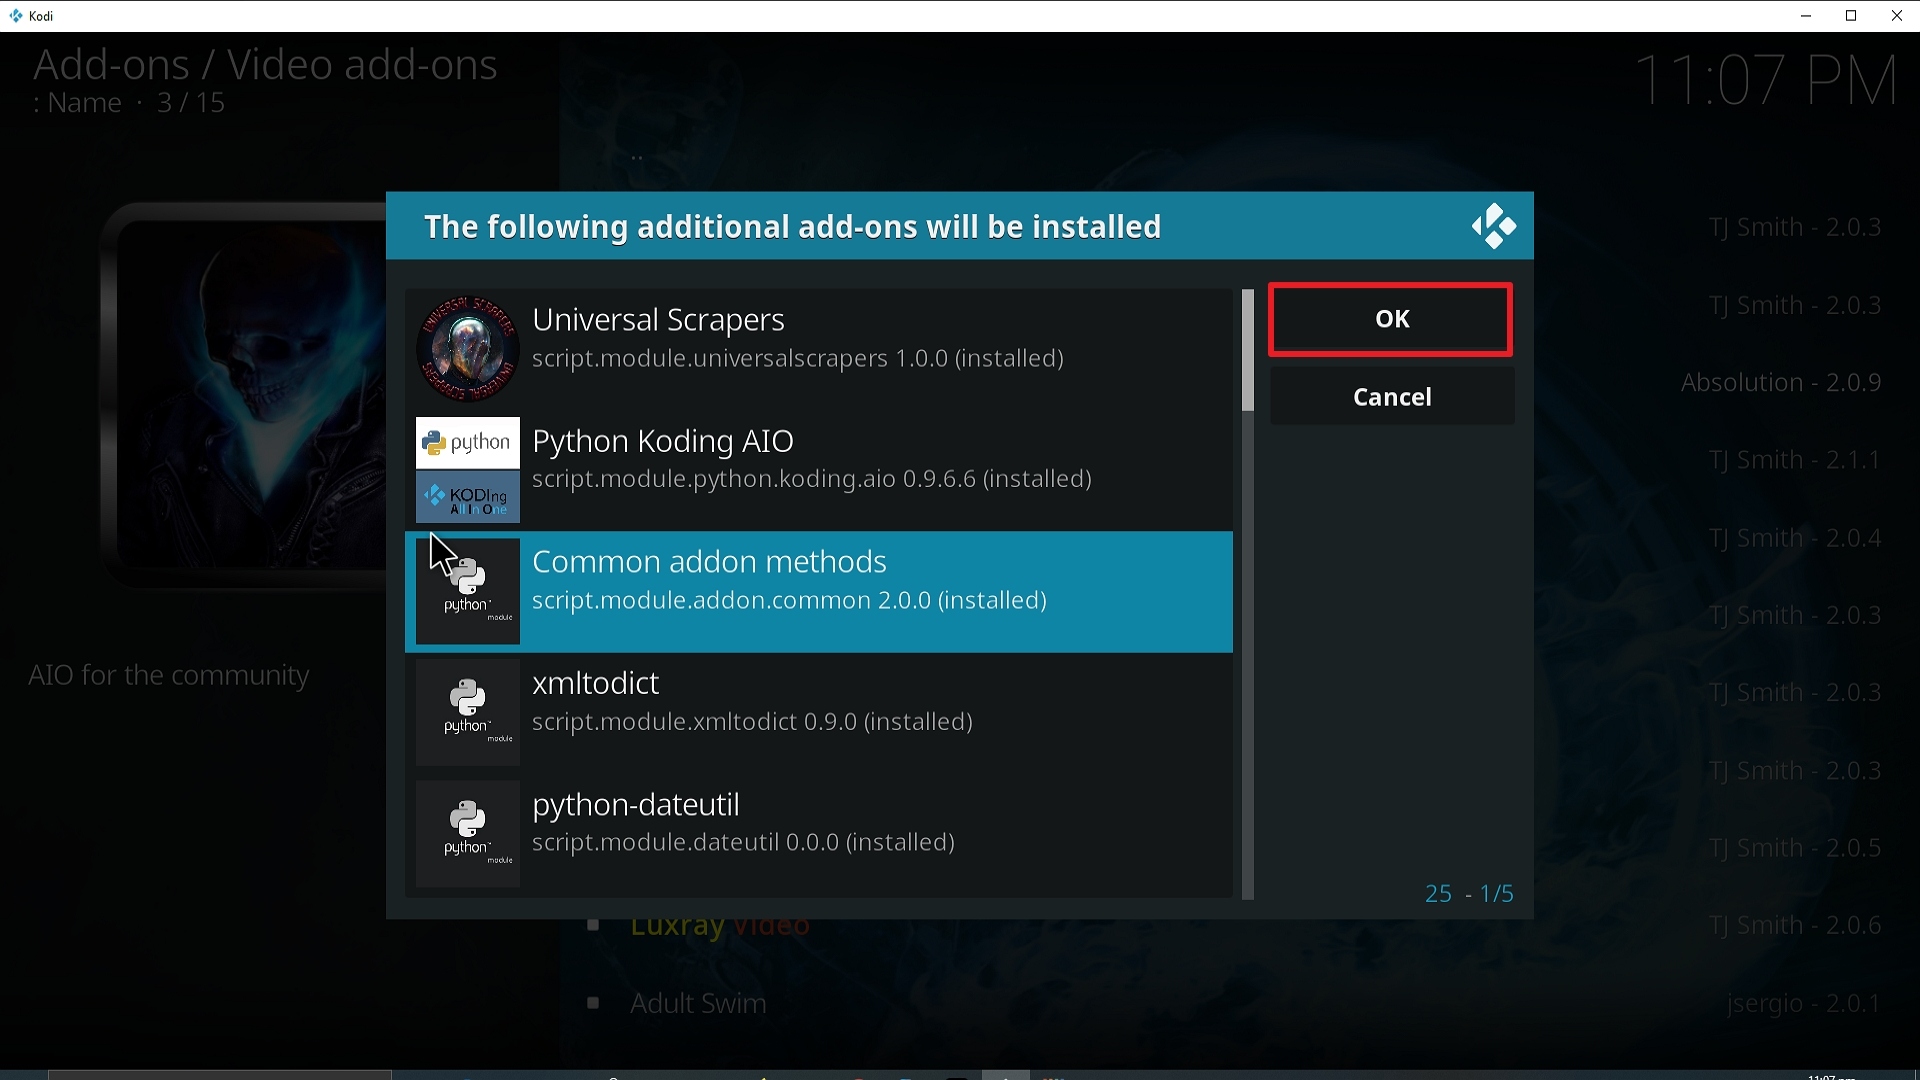
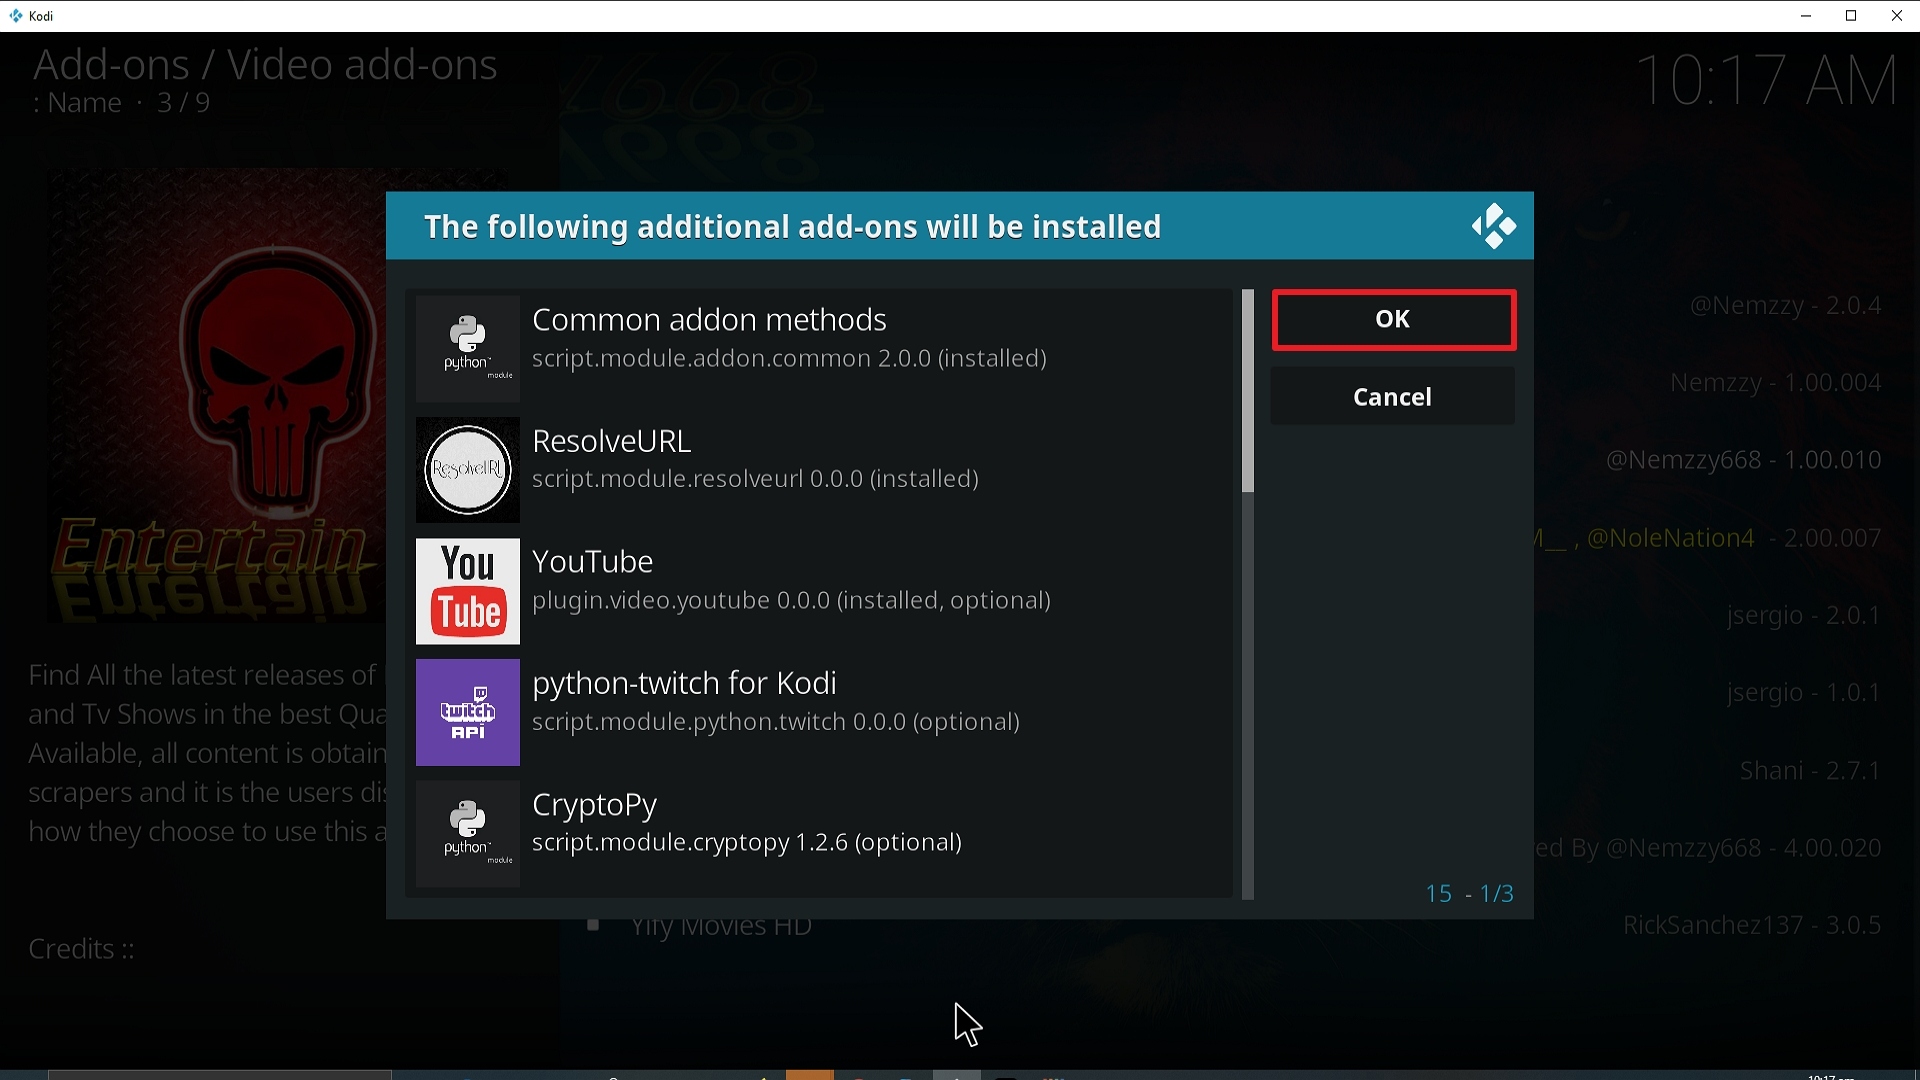
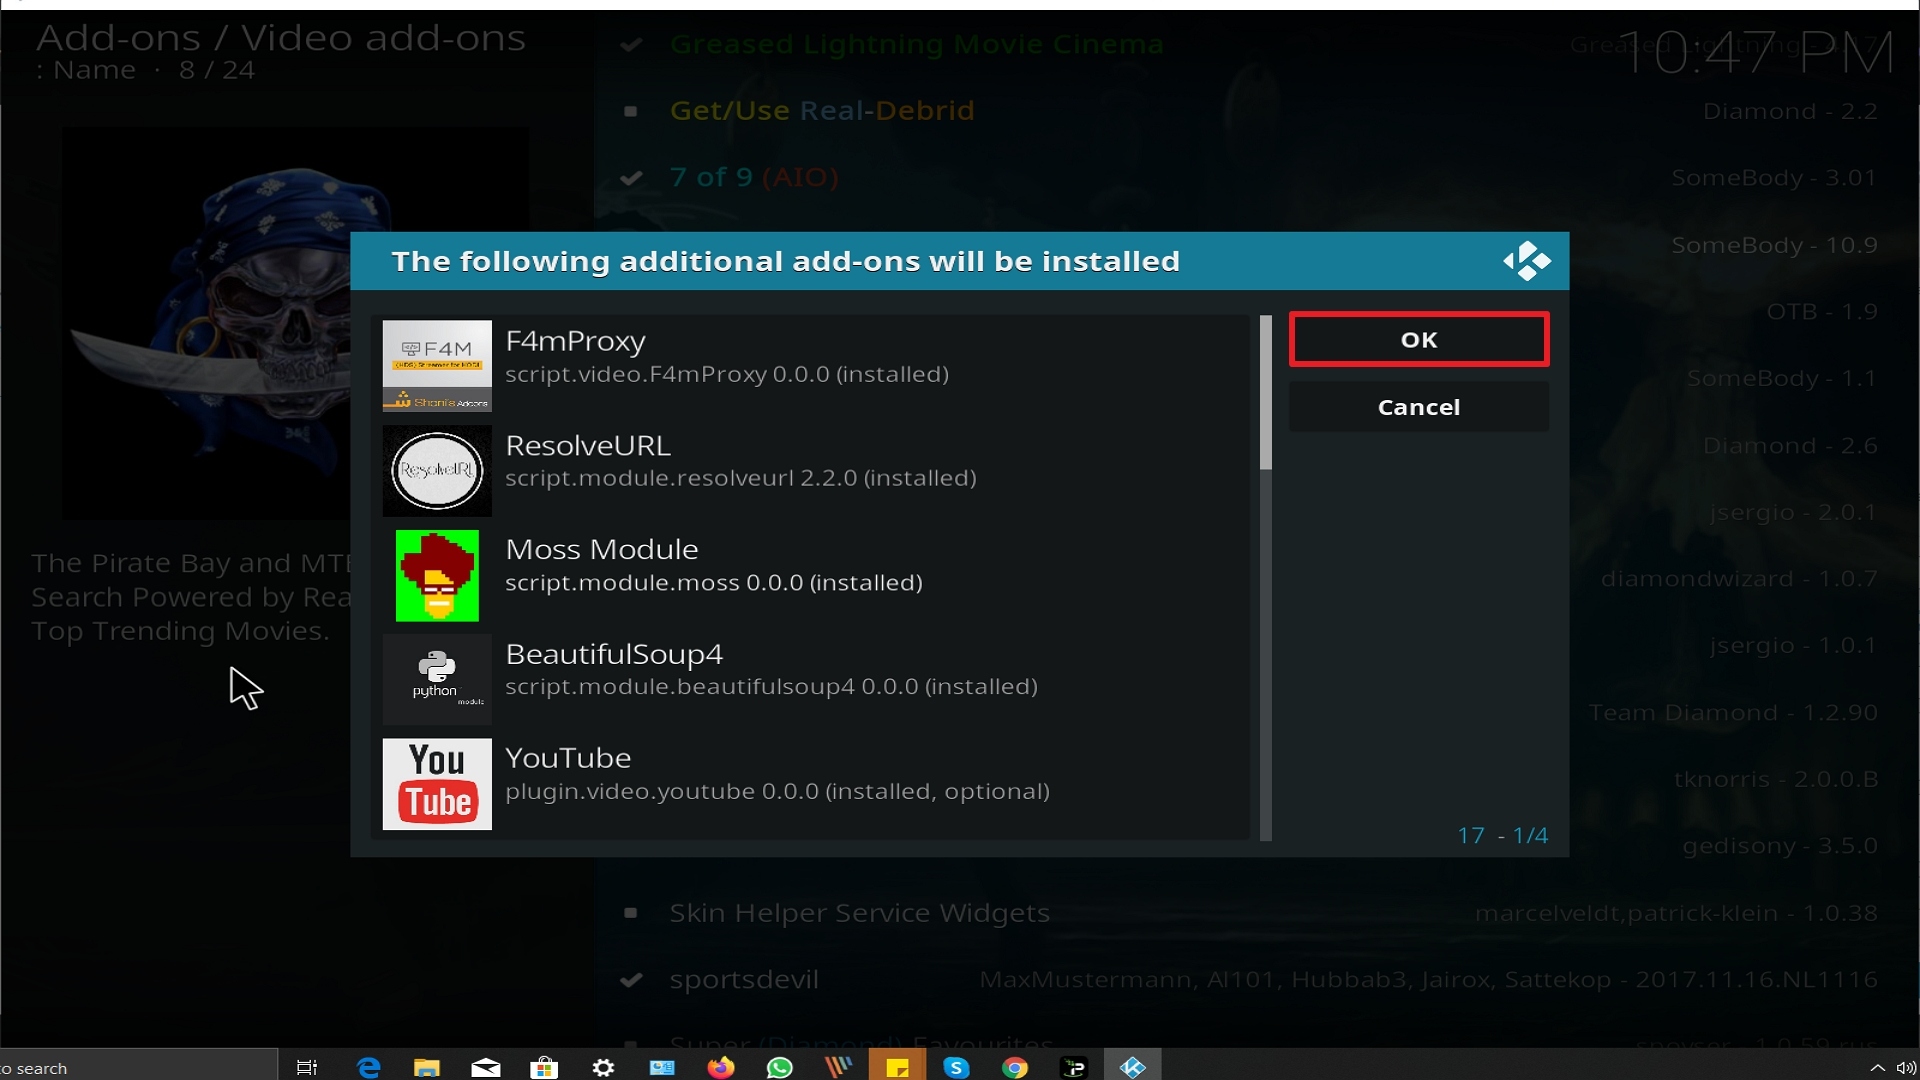
- Click “Ok” when a notification “the following add-ons will be installed” appears and wait for A Pirates Life For Me Add-on to install
- Once the add-on is installed go back to the home screen and select “add-ons”
- Choose “Video add-ons” and select “A Pirates Life For Me”
- There you go, A Pirates Life For Me is now installed.
Real-Debrid Integration
- If you don’t possess a Real-Debrid account yet, you must register.
- When Launching the A Pirates Life For Me add-on you will be notified with this message. Write down the code that will be given.
- Launch a web browser on a different device and enter https://real-debrid.com/device.
- Type in the code you got and select “Continue”
- You will then be granted your Real-Debrid Account
- Go back to A Pirates Life For Me and a notification that shows another successful authorization message will appear, select “ok”
- If notified with a changelog, just press the “ok” button on your remote, and voila! A Pirates Life For Me is now Real-Debrid ready.
ReviewVPN cannot attest to the legality, security and privacy of the applications discussed on this site. It is highly recommended that you use a VPN service while streaming or using Kodi. Currently, your IP 216.73.216.55 is visible to everyone and your Browser is being tracked by Advertisers & ISP Provider. Here are the main reasons why you must use a VPN: A VPN works be replacing your ISP-assigned IP address and creating an encrypted tunnel. We recommend the no log service offered by IPVanish. It works well on a Firestick and offers the fastest possible speeds.
YOUR INTERNET ACTIVITY IS BEING WATCHED
Legal Disclaimer: ReviewVPN.com does not encourage or endorse any illegal activity involved in the usage of services and applications referenced on this site. We do not verify the licensing agreements of services. The end-user is wholly responsible for ensuring that any media accessed through these services does not violate copyright and/or licensing laws. ReviewVPN does not promote, link to, or receive compensation from any Apps and IPTV services.
Install Surfshark on Firestick
How to Install A Pirate’s Life For Me Addon on Kodi with Screenshots
1. From the home screen, select the cogwheel at the upper left.

2. Select System in the bottom right corner.

3. Select Add-ons on the left side of the screen.

4. Select Unknown sources.
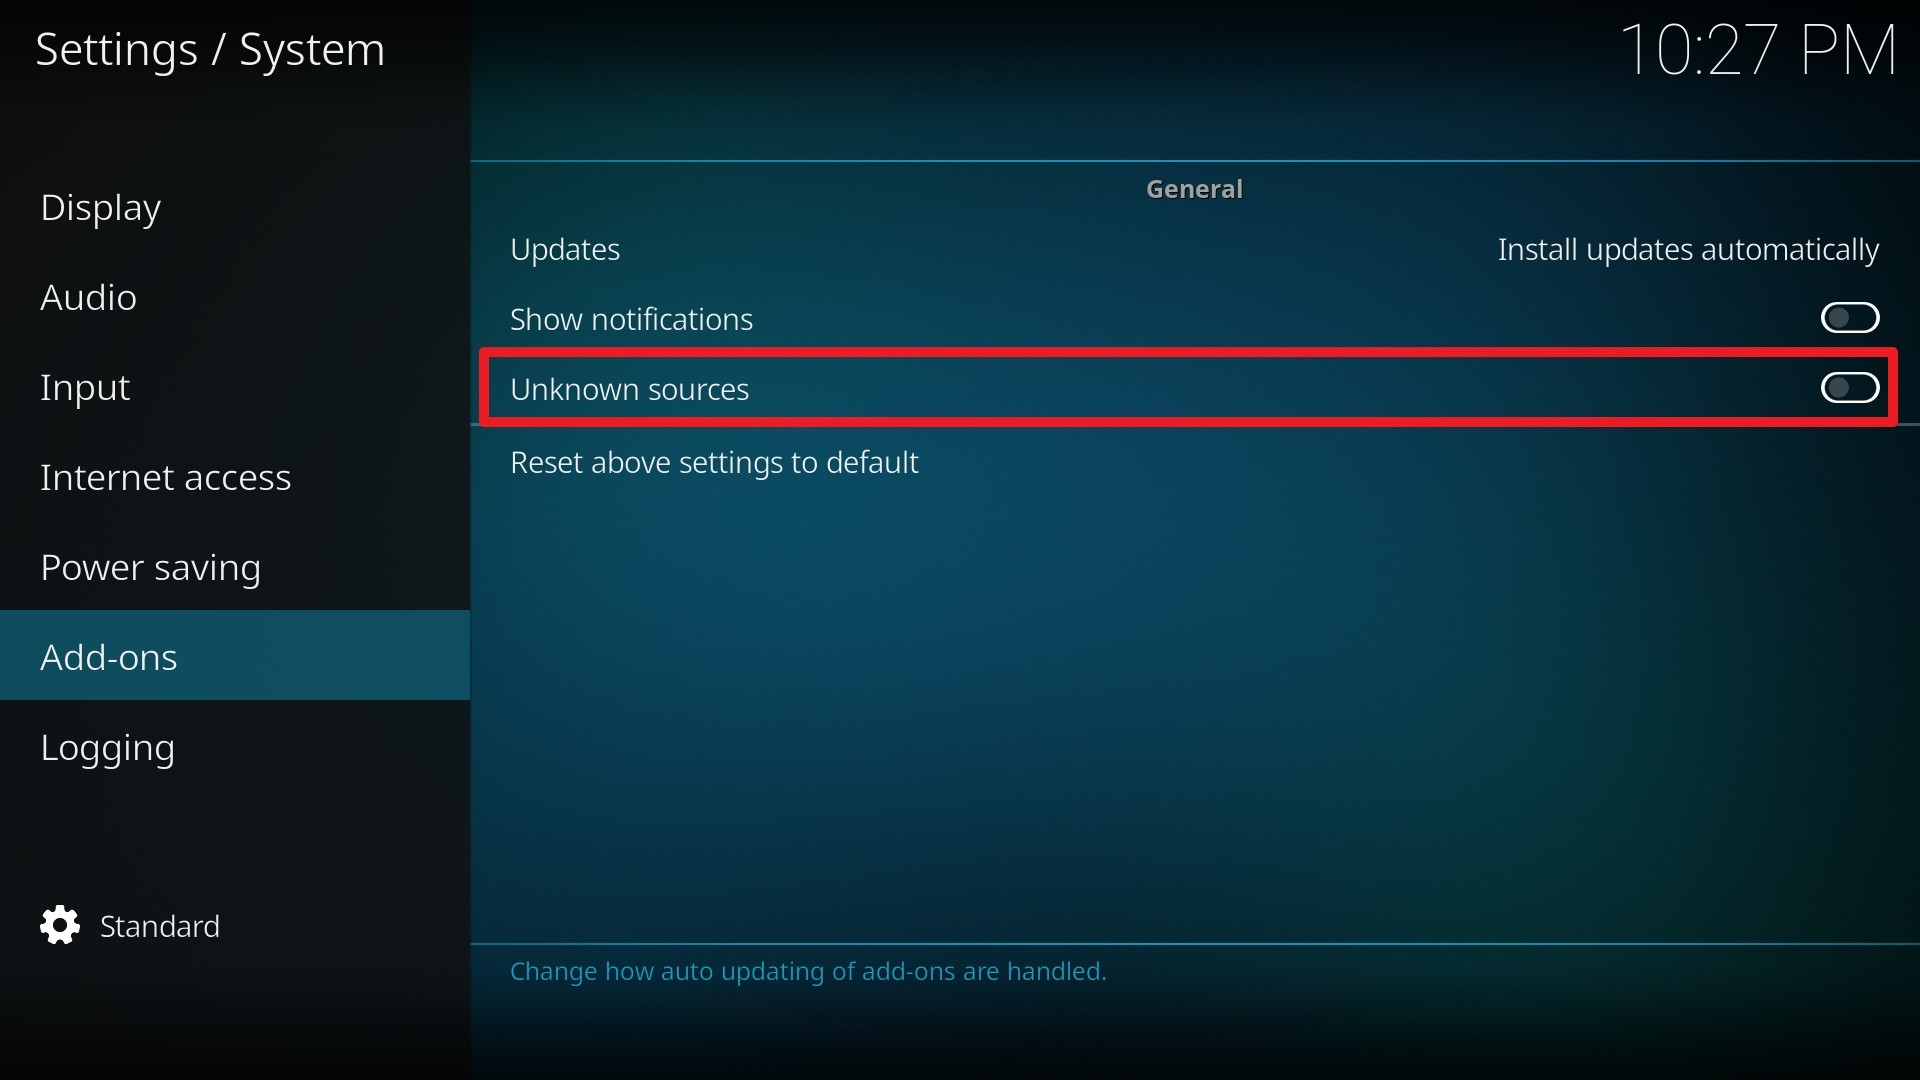
5. Click Yes to allow unknown sources.

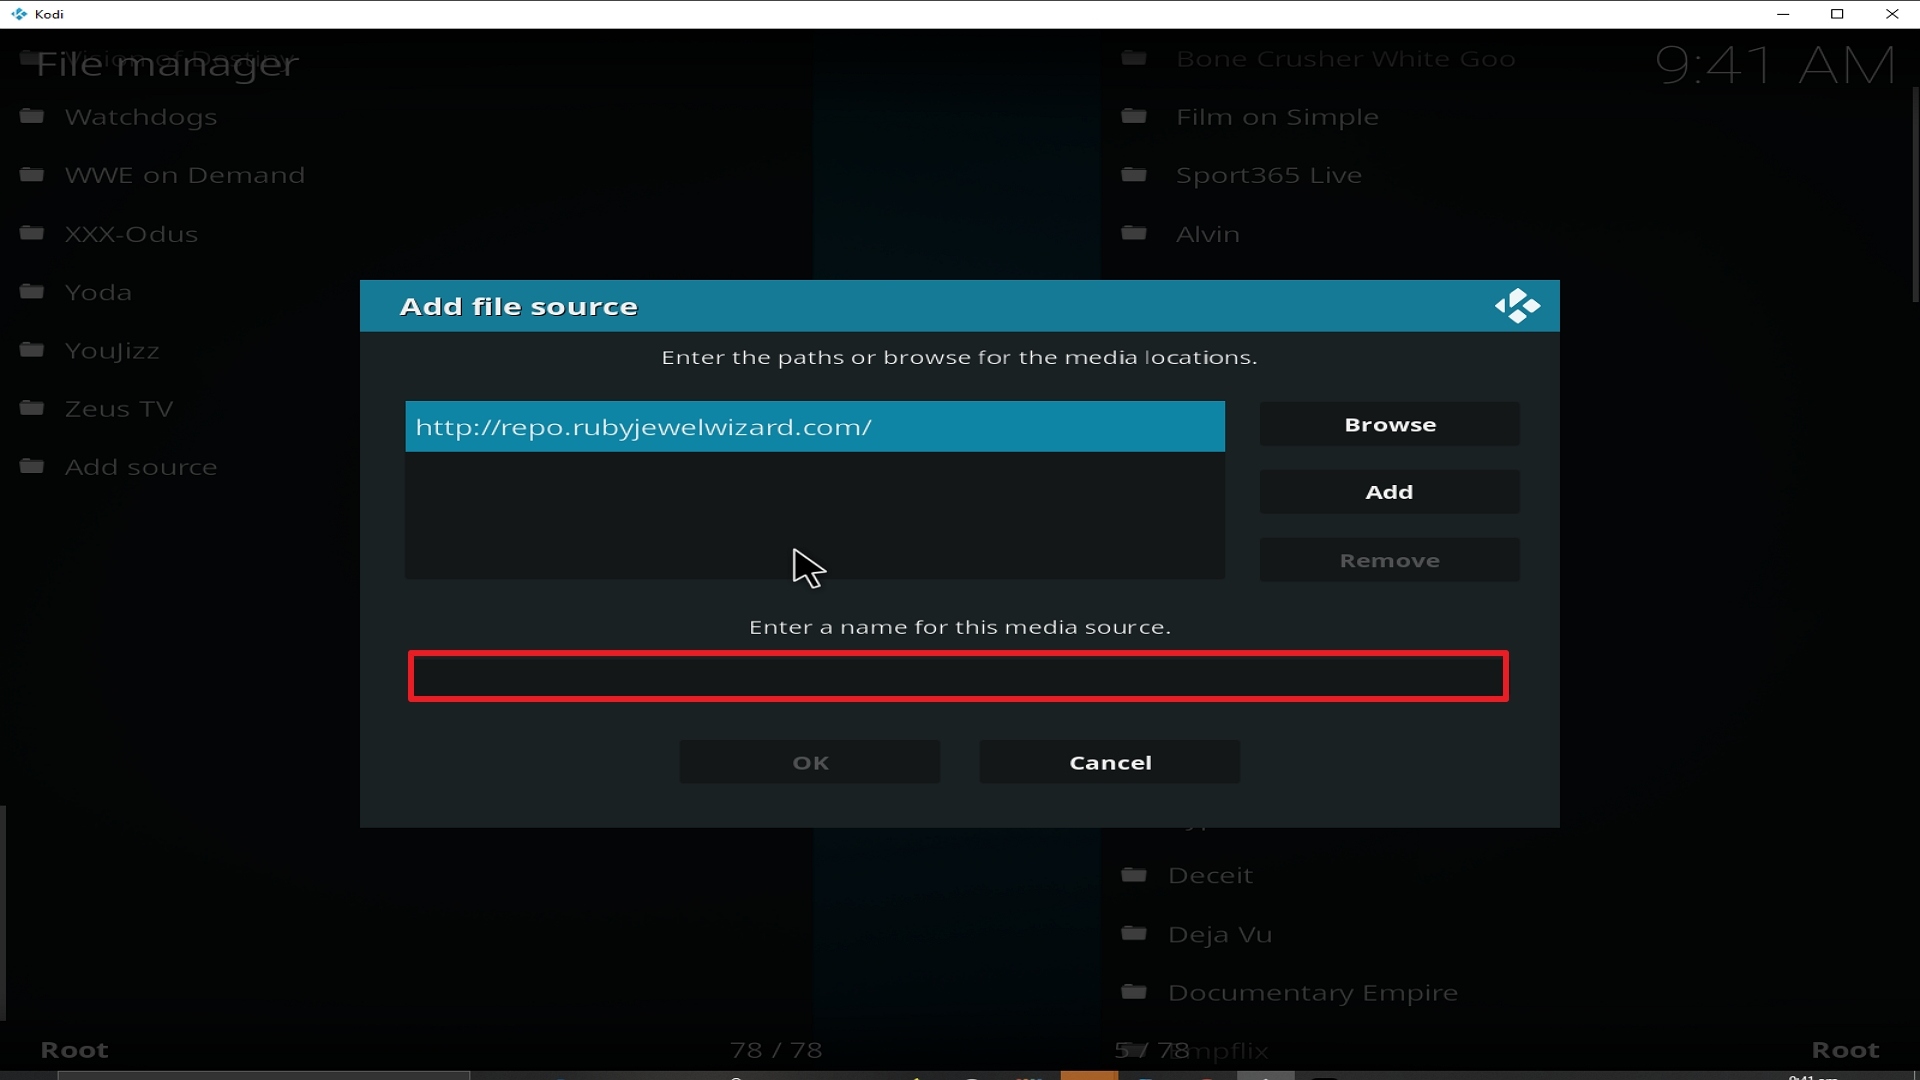
6. Select File manager.
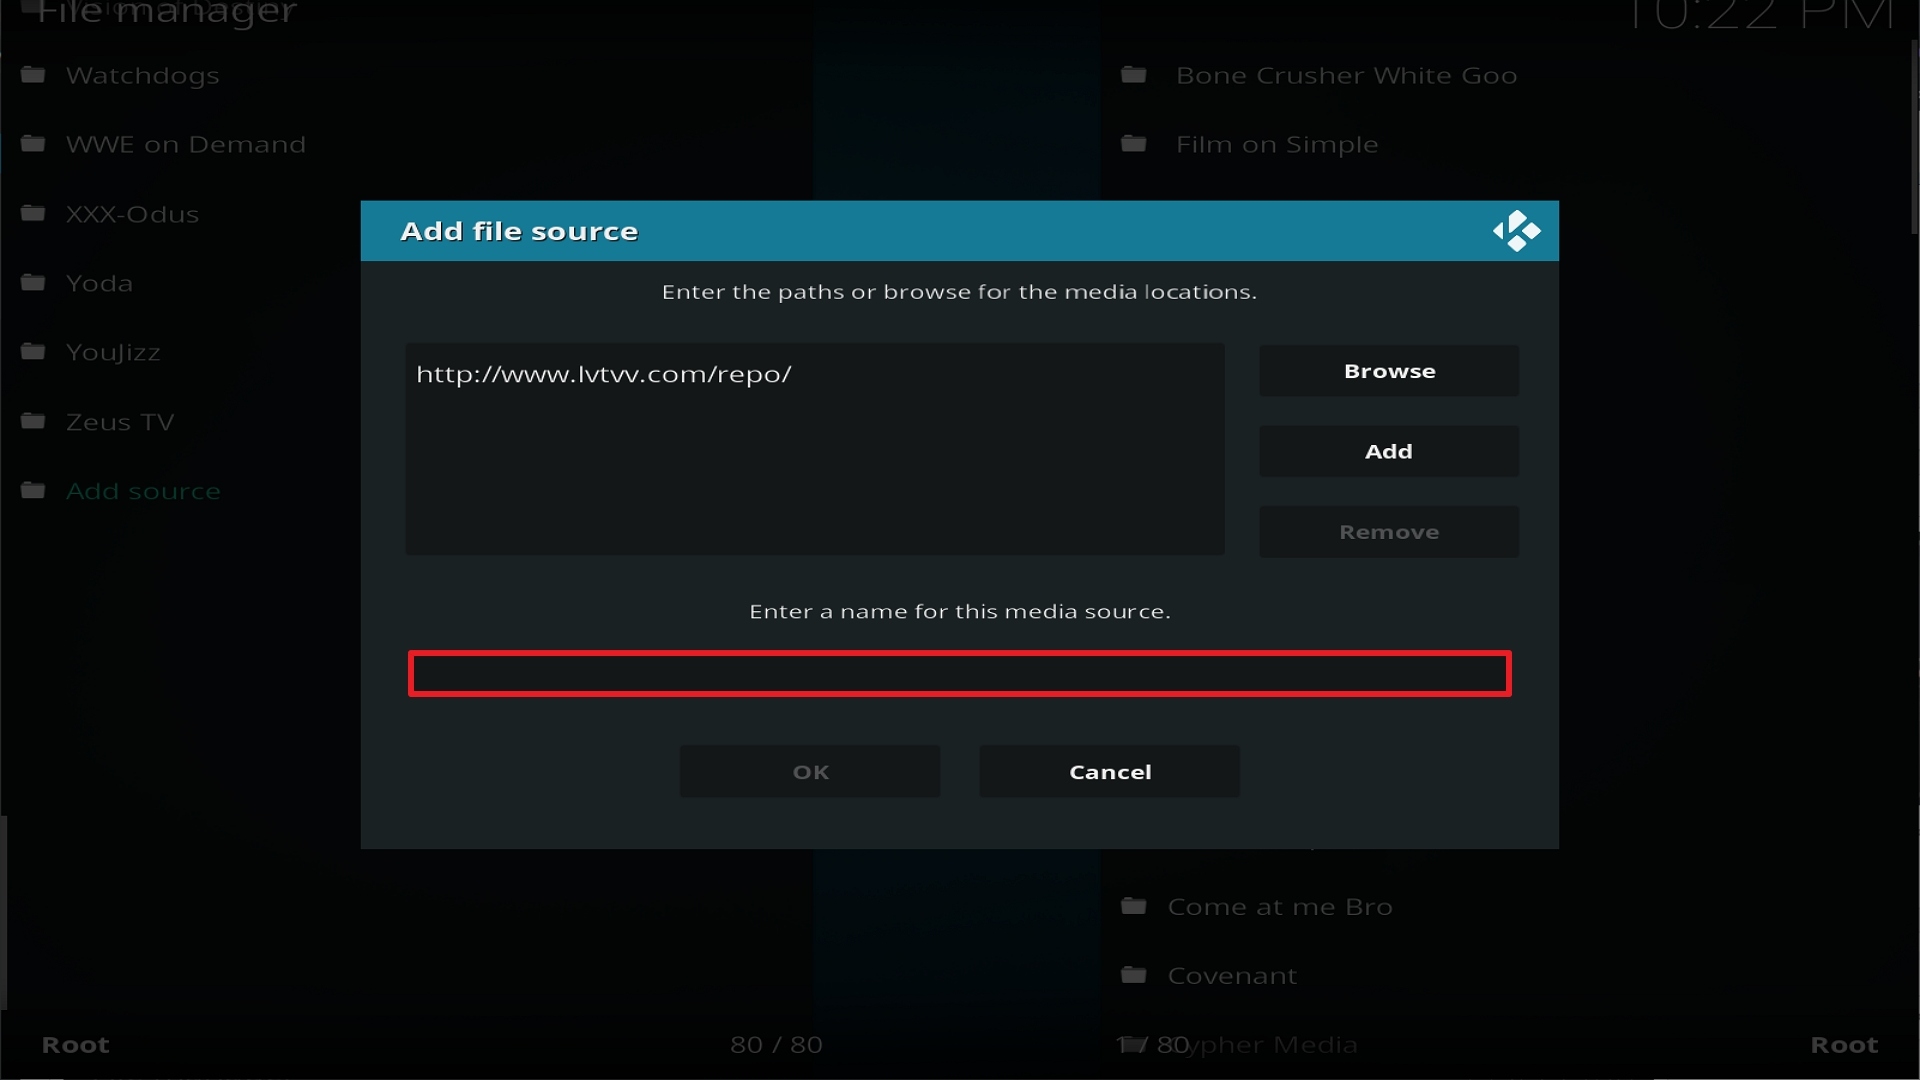
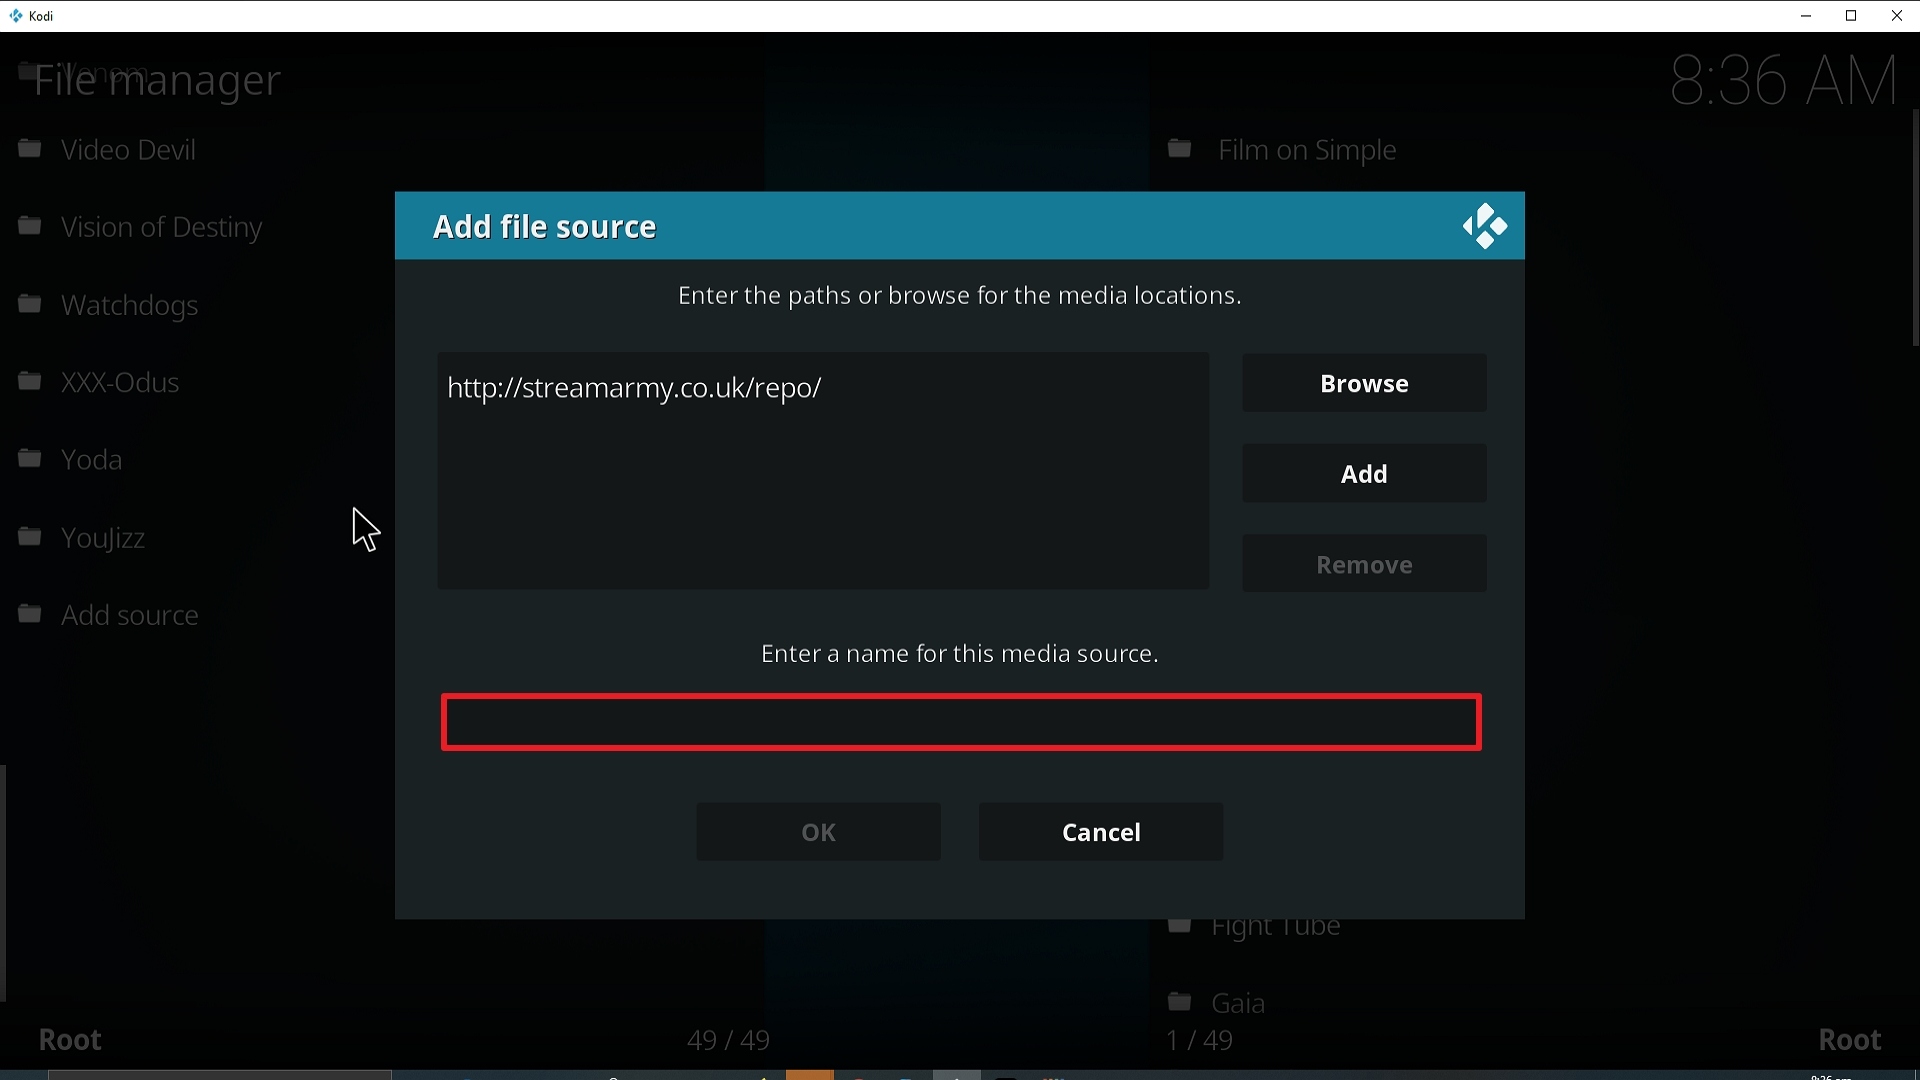
7. Click Add source.

8. Click on <None>.

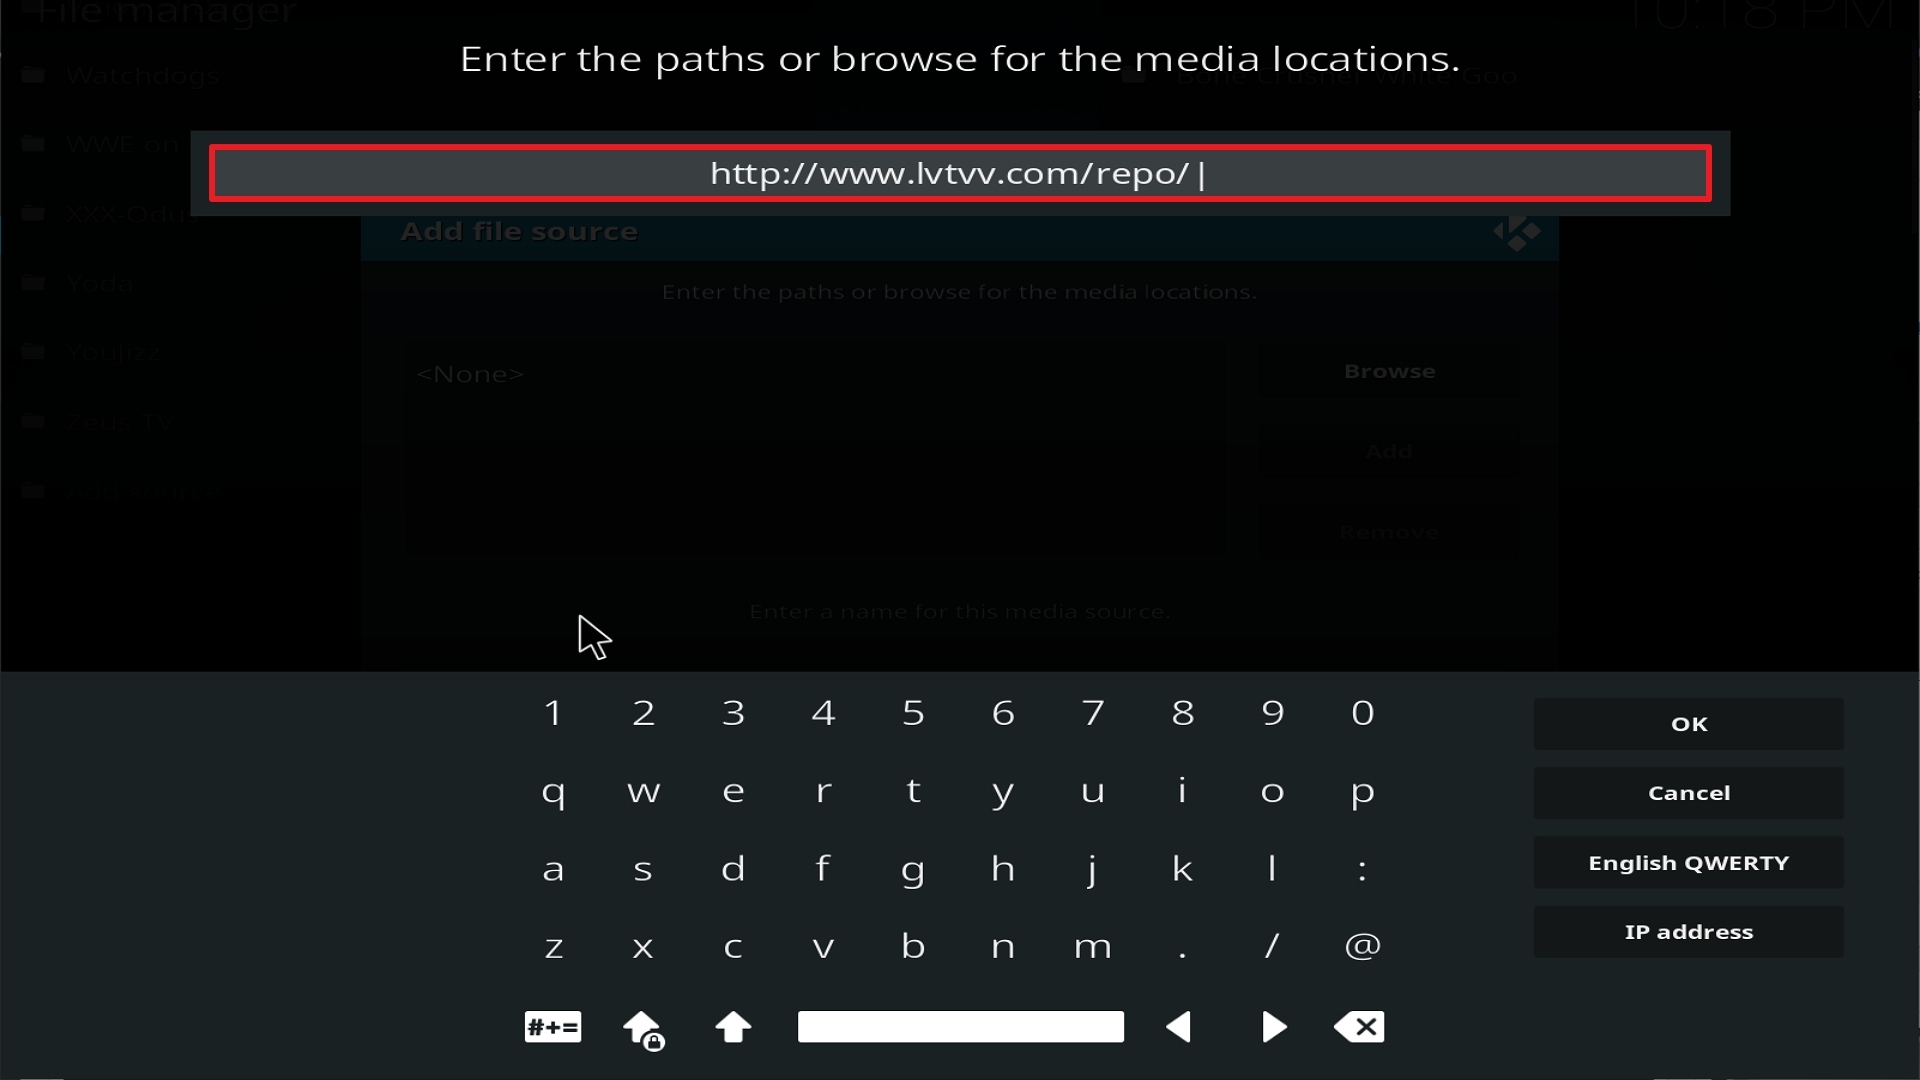
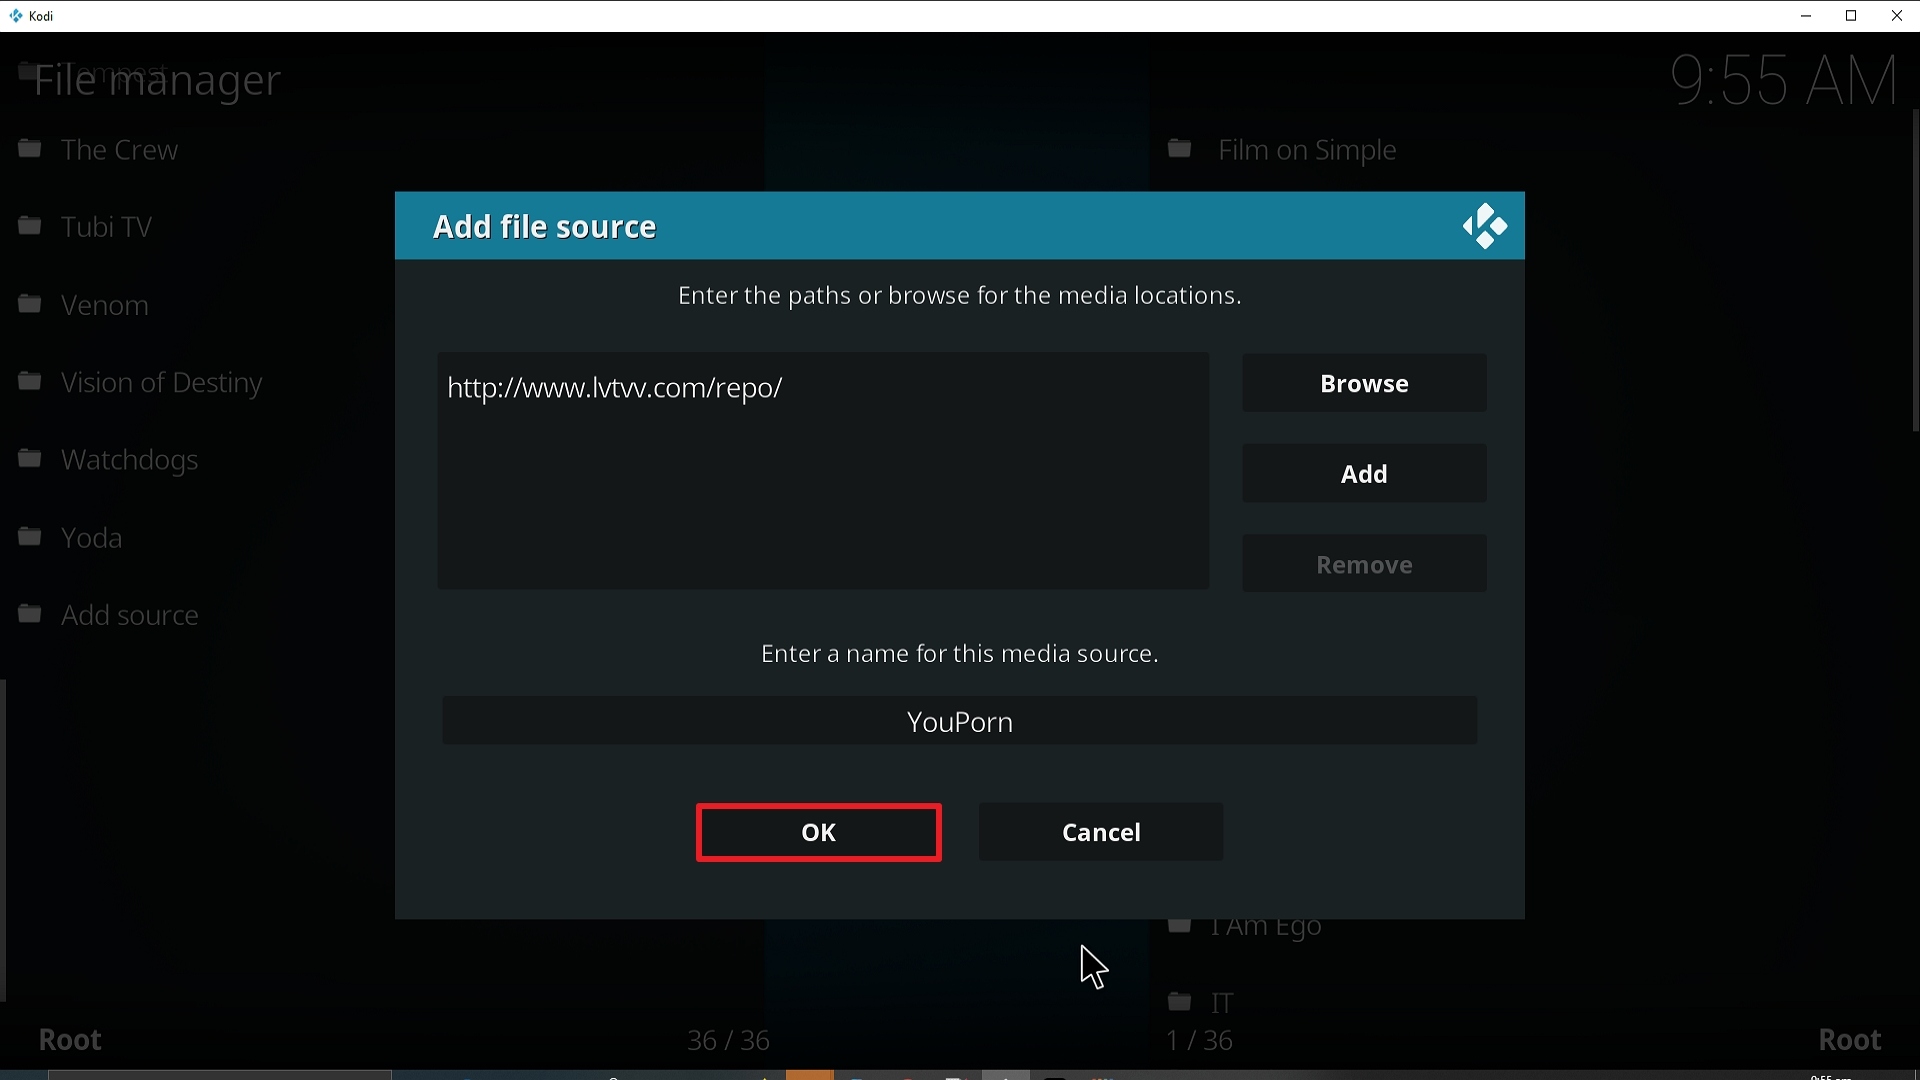
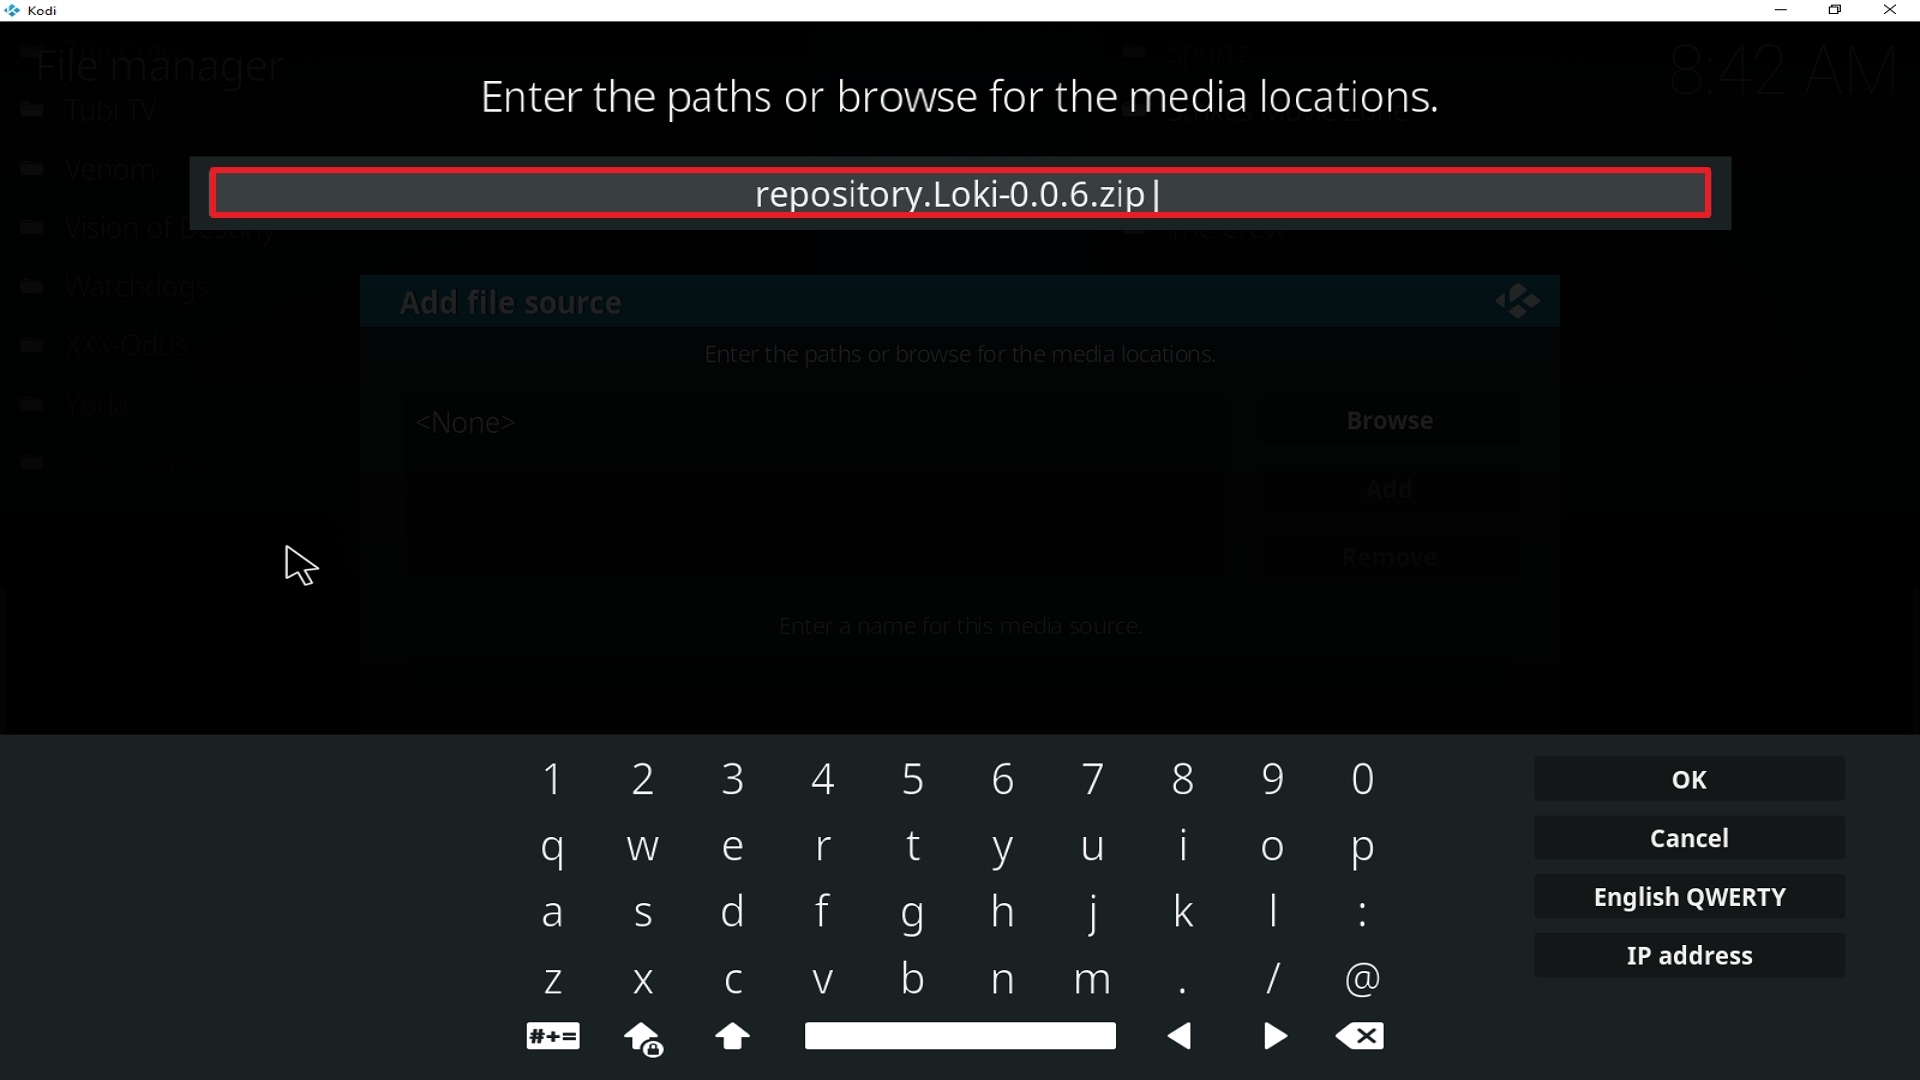
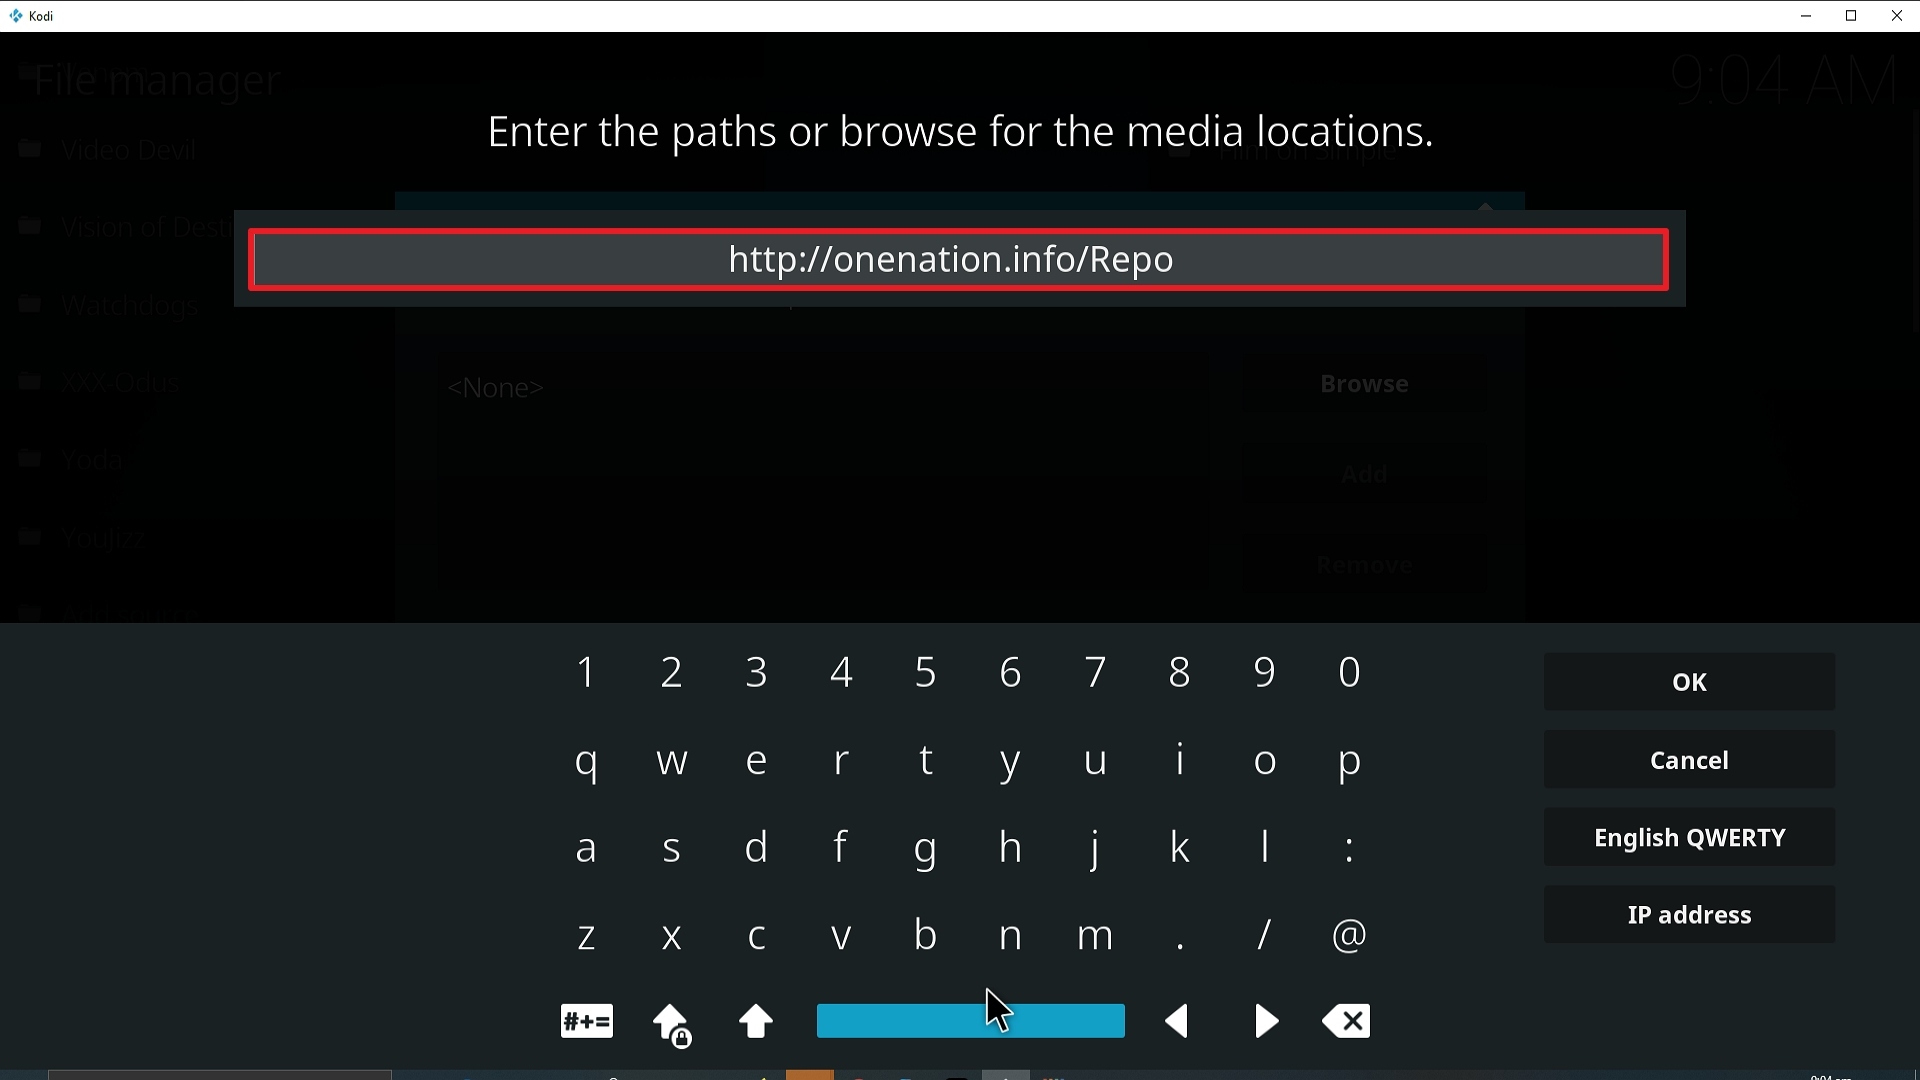
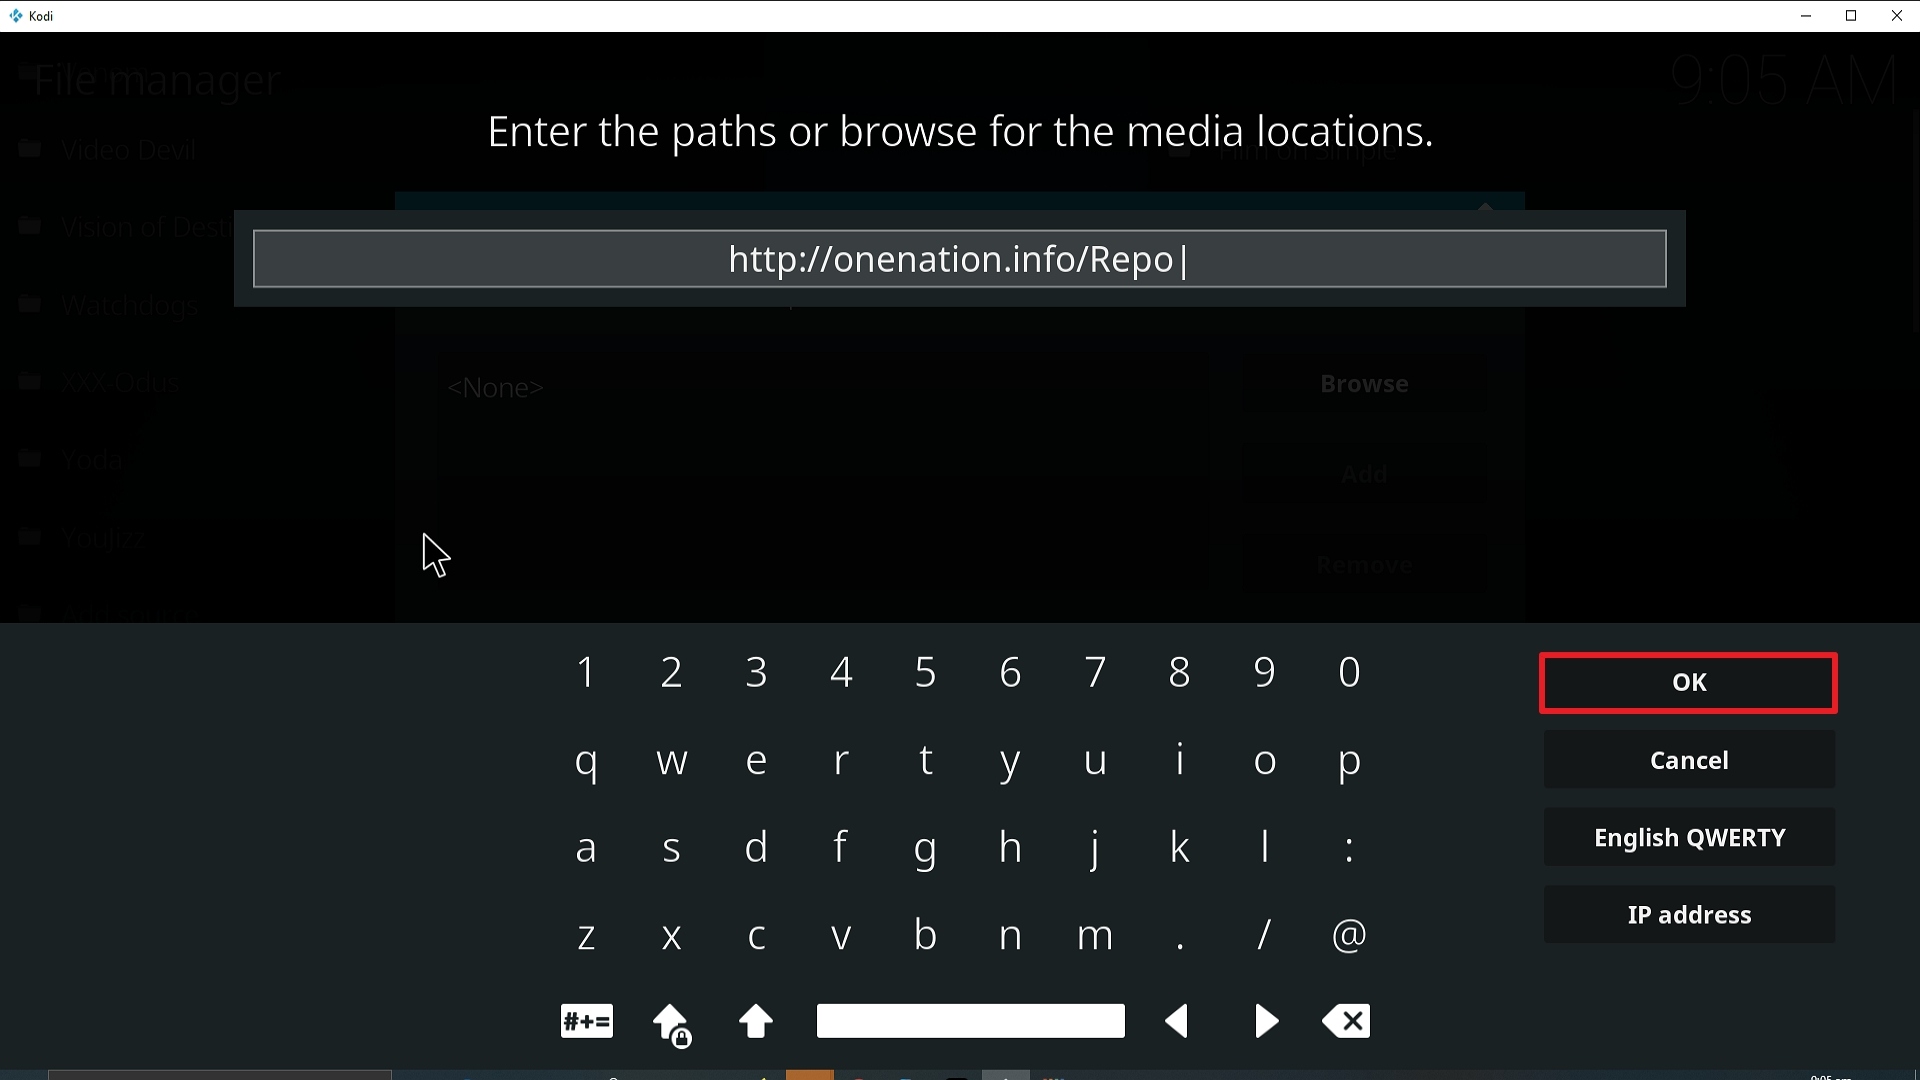
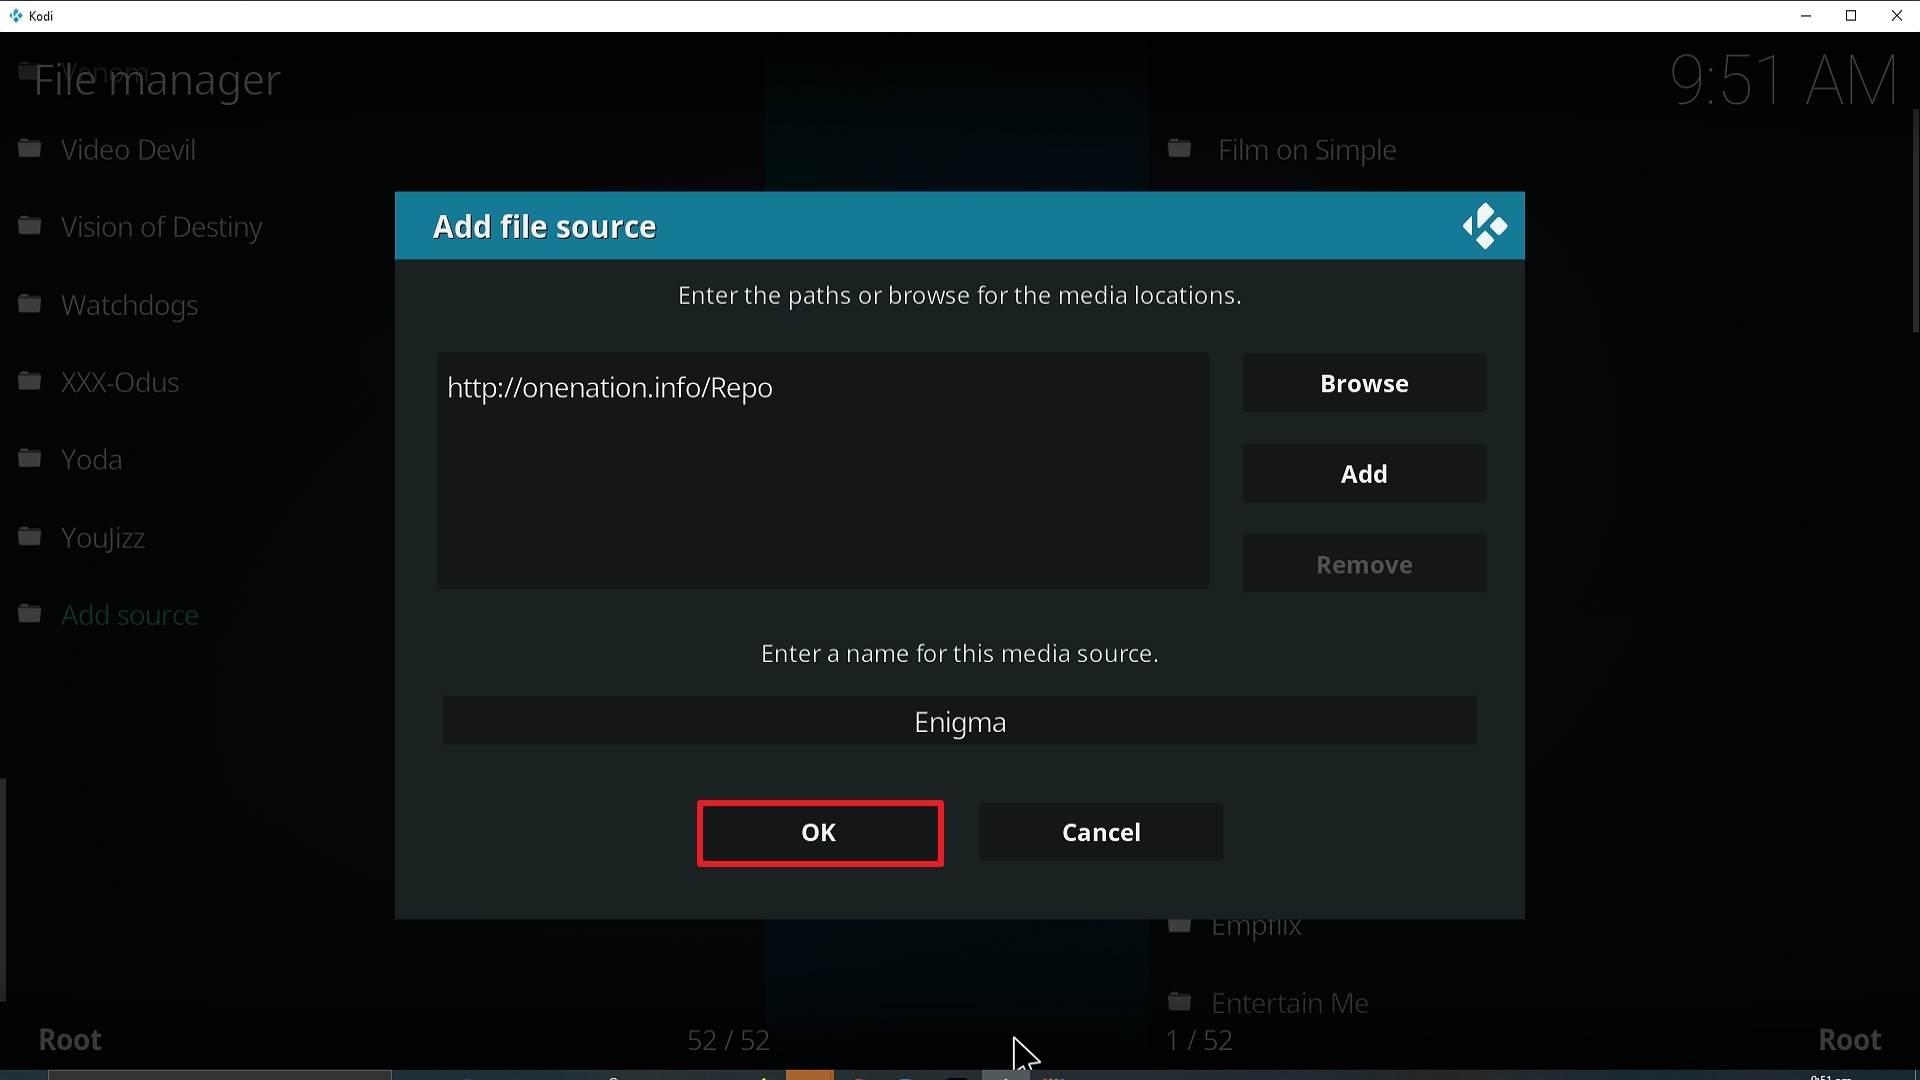
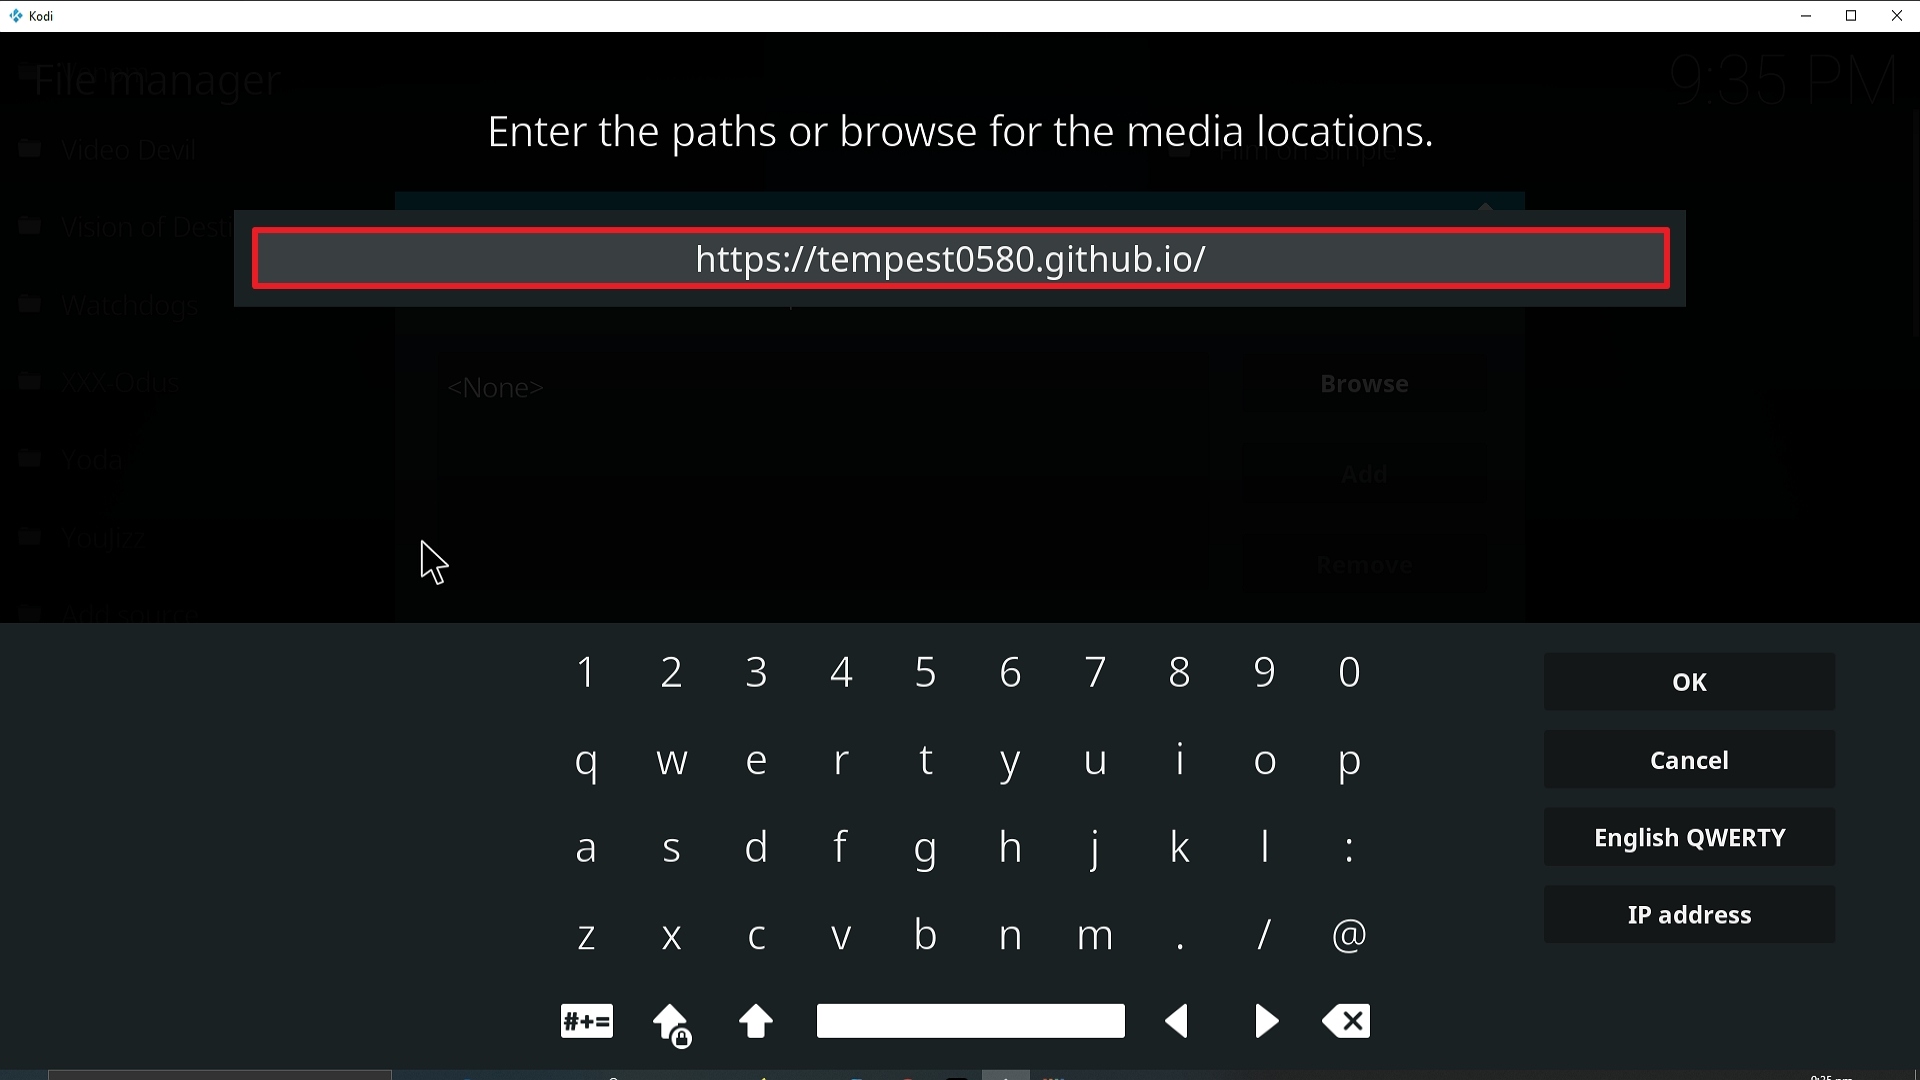
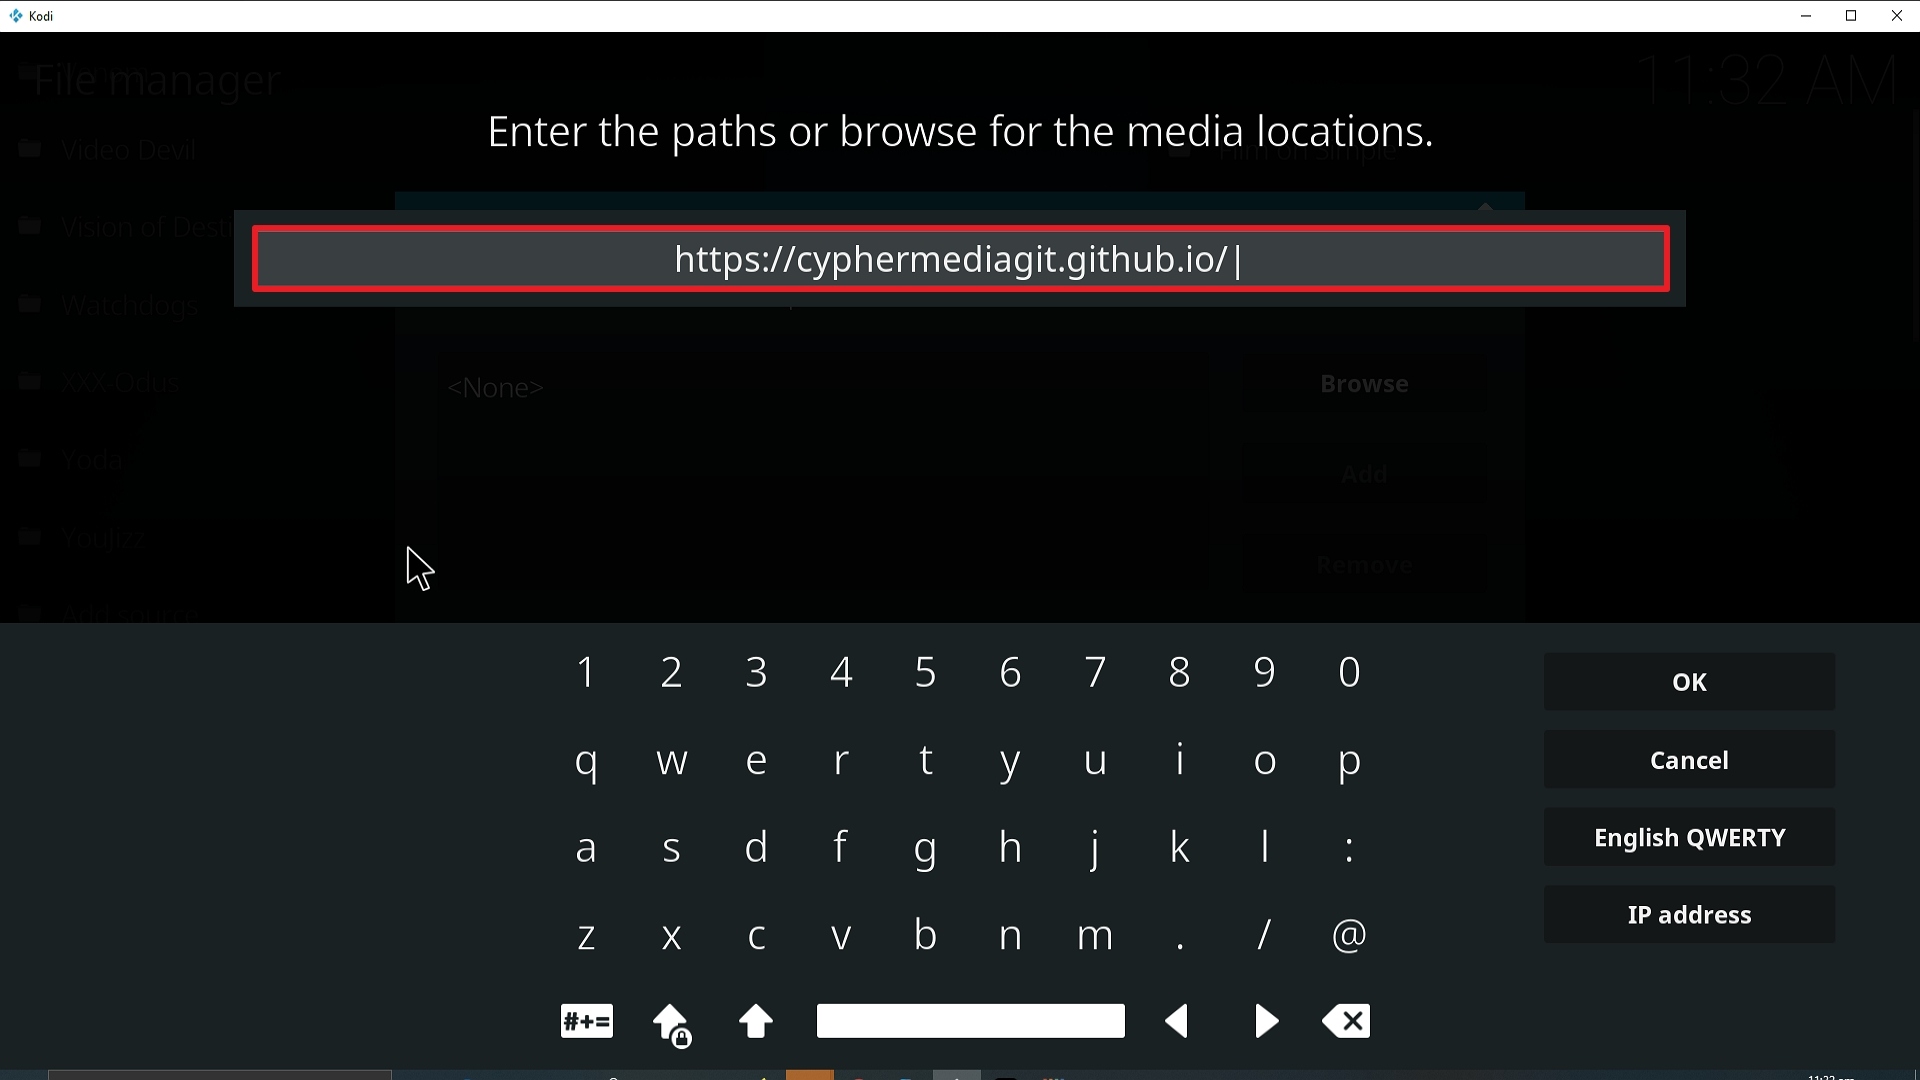
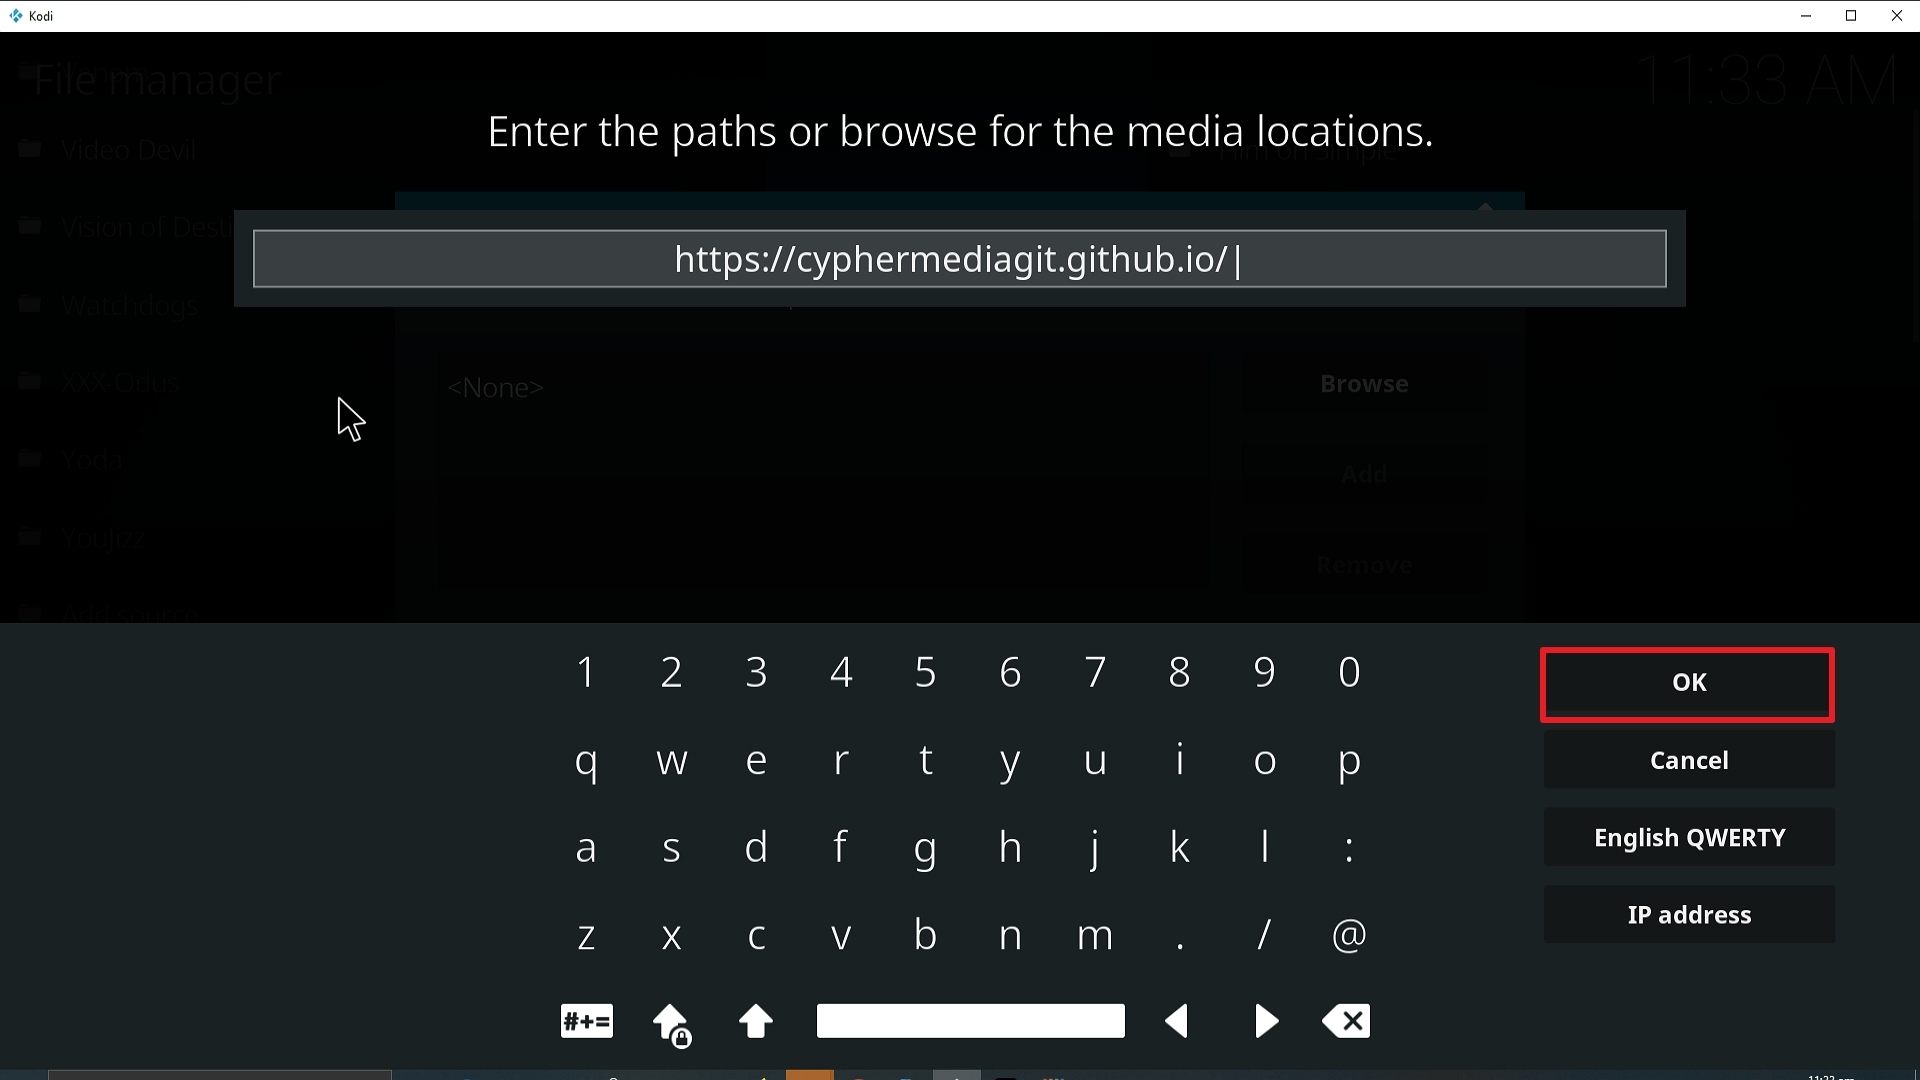
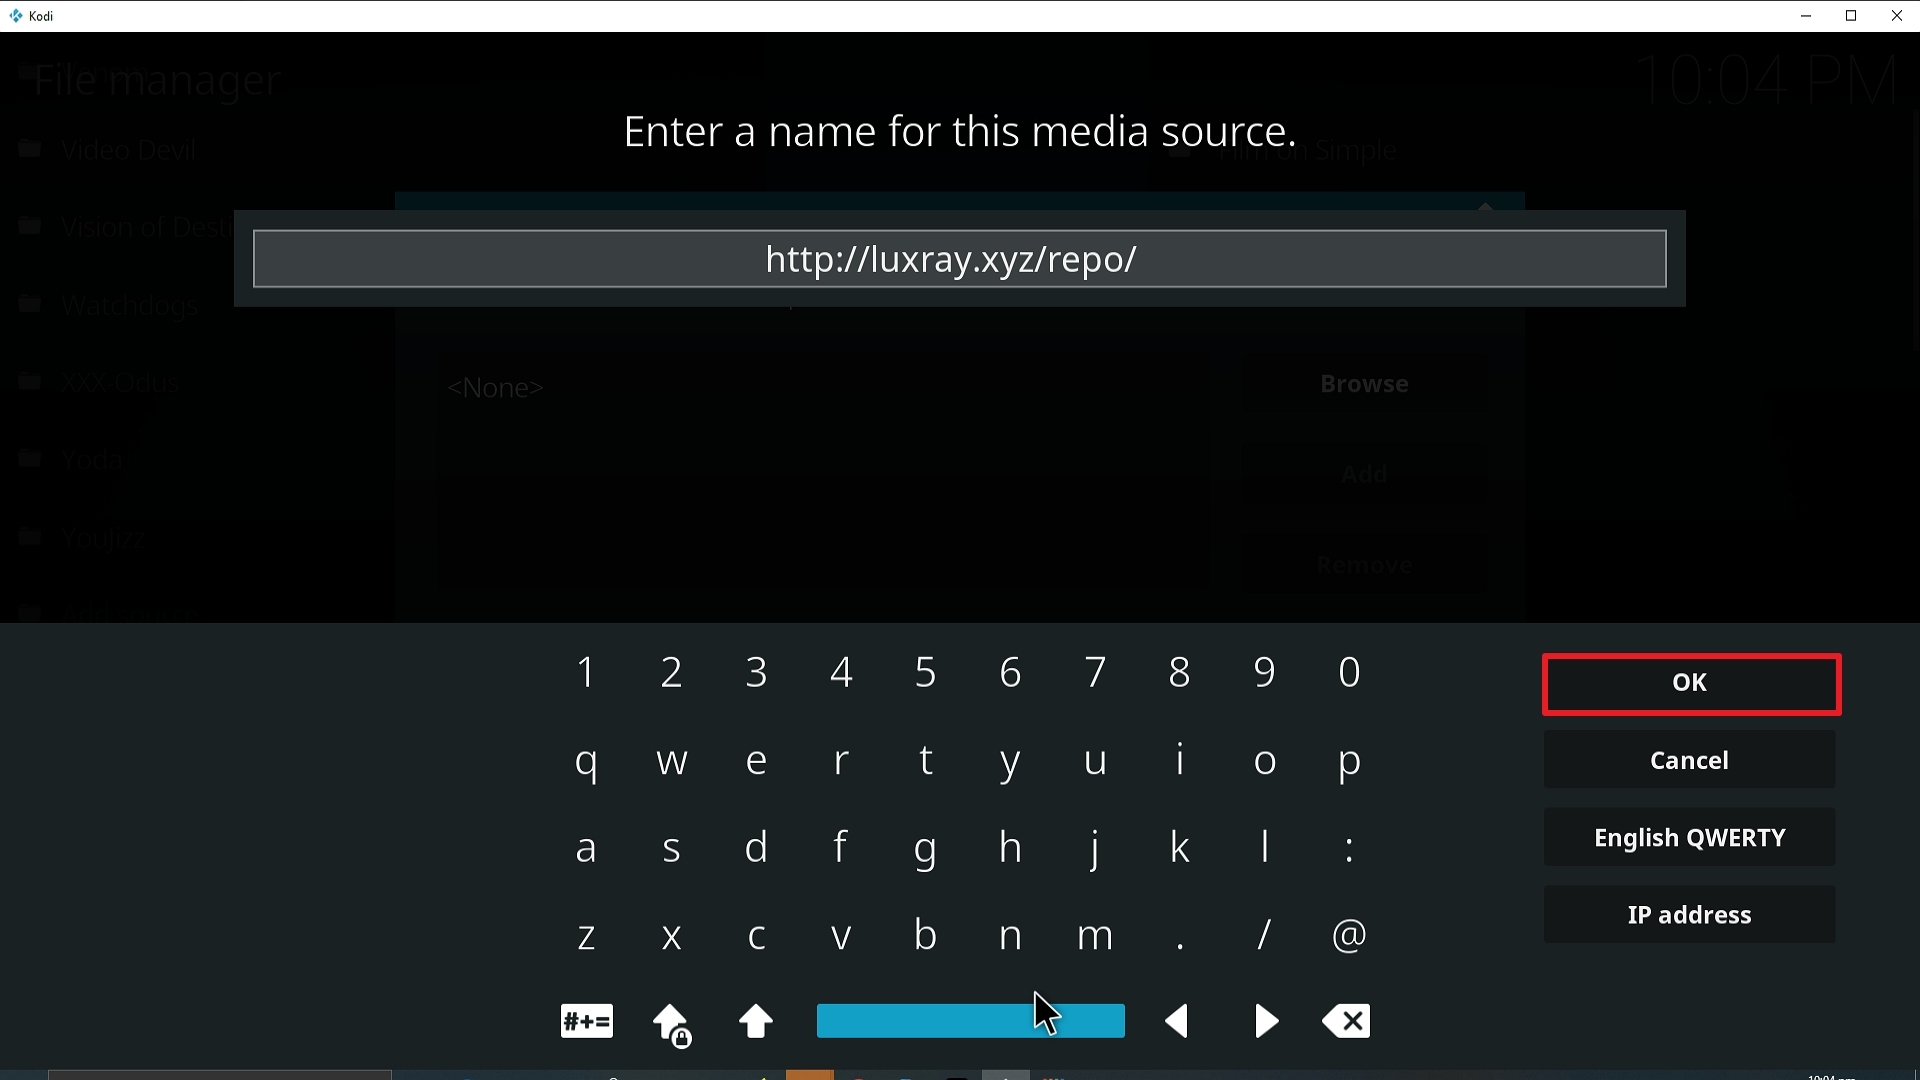
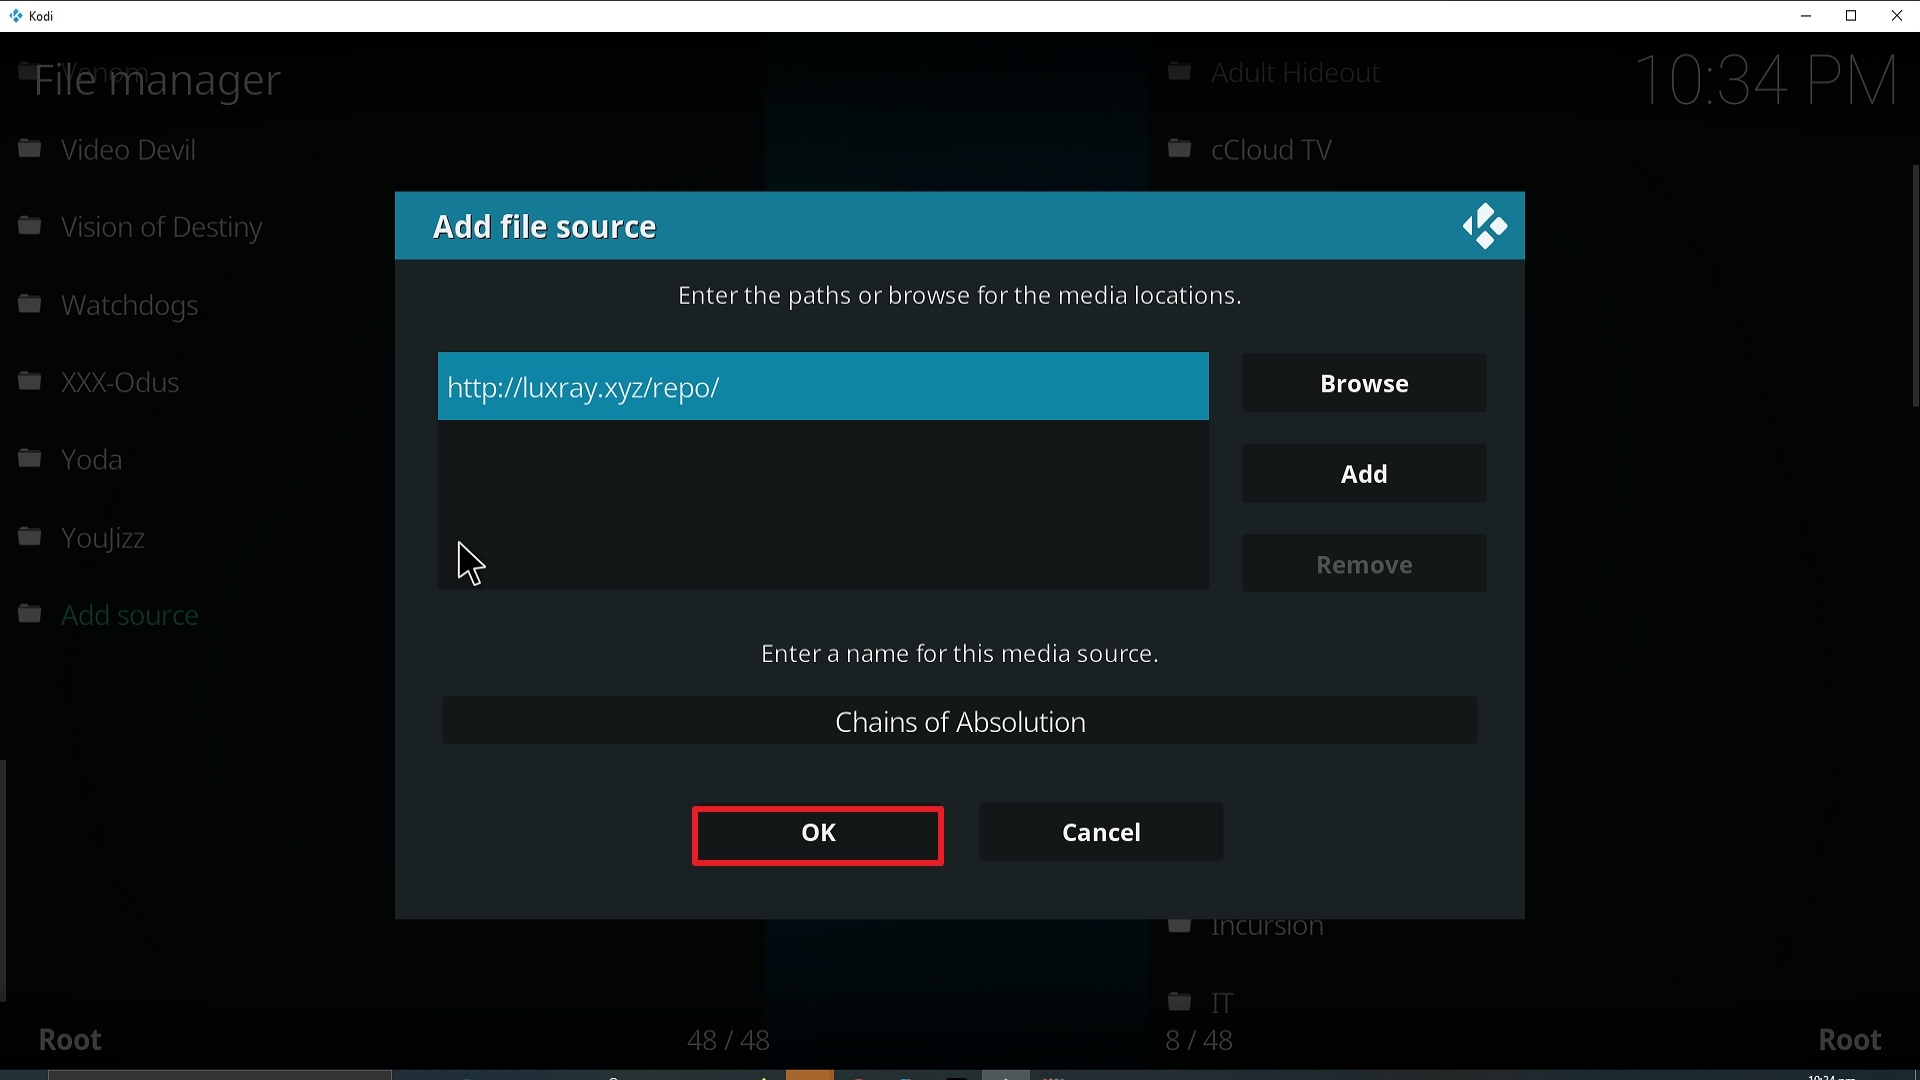
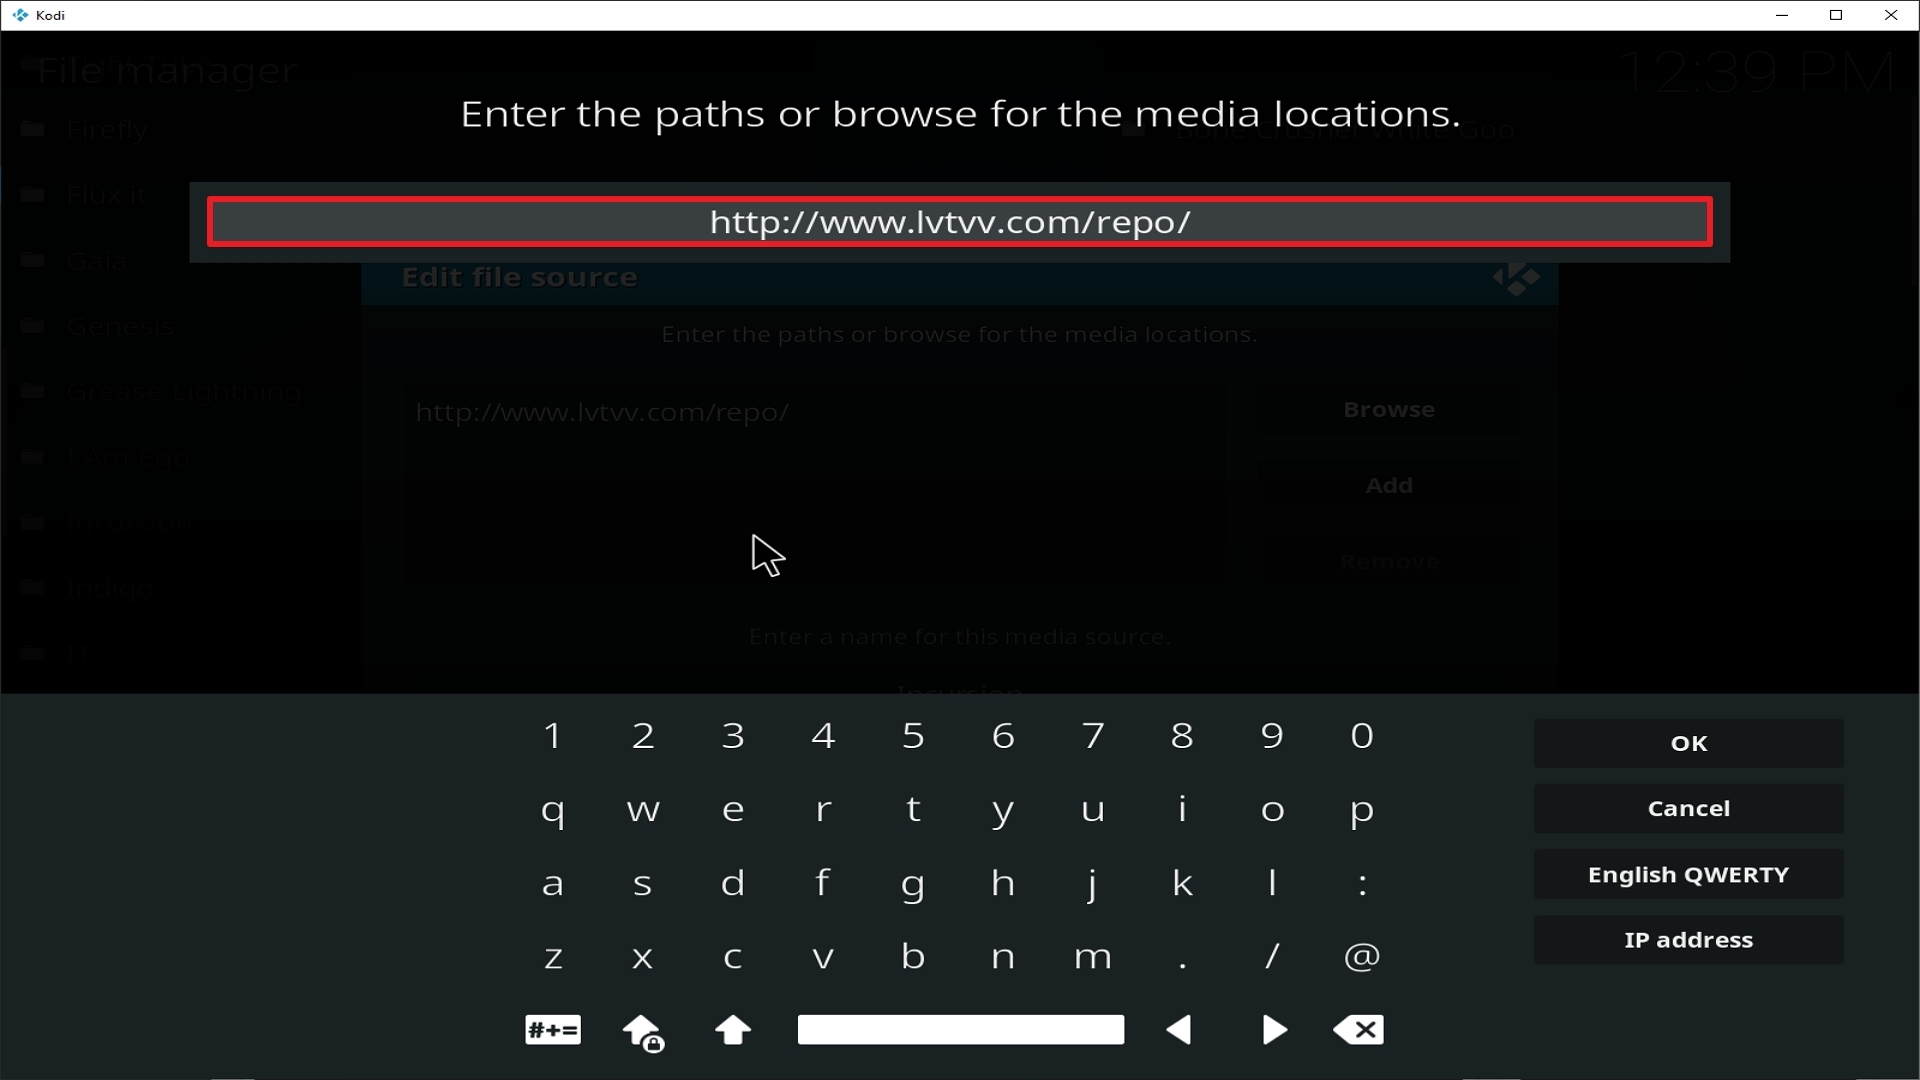
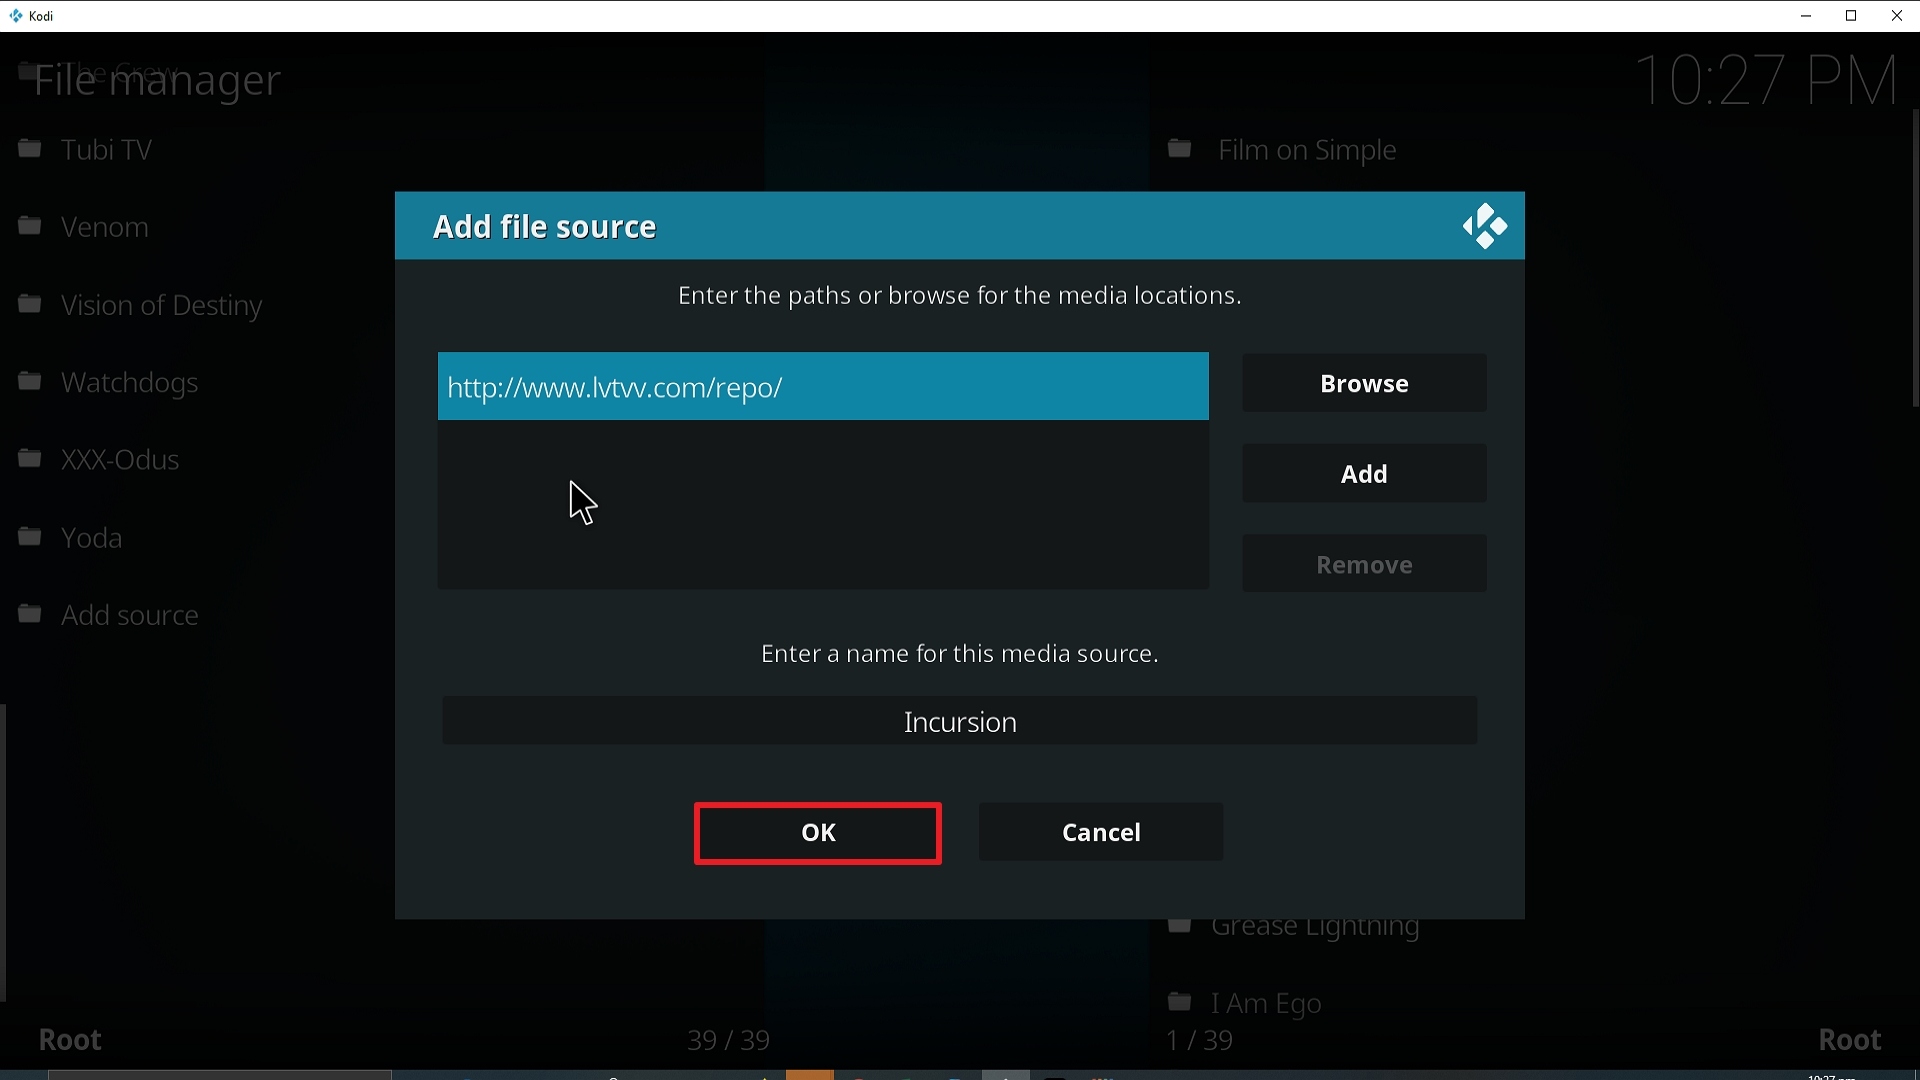
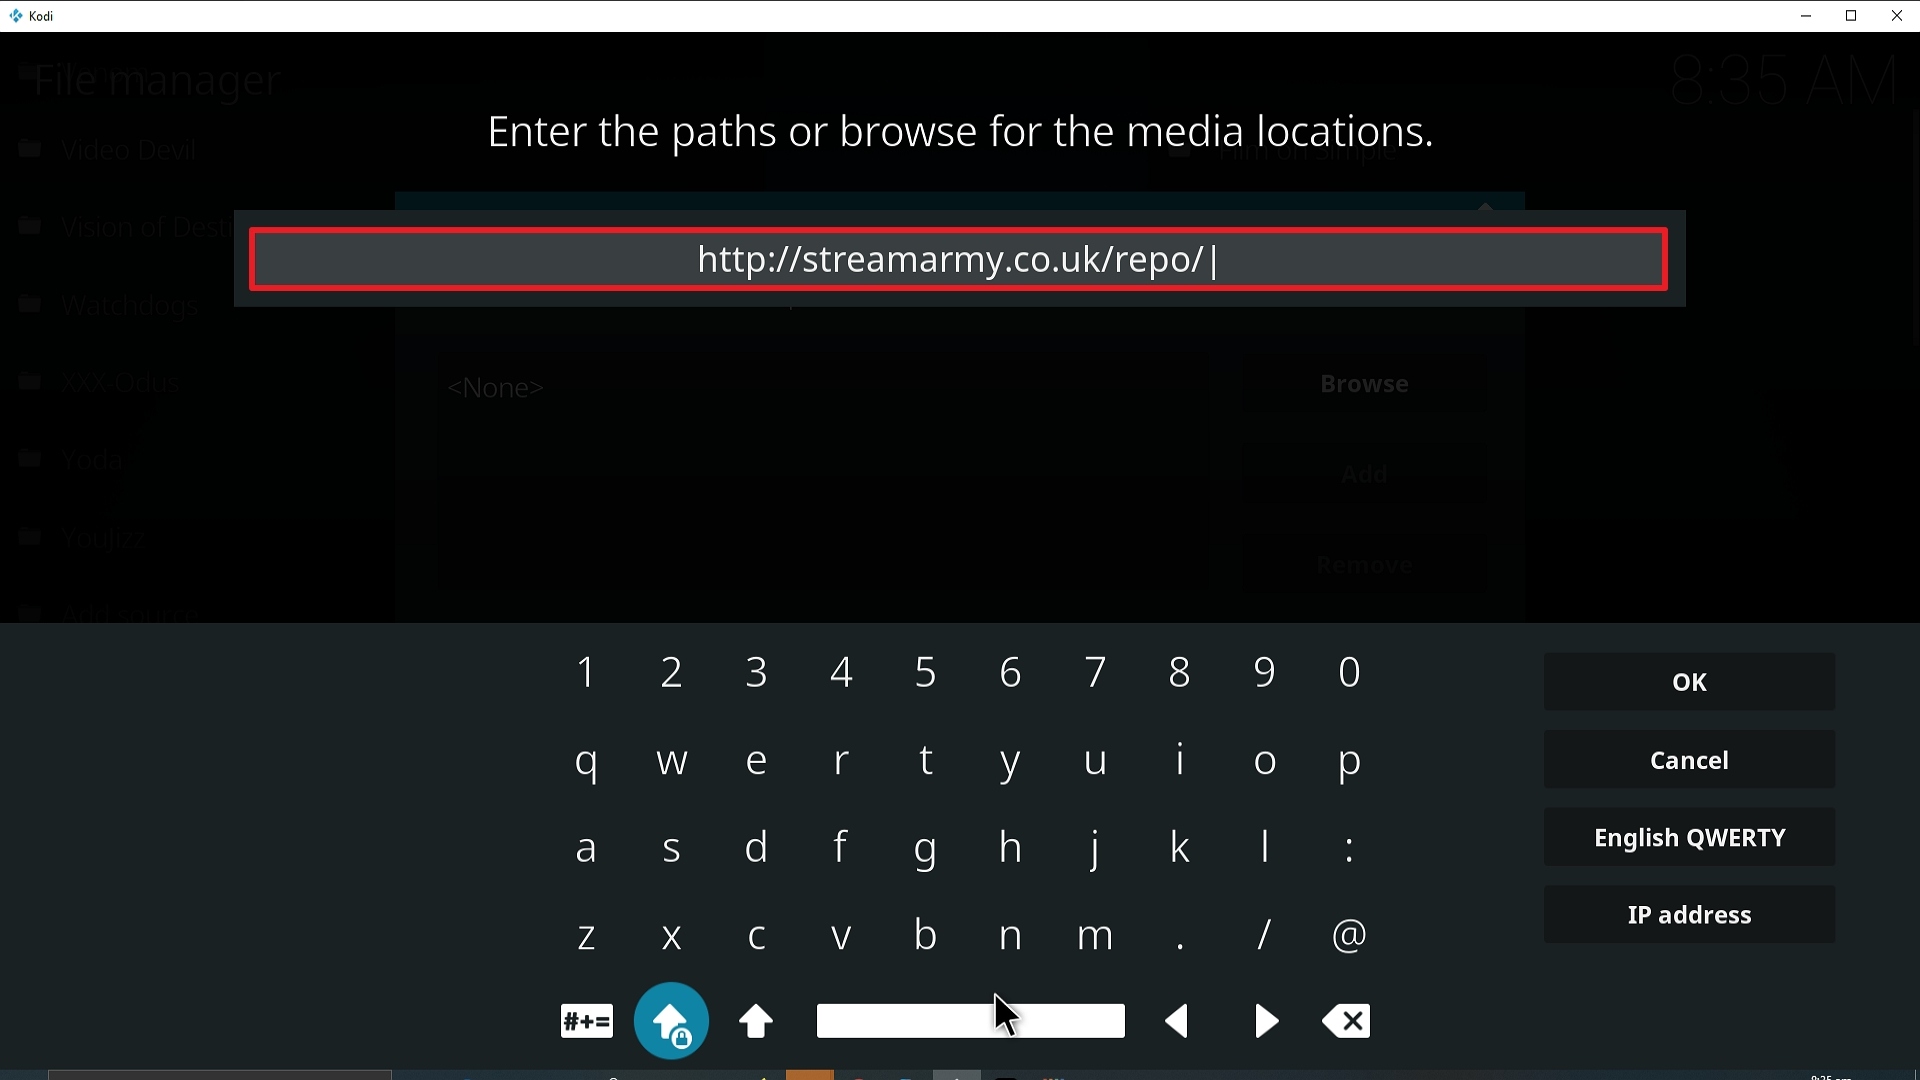
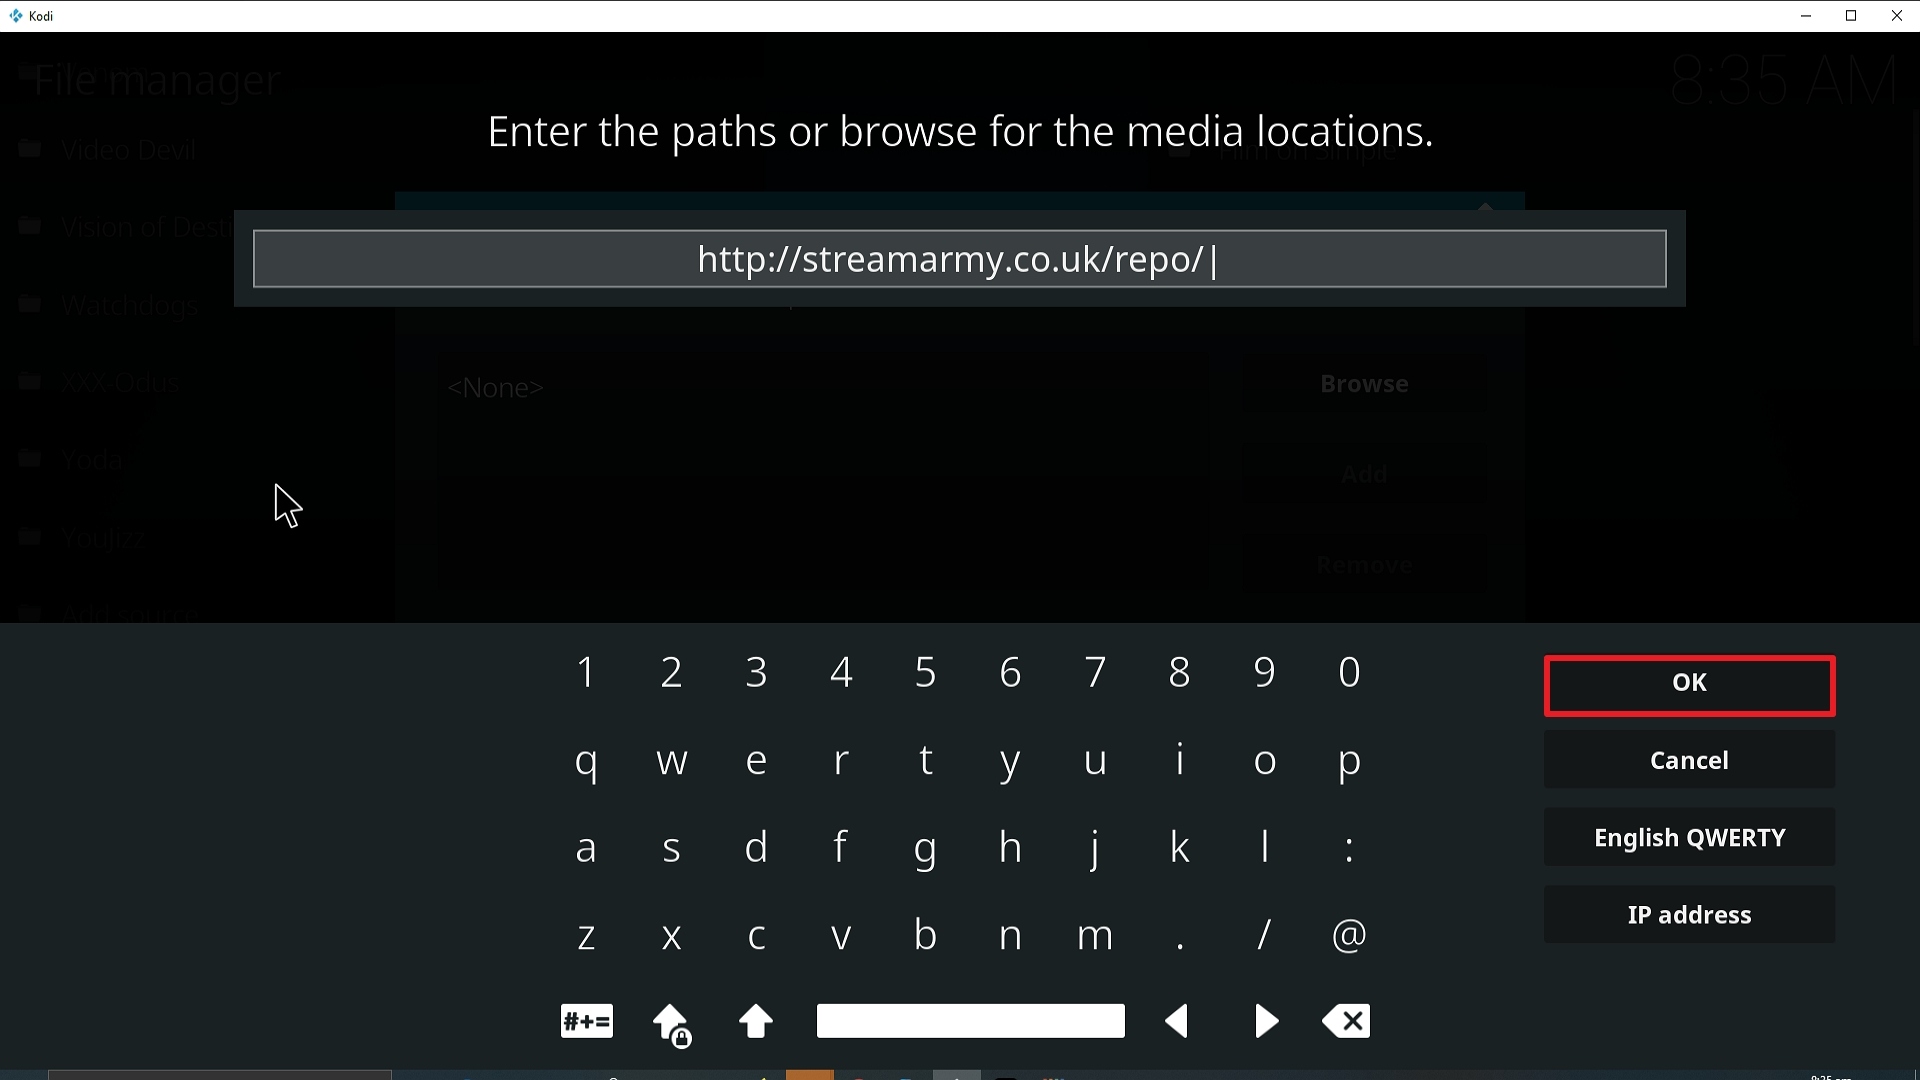
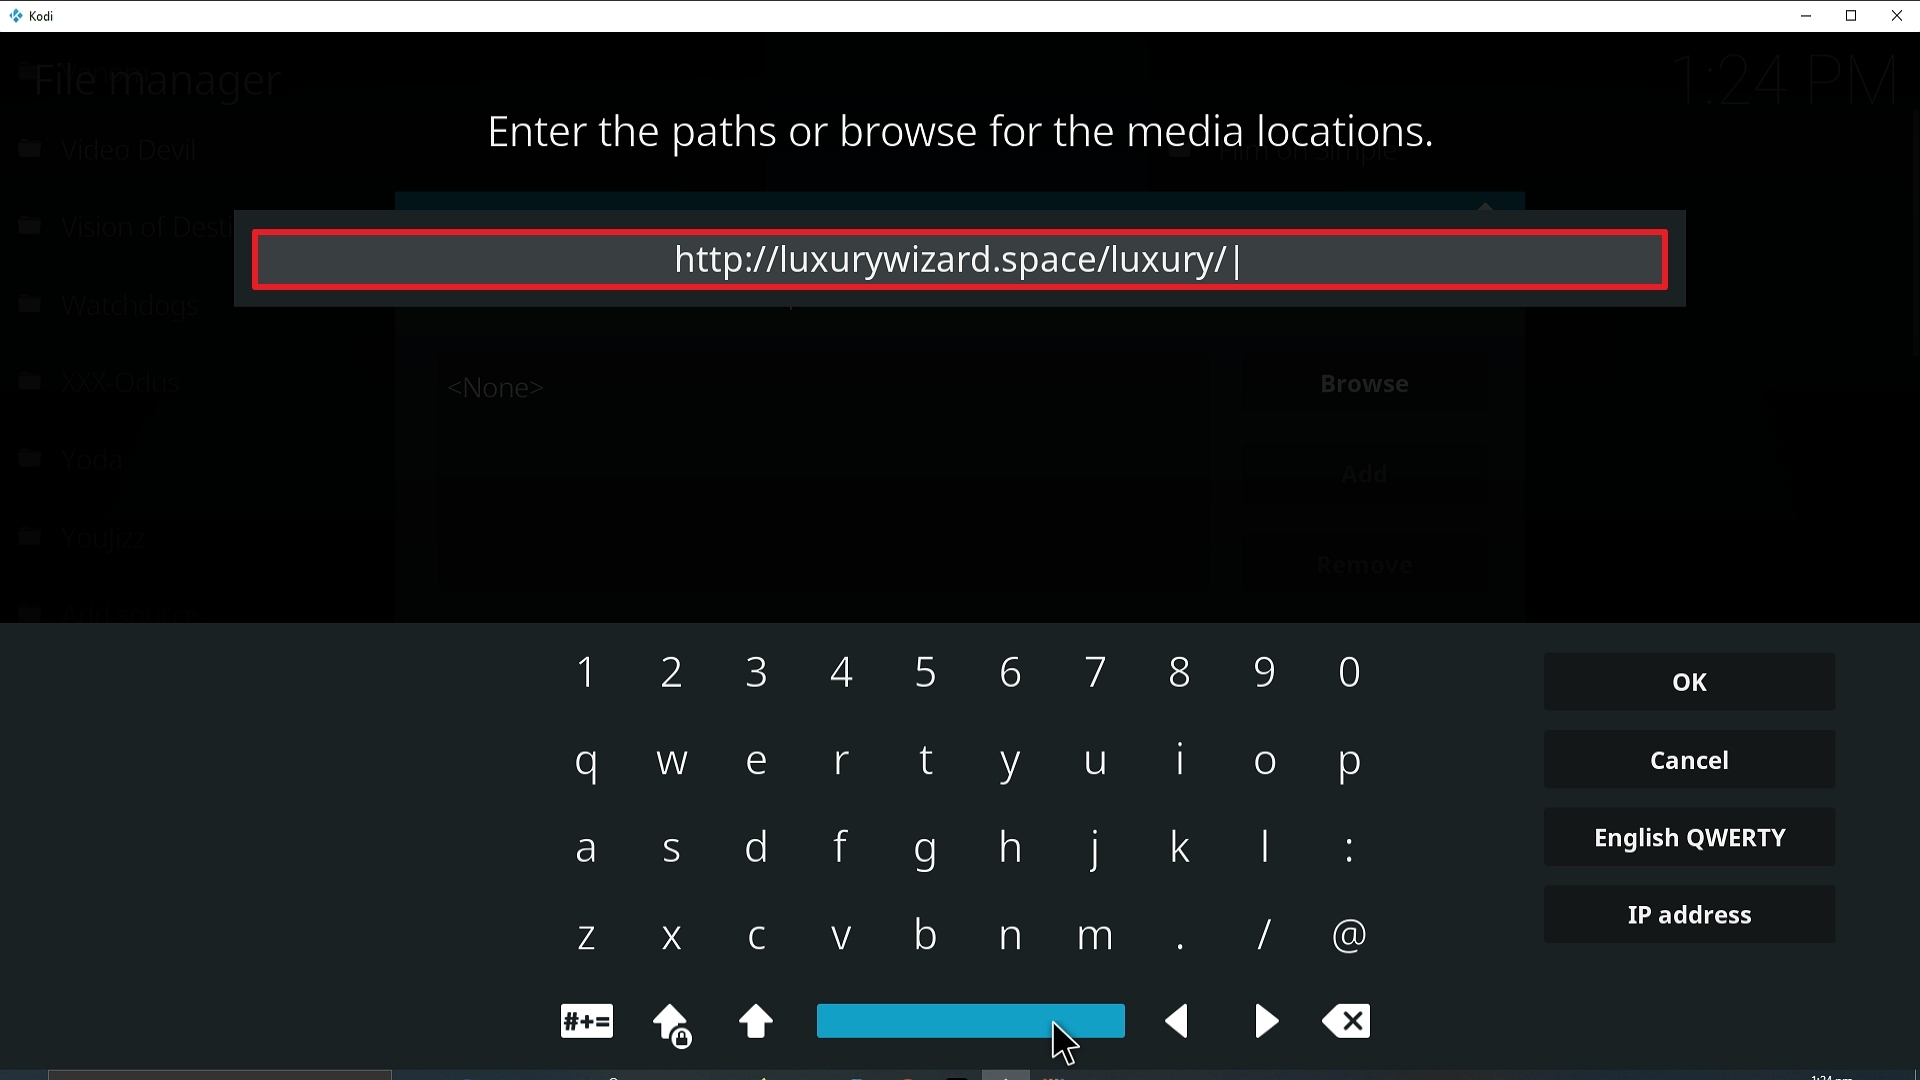
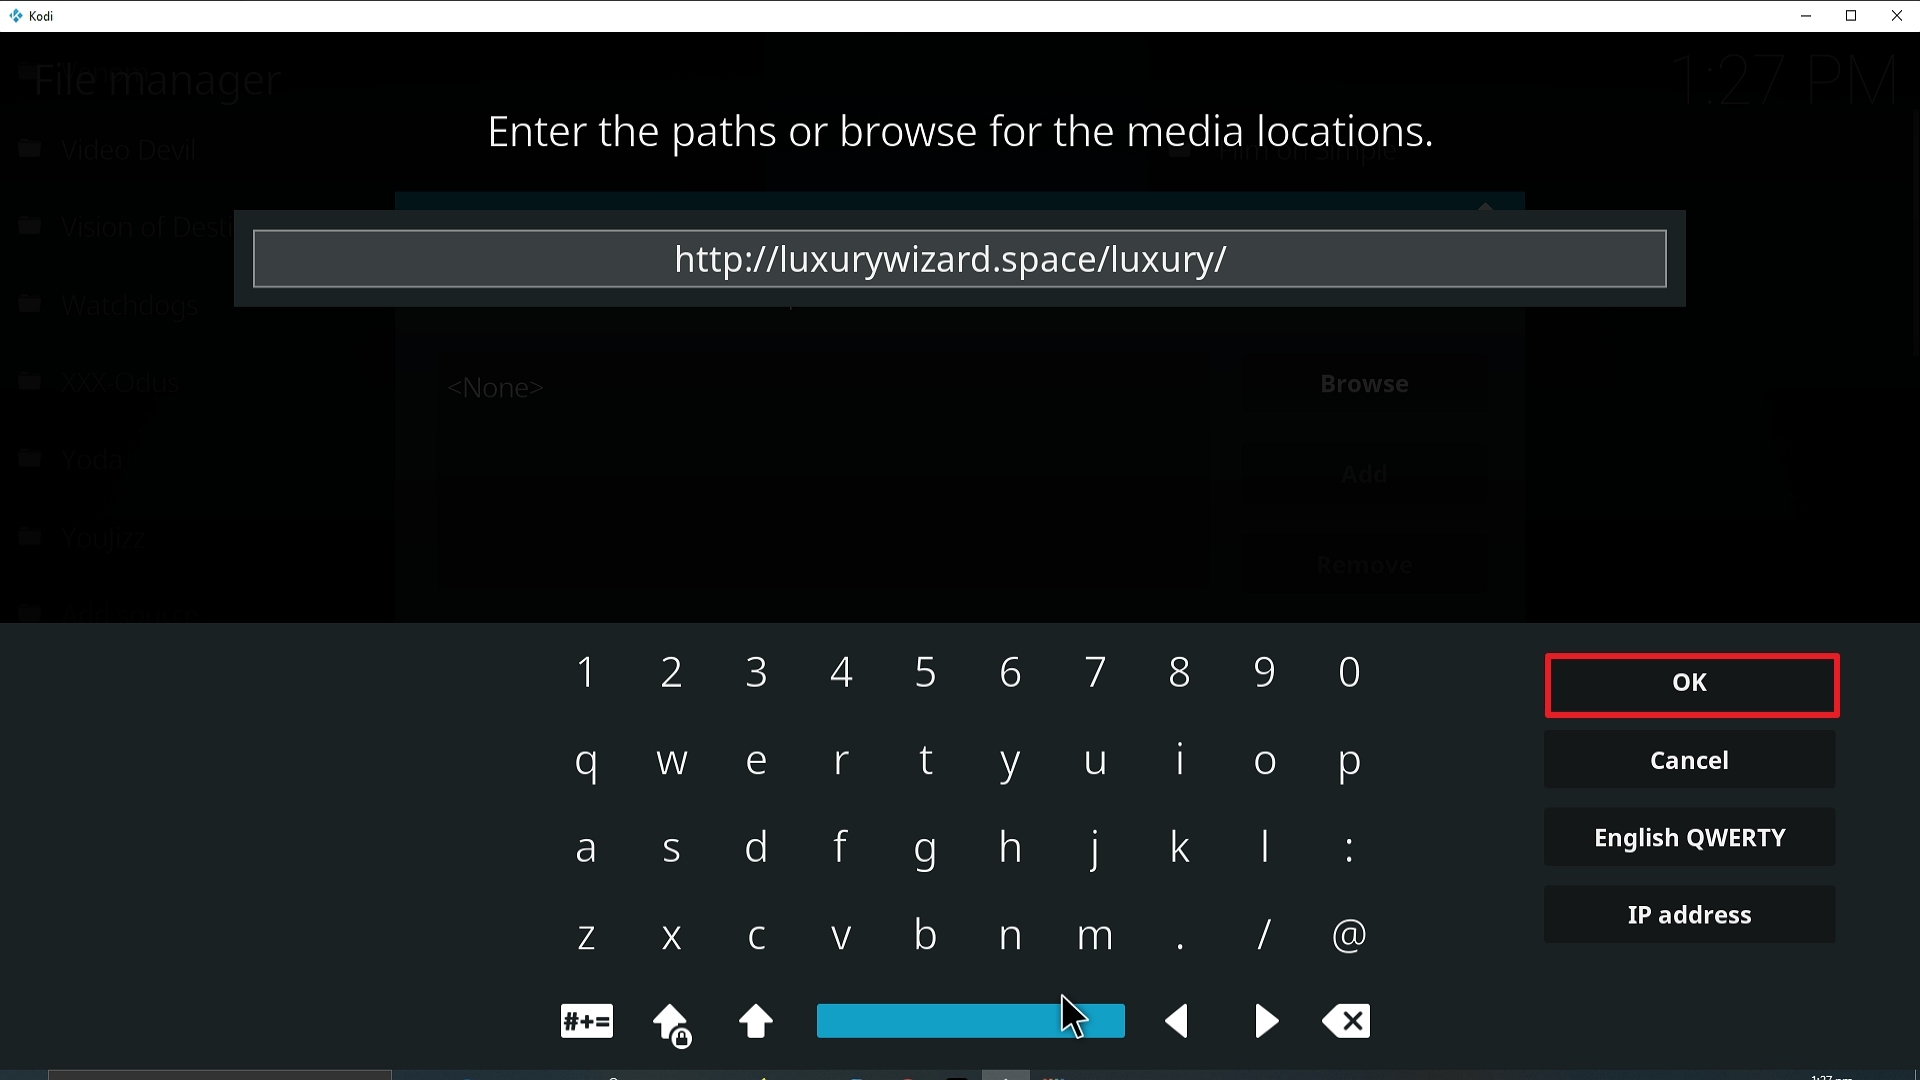
9. Type exactly: http://repo.rubyjewelwizard.com/
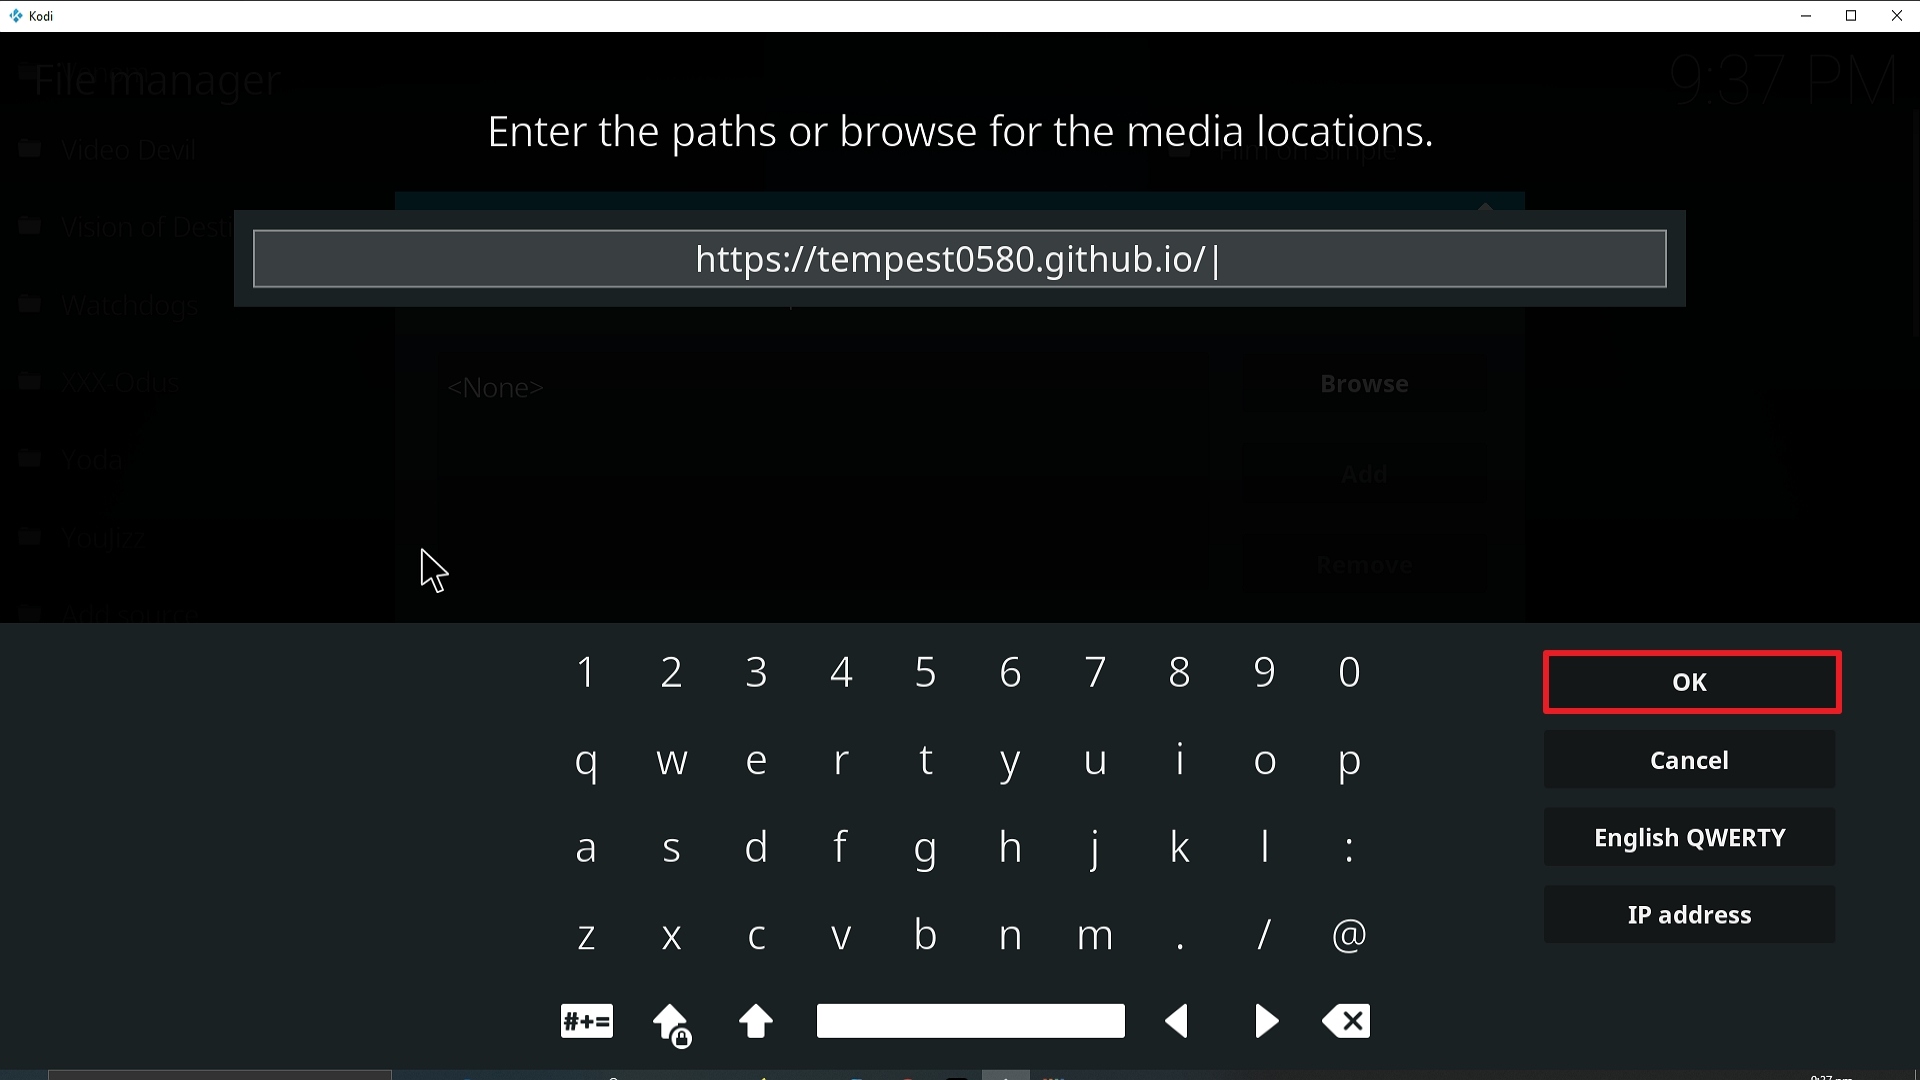
10. Click on OK.
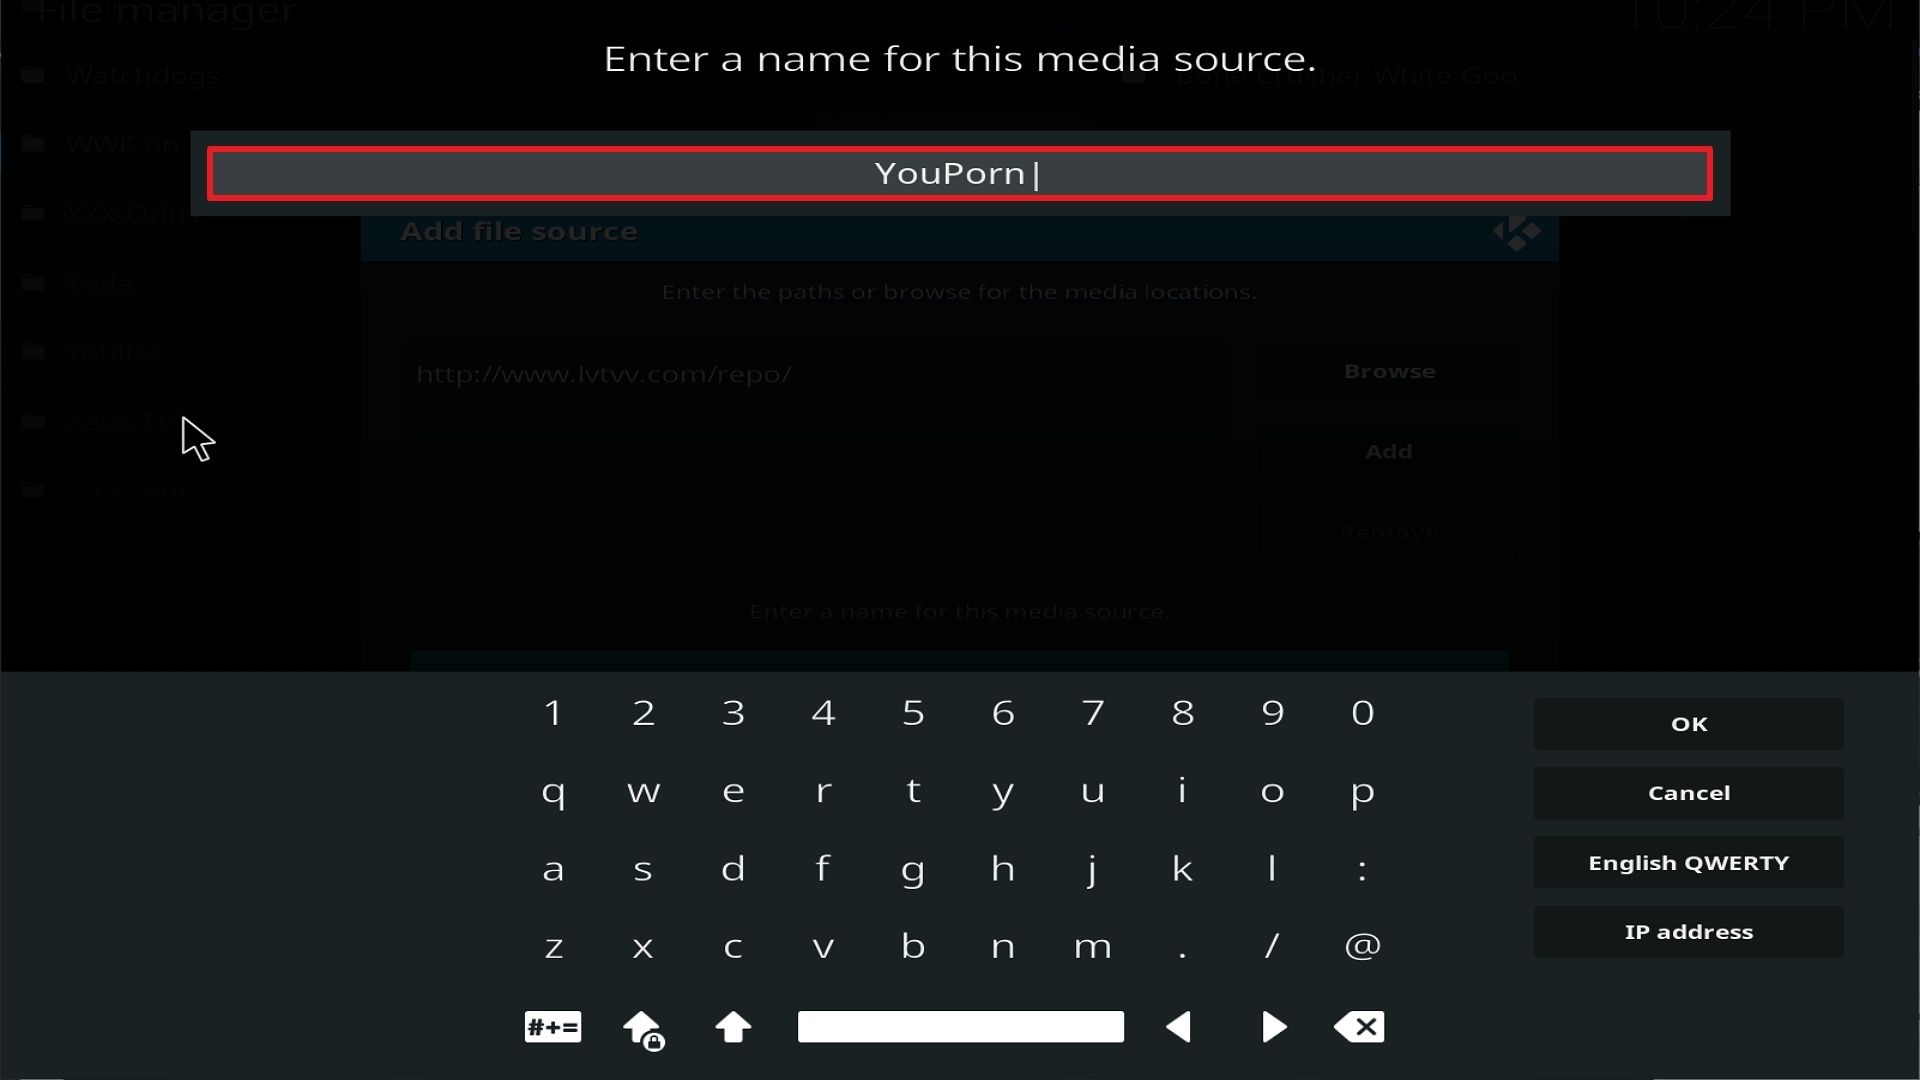
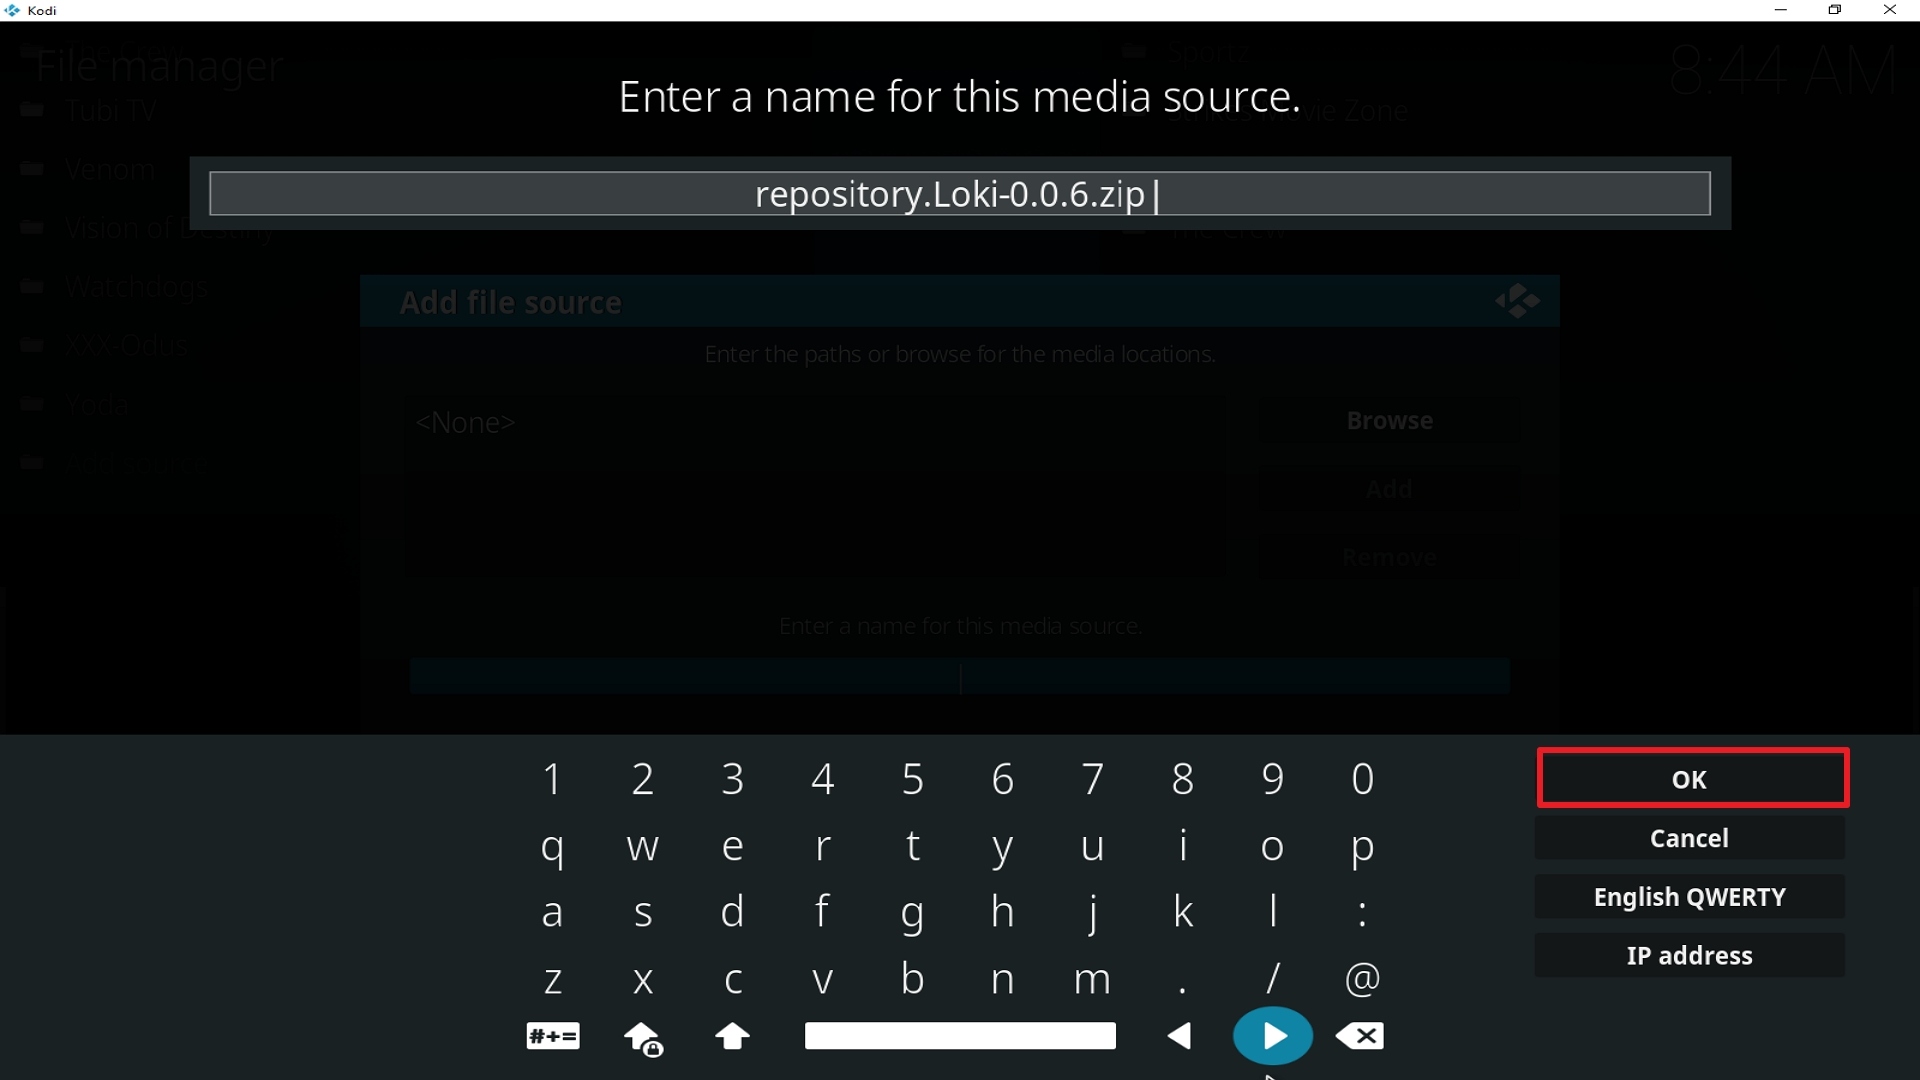
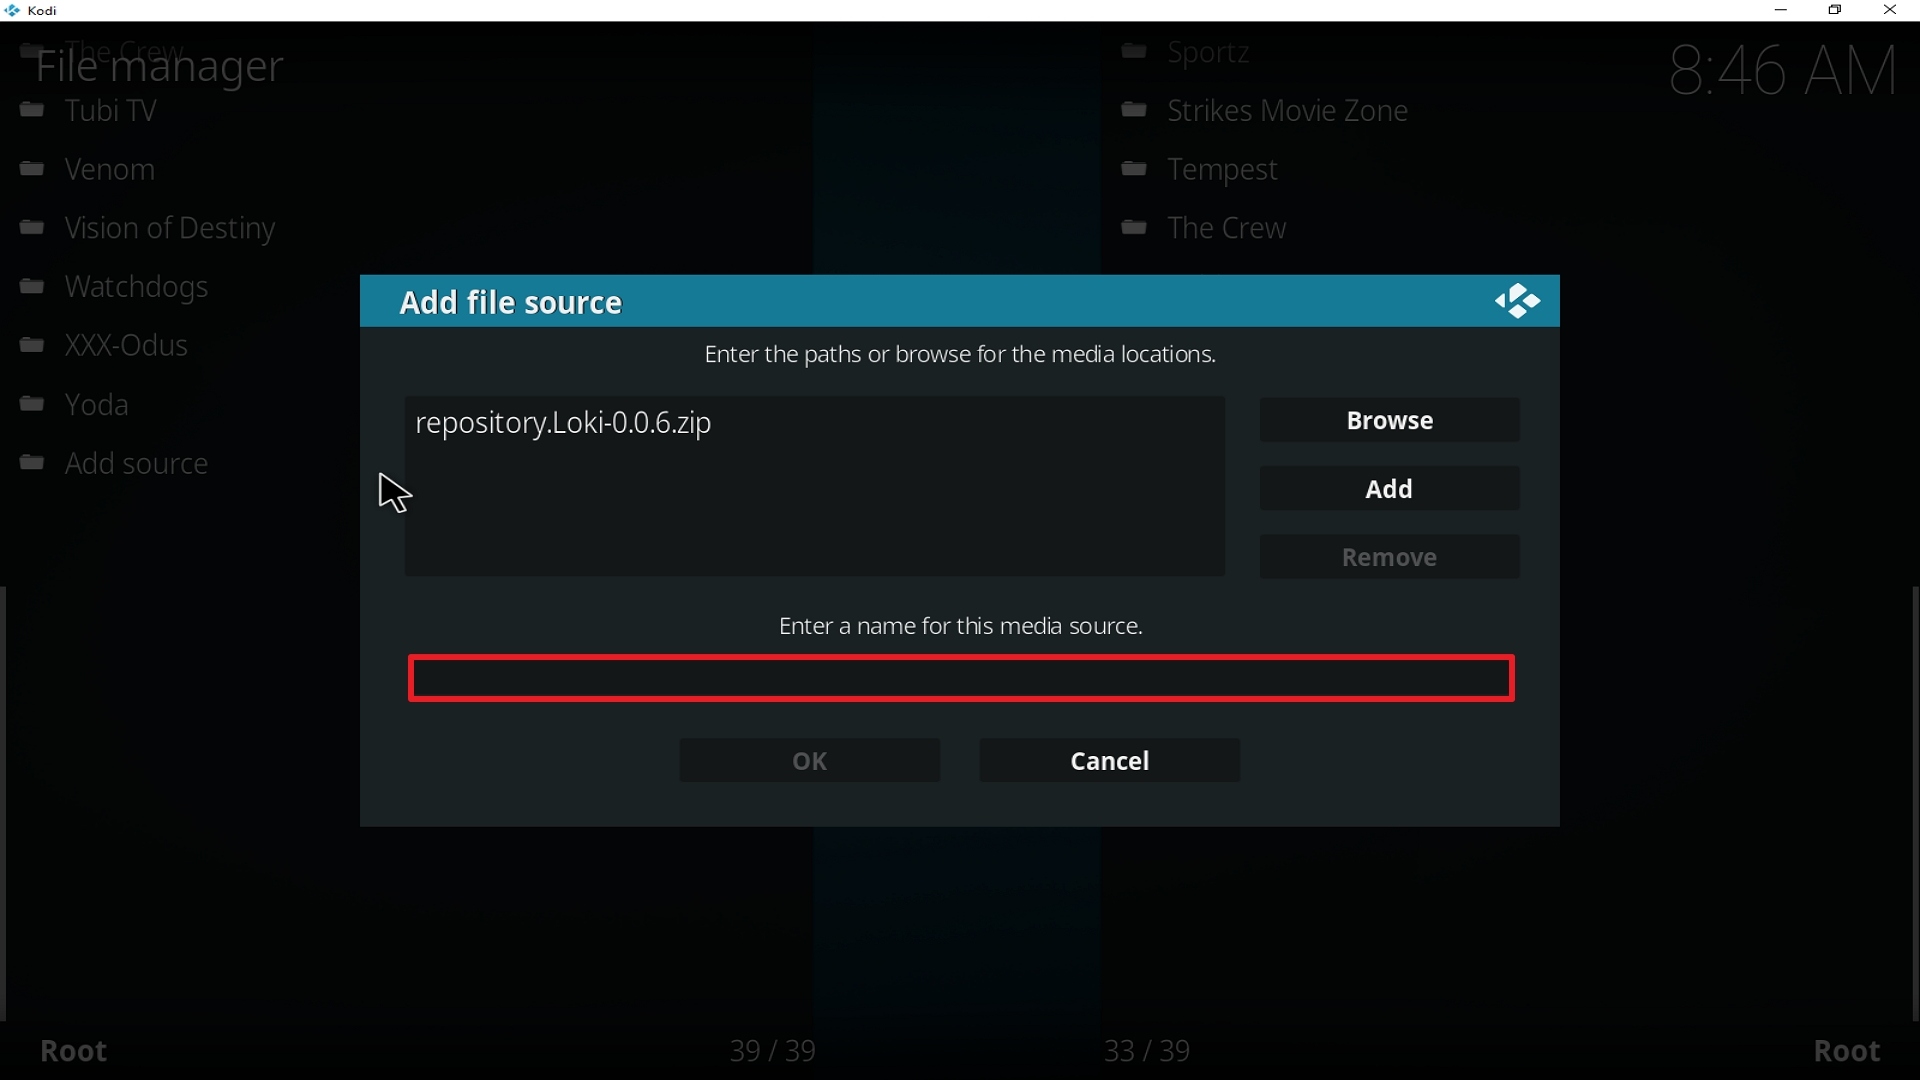
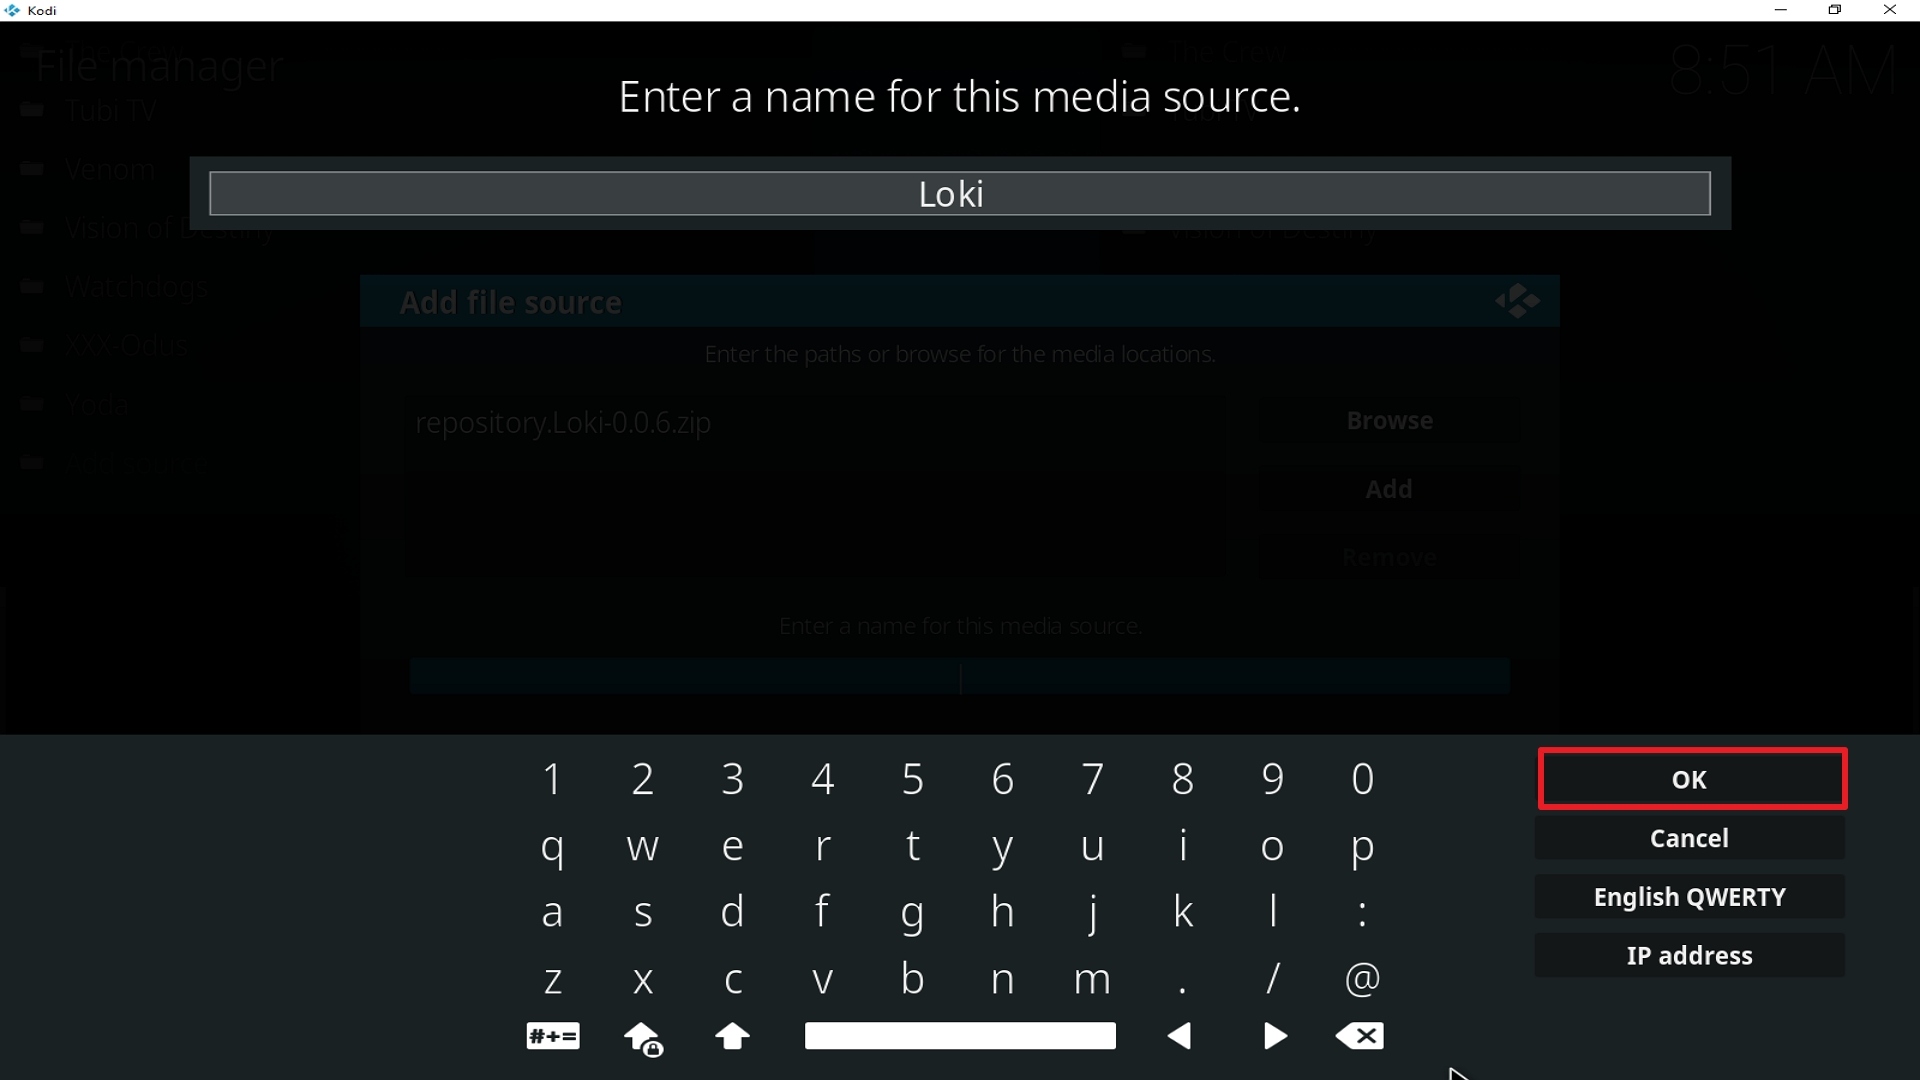
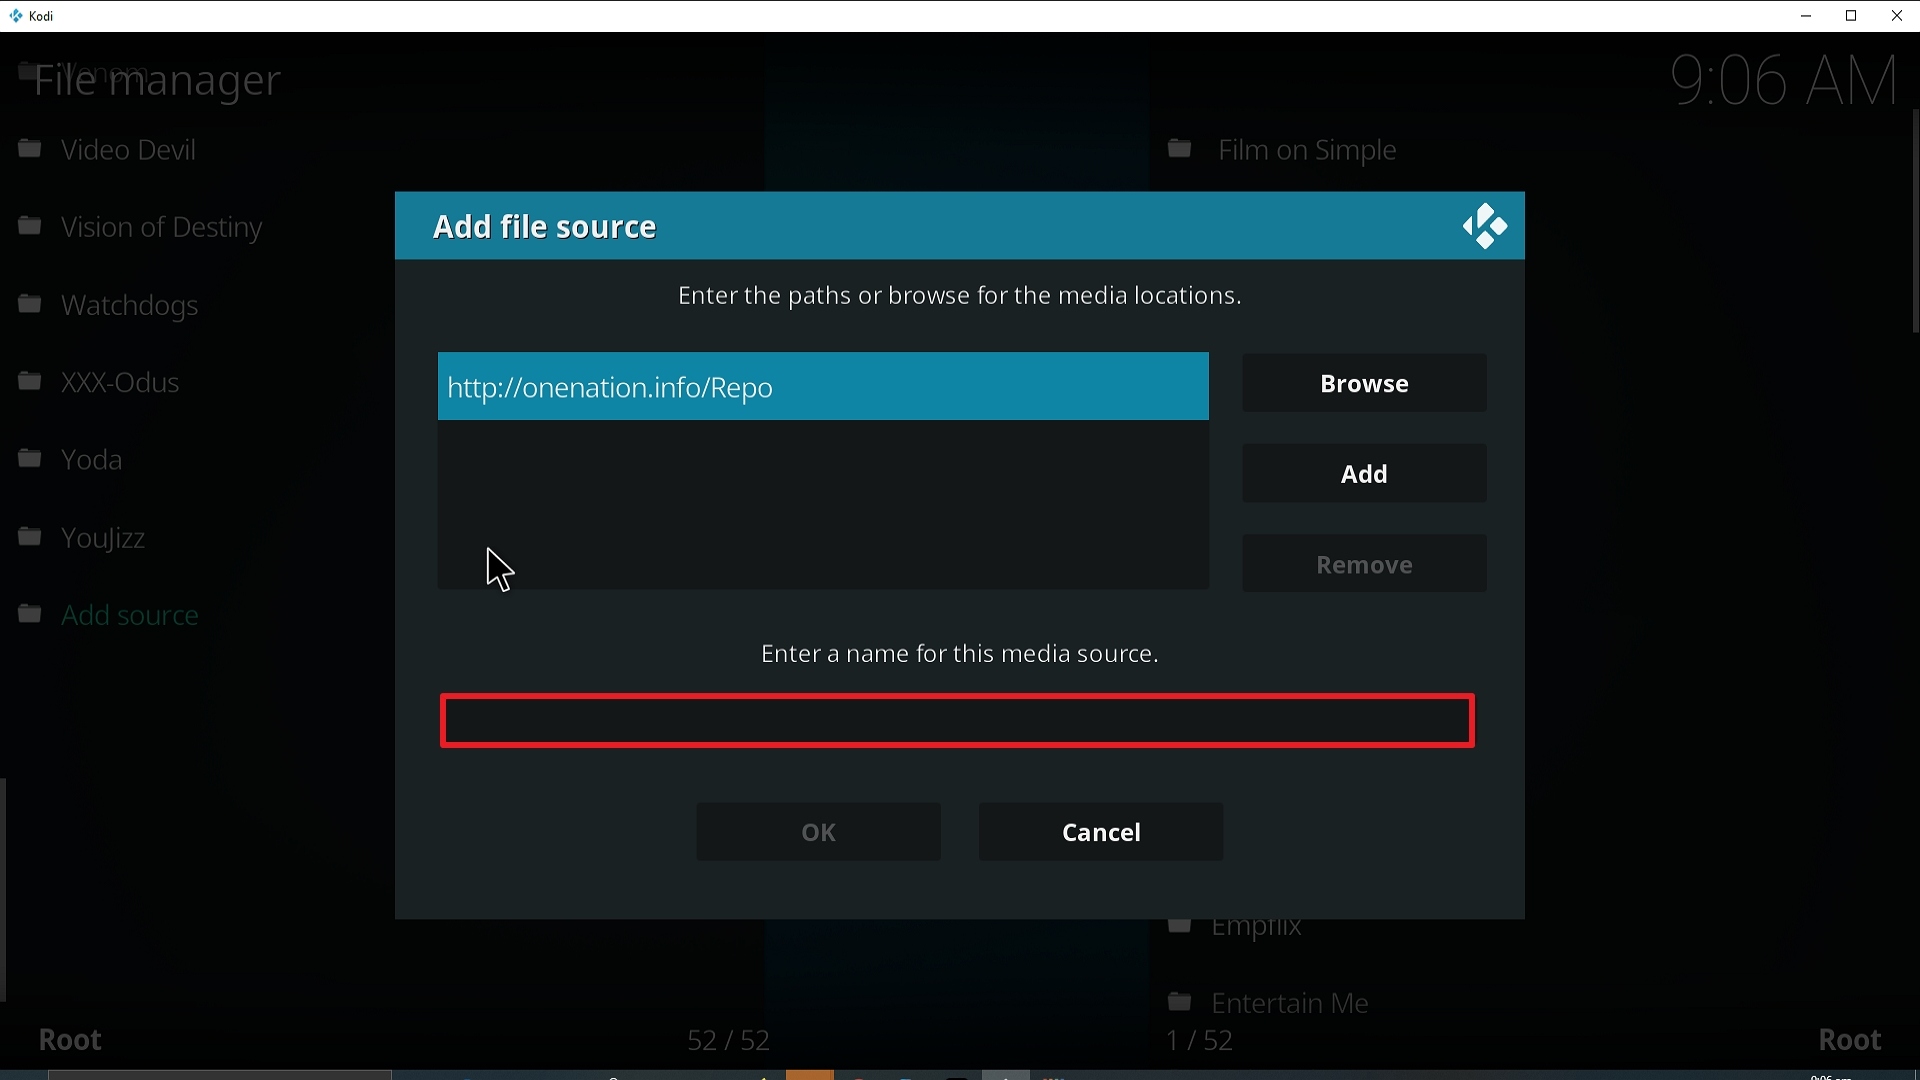
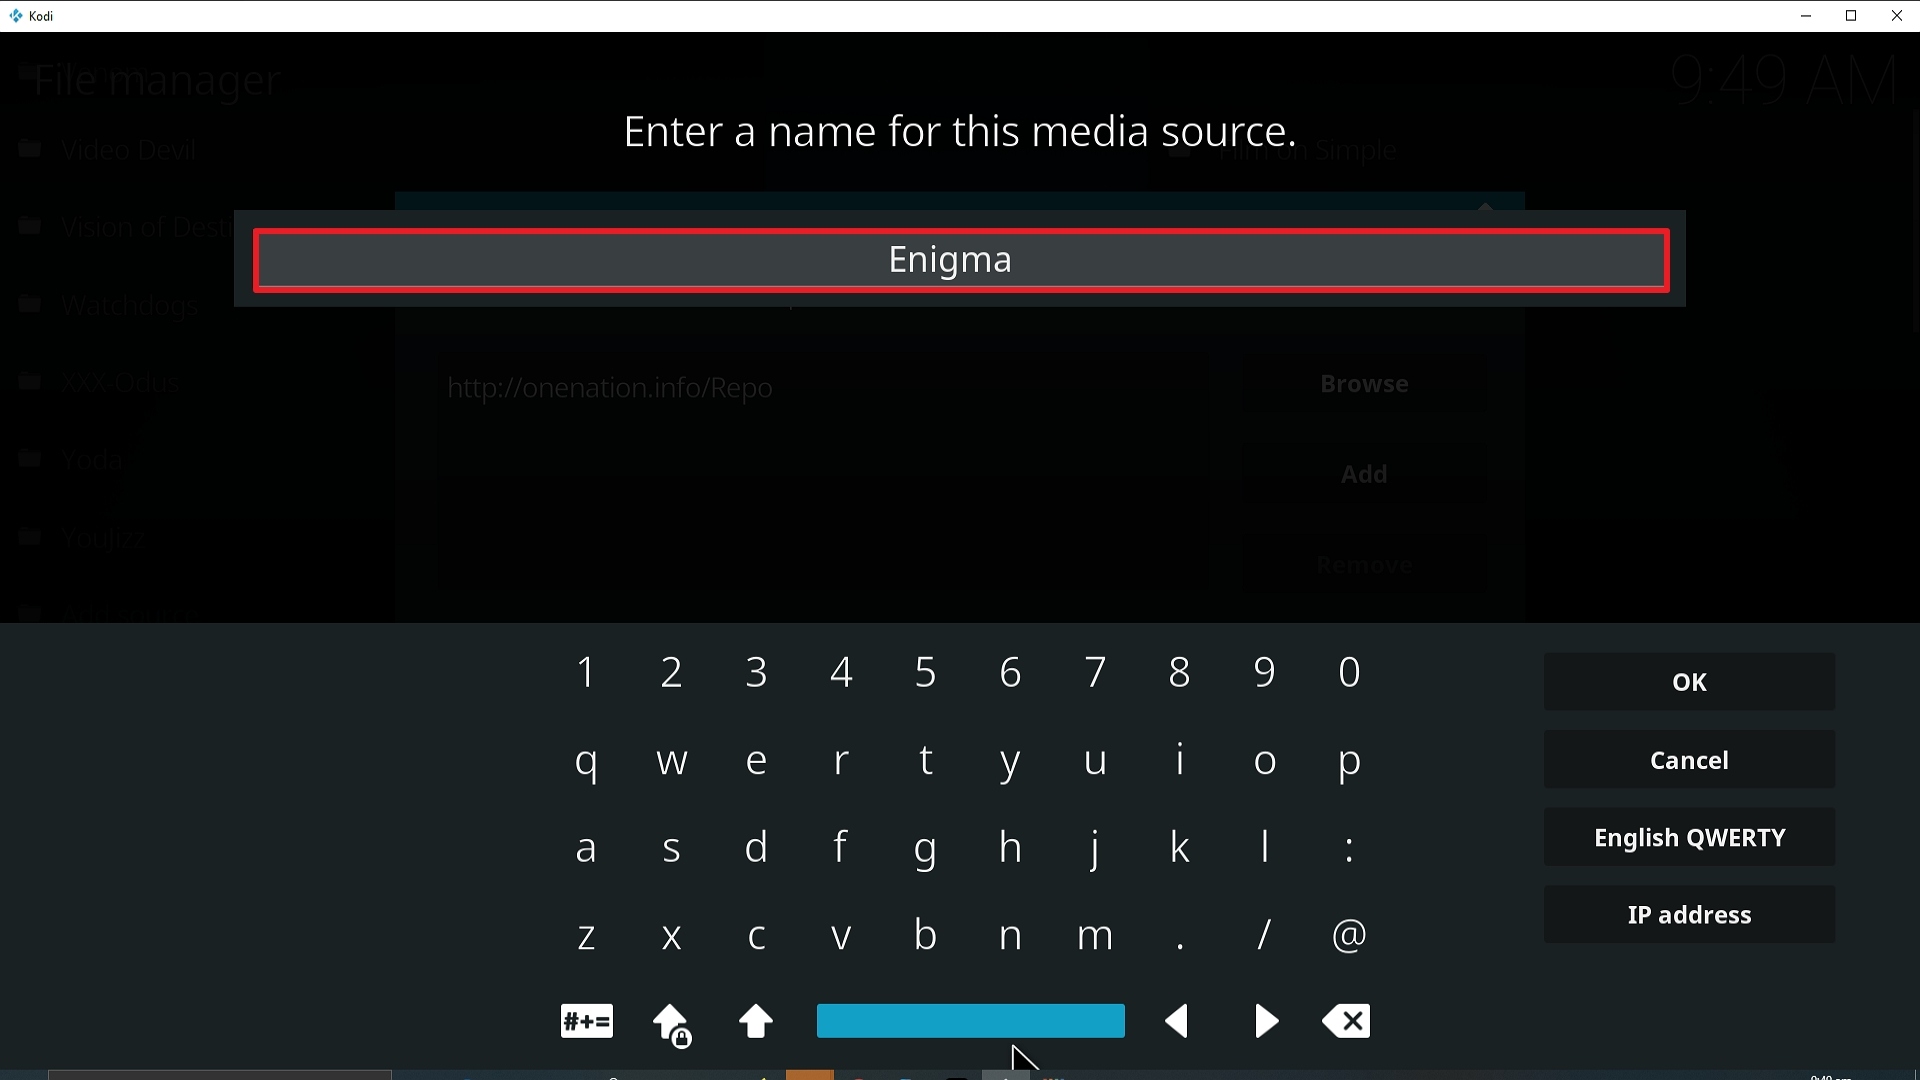
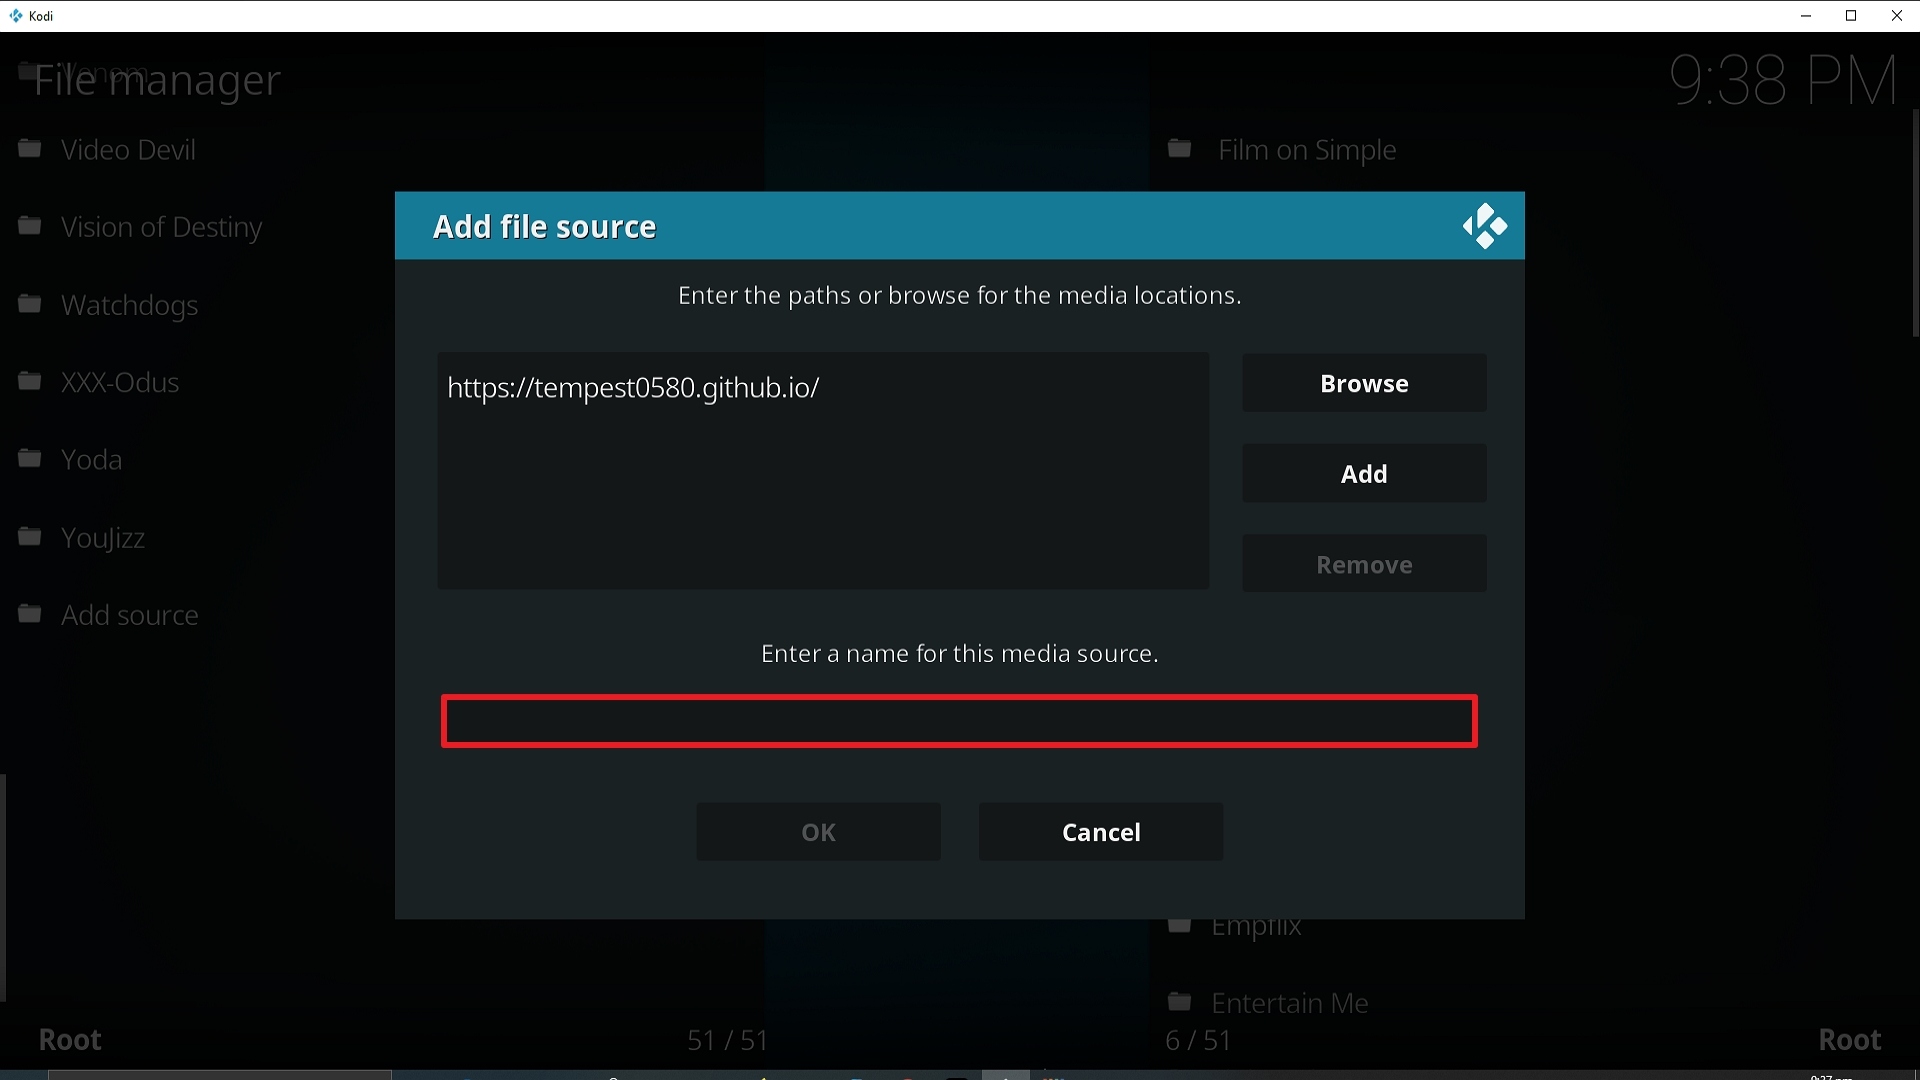
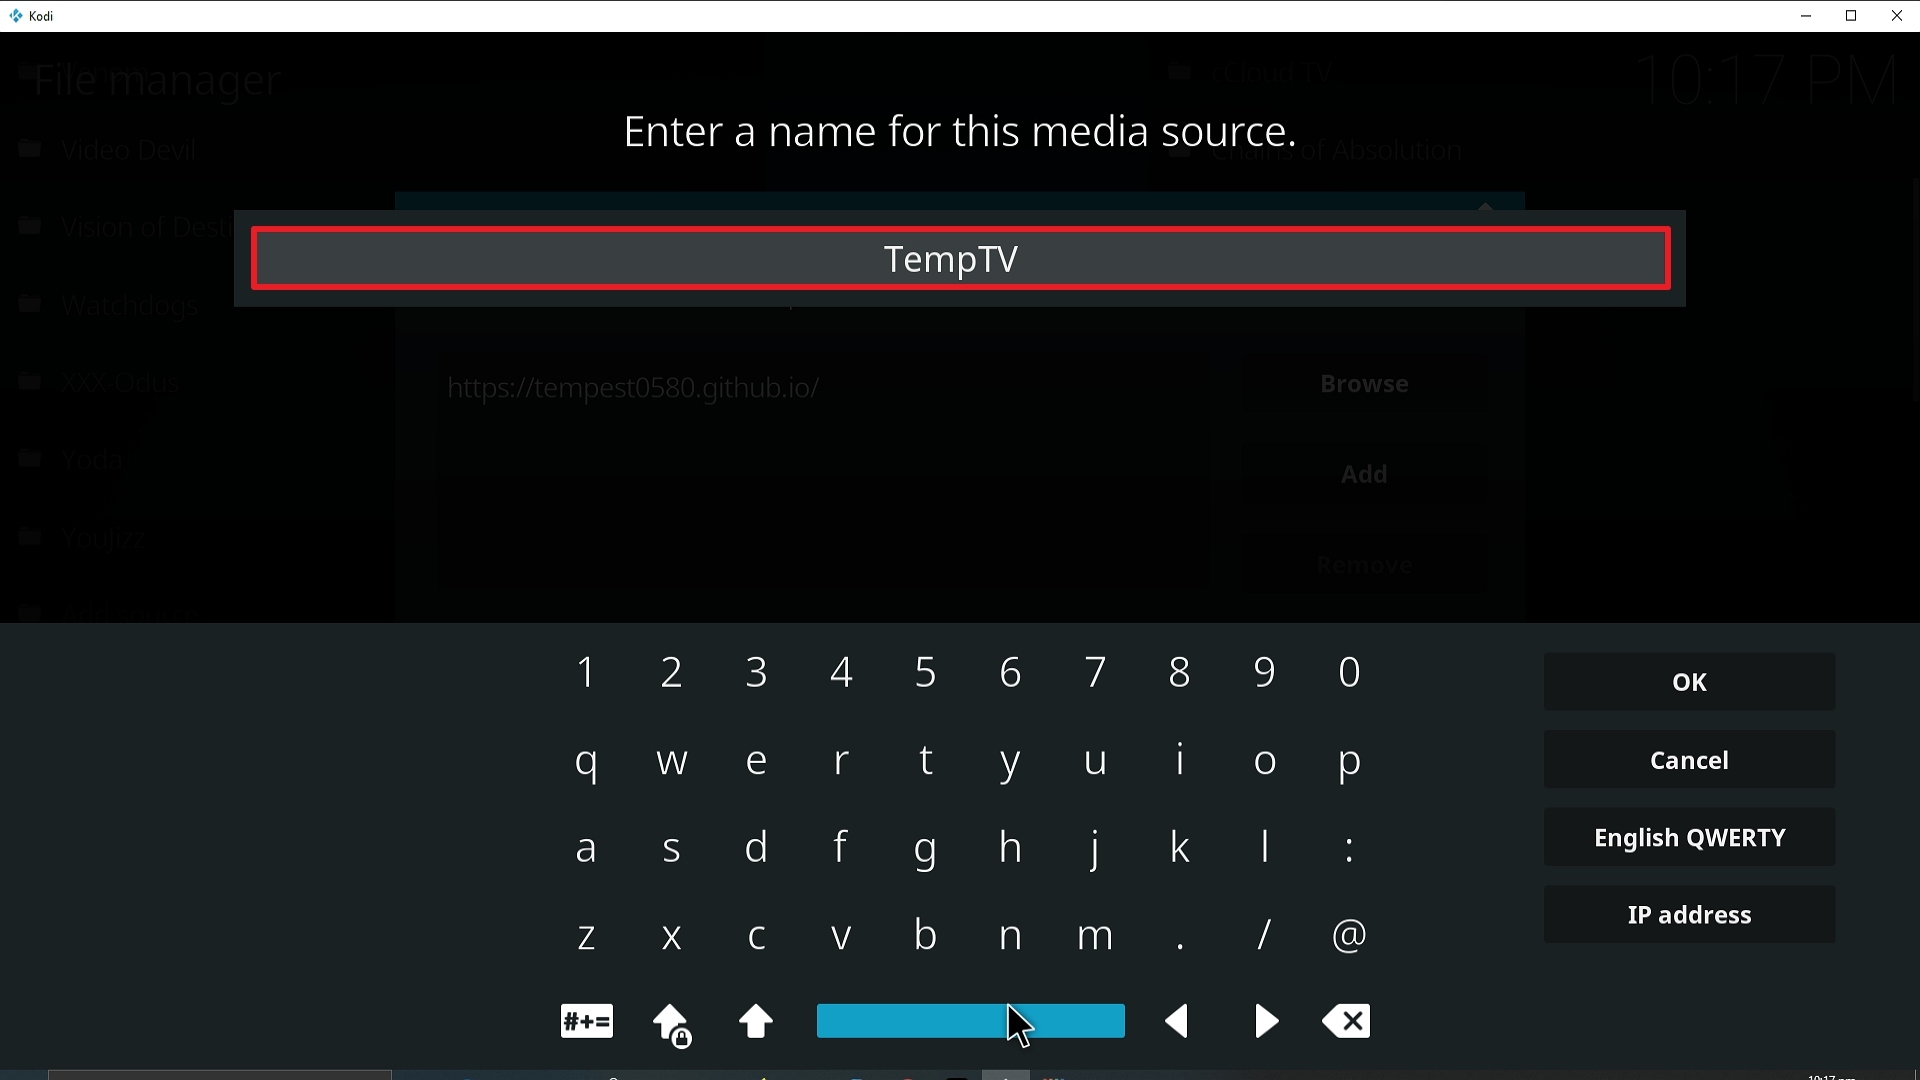
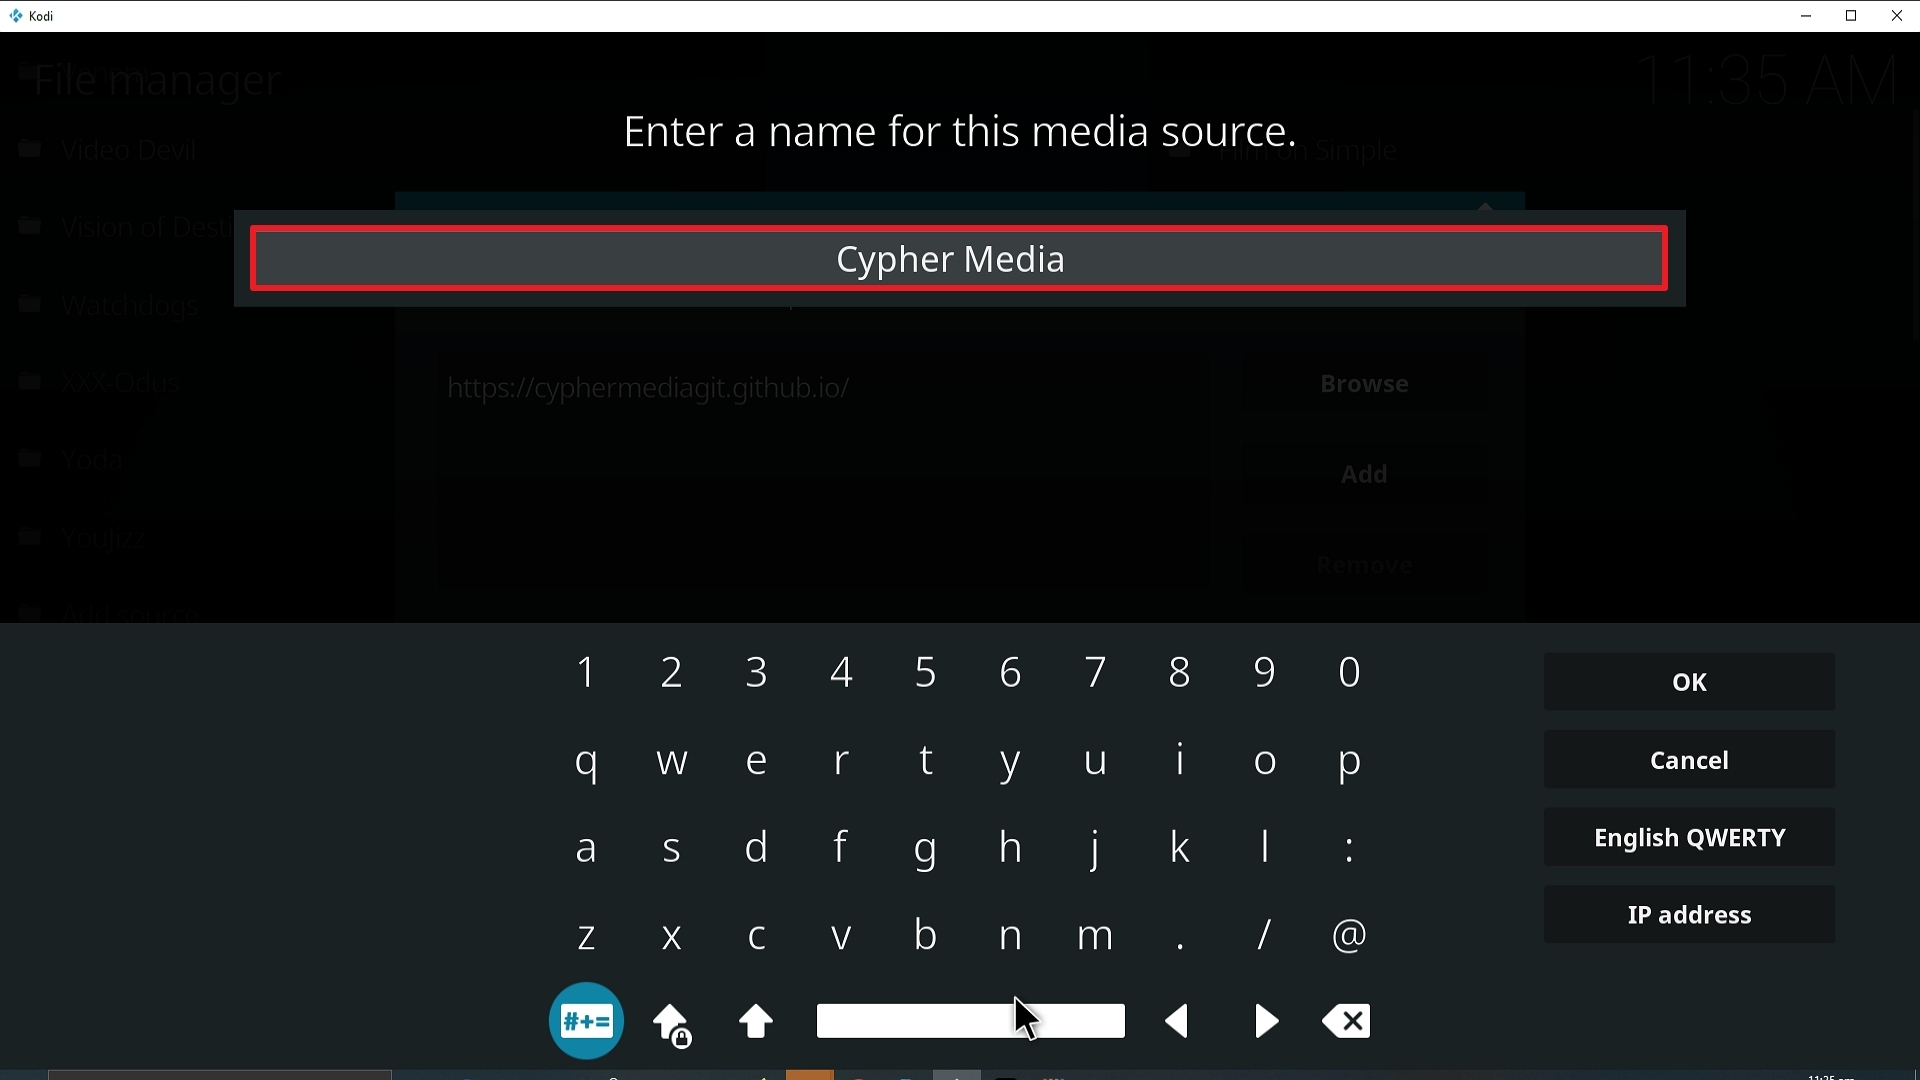
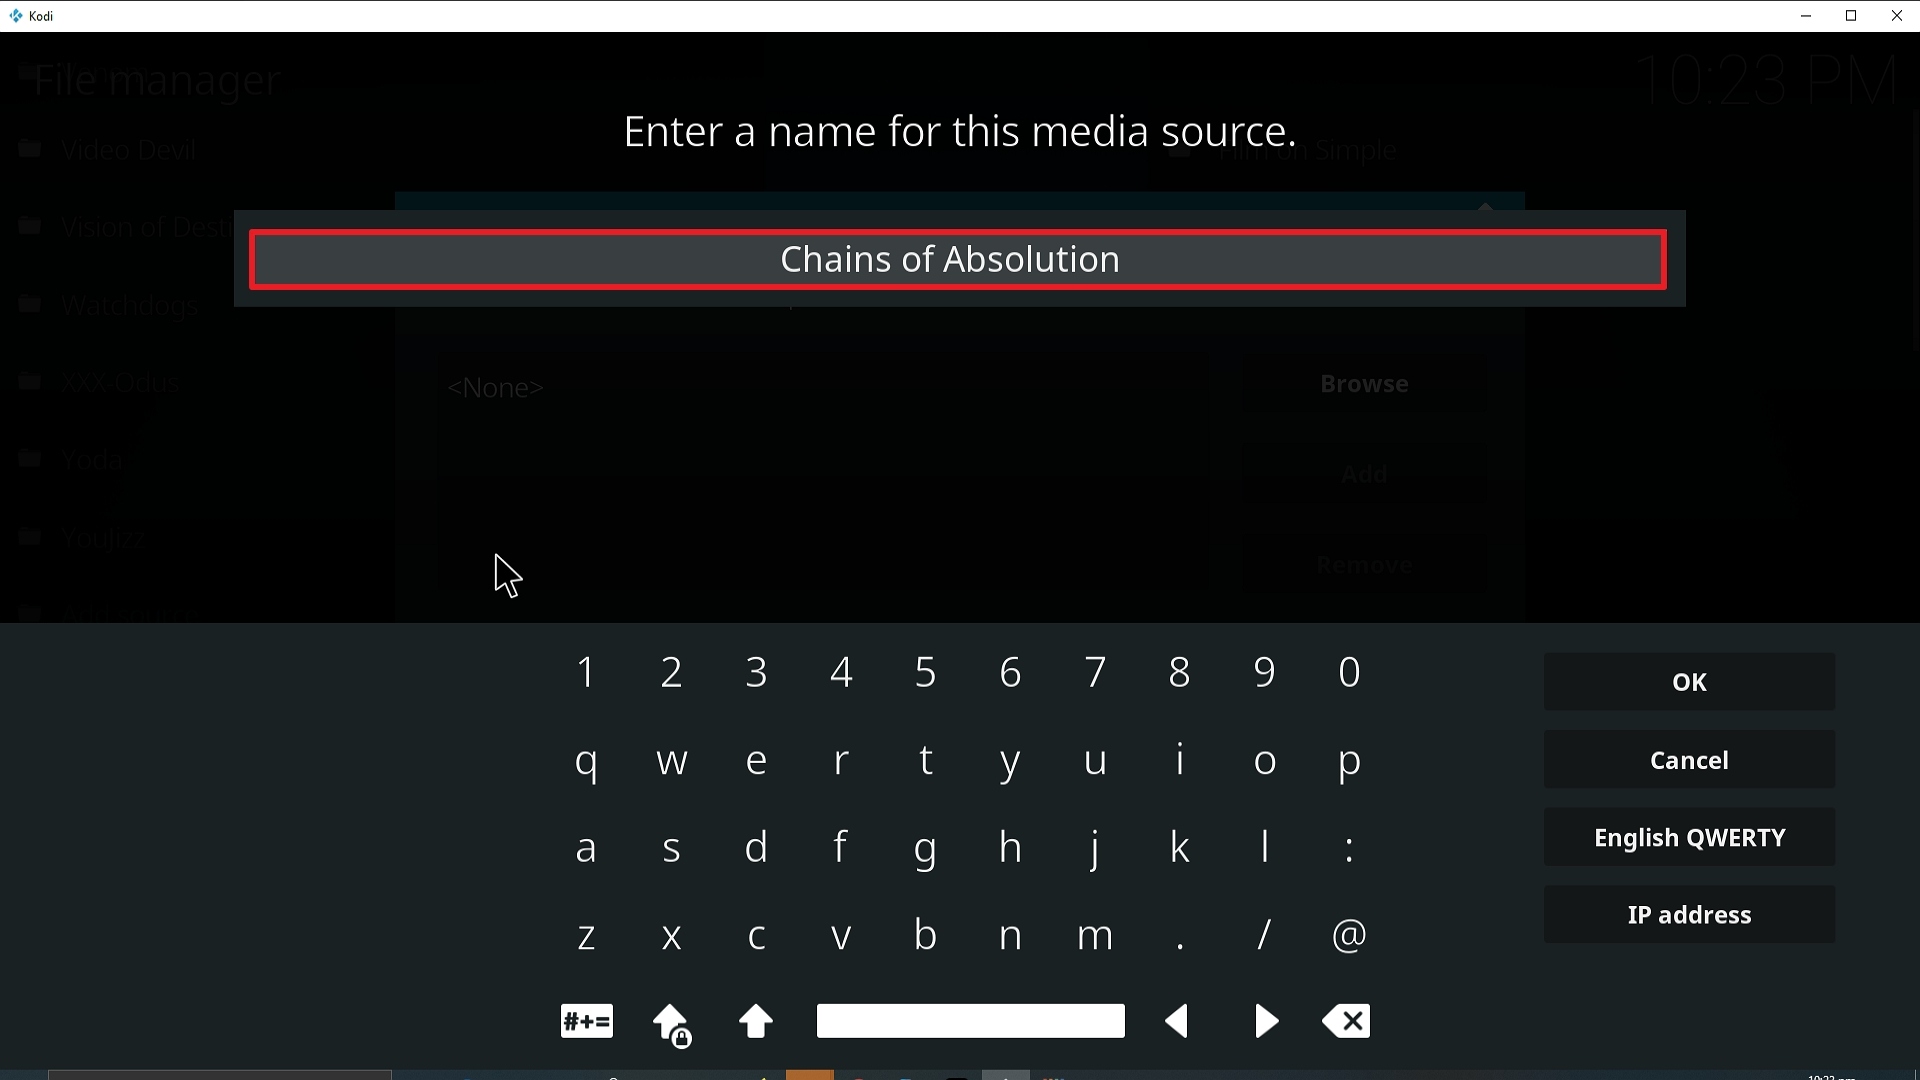
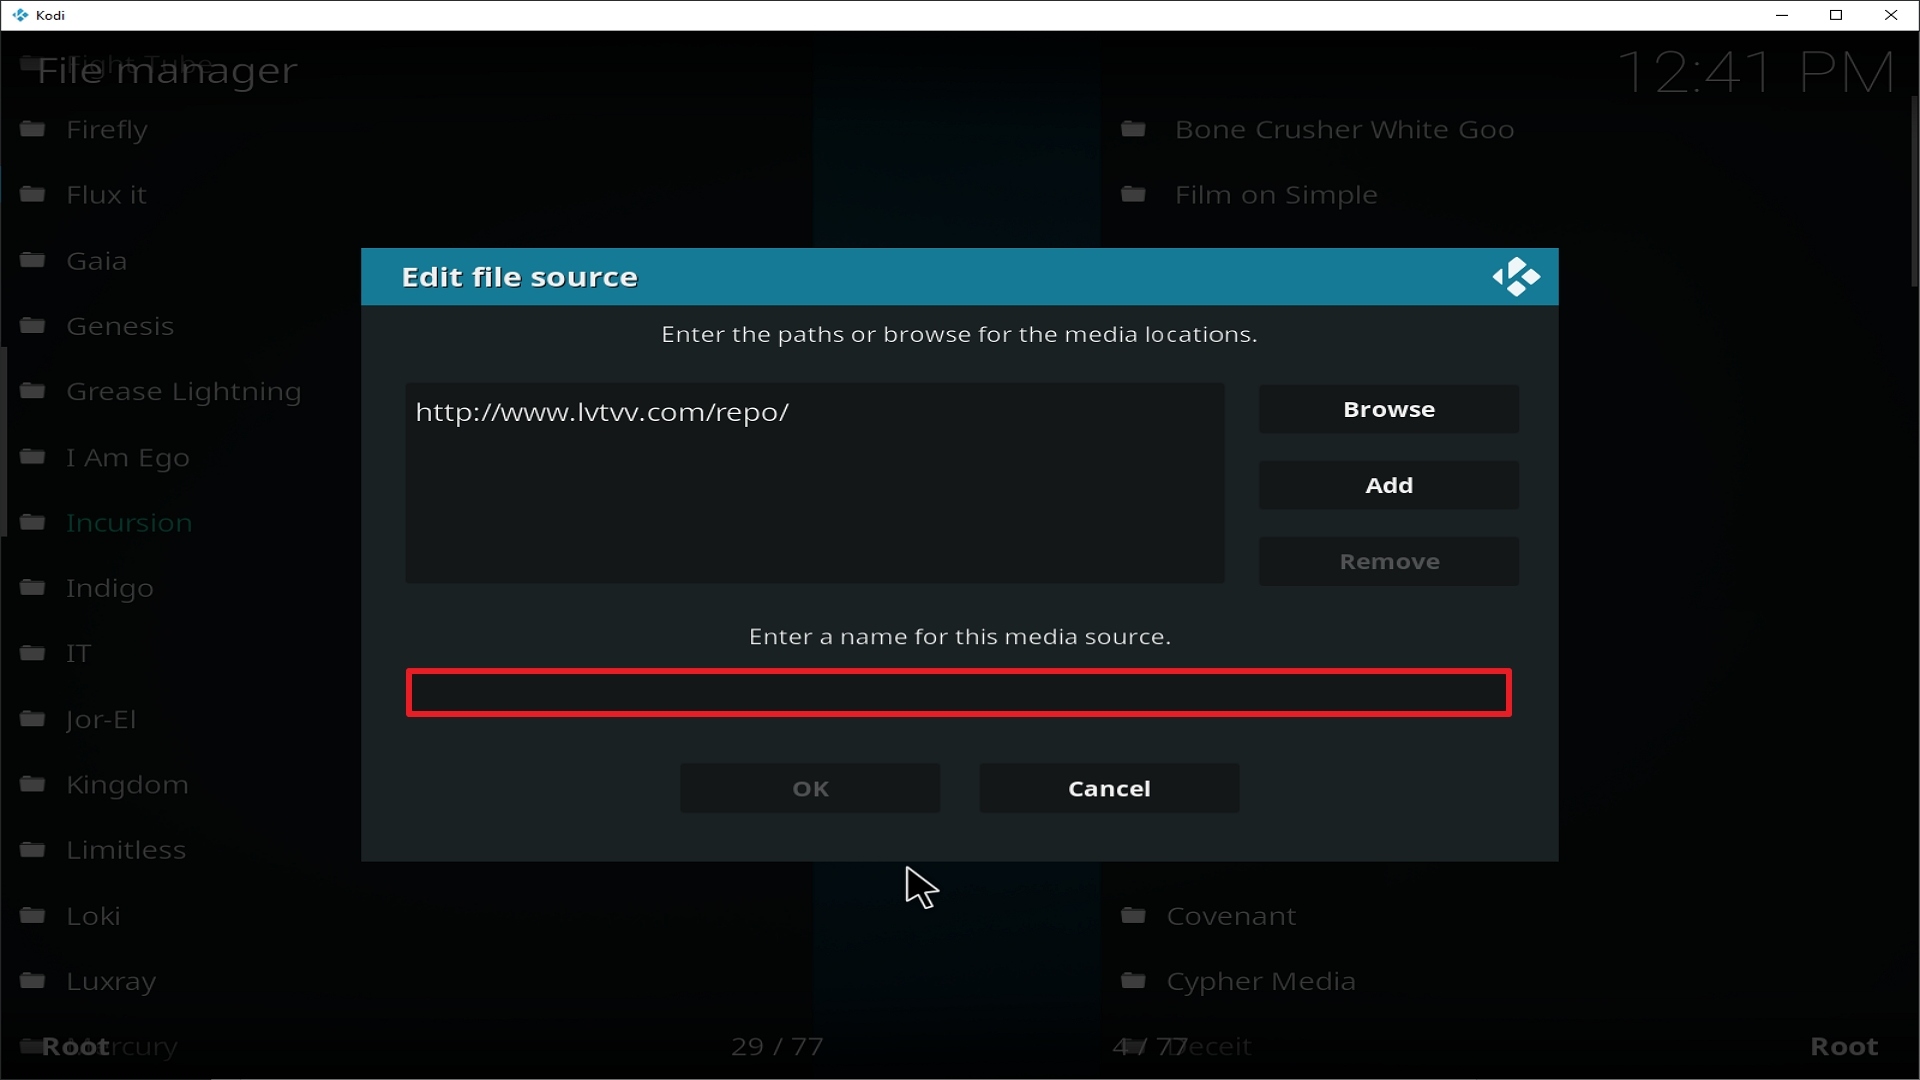
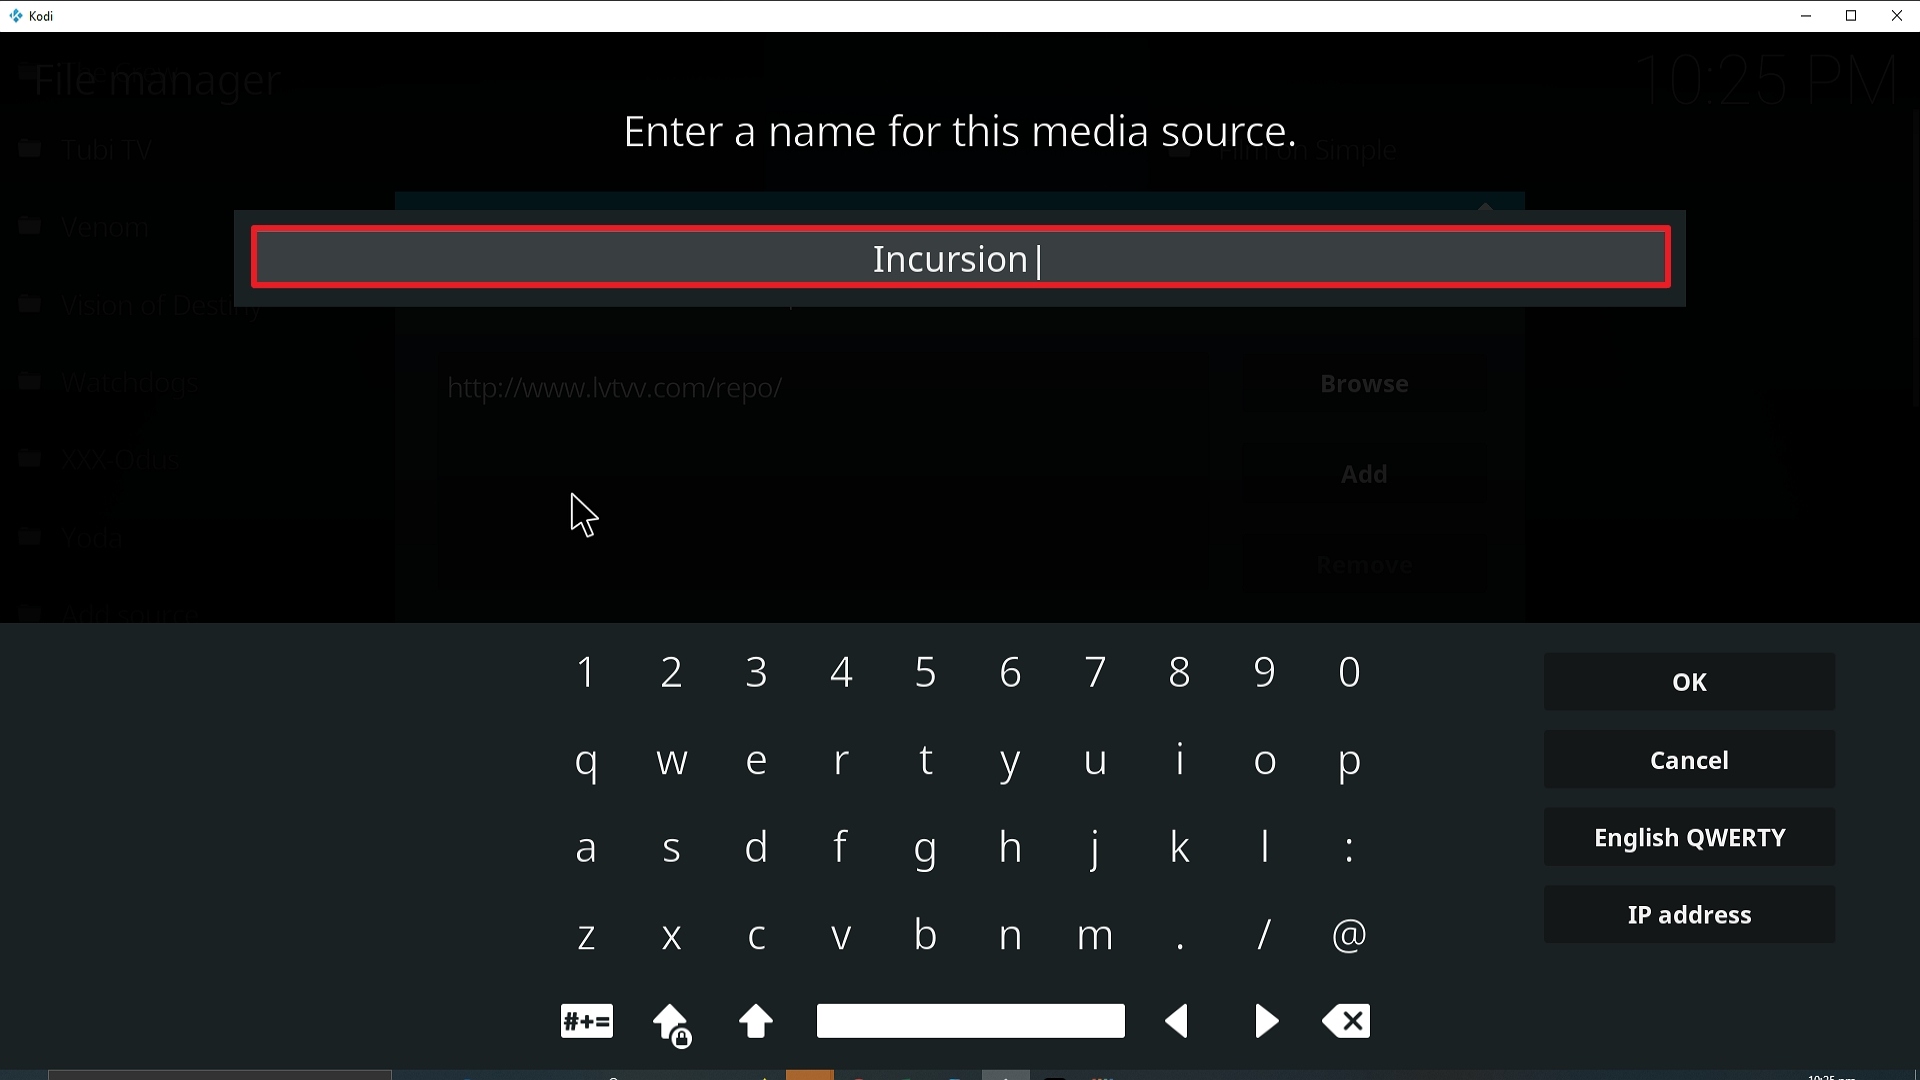
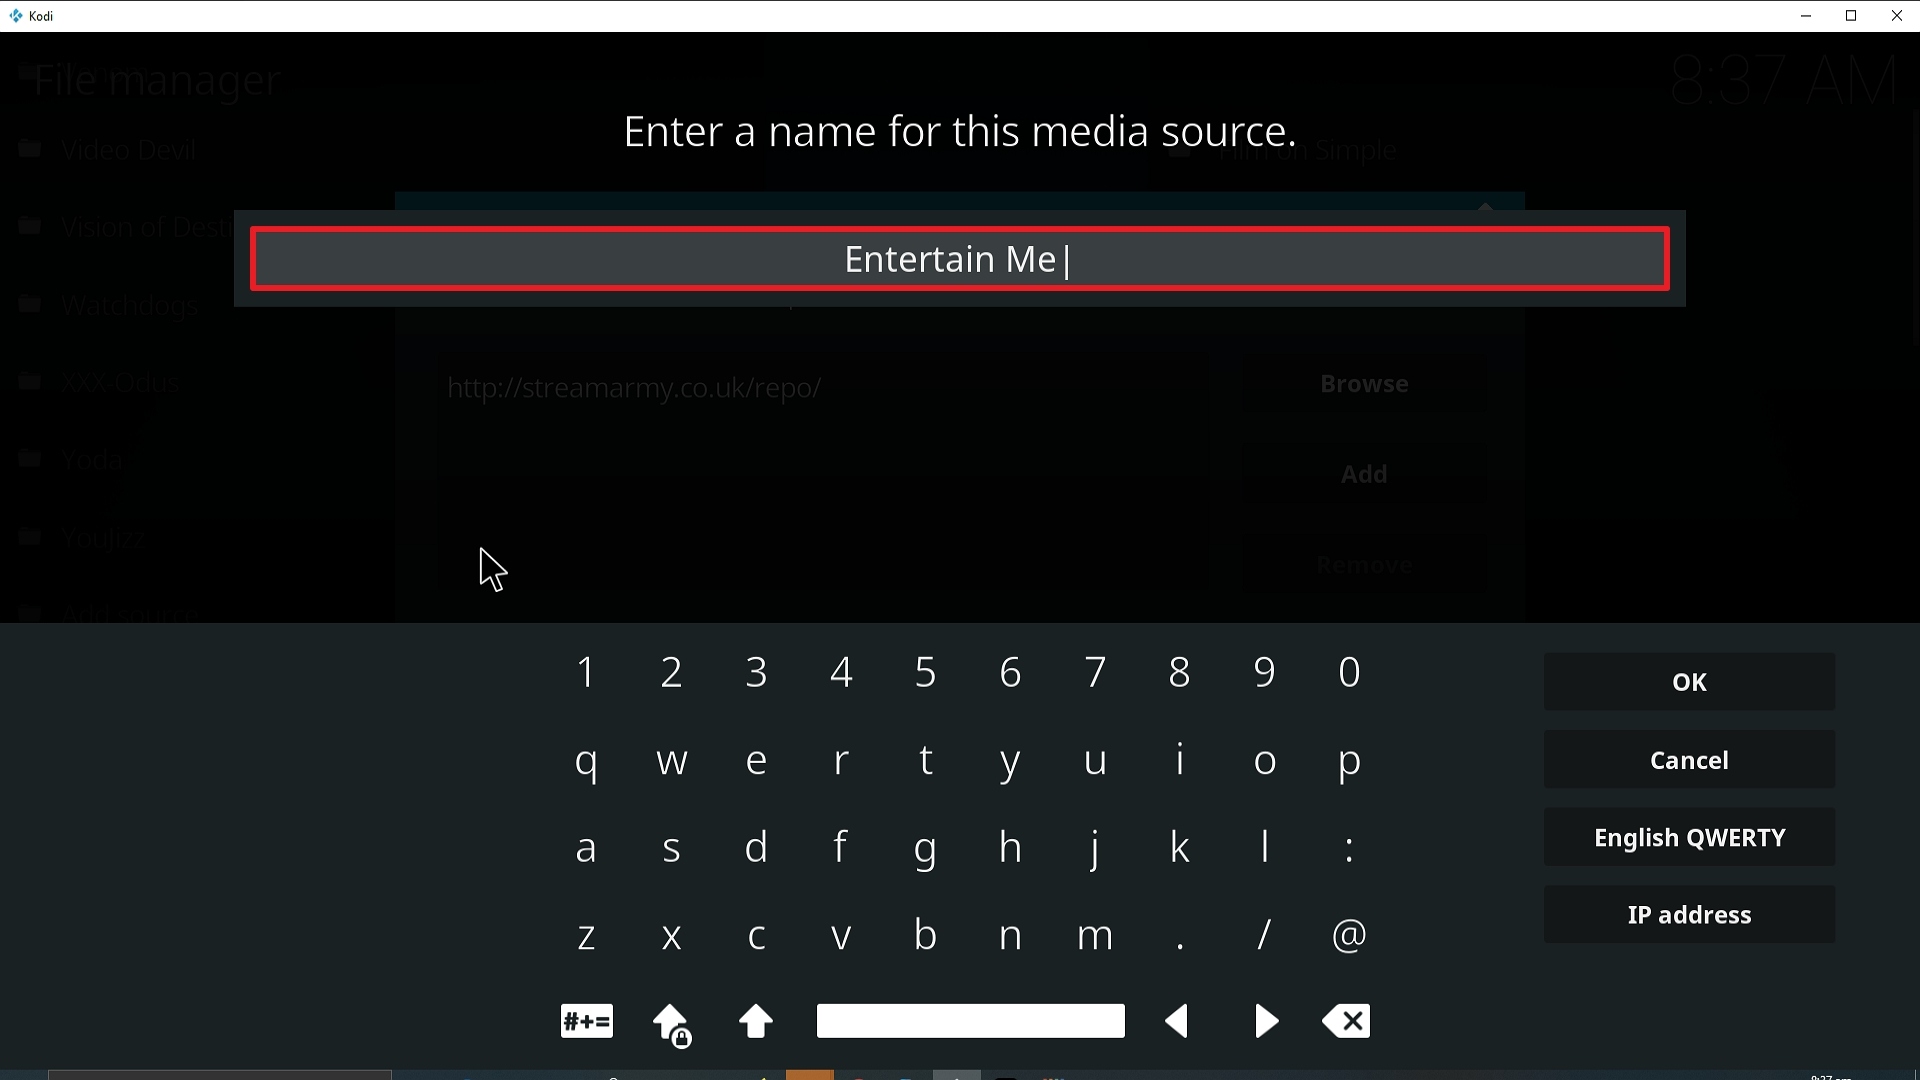
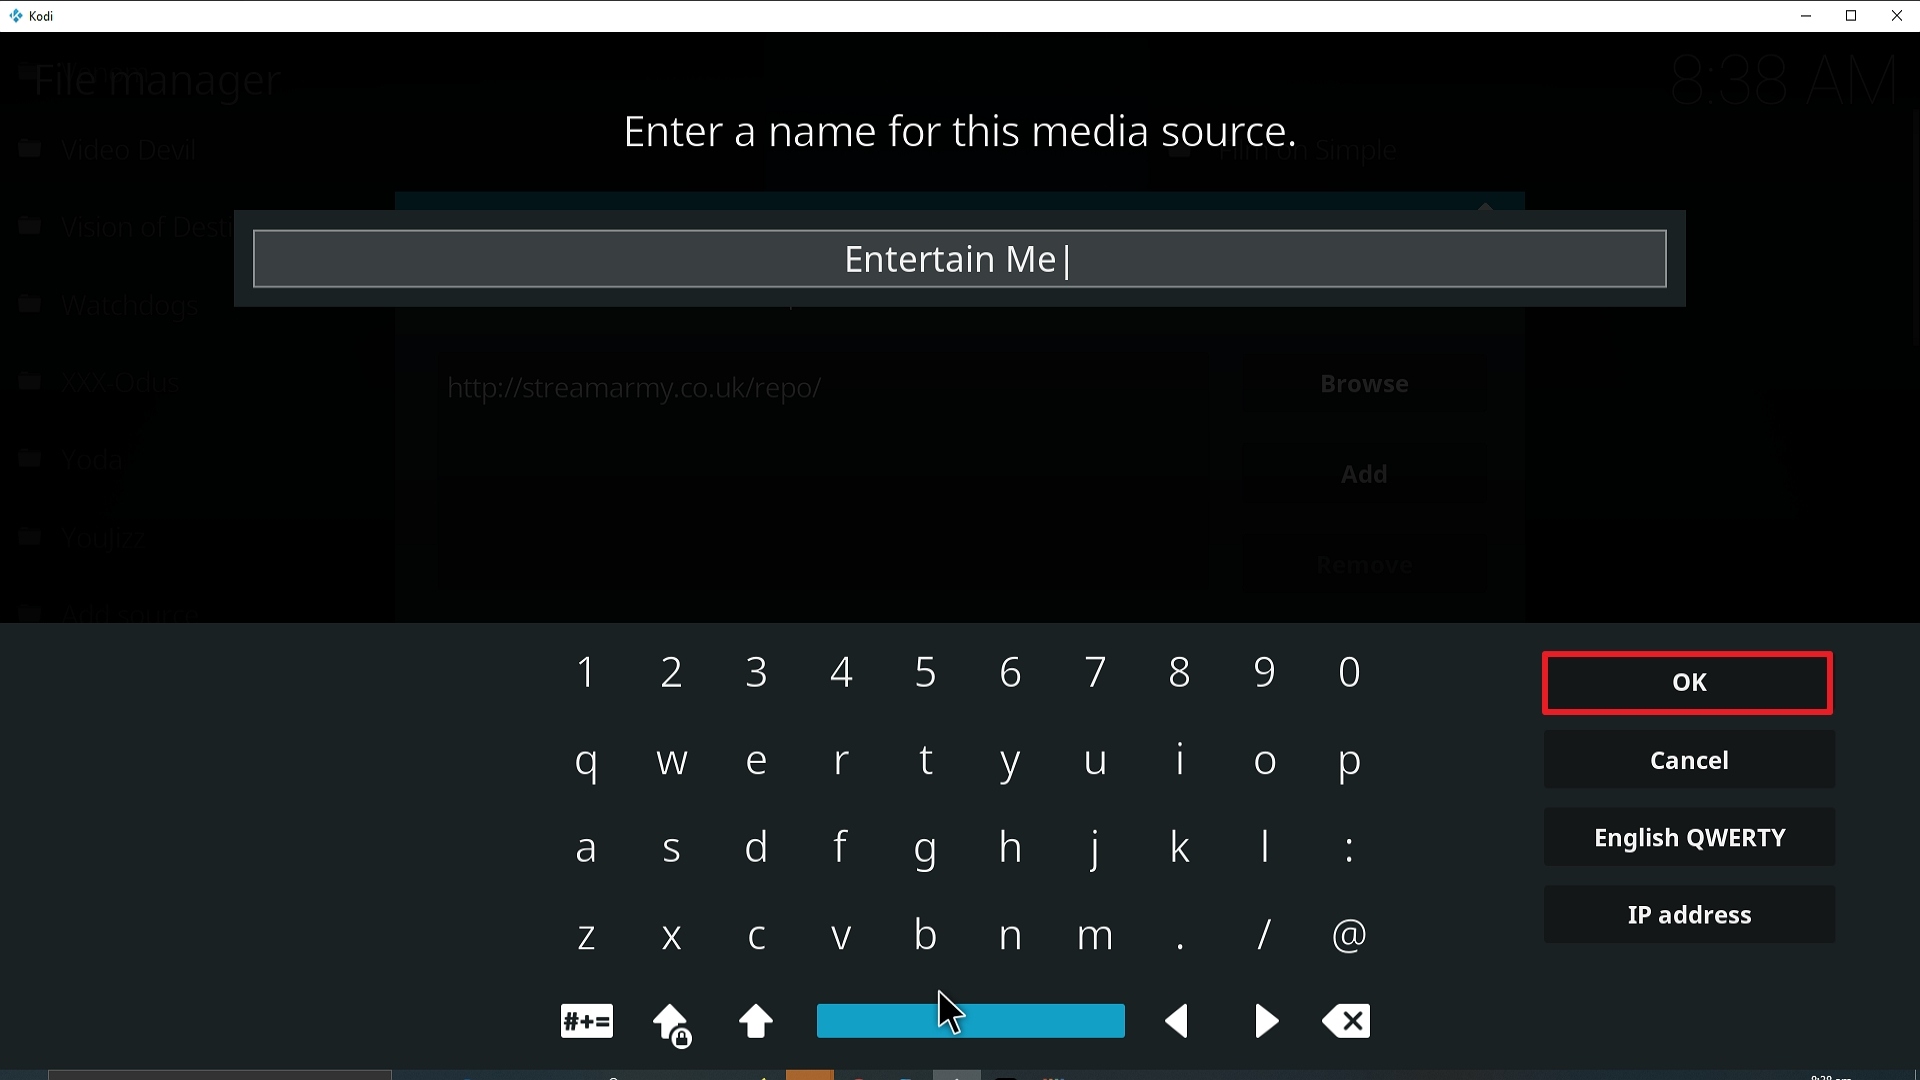
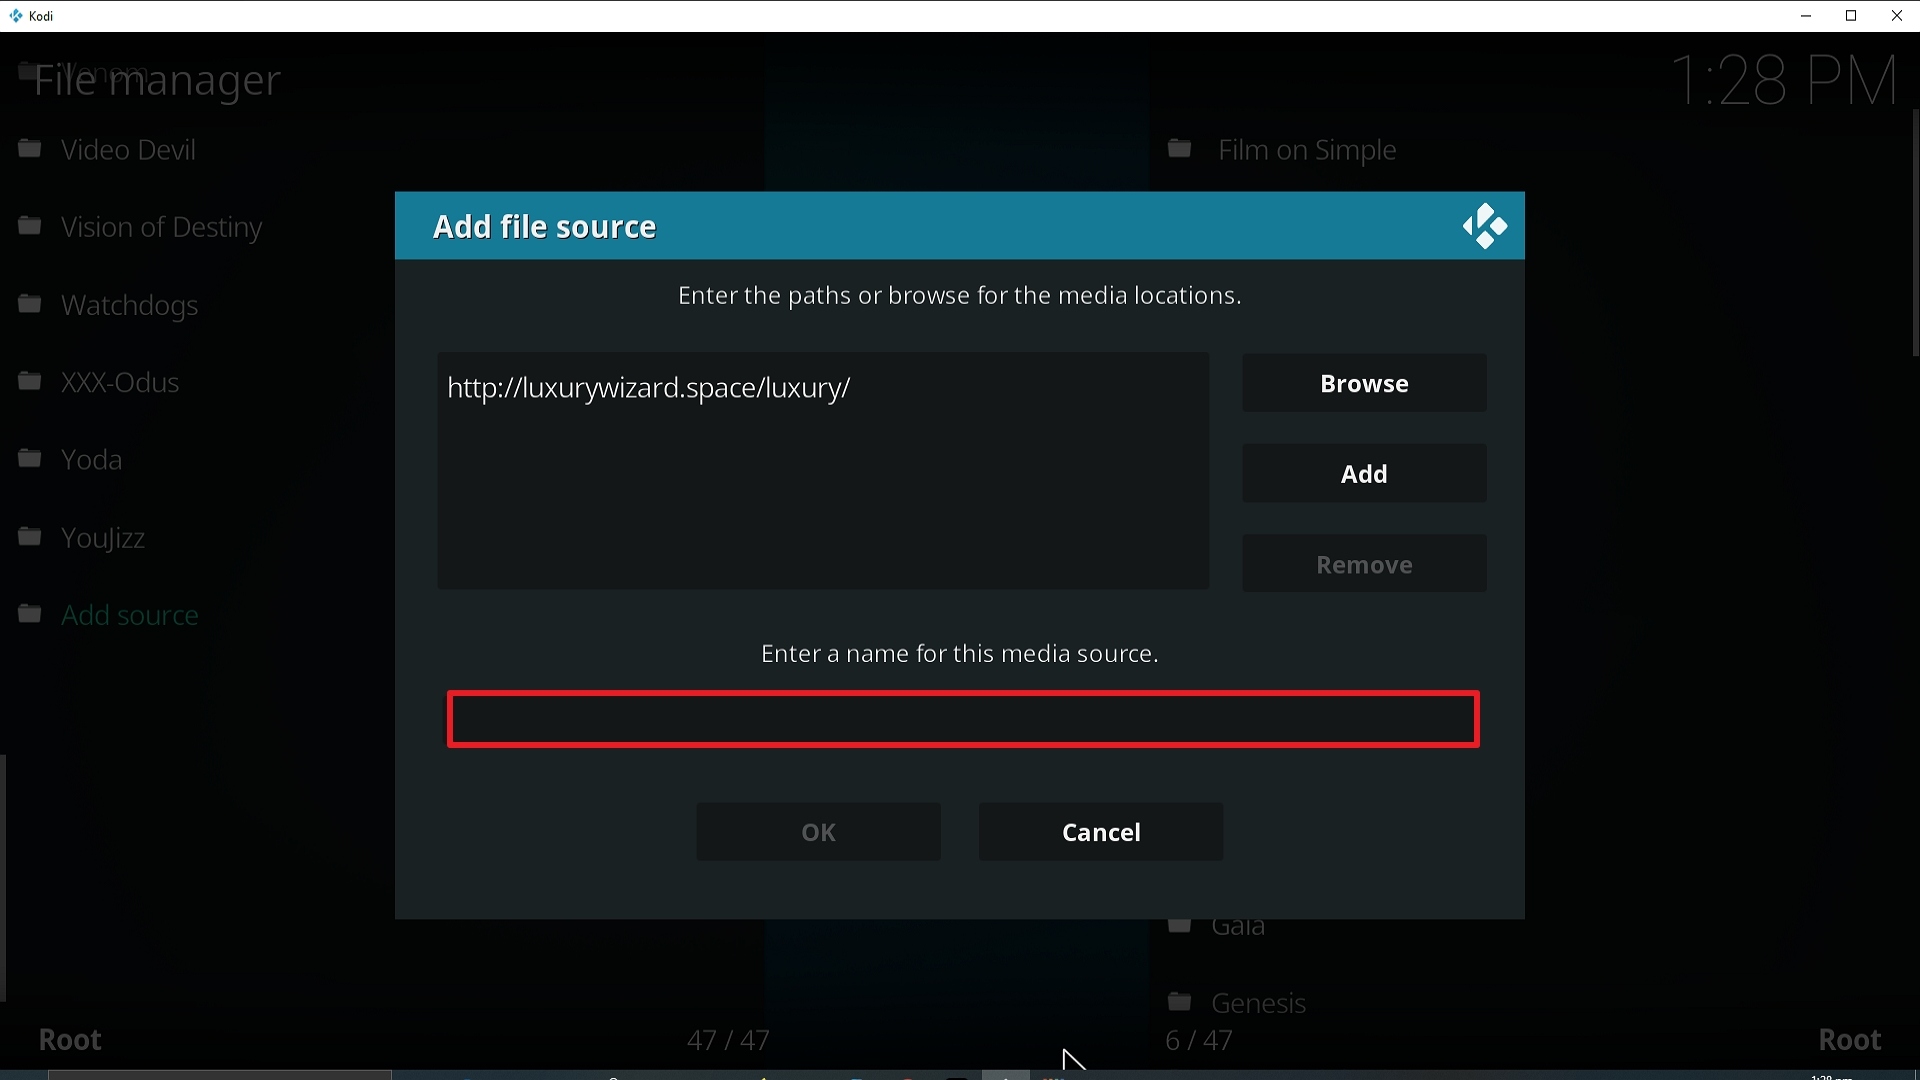
11. Select enter a name for this media source.
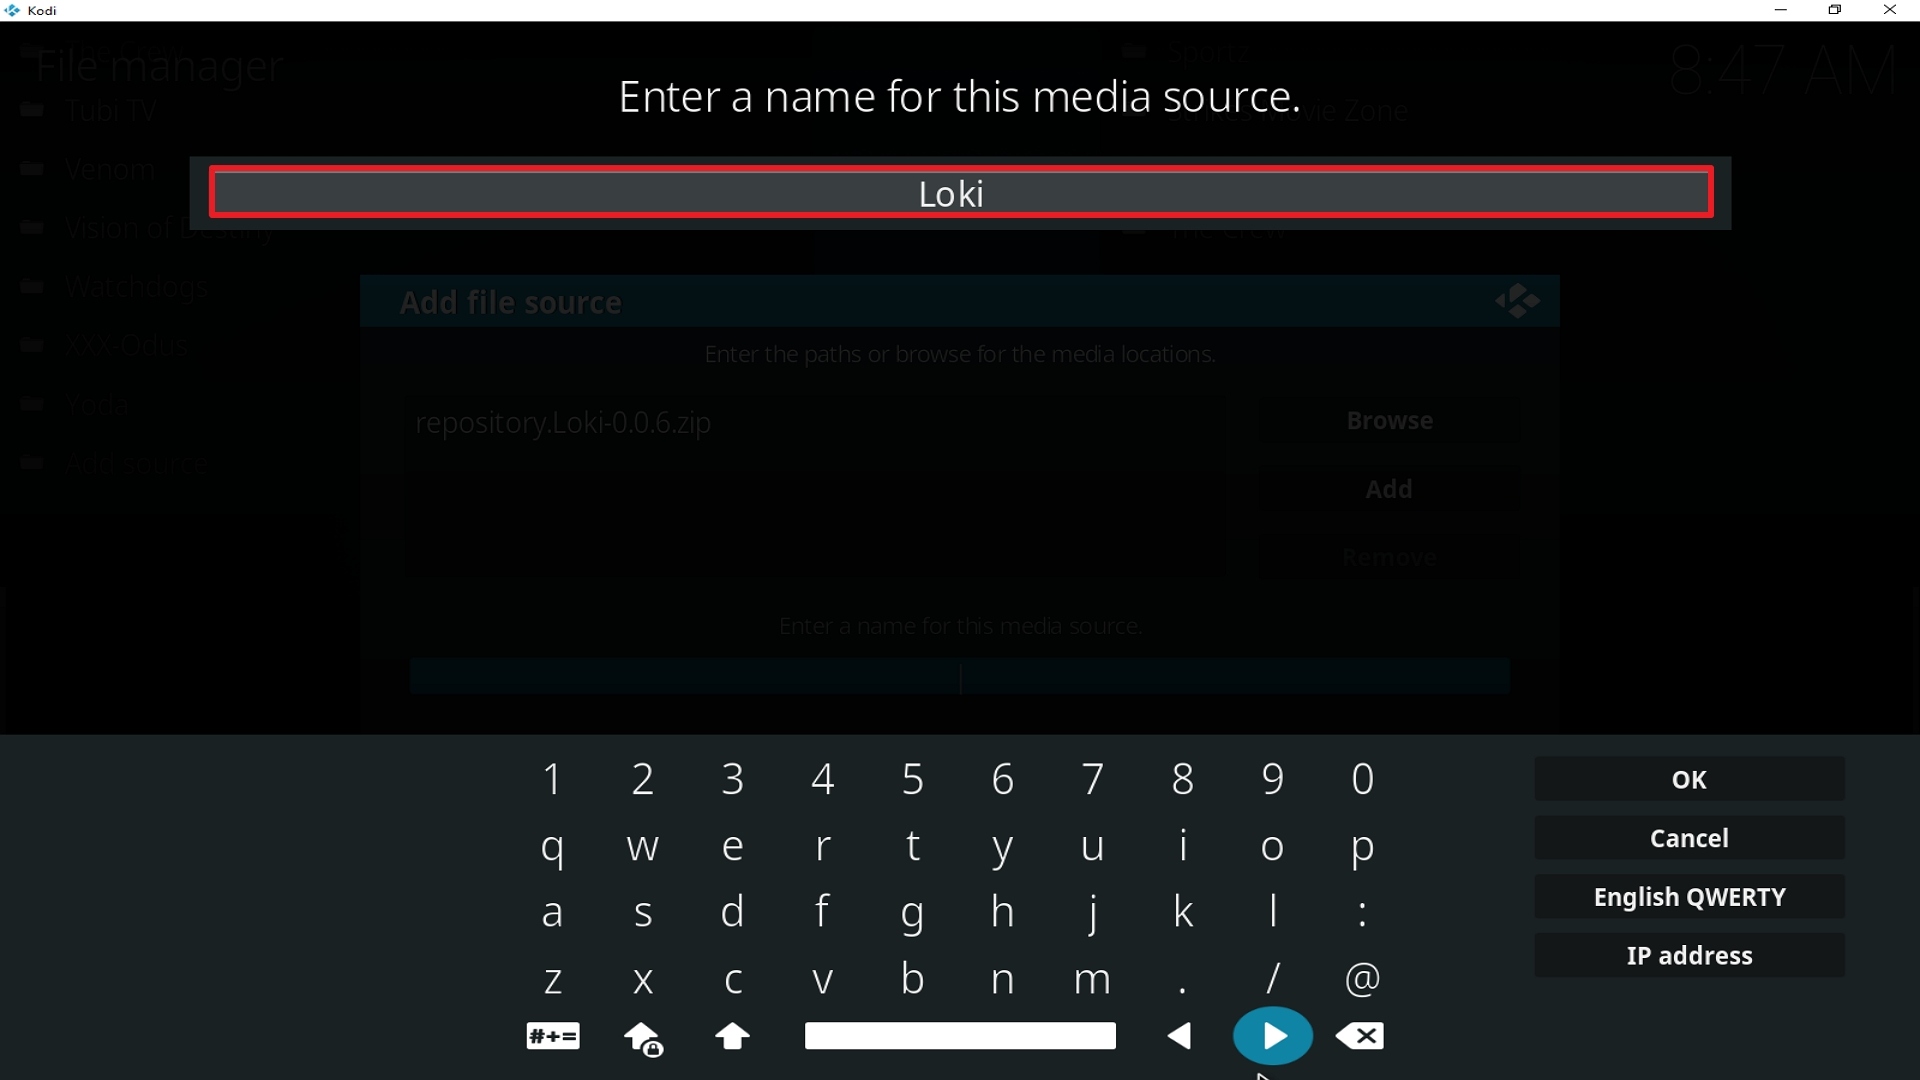
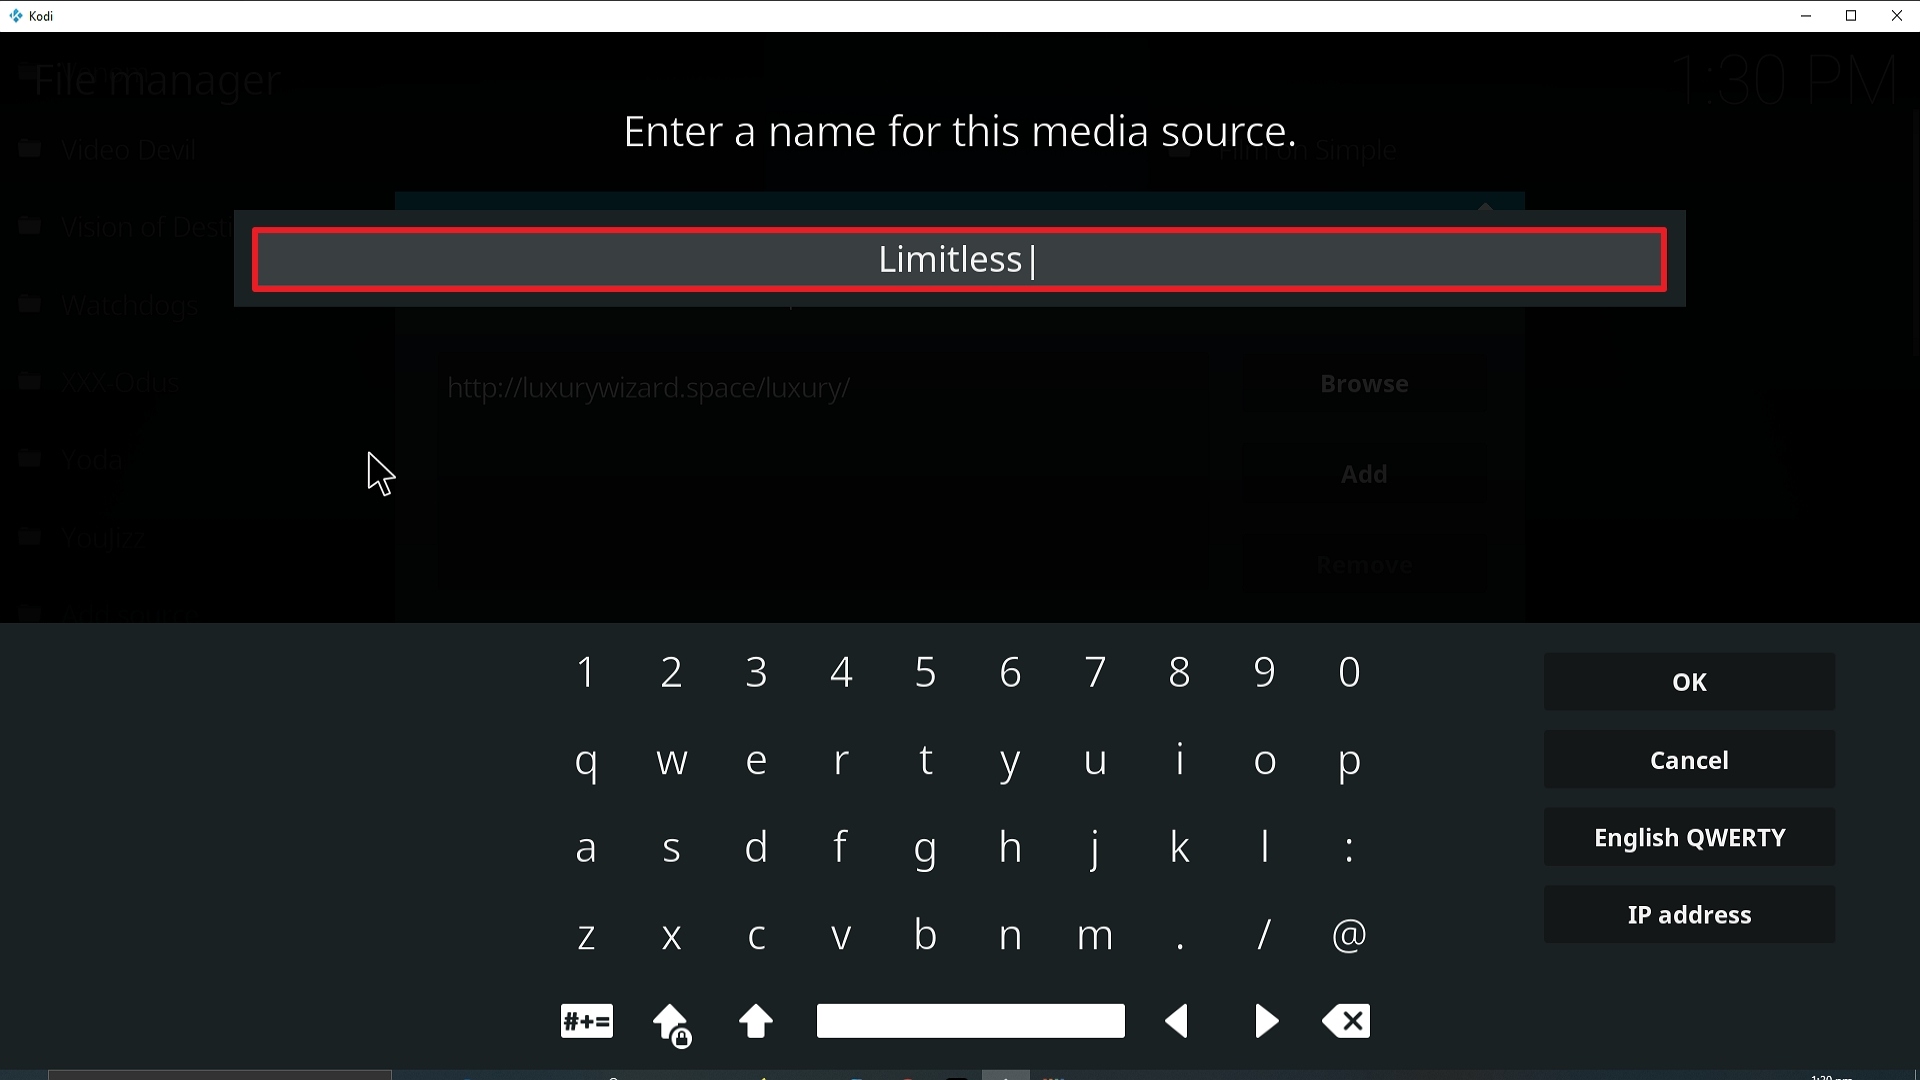
12. Name is A Pirate’s Life For Me (this part isn’t critical as long as you remember the name).
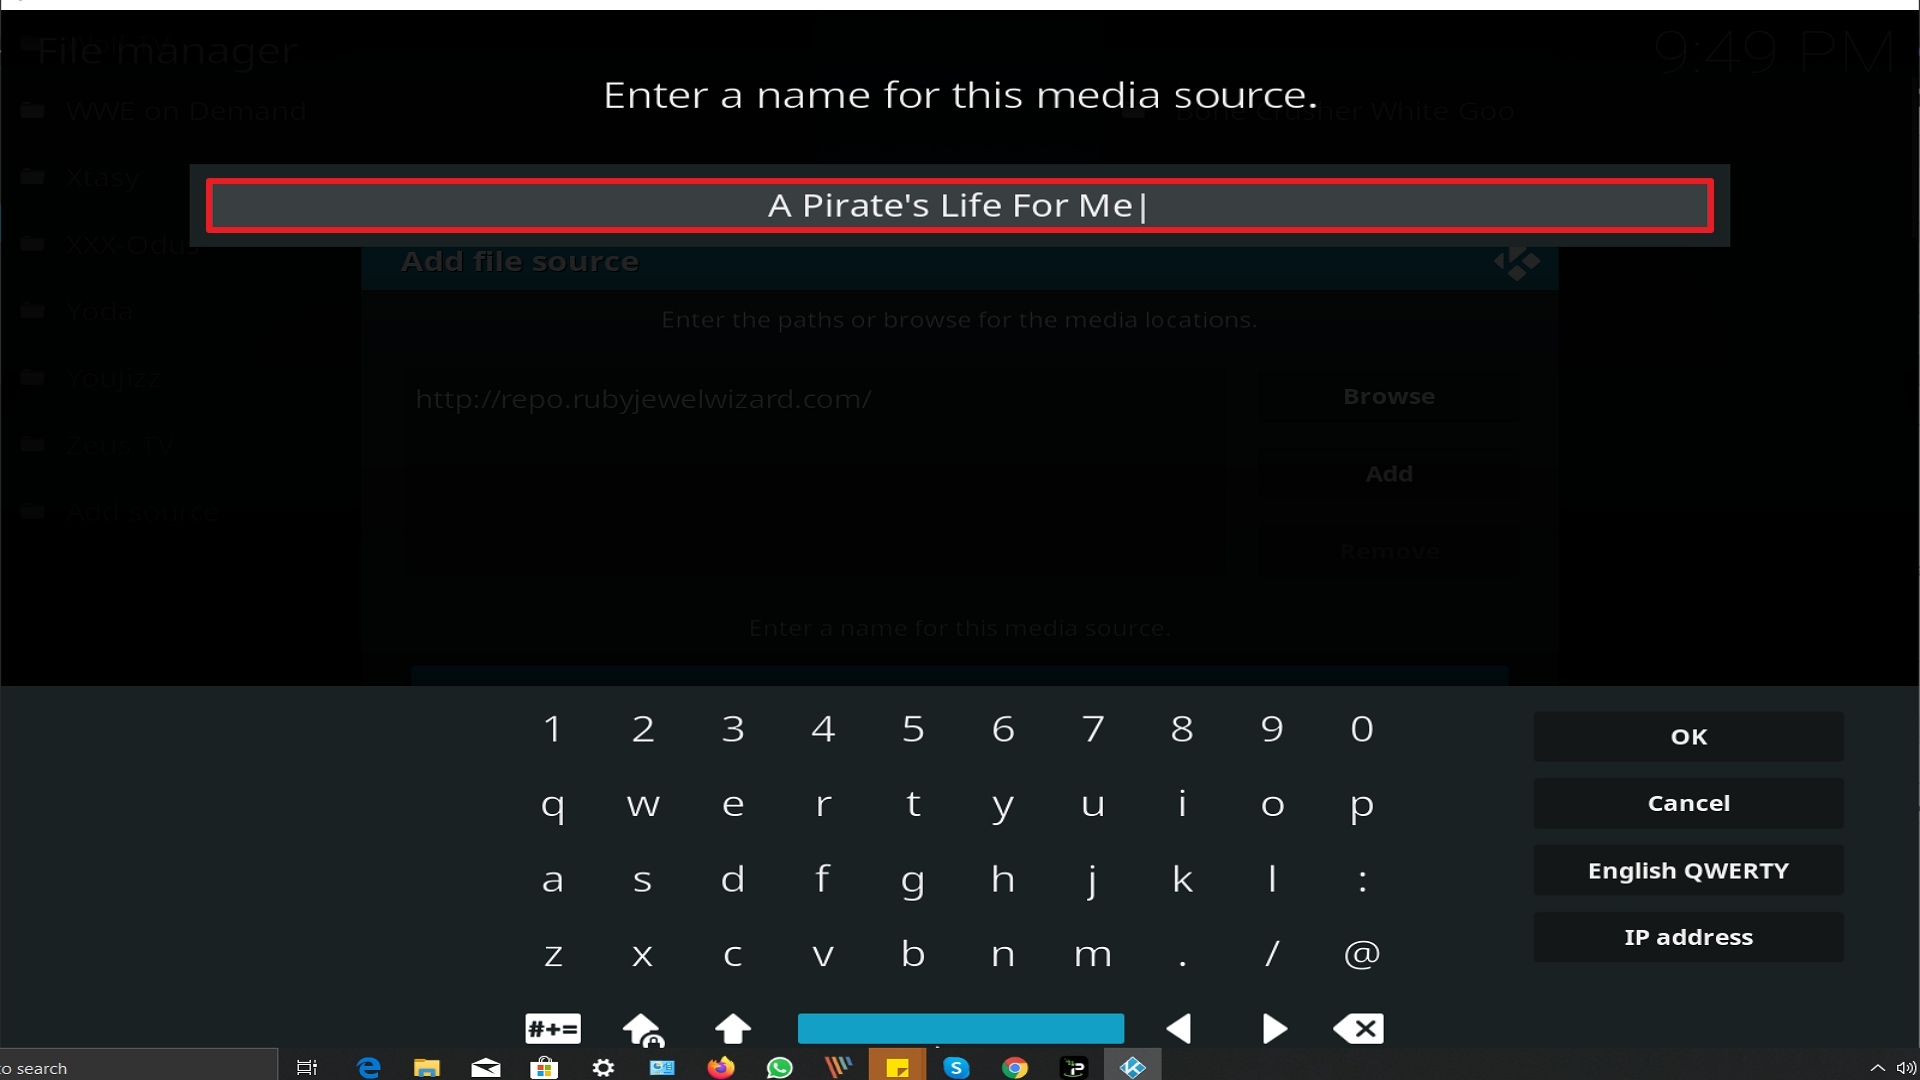
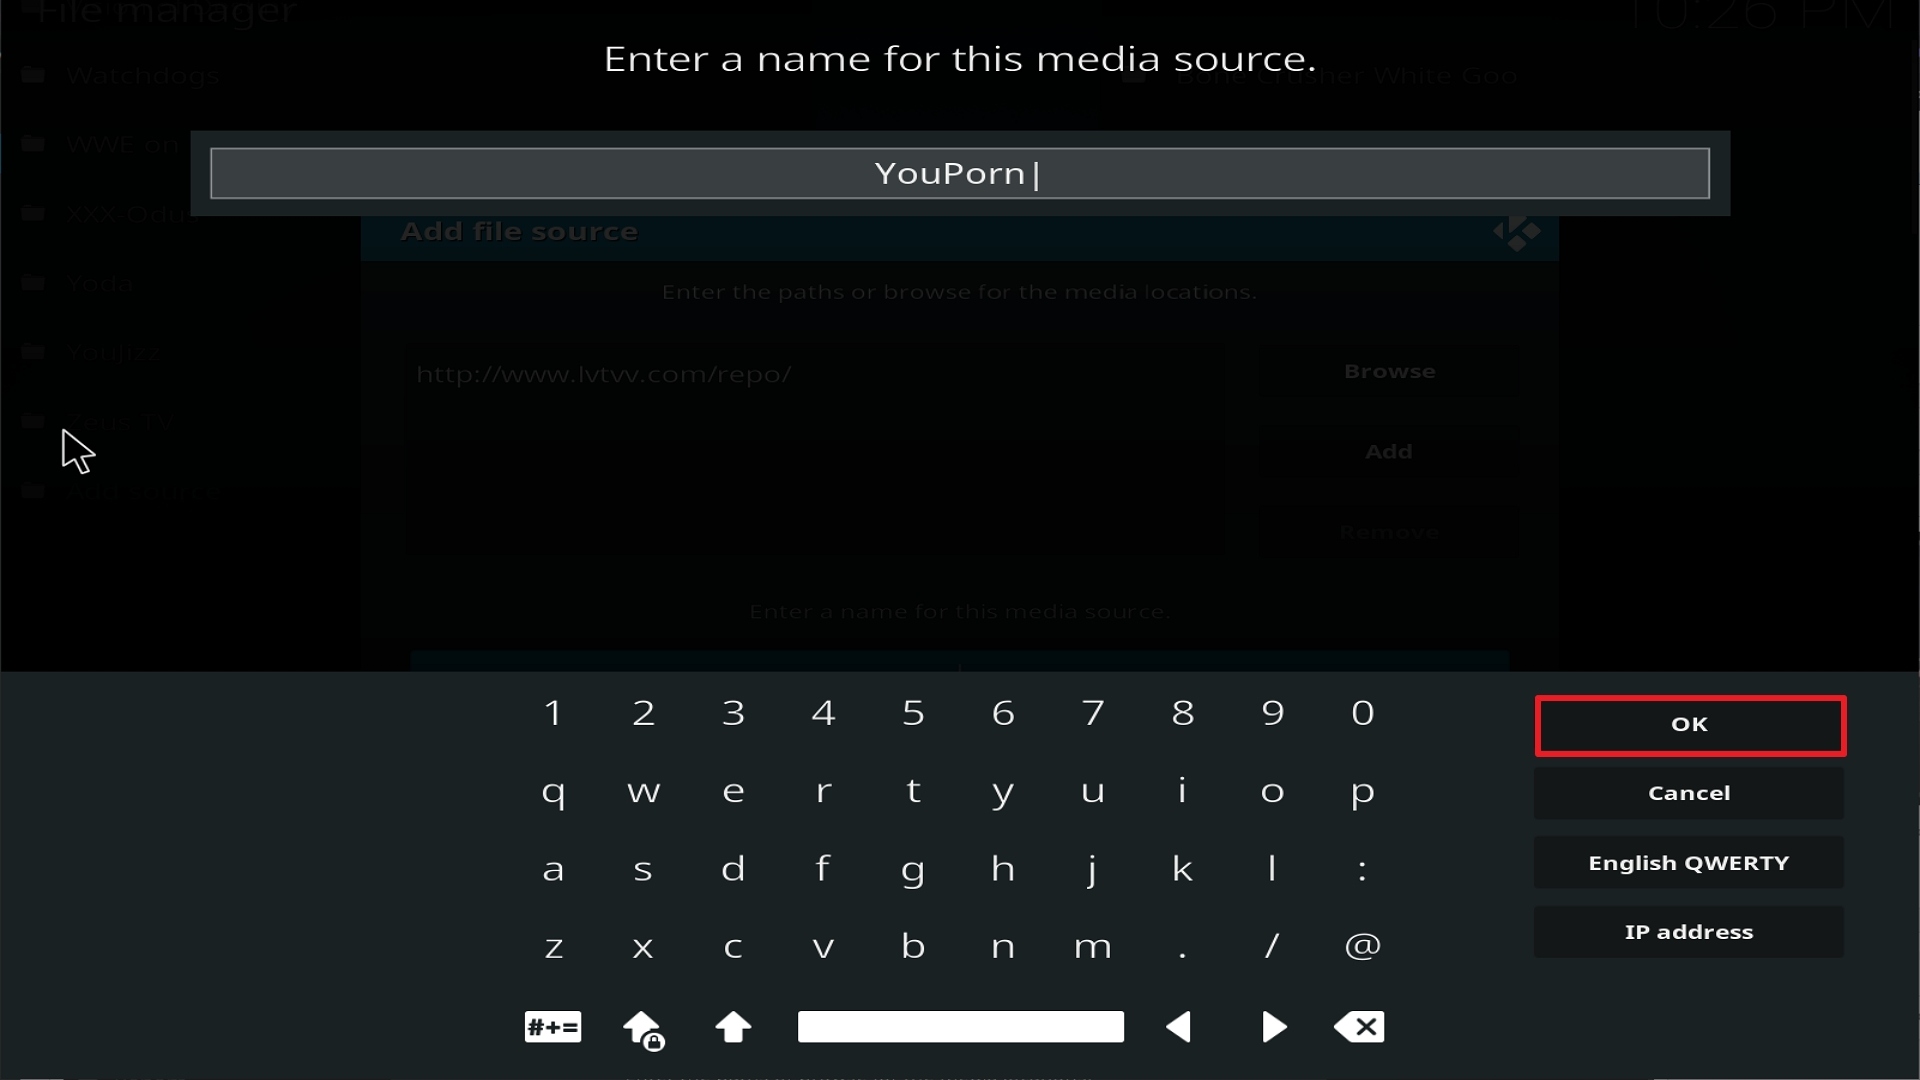
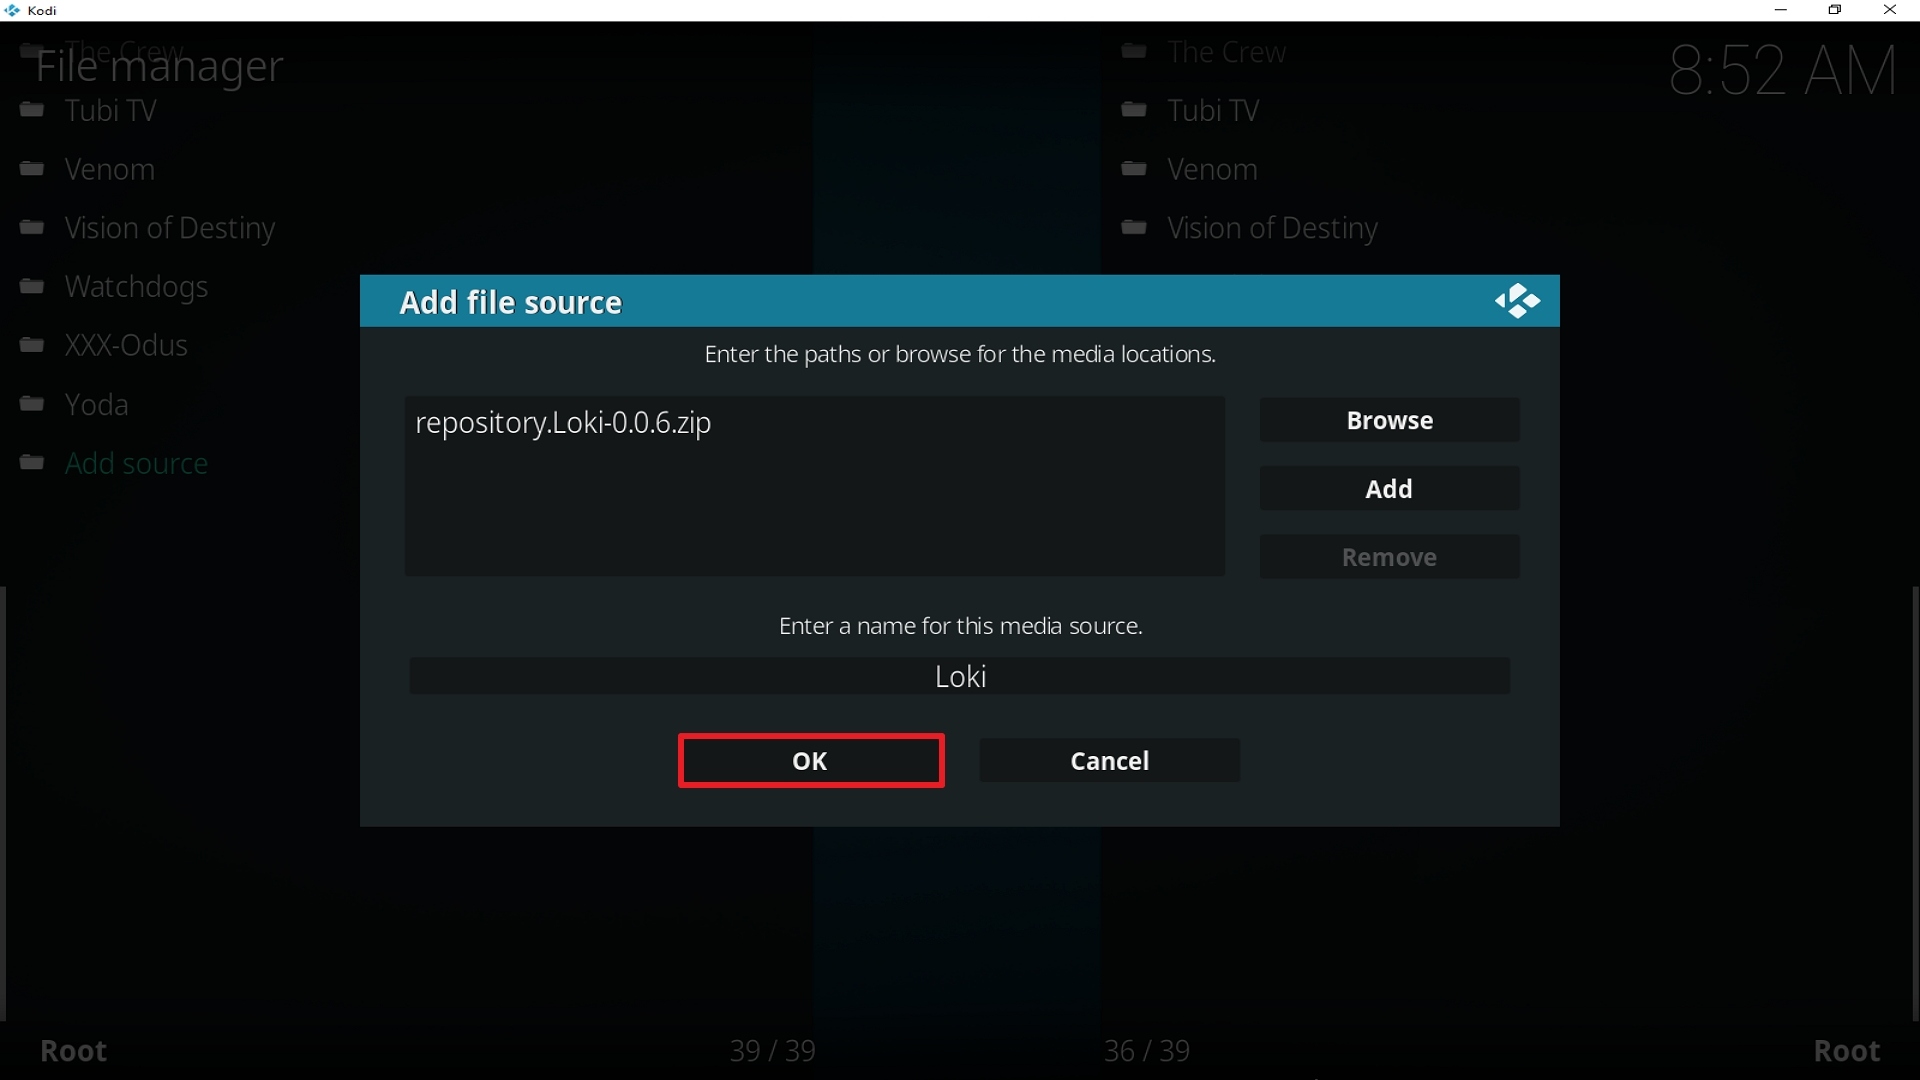
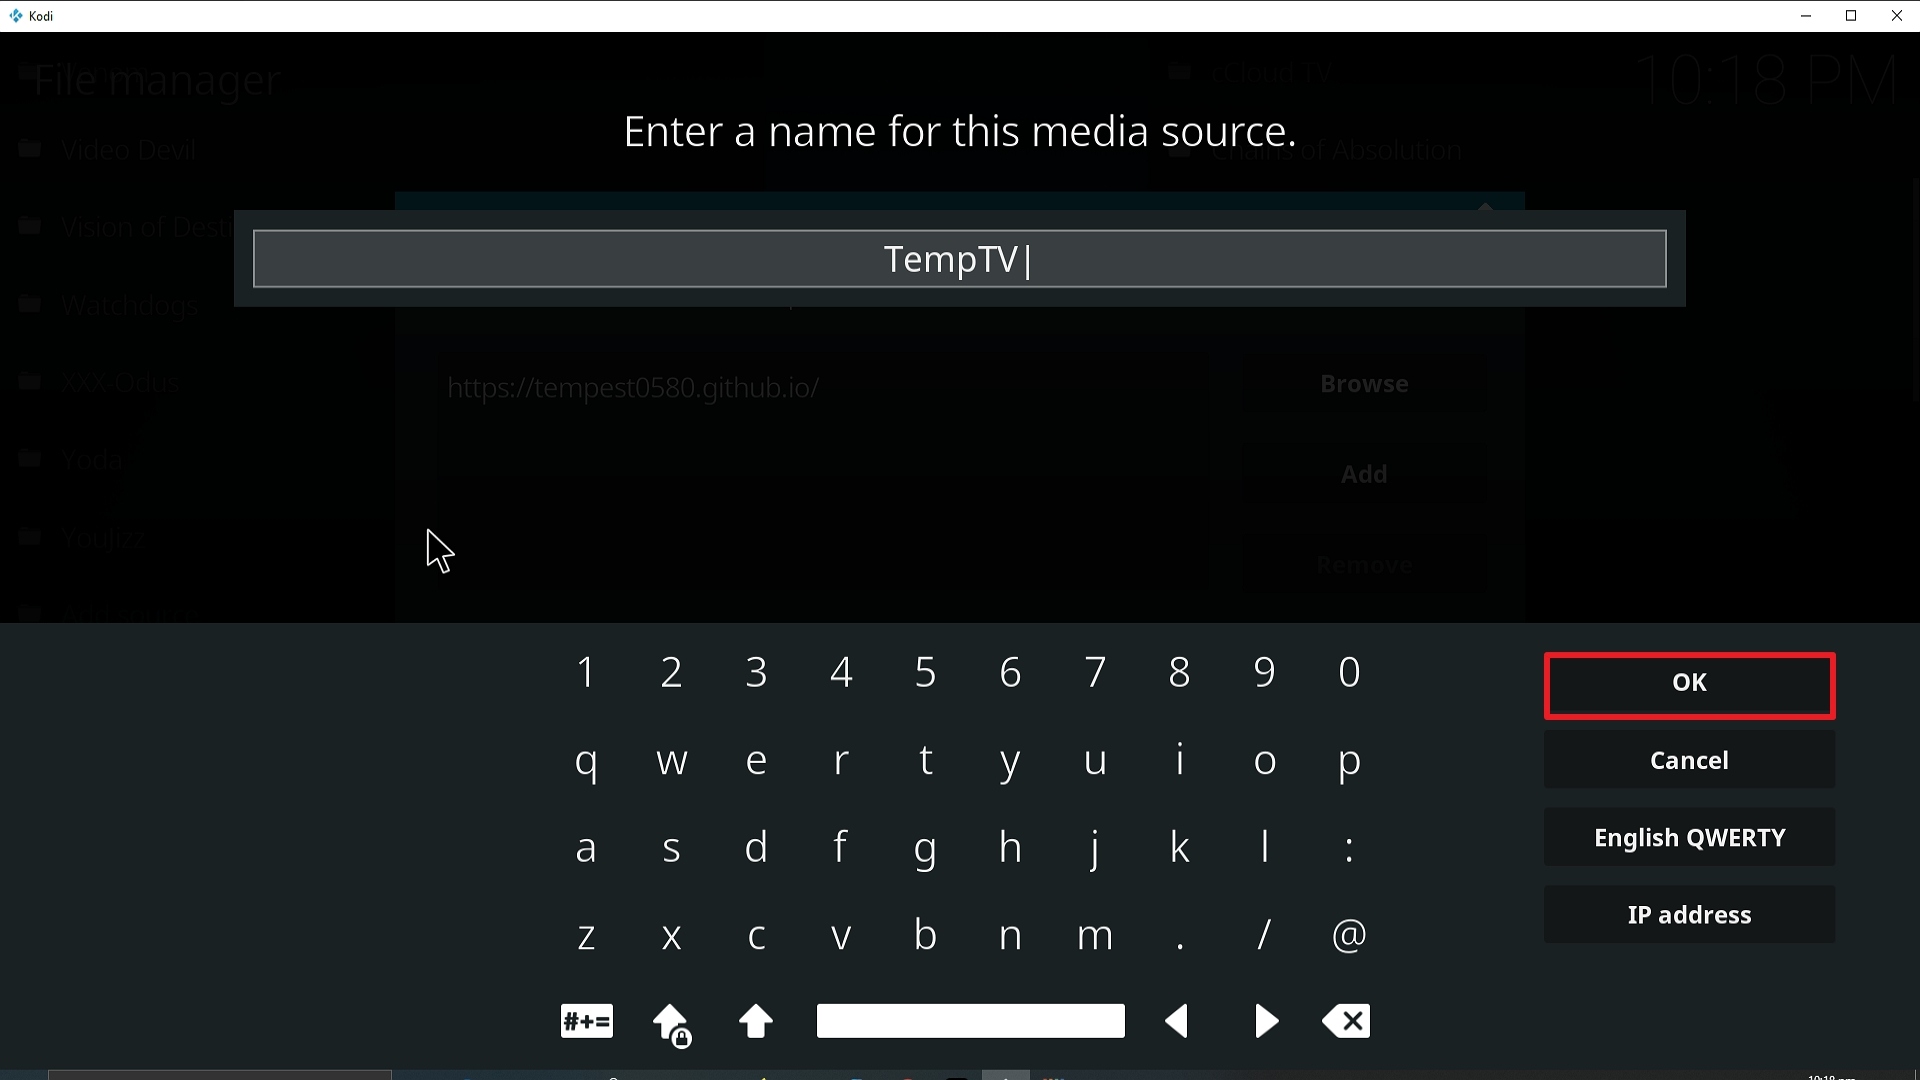
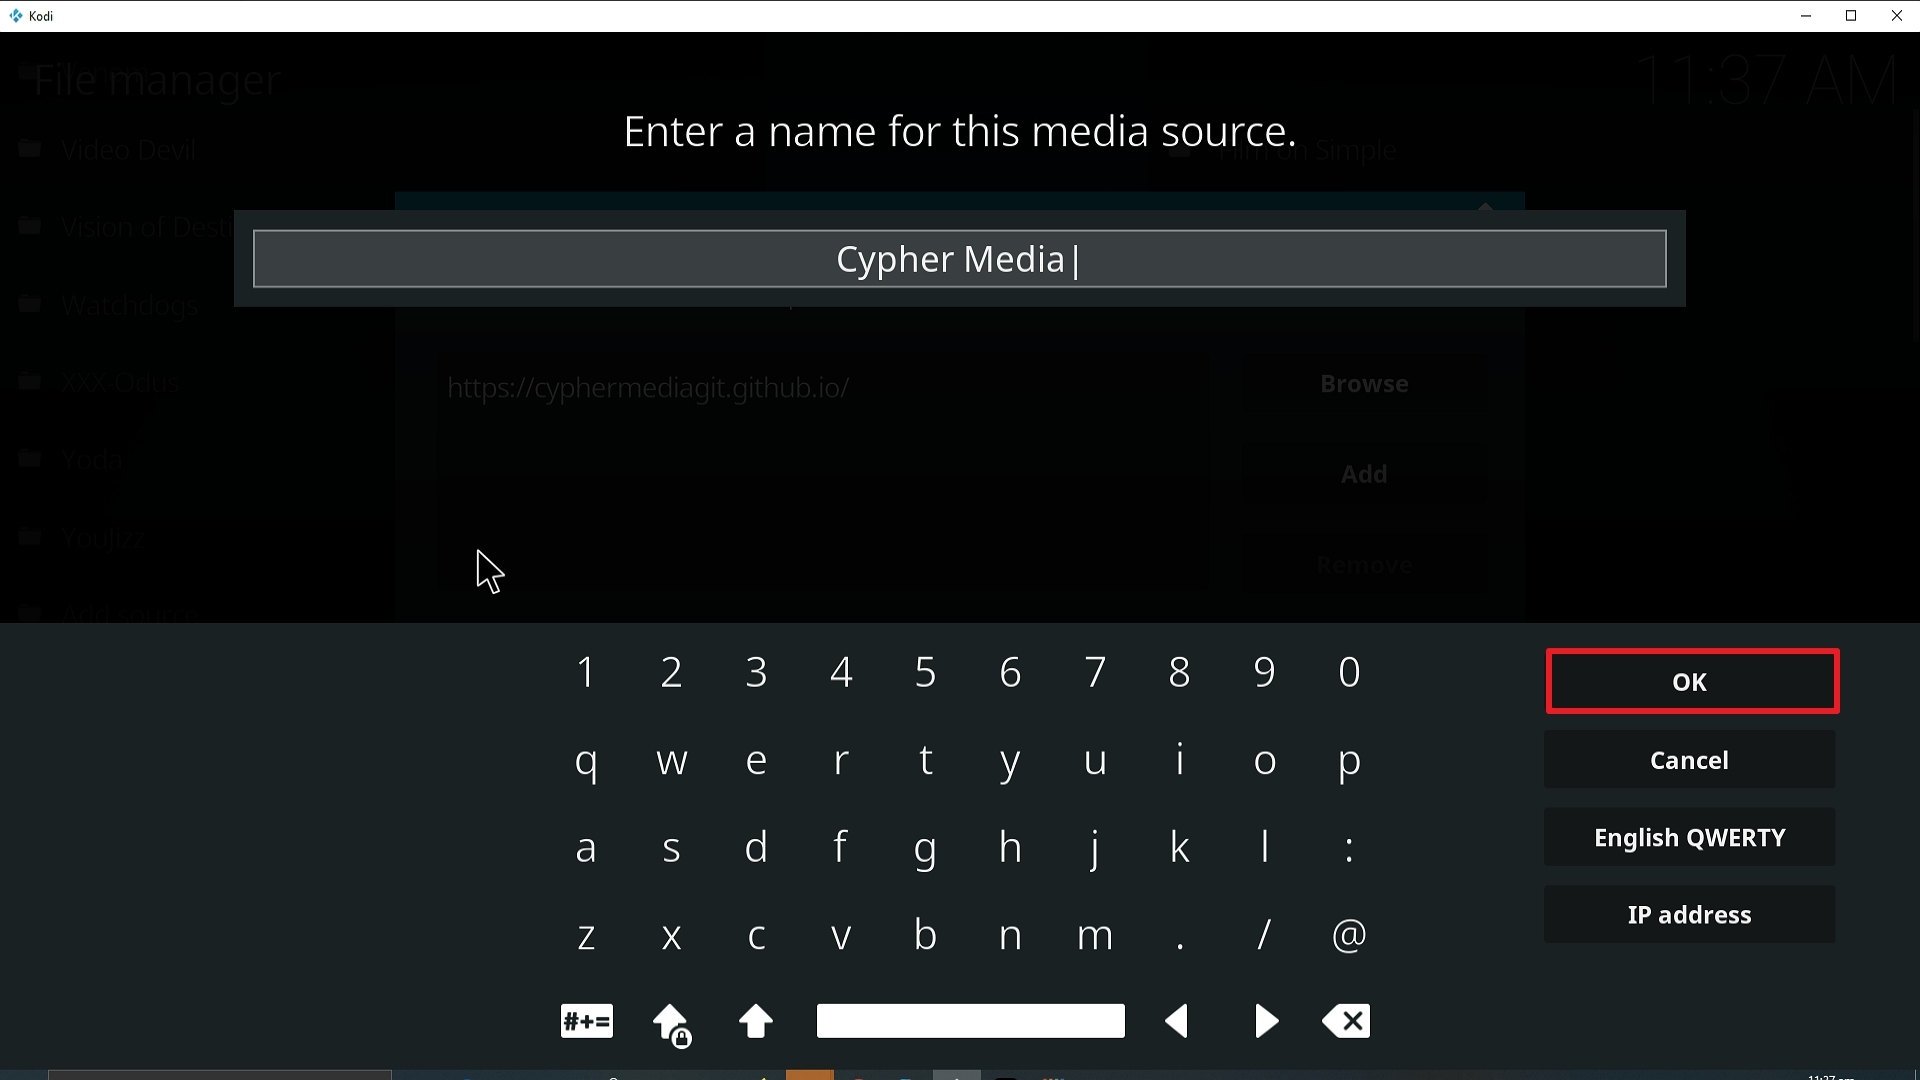
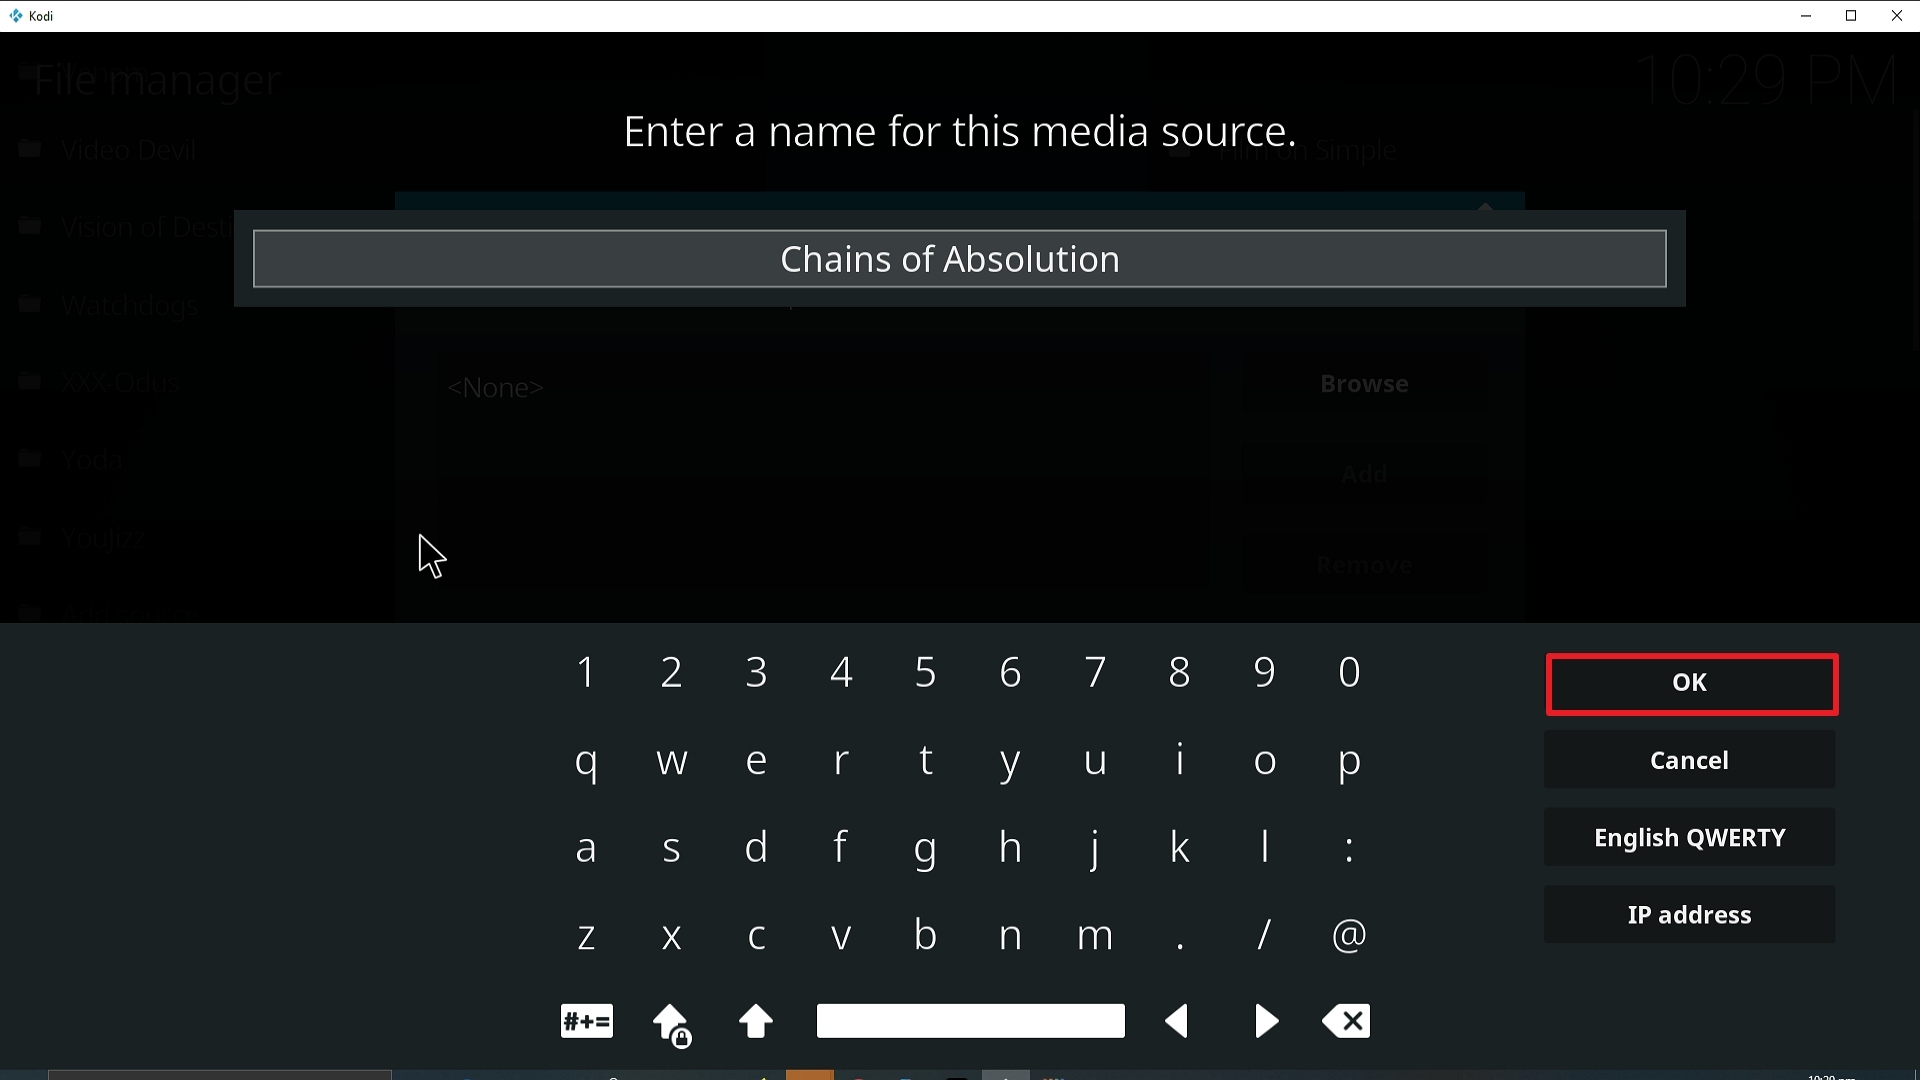
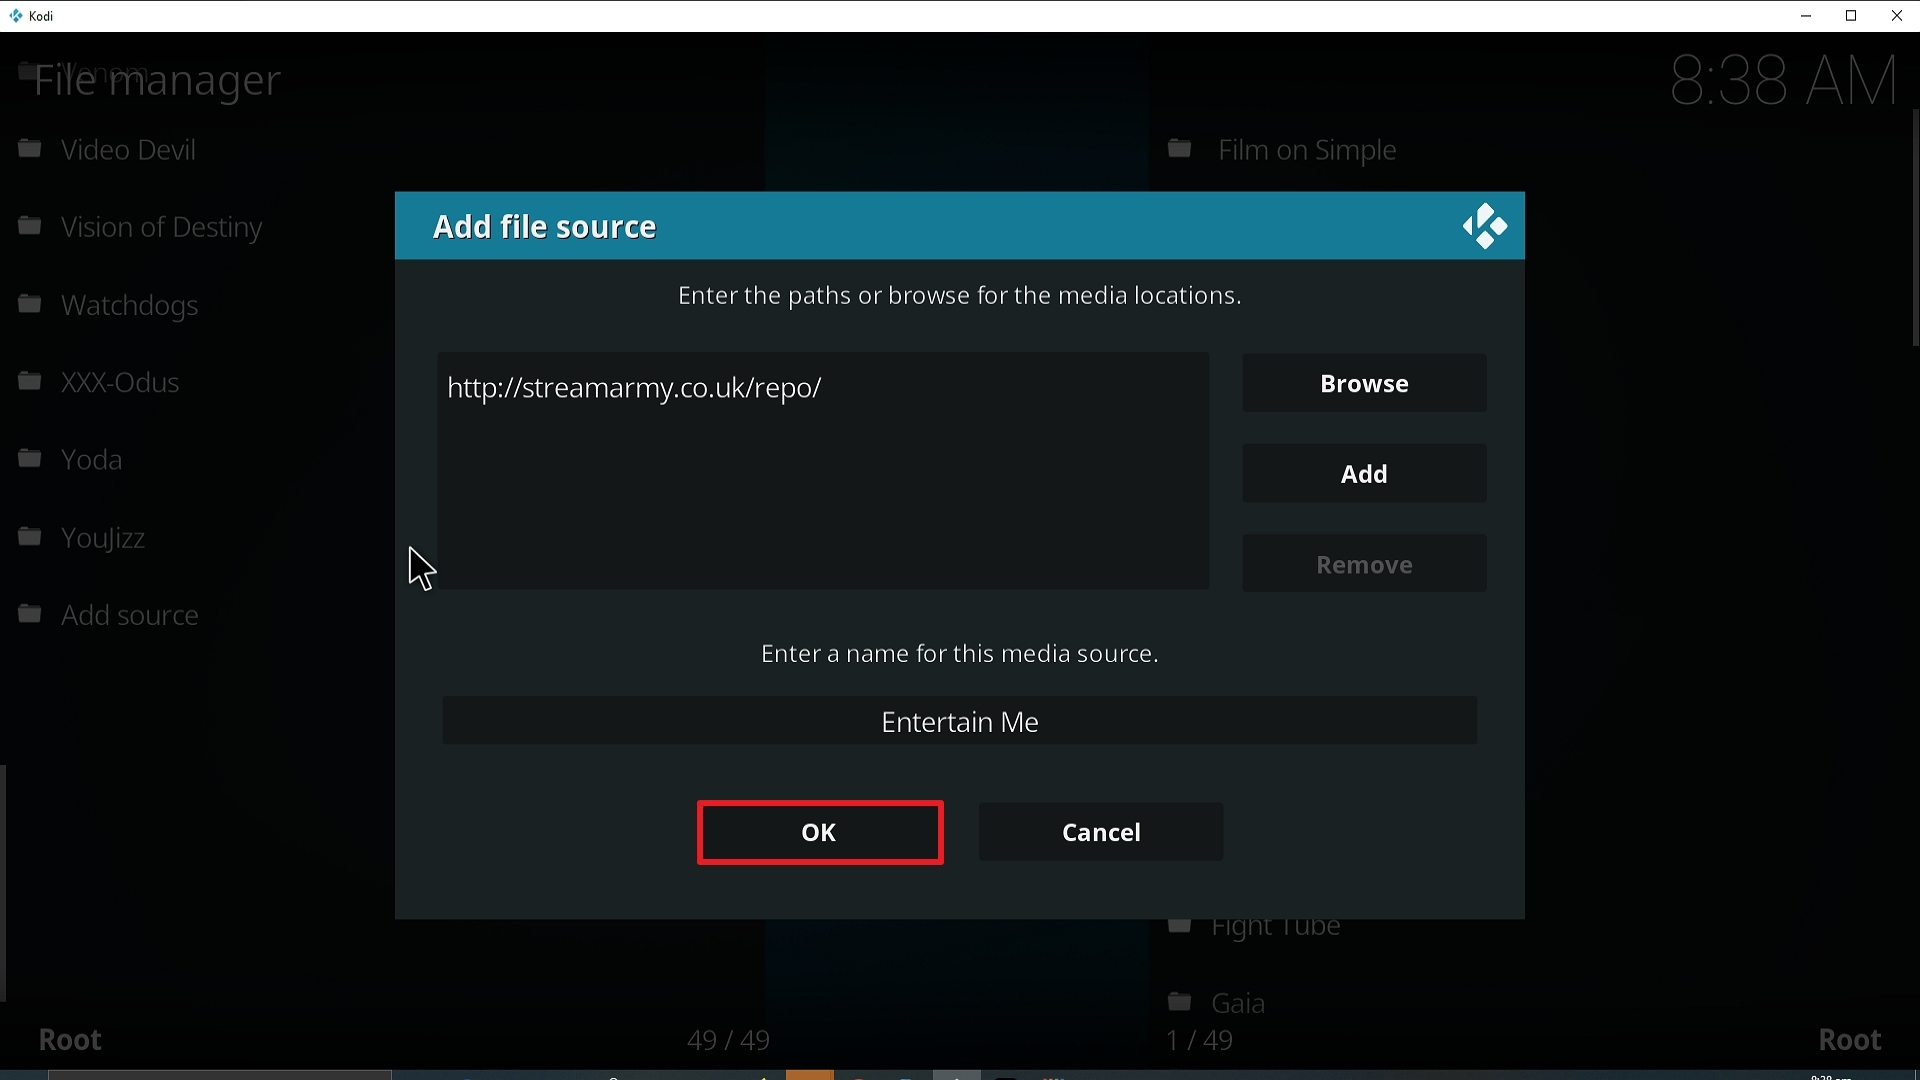
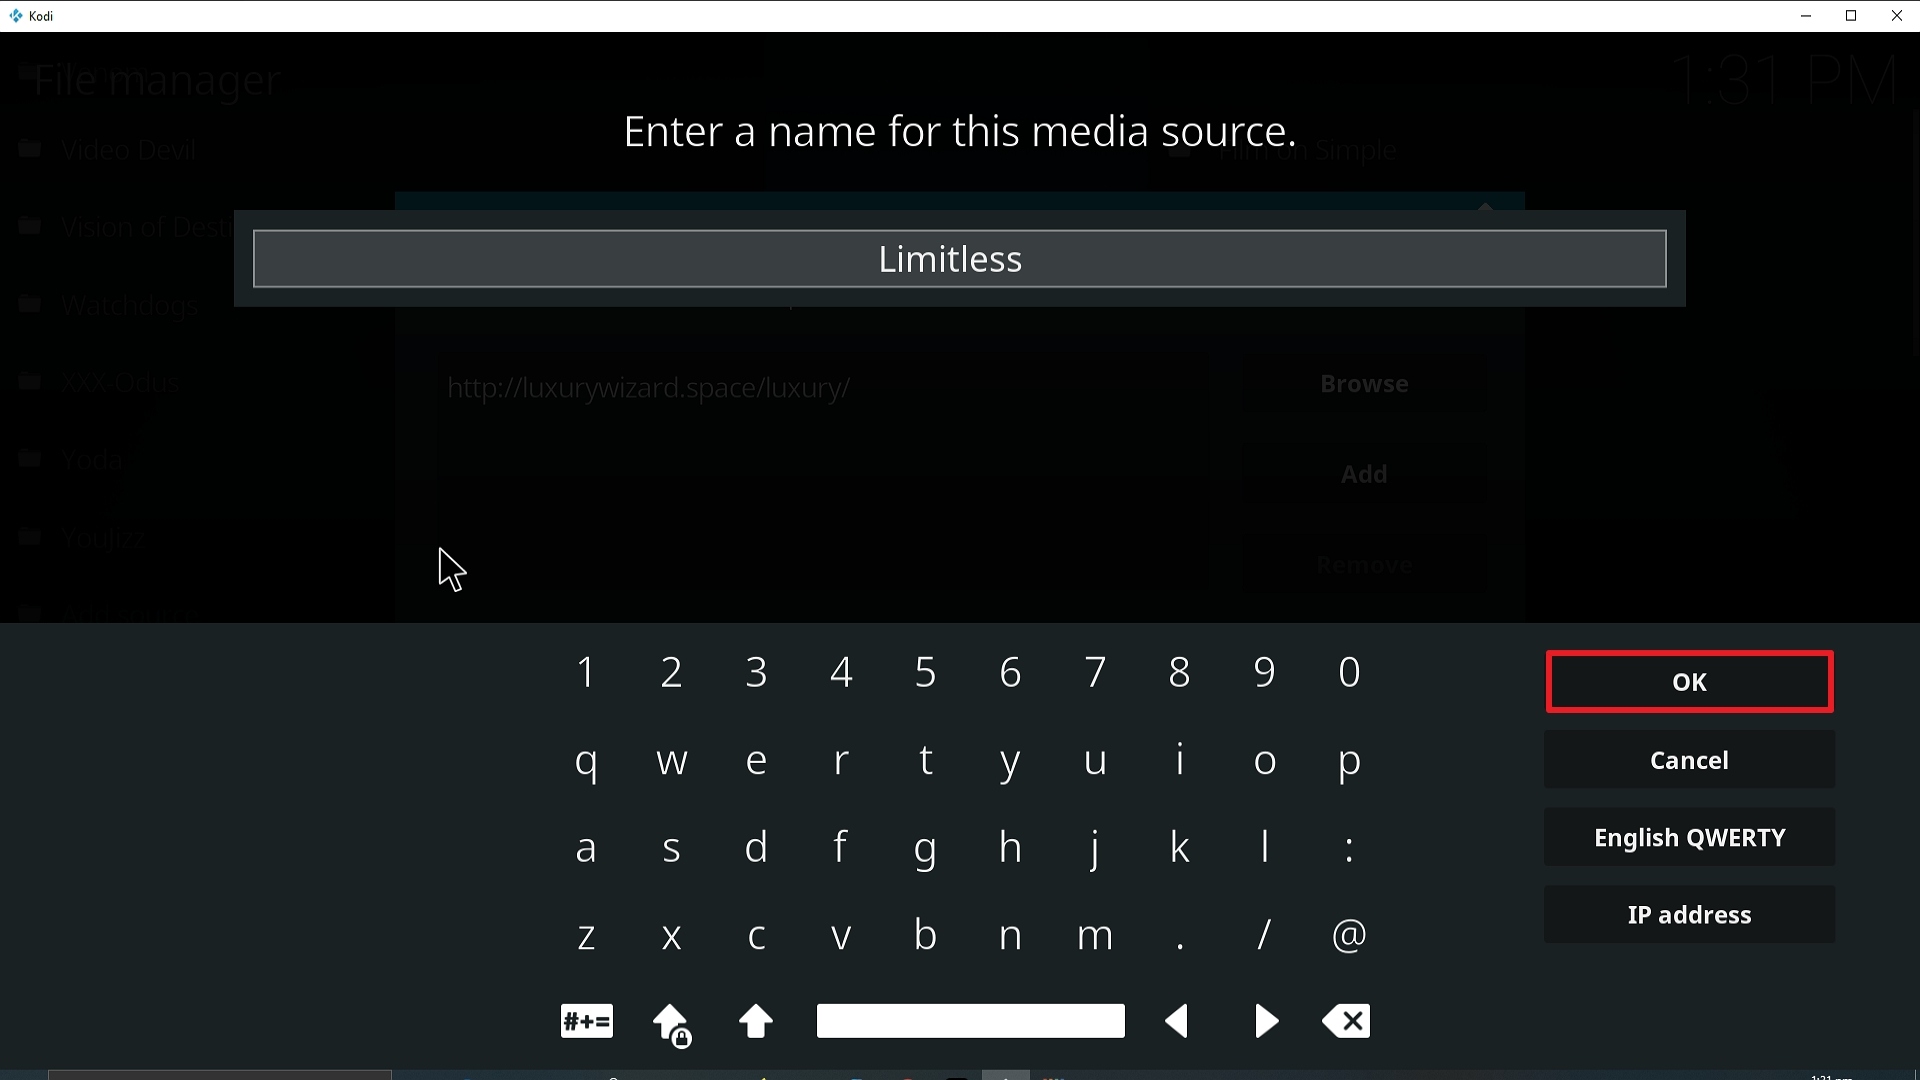
13. Click on OK.
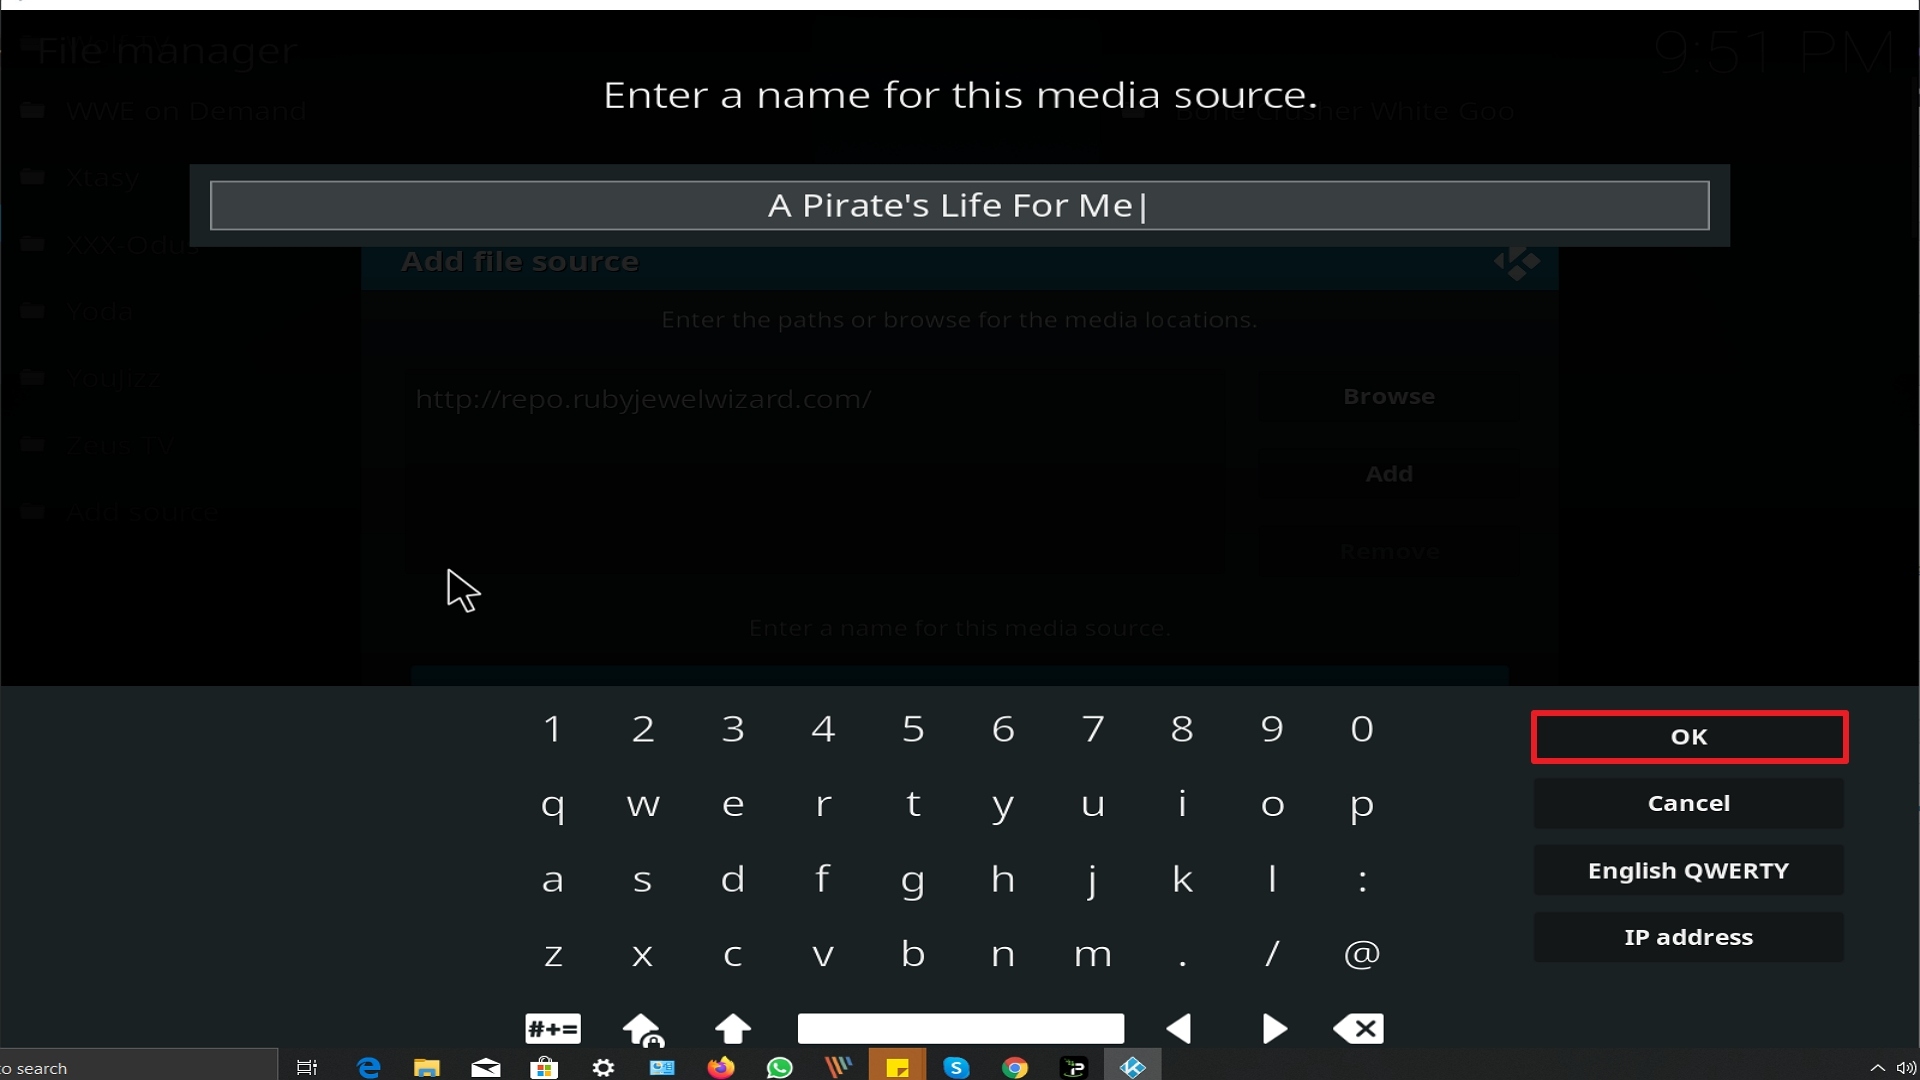
14. Click on OK.

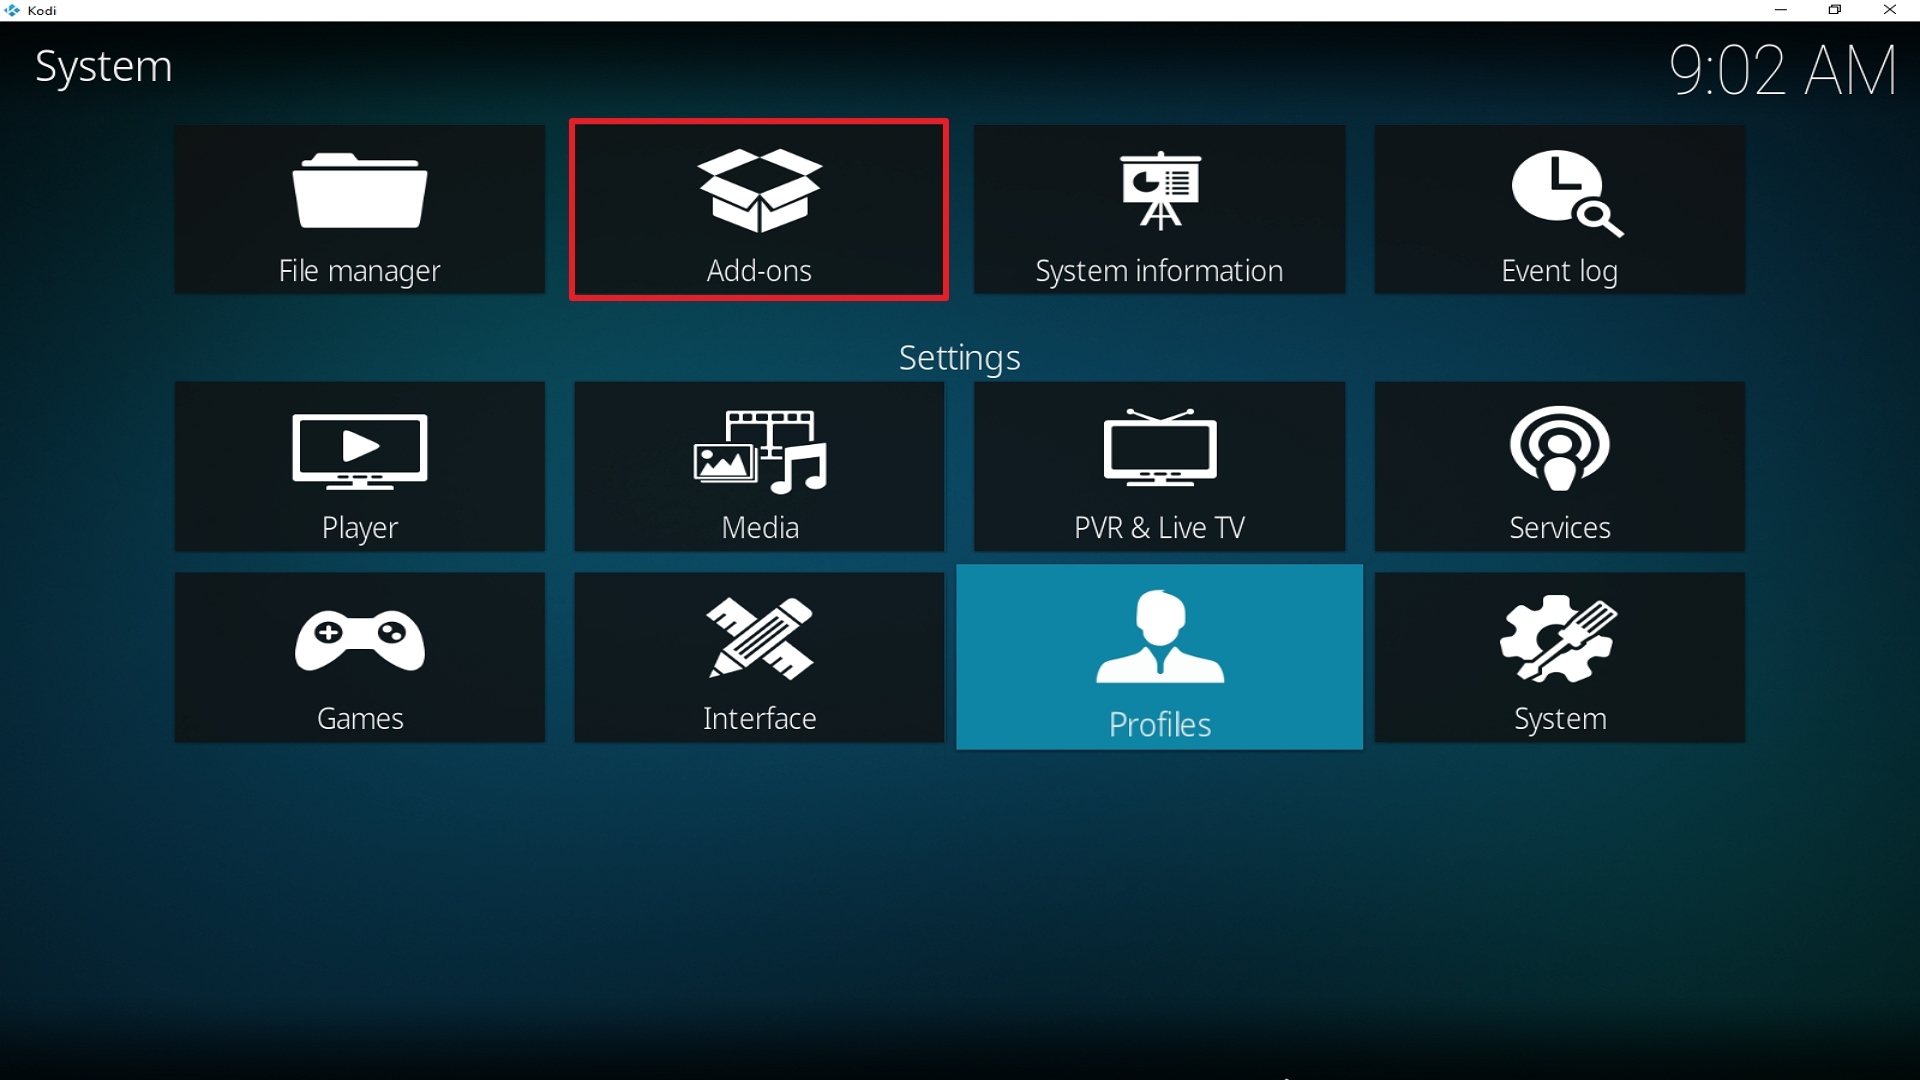
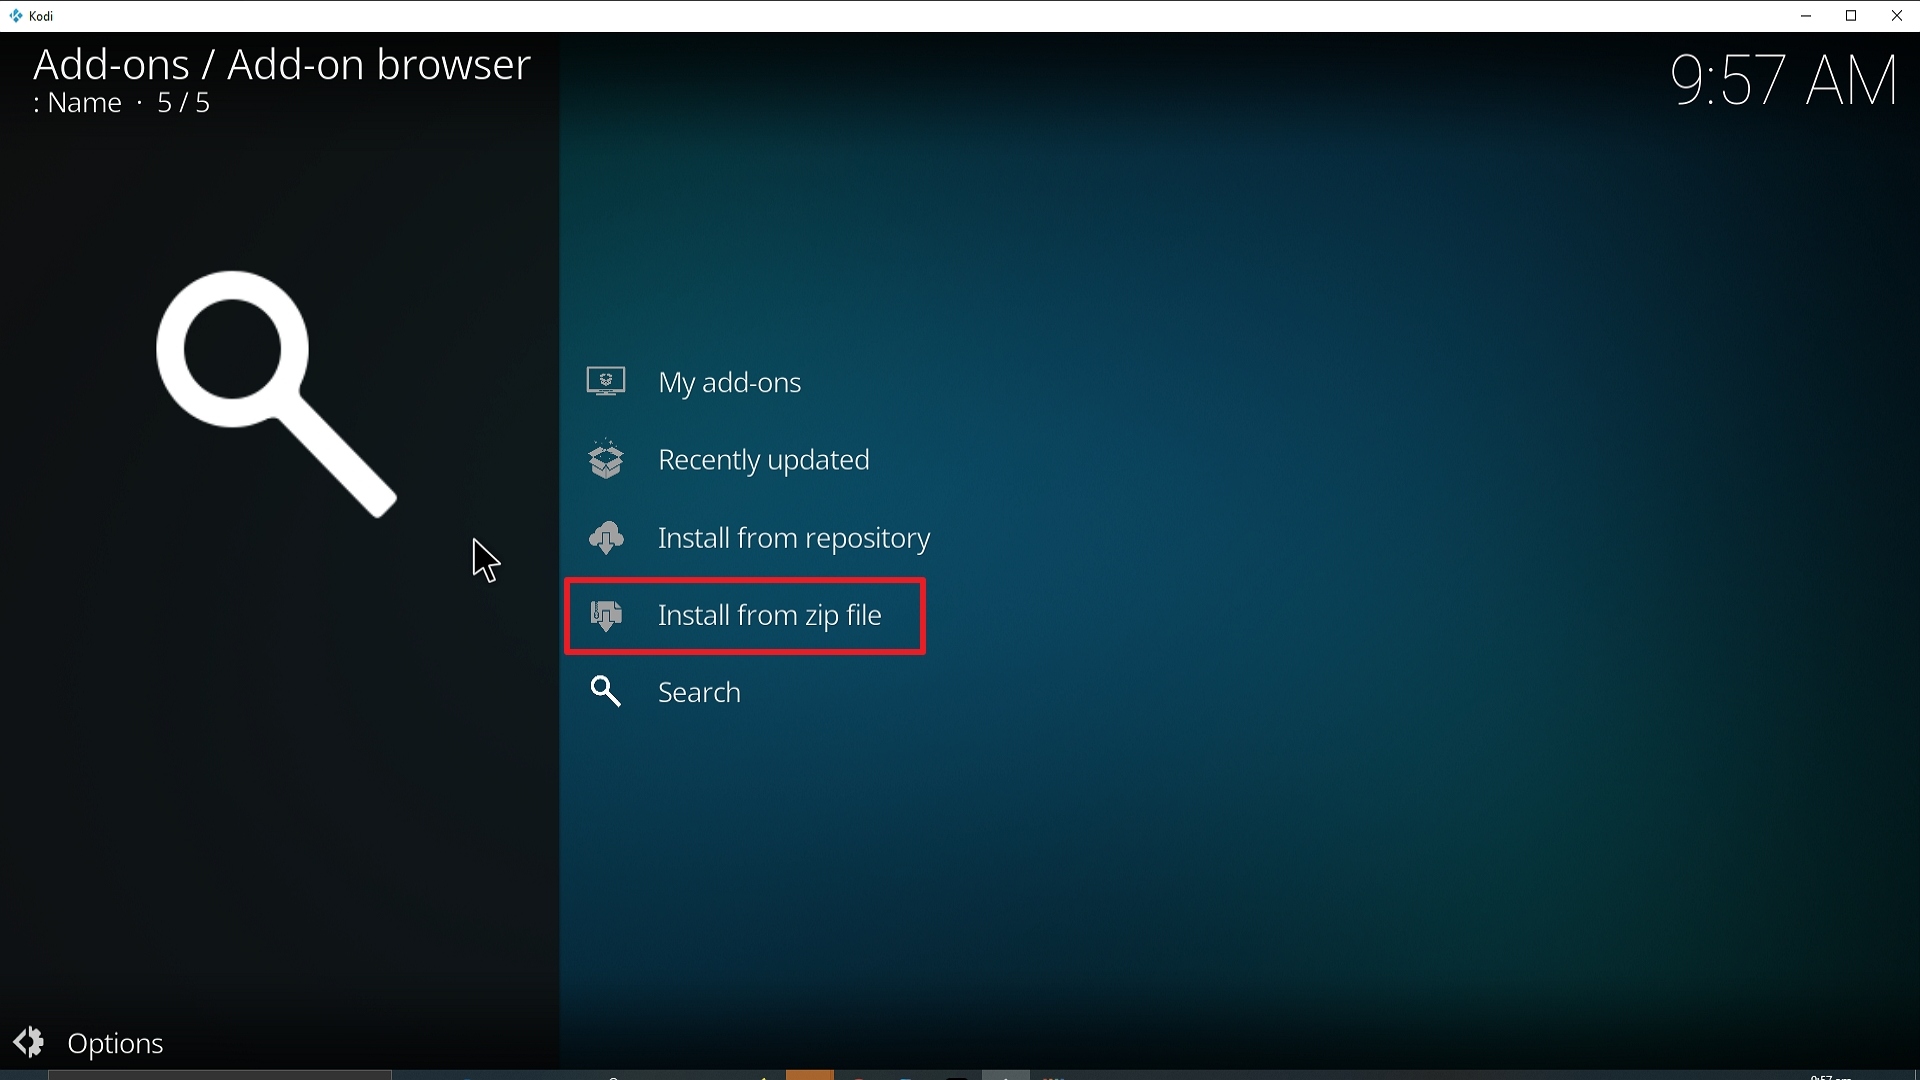
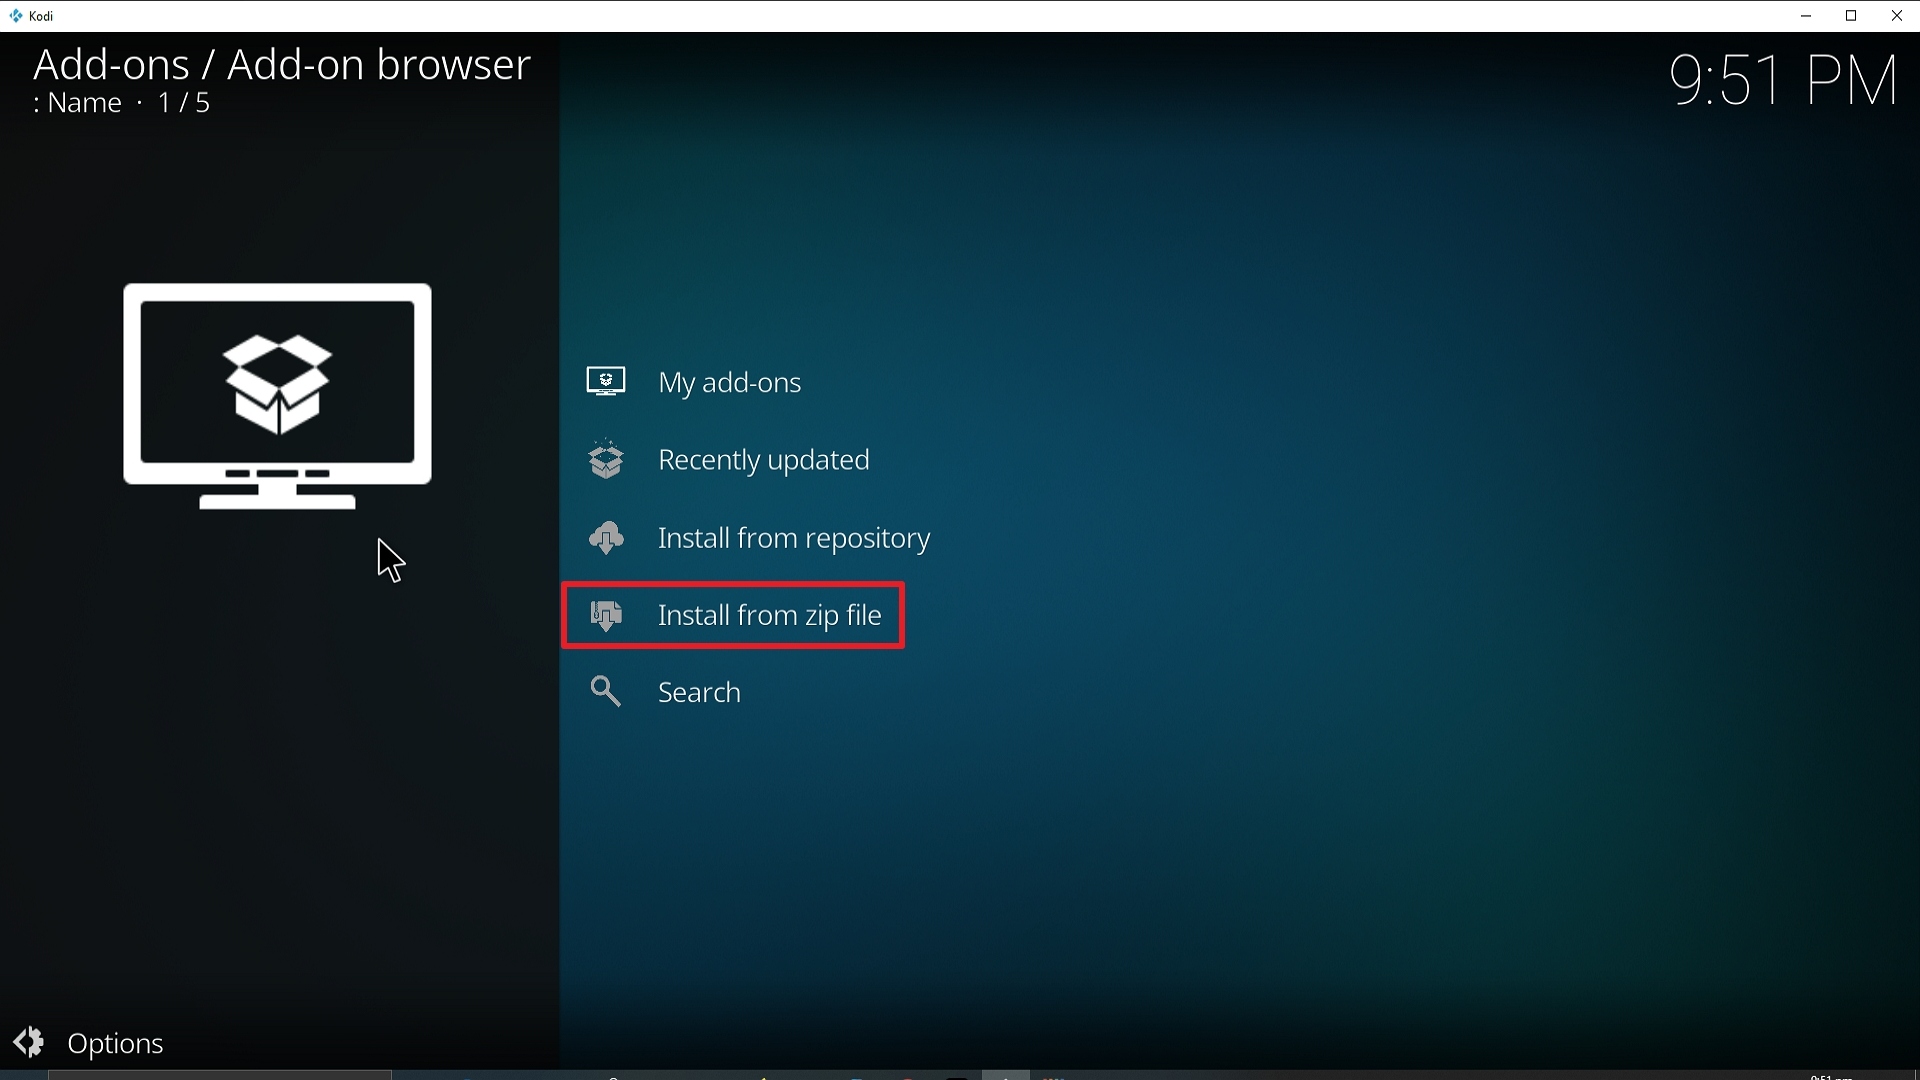
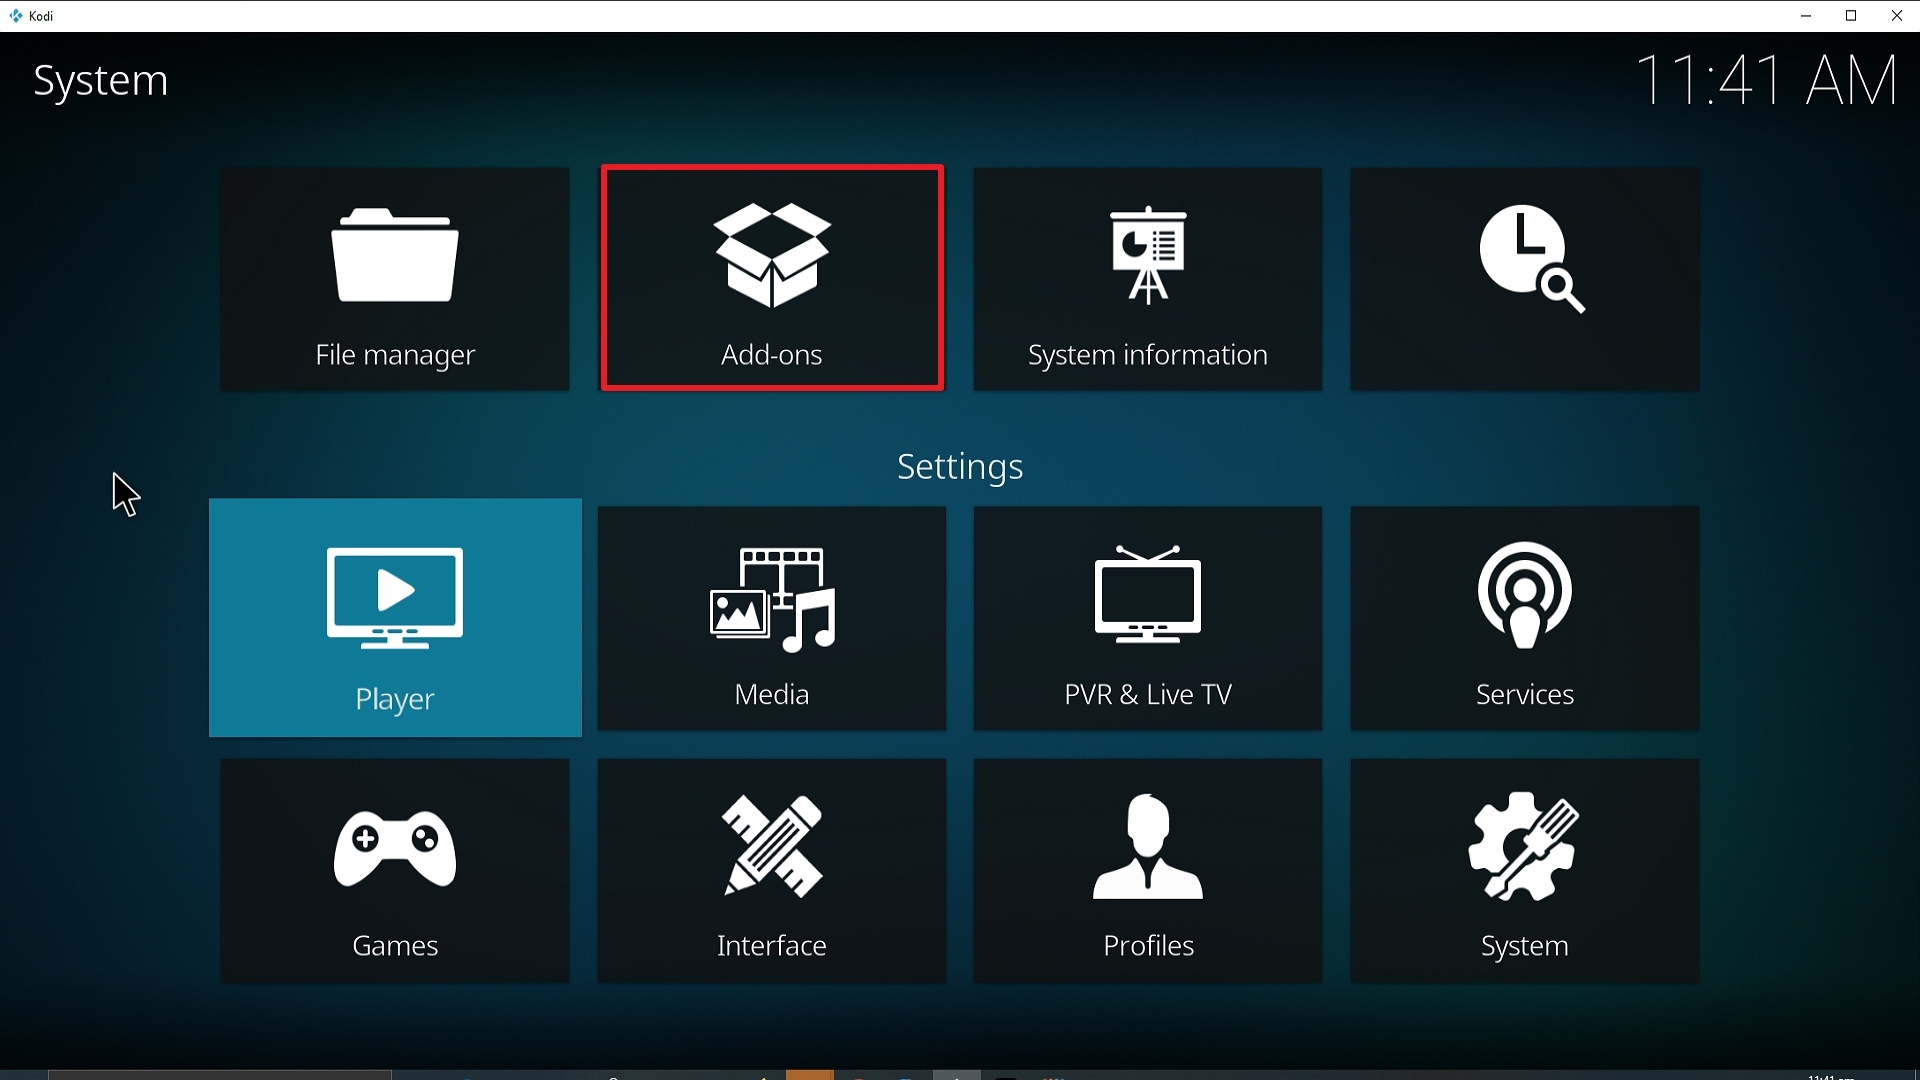
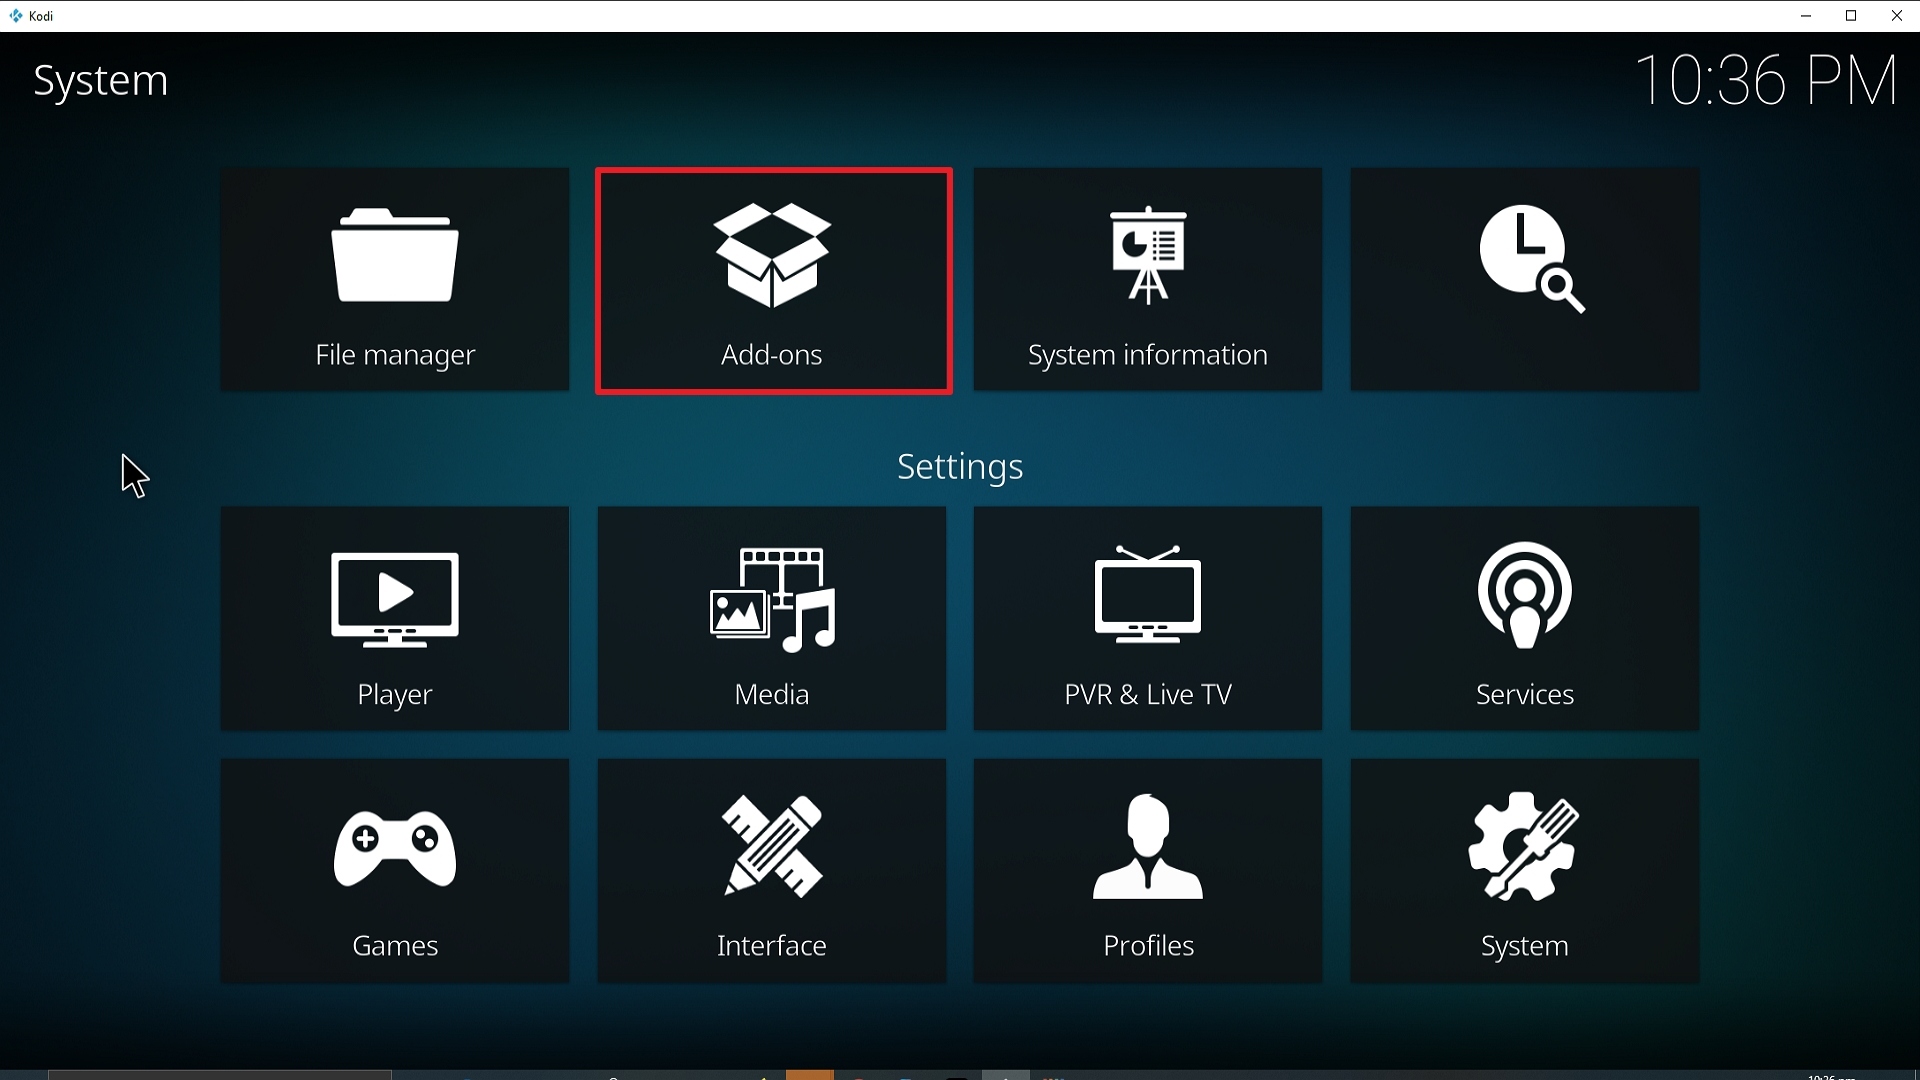
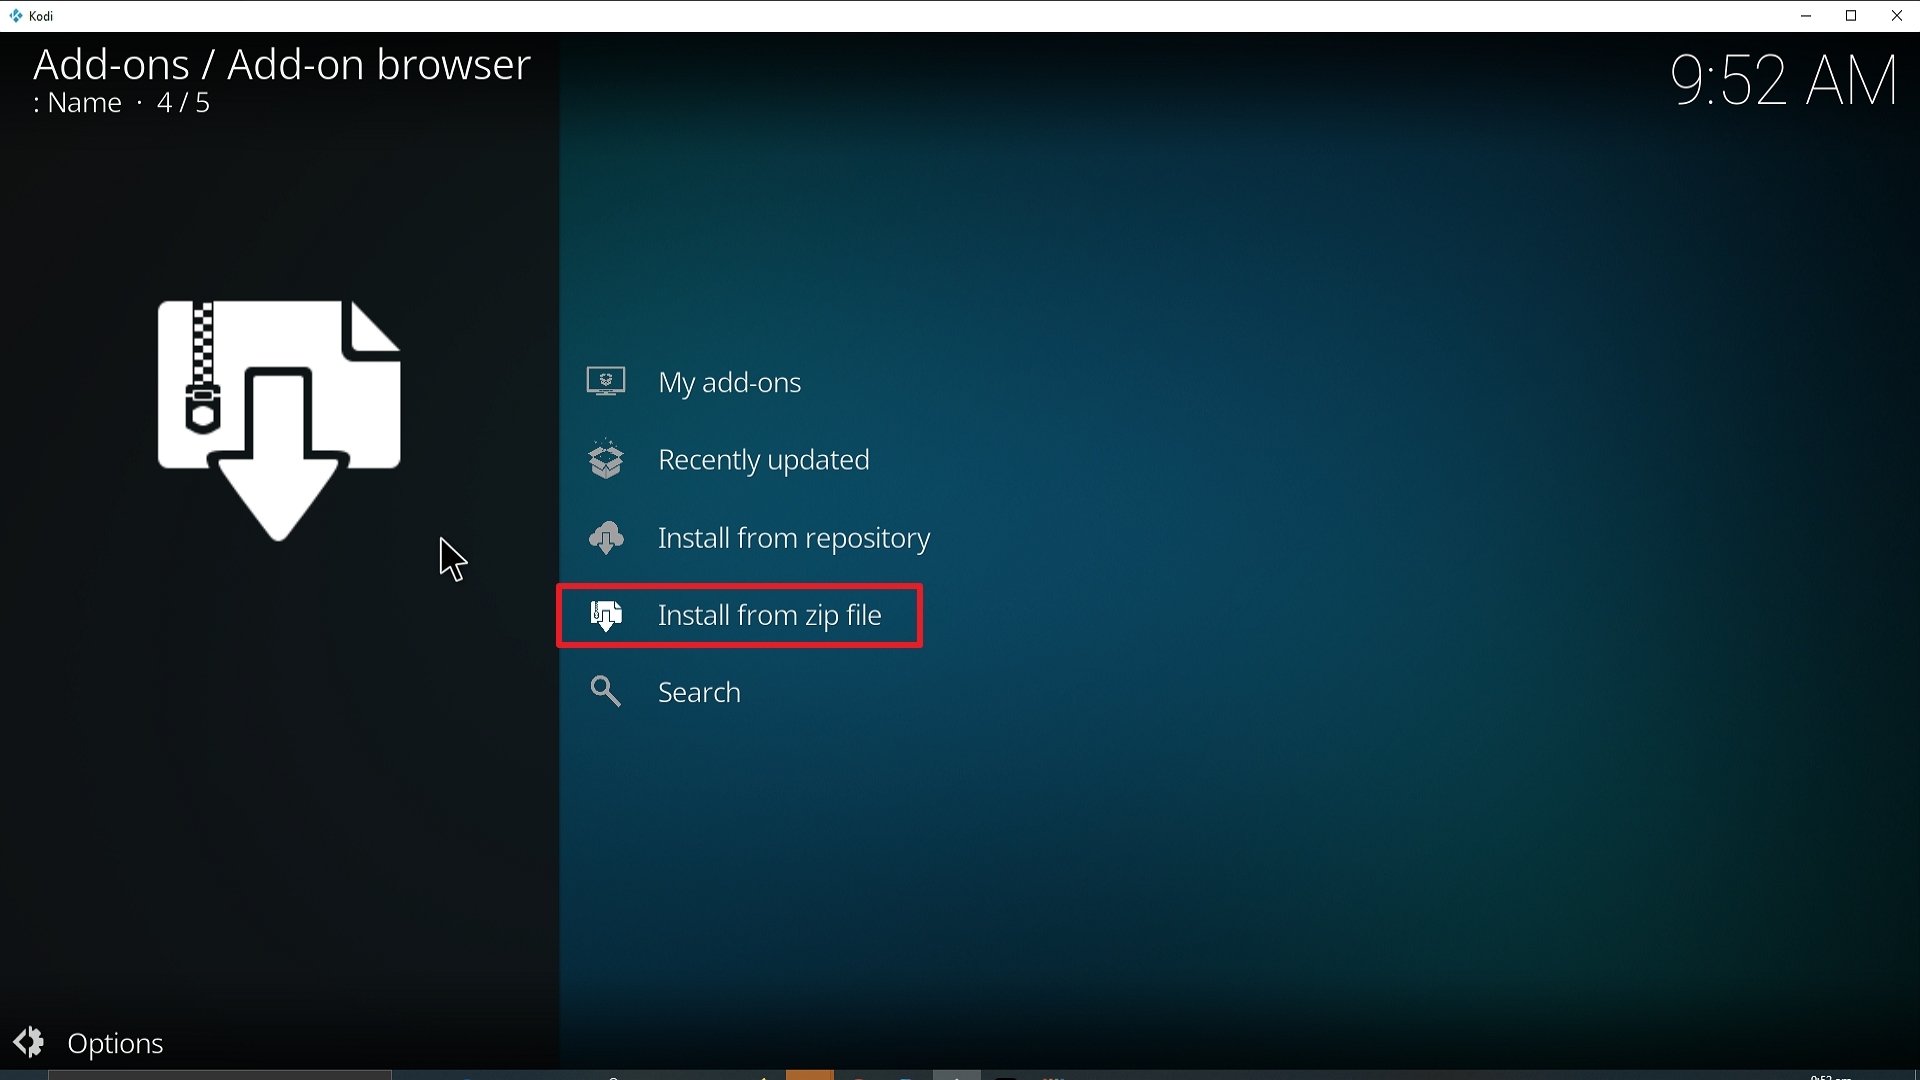
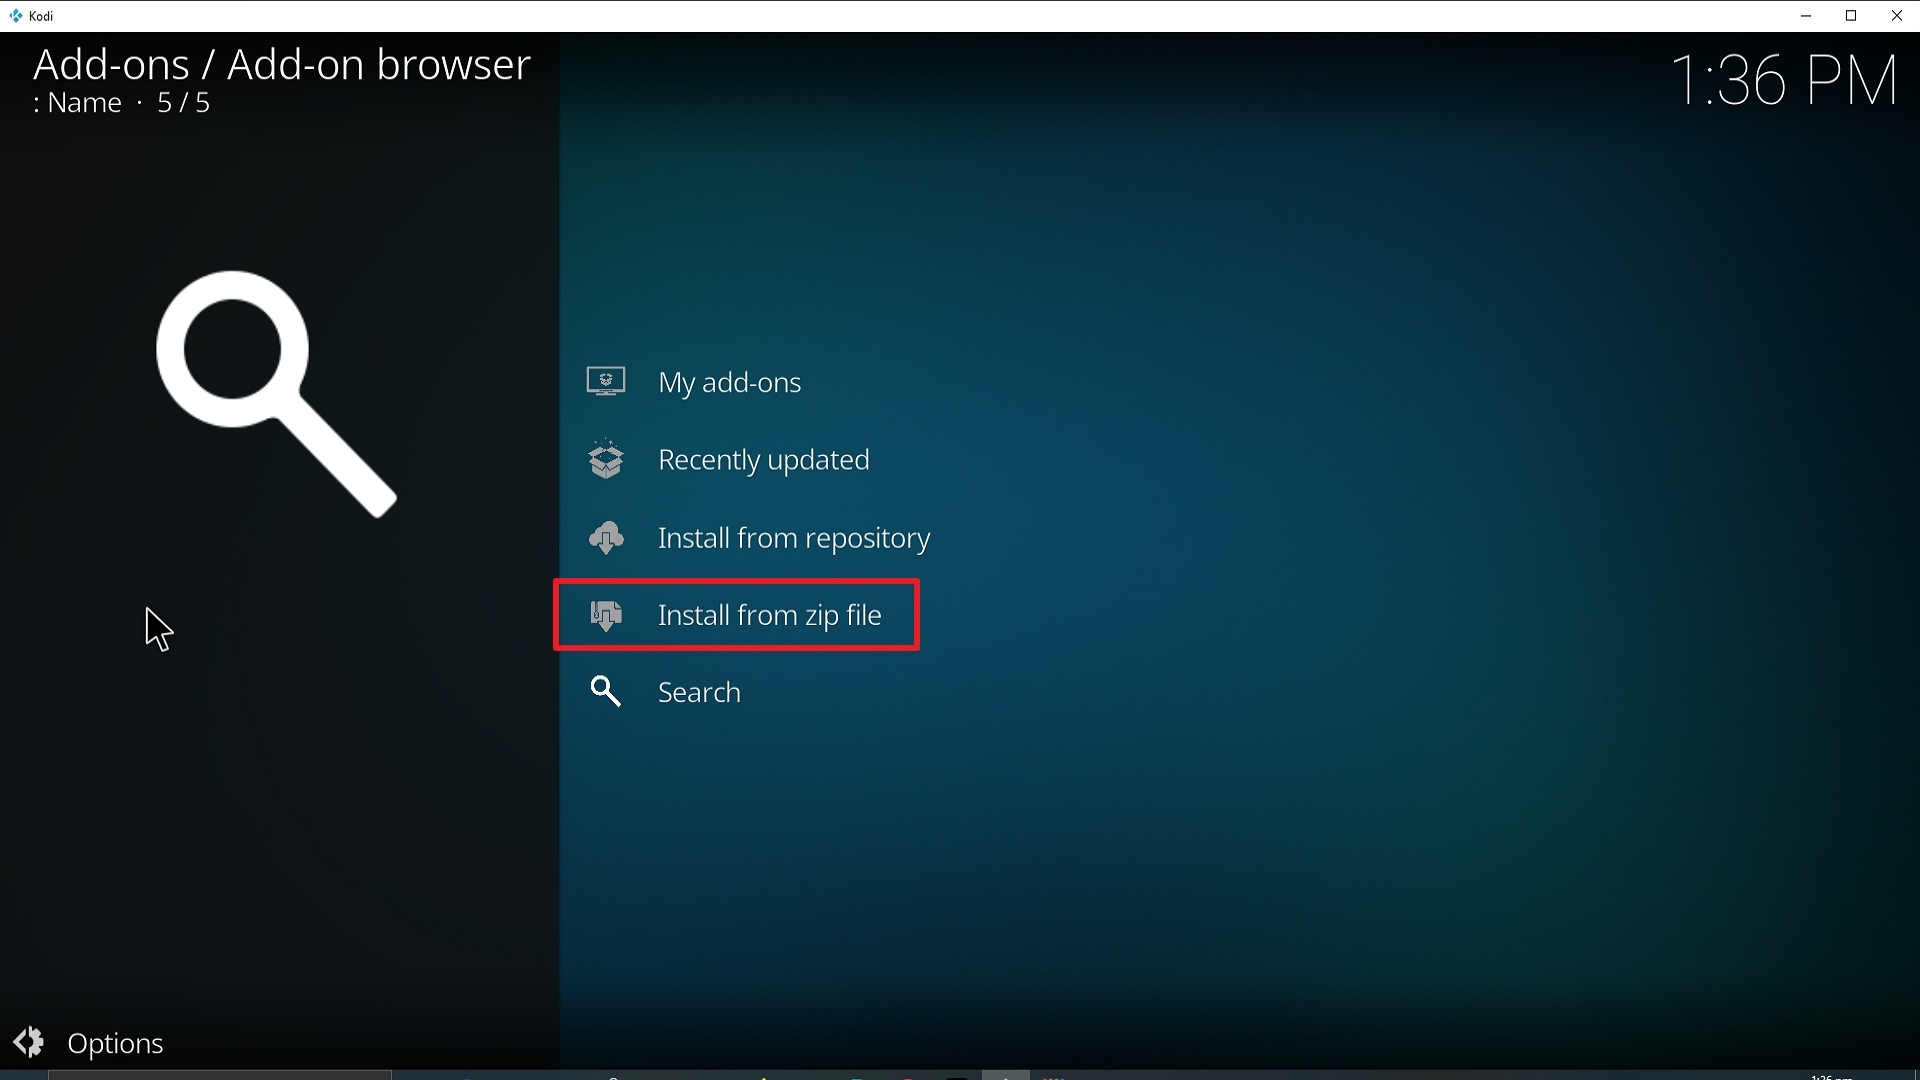
15. Take one step back and click on Add-ons.
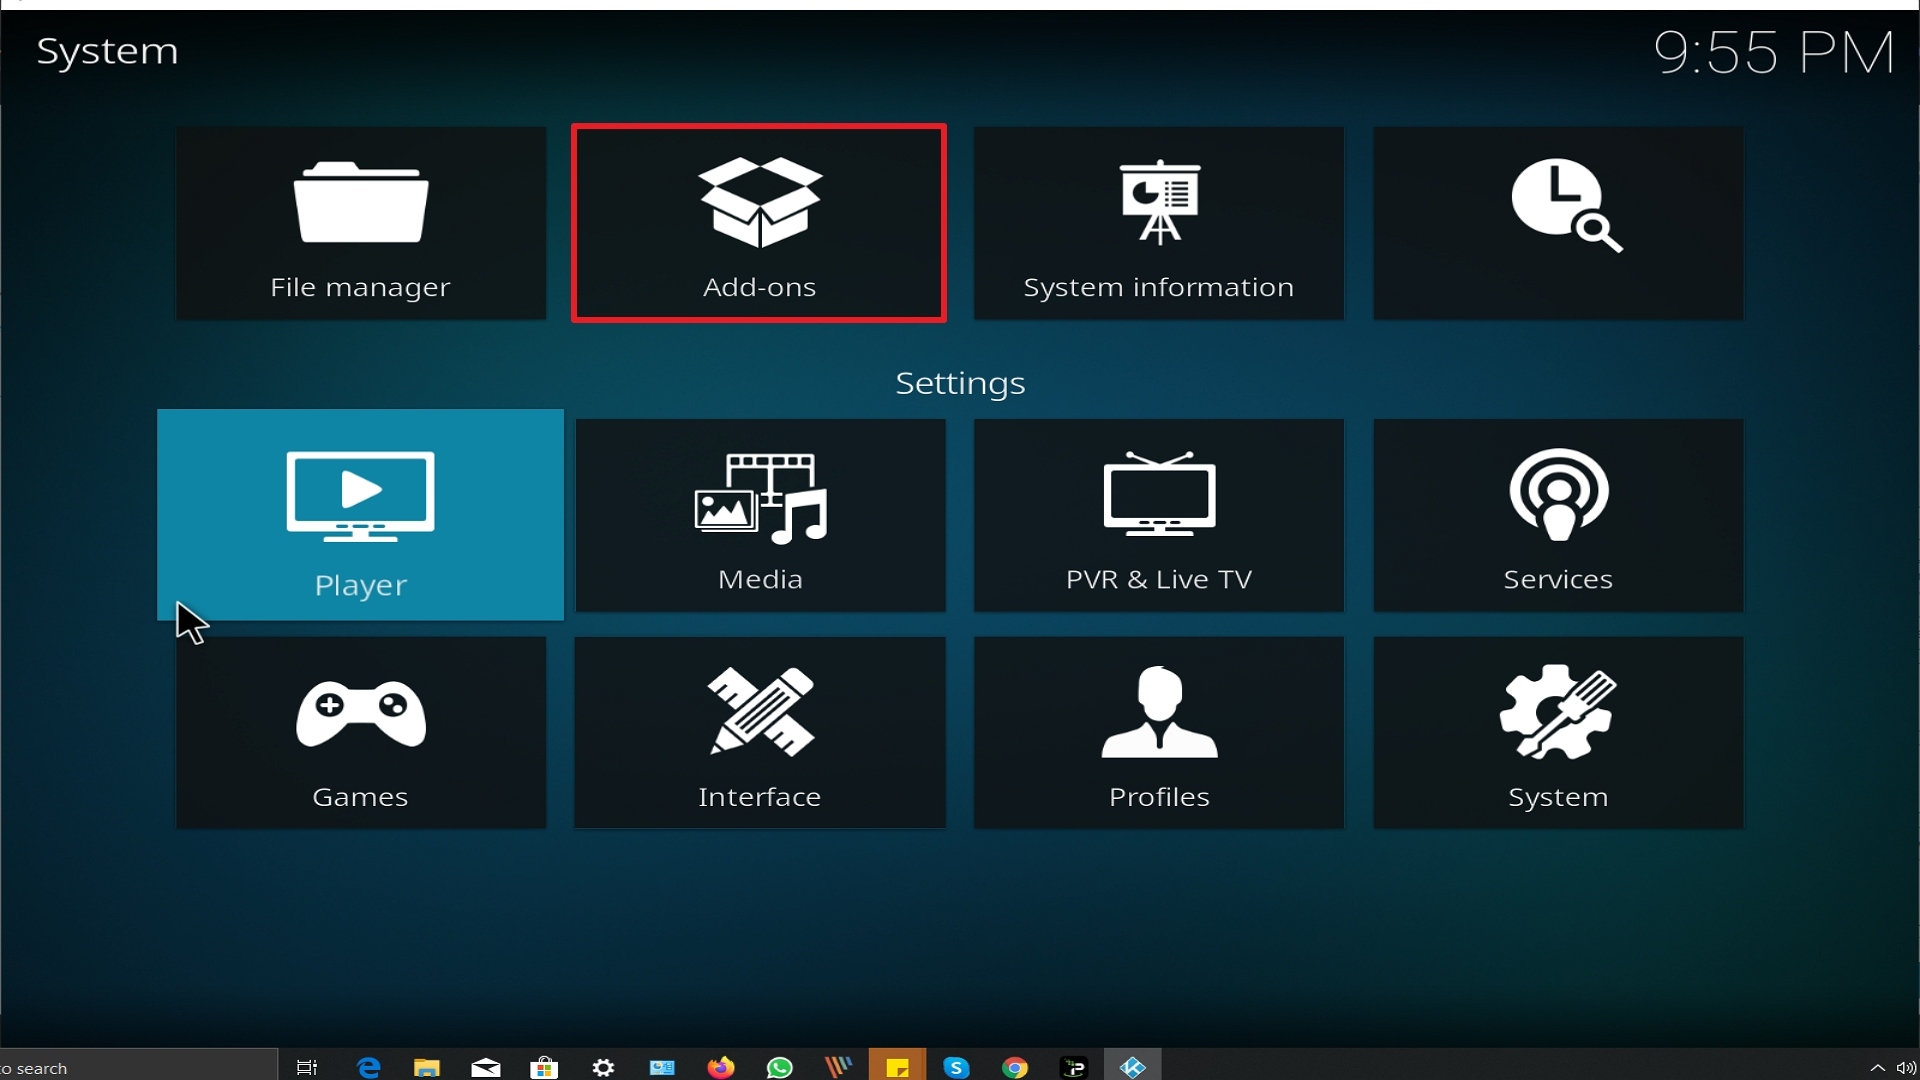
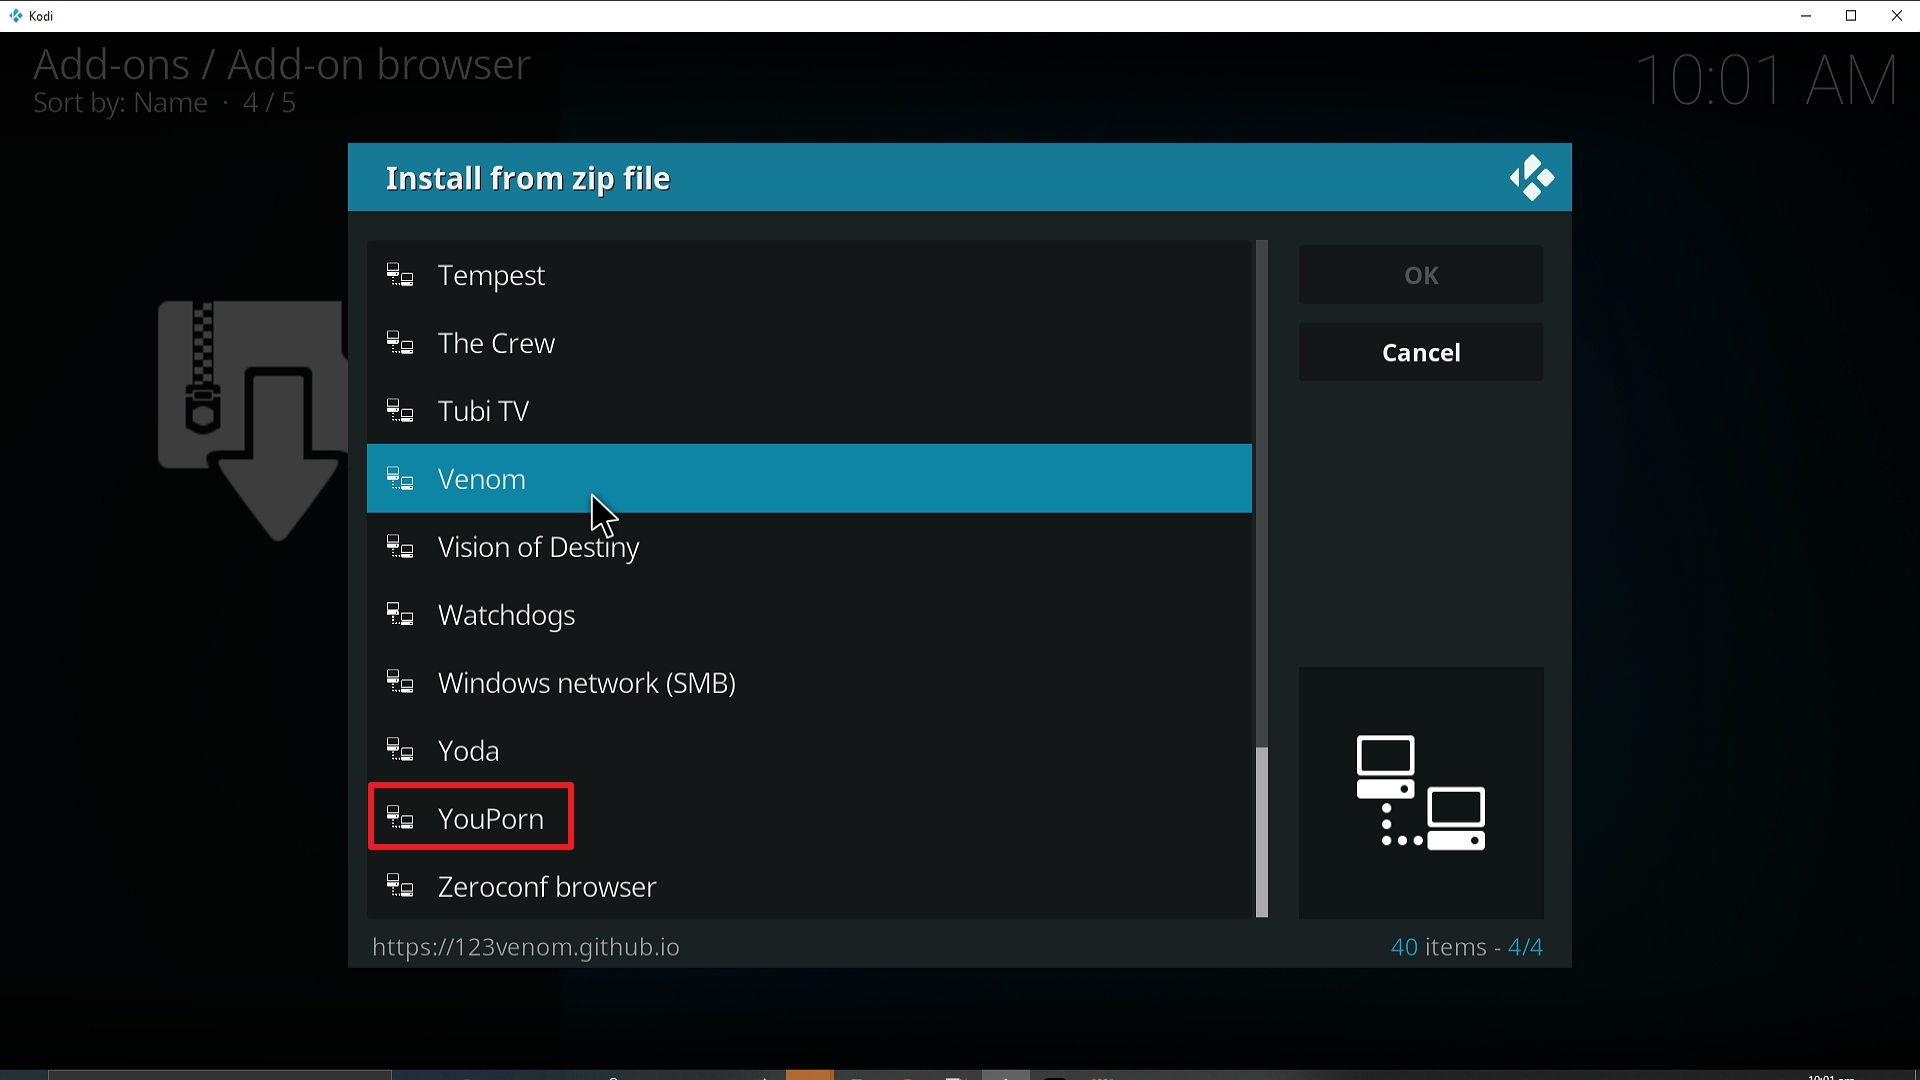
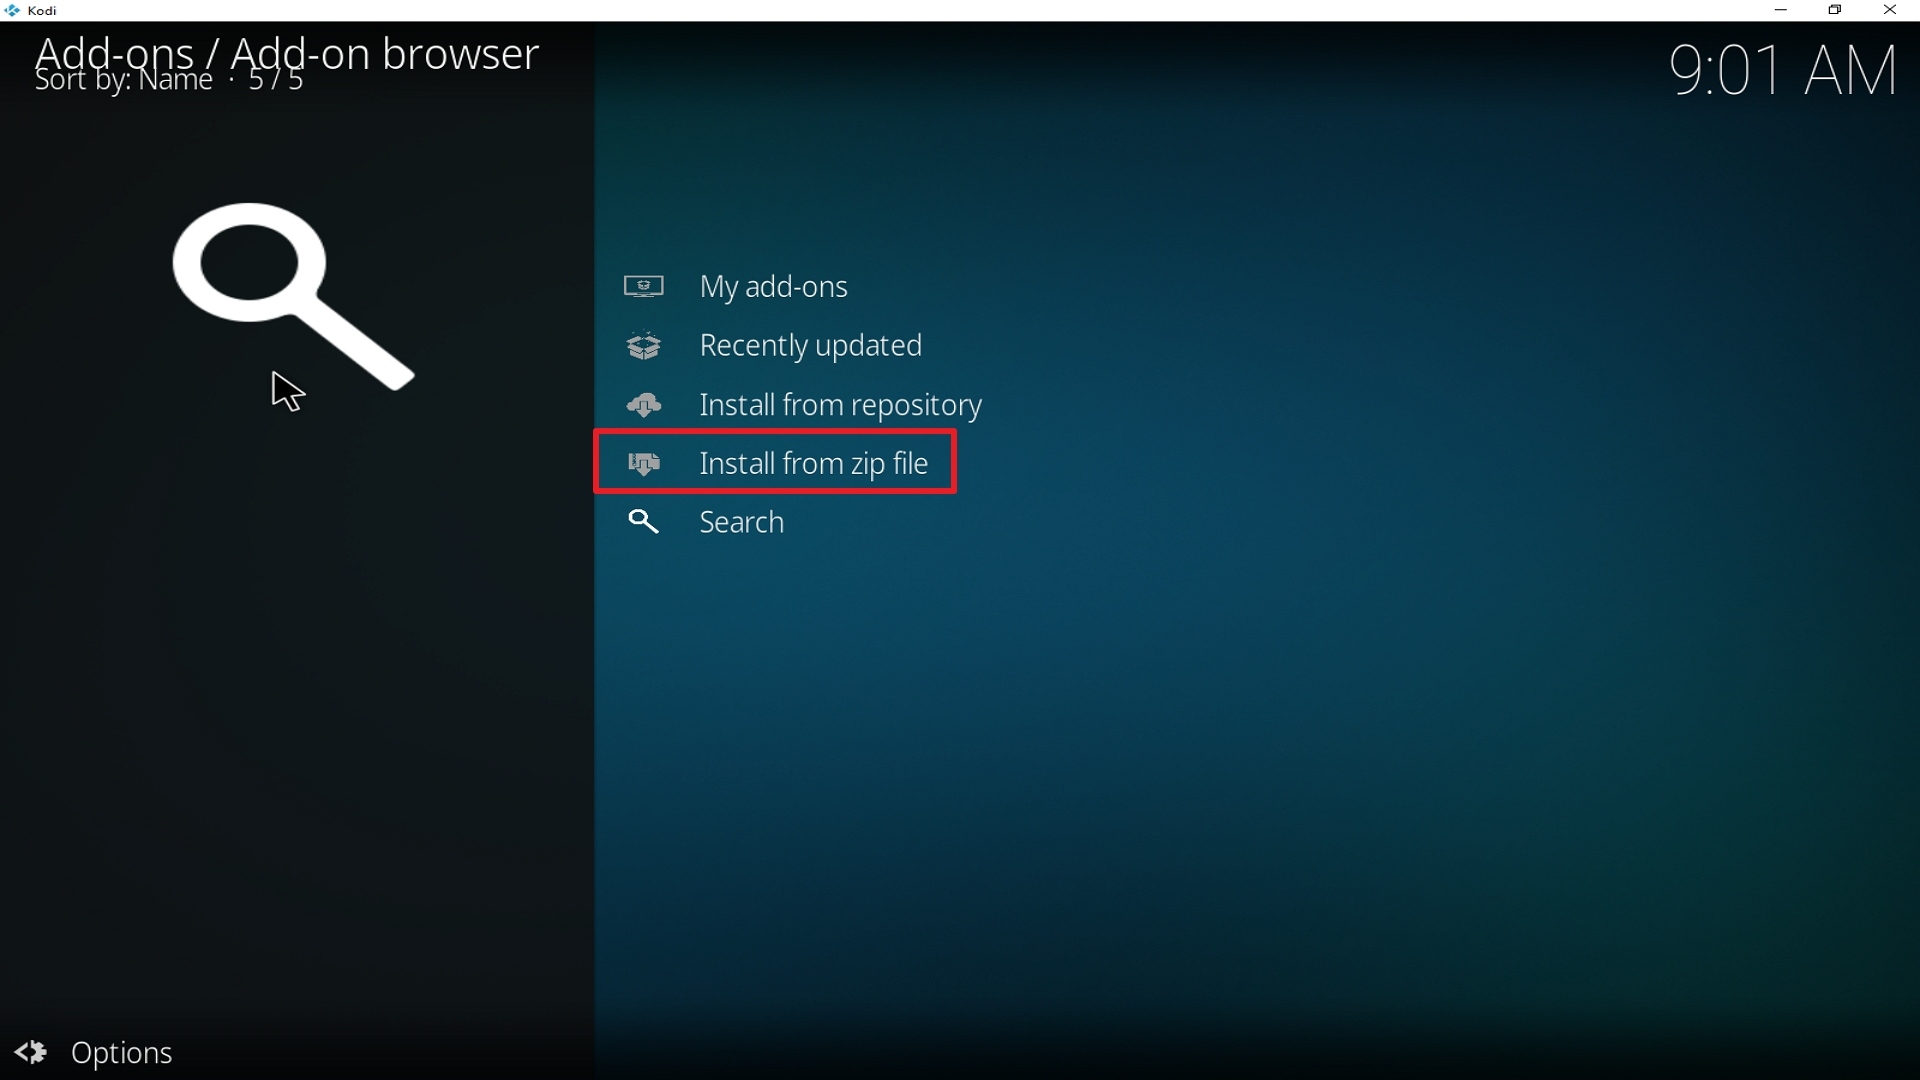
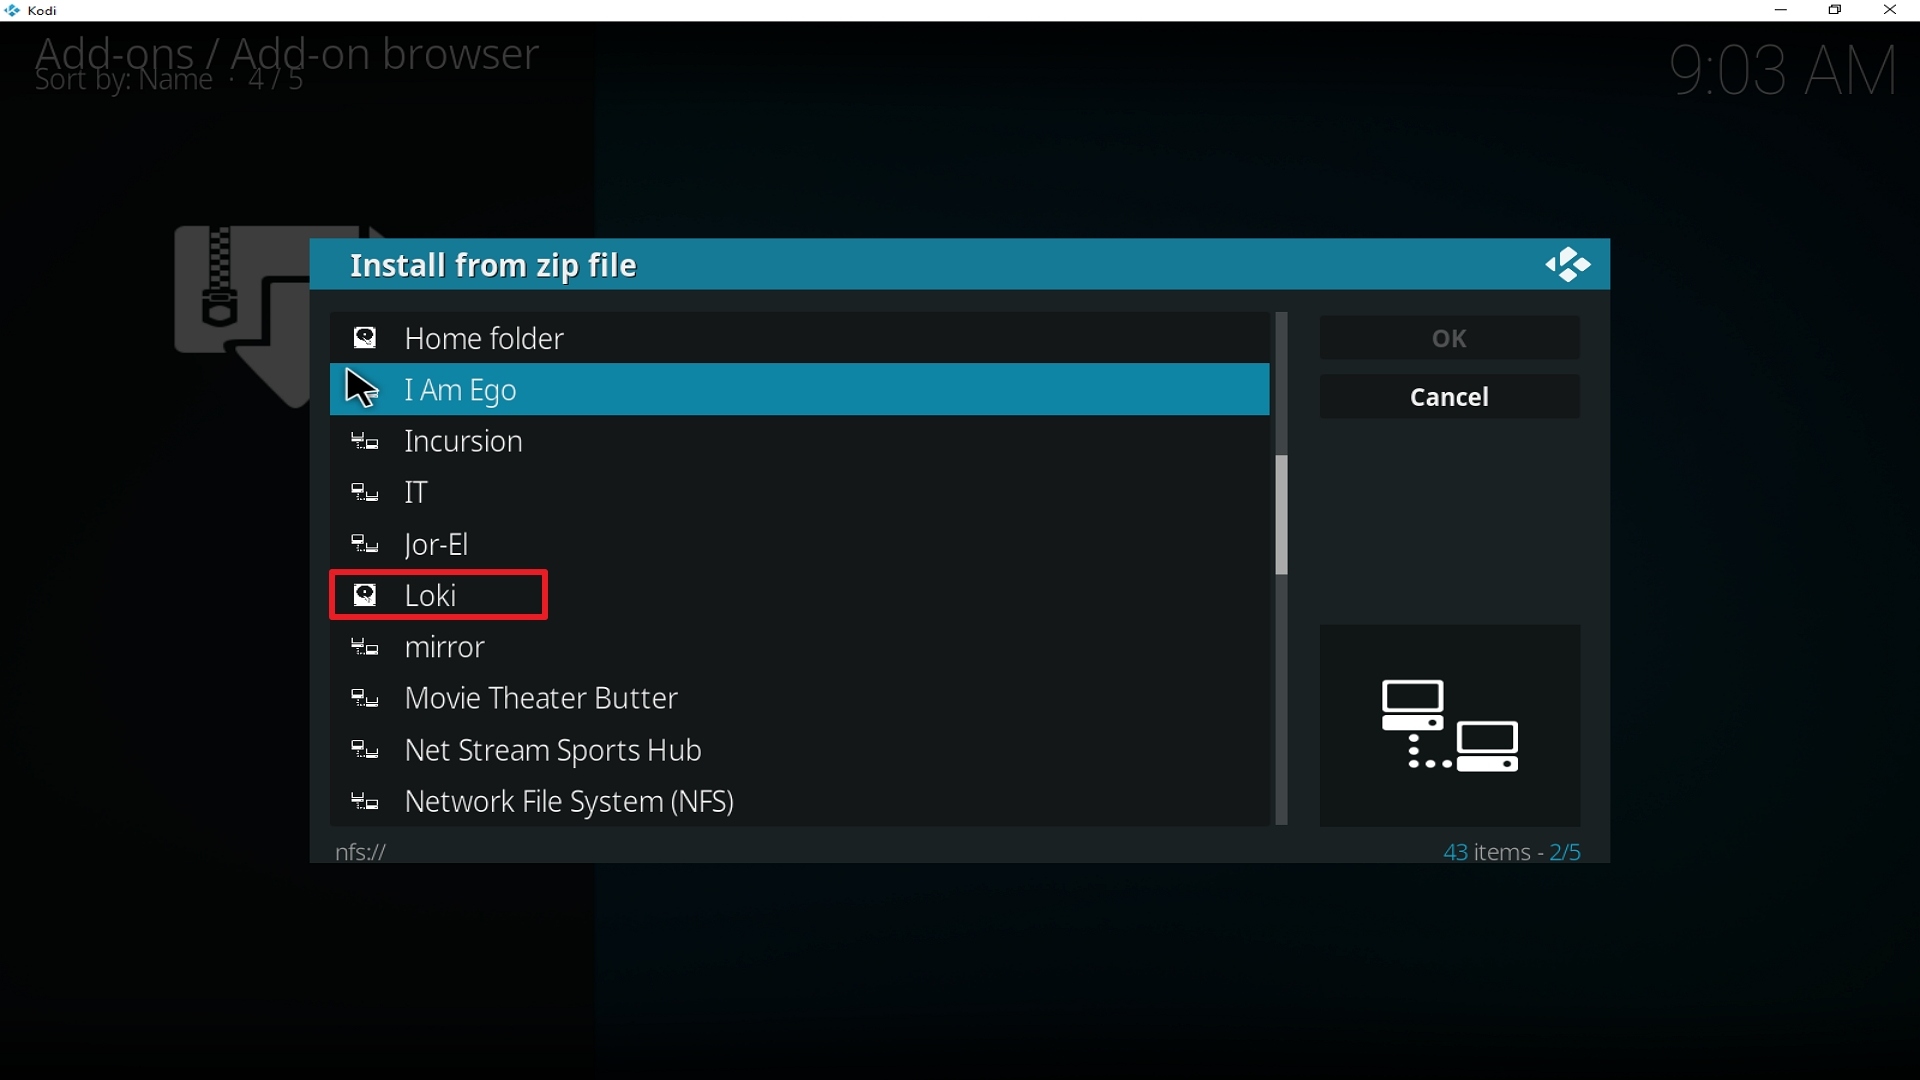
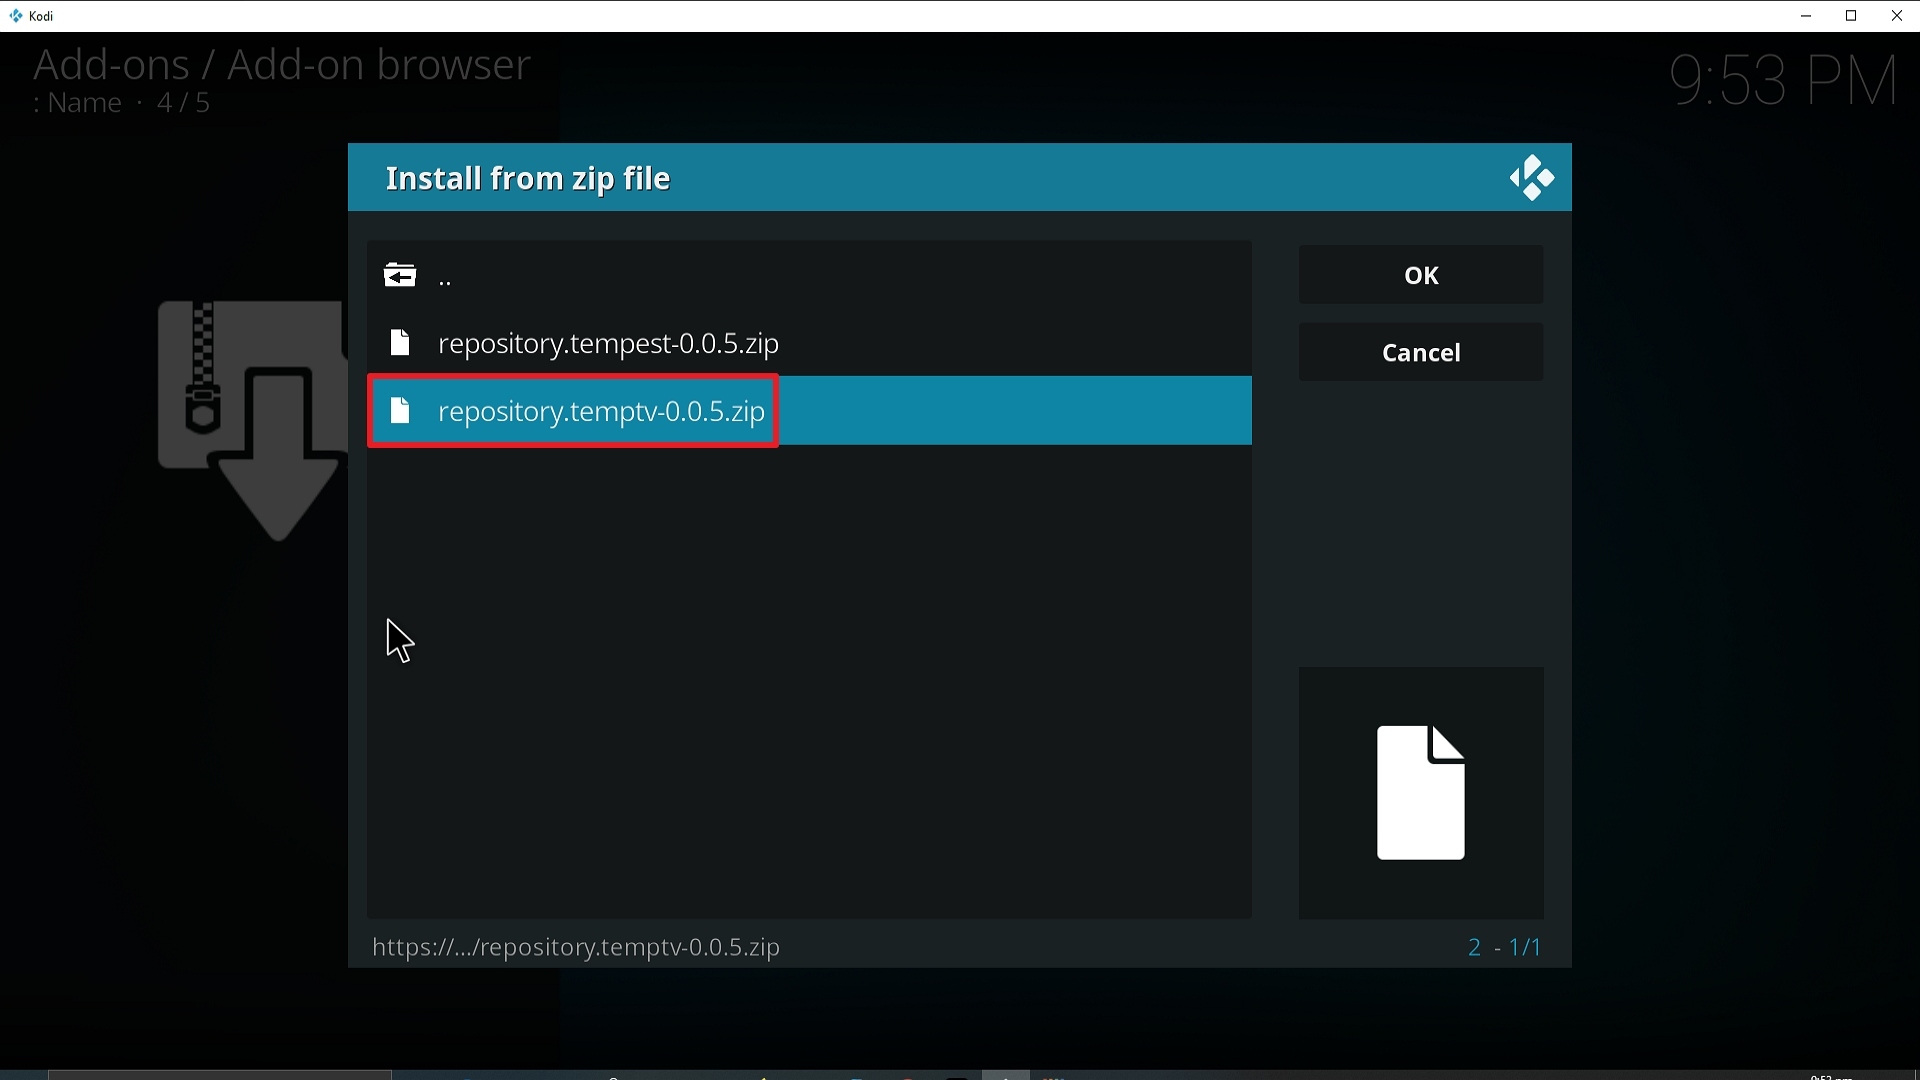
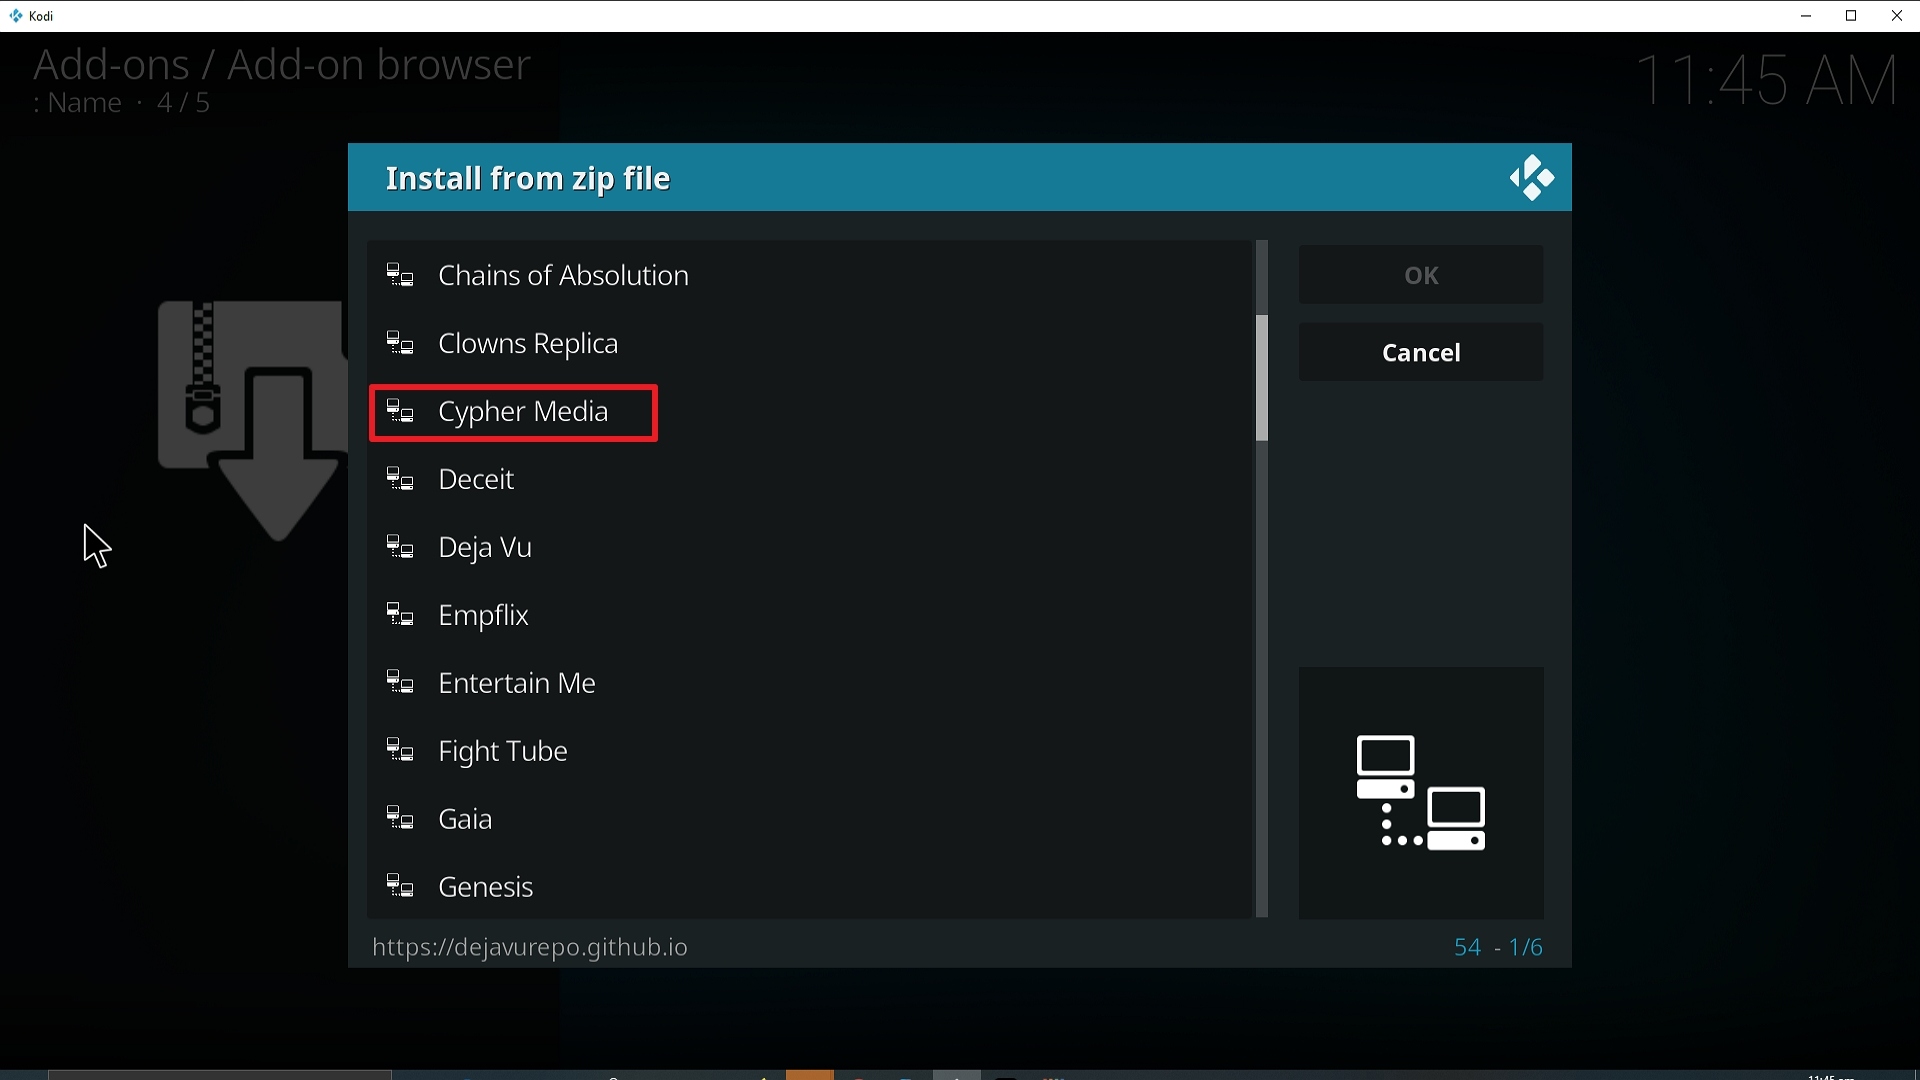
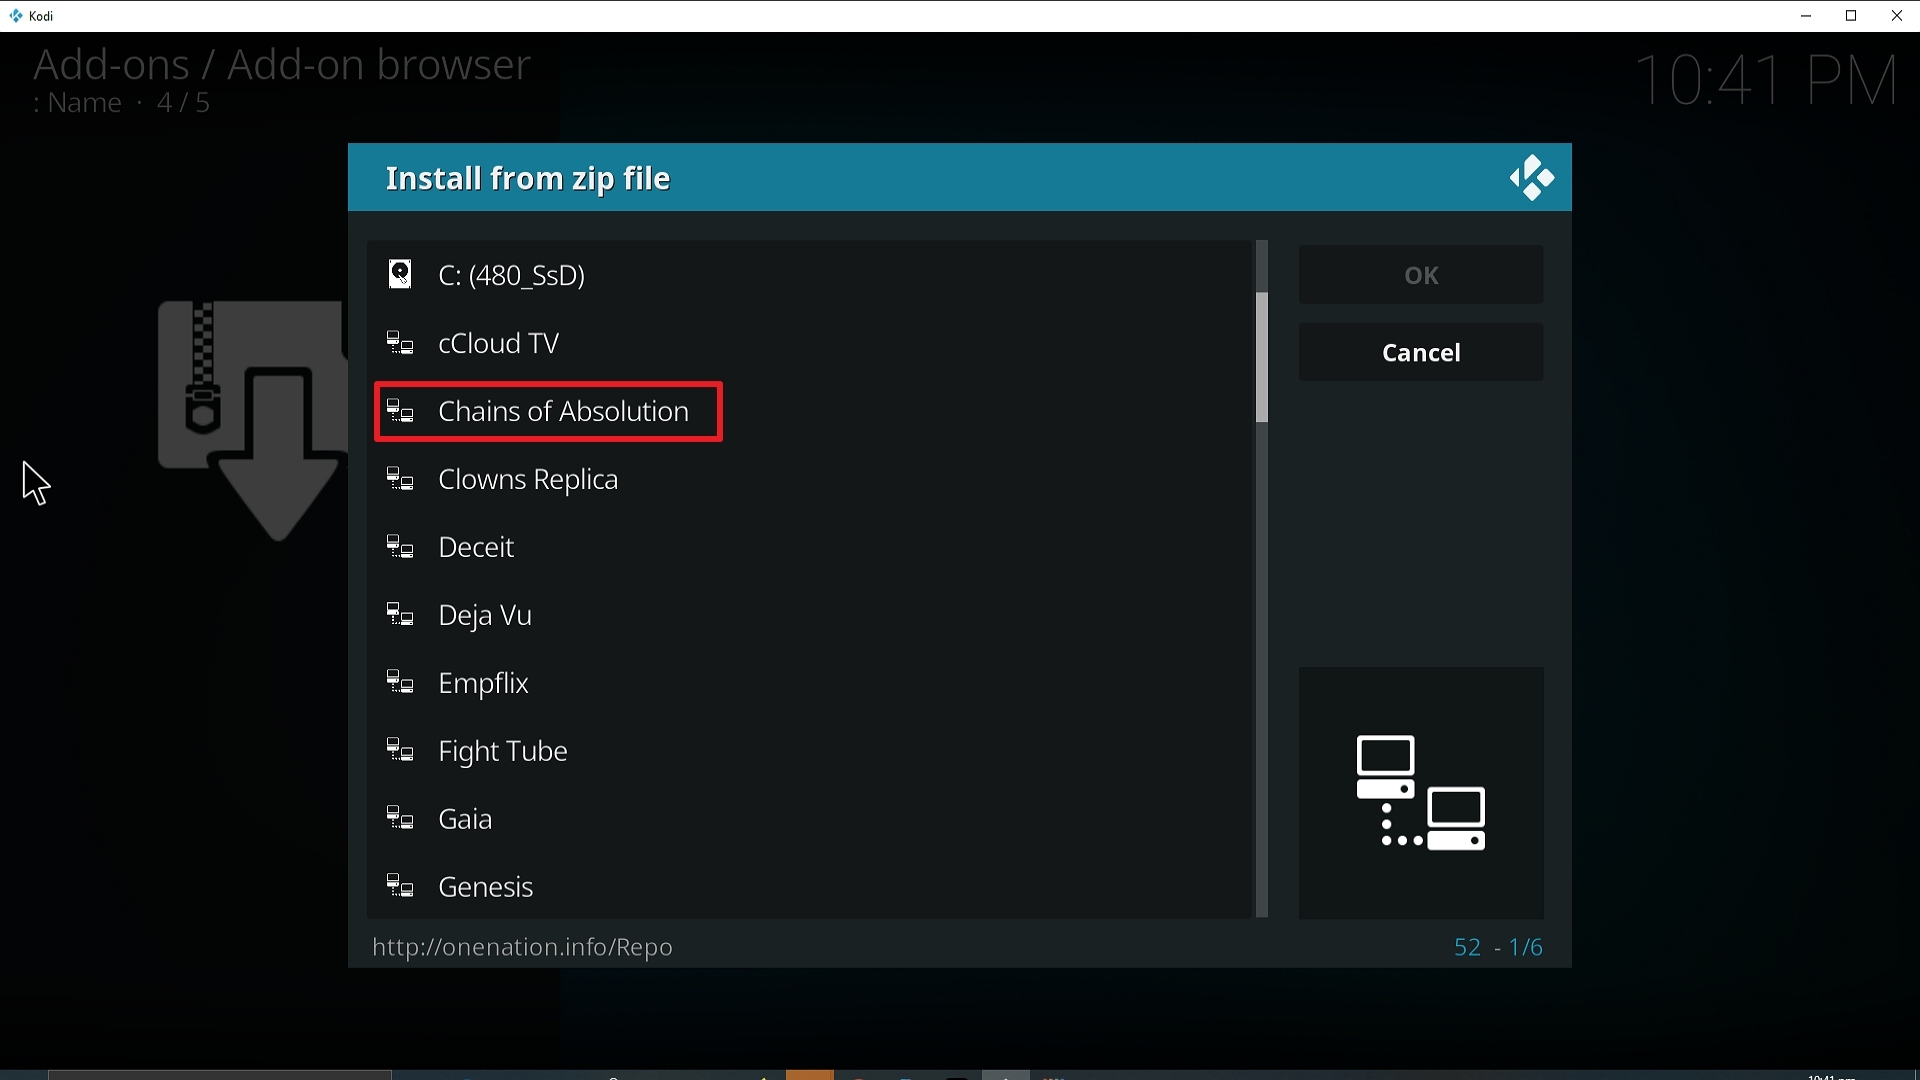
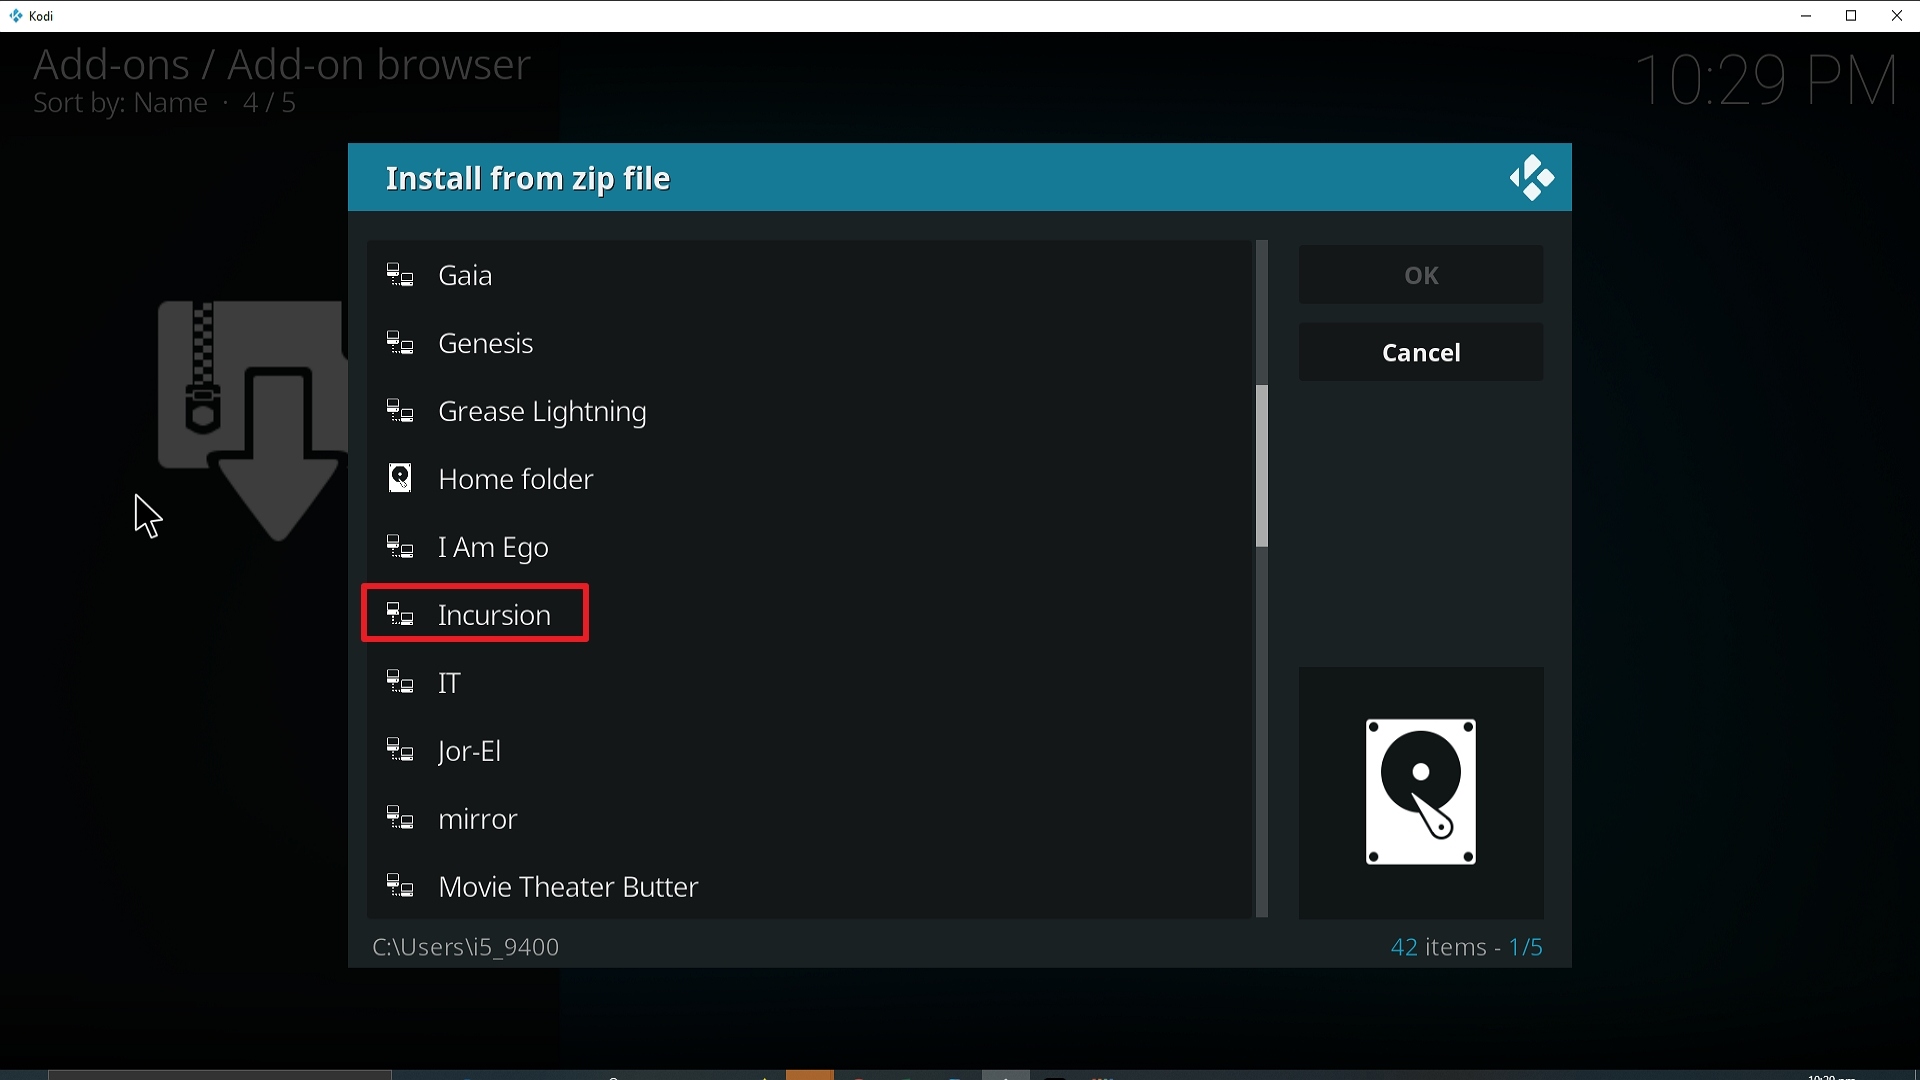
16. Select install from zip file.
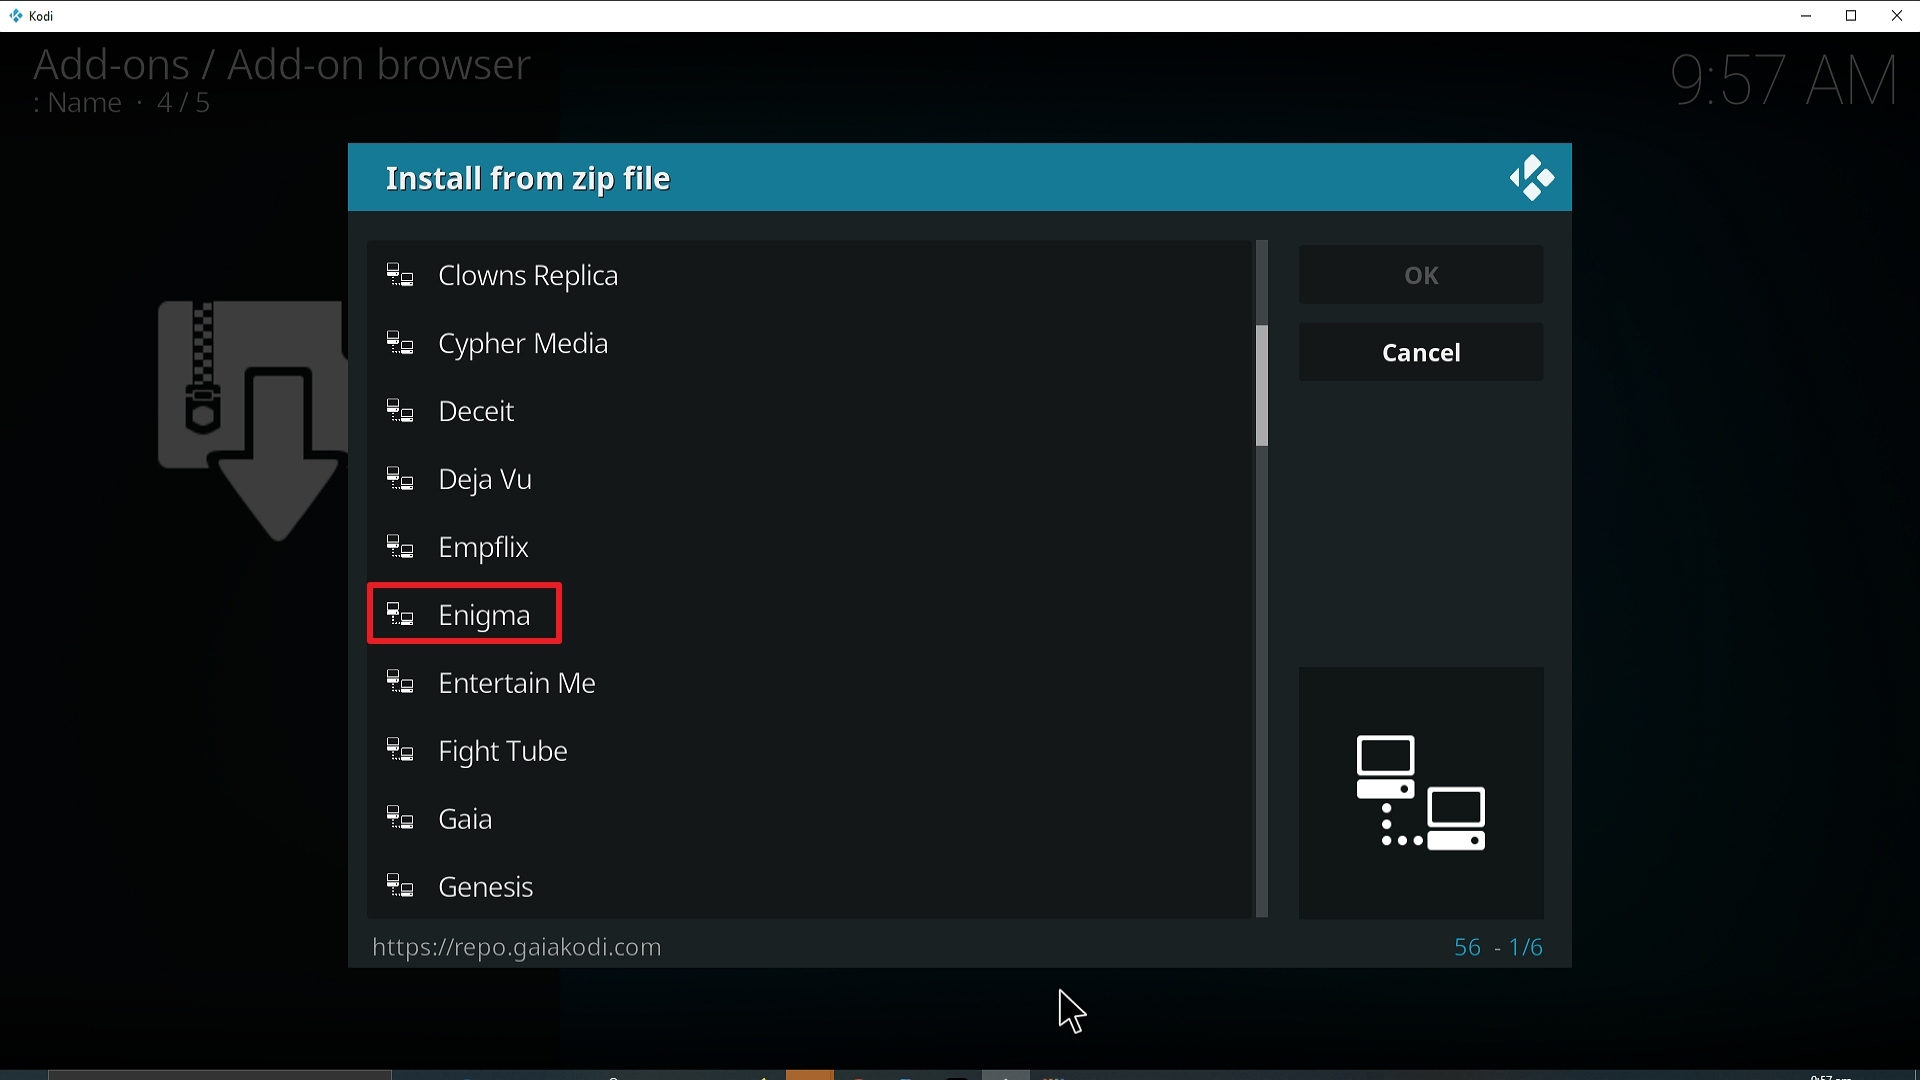
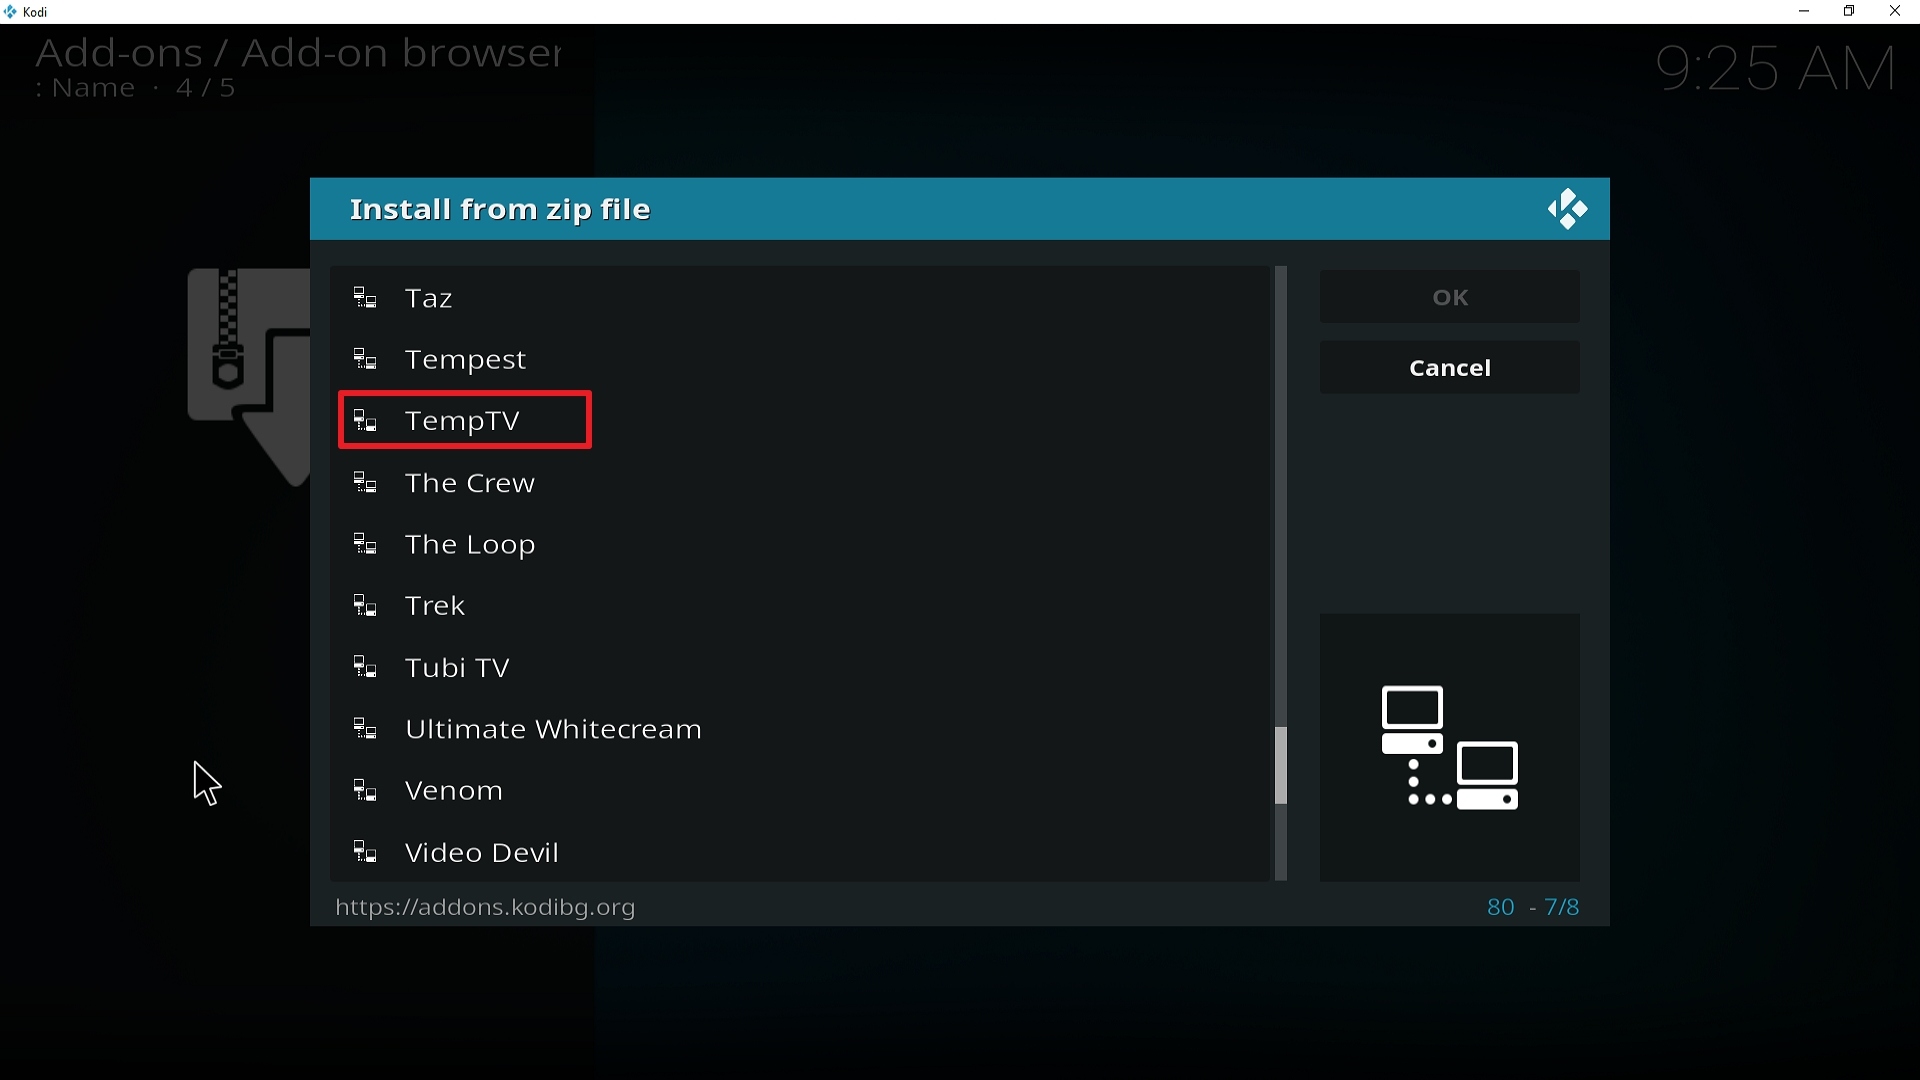
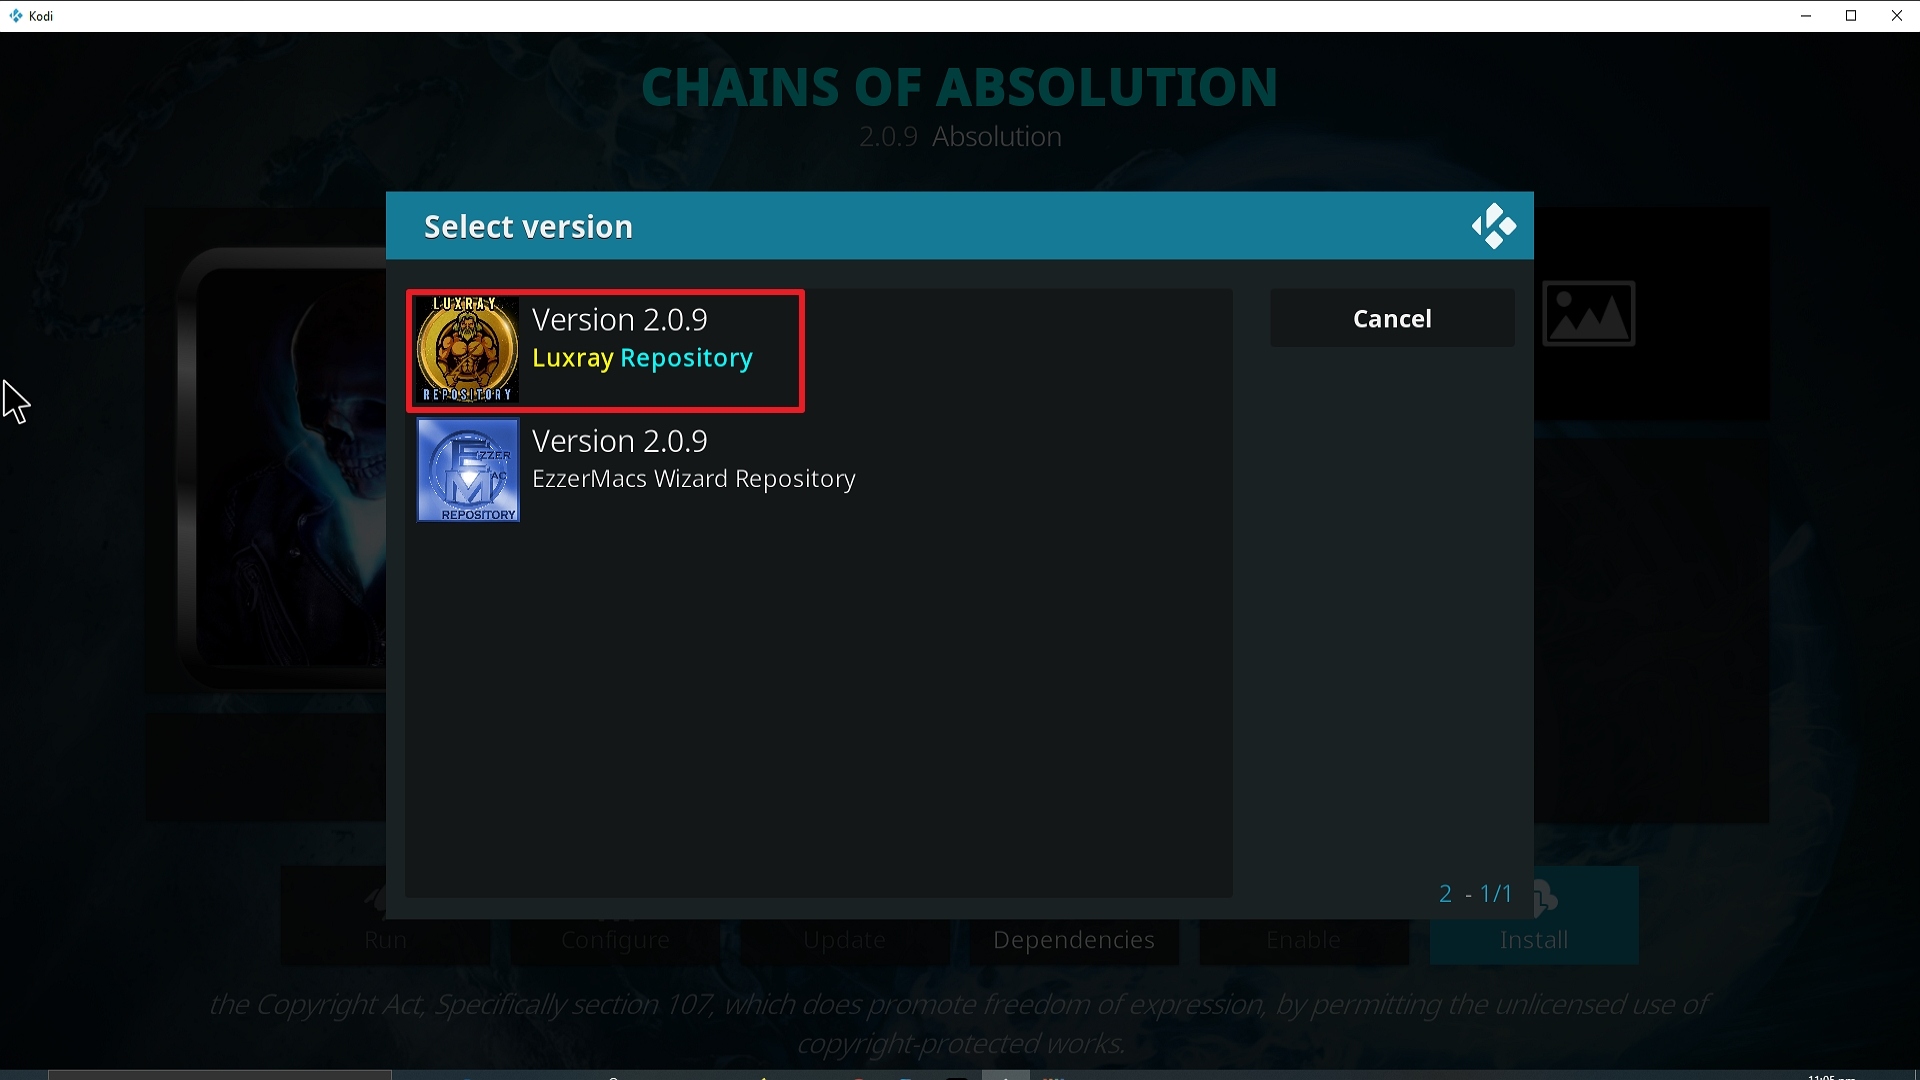
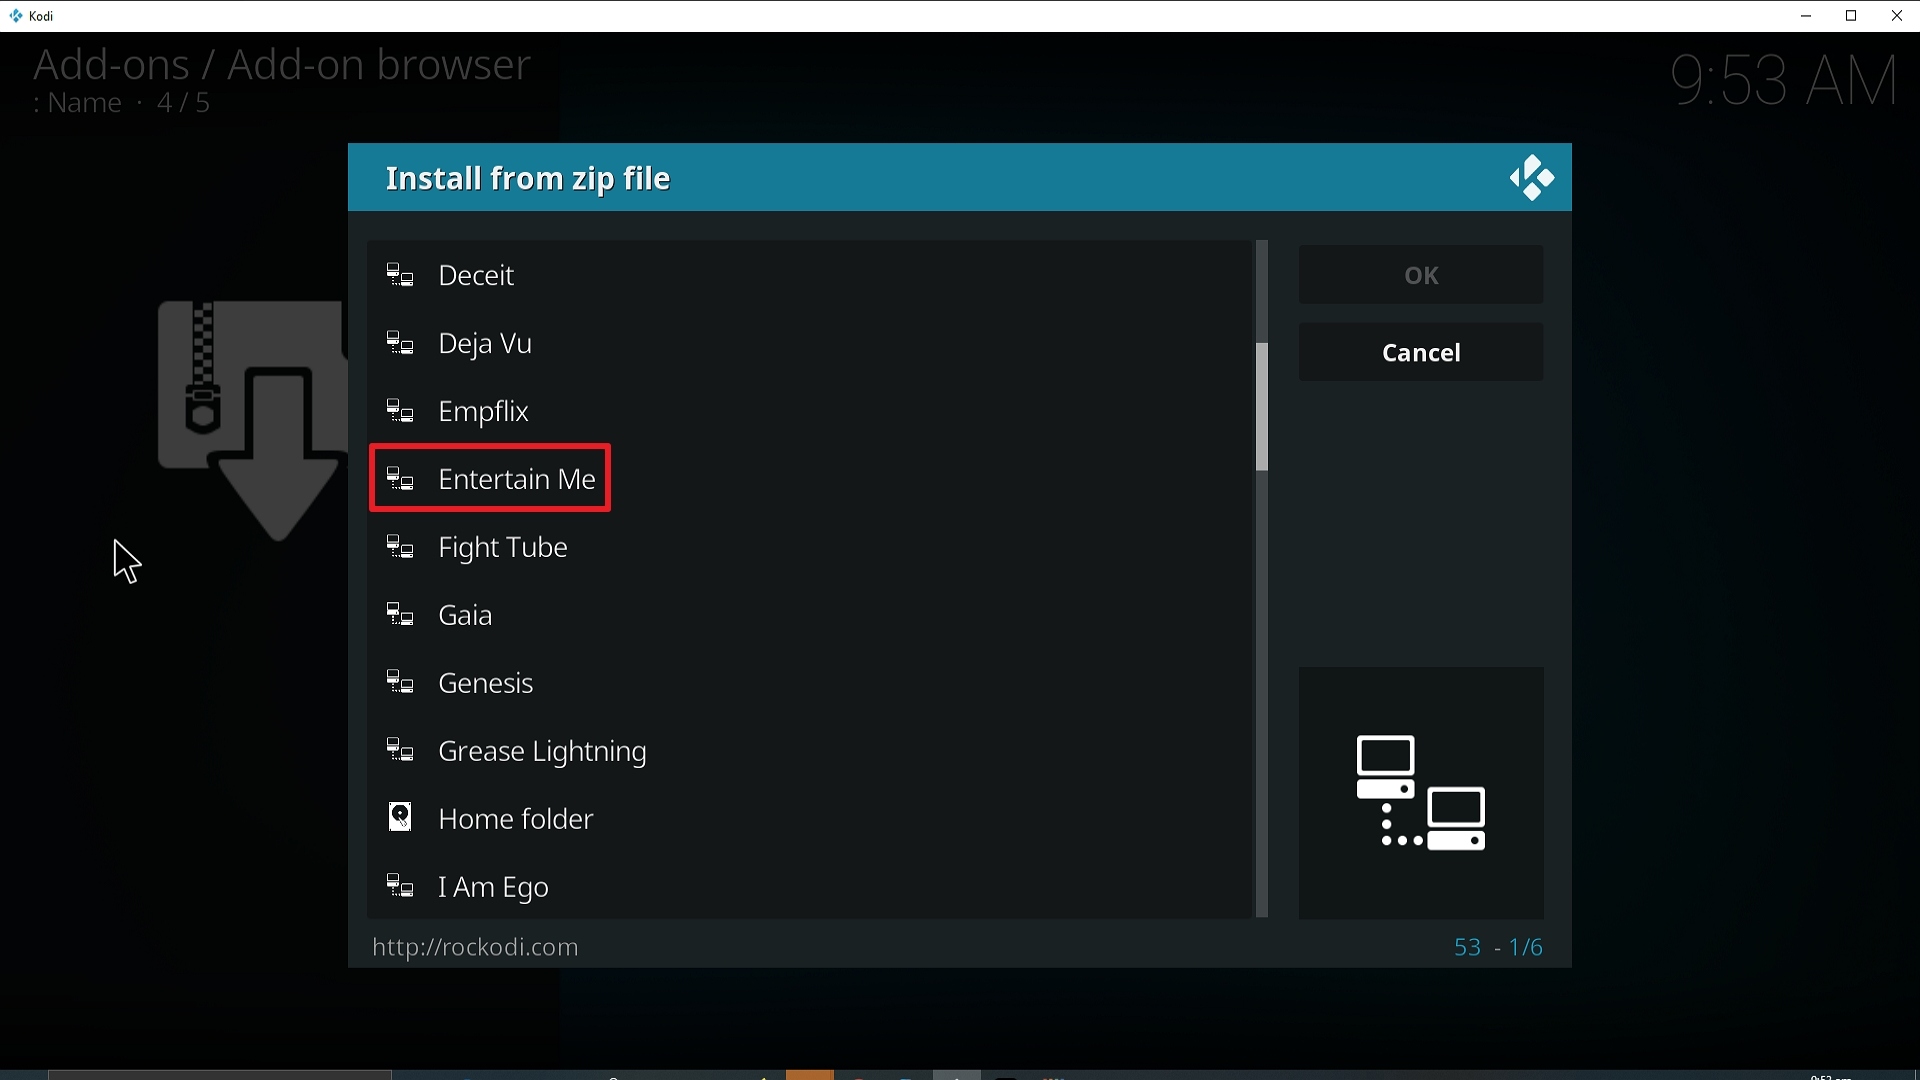
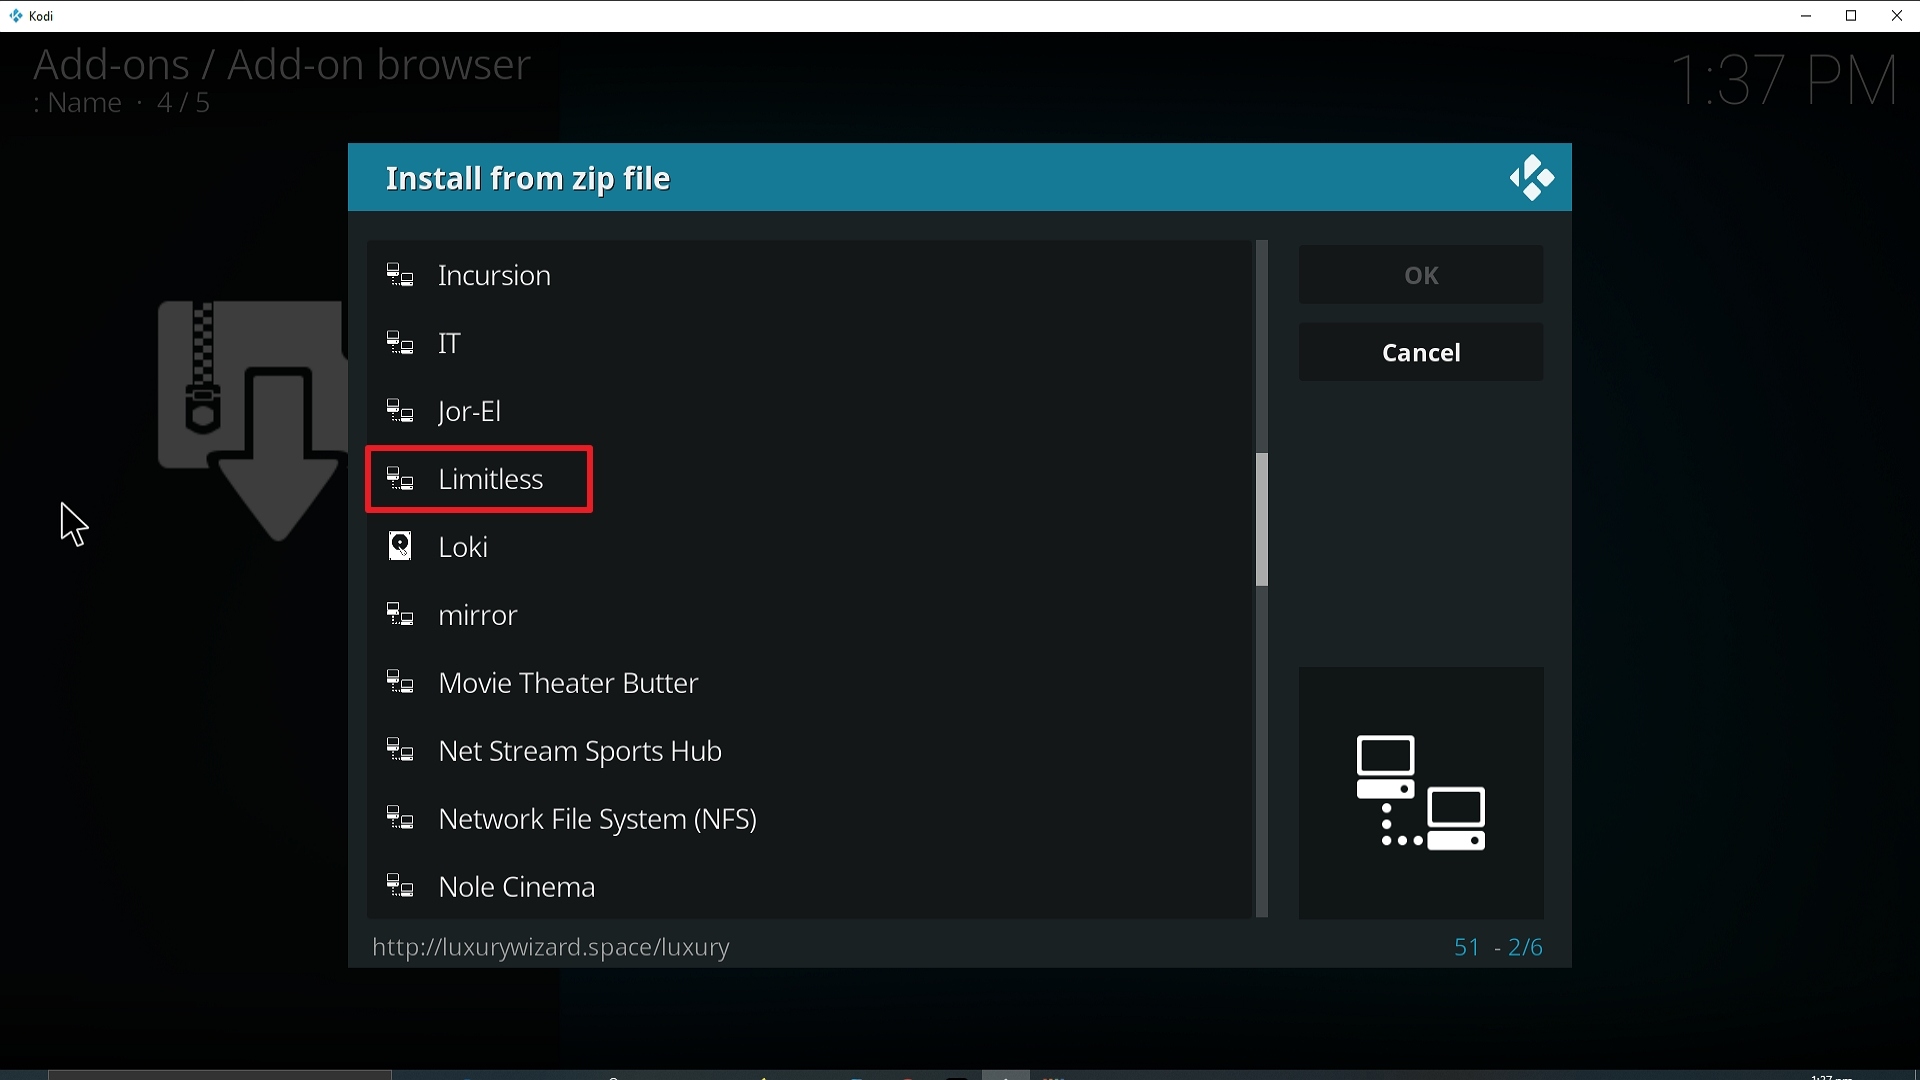
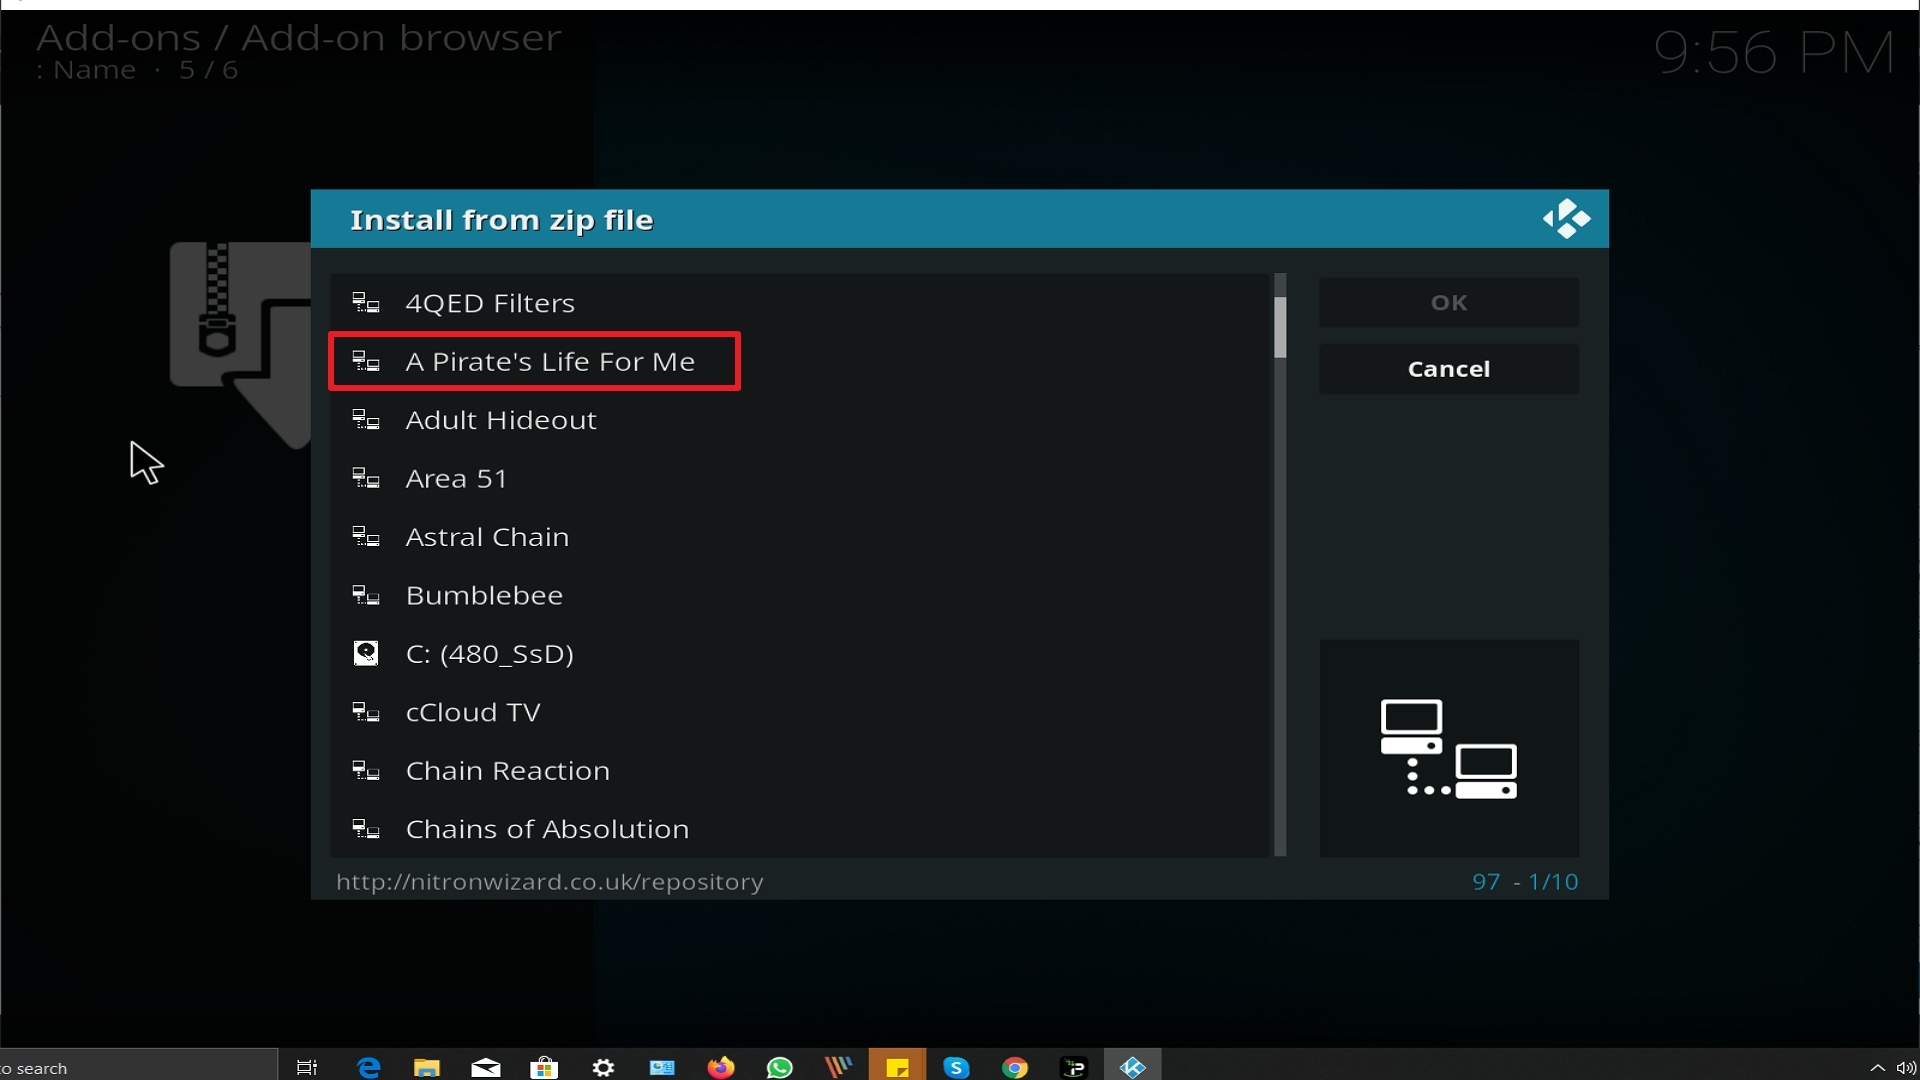
17. Click on A Pirate’s Life For Me (or whatever you named the source).
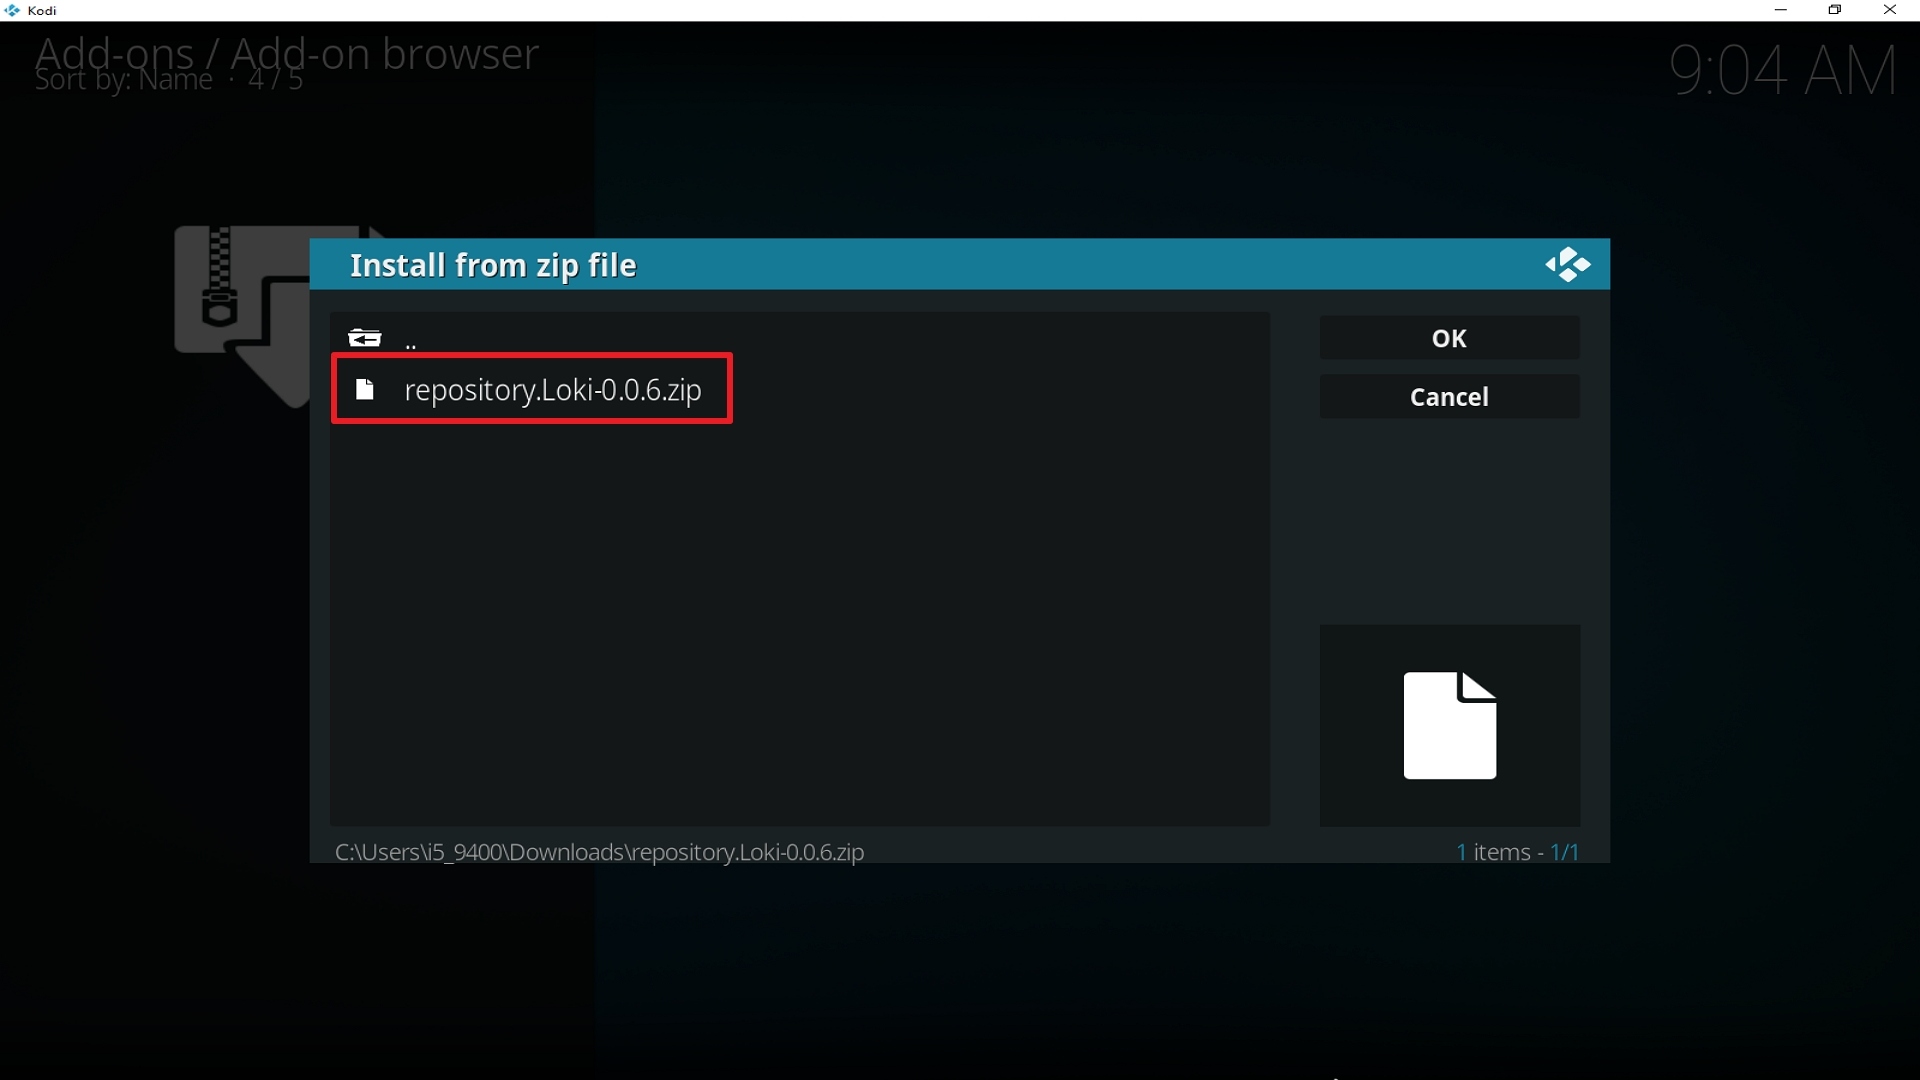
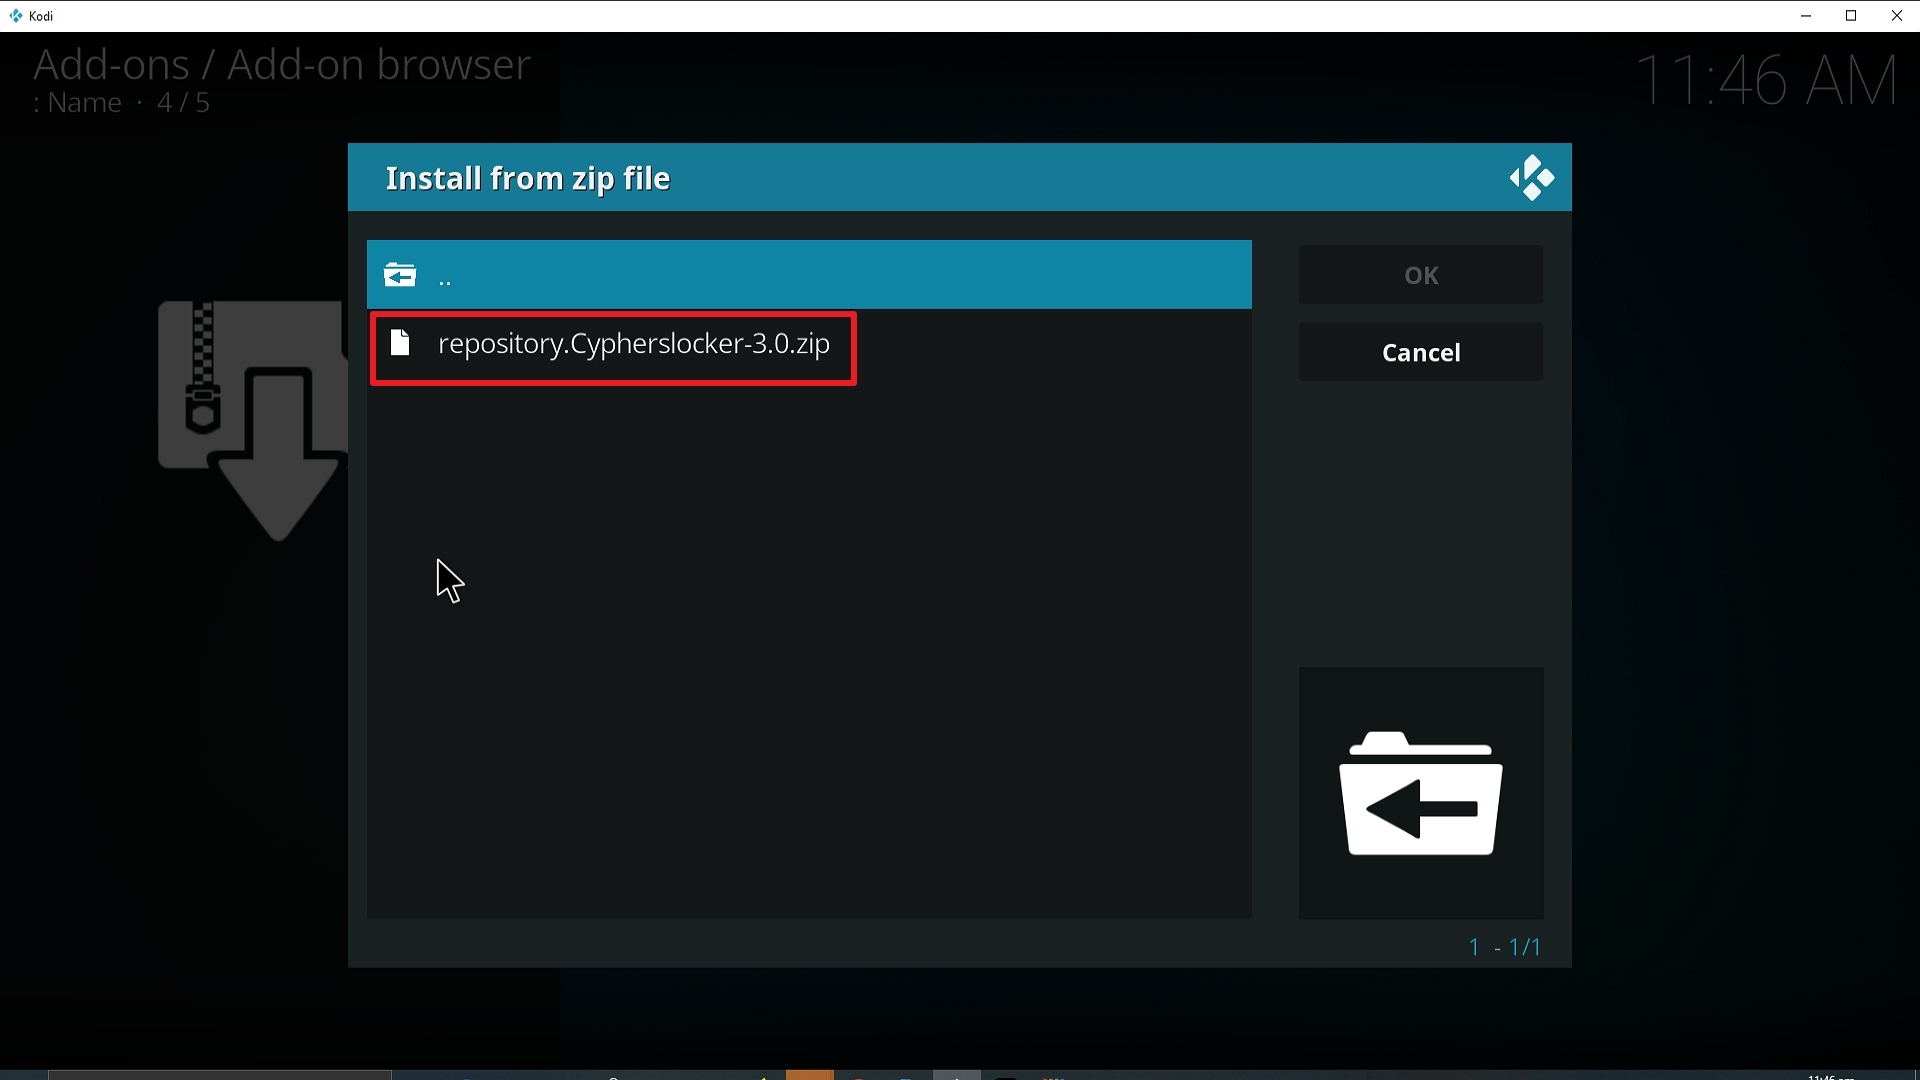
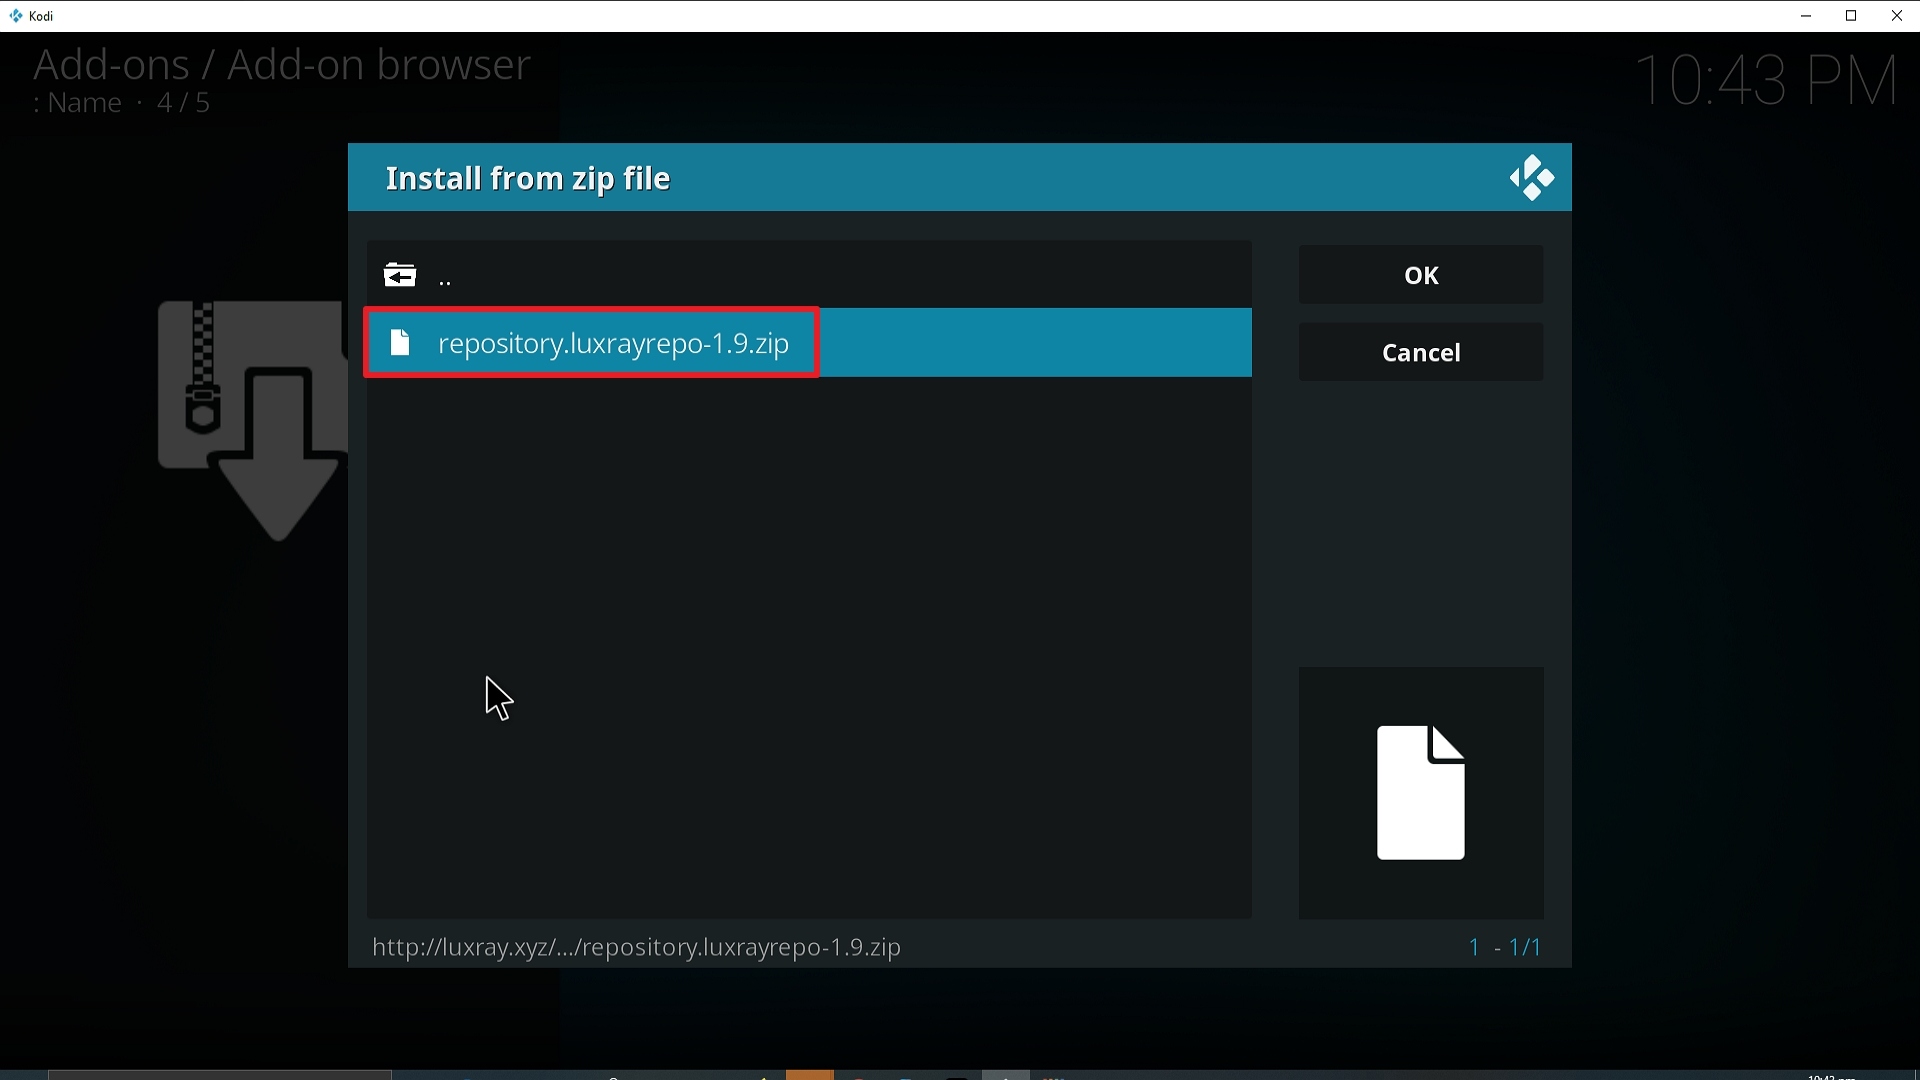
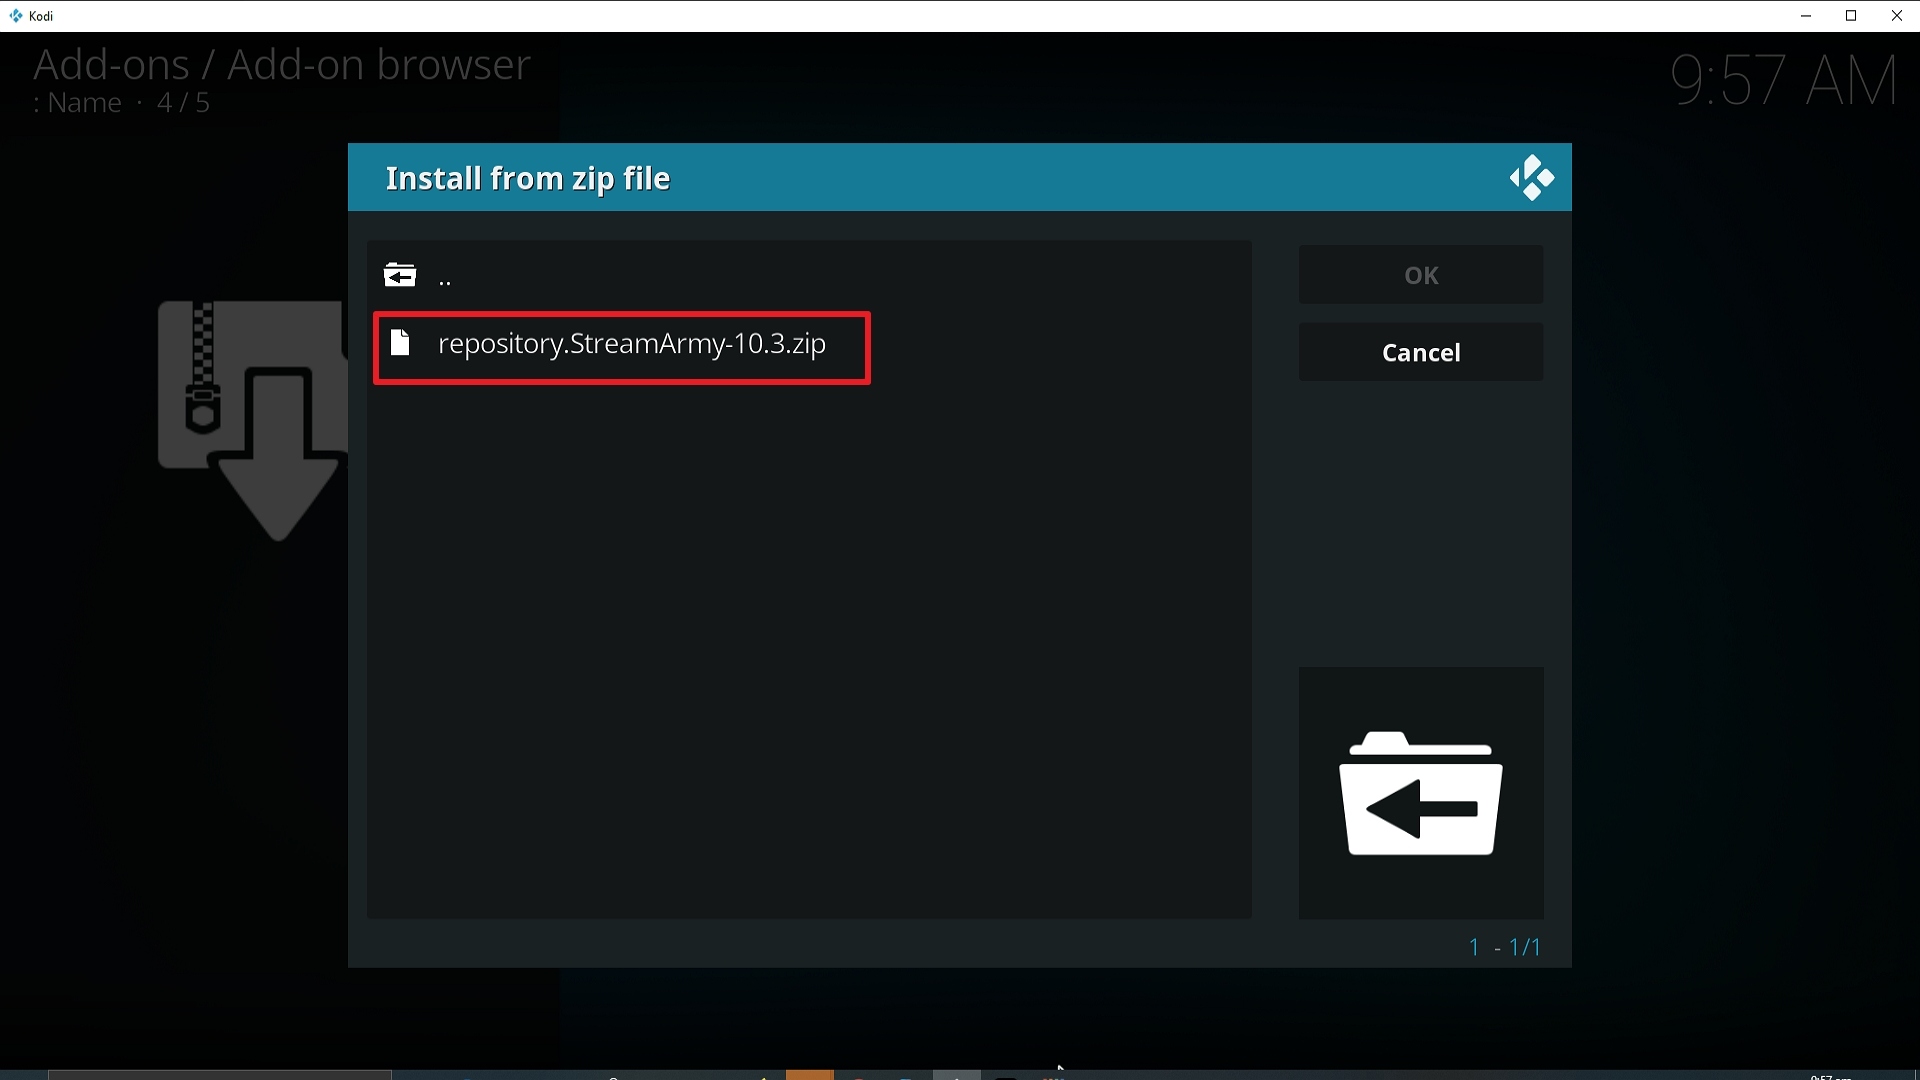
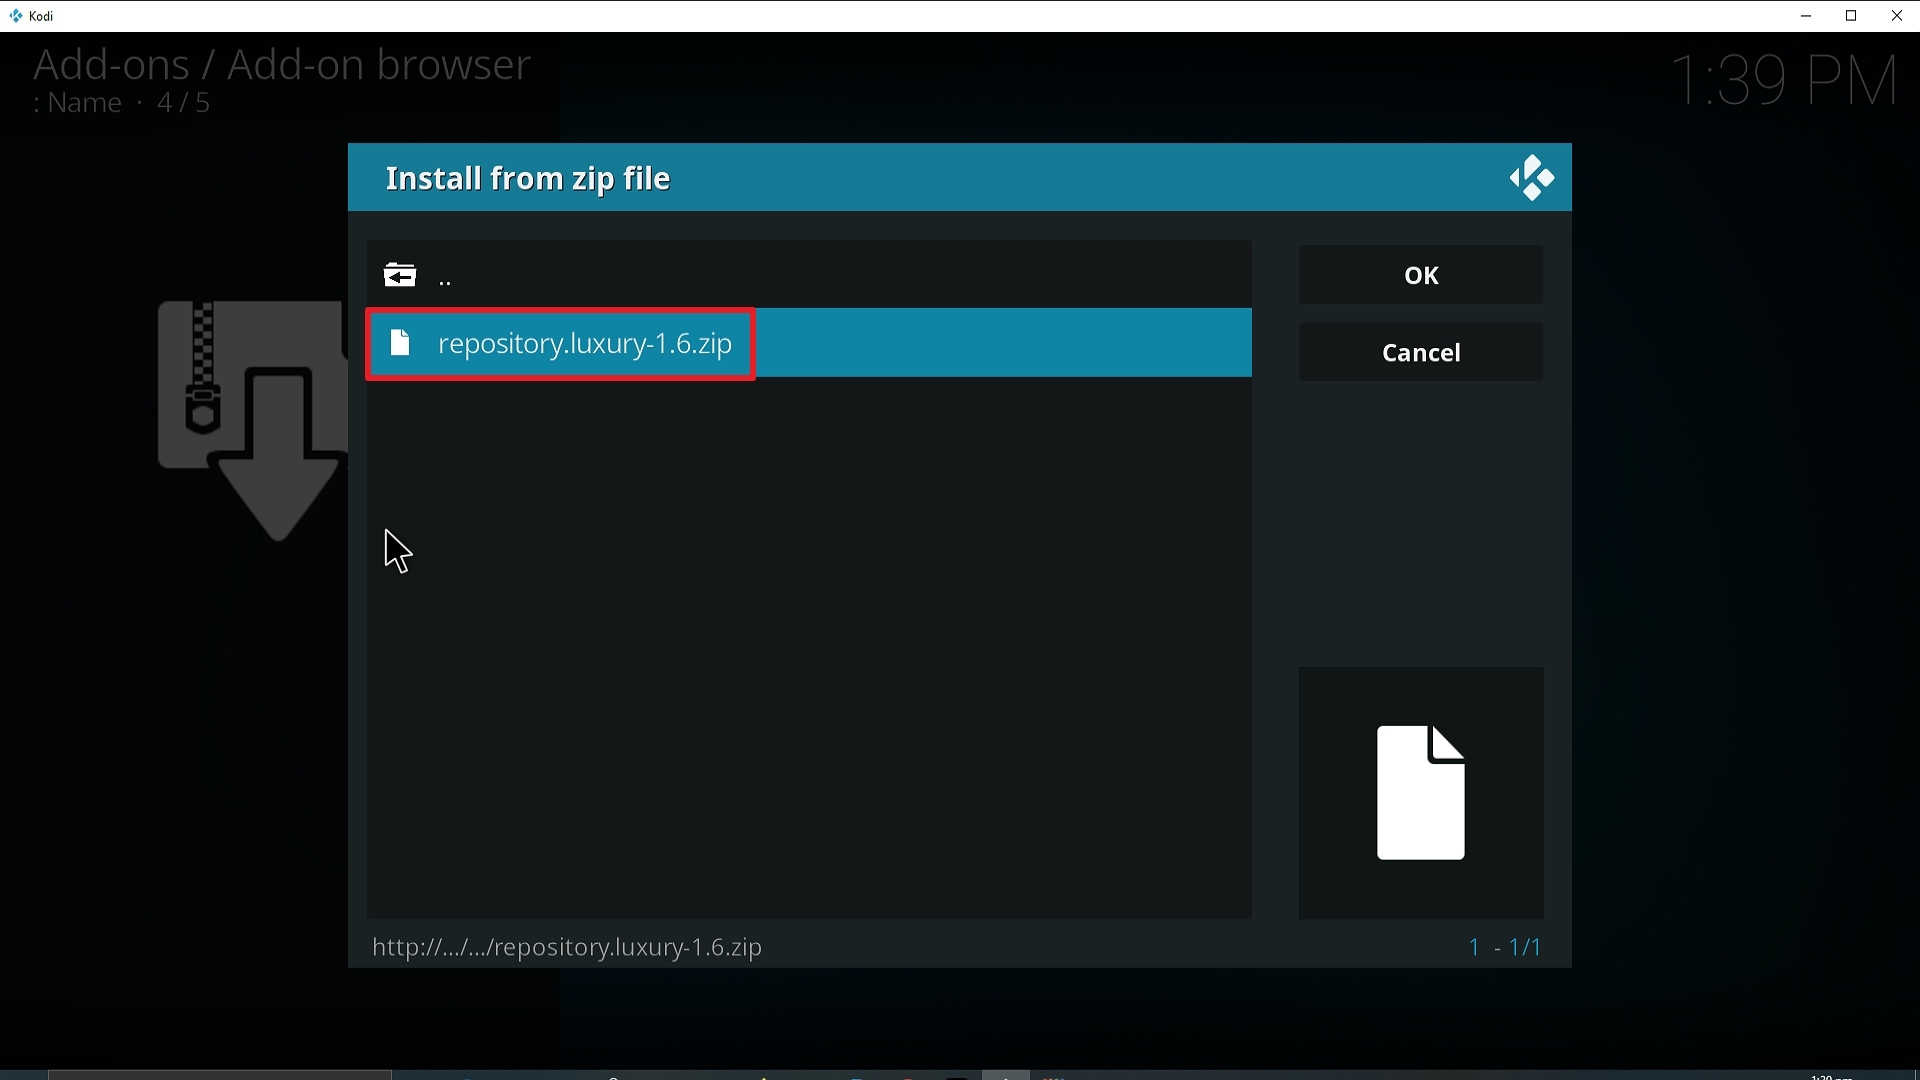
18. Click on repository.Diamond-Wizard-Repo-3.9.6.zip
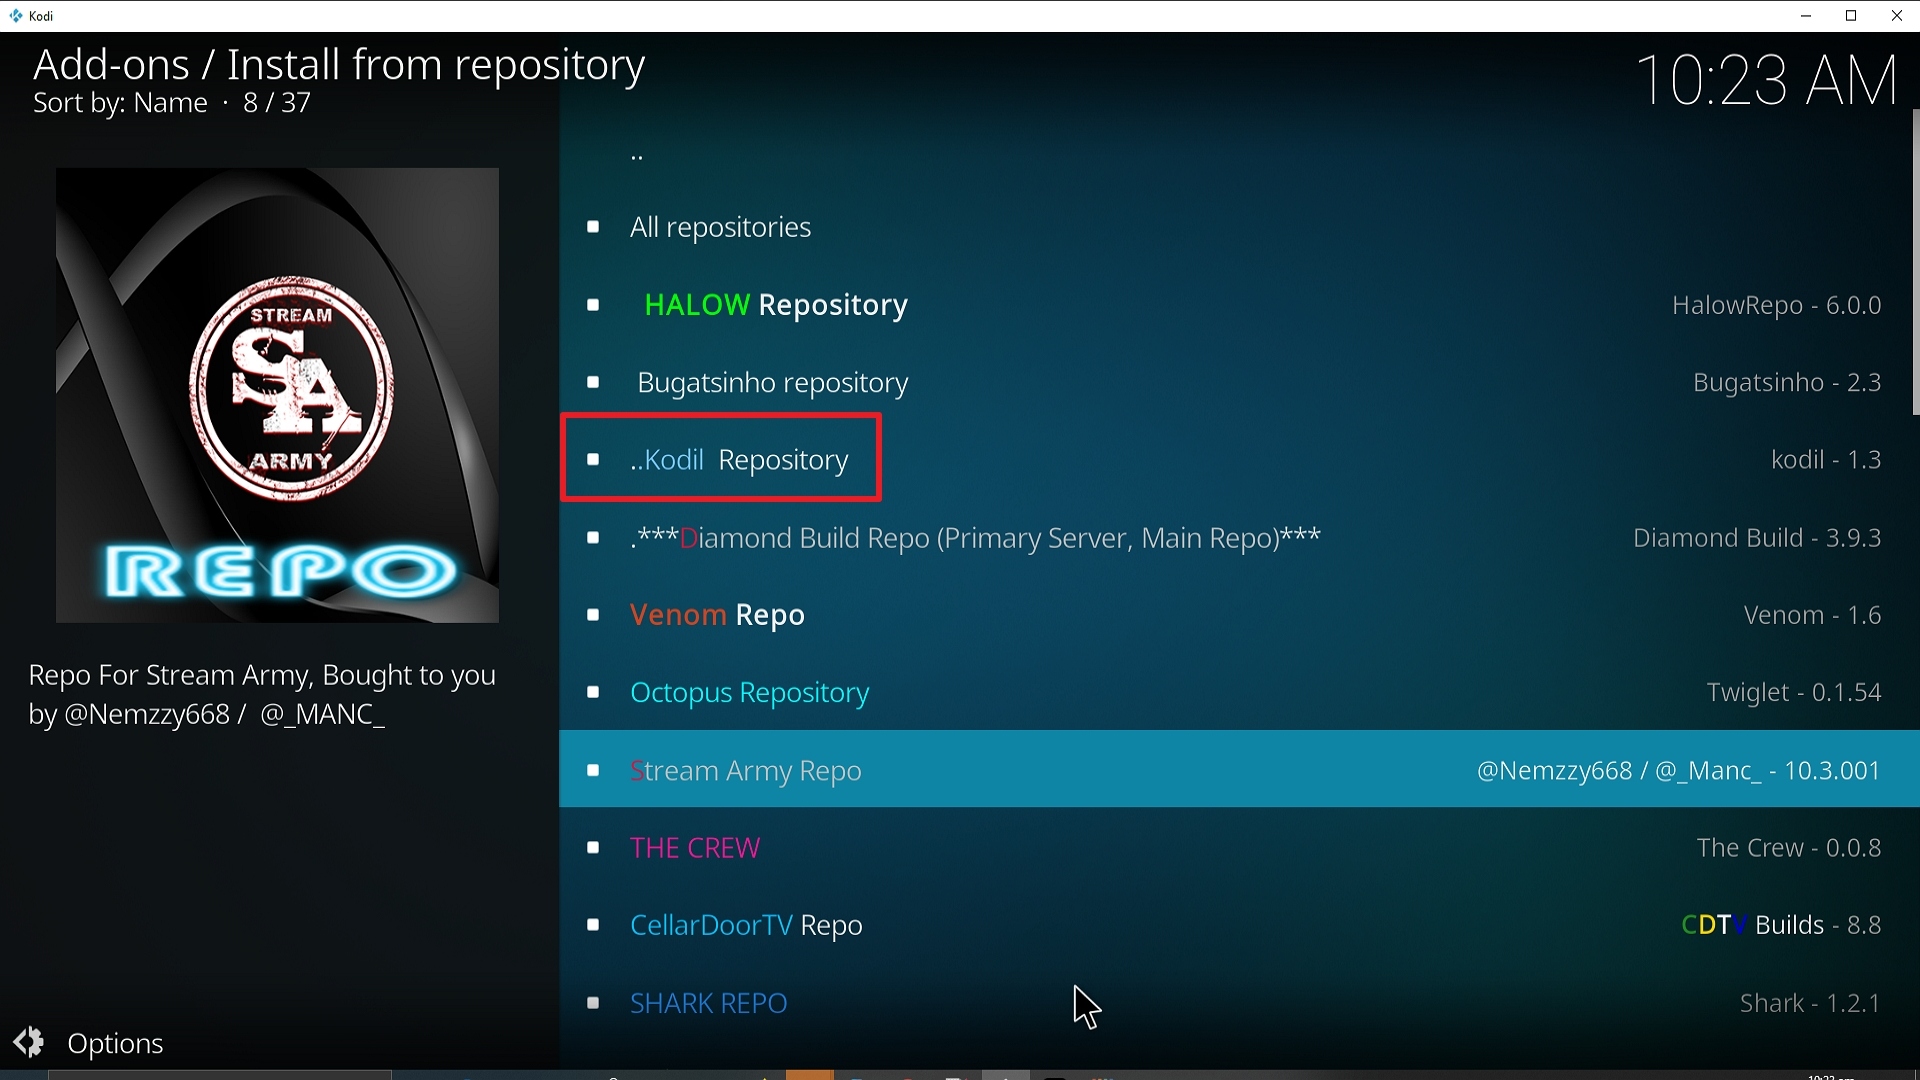
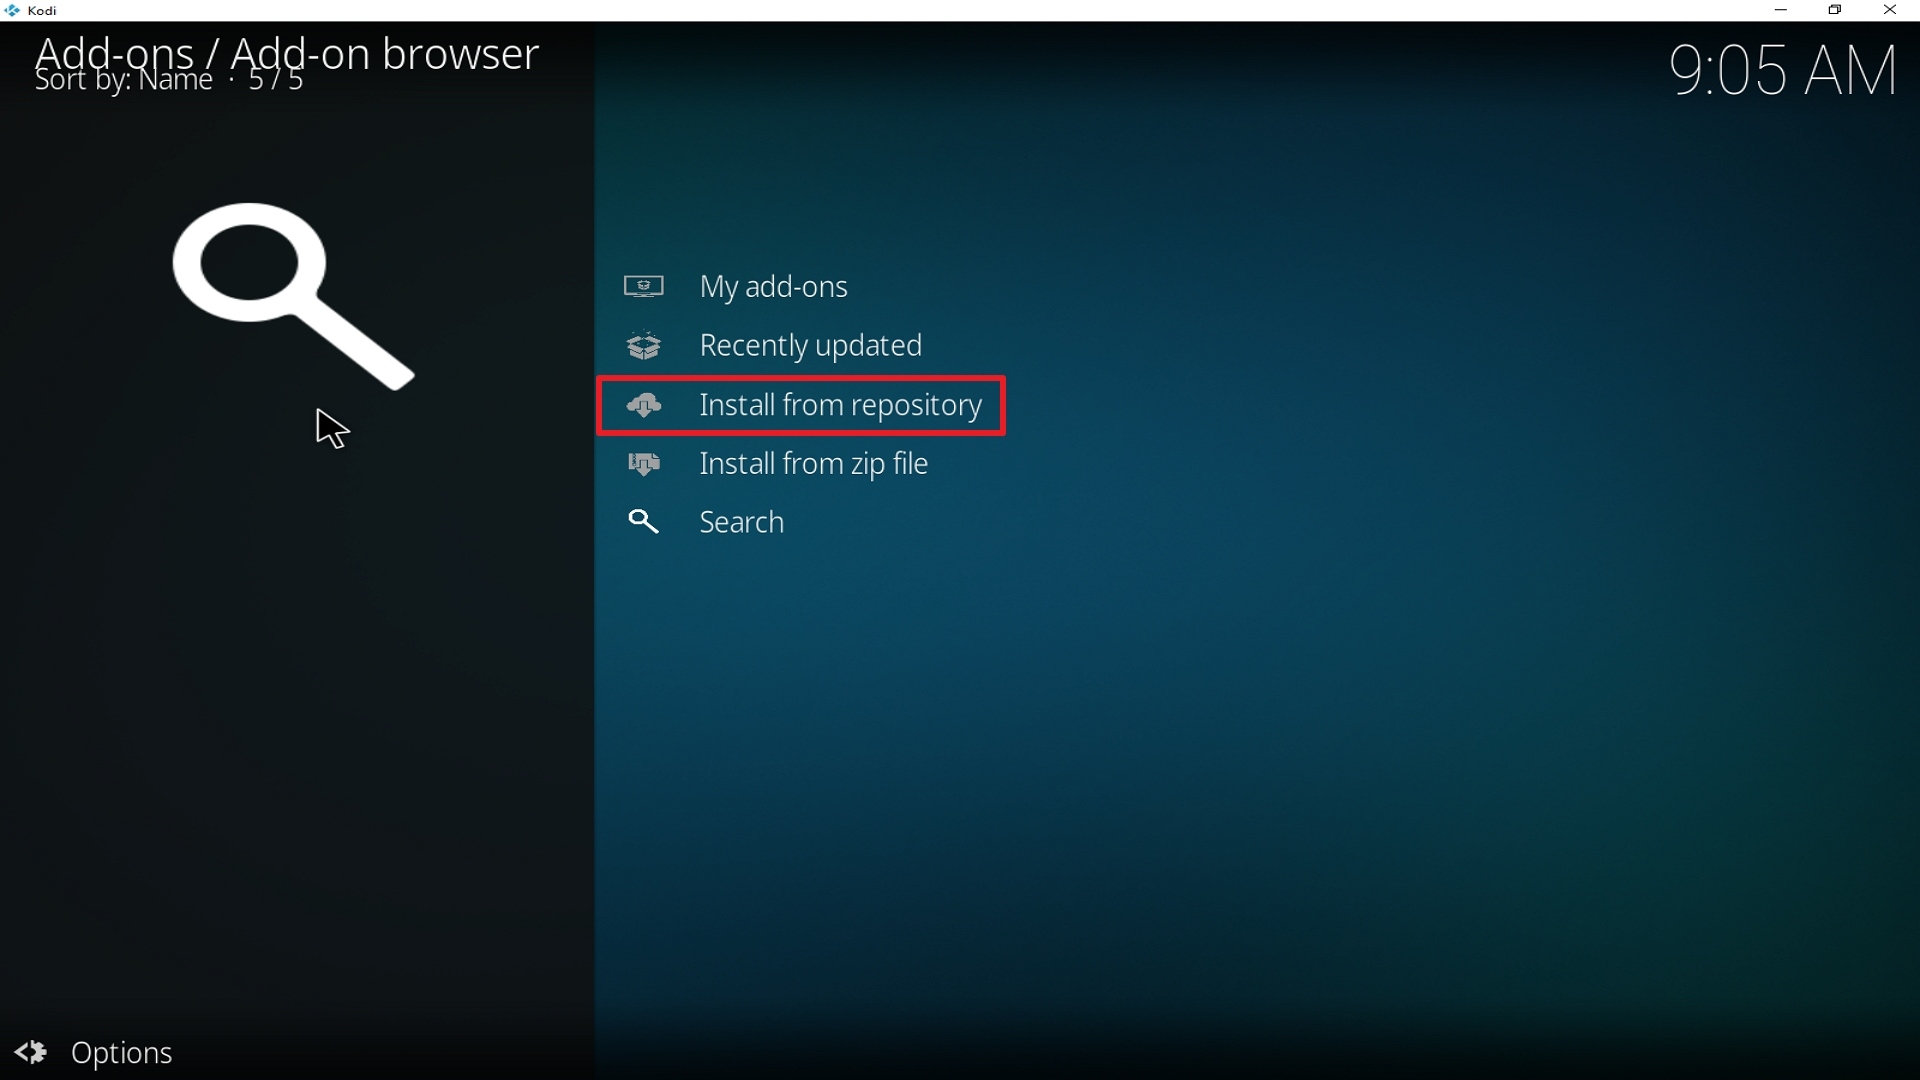
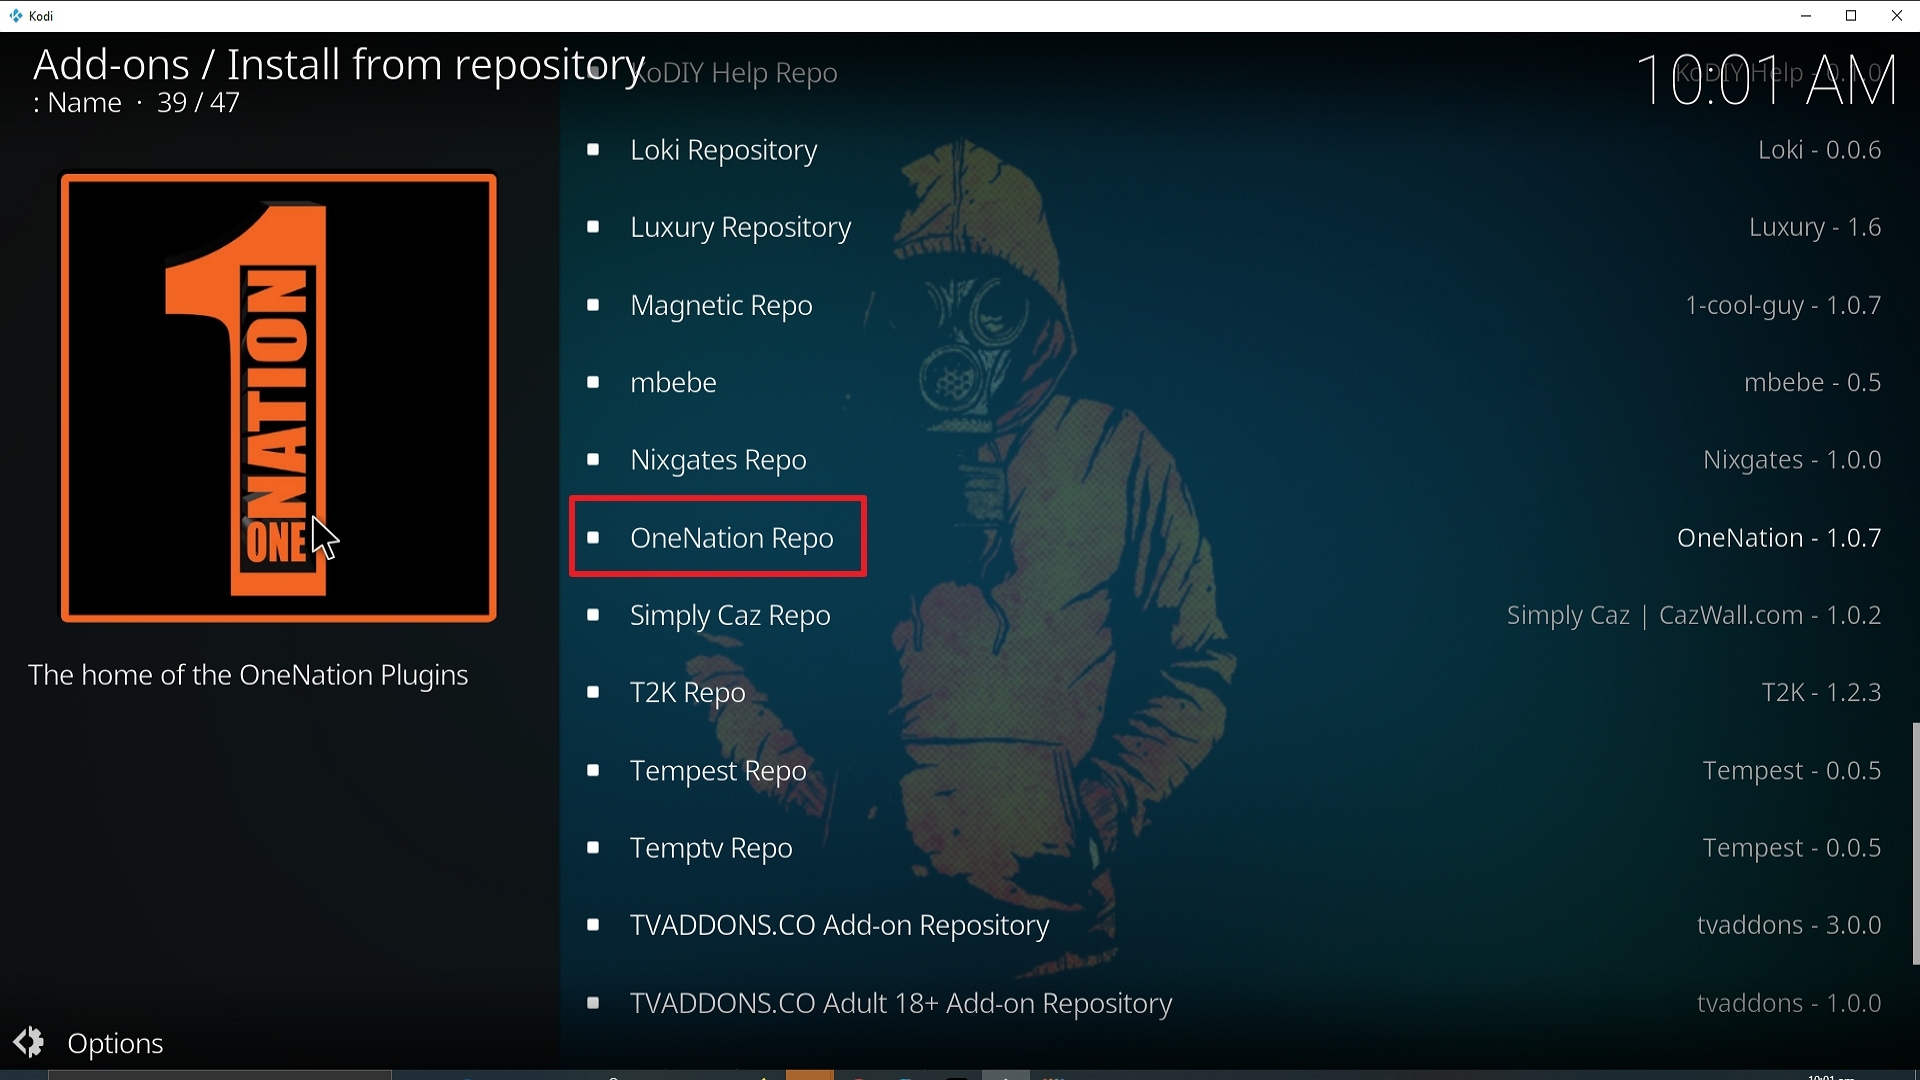
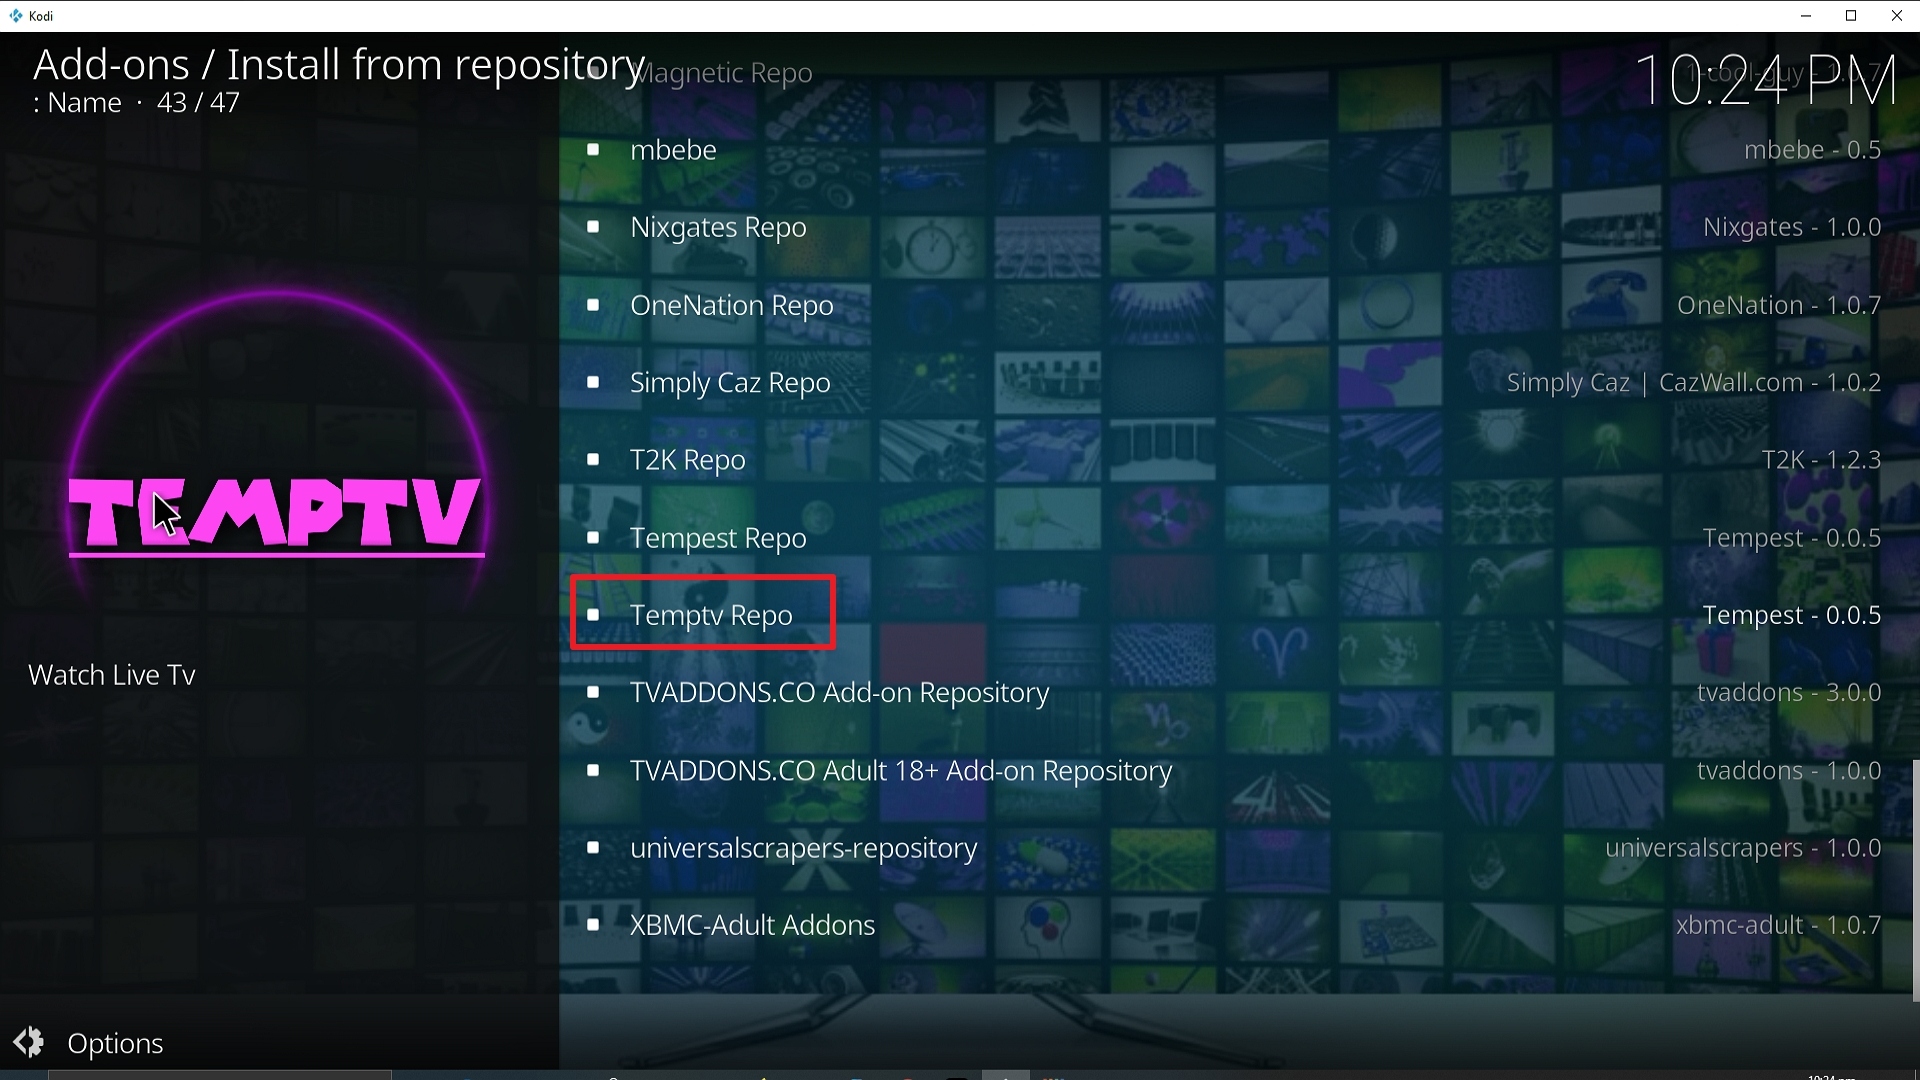
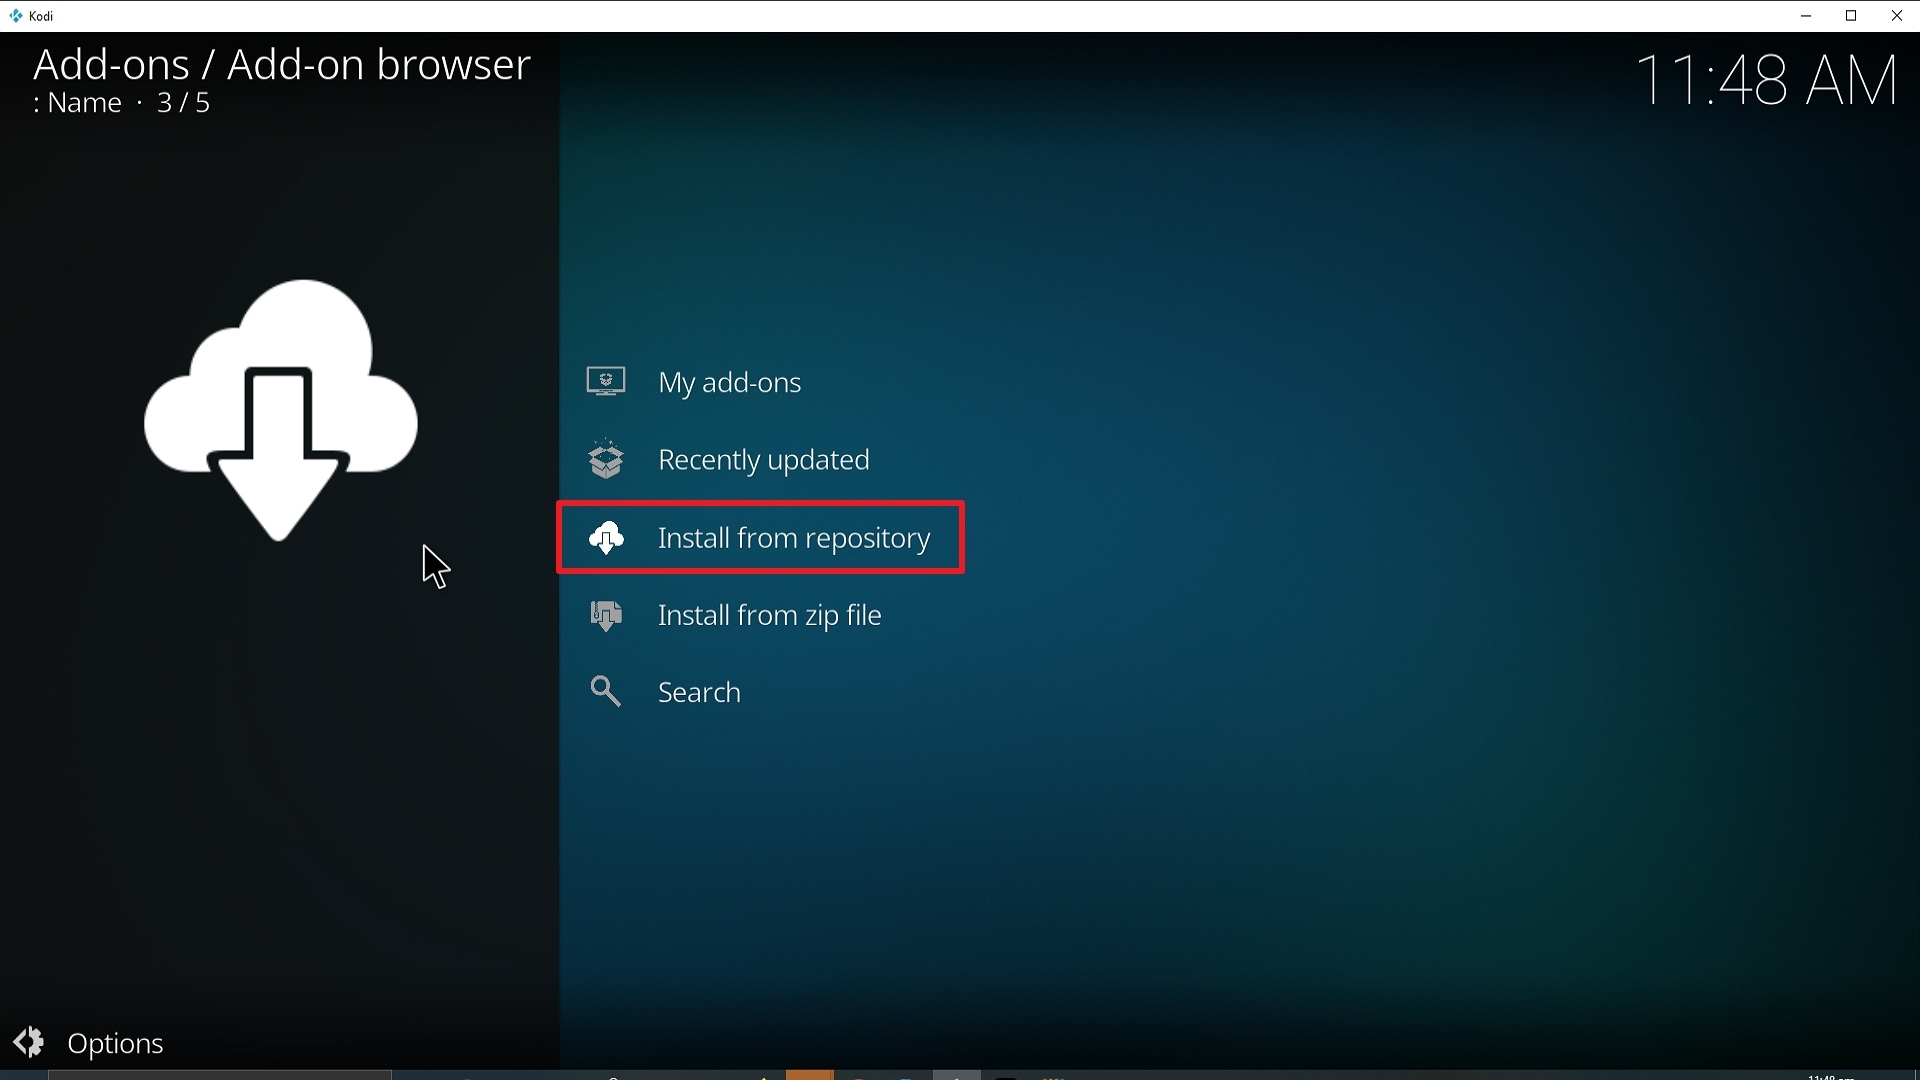
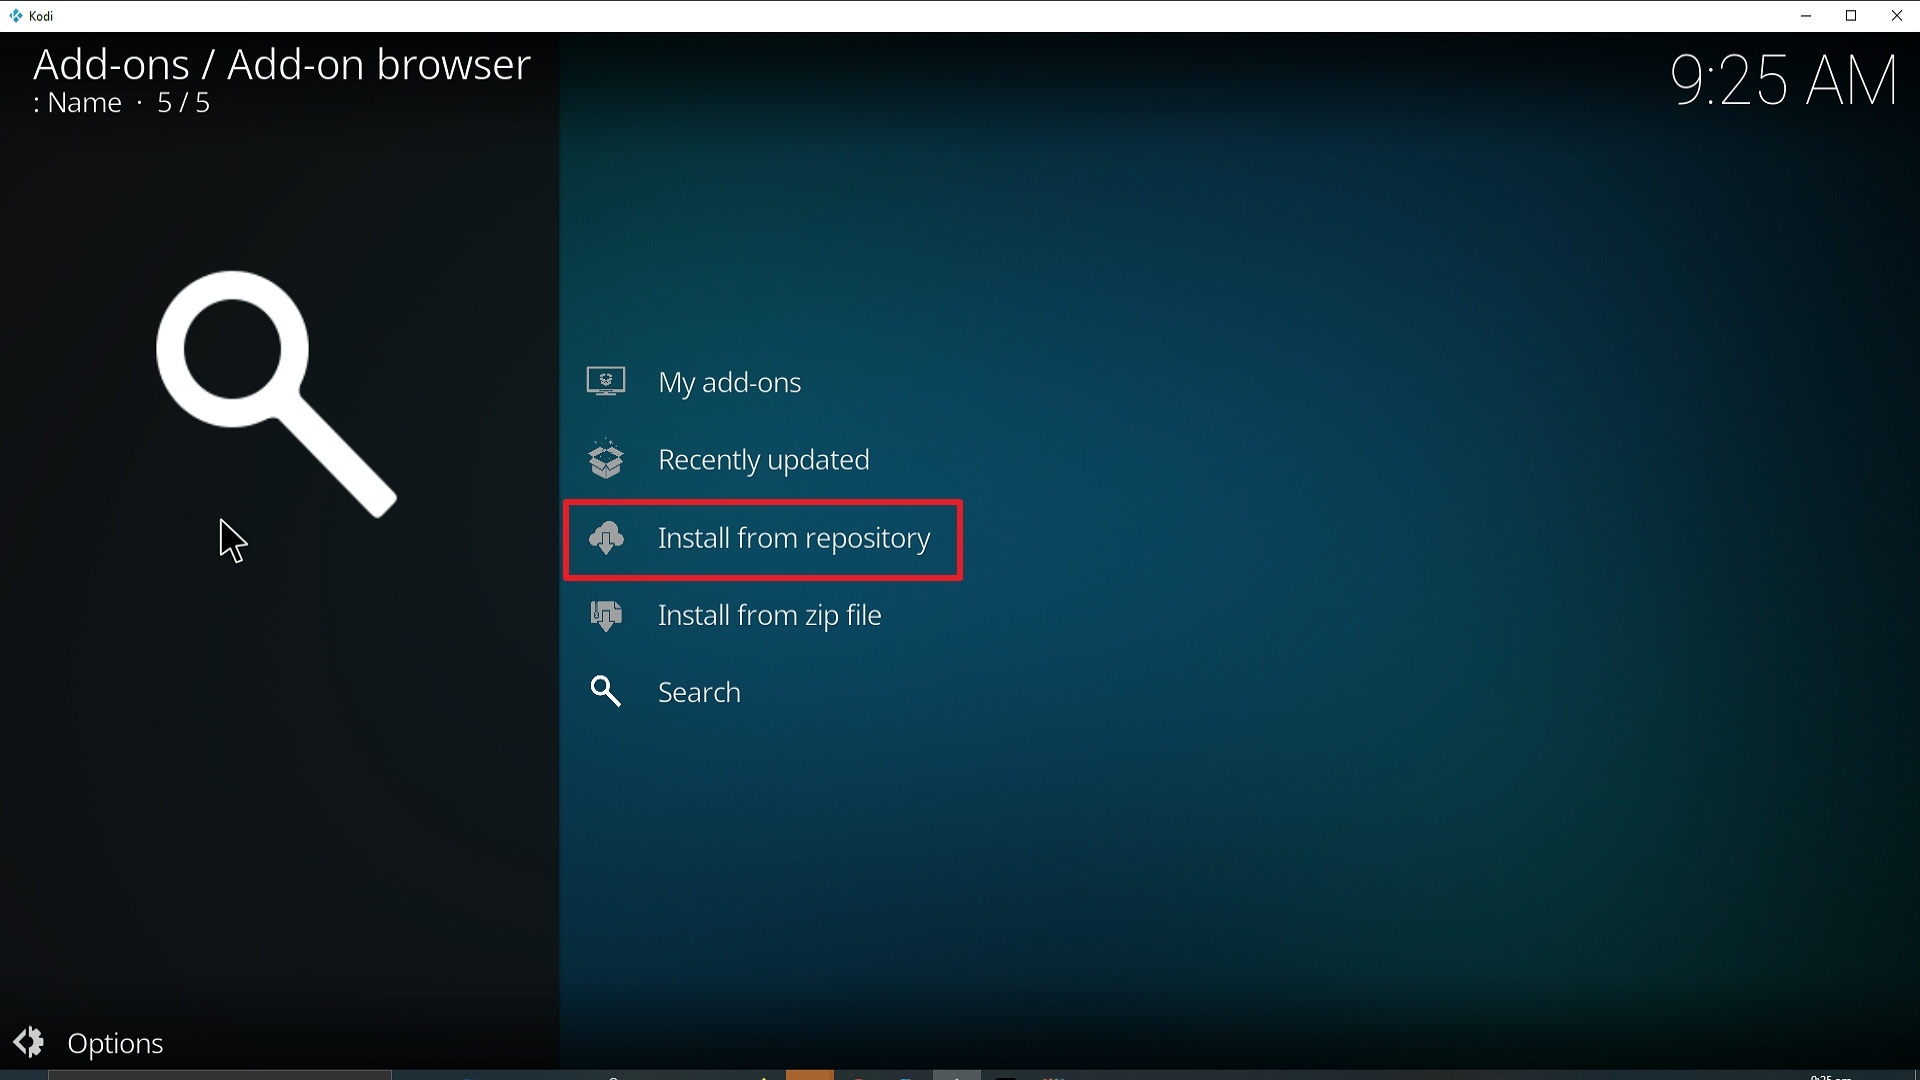
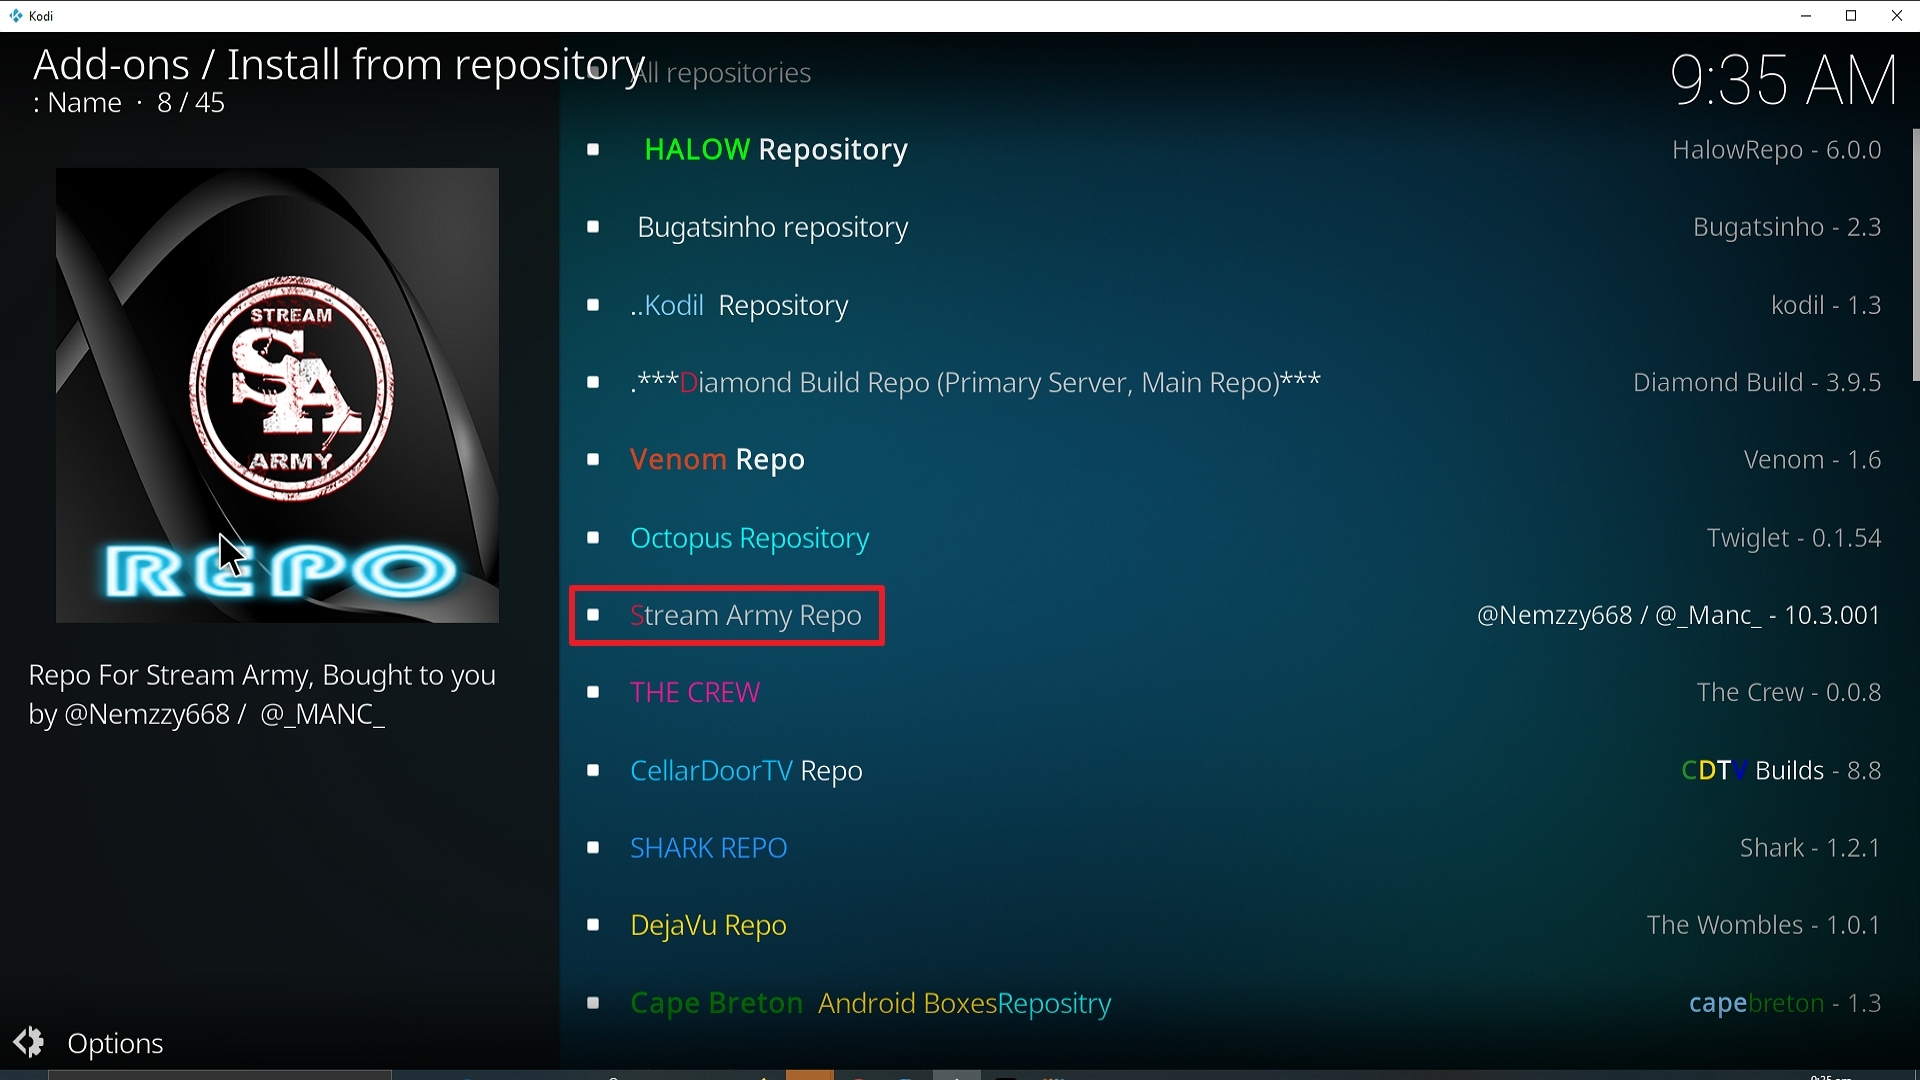
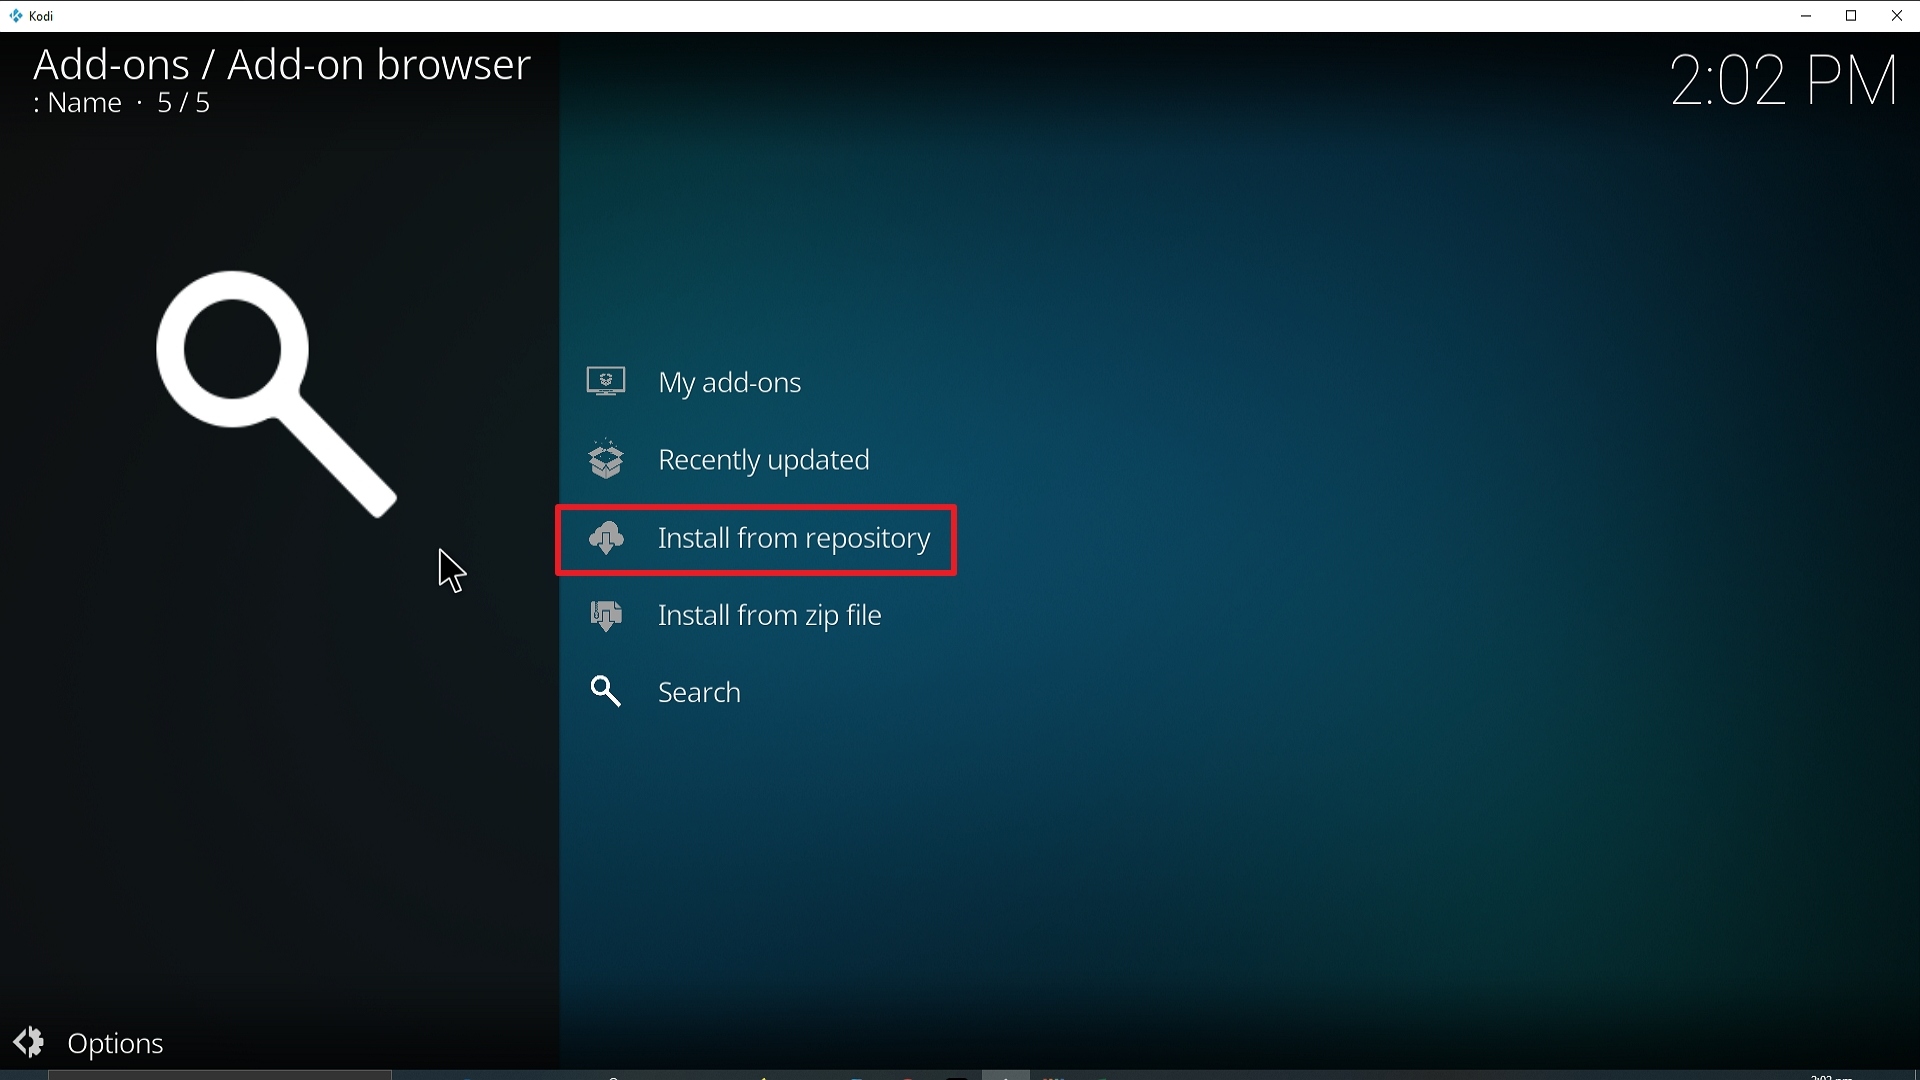
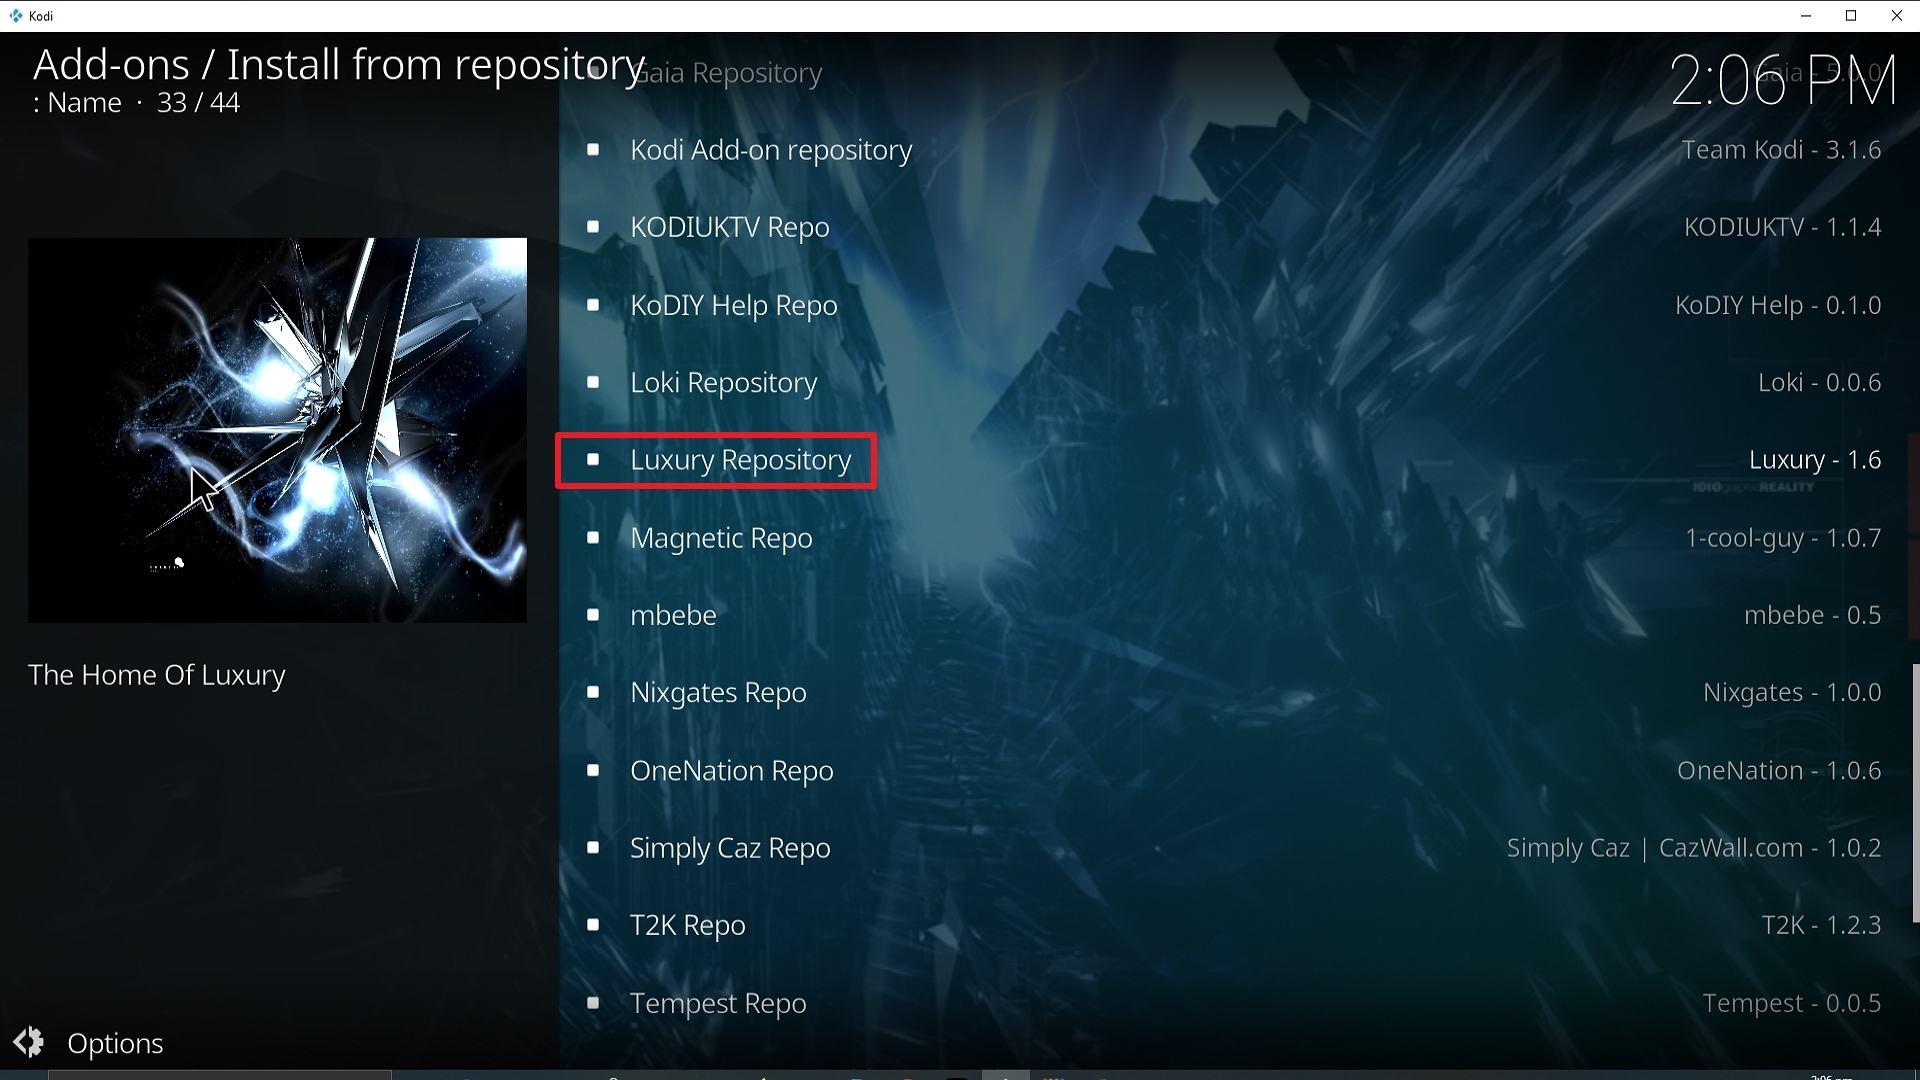
19. Select on Install from repository.
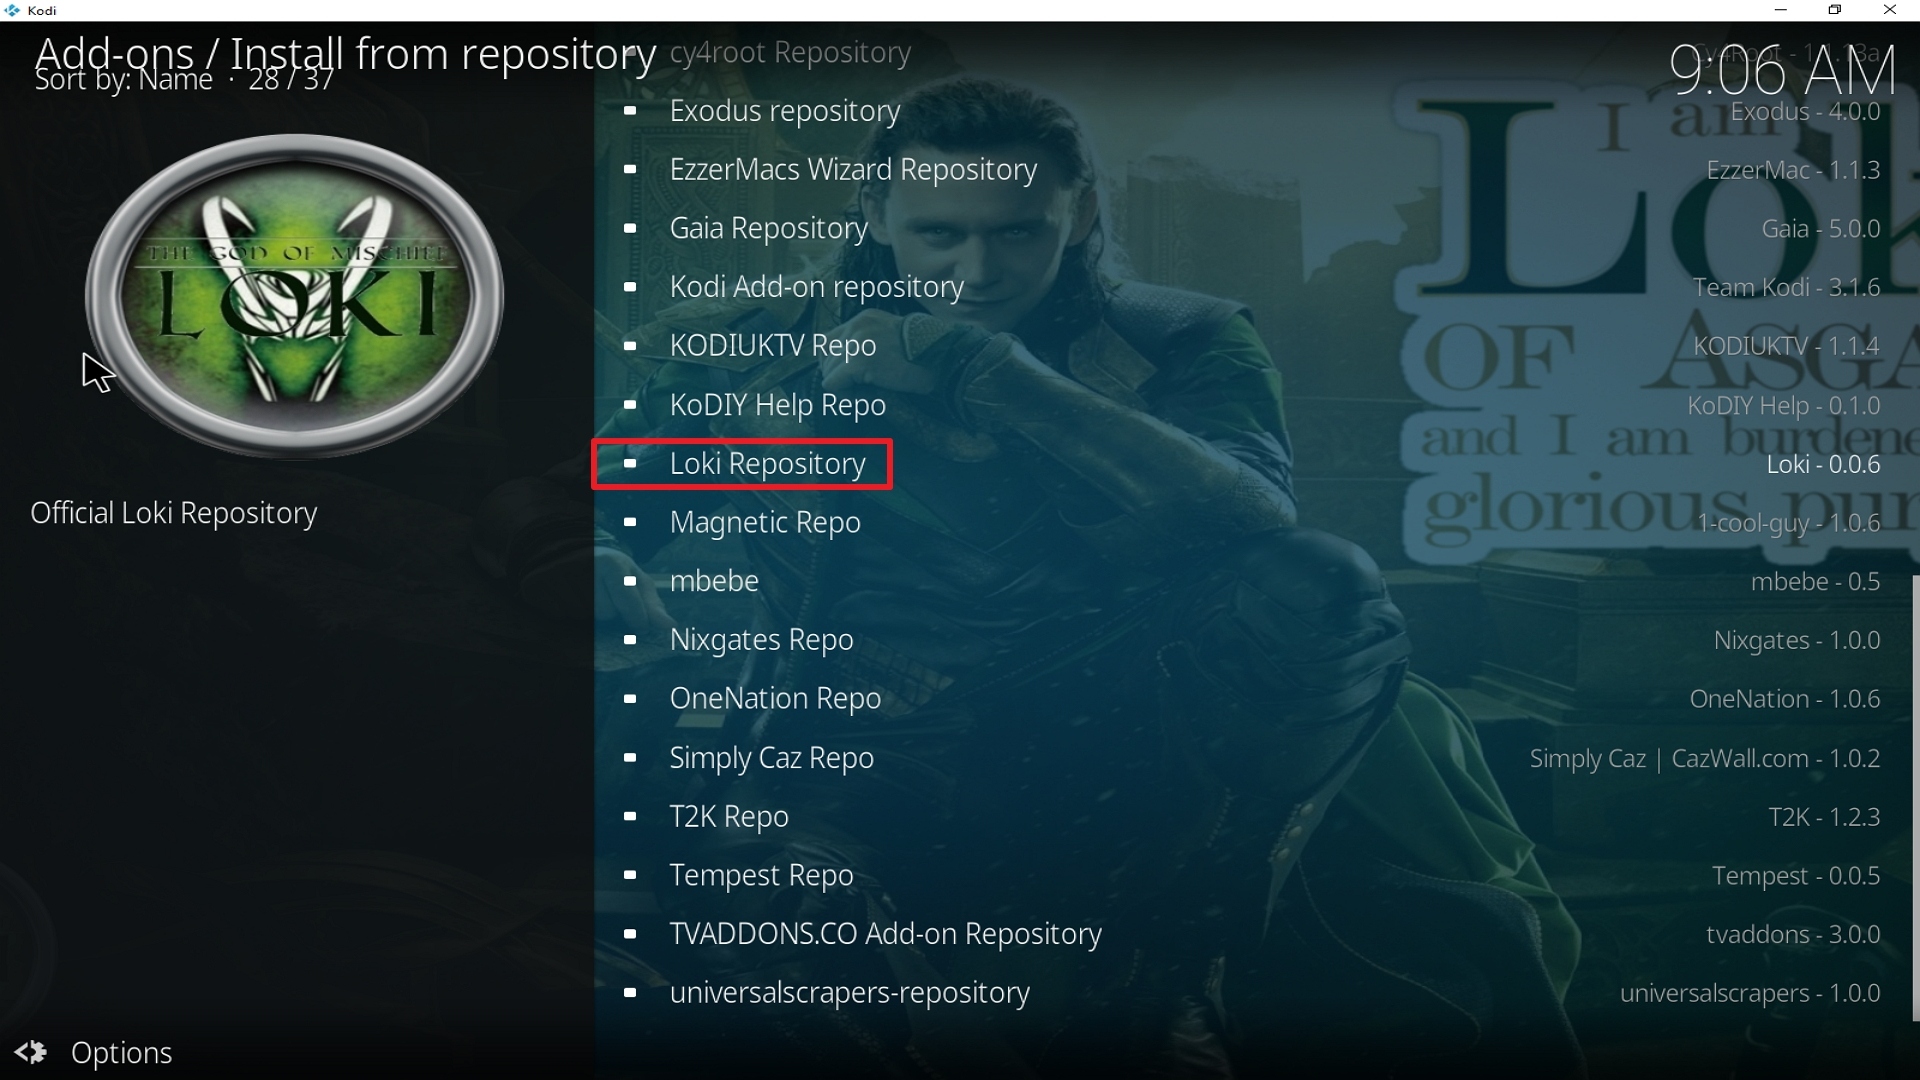
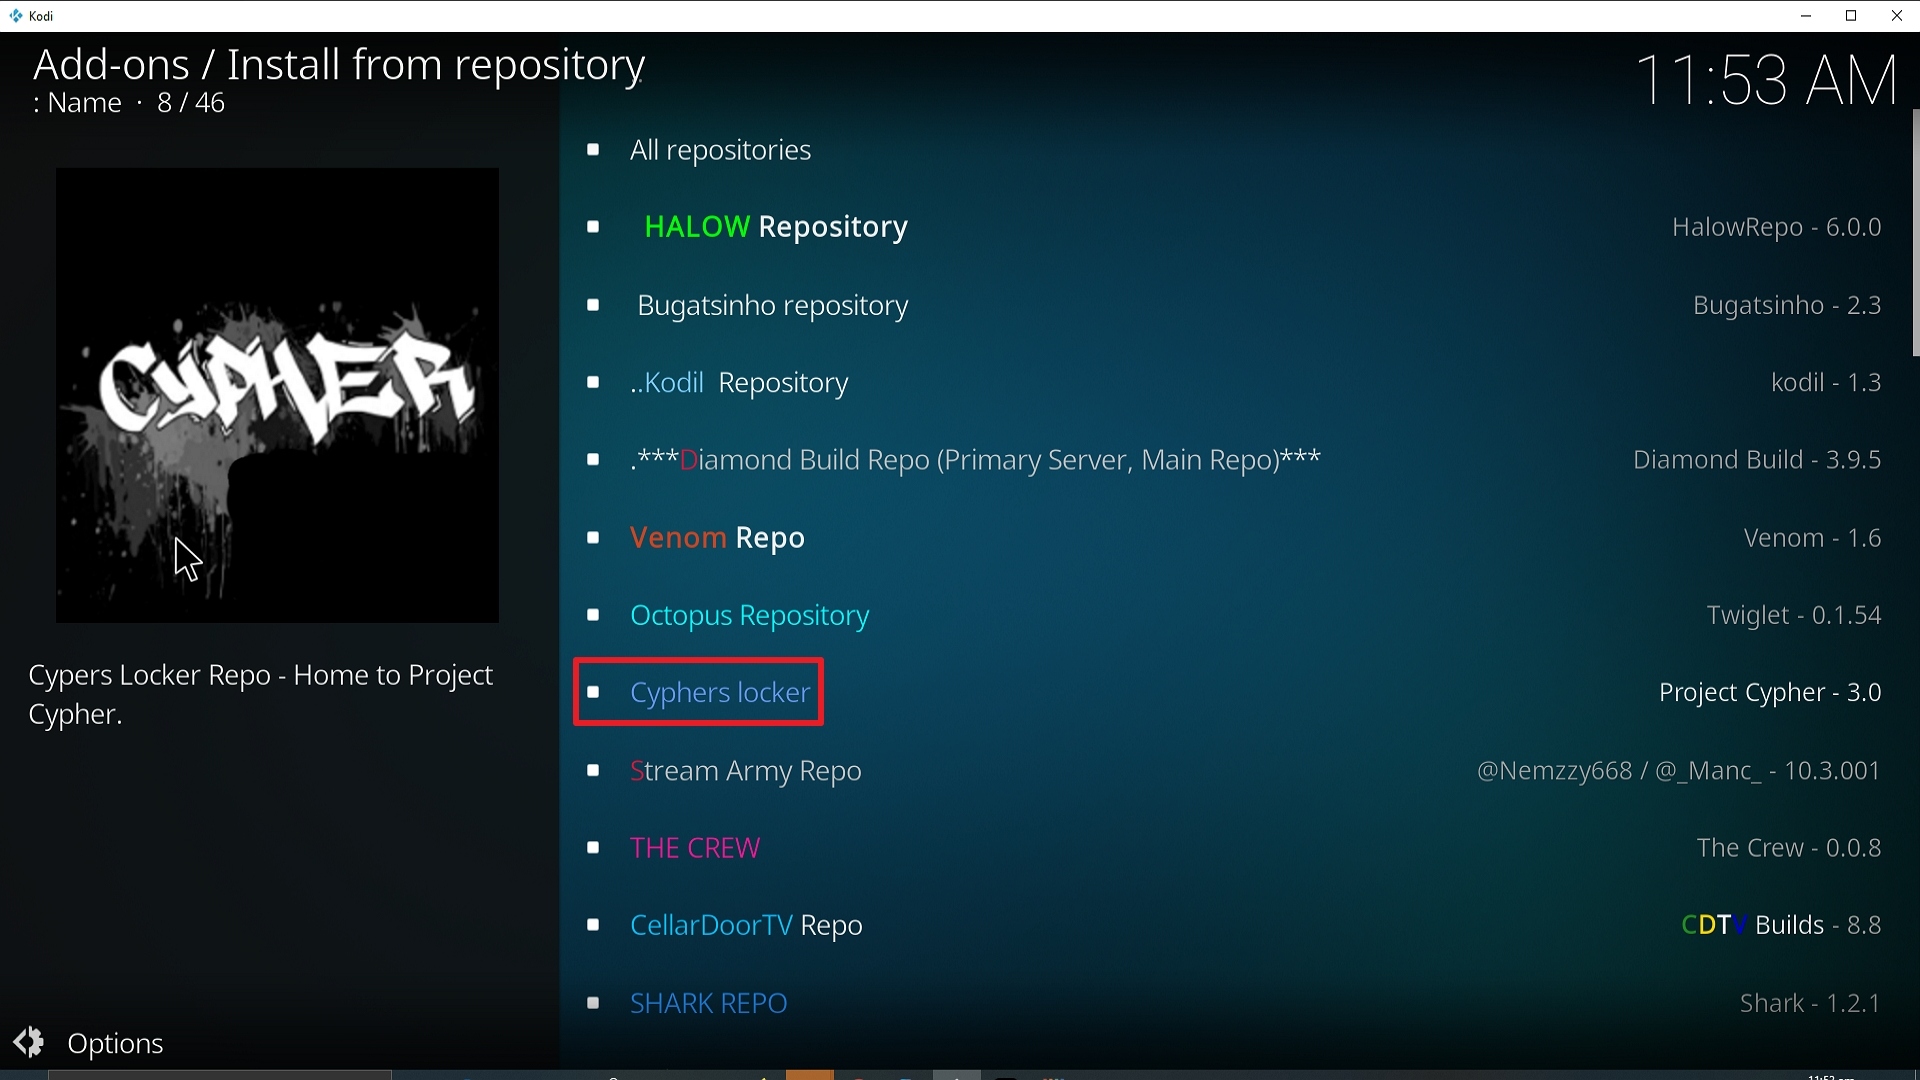
20. Click on Diamond Repo.
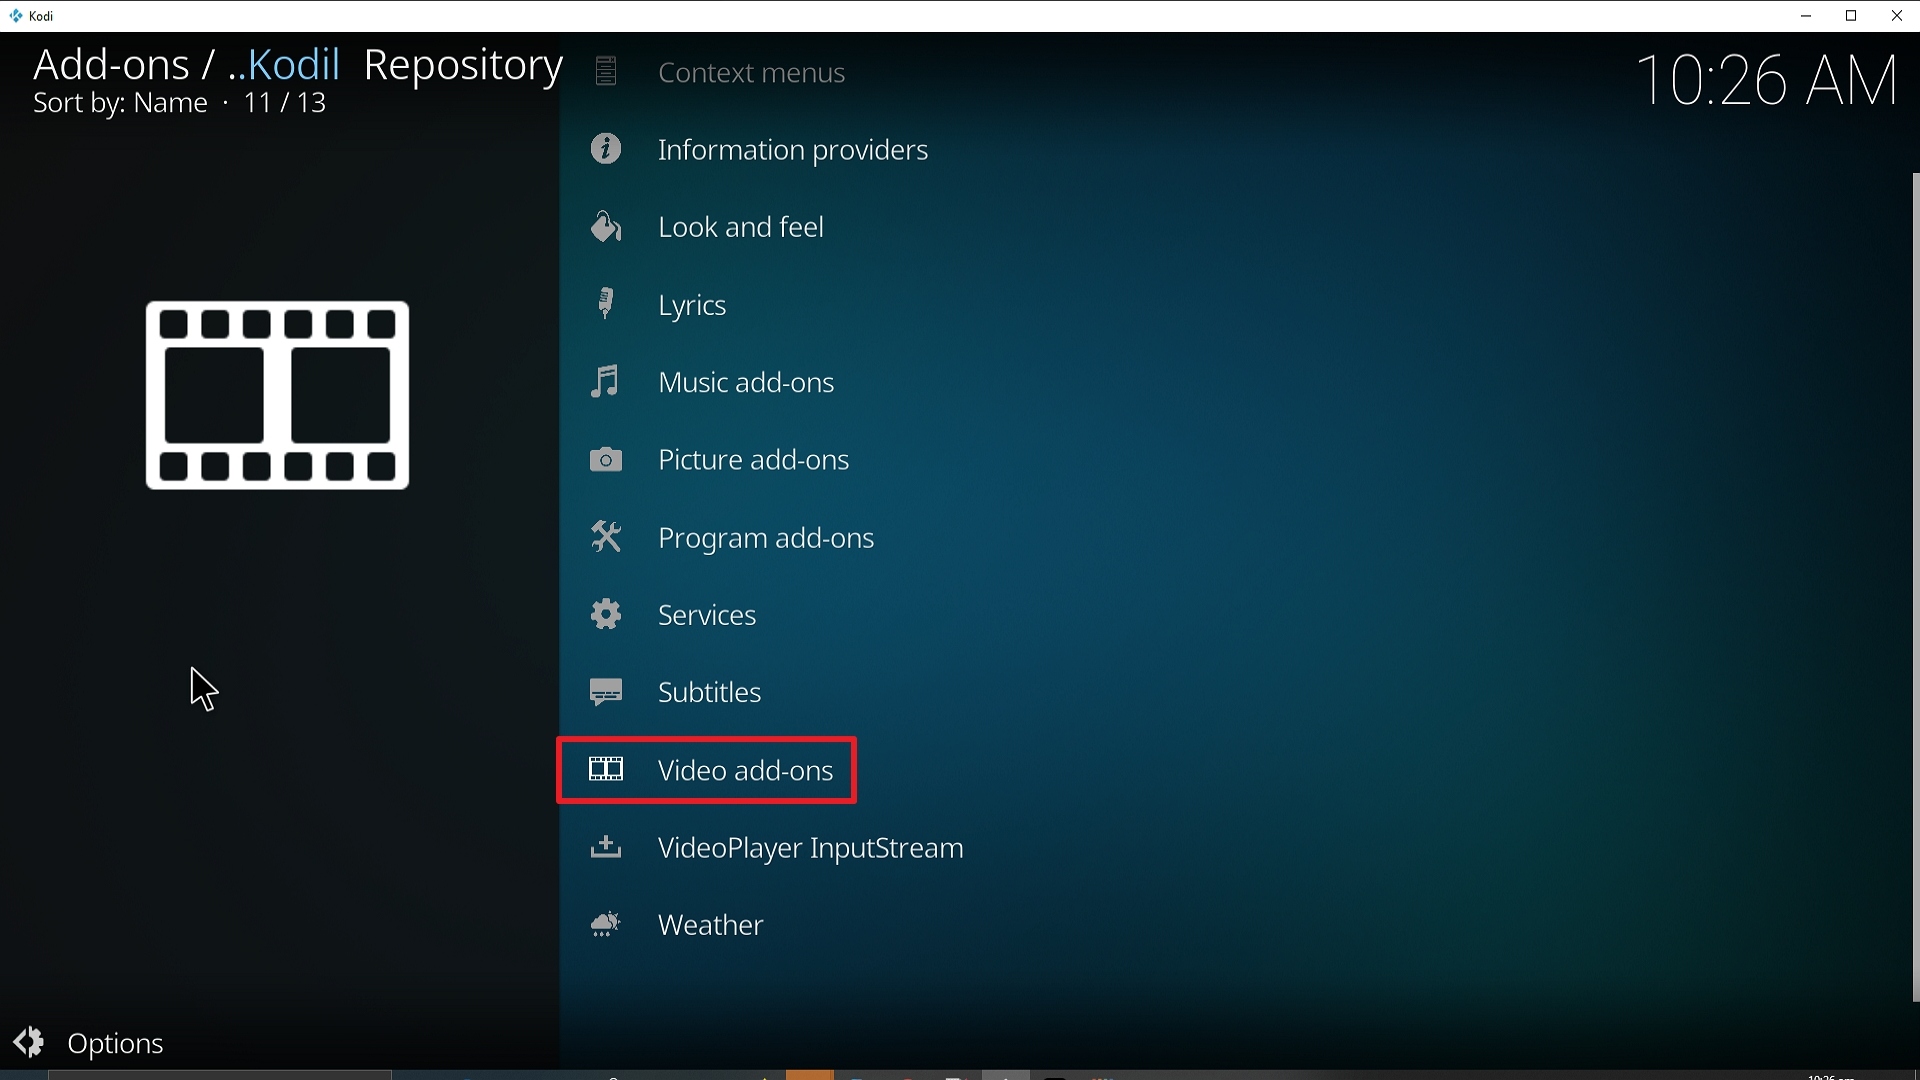
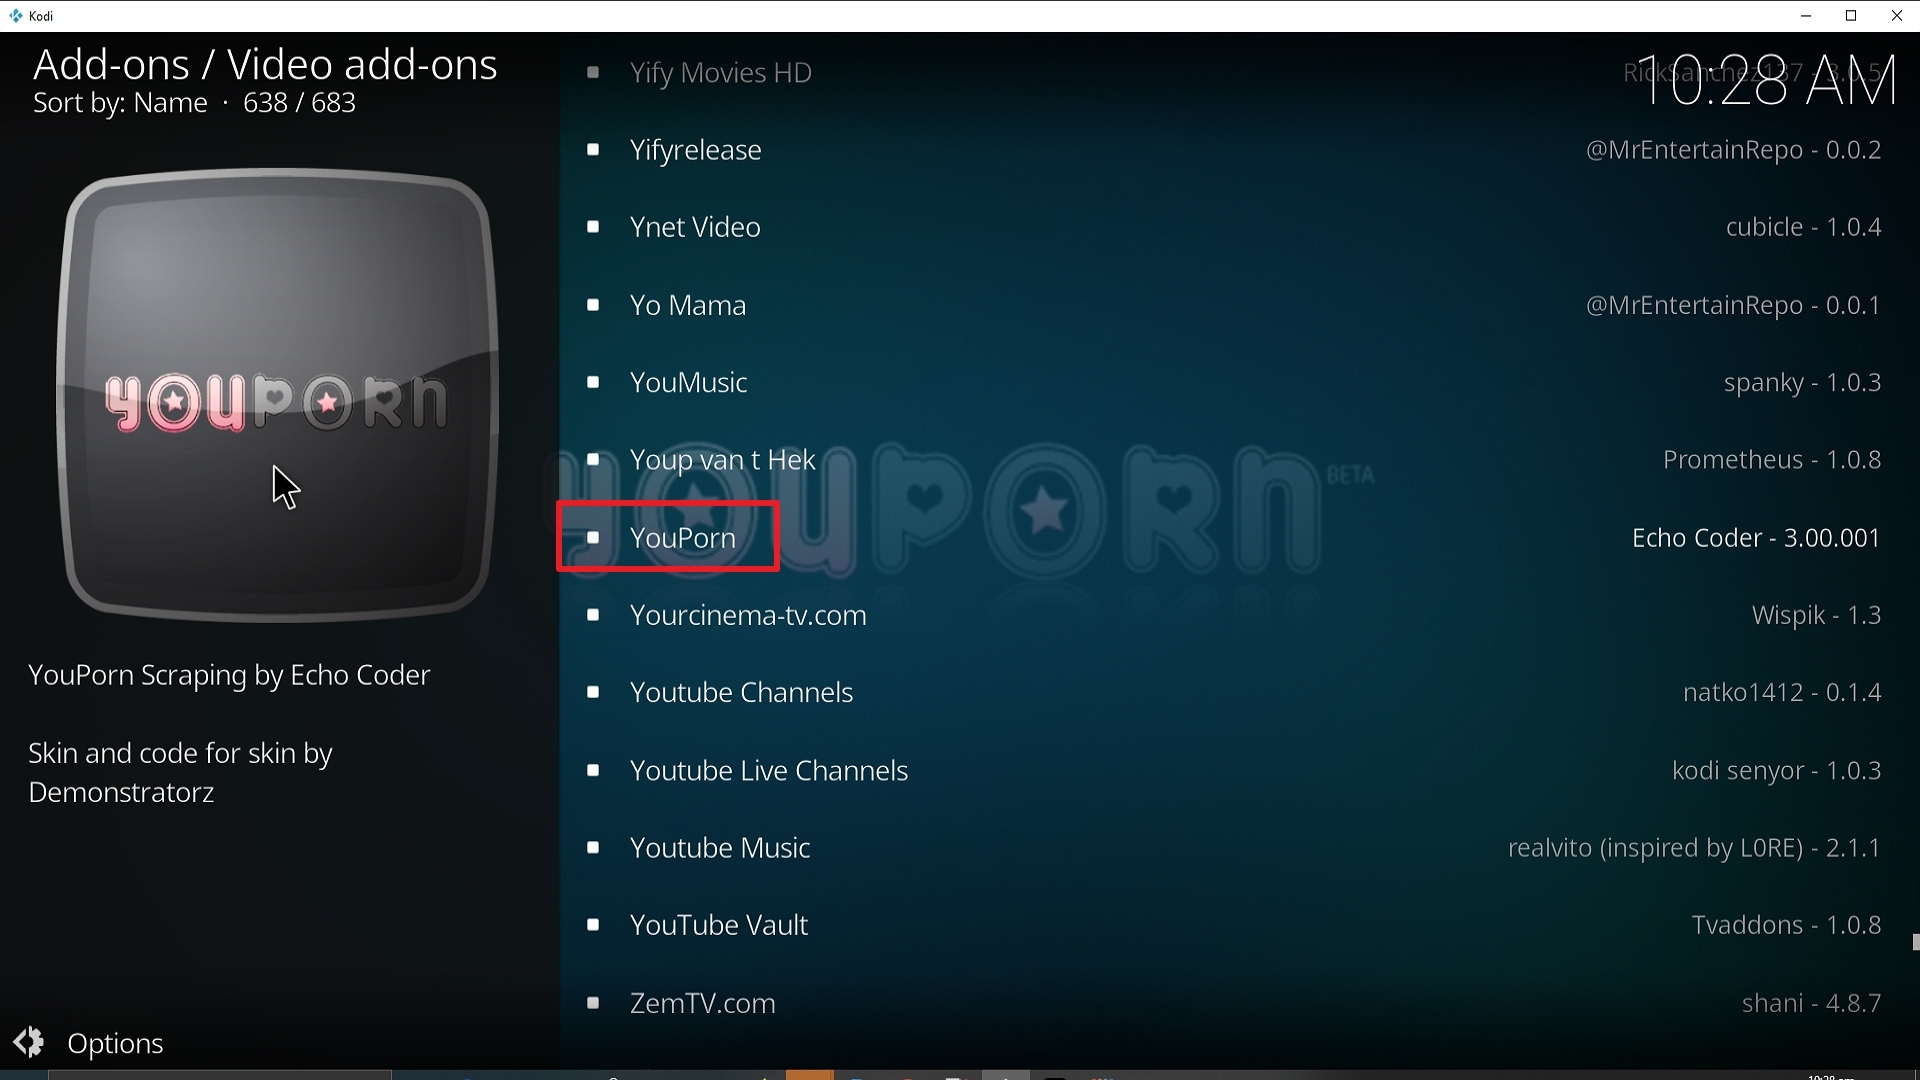
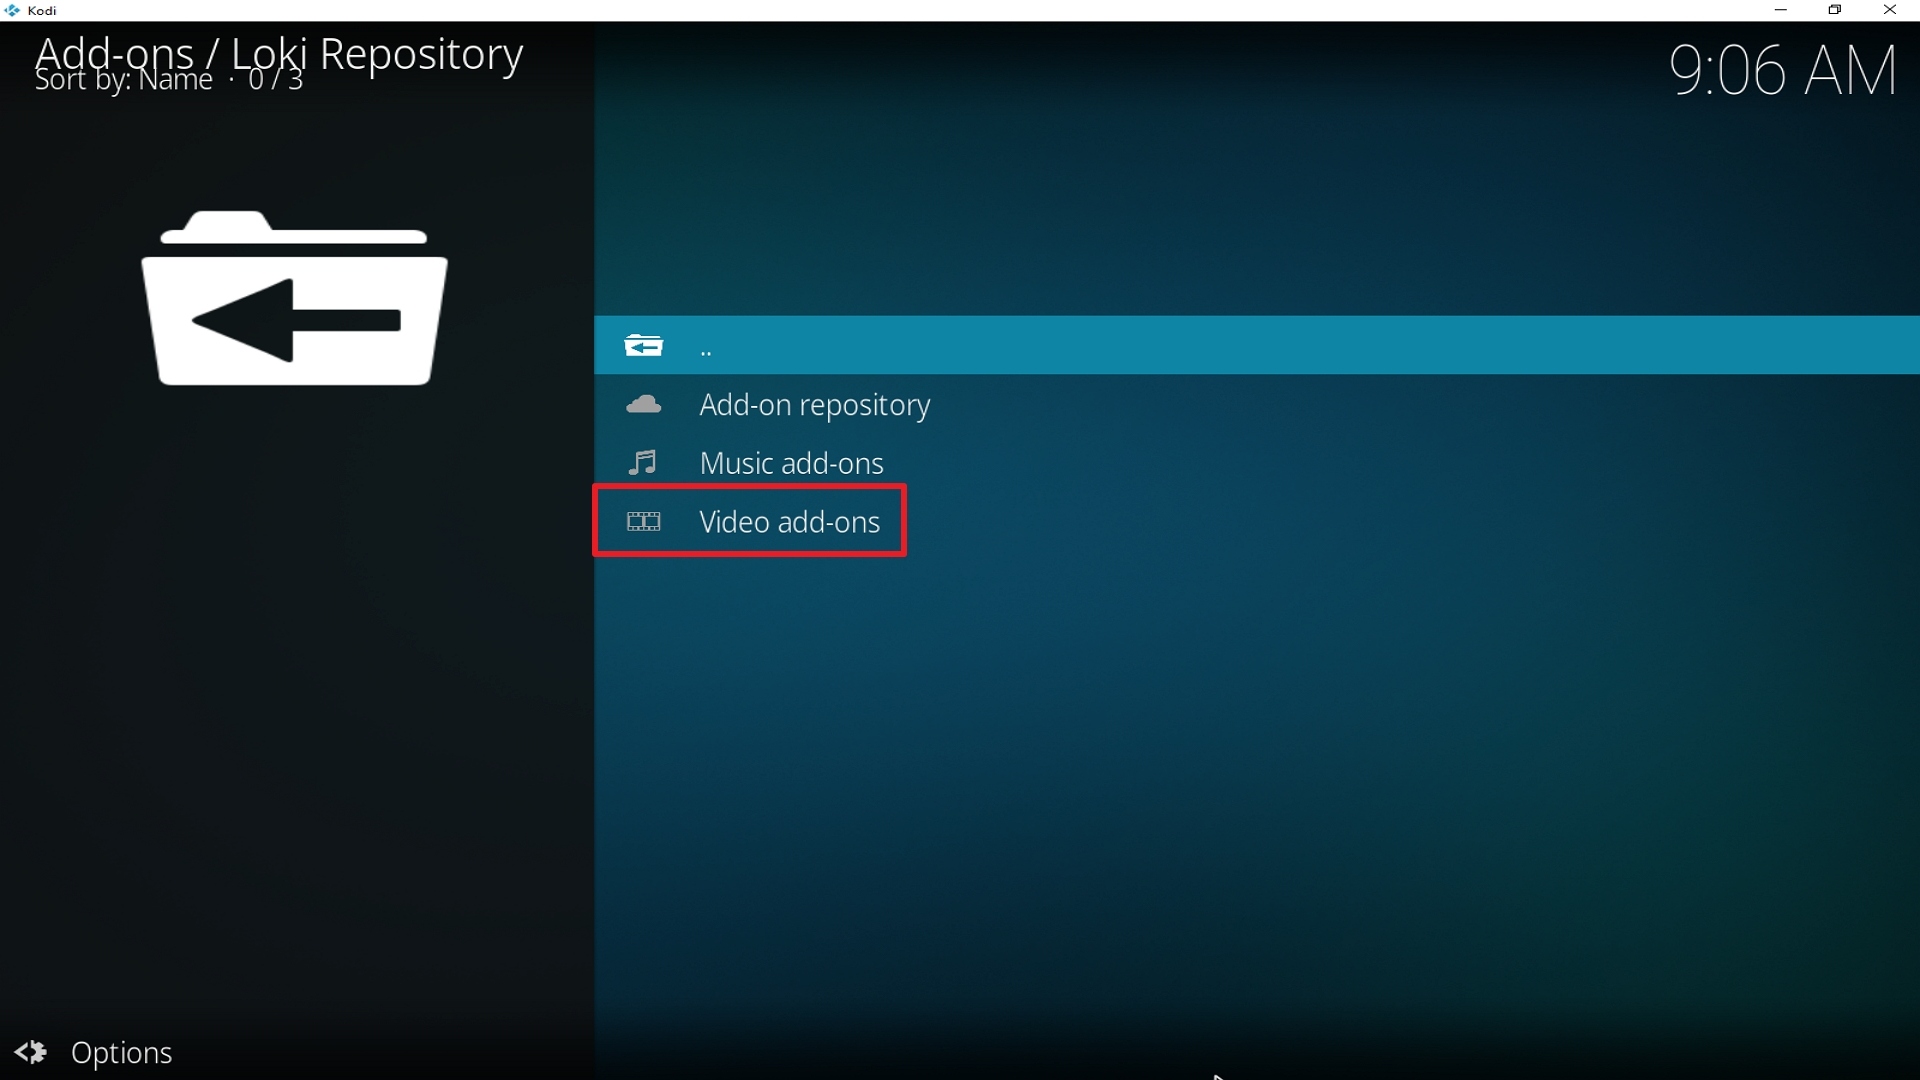
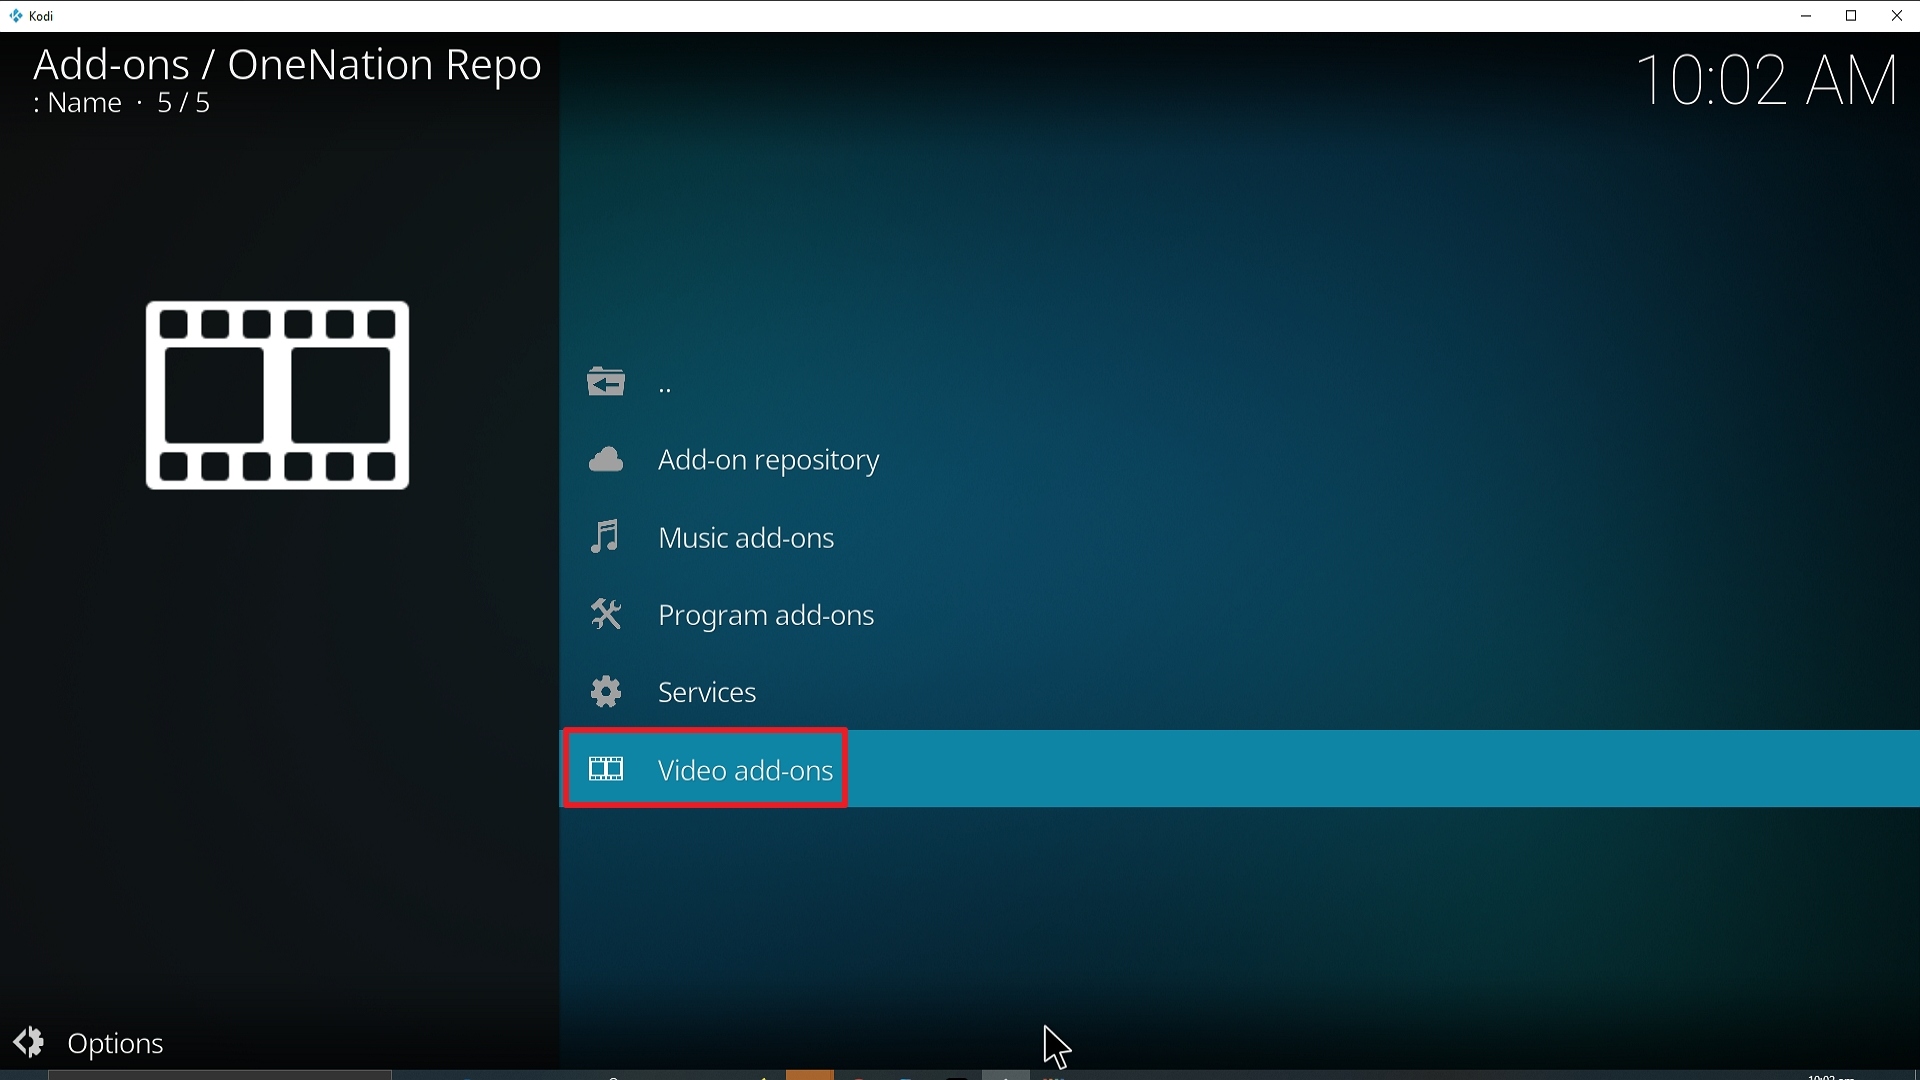
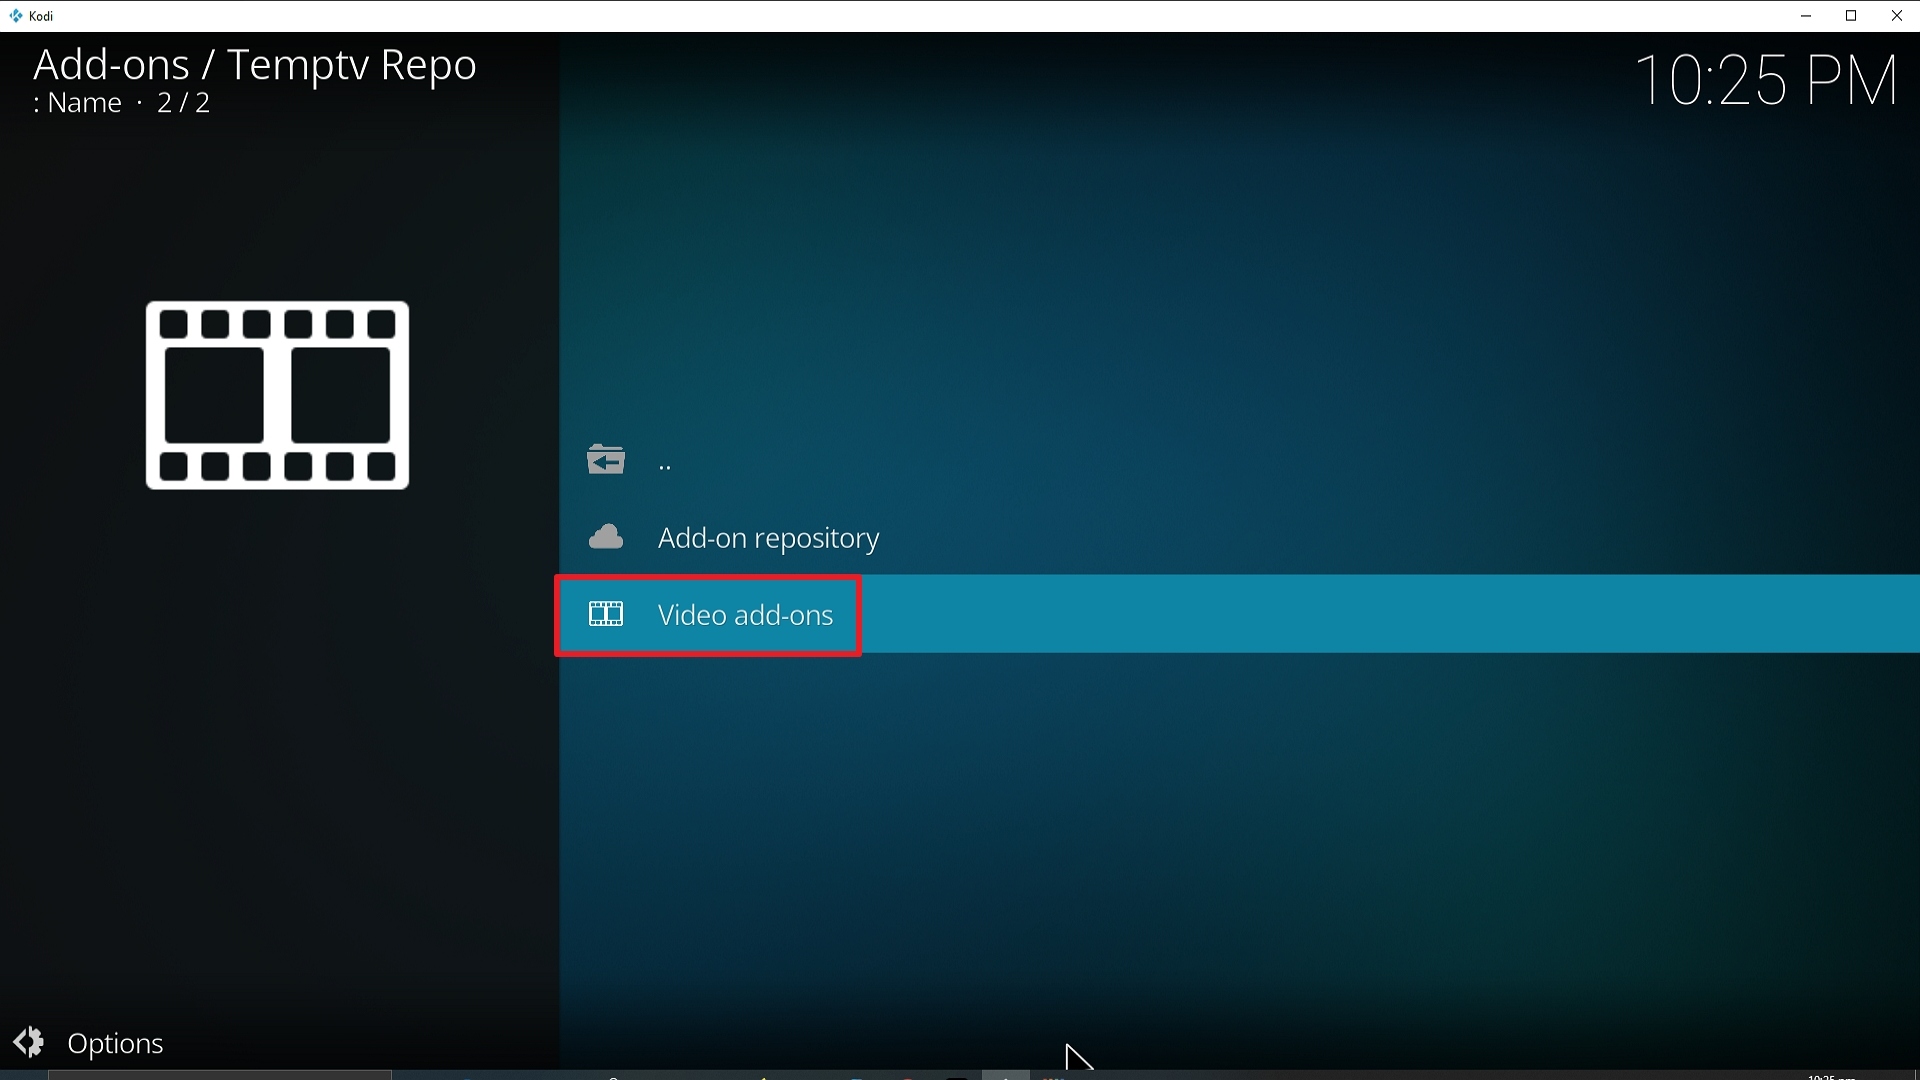
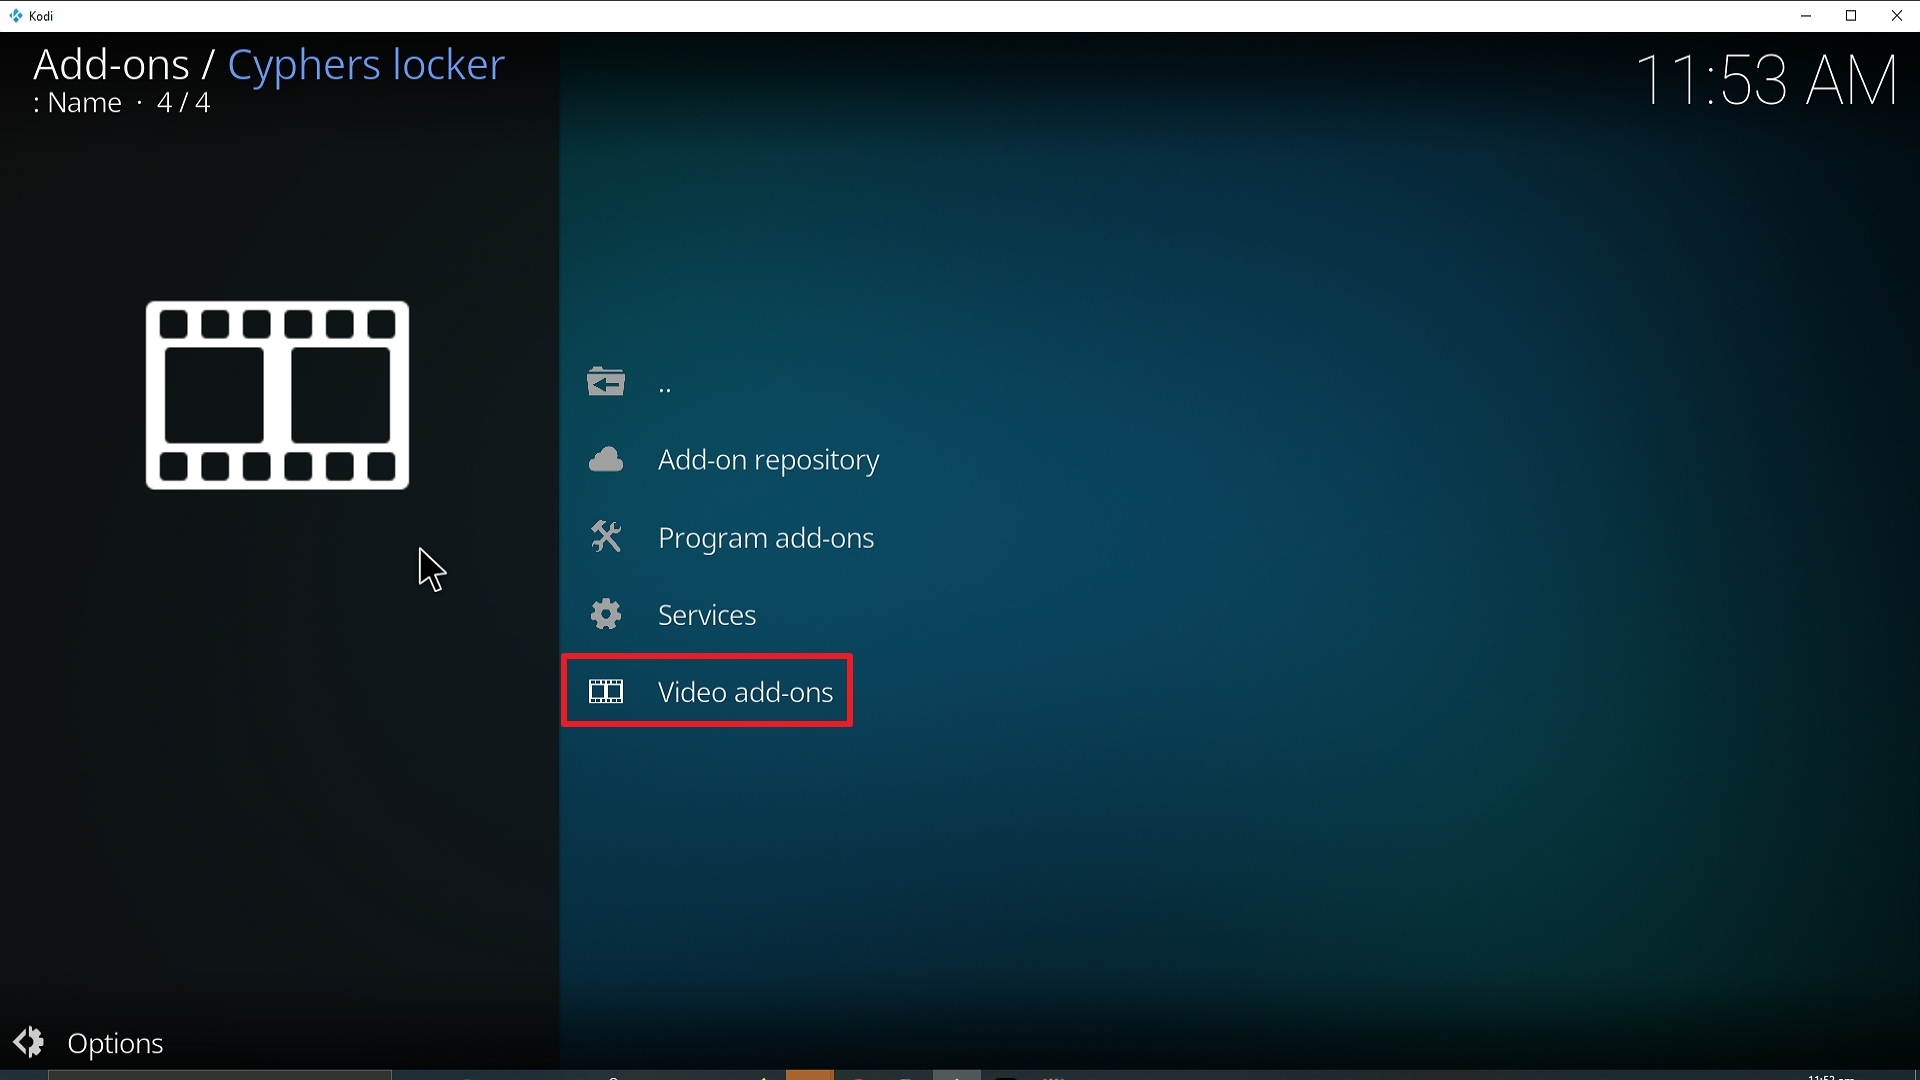
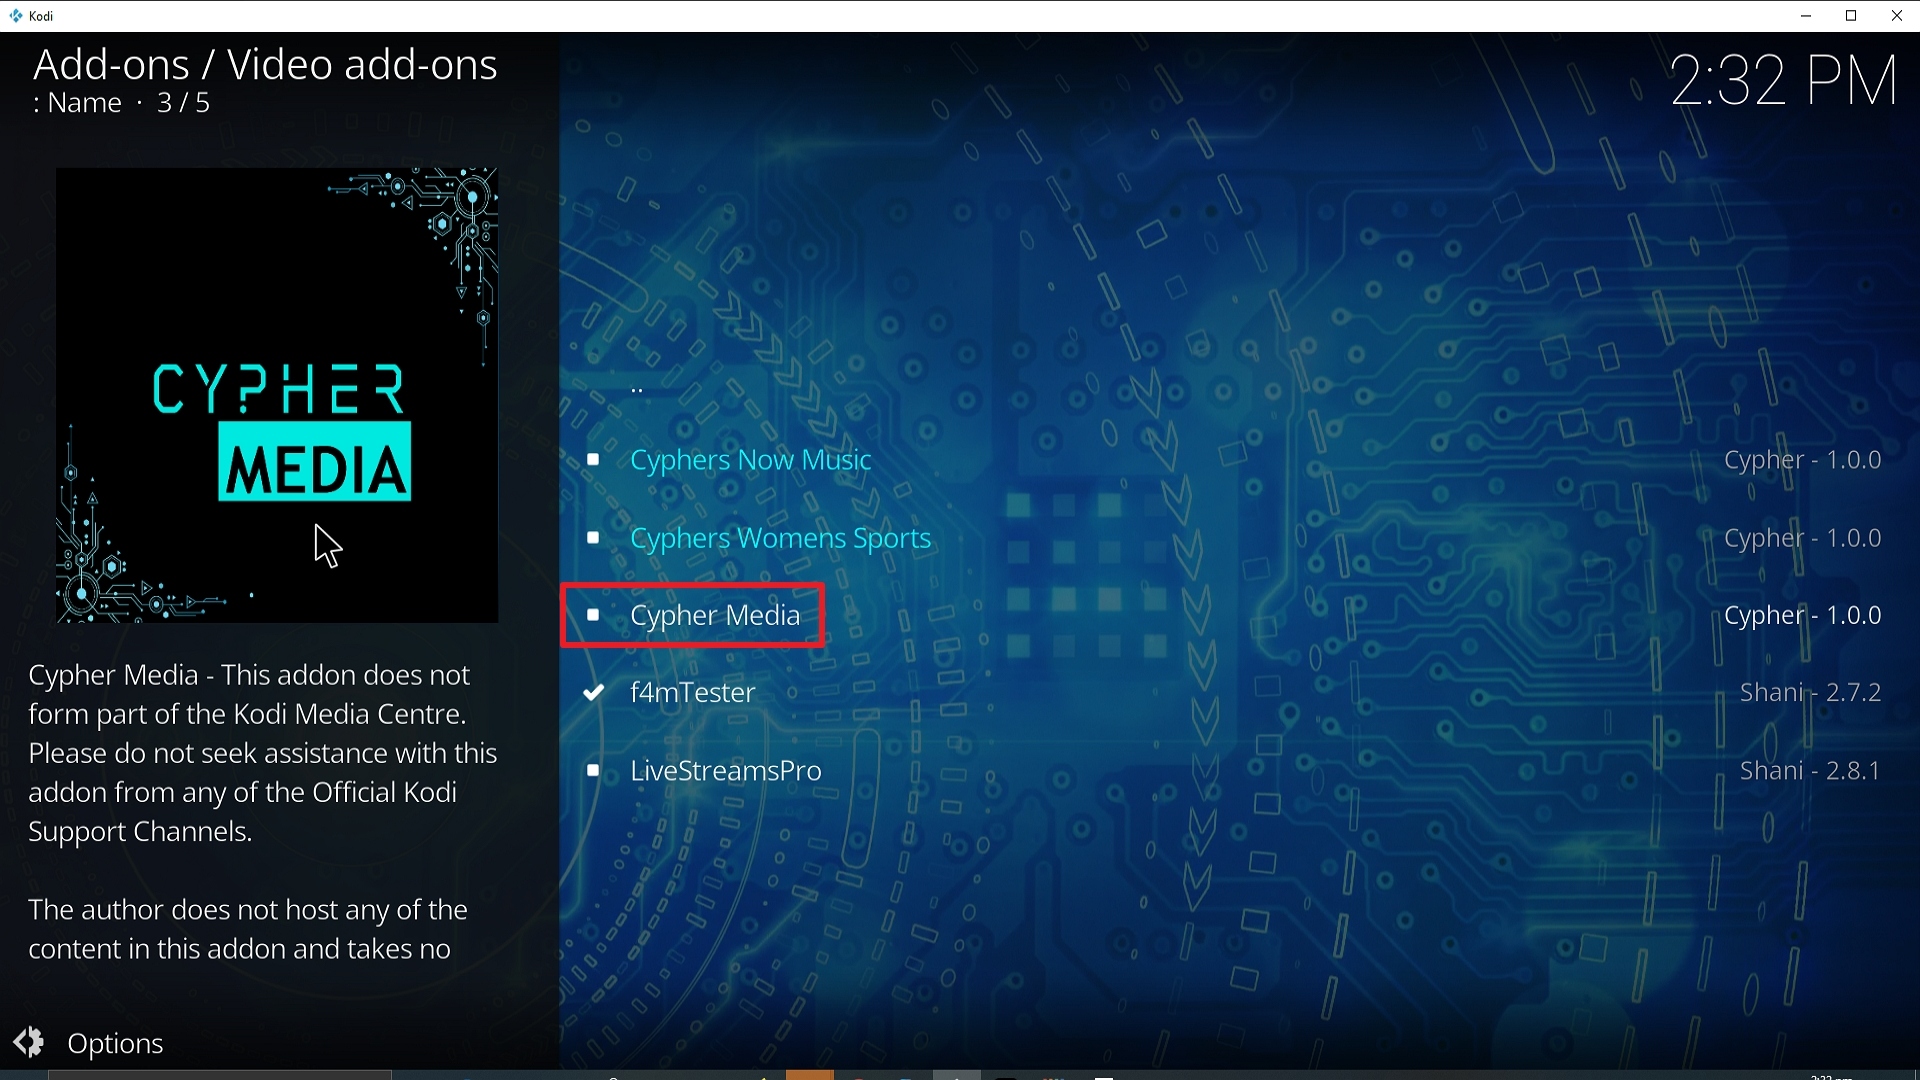
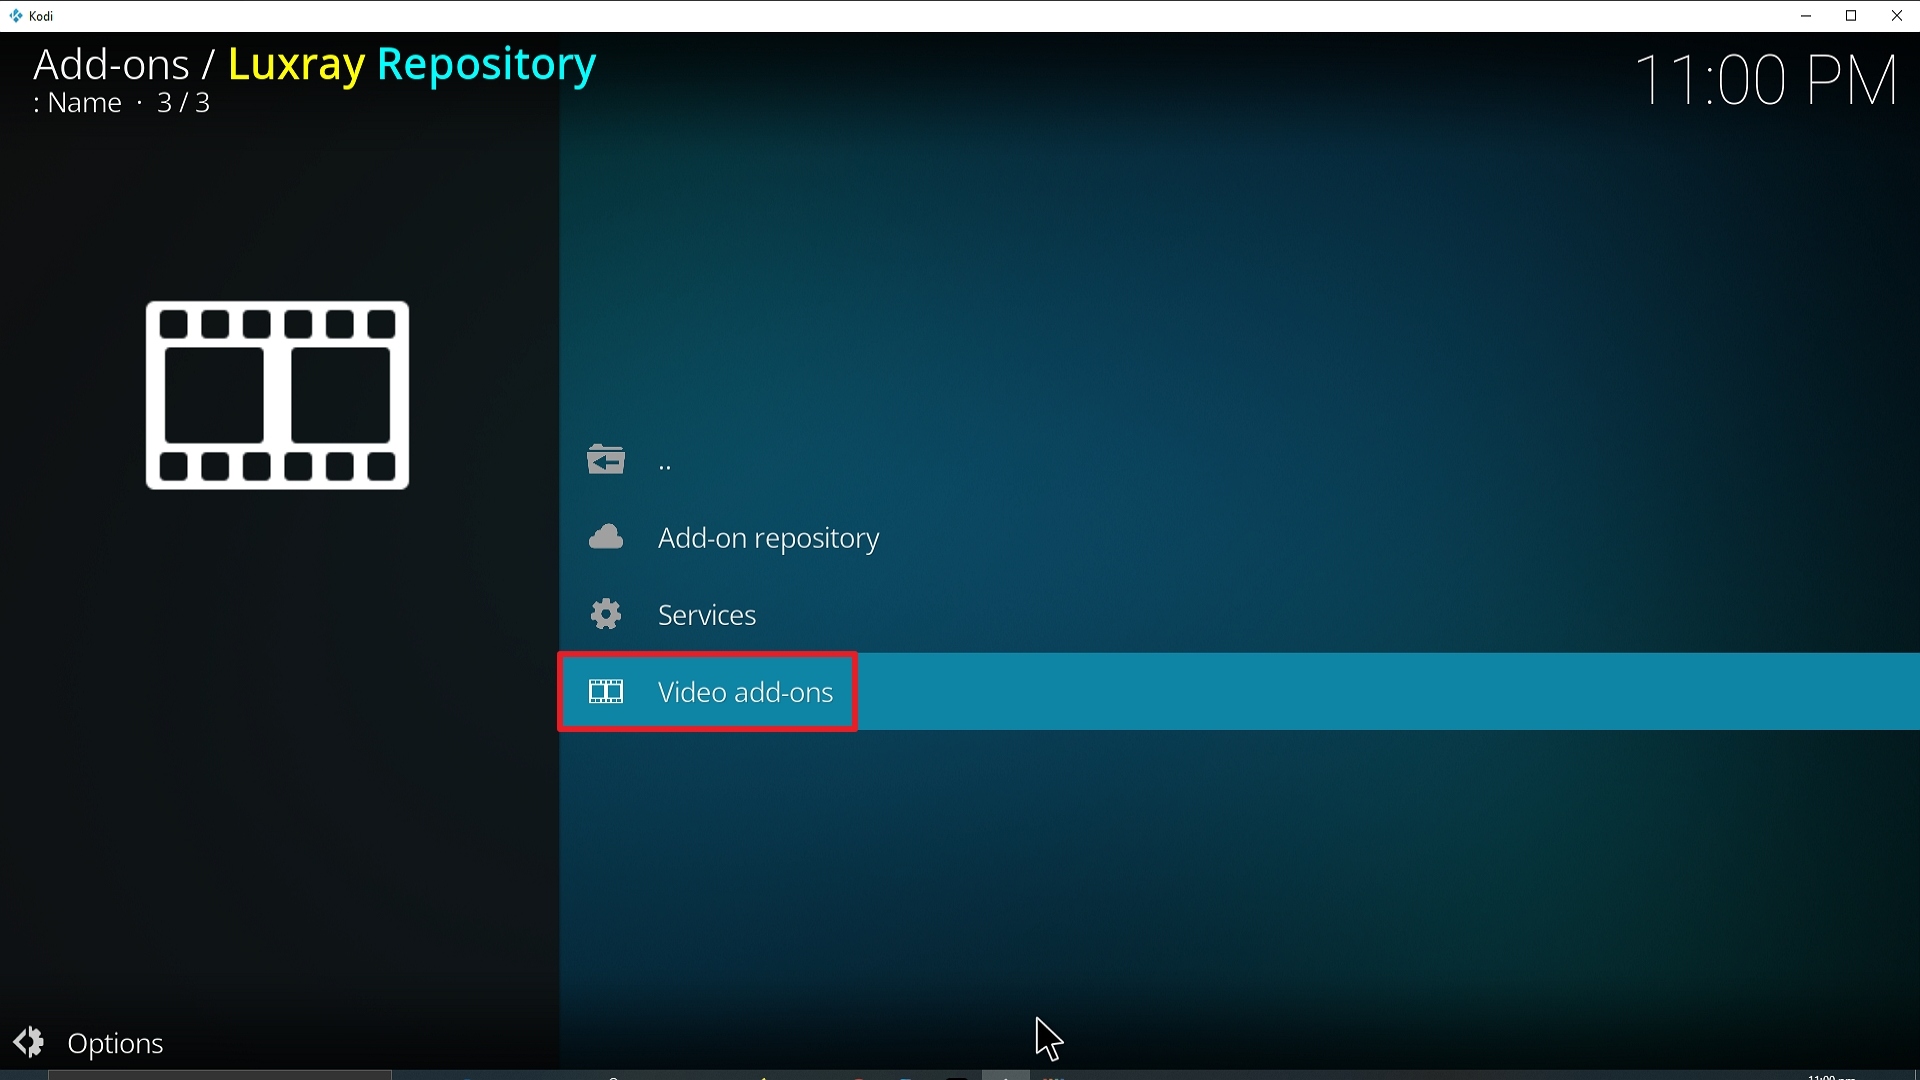
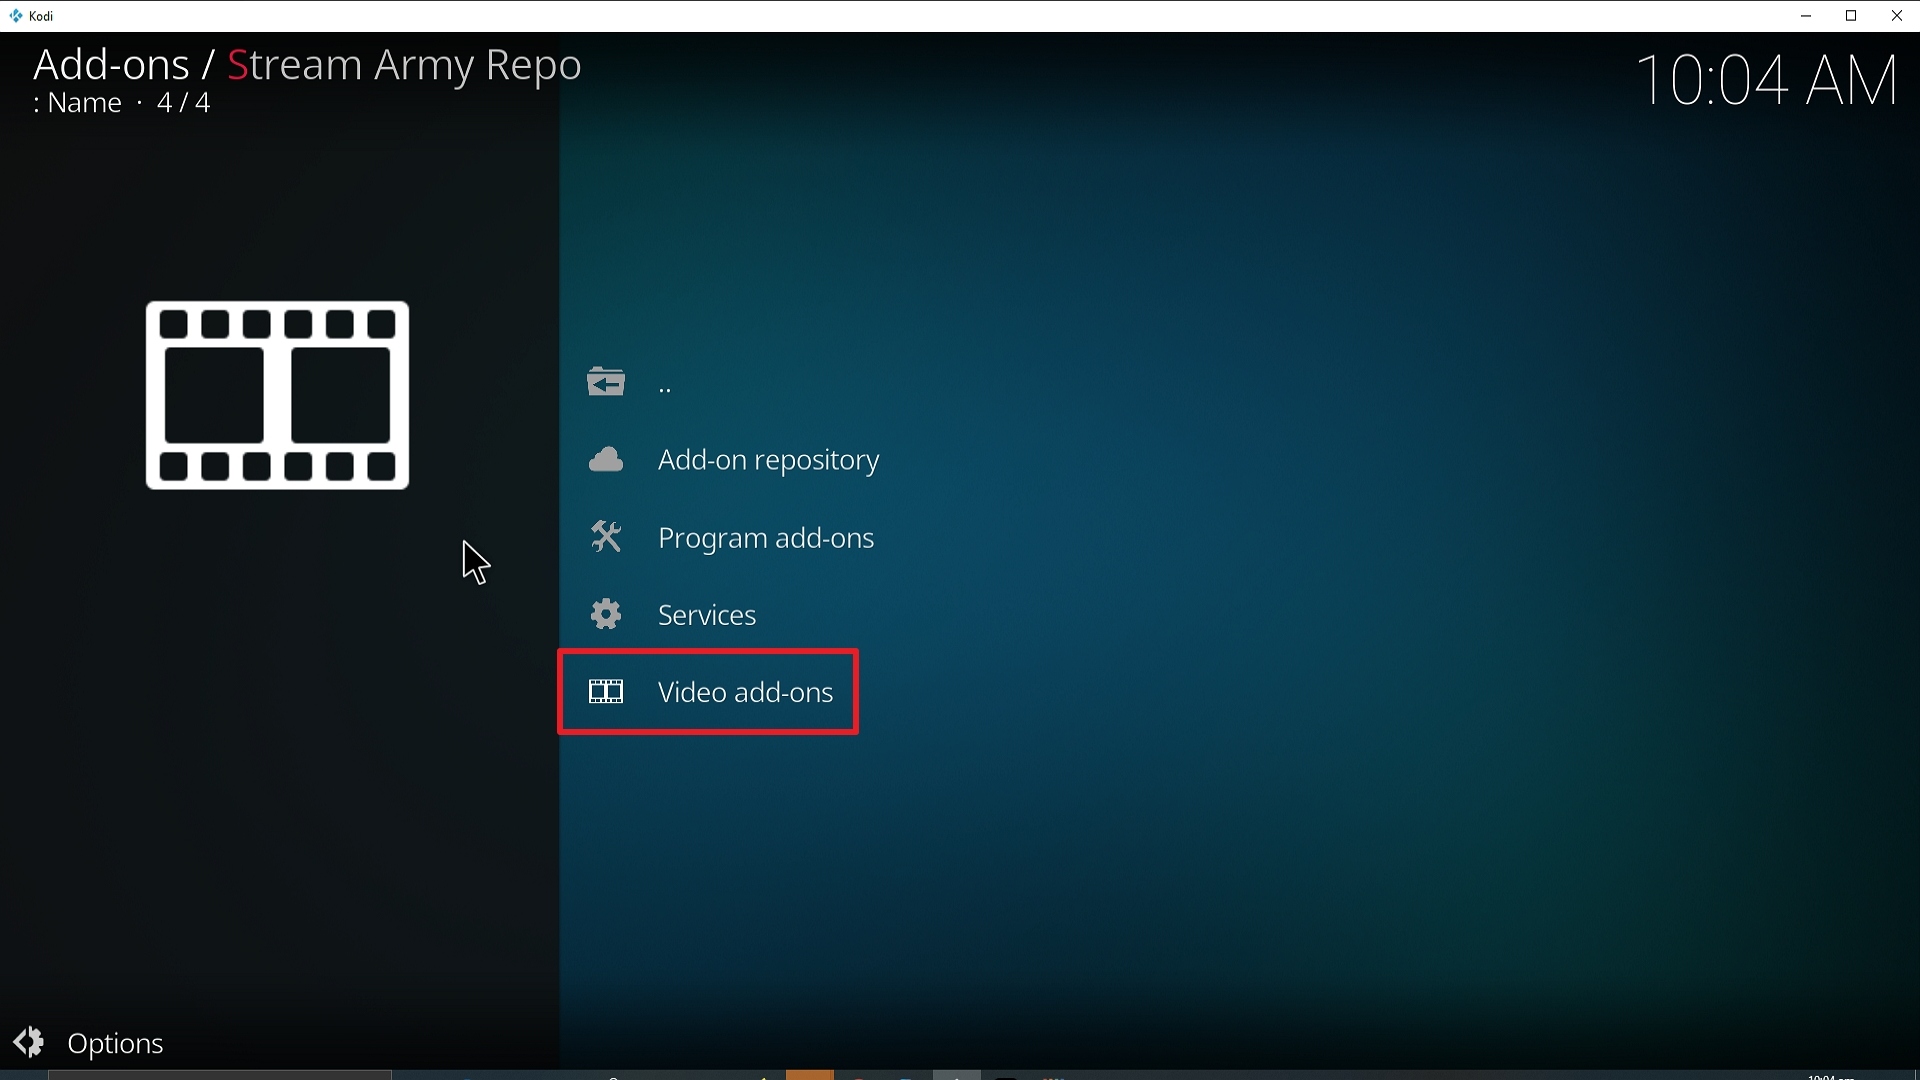
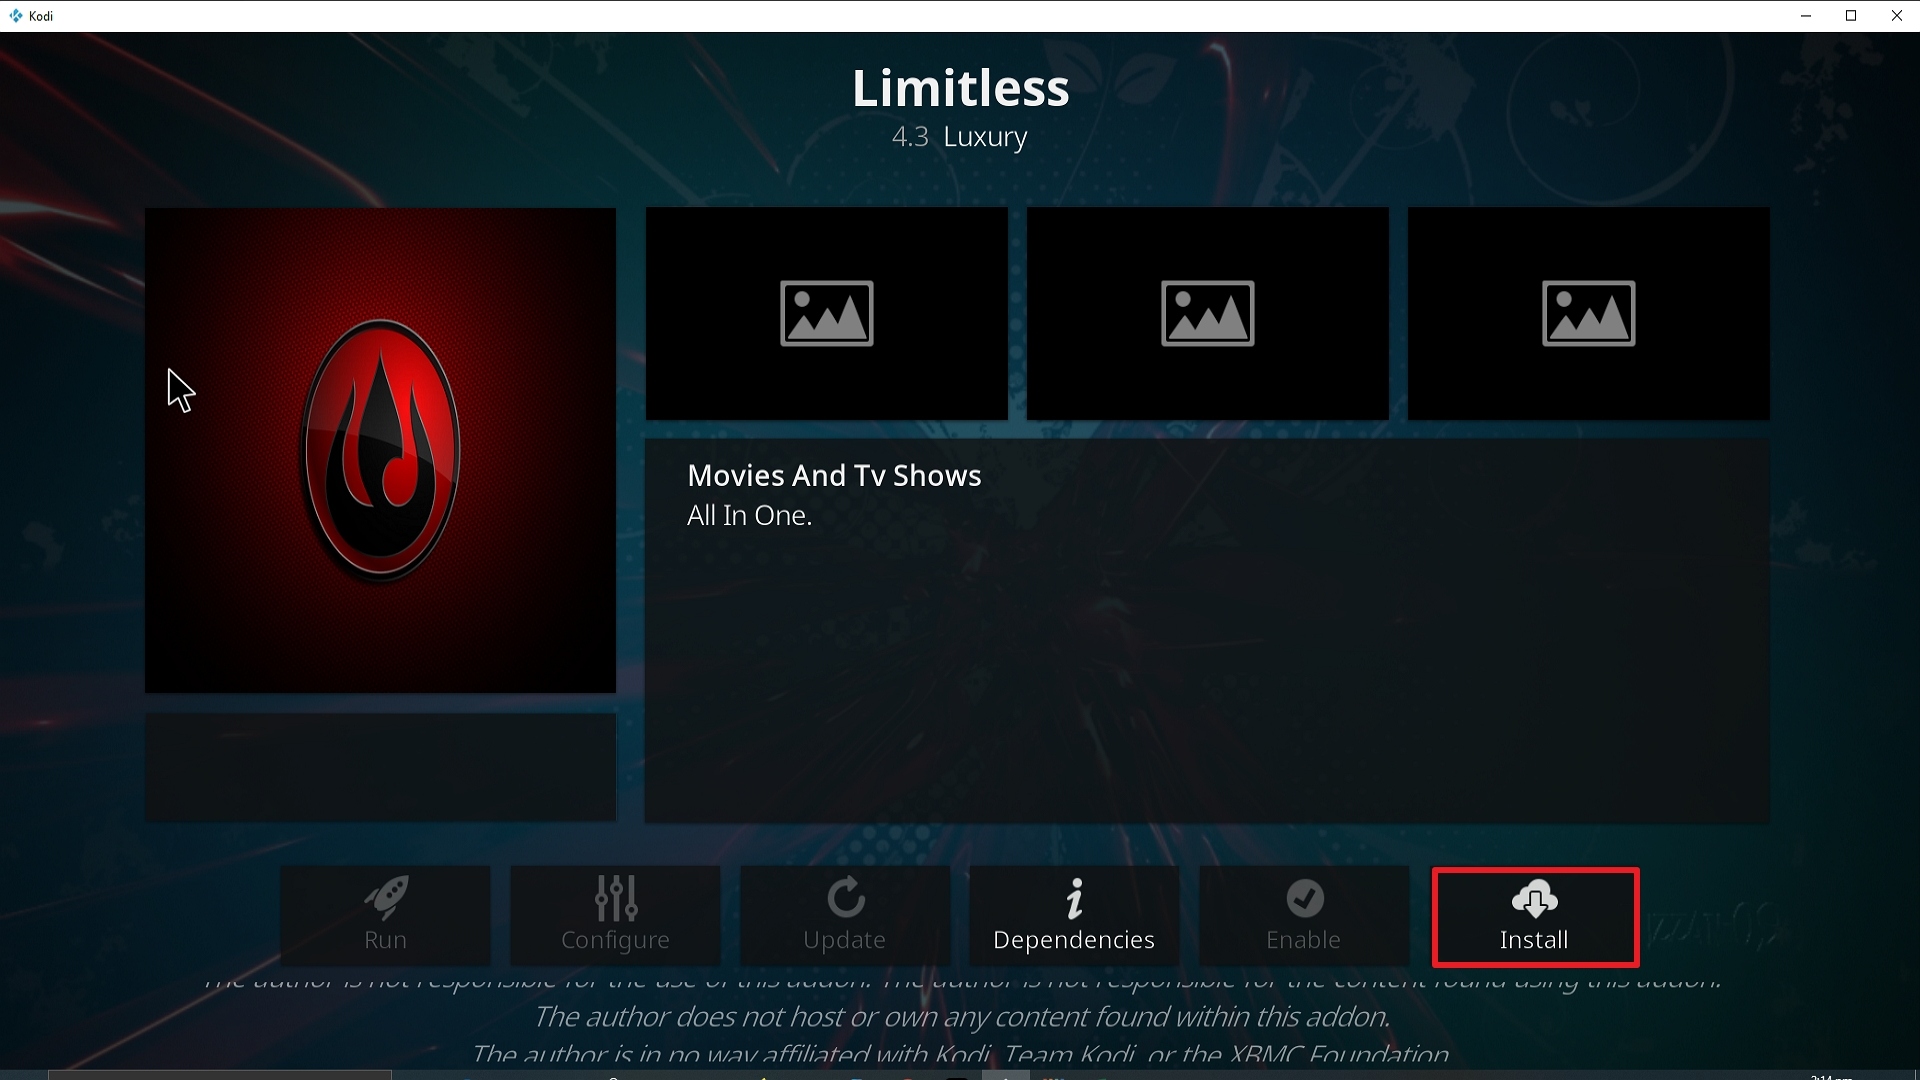
21. Pick Video add-ons.
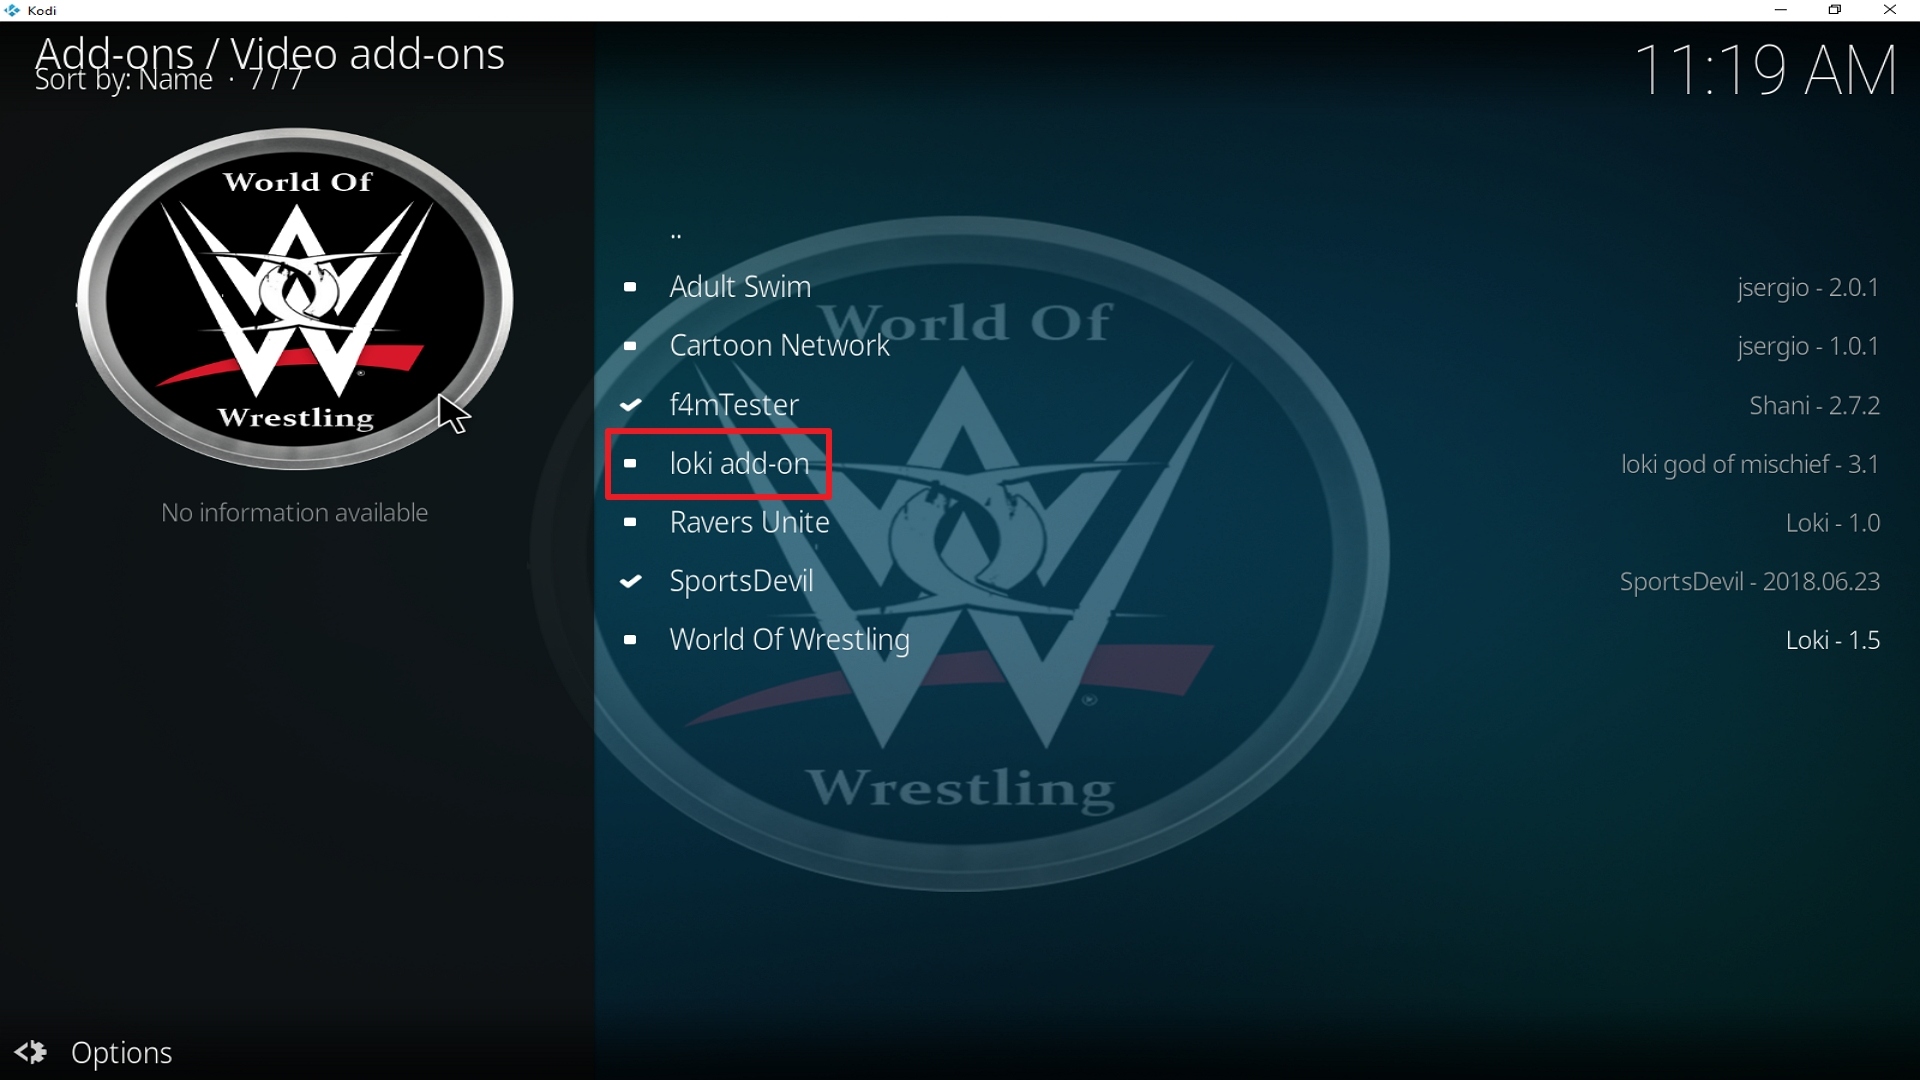
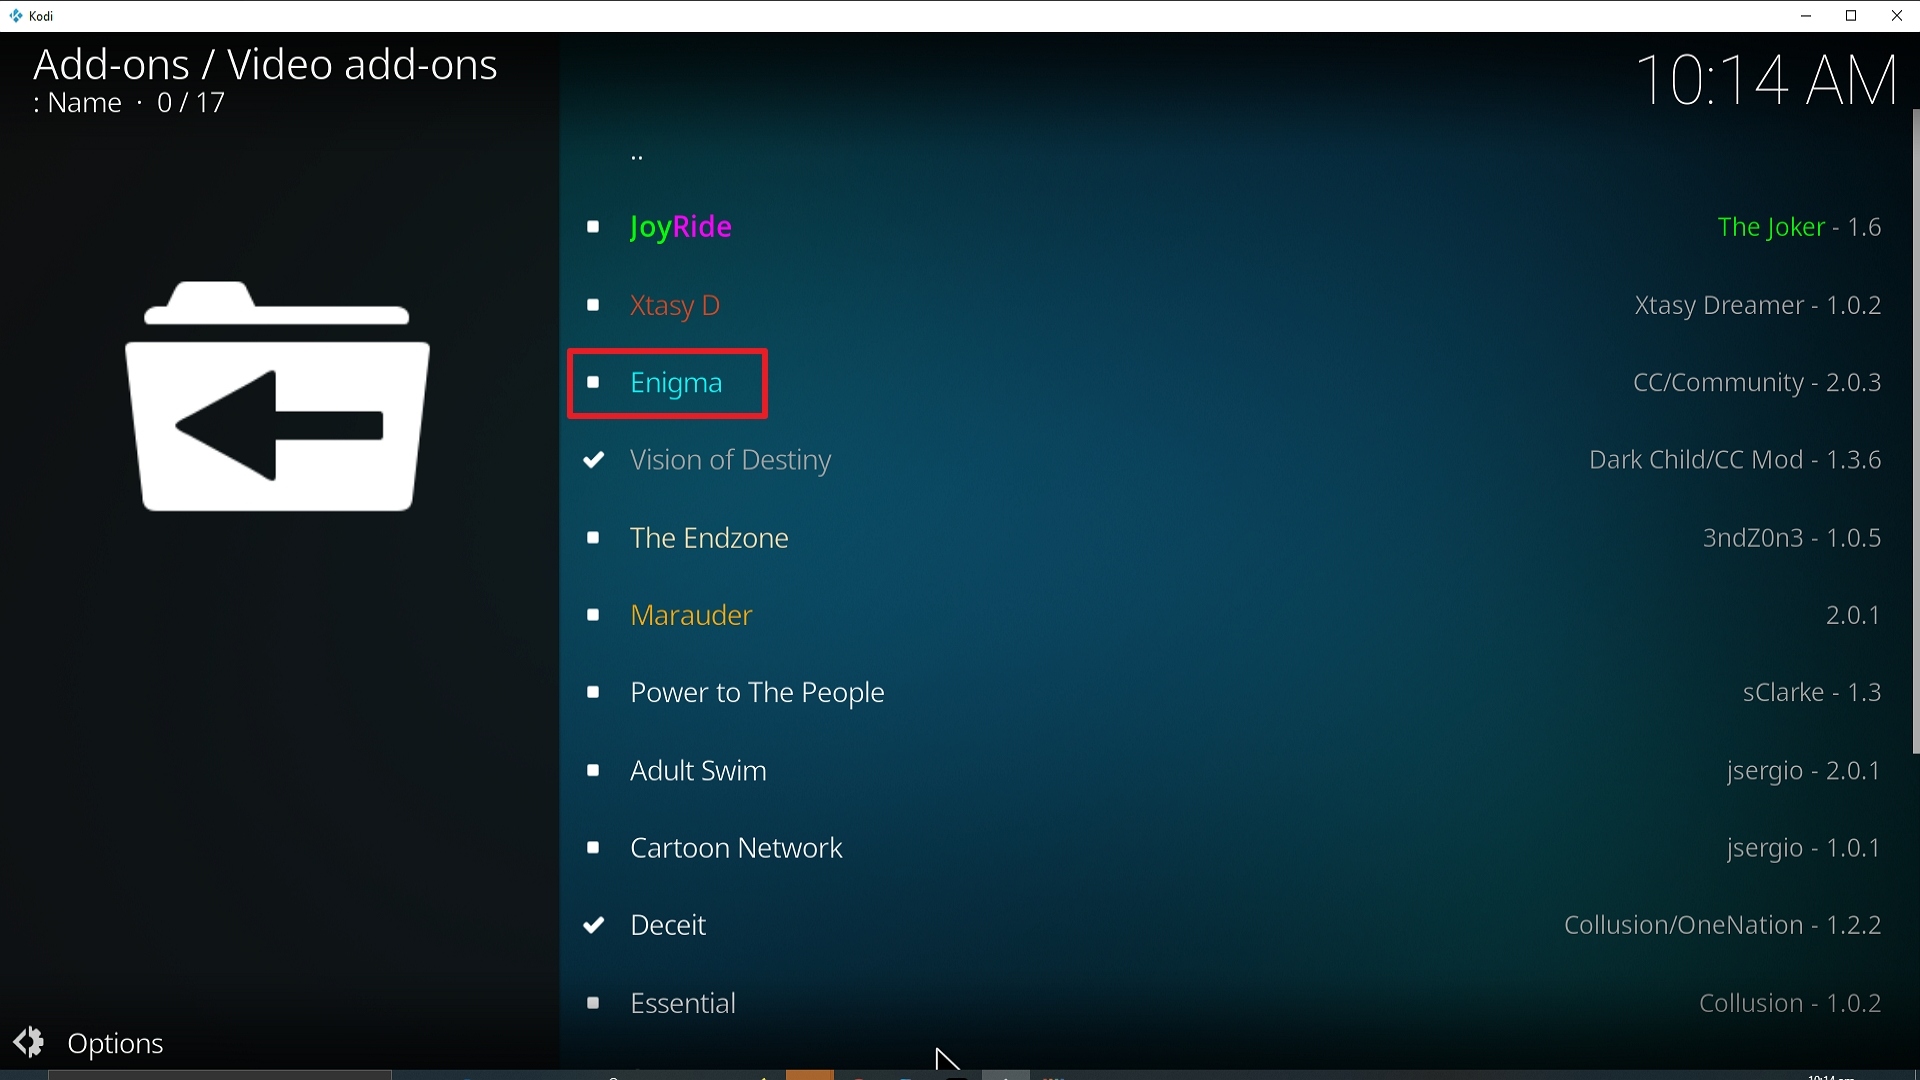
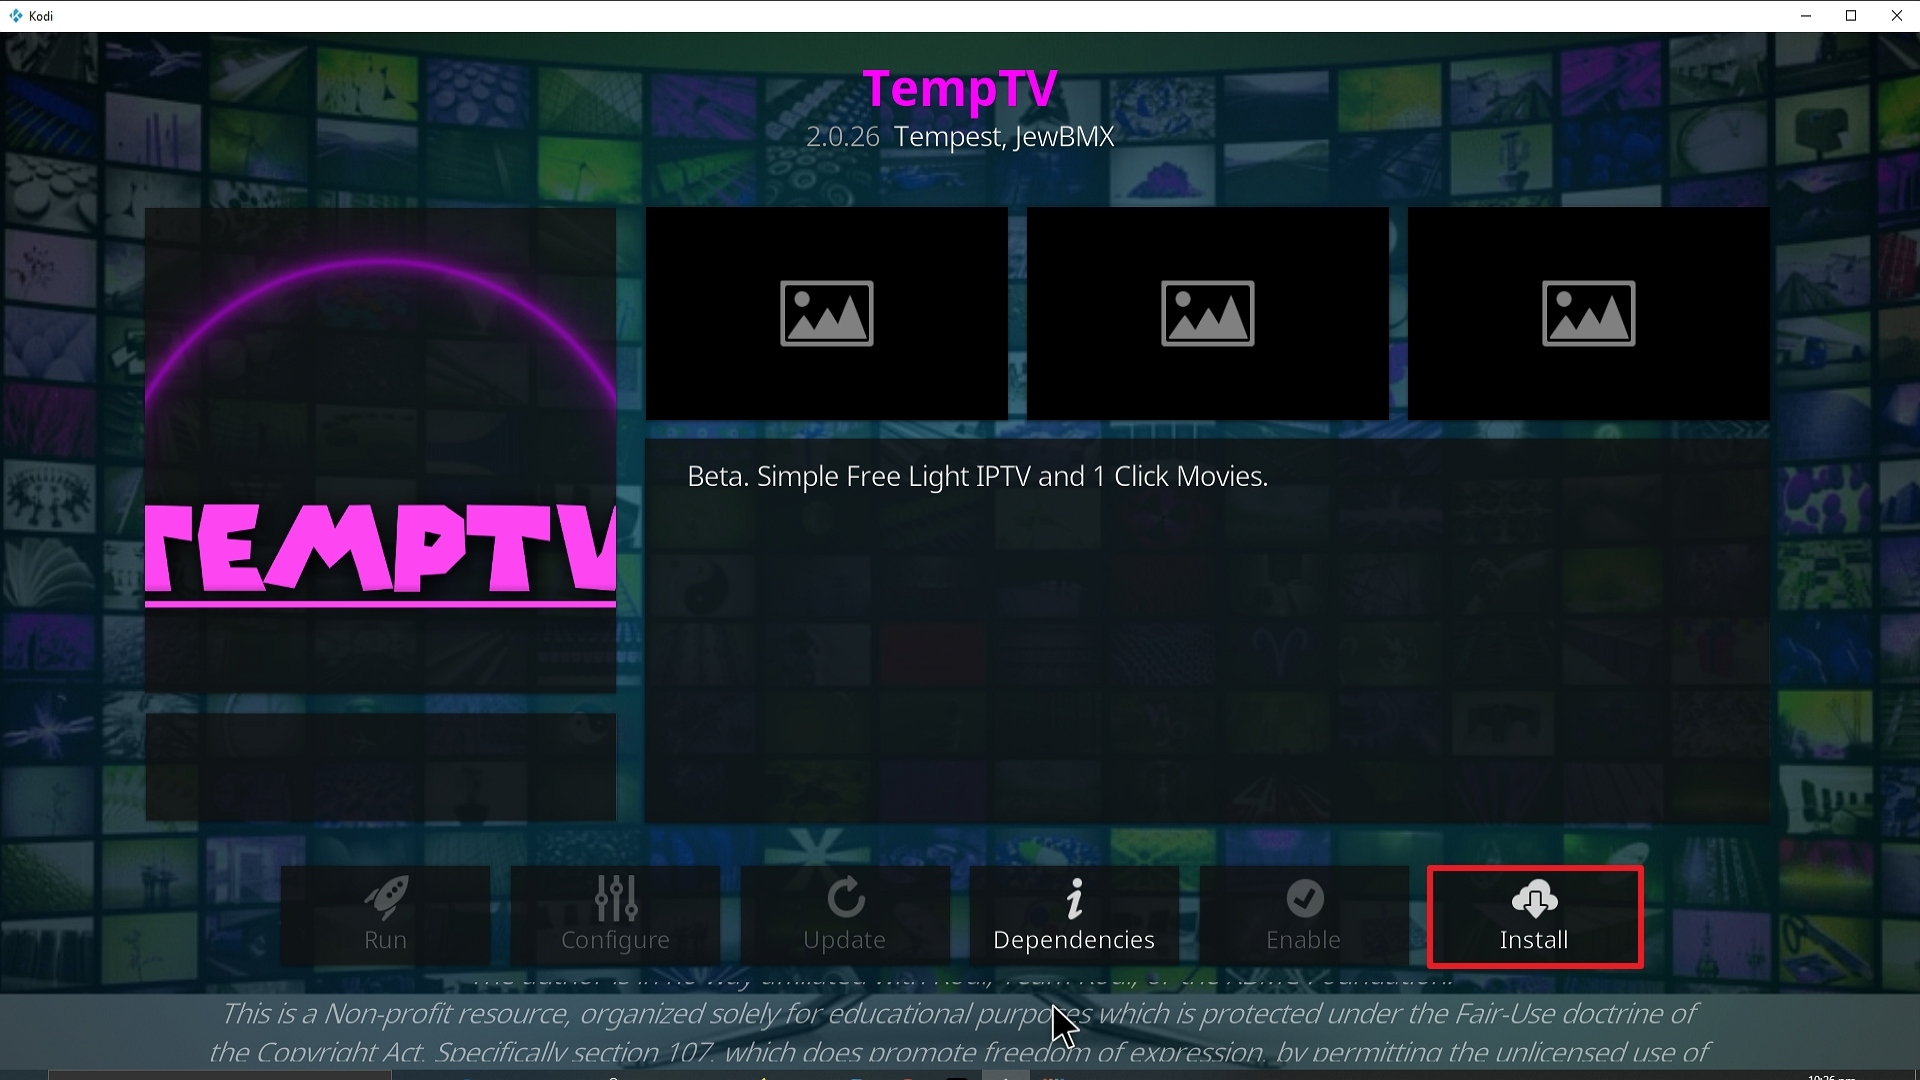
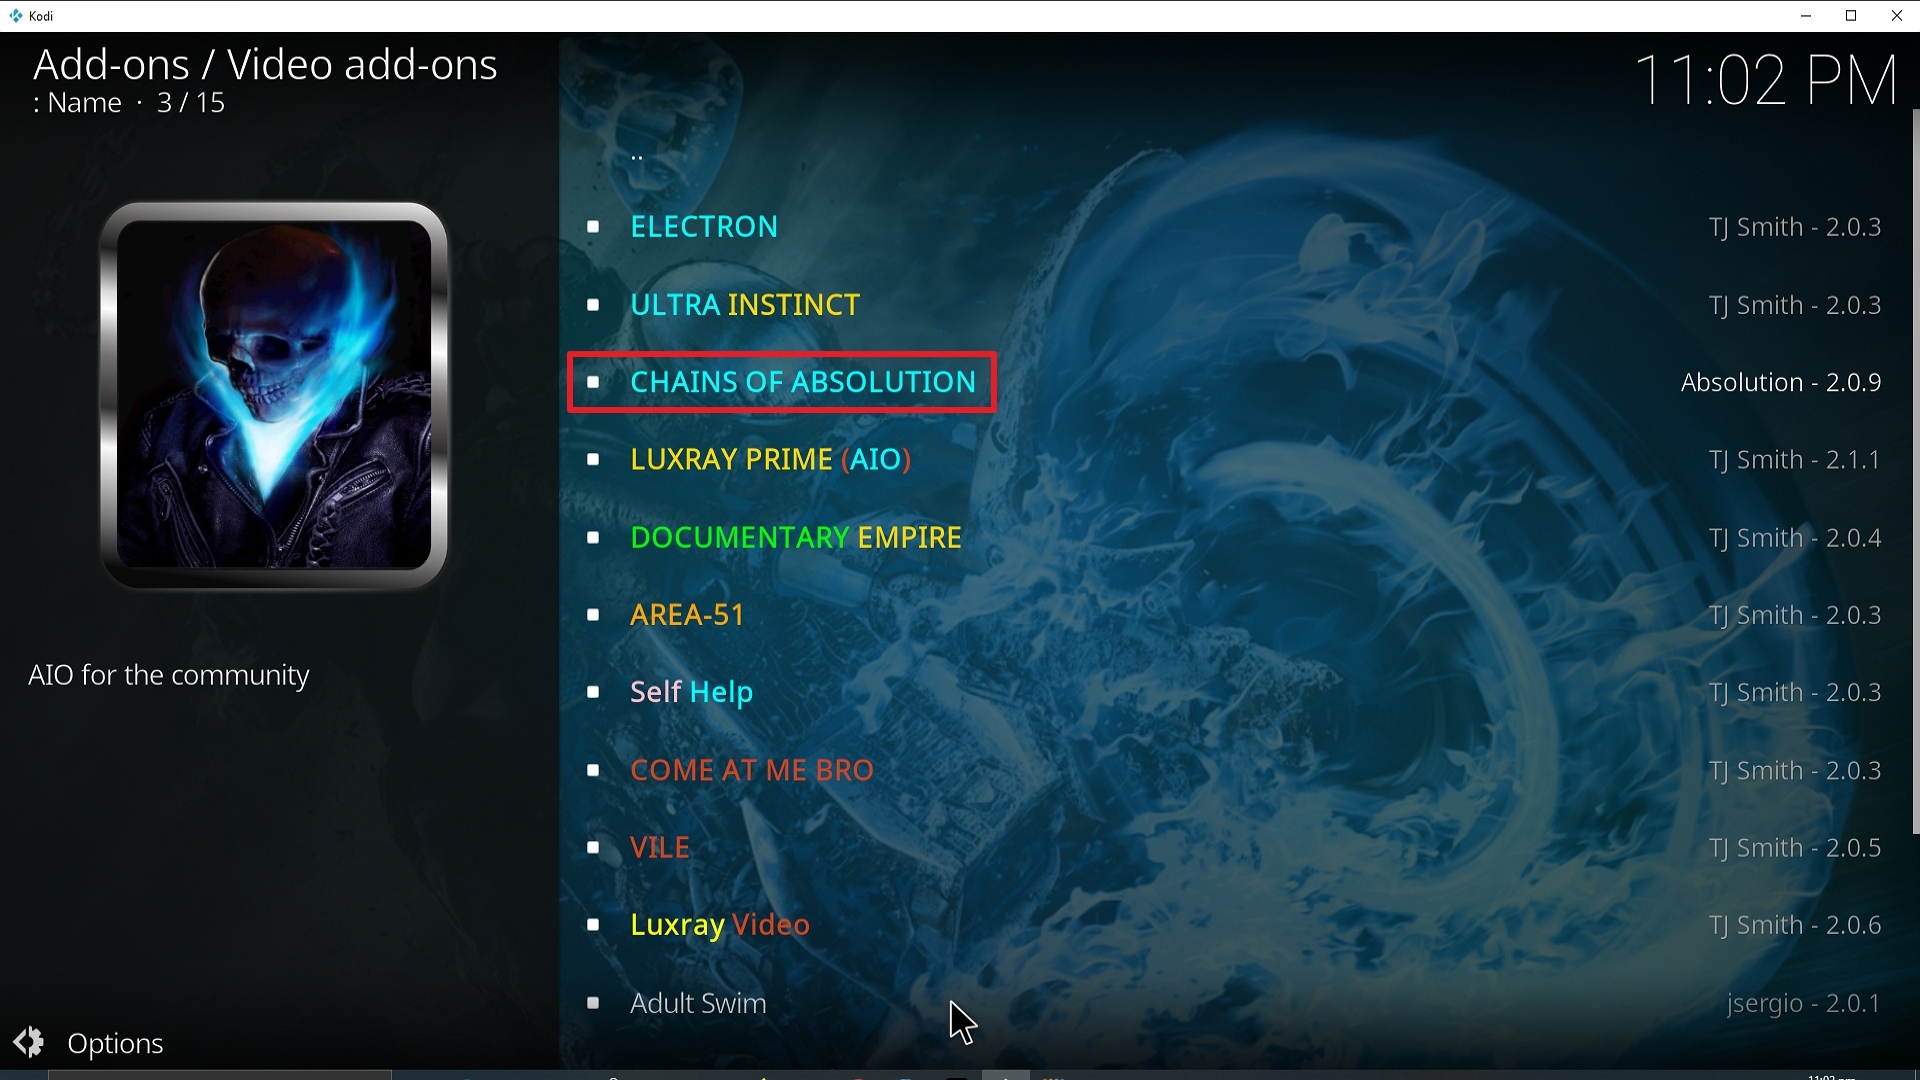
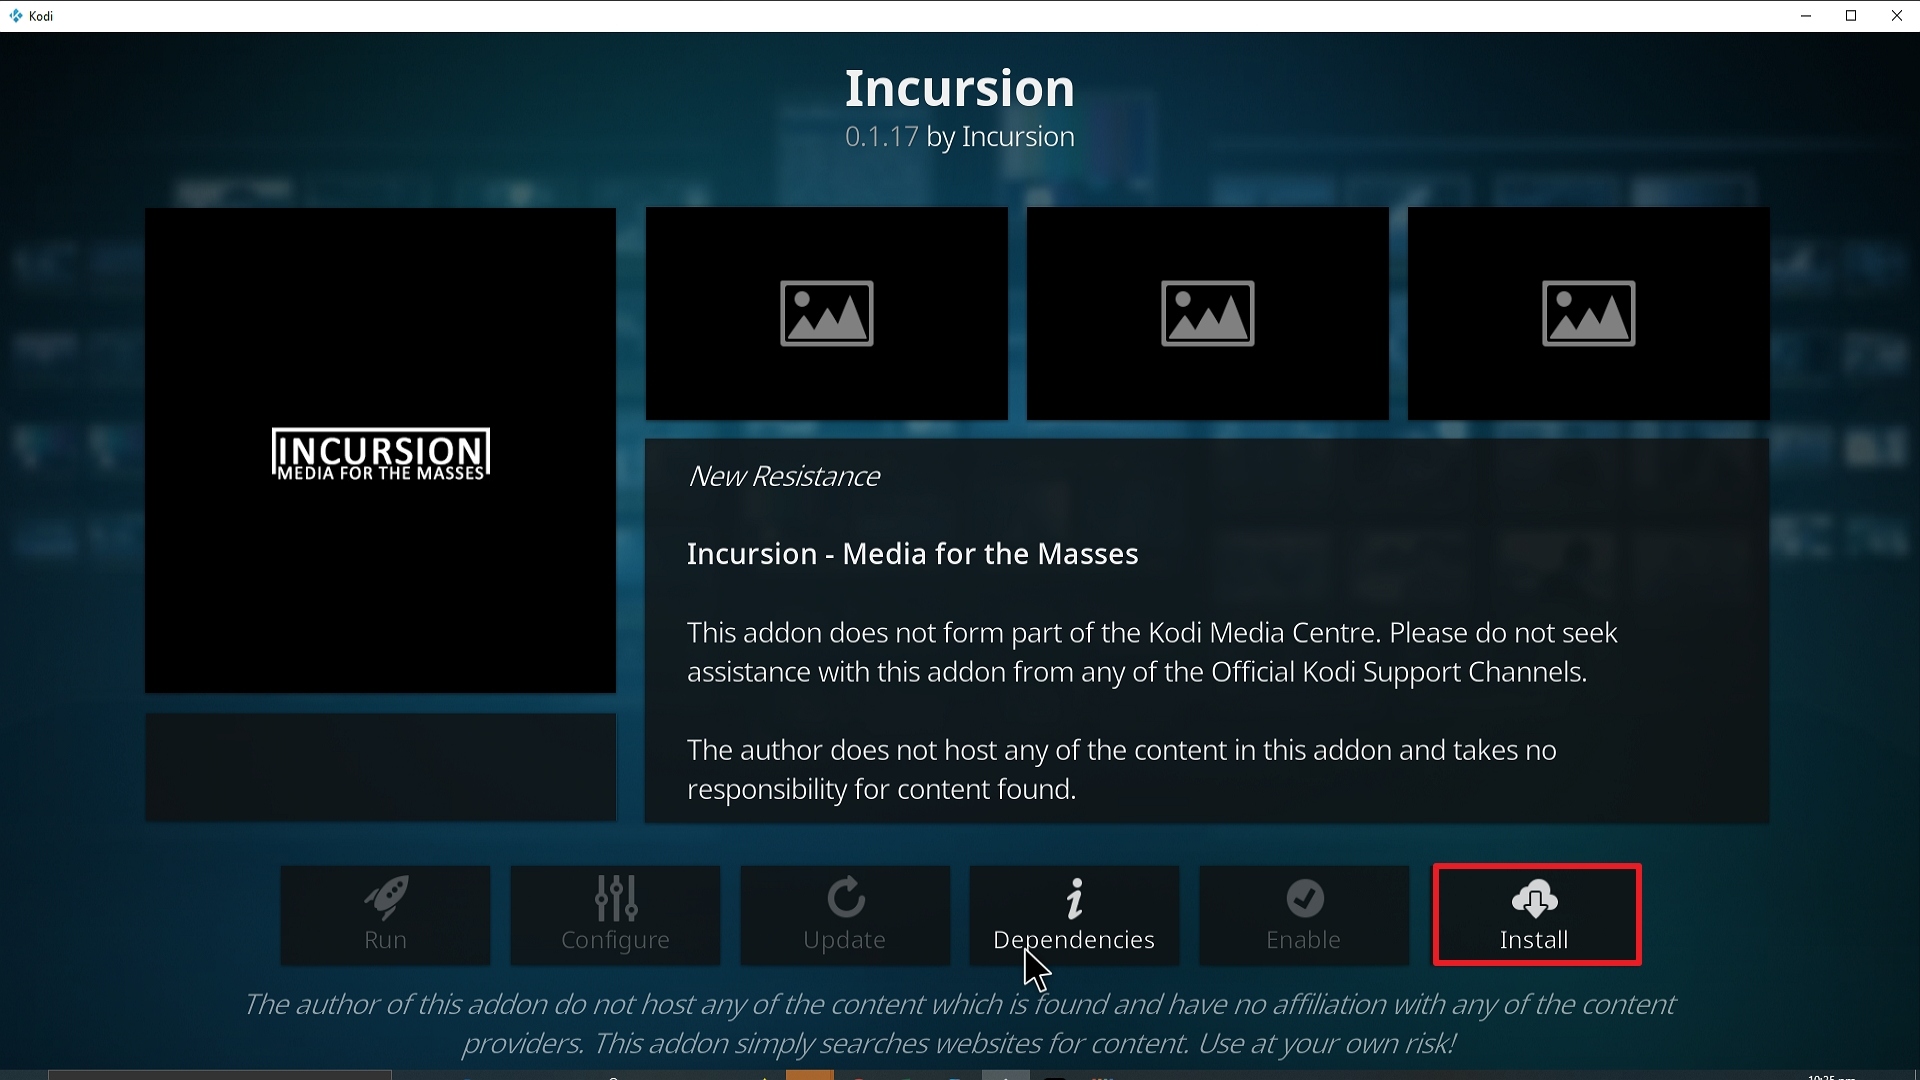
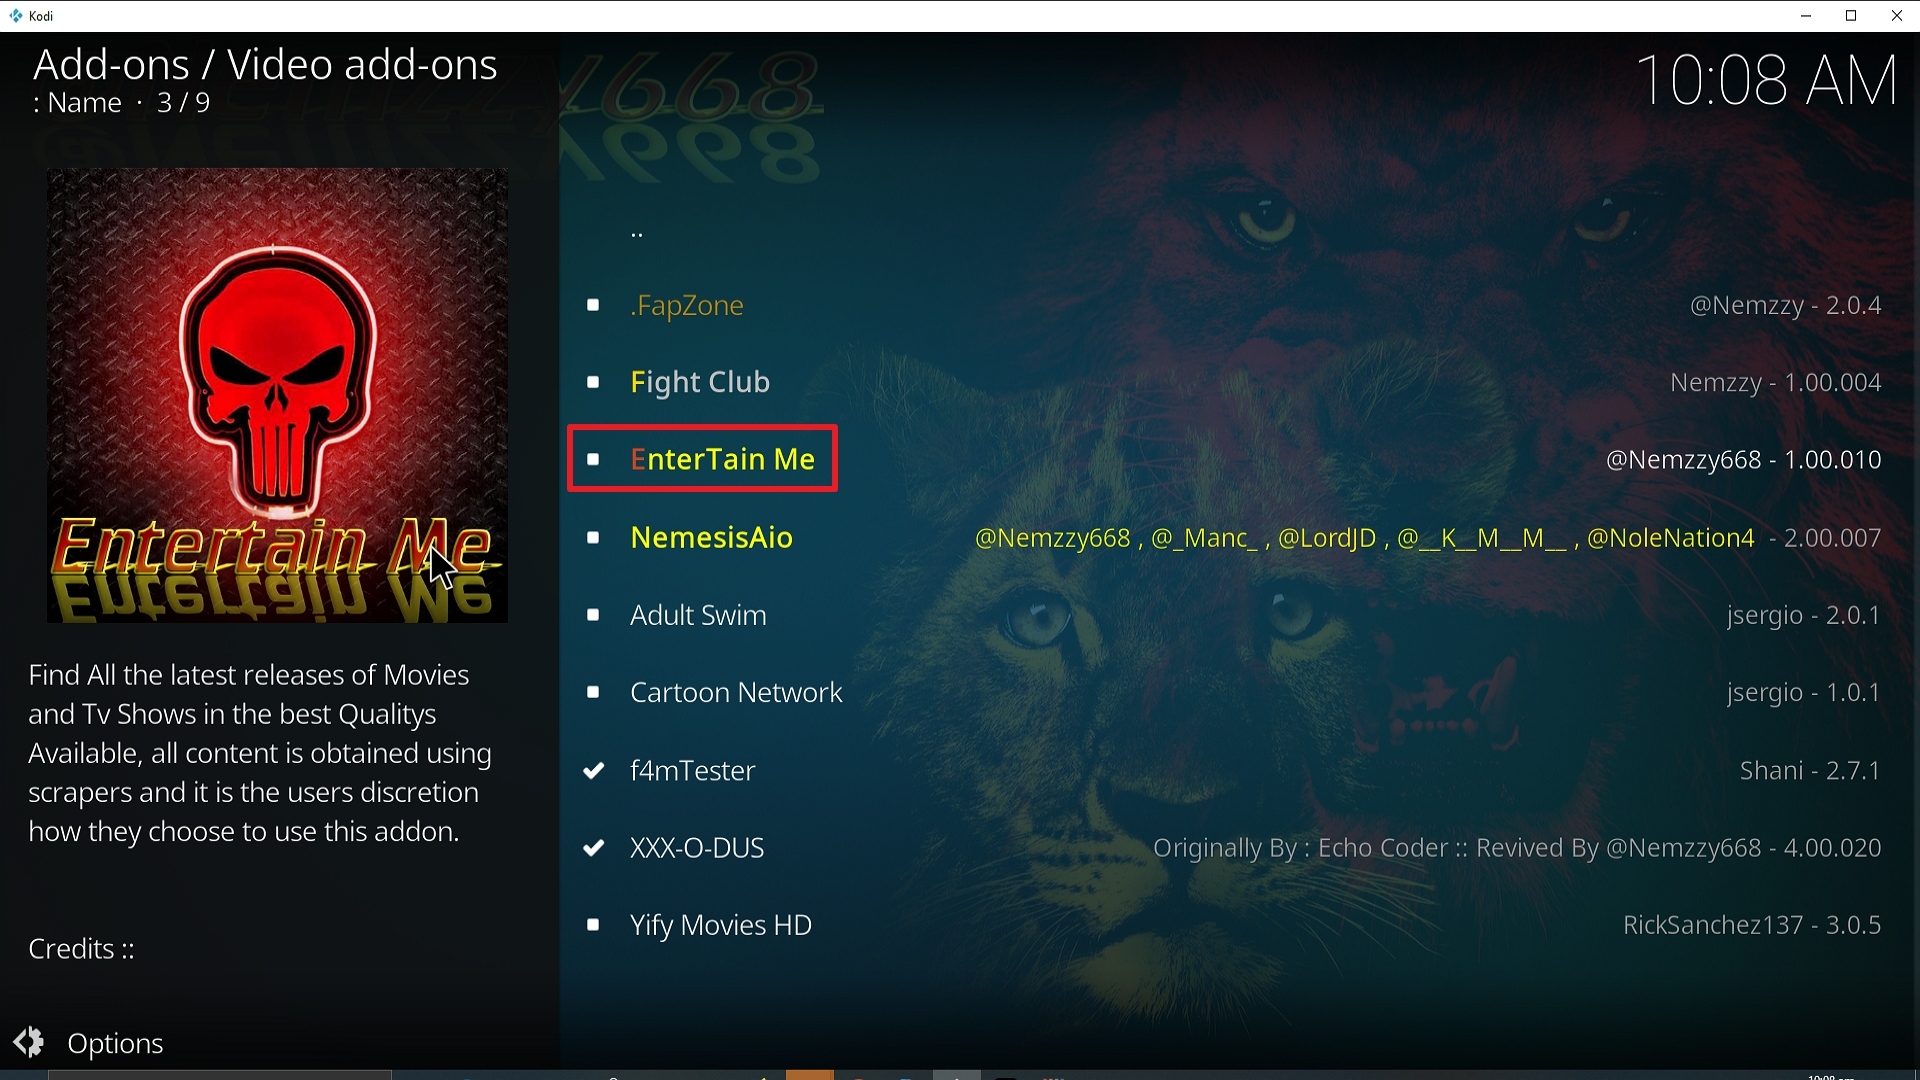
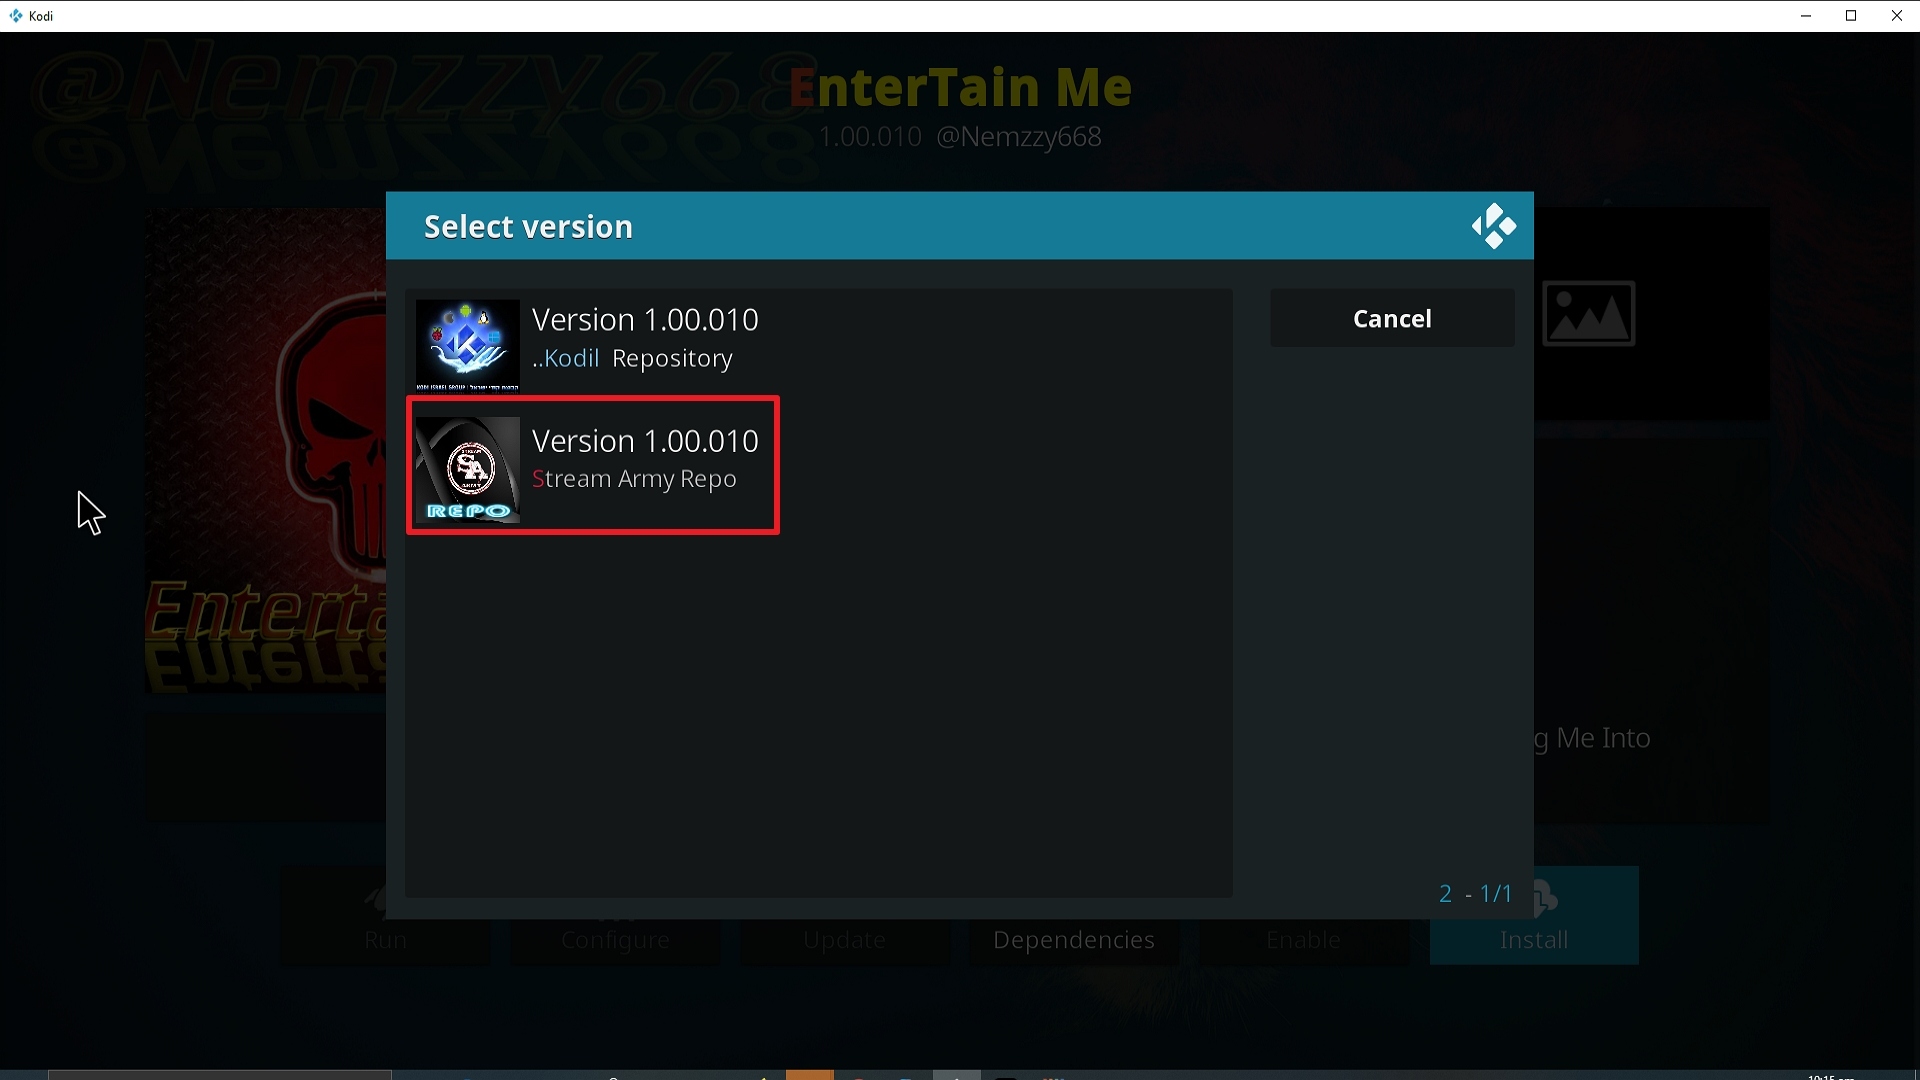
22. Select A Pirate’s Life For Me again.
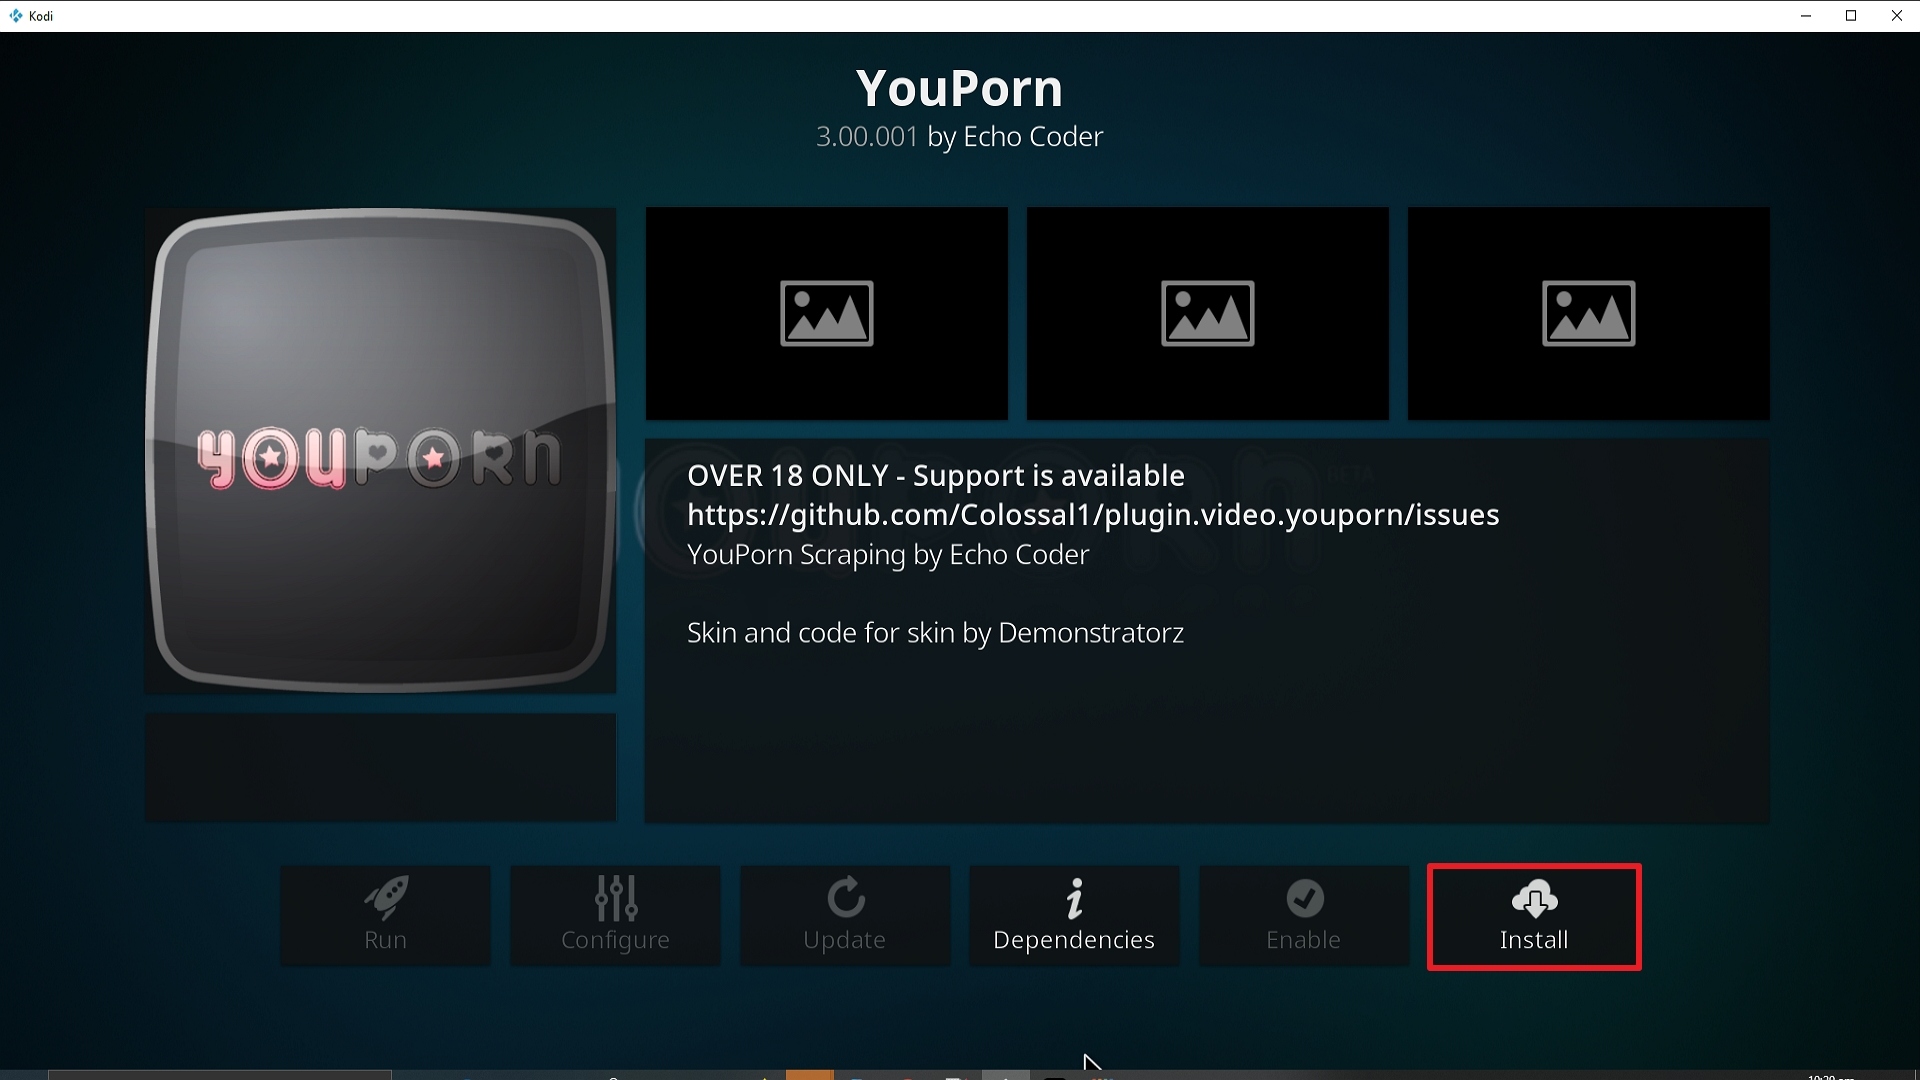
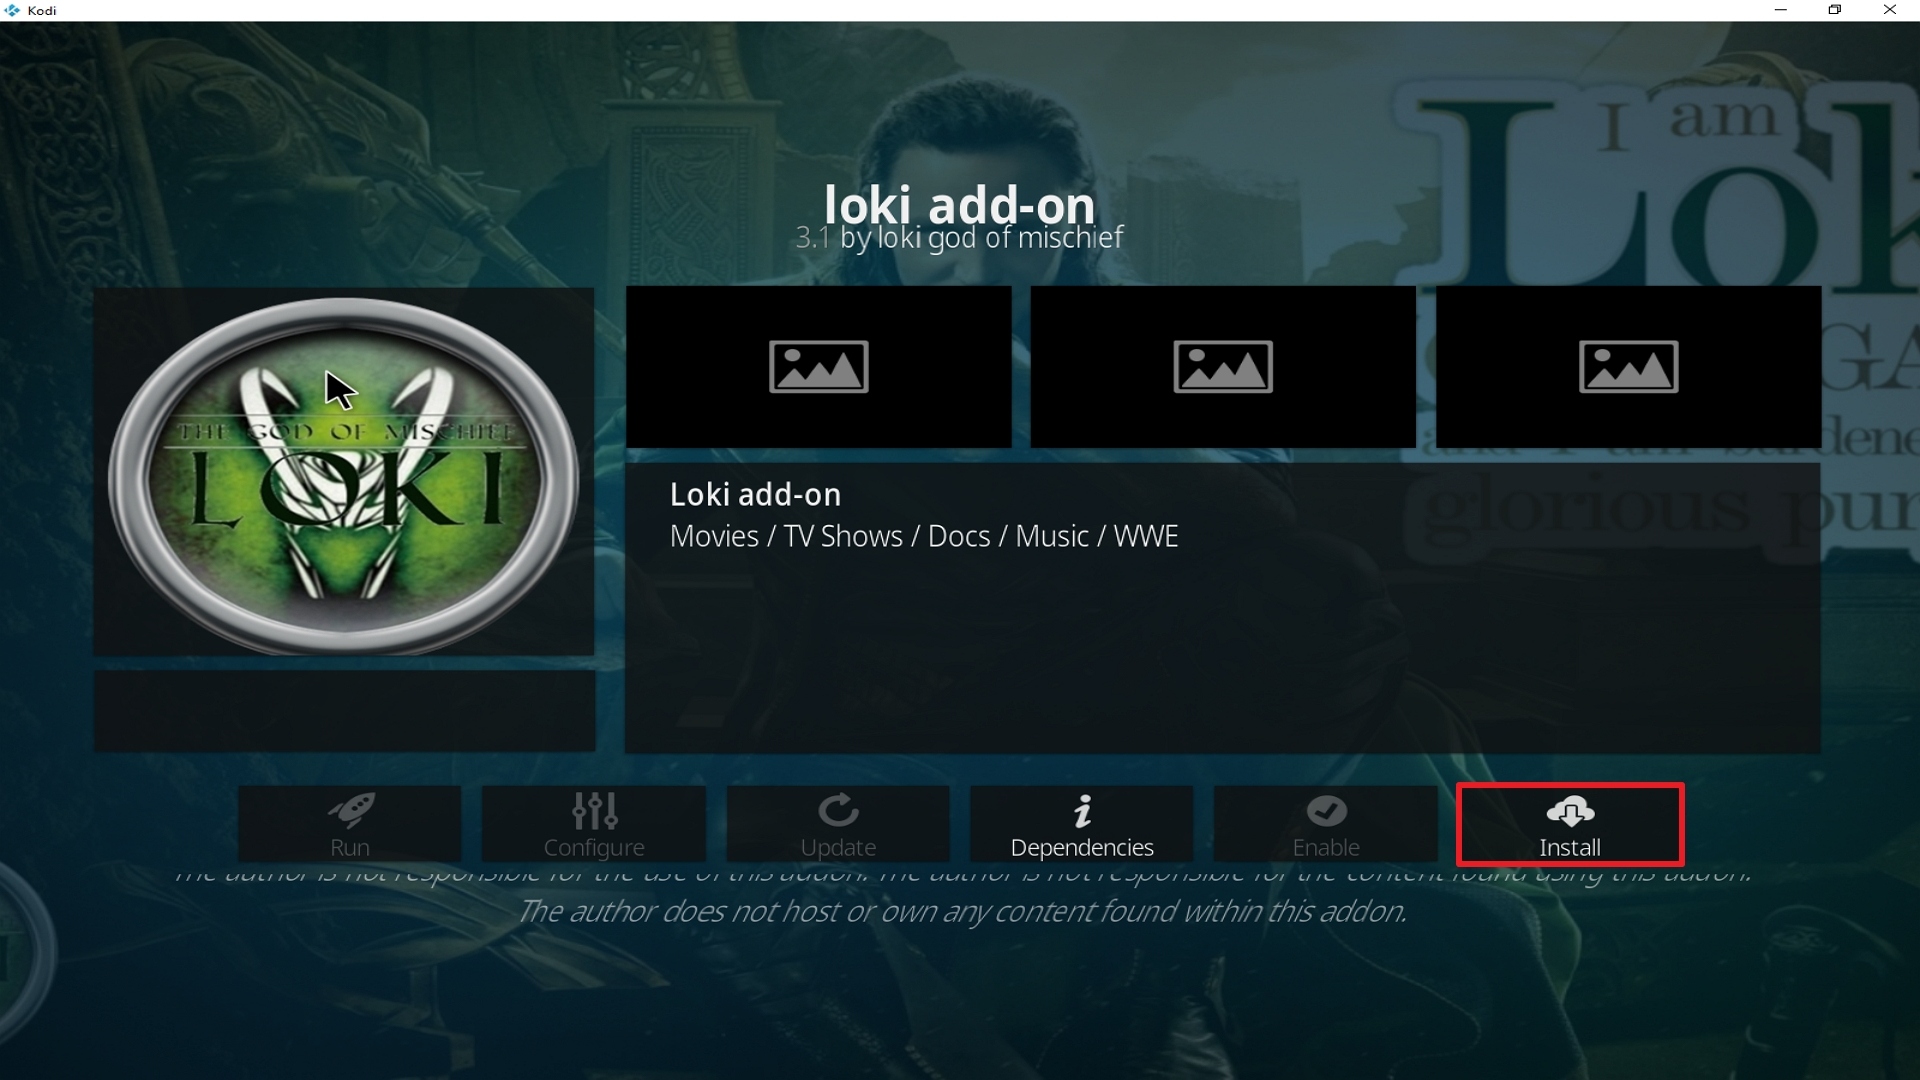
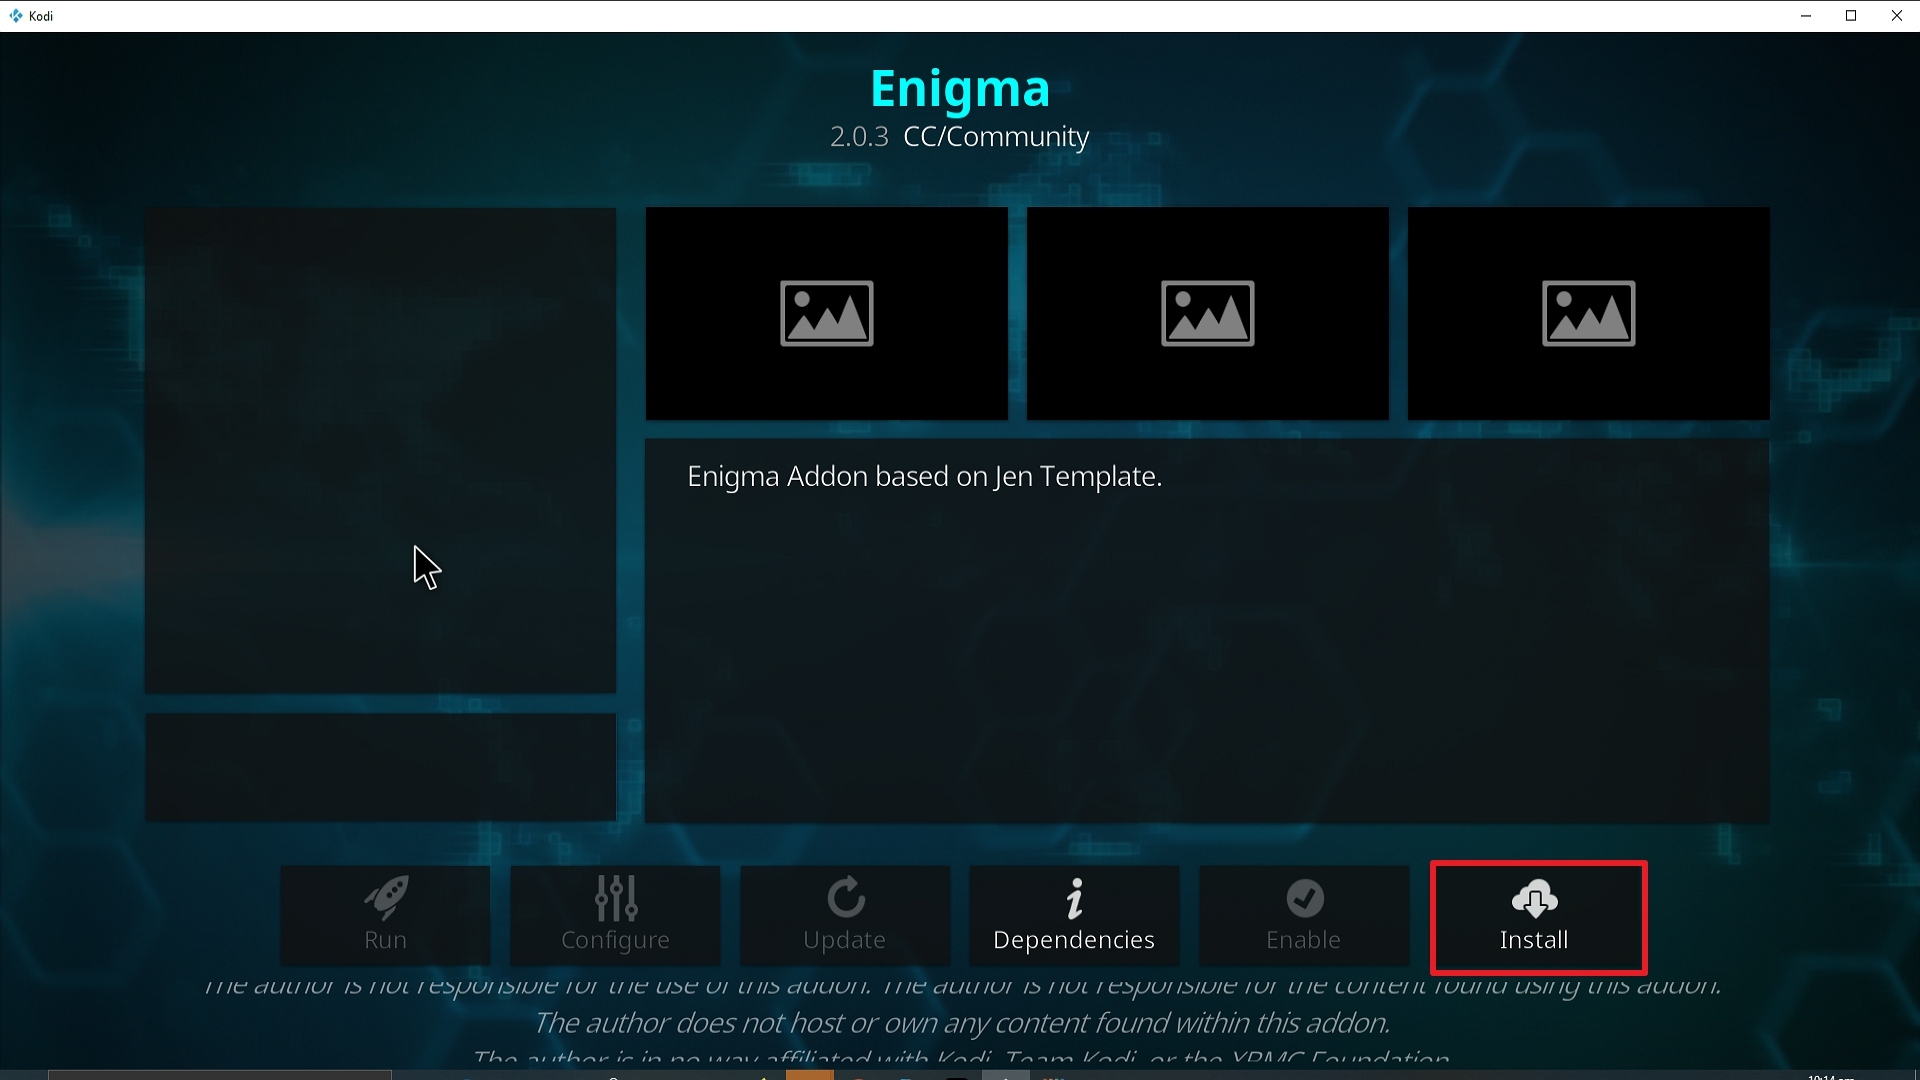
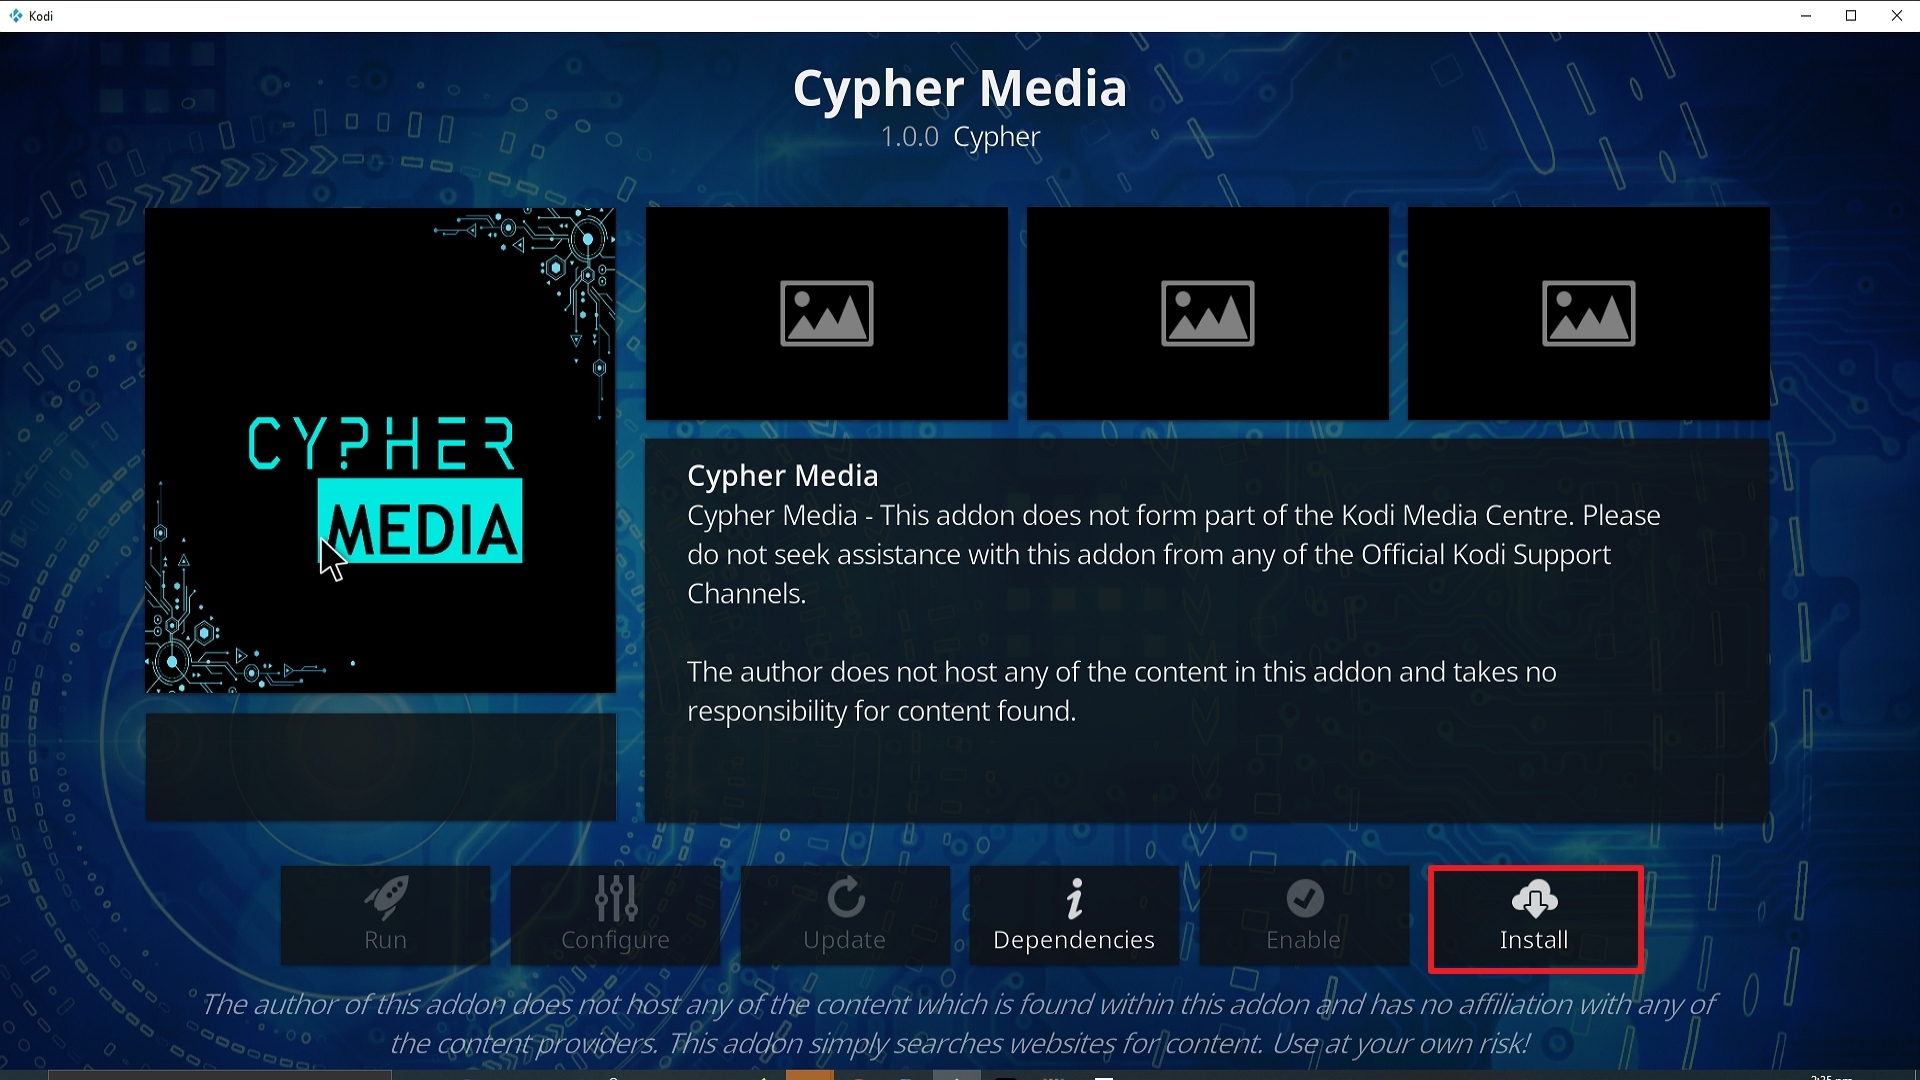
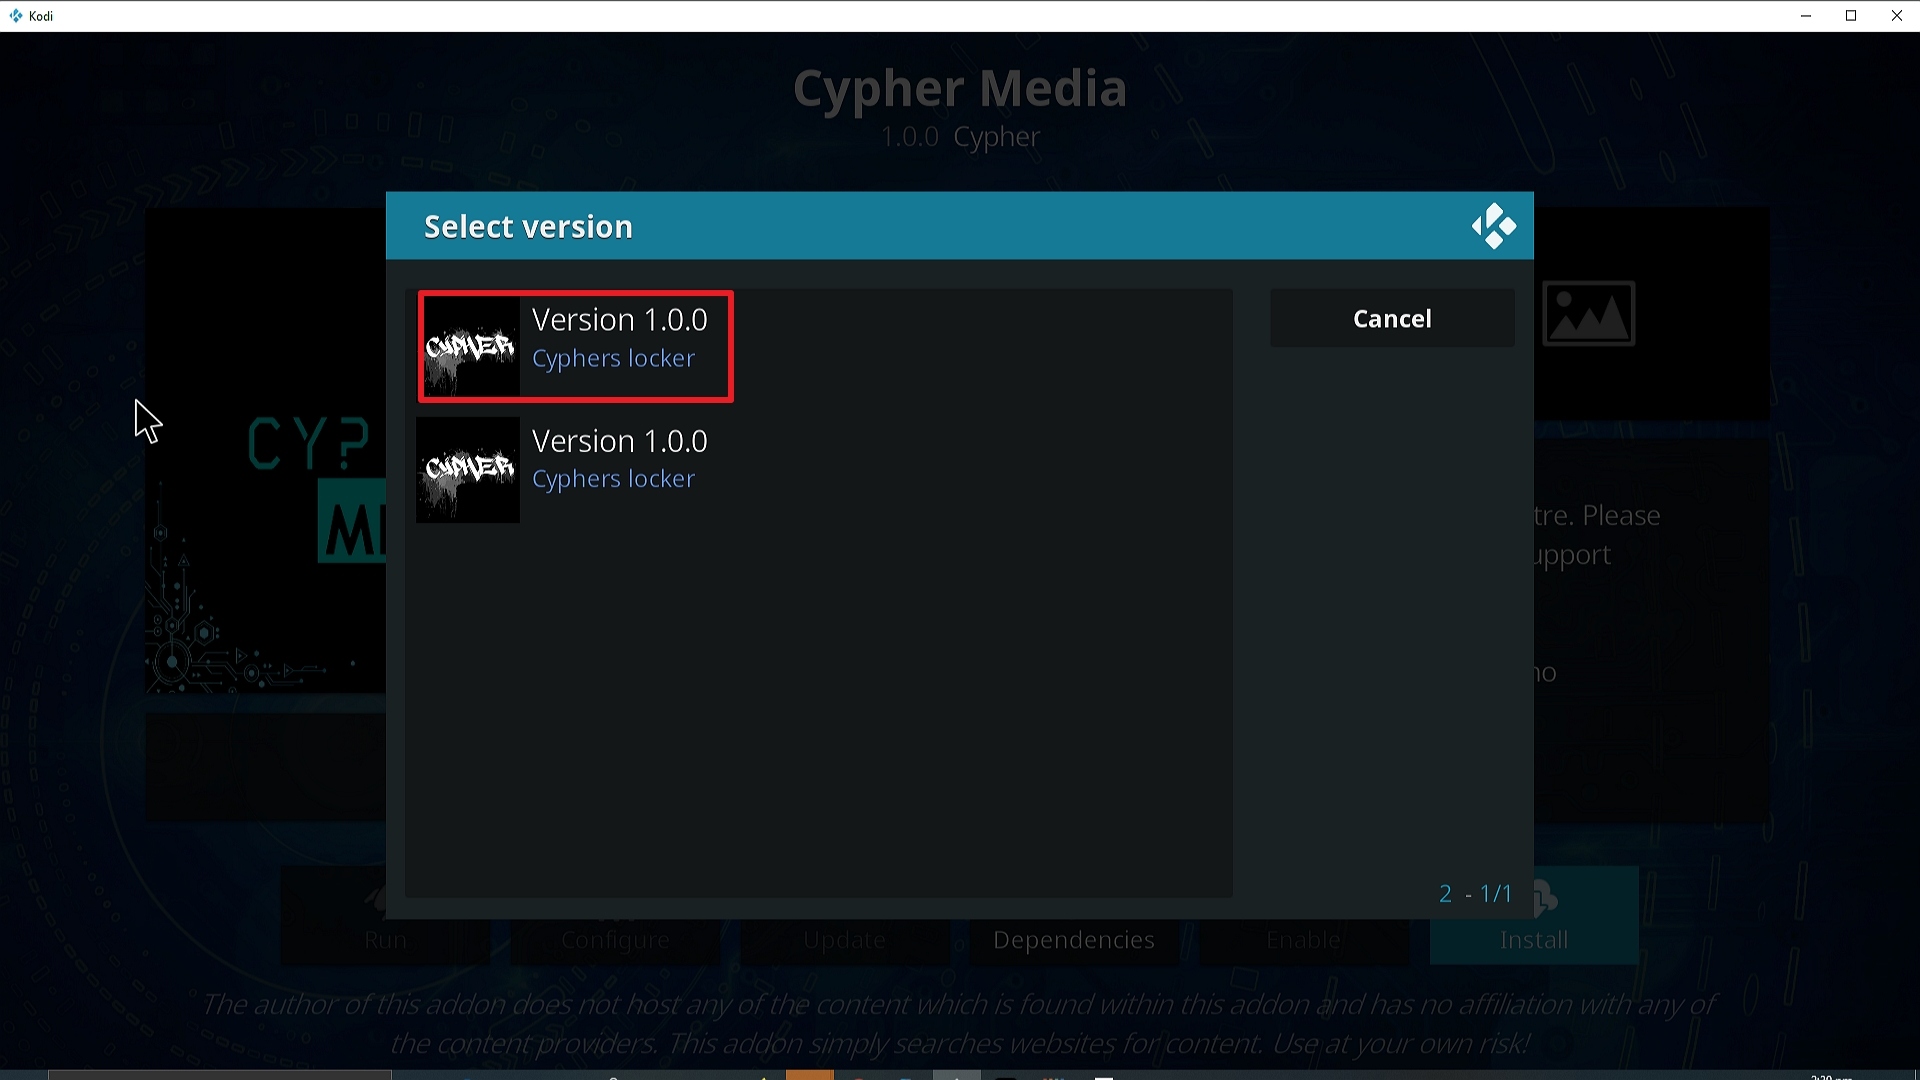
23. Click on Install.
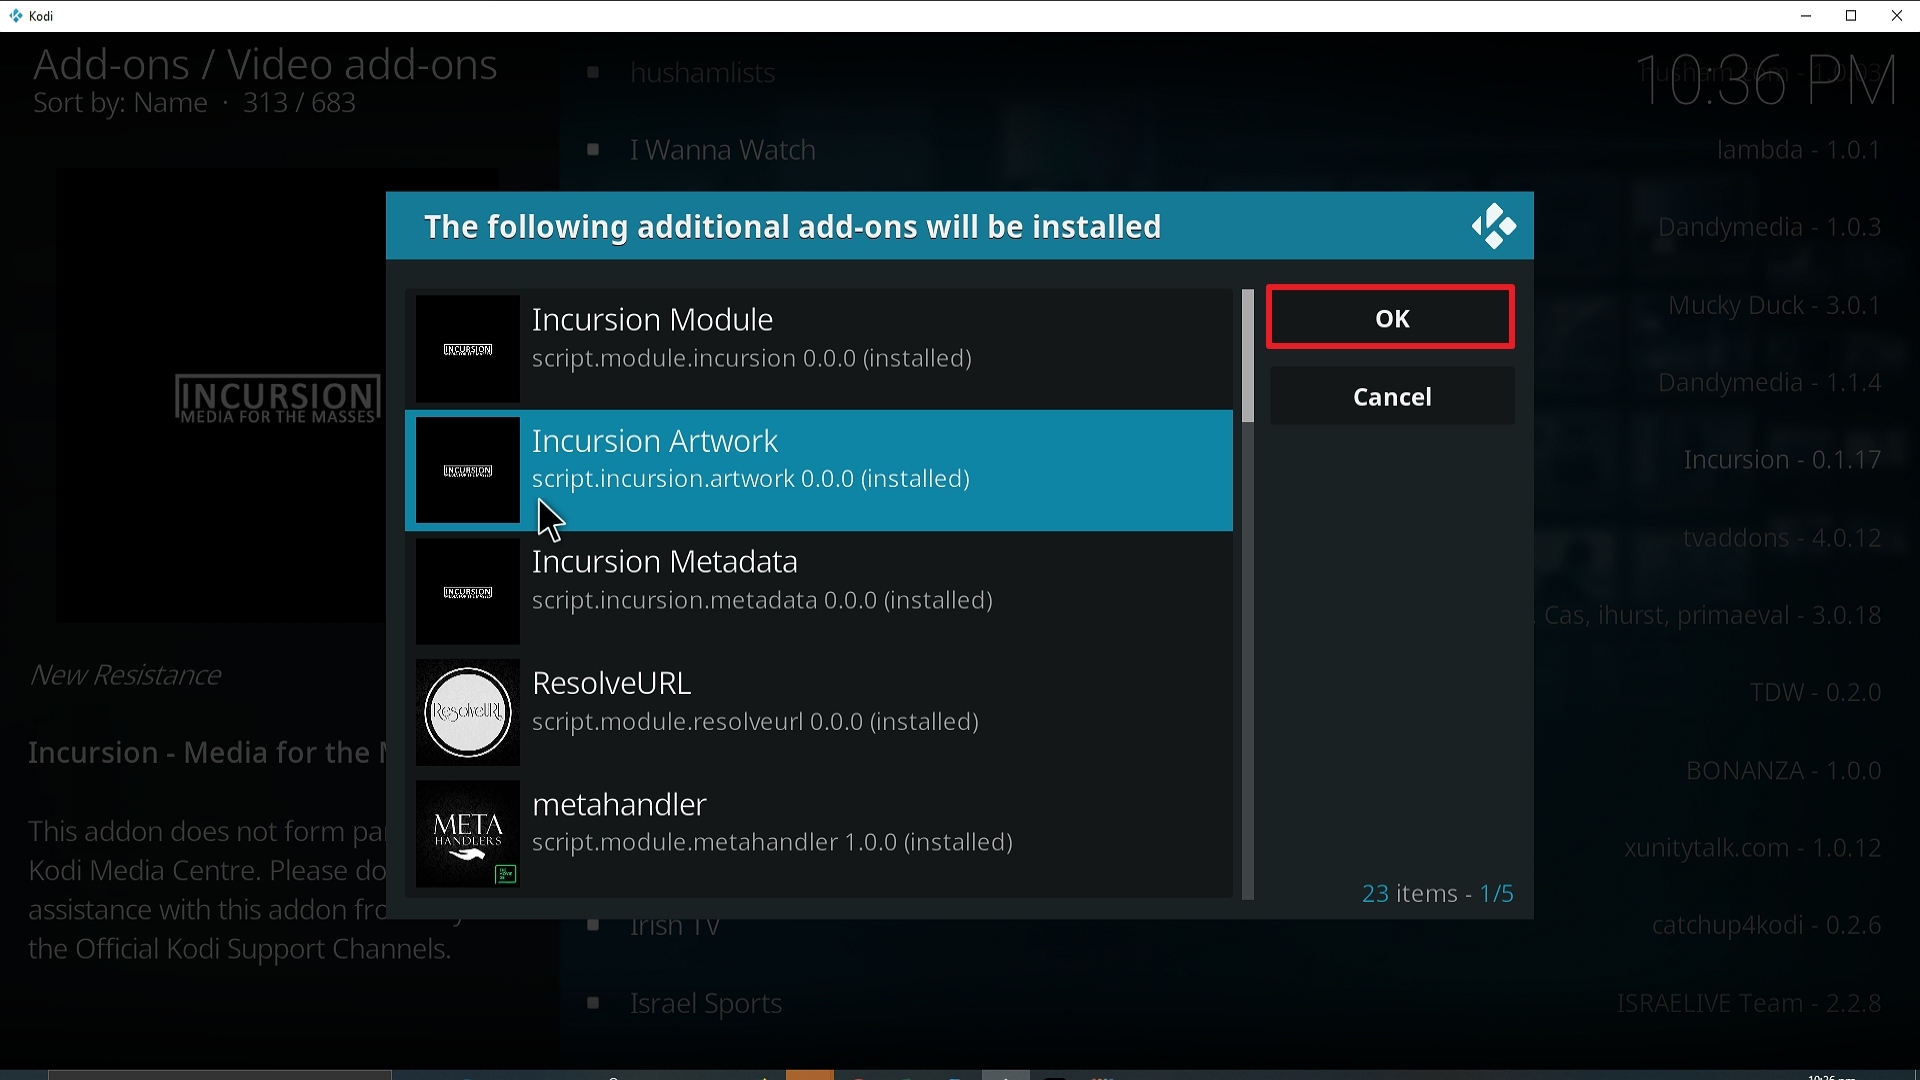
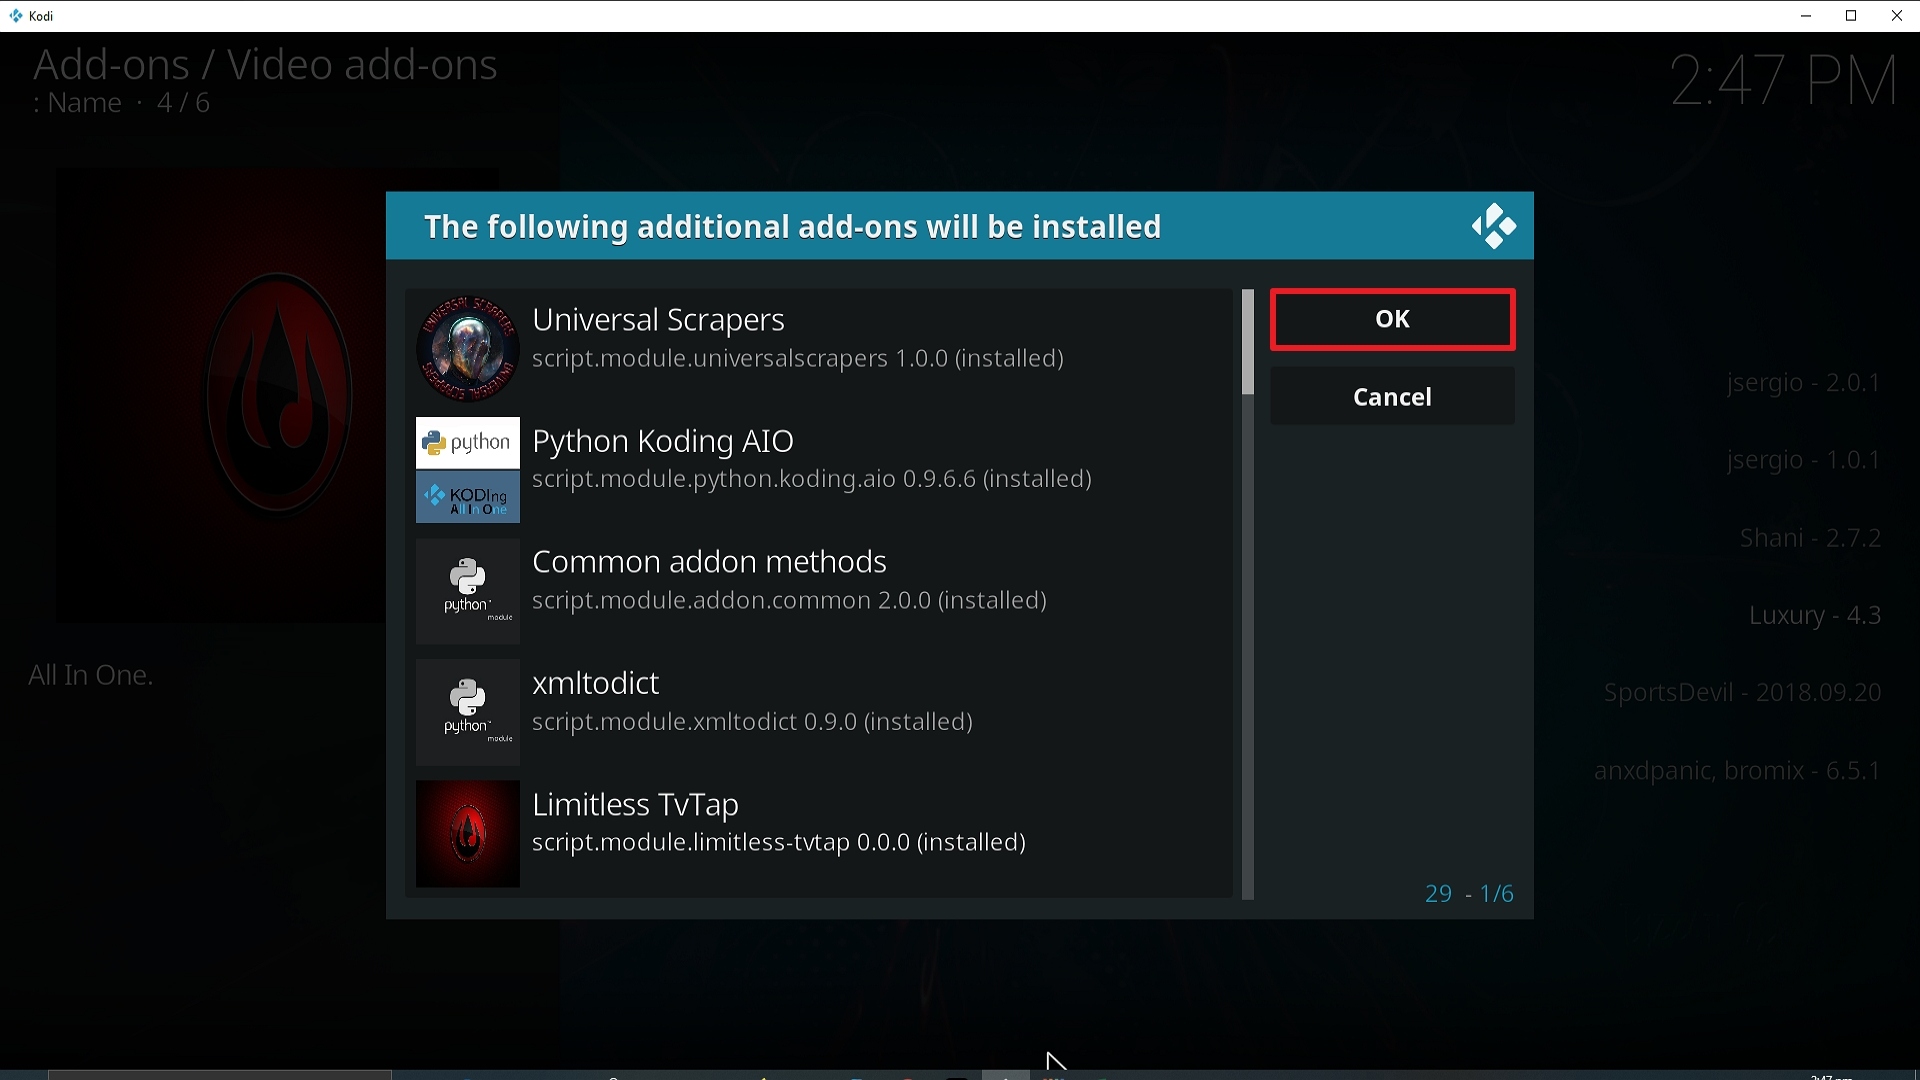
24. Select OK after reviewing the add-ons that will be installed.
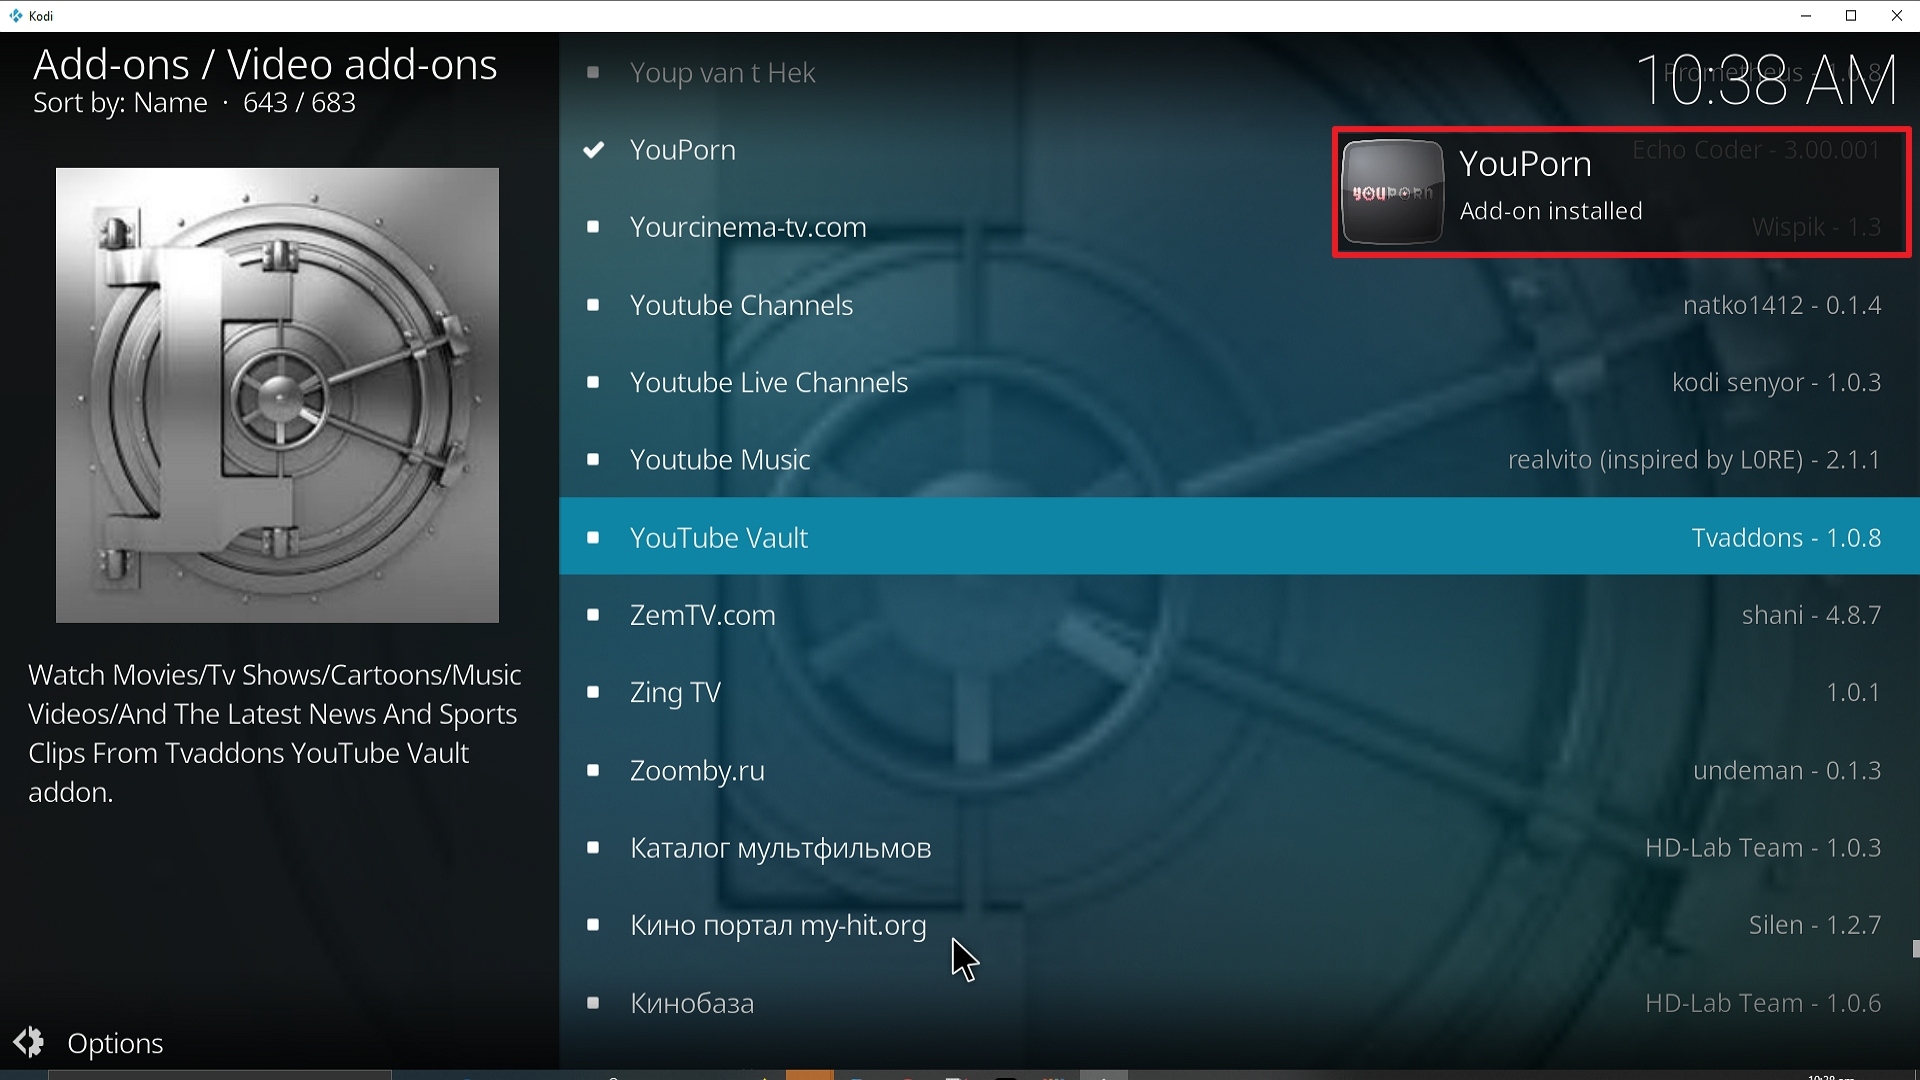
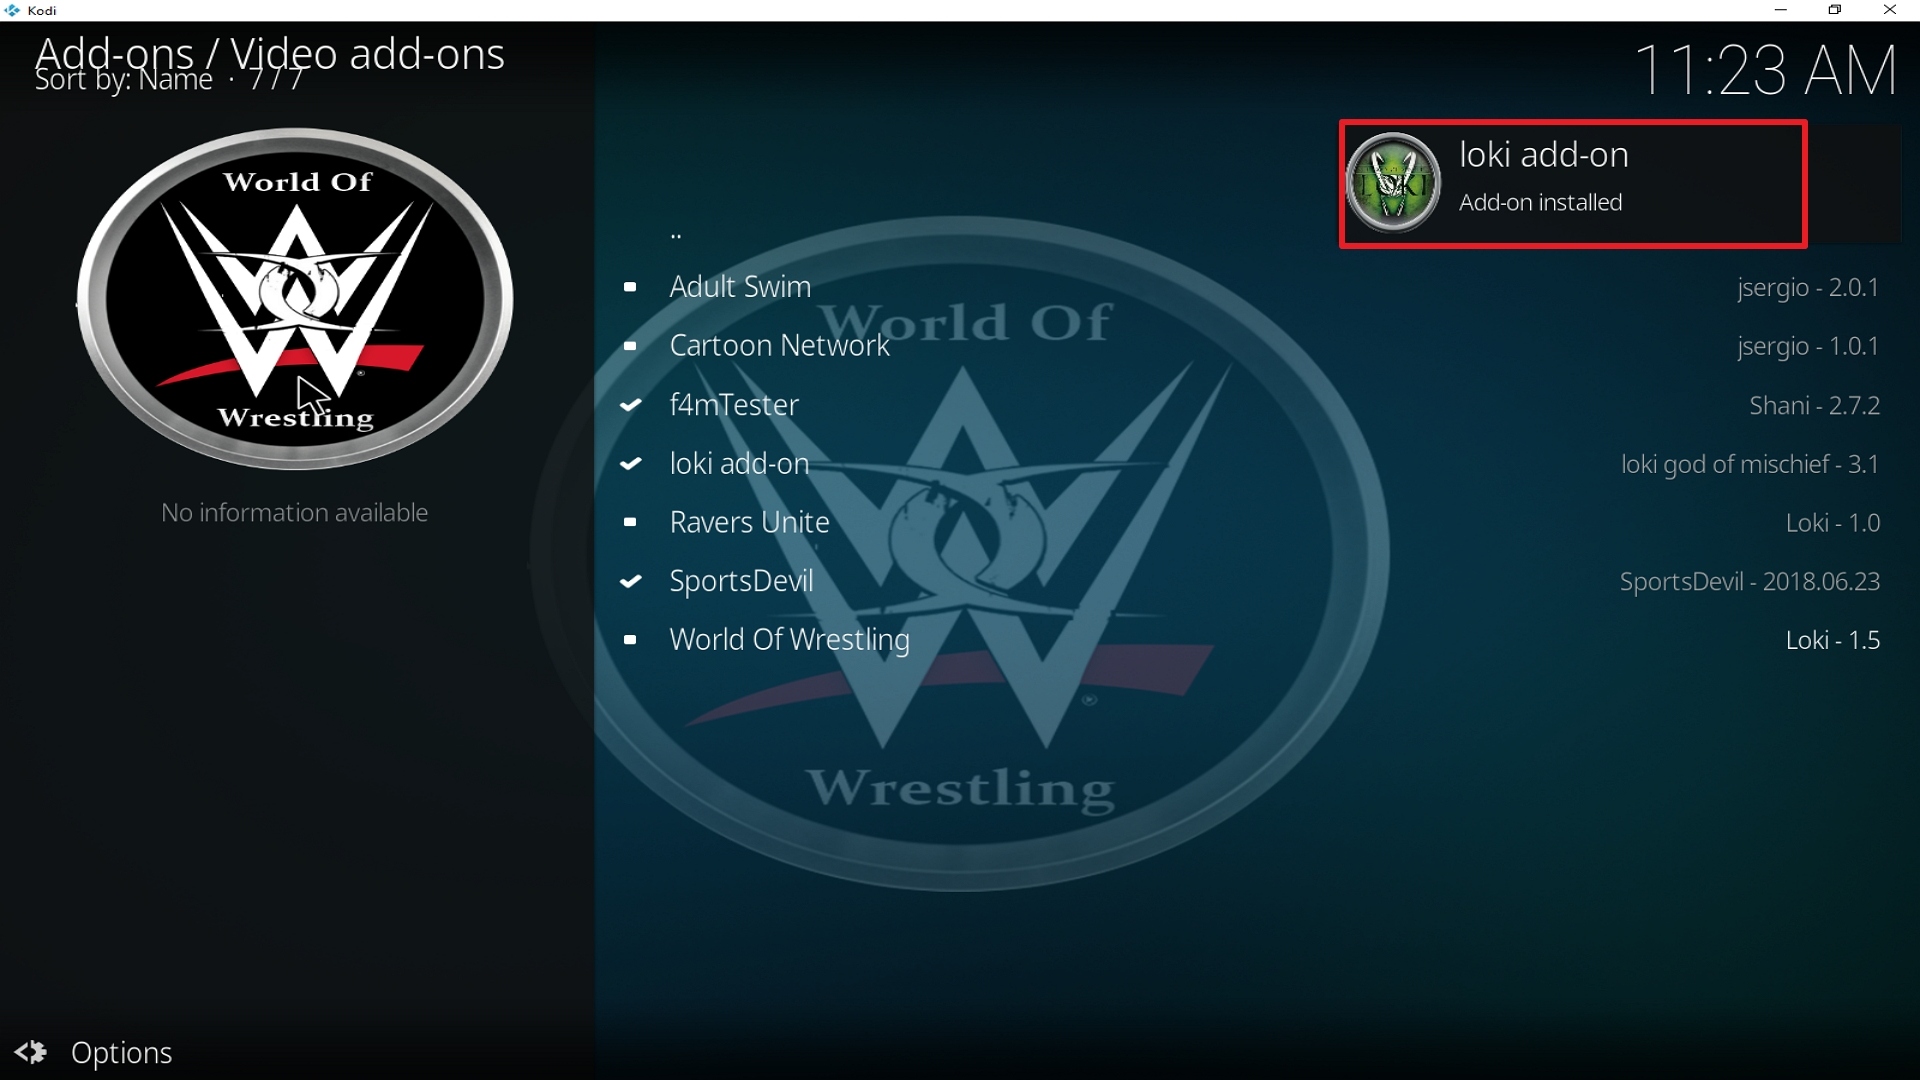
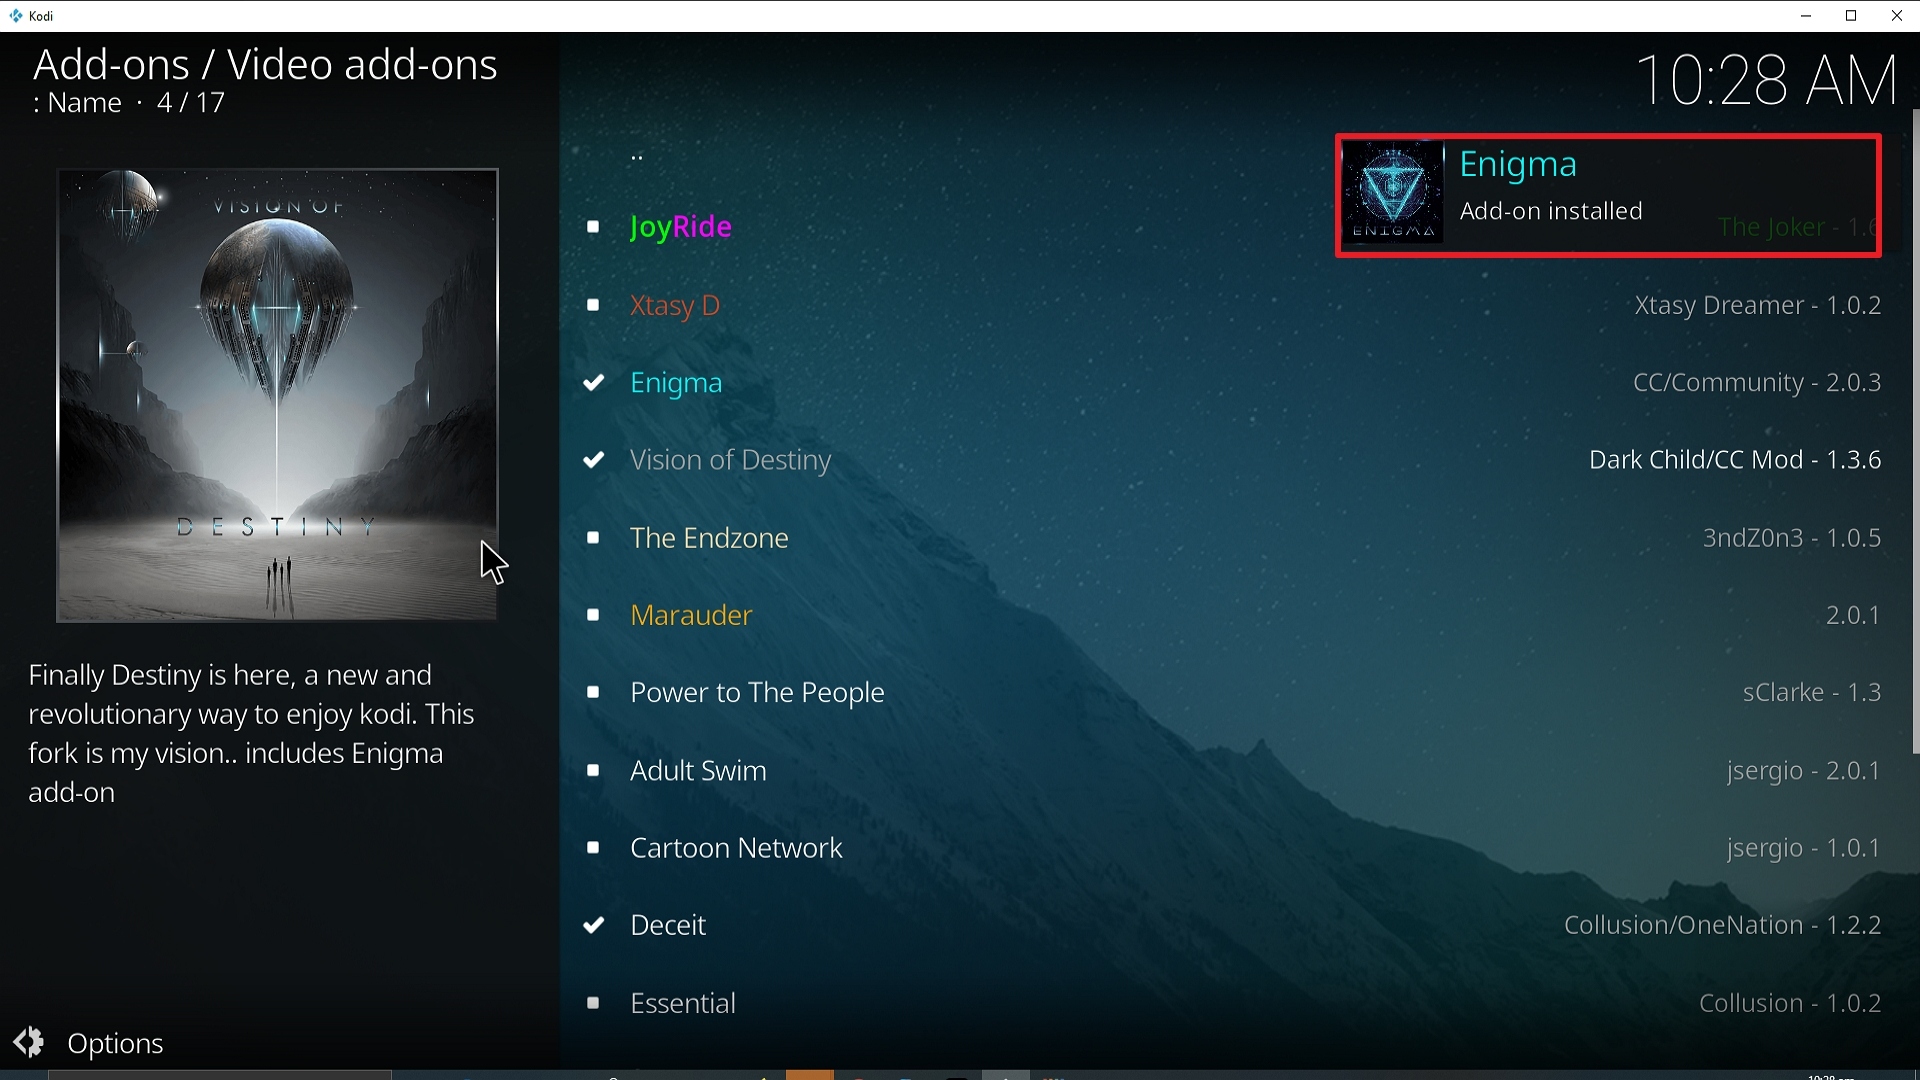
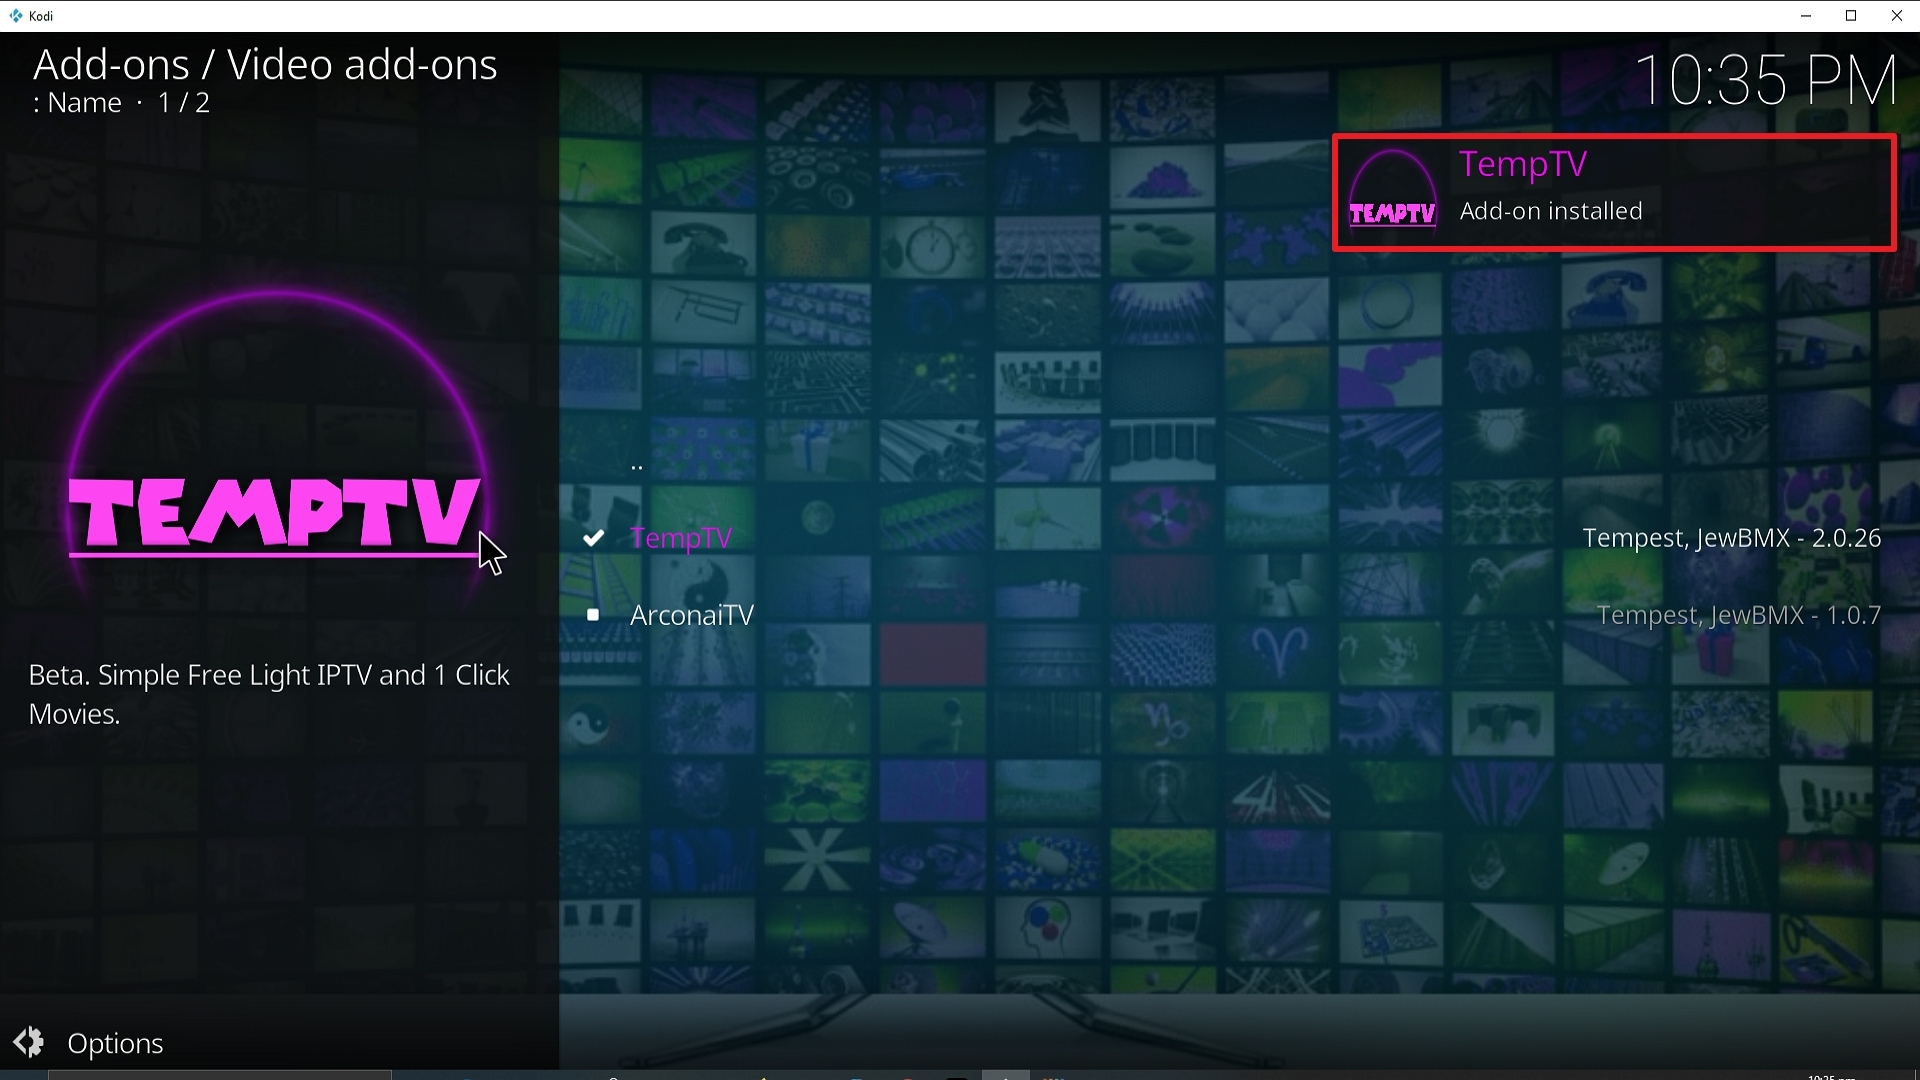
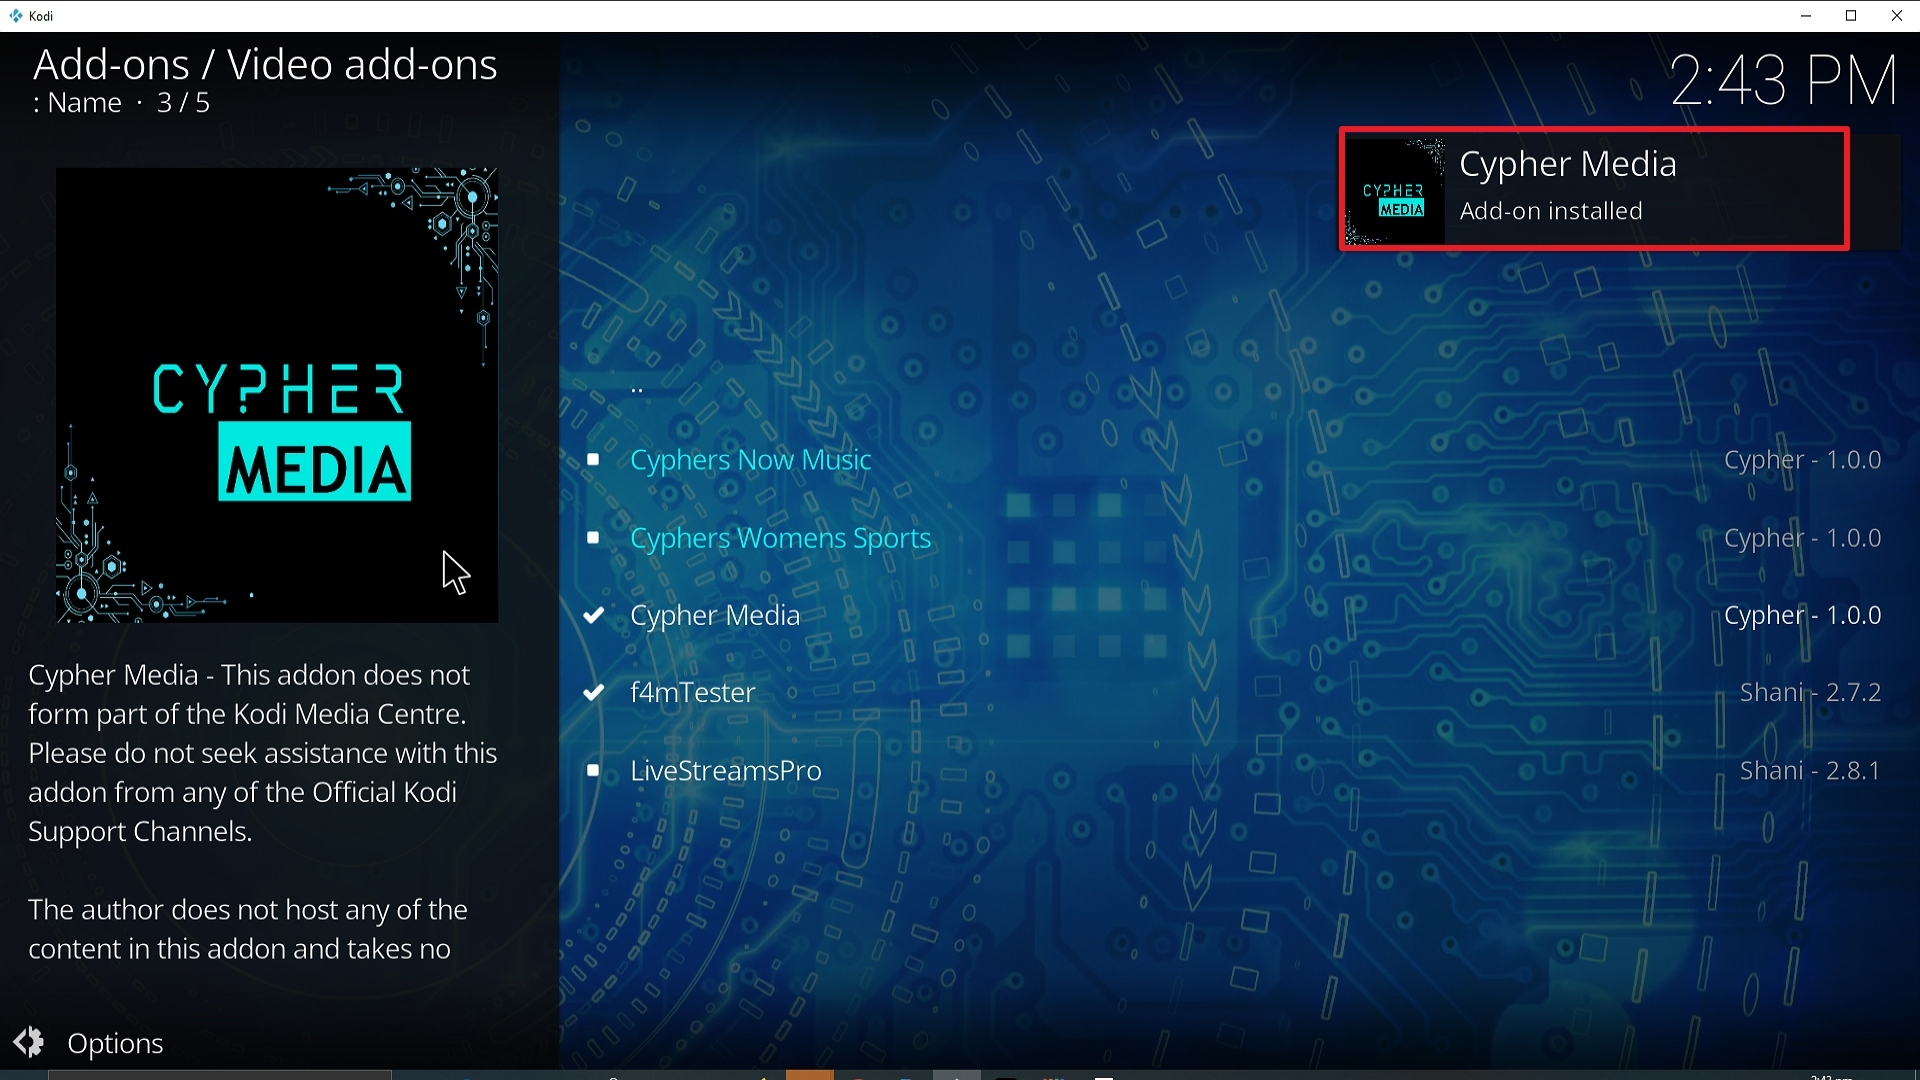
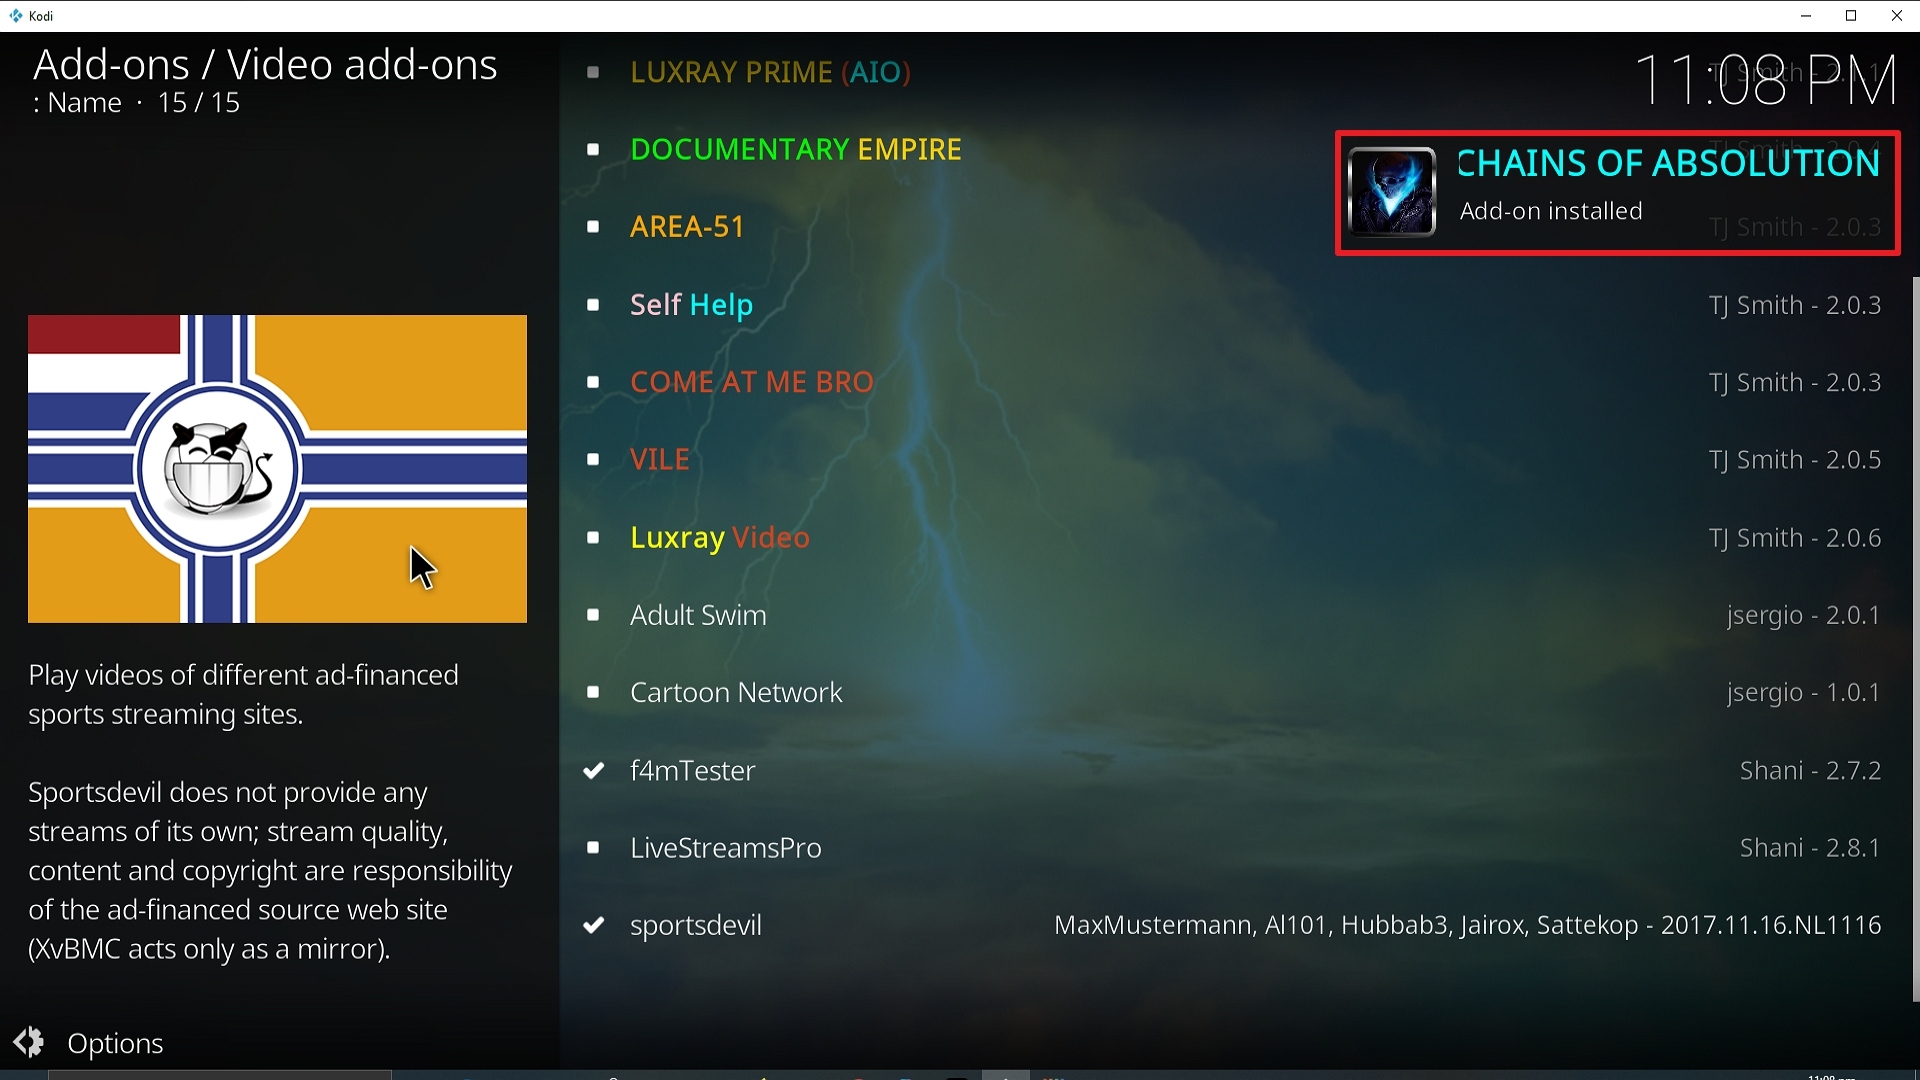
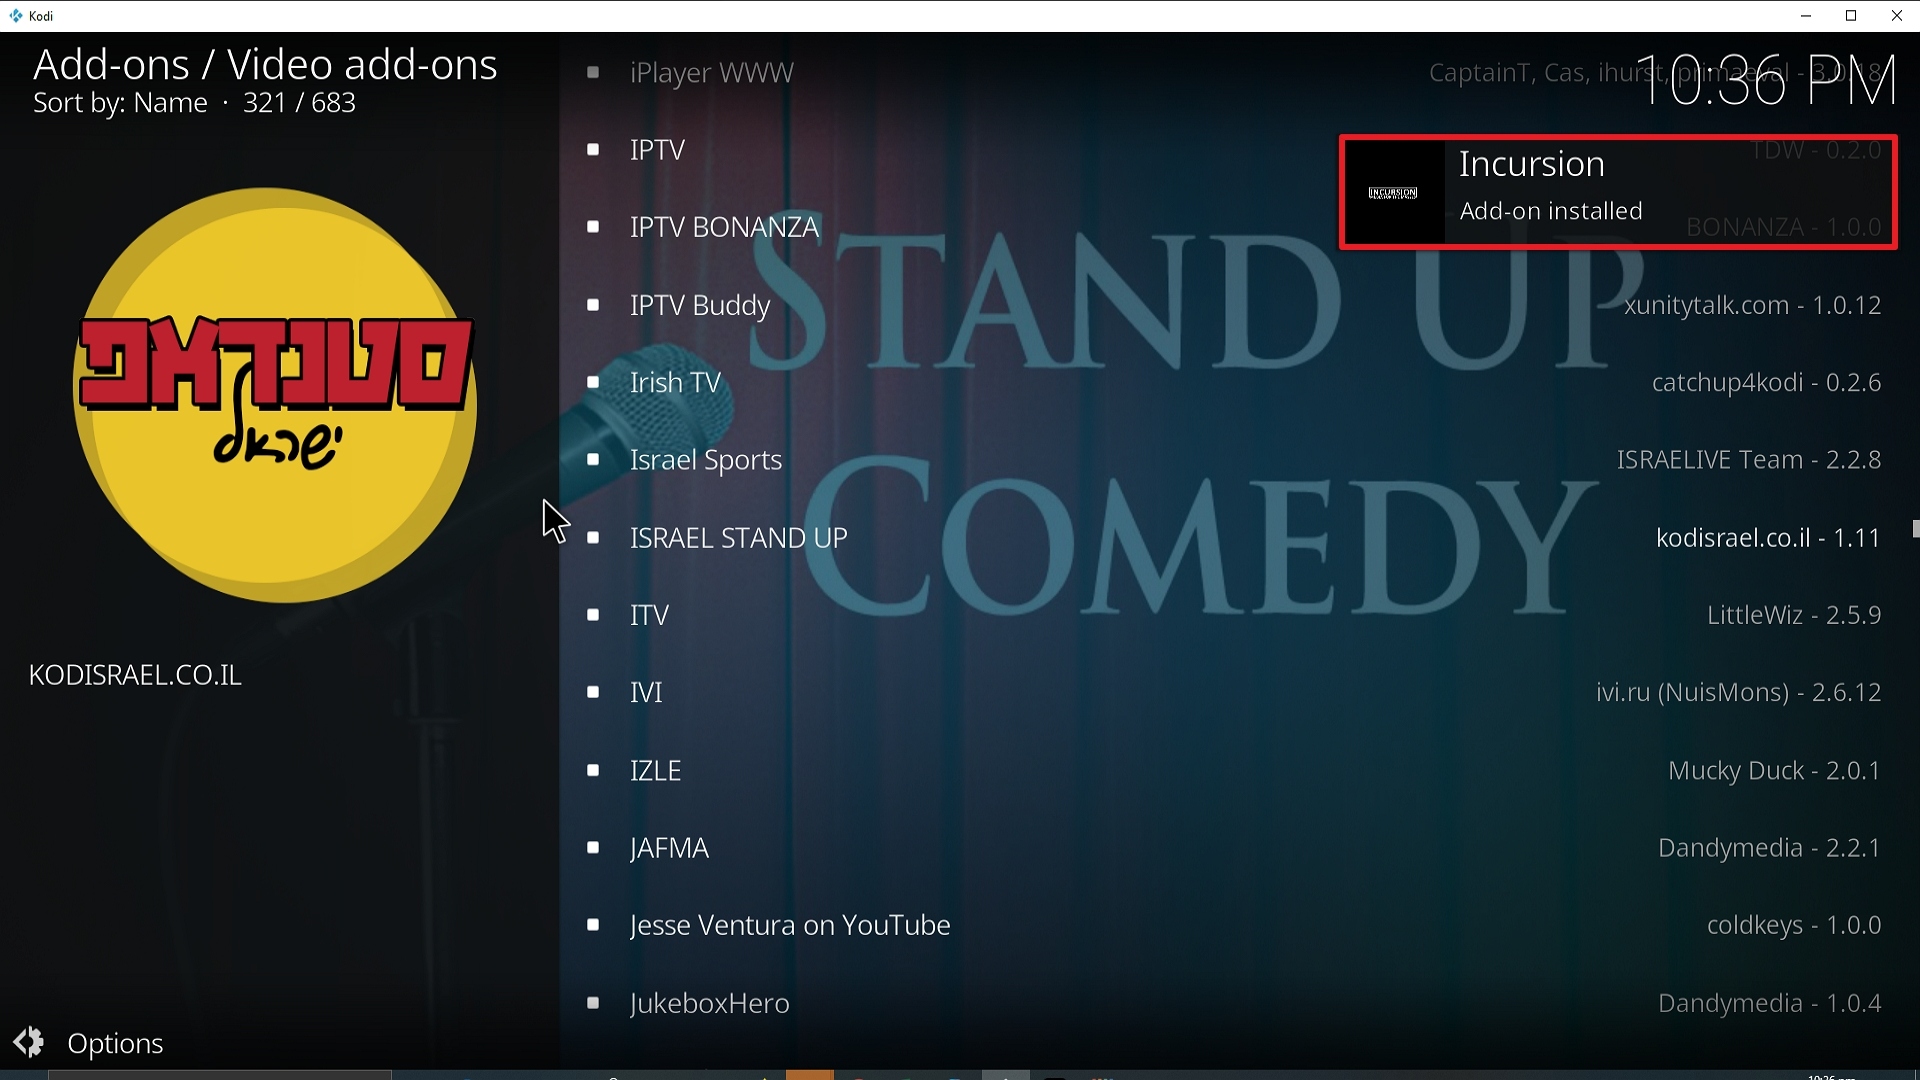
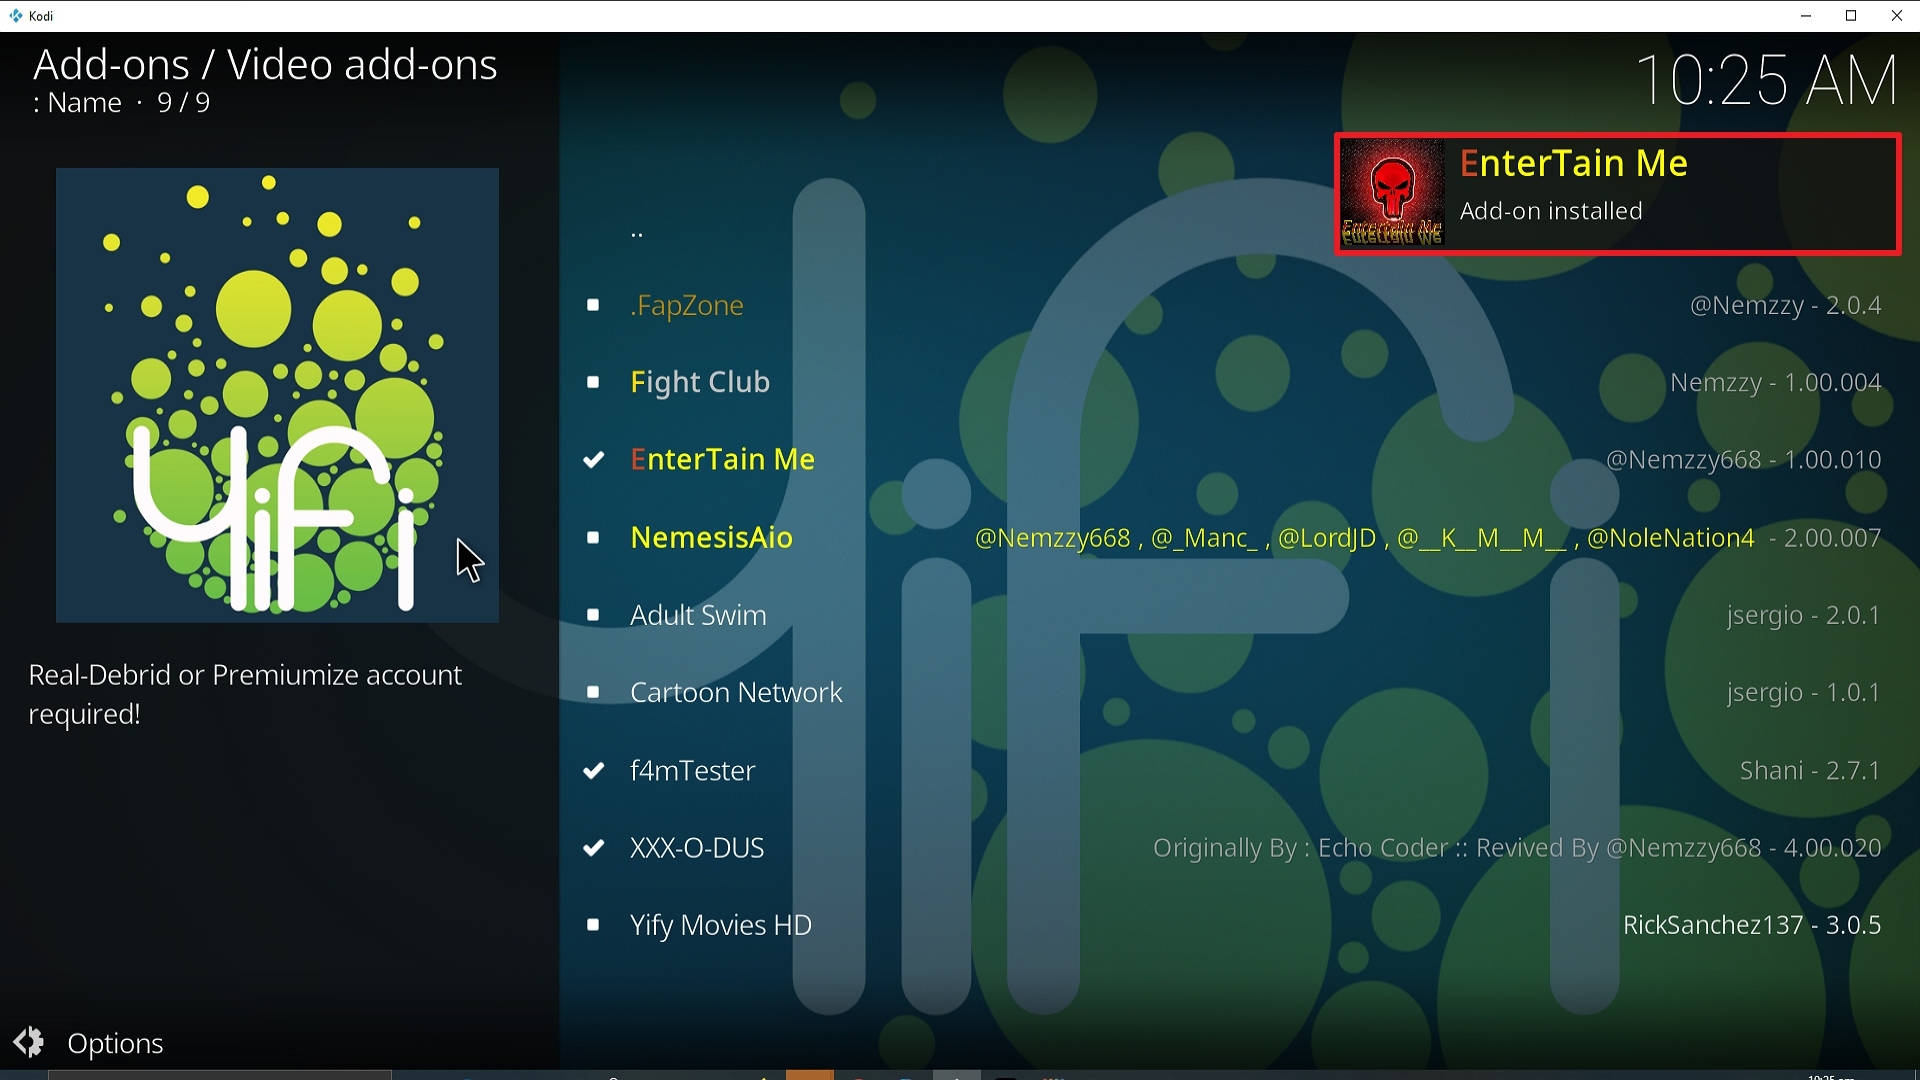
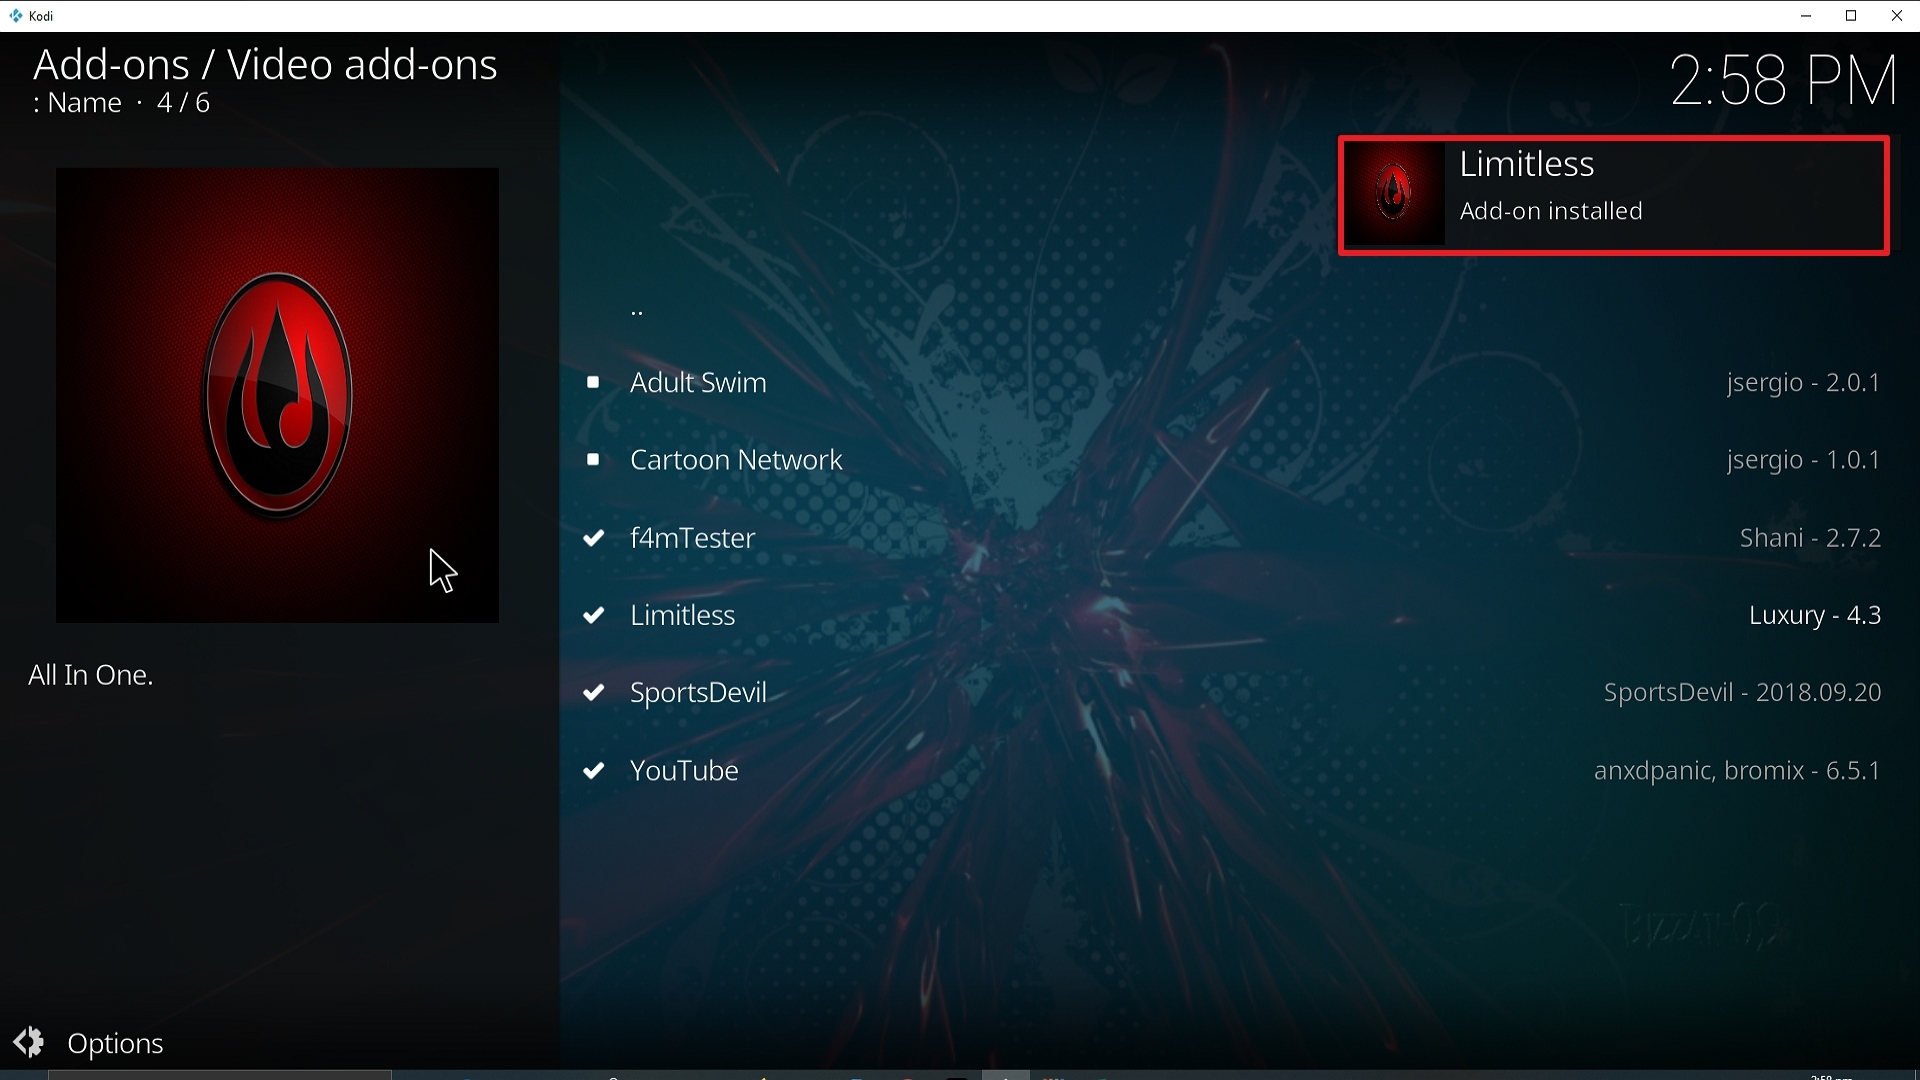
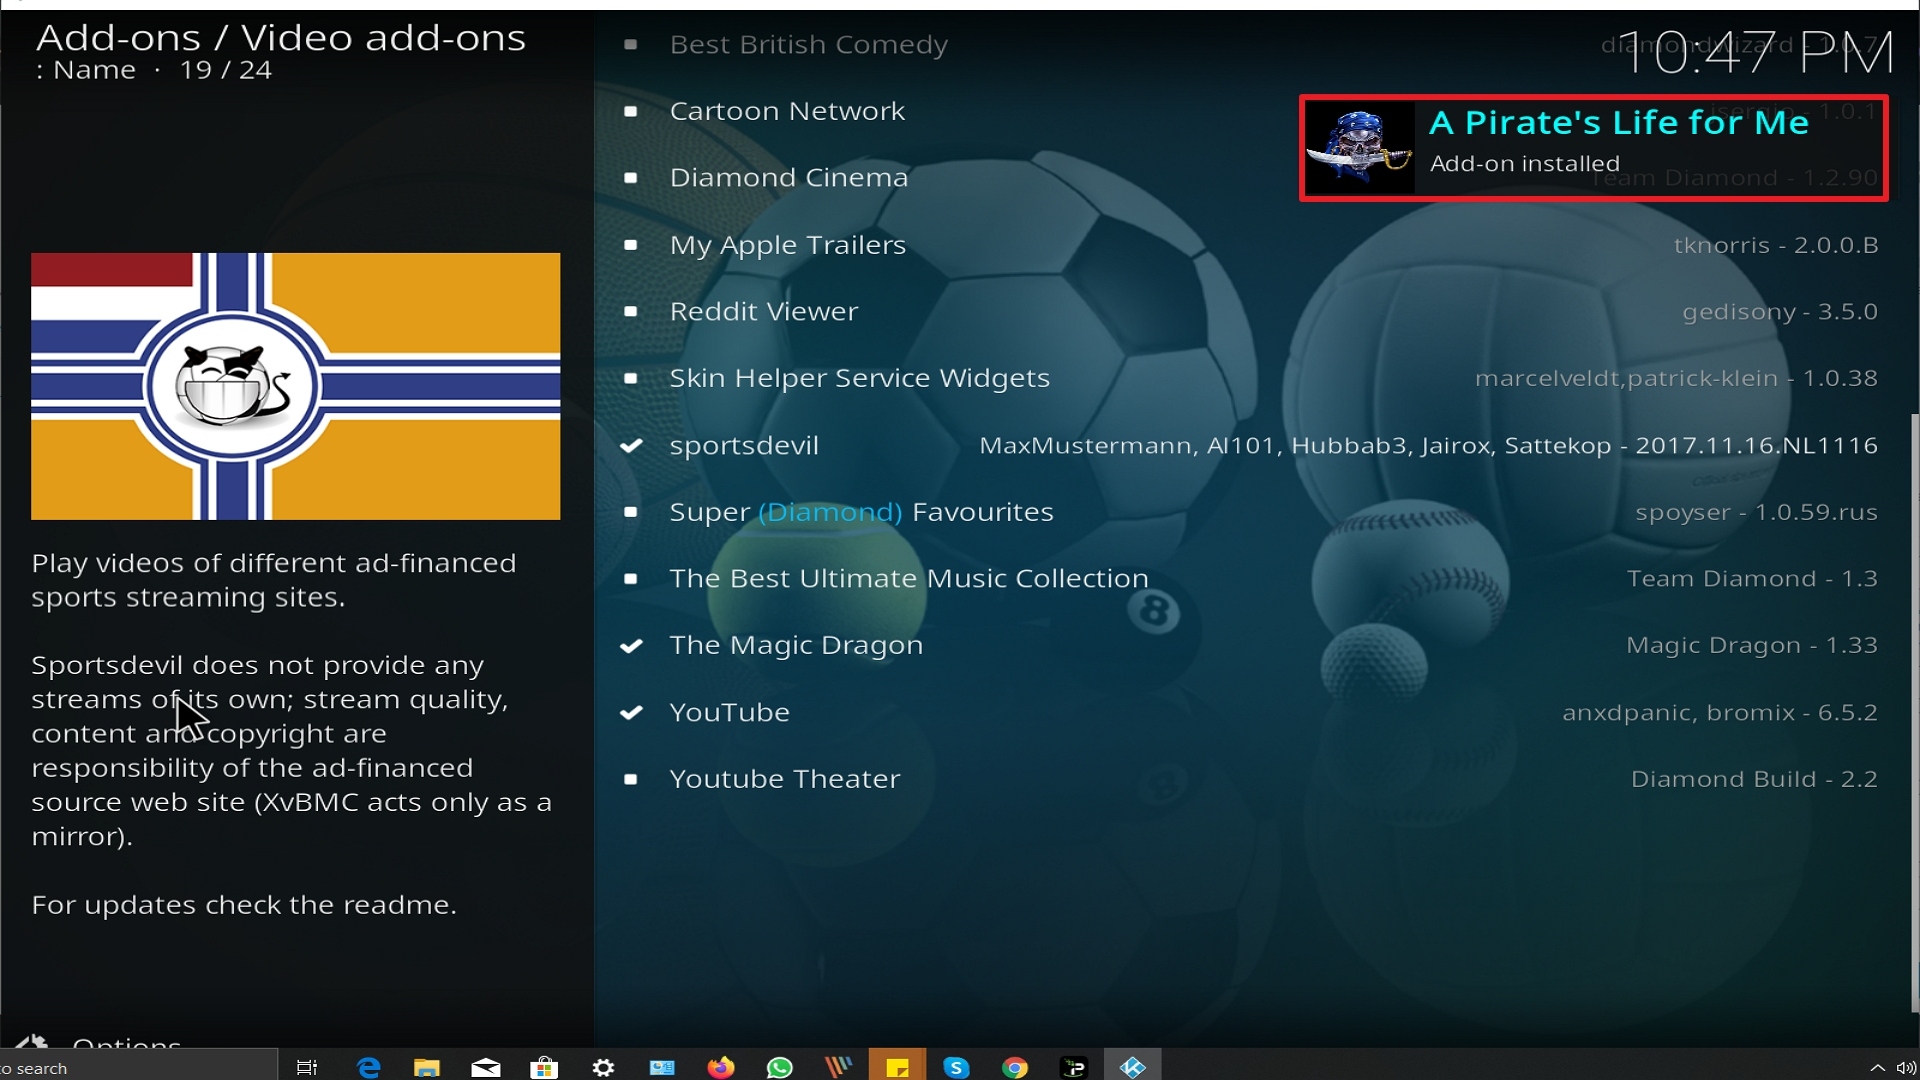
25. You should see a popup in the upper right corner saying A Pirate’s Life For Me has installed. There will actually be multiple popups for the various components.
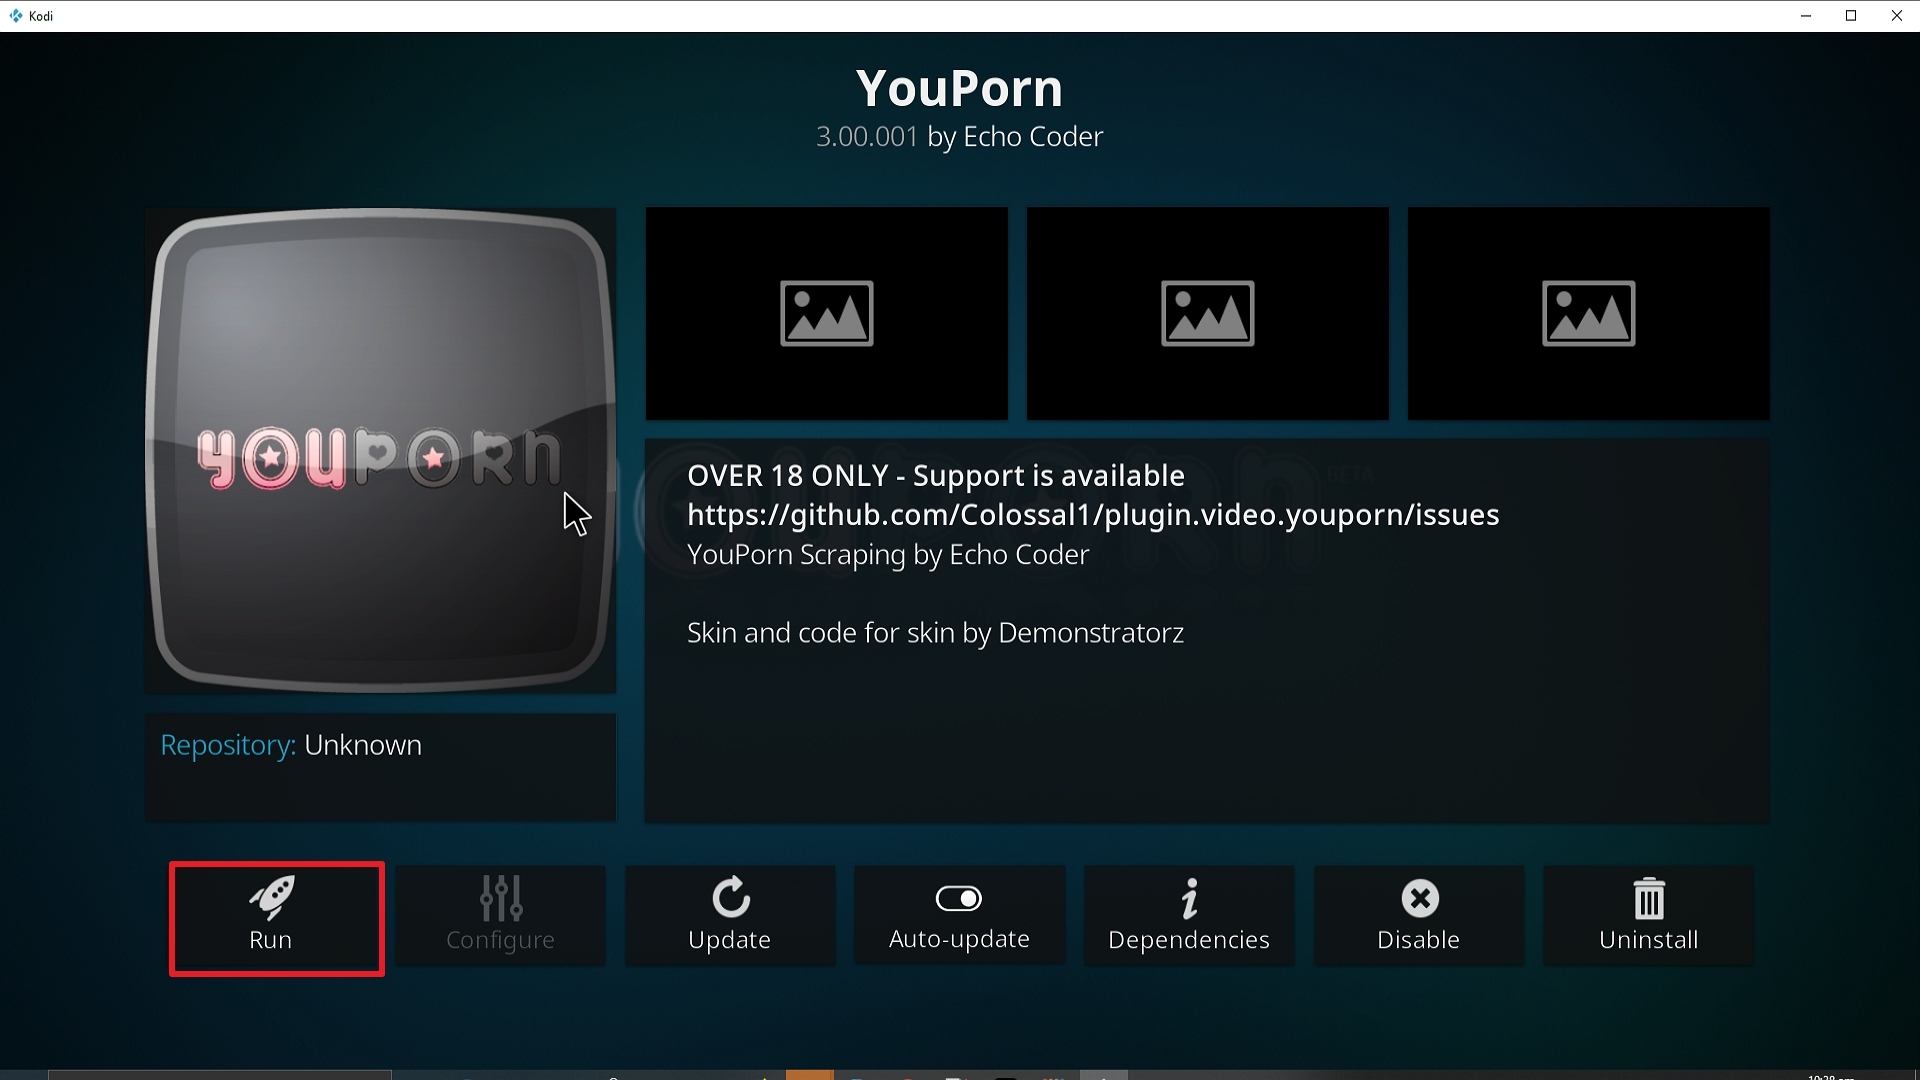
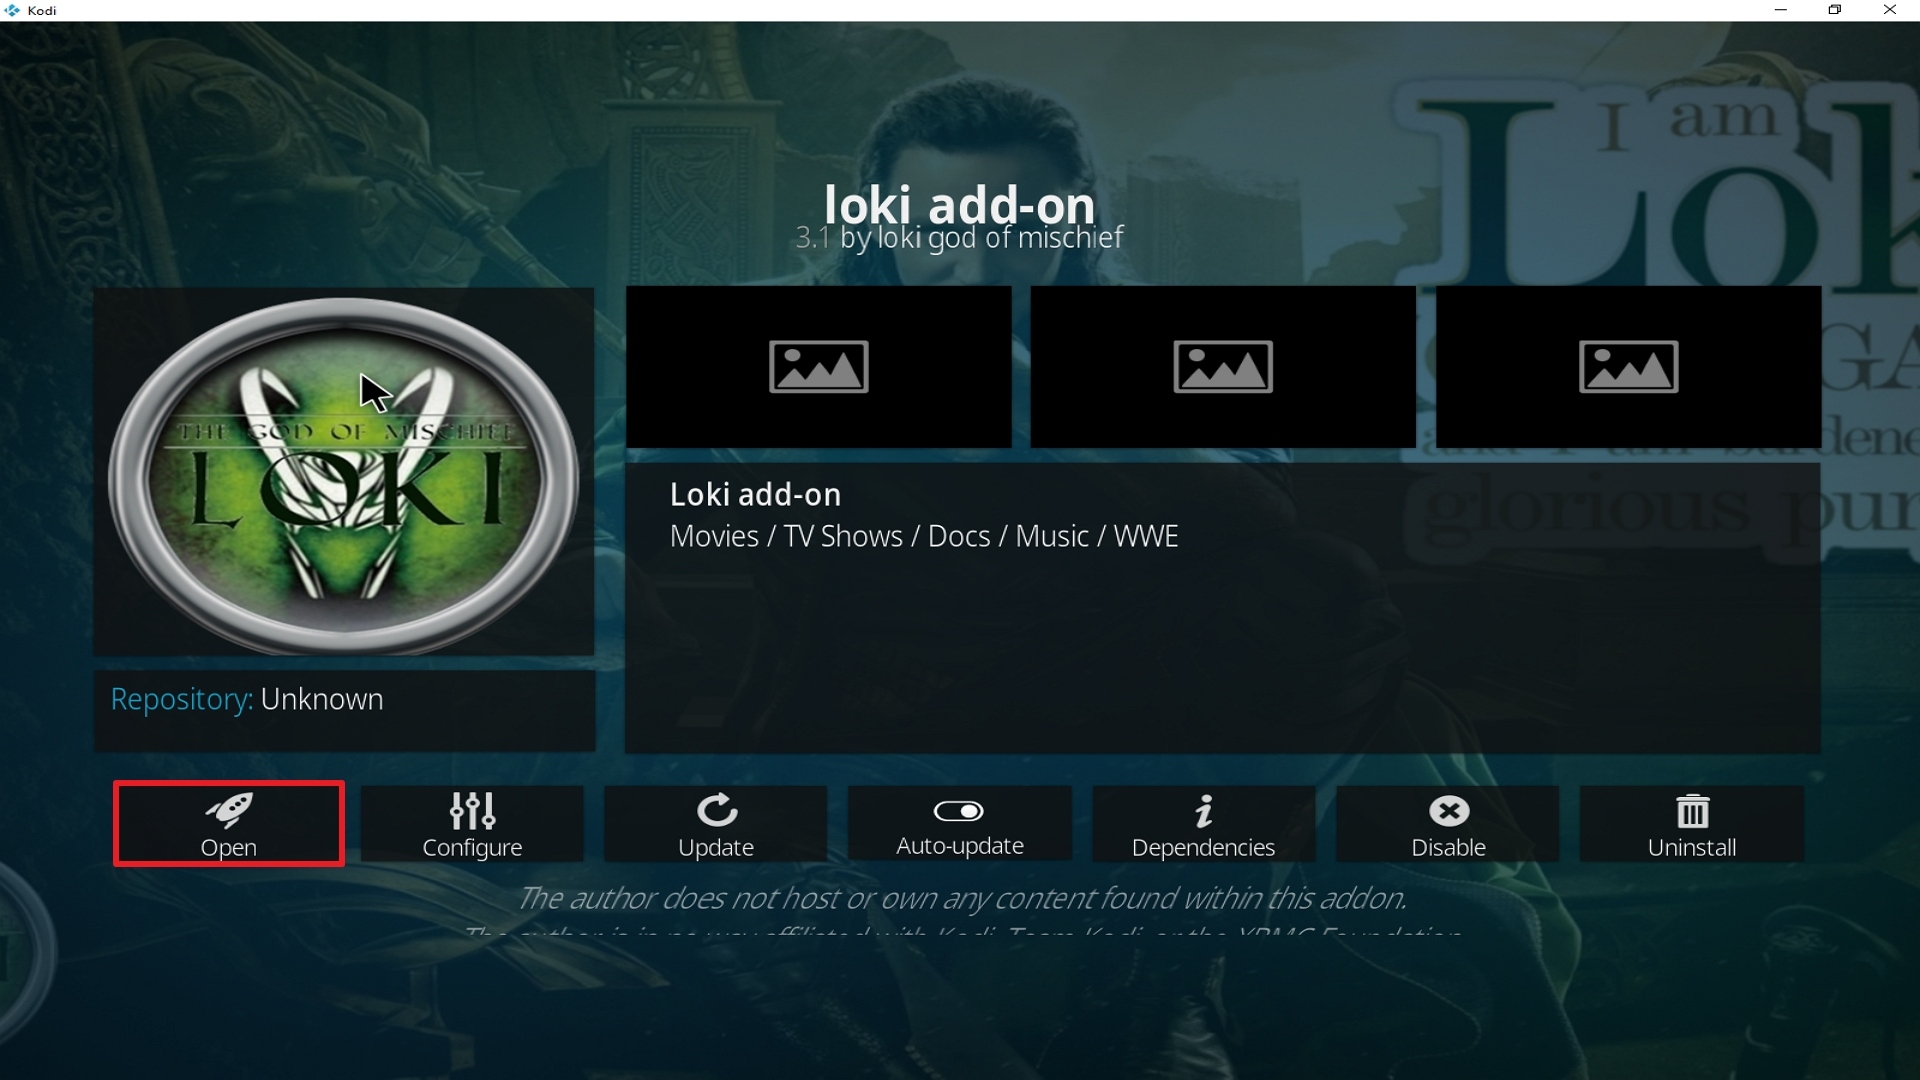
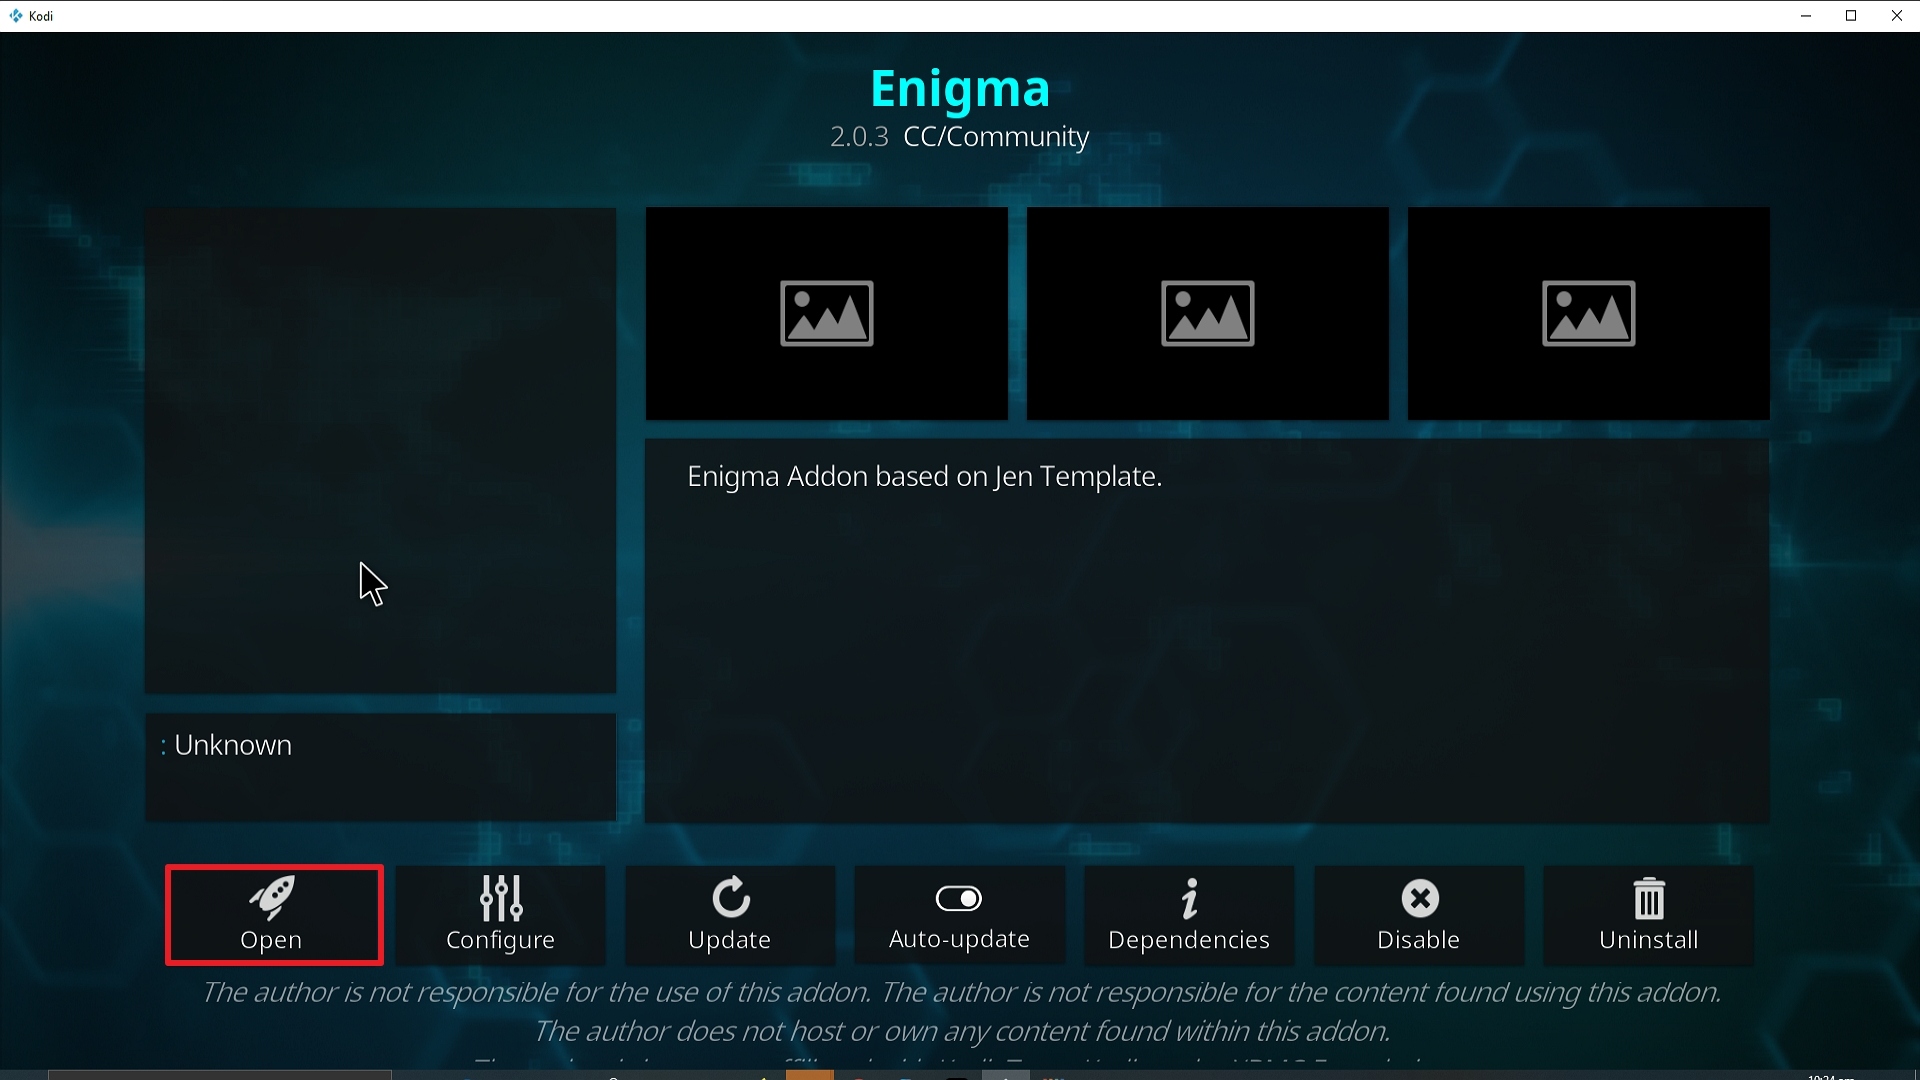
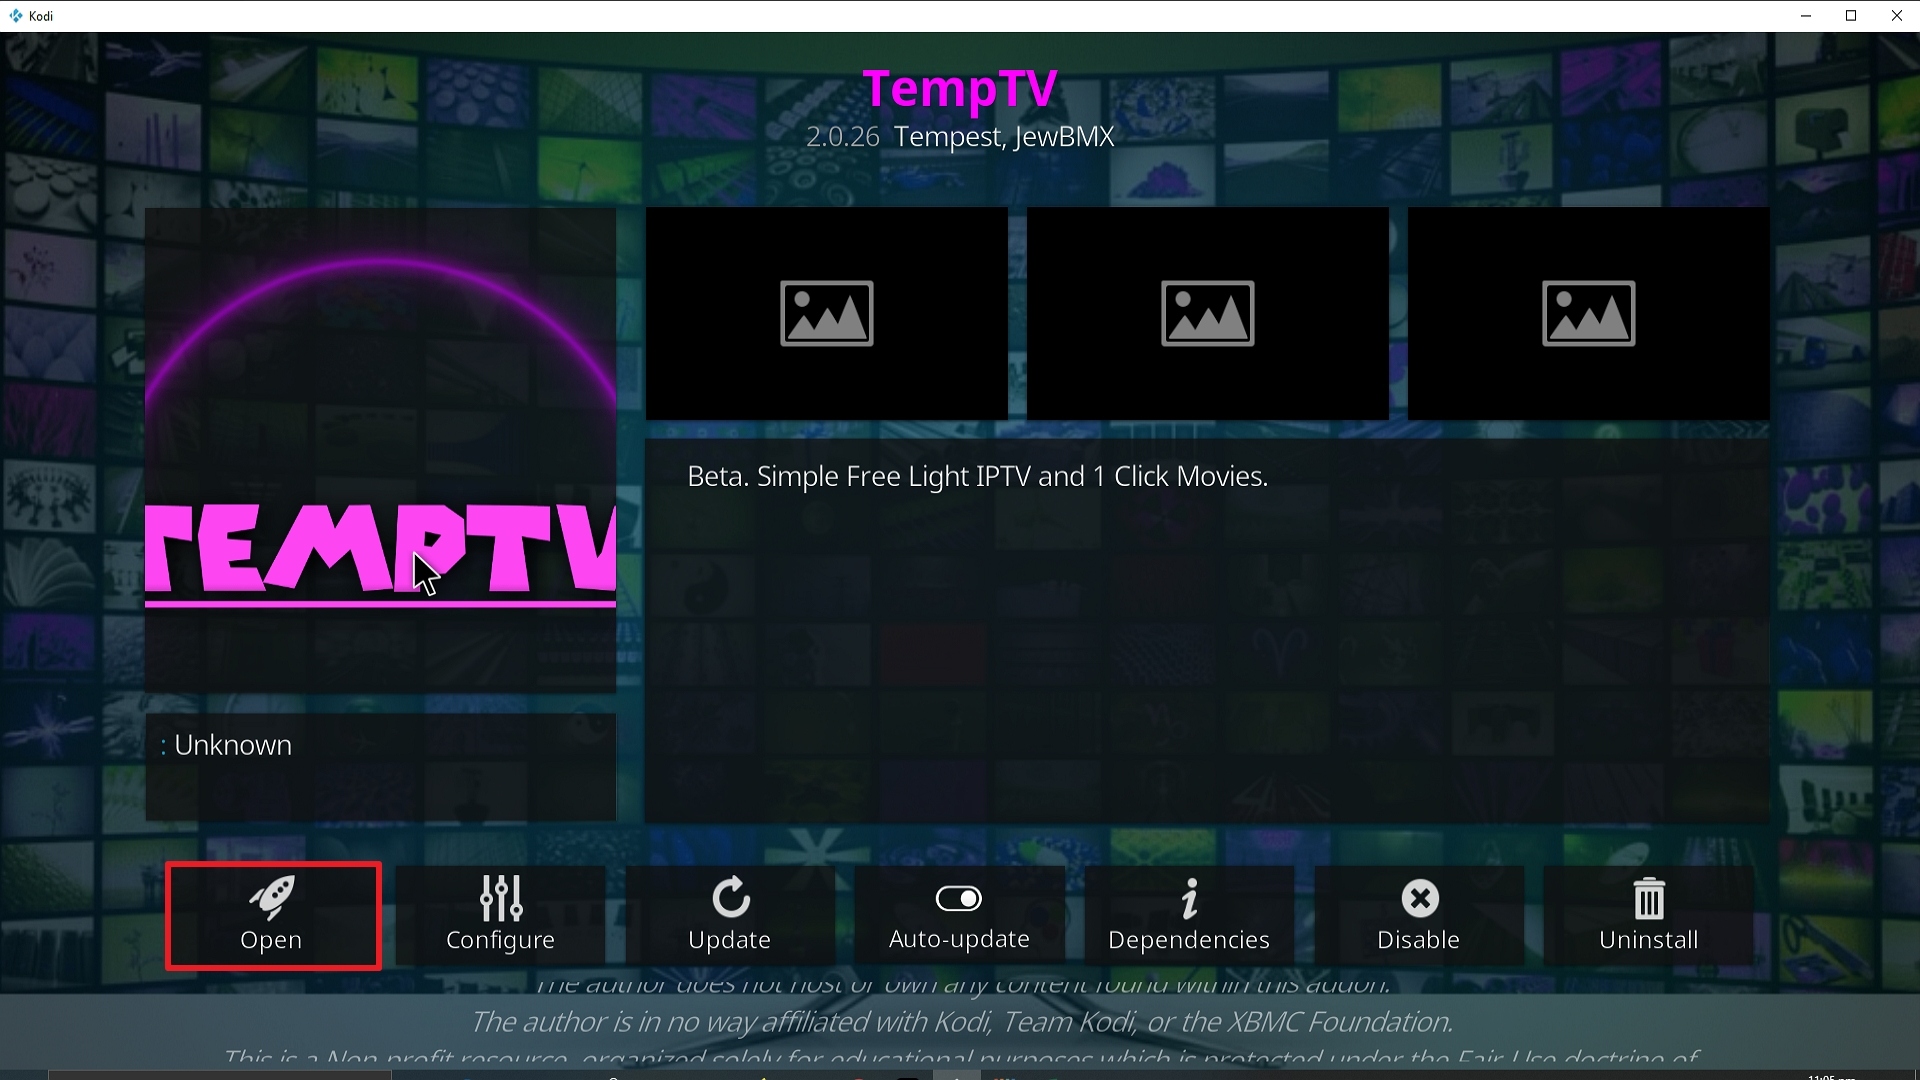
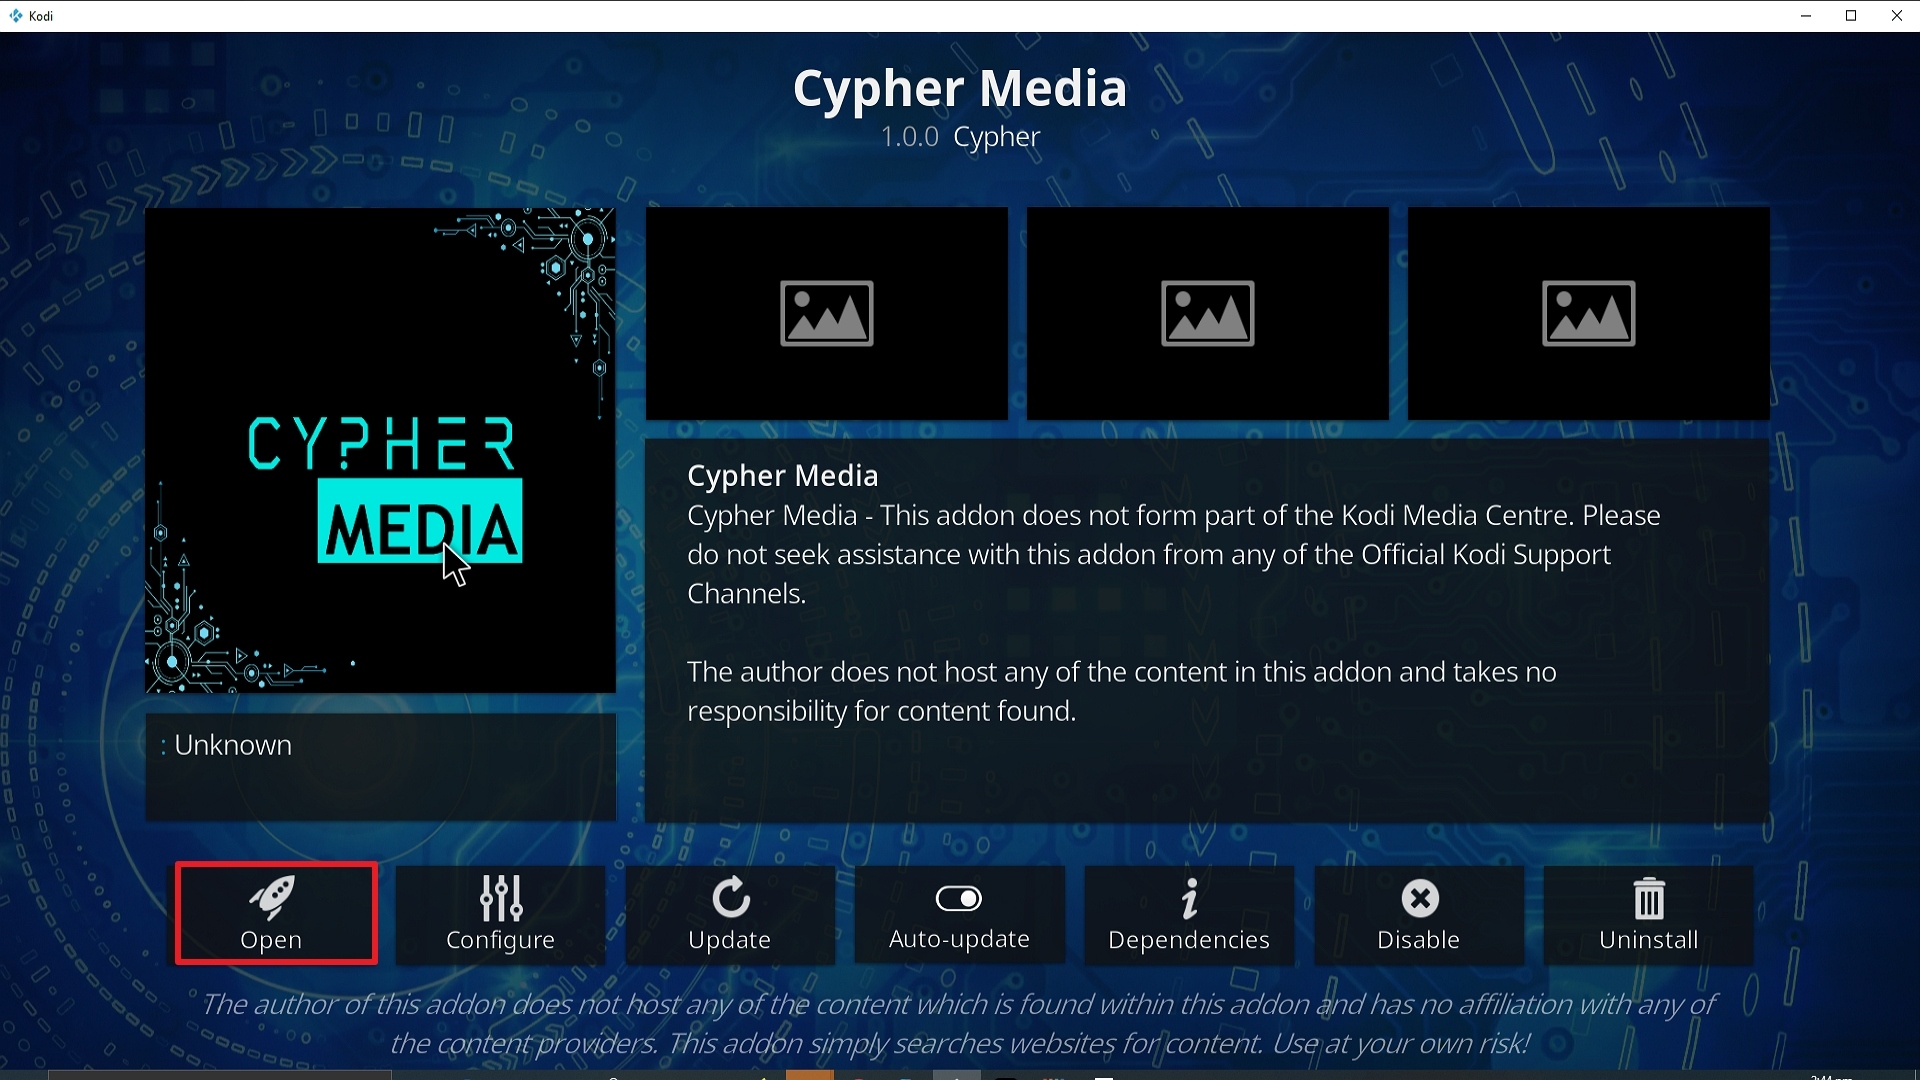
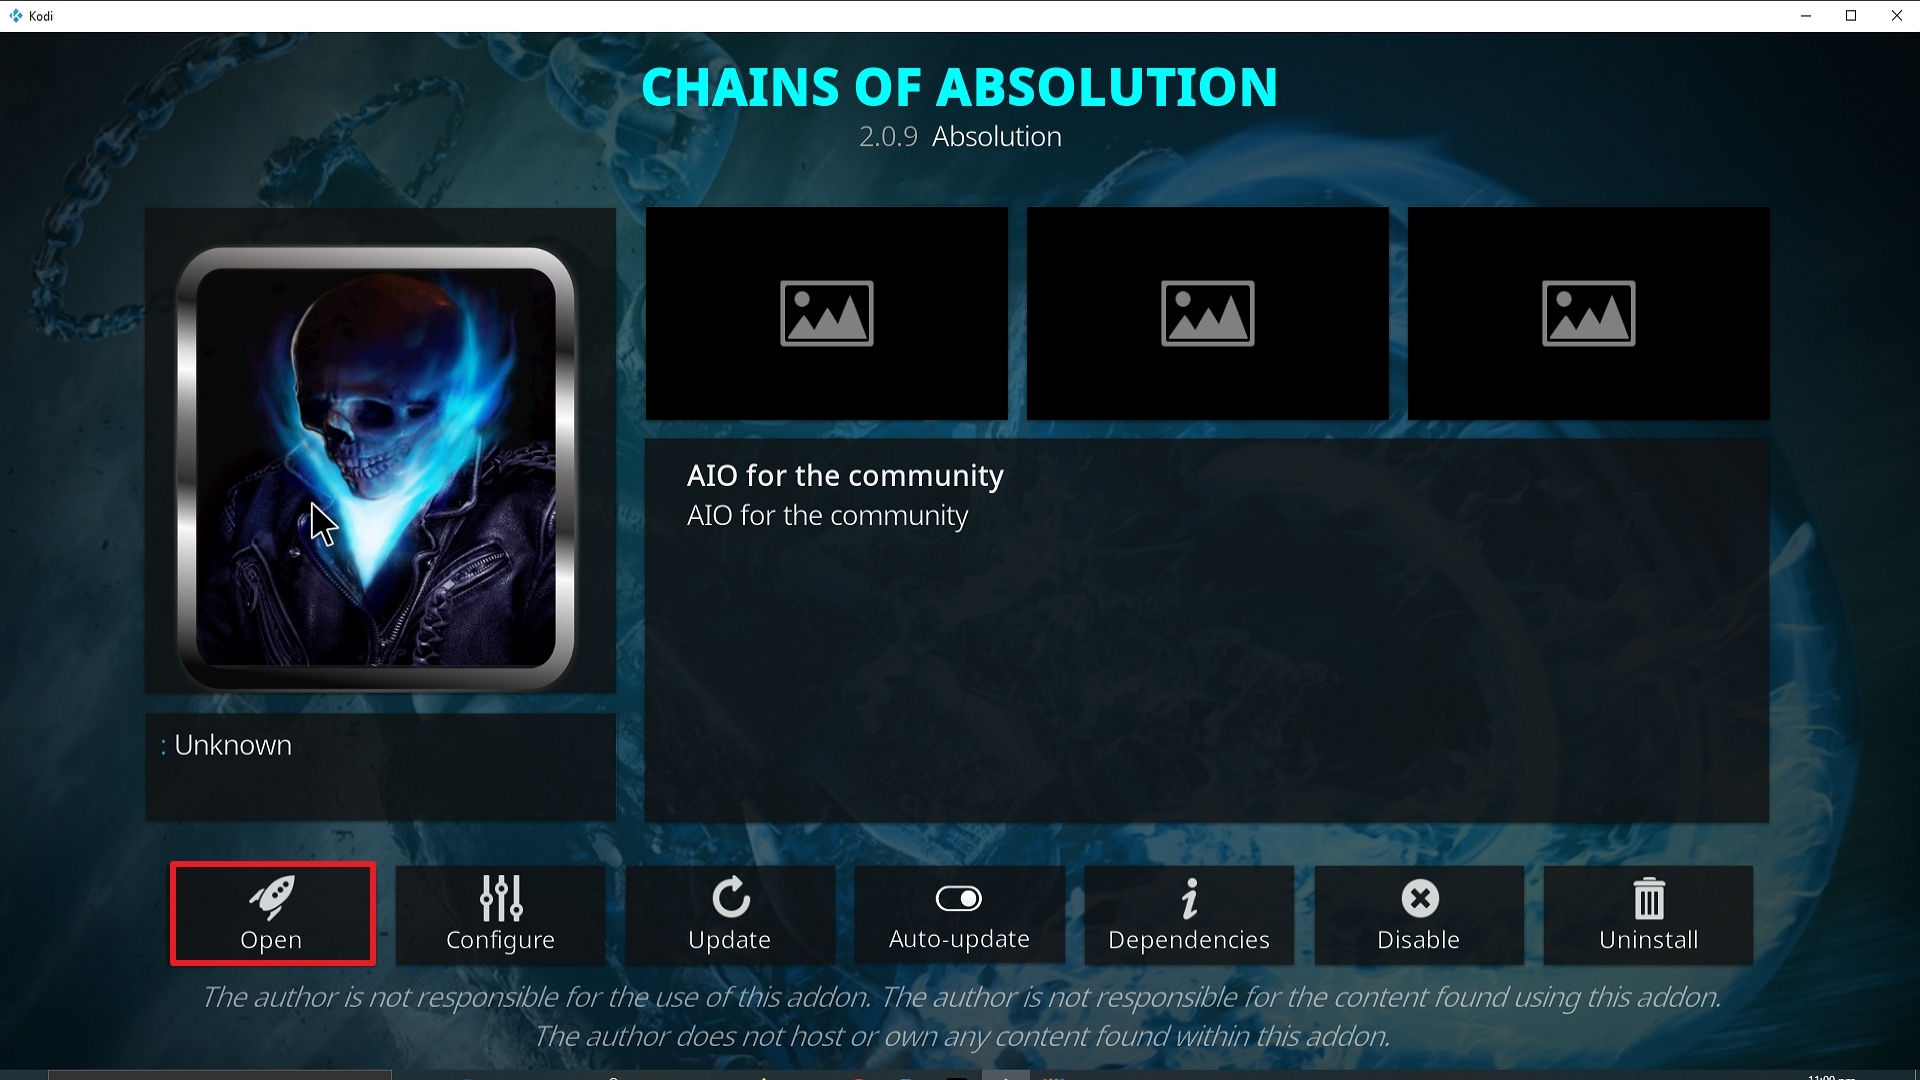
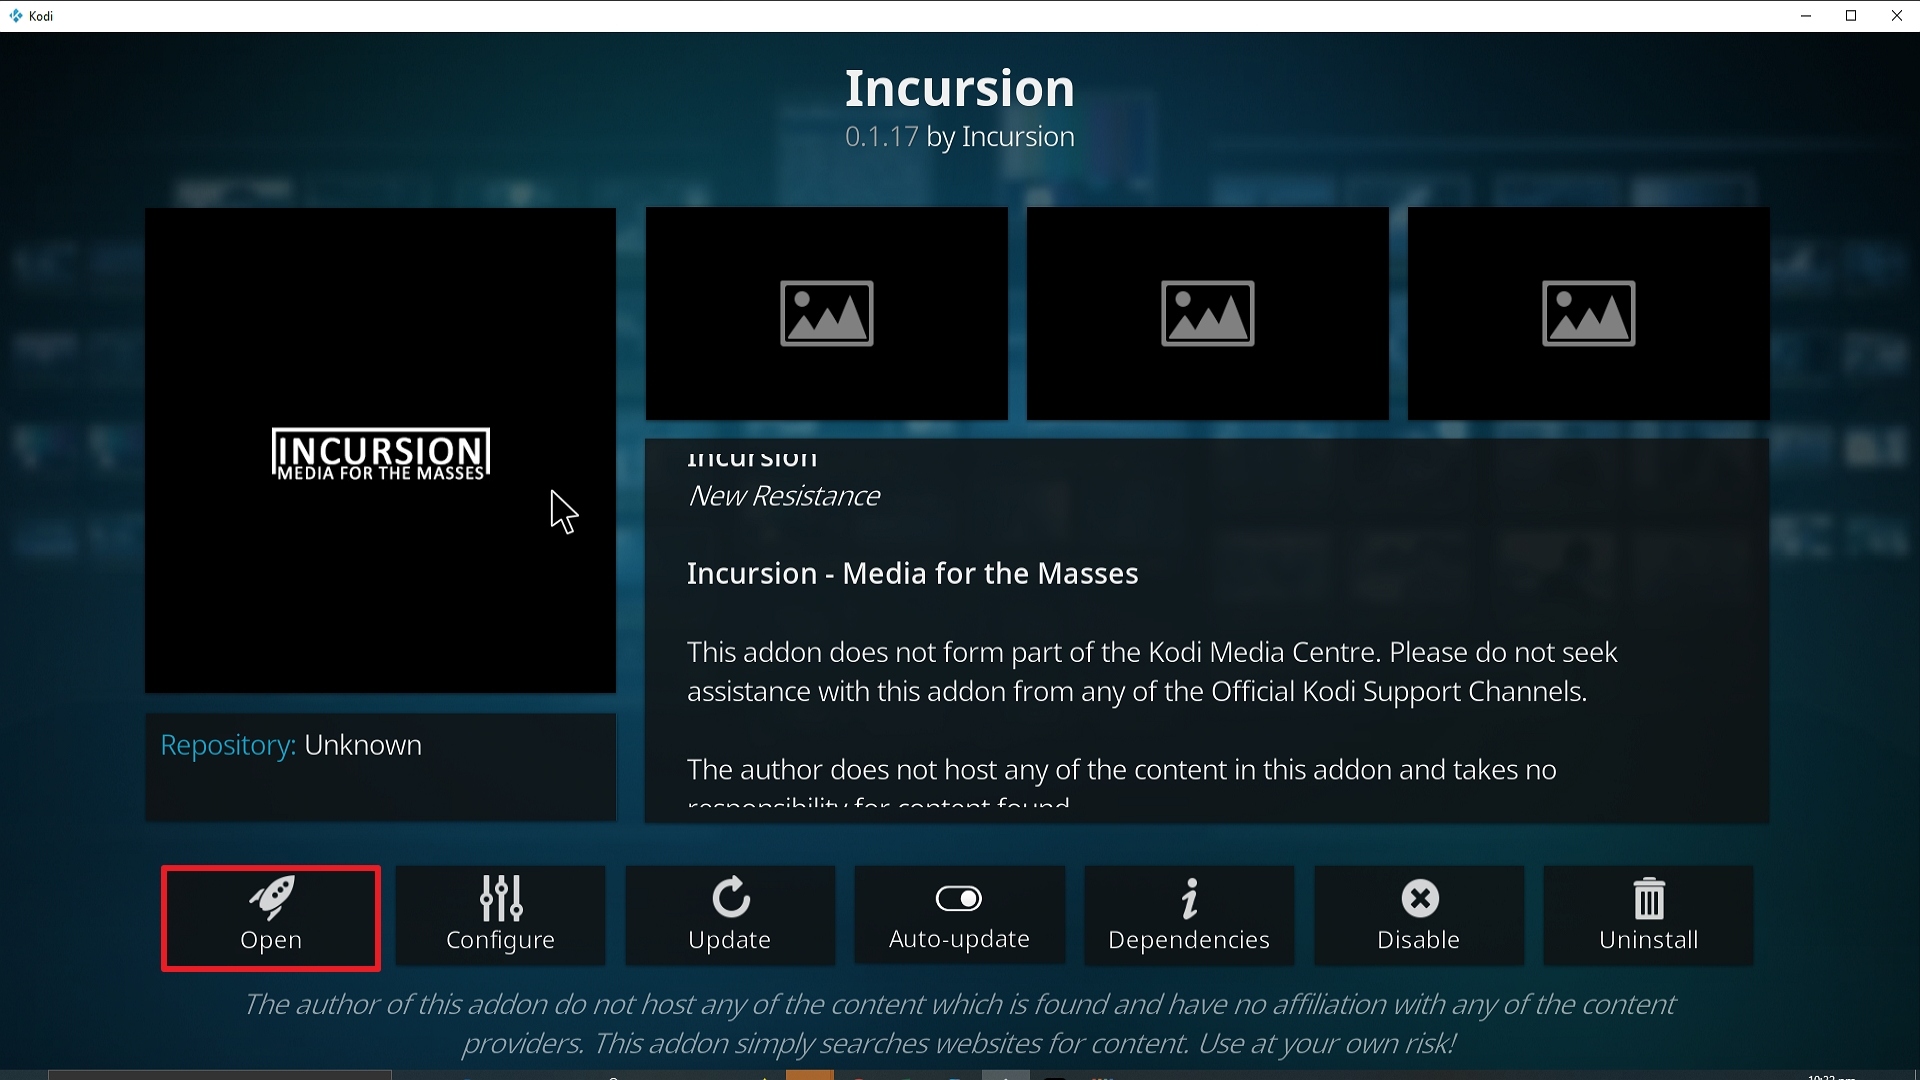
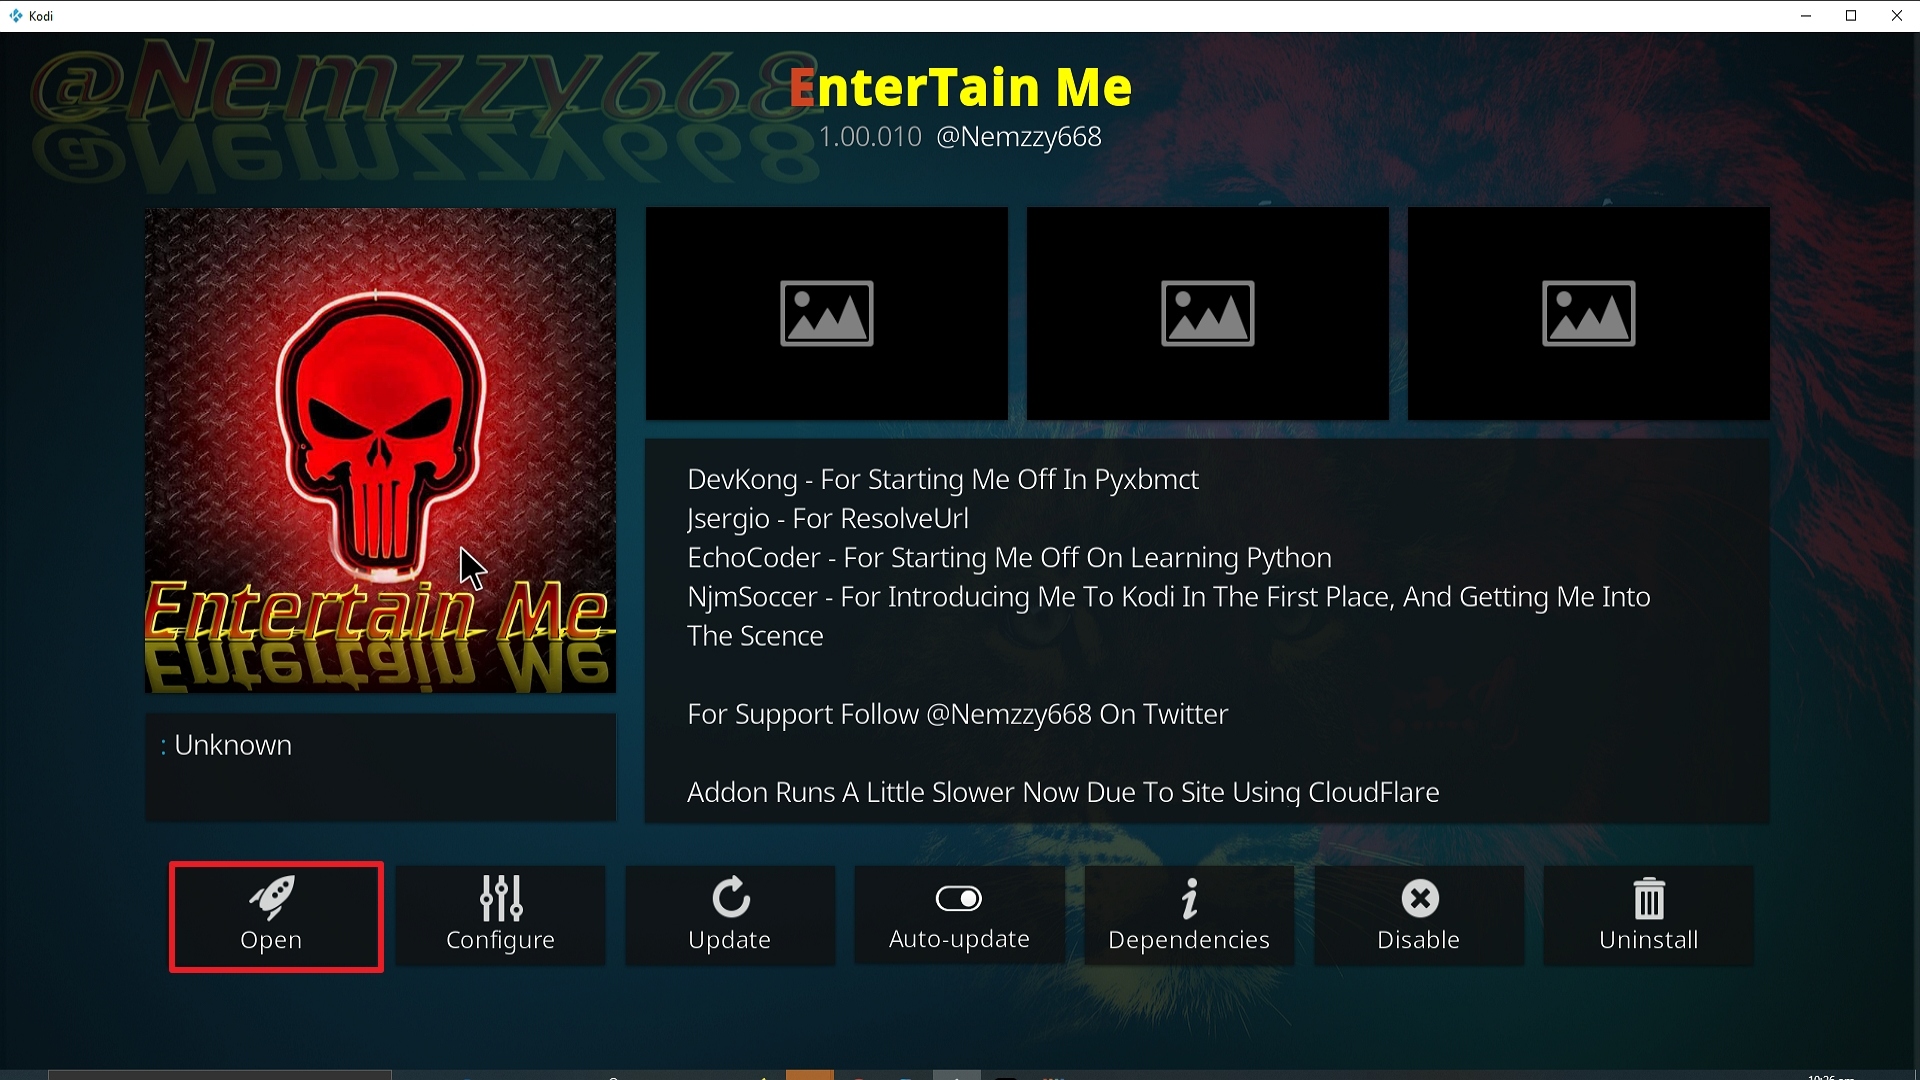
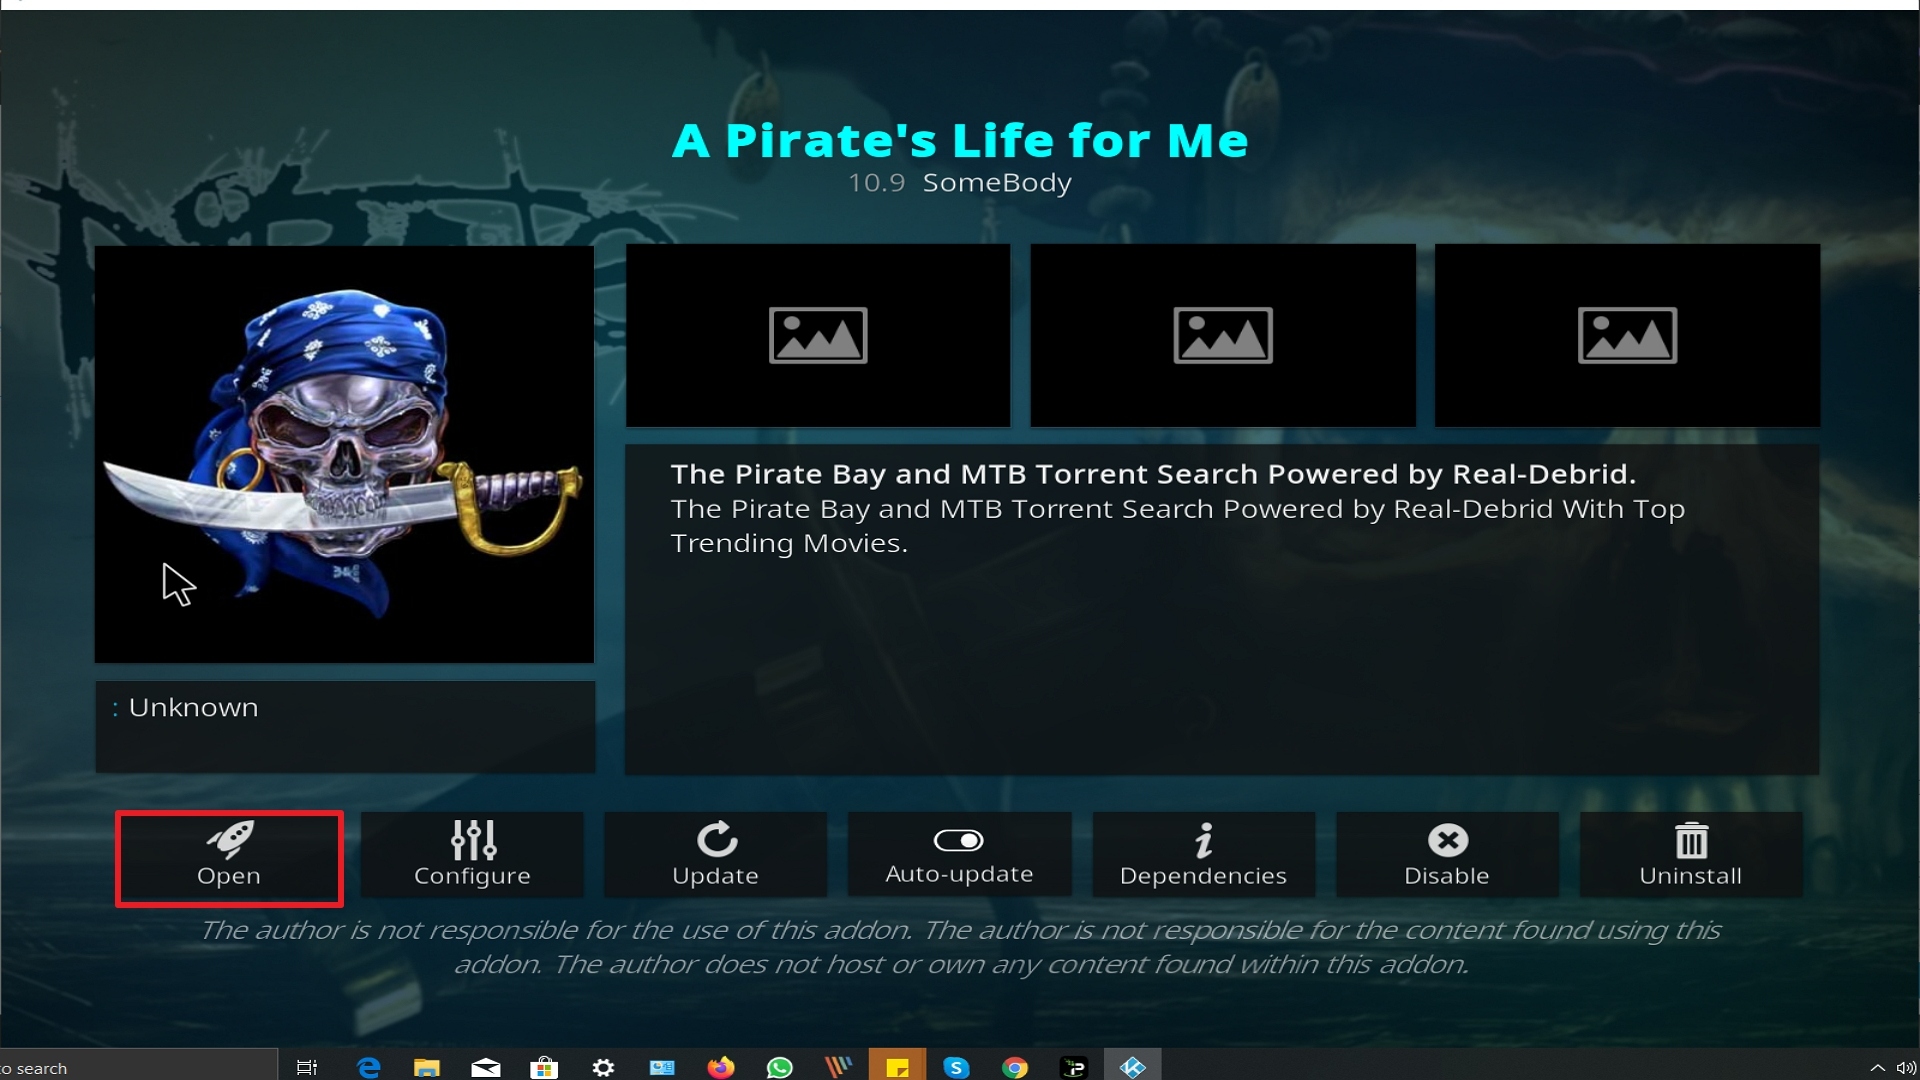
26. Click on Open to start the A Pirate’s Life For Me add-on.
Alternatives
One of the main advantages of A Pirates Life For Me is its cached torrents feature. If we are to compare cached torrents vs traditional file hosts, cached torrents are preferable because, unlike traditional file hosts who have drawbacks, cached torrents are not compressed and therefore produce higher video quality. We highly suggest that you obtain your content from trusted sources. The following add-ons offer similar functions:
– Gaia (requires Real-Debrid)
– Seren (requires Real-Debrid
– 13 Clowns
– The Magic Dragon
– Universal Scrapers
Common Errors
These are some of the things that may cause an issue when installing A Pirates Life For Me:
Your URL address should be written correctly or else this issue will arise. Also, be sure that your Repository is properly installed and the guide above will help you with that. Although cached torrents do not require VPN because you are accessing the torrent directly unlike torrent clients which act as middlemen, to be on the safer side of things, we still advise you to have a reliable VPN installed. Check here for the best VPN deal.
Make sure that the Kodi App is properly installed on your device to avoid this error. Also, you have to double-check if the add-on is installed correctly if not, reinstall it. Please refer to the guide above to help you in installing the add-on properly. An in-depth guide is also provided in this article with regards to the proper installation of Kodi.
This occurs when your media cache is full. We can prevent this by emptying your cache and making sure that it gets cleaned on a regular basis. Cache build is quite common nowadays because it is one way of making our streaming experience smoother.
A Pirates Life for Me supports torrent cached streaming and does not keep any content on its servers. If this issue arises, you may want to wait for a few seconds until the results refresh and choose a working link.
Why use a VPN while streaming?
A Virtual Private Network or VPN service is a substantial tool that obstructs cybercriminals and companies from accessing people’s personal data. When a person uses a VPN service, his/her data goes to a remote server through a secure connection. Wherein, the remote server conceals the IP address, so it appears like that person is accessing the web from another spot, which also allows that person to bypass geo-blocking as well as censorship.
As a result, Virtual Private Networks have grown in popularity, especially in countries like China, where internet censorship is intense and there are times it’s dangerous. Nonetheless, individuals all around the world use VPN services to safeguard their anonymity, privacy, and unlimited access to the web.
VPN services provide the finest protection available when it comes to web users’ internet security. Thus, web users should leave their Virtual Private Network on all the time to protect themselves from cyberattacks and information leaks. VPN services encrypt all the information that travels over the network, which makes it impossible for Internet service providers, governments, and hackers to see people’s personal information.
If online security is people’s top concern, they should ensure that their VPN services utilize military-grade encryption. Web users will also want to have an automatic kill switch that turns their connection off if their VPN service fails. With a strict zero-logs policy and encryption of 256-AES bit, Surfshark service consistently ranks as one of the most secure Virtual Private Networks on the market. This VPN service offers a secure environment for people’s internet use to keep their web activity and data private. Surfshark service protects against threats and prevents censorship restrictions.
With Surfshark, people can break free from geo-restricted content and explore the web with no censorship. This VPN provider has over 5,000 anonymous servers around the world to give its users super-fast, unrestricted web access all the time.
Other reasons why it is our VPN of choice:
- Surfshark’s protocols are perfect for use with Kodi.
- This VPN will definitely hide all of your online activities.
- It has a military-grade level of encryption that will ensure your safety.
- You can access more content and even unblock Netflix and other platforms.
- Supports P2p file-sharing activities which makes it applicable to torrenting
- Strictly follows No-Log Policy.
- One of the Fastest as its raging speed
- It provides 3,200 VPN servers in 65 locations worldwide.
- DNS Leak Protection is active by default.
Note: For more information about SurfShark, please read our SURFSHARK REVIEW.
How to Install Surfshark VPN on Firestick
If your Firestick still has the older interface, read this article to learn how to update it: Update Firestick Interface.
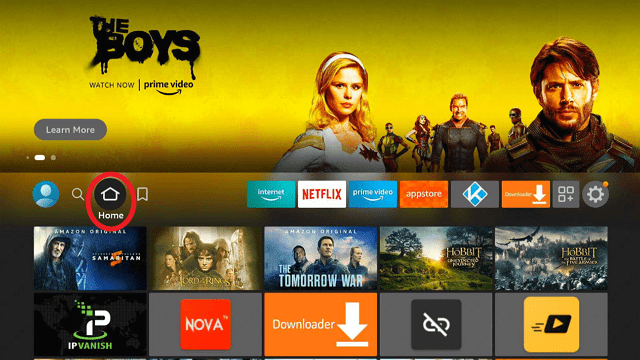
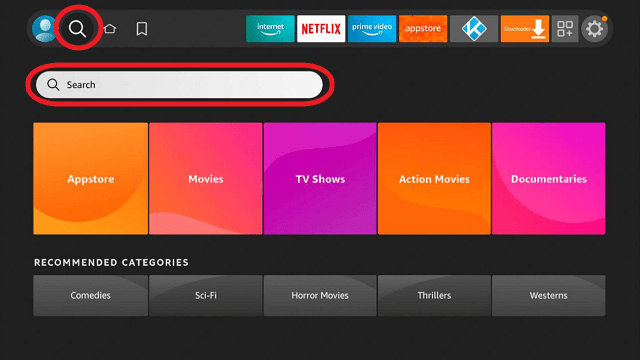
1. Go to the Home screen of your Firestick.
2. Navigate towards the Find tab. Press the Search button from the resulting dropdown.
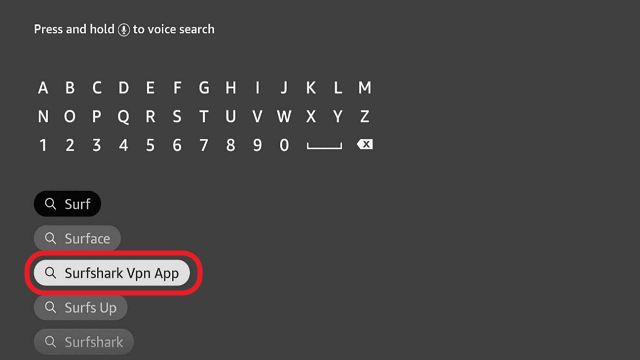
3. Type in the keyword of SurfShark and select from the suggestions that will appear.
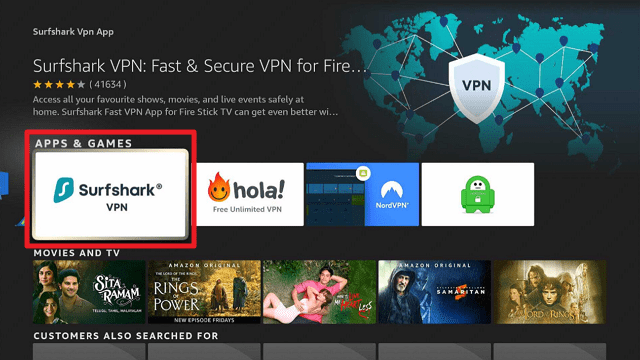
4. Click the official SurfShark icon from your search results.
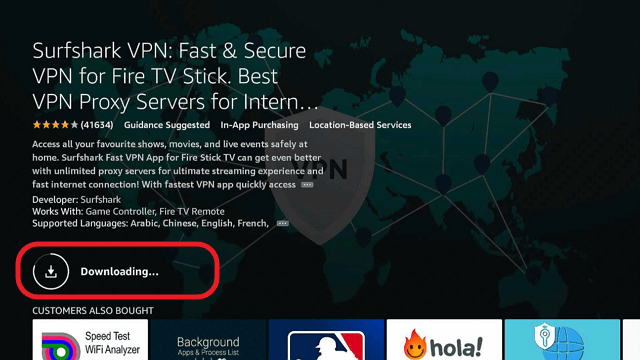
5. Press the Download (You own it) button.
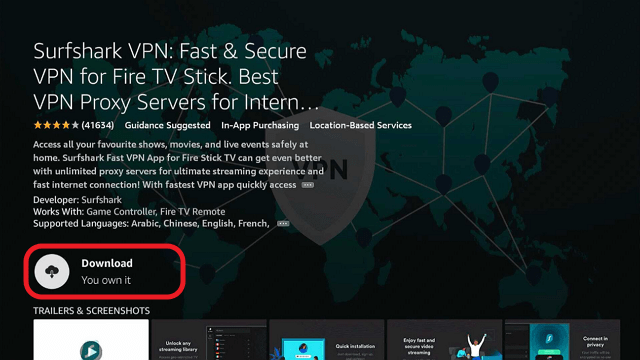
6. The SurfShark VPN installer will download on your device.
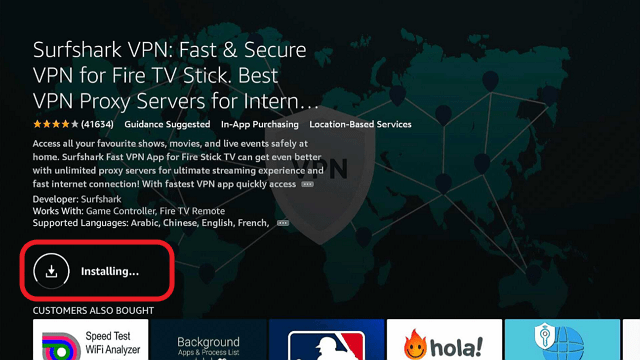
7. SurfShark VPN’s app will automatically install itself on your Fire TV stick.
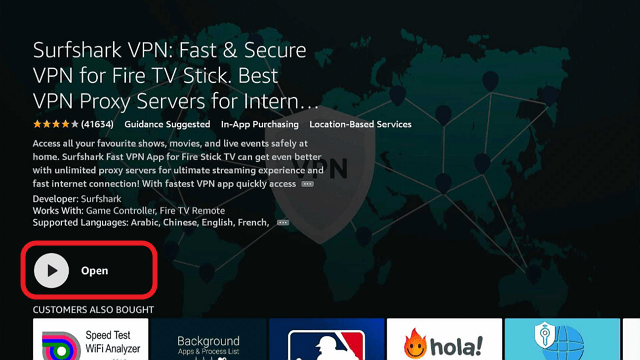
8. Press the Open button after completing SurfShark VPN’s installation process.
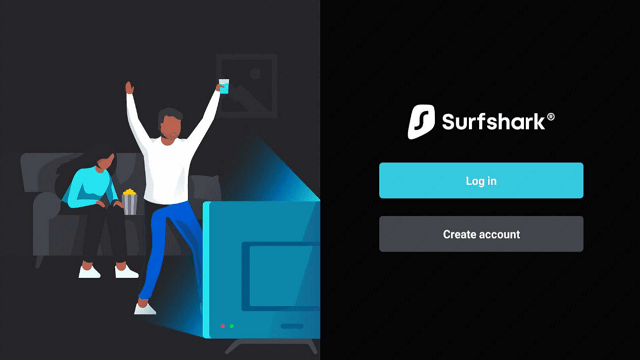
9. Please wait for the SurfShark VPN to load its user interface.

10. You can now log in with your SurfShark VPN account credentials.
Learn more about Surfshark and Grab the Best Surfshark Deal Now!
Install Surfshark on Firestick
For more VPN discounts, go to ReviewVPN Deals and purchase the best VPN for you.
Click here to get the lowest price on Surfshark through our exclusive limited-time offer.
Conclusion
Traditional File Hosts buffer a lot and depend on the bandwidth allocation it provides. It means that your files are compressed and have a pixelated or grainy quality to them. Since A Pirates Life For Me hosts cached torrents, the issues that traditional file hosts carry along with it, are neutralized. A Pirates Life For Me is very ideal for users who don’t have a lot of storage and seek high-quality videos to watch. Although there are also different add-ons that offer the same service, we find that A Pirates Life for Me offers one of the best services thus earning our praise. We hope that this guide will be useful in your endeavor. If you have questions or suggestions, please feel free to drop a comment below or contact us through any of our social media platforms. Thank you for reading!