How to Install Castify on Firestick

Overview

This article will show you how to install Castify on Firestick. 


We know how much more comfortable it is to watch on a large screen rather than on a small device such as a smartphone or tablet. Moreover, there may be instances when you want to cast movies and television shows from your laptop to your Smart TV.

Furthermore, casting helps in better viewing and improves your streaming experience. As a result, many people seek the best app for casting their favorite content to the Firestick. And we at Reviewvpn are always on the lookout for the best apps and solutions to help you with your streaming needs. Therefore, that’s how we came upon Castify.

Castify, also known as Cast TV, not only allows you to cast content from your smartphone to your Firestick, but also adds plenty of other features. This includes the capability of the built-in web browser to locate streaming content. Furthermore, it includes a built-in file manager that makes it easy to find and watch existing media on your Firestick. Finally, it enables the downloading of content so that you can watch it later or whenever you like.

Without further ado, let’s begin with the installation process so you can begin casting and streaming with Castify shortly.


ANONYMOUSLY

Castify APK Download for Android Devices


Castify APK Download for Android Devices

Note: ReviewVPN.com does not host this APK file. It is hosted by Archive.org


How to Install Castify on Firestick

To begin, if your Firestick has not yet been jailbroken, follow the simple steps below to jailbreak it to install Castify on your device: 

1.  Click Home on your remote and scroll once to your Right. Click Setting (Gear Wheel Icon).

Step 1 Install Castify on Firestick


2. Scroll down and to the right until you get to My Fire TV. Click on it.

Step 2 Install Castify on Firestick


3. Select Developer options.

Step 3 Install Castify on Firestick


4. Turn on ADB debugging and Apps from Unknown Sources.

Step 4 Install Castify on Firestick


5. Click Turn On when the pop-up appears.

Step 5 Install Castify on Firestick


Then, after jailbreaking your Firestick, you’ll need to download the Downloader app to sideload Castify. This app, which is easily available on the Amazon App Store, allows you to download APK files.


6. Click Home, click FIND.

Step 6 Install Castify on Firestick


7. Click Search.

Step 7 Install Castify on Firestick


8. You can either say Downloader to your Alexa voice-enabled remote or start typing it. If you typed it, click on the suggestion when it appears.

Step 8 Install Castify on Firestick


9. Click on the Downloader Icon.

Step 9 Install Castify on Firestick


10. Click Download.

Step 10 Install Castify on Firestick


step 10 Install Castify on Firestick


11. Click on Open.

Step 11 Install Castify on Firestick


12. Click on Allow.

Step 12 Install Castify on Firestick


13. Use the Downloader search tab.

Install Castify on Firestick Step 13


14. You will be asked to enter a download link. Type in “https://reviewvpn.com/cast” and select Go.

Install Castify on Firestick Step 14


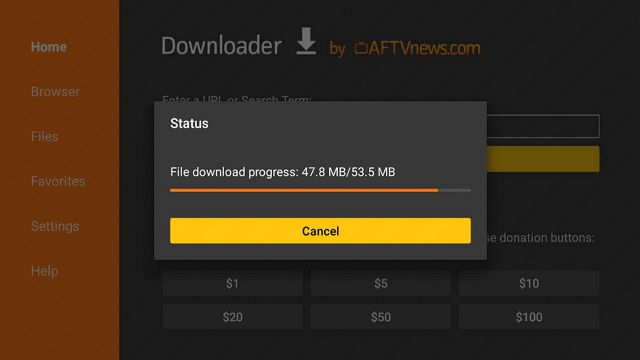
15. Depending on your internet connection, the APK will take a few seconds to download.

Install Castify on Firestick Step 15


16. After that, choose Install.

Install Castify on Firestick Step 16


17. Then click Open.

Install Castify on Firestick Step 17


YOUR INTERNET ACTIVITY IS BEING WATCHED

ReviewVPN cannot attest to the legality, security and privacy of the applications discussed on this site. It is highly recommended that you use a VPN service while streaming or using Kodi.

Currently, your IP 144.76.151.45 is visible to everyone and your Browser is being tracked by Advertisers & ISP Provider.

Save 65% Now

Limited Time Offer

Here are the main reasons why you must use a VPN:

  • Your activities are hidden from your ISP, the government, and from the apps you are using.
  • You can access additional movies and TV streams.
  • ISP attempts to throttle are thrwarted thus reducing buffering issues.
  • Geographically restricted content like Netflix and Hulu can be unblocked.

A VPN works be replacing your ISP-assigned IP address and creating an encrypted tunnel. We recommend the no log service offered by IPVanish. It works well on a Firestick and offers the fastest possible speeds.

Special Limited Time Offer - Get IPVanish


Legal Disclaimer: ReviewVPN.com does not encourage or endorse any illegal activity involved in the usage of services and applications referenced on this site. We do not verify the licensing agreements of services. The end-user is wholly responsible for ensuring that any media accessed through these services does not violate copyright and/or licensing laws. ReviewVPN does not promote, link to, or receive compensation from any Apps and IPTV services.


Install Surfshark on Firestick

Best Surfshark Deal


Castify Features

  • Allows you to watch videos, movies, shows, sports, and live news on your Firestick.
  • Permits you to play on your phone or cast to compatible smart devices.
  • Enables users to download videos for later viewing
  • Compatibility with Chromecast, Roku, Apple TV AirPlay, Amazon Fire TV, DLNA, WebOS, and Netcast
  • It comes equipped with a built-in web browser.
  • Includes demo videos that will assist you in getting started with Castify.
  • Allows you to stream your IPTV services directly from the app.
  • It includes a search tool that enables you to look up websites or applications.
  • Enables you to save your favorite items as bookmarks
  • Allows you to disable battery optimization, which certain streaming receivers require.
  • It includes a built-in file manager for managing videos, audio files, and photos.
  • Allows for the provisioning of several servers so that videos can be viewed on the server that is most compatible with your device.
  • Provides tips and tutorials on how to use the app.
  • It allows you to create a playlist.


Pros & Cons

Pros

  • Aside from casting, it has several additional features.
  • Assists in the viewing of IPTV services
  • It includes an integrated file manager and web browser.


Cons

  • When I tested the search function for the first time, it did not work.
  • Screen mirroring is not available on my device.
  • At times, the app can be difficult to navigate.


Stream Safely with Castify and a VPN

The best thing about Castify is that it lets you do a lot of different things, such as cast to smart devices, play videos, watch IPTV, and more. Apart from that, it enables you to download stuff from the web for later viewing. However, the more activities you may accomplish using Castify, the more reason there is to protect your connection. This is to prevent data breaches and IP address leaks, which could jeopardize your online security. And the most secure and efficient way to do it is through the use of a VPN.

A VPN service, such as Surfshark, will provide you with online anonymity by allowing you to connect to one of its numerous servers. It encrypts your connection using AES-256 bit military-grade encryption, which ensures that your internet traffic is uncrackable. As a result, you can be certain that you will leave no trace on any website or application that you access while connected to the service. Apart from that, it gives numerous additional benefits, including the following:

  • Prevents ISP throttling, which causes lags, buffering, and internet sluggishness.
  • It links you automatically to the fastest server connection available in your area to ensure maximum speed.

Note: For more information about Surfshark, please read our Surfshark Review.


Grab your subscription now!

Click here to get the lowest price on Surfshark through our exclusive limited-time offer.


How to Install Surfshark VPN on Firestick

If your Firestick still has the older interface, read this article to learn how to update it: Update Firestick Interface.

Follow our screenshots below to install the SurfShark VPN app on your Fire TV stick.

1. Go to the Home screen of your Firestick.

step 1 Install Surfshark VPN on Firestick


2. Navigate towards the Find tab. Press the Search button from the resulting dropdown.

step 2 Install Surfshark VPN on Firestick


3. Type in the keyword of SurfShark and select from the suggestions that will appear.

step 3 Install Surfshark VPN on Firestick


4. Click the official SurfShark icon from your search results.

step 4 Install Surfshark VPN on Firestick


5. Press the Download (You own it) button.

step 5 Install Surfshark VPN on Firestick


6. The SurfShark VPN installer will download on your device.

step 6 Install Surfshark VPN on Firestick


7. SurfShark VPN’s app will automatically install itself on your Fire TV stick.

step 7 Install Surfshark VPN on Firestick


8. Press the Open button after completing SurfShark VPN’s installation process.

step 8 Install Surfshark VPN on Firestick


9. Please wait for the SurfShark VPN to load its user interface.

step 9 Install Surfshark VPN on Firestick


10. You can now log in with your SurfShark VPN account credentials.

step 10 Install Surfshark VPN on Firestick

Learn more about Surfshark and Grab the Best Surfshark Deal Now!


Install Surfshark on Firestick

Best Surfshark Deal


Other VPNs to Consider

NordVPN (Best for Streaming)

Best Features

  • 5000+ Server in 50+ Countries 
  • Military-Grade Encryption
  • Fast Connection Speed
  • Suitable to a lot of devices
  • No-Log Policy

Prices
  • Complete $5.89 per month (64% Discount)
  • Plus $4.59 per month (56% Discount)
  • Standard $3.69 per month (55% Discount)

Best Features

  • 750+ High-speed VPN Servers in 43 Locations
  • Military-Grade Encryption
  • Fastest HD Streaming and Gaming
  • 30-Day Money-Back Guarantee
  • Unlimited Data & Devices
  • No-Log Policy

Prices
  • 3 Years $1.99 per month (82% Discount)
  • 1 Years $3.29 per month (70% Discount)
  • 1 Month $10.99 per month

IPVanish VPN (Most Secure)

Best Features

  • 1200+ Servers in 60+ Countries around the world
  • Unlimited Connections
  • No-Log Policy
  • Top Notch Military-Grade VPN Protocols and Encryptions
  • 100% Safe and Secured
  • Most Trusted VPN
  • Best VPN for Firestick
  • 30-Day Money-Back Guarantee

Prices
  • Yearly $3.99 per month (63% Discount) – 30 days risk free + Ransomware & Malware Protection
  • Quarterly $5.32 per month (51% Discount)
  • Monthly $10.99 per month


For more VPN discounts, go to ReviewVPN Deals and purchase the best VPN for you.

Click here to get the lowest price on Surfshark through our exclusive limited-time offer.


Castify Alternatives


FAQs

What is Castify App?

The Castify App enables you to cast content to your mobile devices, tablets, and smart televisions. Furthermore, Castify includes a built-in web browser that enables you to search for streaming sites that are compatible with your device. In addition, it supports IPTV services, allowing you to view your favorite shows via your IPTV subscription.


How to use Castify?

How to use Castify app is quick and easy. All you need to do is navigate to the content you wish to see. Following that, choose a server from which to stream the movie or show. Then choose a device to watch it on, such as your Amazon Fire TV or mobile phone. Simply wait for the video to load then you can enjoy watching on your preferred device.


How does screen Castify work?

Castify works by allowing you to cast content to your devices, such as a Firestick, Roku, mobile device, or tablet. As a result, it enables you to watch videos on any platform.


Is Castify safe?

Yes, Castify is a safe application to use and install on your Firestick. However, while using Castify, a VPN such as Surfshark will add a layer of protection.


Is Castify free?

Yes, installing and using Castify on your Firestick and other devices is entirely free.


Final Thoughts

Apart from casting, Castify offers plenty of other options to its users. Furthermore, what drew my interest was its built-in browser, which enables you to search for websites that you may watch on your device. In addition, it supports IPTV services, allowing you to watch your favorite movies and television shows via your IPTV provider. Moreover, it includes a file manager, which enables you to watch and view your saved content on your device. To sum up, there are various ways to access and stream Castify content on any device.

Install Tivimate on Firestick and Android – 2023 Guide

Tivimate for Amazon Firestick

In this article, we will show you how to install Tivimate on Firestick and other devices that are compatible with the android operating system.


Tivimate is an IPTV player for the Firestick that you can use with your IPTV Service provider that offers M3U URL. You need to find out if your IPTV service provider has M3U URL so that you can fully utilize Tivimate on your Firestick.

Tivimate has two versions that you can install on your firestick. There is a premium version and a free version. There are certain features that are only accessible with the Premium version but if you don’t mind not having those altogether, we suggest you stick with the free version.


Download Tivimate App on Android


Download Tivimate


Note: ReviewVPN.com does not host this Tivimate APK file. It is hosted on Archive.org. 


ANONYMOUSLY

Is Tivimate Safe and Virus-free?

Tivimate Virus Total Result

We tested this app using VirusTotal and found no threats or any malicious files and malware.

Despite having good results, we still need to be vigilant in protecting our privacy while streaming.

A Virtual Private Network or VPN will definitely help us maintain our security and anonymity while using Tivimate.

Here’s how you can Install The Best VPN For Firestick and All Devices.


Tivimate Installation Guide On Your Amazon Firestick

  1. On the Home Screen, go to Settings.
  2. Select My Fire TV
  3. Select Developer Options
  4. Turn On ADB debugging and Apps from Unknown Sources.
  5. Head back to the home screen and select the Search icon.
  6. Search for Downloader and click on Downloader (It will appear under the keyboard).
  7. Choose the Downloader orange button.
  8. Download it
  9. Choose Open
  10. Select Allow
  11. Choose OK
  12. Type https://reviewvpn.com/tvm and select GO.
  13. Wait for it to finish
  14. Install Tivimate
  15. Select Done
  16. This will automatically take you back to Downloader. Select Delete
  17. Choose Delete Again
  18. Head back to the Home Screen and under “Your Apps & Channels”, select See All.
  19. Scroll down and click on the select button while hanging around to relocate the app, after which move it to the front
  20. There you go, Tivimate is now installed!


Install Tivimate on Firestick (Video)


Install Tivimate on Firestick with Screenshots

1.  Install the Downloader app and jailbreak your firestick by enabling unknown sources. To learn more about the procedure, you may read How to Install the Downloader App and Enable Unknown Sources.


2. Type https://reviewvpn.com/tvm and click GO.

Install Tivimate on Firestick


3. Wait for the APK to be downloaded.

Install Tivimate on Firestick

Install Tivimate on Firestick


4. Click Install.

Install Tivimate on Firestick


5. Click open.

Install Tivimate on Firestick


7. Tivimate is installed

Install Tivimate on Firestick


YOUR INTERNET ACTIVITY IS BEING WATCHED

ReviewVPN cannot attest to the legality, security and privacy of the applications discussed on this site. It is highly recommended that you use a VPN service while streaming or using Kodi.

Currently, your IP 144.76.151.45 is visible to everyone and your Browser is being tracked by Advertisers & ISP Provider.

Save 65% Now

Limited Time Offer

Here are the main reasons why you must use a VPN:

  • Your activities are hidden from your ISP, the government, and from the apps you are using.
  • You can access additional movies and TV streams.
  • ISP attempts to throttle are thrwarted thus reducing buffering issues.
  • Geographically restricted content like Netflix and Hulu can be unblocked.

A VPN works be replacing your ISP-assigned IP address and creating an encrypted tunnel. We recommend the no log service offered by IPVanish. It works well on a Firestick and offers the fastest possible speeds.

Special Limited Time Offer - Get IPVanish


Legal Disclaimer: ReviewVPN.com does not encourage or endorse any illegal activity involved in the usage of services and applications referenced on this site. We do not verify the licensing agreements of services. The end-user is wholly responsible for ensuring that any media accessed through these services does not violate copyright and/or licensing laws. ReviewVPN does not promote, link to, or receive compensation from any Apps and IPTV services.


Install Surfshark on Firestick

Best Surfshark Deal


How To Integrate Tivimate To Your IPTV

Note: You can only use Tivimate with an M3U URL.

The M3U URL will be given to you by your provider via email or you can request it through your provider’s technical support.

One more thing, Tivimate will not integrate properly if your VPN is active.

Make sure to turn it off when you are doing the integration. You can put it back on after the process is finished.

  1. Launch TiviMate and select Add Playlist
  2. Choose Enter URL
  3. Type in the M3U URL given to you along with your personal information. There will be two URLs which consist of the channel list and Electronic Program Guide.

These M3U URLs mostly demand you to give your username and password. These will be seen as “username=xxxx” & password=xxxx”.  You have to type in your username and password where the x’s are located.

  1. Select Next.
  2. Hold on for a moment for Channels to insert.
  3. Click on Next once a notification appears.
  4. Select Enter URL to insert the EPG, then input the EPG URL
  5. Select Done
  6. The EPG will now be imported. Enjoy watching!

 Note: If you wish to access more than 6000 public channels, check Tivimate.


Tivimate Features

  • The interface is made for big screens
  • Multiple Playlist support
  • EPG Update
  • Favorites
  • Keep track of your favorite tv shows with the Catch-up feature


Tivimate Pros and Cons

Pros

  • Closed Captioning and Subtitle Support
  • Unique UI
  • Easy navigation


Cons

  • The unique features are available with a premium account
  • The free version does not allow multiple playlists. Also, you have to manually integrate playlists if you are using the free version.
  • IPTV services are tricky so one can expect to have some issues when running Tivimate. It is important to note that the service is the problem, not the App itself.


Should I Use A VPN?

surfshark logo

You have to turn off your VPN when integrating Tivimate with your IPTV Service as it interferes with the whole process and might mess things up for you. You can turn it back after the integration is complete.

If you are not yet familiar with how a VPN works, We have an article that will help you fully understand it. Just click on this link.

Note: For more information about Surfshark, please read our Surfshark Review.


Grab your subscription now!

Click here to get the lowest price on Surfshark through our exclusive limited-time offer.


How to Install Surfshark VPN on Firestick

If your Firestick still has the older interface, read this article to learn how to update it: Update Firestick Interface.

Follow our screenshots below to install the SurfShark VPN app on your Fire TV stick.

1. Go to the Home screen of your Firestick.

step 1 Install Surfshark VPN on Firestick


2. Navigate towards the Find tab. Press the Search button from the resulting dropdown.

step 2 Install Surfshark VPN on Firestick


3. Type in the keyword of SurfShark and select from the suggestions that will appear.

step 3 Install Surfshark VPN on Firestick


4. Click the official SurfShark icon from your search results.

step 4 Install Surfshark VPN on Firestick


5. Press the Download (You own it) button.

step 5 Install Surfshark VPN on Firestick


6. The SurfShark VPN installer will download on your device.

step 6 Install Surfshark VPN on Firestick


7. SurfShark VPN’s app will automatically install itself on your Fire TV stick.

step 7 Install Surfshark VPN on Firestick


8. Press the Open button after completing SurfShark VPN’s installation process.

step 8 Install Surfshark VPN on Firestick


9. Please wait for the SurfShark VPN to load its user interface.

step 9 Install Surfshark VPN on Firestick


10. You can now log in with your SurfShark VPN account credentials.

step 10 Install Surfshark VPN on Firestick

Learn more about Surfshark and Grab the Best Surfshark Deal Now!


Install Surfshark on Firestick

Best Surfshark Deal


Other VPNs to Consider

NordVPN (Best for Streaming)

Best Features

  • 5000+ Server in 50+ Countries 
  • Military-Grade Encryption
  • Fast Connection Speed
  • Suitable to a lot of devices
  • No-Log Policy

Prices
  • Complete $5.89 per month (64% Discount)
  • Plus $4.59 per month (56% Discount)
  • Standard $3.69 per month (55% Discount)

Best Features

  • 750+ High-speed VPN Servers in 43 Locations
  • Military-Grade Encryption
  • Fastest HD Streaming and Gaming
  • 30-Day Money-Back Guarantee
  • Unlimited Data & Devices
  • No-Log Policy

Prices
  • 3 Years $1.99 per month (82% Discount)
  • 1 Years $3.29 per month (70% Discount)
  • 1 Month $10.99 per month

IPVanish VPN (Most Secure)

Best Features

  • 1200+ Servers in 60+ Countries around the world
  • Unlimited Connections
  • No-Log Policy
  • Top Notch Military-Grade VPN Protocols and Encryptions
  • 100% Safe and Secured
  • Most Trusted VPN
  • Best VPN for Firestick
  • 30-Day Money-Back Guarantee

Prices
  • Yearly $3.99 per month (63% Discount) – 30 days risk free + Ransomware & Malware Protection
  • Quarterly $5.32 per month (51% Discount)
  • Monthly $10.99 per month


For more VPN discounts, go to ReviewVPN Deals and purchase the best VPN for you.


Alternatives for TiviMate

These apps are decent alternatives should Tivimate experience issues during its run. 


FAQs

What Does Tivimate Do?

Tivimate organizes your playlist and provides an episode guide for a smooth viewing experience 


Compatible Platforms

Tivimate is compatible with the Amazon Firestick and other Android devices.


Is Tivimate Safe To Use?

Tivimate is safe to use and install on your Firestick and any other android device.


Is Tivimate Legal Or Grey?

It is 100% legal to use.


Is Tivimate Free?

There is a free version and a premium version.


Are There ADS?

There are ads for the free version.


Is There A Premium Version?

Yes, there is a premium version for Tivimate


Is There An Official Website?

There is no official website for Tivimate


What Other Devices Does It Work On?

Tivimate will work on other Amazon and Android devices.


How Does The App Work?

Simply follow the installation guide we have provided above.


Minimum Version Required

Version 5.0 and above is ideal. 


How Long Has It Been Around?

Scouring through Reddit forums, we have found out that Tivimate was launched back in 2018. 


What Is The Development Team Like?

The app is always updated which is a good indication that the developer is compassionate about continuing the good service this app does. Should you have queries regarding the app, you can send an email directly to the developer at ar.mobile.dev@gmail.com


Review

Well for starters, Tivimate is not for the faint-hearted. Tivimate has a very meticulous procedure that has to be followed by the letter.

You have to be keen even with the smallest detail and make sure not to miss a step. Once you finish the steps, a wonderful viewing experience awaits you. We liked the fact that the EPG is updated on a regular basis and that there are Catch-up and favorites. With these unique features, you are assured of being able to keep up with your favorite tv shows if ever you miss them.

We hope that this article helps you with how to install Tivimate on Firestick and other android devices.

Please drop a comment below if this article was able to help you in installing Tivimate on your Amazon Firestick. Thank you!

How to Install World of Sounds Kodi Addon

Overview

In this tutorial, you will learn how to install the World of Sounds Kodi music add-on.


World of Sounds has a huge library of artists, radio streams, genres, songs, and lots more.

World of Sounds Kodi add-on is found within the Ghost Repo and this makes it one of the best Kodi add-ons. This add-on has similarities with Mp3 Streams.


ANONYMOUSLY

Features of the World of Sounds Kodi Add-on

  • World of Sounds add-on has a user-friendly interface
  • Regular updating of Kodi add-ons
  • Huge collection of movies, music, music videos, live TV music shows.
  • Real Debrid integration for best streaming.
  • Categories and subcategories of music and music videos
  • Easy to use a window with a customizable search box that allows searching by popularity, rating, trending, and categories.


Step by Step Guide on How to Install World of Sounds Kodi Add-on

The first thing to do when you want to install World of Sounds add-on is to turn ON the UNKNOWN SOURCE. 


To enable the UNKNOWN SOURCE, follow these steps:

  • Open your Kodi app. Once it’s running properly, scroll up to find the SETTING icon and click on it. On the new window,  navigate to SYSTEM and click on it. 
  • Click on Add-on and scroll to UNKNOWN SOURCE. Click on UNKNOWN SOURCE; a warning message will appear. 
  • Click YES. Click on the ESC or BACKSPACE button on your keyboard to go back to the home screen.


  1. From the home screen, click on the setting icon/symbol, and on the window that will come out, scroll up to File manager and click on it.
  2. Select Add source and on the new dialog box, tap on <NONE> and enter the media link or source URL which is in this format: http://ghost-repo.de (Ensure that you type all the letters correctly) and select OK. Also, enter an easy-to-remember name on the dialog box (we used “repository” here) and click OK.
  3. Use the ESC or BACKSPACE button on your keyboard to return to the home screen.
  4. Click on Add-on and on the new window that will pop up, scroll down to INSTALL FROM ZIP.
  5. Navigate to the name you saved the source file and click on it. It will Bring out different repository zip; select this one: repository.Ghost.zip and wait while the repository is downloading. Once done, a notification will appear at the top right side of your screen
  6. The next step is to select INSTALL FROM REPOSITORY
  7. Click on GHOST REPO  (make sure the repository version is GHOST 2.0.4)
  8. On the new dialog box that will appear, navigate down to MUSIC ADD-ONS (we are choosing music add-on because this add-on falls into music category) and click on it.
  9. Select the world of Sounds (Team Ghost version 1.0.2.  Note the version may vary, so don’t be confused)
  10. Click on INSTALL
  11. Choose GHOST REPO V1.0.2
  12. A new dialog box will pop up with this message “THE FOLLOWING ADDITIONAL ADD-ONS WILL BE INSTALLED”, click “OK”
  13. Click NO if a dialog box with this message appears “YOUTUBE; EXECUTE SET-UP WIZARD”. Wait for the installation to complete.


YOUR INTERNET ACTIVITY IS BEING WATCHED

ReviewVPN cannot attest to the legality, security and privacy of the applications discussed on this site. It is highly recommended that you use a VPN service while streaming or using Kodi.

Currently, your IP 144.76.151.45 is visible to everyone and your Browser is being tracked by Advertisers & ISP Provider.

Save 65% Now

Limited Time Offer

Here are the main reasons why you must use a VPN:

  • Your activities are hidden from your ISP, the government, and from the apps you are using.
  • You can access additional movies and TV streams.
  • ISP attempts to throttle are thrwarted thus reducing buffering issues.
  • Geographically restricted content like Netflix and Hulu can be unblocked.

A VPN works be replacing your ISP-assigned IP address and creating an encrypted tunnel. We recommend the no log service offered by IPVanish. It works well on a Firestick and offers the fastest possible speeds.

Special Limited Time Offer - Get IPVanish


Legal Disclaimer: ReviewVPN.com does not encourage or endorse any illegal activity involved in the usage of services and applications referenced on this site. We do not verify the licensing agreements of services. The end-user is wholly responsible for ensuring that any media accessed through these services does not violate copyright and/or licensing laws. ReviewVPN does not promote, link to, or receive compensation from any Apps and IPTV services.


Install Surfshark on Firestick

Best Surfshark Deal


Install  World of Sounds Kodi Add-on with Screenshots

 1. From the home screen, select the cogwheel at the upper left.

Step 1 Install World of Sounds on kodi


2. Select System in the bottom right corner.

Step 2 Install World of Sounds on kodi


3. Hover Add-ons on the left side of the screen.  Select Unknown sources.

Step 3 Install Nemesis AIO on kodi


4. Click Yes to allow unknown sources.

Step 4 Install World of Sounds on kodi


5. Take one step back, Select File manager.

Step 5 Install World of Sounds on kodi


6. Click Add source.

Step 6 Install World of Sounds on kodi


7. Click on <None>.

Step 7 Install World of Sounds on kodi


8. Type in http://ghost-repo.de

Step 8 Install World of Sounds on Kodi


9. Select OK.

Step 9 Install World of Sounds on Kodi


10. Select Enter a name for this media source.

Step 10 Install World of Sounds on Kodi


11. Name is ghost (this part isn’t critical as long as you remember the name).

Step 11 Install World of Sounds on Kodi


12. Click OK.

Step 12 Install World of Sounds on Kodi


13. Click on OK.

Step 13 Install World of Sounds on Kodi


14. Take one step back and click on Add-ons.

Step 14 Install World of Sounds on Kodi


15. Select install from zip file.

Step 15 Install World of Sounds on Kodi


16. Click on Ghost (or whatever you named the source).

Step 16 Install World of Sounds on Kodi


17. Click on repository.Ghost.zip

Step 17 Install World of Sounds on Kodi


18. Once the installation is completed, a pop message will appear.

Step 18 Install World of Sounds on Kodi


19. Select on Install from repository.

Step 19 Install World of Sounds on Kodi


20. Click on Ghost Repo.

Step 20 Install World of Sounds on Kodi


21. Pick Video add-ons.

Step 21 Install World of Sounds on Kodi


22. Select World of Sounds.

Step 22 Install World of Sounds on Kodi


23. Click on Install.

Step 23 Install World of Sounds on Kodi


24. Select Version 1.0.3

Step 24 Install World of Sounds on Kodi


25. Select OK after reviewing the addons that will be installed.

Step 25 Install World of Sounds on Kodi


26. You should see a popup in the upper right corner saying World of Sounds has installed. There will actually be multiple popups for the various components.

Step 26 Install World of Sounds on Kodi


26. Click on World of Sounds.

Step 26 Install World of Sounds on Kodi


27. Click on Open to start the World of Sounds addon.

Step 27 Install World of Sounds on Kodi


28. Click on Open to start the World of Sounds addon.

Step 28 Install World of Sounds on Kodi


How to Use the World of Sounds Kodi Add-on

  • Use the ESC or BACKSPACE button on your keyboard to go back to the home screen.
  • Click on Add-ons and. Select music add-ons and world of Sounds add-on will appear. 
  • Click on the world of Sounds add-on icon to stream non stop the music.


Don’t Use Kodi Without a VPN

Using Kodi without a VPN will make your IP address public on your internet service provider network. We recommend installing Surfshark on your device before using Kodi. Surfshark helps you to bypass location restrictions and Internet service provider throttling. Surfshark also masks your IP address thereby making you appear anonymous on the ISP network.

Note: For more information about Surfshark, please read our Surfshark Review.


Grab your subscription now!


How to Install Surfshark VPN on Firestick

If your Firestick still has the older interface, read this article to learn how to update it: Update Firestick Interface.

Follow our screenshots below to install the SurfShark VPN app on your Fire TV stick.

1. Go to the Home screen of your Firestick.

step 1 Install Surfshark VPN on Firestick


2. Navigate towards the Find tab. Press the Search button from the resulting dropdown.

step 2 Install Surfshark VPN on Firestick


3. Type in the keyword of SurfShark and select from the suggestions that will appear.

step 3 Install Surfshark VPN on Firestick


4. Click the official SurfShark icon from your search results.

step 4 Install Surfshark VPN on Firestick


5. Press the Download (You own it) button.

step 5 Install Surfshark VPN on Firestick


6. The SurfShark VPN installer will download on your device.

step 6 Install Surfshark VPN on Firestick


7. SurfShark VPN’s app will automatically install itself on your Fire TV stick.

step 7 Install Surfshark VPN on Firestick


8. Press the Open button after completing SurfShark VPN’s installation process.

step 8 Install Surfshark VPN on Firestick


9. Please wait for the SurfShark VPN to load its user interface.

step 9 Install Surfshark VPN on Firestick


10. You can now log in with your SurfShark VPN account credentials.

step 10 Install Surfshark VPN on Firestick

Learn more about Surfshark and Grab the Best Surfshark Deal Now!


Install Surfshark on Firestick

Best Surfshark Deal


Other VPNs to Consider

NordVPN (Best for Streaming)

Best Features

  • 5000+ Server in 50+ Countries 
  • Military-Grade Encryption
  • Fast Connection Speed
  • Suitable to a lot of devices
  • No-Log Policy

Prices
  • Complete $5.89 per month (64% Discount)
  • Plus $4.59 per month (56% Discount)
  • Standard $3.69 per month (55% Discount)

Best Features

  • 750+ High-speed VPN Servers in 43 Locations
  • Military-Grade Encryption
  • Fastest HD Streaming and Gaming
  • 30-Day Money-Back Guarantee
  • Unlimited Data & Devices
  • No-Log Policy

Prices
  • 3 Years $1.99 per month (82% Discount)
  • 1 Years $3.29 per month (70% Discount)
  • 1 Month $10.99 per month

IPVanish VPN (Most Secure)

Best Features

  • 1200+ Servers in 60+ Countries around the world
  • Unlimited Connections
  • No-Log Policy
  • Top Notch Military-Grade VPN Protocols and Encryptions
  • 100% Safe and Secured
  • Most Trusted VPN
  • Best VPN for Firestick
  • 30-Day Money-Back Guarantee

Prices
  • Yearly $3.99 per month (63% Discount) – 30 days risk free + Ransomware & Malware Protection
  • Quarterly $5.32 per month (51% Discount)
  • Monthly $10.99 per month


For more VPN discounts, go to ReviewVPN Deals and purchase the best VPN for you.

Click here to get the lowest price on Surfshark through our exclusive limited-time offer.


Learn How To Install Kodi on iOS

How to Install Kodi on iOS

In this write-up, we will teach you extensively, how to install the Kodi streaming app on iDevices such as iPad or iPhone.


The Kodi app as we know is compatible with most OS (Operating systems). One good side of the Kodi app is that it allows you to stream all kinds of media both saved or online. Kodi comes with easy to use interface and awesome entertainment features.

You may as well use Kodi build and tons of add-ons that are free to use. You can as well, customize Kodi menu options to your choice. You can also be able to install Kodi repositories very easily and fast.

If you are confused about the type of Kodi build or best repositories, click on Best Kodi Builds for guidance on making a selection. However, a strong and reliable internet connection is necessary if you want to enjoy the Kodi app on your iOS devices such as iPhone or iPad.


ANONYMOUSLY


Kodi: What is It?

The Kodi app is formerly known as the Xbox Media Centre (XBMC). It is software developed for streaming online media from home. Kodi is open-source software that allows you to be able to stream content such as movies, music, tv-series, and lots more.

Kodi allows you to save a media file or do online streaming of any digital content easily and conveniently. It is worthy to note that Kodi does not create its media files (meaning they are a medium where you can have access to those files).

Kodi allows you to customize menus, interfaces, themes, add-ons, and plugins. You may also customize the skin of your Kodi software to your choice. You can download Kodi on their official download page and you need not worry as it’s compatible with all OS (operating systems).

However, for iOS users, jailbreaking is required before installing Kodi; this is because Kodi is not compatible with iOS that is not jailbroken.


Installation of Kodi on iPad or iPhone

Kodi app is not yet available on the Kodi Appstore. So if you want to install this app on your iPad or iPhone, you will need an installer: which allows you to install Kodi on iDevices. The installer app you need is TweakBox. TweakBox app installer is a third party installation app hosting different app that is not found on the Apple Appstore marketplace. It also comes with lots of amazing features and lets you download and install modified apps, applications that are still in their beta mode, and premium apps.  All the apps on tweaBox come as cracked versions with great features. One good side of tweaBox is that it allows you to download apps and games that are paid free of charge. With TweakBoX, you don’t need to jailbreak your iPhone or iPad. TweakBox is compatible with Android, iPhone, iPad, and iPods. We advise those using iOS devices such as iPhone or iPad to upgrade to at least version 7 of the iOS operating system. In this tutorial, we are going to use the iPhone XS which operates on the iOS version. That being said, other versions and other devices including the iPad can use this tutorial as well.


Note: As of writing this, Kodi 17.6 Krypton is version is the only available version via the TweakBox app installer. We have two ways which you might consider to install Kodi. One step is via the Cydia and the second step is using the XCODE procedure. 

Steps on How to Install Kodi on iPad or iPhone Via the CYDIA Impactor

This is the best way you can use to install Kodi on your iDevices such as iPad or iPhone without having to jailbreak your iOS device. The Cydia impactor is a well-known app that is downloadable and can be installed on windows and macOS and allows users of iOS devices to install apps that are not from the official apple AppStore on iOS powered devices. To use the Cydia impactor app, click on Cydia Impactor and you can also download the Kodi.IPA file.

  1. Switch on your computer and allow it to the booth. Then use the USB cable or any other compatible cable to connect your iPad or iPhone to the computer (the computer might be windows OS or MAC OS). When you connect your iPhone or iPad to your MAC computer and the iTunes app opens automatically, you need to close it. 
  2. Navigate and launch the Cydia impactor app. Once it opens, you should drag-n-drop the Kodi app IPA file (this you should have downloaded earlier).
  3. You should ensure that the iPhone or iPad is already selected (do this in the drop-down menu) and after that, click on the start button.
  4. At this point, the Cydia Impactor will request your Apple identification login details. Enter your ID login details to verify and sign the IPA file. Here you might choose a different Apple ID if you are concerned about your privacy.
  5. When the installation is completed; navigate to the menu of your device and click on the menu option and click on settings, then select general and then profiles and choose device management (However, note that there will be a variation of these options depending on your iOS versions) scroll to find the profile with your Apple Identification (ID) and click open.
  6. Click on the “trust” option. This is to enable the trust option on the new Kodi app on your iDevices such as iPad or iPhone.
  7. At this point, the app is already installed. Launch it and enjoy its streaming features.

Second method: installing Kodi app on iPad or iPhone using the XCODE.


To use this method to install Kodi on your iPad or iPhone, you need to download the following:

First, you need to download the Kodi deb file. The Kodi deb file can be downloaded from here. The Kodi deb file has two versions which are versions 15.2 and 18.2 respectively.

Second, you need the iOS App Signer. This can be downloaded as a zip file. We recommend you download version 1.12 and unzip the file. Ignore any ads you will come across after downloading this file.

Third, you will download and install the Xcode.


YOUR INTERNET ACTIVITY IS BEING WATCHED

ReviewVPN cannot attest to the legality, security and privacy of the applications discussed on this site. It is highly recommended that you use a VPN service while streaming or using Kodi.

Currently, your IP 144.76.151.45 is visible to everyone and your Browser is being tracked by Advertisers & ISP Provider.

Save 65% Now

Limited Time Offer

Here are the main reasons why you must use a VPN:

  • Your activities are hidden from your ISP, the government, and from the apps you are using.
  • You can access additional movies and TV streams.
  • ISP attempts to throttle are thrwarted thus reducing buffering issues.
  • Geographically restricted content like Netflix and Hulu can be unblocked.

A VPN works be replacing your ISP-assigned IP address and creating an encrypted tunnel. We recommend the no log service offered by IPVanish. It works well on a Firestick and offers the fastest possible speeds.

Special Limited Time Offer - Get IPVanish


You can download and install this file from the Mac AppStore. When you are done downloading and installing these apps on your MAC computer, then let’s get started with the installation of Kodi using the XCODE:

  1. Boot your MAC computer and plug in your iPad or iPhone via MAC PC and launch the XCODE.
  2. At this point, you will be prompted to click on creating a new XCODE project. We advise that you ensure that the application is properly highlighted via the iOS section can be found on the left side of your screen. Once you found it, click on the option with a single view application and then click the “next” button.
  3. A dialog will appear prompting you to identify the type of application you intend to create. We advise filling in the product name (here, you might enter “Kodi”) and on the organization identifier, you may choose com.davidprice. When other fields had been filled already, you might as well leave the other options empty. Now, you should choose the app: iPhone or iPad, or you might leave everything to universal and click the next button.
  4. The next dialog box that will appear, select the location you want for your GIT REPOSITORY. Here, we saved it on the desktop and tap on the create button.
  5. Next, don’t give access to “XCODE” to your contacts. You might as well allow access, but we don’t recommend doing so.    
  6. The next dialog box should have a message like this: ‘No code signing identities found’, at this point, to fix such, you need to click the FIX issue button that is found beneath this message. 
  7. The next dialog box will prompt you to enter your Apple ID detail for signing in.
  8. Return the home screen and a dialog box with this message: “To fix this issue, select a Development Team to use for provisioning” will appear. You are required to choose the “Development team” and the pop message alerting you of the fixing of the issue will pop up. Wait while the fixing is done. Within a while, it will be fixed.
  9. Launch the App signer which you did download earlier by clicking on its icon. It will prompt you to enter the file; at this point, you will have to find the Kodi deb file which you had downloaded earlier.
  10. The signing certificate by now must have been filed which contains your Apple Identification details. Click on the profile for provisioning the profile with the identifier which was found above (step3). By now, you should have filled in the New Application ID. When prompted to choose the App display name, you may input “Kodi” and then hit the start button.
  11. You will be required to select a file name that you will use to save the file, choose any name you can easily remember, and the destination where the file will be saved and then click on save. At this point, the App signer will start unpacking all the data and saving the file. Once everything is set, it will display done.
  12. Return to the XCODE and navigate to windows and click on devices. Select the iOS device which is found on the lefthand side of your screen. Also, hover on the right-hand corner of your screen to view the details of your iPad or iPhone.
  13. Navigate to find the.IPA file which the iOS app has generated in step 9 and then click launch or the open button. Wait while the installation is completing. Once it is completed, you will find the Kodi app installed on your device.
  14. When this is done, remove your Ipad or iPhone. Once you remove it, unlock it, and when an error message like this pops up “untrusted developer”, click cancel.
  15. You may also use this method: go to the setting of your device and click on settings, then general, and then navigate to find the device manager option. Once you find it (under the developer app), click on it, and tap on the account which you used a while ago, and on the next screen which will come up, click on the “name of account” and the next dialogue box, click on Trust.
  16. Return to the home screen of your device and you will see the icon of the installed app.


Addons on Kodi

When you are done installing the Kodi app, next is to start adding Add-ons in other to customize your streaming experience. You may choose your favorite Kodi add-ons via Kodi’s list of add-ons. Twitch; this has some similarities with YouTube. It allows you to stream live content such as games and lots more. You are able to download other content that is not game-related.

YouTube: if you are familiar with how YouTube sites work, then you will understand this add-on very well. You will be able to stream trending videos, channels, and live shows. However, you are required to sign in or sign up to use the YouTube Add-on. You can find this in the official Kodi library found on the video section of the Kodi add-0n menu.

SpotiMC, this is a similar Spotify app. It allows you to stream videos and music mp3, music videos. As of writing this, SpotiMC is one of the well-known streaming services globally. You can use SpotiMC as a ZIP file. When the installation is done, you can find the add-on at the Kodi Emby beta add-on section. Click on music Addons and choose Spotify. Open your app and then allow authentication to your Spotify to grant SpotiMC full access.


The APPLE iTunes Podcast

This has an easy-to-use interface. You can download this add-on on the Kodi add-on official library and it has tons of podcasts for you to install.


Grab your subscription now!

Click here to get the lowest price on Surfshark through our exclusive limited-time offer.


How to Install Surfshark VPN on Firestick

If your Firestick still has the older interface, read this article to learn how to update it: Update Firestick Interface.

Follow our screenshots below to install the SurfShark VPN app on your Fire TV stick.

1. Go to the Home screen of your Firestick.

step 1 Install Surfshark VPN on Firestick


2. Navigate towards the Find tab. Press the Search button from the resulting dropdown.

step 2 Install Surfshark VPN on Firestick


3. Type in the keyword of SurfShark and select from the suggestions that will appear.

step 3 Install Surfshark VPN on Firestick


4. Click the official SurfShark icon from your search results.

step 4 Install Surfshark VPN on Firestick


5. Press the Download (You own it) button.

step 5 Install Surfshark VPN on Firestick


6. The SurfShark VPN installer will download on your device.

step 6 Install Surfshark VPN on Firestick


7. SurfShark VPN’s app will automatically install itself on your Fire TV stick.

step 7 Install Surfshark VPN on Firestick


8. Press the Open button after completing SurfShark VPN’s installation process.

step 8 Install Surfshark VPN on Firestick


9. Please wait for the SurfShark VPN to load its user interface.

step 9 Install Surfshark VPN on Firestick


10. You can now log in with your SurfShark VPN account credentials.

step 10 Install Surfshark VPN on Firestick

Learn more about Surfshark and Grab the Best Surfshark Deal Now!


Install Surfshark on Firestick

Best Surfshark Deal


Other VPNs to Consider

NordVPN (Best for Streaming)

Best Features

  • 5000+ Server in 50+ Countries 
  • Military-Grade Encryption
  • Fast Connection Speed
  • Suitable to a lot of devices
  • No-Log Policy

Prices
  • Complete $5.89 per month (64% Discount)
  • Plus $4.59 per month (56% Discount)
  • Standard $3.69 per month (55% Discount)

Best Features

  • 750+ High-speed VPN Servers in 43 Locations
  • Military-Grade Encryption
  • Fastest HD Streaming and Gaming
  • 30-Day Money-Back Guarantee
  • Unlimited Data & Devices
  • No-Log Policy

Prices
  • 3 Years $1.99 per month (82% Discount)
  • 1 Years $3.29 per month (70% Discount)
  • 1 Month $10.99 per month

IPVanish VPN (Most Secure)

Best Features

  • 1200+ Servers in 60+ Countries around the world
  • Unlimited Connections
  • No-Log Policy
  • Top Notch Military-Grade VPN Protocols and Encryptions
  • 100% Safe and Secured
  • Most Trusted VPN
  • Best VPN for Firestick
  • 30-Day Money-Back Guarantee

Prices
  • Yearly $3.99 per month (63% Discount) – 30 days risk free + Ransomware & Malware Protection
  • Quarterly $5.32 per month (51% Discount)
  • Monthly $10.99 per month


For more VPN discounts, go to ReviewVPN Deals and purchase the best VPN for you.

Click here to get the lowest price on Surfshark through our exclusive limited-time offer.


Final words

Kodi app is not directly available on the Apple Appstore for downloading. However, you may install this on your iOS device using either the Cydia impactor or the XCODE. Kodi app on iOS devices allows you to stream loads of content such as videos, movies, tv-series, tv shows, and lots more.

How To Install CyberGhost VPN On A Firestick

CyberGhost VPN Overview

In this article, we will help you install Cyber Ghost VPN on Firestick.


When we talk about VPN services, it is often hard to choose the best VPN among the thousands of VPN services In the market.

With the entry of CyberGhost VPN, that confusion has been cleared.

CyberGhost VPN has proven to be among the top VPN you will find in the market when it comes to unlocking location-restricted content and video streaming service.

CyberGhost APP often comes as a customized Application for FireTV or firestick. In this article, we will show you how to install CyberGhost on a firestick.


What Does CyberGhost VPN Do For A Firestick?

High Security 

Installing CyberGhost VPN on your firestick or other devices such as computers or smartphones will ensure your security. This is achieved by encrypting your online data. It is a well-known fact that CyberGhost has the highest encryption which is 256bit MG (MILITARY GRADE). What this 256B-MG does is to keep secure your data while you are surfing the net or streaming videos on the firestick device.


CyberGhost VPN Hides Your Internet Protocol Address

When CyberGhost VPN is installed on your firestick or any other device and you connect it, it automatically hides your internet protocol address. While hiding your IP, it will change it to a different IP address on the ISP network. This is because internet service provider monitors every activity you are doing online. So CyberGhost helps you to stay anonymous and secure by hiding your IP address on the ISP network.


No log Releasing Or Keeping

One good side of CyberGhost VPN is that it does not keep or release logs of any kind. What this means is that whatever you are doing or browsing on the internet or videos you stream on the internet are all private and encrypted; making it anonymous. Also, CyberGhost VPN does not leak the user’s logs or online activities to a third party. Everything done on CyberGhost remains in CyberGhost.


CyberGhost VPN Unlocks Streaming Services

With CyberGhost VPN, you can stream using paid streaming applications from anywhere around the globe. Cyberghost is also compatible with other streaming platforms.


ANONYMOUSLY

How To Install CyberGhost VPN On A Firestick

One good side of CyberGhost VPN is easy installation. CyberGhost VPN does not require many connections or technical know-how, unlike other VPN services you will find in the market. You can install CyberGhost on any Amazon Firestick be it a second or third-generation Fires Television or firestick device. 

To install CyberGhost VPN on a firestick, the first thing you need to do is to sign up for an account on CyberGhost. You will need to sign up with a password and a username that is very easy to remember.

  • Switch on the firestick and allow the fire TV device to start properly.
  • From the firestick main screen, scroll through and you will find an image with the magnifying-glass icon; when you click on it, it will open the search menu where you will input your search option.
  • When the new windows open which is where you input your search, input “CyberGhost”. When this is done, choose the first-ever result that will come up for the CyberGhost VPN.
  • Wait for the yellow button to appear. This is where you can download the CyberGhost VPN. Note that you will not see an option with download, but what you will see is “GET”. Click on it the downloading will start. The installation is done automatically. 
  • When the downloading and installation of a CyberGhost VPN is done, a new window with the “open” option will appear. Click on it to launch the downloaded app.
  • You need to accept the terms and conditions or terms of service before proceeding. Failure to do so, you cant access the CyberGhost service. Once you accept the terms, choose to allow access. When a pop-up message says “Allow APP to set-up a VPN connection”, choose yes or OK.
  • When this is done, a new window where you will input your login details such as password and username will appear. Input your password and username and then click on login.
  • You will be logged in to a new window. A pop-up notification with this message “connect”. Click on it to connect CyberGhost VPN to the network.
  • On the dropdown menu, you can click on it to choose the best location or change location. This will open a new window with a list of server locations for you to choose from. You can preview each server location before choosing. 


Screenshots With Step by Step Instruction To Install CyberGhost VPN On A Firestick

1.  Click Home on your remote and scroll once to your left. It will be the search icon.

Install CyberGhost VPN On A Firestick step 1


2. You can either say the name of the app to your Alexa’s voice-enabled remote or start typing it. If you typed it, click on the suggestion when it appears.

Install CyberGhost VPN On A Firestick step 2


3. Click on the CyberGhost VPN icon.

Install CyberGhost VPN On A Firestick step 3


4. Click on Download.

Install CyberGhost VPN On A Firestick step 4


5. Click Open.

Install CyberGhost VPN On A Firestick step 5


6.  Click Agree and Continue.

Install CyberGhost VPN On A Firestick step 6


7. To proceed select Open Connection Checker.

Install CyberGhost VPN On A Firestick step 7


8. Scroll down and simply click Return to login.

Install CyberGhost VPN On A Firestick step 8


9. Visit cgvpn.info/link from a web browser, and enter the code to Validate Pin.

Install CyberGhost VPN On A Firestick step 9

Installing And Using CyberGhost VPN With Kodi On A Firestick

  • In the case of Fire TV device, if you have already installed Kodi, then all you have to do now is to do a connection between the cyber ghost and your Kodi, this will help keep your identity private. For anyone who already has Kodi, just connect your CyberGhost by launching the app and tapping on the connect to a server; you can choose the location or region you want.
  • For new user, kindly follow the step by step guide to install Kodi on your amazon firestick.
  • You need to download and install the Downloader App.
  • For you to be able to install this, you must enable the allow installation of apps from a known source. This is to be able to install the downloaded app.
  • Launch the installed downloader App. When the app opens, a new window with the URL Box, input this: https://kodi.tv/download
  • Navigate through the android build. If your firestick is new, choose the “64-bit version. However, if you are using an old version, you are advised to choose the 32-bit version.
  • When the downloading is done, at the bottom of the screen, you will see the stall option, click on it. Once the installation is done, a new window will open notifying you of the successful installation of the Kodi app.


YOUR INTERNET ACTIVITY IS BEING WATCHED

ReviewVPN cannot attest to the legality, security and privacy of the applications discussed on this site. It is highly recommended that you use a VPN service while streaming or using Kodi.

Currently, your IP 144.76.151.45 is visible to everyone and your Browser is being tracked by Advertisers & ISP Provider.

Save 65% Now

Limited Time Offer

Here are the main reasons why you must use a VPN:

  • Your activities are hidden from your ISP, the government, and from the apps you are using.
  • You can access additional movies and TV streams.
  • ISP attempts to throttle are thrwarted thus reducing buffering issues.
  • Geographically restricted content like Netflix and Hulu can be unblocked.

A VPN works be replacing your ISP-assigned IP address and creating an encrypted tunnel. We recommend the no log service offered by IPVanish. It works well on a Firestick and offers the fastest possible speeds.

Special Limited Time Offer - Get IPVanish


Legal Disclaimer: ReviewVPN.com does not encourage or endorse any illegal activity involved in the usage of services and applications referenced on this site. We do not verify the licensing agreements of services. The end-user is wholly responsible for ensuring that any media accessed through these services does not violate copyright and/or licensing laws. ReviewVPN does not promote, link to, or receive compensation from any Apps and IPTV services.


Install Surfshark on Firestick

Best Surfshark Deal


Pros and Cons

Pros

  • 24/7 Tech. Support via live chat and email available
  • A fast and strong connection
  • You can unlock content from paid streaming applications

Cons

  • Has expensive for an annual subscription plan.


FAQ

CyberGhost VPN has 5,600 servers and is available in over 90 countries globally is compatible with 7 different devices. For a monthly subscription to this app, it goes for $2.75

Conclusion

CyberGhost VPN meets the requirements of a standard VPN service. The monthly fee is affordable and if you find it not suited to your needs, you can stop your subscription anytime.


Final Thoughts

We hope this article helps you in installing CyberGhost VPN on your Firestick. Thank you!

How To Install Disney Plus App on Firestick

Disney Plus Overview

This article tackles how to install Discovery Plus app on Firestick.


One of the fastest and most downloaded services on the Amazon Store is Disney+(plus). This Disney+(Plus) is an Amazon device that helps in video streaming services. This hottest device was made available on November 12, 2019. 

Then it became one of the most visited services on Amazon prime. This pertinent new service competes with other services like Netflix, Hulu, Amazon Prime, and even Apple TV. Consequently, the arousing excitement of this Disney Plus is unimaginable because of its originality and creativity. 

The prominent attributes that this service exhibits as its features and contents are Pixar, National Geographic, and Marvel Cinematic Universe. You can certainly view different arrays of movies from the Stars Wars franchise. USA, Netherlands, and Canada were the first places this Disney Plus was Lunched, and later it was made visible in Australia, India, Uk, New Zealand, and many European countries. 

The subscription determines the channels or services one enjoys. Following this work carefully, you can be able to install Disney Plus App on Firestick, you will know how to sign into Disney Plus, what to watch with Disney, and you can be able to consider what product features the service contained.


ANONYMOUSLY

Steps For The Installation Of Disney Plus App On Firestick/Fire TV

The compatibility of this service makes it unique and special from other services. It has a perfect match with Alexa which could mean that you can order the voice command to Alexa to enable the movies to show and play within the app. 

Disney Plus is simple to connect and start operating on with the aid of Amazon Firestick. Before you can make this a reality, you need to install the Disney Plus App on Firestick TV. 


These Are The Following Guidelines For The Installation Of This Device:

  1. Move your mouse to the search bar.
  2. To select from the list provided you need to enter “Disney Plus”. 
  3. Within the space of “Apps & Games”, you select Disney Plus App. 
  4. You can then hover your mouse on “Get” and Click it. 
  5. Disney Plus may not download immediately, so it takes the space of one to two minutes to download. 
  6. You will be propelled to open the App. This is not compulsory because you may desire to go back to the Home screen to place the Disney Plus app where you wish. 
  7. When you are on your Home screen you can move to the right under Your Apps & Channels where you can select “SEE ALL”. 
  8. Place your mouse on Disney Plus and click the Options button on your remote. And then click on MOVE. 
  9. If you desire you can adjust your Disney Plus to the front of Your Apps& Channels. 
  10. Finally, you have gotten the Disney Plus app installed successfully. Having installed the Disney Plus App you need to sign in for effective use of the App. 

Install Disney Plus Outside the USA Using Aptoide

1. Scroll to the right-most portion of your home screen and click the wheel gear button (Settings).

Best VPN To Unblock Disney Plus


2. Scroll down and to the right until you get to My Fire TV. Click on it.

Best VPN To Unblock Disney Plus


3. Select Developer options.

Best VPN To Unblock Disney Plus


4. Turn on ADB debugging and Apps from Unknown Sources.

Best VPN To Unblock Disney Plus


5. Click Turn On when the pop-up appears.

Best VPN To Unblock Disney Plus


Then, after jailbreaking your Firestick, you’ll need to install the Downloader app. This app, which is easily available on the Amazon App Store, allows you to download APK files.


6. Click Home, click FIND.

Best VPN To Unblock Disney Plus


7. Click Search.

Best VPN To Unblock Disney Plus


8. You can either say Downloader to your Alexa voice-enabled remote or start typing it. If you typed it, click on the suggestion when it appears.

Best VPN To Unblock Disney Plus


9. Click on the Downloader Icon.

Best VPN To Unblock Disney Plus


10. Click Download.

Best VPN To Unblock Disney Plus


Best VPN To Unblock Disney Plus


11. Click on Open.

Best VPN To Unblock Disney Plus


12. Click on Allow.

Best VPN To Unblock Disney Plus


13. Use the Downloader search tab.

Best VPN To Unblock Disney Plus


14. Type in https://reviewvpn.com/disn and click Go

Best VPN To Unblock Disney Plus


15. Wait for the APK to be downloaded.

Best VPN To Unblock Disney Plus


16. Click Install.

Best VPN To Unblock Disney Plus


17. Select Open.

Best VPN To Unblock Disney Plus


18. Aptoide App will launch directly to Disney plus. There might be some possibility that you need to use Mouse Toggle. Click on Install.

Best VPN To Unblock Disney Plus


19. Choose OK.

Best VPN To Unblock Disney Plus


20. Select Allow.

Best VPN To Unblock Disney Plus


21. The apk is now downloading.

Best VPN To Unblock Disney Plus


22. Select Install.

Best VPN To Unblock Disney Plus


23. Wait for the app to be installed

Best VPN To Unblock Disney Plus


24. Click Open.

Best VPN To Unblock Disney Plus


25. You can now use Disney Plus wherever you are.


YOUR INTERNET ACTIVITY IS BEING WATCHED

ReviewVPN cannot attest to the legality, security and privacy of the applications discussed on this site. It is highly recommended that you use a VPN service while streaming or using Kodi.

Currently, your IP 144.76.151.45 is visible to everyone and your Browser is being tracked by Advertisers & ISP Provider.

Save 65% Now

Limited Time Offer

Here are the main reasons why you must use a VPN:

  • Your activities are hidden from your ISP, the government, and from the apps you are using.
  • You can access additional movies and TV streams.
  • ISP attempts to throttle are thrwarted thus reducing buffering issues.
  • Geographically restricted content like Netflix and Hulu can be unblocked.

A VPN works be replacing your ISP-assigned IP address and creating an encrypted tunnel. We recommend the no log service offered by IPVanish. It works well on a Firestick and offers the fastest possible speeds.

Special Limited Time Offer - Get IPVanish


Legal Disclaimer: ReviewVPN.com does not encourage or endorse any illegal activity involved in the usage of services and applications referenced on this site. We do not verify the licensing agreements of services. The end-user is wholly responsible for ensuring that any media accessed through these services does not violate copyright and/or licensing laws. ReviewVPN does not promote, link to, or receive compensation from any Apps and IPTV services.


Install Surfshark on Firestick

Best Surfshark Deal


How To Sign In To Disney Plus

To make effective and efficient use of the content within the Disney Plus app, you need to have an account. To create this account, you need to follow this quick and easy guide below: 

  1. When you have already created an account you need to choose Log in but before this, you need to launch Disney Plus and then click START FREE TRIAL. 
  2. To proceed you need to enter your email within the space provided. 
  3. Make this accessible, your password will be demanded, once you enter your password, continue will pop-up then you click it. 
  4. To know if you are successful you will immediately receive an email after your login credentials are created. Finally, you will choose the duration of the subscription. It is necessary to know what you can watch with Disney+. 


The Content Of Disney Plus

There is a wide range of impressive displays like Marvel shows and movies like Captain Marvel Avengers Endgame, the entire arrangement of Star Wars, The Mandalorian, Lego Star Wars, Star Wars Resistance, programs like Simpsons and more. 

It may interest you that Disney can offer you chances of watching Hulu and ESPN with your bundle package. The specialty of this Hulu is its availability of TV shows from local U.S cable channels and networks. 

Its streaming system shows TV episodes immediately as soon as it is launched and different kinds of movies are available. And for the ESPN, it gives you the chance of viewing sports programs.


The Uniqueness Of The Service Product Features

There are a plethora of services but Disney Plus appears more unique. You can view 4K Ultra HD content in intense audio. it is created in a way you can see a symbol that tells you the format that you are watching. 

This symbol is located at the upper right of the screen before the beginning of the video. The beauty of this service is that you can create as many as seven user profiles for different people and it can work concurrently. 

It gives unstoppable mobile downloads for offline viewing. There is no compulsion or constraint in the number of downloads you make when using this device. The storage space depends on the number of titles stored. This device enables the user to have navigation support, closed captioning, and descriptive audio. 

Note: For more information about Surfshark, please read our Surfshark Review.


Grab your subscription now!


How to Install Surfshark VPN on Firestick

If your Firestick still has the older interface, read this article to learn how to update it: Update Firestick Interface.

Follow our screenshots below to install the SurfShark VPN app on your Fire TV stick.

1. Go to the Home screen of your Firestick.

step 1 Install Surfshark VPN on Firestick


2. Navigate towards the Find tab. Press the Search button from the resulting dropdown.

step 2 Install Surfshark VPN on Firestick


3. Type in the keyword of SurfShark and select from the suggestions that will appear.

step 3 Install Surfshark VPN on Firestick


4. Click the official SurfShark icon from your search results.

step 4 Install Surfshark VPN on Firestick


5. Press the Download (You own it) button.

step 5 Install Surfshark VPN on Firestick


6. The SurfShark VPN installer will download on your device.

step 6 Install Surfshark VPN on Firestick


7. SurfShark VPN’s app will automatically install itself on your Fire TV stick.

step 7 Install Surfshark VPN on Firestick


8. Press the Open button after completing SurfShark VPN’s installation process.

step 8 Install Surfshark VPN on Firestick


9. Please wait for the SurfShark VPN to load its user interface.

step 9 Install Surfshark VPN on Firestick


10. You can now log in with your SurfShark VPN account credentials.

step 10 Install Surfshark VPN on Firestick

Learn more about Surfshark and Grab the Best Surfshark Deal Now!


Install Surfshark on Firestick

Best Surfshark Deal


Other VPNs to Consider

NordVPN (Best for Streaming)

Best Features

  • 5000+ Server in 50+ Countries 
  • Military-Grade Encryption
  • Fast Connection Speed
  • Suitable to a lot of devices
  • No-Log Policy

Prices
  • Complete $5.89 per month (64% Discount)
  • Plus $4.59 per month (56% Discount)
  • Standard $3.69 per month (55% Discount)

Best Features

  • 750+ High-speed VPN Servers in 43 Locations
  • Military-Grade Encryption
  • Fastest HD Streaming and Gaming
  • 30-Day Money-Back Guarantee
  • Unlimited Data & Devices
  • No-Log Policy

Prices
  • 3 Years $1.99 per month (82% Discount)
  • 1 Years $3.29 per month (70% Discount)
  • 1 Month $10.99 per month

IPVanish VPN (Most Secure)

Best Features

  • 1200+ Servers in 60+ Countries around the world
  • Unlimited Connections
  • No-Log Policy
  • Top Notch Military-Grade VPN Protocols and Encryptions
  • 100% Safe and Secured
  • Most Trusted VPN
  • Best VPN for Firestick
  • 30-Day Money-Back Guarantee

Prices
  • Yearly $3.99 per month (63% Discount) – 30 days risk free + Ransomware & Malware Protection
  • Quarterly $5.32 per month (51% Discount)
  • Monthly $10.99 per month


For more VPN discounts, go to ReviewVPN Deals and purchase the best VPN for you.

Click here to get the lowest price on Surfshark through our exclusive limited-time offer.


Conclusion

Disney Plus is a powerful device that moves beyond range. It is more affordable than some devices like Netflix and HBO subscriptions; almost the same as Apple TV+. 

You can subscribe for $6.99 for a month in the US. If you want to subscribe for one year, the plan will cost you $69.99. then you will have the chance of saving $ 14. But in Canada, the prices are not the same, though it offers the same benefits. It has a very attractive bundle offers for you to choose from. 

The subscription of Disney Plus can be included with Hulu Service. It endorses many fascinating originalities and inclusively, you can watch a whole range of movies.


What Is Your Favorite Streaming App? Cast Your Vote Below.

Learn How to Install and Use GBA4iOS on iPhone

How to Install and Use GBA4iOS on iPhone

The number of fans that follow standard games like “Pokemon”, “Mario” and “Day of the Tentacle” is overwhelming but it is has become a concern to many people that these games are not found in Apple’s App Store.


Many Apple users may not be happy about the fact that these amazing games are not available in the Apple store. The way out to this problem is by installing GBA4iOS in the Apple iPhone which makes use of iOS 13, 12, or 11. 

With GBA4iOS, you can play these games on your Apple phone. We may be tempted to ask what GBA4iOS is all about. It means Gameboy Advanced Emulator. It is an iOS emulator that gives you direct access to Gameboy Advanced games on your Apple Devices. 

The process of working with GBA4iOS may seem to be difficult but it is possible. Talking about how secure GBA4iOS is, which may arise as a question in our mind, GBA4iOS after some research work, we found that GBA4iOS for a long time is very safe and secure.


ANONYMOUSLY


Legal Disclaimer: ReviewVPN.com does not encourage or endorse any illegal activity involved in the usage of services and applications referenced on this site. We do not verify the licensing agreements of services. The end-user is wholly responsible for ensuring that any media accessed through these services does not violate copyright and/or licensing laws. ReviewVPN does not promote, link to, or receive compensation from any Apps and IPTV services.


Preliminary Cautions

  • GBA4iOS which is a Gameboy Advanced Emulator allows you to enjoy Gameboy Advance games on your Apple phone
  • When we tested this development, we did not see any danger about how it works. If you feel you want to implore the services of GBA4iOS you should do it at your own risk.
  • Your smartphone or computer can play retro video games like Super Nintendo or Atari when you use Emulators. These outdated games are known as Read-Only Memory (ROMs). They are duplicate software of cartridges just like Sega Genesis and Sony PlayStation CD.
  • Since ROMs are protected by copyright, It is illegal to download them.
  • We don’t encourage you to download ROMs.


YOUR INTERNET ACTIVITY IS BEING WATCHED

ReviewVPN cannot attest to the legality, security and privacy of the applications discussed on this site. It is highly recommended that you use a VPN service while streaming or using Kodi.

Currently, your IP 144.76.151.45 is visible to everyone and your Browser is being tracked by Advertisers & ISP Provider.

Save 65% Now

Limited Time Offer

Here are the main reasons why you must use a VPN:

  • Your activities are hidden from your ISP, the government, and from the apps you are using.
  • You can access additional movies and TV streams.
  • ISP attempts to throttle are thrwarted thus reducing buffering issues.
  • Geographically restricted content like Netflix and Hulu can be unblocked.

A VPN works be replacing your ISP-assigned IP address and creating an encrypted tunnel. We recommend the no log service offered by IPVanish. It works well on a Firestick and offers the fastest possible speeds.

Special Limited Time Offer - Get IPVanish


The Installation Process of GBA4iOS on iPhone or iPad

Step 1:    Open Safari on your iPhone or iPad and enter Tweakboxapp.com 

Step 2:   When it opens, you will find the install now option on the first page, click on it. When you click on it, the browser will show the permission to download the configuration file on the iOS device which you should allow by clicking on the allow button

Step 3:   Having downloaded the profile, open the app settings, click General, click Profile, then look for the Tweakbox Profile in that space, and install it.

Step 4:   After following the steps above, go back to the home screen of the Apple device and launch the Tweakbox app which is there.

Step 5:   When the app is opened, click on the Apps tab and look for all the Apps which fall under the Tweakbox app. Check out for GBA4iOS then install it.

Steps to follow to allow apps from unknown sources:

  1.   Open Settings.
  2.   move to General.
  3.   Click on Profiles and Device Management.
  4.   Click on the text that appears under the App.
  5.   Click on trust (Changsha Yasheng … which maybe something else on your system).
  6.   Then you click on the trust tab again.


To download ROMs of Pokemon, Metroid, Mario, The Legend of Zelda, Fire Emblem on iPhone please follow these steps:

Step 1.    Immediately you succeeded in installing the GBA4iOS APP on your iPhone device, open it. 

Step 2.   On the right side of your screen, strike on the “SEARCH BUTTON”.

Step 3.   To find ROM, you have to click the game series. You will have 11 options available for you to choose from. In case you want to choose other ROM who have to search it out on Google. And you can take a favorite game of your choice. As soon as you download the ROM of your favorite game, kindly get it started by launching it.


Methods of Deleting GBA4iOs App on iPhone

  1.   To delete a GBA4iOS App you need to go to the SETTINGS
  2.   Click on GENERAL
  3.   Go to your profile and Device Management and select then. 
  4.   This will pop up “Jiang Xi Microblog Technology Co., Ltd” click Delete and confirm it. 


Other Uses Of GBA4iOS

This GBA4iOS is remarkably good because it works fast and it is reliable. This implies that you will not experience any cashing-in-on some of your favorite games. 


GBA4iOS allows you to do the following:

  • Customizing the Control center on iPhone and iPad.
  • Customizing App Icons on iPhone.
  • Customizing iMessage App Drawer on iPhone and iPad. 
  • Adjusting Click Speed of Side Button on iPhone X. 
  • You can get other uses of GBA4iOS but we will limit our discussion to the above listed as we only focused on how to install it.


Ways of Using GBA4iOS to Download Games

You can open to see its interface after installing the App. You will find out that there are no pre-installed games, so you need to install these games differently with a ROM website. To achieve this, we have an easy guide below for you on how to use GBA4iOS by installing game ROMS. 

  1.  Launch your Safari and move to https://romsmania.cc/
  2.  Select Gameboy Advance or Game Colour under Popular Consoles 
  3.  From the list provided, make a selection of your preferred game. 
  4.  Move down and select Download 
  5.  Give it small time for the ROM to download 
  6.  Select open in GBA4iOS
  7.  From here, you will find your game is installed and finally tap on the game to launch it and enjoy it. 


Conclusion

GBA4iOS has a lot of ads. When you experience too many ads, which often takes a long time and you may consider waiting for it to finish. You will find an X (used to cancel the ads) at the upper left-hand corner. It shows that the advert is over. When you don’t want to experience much of these ads, you can click Skip on the lower right-hand side.  

Within the Setting tab of your app, you can change the Controller Skins, Opacity, and many more. And when you feel like taking a large list of games, you need to go to your right side of your screen and get them using side tools. To be candid, GBA4iOS is an amazing app that Gameboy fans cannot afford to miss. Install this app and you will be glad you did.

Firefox 68.8.0 Browser for Firestick

Firefox Web browser Overview


Over two decades ago, the only browser that was available to use the internet was Internet Explorer. As time passed by, a lot of advances were made in Technology and thus resulted in the creation of other web browsers that are better than the ancient IE. One of the browsers that emerged before Google Chrome was Mozilla Firefox. The day of its launch paved the way for a lot of exciting discoveries the internet has to offer and made our daily lives better because it helped with communication, research, and entertainment. Today, Firefox is still one of the leading web browsers of choice because of its upgraded security and privacy. In this article, we will highlight the new and exciting features of this version. 


Is It Any Good

The version of Firefox that you can download on the Amazon App Store does not allow downloads and add-ons. This version though does allow downloads and add-ons but we must sideload it first using the downloader app. 


Is Firefox Web Browser Safe and Virus-free?

We tested this app using VirusTotal and found no threats or any malicious files and malware.

Despite having good results, we still need to be vigilant in protecting our privacy while streaming.

A Virtual Private Network or VPN will definitely help us maintain our security and anonymity while using Firefox Web Browser.

Here’s how you can Install The Best VPN For Firestick and All Devices.


ANONYMOUSLY


If your Firestick still has the older interface, read this article to learn how to update it: Update Firestick Interface.


Install Firefox On Firestick with Screenshots

1.  Click Home on your remote and scroll once to your Right. Click Setting (Gear Wheel Icon).

Step 1 Install Firefox On Firestick


2. Scroll down and to the right until you get to My Fire TV. Click on it.

Step 2 Install Firefox On Firestick


3. Select Developer options.

Step 3 Install Firefox On Firestick


4. Turn on ADB debugging and Apps from Unknown Sources.

Step 4 Install Firefox On Firestick


5. Click Turn On when the pop-up appears.

Step 5 Install Firefox On Firestick


6. Click Home, click FIND.

Step 6 Install Firefox On Firestick


7. Click Search.

Step 7 Install Firefox On Firestick


8. You can either say Downloader to your Alexa voice-enabled remote or start typing it. If you typed it, click on the suggestion when it appears.

Step 8 Install Firefox On Firestick


9. Click on the Downloader Icon.

Step 9 Install Firefox On Firestick


10. Click Download.

Step 10 Install Firefox On Firestick


step 10 Install Firefox On Firestick


11. Click on Open.

Step 11 Install Firefox On Firestick


12. Click on Allow.

Step 12 Install Firefox On Firestick


13. Use the Downloader search tab.

Install Firefox On Firestick Step 13


14. Type in https://reviewvpn.com/fox & Tap on the Go button.

Install Firefox On Firestick step 14


15. Wait for the file download to finish.

Install Firefox On Firestick step15


16. Click Install.

Install Firefox On Firestick step 16


17. Click on Open.

Install Firefox On Firestick step 17


18.

Install Firefox On Firestick step 18


Screenshots with Step by Step Instruction to Install Firefox 68.8.0 on a Firestick (Official)

1. Click FIND.

Trashy Movies1


2. Click Search.

Movie Nite2


3. You can either say Firefox to your Alexa’s voice-enabled remote or start typing it. If you typed it, click on the suggestion when it appears.

Step 2 Install Firefox On a Firestick


4. Click on the Firefox icon.

Step 3 Install Firefox On a Firestick


5. Click on Download.

Step 4 Install Firefox On a Firestick


6. Select Keep Turbo Mode Enabled.

Step 5 Install Firefox On a Firestick


7. Click on the “Ok, got it” button.

Step 6 Install Firefox On a Firestick


8. Select Not now

Step 7 Install Firefox On a Firestick new


9. There you go, Firefox is now installed on your Firestick.

Step 8 Install Firefox On a Firestick


YOUR INTERNET ACTIVITY IS BEING WATCHED

ReviewVPN cannot attest to the legality, security and privacy of the applications discussed on this site. It is highly recommended that you use a VPN service while streaming or using Kodi.

Currently, your IP 144.76.151.45 is visible to everyone and your Browser is being tracked by Advertisers & ISP Provider.

Save 65% Now

Limited Time Offer

Here are the main reasons why you must use a VPN:

  • Your activities are hidden from your ISP, the government, and from the apps you are using.
  • You can access additional movies and TV streams.
  • ISP attempts to throttle are thrwarted thus reducing buffering issues.
  • Geographically restricted content like Netflix and Hulu can be unblocked.

A VPN works be replacing your ISP-assigned IP address and creating an encrypted tunnel. We recommend the no log service offered by IPVanish. It works well on a Firestick and offers the fastest possible speeds.

Special Limited Time Offer - Get IPVanish


Legal Disclaimer: ReviewVPN.com does not encourage or endorse any illegal activity involved in the usage of services and applications referenced on this site. We do not verify the licensing agreements of services. The end-user is wholly responsible for ensuring that any media accessed through these services does not violate copyright and/or licensing laws. ReviewVPN does not promote, link to, or receive compensation from any Apps and IPTV services.


Install Surfshark on Firestick

Best Surfshark Deal


What Does It Do?

Firefox is a web browser that you can use to browse the internet for anything. This version gives you permission to download files and use the add-ons featured in-browser.


Compatible Platforms

This version is compatible with the Amazon Firestick, Fire TV, Mac OS, Windows, Linux, IOS, and Android


Features

  • Top Sites
  • Bookmarks
  • History
  • Private Mode
  • Thumbnails of sites you visit often


Pros and Cons

Pros

  • Secure browsing
  • Blocks ads and trackers via Privacy Badger
  • Reverse Image Search
  • Dark Mode via Dark Reader


Cons

  • Some ads and pop-ups still manage even though the add-on the blocks them is active
  • Mouse Toggle Required


FAQs

Is It Safe To Use?

Firefox is one of the safest browsers to use.

 
Is It Legal Or Grey?

It is 100% legal to download and use.


Should I Use A VPN?

This is interesting because you can legally download it without the help of a VPN but what you do afterward depends if you will be needing one. If you are going to download stuff, we recommend that you use one because it will conceal your online activity and identity from your ISP. You will also need one if you are going to access content that is location restricted. Lastly, the VPN will help you speed up your downloads because it will thwart the efforts of your ISP to throttle your connection.

 If you are in need of a VPN service, you can follow our step-by-step guide by clicking on this link.

Note: For more information about SurfShark, please read our SURFSHARK REVIEW.


Grab your subscription now!


How to Install Surfshark VPN on Firestick

If your Firestick still has the older interface, read this article to learn how to update it: Update Firestick Interface.

You can download Surfshark directly from the Amazon App store. It will be easy for you to find Surfshark with your Firestick’s Find feature. Refer to our screenshots below.

1. Go to the Home screen of your Firestick.

step 1 Install Surfshark VPN on Firestick


2. Navigate towards the Find tab. Press the Search button from the resulting dropdown.

step 2 Install Surfshark VPN on Firestick


3. Type in the keyword of SurfShark and select from the suggestions that will appear.

step 3 Install Surfshark VPN on Firestick


4. Click the official SurfShark icon from your search results.

step 4 Install Surfshark VPN on Firestick


5. Press the Download (You own it) button.

step 5 Install Surfshark VPN on Firestick


6. The SurfShark VPN installer will download on your device.

step 6 Install Surfshark VPN on Firestick


7. SurfShark VPN’s app will automatically install itself on your Fire TV stick.

step 7 Install Surfshark VPN on Firestick


8. Press the Open button after completing SurfShark VPN’s installation process.

step 8 Install Surfshark VPN on Firestick


9. Please wait for the SurfShark VPN to load its user interface.

step 9 Install Surfshark VPN on Firestick


10. You can now log in with your SurfShark VPN account credentials.

step 10 Install Surfshark VPN on Firestick

Learn more about Surfshark and Grab the Best Surfshark Deal Now!


Install Surfshark on Firestick

Best Surfshark Deal


Other VPNs to Consider

NordVPN (Best for Streaming)

Best Features

  • 5000+ Server in 50+ Countries 
  • Military-Grade Encryption
  • Fast Connection Speed
  • Suitable to a lot of devices
  • No-Log Policy

Prices
  • Complete $5.89 per month (64% Discount)
  • Plus $4.59 per month (56% Discount)
  • Standard $3.69 per month (55% Discount)

Best Features

  • 750+ High-speed VPN Servers in 43 Locations
  • Military-Grade Encryption
  • Fastest HD Streaming and Gaming
  • 30-Day Money-Back Guarantee
  • Unlimited Data & Devices
  • No-Log Policy

Prices
  • 3 Years $1.99 per month (82% Discount)
  • 1 Years $3.29 per month (70% Discount)
  • 1 Month $10.99 per month

IPVanish VPN (Most Secure)

Best Features

  • 1200+ Servers in 60+ Countries around the world
  • Unlimited Connections
  • No-Log Policy
  • Top Notch Military-Grade VPN Protocols and Encryptions
  • 100% Safe and Secured
  • Most Trusted VPN
  • Best VPN for Firestick
  • 30-Day Money-Back Guarantee

Prices
  • Yearly $3.99 per month (63% Discount) – 30 days risk free + Ransomware & Malware Protection
  • Quarterly $5.32 per month (51% Discount)
  • Monthly $10.99 per month


For more VPN discounts, go to ReviewVPN Deals and purchase the best VPN for you.

Click here to get the lowest price on Surfshark through our exclusive limited-time offer.


Is It Free?

Yes, it is free to download and install on your device.

 
Are There ADS?

There will be ads here and there depending on the website you visit. It can be minimized by integrating an ad-blocker add-on.

 
Is There A Premium Version?

There is no premium version but we believe that this version is already of such caliber for free.

 
Is There An Official Website?

Yes, there is an official website. You can go to https://www.mozilla.org/en-US/firefox/ and check out other related information regarding Firefox.


What Other Devices Does It Work On?

It can work with all devices that run on IOS and Android OS.

 
How Does The App Work?

Please follow the instructions we have stated above. It is pretty simple and you will get the hang of it in no time at all.


Minimum Version Required

Any Android device that has version 4.1 and above


History

How Long Has It Been Around?

Firefox was launched back on November 9, 2004, and has been running ever since. 

 
What Is The Development Team Like?

The website provided educational articles that can help you should issues arise. Just visit their support page which is https://support.mozilla.org/en-US/.


Alternatives

  • Google Chrome
  • Opera
  • Microsoft Edge

Our Opinion

Firefox withstood the test of time and is still one of the most reliable browsers people can use. With this version, you can freely use it to download anything using your firestick. You just have to get used to using it with a Mouse Toggle. It will be annoying at first but when you get the hang of it you will this dilemma tolerable. Just be careful with what you do with it and make sure that you are secured by a trusted VPN so that you won’t have any problems in the future. 

We hope this article was able to help you install the newest version of Firefox on your Firestick. Should you need help, feel free to message us down below and we will reply promptly. Thank you for reading and stay safe!

How to Get on the Dark Web

How to Get on the Dark Web Overview

The internet is not what we see it to be. There are billions of data that the internet houses. These data oftentimes are housed either in the open or surface web which we all are aware of or the two hidden web which might be deep web or dark web. 

Just as the surface web is known by everyone using the internet space, the deep web and dark web is hidden. These two webs often portrays danger; which means it’s a place where most of the illegal and illicit kinds of stuff are done on the internet.

Be that as it may, popular sites such as Facebook and the CIA are known to house sites on the dark web. These sites are often called the onion version. To access the onion site, you need to use a browser called the “Tor browser”. 


The onion often is a router (network) that is used to run encryption on your online data each time you access the internet. When this happens, it will be very difficult for your identity to be tracked on the network. So using a Tor browser will, however, offer protection while enhancing your privacy in the highest other.

One common discussion about the dark web is the onion site; these onion sites are not searchable on any browser or Google. An example of such is; regular site with www.wired.co.uk will be normal on actual internet protocol address through DNS.

When you try using the Tor browser to access a surface site (a website under the surface wee), it provides the highest security and privacy; what this means is that Tor browser pops your IP address in to cloud the “onion space” and eventually pop out while having your location and identity hidden.

This means that when you use a Tor browser on an onion site, that you are on a higher level of security. Also, end-to-end encryption of messages, online data, and other forms are done on the Tor browser. 

Because of the top security of onion sites, top governmental and private organizations such as Facebook, New York, and the CIA often make use of its version of their organizations. Not only does the onion site offer privacy and encryption, but it also offers two more extra features such as ensuring that you are anonymous on the internet service provider network. 

This means that you can access any site without showing on the ISP network. For instance, when you try connecting to a site such as ‘facebookcorewwwi.onion’; this will connect you to the Facebook official site, which is a result of the onion address which means no certificate authority censorship or domain name system. 


ANONYMOUSLY


Dark Web Versus Deep Web: Any Difference? 

Both terms are often interwoven. Be that as it may, both are different from each other. To make it more clear and easy for you to understand; 

When we talk about deep web, it is referring to anything or stuff not indexed on the internet, and can be accessed by search engines; search engines here are Google or Bing. 

Deep web often is things that are behind a paywall or might require you to enter your credentials or information. To put it short, it also includes web content that has been blocked and can’t be indexed by web crawlers. 

You might be wondering what makes up the deep web, the contents are; membership site, fee-based content, medical records, confidential corporate web pages, and government data. A recent survey suggests that 96% or 99% of the internet data are on the deep web.  

What this means is that only a small portion of the internet data is available on the surface or clear web which can be accessed on a standard web browser. However, the dark web is a part of the deep web that is often hidden (intentionally). The dark web requires a special type of browser before accessing its content. 

The special type of browser we are talking about here it the Tor browser. Much information about the percentage of the dark web on the internet is not well known, however, a recent study suggests it at 5% of the whole internet. 

As often, it is used for illegal and illicit activities but it is also used to source for research and other important things. 


How to Get to Dark Web?

The only and easy way to Dark Web is via the Tor browser. The Tor Browser is a browser that is used to access both of this web and websites as well. On the Tor browser, the user’s internet network is encrypted and routed. 

The safest and most convenient way to access Dark Web sites is by downloading and installing Tor Browser on your device.

However, after you must have downloaded and installed the Tor browser, you also are required to install a VPN. 

This is to ensure that your internet traffics is routed via the virtual private network before reaching the Tor network and arriving at the final destination. When this happens, the internet service provider network will only see that your network is encrypted and appear on the network as private.

Steps on How to Get to Dark Web

Using a VPN

It is recommended to use a VPN with a zero log policy and with a leak protection policy. We recommend using Surfshark. All you have to do is run your VPN app and choose the location of your choice and click on connect. When this is done, your IP address will change to that chosen location of yours.


Downloading and Installing Tor Browser

tor logo

We recommend downloading and installing the Tor browser from the official Tor site. However, before you do, ensure that your CyberGhost VPN is actively running on your device. Once done, you will be prompted to connect your VPN via the Tor browser (this is after you must have installed the Tor Browser).


Grab your subscription now!

Click here to get the lowest price on Surfshark through our exclusive limited-time offer.


Start Accessing Dark Web .onion Websites

Install Duck Duck Go

Launch your Tor browser on your computer. When it is running, you will be redirected to DuckDuckGo. The DuckDuckGo is a search engine on Dark Web which provides encryption and top-notch security while you are accessing in this sites. However, you should be careful while on Dark Web sites and mind the type of pieces of information you are giving out.


Services and Dark Web Tools That Pose a Risk

Below are the lists of identified service or tools that often present this web as a risk:

  • Phishing
  • Trade secrets or intellectual threats
  • Refunds
  • Financial data
  • Access to the virus such as Trojans, (RATS), keylogging, and exploitative measures
  • Support services like tutorials
  • Customer data
  • Espionage such as customization, targeting, and services


 Also, according to a report, there are other three risks. They include:

Defrauding the Enterprise

  • This often is internet protocol theft and espionage which leads to a financial loss or impairing a company from competing. 
  • Disruption of the enterprise: This is a malware or DDoS attacks which often impede the smooth running of the business.
  • Devaluation of the enterprise; which is causing damage to reputations, enhancing competitors to take over or undermining business trust.


What Browser for the Dark Web?

On the dark web, everything seems to be in chaos; everyone on it seems to be a victim or suspect; this is because everyone is under anonymity and no one is willing to give out their information as well.

For you to safely and protectively access the web, it is recommended to use the Tor browser. As of writing this article, the Tor browser is the only browser that offers higher security and anonymity

What Tor browser does is to route and encrypts your web page via a set of proxy servers, thereby ensuring that your internet protocol address is hidden and cannot be seen by anyone on the internet. The Tor browser works perfectly well and the results it gives are awesome, but it has one downside which is it is slow and often unreliable.


Search Engines on the Dark Web

One would ask if the dark web has search engines. Yes, it has got search engines. However, there are some landscape issues on dark web search engines and some issues of timeout connections and often error messages.

The search engine experience on the web reminisces that of a search engine in the late ’90s. the best search engine on the dark web which is Gram often gives irrelevant answers to a query.

Another search engine on the dark web known as  Hidden Wiki often take lots of time to load and ends up giving the error message.


Dark Web Websites

Websites on this web often have a special feature; the normal website we see on other sites often ends with .co, or .com, however, in the dark web, websites end with .onion. 

This a special domain suffix meaning that the network is hidden and can only be reached using the Tor network. Another feature of the dark web site is its scrambled nature. This dark websites don’t have easy to remember names. For instance, Dream Market which is famous eCommerce sites has its domain name as “eajwlvm3z2lcca76.onion.”

For your information, you should know the sites are made by scammers or hackers. Government law enforcement agencies are fighting and clamping down most dark web sites such as the ones selling and dealing with illegal and illicit goods. 

To be certain, cybercops in 2017 shut down AlphaBay, which is the largest and most popular site on the dark web. However, the Tor network is anonymous, and often leads to DDoS vulnerability and many sites on dark web changes domain names; this is to avoid DDoS. 

However, most site materials on the dark web are outdated and often vary widely.


Dark Web Commerce

The secret to the dark web is related to its compatibility with bitcoin. Bitcoin is a platform; a cryptocurrency platform that allows two end-users to engage a transaction anonymously. Recent research suggests that bitcoin has been and continues to play a big role in the growth and sustenance.

Many eCommerce sites on the dark web use bitcoin as a medium of payment. Not the only bitcoin any cryptocurrency such as Etherium or Litecoin (lots of other coins) are used. Be that as it may, using cryptocurrency does not mean that transacting business on the dark web is safest. The high rate of anonymity on the dark web makes it susceptible to hackers and scammers.


Accessing the Dark Web: Is It Illegal?

It is often seen as being a danger den. However, it should be noted that not everything on Dark Web is illegal. The Tor browser is privacy and hidden communication channel services as a means and medium where people can share and air their thoughts and criticize a bad government. 

For anyone who plans to learn more about the cryptocurrencies such as bitcoin and other altcoins, It has got tones for you.

There are millions of sites on the Dark Web which you would not easily find on the surface web. Examples of such include but not limited to political news, Pirate Bay (a torrent website), Facebook, hard-to-find books, whistleblower Dark Web site, and steam tunnels

There are also eCommerce and legal companies Dark Web which offers legit service as well. However, using Dark Web is legal but depends on your intention. So the use of this site; its legal status will depend on one’s purpose of wanting to use Dark Web sites.


YOUR INTERNET ACTIVITY IS BEING WATCHED

ReviewVPN cannot attest to the legality, security and privacy of the applications discussed on this site. It is highly recommended that you use a VPN service while streaming or using Kodi.

Currently, your IP 144.76.151.45 is visible to everyone and your Browser is being tracked by Advertisers & ISP Provider.

Save 65% Now

Limited Time Offer

Here are the main reasons why you must use a VPN:

  • Your activities are hidden from your ISP, the government, and from the apps you are using.
  • You can access additional movies and TV streams.
  • ISP attempts to throttle are thrwarted thus reducing buffering issues.
  • Geographically restricted content like Netflix and Hulu can be unblocked.

A VPN works be replacing your ISP-assigned IP address and creating an encrypted tunnel. We recommend the no log service offered by IPVanish. It works well on a Firestick and offers the fastest possible speeds.

Special Limited Time Offer - Get IPVanish


Good Uses of Dark Web

It allows you to access the internet without censorship in countries with internet censorship. Many countries such as Cuba, China, Russia, Turkey, and Qatar have censorship issues. So using Dark Web allows one to anonymously enjoy sharing of pieces of information.


Monitor power abuse:

This web gives trained political activists and journalists to find information and stories from the inner government and anonymously share it. Whistleblower sites on it allow journalists to write about abuse of power by government officials.


Dark Web allows you to purchase restricted goods anonymously:

Some goods may be free to use a particular country and restricted in a different country. Using this web it will allow you to purchase goods.


Buying legal goods:

It also allows you to buy goods that are legal anonymously. This might be because the buyer wants to remain hidden from the seller.


Surfing the net anonymously:

Dark Web allows you to find any information on the internet while having your identity hidden on the internet service provider network.


Install Surfshark on Firestick

Best Surfshark Deal


How to Install Surfshark VPN on Firestick

If your Firestick still has the older interface, read this article to learn how to update it: Update Firestick Interface.

Follow our screenshots below to install the SurfShark VPN app on your Fire TV stick.

1. Go to the Home screen of your Firestick.

step 1 Install Surfshark VPN on Firestick


2. Navigate towards the Find tab. Press the Search button from the resulting dropdown.

step 2 Install Surfshark VPN on Firestick


3. Type in the keyword of SurfShark and select from the suggestions that will appear.

step 3 Install Surfshark VPN on Firestick


4. Click the official SurfShark icon from your search results.

step 4 Install Surfshark VPN on Firestick


5. Press the Download (You own it) button.

step 5 Install Surfshark VPN on Firestick


6. The SurfShark VPN installer will download on your device.

step 6 Install Surfshark VPN on Firestick


7. SurfShark VPN’s app will automatically install itself on your Fire TV stick.

step 7 Install Surfshark VPN on Firestick


8. Press the Open button after completing SurfShark VPN’s installation process.

step 8 Install Surfshark VPN on Firestick


9. Please wait for the SurfShark VPN to load its user interface.

step 9 Install Surfshark VPN on Firestick


10. You can now log in with your SurfShark VPN account credentials.

step 10 Install Surfshark VPN on Firestick

Learn more about Surfshark and Grab the Best Surfshark Deal Now!


Install Surfshark on Firestick

Best Surfshark Deal


Other VPNs to Consider

NordVPN (Best for Streaming)

Best Features

  • 5000+ Server in 50+ Countries 
  • Military-Grade Encryption
  • Fast Connection Speed
  • Suitable to a lot of devices
  • No-Log Policy

Prices
  • Complete $5.89 per month (64% Discount)
  • Plus $4.59 per month (56% Discount)
  • Standard $3.69 per month (55% Discount)

Best Features

  • 750+ High-speed VPN Servers in 43 Locations
  • Military-Grade Encryption
  • Fastest HD Streaming and Gaming
  • 30-Day Money-Back Guarantee
  • Unlimited Data & Devices
  • No-Log Policy

Prices
  • 3 Years $1.99 per month (82% Discount)
  • 1 Years $3.29 per month (70% Discount)
  • 1 Month $10.99 per month

IPVanish VPN (Most Secure)

Best Features

  • 1200+ Servers in 60+ Countries around the world
  • Unlimited Connections
  • No-Log Policy
  • Top Notch Military-Grade VPN Protocols and Encryptions
  • 100% Safe and Secured
  • Most Trusted VPN
  • Best VPN for Firestick
  • 30-Day Money-Back Guarantee

Prices
  • Yearly $3.99 per month (63% Discount) – 30 days risk free + Ransomware & Malware Protection
  • Quarterly $5.32 per month (51% Discount)
  • Monthly $10.99 per month


For more VPN discounts, go to ReviewVPN Deals and purchase the best VPN for you.

Click here to get the lowest price on Surfshark through our exclusive limited-time offer.


Final thought

The three types of web we have are the surface web, the deep web, and the Dark Web. The surface web is the one we often access and has a search engines such as Google and Bing. The Dark Web is a hidden part of the internet. The Dark Web is often seen as a danger-prone zone but however, but there are important and legal things one can do in Dark Web as well.

IP Blocker

IP Blocker

IP blocker applications are utilized to add security to the web, mail, or internet servers. These programs cover web users’ IP addresses in anonymity and block online threats or cyber criminals.


Consequently, the main focus of the IP address blocker is to put a stop to any unwanted contacts or hacks. While this may appear similar to what a Virtual Private Network or VPN does, there is still a technical dissimilarity.

IP proxy software links through private connections instead of utilizing the public web. Thus, the essential data of a person or a company can remain protected. Important information like digital voice recordings or video calls can also be kept entirely concealed from public domains.

An IP address is a piece of sensitive information for the reason that it identifies the computer or device’s location. This can’t be evaded because the device’s physical location is important to the delivery system to set up the required connection for the protocol to function thoroughly. Although it takes a special skill, understanding, and knowledge to trace a person’s IP address, this along with pieces of personal data a web user might have published on the internet make it easier for cybercriminals to locate where he/she is.


ANONYMOUSLY


It is a previous conclusion that most individuals don’t want cyber-criminals to locate and trace them. However, there are tons of extra reasons why internet users might want to hide their IP addresses as well.

  • BeeThink IP Blocker Software – is an app that can be used to block numerous user-defined Internet Protocols. Thus, the BeeThink app can prevent various remote PCs from accessing a person’s system. The interface of the IP blocker app is such that it is complex and user-friendly in its function. Wherein, users will not feel the need to be an expert in p[rograms or encryption to utilize it.
  • A2 Hosting – since it was launched in 2001, it has now tons of experience in terms of web hosting. The A2 Hosting app not only promises several top speeds on the web but also the finest IP blockers in the industry.


Features

  1. Reseller, Shared, VPS, and Dedicated hosting programs with IP blocker support.
  2. 24/7 customer support
  3. Linux-based server
  4. It has servers in the United States and Europe.


  • Express VPN – is perfect for all types of internet users, and is one of the best IP blockers. This VPN provider bears the functionality that the largest corporations can benefit, and the ease of use for multiple business entities. This app is a popular Virtual Private Network provider option that has more than 3000 servers across 94 countries. Express VPN is compatible with all major native clients, which include Mac, Windows, Android, Linux, iOS, as well as Blackberry. Also, the VPN service has tons of custom firmware for Domain Name System (DNS) content and routers that can access streaming devices.

Features

  1. Provides 30,000 IP addresses and supports 5 devices on one account
  2. Enterprise-level encryption supported
  3. Accepts Bitcoin payments
  4. Supports Bit-torrent and peer-to-peer (P2P)
  5. It has DNS leak protection


  • CyberGhost – is a German and Romanian-based VPN provider. CyberGhost has a user base of more than 10 million users. This VPN provider supports Mac, Windows, Android, and iOS. It is an ideal IP blocker option. It allows its users to see which website they want to unblock with their IP so that it can choose the best IP address.


Features

  1. More than 6000 servers across 90 countries
  2. Private connection
  3. Automated data compression
  4. Dedicated IP
  5. Automated HTTPS redirection


YOUR INTERNET ACTIVITY IS BEING WATCHED

ReviewVPN cannot attest to the legality, security and privacy of the applications discussed on this site. It is highly recommended that you use a VPN service while streaming or using Kodi.

Currently, your IP 144.76.151.45 is visible to everyone and your Browser is being tracked by Advertisers & ISP Provider.

Save 65% Now

Limited Time Offer

Here are the main reasons why you must use a VPN:

  • Your activities are hidden from your ISP, the government, and from the apps you are using.
  • You can access additional movies and TV streams.
  • ISP attempts to throttle are thrwarted thus reducing buffering issues.
  • Geographically restricted content like Netflix and Hulu can be unblocked.

A VPN works be replacing your ISP-assigned IP address and creating an encrypted tunnel. We recommend the no log service offered by IPVanish. It works well on a Firestick and offers the fastest possible speeds.

Special Limited Time Offer - Get IPVanish


  • Easy-Hide-IP – The brand does exactly what it states. The Easy Hide IP app hides its users’ IP addresses from being tracked on the internet by rerouting their web traffic. When the VPN service is active, the internet traffic is routed via the VPN service so it is not possible to be tracked by hackers as well as advertisers.


Features

  1. More than 150 servers across 26 countries
  2. 2048-bit encryption
  3. Unlimited bandwidth and speed
  4. Allows P2P Networks and Torrents


  • Surfshark – This VPN service is United States-based from Orlando, Florida. Surfshark is an established VPN provider that is popular for offering a reliable and fast Virtual Private Network experience. The VPN service has no third parties included in its infrastructure. This VPN service is great for unblocking tons of content with geo-restrictions. Thus, it is your perfect choice for an IP blocker app.


Surfshark offers all the advanced Virtual Private Network features a web user would expect to get from the finest VPN provider. These include:

  • Strict no-logs policy
  • It has a Killswitch feature
  • It has a DNS leak protection feature
  • Encryptions – L2TP, PPTP, and OpenVPN
  • Allows unlimited simultaneous connections
  • User-friendly interface

Surfshark users can choose from 3,200 VPN servers in 65 worldwide locations. Users can link to different IP addresses limitlessly if they want. IP address changes can further help users keep their identity and web activities unknown to cybercriminals who might be searching.


Why Use a VPN Service When Browsing Online

Surfing the internet or transacting on a public Wi-Fi network means a person could be exposing his/her private data and browsing activities. That’s why a VPN app is recommended for people concerned about their internet privacy as well as security.

VPN services essentially generate an information tunnel between web users’ local network and an exit junction in the other region, which makes it seem as if a person is in another location. This advantage allows internet freedom, or web users’ ability to access their favorite web pages and applications while very busy.

Without a Virtual Private Network, a person’s Internet Service Provider or ISP can know his/her complete browsing history. On the contrary, with a VPN service, a web user’s search history is concealed. That is for the reason that a web user’s internet activity will be linked with the IP address of the VPN server. A VPN service provides servers across the globe. Wherein, the search activity of a web user could seem to be from any one of the servers. Nonetheless, search engines also track a person’s search history, but they will connect that data with another IP address. Despite that, a VPN will always keep a person’s internet activity private.


Install Surfshark on Firestick

Best Surfshark Deal


How to Install Surfshark VPN on Firestick

If your Firestick still has the older interface, read this article to learn how to update it: Update Firestick Interface.

You can download Surfshark directly from the Amazon App store. It will be easy for you to find Surfshark with your Firestick’s Find feature. Refer to our screenshots below.

1. Go to the Home screen of your Firestick.

step 1 Install Surfshark VPN on Firestick


2. Navigate towards the Find tab. Press the Search button from the resulting dropdown.

step 2 Install Surfshark VPN on Firestick


3. Type in the keyword of SurfShark and select from the suggestions that will appear.

step 3 Install Surfshark VPN on Firestick


4. Click the official SurfShark icon from your search results.

step 4 Install Surfshark VPN on Firestick


5. Press the Download (You own it) button.

step 5 Install Surfshark VPN on Firestick


6. The SurfShark VPN installer will download on your device.

step 6 Install Surfshark VPN on Firestick


7. SurfShark VPN’s app will automatically install itself on your Fire TV stick.

step 7 Install Surfshark VPN on Firestick


8. Press the Open button after completing SurfShark VPN’s installation process.

step 8 Install Surfshark VPN on Firestick


9. Please wait for the SurfShark VPN to load its user interface.

step 9 Install Surfshark VPN on Firestick


10. You can now log in with your SurfShark VPN account credentials.

step 10 Install Surfshark VPN on Firestick

Learn more about Surfshark and Grab the Best Surfshark Deal Now!


Install Surfshark on Firestick

Best Surfshark Deal


Other VPNs to Consider

NordVPN (Best for Streaming)

Best Features

  • 5000+ Server in 50+ Countries 
  • Military-Grade Encryption
  • Fast Connection Speed
  • Suitable to a lot of devices
  • No-Log Policy

Prices
  • Complete $5.89 per month (64% Discount)
  • Plus $4.59 per month (56% Discount)
  • Standard $3.69 per month (55% Discount)

Best Features

  • 750+ High-speed VPN Servers in 43 Locations
  • Military-Grade Encryption
  • Fastest HD Streaming and Gaming
  • 30-Day Money-Back Guarantee
  • Unlimited Data & Devices
  • No-Log Policy

Prices
  • 3 Years $1.99 per month (82% Discount)
  • 1 Years $3.29 per month (70% Discount)
  • 1 Month $10.99 per month

IPVanish VPN (Most Secure)

Best Features

  • 1200+ Servers in 60+ Countries around the world
  • Unlimited Connections
  • No-Log Policy
  • Top Notch Military-Grade VPN Protocols and Encryptions
  • 100% Safe and Secured
  • Most Trusted VPN
  • Best VPN for Firestick
  • 30-Day Money-Back Guarantee

Prices
  • Yearly $3.99 per month (63% Discount) – 30 days risk free + Ransomware & Malware Protection
  • Quarterly $5.32 per month (51% Discount)
  • Monthly $10.99 per month


For more VPN discounts, go to ReviewVPN Deals and purchase the best VPN for you.

Click here to get the lowest price on Surfshark through our exclusive limited-time offer.