Install Enigma Kodi Addon

Enigma Kodi Addon

The article will help you on how to install Enigma Kodi Addon on Firestick.

 

Source: http://onenation.info/Repo

Note: Use The Crew Repo instead, One Nation Repo is currently not working.

Enigma Kodi addon shouldn’t be confused with the older and now-defunct Enigma Entertainment from 2017. Housed in the well respected One Nation repository, Enigma concentrates solely on Movies and TV Shows, as well as a Music Video and Anime section for fans.

Anime is seen less and less on addons, due to the difficulty in getting working streams.

A solid addon from a great repository with many working links and a good library of content.


ANONYMOUSLY

Common Errors

These are some of the most common errors and fixes you will encounter with Enigma. We’ve also included links to more in-depth fix guides if our quick fixes don’t do the trick:

  • Kodi error check log: An error in your Kodi check log is really nothing for you to worry about. Most of the time it just means that your cache is full and needs to be cleared. Just like the internet, every piece of media you watch has parts of it cached to make it load quickly if you choose to watch it again. Media files are large and over time this builds up and eats all your storage space. To find out other fixes read our in-depth guide linked above.


  • Olpair Streaming Error: You won’t get this error if you decided to pay for Real Debrid. For those who want to stream for free, you must put up with Captcha servers which need the links updated on a regular basis. Most of the content will be streamed through Olpair though there are tonnes of free servers. Find out how to fix, read our fix guide linked above.


  • Source not working/slow/frozen: While you are watching movies on Enigma you may get sources, that either doesn’t work, are slow, or freeze intermittently giving you a pixelated screen. If the source doesn’t connect at all, give it 10-15 seconds to connect and begin to buffer. You can also try to reload the source again, to see if that does the trick. Also just try a few other sources and see if you still get the same trouble. If none of the source’s work and the add on is working, then read our in-depth guide linked above.


  • Could not Download/ Web URL failure: With this error check that the URL is correctly typed out. If that checks out, then try the URL in a browser and see if it works there. If that’s all good then the problem is just a connection, keep trying till it goes through. But if you get no joy in a browser then the repo may be down, so it could be time to download another addon or just be patient and try again later. For more fixes read our in-depth guide linked above.


  • Script Error: A script error means that a script in either the One Nation repository or your Kodi installation is corrupted. Try to download the repo again and see if that corrects that error. If you still get a script error preventing you from installing the addon then the problem lies with your Kodi installation. You may either need to update Kodi to the latest or reinstall it entirely. Find out how to do both, read our fix guide linked above.


Review

Enigma is a good addon, and if One Nation features it, then it will be serving quality. Having said that it’s nothing special, that you wouldn’t get with Seren or Nole Cinemas. Another standard movie and TV Shows addon.

Sections in Enigma include:

  • Movies
  • TV Shows
  • Documentaries
  • Toons/Anime
  • Comedy
  • Classics
  • Music
  • Ambient
  • Setting
  • Pair/Authorise
  • Search


YOUR INTERNET ACTIVITY IS BEING WATCHED

ReviewVPN cannot attest to the legality, security and privacy of the applications discussed on this site. It is highly recommended that you use a VPN service while streaming or using Kodi.

Currently, your IP 216.73.217.150 is visible to everyone and your Browser is being tracked by Advertisers & ISP Provider.

Save 65% Now

Limited Time Offer

Here are the main reasons why you must use a VPN:

  • Your activities are hidden from your ISP, the government, and from the apps you are using.
  • You can access additional movies and TV streams.
  • ISP attempts to throttle are thrwarted thus reducing buffering issues.
  • Geographically restricted content like Netflix and Hulu can be unblocked.

A VPN works be replacing your ISP-assigned IP address and creating an encrypted tunnel. We recommend the no log service offered by IPVanish. It works well on a Firestick and offers the fastest possible speeds.

Special Limited Time Offer - Get IPVanish


Legal Disclaimer: ReviewVPN.com does not encourage or endorse any illegal activity involved in the usage of services and applications referenced on this site. We do not verify the licensing agreements of services. The end-user is wholly responsible for ensuring that any media accessed through these services does not violate copyright and/or licensing laws. ReviewVPN does not promote, link to, or receive compensation from any Apps and IPTV services.


Install Surfshark on Firestick
Best Surfshark Deal


How to Install Enigma Addon on Kodi with Screenshots

  1. From the home screen, select the cogwheel at the upper left.

Step 1 Installing Enigma addon on Kodi


2. Select System in the bottom right corner.

Step 2 Installing Enigma addon on Kodi


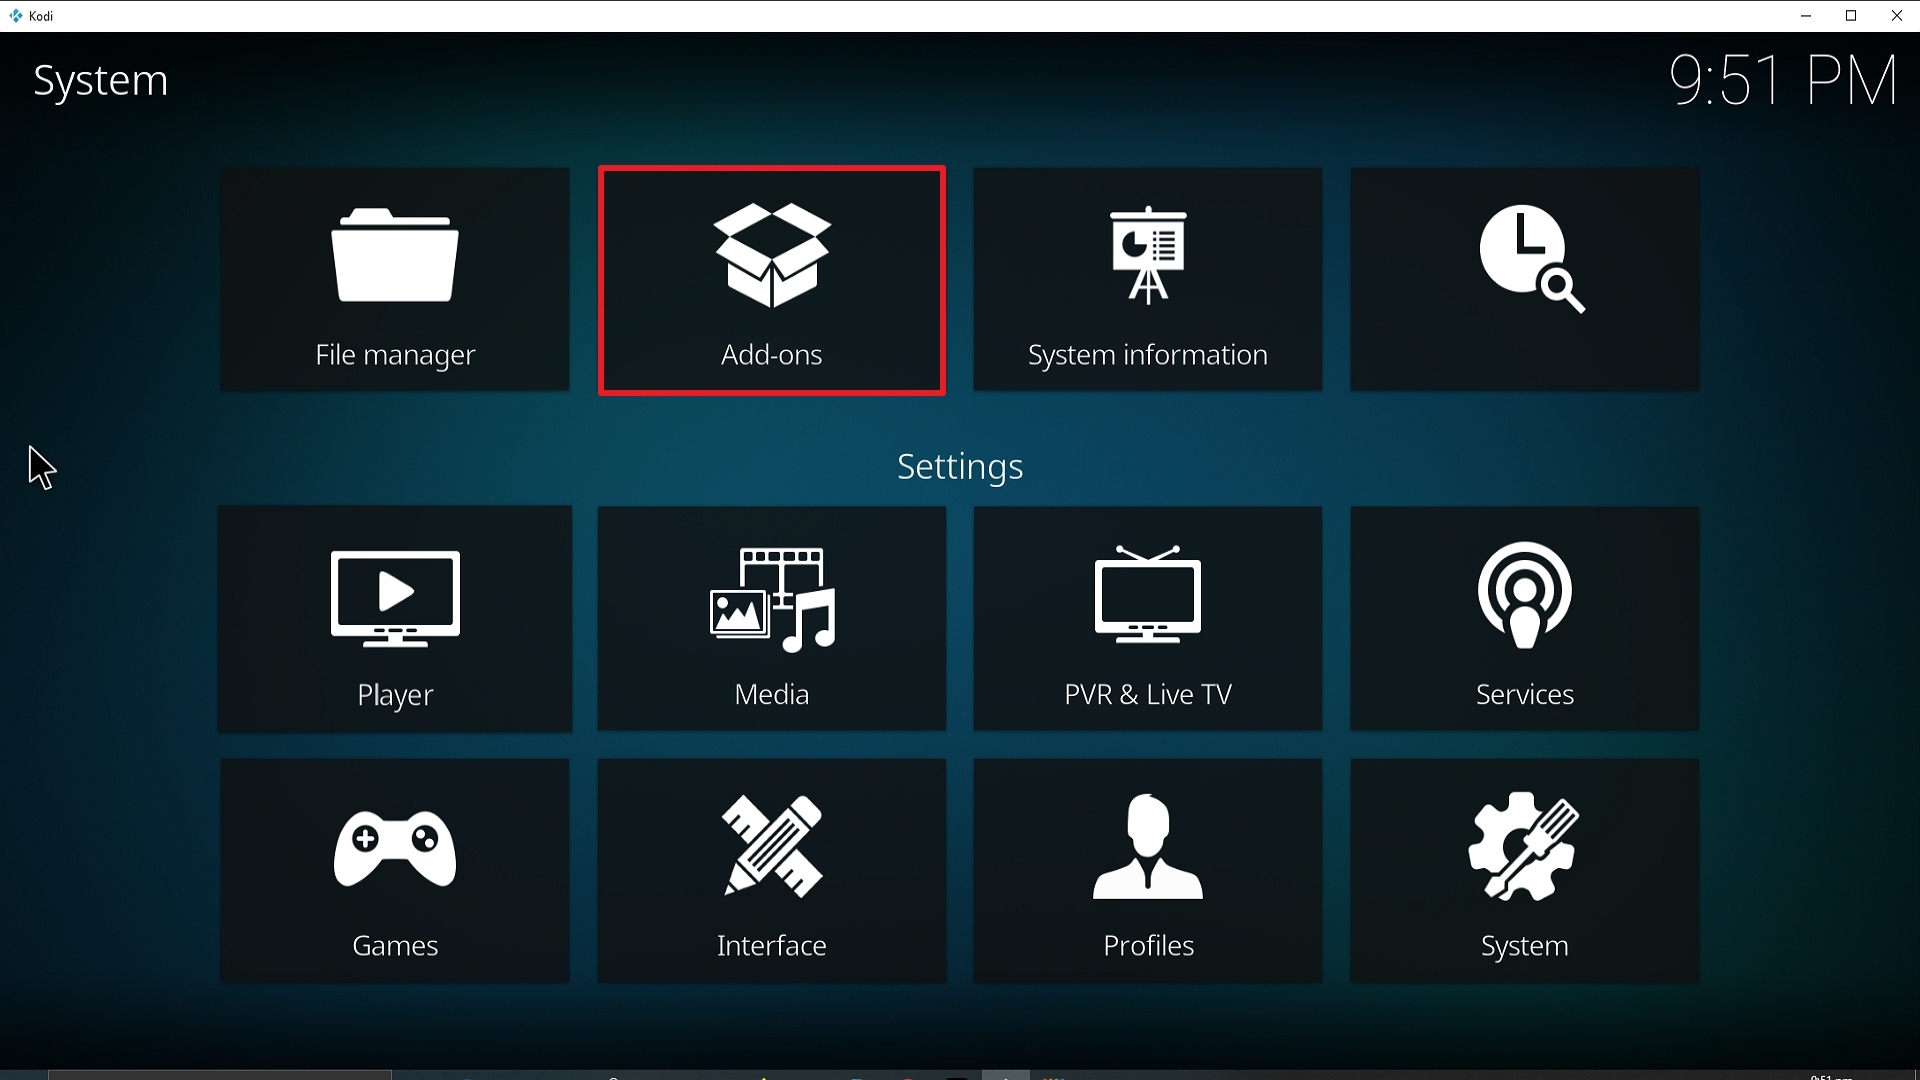
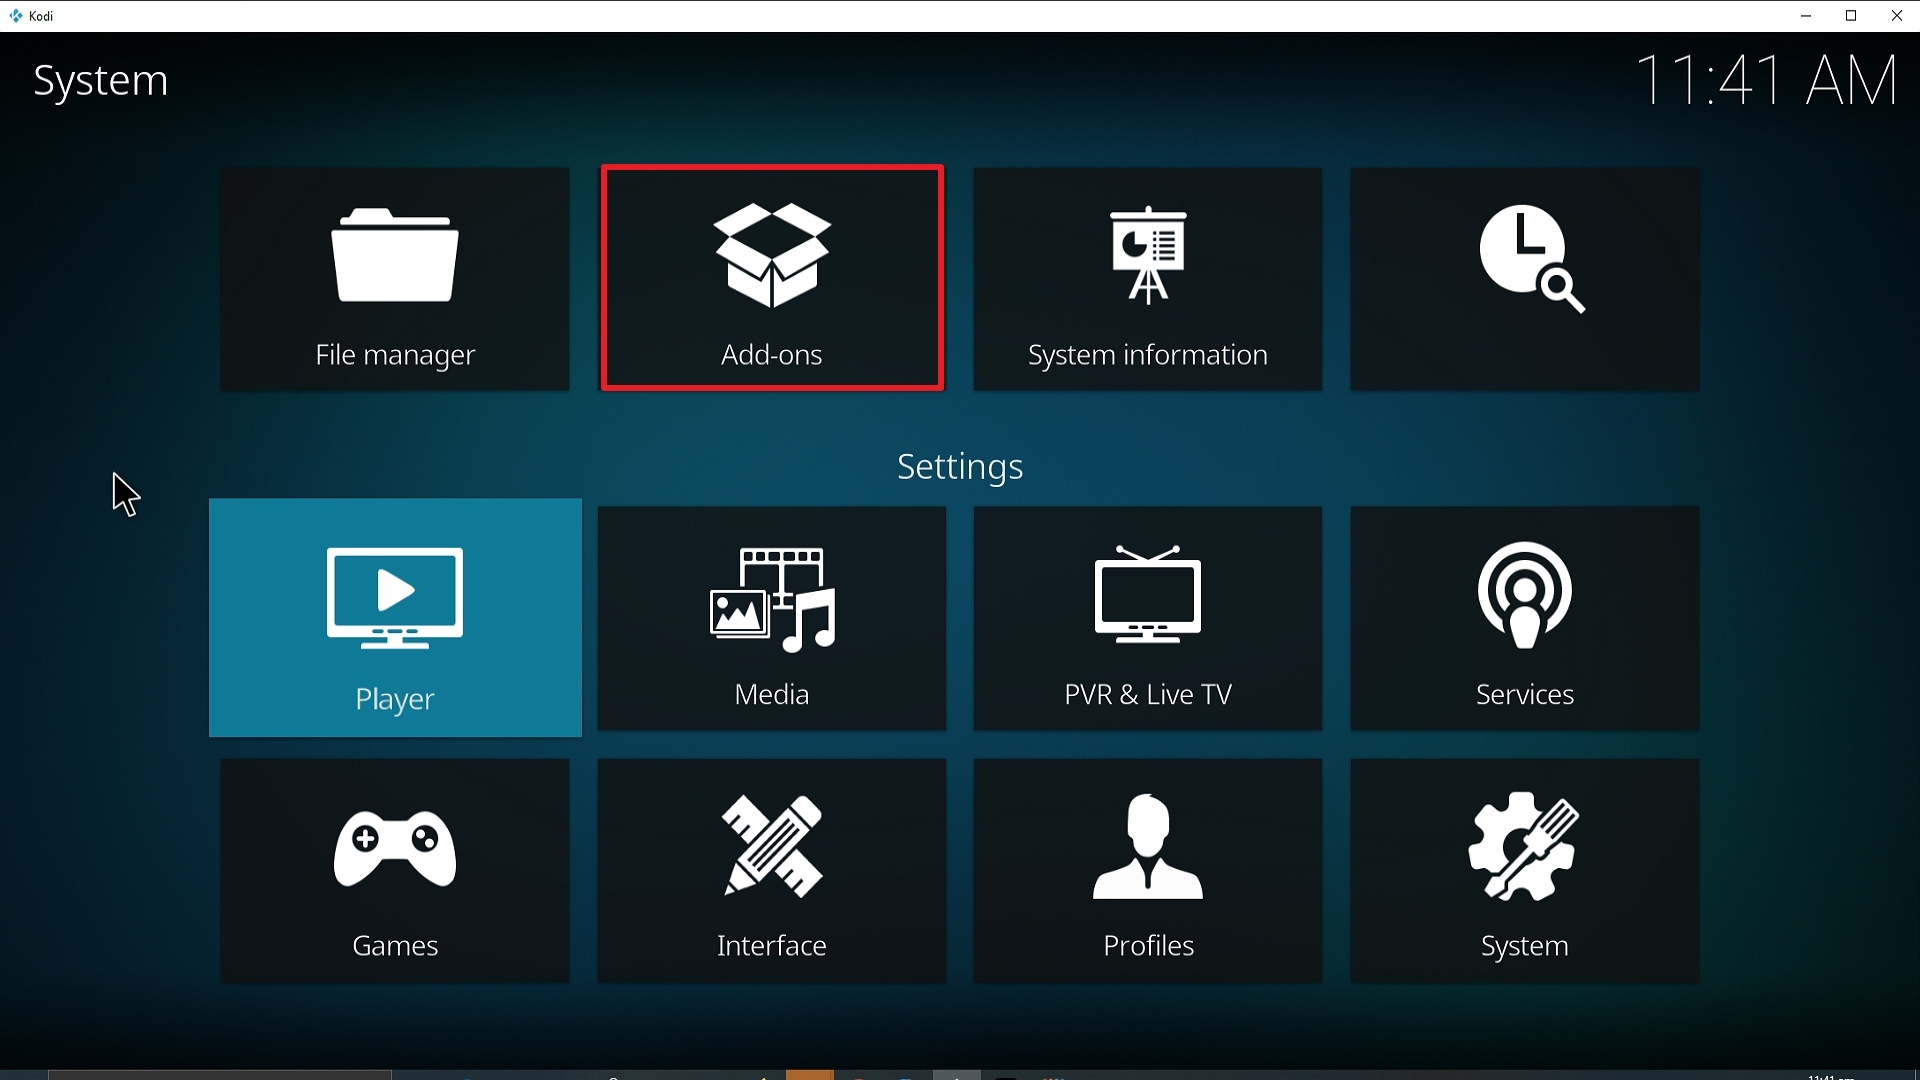
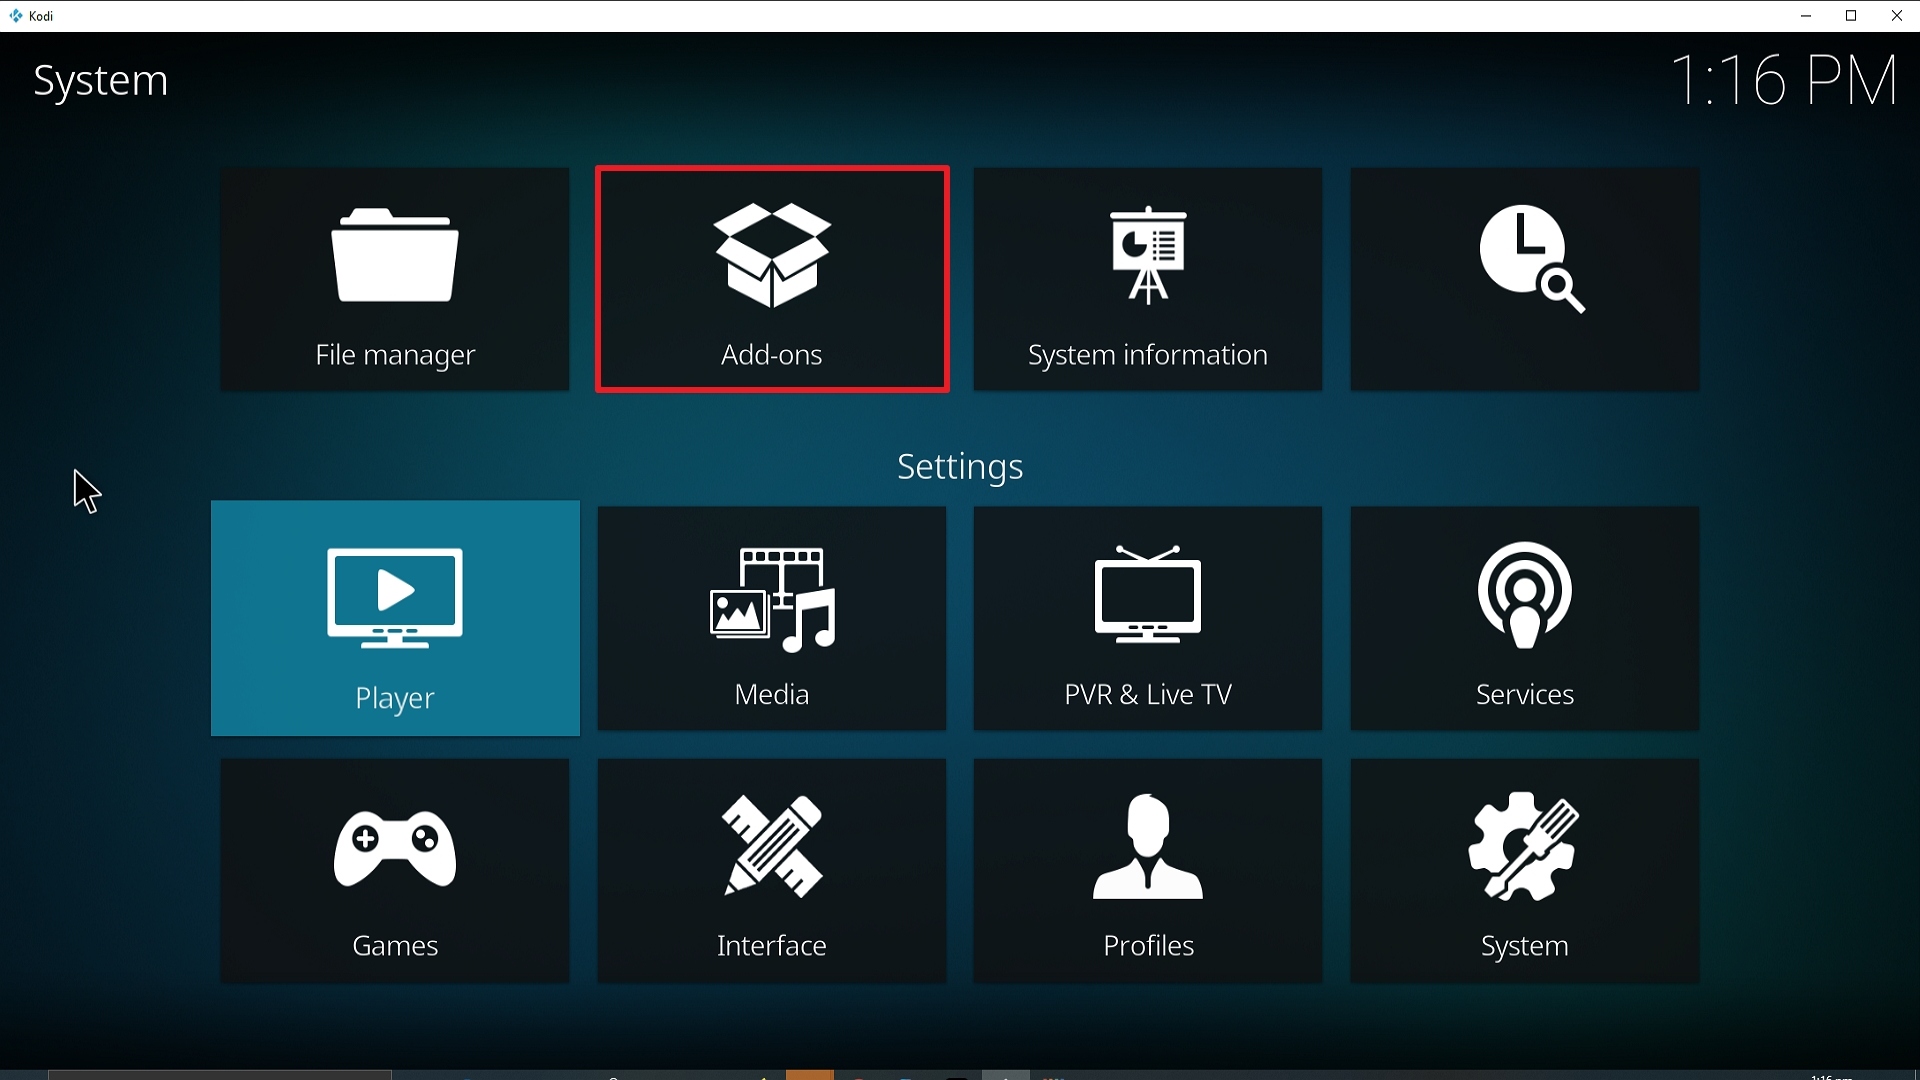
3. Select Add-ons on the left side of the screen.

Step 3 Installing Enigma addon on Kodi


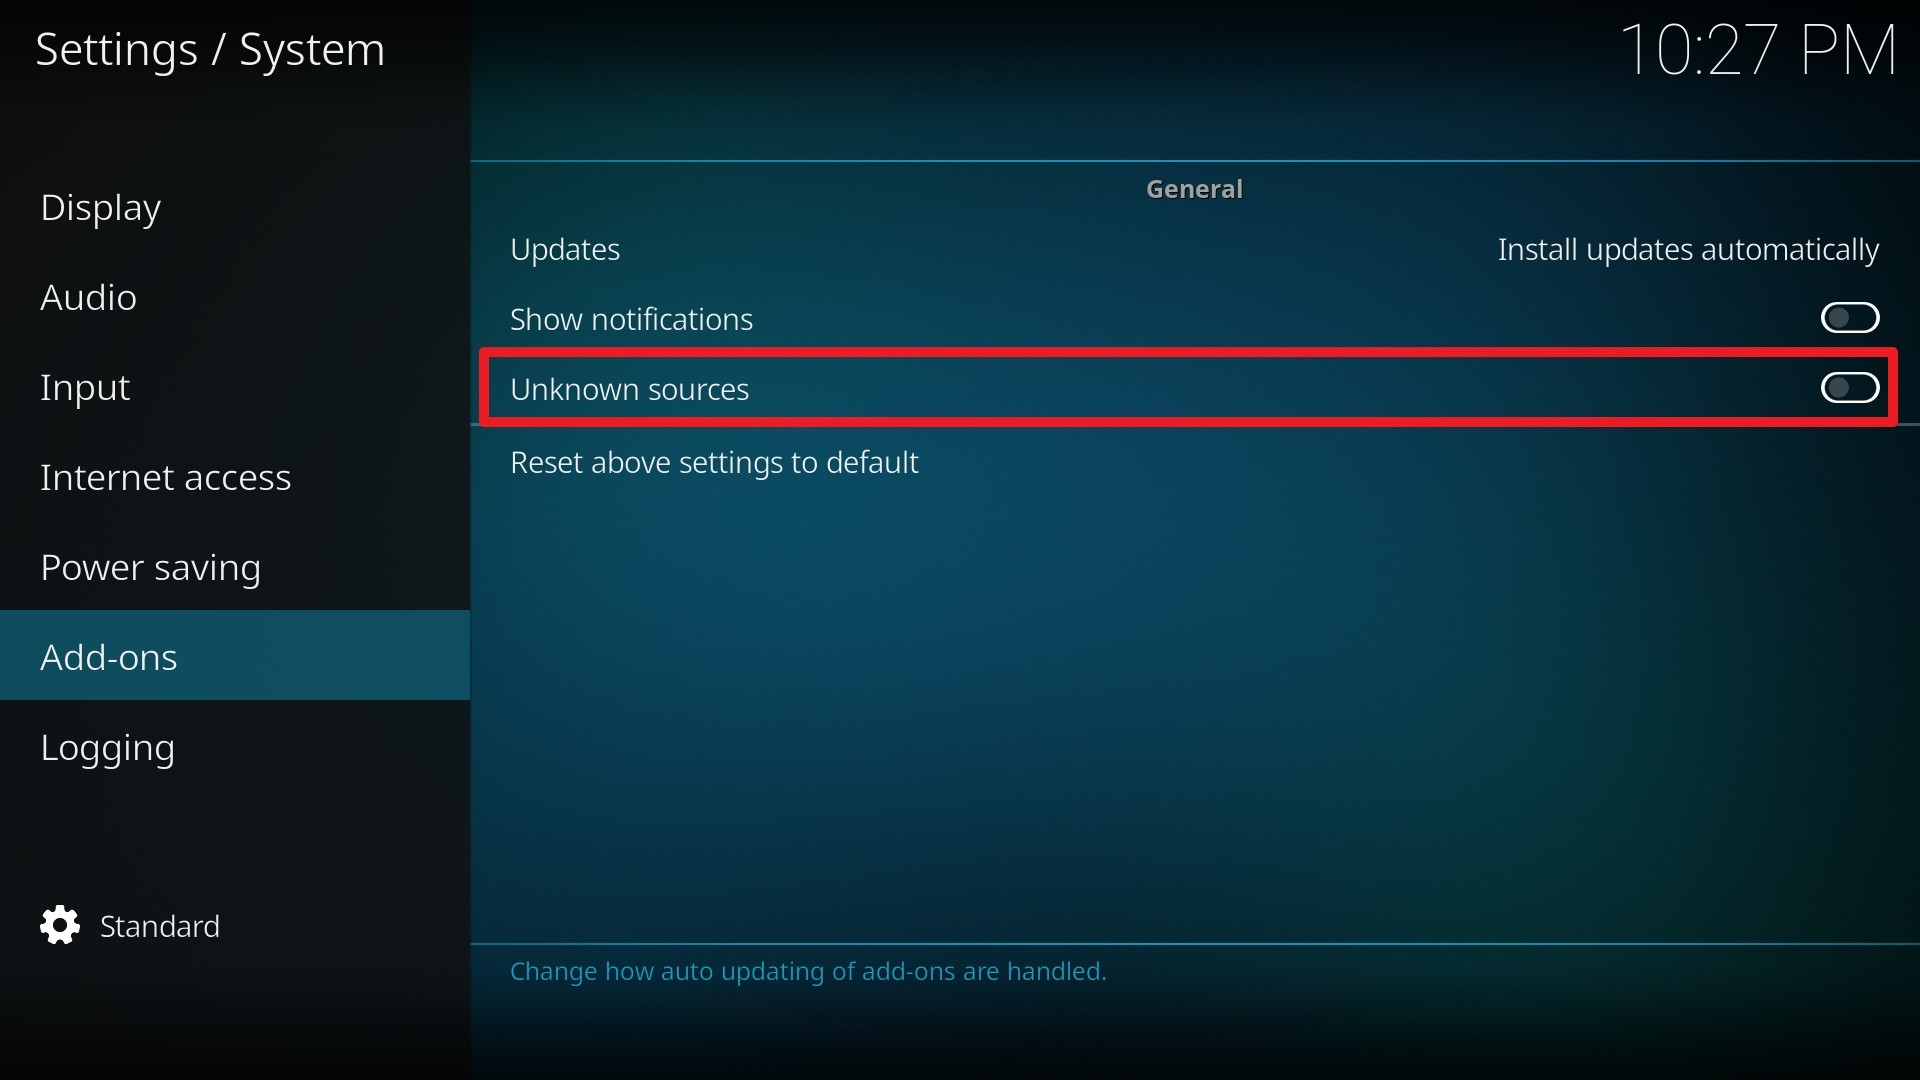
4. Select Unknown sources.

Step 4 Installing Enigma addon on Kodi


5. Click Yes to allow unknown sources.

Step 5 Installing Enigma addon on Kodi


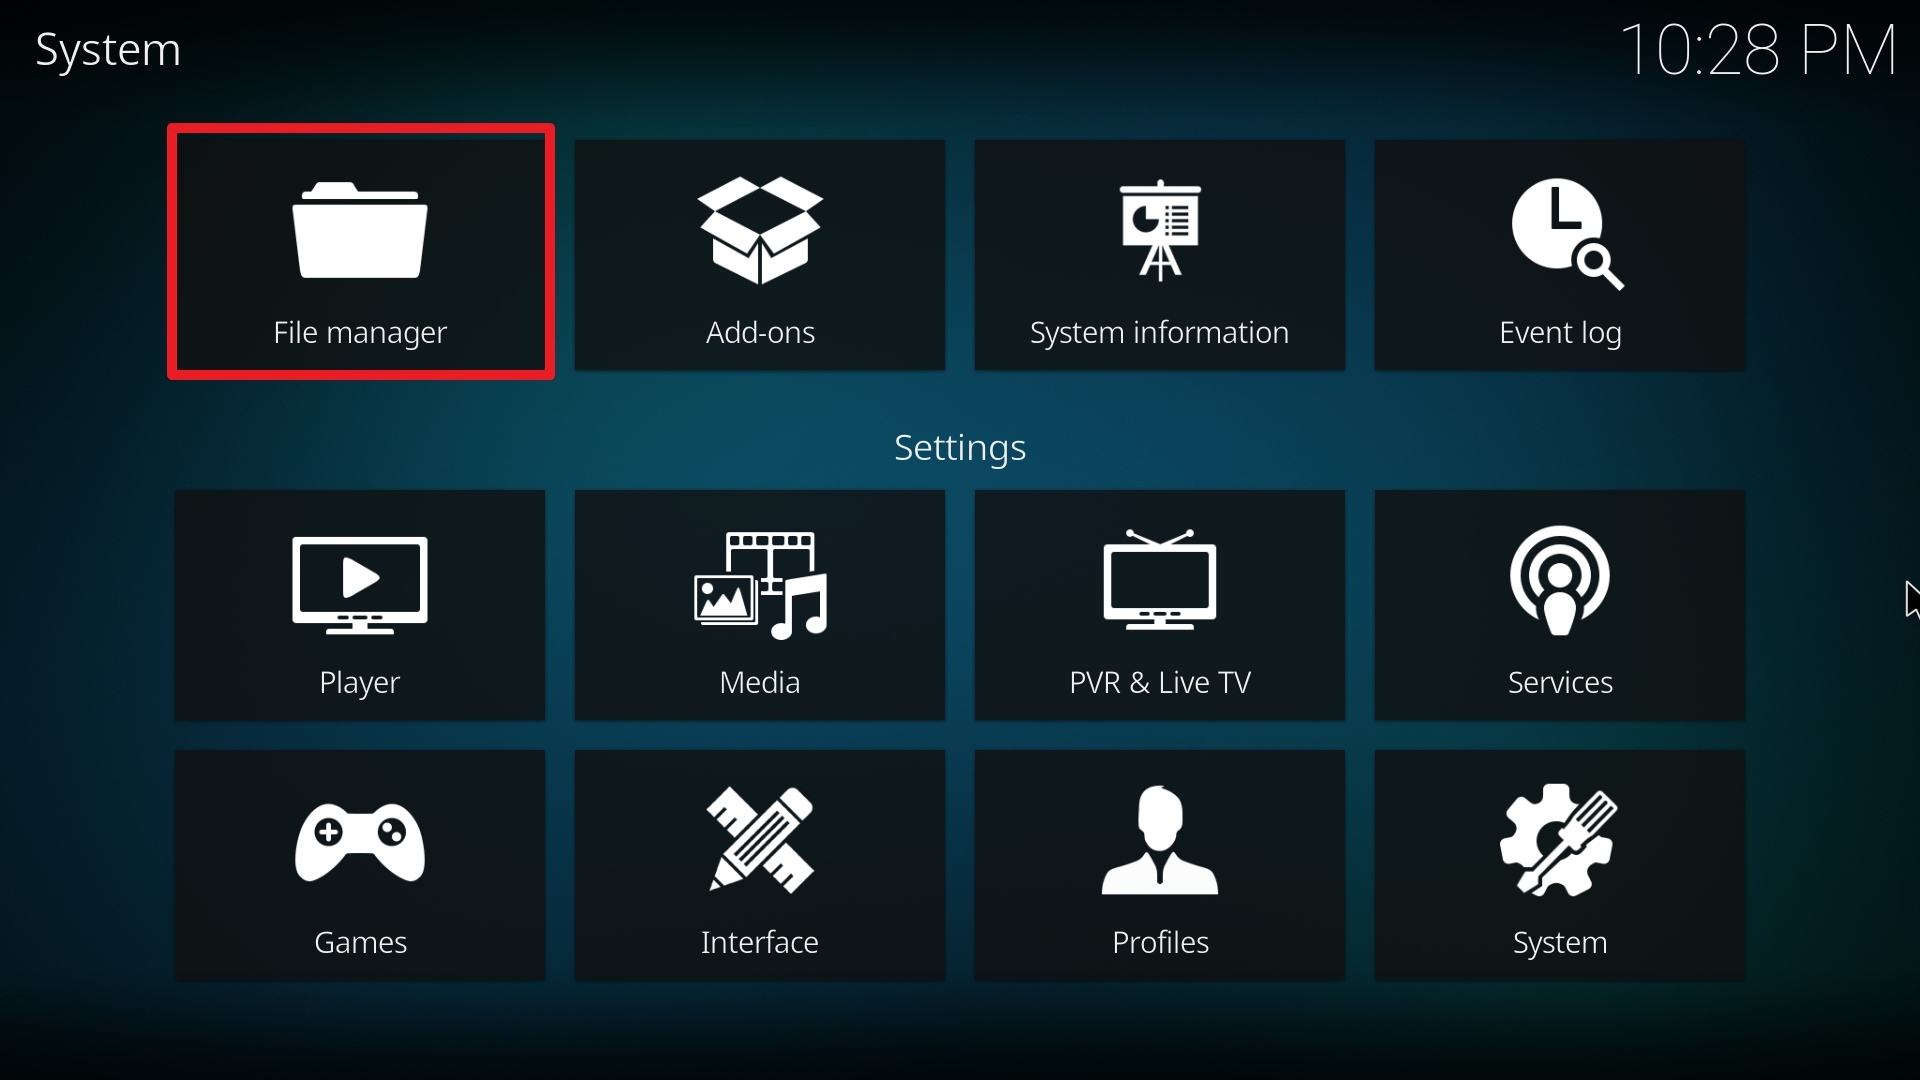
6. Select File manager.

Step 6 Installing Enigma on Kodi


7. Click Add source.

Step 7 Installing Enigma addon on Kodi


8. Click on <None>.

Step 8 Installing Enigma addon on Kodi


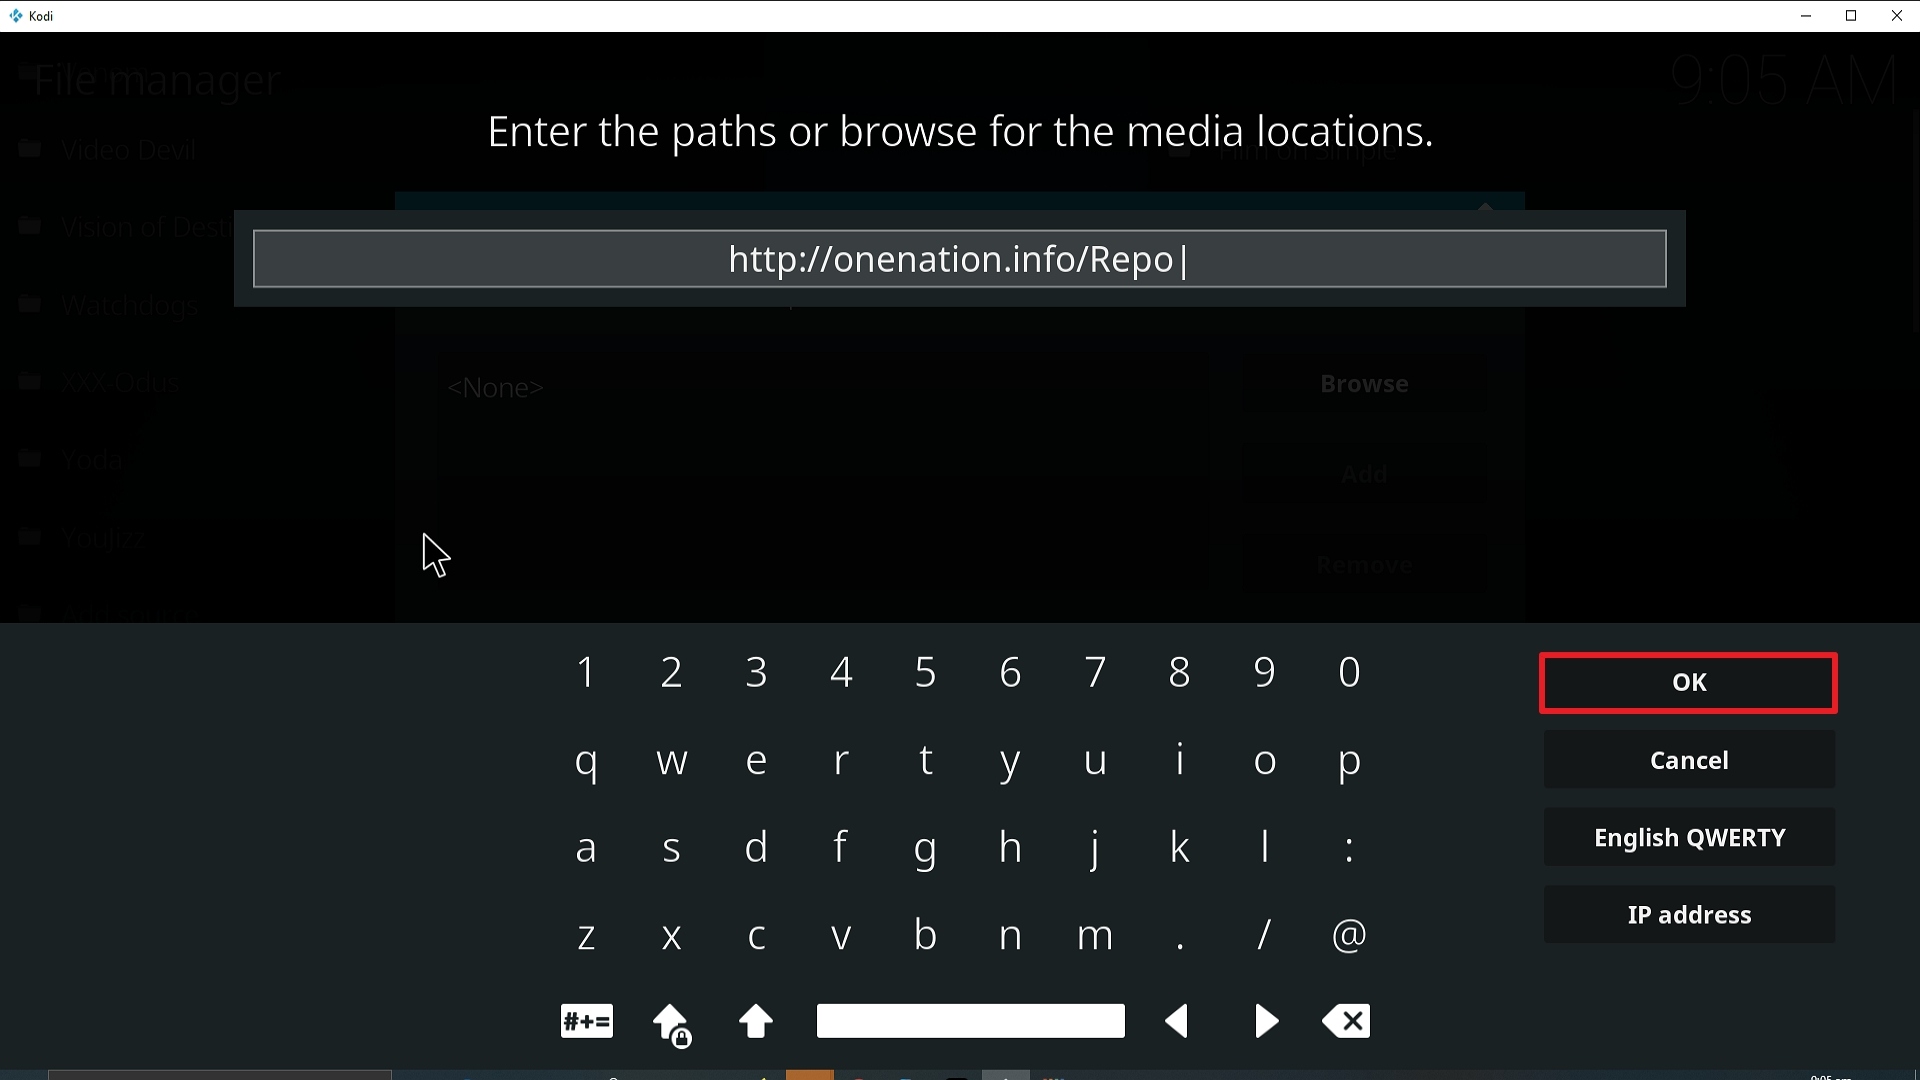
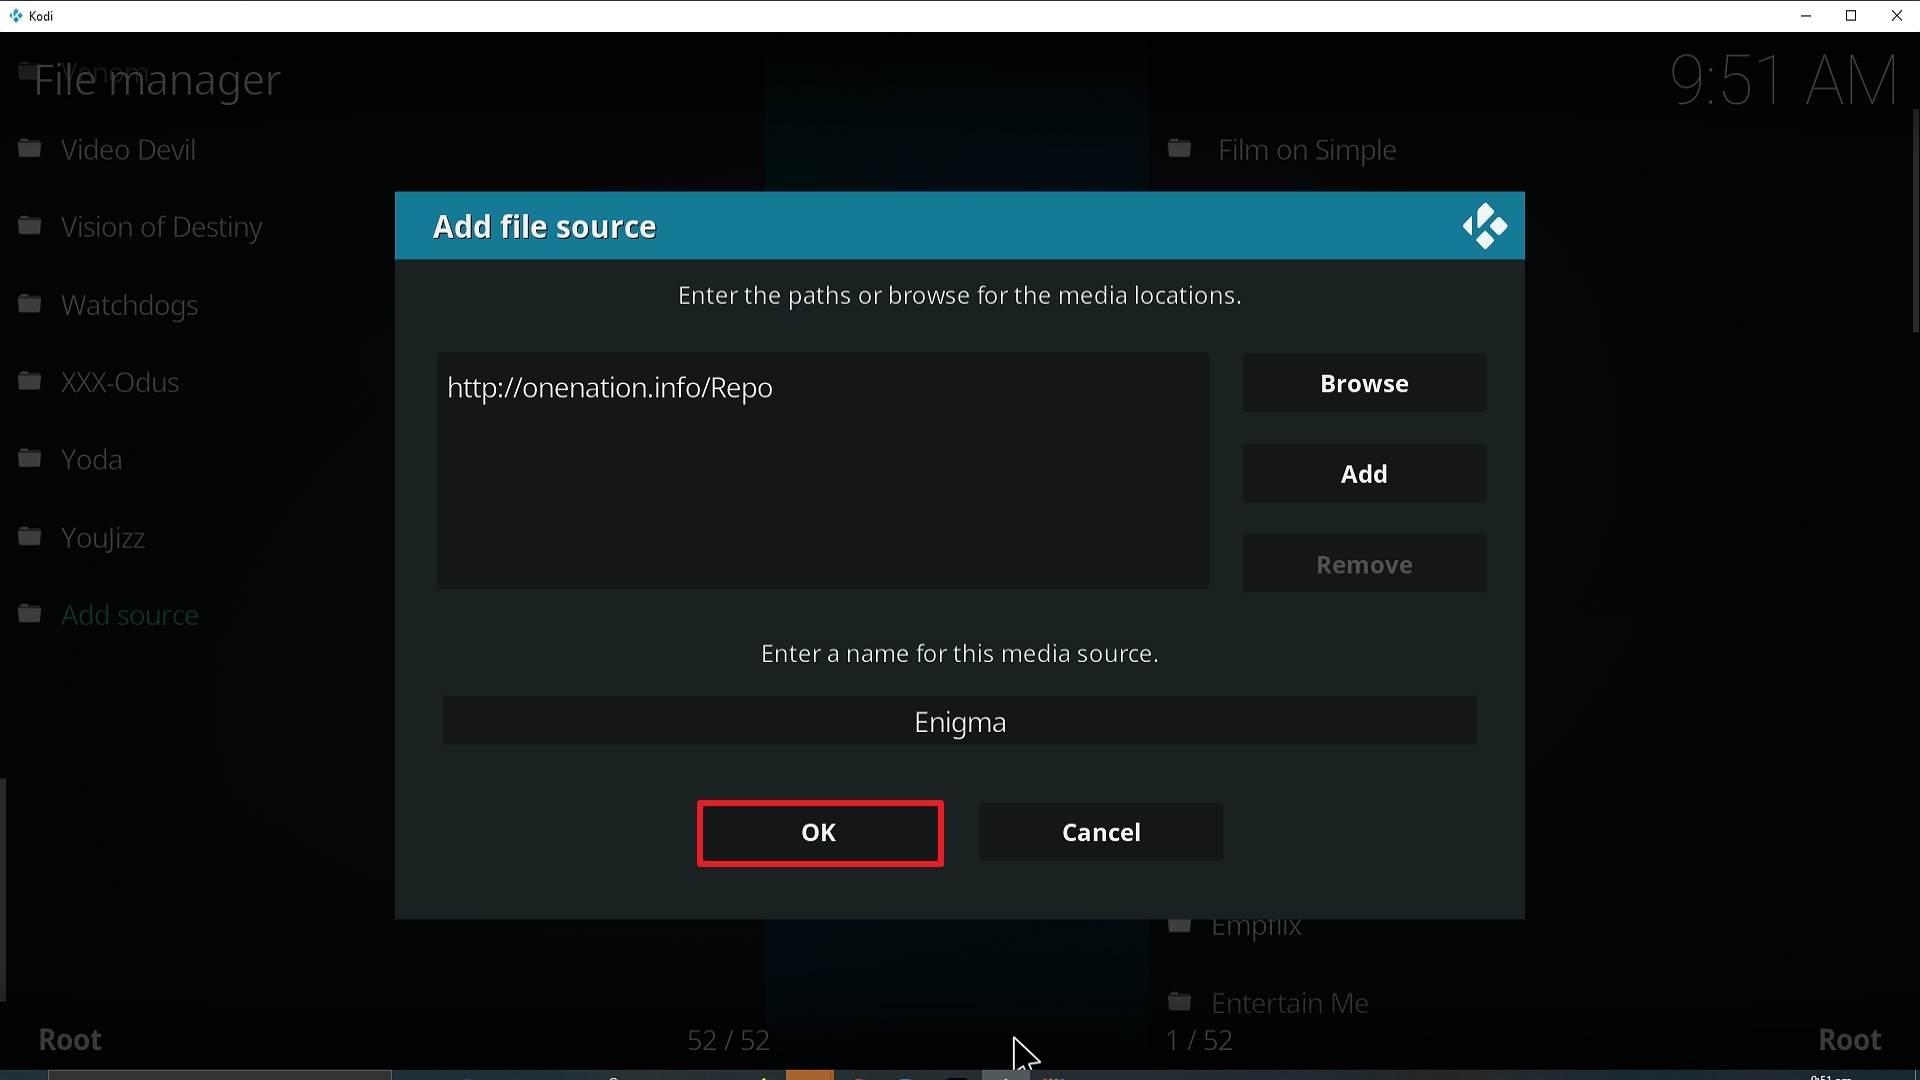
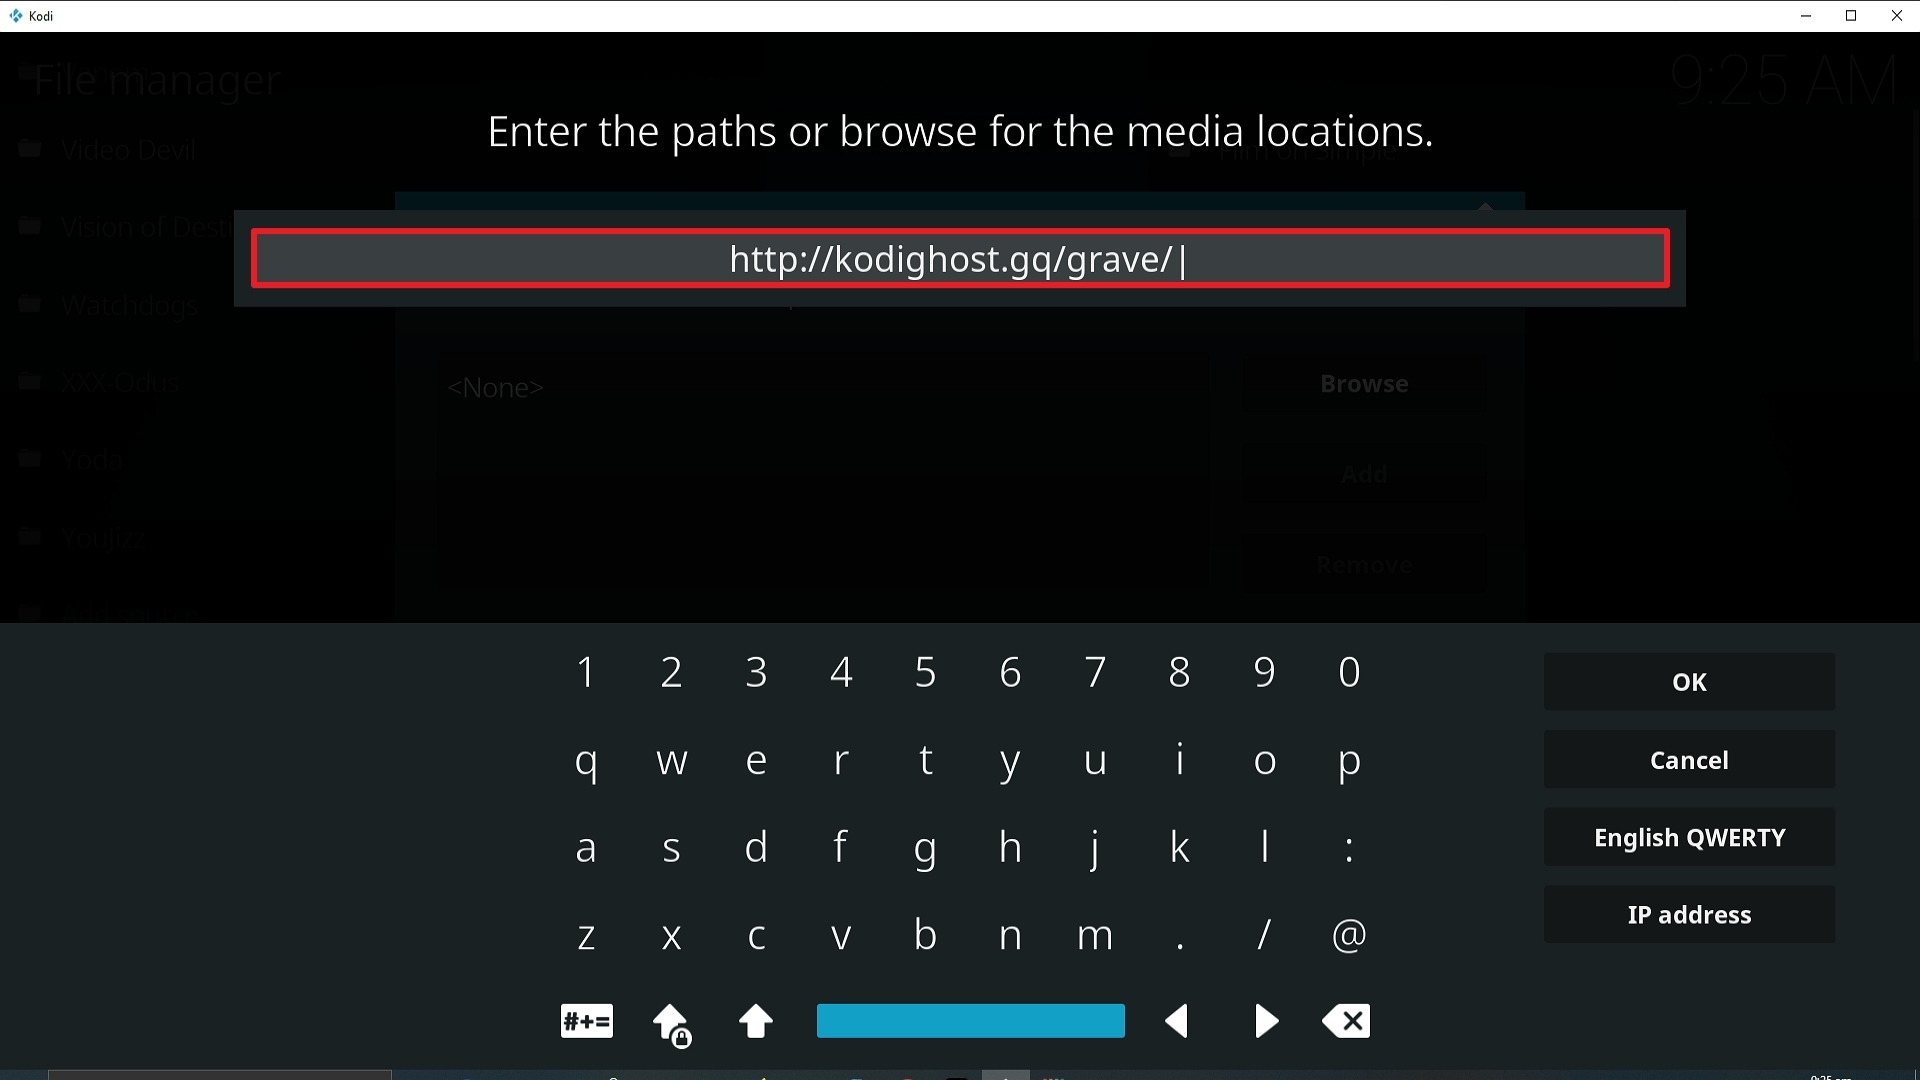
9. Type exactly: http://onenation.info/Repo
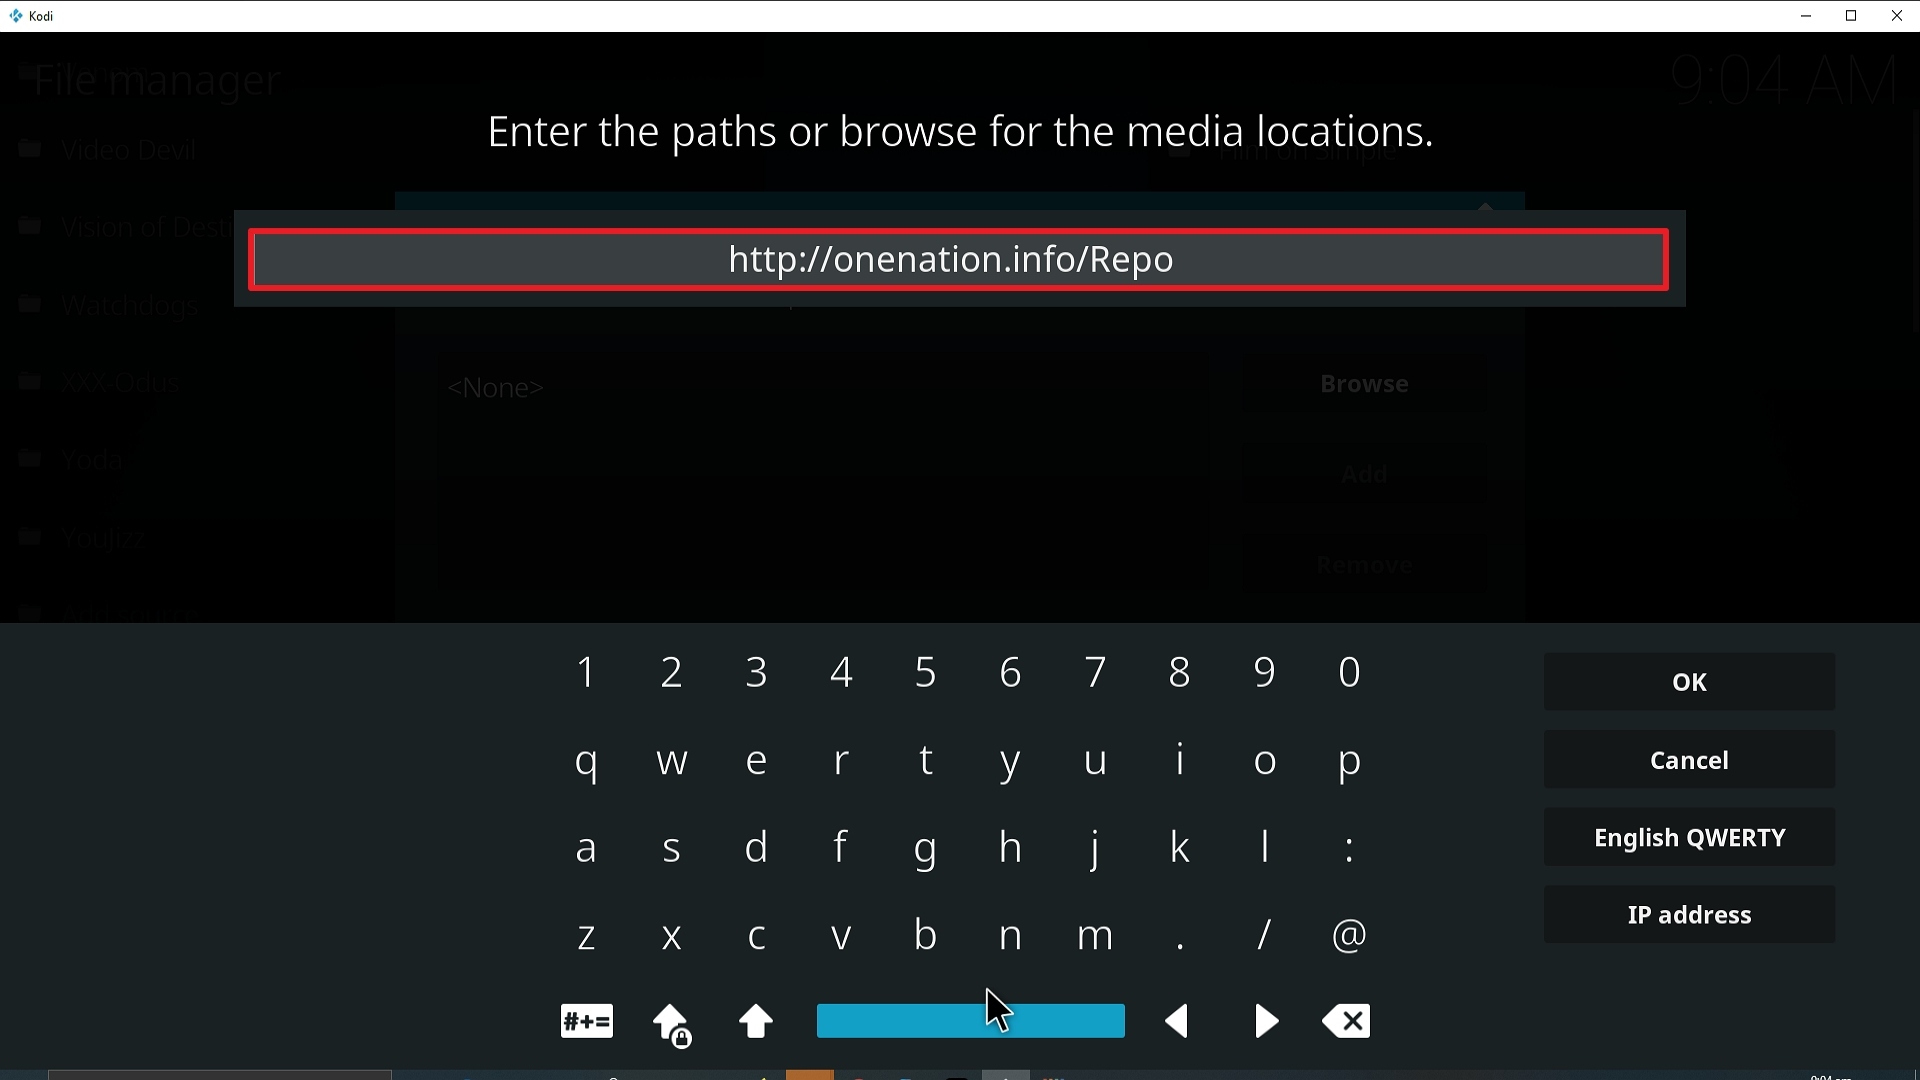
Step 9 Installing Enigma Kodi addon on Kodi


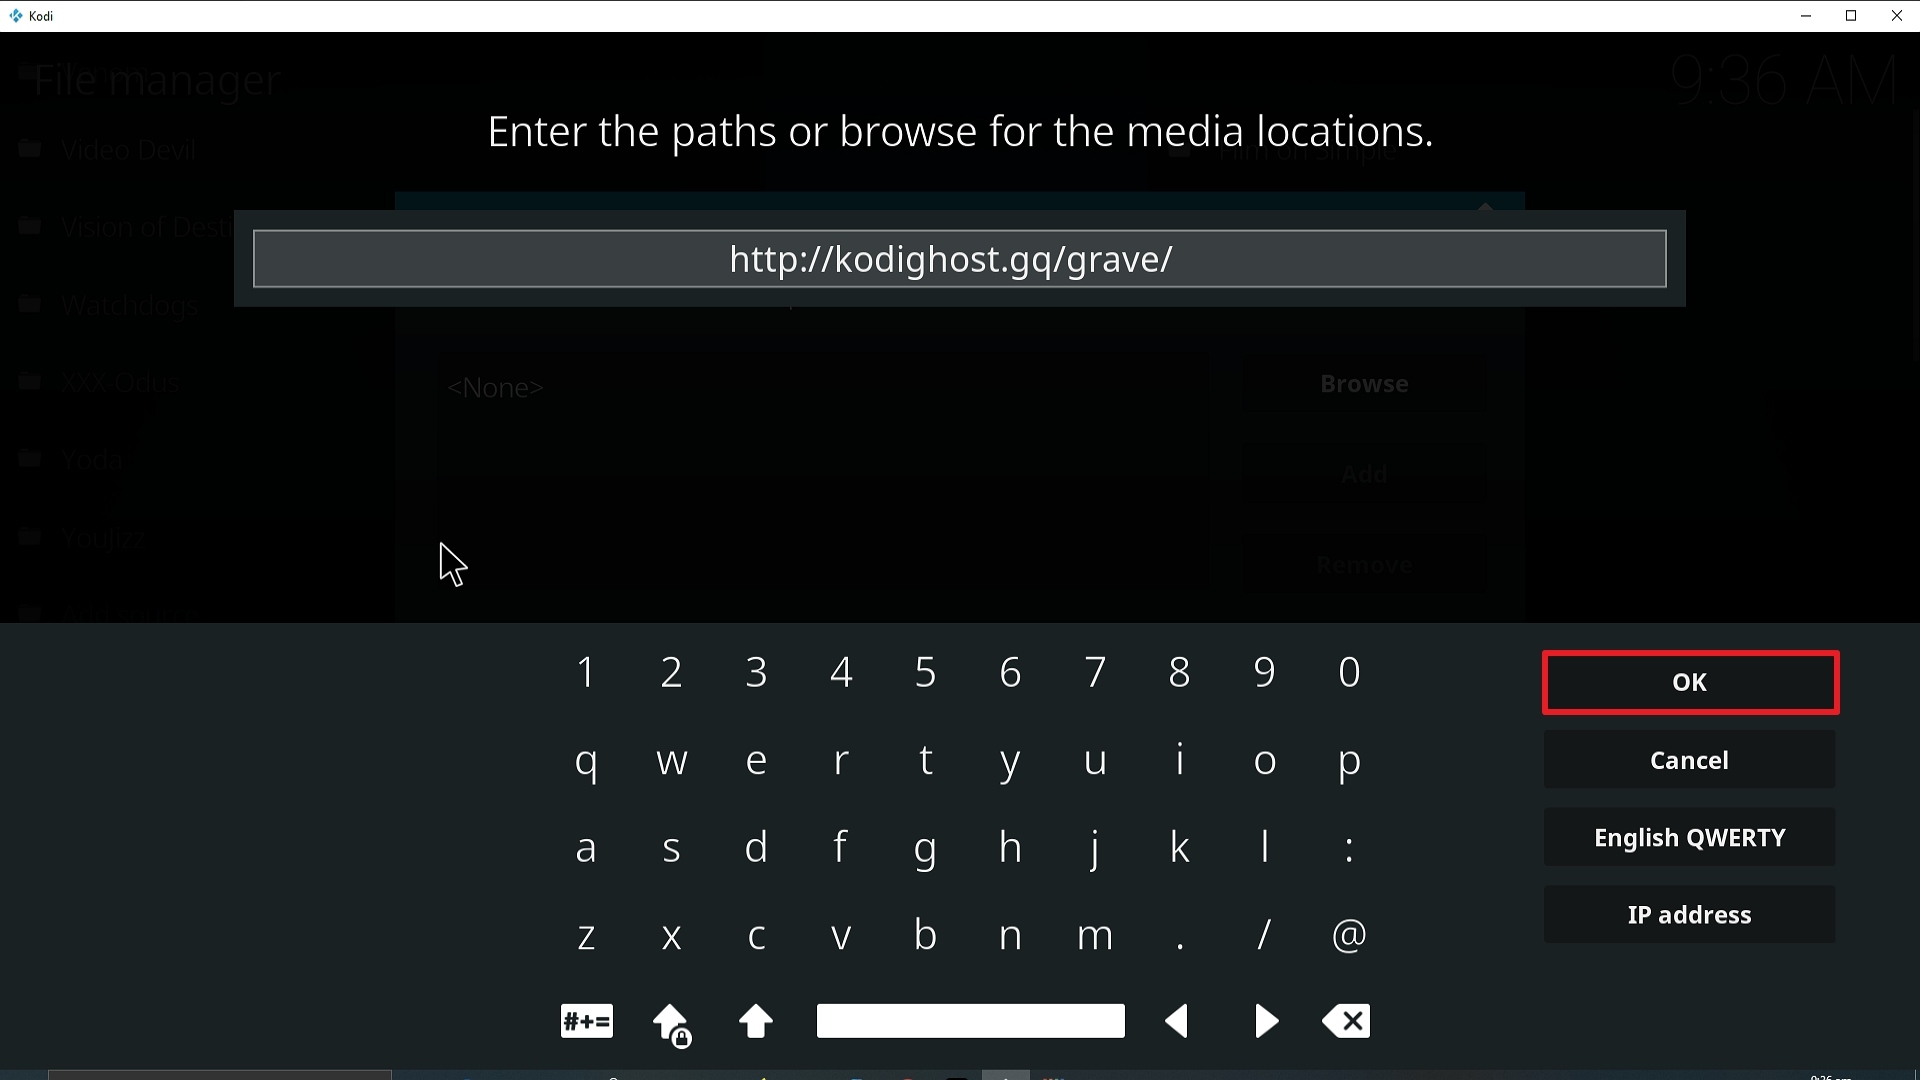
10. Click on OK.

Step 10 Installing Enigma Kodi addon on Kodi


11. Select enter a name for this media source.
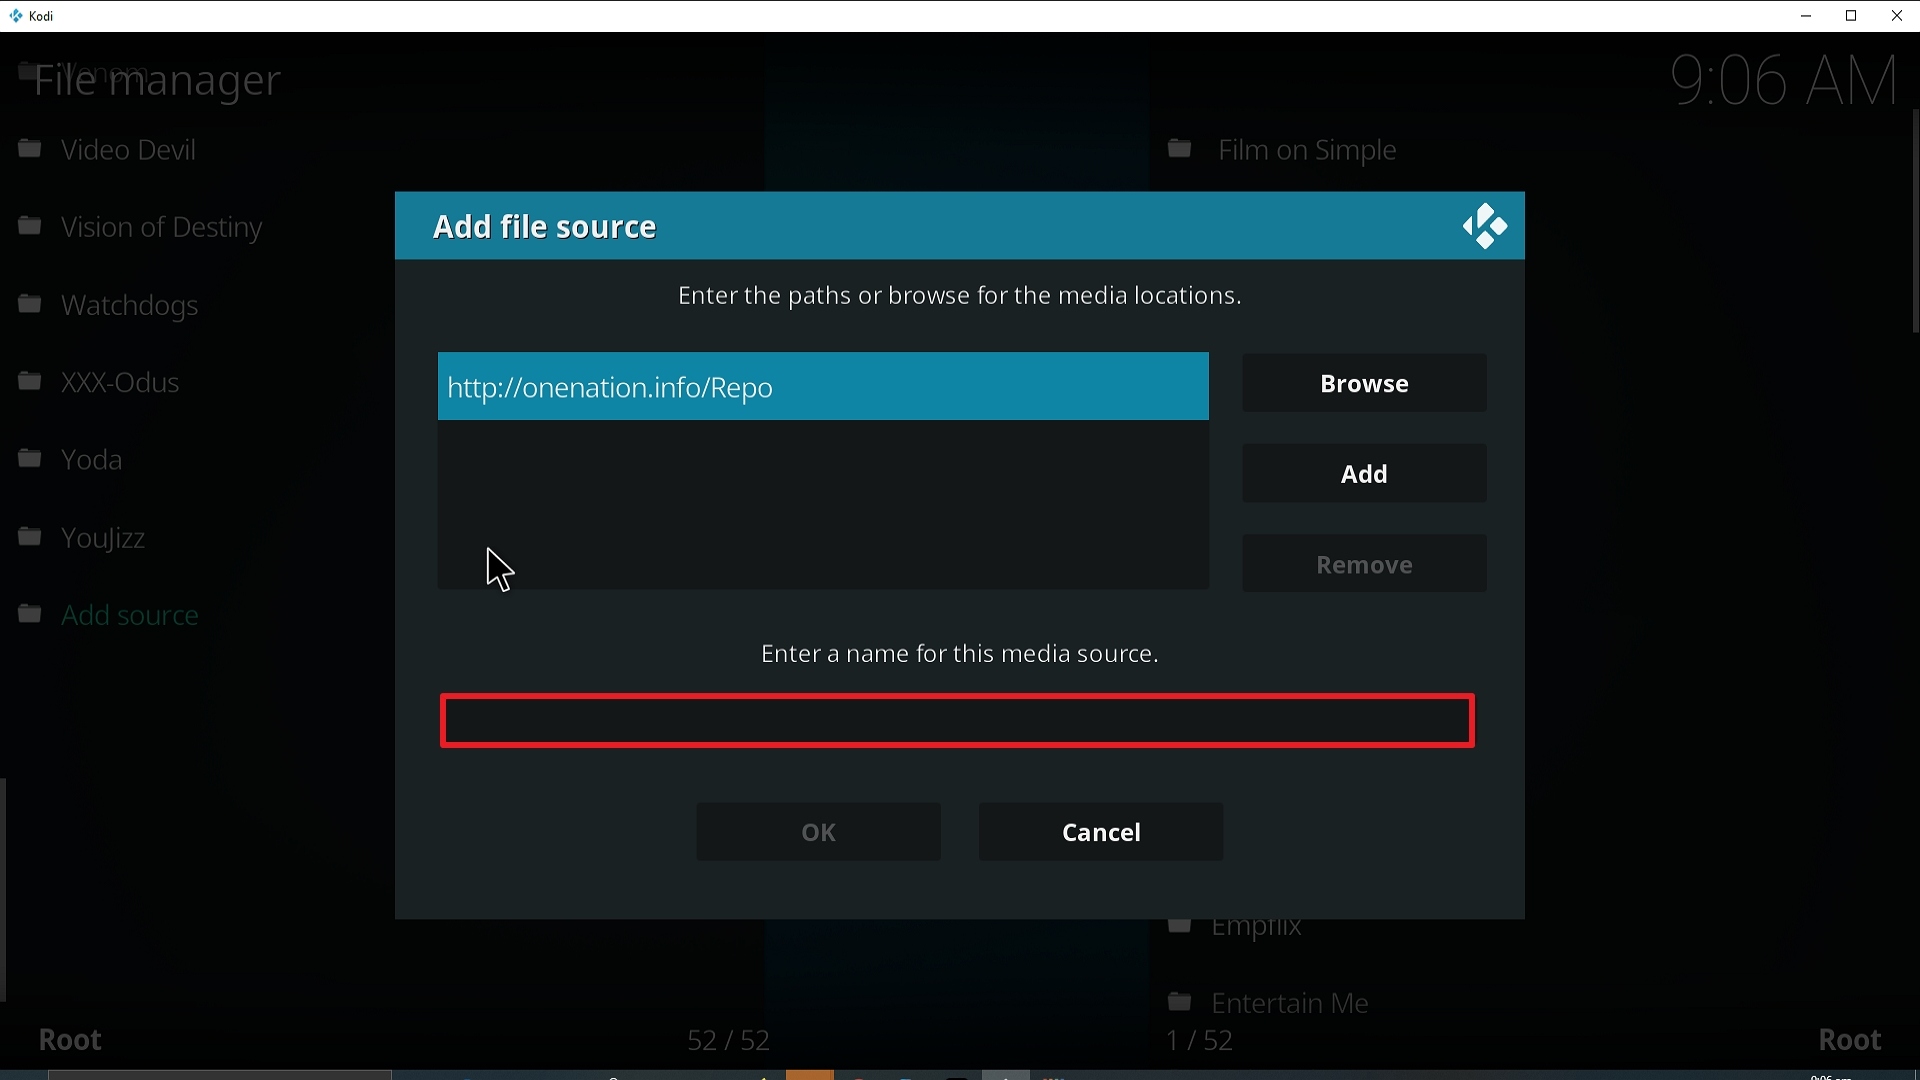
Step 11 Installing Enigma Kodi addon on Kodi


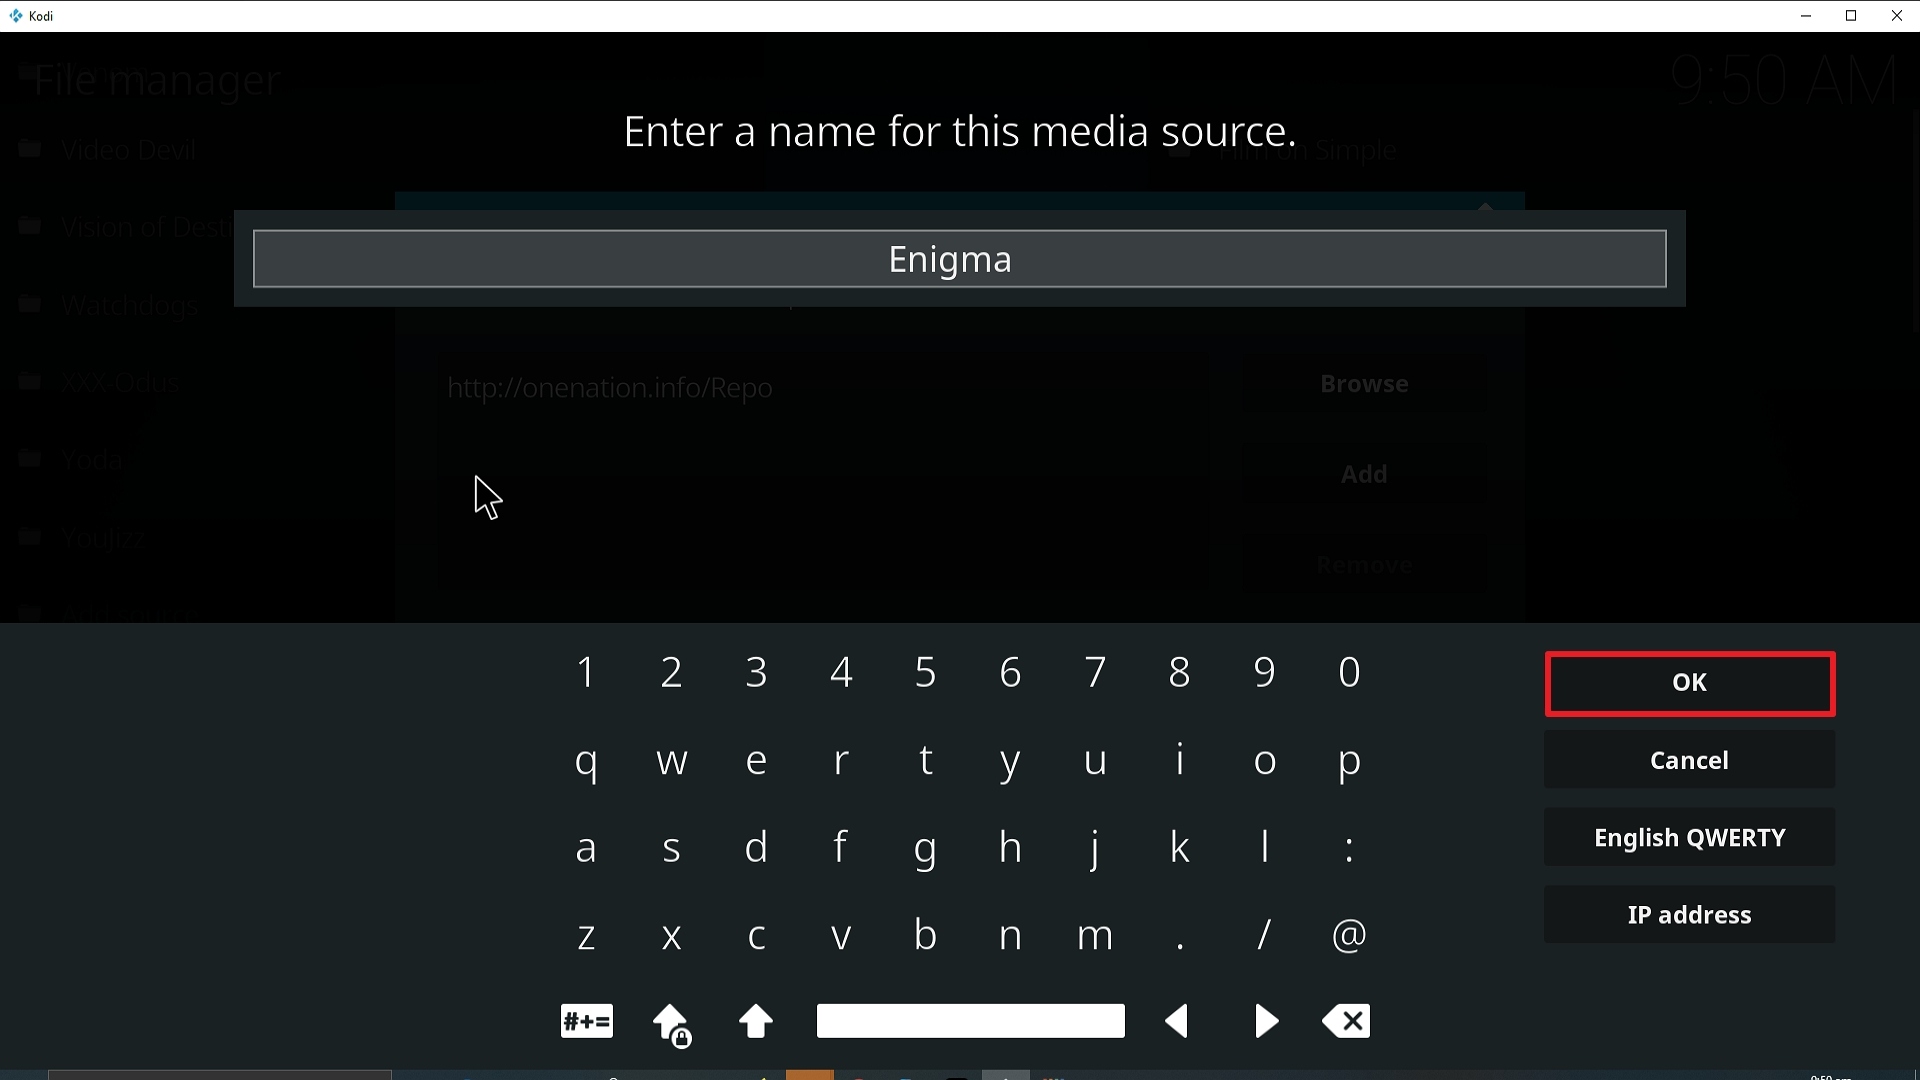
12. Name is Enigma (this part isn’t critical as long as you remember the name).
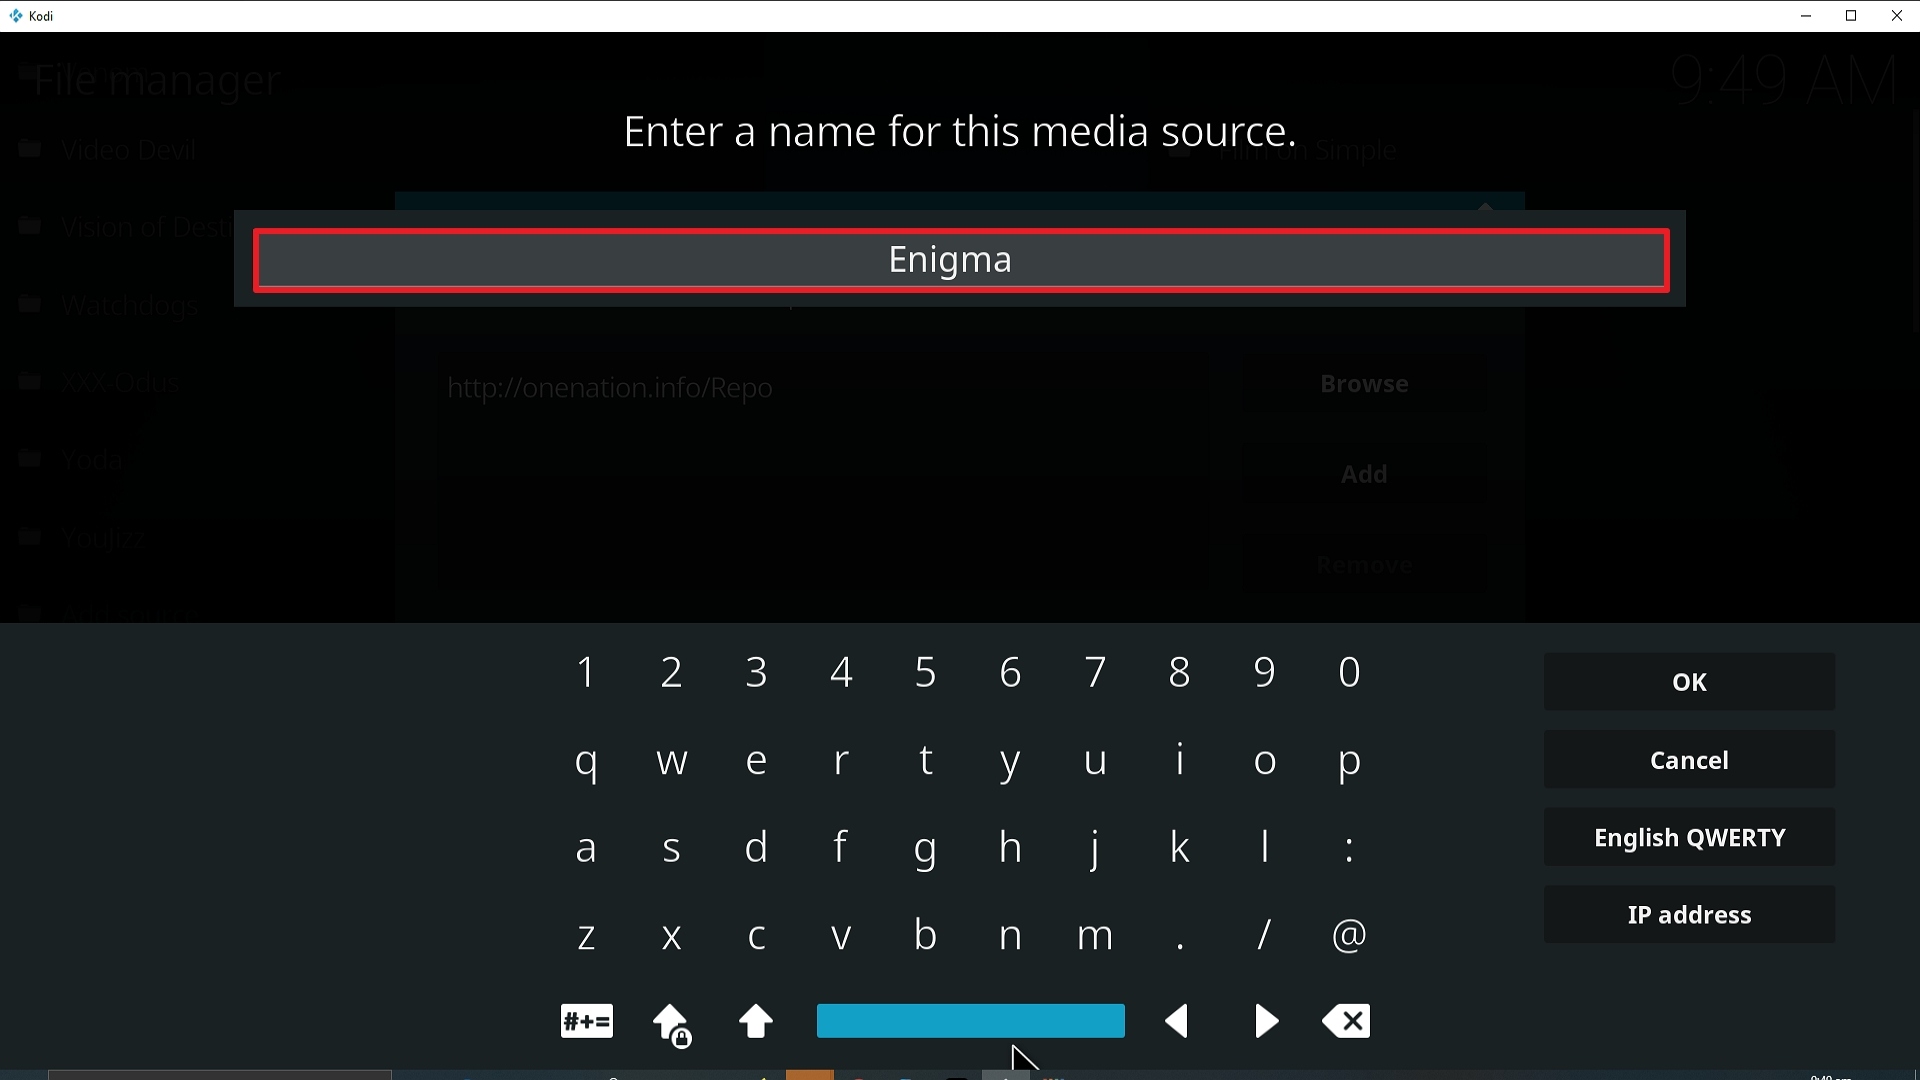
Step 12 Installing Enigma Kodi addon on Kodi


13. Click on OK.

Step 13 Installing Enigma Kodi addon on Kodi


14. Click on OK.

Step 14 Installing Enigma Kodi addon on Kodi


15. Take one step back and click on Add-ons.
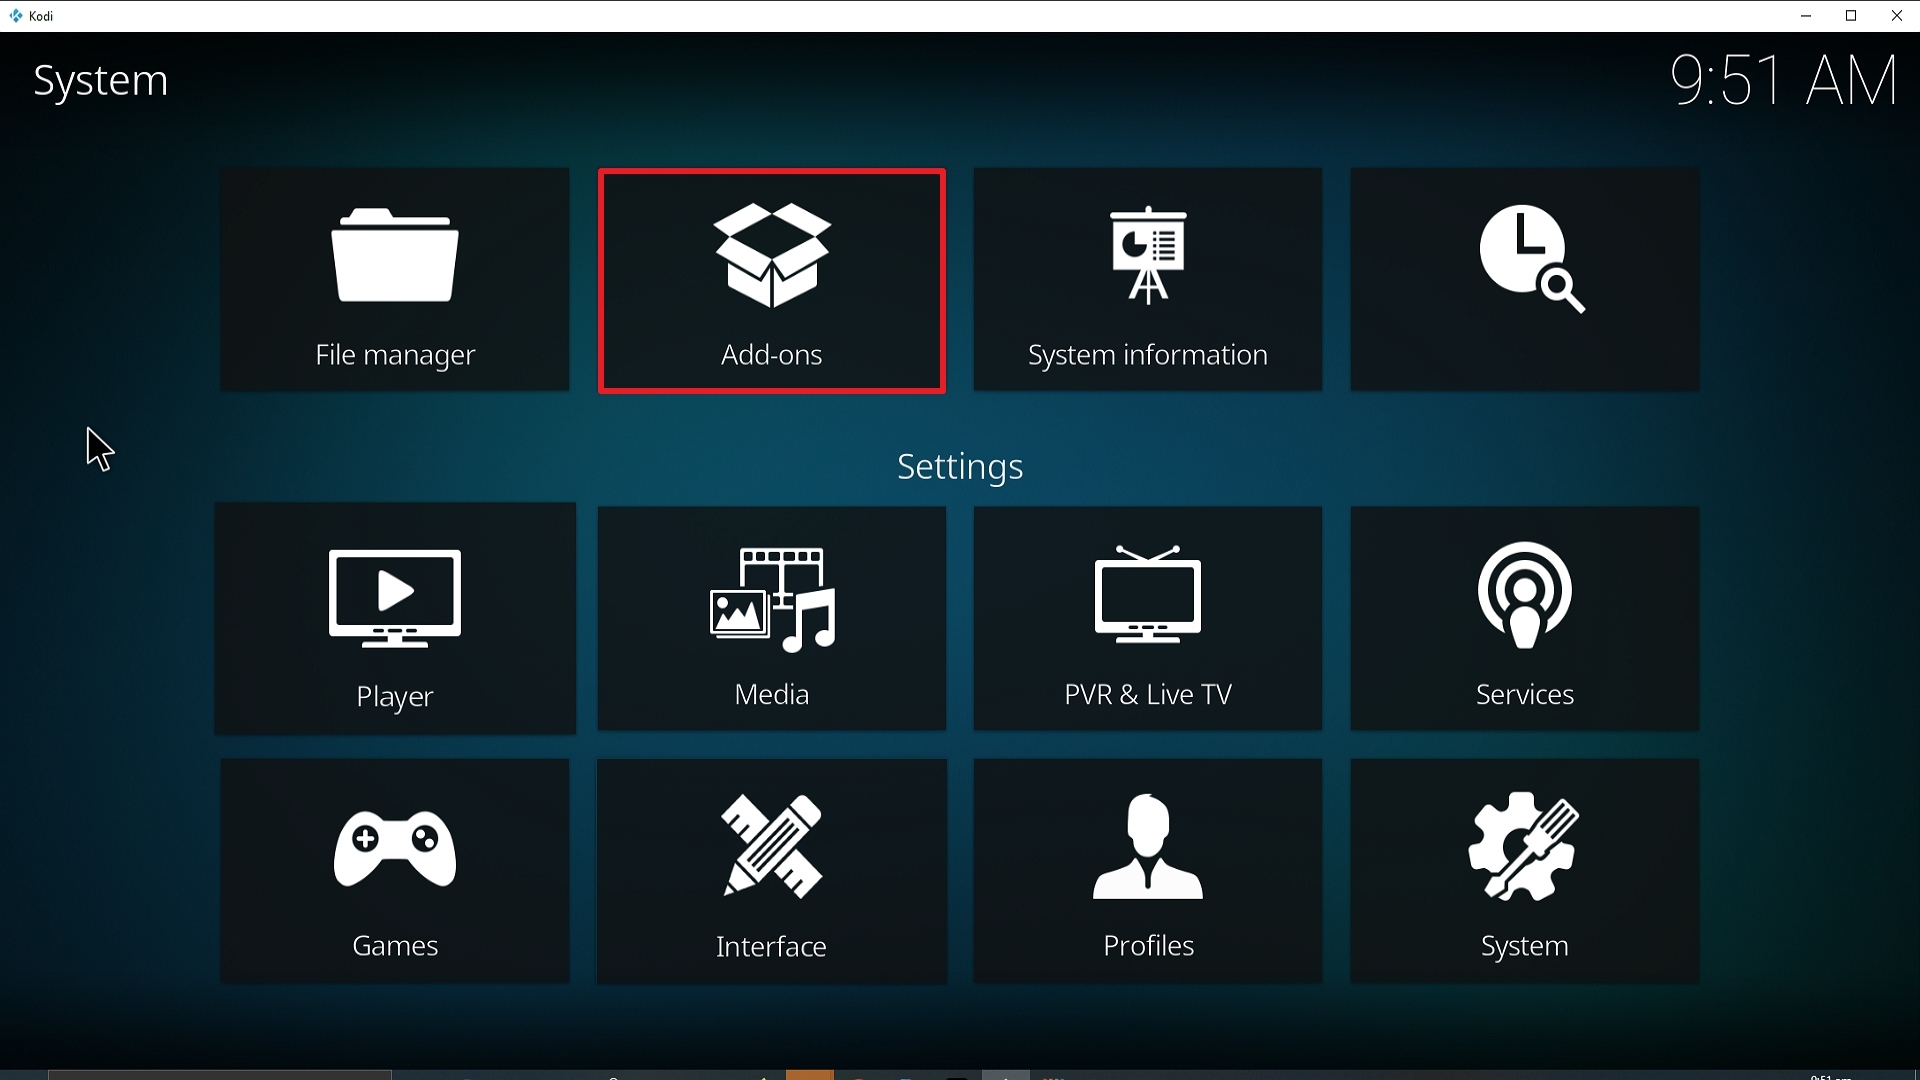
Step 15 Installing Enigma Kodi addon on Kodi


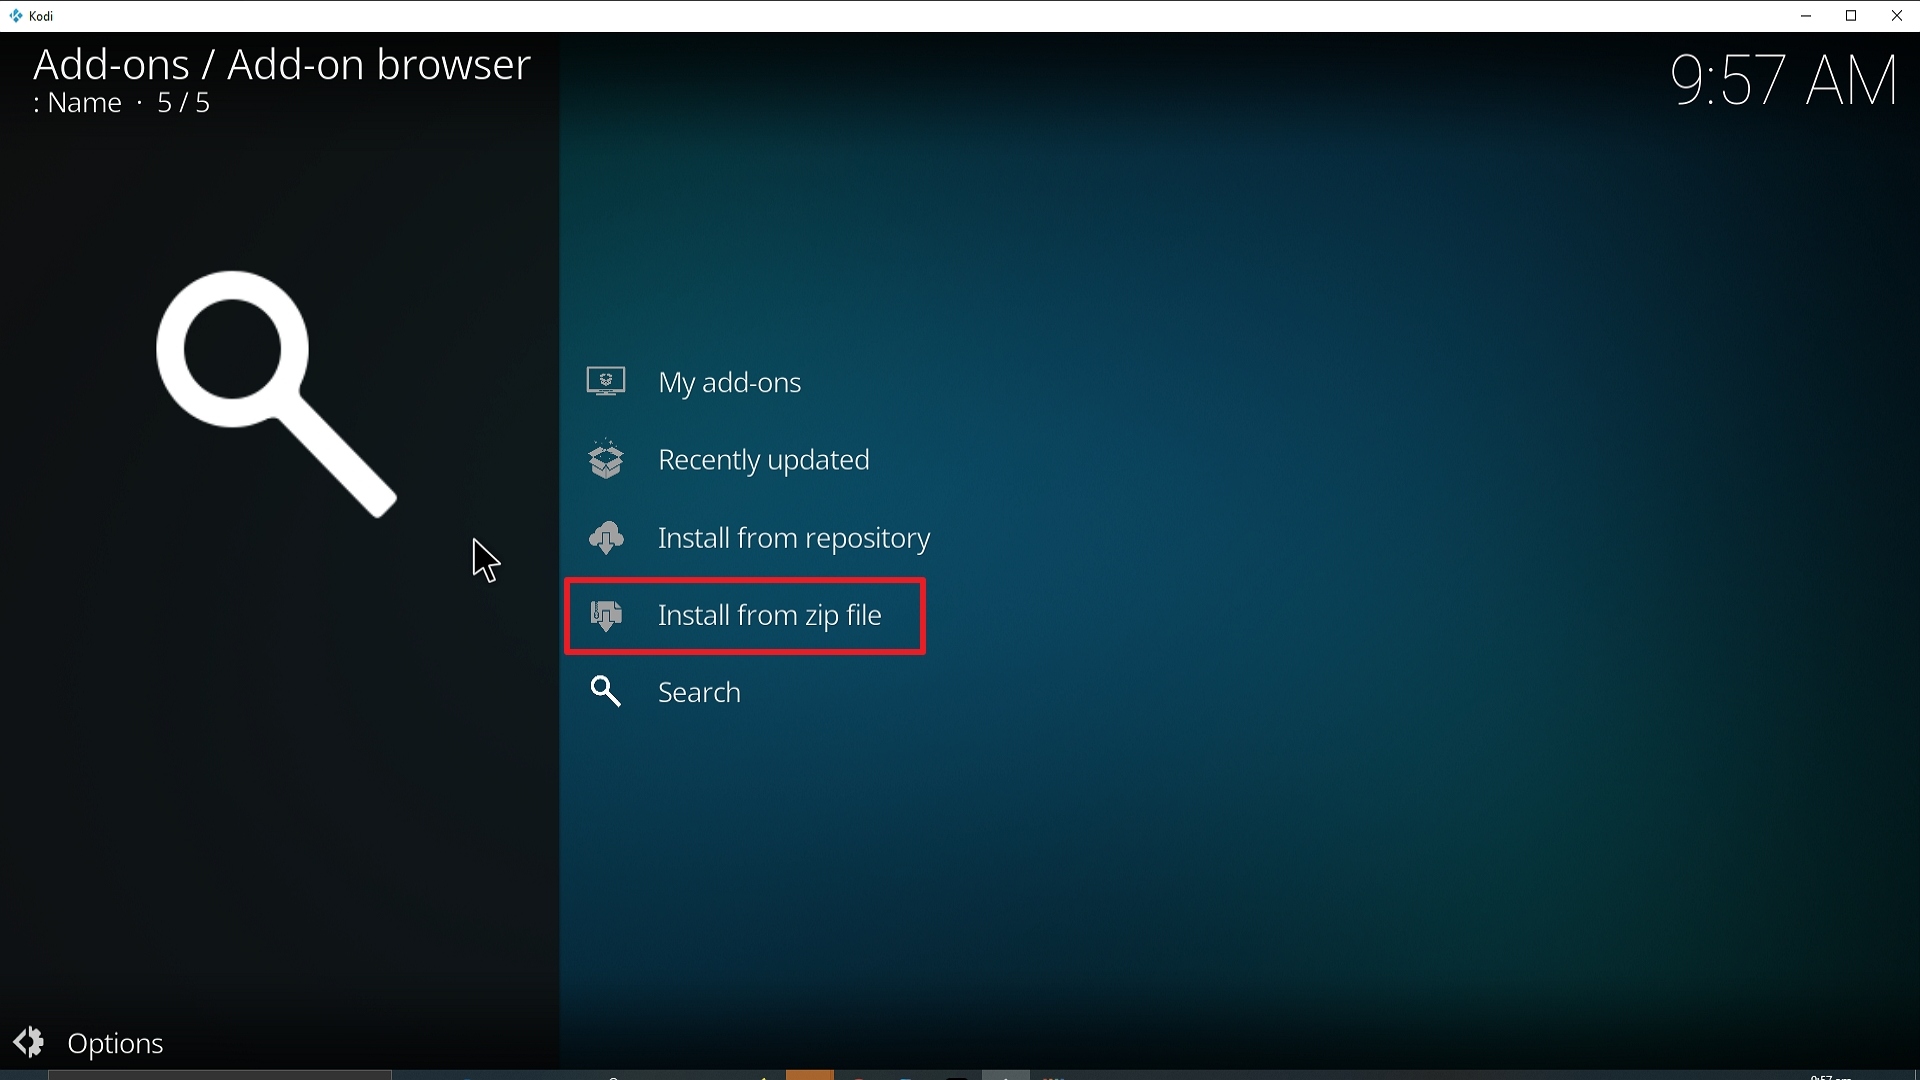
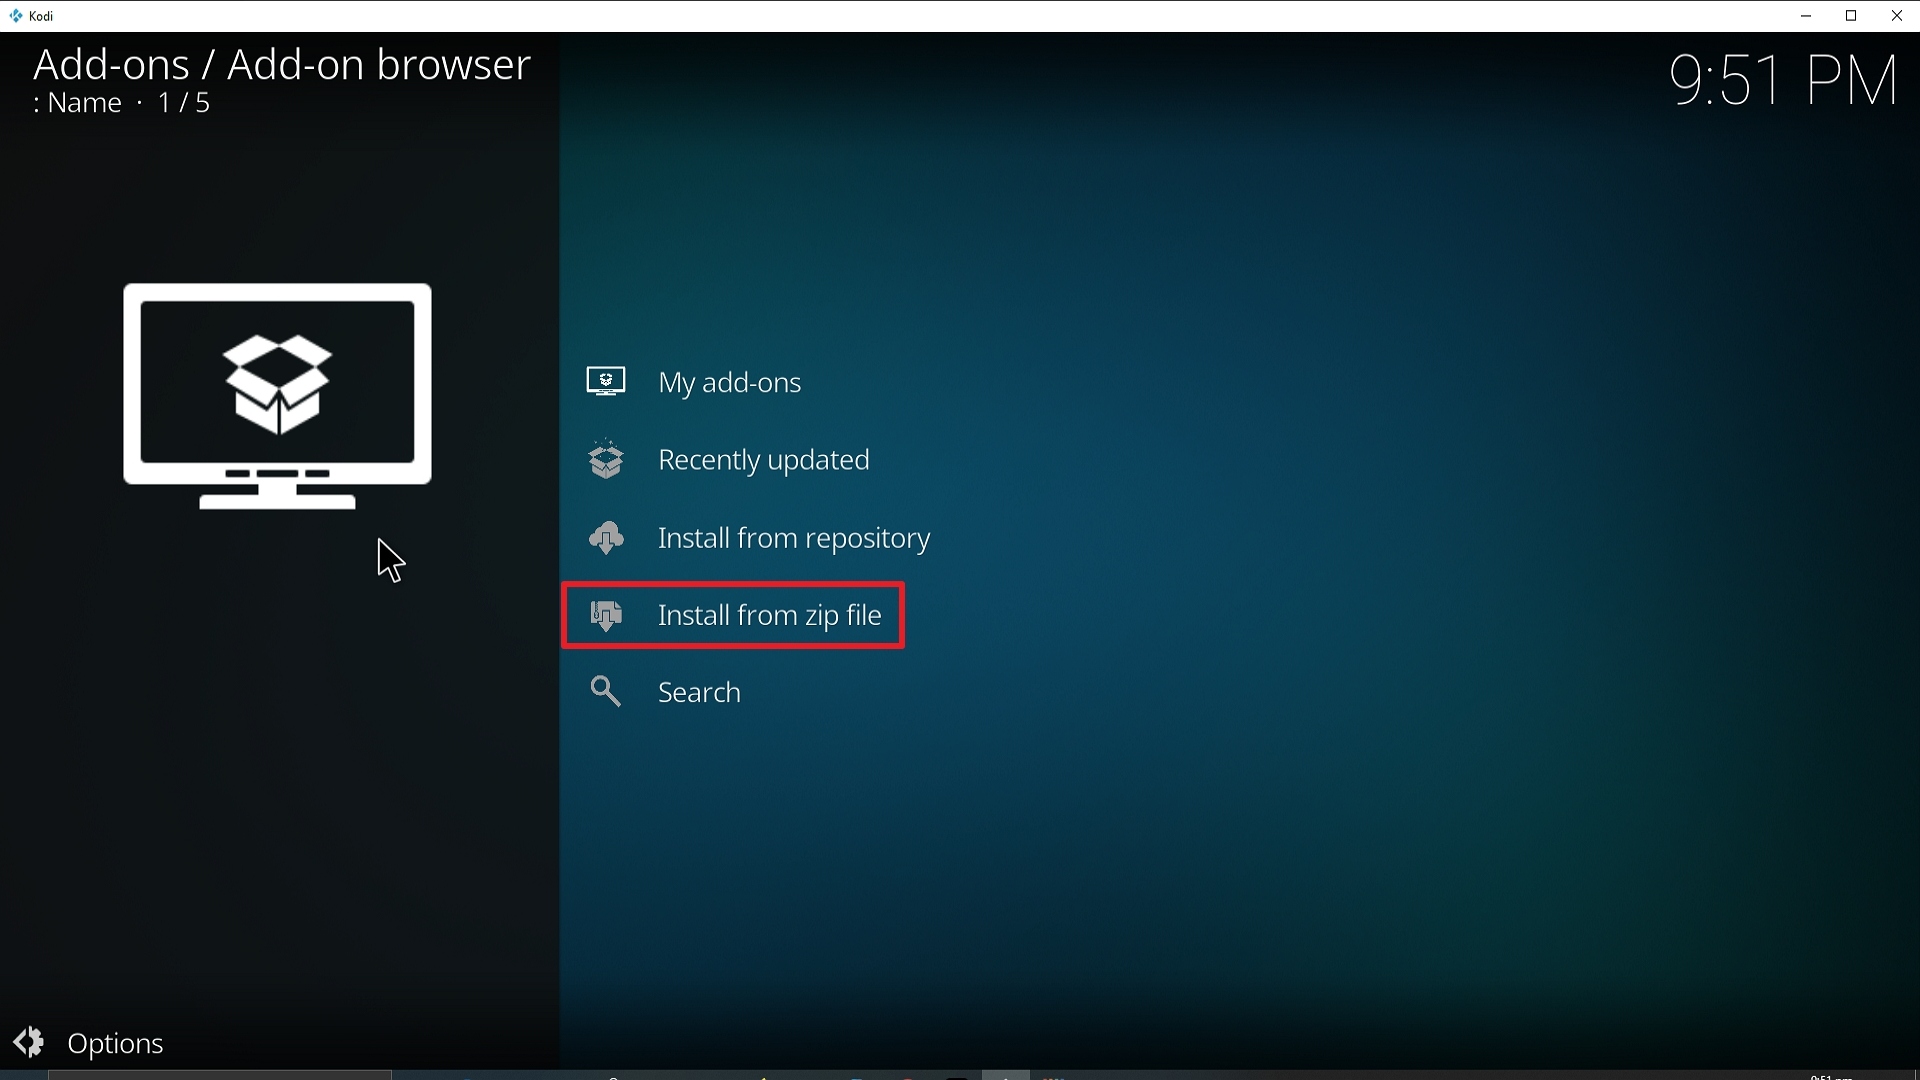
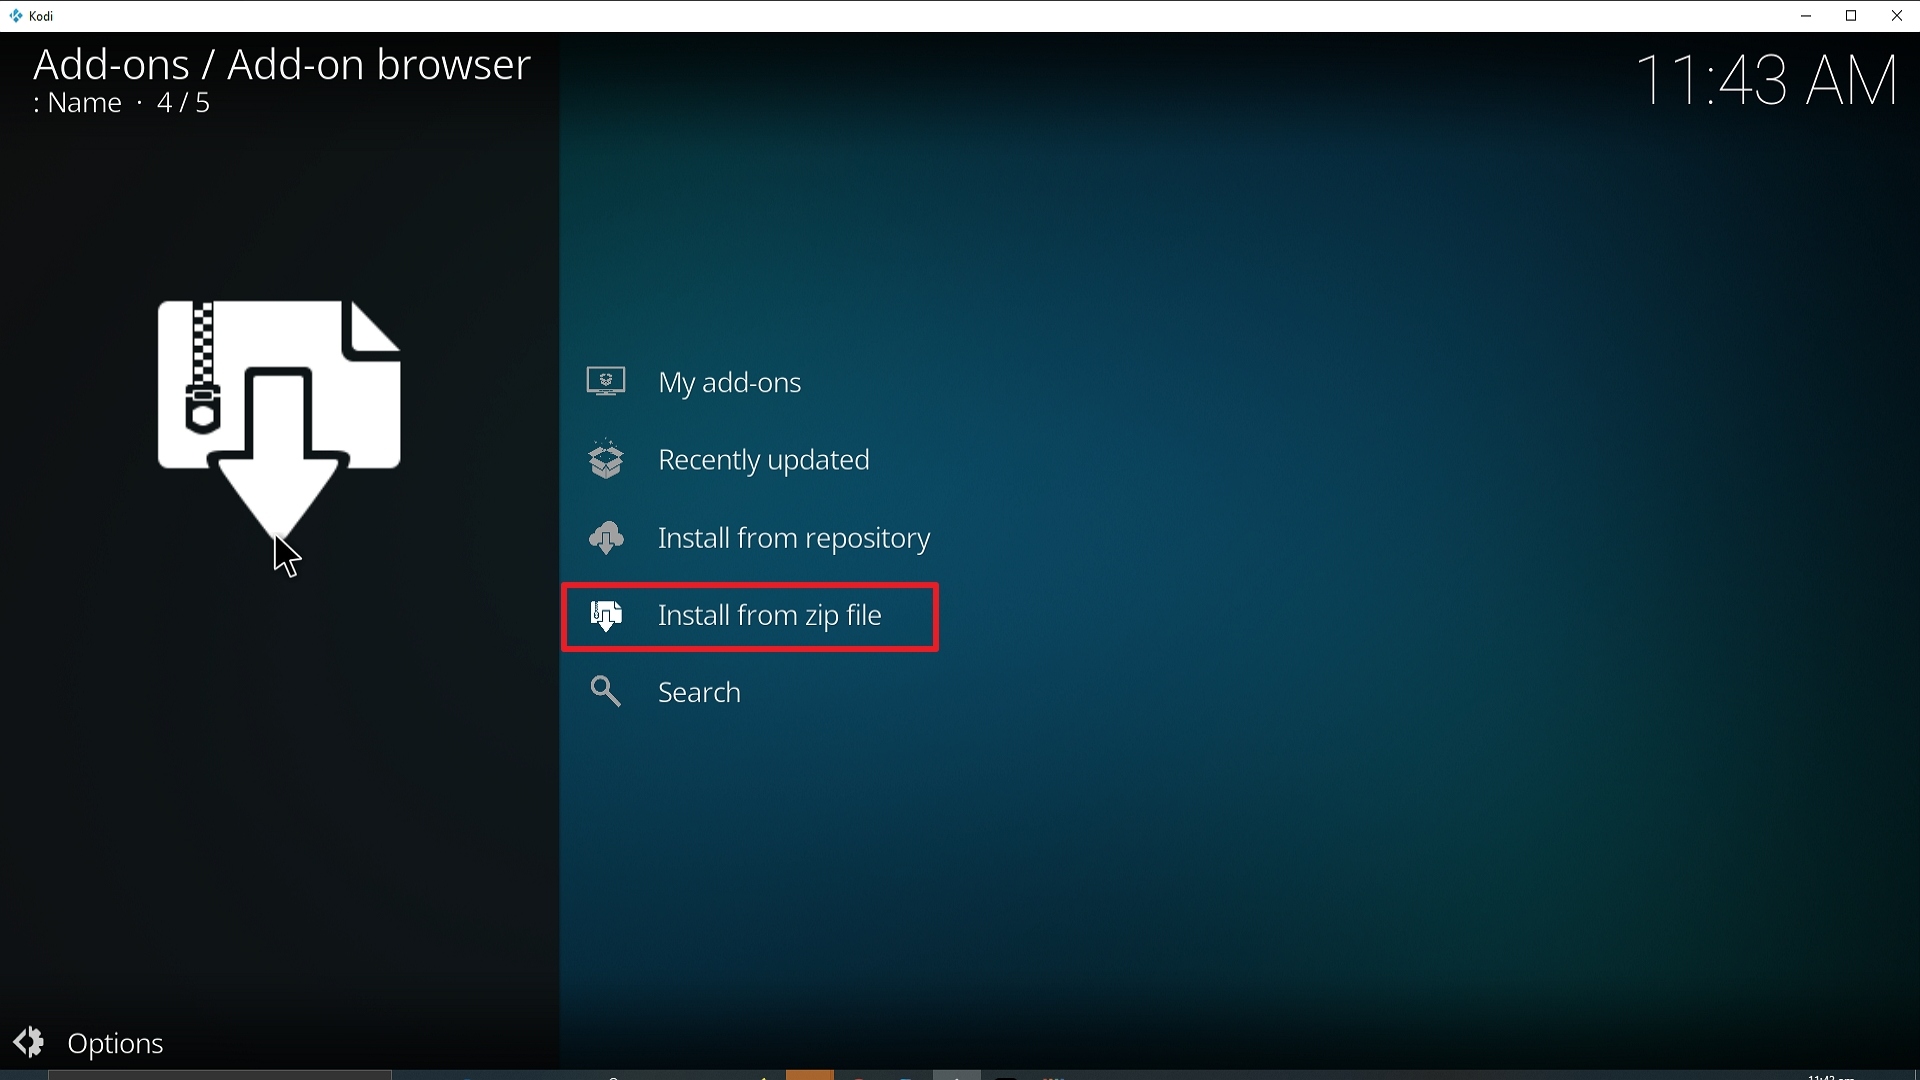
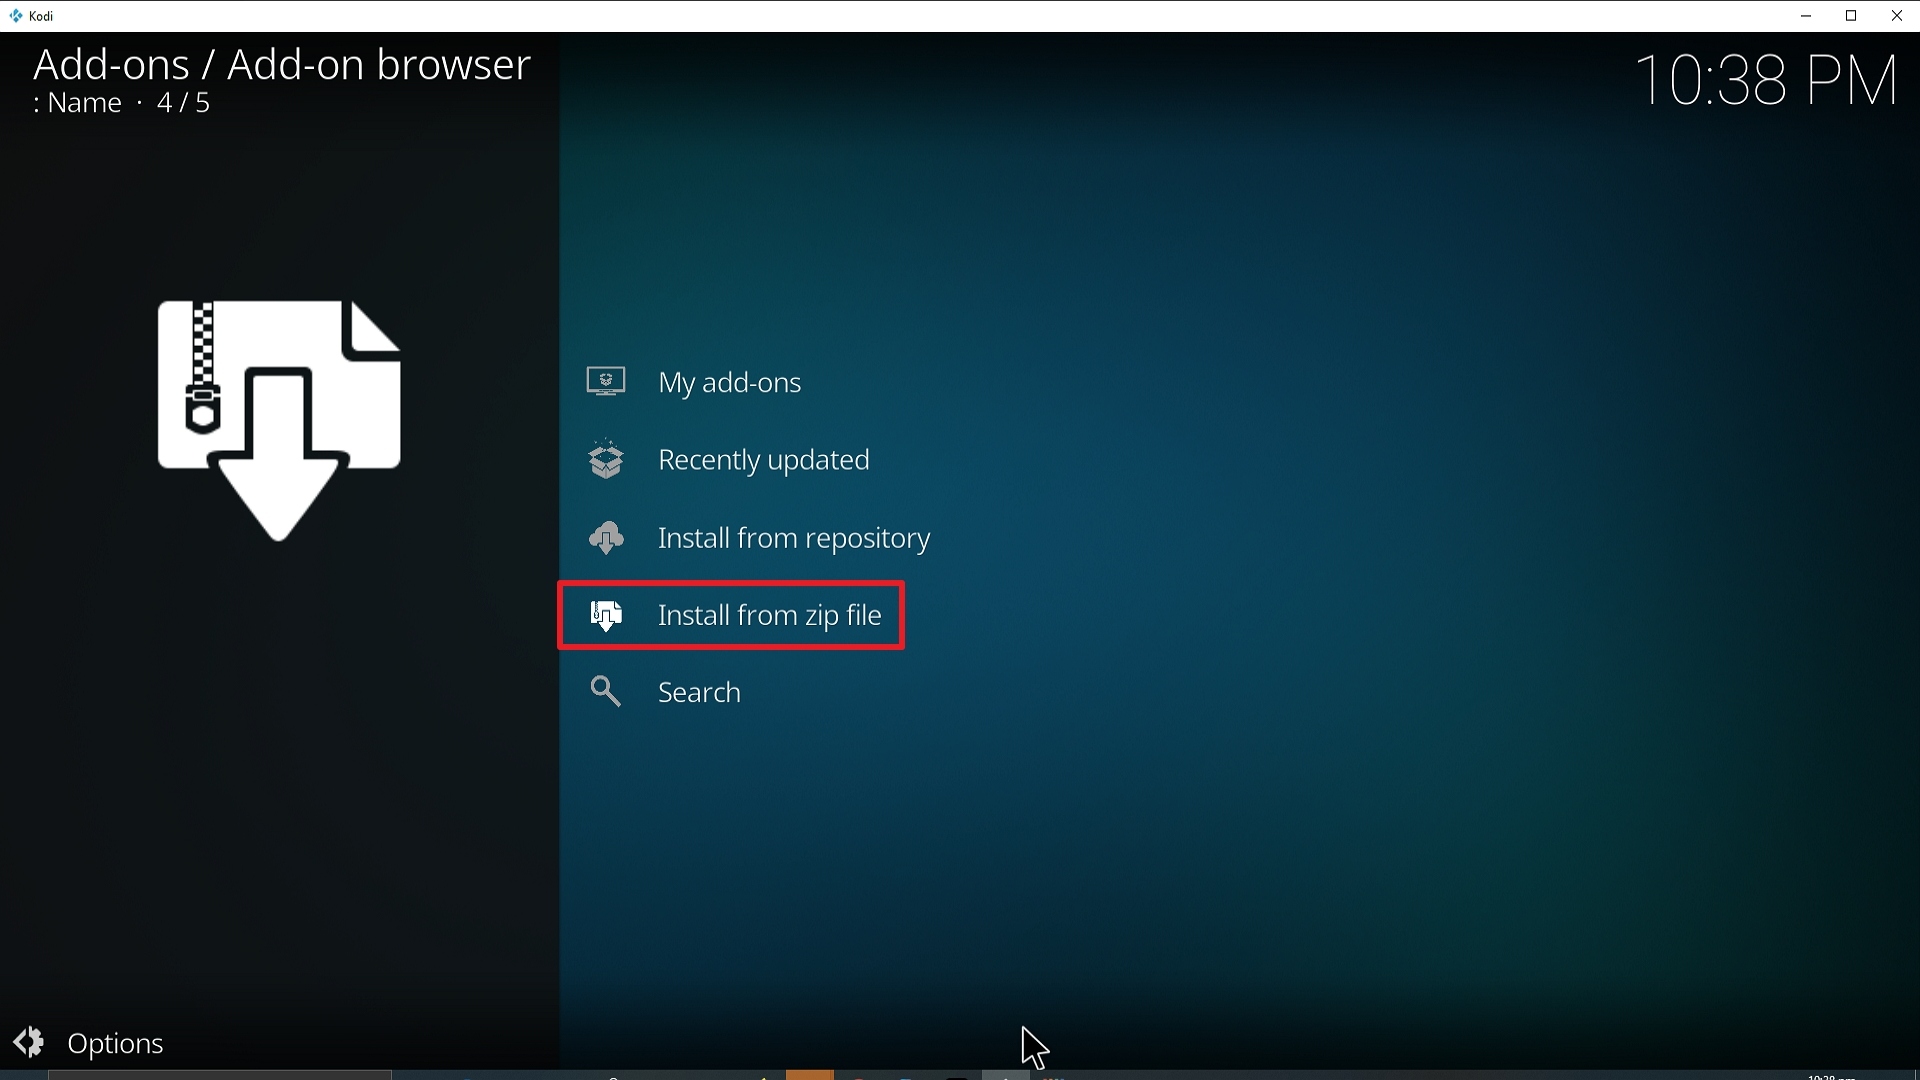
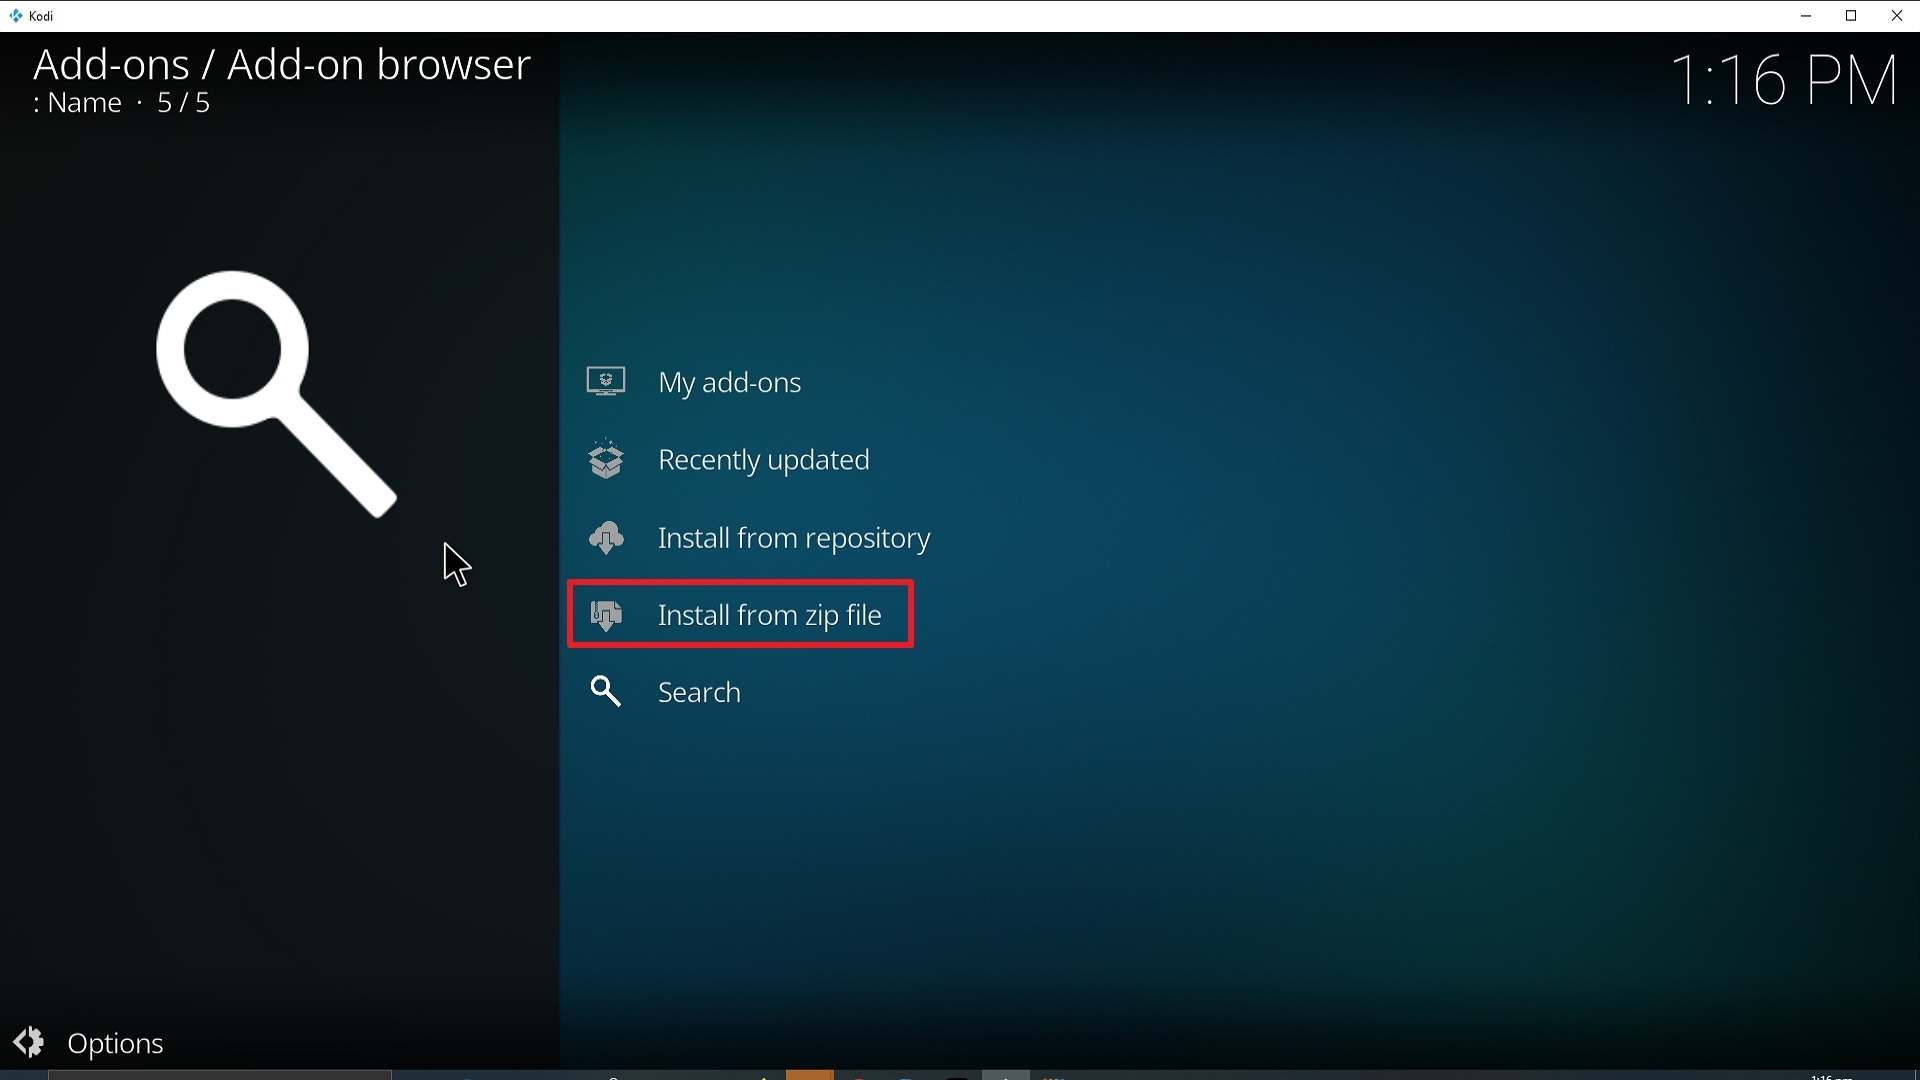
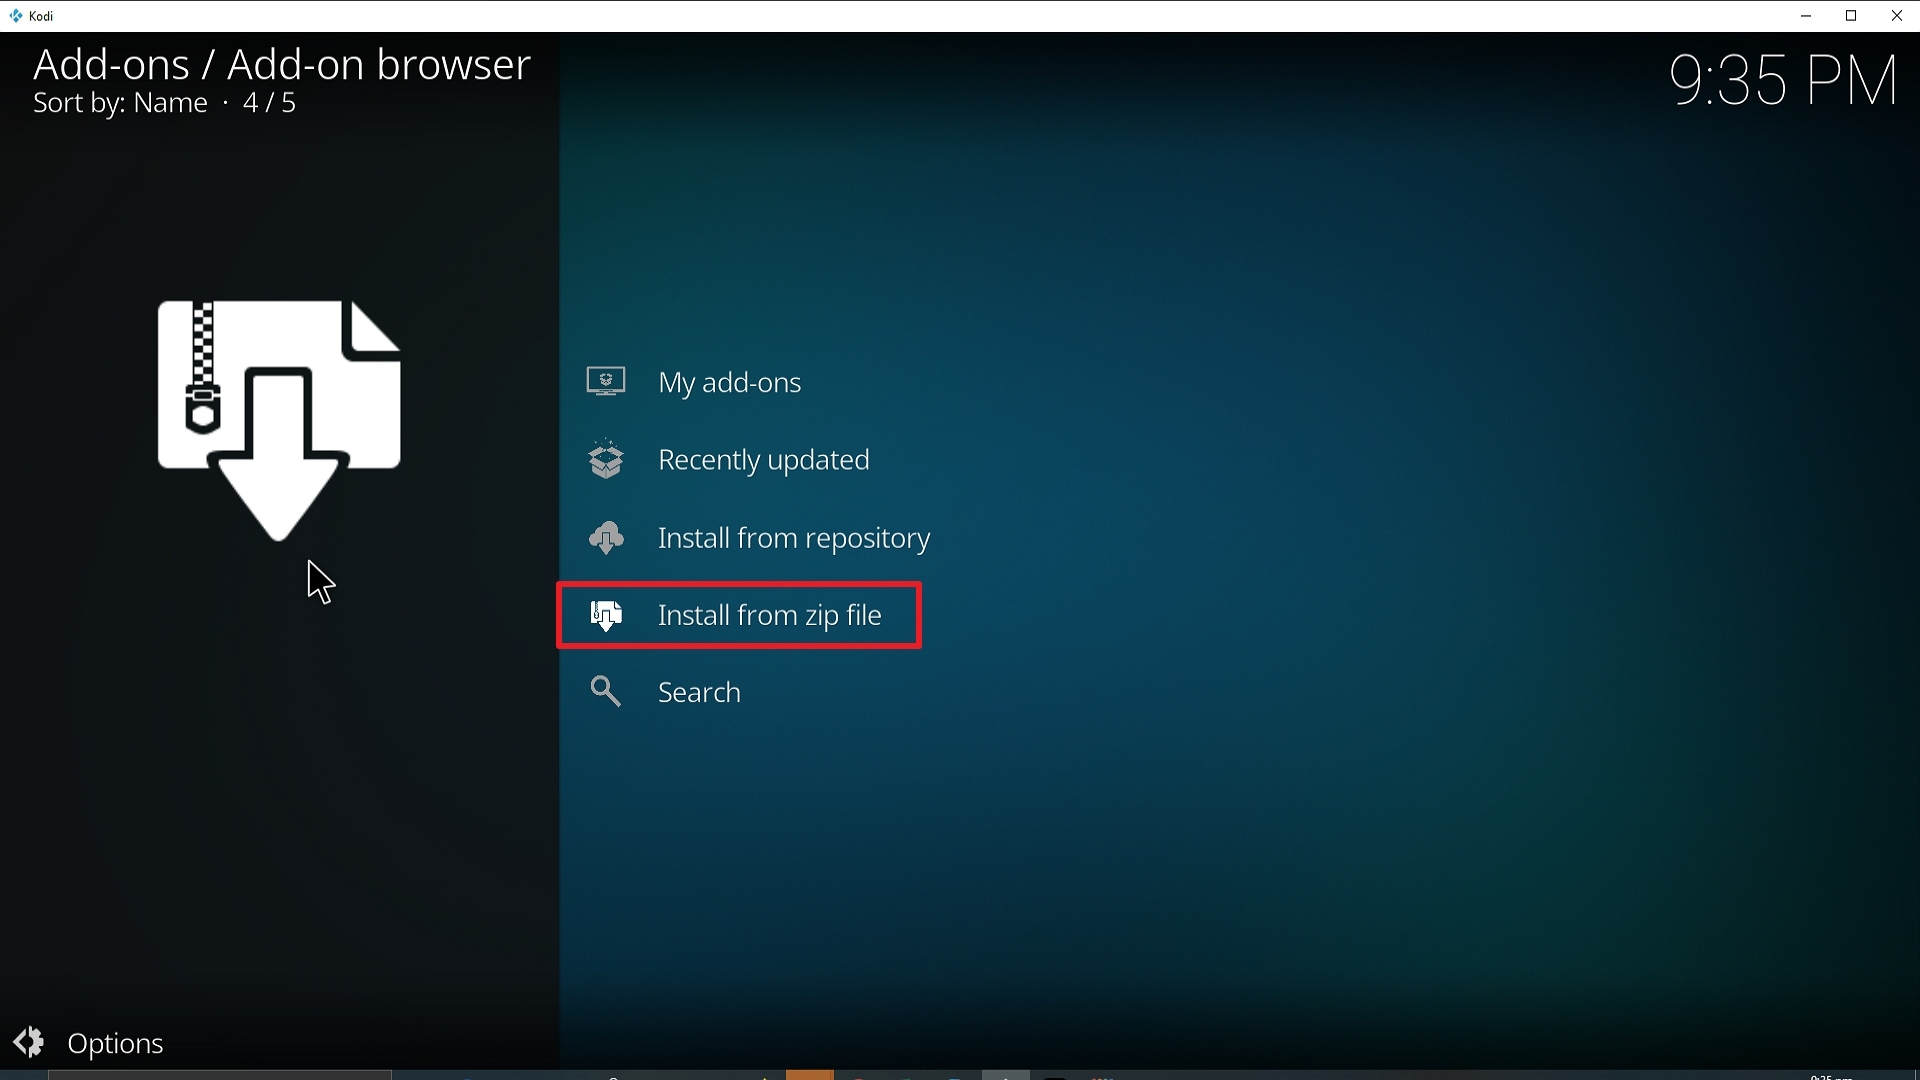
16. Select install from zip file.

Step 16 Installing Enigma Kodi addon on Kodi


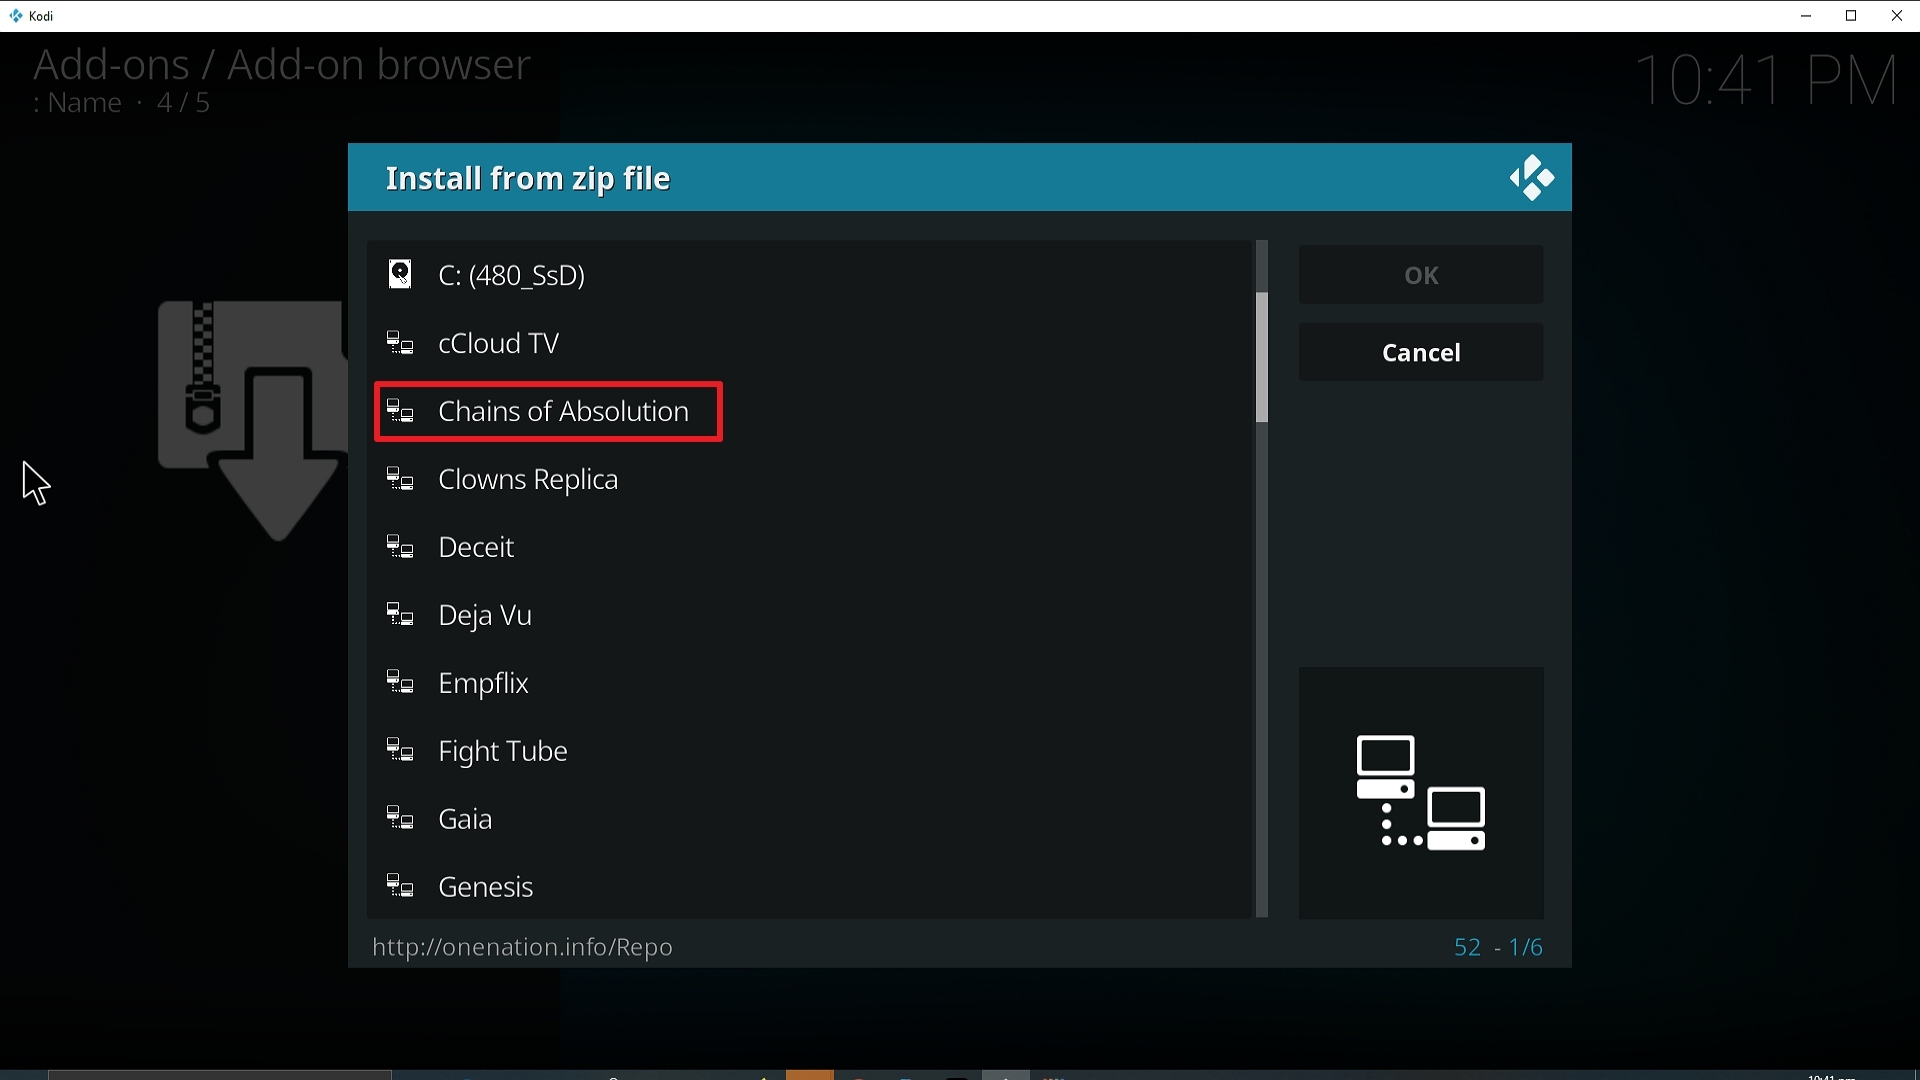
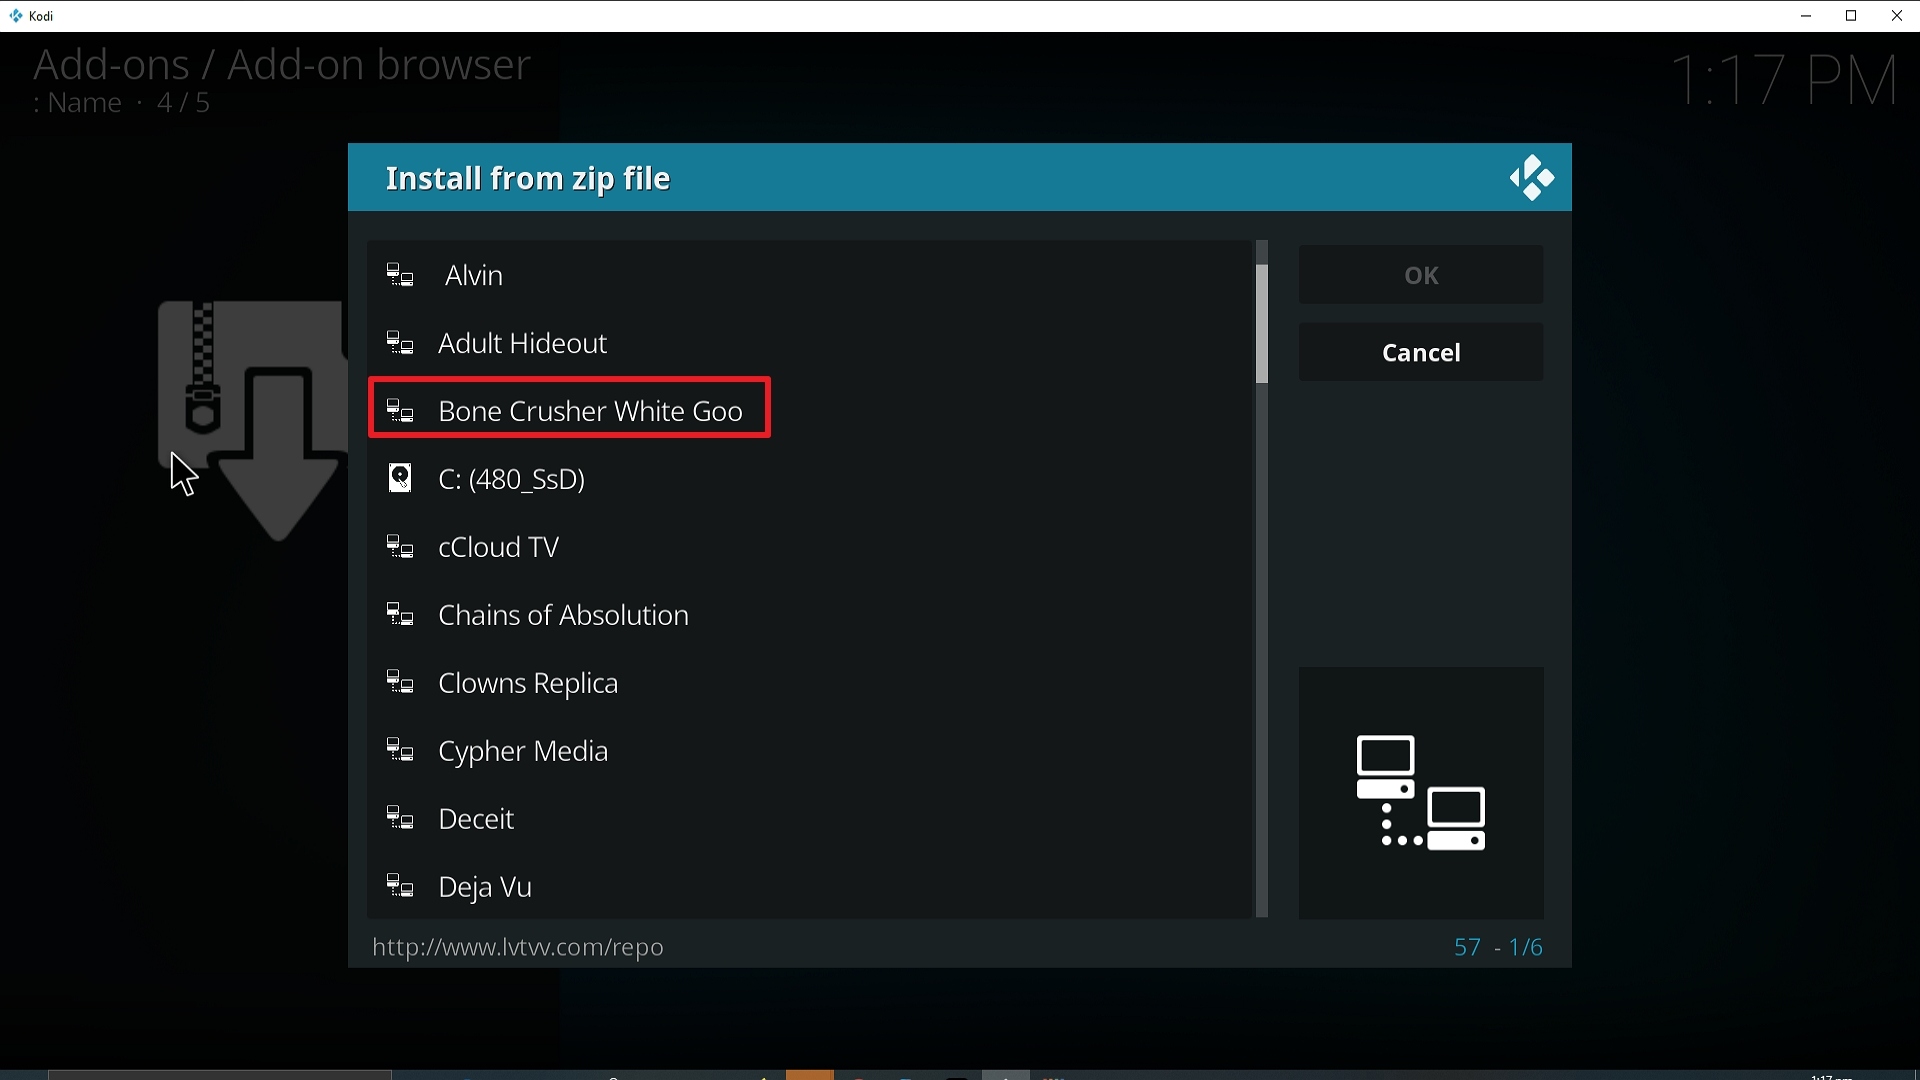
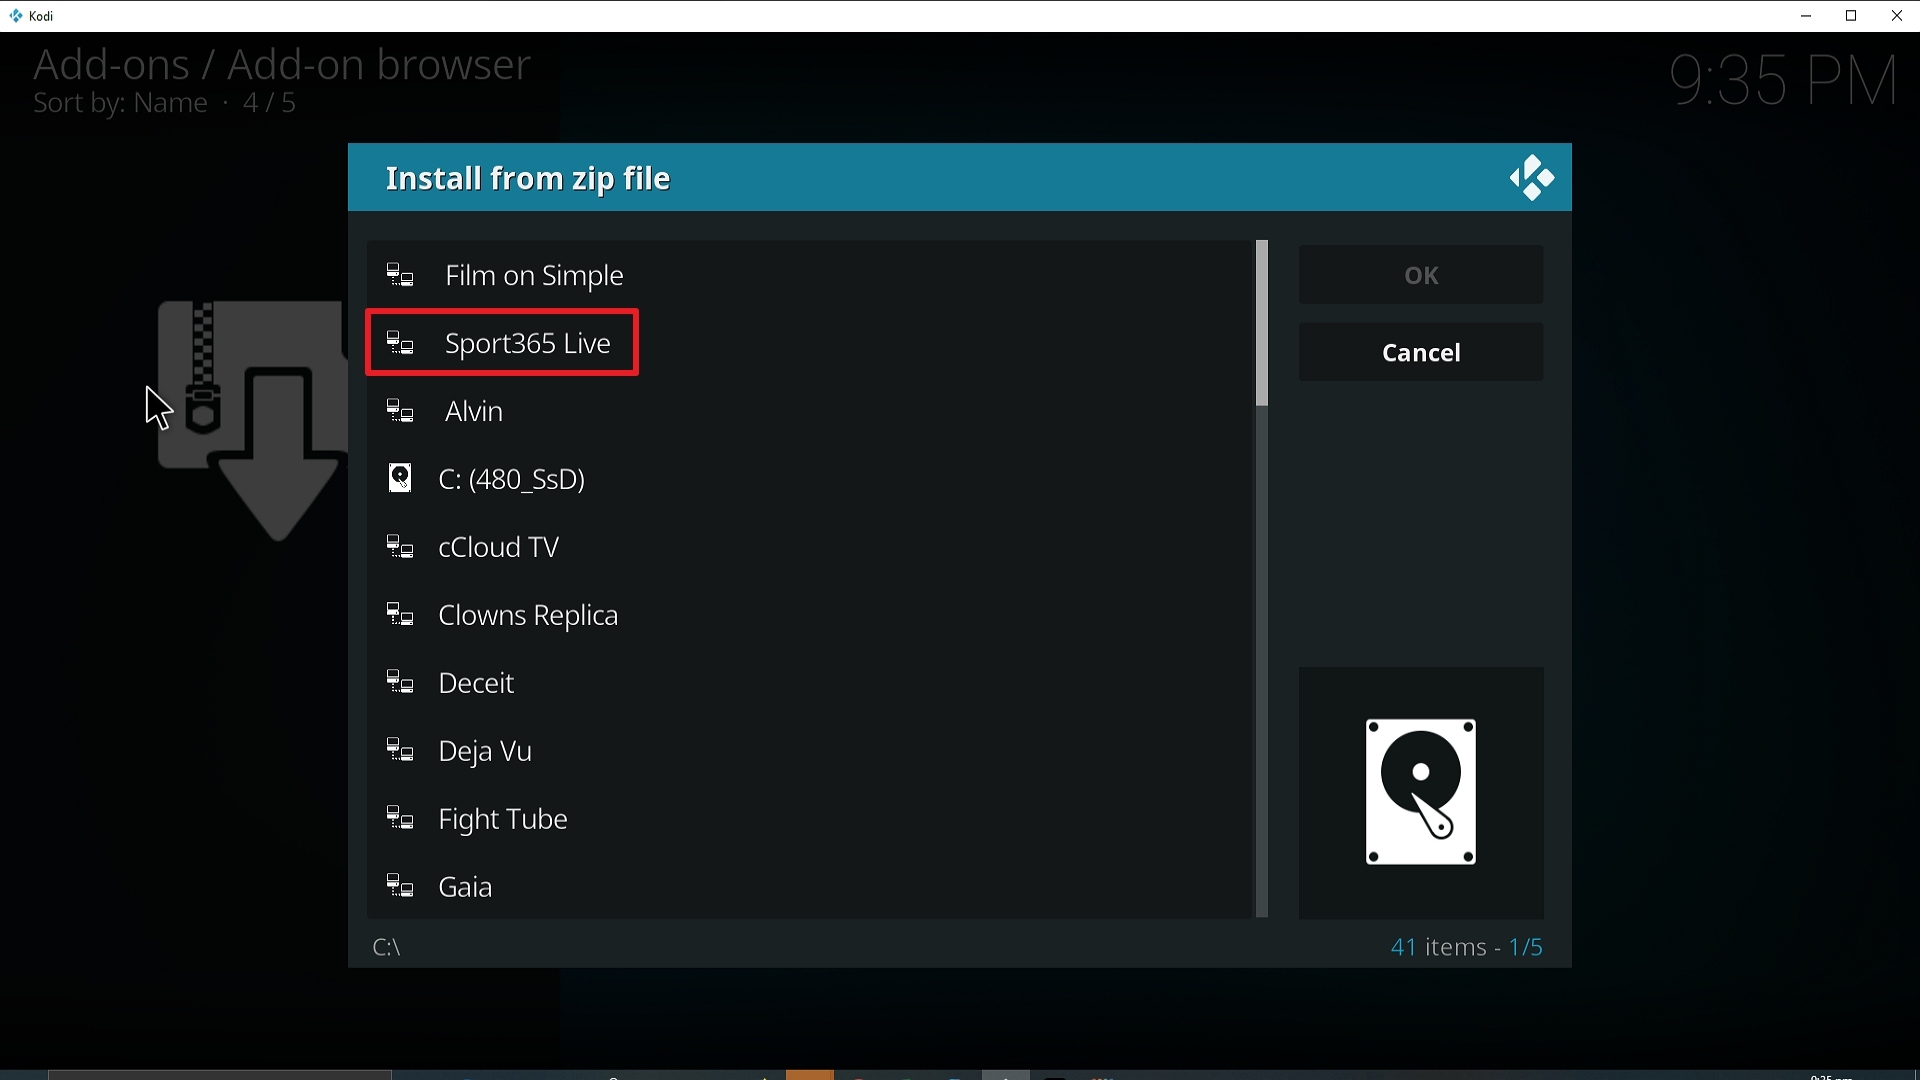
17. Click on Enigma (or whatever you named the source).
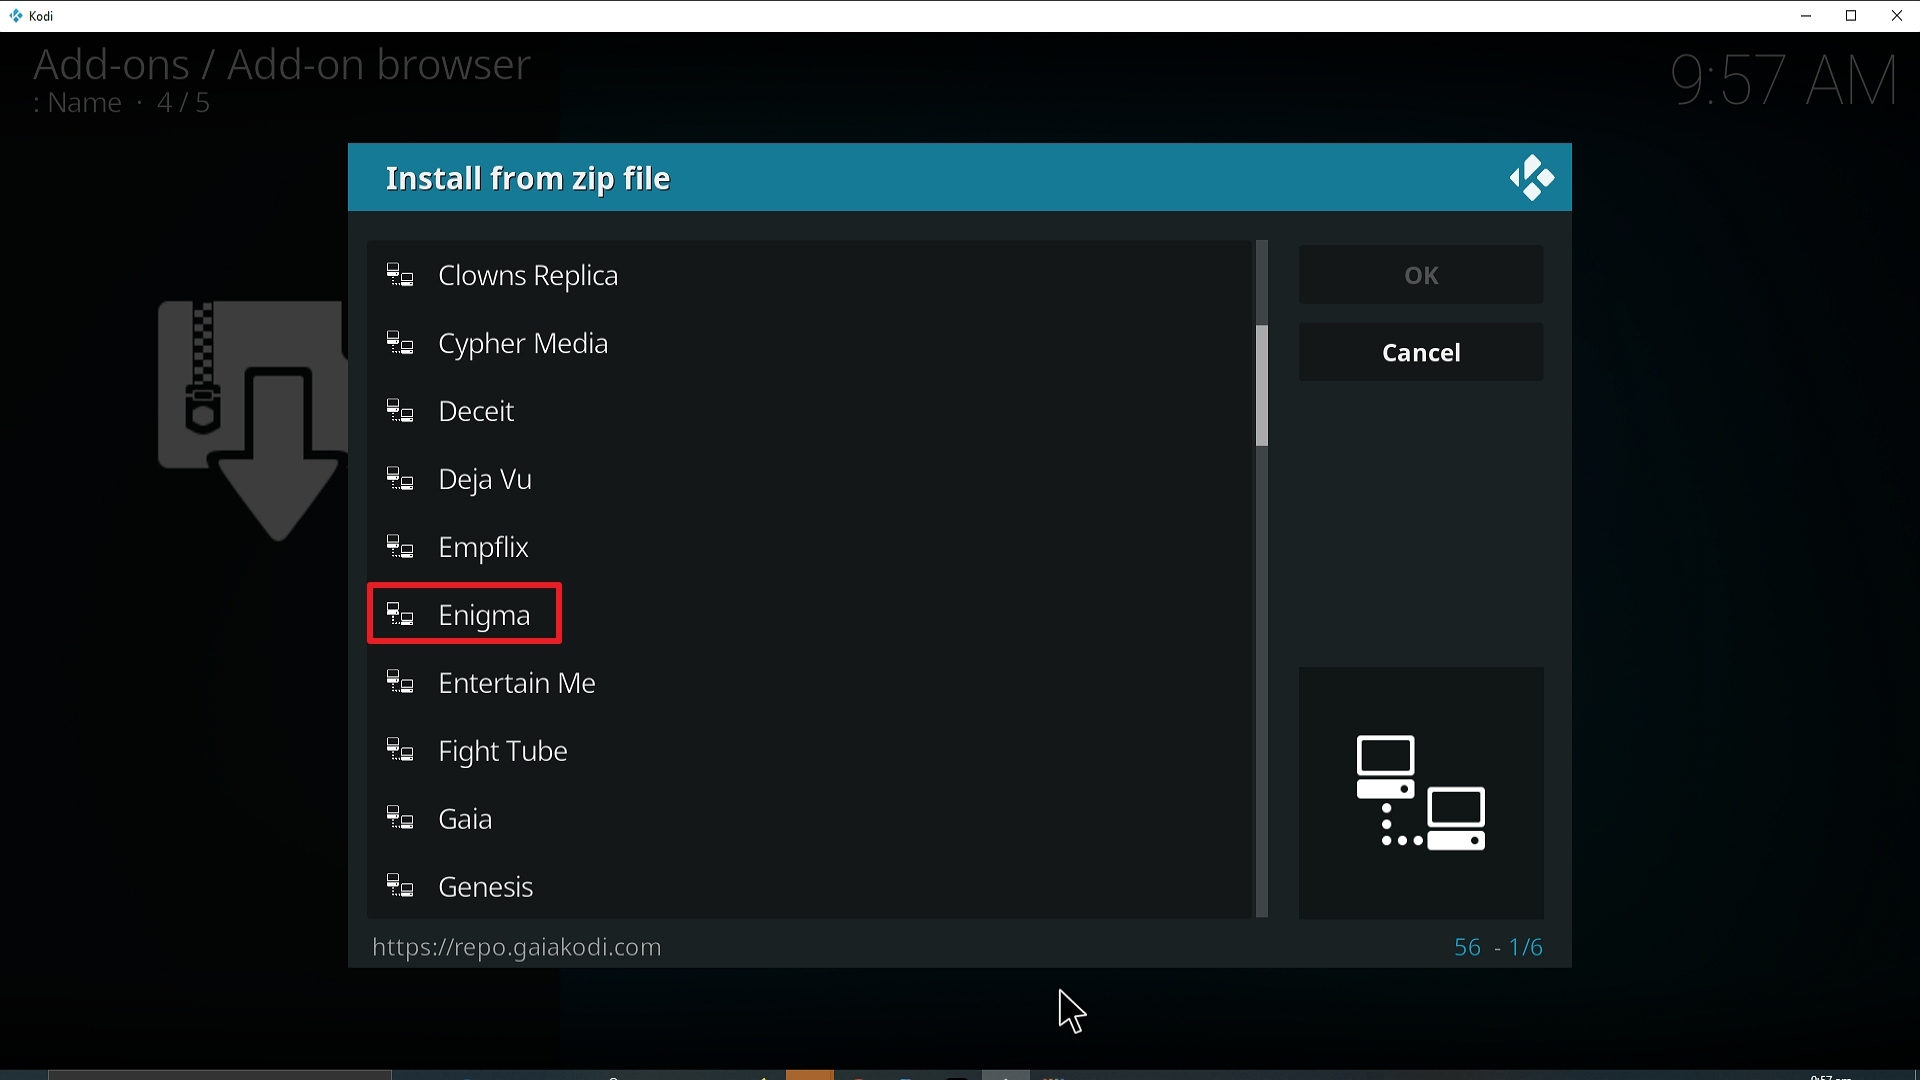
Step 17 Installing Enigma Kodi addon on Kodi


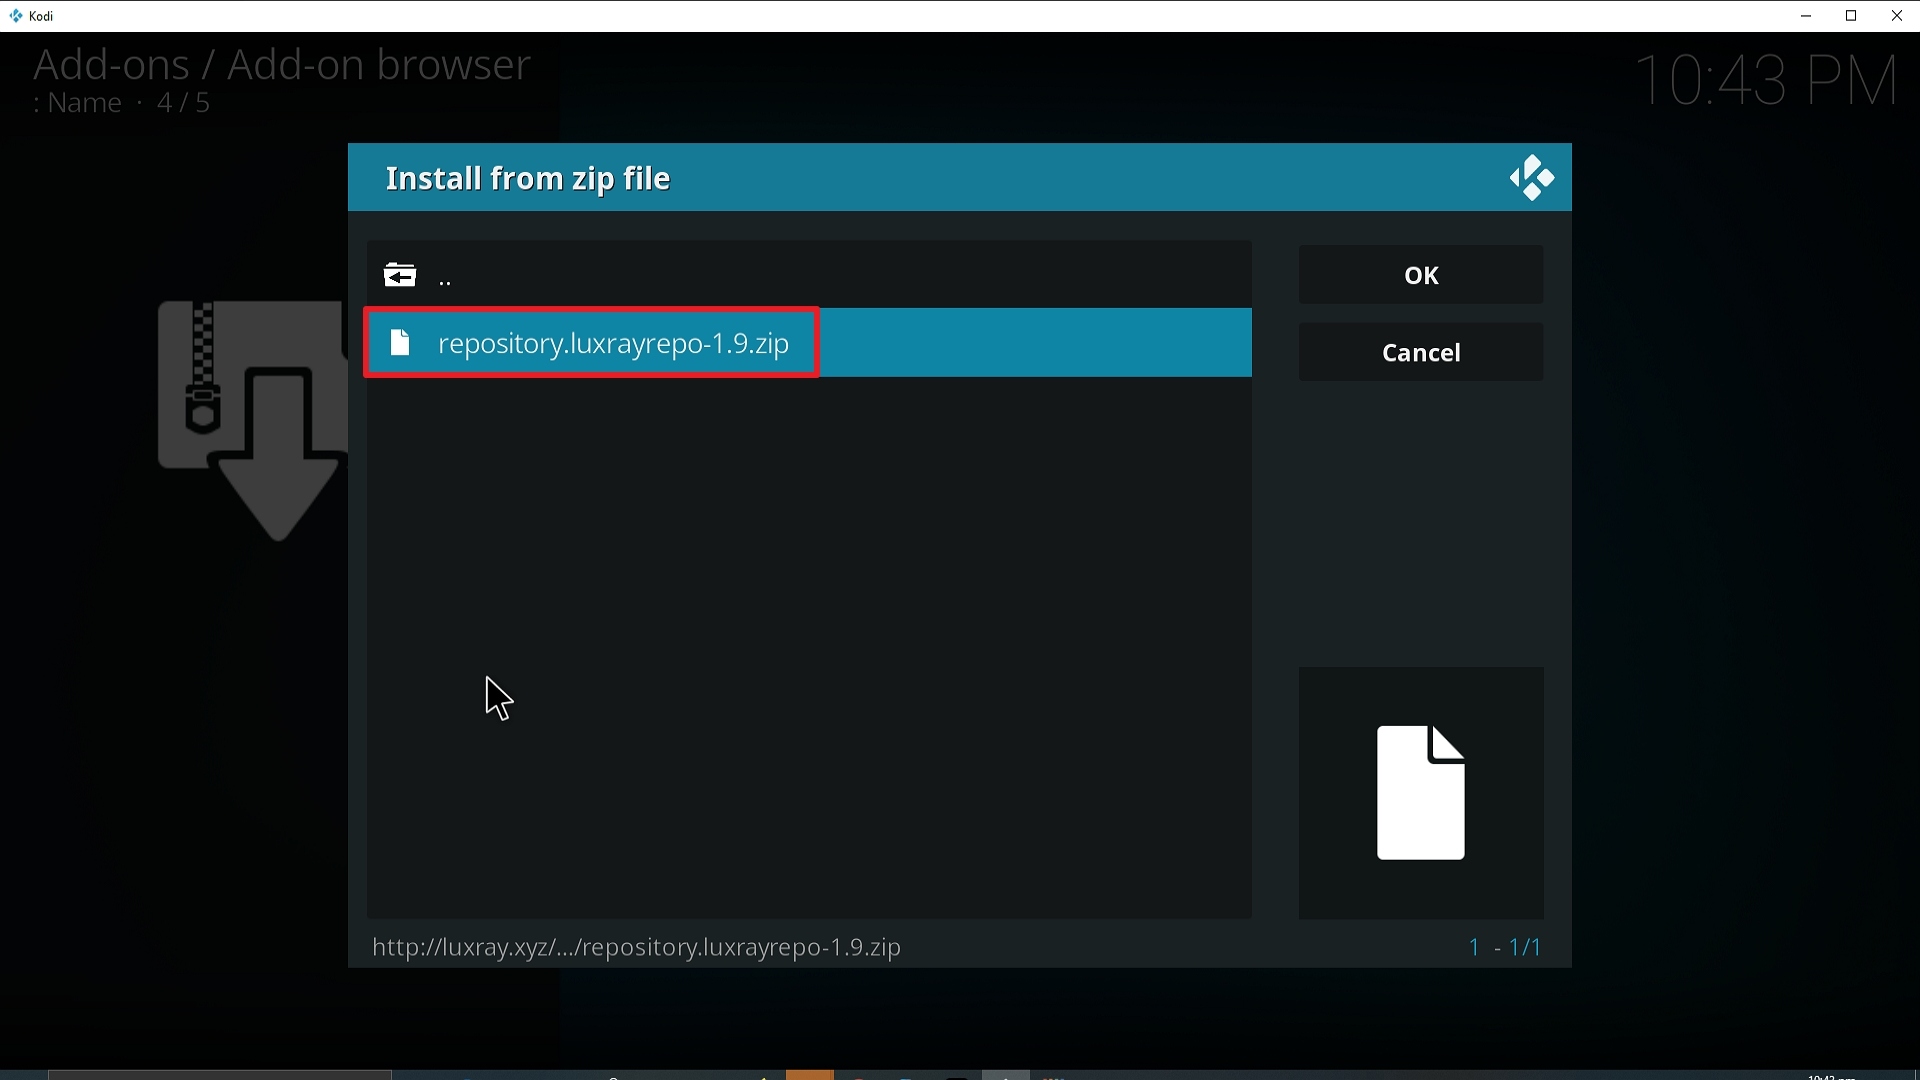
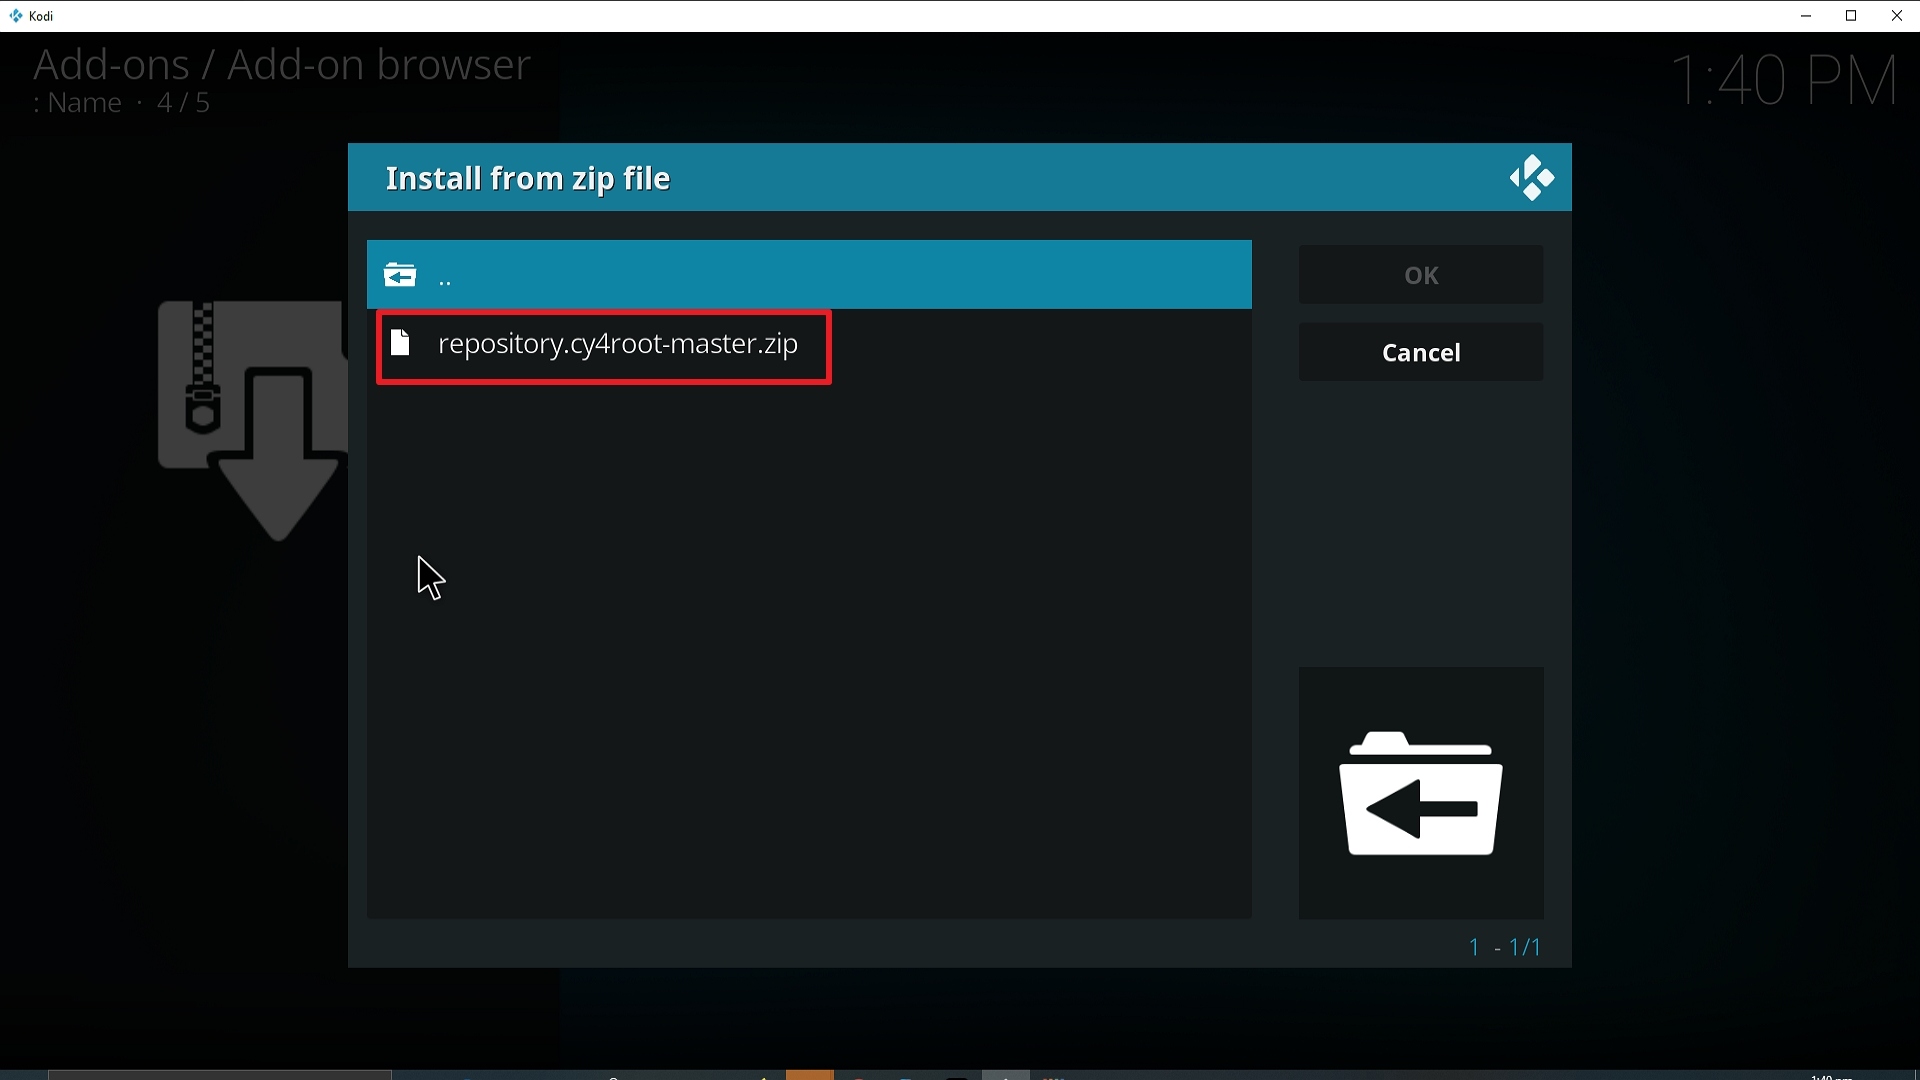
18. Click on repository.onenation-1.0.7.zip
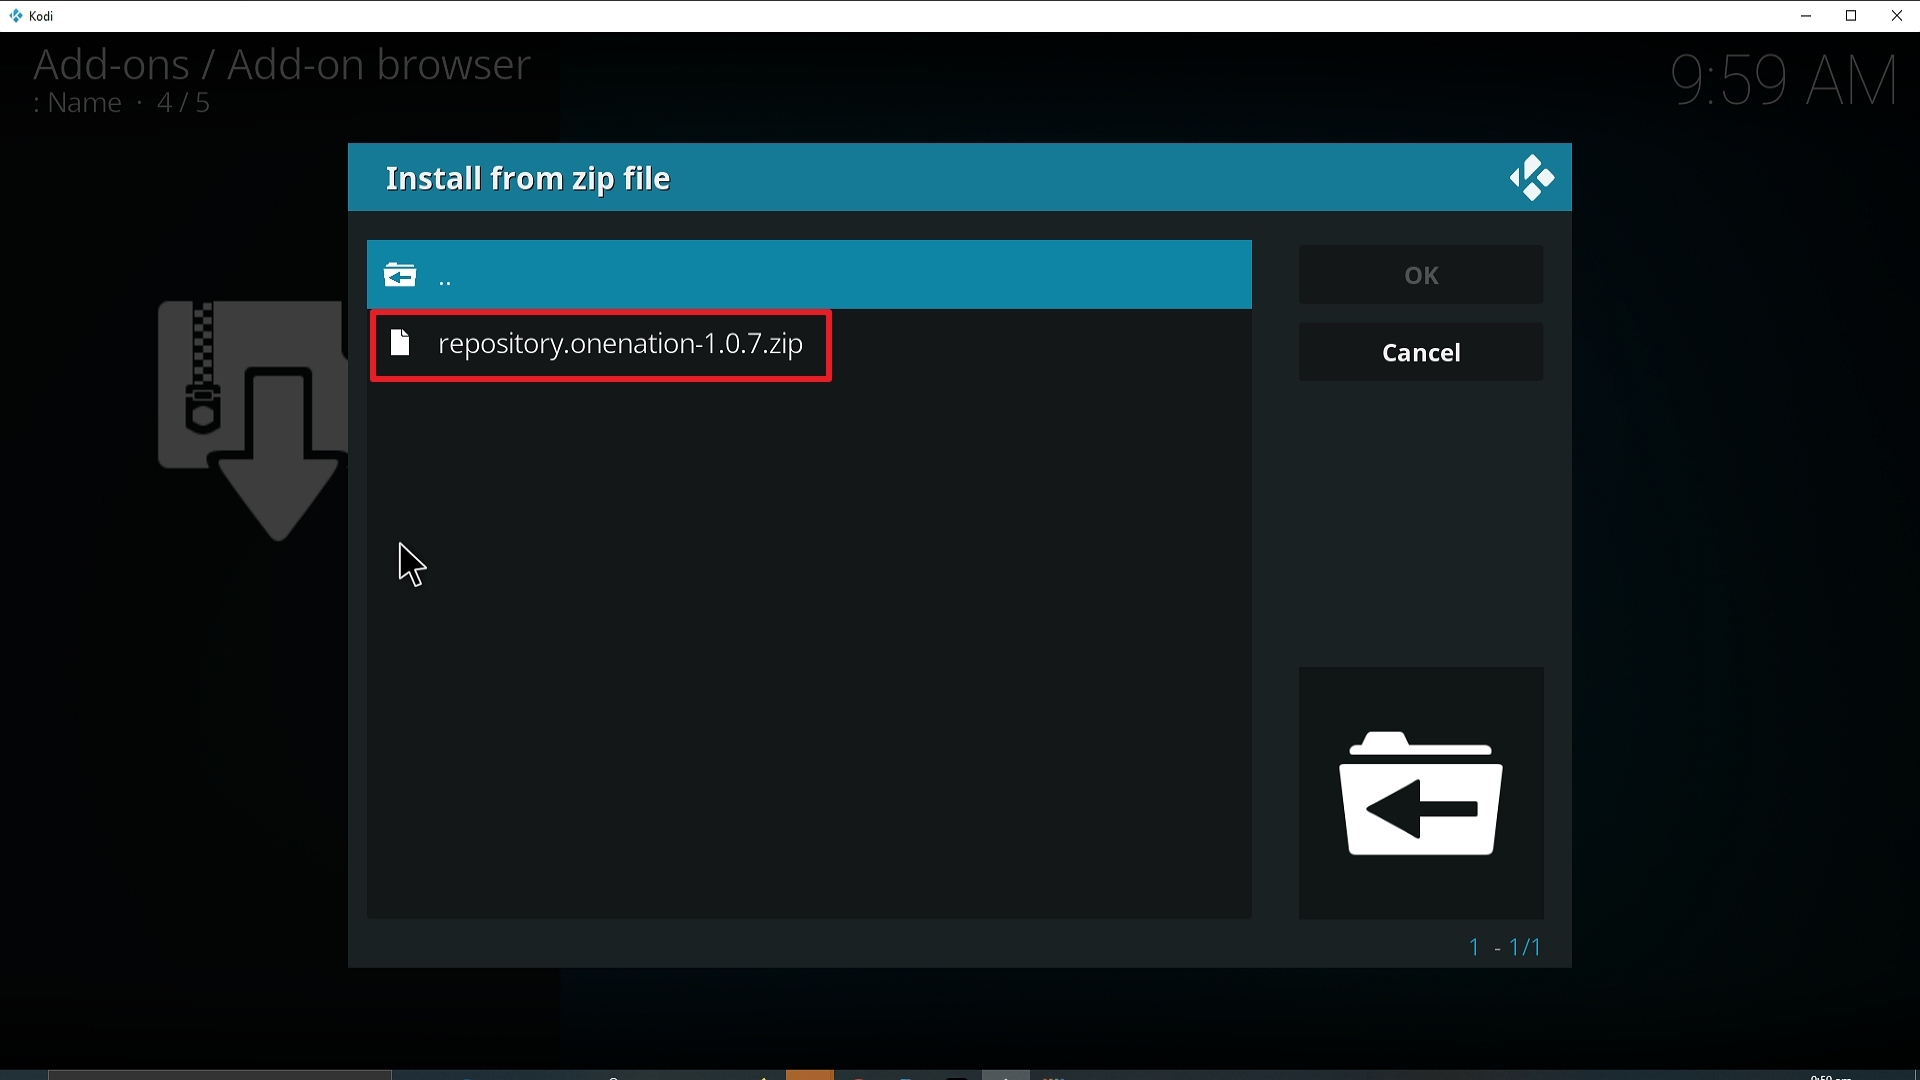
Step 18 Installing Enigma Kodi addon on Kodi


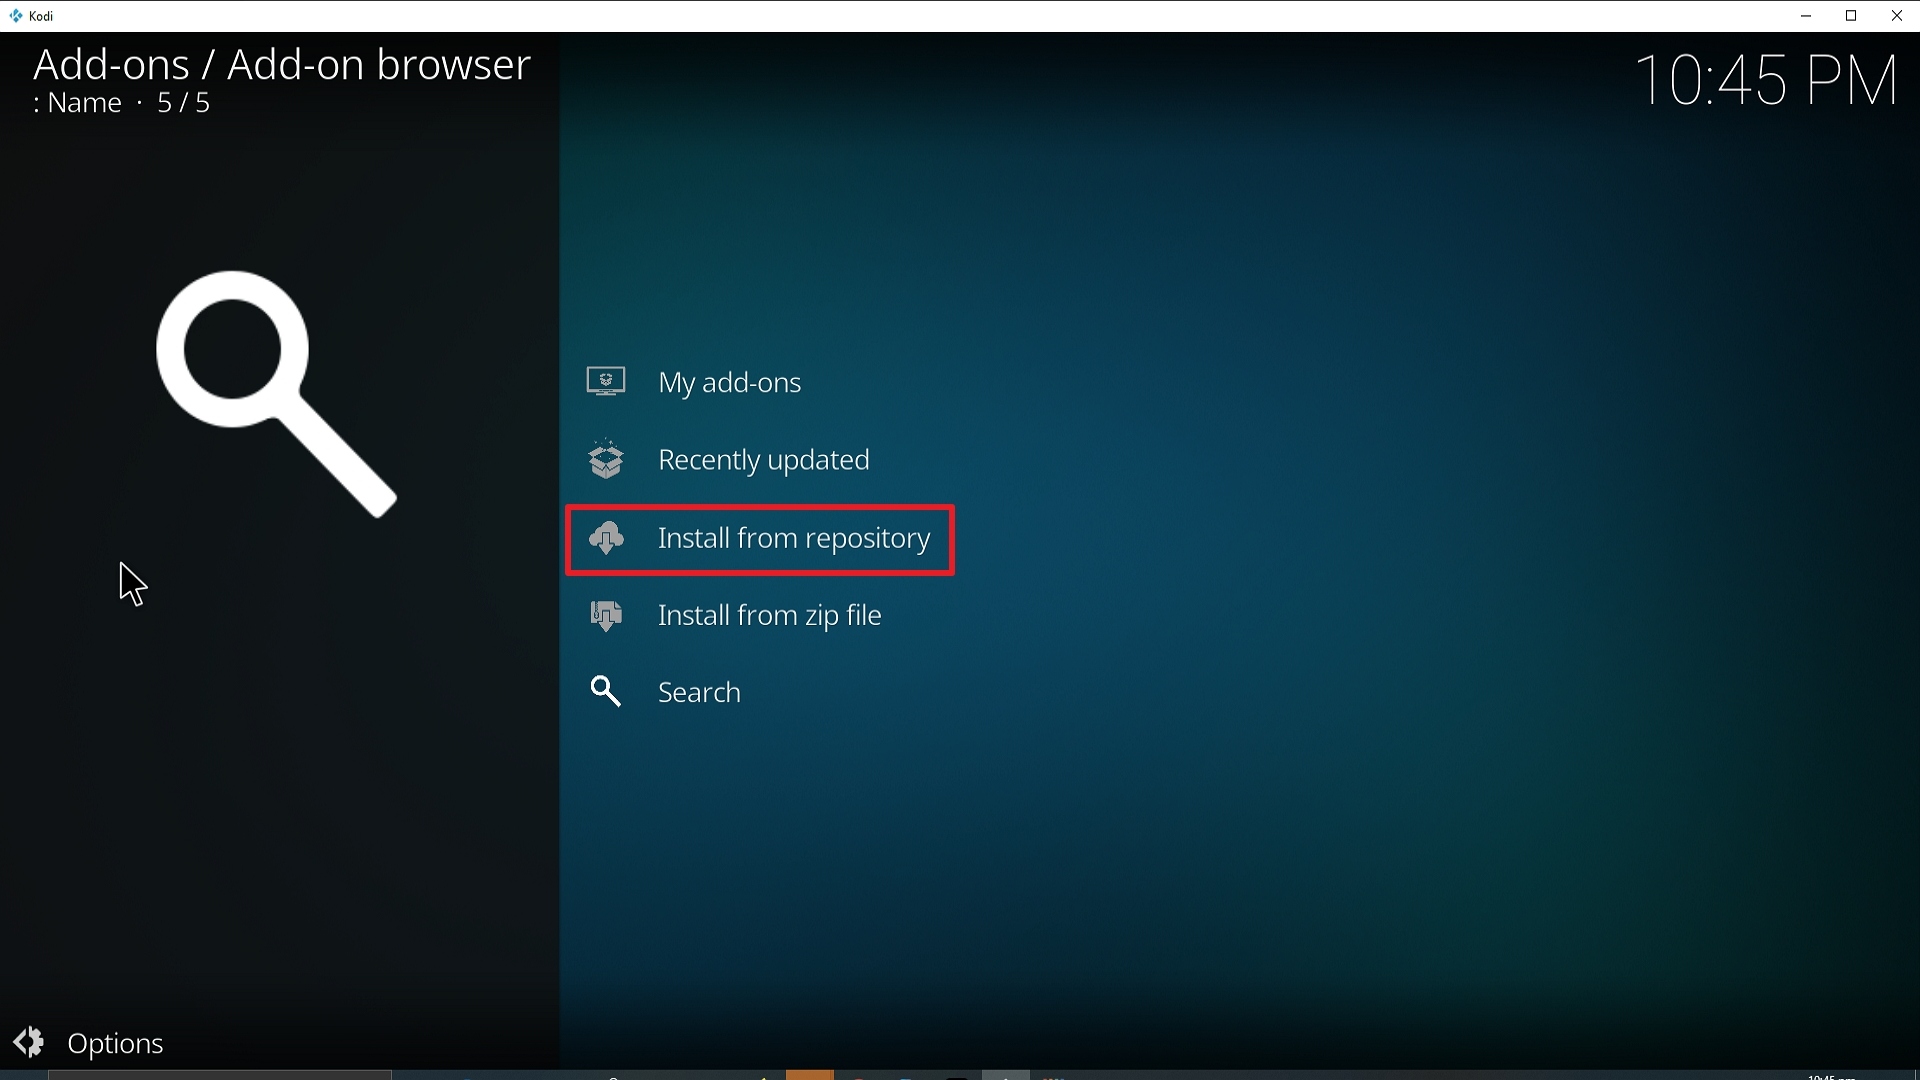
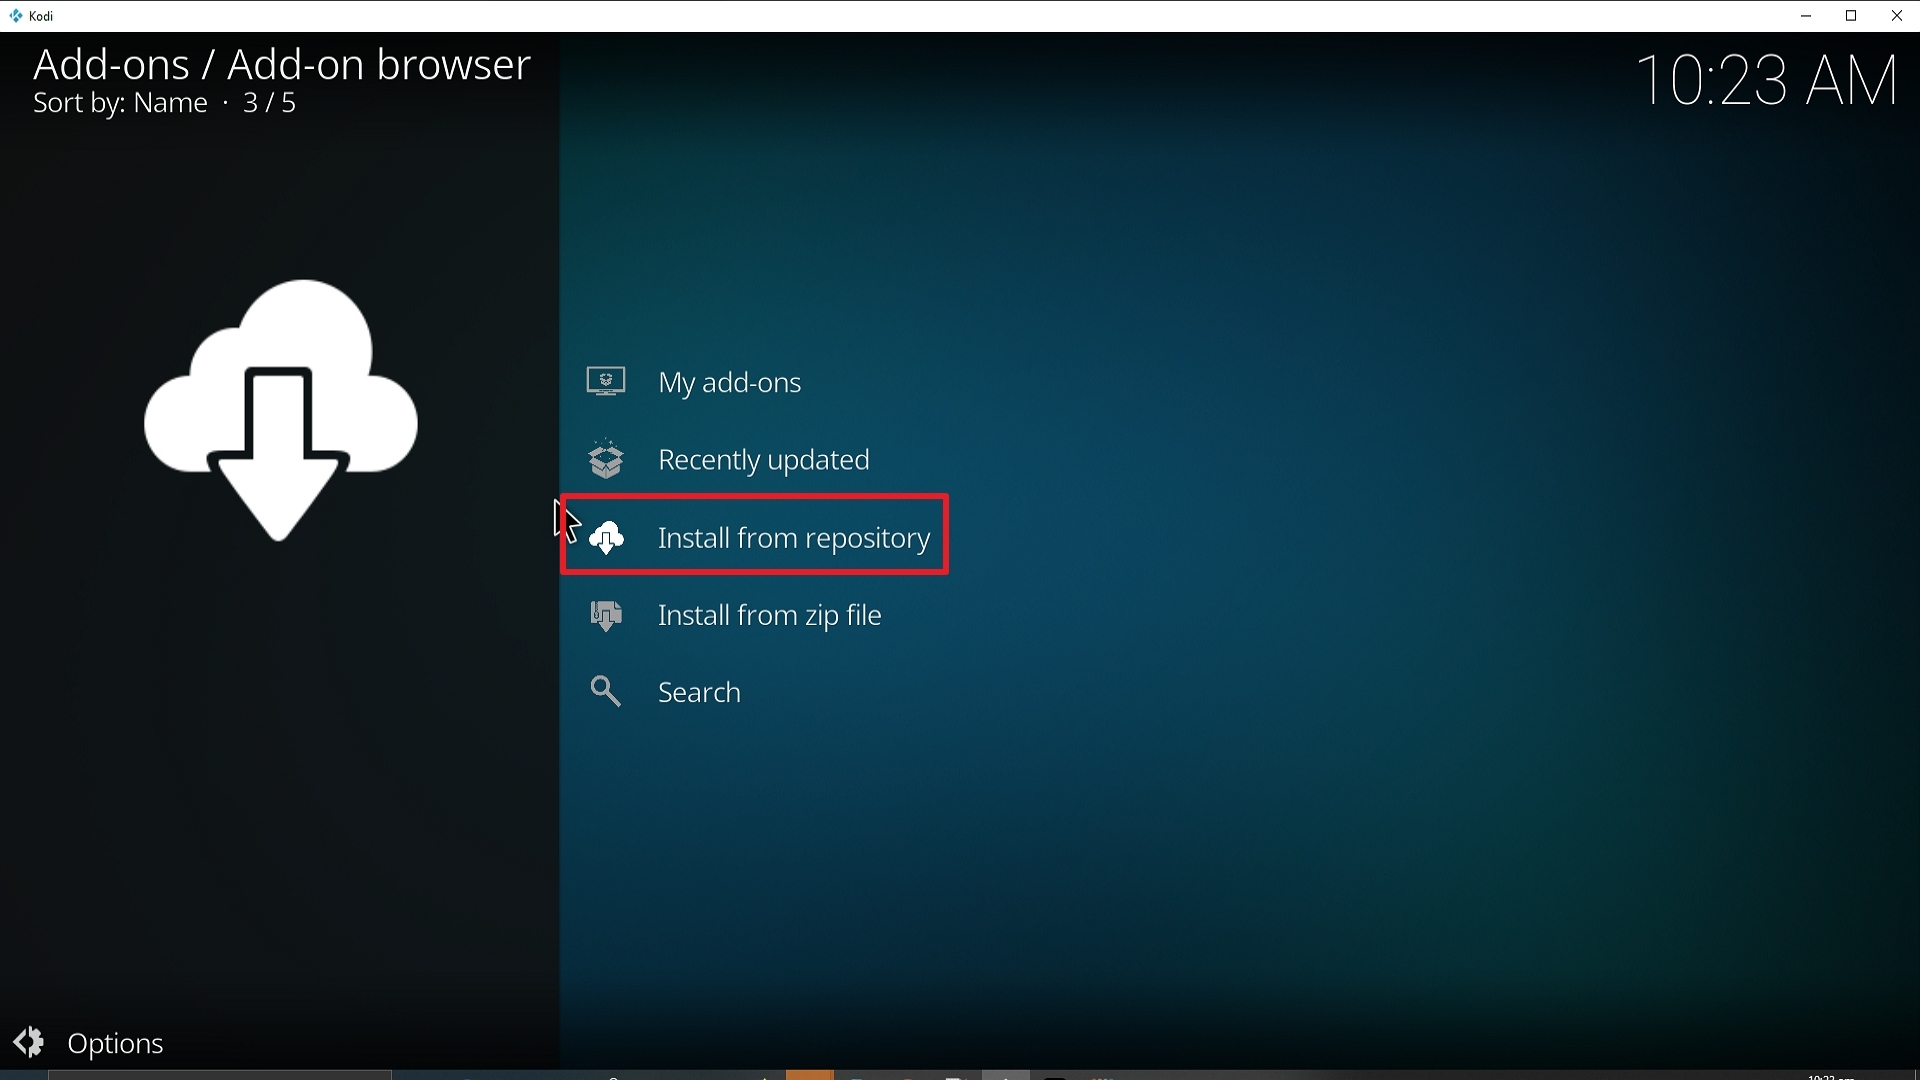
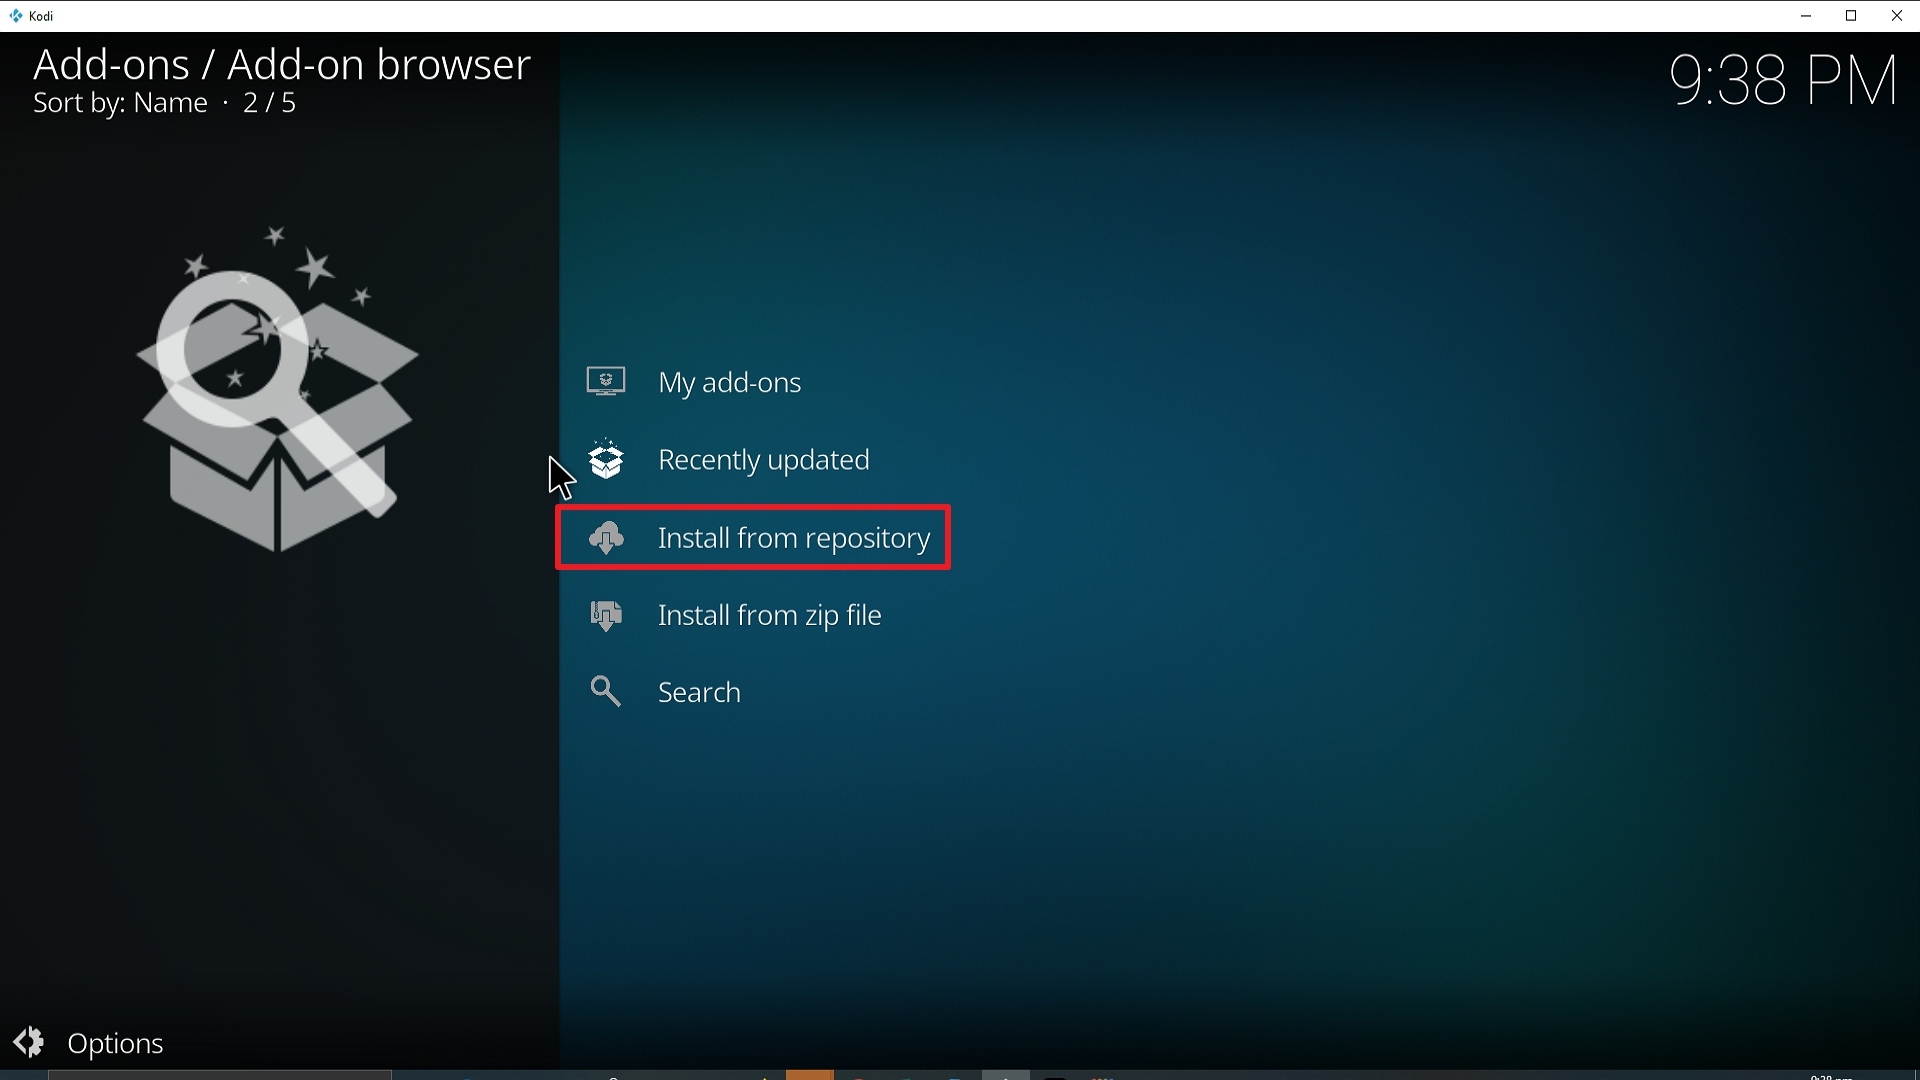
19. Select on Install from repository.
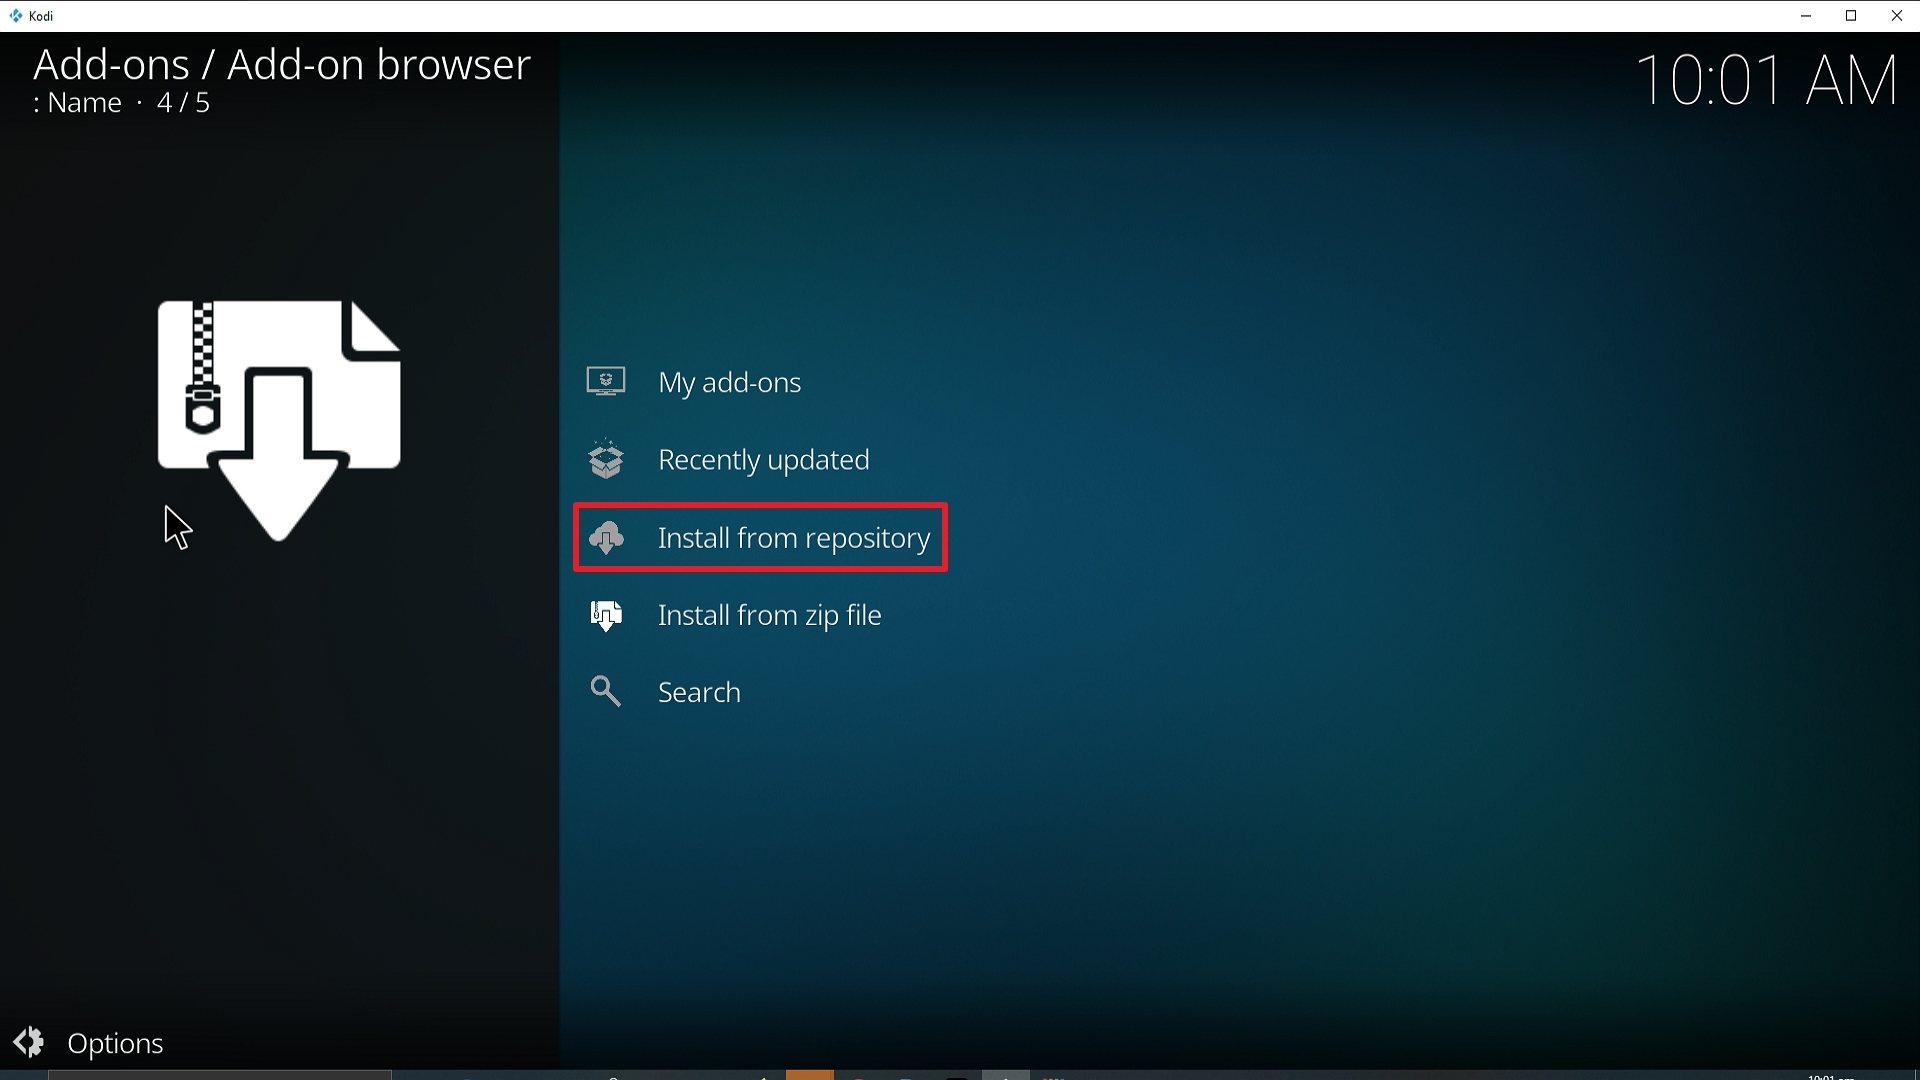
Step 19 Installing Enigma Kodi addon on Kodi


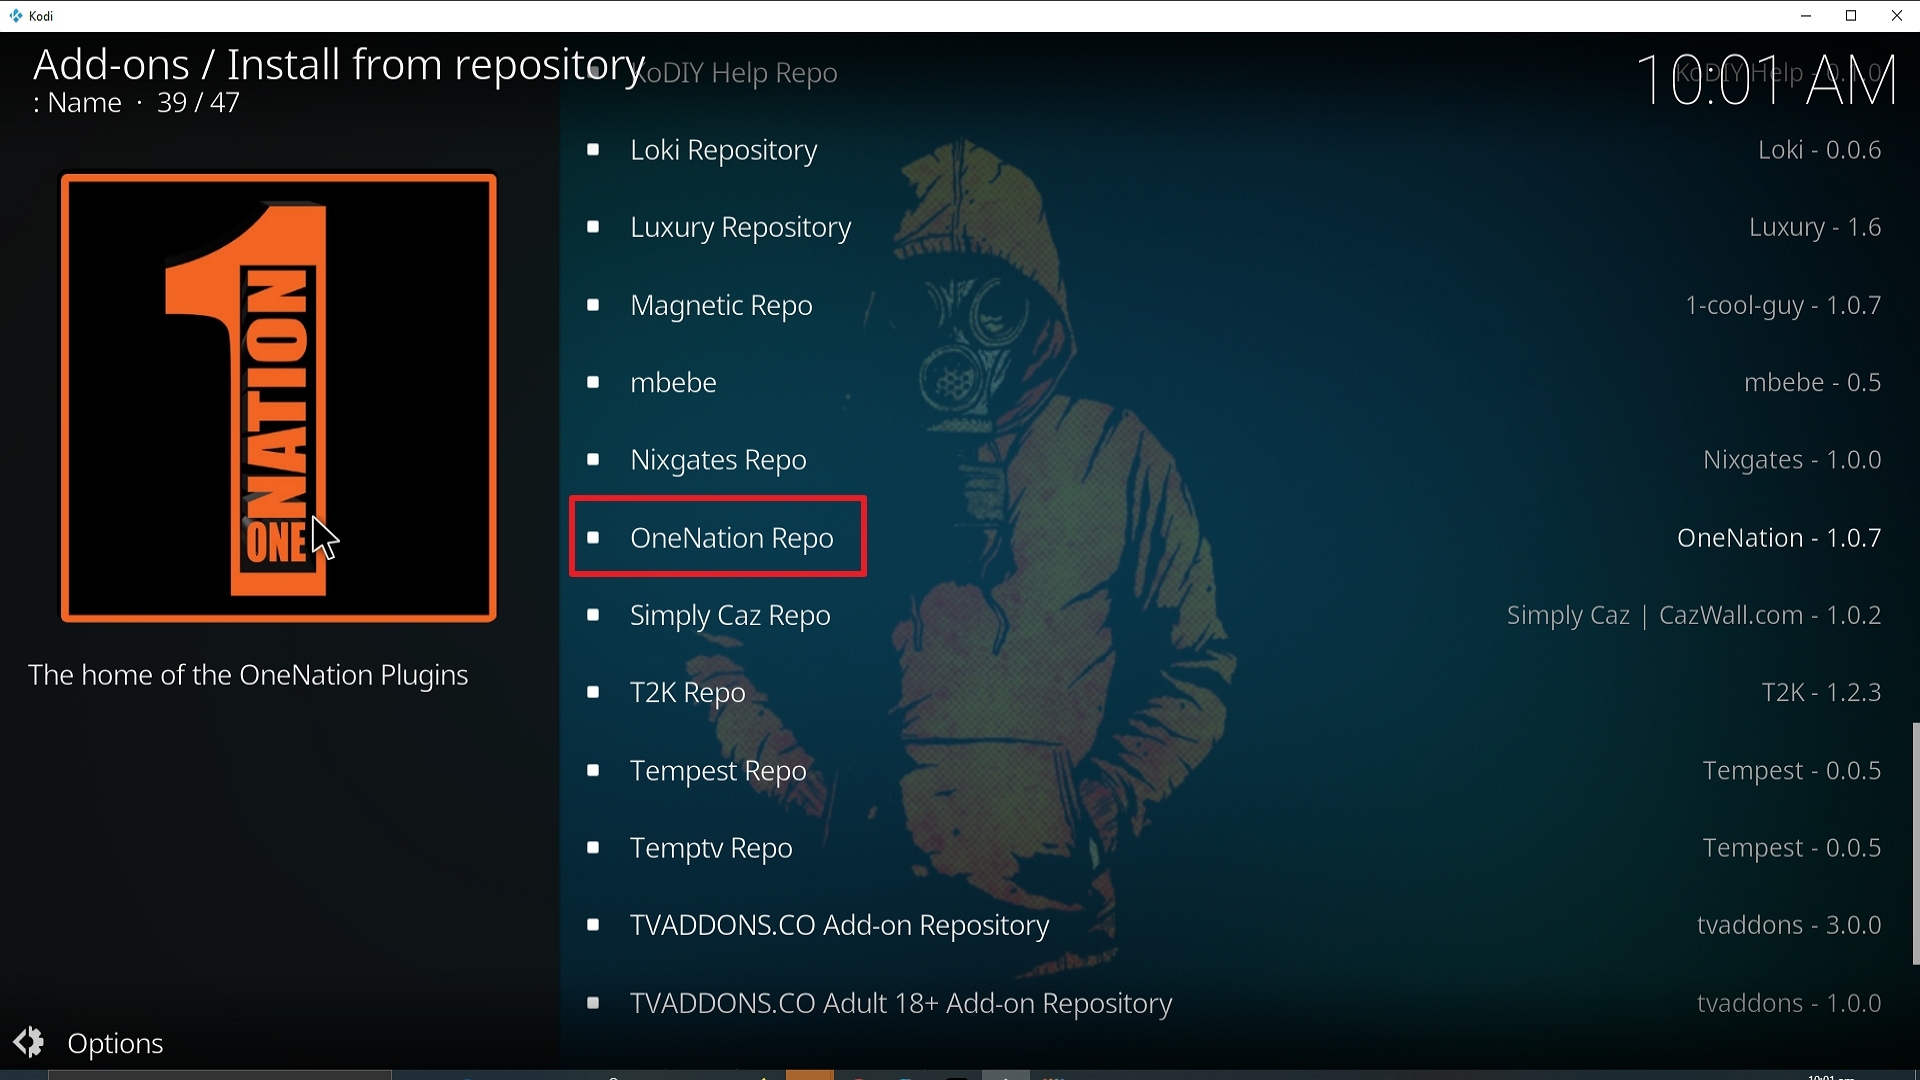
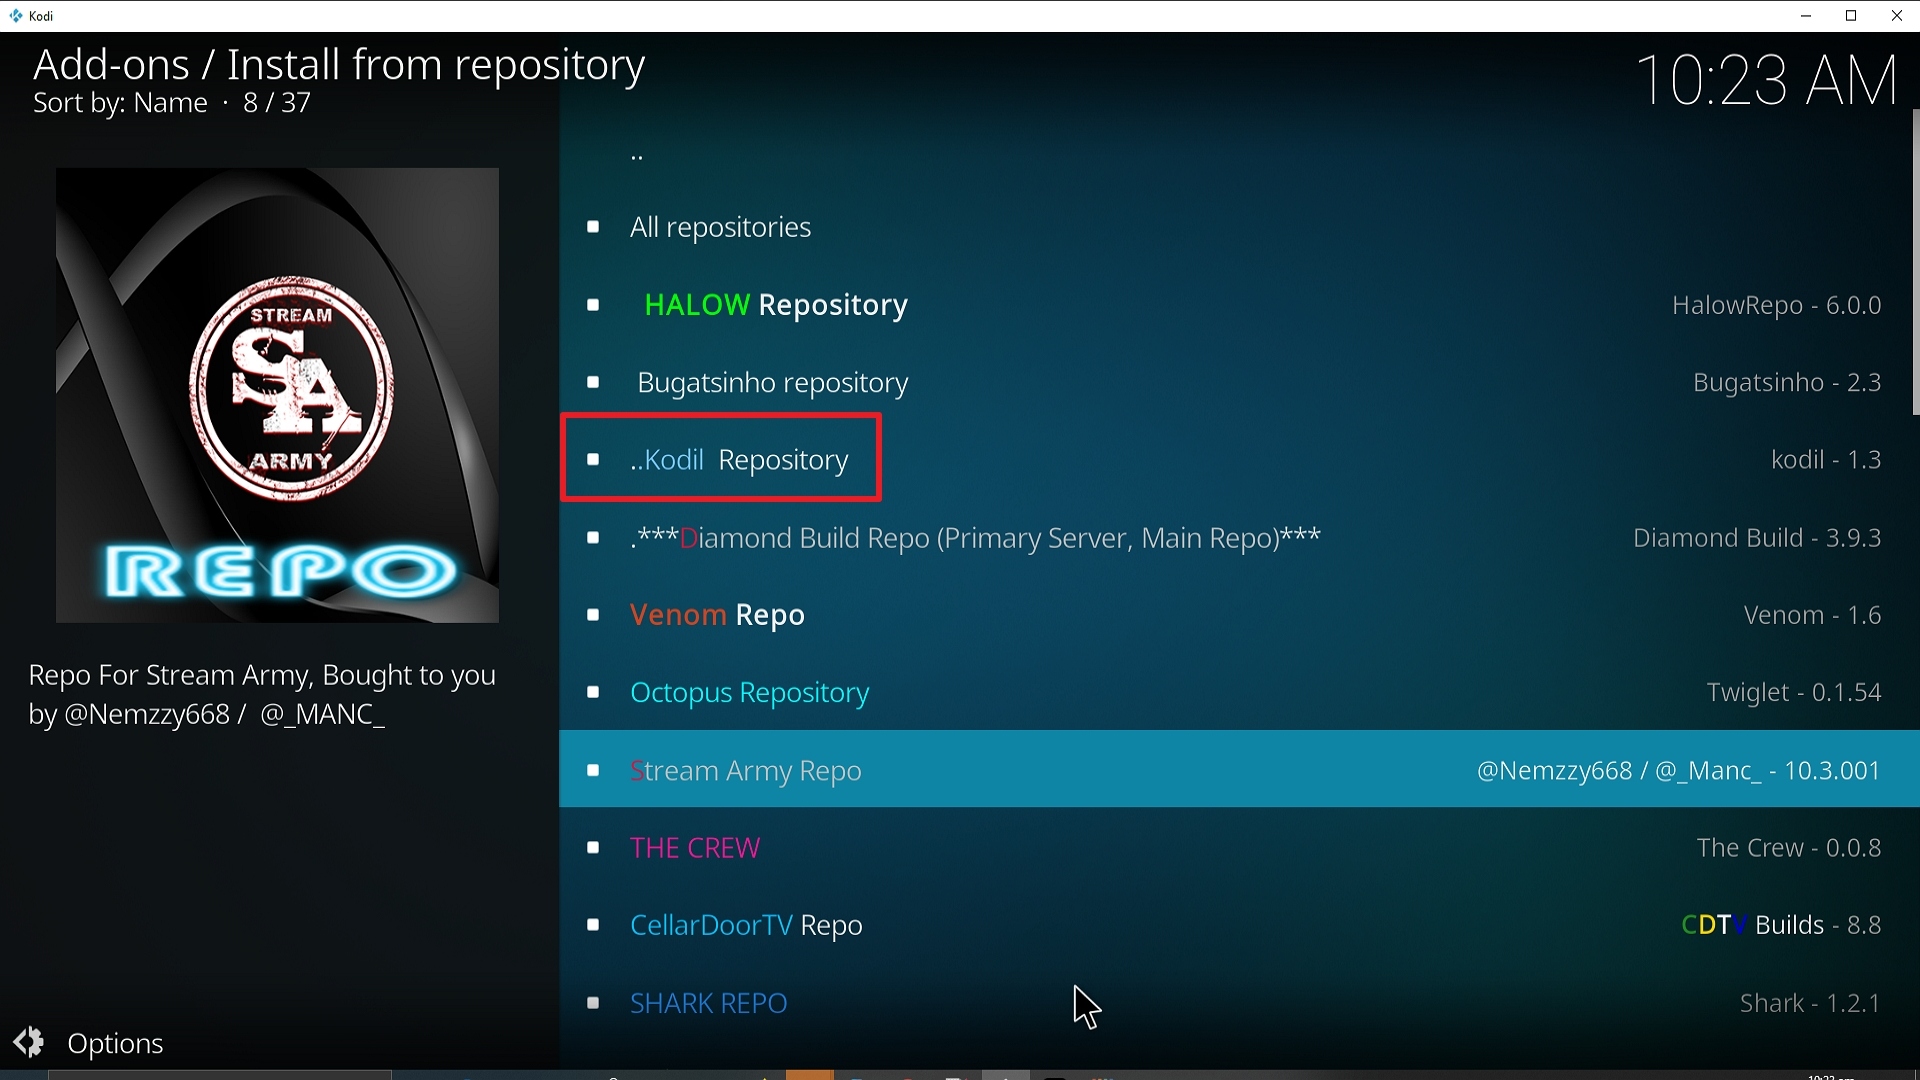
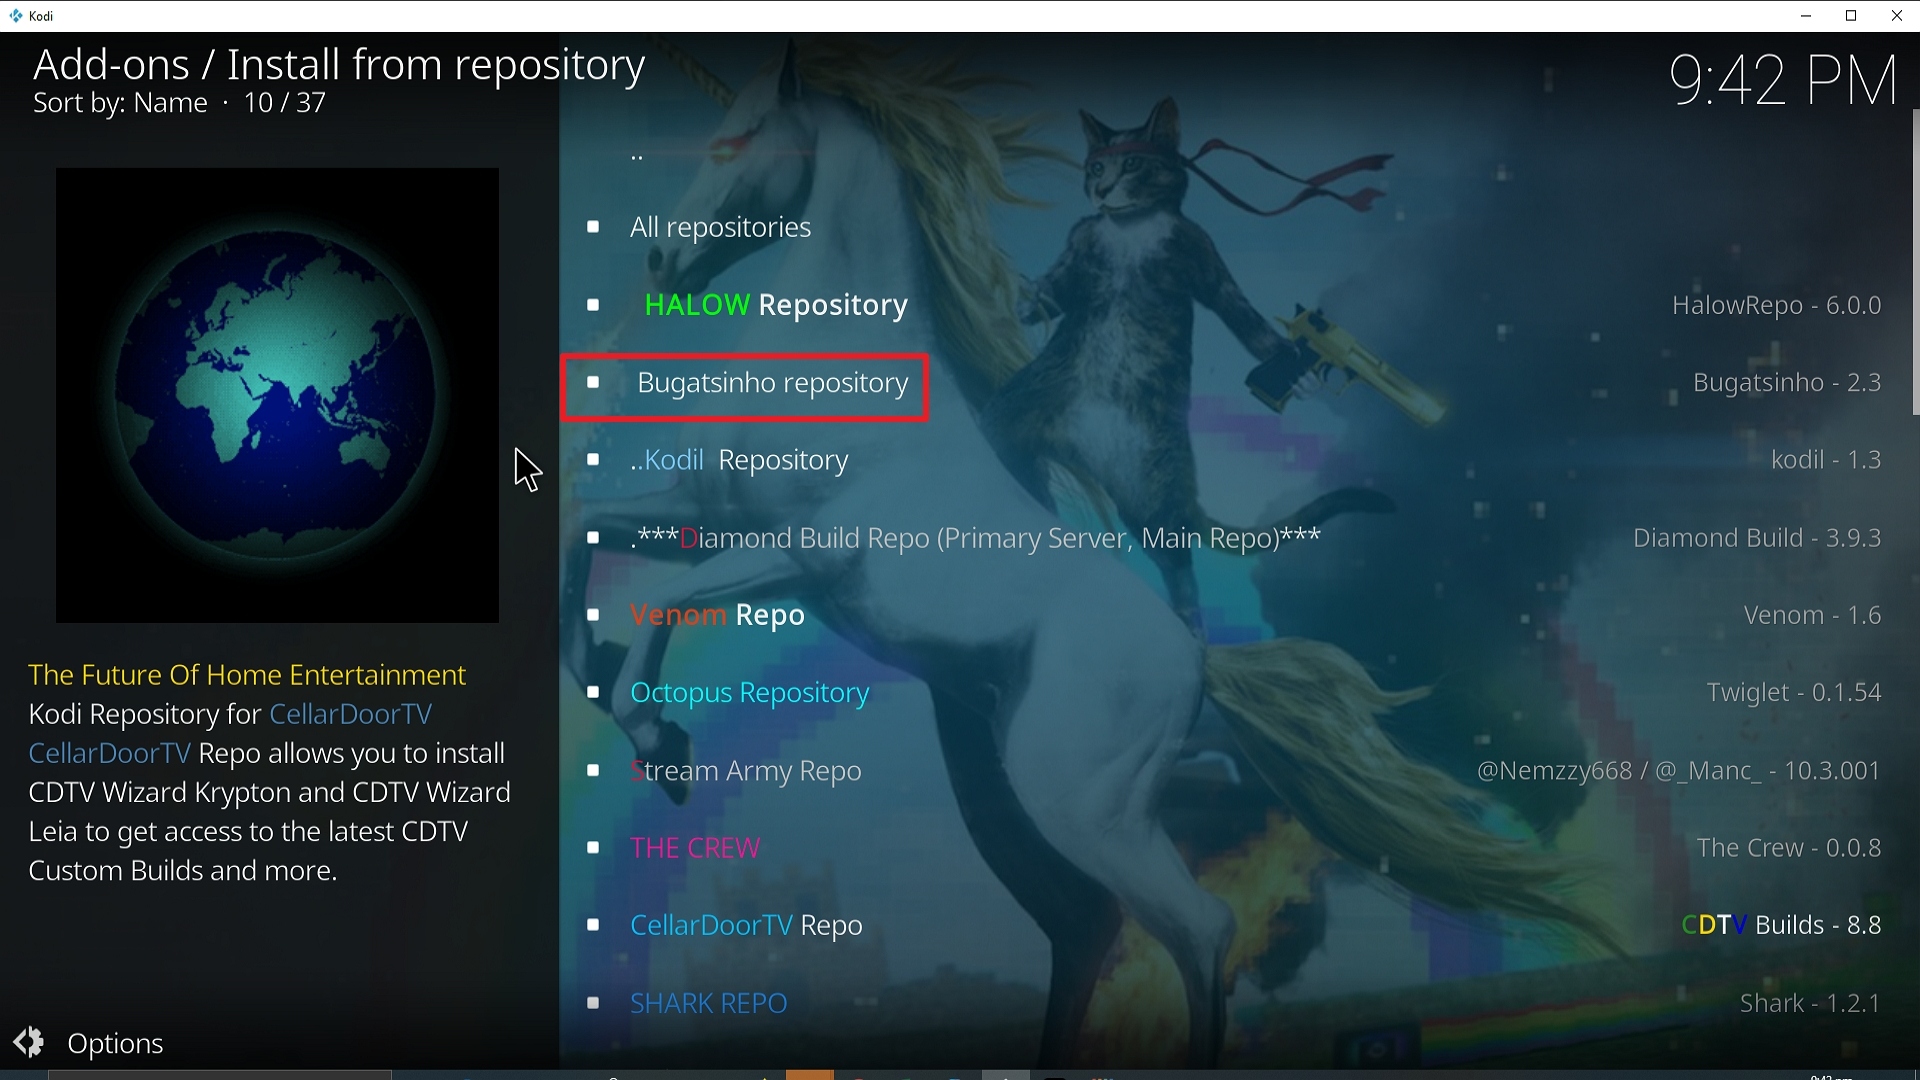
20. Click on Onenation Repo.

Step 20 Installing Enigma Kodi addon on Kodi


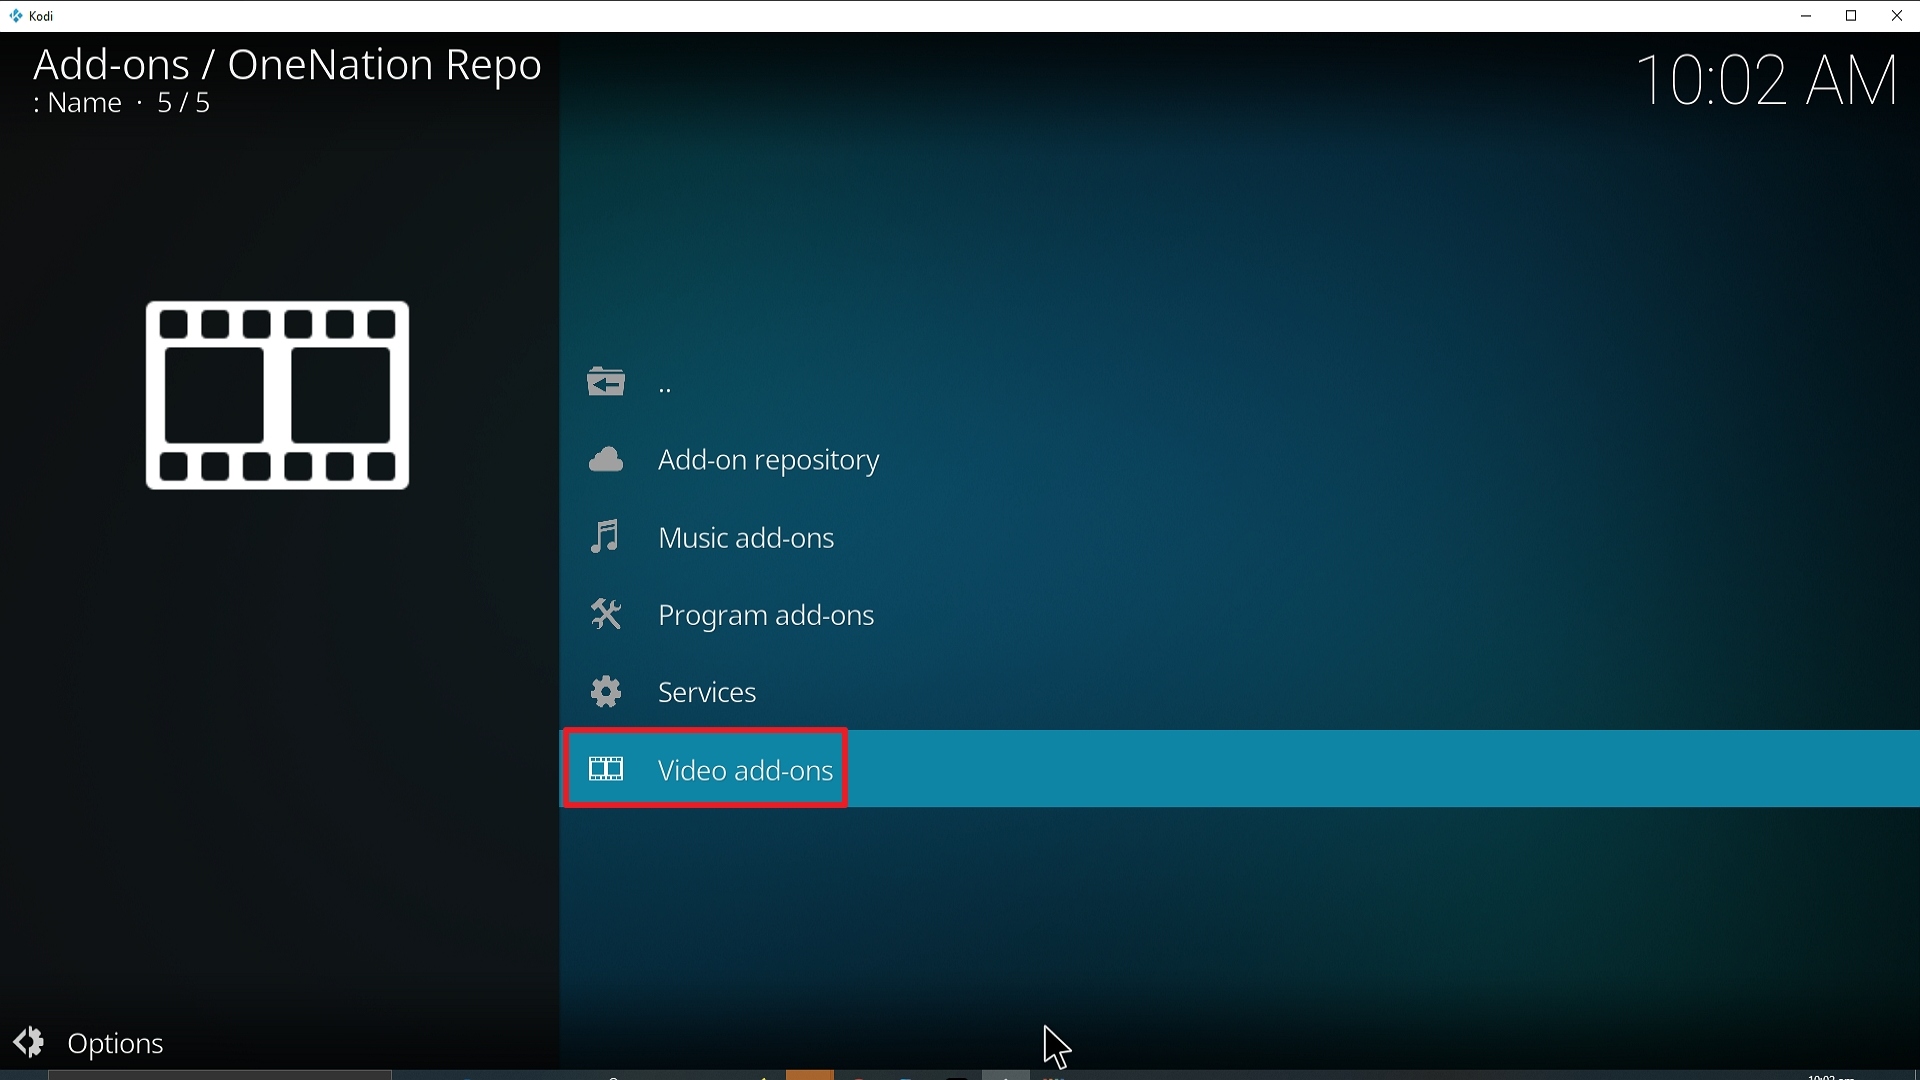
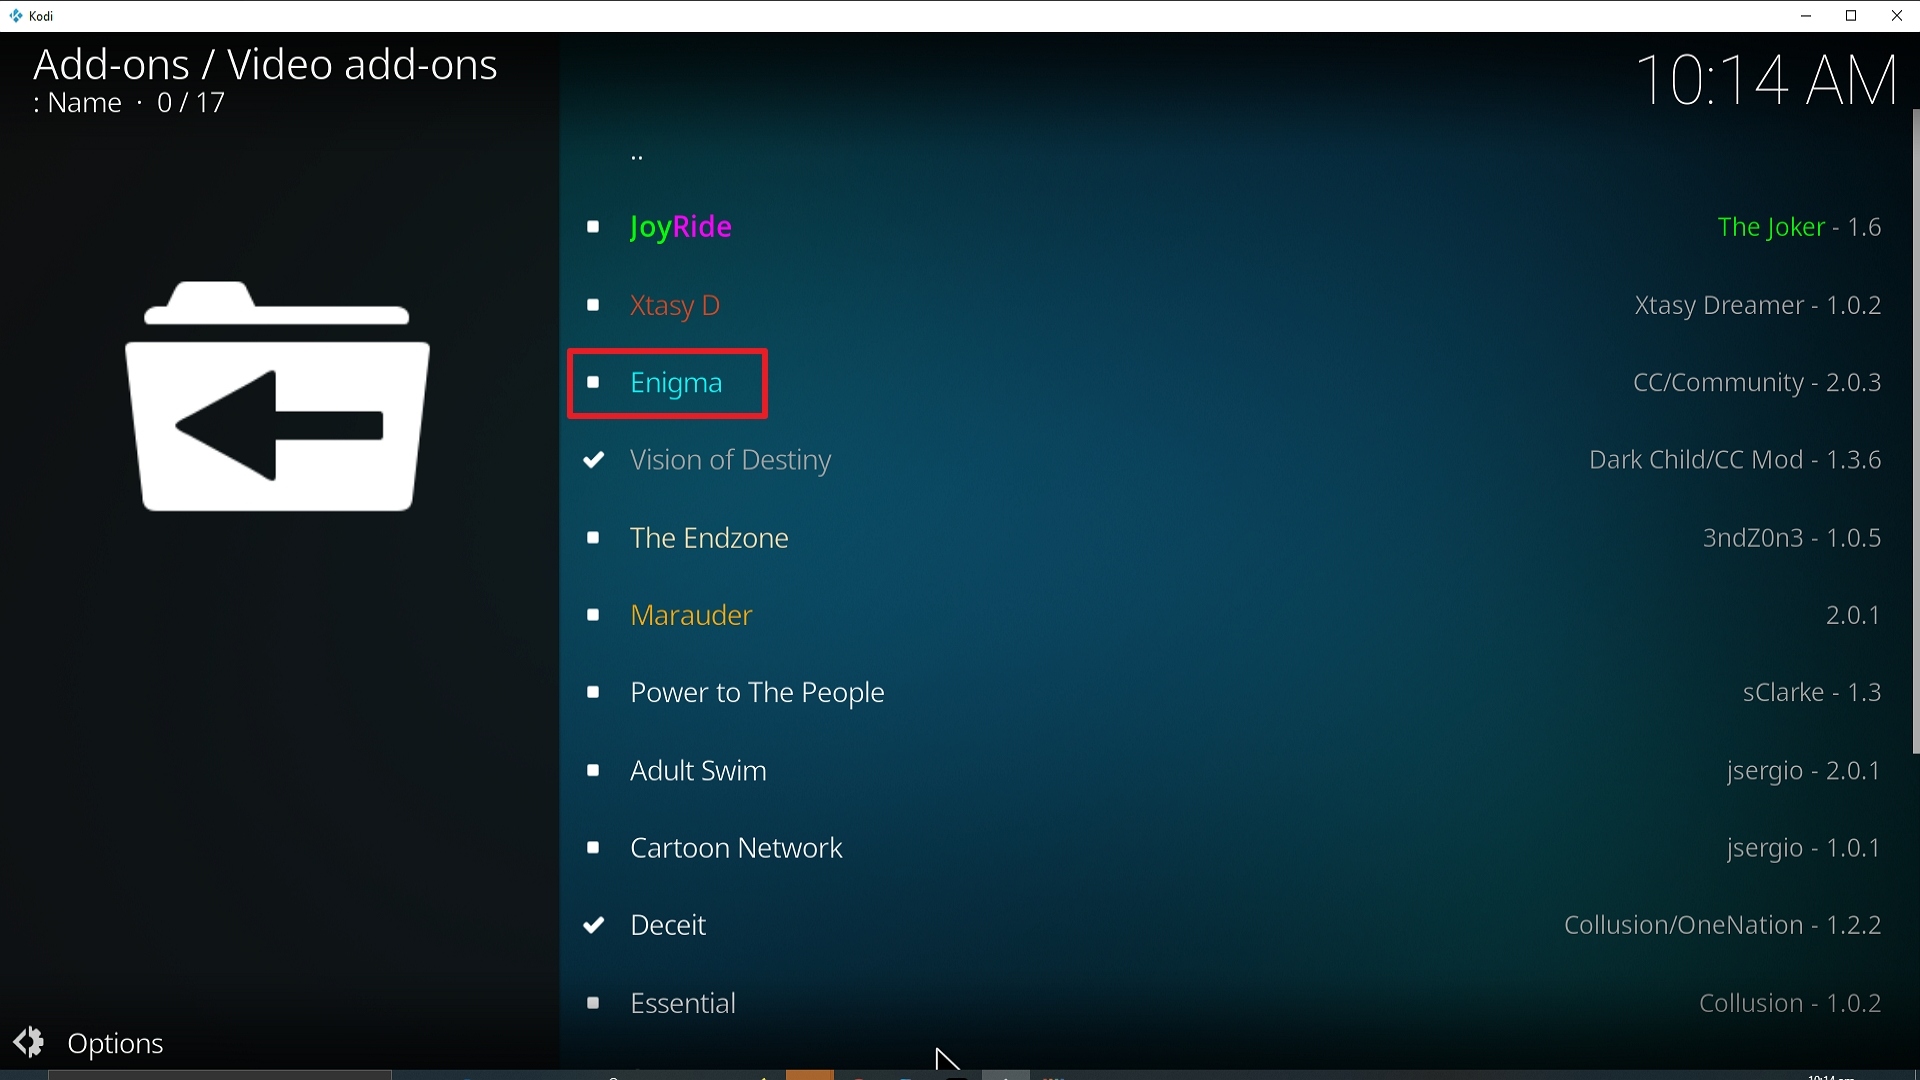
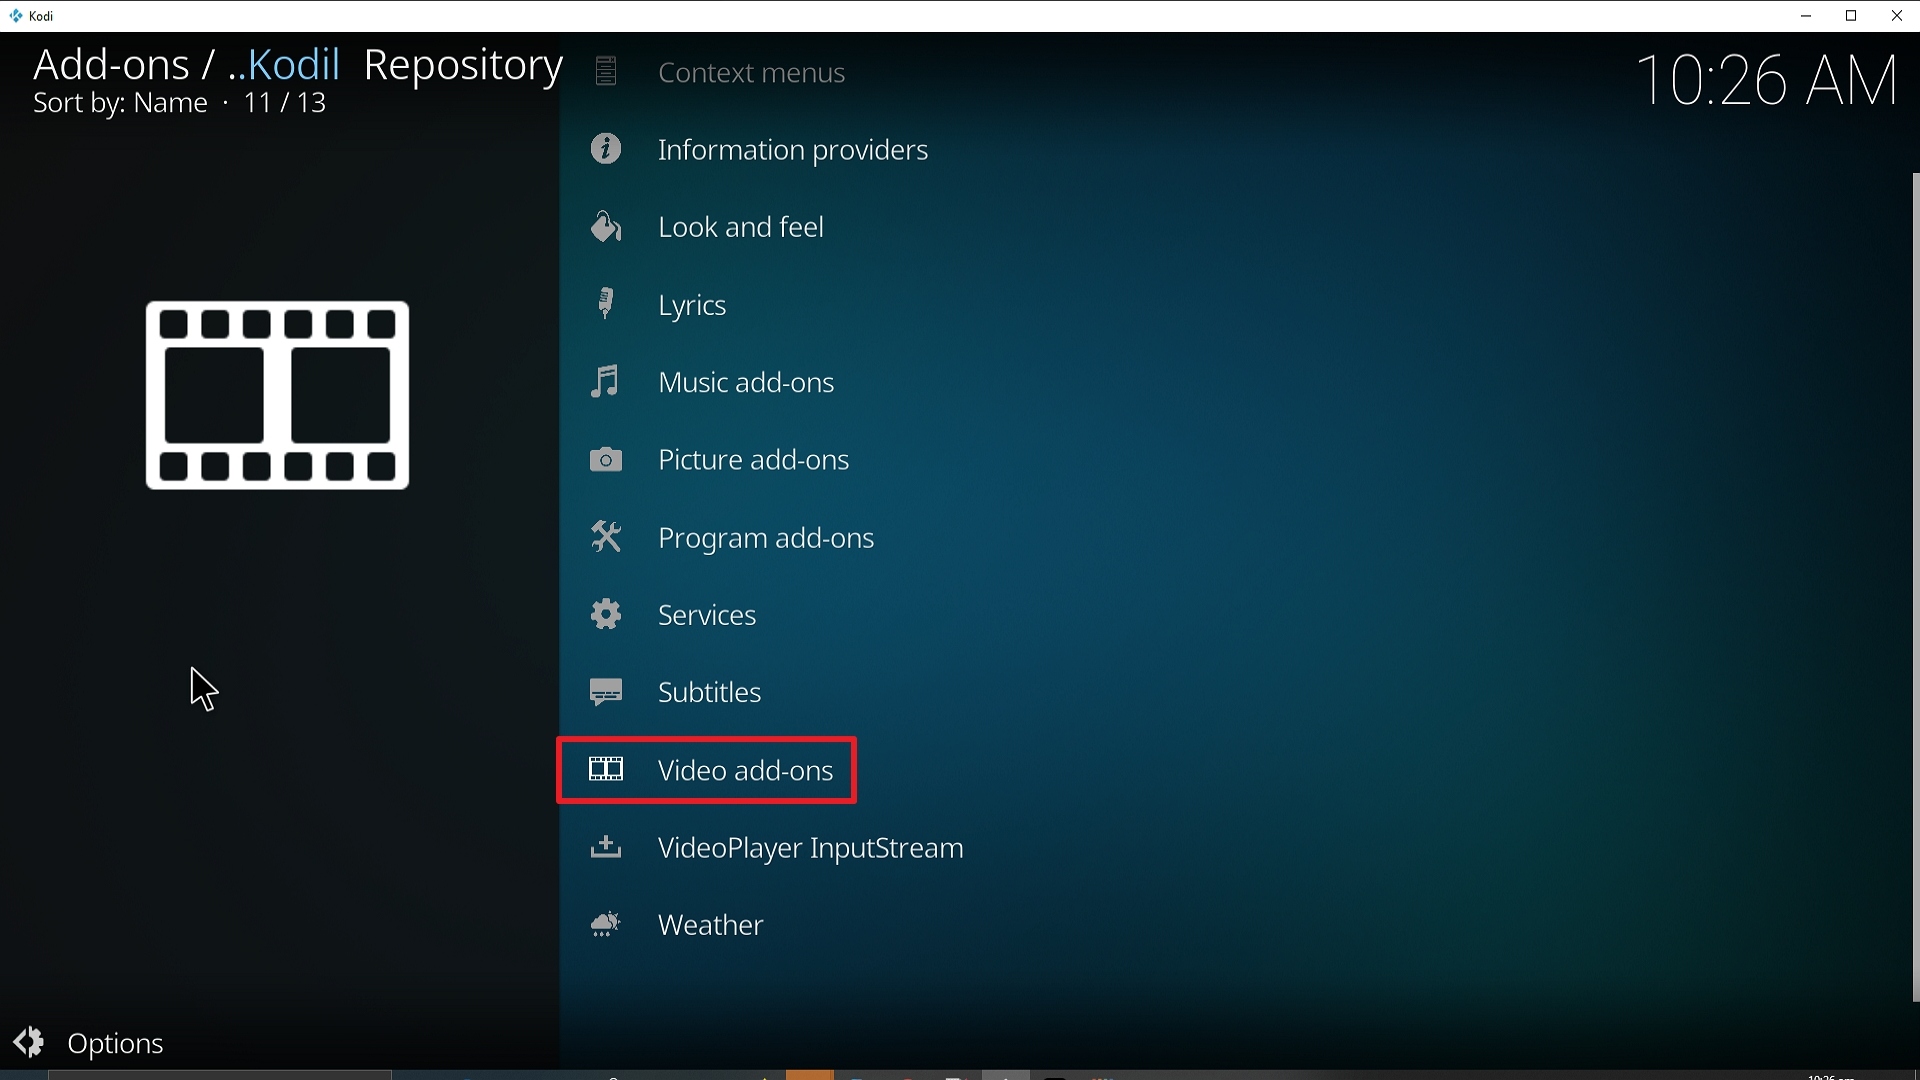
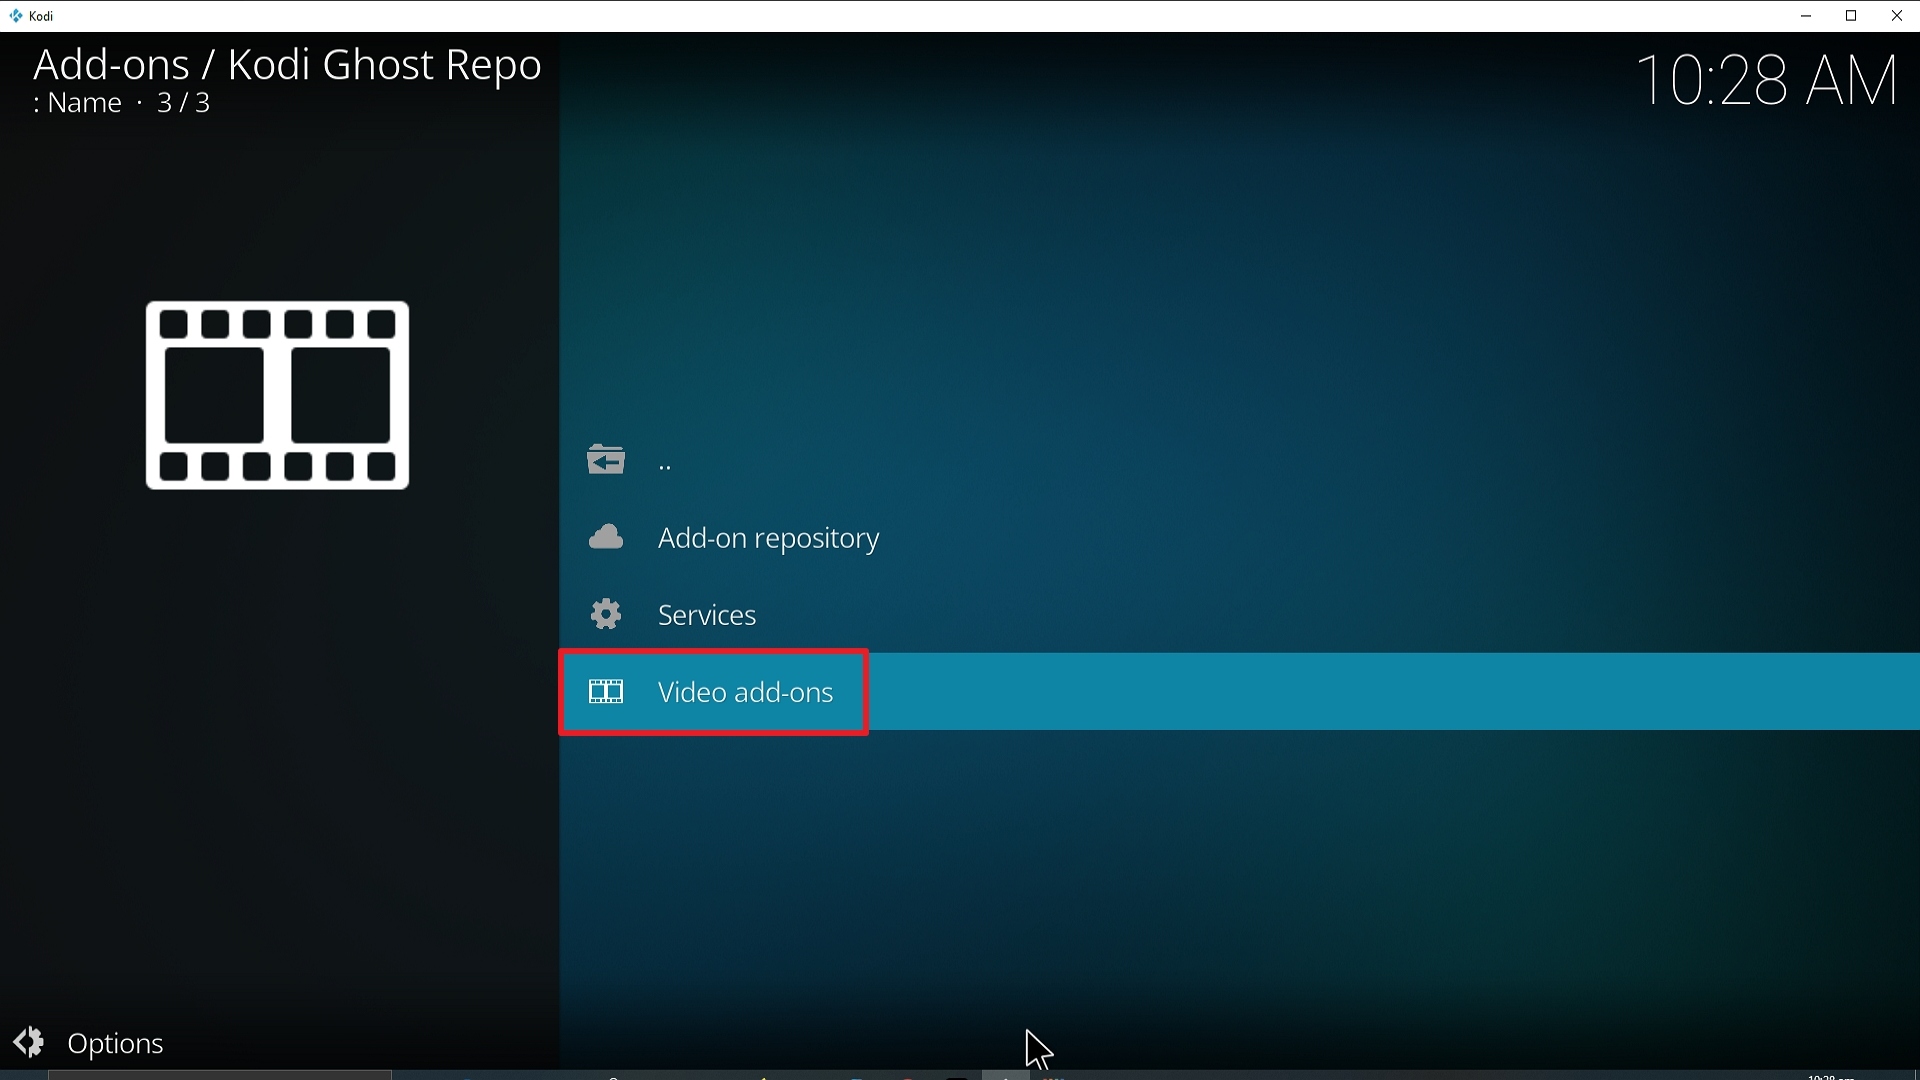
21. Pick Video add-ons.

Step 21 Installing Enigma Kodi addon on Kodi


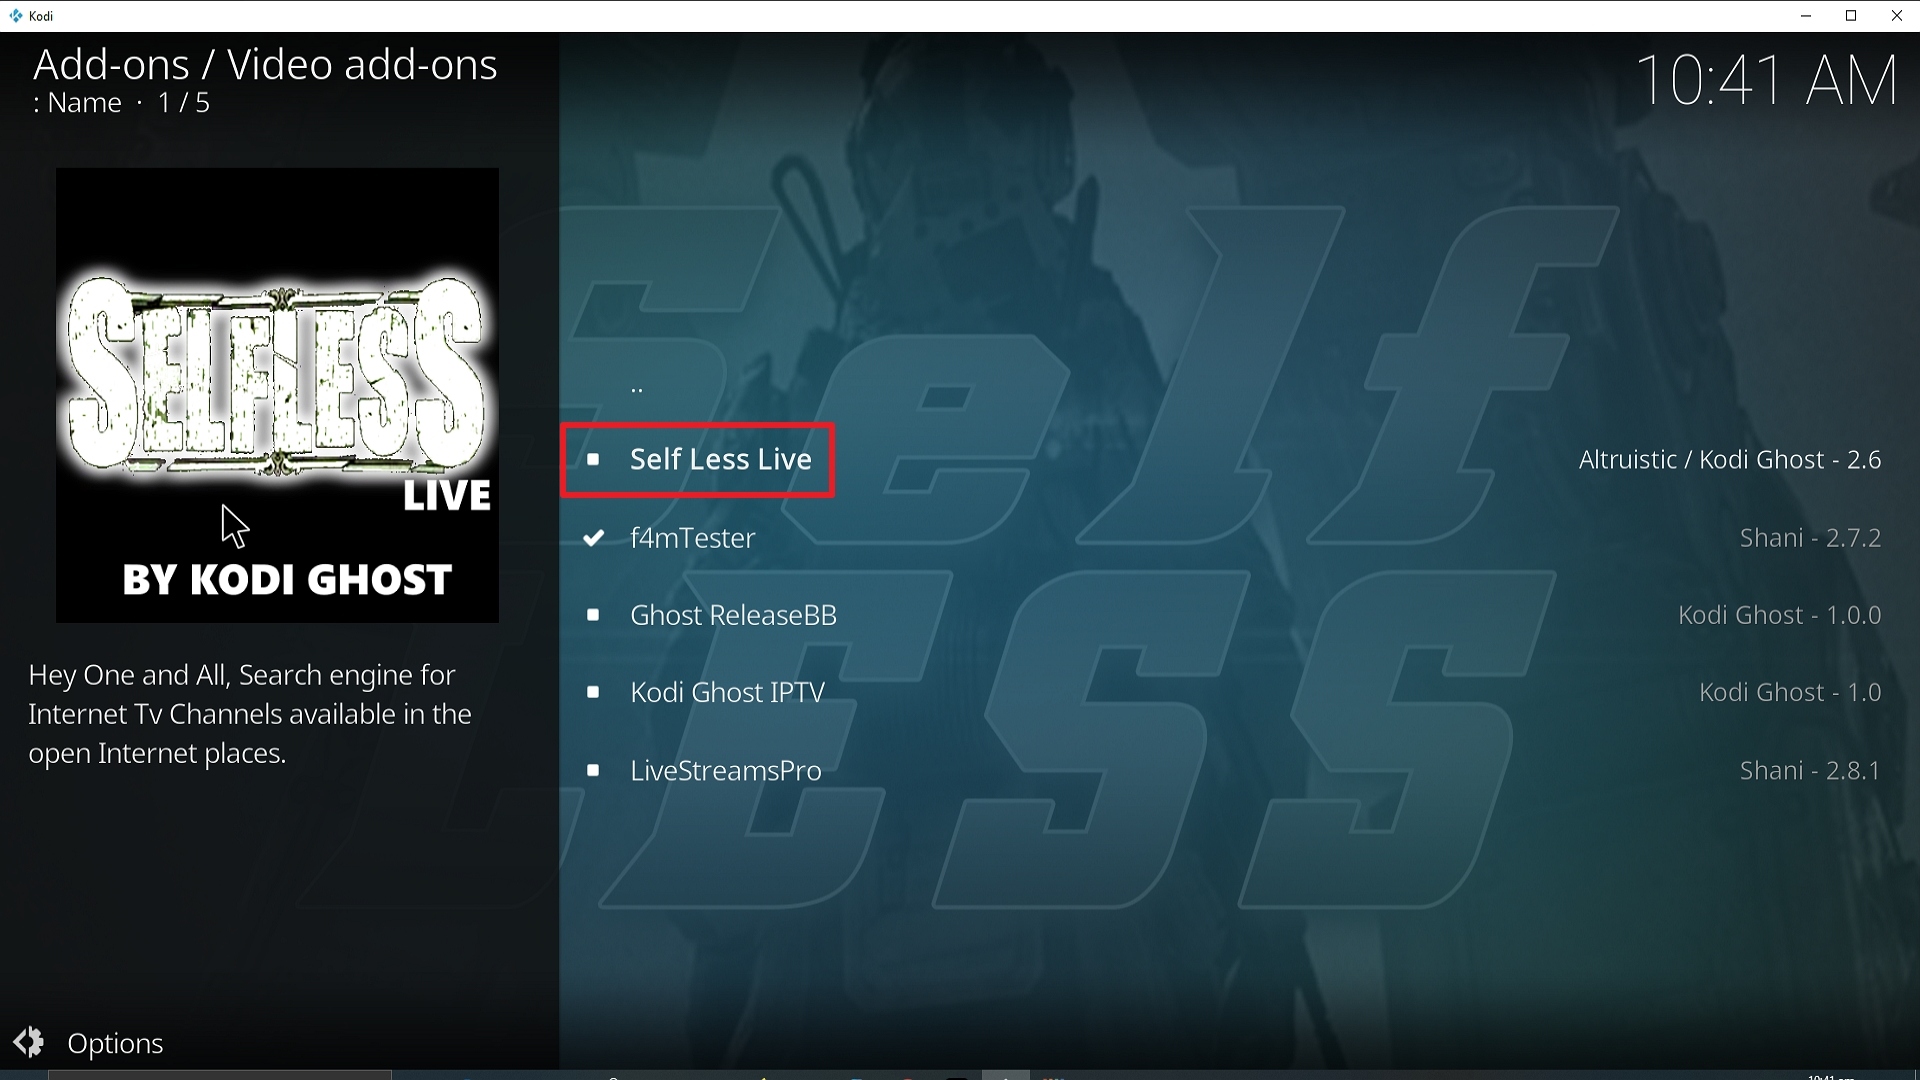
22. Select Enigma again.

Step 22 Installing Enigma Kodi addon on Kodi


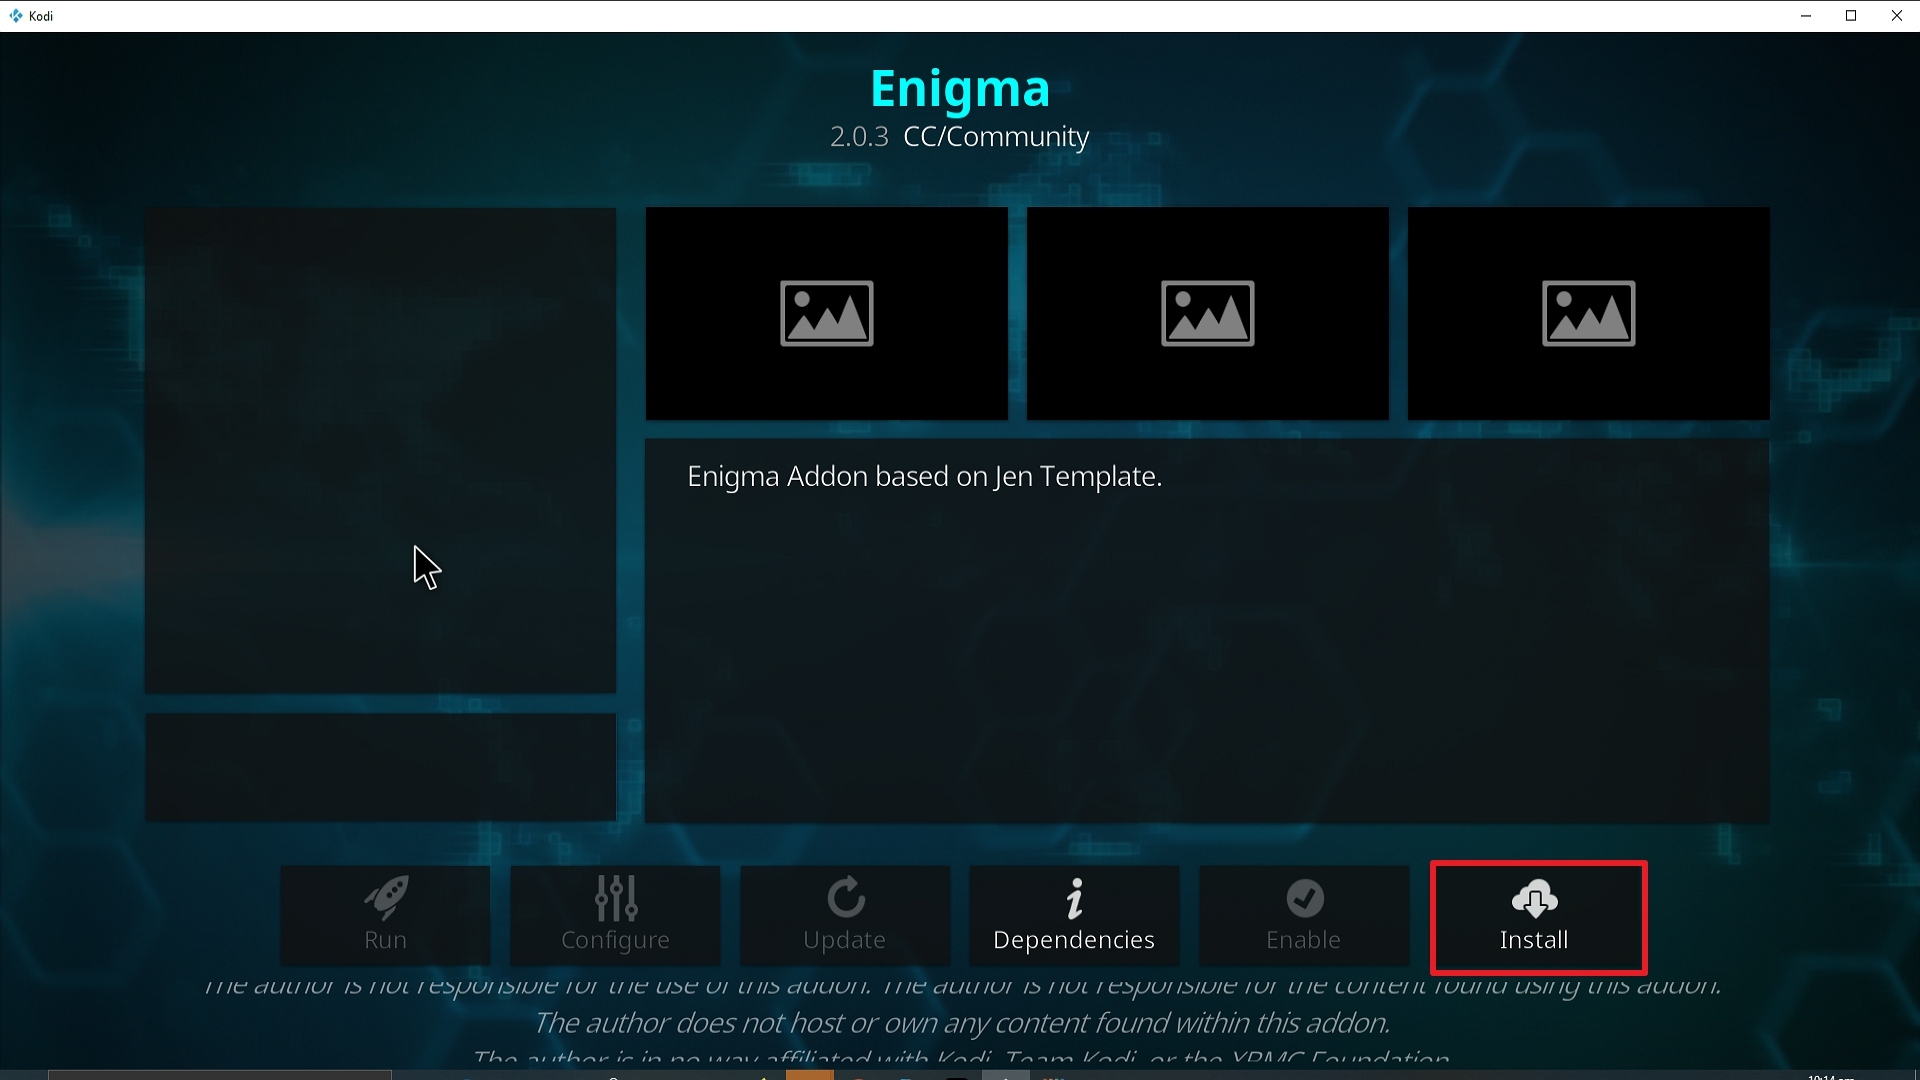
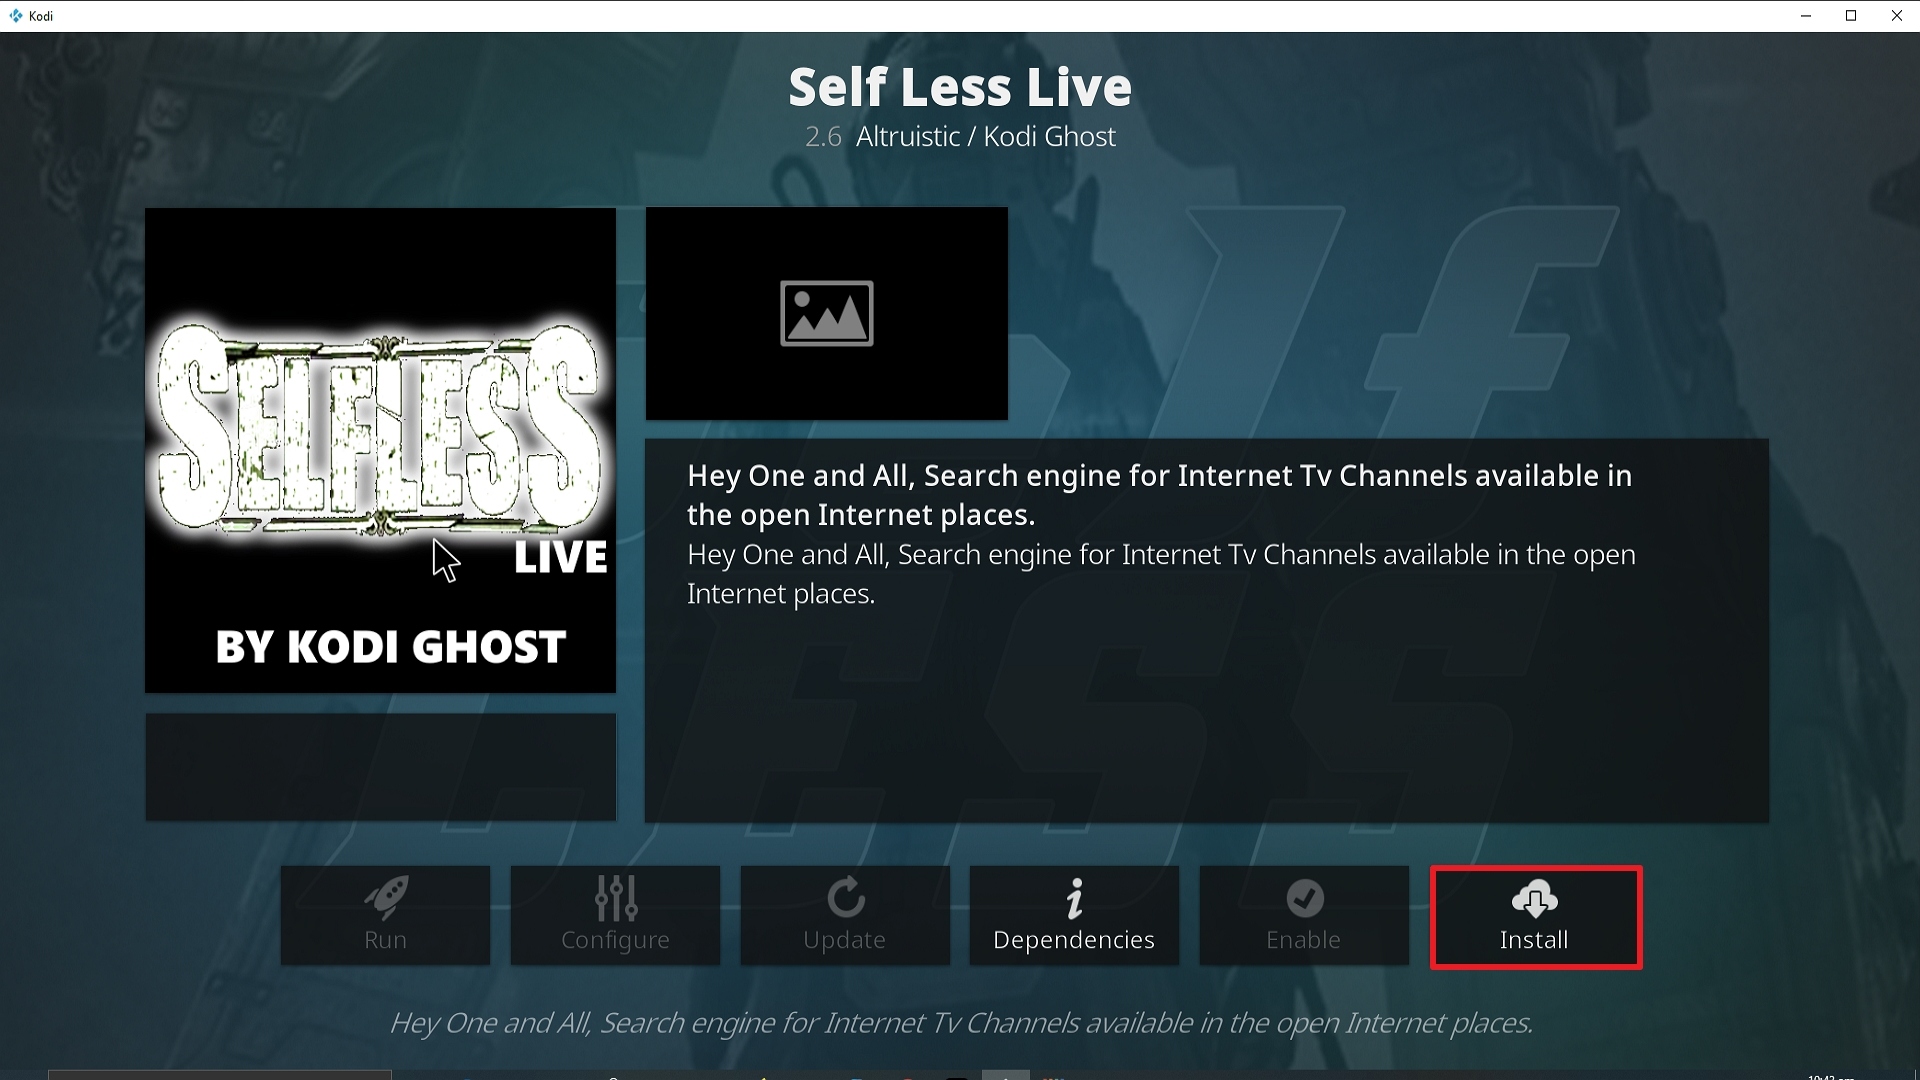
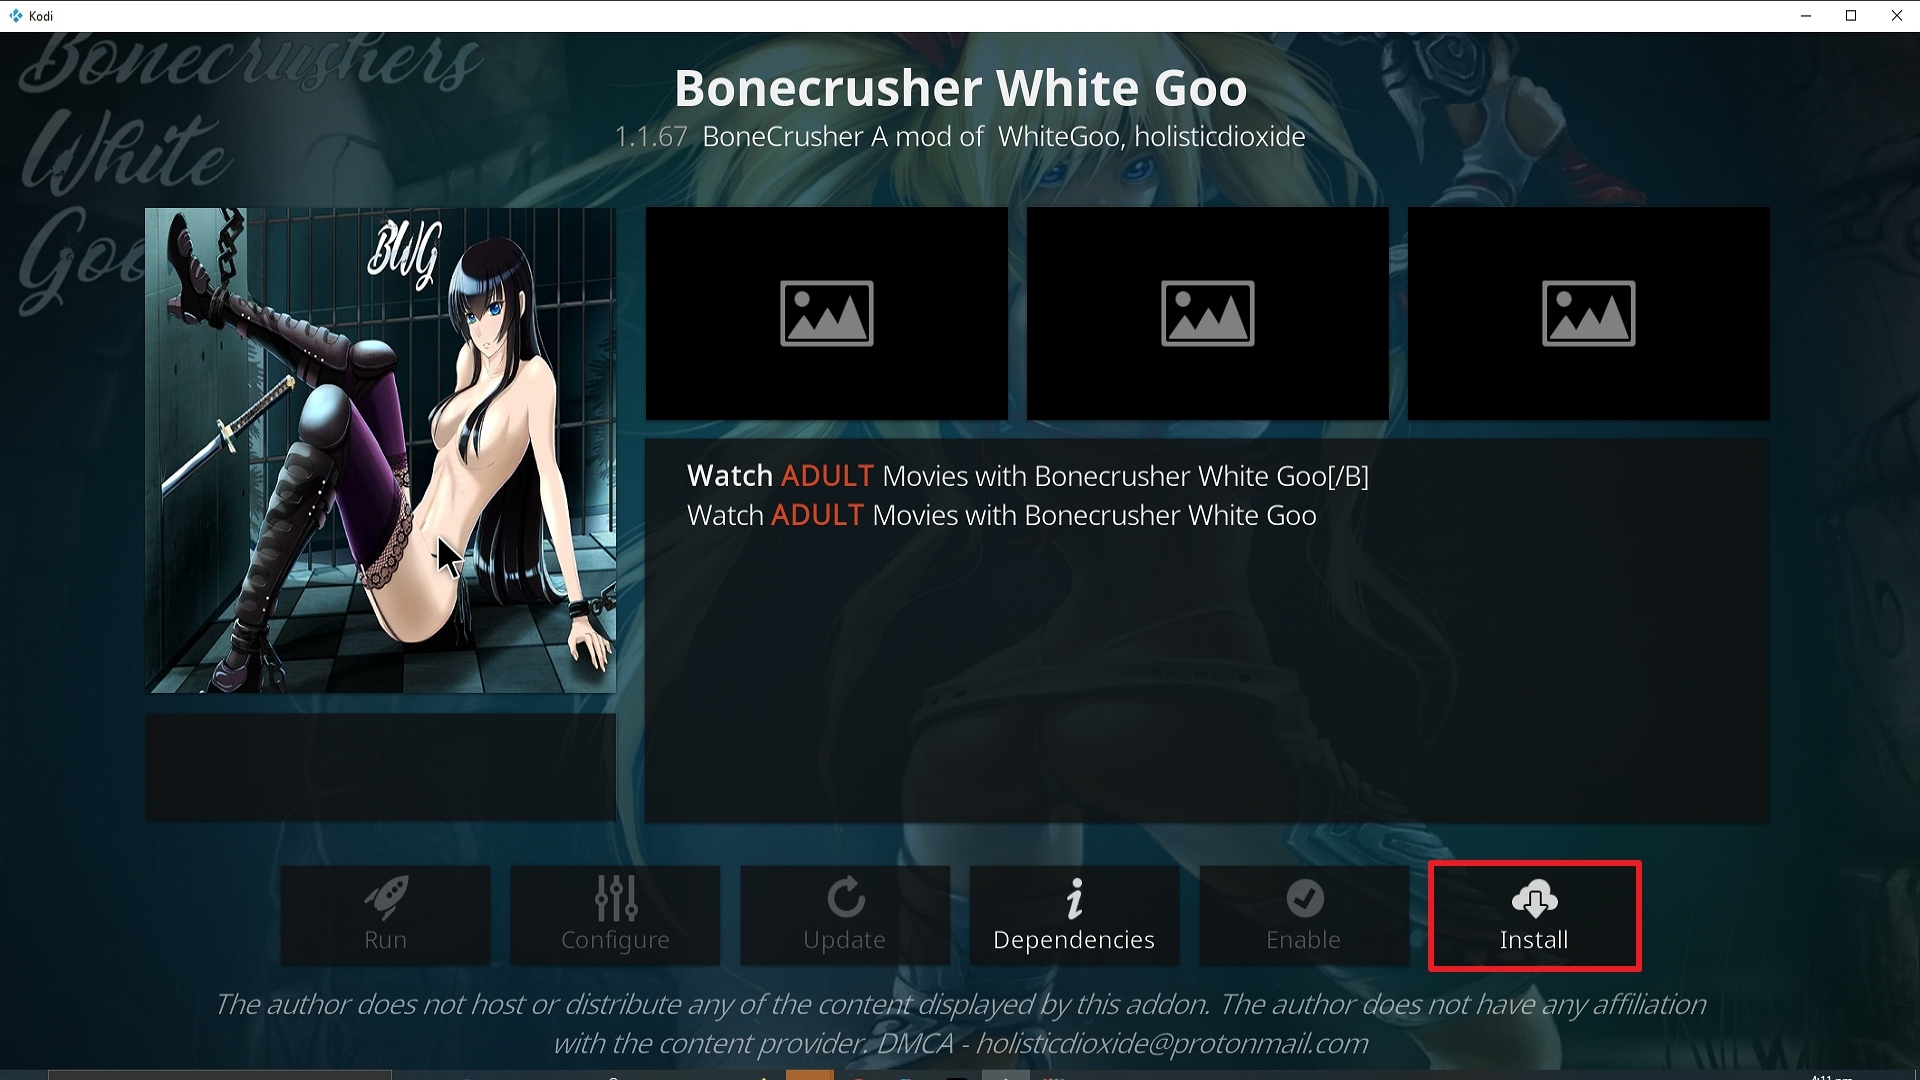
23. Click on Install.

Step 23 Installing Enigma Kodi addon on Kodi


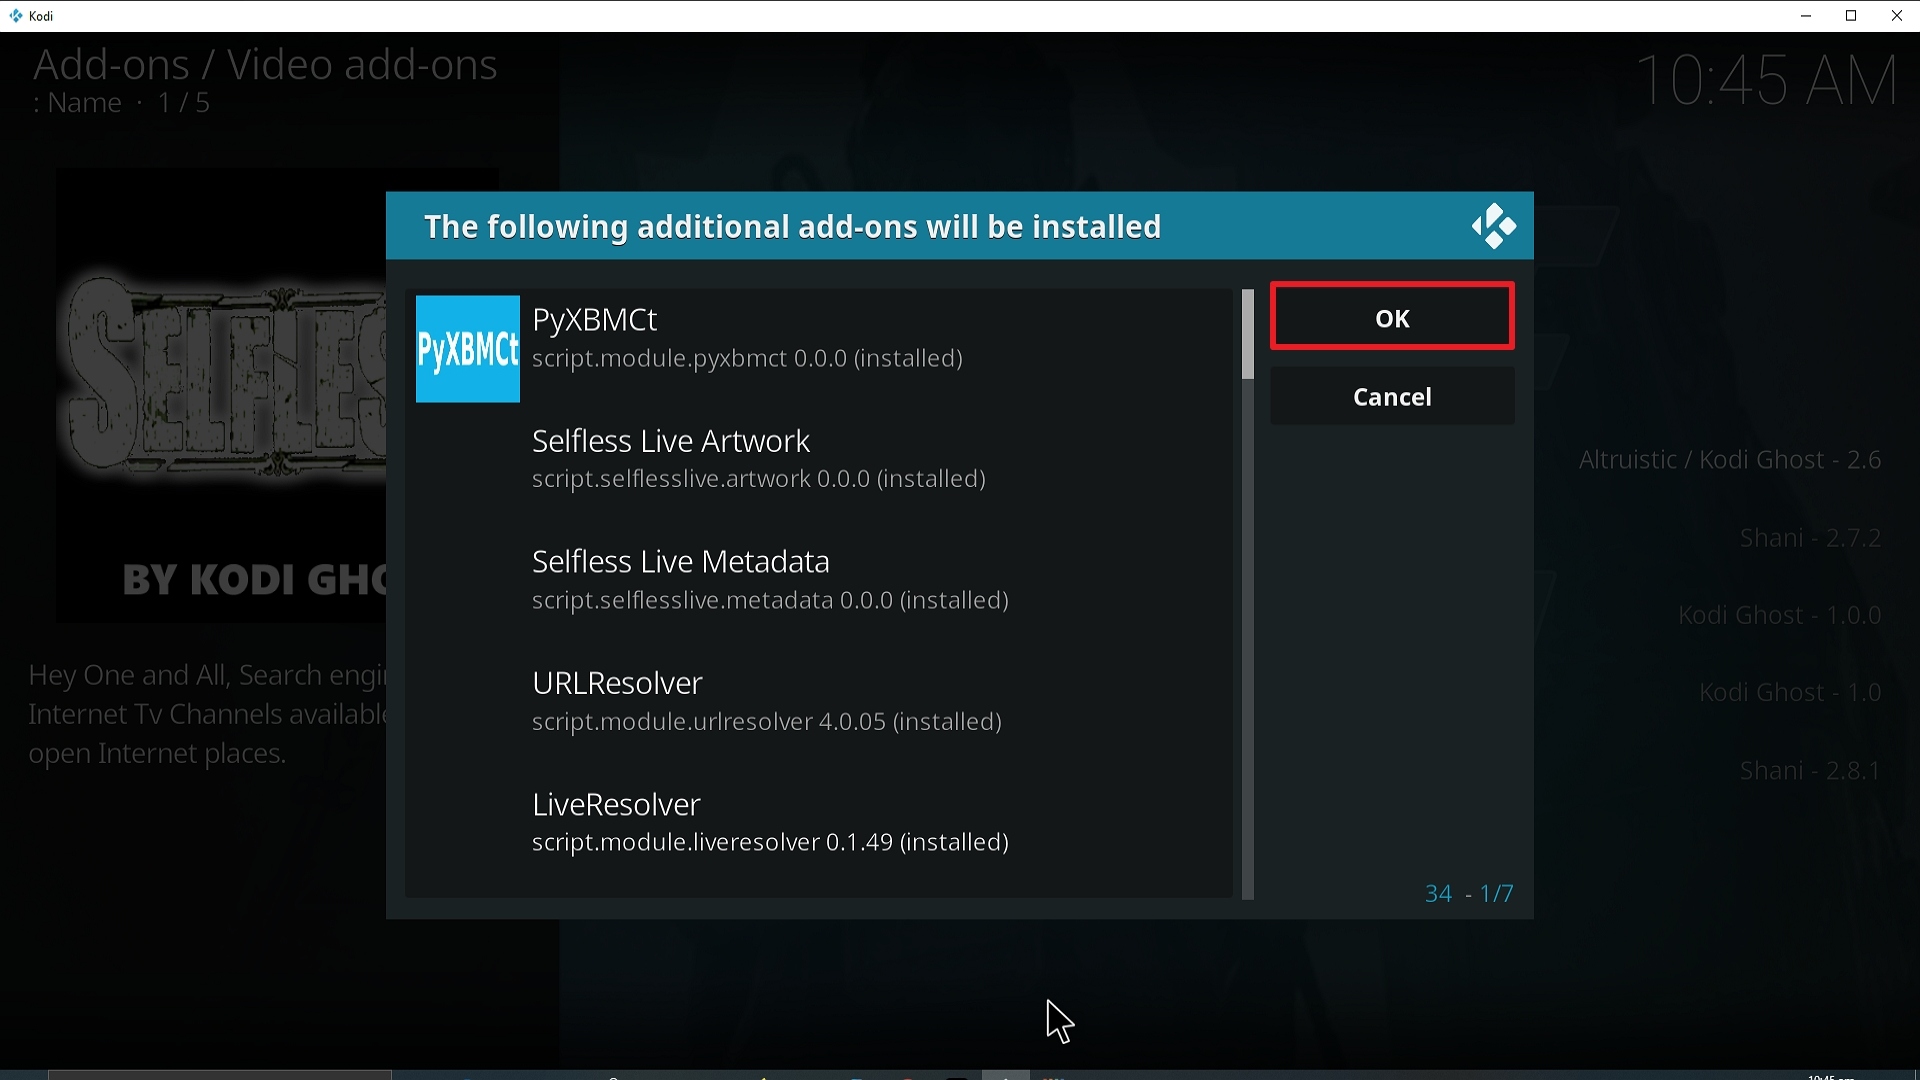
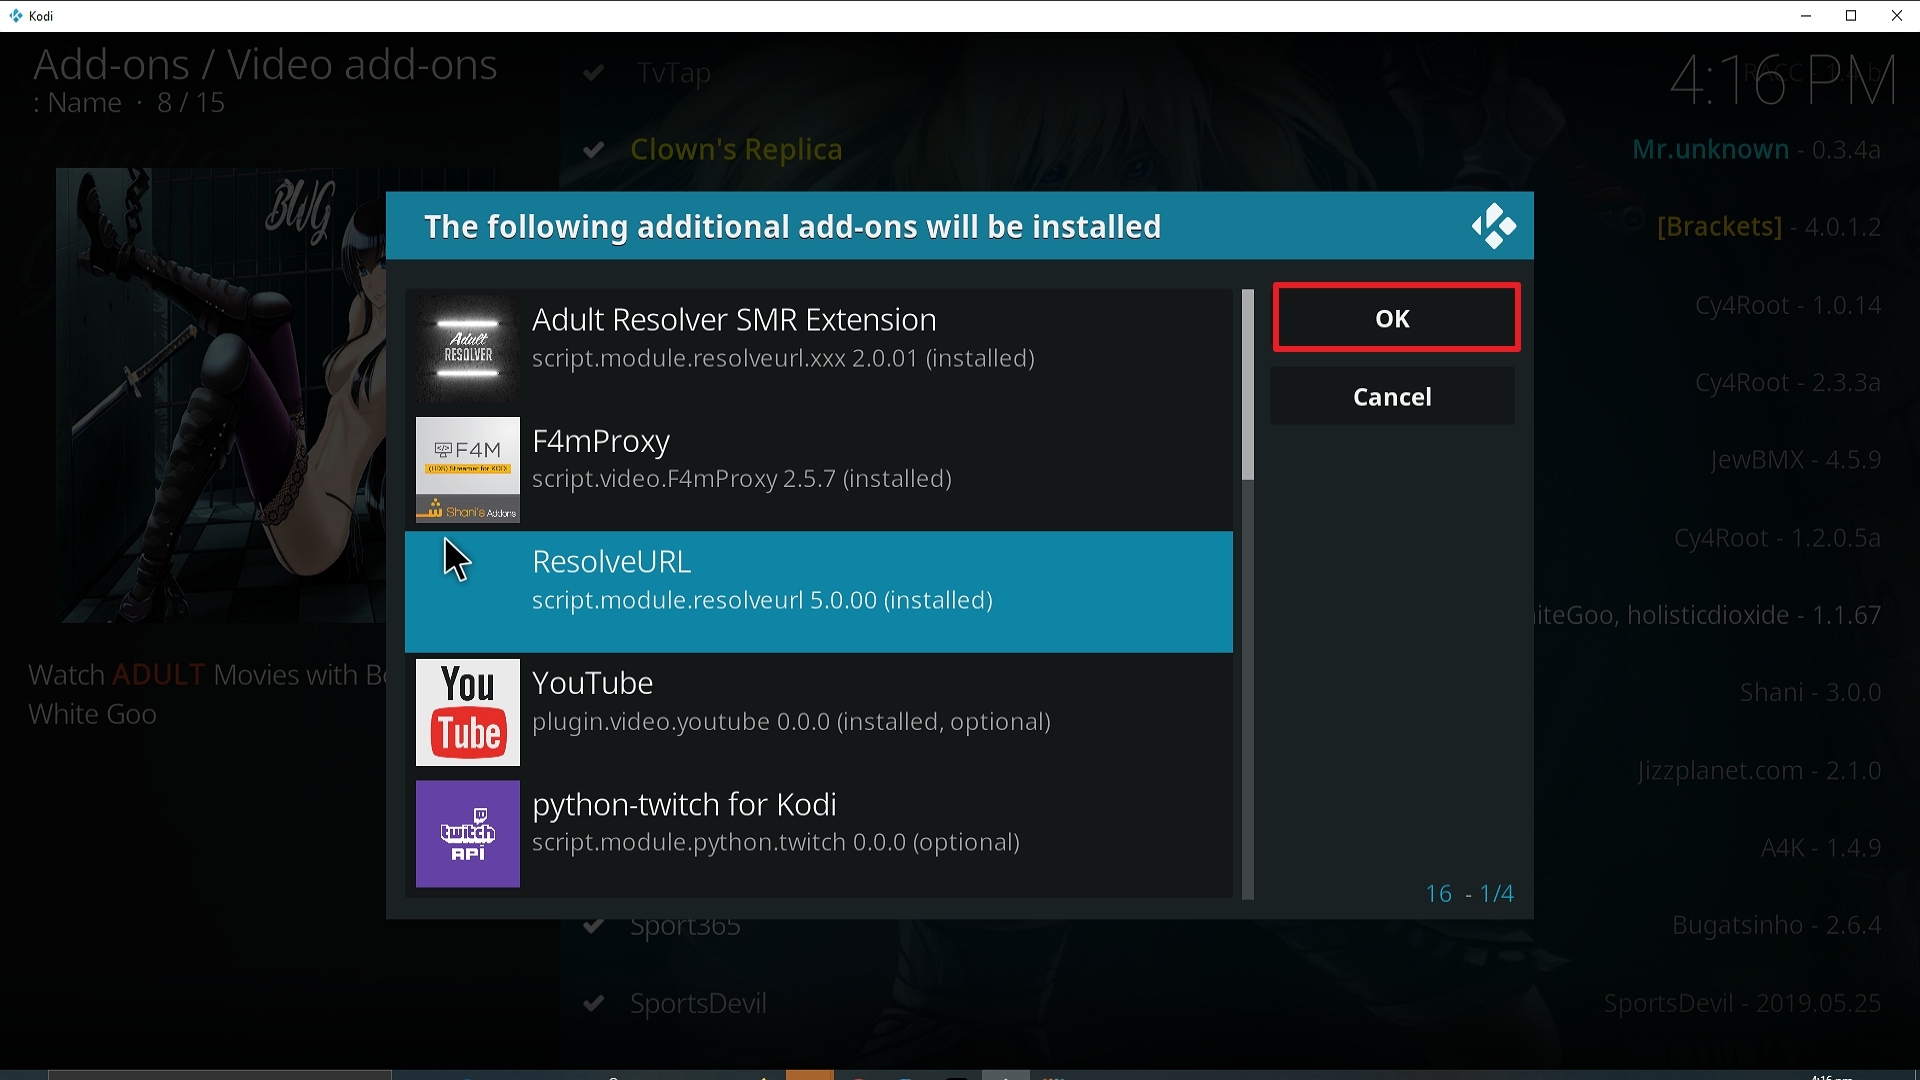
24. Select OK after reviewing the add-ons that will be installed.

Step 24 Installing Enigma Kodi addon on Kodi


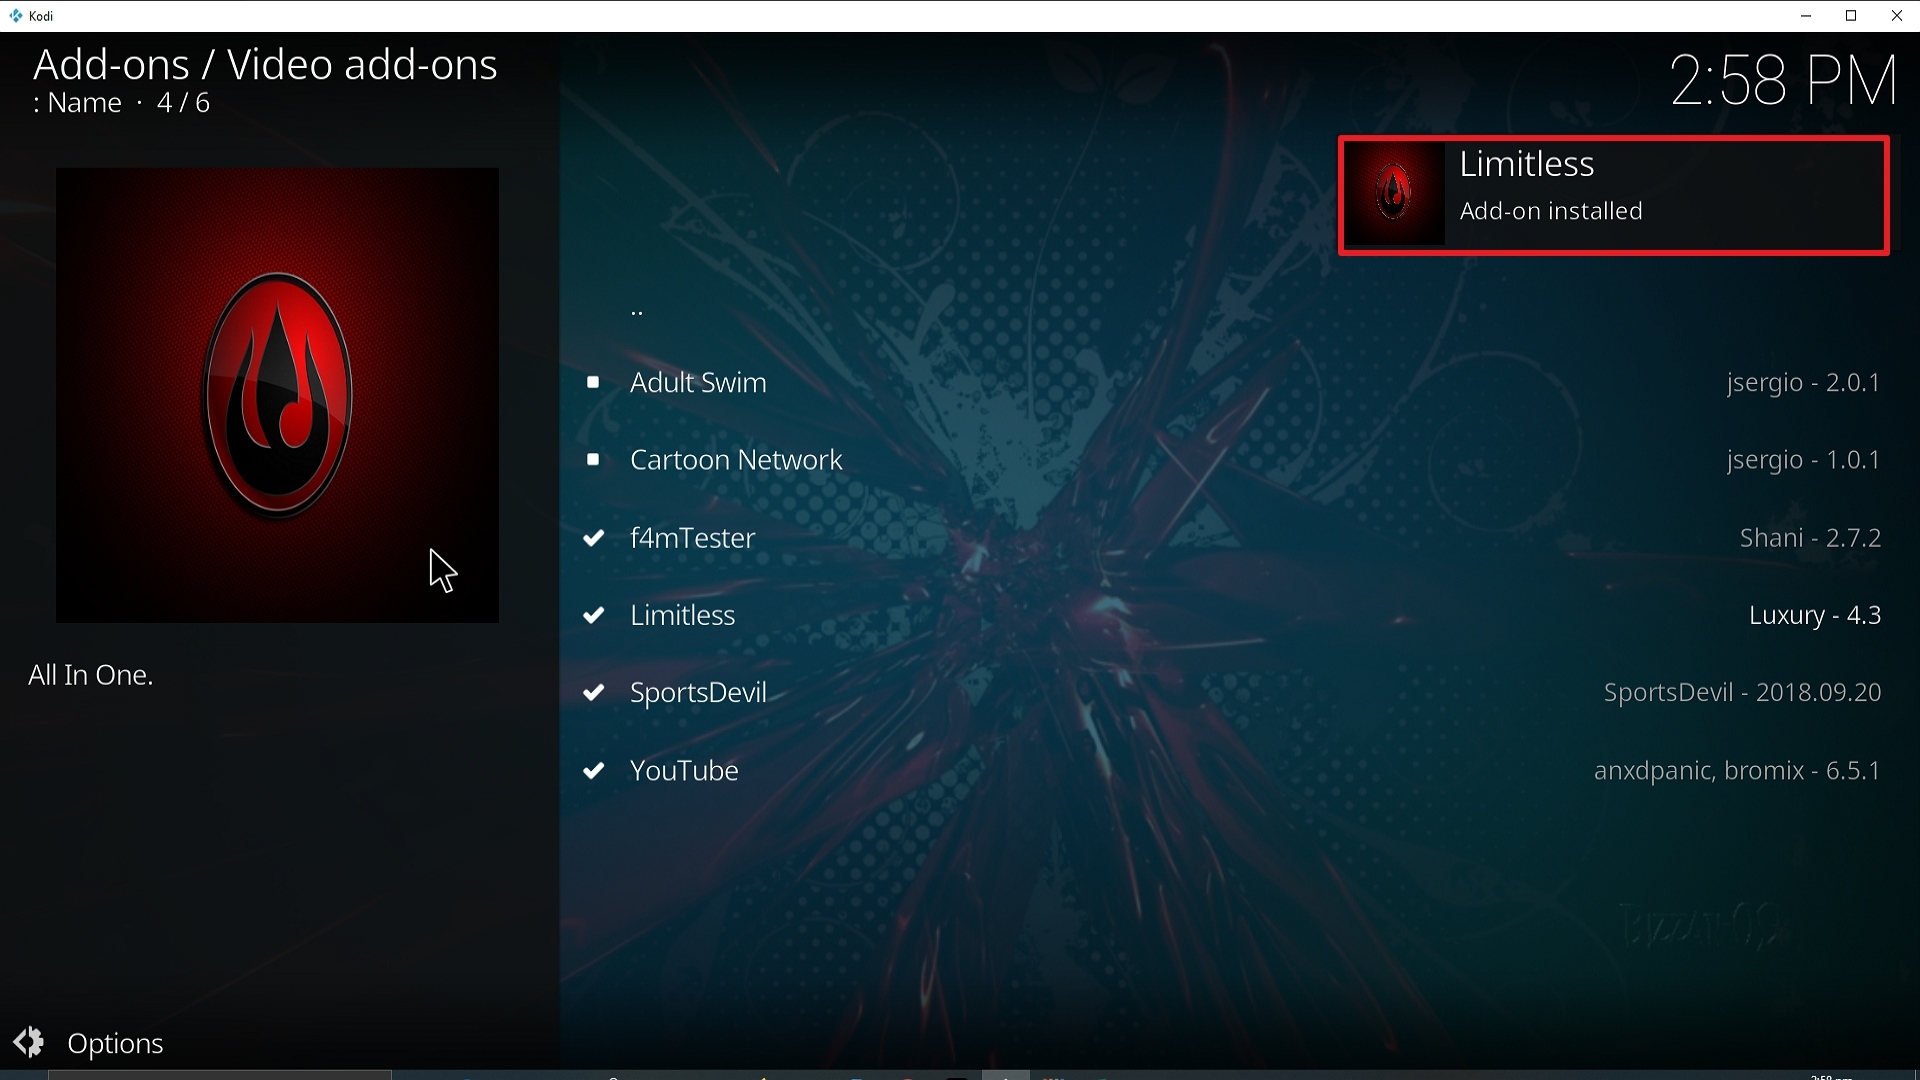
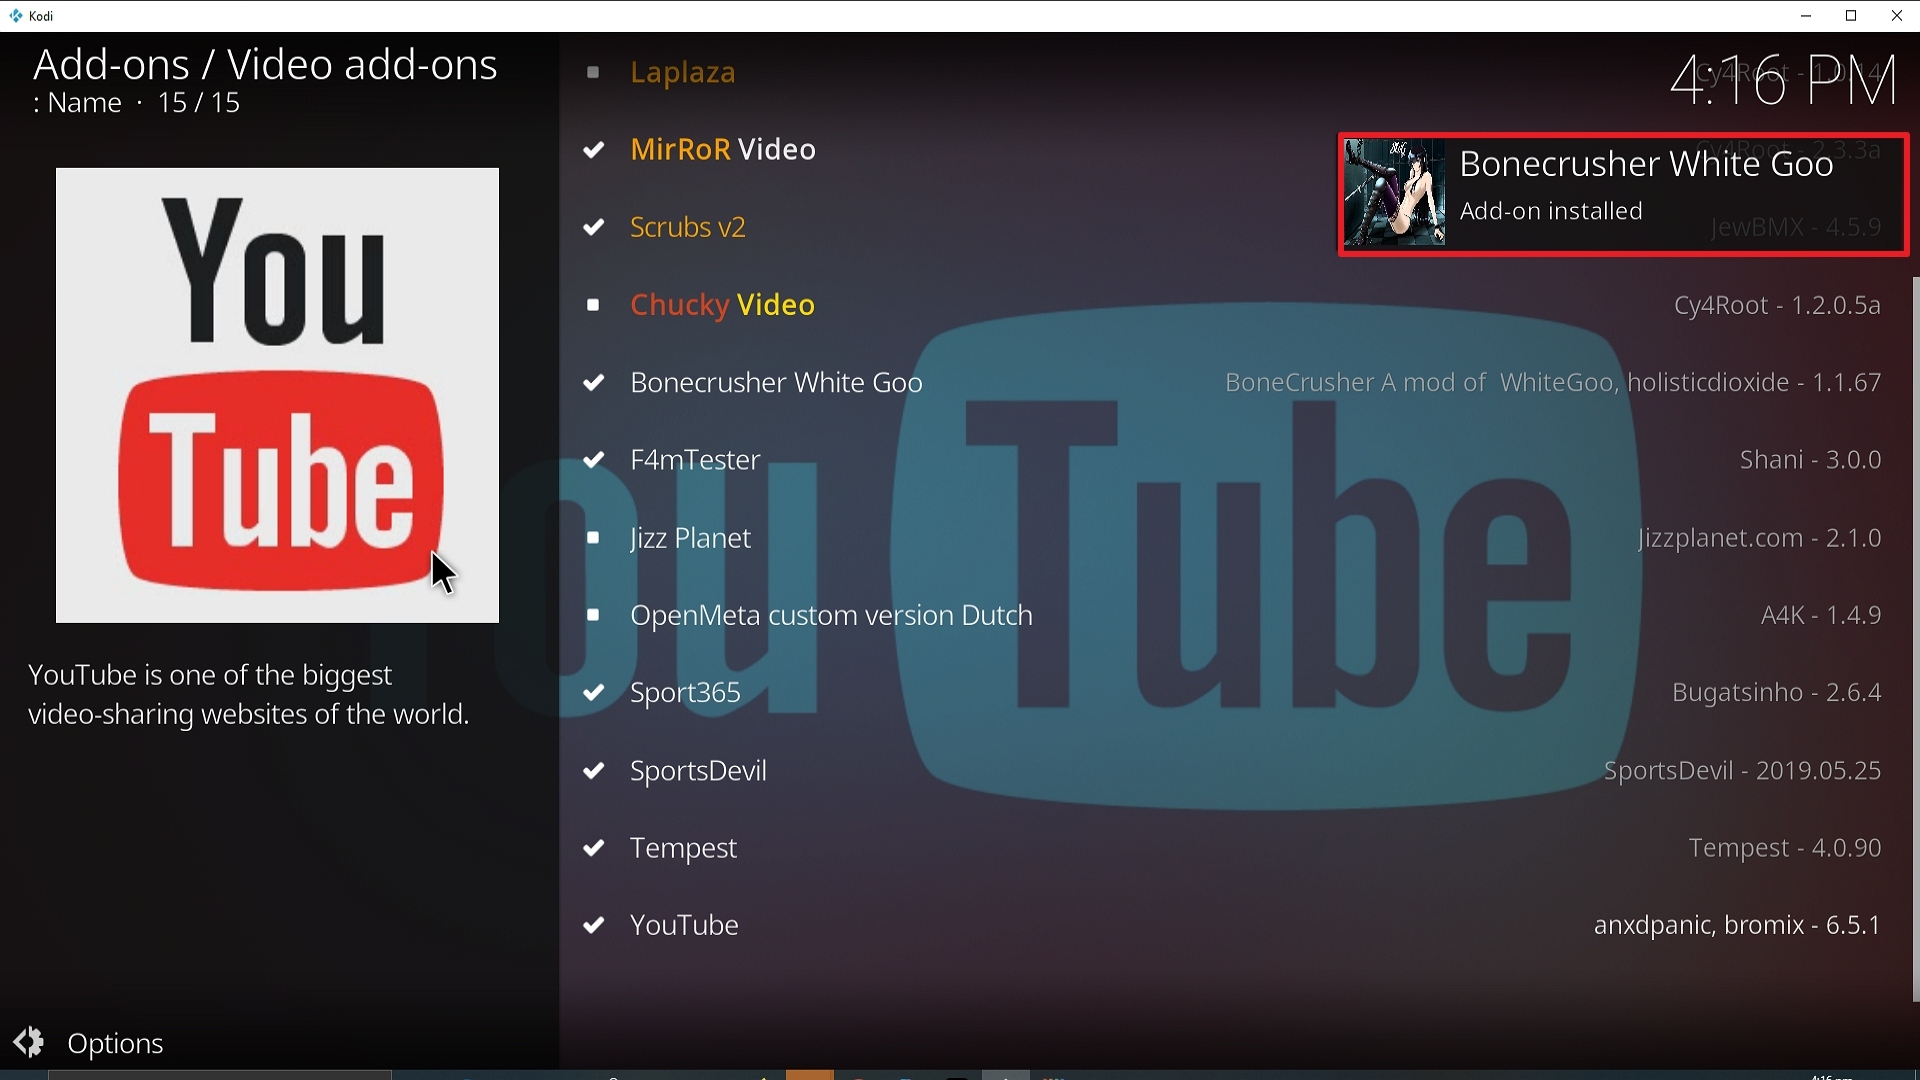
25. You should see a popup in the upper right corner saying Enigma has installed. There will actually be multiple popups for the various components.
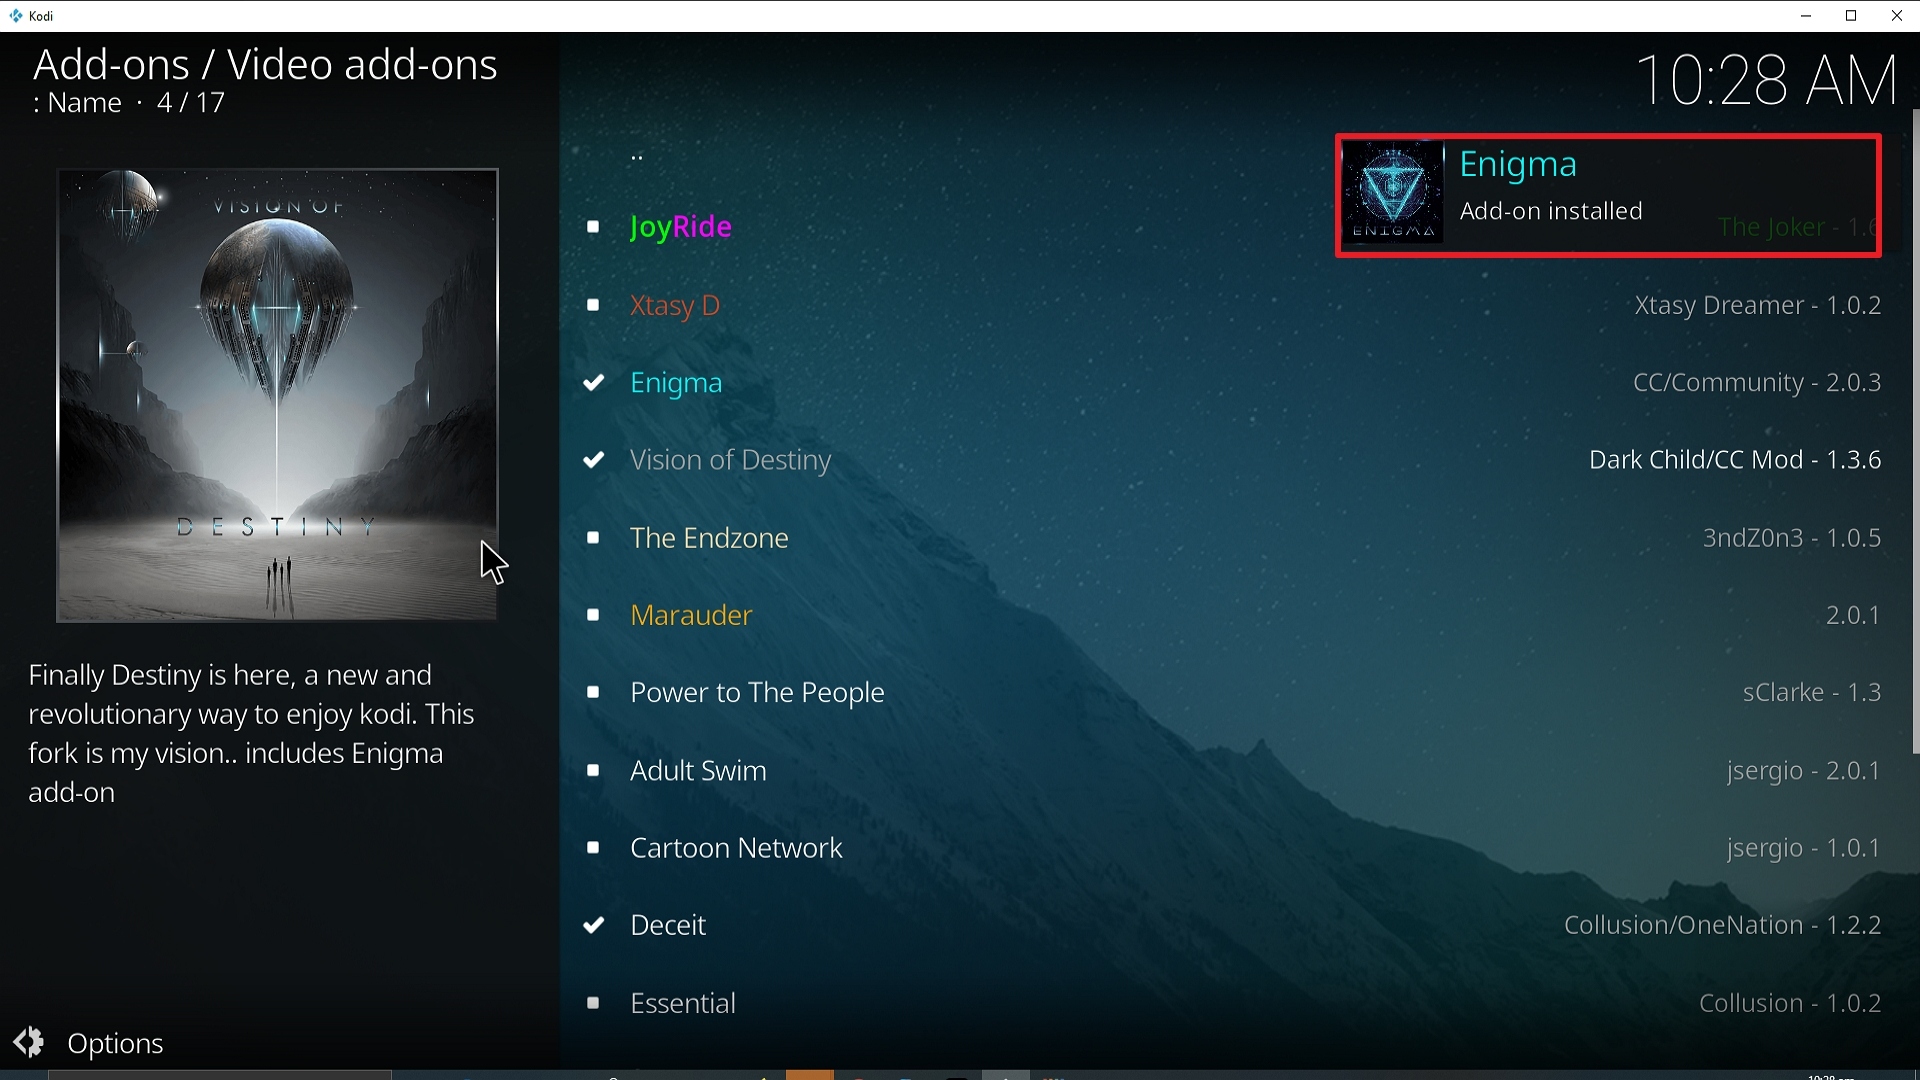
Step 25 Installing Enigma Kodi addon on Kodi


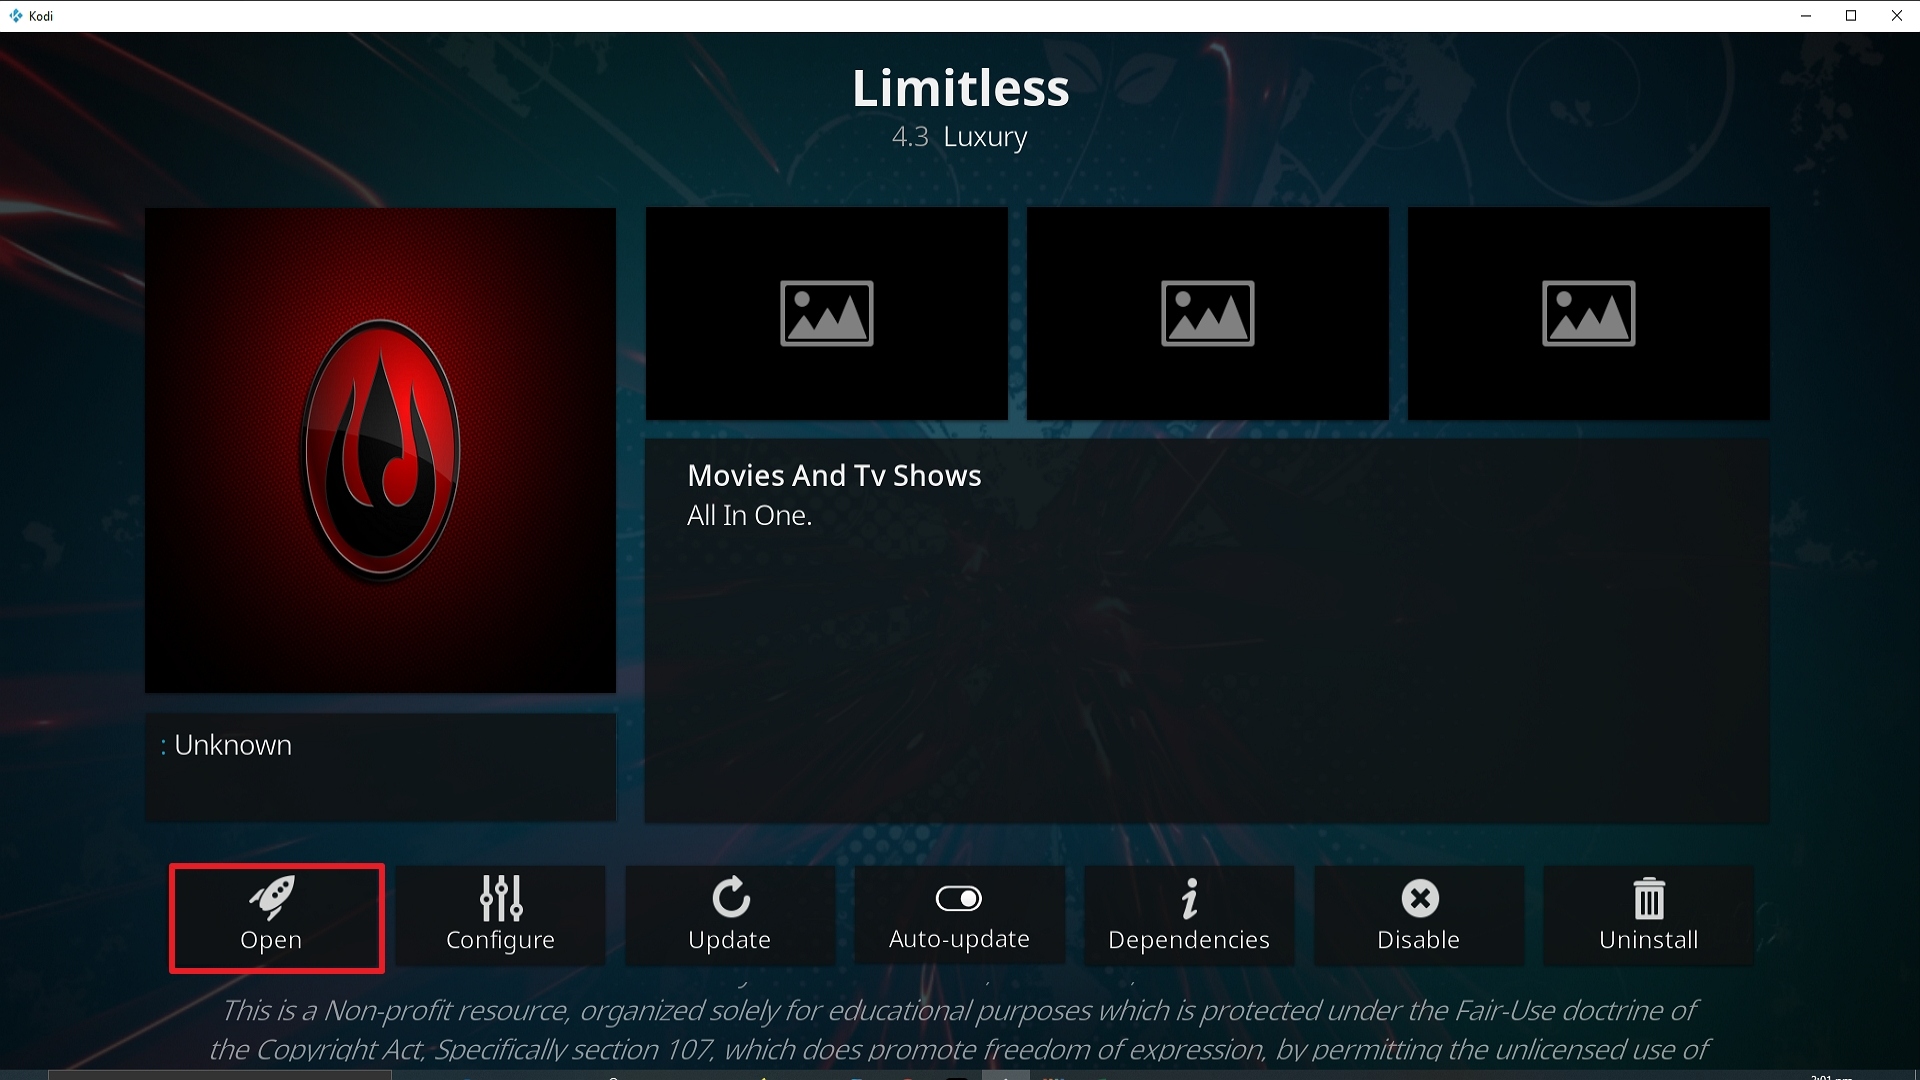
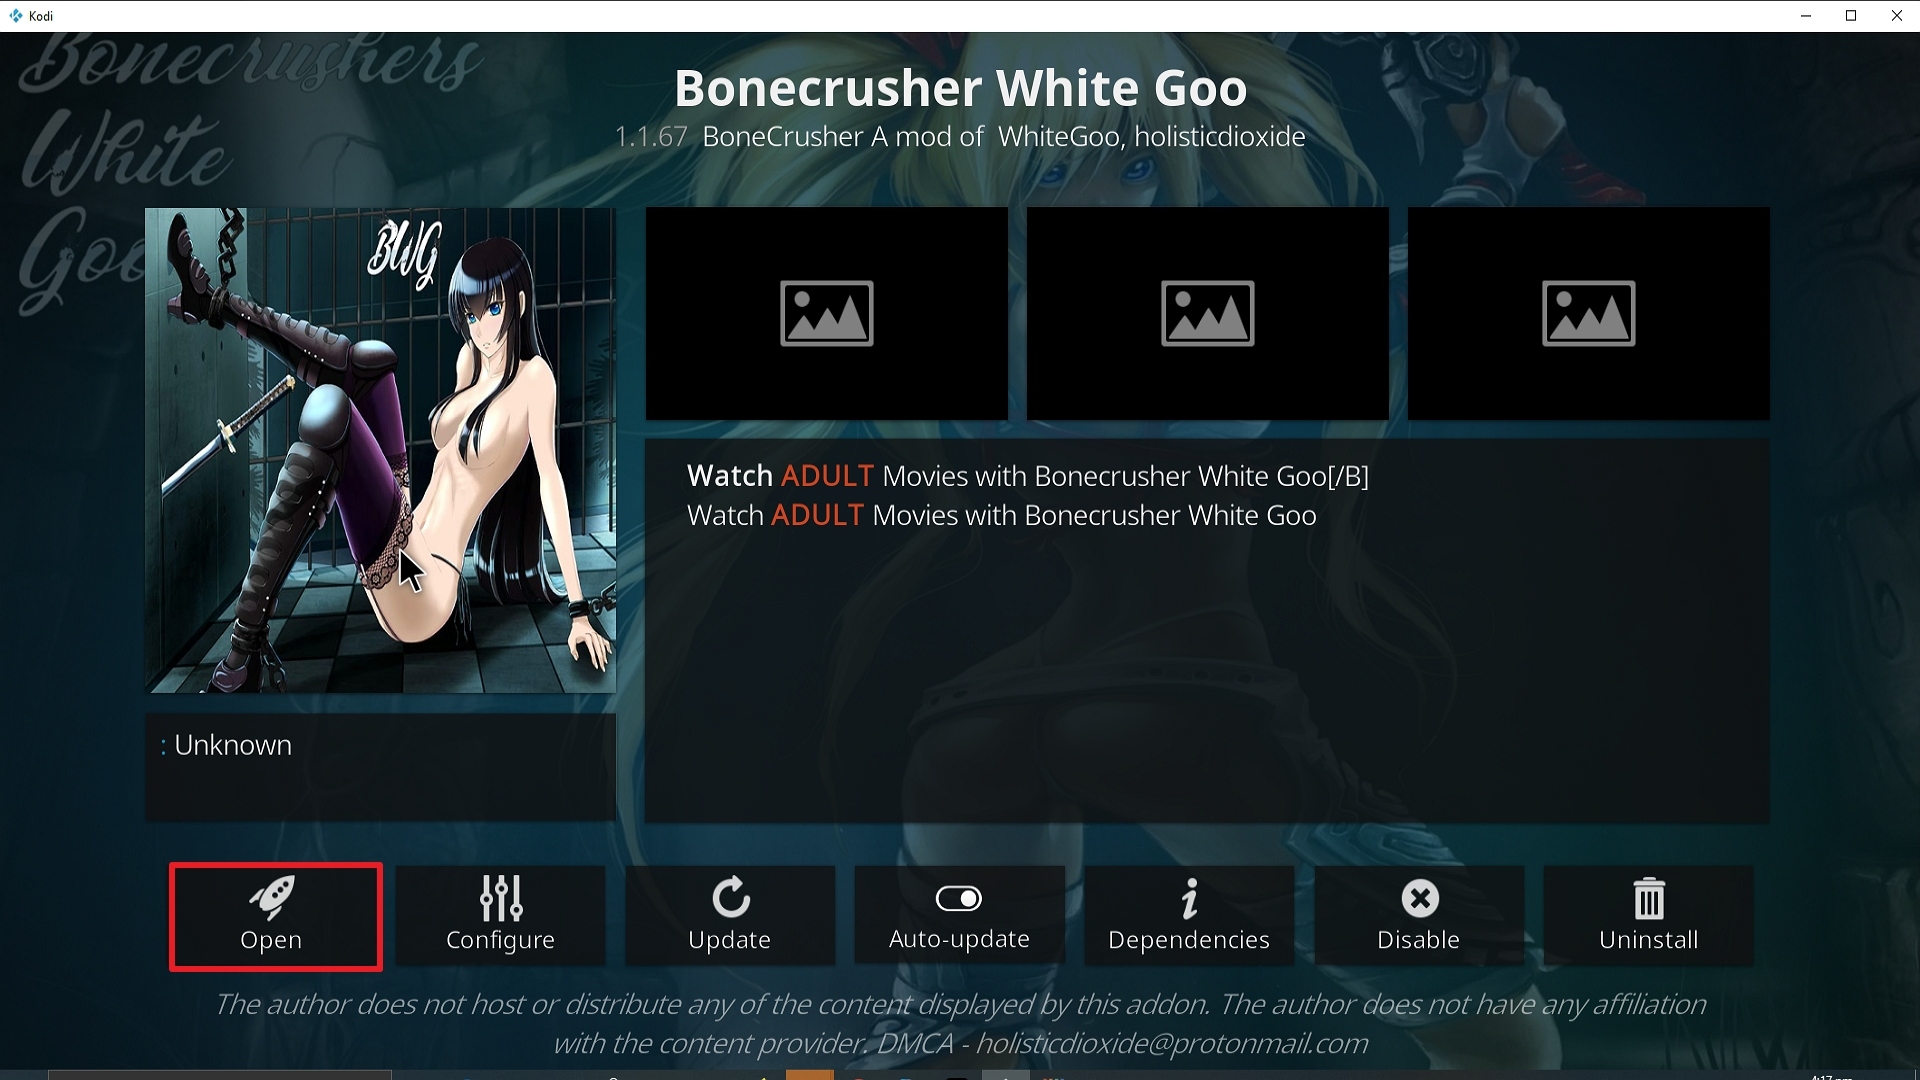
26. Click on Open to start the Enigma  add-on.
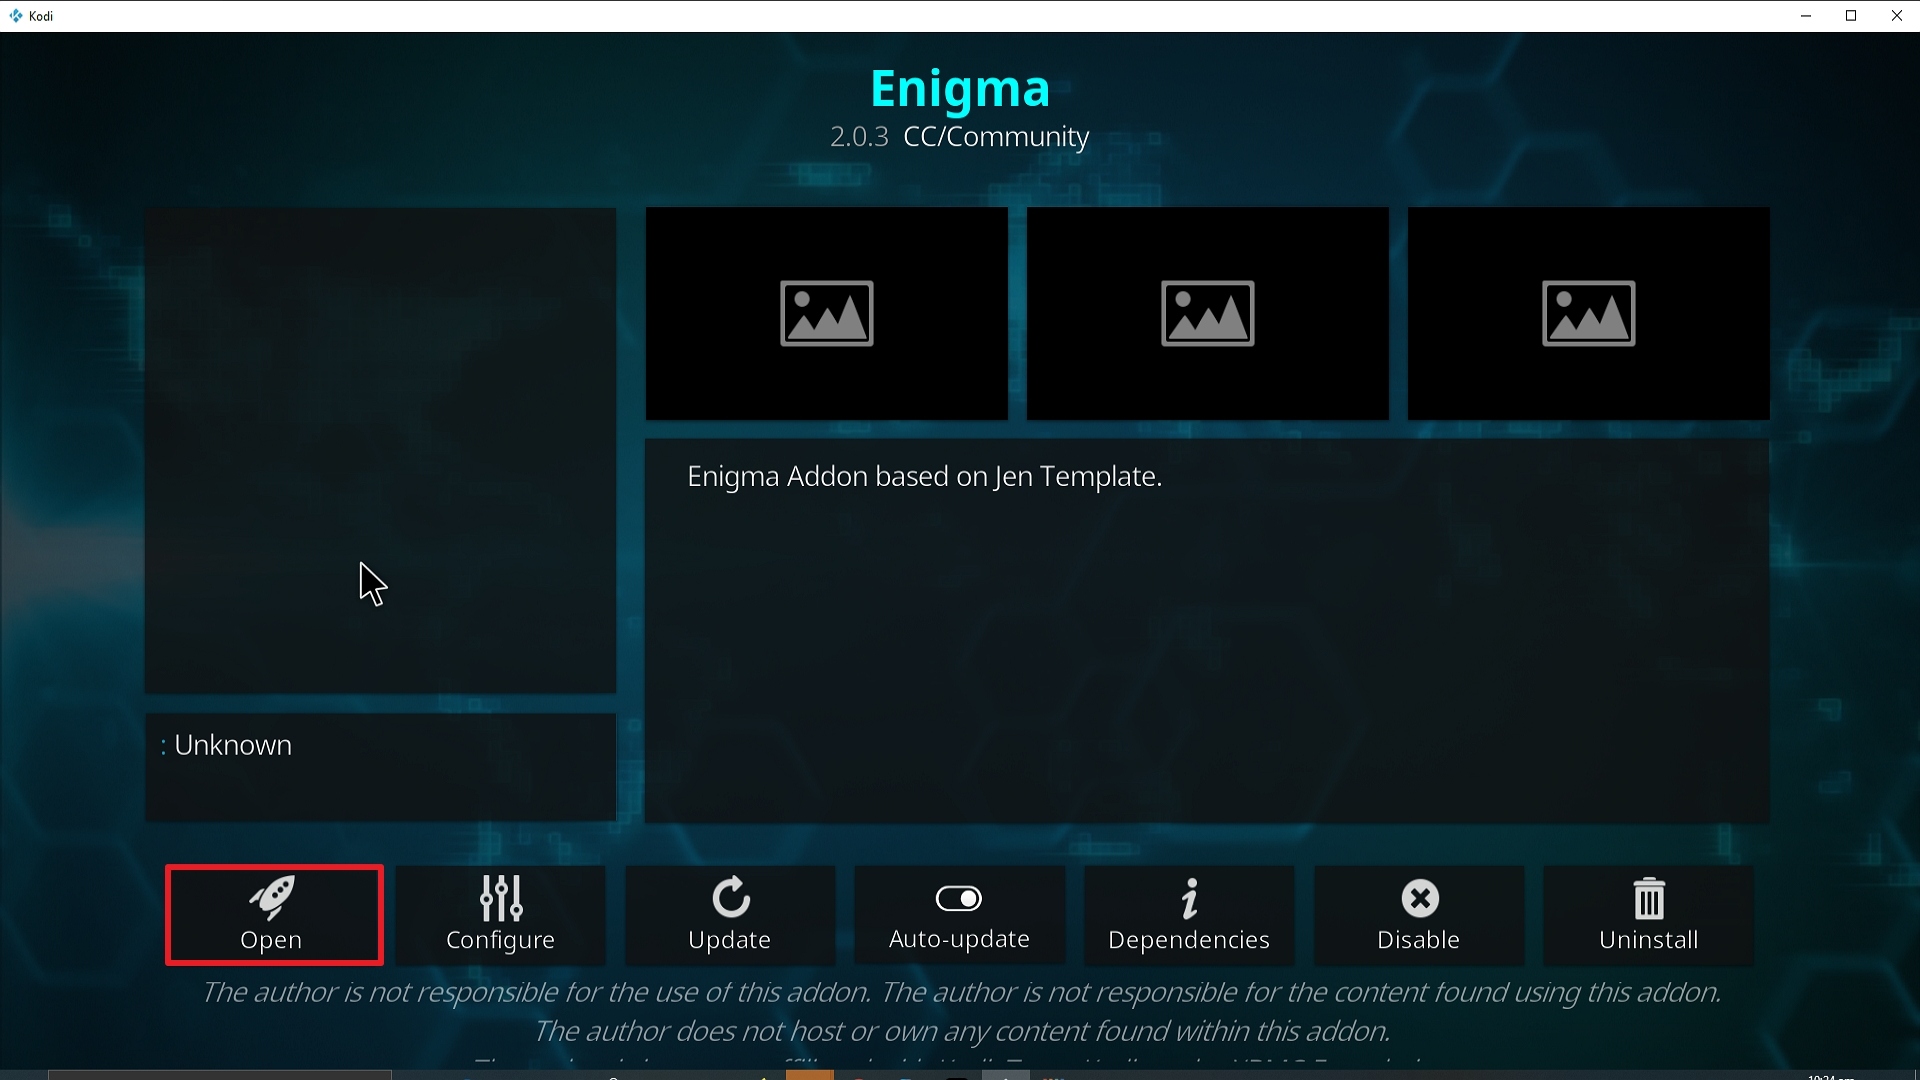
Step 26 Installing Enigma Kodi addon on Kodi


Stream Safely with a VPN

All of your online activities are being tracked by your ISP. Streaming, most especially, is closely monitored because it consumes a lot of data.

Once your ISP discovers that you are exceeding your data cap, it will do everything to disrupt your streaming experience. It will throttle down your connection which results in buffering. And we do not want that for you.

To prevent this from happening, we highly recommend using streaming apps with a premium VPN service like Surfshark.

Here are the other perks of having it on your device:

  • Provides access to geo-restricted content.
  • Protects all of your personal data when accessing public wifi internet.
  • Cloaks all of your online activities and identity that may be used by online threats like hackers and ISP.
  • It is the best solution for Firestick buffering and Kodi Buffering as well.

Note: For more information about Surfshark, please read our Surfshark Review.


Grab your subscription now!

Click here to get the lowest price on Surfshark through our exclusive limited-time offer.


How to Install Surfshark VPN on Firestick

If your Firestick still has the older interface, read this article to learn how to update it: Update Firestick Interface.

Follow our screenshots below to install the SurfShark VPN app on your Fire TV stick.

1. Go to the Home screen of your Firestick.
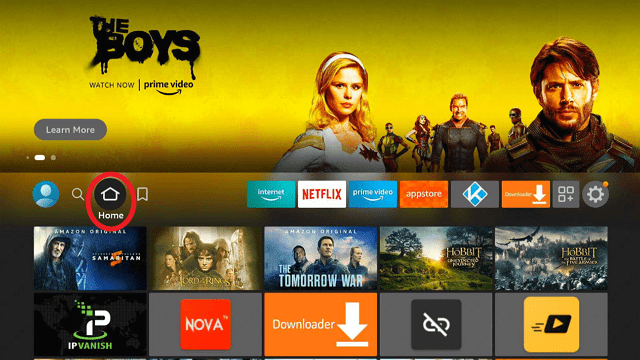
step 1 Install Surfshark VPN on Firestick


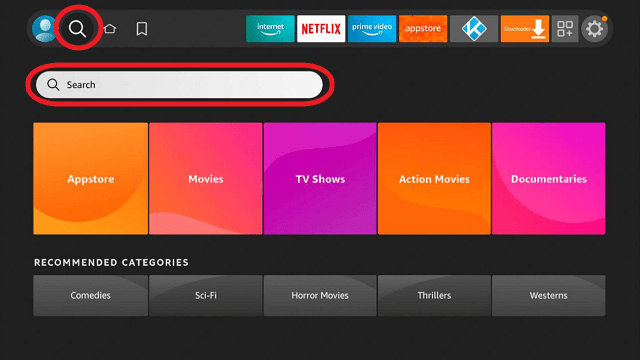
2. Navigate towards the Find tab. Press the Search button from the resulting dropdown.
step 2 Install Surfshark VPN on Firestick


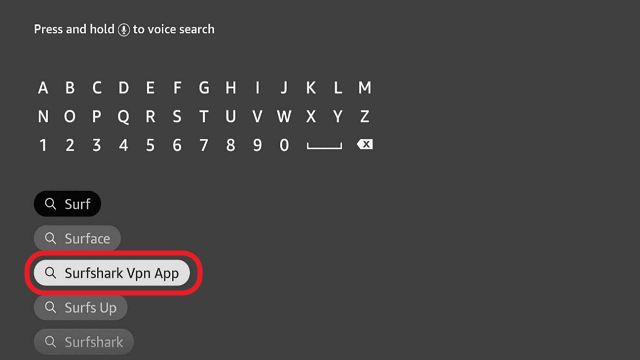
3. Type in the keyword of SurfShark and select from the suggestions that will appear.
step 3 Install Surfshark VPN on Firestick


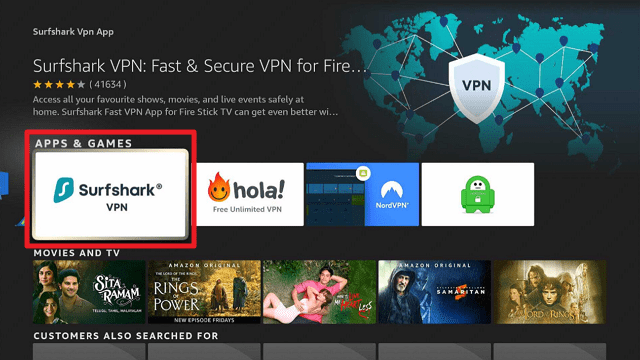
4. Click the official SurfShark icon from your search results.
step 4 Install Surfshark VPN on Firestick


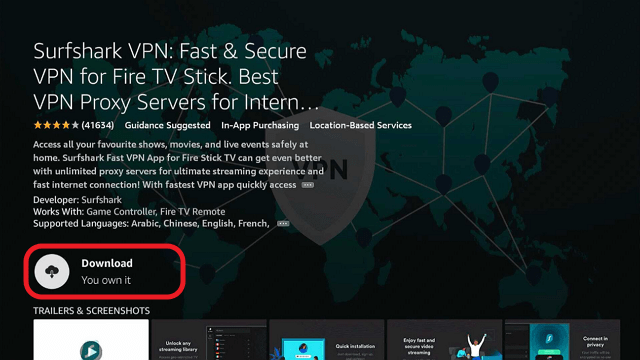
5. Press the Download (You own it) button.
step 5 Install Surfshark VPN on Firestick


6. The SurfShark VPN installer will download on your device.
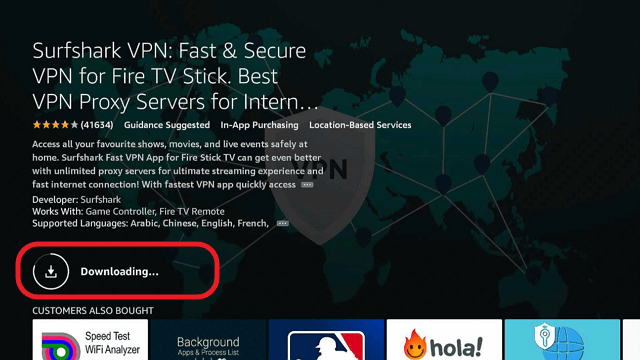
step 6 Install Surfshark VPN on Firestick


7. SurfShark VPN’s app will automatically install itself on your Fire TV stick.
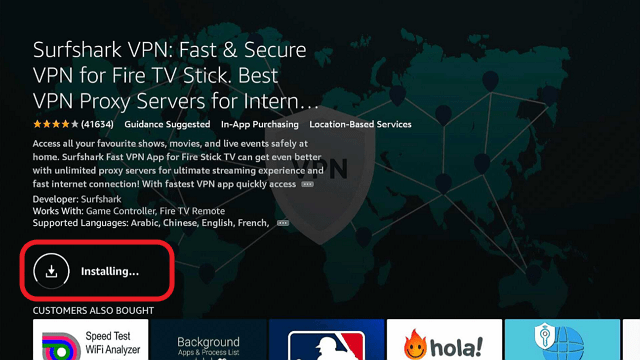
step 7 Install Surfshark VPN on Firestick


8. Press the Open button after completing SurfShark VPN’s installation process.
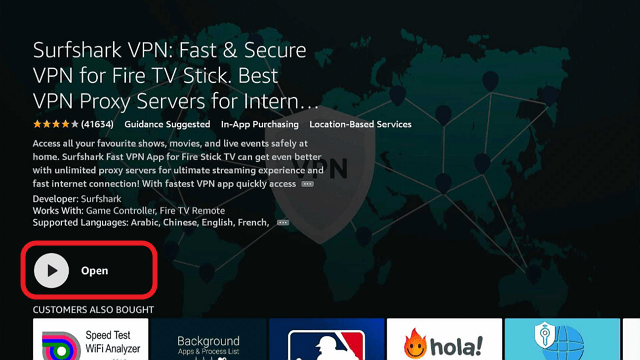
step 8 Install Surfshark VPN on Firestick


9. Please wait for the SurfShark VPN to load its user interface.
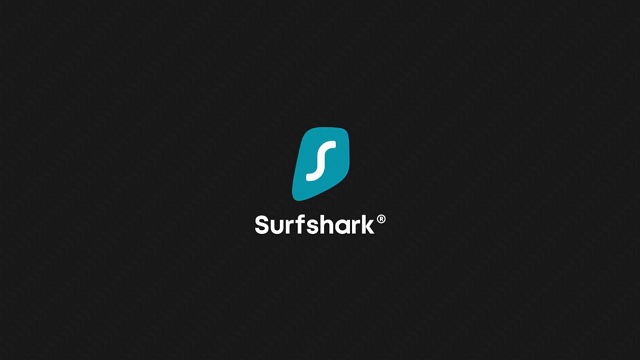
step 9 Install Surfshark VPN on Firestick


10. You can now log in with your SurfShark VPN account credentials.
step 10 Install Surfshark VPN on Firestick

Learn more about Surfshark and Grab the Best Surfshark Deal Now!


Install Surfshark on Firestick
Best Surfshark Deal


Other VPNs to Consider

NordVPN (Best for Streaming)

Best Features

  • 5000+ Server in 50+ Countries 
  • Military-Grade Encryption
  • Fast Connection Speed
  • Suitable to a lot of devices
  • No-Log Policy

Prices
  • Complete $5.89 per month (64% Discount)
  • Plus $4.59 per month (56% Discount)
  • Standard $3.69 per month (55% Discount)

Best Features

  • 750+ High-speed VPN Servers in 43 Locations
  • Military-Grade Encryption
  • Fastest HD Streaming and Gaming
  • 30-Day Money-Back Guarantee
  • Unlimited Data & Devices
  • No-Log Policy

Prices
  • 3 Years $1.99 per month (82% Discount)
  • 1 Years $3.29 per month (70% Discount)
  • 1 Month $10.99 per month

IPVanish VPN (Most Secure)

Best Features

  • 1200+ Servers in 60+ Countries around the world
  • Unlimited Connections
  • No-Log Policy
  • Top Notch Military-Grade VPN Protocols and Encryptions
  • 100% Safe and Secured
  • Most Trusted VPN
  • Best VPN for Firestick
  • 30-Day Money-Back Guarantee

Prices
  • Yearly $3.99 per month (63% Discount) – 30 days risk free + Ransomware & Malware Protection
  • Quarterly $5.32 per month (51% Discount)
  • Monthly $10.99 per month


For more VPN discounts, go to ReviewVPN Deals and purchase the best VPN for you.

Click here to get the lowest price on Surfshark through our exclusive limited-time offer.


Install TempTV Kodi Addon

TempTV Kodi Addon

The article will help you on how to install TempTV Kodi Addon on Firestick.


Source: https://tempest0580.github.io/

TempTV is a great new Live TV Kodi addon that draws streams from several well-known sources for Kodi users. Including USA TV and Pluto TV, as well as having a good selection of foreign TV and adult content.

You can also search channels by language and country which is a handy feature.

TempTV is on its second major version and was updated as recently as September 2019, adding Arconai TV.

A great source for free IPTV.


ANONYMOUSLY

Common Errors

Here are the 3 most common errors you are most likely to come across with TempTV:

  • Stream not working/ Not available. When looking for working live TV streams be prepared to find a lot of dud links. Firstly, are you using a VPN with Kodi? If not, many of the links may not work. But not because they are broken, but because your ISP is blocking your access to the content, as it is being streamed illegally. Check here for the best VPN deal. By using a VPN, you can bypass any content blocks or firewalls from your ISP or third parties. When connecting to a stream bear in mind it can take up to 10 seconds for the stream to start working. Also, if the match you are watching is popular the server may be overrun with requests and some will time out. So, try and refresh a few times before you move on. If none of that works, then try our more in-depth fix guide for streams linked above.


  • Kodi error check log. A common error you will get the longer you use Kodi. All the media that you stream is cached so that it can load faster the next time you access it. By caching media, Kodi makes it seamless for you to navigate between pages on an addon and reload content that you had been previously watching. This includes fan art as well. All this media caching will quickly fill up your storage space, which may happen faster if you stream a lot and use a low storage device like an Amazon Firestick. To find out how to clear your cache and fix other problems in your error log read our in-depth guide linked above.


  • Could not connect to URL/Download: Being unable to connect to the URL to download TempTV is common. The most common fix is to double-check the URL that you have written out. Make sure that you have copied it exactly. Next check the repository that the source is coming from. Make sure you have used the repo that we have given you, rather than another unknown source. Also try the URL again if correctly typed, to check that there just isn’t a blip on the server where the file is located. If the problem persists read other methods that you can try to fix the error. Read our fix guide link above.


  • Script Error: This means that either TempTV or your Kodi installation has a missing or corrupted script. Check the addon by reinstalling it. If the error persists then the problem might lie with your Kodi installation. You may need to either update Kodi or just give it a fresh install. To learn how to do this and more read our in-depth guide linked above.

Review

TempTV is a good Kodi addon, but not a Mobdro or a Red Box. They offer a bigger range of channels, with better uptime. Or just pay the $7 a month for 3,000+ HD Channel on a premium IPTV provider like Player’s Klub.

TempTV has the following sections:

  • 1 Click Movies
  • 1 Click Shows
  • Arconai TV
  • Pluto TV
  • USA TV Go
  • Stream Live
  • Foreign Channels
  • Adult’s Only
  • Settings
  • Entertainment
  • Movies
  • Kids
  • Sports
  • News
  • Music
  • 24/7


YOUR INTERNET ACTIVITY IS BEING WATCHED

ReviewVPN cannot attest to the legality, security and privacy of the applications discussed on this site. It is highly recommended that you use a VPN service while streaming or using Kodi.

Currently, your IP 216.73.217.150 is visible to everyone and your Browser is being tracked by Advertisers & ISP Provider.

Save 65% Now

Limited Time Offer

Here are the main reasons why you must use a VPN:

  • Your activities are hidden from your ISP, the government, and from the apps you are using.
  • You can access additional movies and TV streams.
  • ISP attempts to throttle are thrwarted thus reducing buffering issues.
  • Geographically restricted content like Netflix and Hulu can be unblocked.

A VPN works be replacing your ISP-assigned IP address and creating an encrypted tunnel. We recommend the no log service offered by IPVanish. It works well on a Firestick and offers the fastest possible speeds.

Special Limited Time Offer - Get IPVanish


Legal Disclaimer: ReviewVPN.com does not encourage or endorse any illegal activity involved in the usage of services and applications referenced on this site. We do not verify the licensing agreements of services. The end-user is wholly responsible for ensuring that any media accessed through these services does not violate copyright and/or licensing laws. ReviewVPN does not promote, link to, or receive compensation from any Apps and IPTV services.


Install Surfshark on Firestick

Best Surfshark Deal


How to Install TempTV Addon on Kodi with Screenshots

  1. From the home screen, select the cogwheel at the upper left.

Step 1 Installing TempTV addon on Kodi


2. Select System in the bottom right corner.

Step 2 Installing TempTV addon on Kodi


3. Select Add-ons on the left side of the screen.

Step 3 Installing TempTV addon on Kodi


4. Select Unknown sources.

Step 4 Installing TempTV addon on Kodi


5. Click Yes to allow unknown sources.

Step 5 Installing TempTV addon on Kodi


6. Select File manager.

Step 6 Installing TempTV on Kodi


7. Click Add source.

Step 7 Installing TempTV addon on Kodi


8. Click on <None>.

Step 8 Installing TempTV addon on Kodi


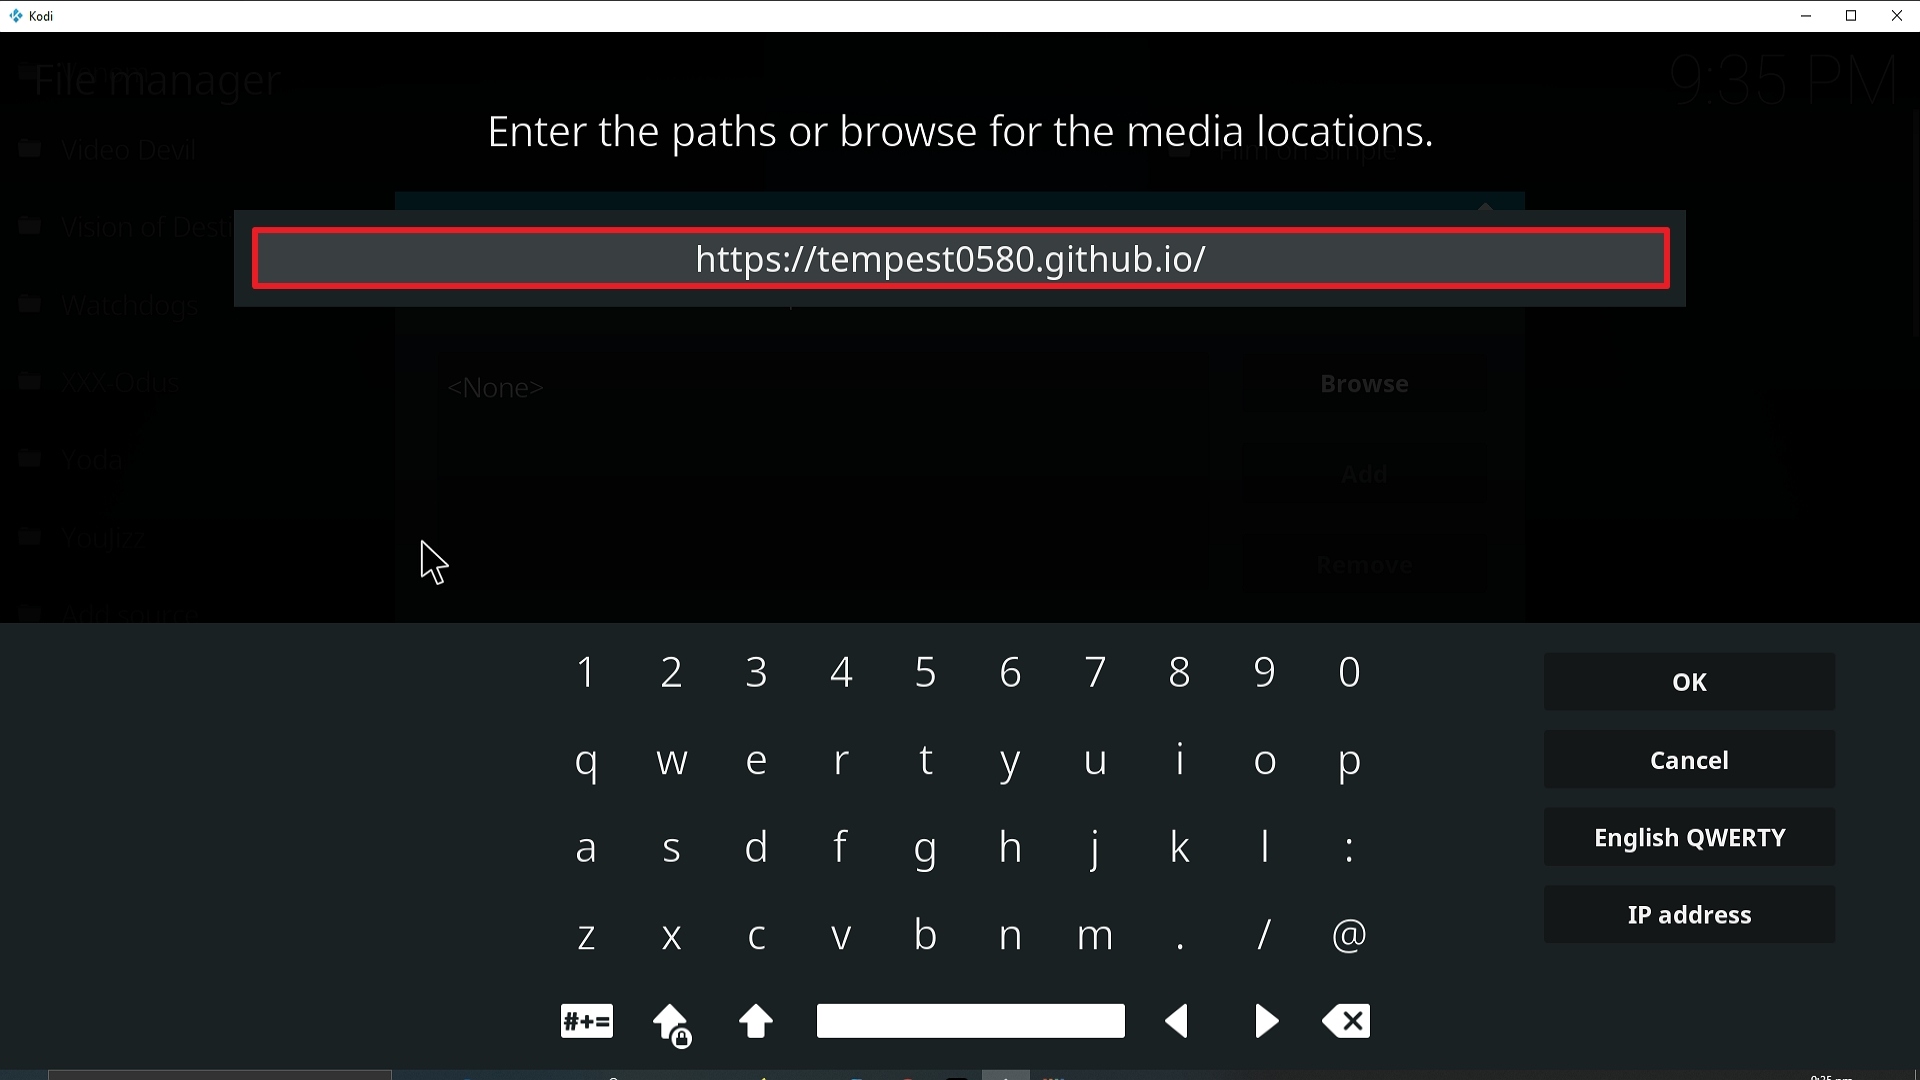
9. Type exactly: https://tempest0580.github.io/

Step 16 Installing TempTV Kodi addon on Kodi


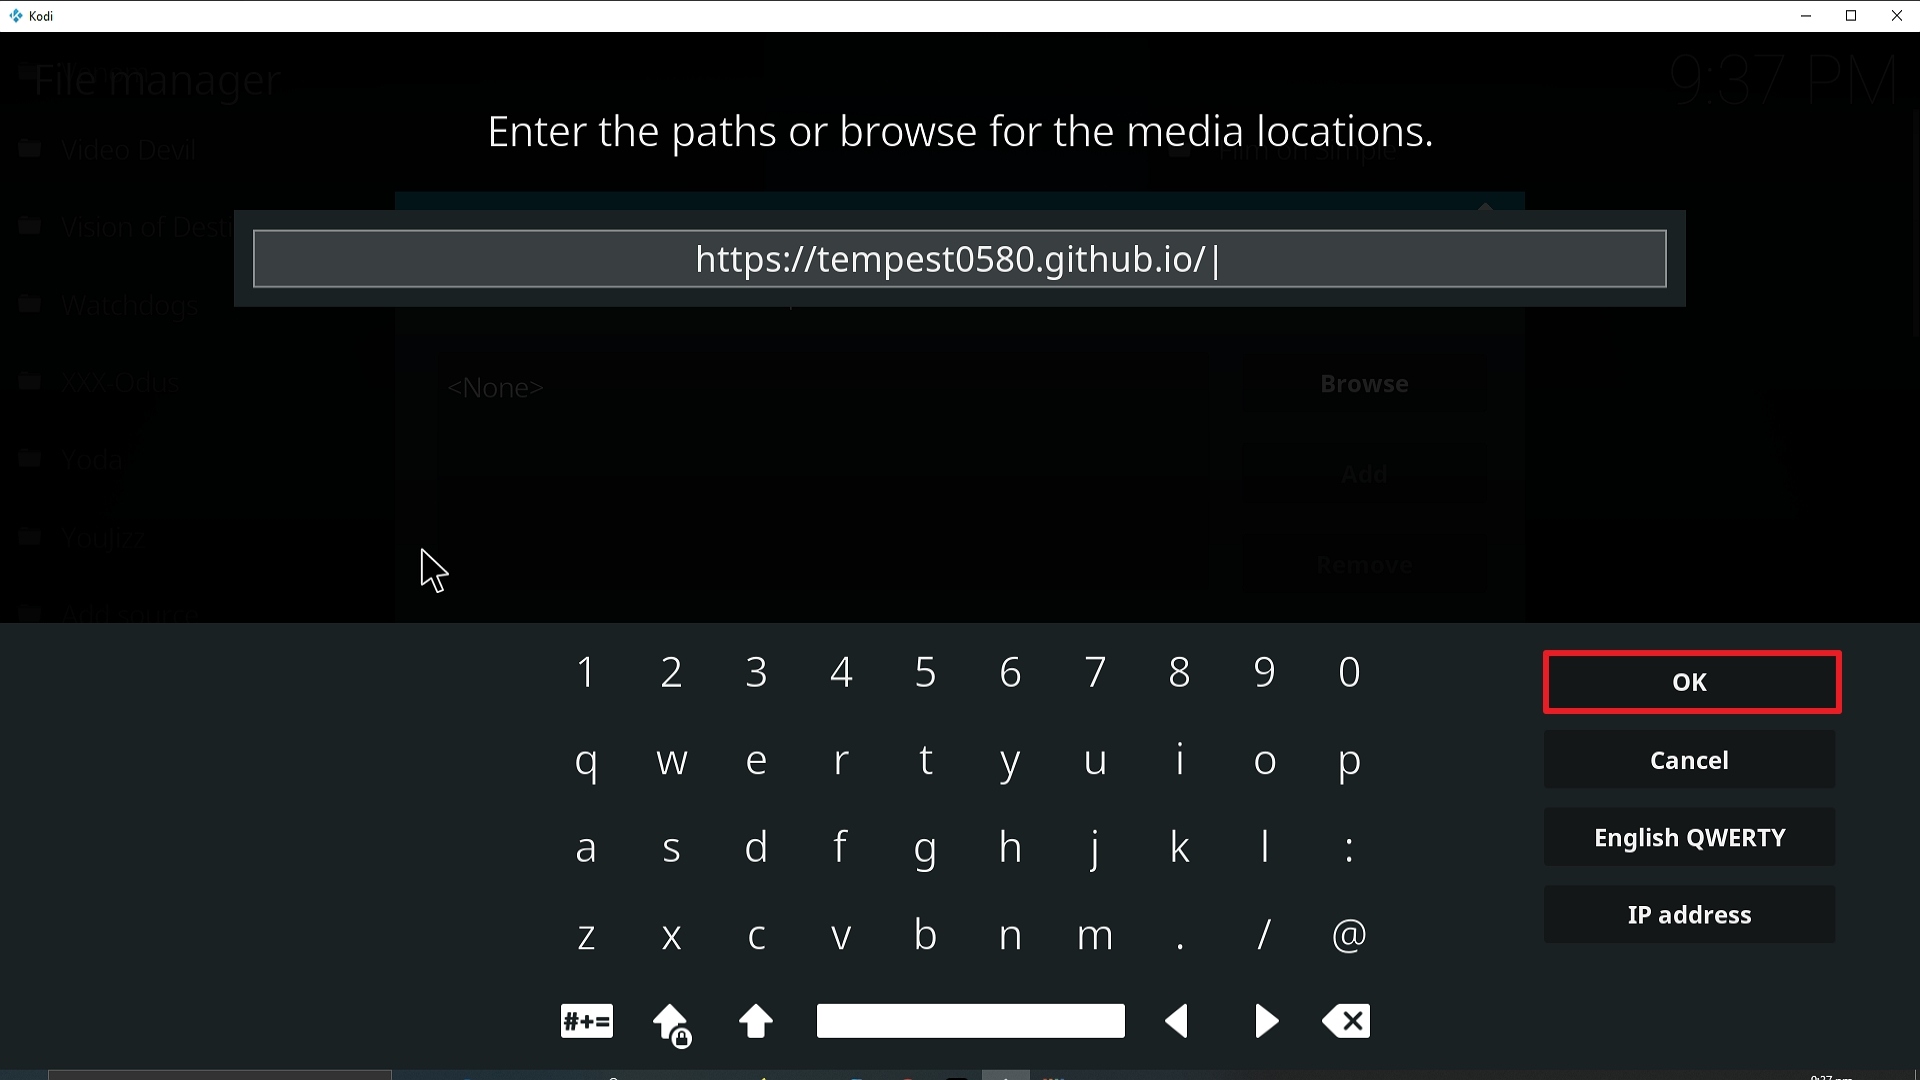
10. Click on OK.

Step 10 Installing TempTV Kodi addon on Kodi


11. Select enter a name for this media source.

Step 11 Installing TempTV Kodi addon on Kodi


12. Name is TempTV (this part isn’t critical as long as you remember the name).

Step 12 Installing TempTV Kodi addon on Kodi


13. Click on OK.

Step 13 Installing TempTV Kodi addon on Kodi


14. Click on OK.

Step 14 Installing TempTV Kodi addon on Kodi


15. Take one step back and click on Add-ons.

Step 15 Installing TempTV Kodi addon on Kodi


16. Select install from zip file.

Step 16 Installing TempTV Kodi addon on Kodi


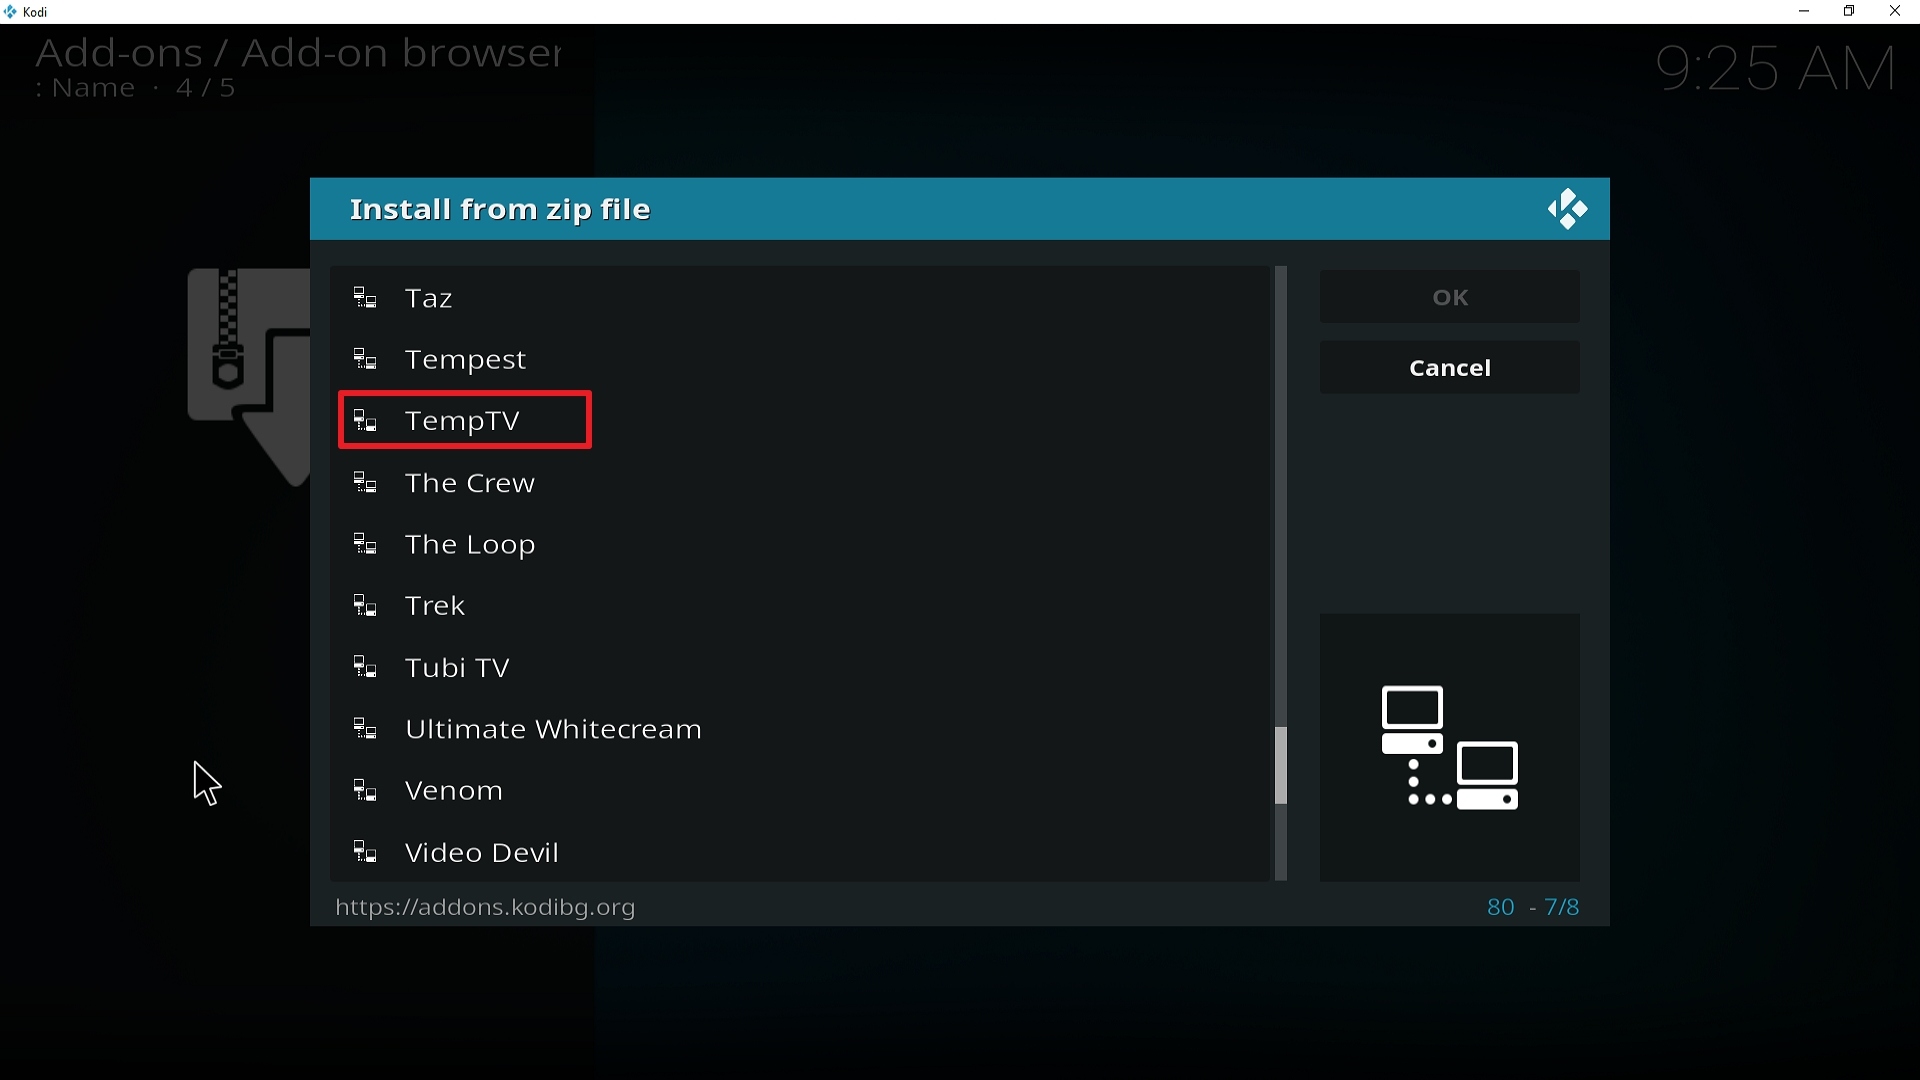
17. Click on TempTV (or whatever you named the source).

Step 17 Installing Temptv addon on Kodi


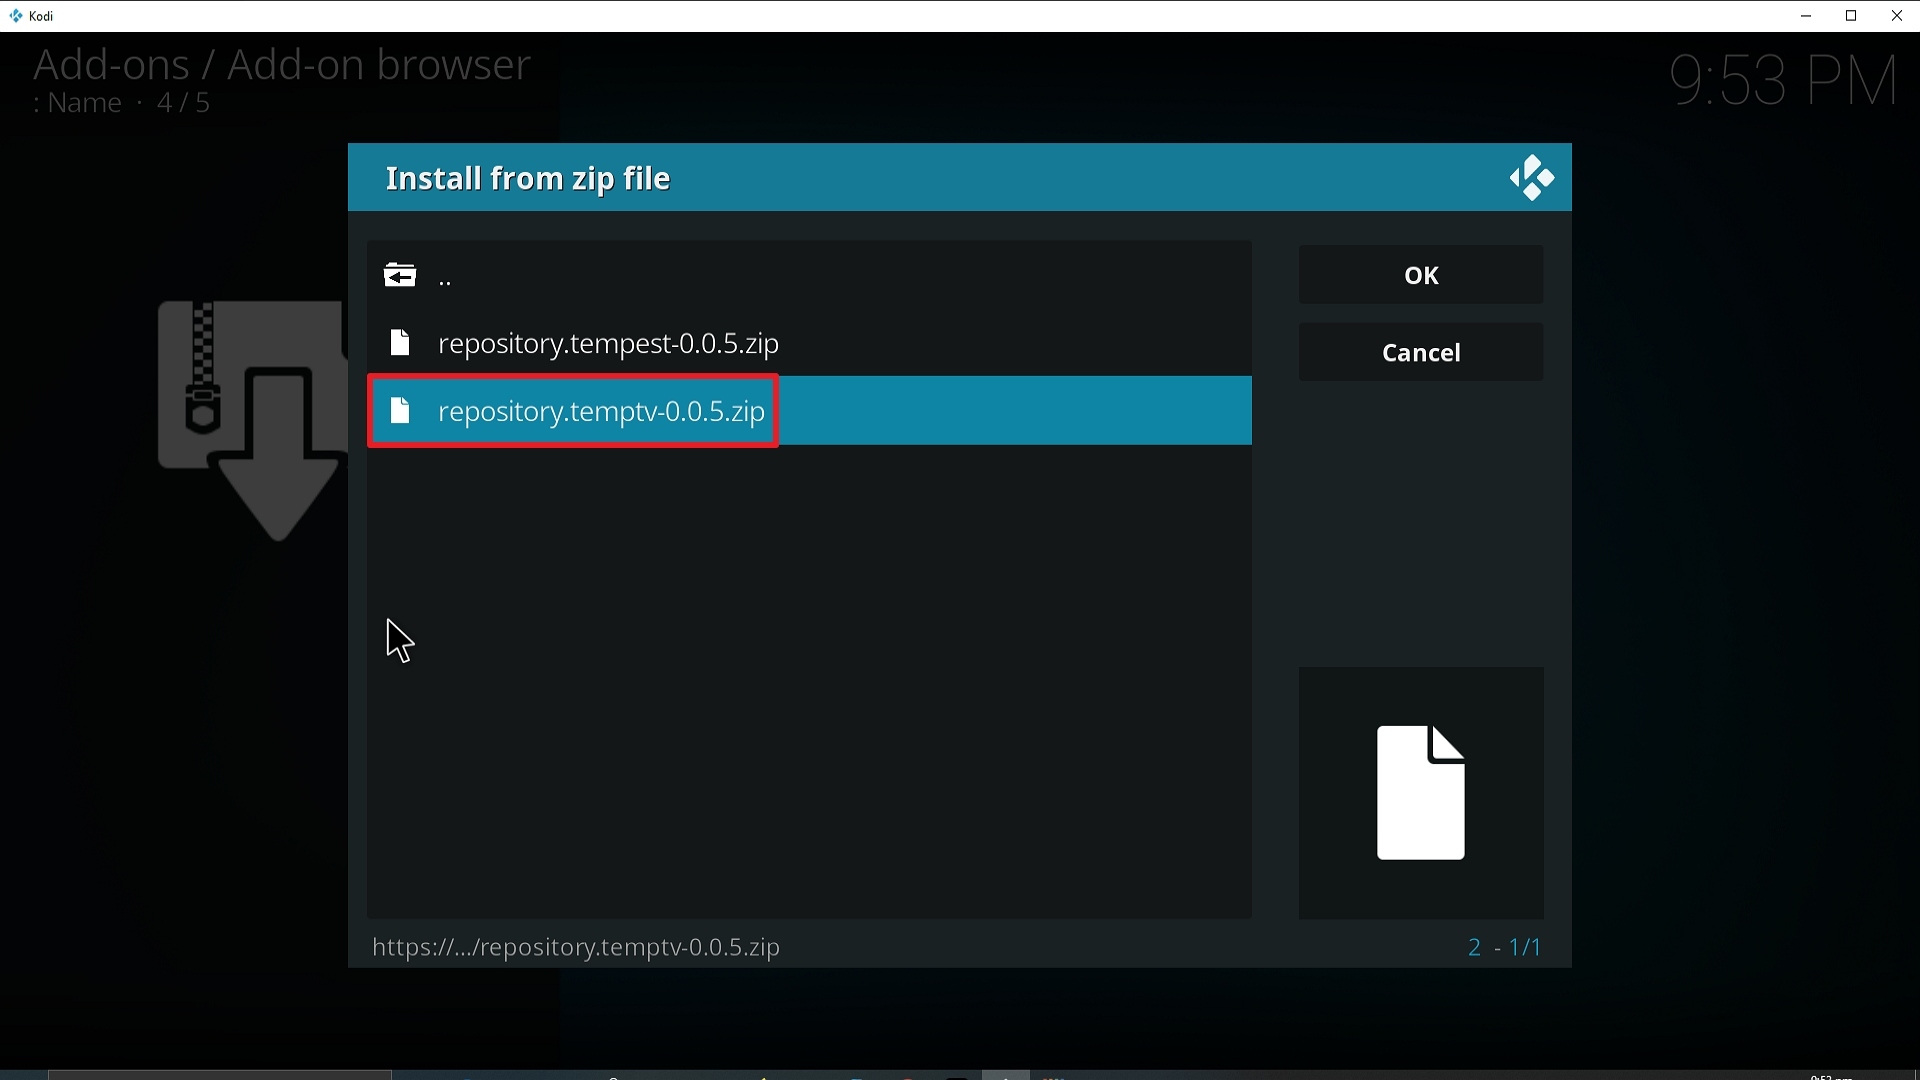
18. Click on repository.temptv.zip

Step 18 Installing TempTV Kodi addon on Kodi


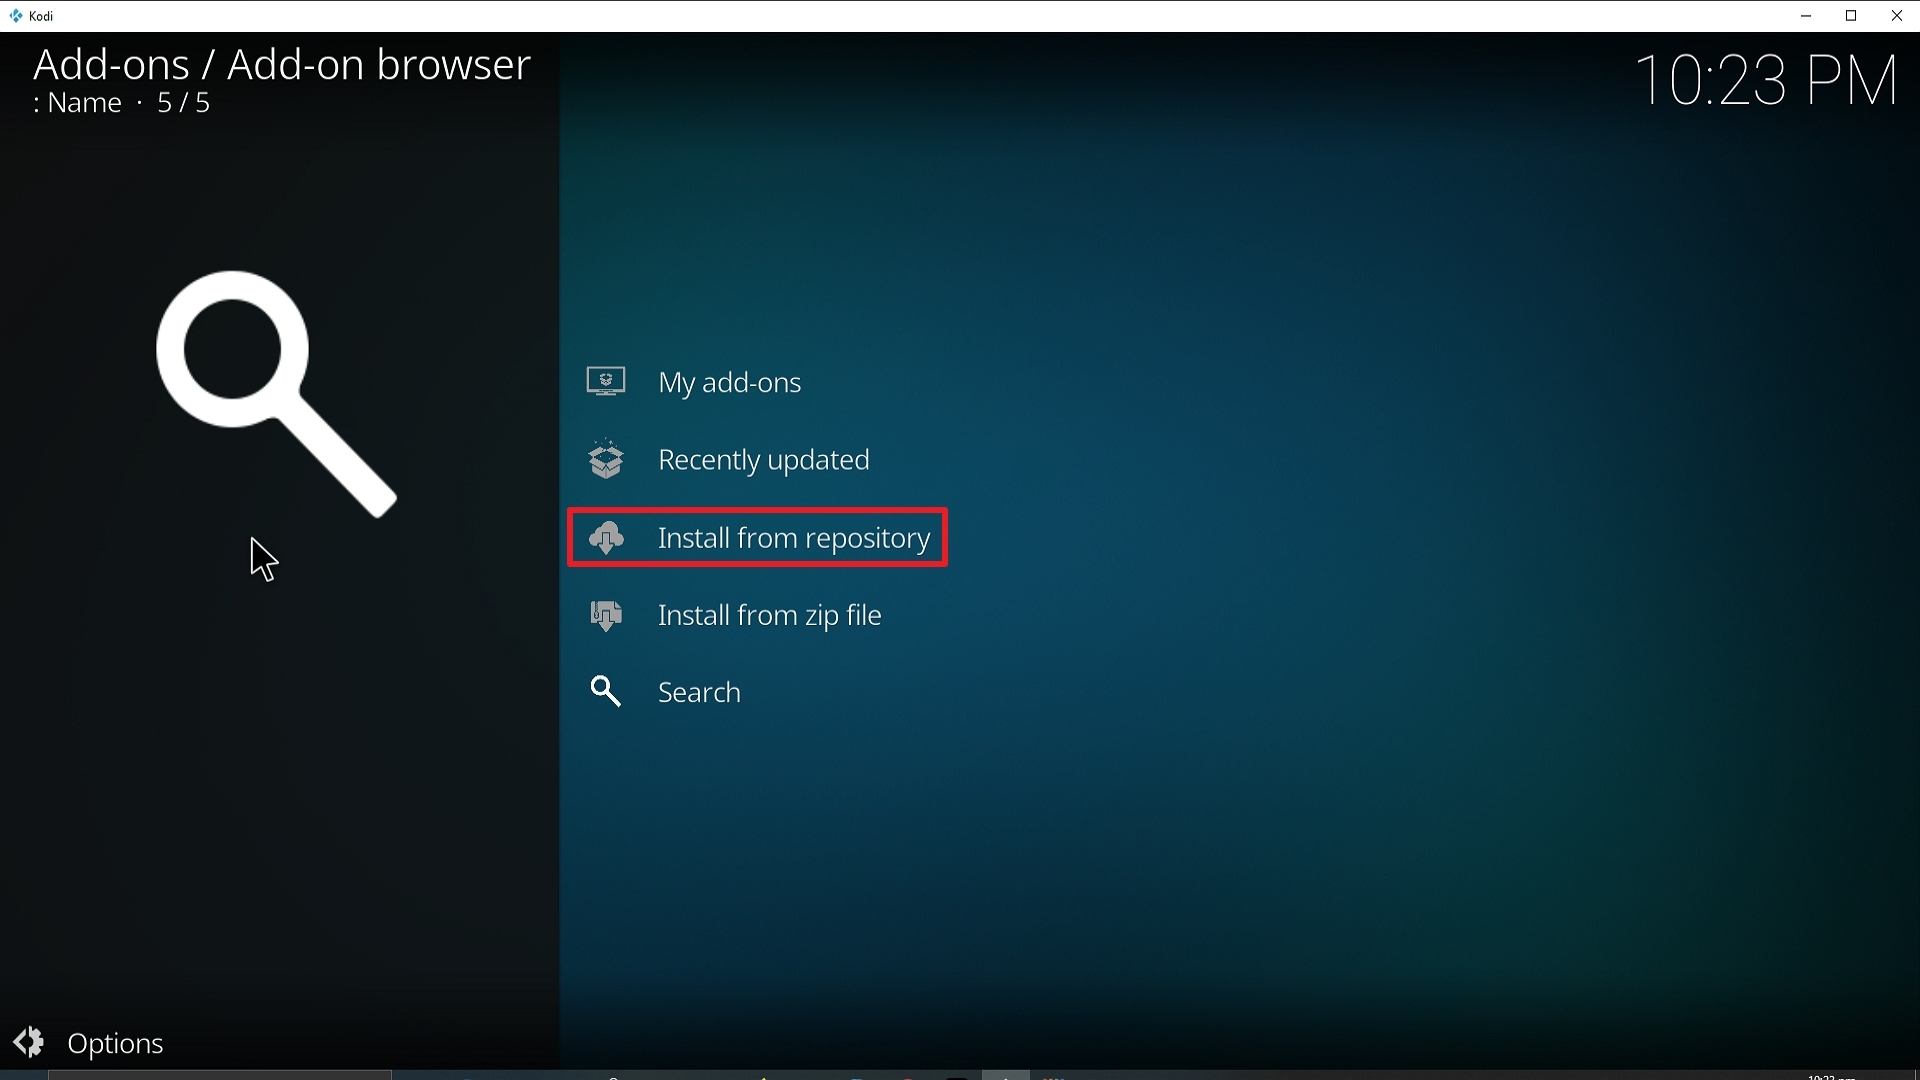
19. Select on Install from repository.

Step 19 Installing TempTV Kodi addon on Kodi


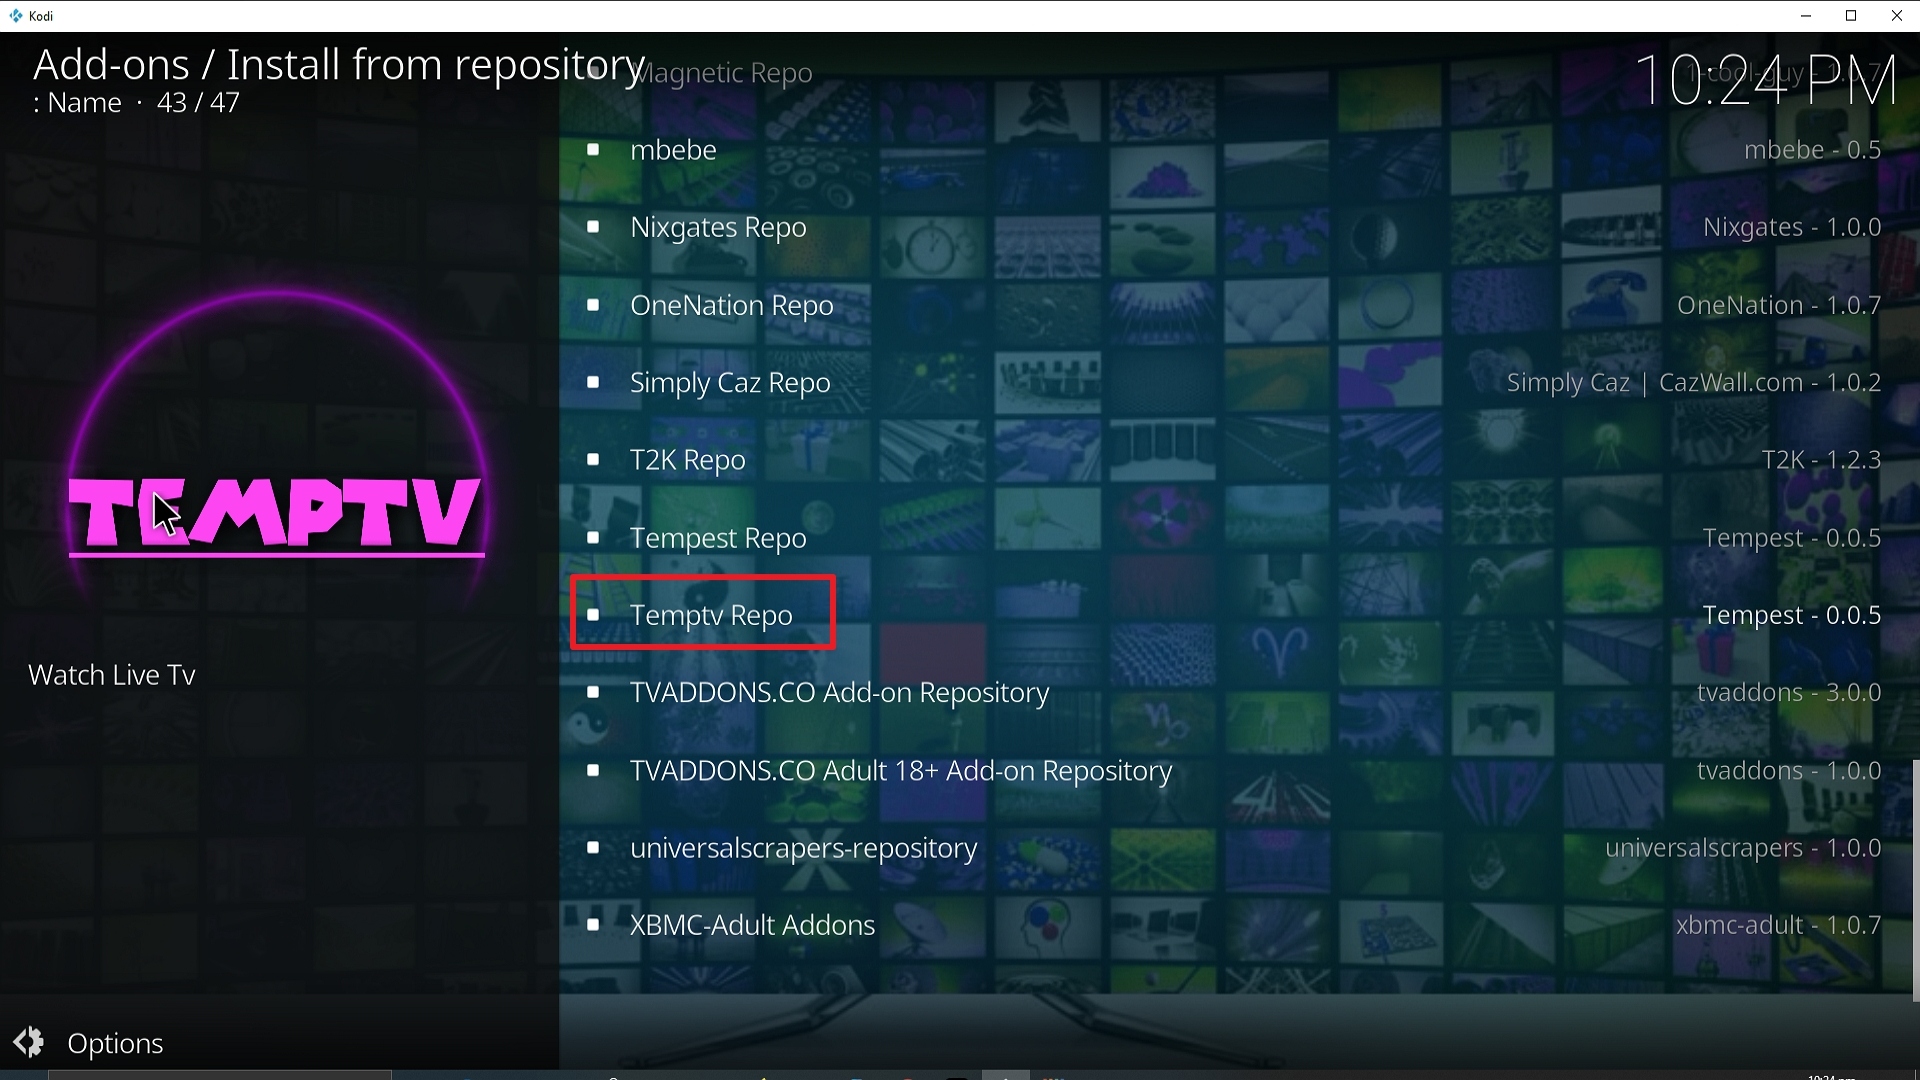
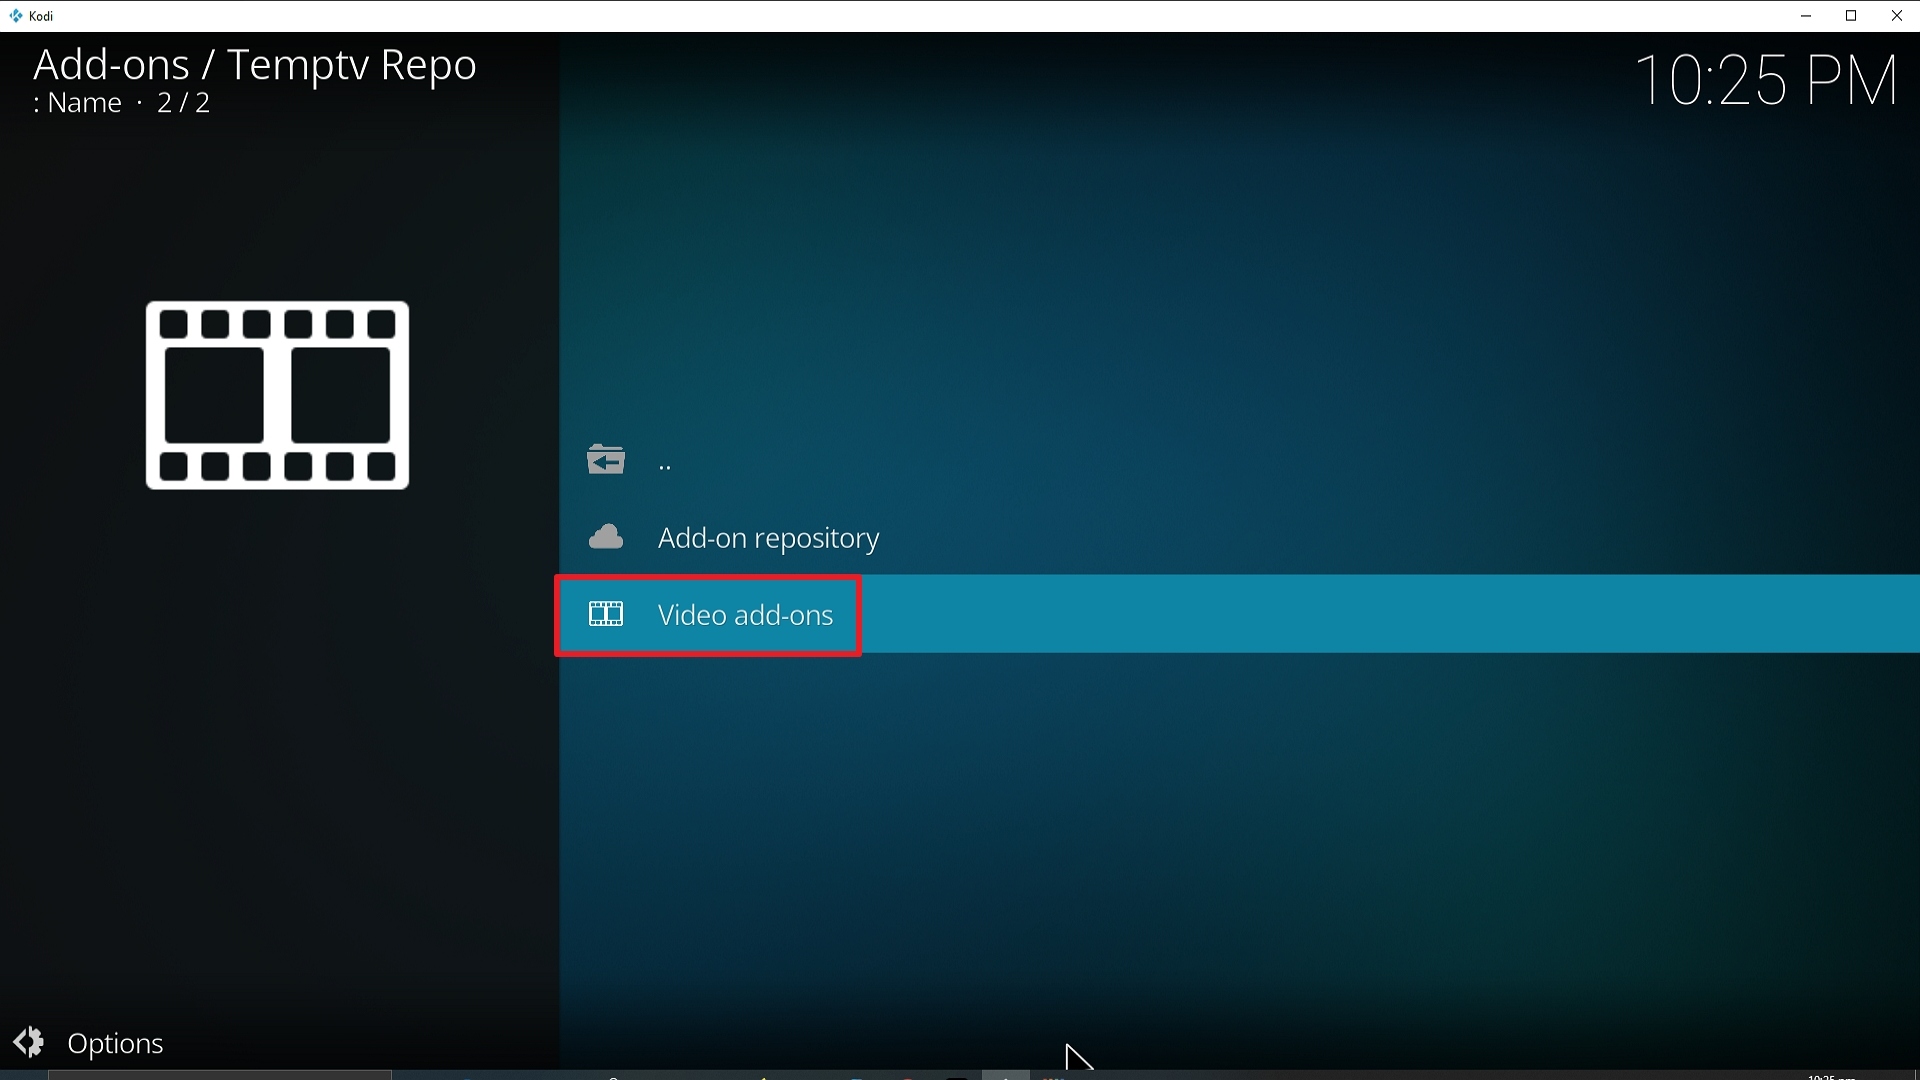
20. Click on Temptv Repo.

Step 20 Installing TempTV Kodi addon on Kodi


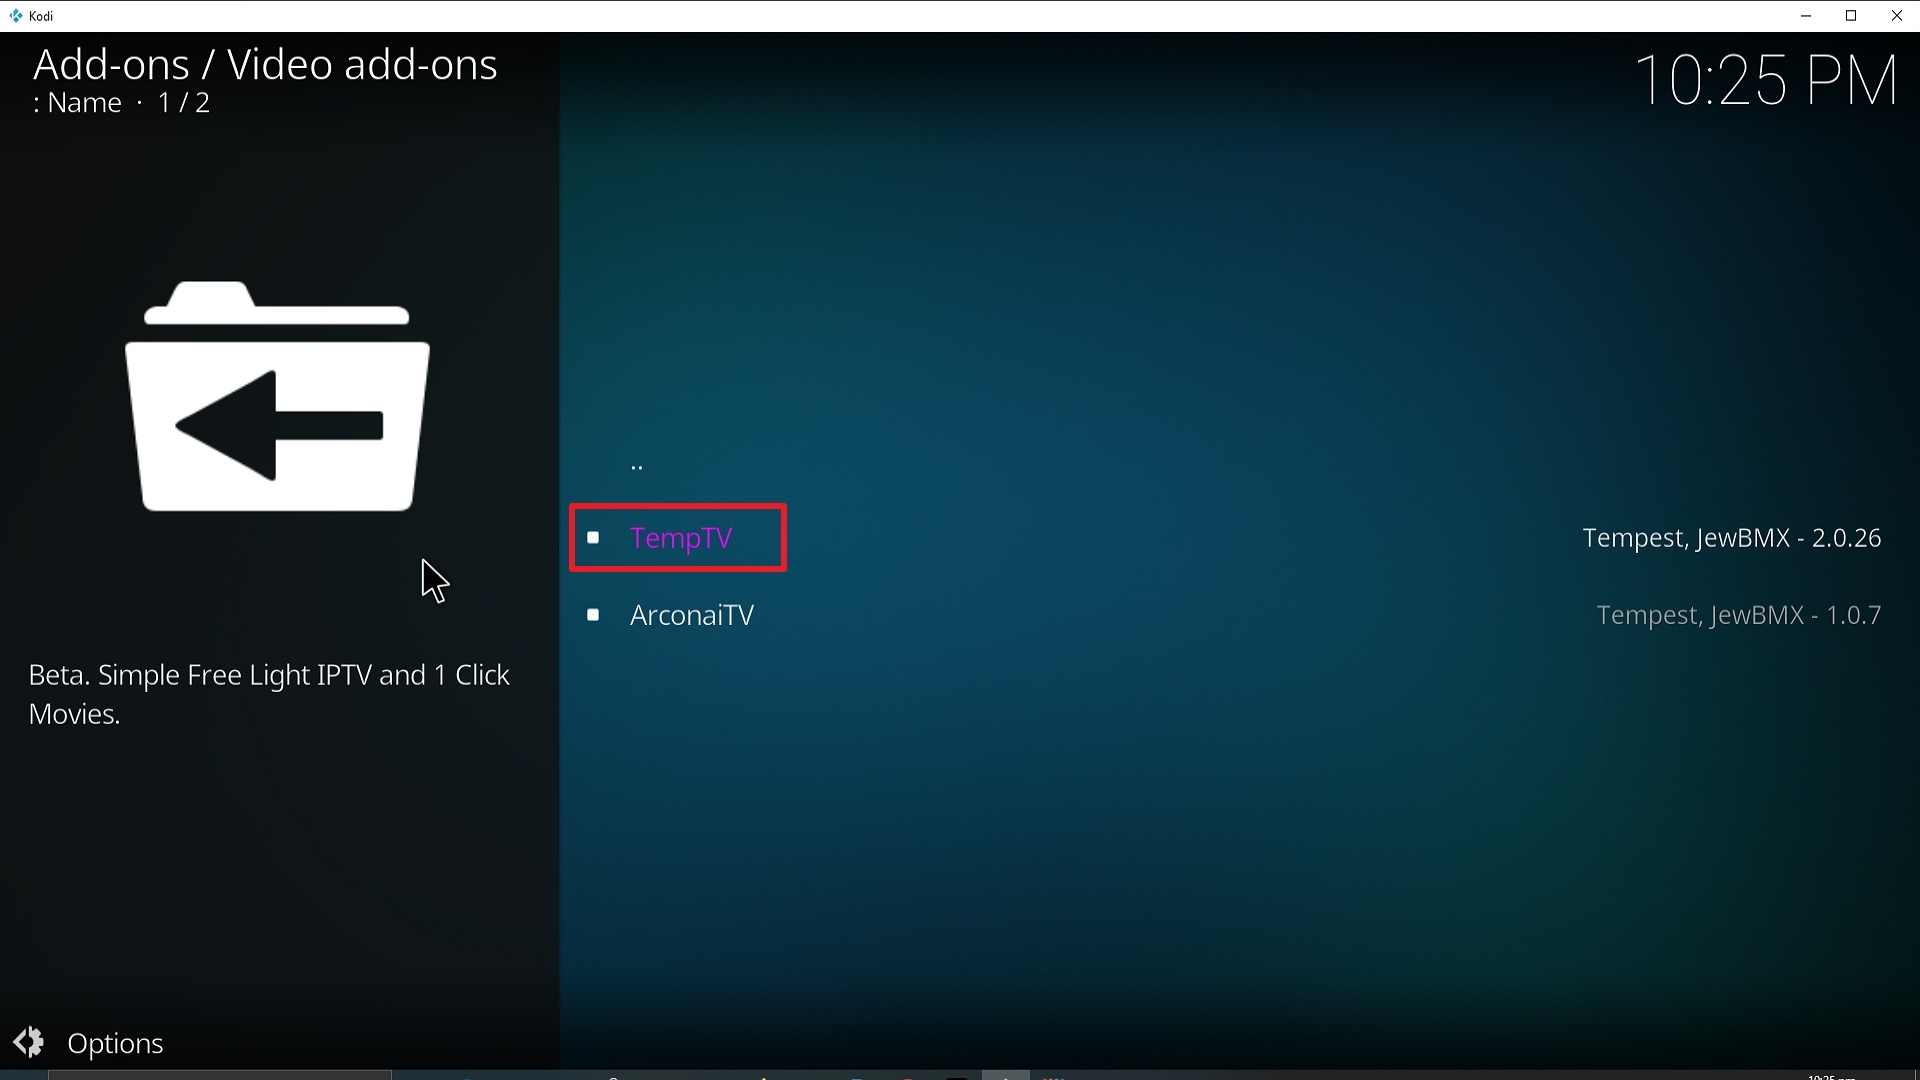
21. Pick Video add-ons.

Step 21 Installing TempTV Kodi addon on Kodi


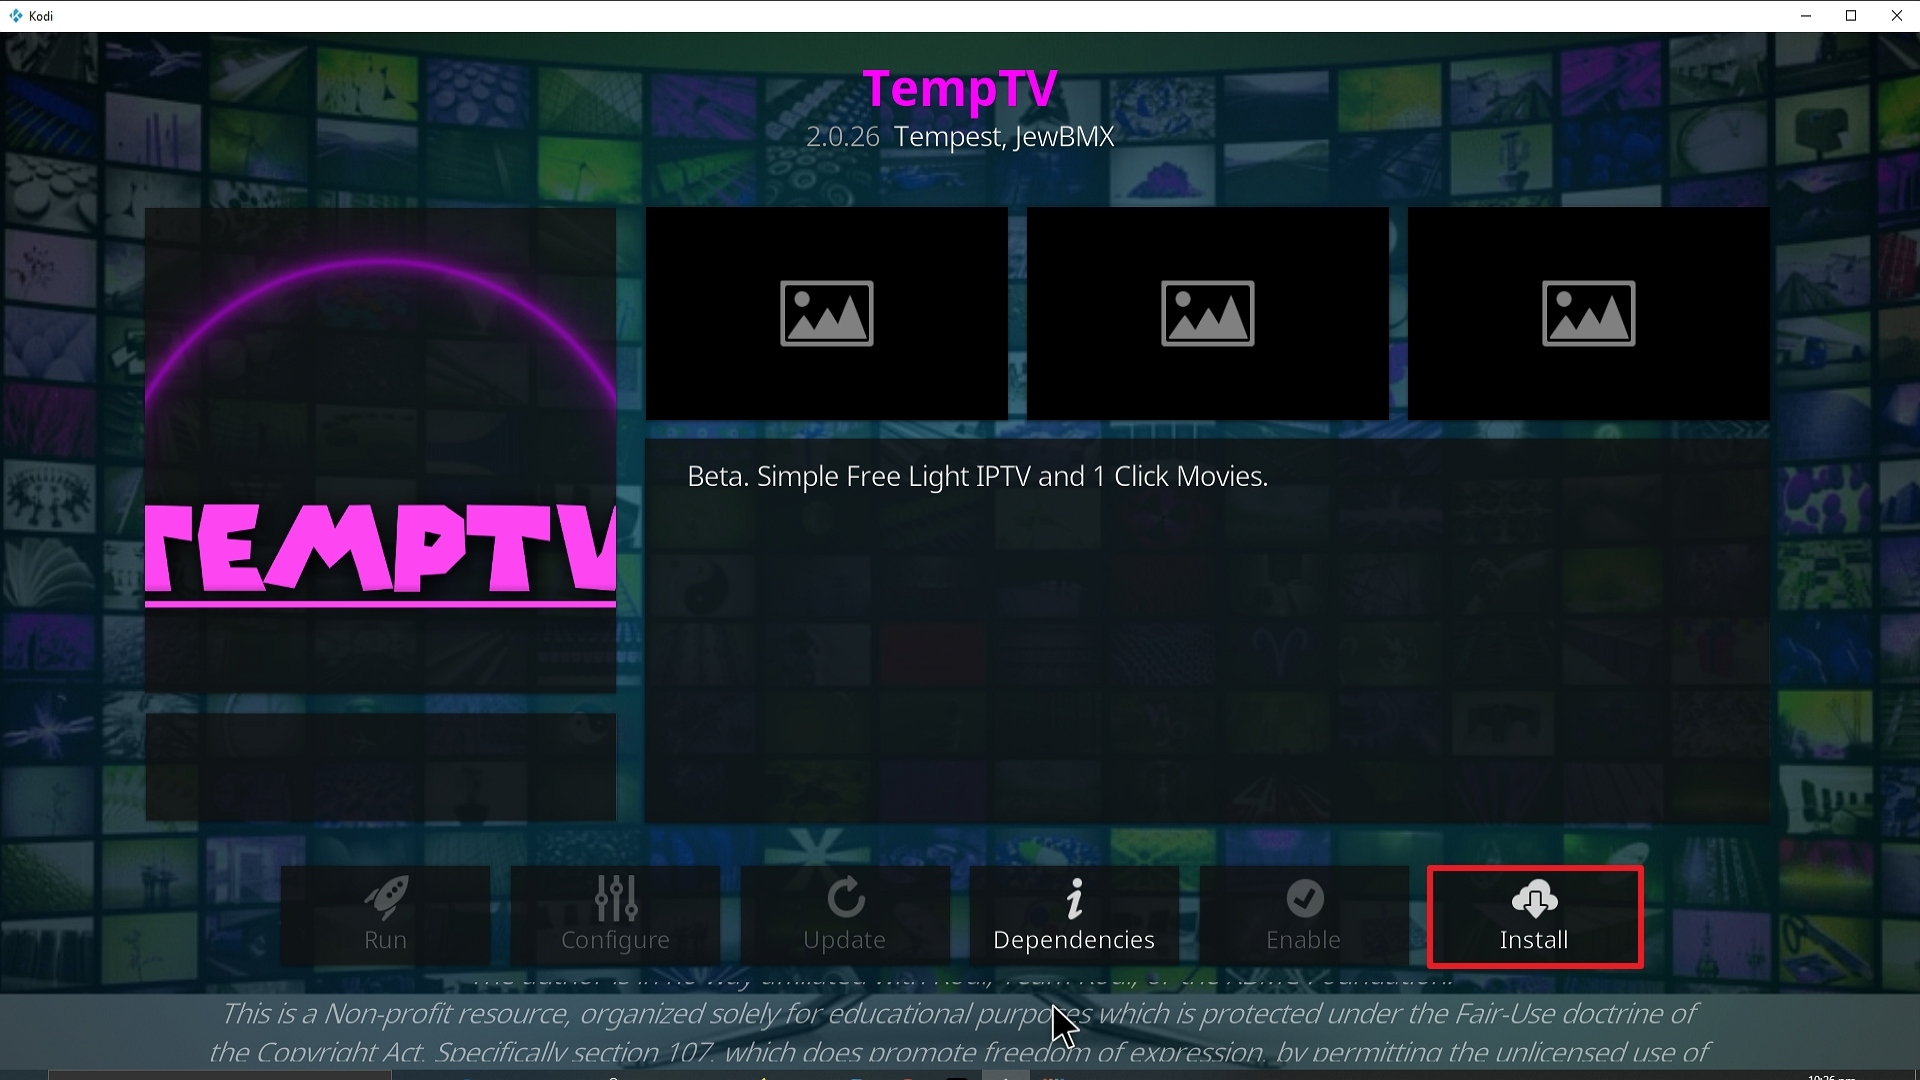
22. Select TempTV again.

Step 22 Installing TempTV Kodi addon on Kodi


23. Click on Install.

Step 23 Installing TempTV Kodi addon on Kodi


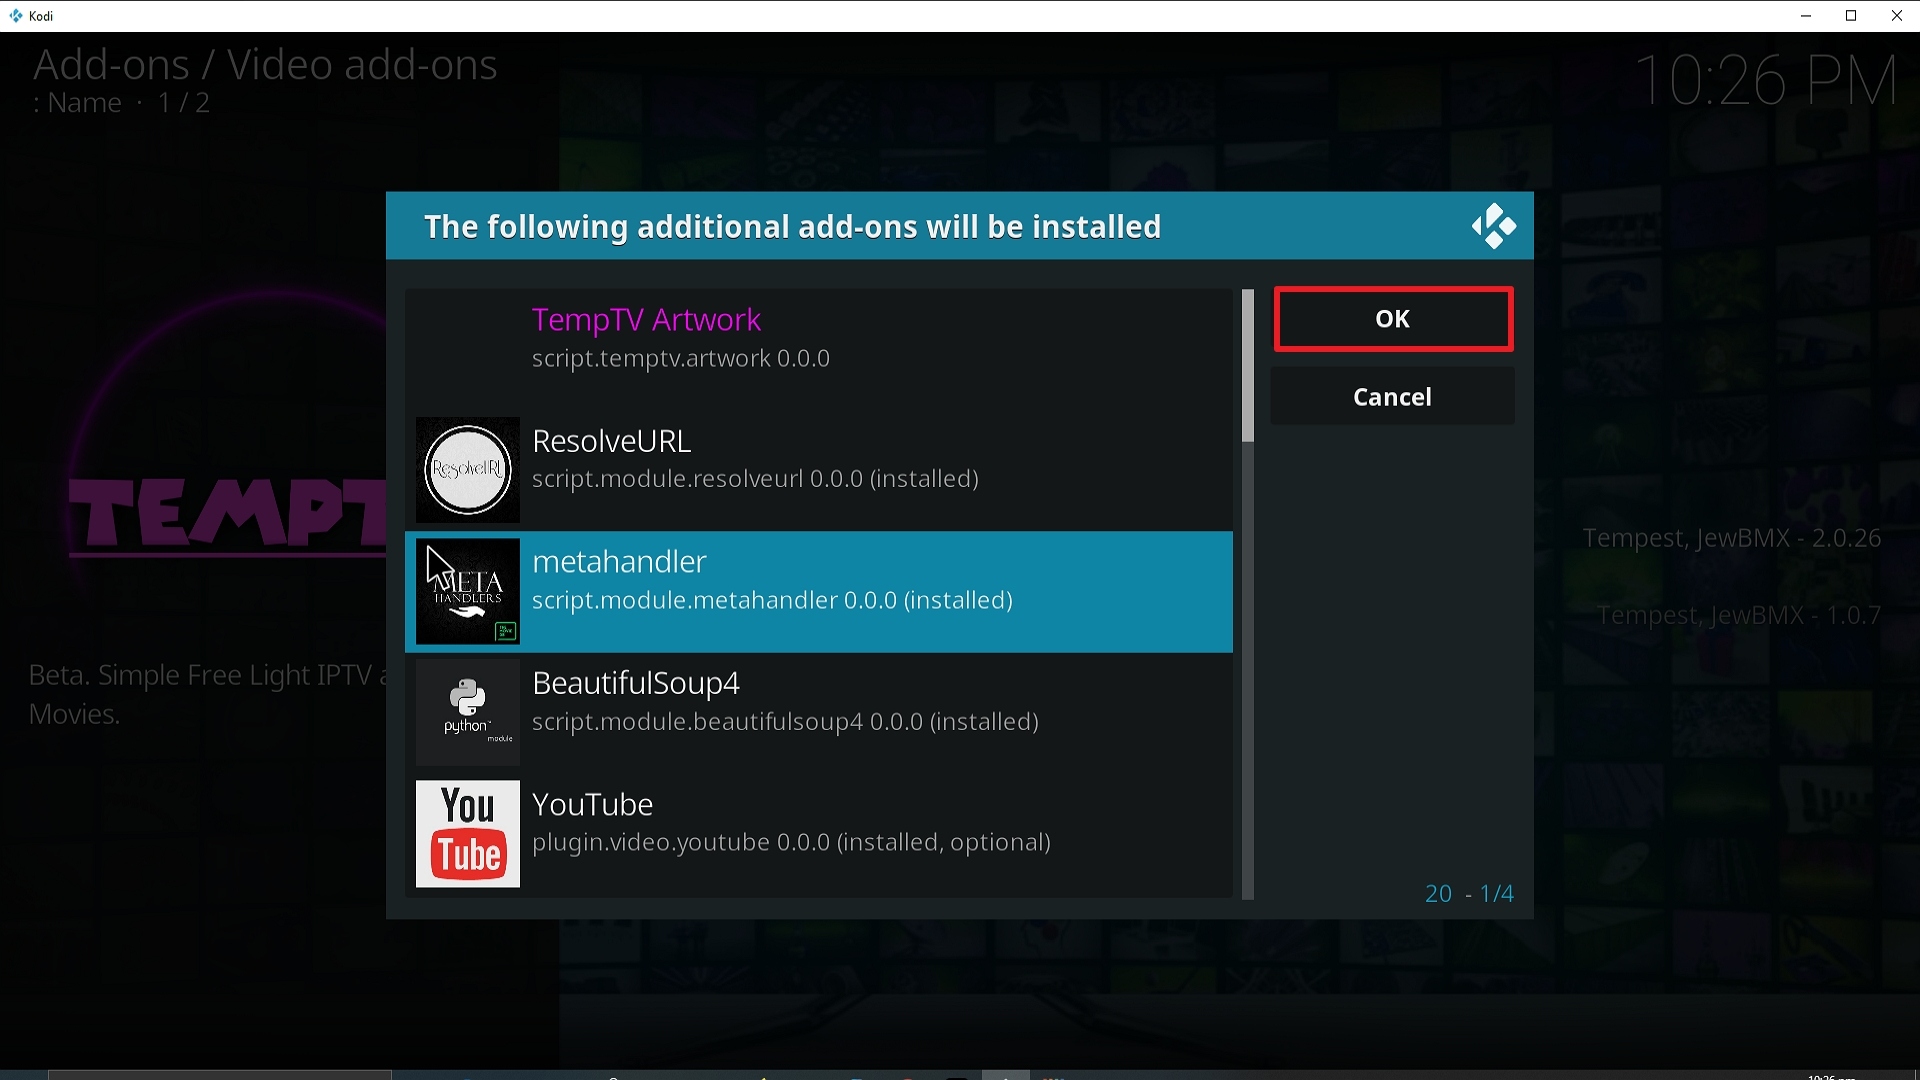
24. Select OK after reviewing the add-ons that will be installed.

Step 24 Installing TempTV Kodi addon on Kodi


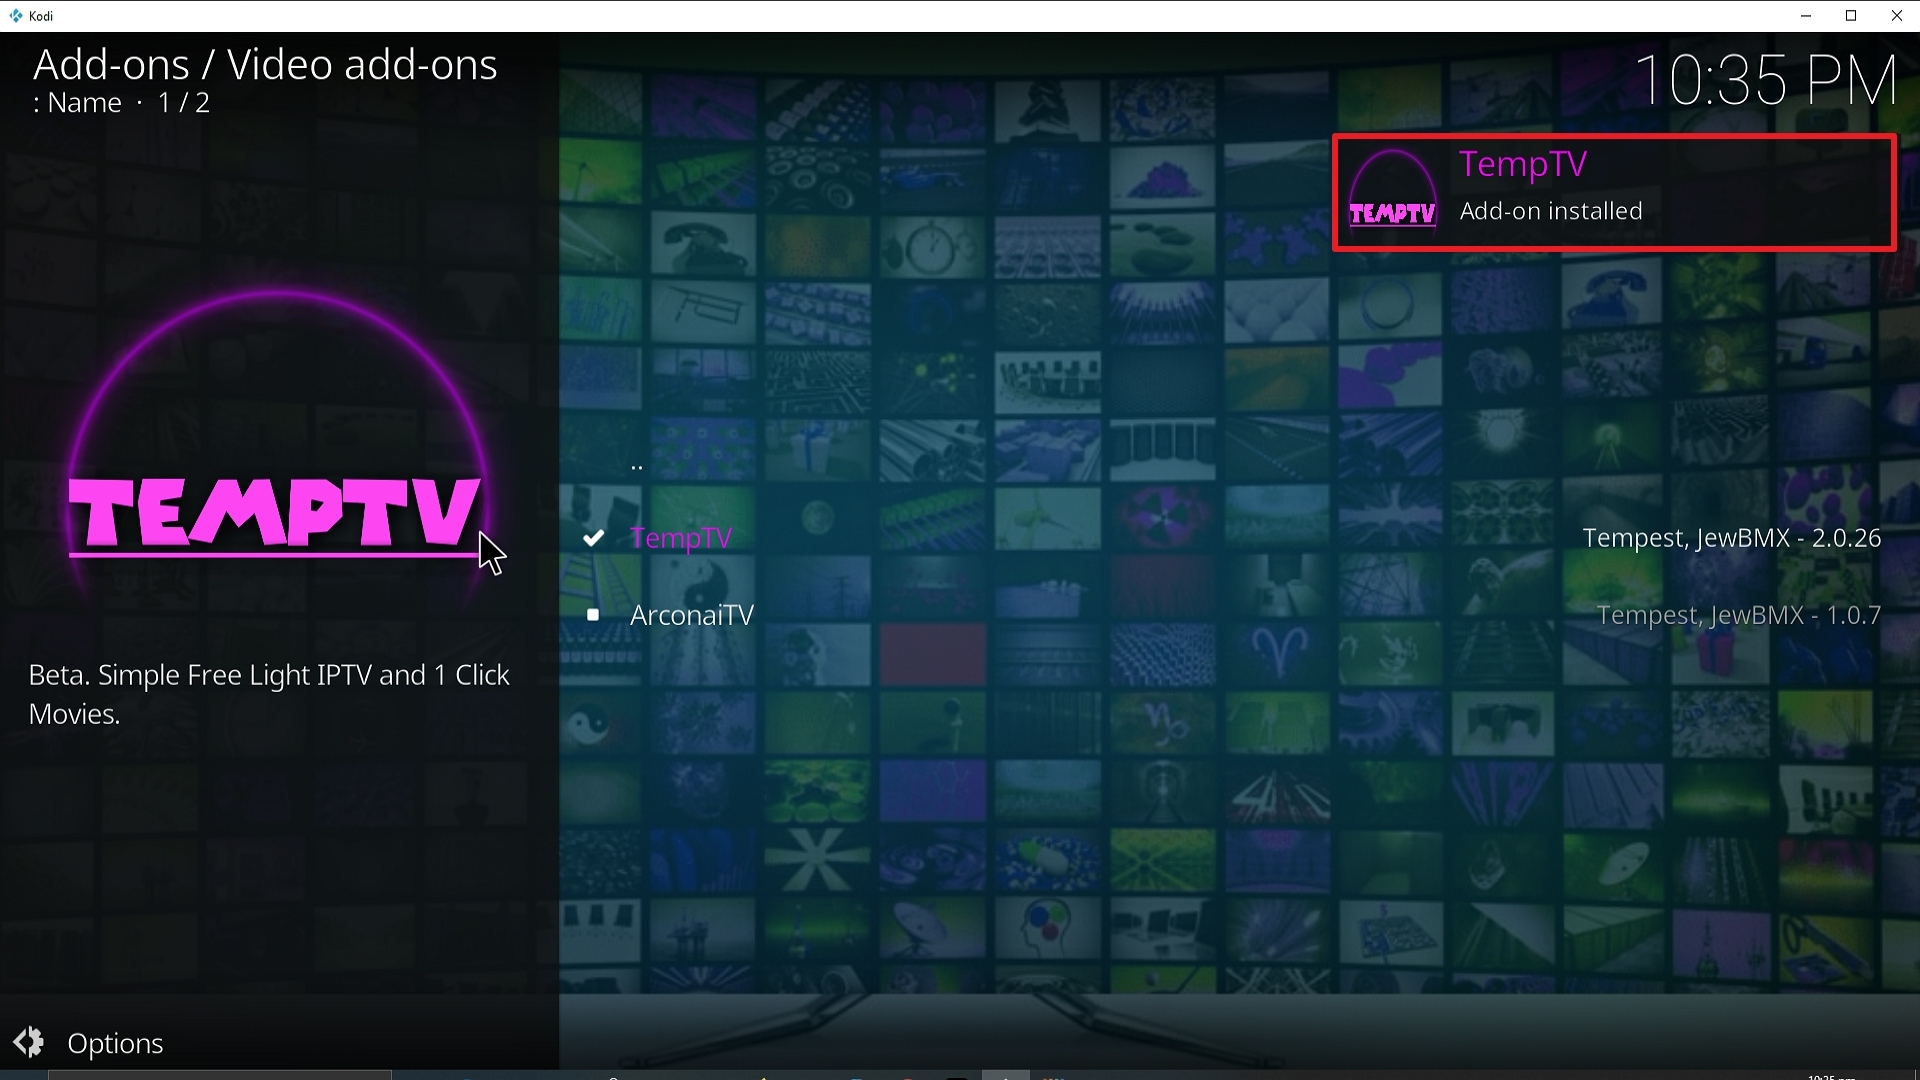
25. You should see a popup in the upper right corner saying TempTV has been installed. There will actually be multiple popups for the various components.

Step 25 Installing TempTV Kodi addon on Kodi


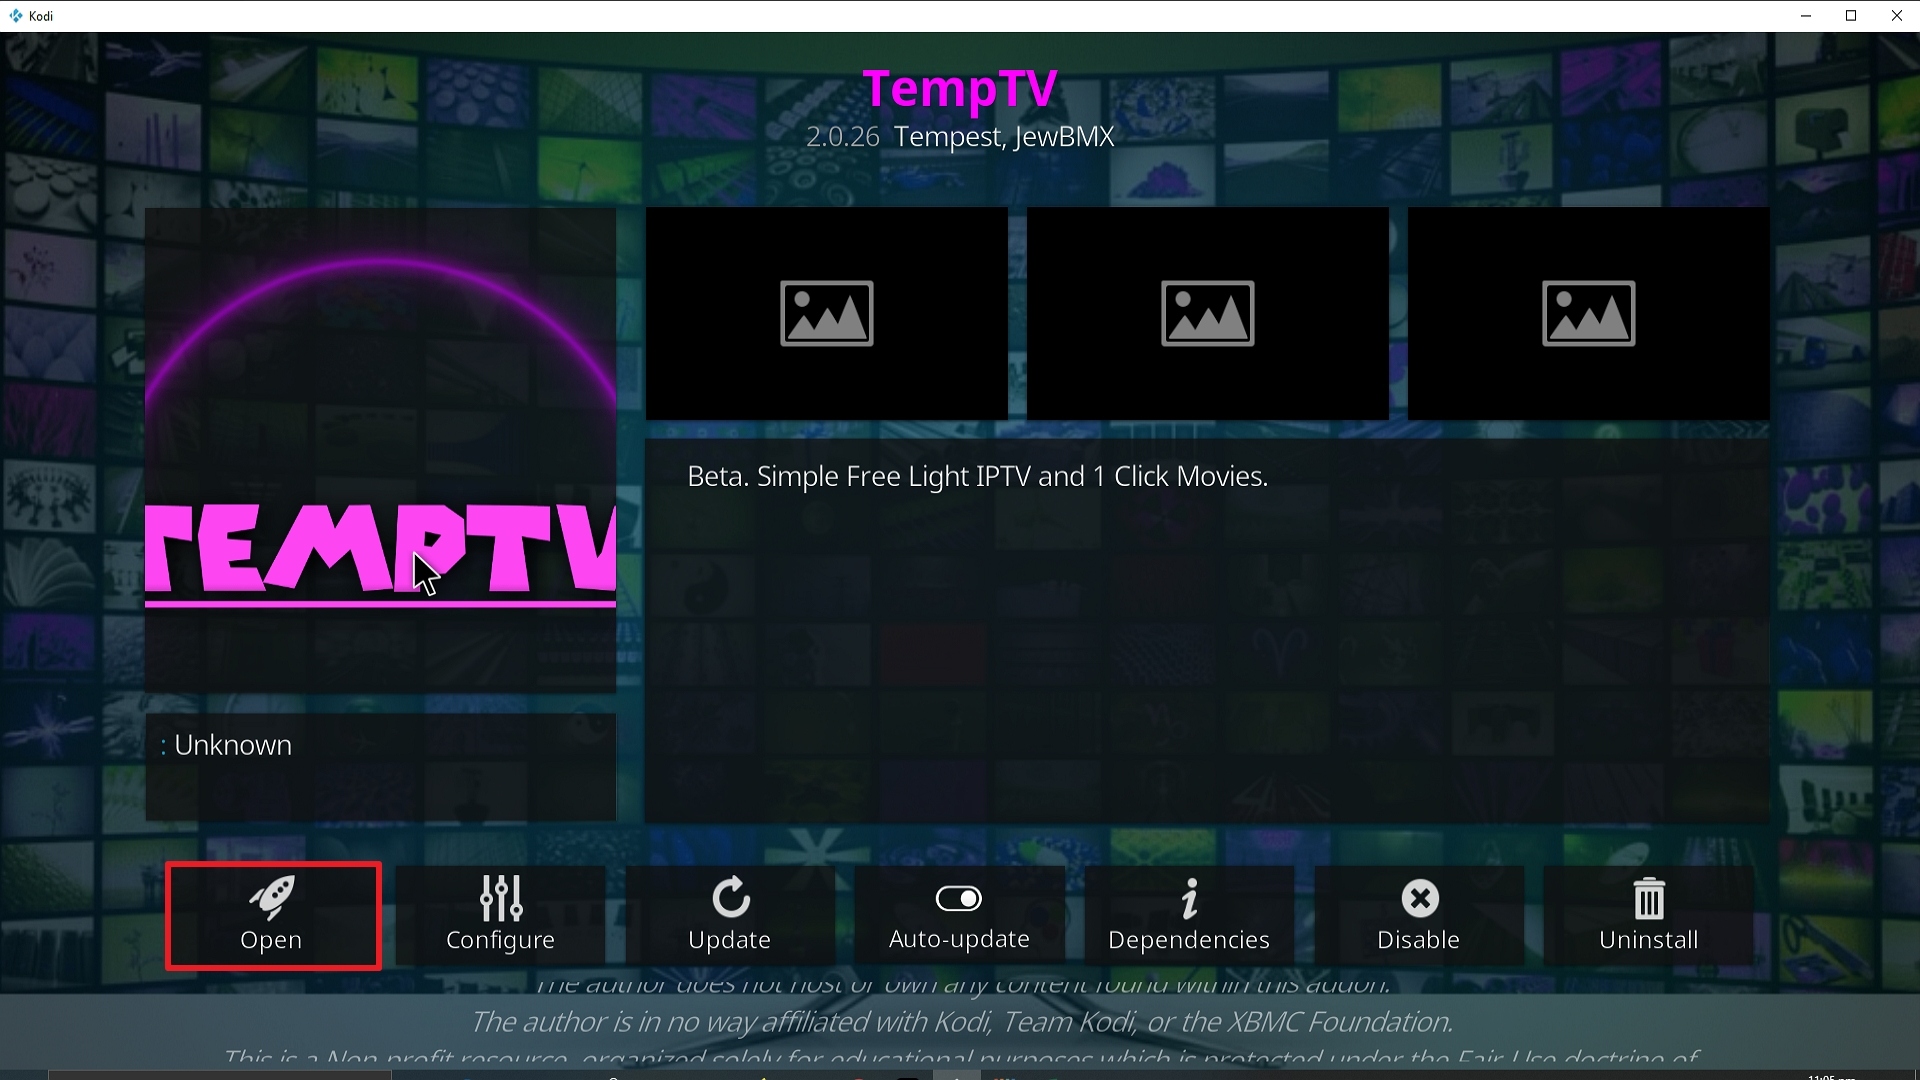
26. Click on Open to start the TempTV add-on.

Step 26 Installing TemptTV Kodi addon on Kodi


Stream Safely with a VPN

All of your online activities are being tracked by your ISP. Streaming, most especially, is closely monitored because it consumes a lot of data.

Once your ISP discovers that you are exceeding your data cap, it will do everything to disrupt your streaming experience. It will throttle down your connection which results in buffering. And we do not want that for you.

To prevent this from happening, we highly recommend using streaming apps with a premium VPN service like Surfshark.

Here are the other perks of having it on your device:

  • Provides access to geo-restricted content.
  • Protects all of your personal data when accessing public wifi internet.
  • Cloaks all of your online activities and identity that may be used by online threats like hackers and ISP.
  • It is the best solution for Firestick buffering and Kodi Buffering as well.

Note: For more information about Surfshark, please read our Surfshark Review.


Grab your subscription now!

Click here to get the lowest price on Surfshark through our exclusive limited-time offer.


How to Install Surfshark VPN on Firestick

If your Firestick still has the older interface, read this article to learn how to update it: Update Firestick Interface.

Follow our screenshots below to install the SurfShark VPN app on your Fire TV stick.

1. Go to the Home screen of your Firestick.

step 1 Install Surfshark VPN on Firestick


2. Navigate towards the Find tab. Press the Search button from the resulting dropdown.

step 2 Install Surfshark VPN on Firestick


3. Type in the keyword of SurfShark and select from the suggestions that will appear.

step 3 Install Surfshark VPN on Firestick


4. Click the official SurfShark icon from your search results.

step 4 Install Surfshark VPN on Firestick


5. Press the Download (You own it) button.

step 5 Install Surfshark VPN on Firestick


6. The SurfShark VPN installer will download on your device.

step 6 Install Surfshark VPN on Firestick


7. SurfShark VPN’s app will automatically install itself on your Fire TV stick.

step 7 Install Surfshark VPN on Firestick


8. Press the Open button after completing SurfShark VPN’s installation process.

step 8 Install Surfshark VPN on Firestick


9. Please wait for the SurfShark VPN to load its user interface.

step 9 Install Surfshark VPN on Firestick


10. You can now log in with your SurfShark VPN account credentials.

step 10 Install Surfshark VPN on Firestick

Learn more about Surfshark and Grab the Best Surfshark Deal Now!


Install Surfshark on Firestick

Best Surfshark Deal


Other VPNs to Consider

NordVPN (Best for Streaming)

Best Features

  • 5000+ Server in 50+ Countries 
  • Military-Grade Encryption
  • Fast Connection Speed
  • Suitable to a lot of devices
  • No-Log Policy

Prices
  • Complete $5.89 per month (64% Discount)
  • Plus $4.59 per month (56% Discount)
  • Standard $3.69 per month (55% Discount)

Best Features

  • 750+ High-speed VPN Servers in 43 Locations
  • Military-Grade Encryption
  • Fastest HD Streaming and Gaming
  • 30-Day Money-Back Guarantee
  • Unlimited Data & Devices
  • No-Log Policy

Prices
  • 3 Years $1.99 per month (82% Discount)
  • 1 Years $3.29 per month (70% Discount)
  • 1 Month $10.99 per month

IPVanish VPN (Most Secure)

Best Features

  • 1200+ Servers in 60+ Countries around the world
  • Unlimited Connections
  • No-Log Policy
  • Top Notch Military-Grade VPN Protocols and Encryptions
  • 100% Safe and Secured
  • Most Trusted VPN
  • Best VPN for Firestick
  • 30-Day Money-Back Guarantee

Prices
  • Yearly $3.99 per month (63% Discount) – 30 days risk free + Ransomware & Malware Protection
  • Quarterly $5.32 per month (51% Discount)
  • Monthly $10.99 per month


For more VPN discounts, go to ReviewVPN Deals and purchase the best VPN for you.

Click here to get the lowest price on Surfshark through our exclusive limited-time offer.


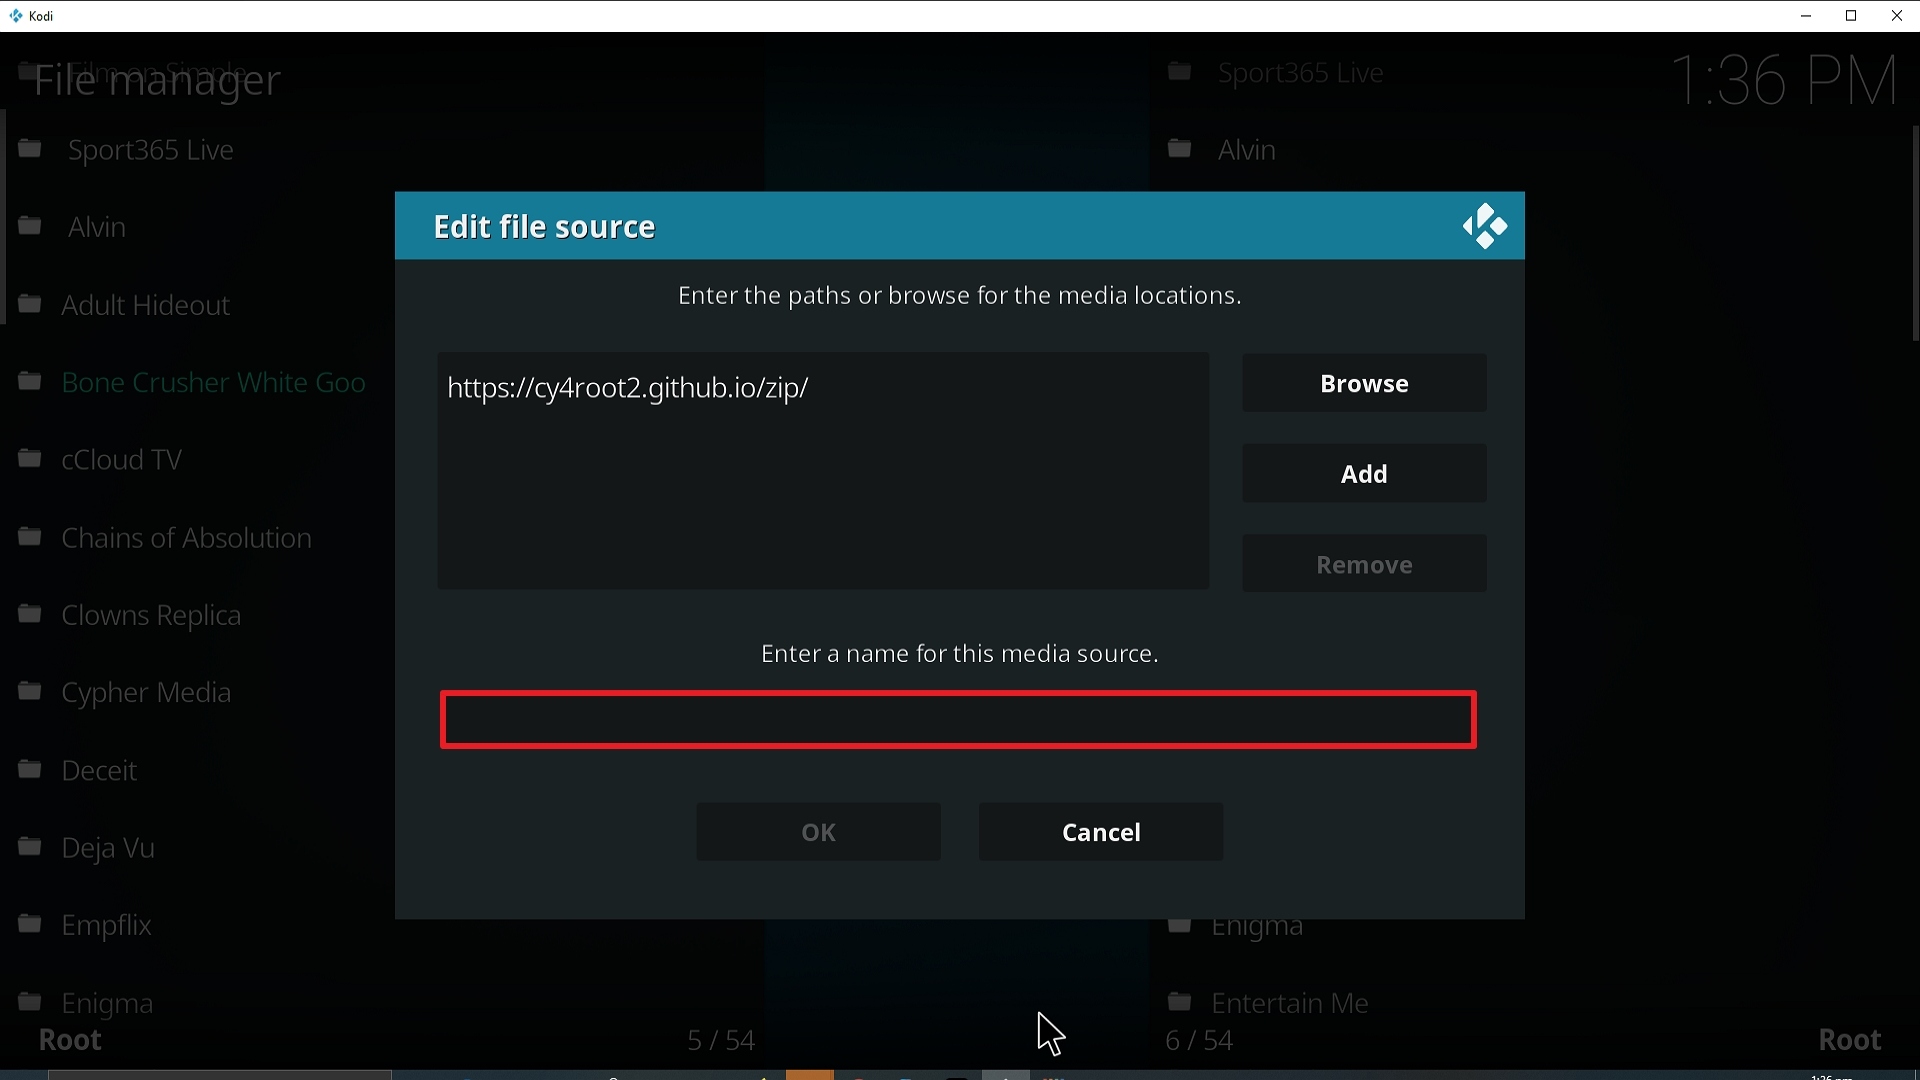
Install Cypher Media Kodi Addon

Cypher Media Kodi Addon

Source: https://cyphermediagit.github.io/

In this article, we will help you install Cyper Media Kodi Addon on Firestick.


Cypher Media is a high-quality Kodi addon from the Cypher Media repository. Acts as an all-in-one addon with links to movies, TV Shows, and live TV. Some Kodi users will be pleased to see sections for Anime and Mange which has become notoriously difficult to get hold of on Kodi, after a crackdown by Asian content producers.

A good addon with plenty of working links, we will see how they get on with the all-in-one aspect, as most addons tend to fall short when it comes to Live TV.

Compatible with IMDB, Trakt, and Real Debrid. To get the best working links we recommend that you pay for a premium Real Debrid subscription.


ANONYMOUSLY

Common Errors

Here are the most common errors, quick fixes, and in-depth guides for Cypher Media:

  • Source not working/slow/frozen: Cypher Media does not host any of the content that you watch. You can easily fall into the trap of thinking it’s just like Netflix, and the content will load instantly. This is especially not the case if you don’t use Real Debrid. Waiting for free links and servers mean you pay with your time instead of your money. Links can take up to 20 seconds to connect and start buffering. Also, servers may need to be contacted more than once, as you refresh the link. Bear in mind higher quality media files like 1080p and 4K will take even longer to stream. To find other ways to fix broken sources read our in-depth guide linked above.
  • Kodi check log error: The first time you get a check log error, it might freak out. Like when your laptop randomly decides to tell you that it’s out of memory but give it a few weeks and you’ll know the ins and outs of Kodi and how to fix these minor errors. A check log error can be many things, but in most cases, it simply relates to your media cache being full. Like your browsing history, a cache builds snippets to enable you quicker access and loading the second time around. To learn how to empty your cache and download other helpful system tools for Kodi read our fix guide linked above.
  • Could not connect to URL/Download: This tends to either be a quick fix or a longer search around for a new add on. Always check you have spelled the URL correctly. Once you have done that check the URL in a browser. If it works, great. You just need to try the URL a few times until the server accepts the download. If not, then it might be time to look for another addon in the meantime. For other fixes read our in-depth guide linked above.


Review

Cypher Media is a good add on, but it’s still in its 1st version. We must admit we are always skeptical of add ons which try and do movies, tv shows, and Live TV. They almost never work as it just takes too much time and manpower to keep all the plates spinning.

For Live TV we always recommend you use a paid service if you want better quality and selection of channels. We would pay $7 + a month, t watch the 3,000+ HD Channel on Player’s Klub or Helix TV, rather than spend hours fiddling around with free Live TV on any addon.

The same line of argument of paying for Real Debrid. If your time is valuable, then better to pay a small amount of money for convenience’s sake.

Cypher Media has the following sections:

  • Movies
  • TV Shows
  • My Movies
  • My TV Shows
  • Tv calendar
  • Live IPTV
  • Holiday Movies
  • Comic Book Movies
  • Anime
  • Manga
  • Documentaries
  • Search
  • Tools
  • Scraper Settings


YOUR INTERNET ACTIVITY IS BEING WATCHED

ReviewVPN cannot attest to the legality, security and privacy of the applications discussed on this site. It is highly recommended that you use a VPN service while streaming or using Kodi.

Currently, your IP 216.73.217.150 is visible to everyone and your Browser is being tracked by Advertisers & ISP Provider.

Save 65% Now

Limited Time Offer

Here are the main reasons why you must use a VPN:

  • Your activities are hidden from your ISP, the government, and from the apps you are using.
  • You can access additional movies and TV streams.
  • ISP attempts to throttle are thrwarted thus reducing buffering issues.
  • Geographically restricted content like Netflix and Hulu can be unblocked.

A VPN works be replacing your ISP-assigned IP address and creating an encrypted tunnel. We recommend the no log service offered by IPVanish. It works well on a Firestick and offers the fastest possible speeds.

Special Limited Time Offer - Get IPVanish


Legal Disclaimer: ReviewVPN.com does not encourage or endorse any illegal activity involved in the usage of services and applications referenced on this site. We do not verify the licensing agreements of services. The end-user is wholly responsible for ensuring that any media accessed through these services does not violate copyright and/or licensing laws. ReviewVPN does not promote, link to, or receive compensation from any Apps and IPTV services.


Install Surfshark on Firestick

Best Surfshark Deal


How to Install Cypher Media Addon on Kodi with Screenshots

  1. From the home screen, select the cogwheel at the upper left.

Step 1 Installing Cypher Media addon on Kodi


2. Select System in the bottom right corner.

Step 2 Installing Cypher Media addon on Kodi


3. Select Add-ons on the left side of the screen.

Step 3 Installing Cypher Media addon on Kodi


4. Select Unknown sources.

Step 4 Installing Cypher Media addon on Kodi


5. Click Yes to allow unknown sources.

Step 5 Installing Cypher Media addon on Kodi


6. Select File manager.

Step 6 Installing Cypher Media on Kodi


7. Click Add source.

Step 7 Installing Cypher Media addon on Kodi


8. Click on <None>.

Step 8 Installing Cypher Media addon on Kodi


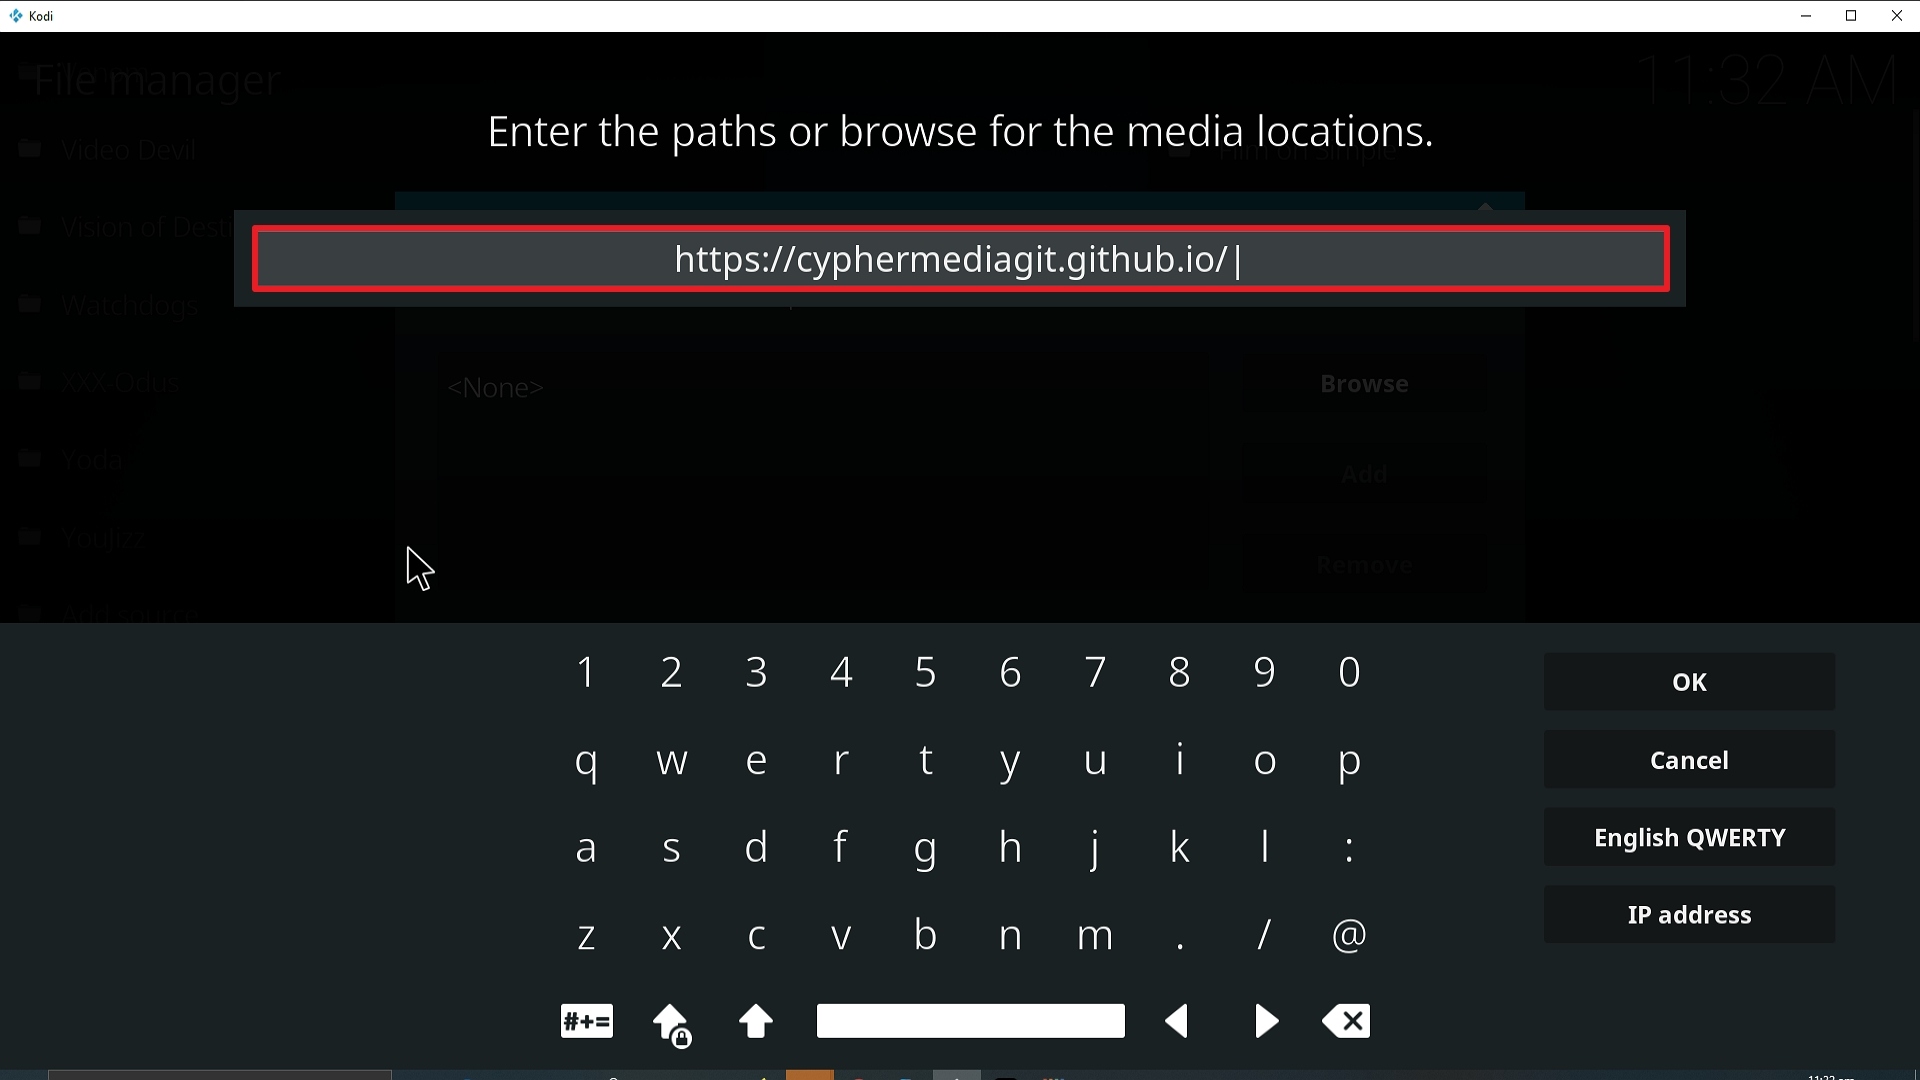
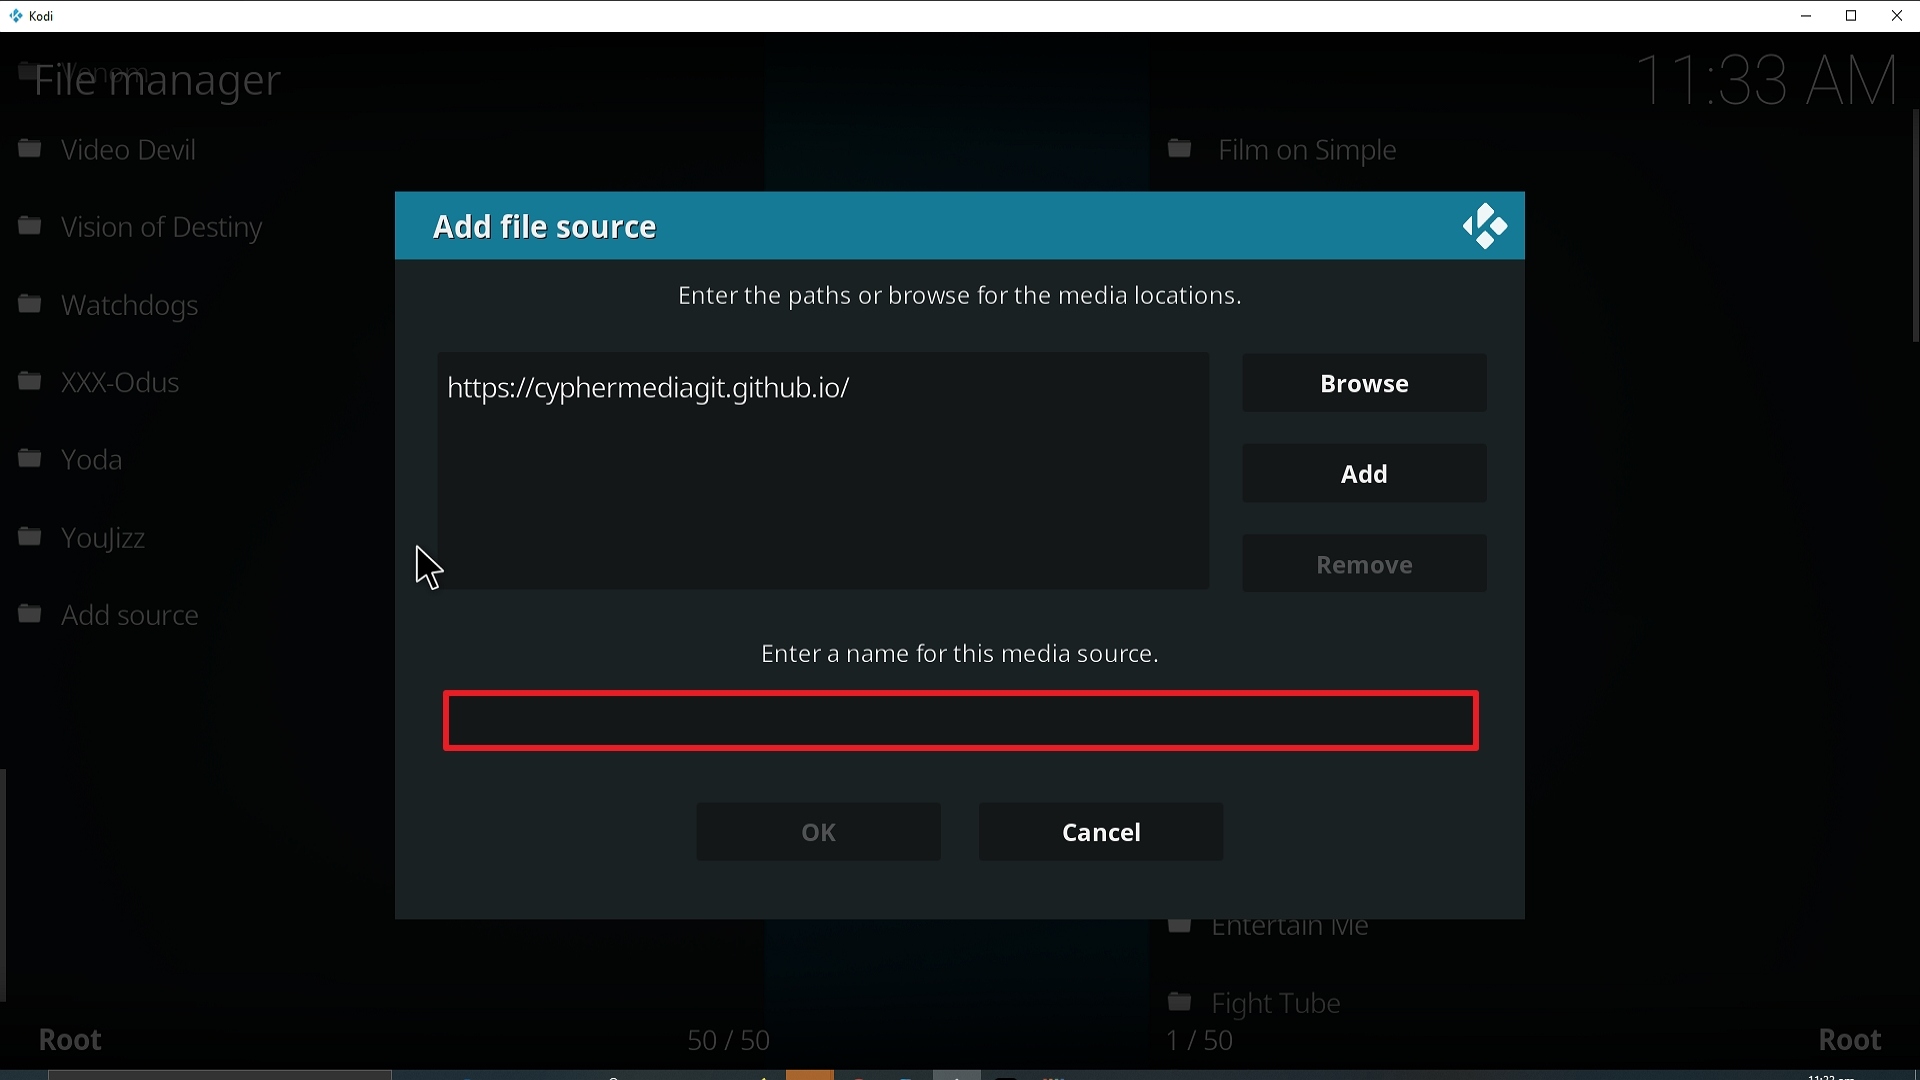
9. Type exactly: https://cyphermediagit.github.io/

Step 9 Installing Cypher Media Kodi addon on Kodi


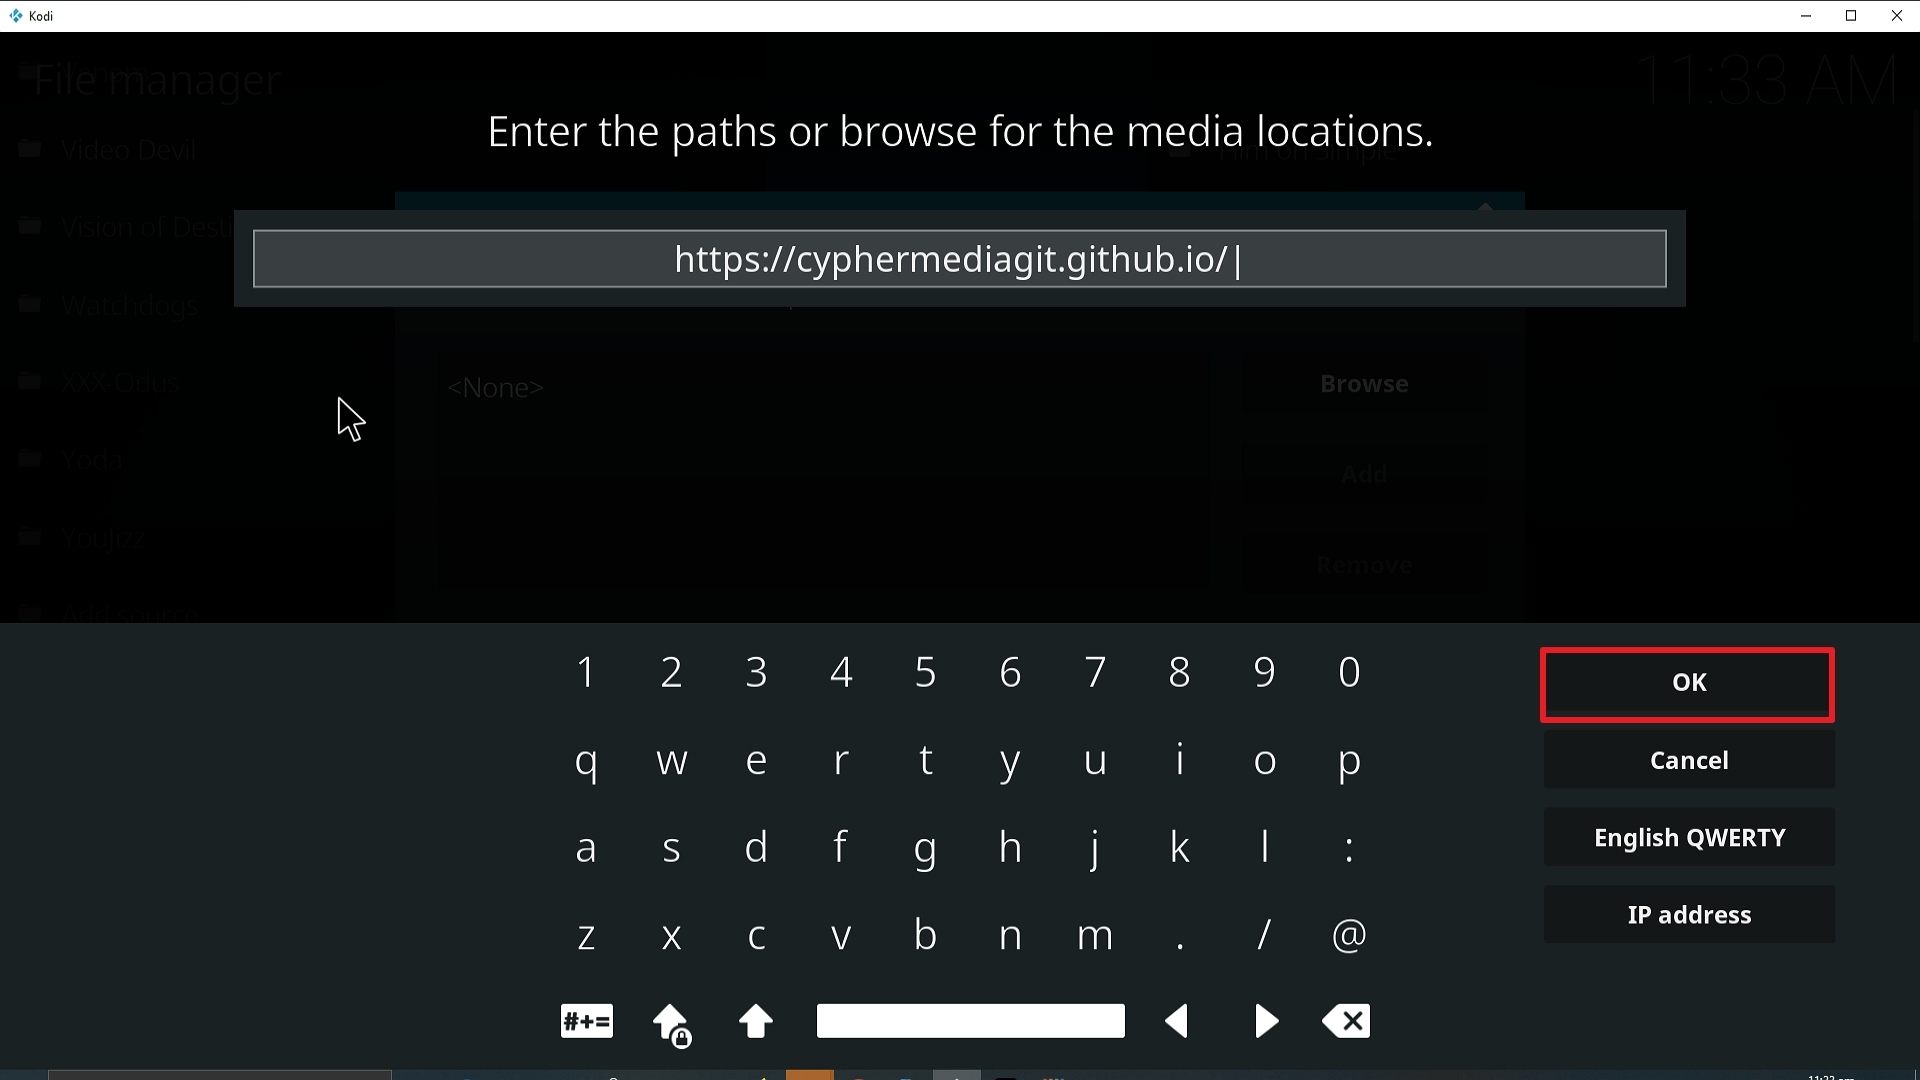
10. Click on OK.

Step 10 Installing Cypher Media Kodi addon on Kodi


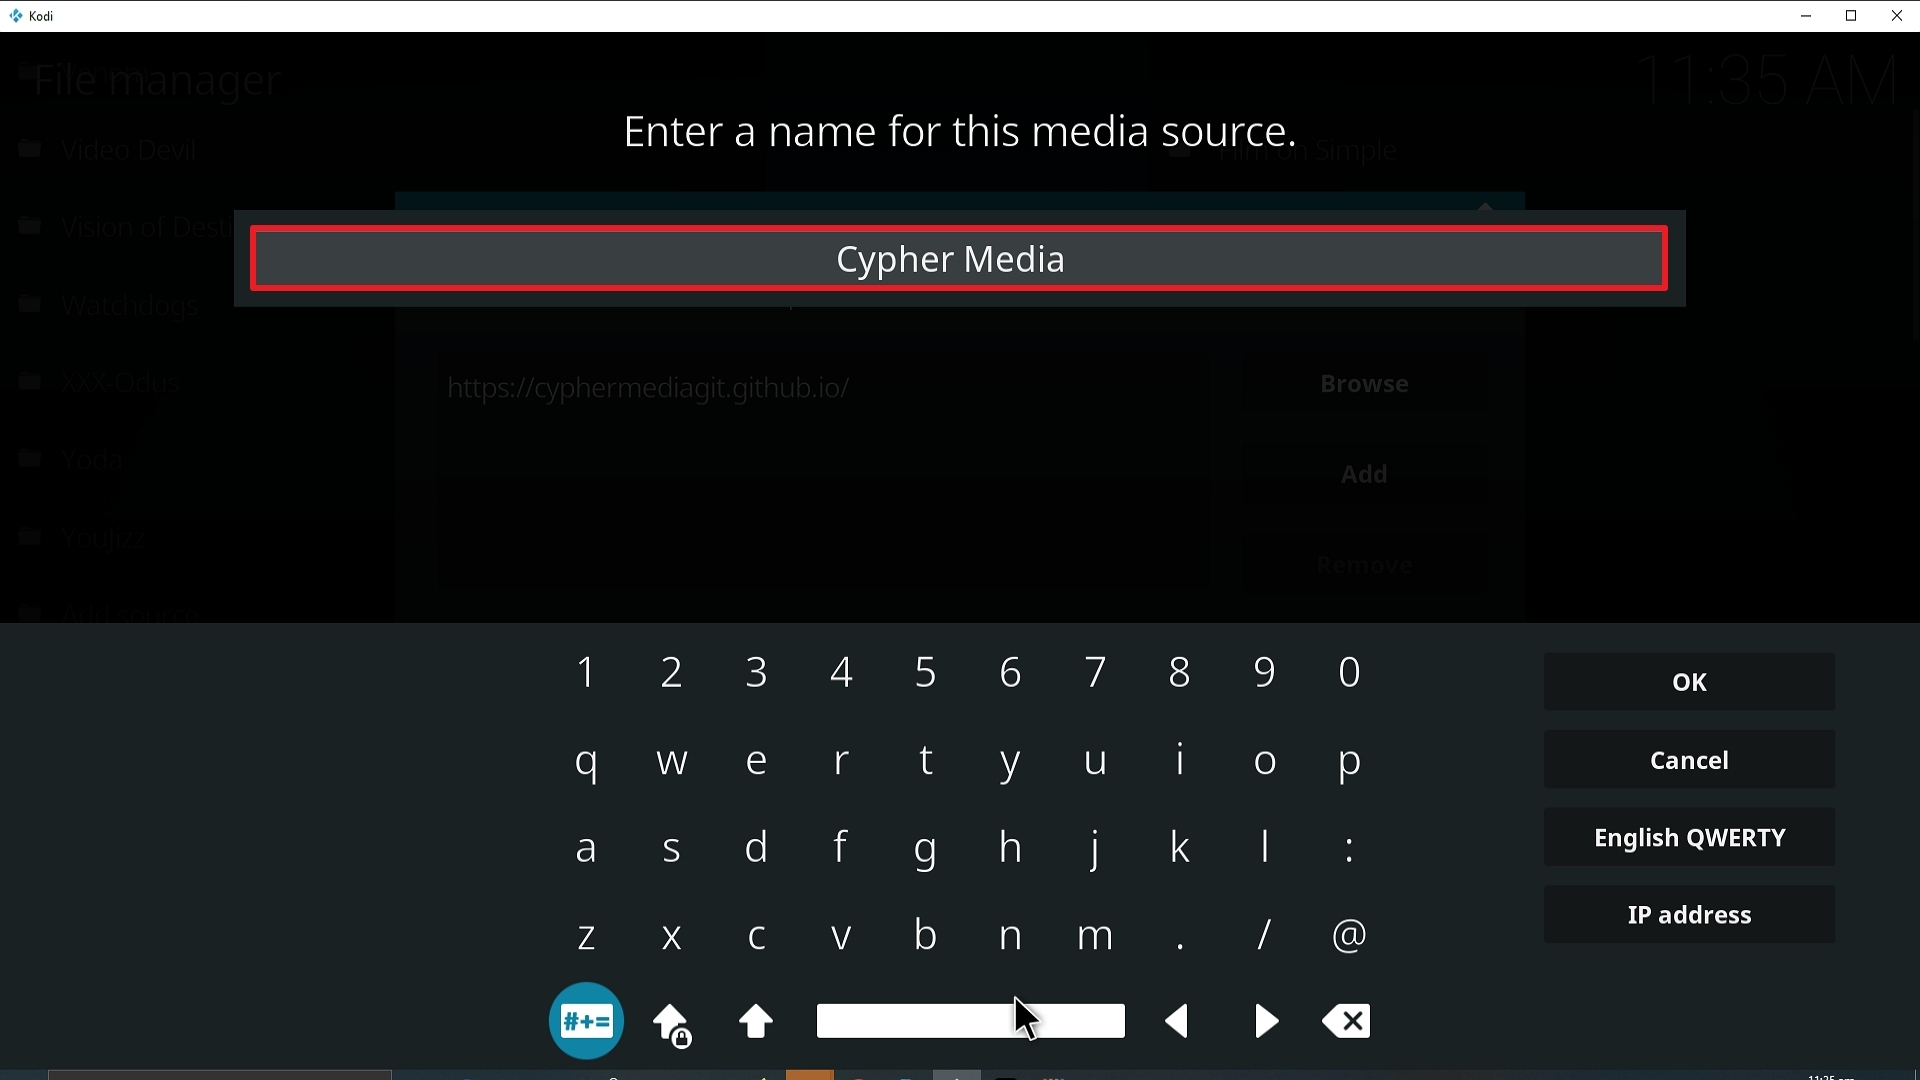
11. Select enter a name for this media source.

Step 11 Installing Cypher Media Kodi addon on Kodi


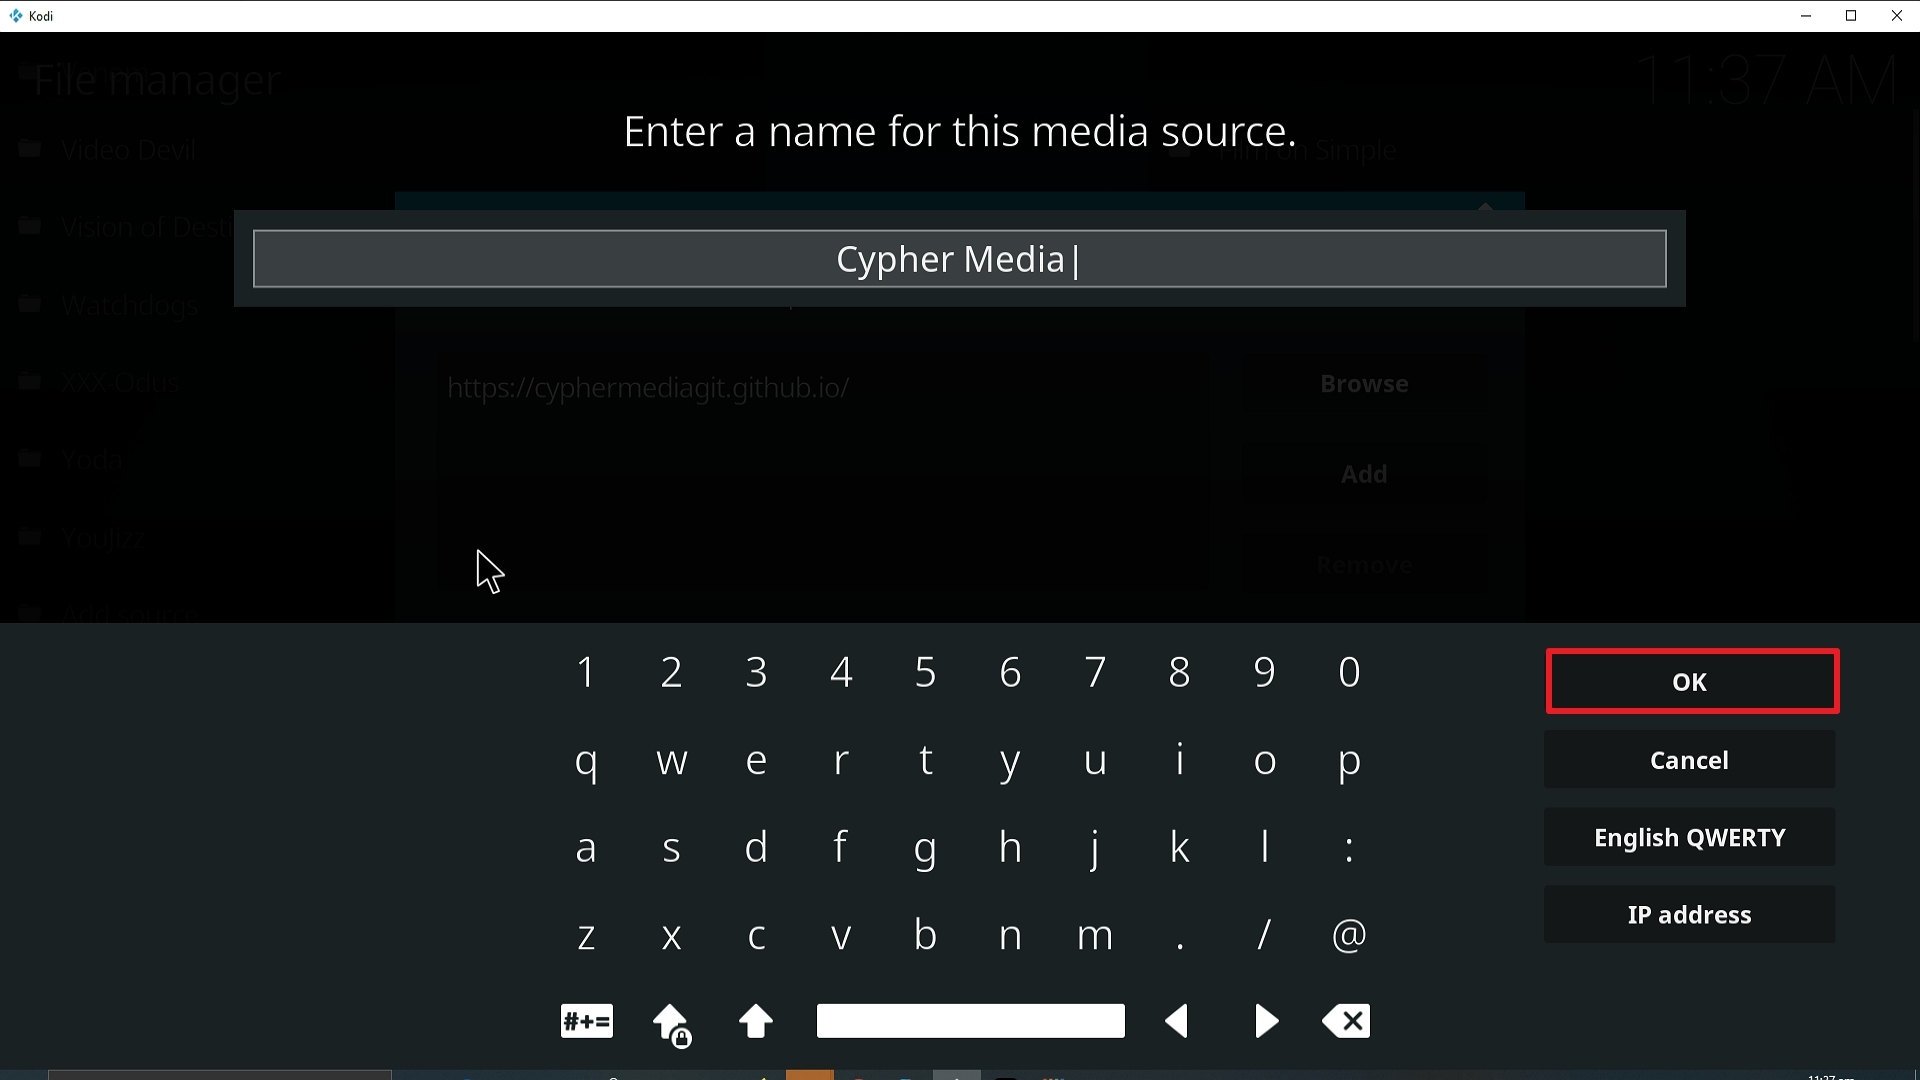
12. Name is Cypher Media (this part isn’t critical as long as you remember the name).

Step 12 Installing Cypher Media Kodi addon on Kodi


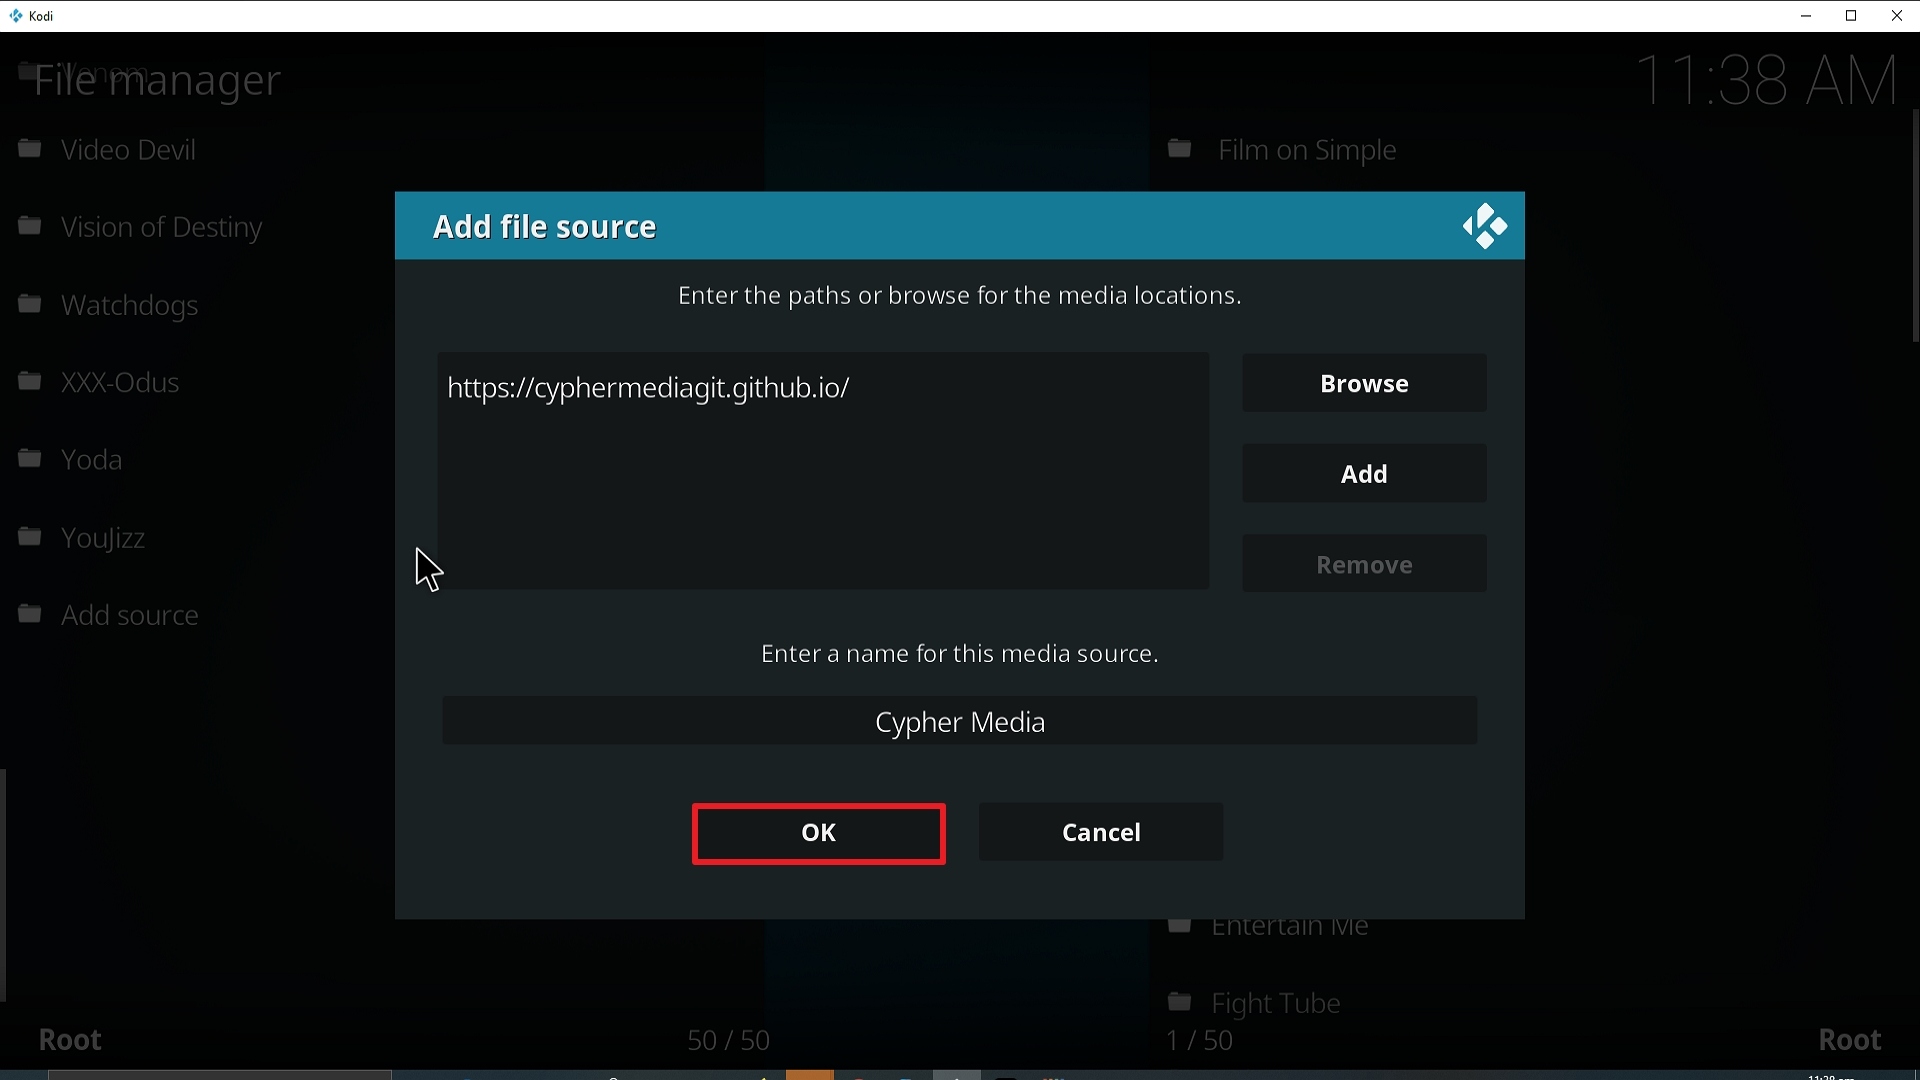
13. Click on OK.

Step 13 Installing Cypher Media Kodi addon on Kodi


14. Click on OK.

Step 14 Installing Cypher Media Kodi addon on Kodi


15. Take one step back and click on Add-ons.

Step 15 Installing Cypher Media Kodi addon on Kodi


16. Select install from zip file.

Step 16 Installing Cypher Media Kodi addon on Kodi


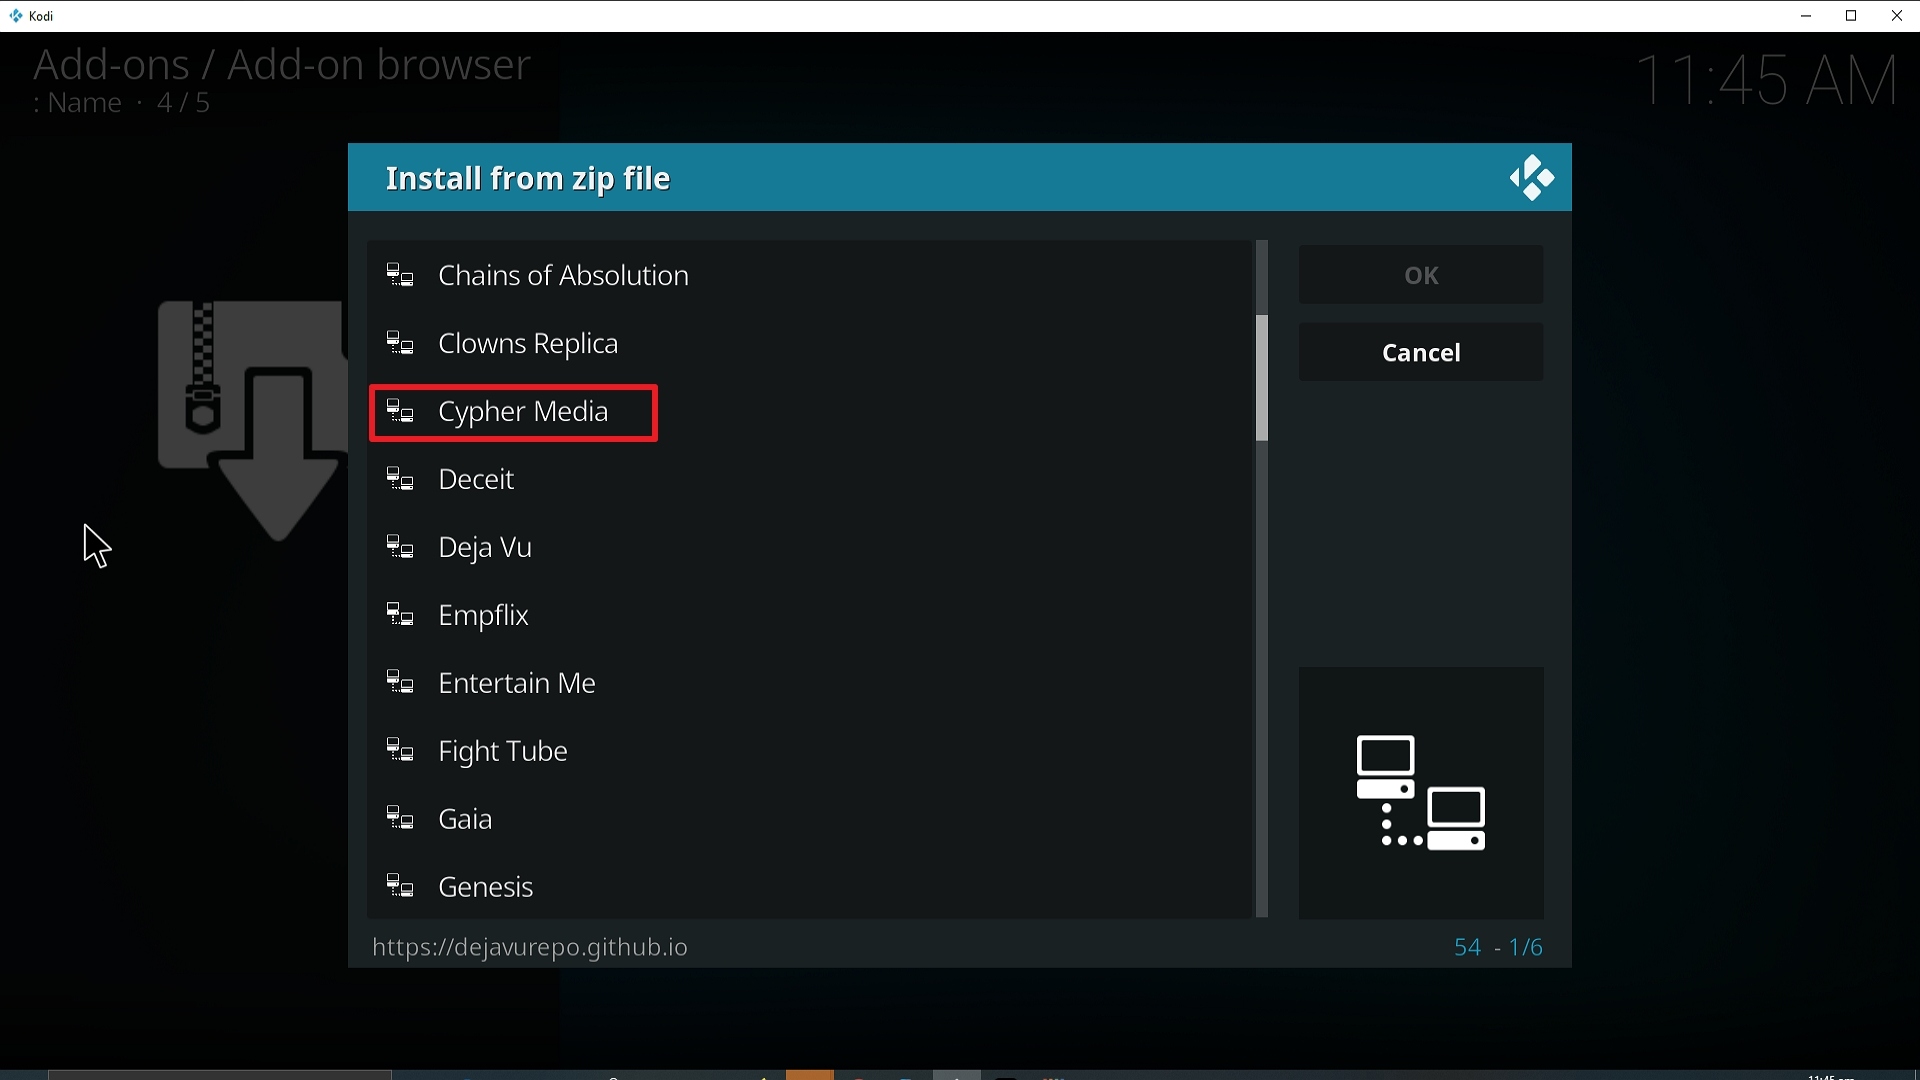
17. Click on Cypher Media (or whatever you named the source).

Step 17 Installing Cypher Media Kodi addon on Kodi


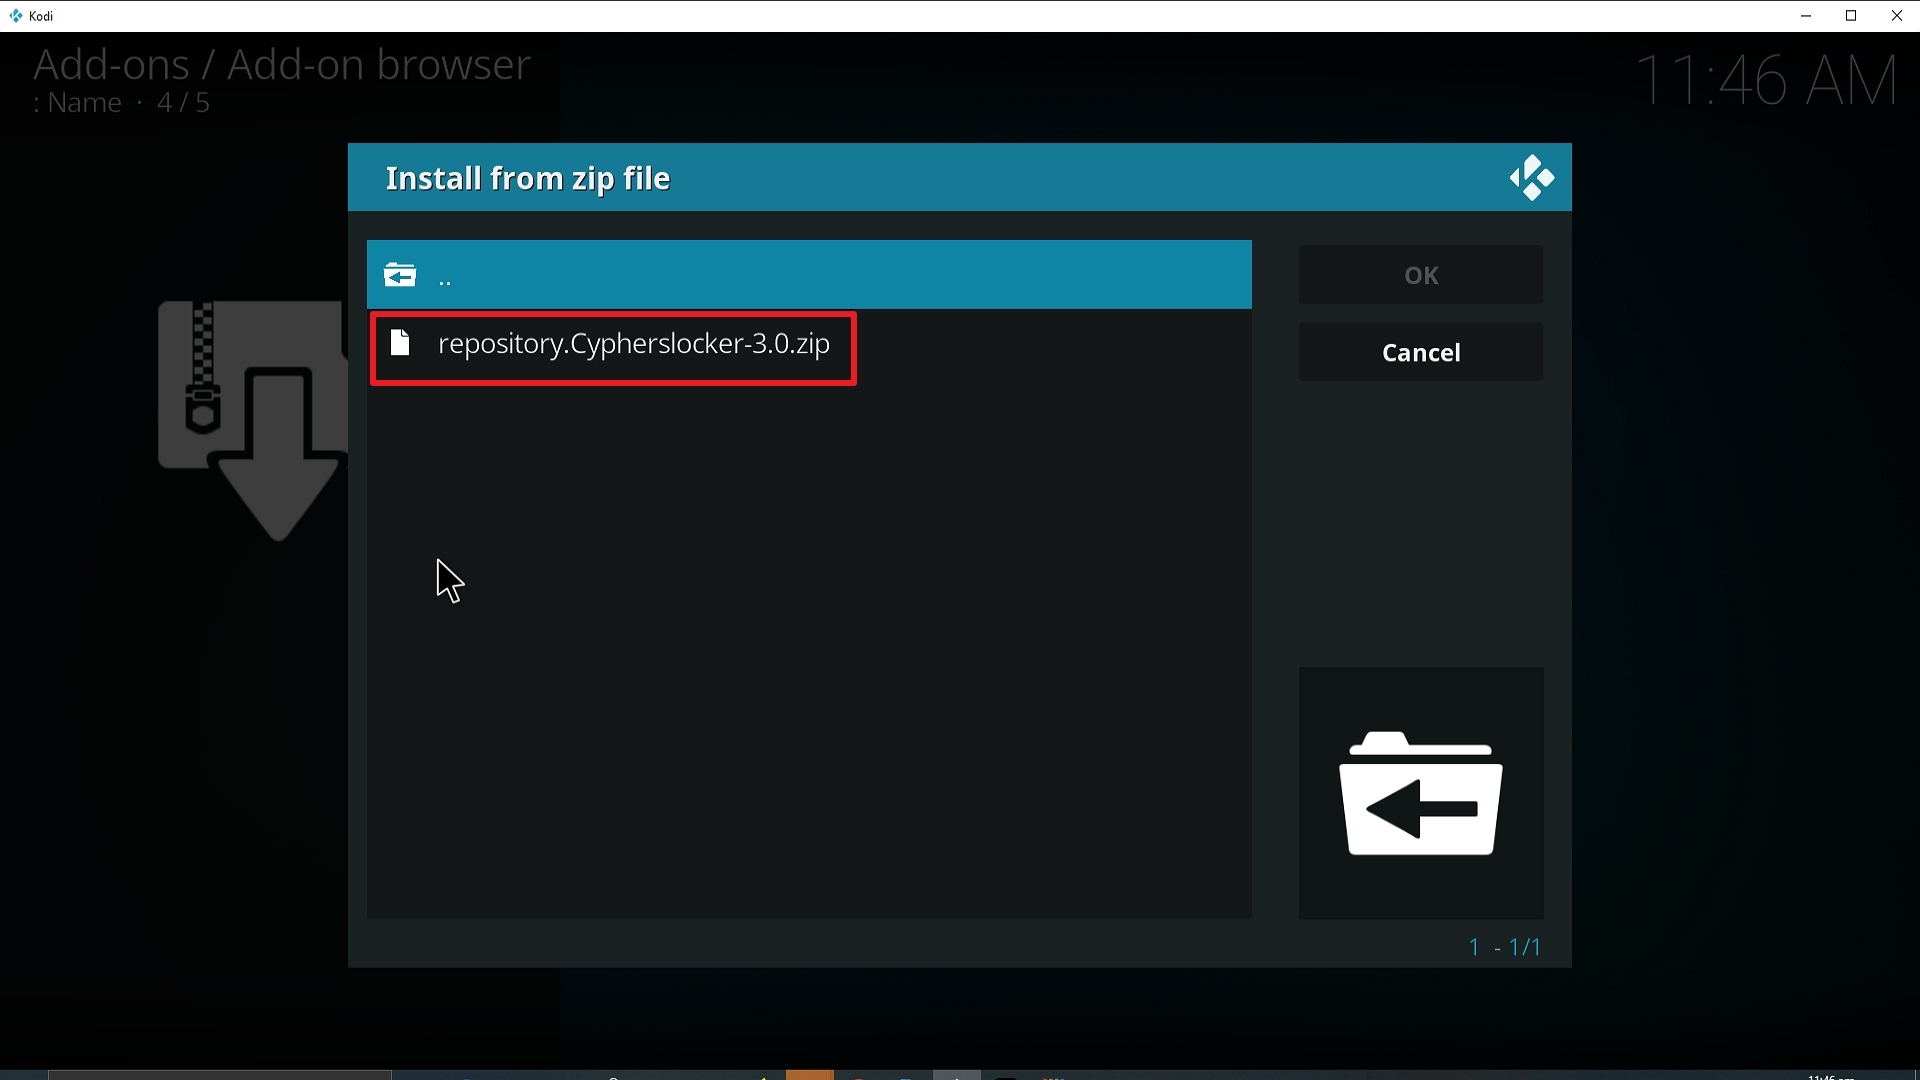
18. Click on repository.Cypherslocker-3.0.zip

Step 18 Installing Cypher Media Kodi addon on Kodi


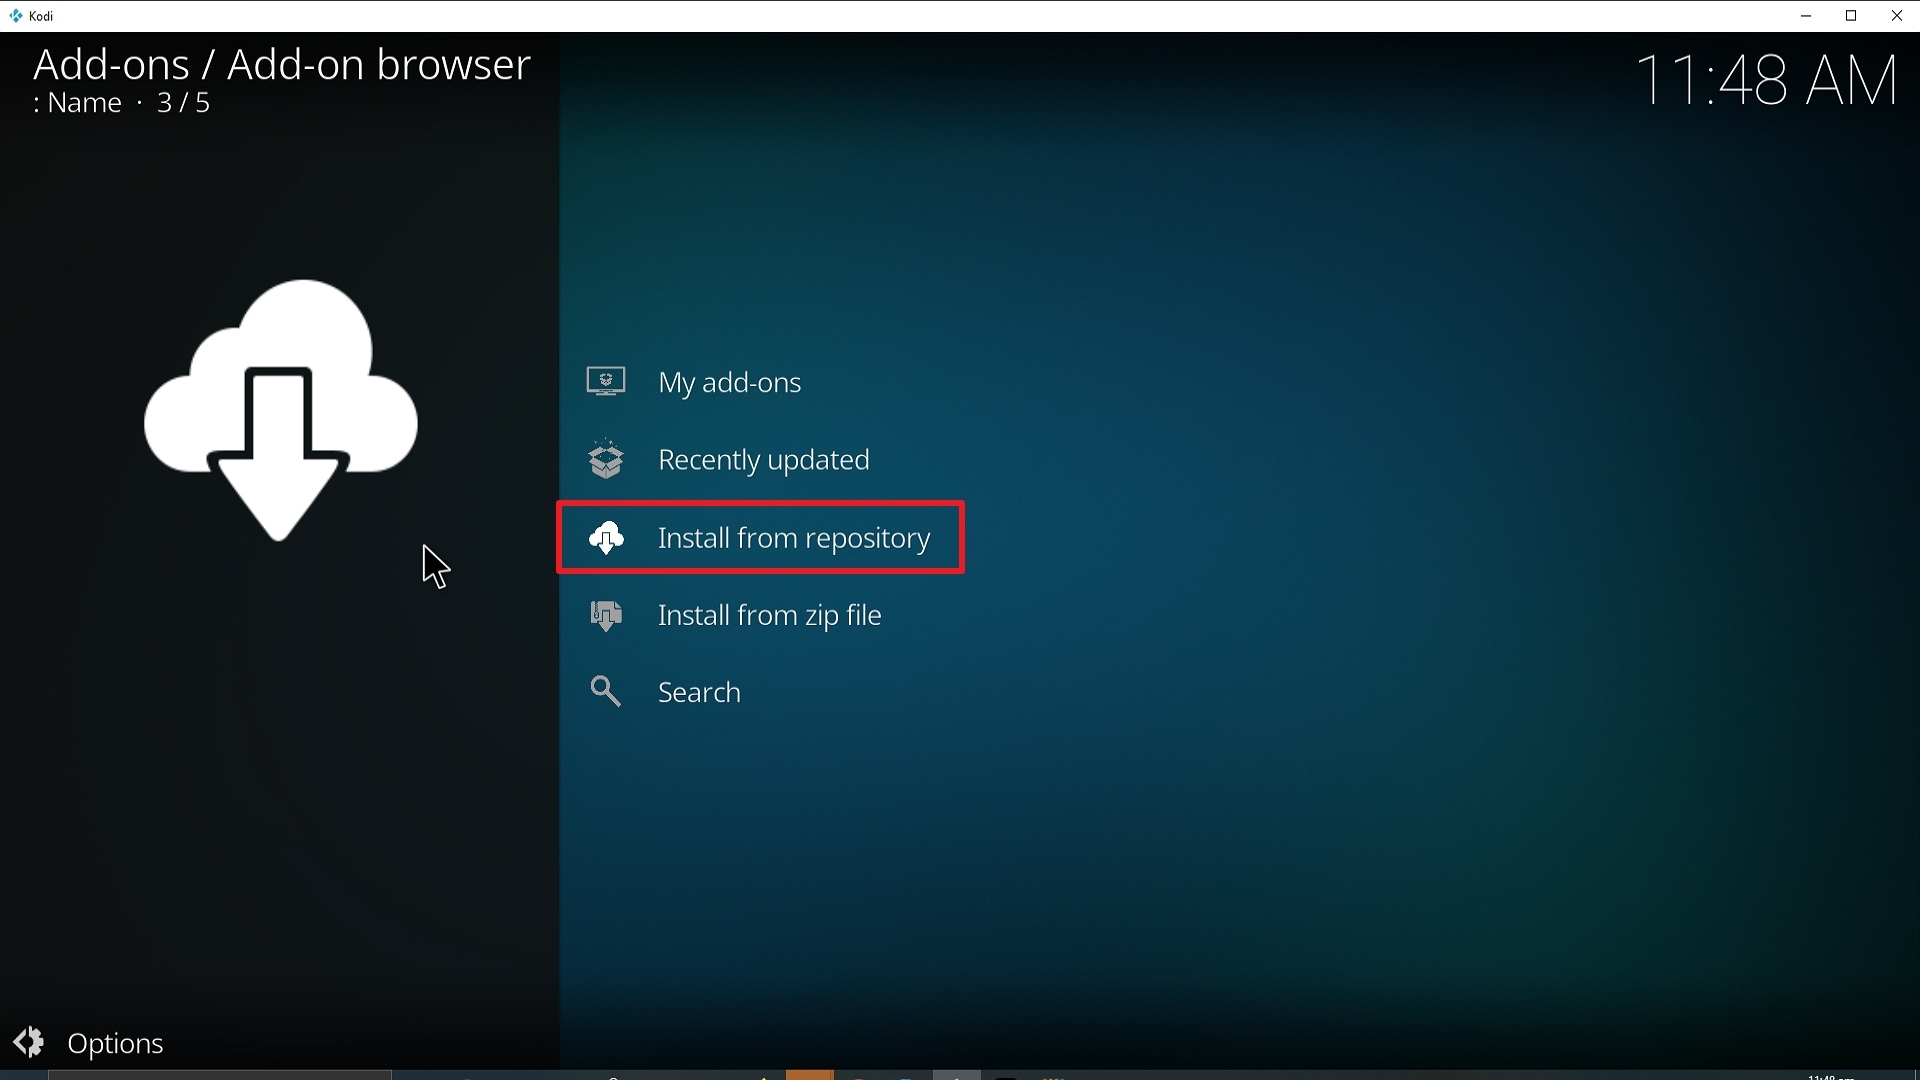
19. Select on Install from repository.

Step 19 Installing Cypher Media Kodi addon on Kodi


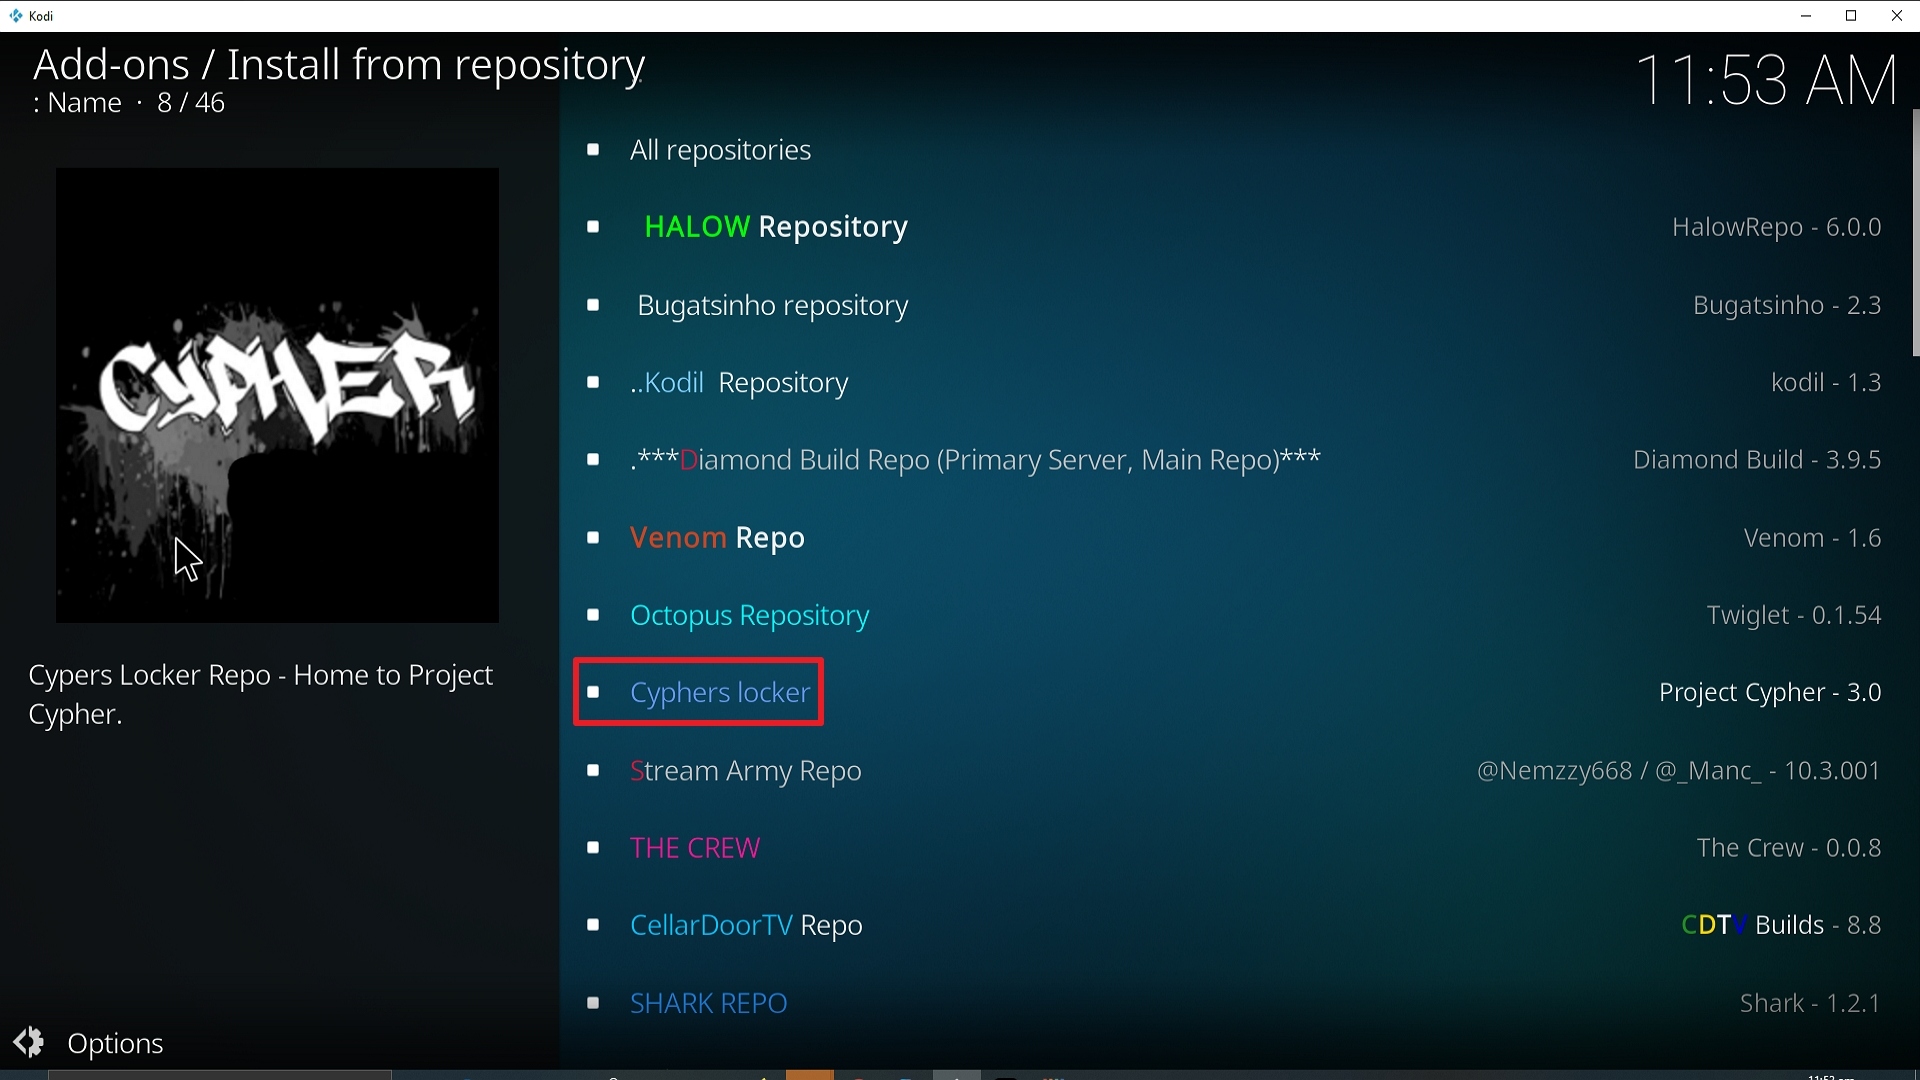
20. Click on Cyphers Locker Repo.

Step 20 Installing Cypher Media Kodi addon on Kodi


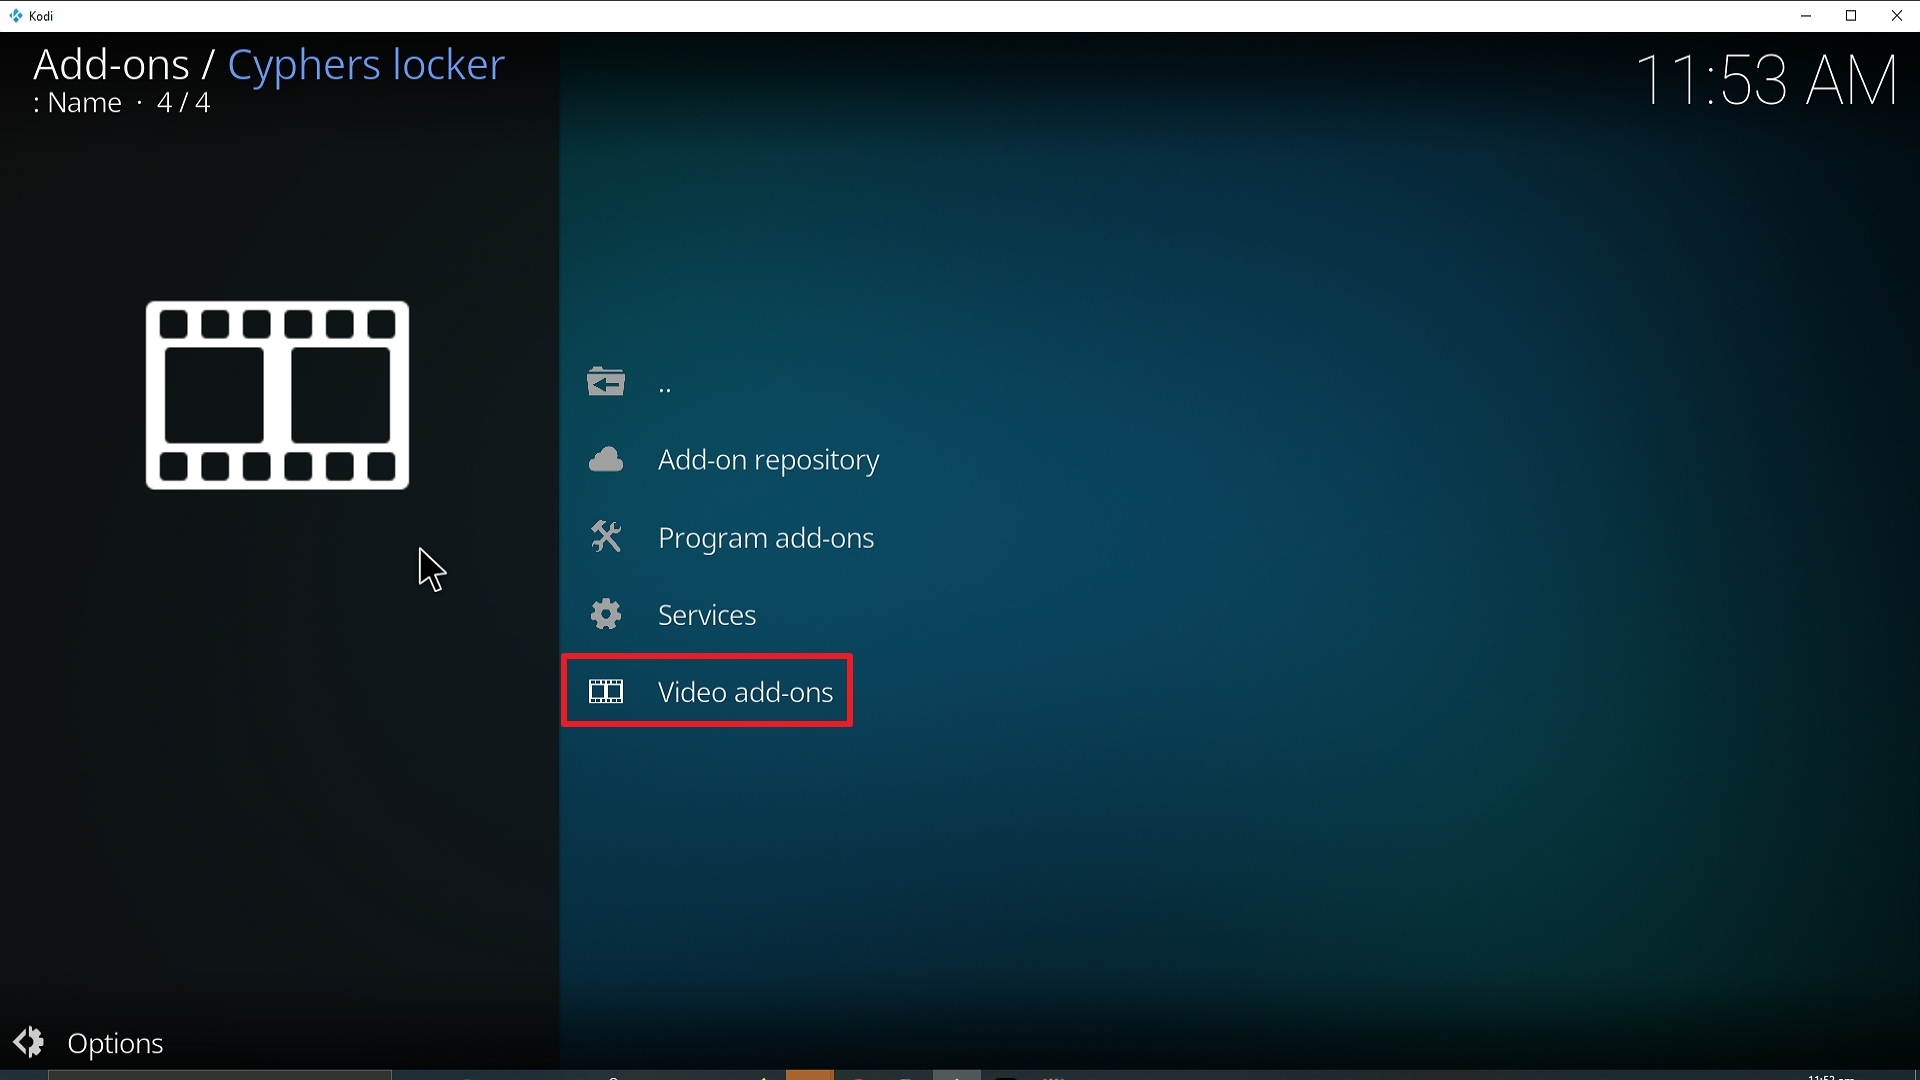
21. Pick Video add-ons.

Step 21 Installing Cypher Media Kodi addon on Kodi


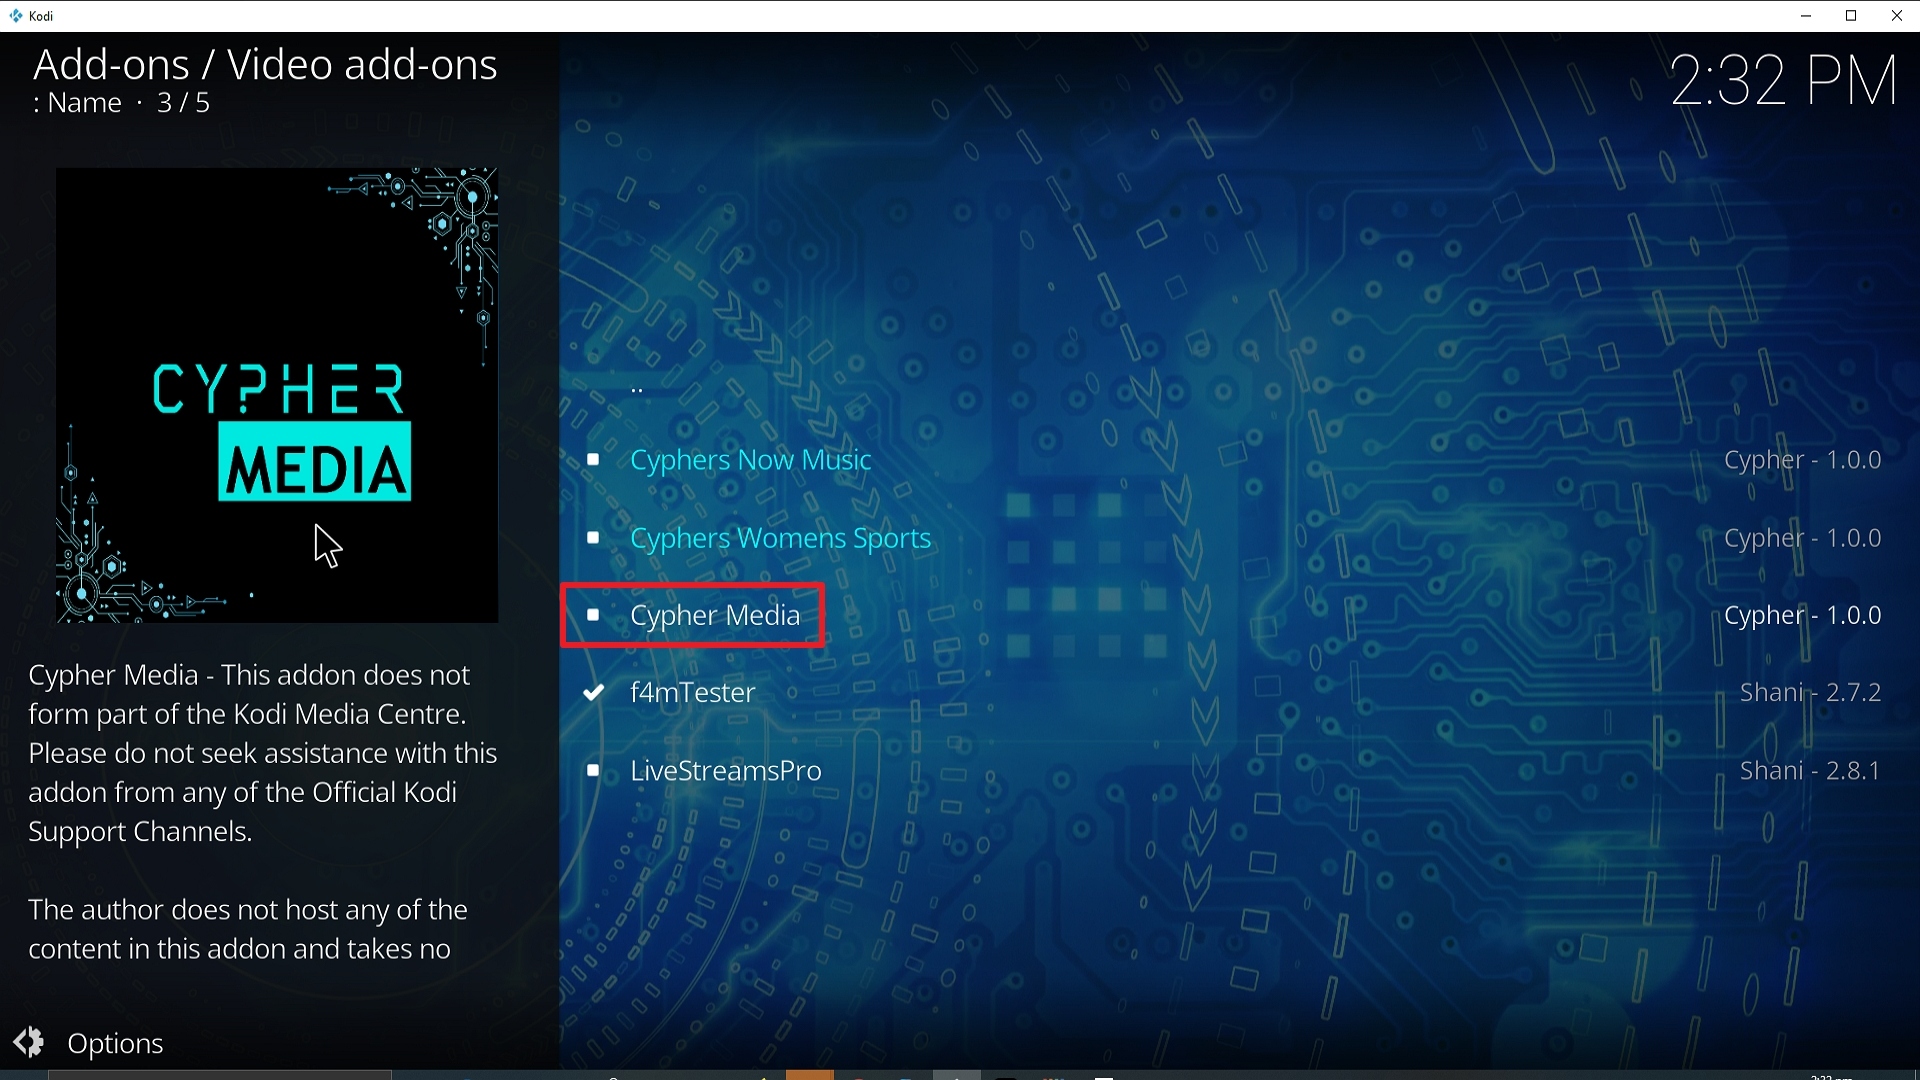
22. Select Cypher Media again.

Step 22 Installing Cypher Media Kodi addon on Kodi


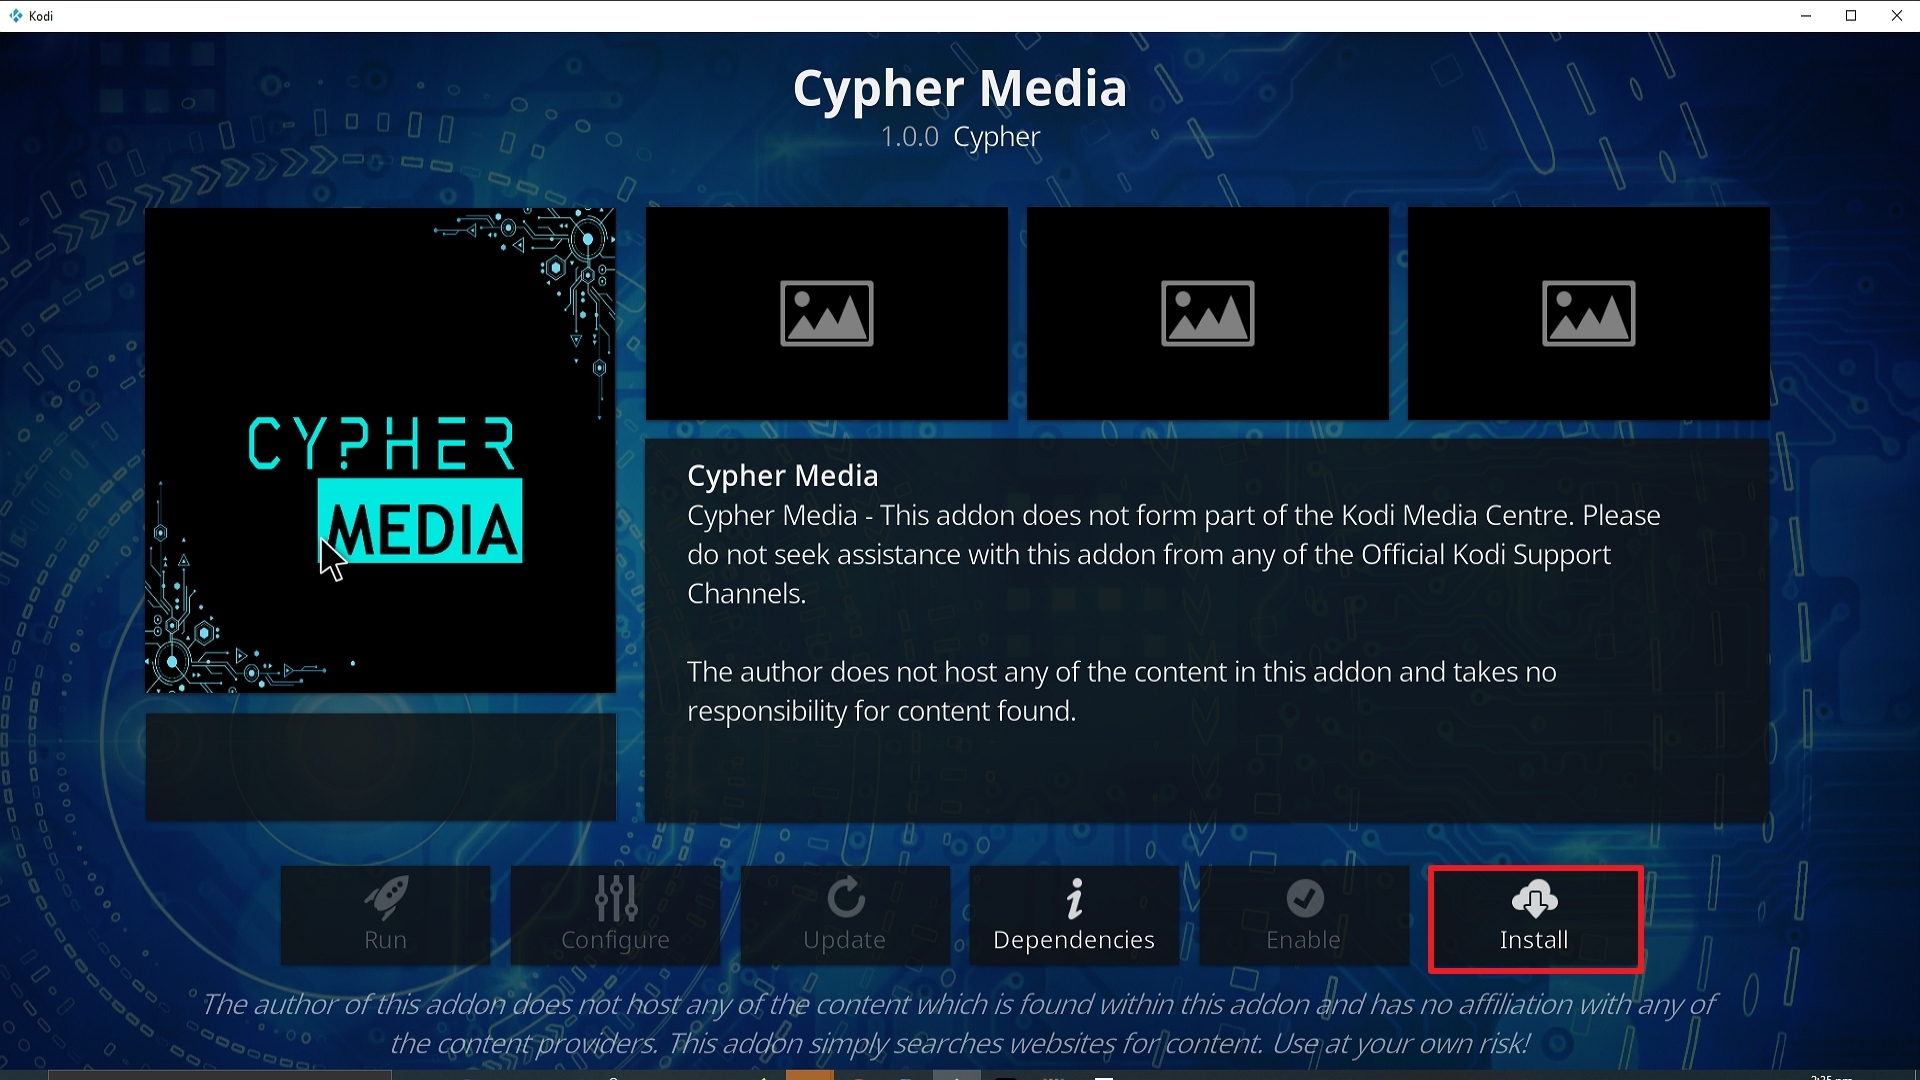
23. Click on Install.

Step 23 Installing Cypher Media Kodi addon on Kodi


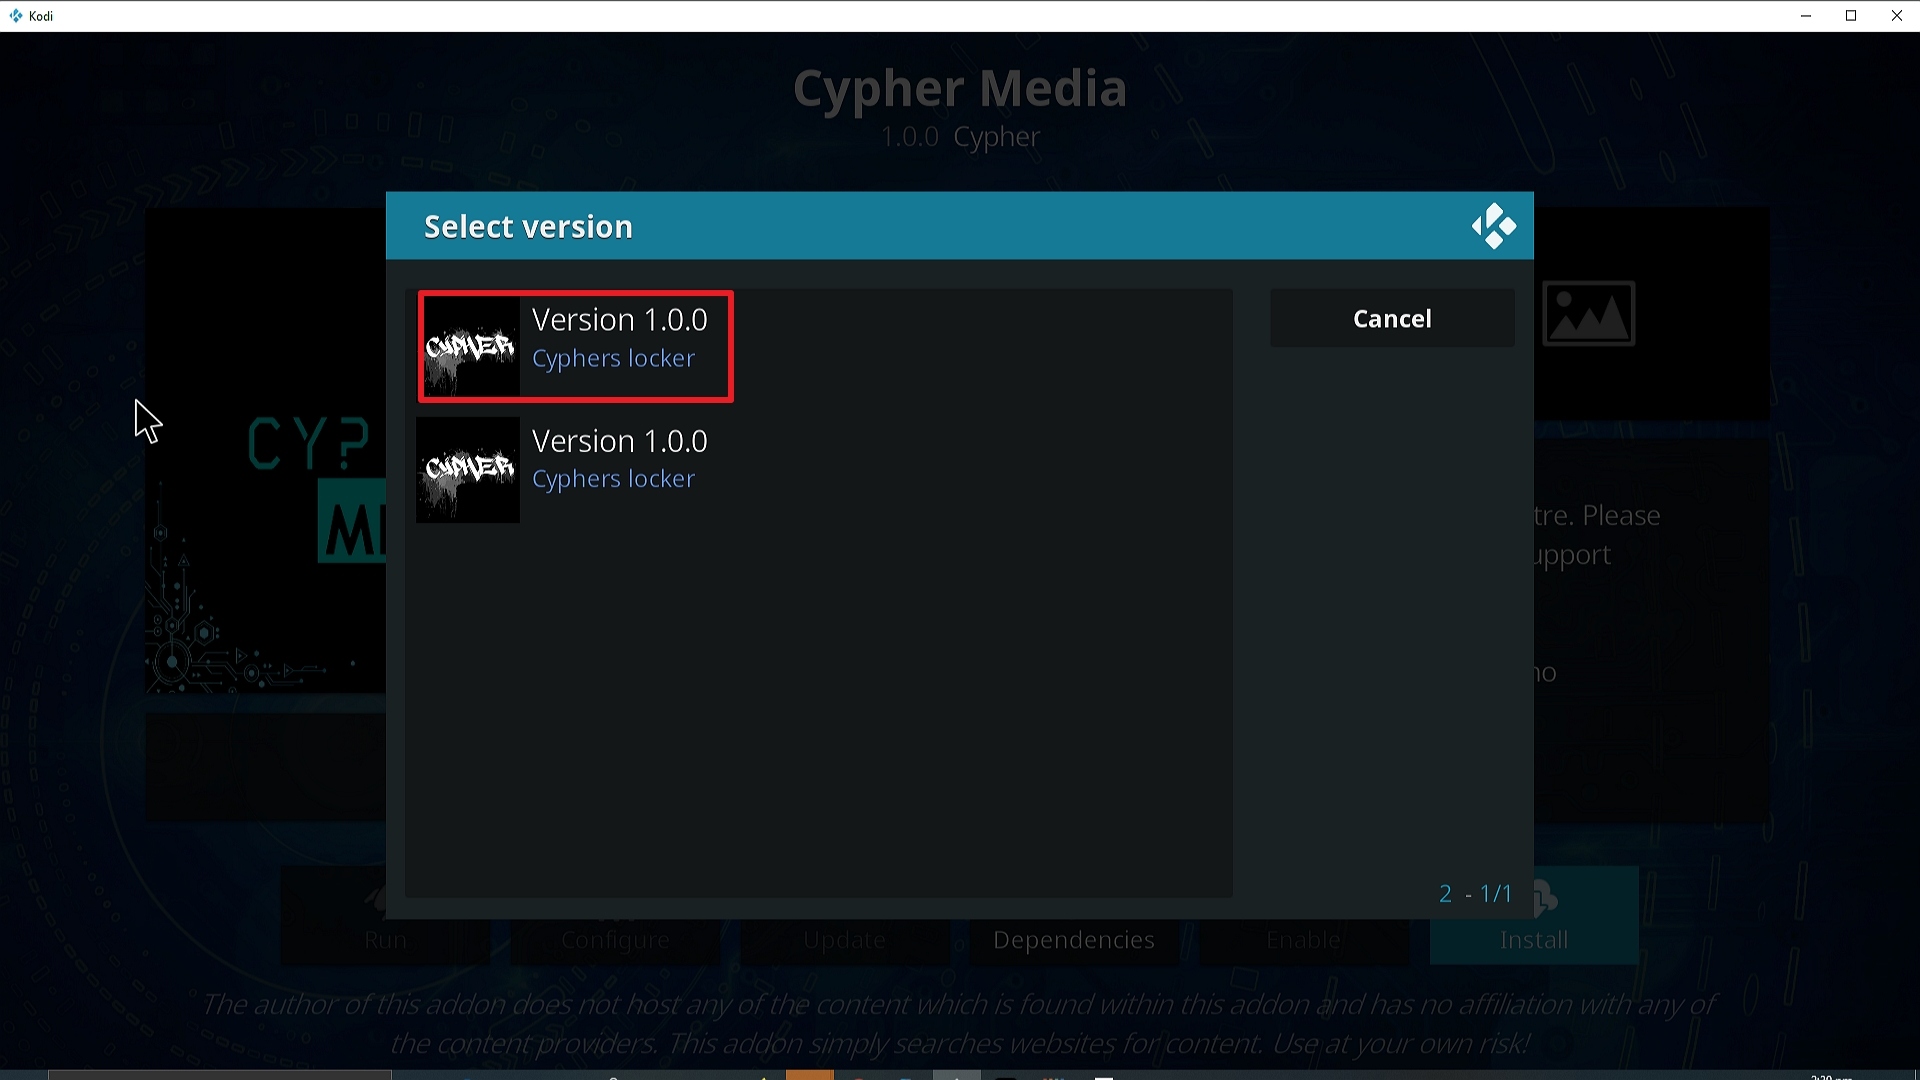
24. Select Version 1.0.0 (Cyphers Locker Repo)

Step 24 Installing Cypher Media Kodi addon on Kodi


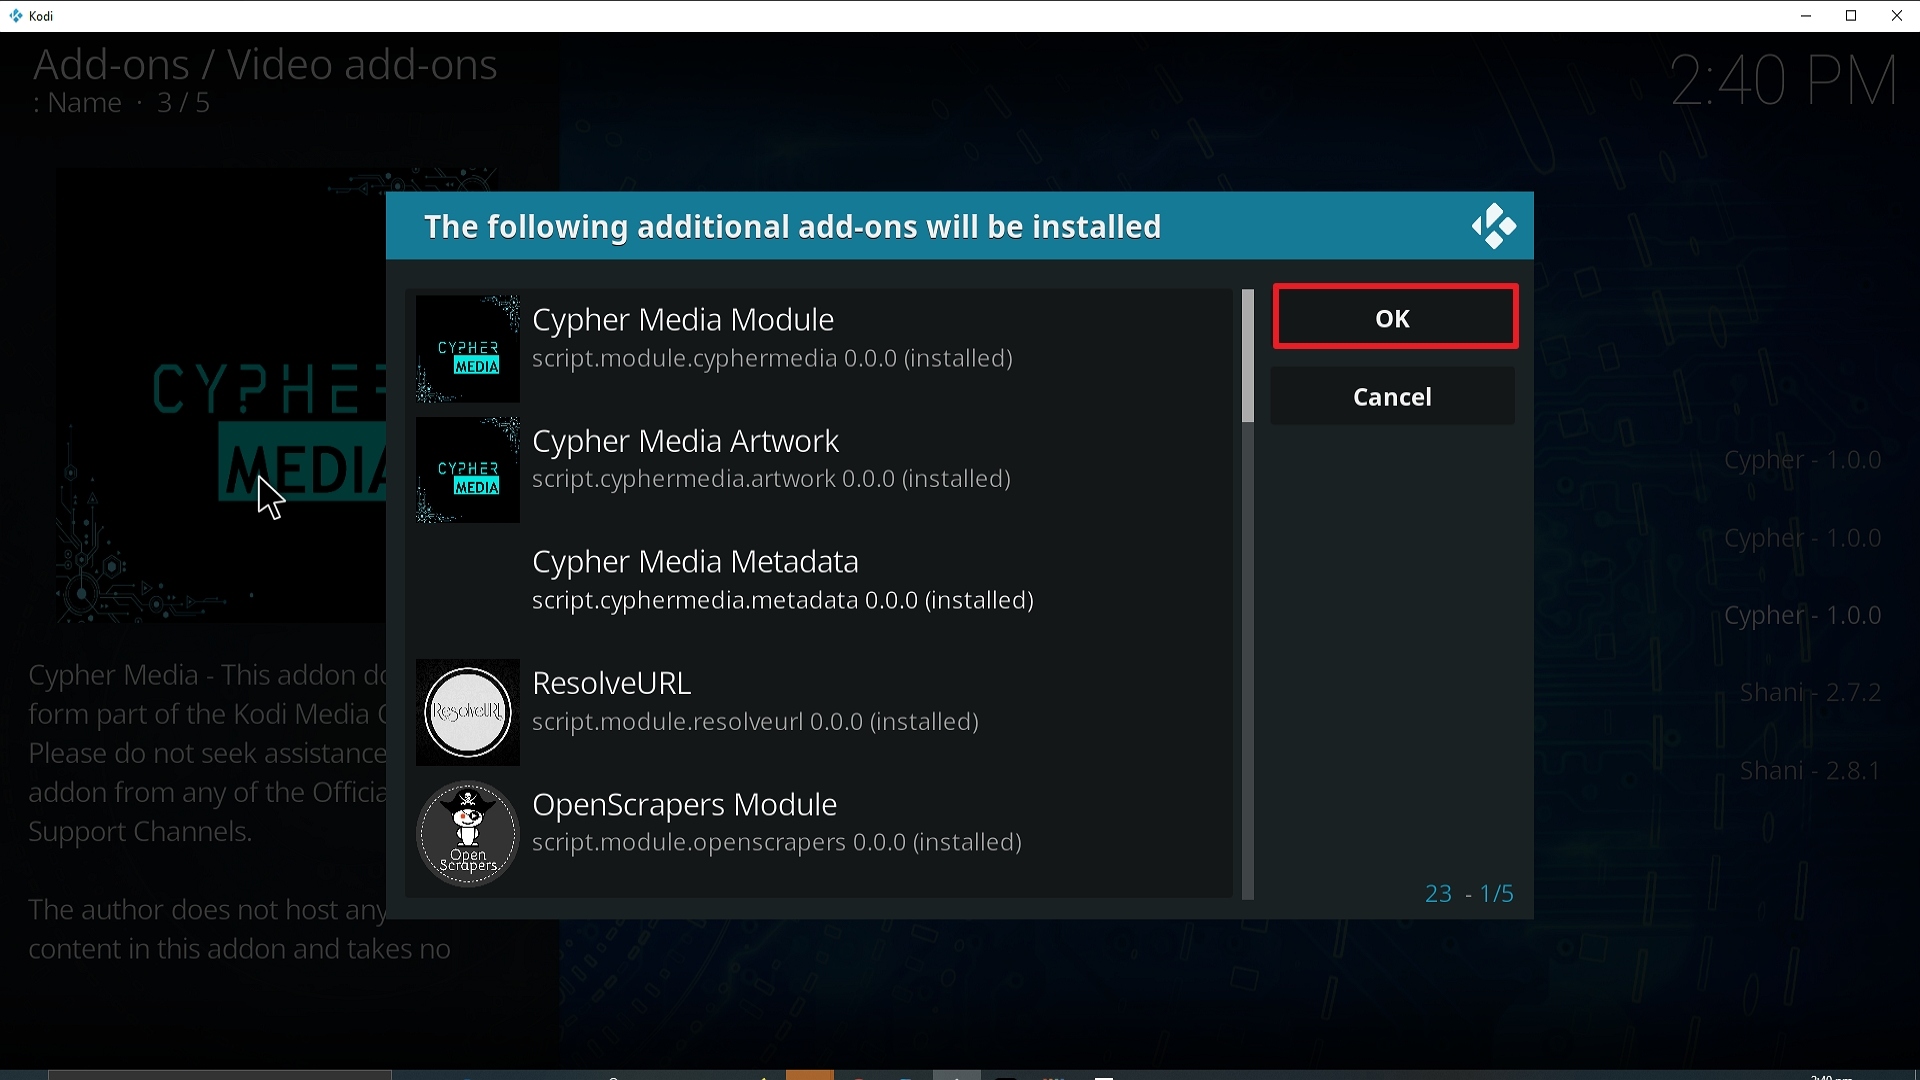
25. Select OK after reviewing the add-ons that will be installed.

Step 25 Installing Cypher Media Kodi addon on Kodi


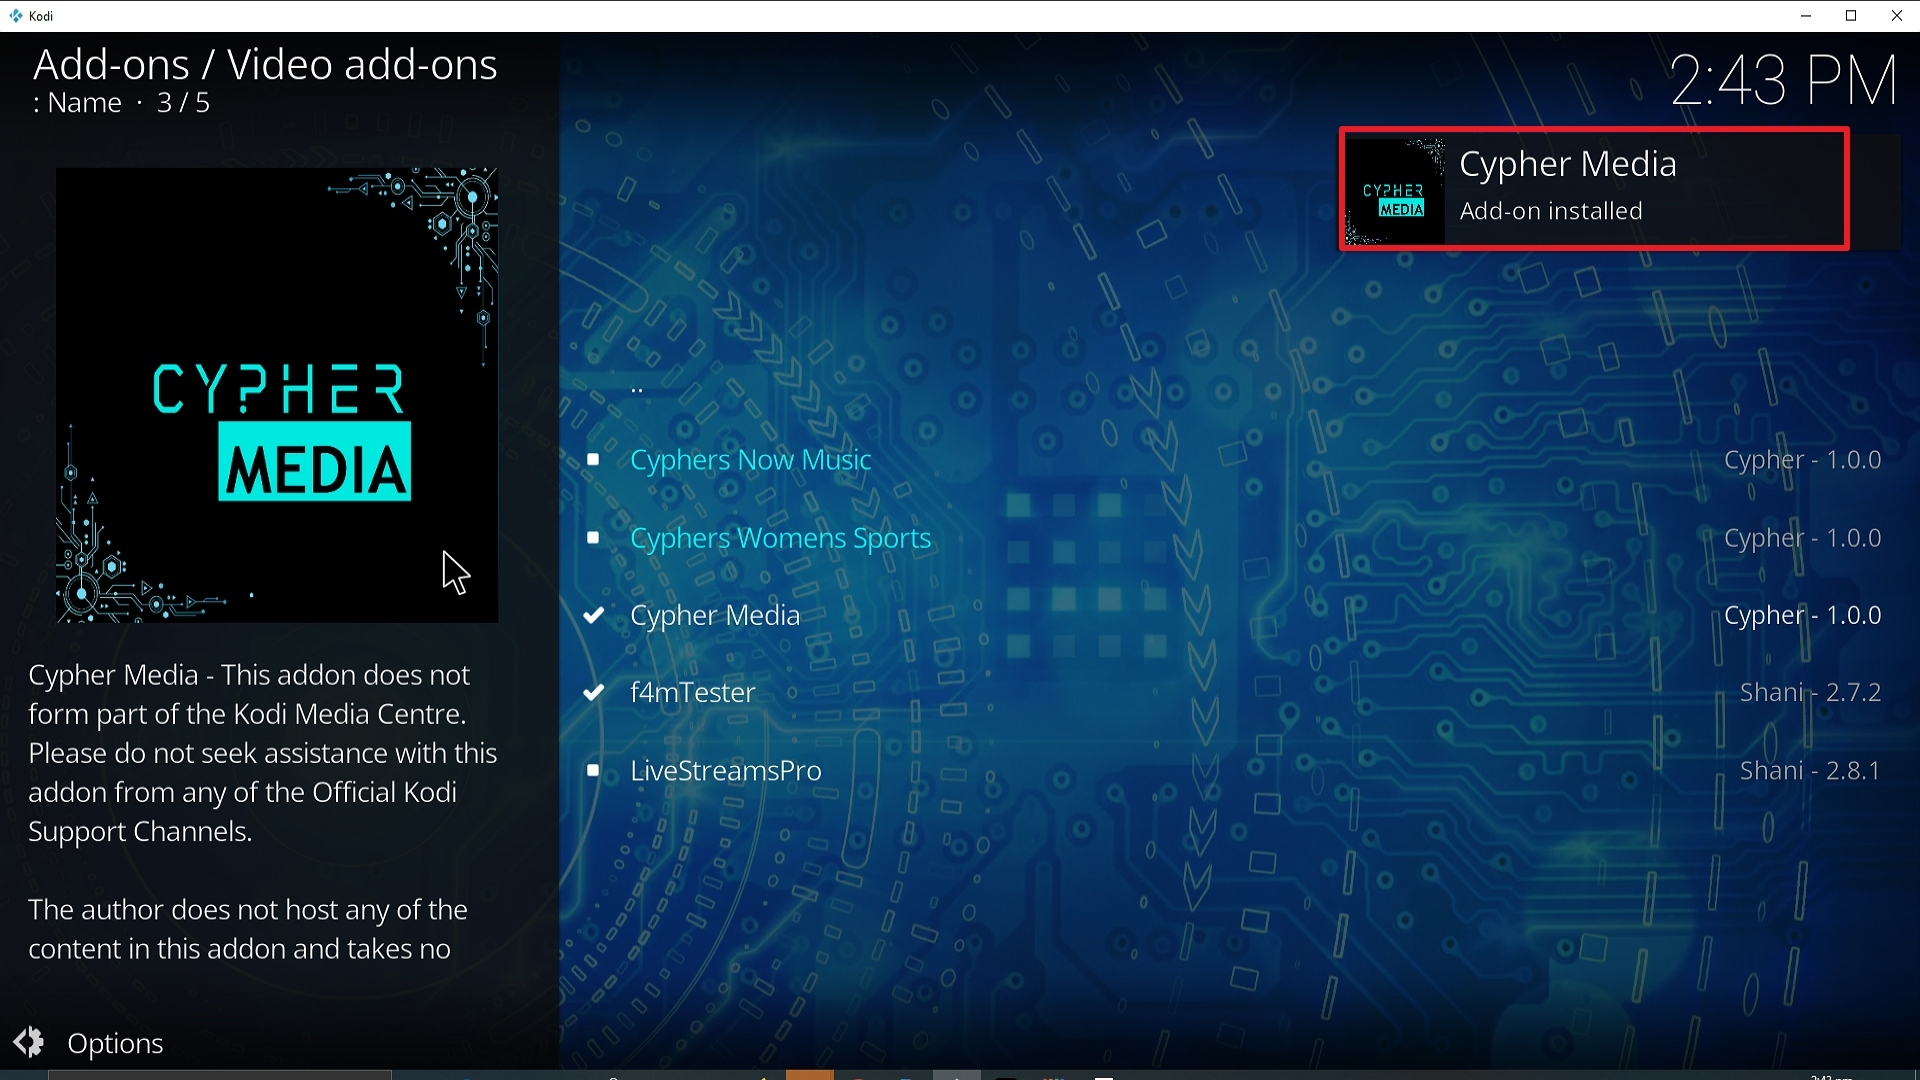
26. You should see a popup in the upper right corner saying Cypher Media has installed. There will actually be multiple popups for the various components.

Step 26 Installing Cypher Media Kodi addon on Kodi


27. Click on Open to start the Cypher Media add-on.

Step 27 Installing Cypher Media Kodi addon on Kodi


Why do you need a VPN while streaming with Kodi?

A VPN is software that encrypts and masks your online identity to appear as secure, anonymous, and private use on the Internet service provider network. 


Benefits of using a VPN

  • Stream Anonymously
  • Bypass Geolocation
  • Minimize Throttling

Note: For more information about Surfshark, please read our Surfshark Review.


Install Surfshark on Firestick

Best Surfshark Deal


How to Install Surfshark VPN on Firestick

If your Firestick still has the older interface, read this article to learn how to update it: Update Firestick Interface.

Follow our screenshots below to install the SurfShark VPN app on your Fire TV stick.

1. Go to the Home screen of your Firestick.

step 1 Install Surfshark VPN on Firestick


2. Navigate towards the Find tab. Press the Search button from the resulting dropdown.

step 2 Install Surfshark VPN on Firestick


3. Type in the keyword of SurfShark and select from the suggestions that will appear.

step 3 Install Surfshark VPN on Firestick


4. Click the official SurfShark icon from your search results.

step 4 Install Surfshark VPN on Firestick


5. Press the Download (You own it) button.

step 5 Install Surfshark VPN on Firestick


6. The SurfShark VPN installer will download on your device.

step 6 Install Surfshark VPN on Firestick


7. SurfShark VPN’s app will automatically install itself on your Fire TV stick.

step 7 Install Surfshark VPN on Firestick


8. Press the Open button after completing SurfShark VPN’s installation process.

step 8 Install Surfshark VPN on Firestick


9. Please wait for the SurfShark VPN to load its user interface.

step 9 Install Surfshark VPN on Firestick


10. You can now log in with your SurfShark VPN account credentials.

step 10 Install Surfshark VPN on Firestick

Learn more about Surfshark and Grab the Best Surfshark Deal Now!


Install Surfshark on Firestick

Best Surfshark Deal


Other VPNs to Consider

NordVPN (Best for Streaming)

Best Features

  • 5000+ Server in 50+ Countries 
  • Military-Grade Encryption
  • Fast Connection Speed
  • Suitable to a lot of devices
  • No-Log Policy

Prices
  • Complete $5.89 per month (64% Discount)
  • Plus $4.59 per month (56% Discount)
  • Standard $3.69 per month (55% Discount)

Best Features

  • 750+ High-speed VPN Servers in 43 Locations
  • Military-Grade Encryption
  • Fastest HD Streaming and Gaming
  • 30-Day Money-Back Guarantee
  • Unlimited Data & Devices
  • No-Log Policy

Prices
  • 3 Years $1.99 per month (82% Discount)
  • 1 Years $3.29 per month (70% Discount)
  • 1 Month $10.99 per month

IPVanish VPN (Most Secure)

Best Features

  • 1200+ Servers in 60+ Countries around the world
  • Unlimited Connections
  • No-Log Policy
  • Top Notch Military-Grade VPN Protocols and Encryptions
  • 100% Safe and Secured
  • Most Trusted VPN
  • Best VPN for Firestick
  • 30-Day Money-Back Guarantee

Prices
  • Yearly $3.99 per month (63% Discount) – 30 days risk free + Ransomware & Malware Protection
  • Quarterly $5.32 per month (51% Discount)
  • Monthly $10.99 per month


For more VPN discounts, go to ReviewVPN Deals and purchase the best VPN for you.


Install Chains of Absolution Kodi Addon

Chains of Absolution Kodi Addon

In this article, we will help you install Chains of Absolution Kodi Build on Firestick.


Source: http://luxray.xyz/repo/

Chains of Absolution Kodi addon is a pretty basic UI addon that gives you access to a wide range of movies and TV Shows.

Mainly aimed at Detective and Sci-Fi shows and Movies. Compatible with Trakt and The Movie Database (TMDB)

You can also install the Luxray Prime addon which would include Chains of Absolution as well as 18 other add ons.


Common Errors 

Here are the most common errors you are likely to come across with Chains of Absolution:

  • Kodi check log error: A check log error can happen for several reasons, there may be a corrupted file that has been downloaded onto your system, or your Kodi installation needs to be upgraded. The most likely reason though is a full media cache. Over time, each item of media you see, or watch is cached in a media file. This allows your system to load faster and work smoother. This cache file fills up, faster if your device has a small or limited amount of storage. A check log error happens when the cache needs to be emptied. Find out how to do that and more, read our in-depth guide linked above.


  • Source not working/slow/frozen: When trying to connect to a media source, almost always this is being hosted on a server not owned by the addon. So, the process can be slow, and sometimes the link will look like it doesn’t work. That’s because it can take up to 20 seconds for the connection to happen. Also bear in mind, due to the illegal nature of your viewing, the link may be blocked by your internet provider. So be sure to use a VPN when watching anything on Kodi or Chains of Absolution. Check here for the best VPN deal. For other problems and fixes read our fix guide linked above.


  • Could not connect to URL/Download: Being unable to download the addon, generally means a simple spelling mistake with the URL. Make sure the URL is correct, and you are using a VPN. This prevents your internet provider from blocking your downloading the addon. For more fixes read our in-depth guide linked above.


ANONYMOUSLY

Review

I don’t think we have ever seen a menu with so many options, 63 to count. Chains of Absolution has obviously been put together by a sci-fi and Dr. Who nut, as it has several sections dedicated to each of the Doctors.

A good addon, but basic, the reason for many categories is there are no sub-categories.

Better served to download Luxray Prime, Seren, or Nole Cinema

Categories in Chains of Absolution include:

  • IPTV
  • Movie Collections (Various collections e.g. Elvis, Sherlock, Star Wars, Rocky, Marvel Universe)
  • TV Collections (Various collections e.g. Black Adder, Peaky Blinders, Penny Dreadful)
  • Movie Scrapers
  • Trending Movies
  • Popular Movies
  • TMDB Upcoming
  • TMDB Popular
  • TMDB Now Playing
  • TMDB Top Rated
  • Movie Watchlist TRAKT
  • Most Watched
  • TV Scrapers
  • 24/7 TV Shows
  • New Episodes
  • Trending Episodes
  • Popular Shows
  • TV Watchlist TRAKT
  • TV Collection TRAKT
  • Anticipated
  • Collected
  • TMDB Airing Today
  • Search
  • Search All TMDB
  • Search All TRAKT
  • Regeneration
  • Dr. Who Spotlight


YOUR INTERNET ACTIVITY IS BEING WATCHED

ReviewVPN cannot attest to the legality, security and privacy of the applications discussed on this site. It is highly recommended that you use a VPN service while streaming or using Kodi.

Currently, your IP 216.73.217.150 is visible to everyone and your Browser is being tracked by Advertisers & ISP Provider.

Save 65% Now

Limited Time Offer

Here are the main reasons why you must use a VPN:

  • Your activities are hidden from your ISP, the government, and from the apps you are using.
  • You can access additional movies and TV streams.
  • ISP attempts to throttle are thrwarted thus reducing buffering issues.
  • Geographically restricted content like Netflix and Hulu can be unblocked.

A VPN works be replacing your ISP-assigned IP address and creating an encrypted tunnel. We recommend the no log service offered by IPVanish. It works well on a Firestick and offers the fastest possible speeds.

Special Limited Time Offer - Get IPVanish


Legal Disclaimer: ReviewVPN.com does not encourage or endorse any illegal activity involved in the usage of services and applications referenced on this site. We do not verify the licensing agreements of services. The end-user is wholly responsible for ensuring that any media accessed through these services does not violate copyright and/or licensing laws. ReviewVPN does not promote, link to, or receive compensation from any Apps and IPTV services.


Install Surfshark on Firestick

Best Surfshark Deal


If you chose instead to install Luxray Prime you would get the following list of add ons, some real quality in there including Area 51, Nole Cinema and 7 of 9:

  • Chains of Absolution
  • 7 of 9
  • Luxray Video
  • Self Help
  • Come at me Bro
  • Nole Cinema
  • Ghost
  • Ultra-Instinct
  • Vile
  • Area-51
  • Documentary Empire
  • The Mad Titan
  • Prime Movies
  • Prime TV Shows
  • Prime Animated
  • Prime Documentaries
  • Prime Live TV
  • Prime 24/7
  • Prime Adult XXX


How to Install Chains of Absolution Addon on Kodi with Screenshots

  1. From the home screen, select the cogwheel at the upper left.

Step 1 Installing Chains of Absolution addon on Kodi


2. Select System in the bottom right corner.

Step 2 Installing Chains of Absolution addon on Kodi


3. Select Add-ons on the left side of the screen.

Step 3 Installing Chains of Absolution addon on Kodi


4. Select Unknown sources.

Step 4 Installing Chains of Absolution addon on Kodi


5. Click Yes to allow unknown sources.

Step 5 Installing Chains of Absolution addon on Kodi


6. Select File manager.

Step 6 Installing Chains of Absolution on Kodi


7. Click Add source.

Step 7 Installing Chains of Absolution addon on Kodi


8. Click on <None>.

Step 8 Installing Chains of Absolution addon on Kodi


9. Type exactly: http://luxray.xyz/repo/

Step 9 Installing Chains of Absolution Kodi addon on Kodi


10. Click on OK.

Step 10 Installing Chains of Absolution Kodi addon on Kodi


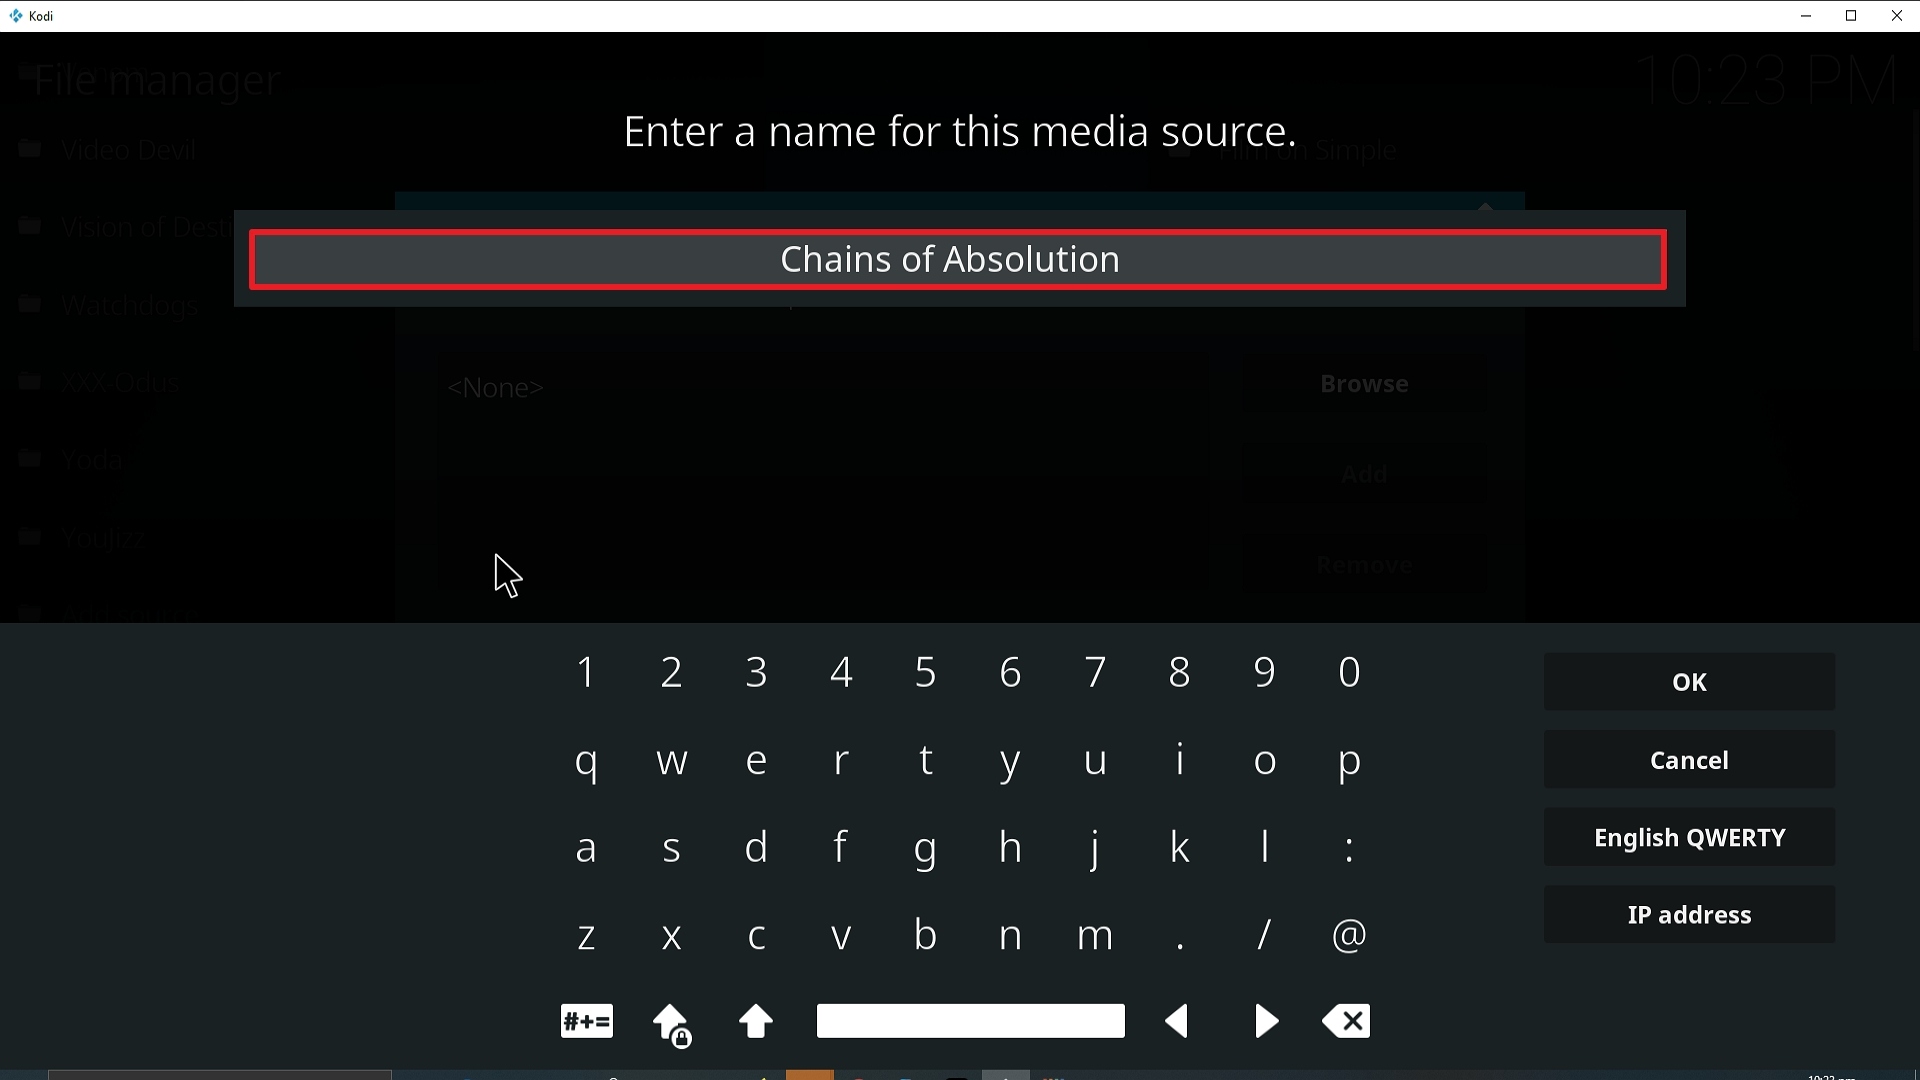
11. Select enter a name for this media source.

Step 11 Installing Chains of Absolution Kodi addon on Kodi


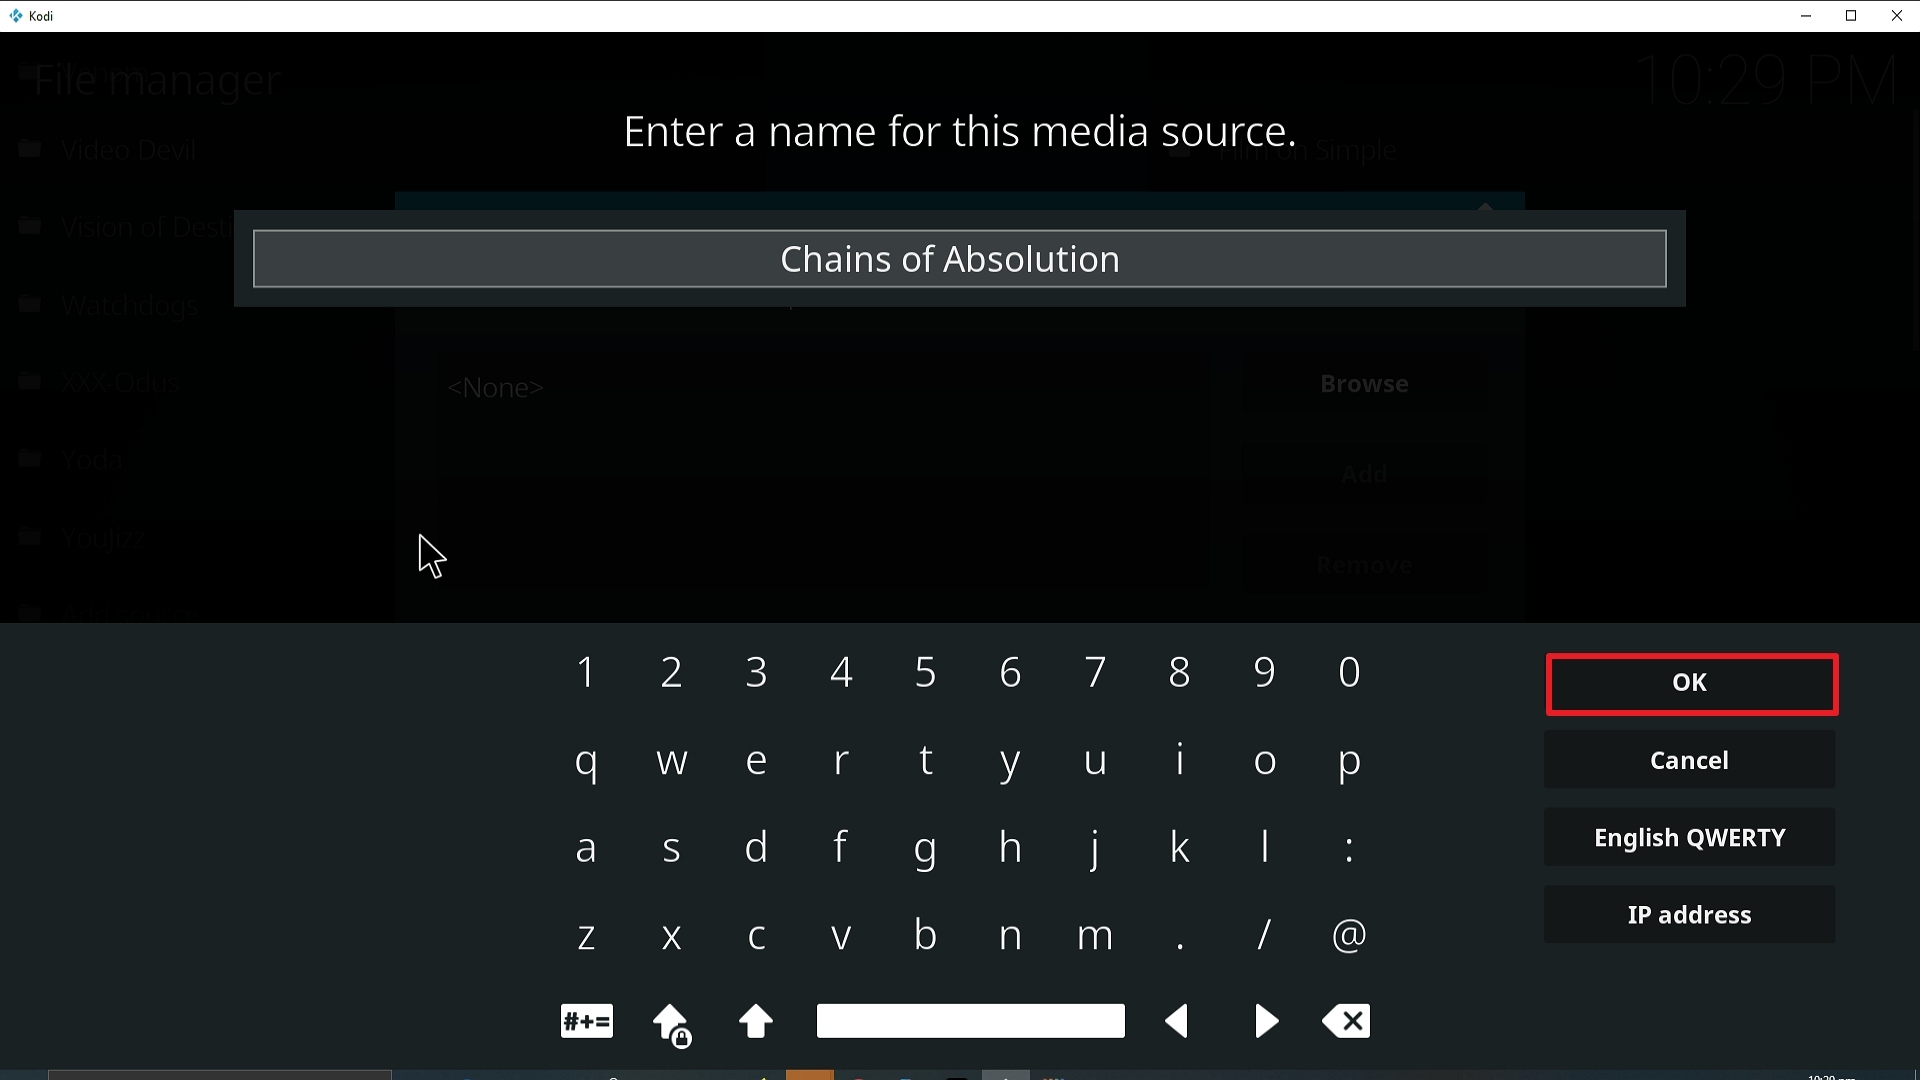
12. Name is Chains of Absolution (this part isn’t critical as long as you remember the name).

Step 12 Installing Chains of Absolution Kodi addon on Kodi


13. Click on OK.

Step 13 Installing Chains of Absolution Kodi addon on Kodi


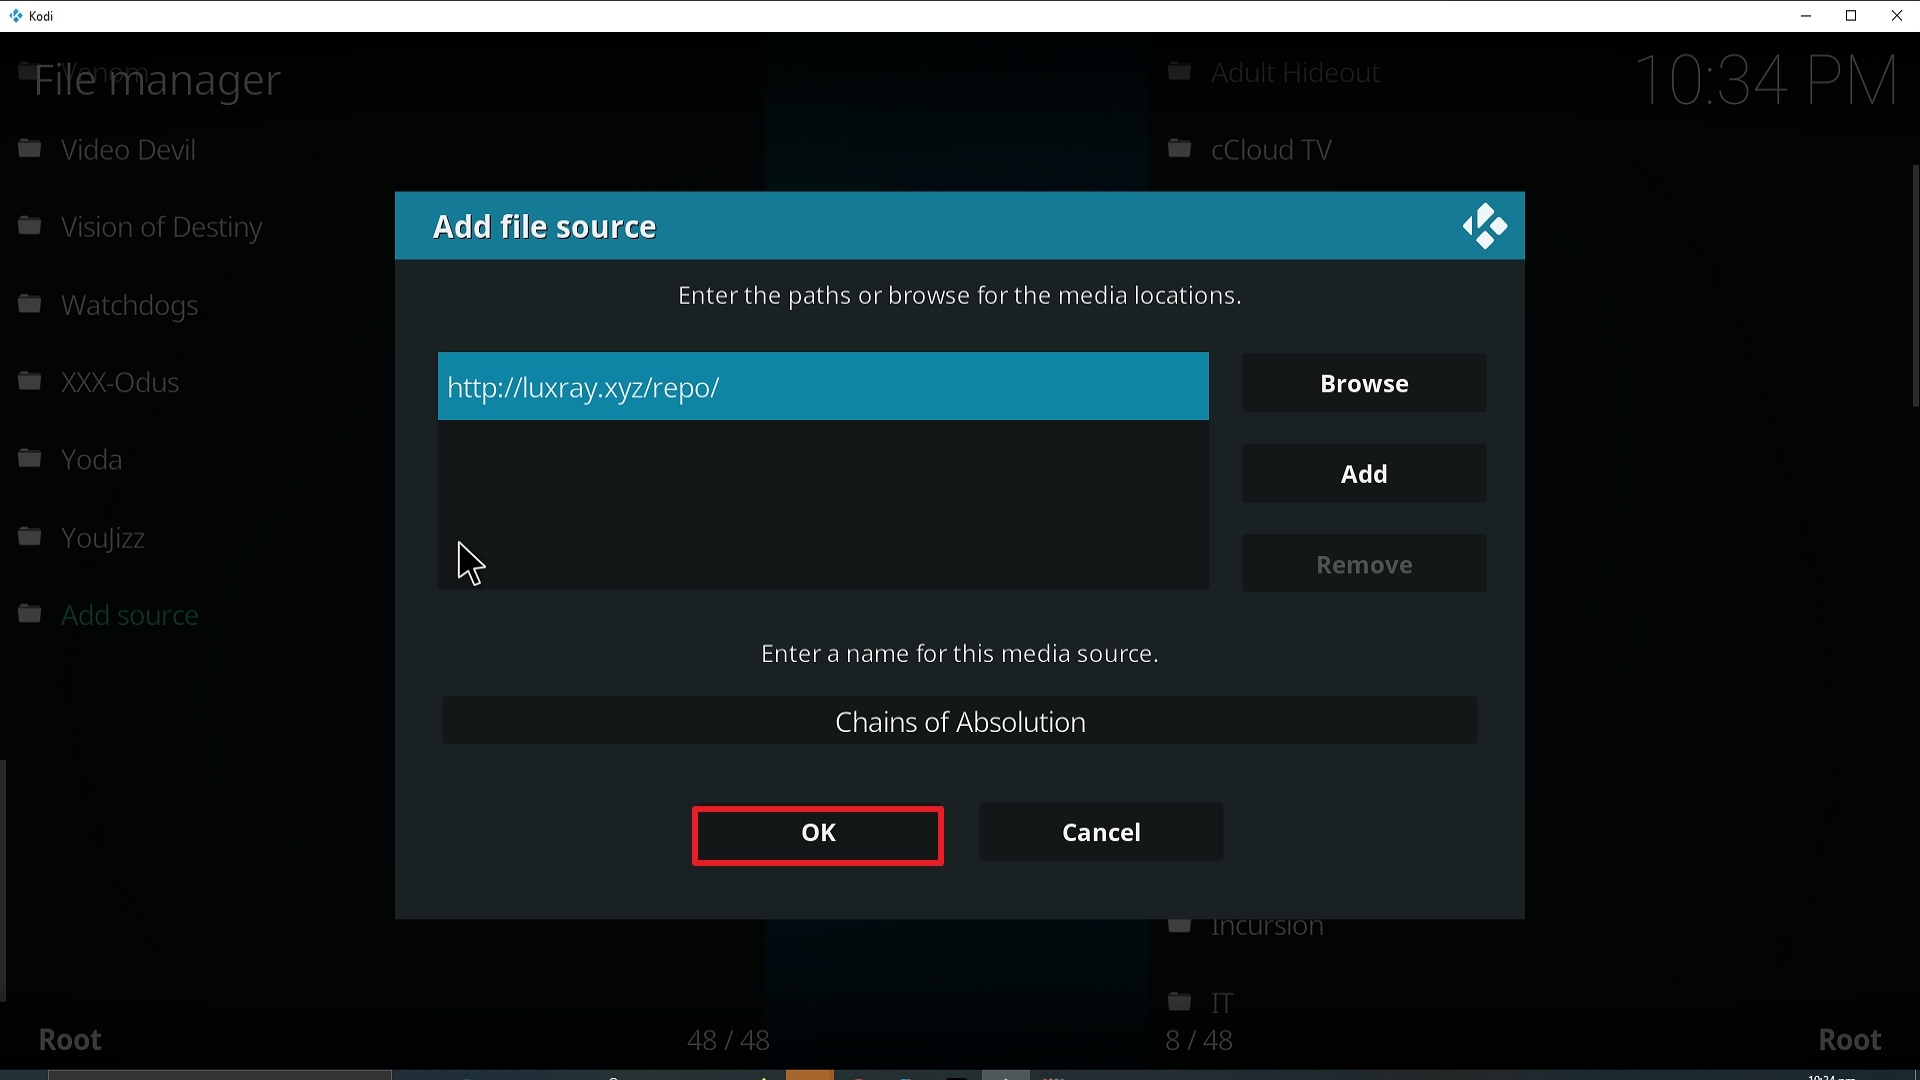
14. Click on OK.

Step 14 Installing Chains of Absolution Kodi addon on Kodi


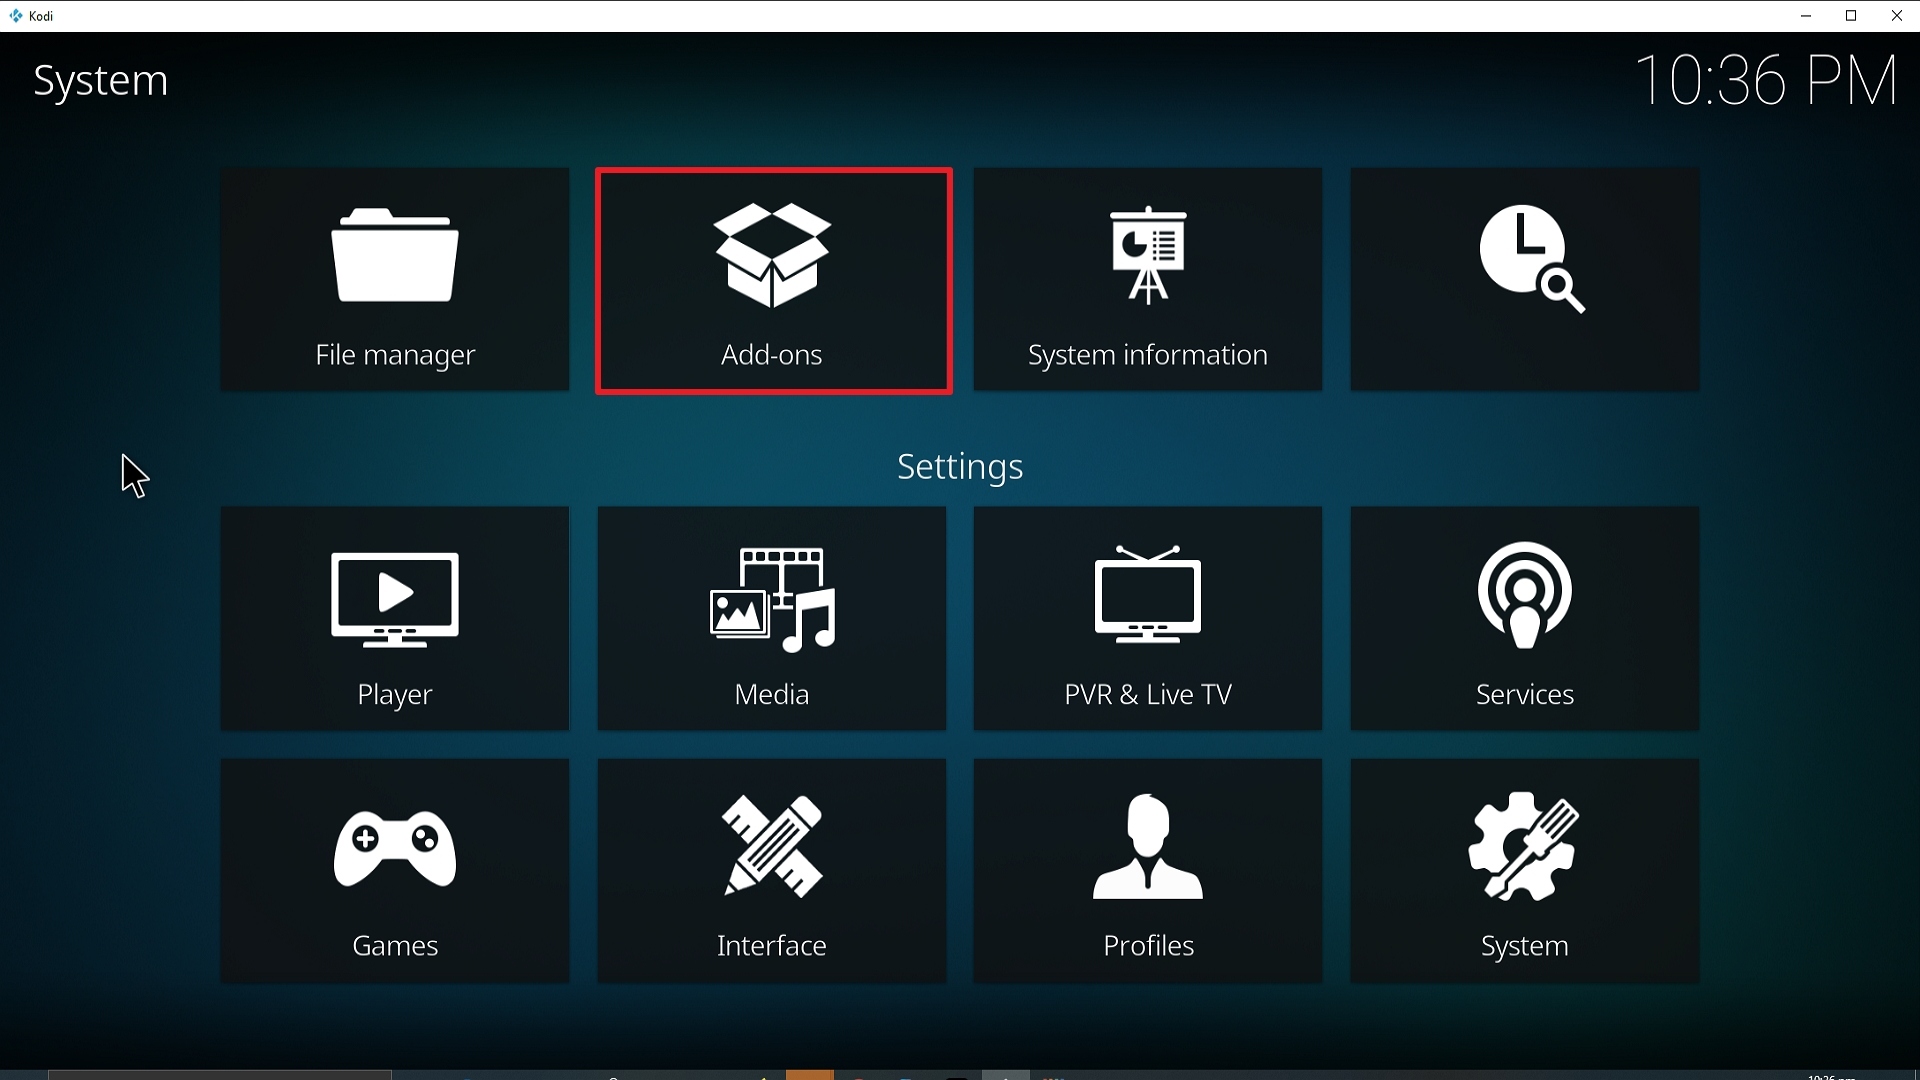
15. Take one step back and click on Add-ons.

Step 15 Installing Chains of Absolution Kodi addon on Kodi


16. Select install from zip file.

Step 16 Installing Chains of Absolution Kodi addon on Kodi


17. Click on Chains of Absolution (or whatever you named the source).

Step 17 Installing Chains of Absolution Kodi addon on Kodi


18. Click on repository.luxrayrepo-1.9.zip

Step 18 Installing Chains of Absolution Kodi addon on Kodi


19. Select on Install from repository.

Step 19 Installing Chains of Absolution Kodi addon on Kodi


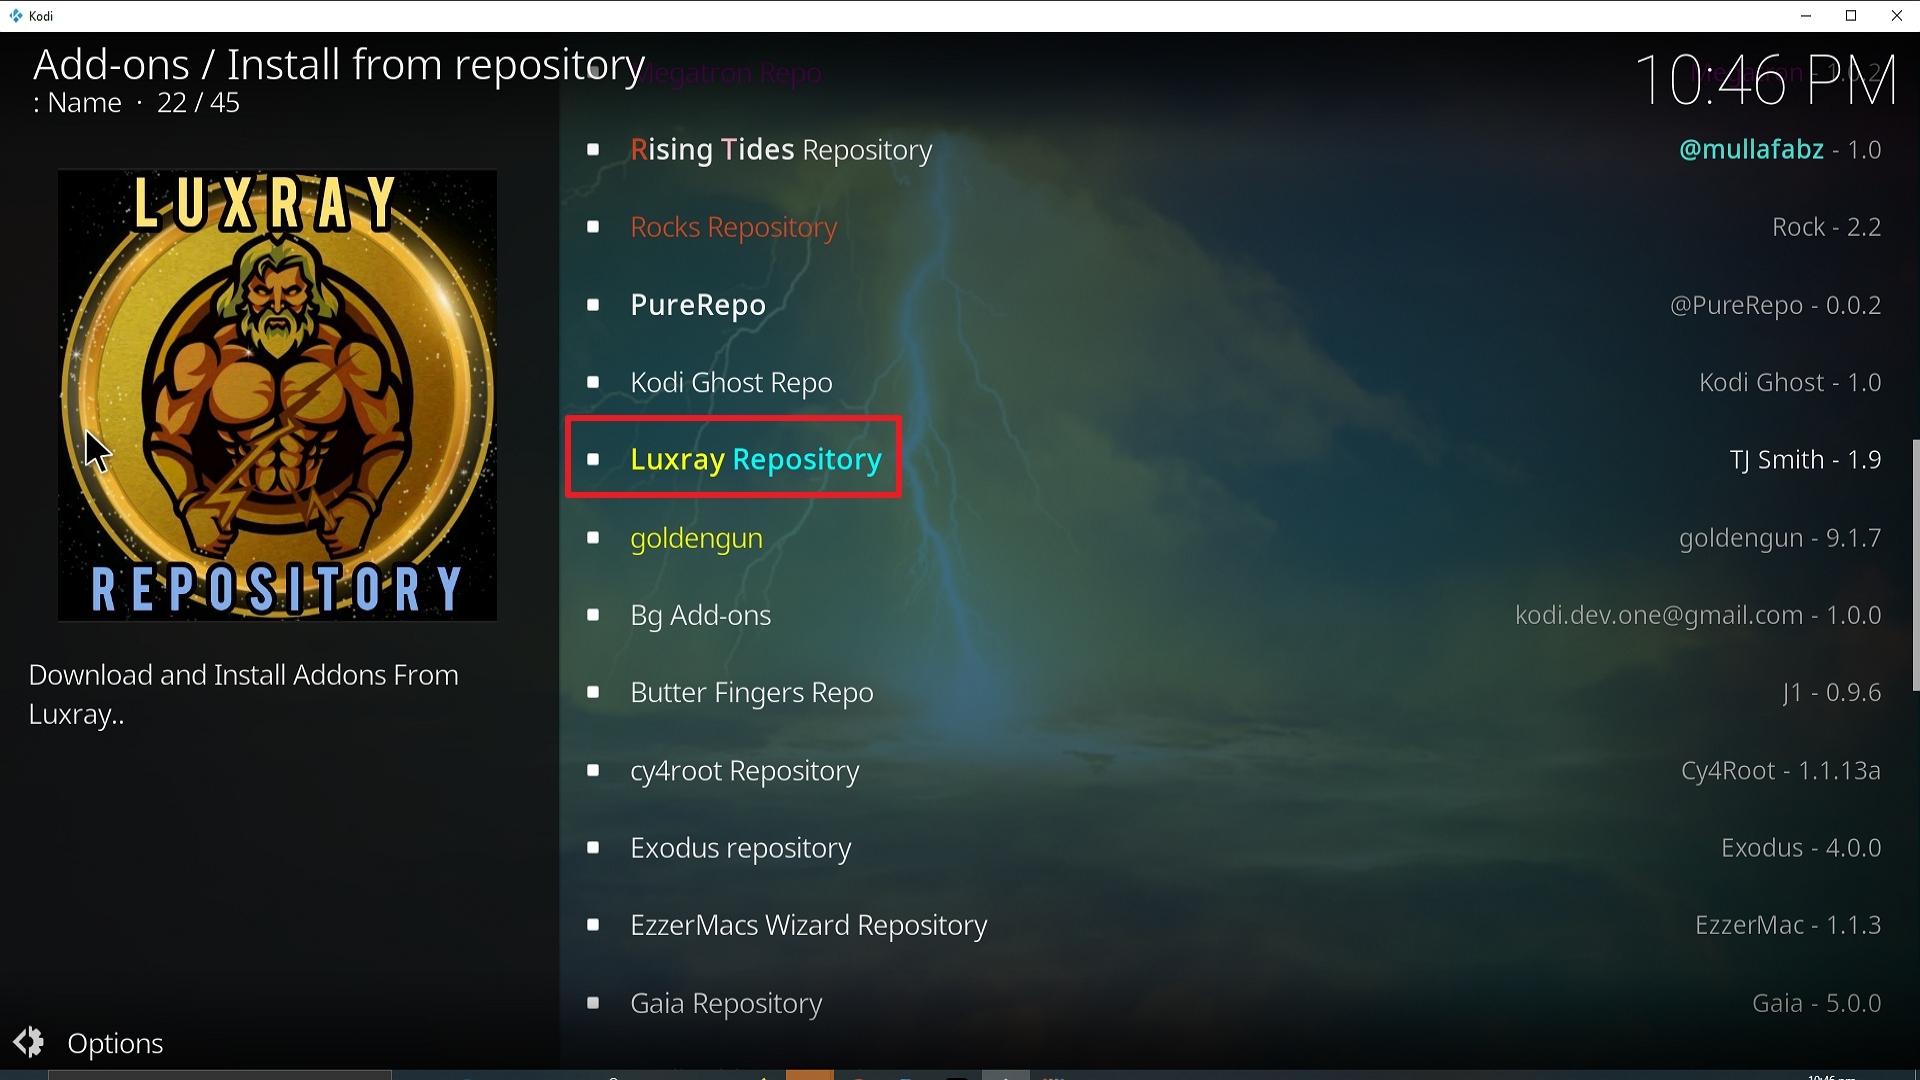
20. Click on Luxury Repo.

Step 20 Installing Chains of Absolution Kodi addon on Kodi


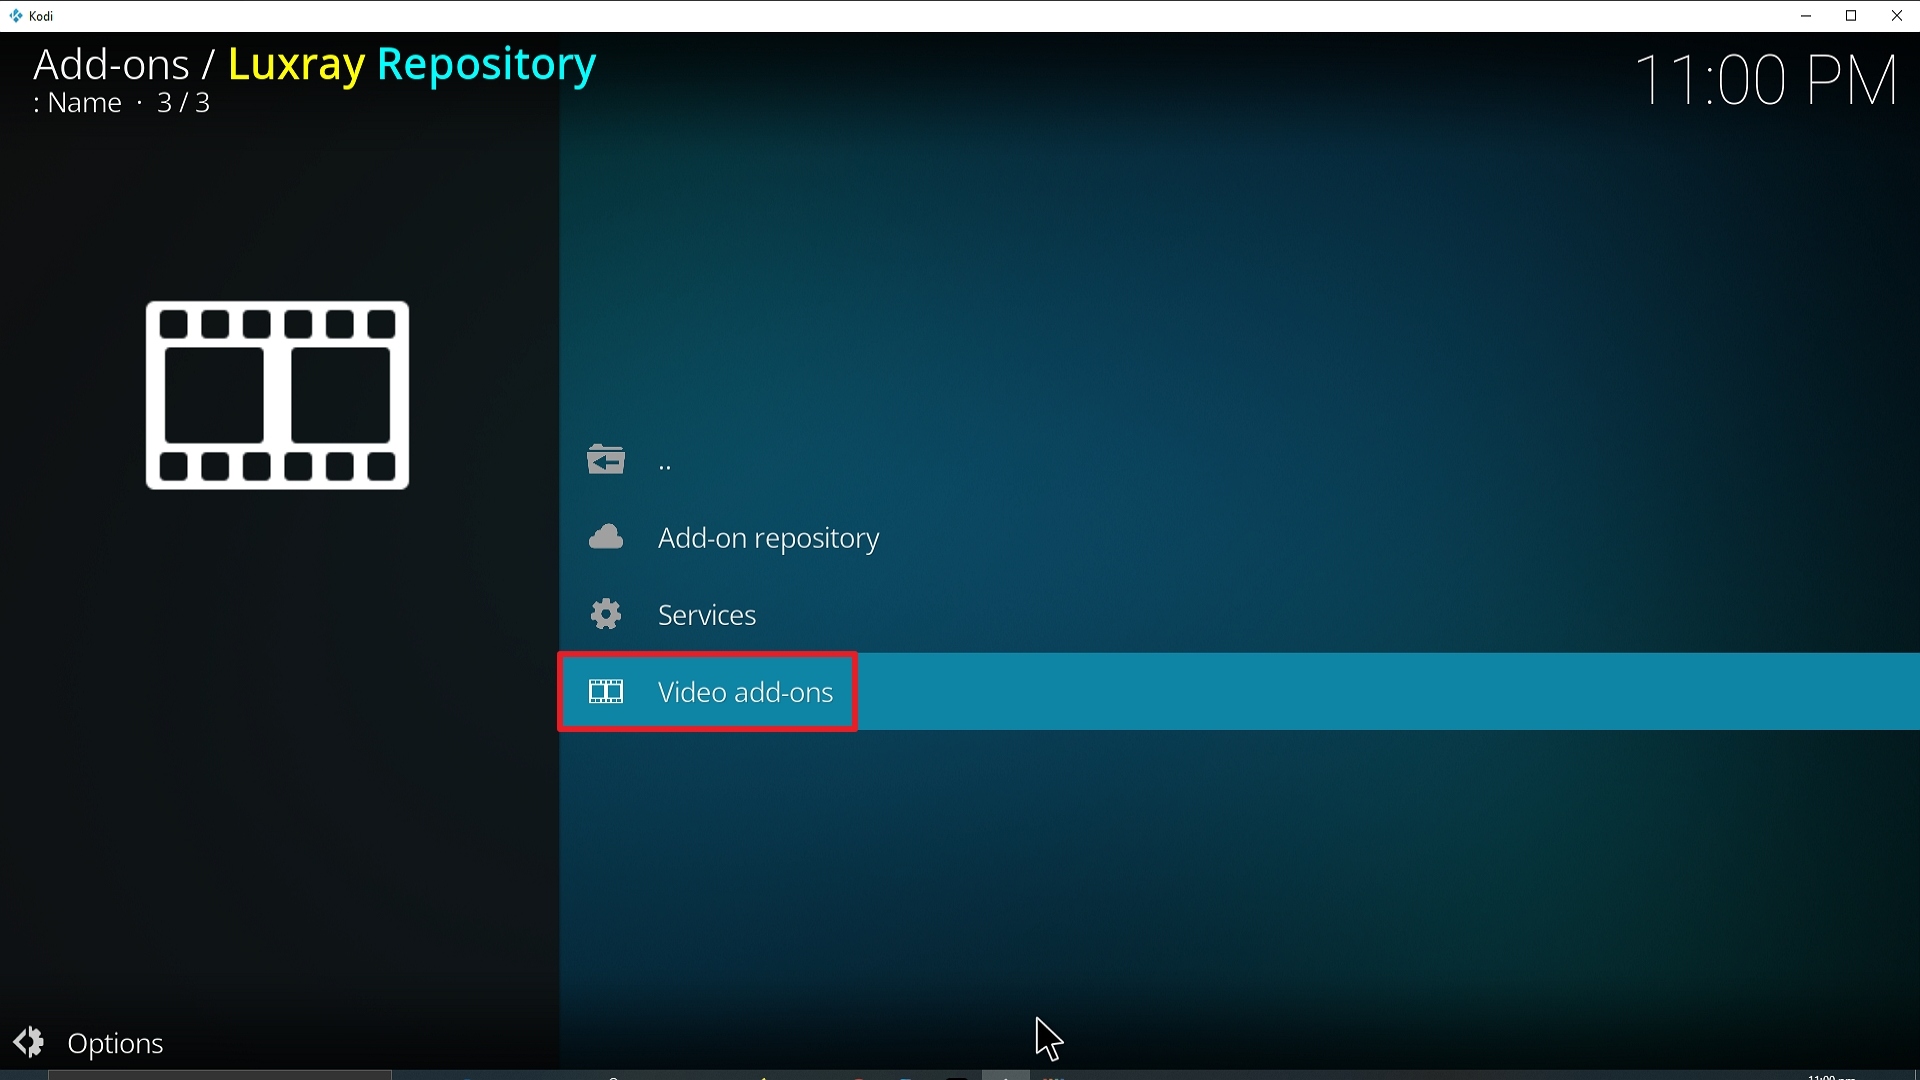
21. Pick Video add-ons.

Step 21 Installing Chains of Absolution Kodi addon on Kodi


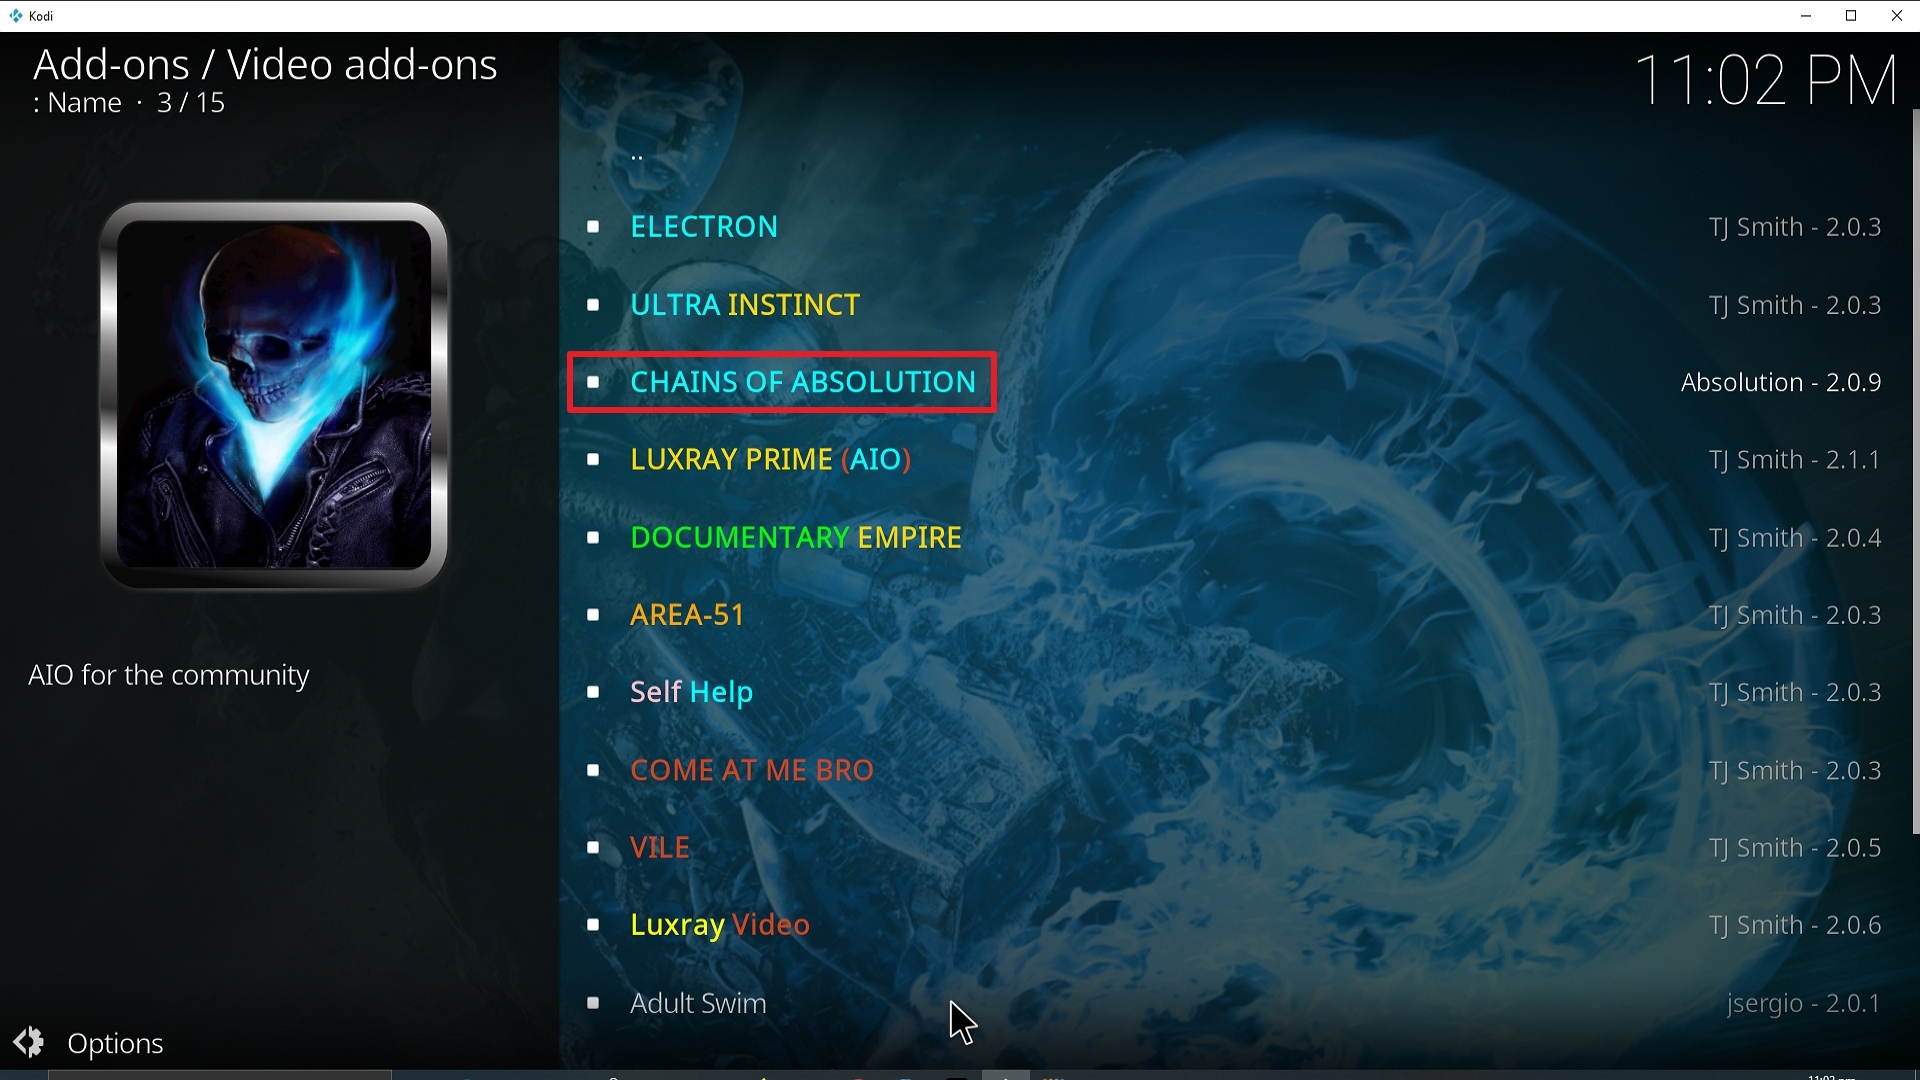
22. Select Chains of Absolution again.

Step 22 Installing Chains of Absolution Kodi addon on Kodi


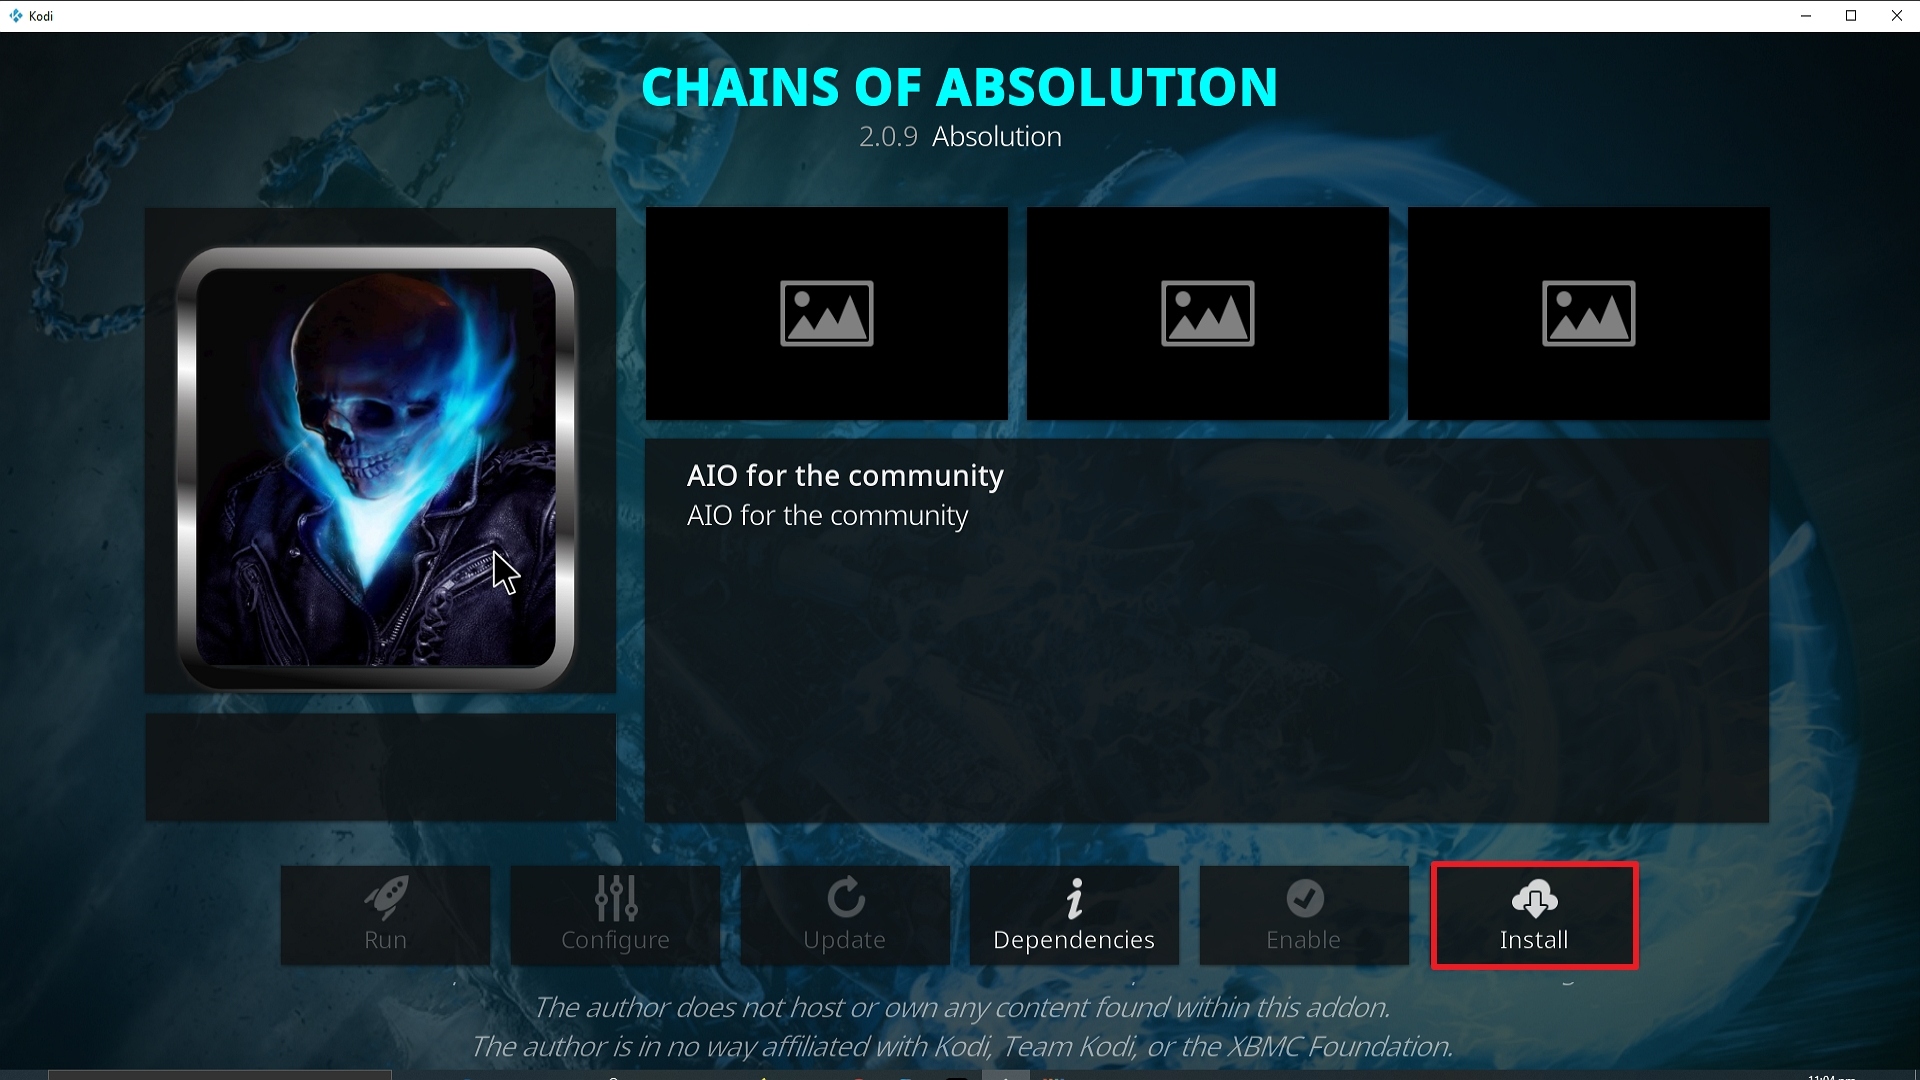
23. Click on Install.

Step 23 Installing Chains of Absolution Kodi addon on Kodi


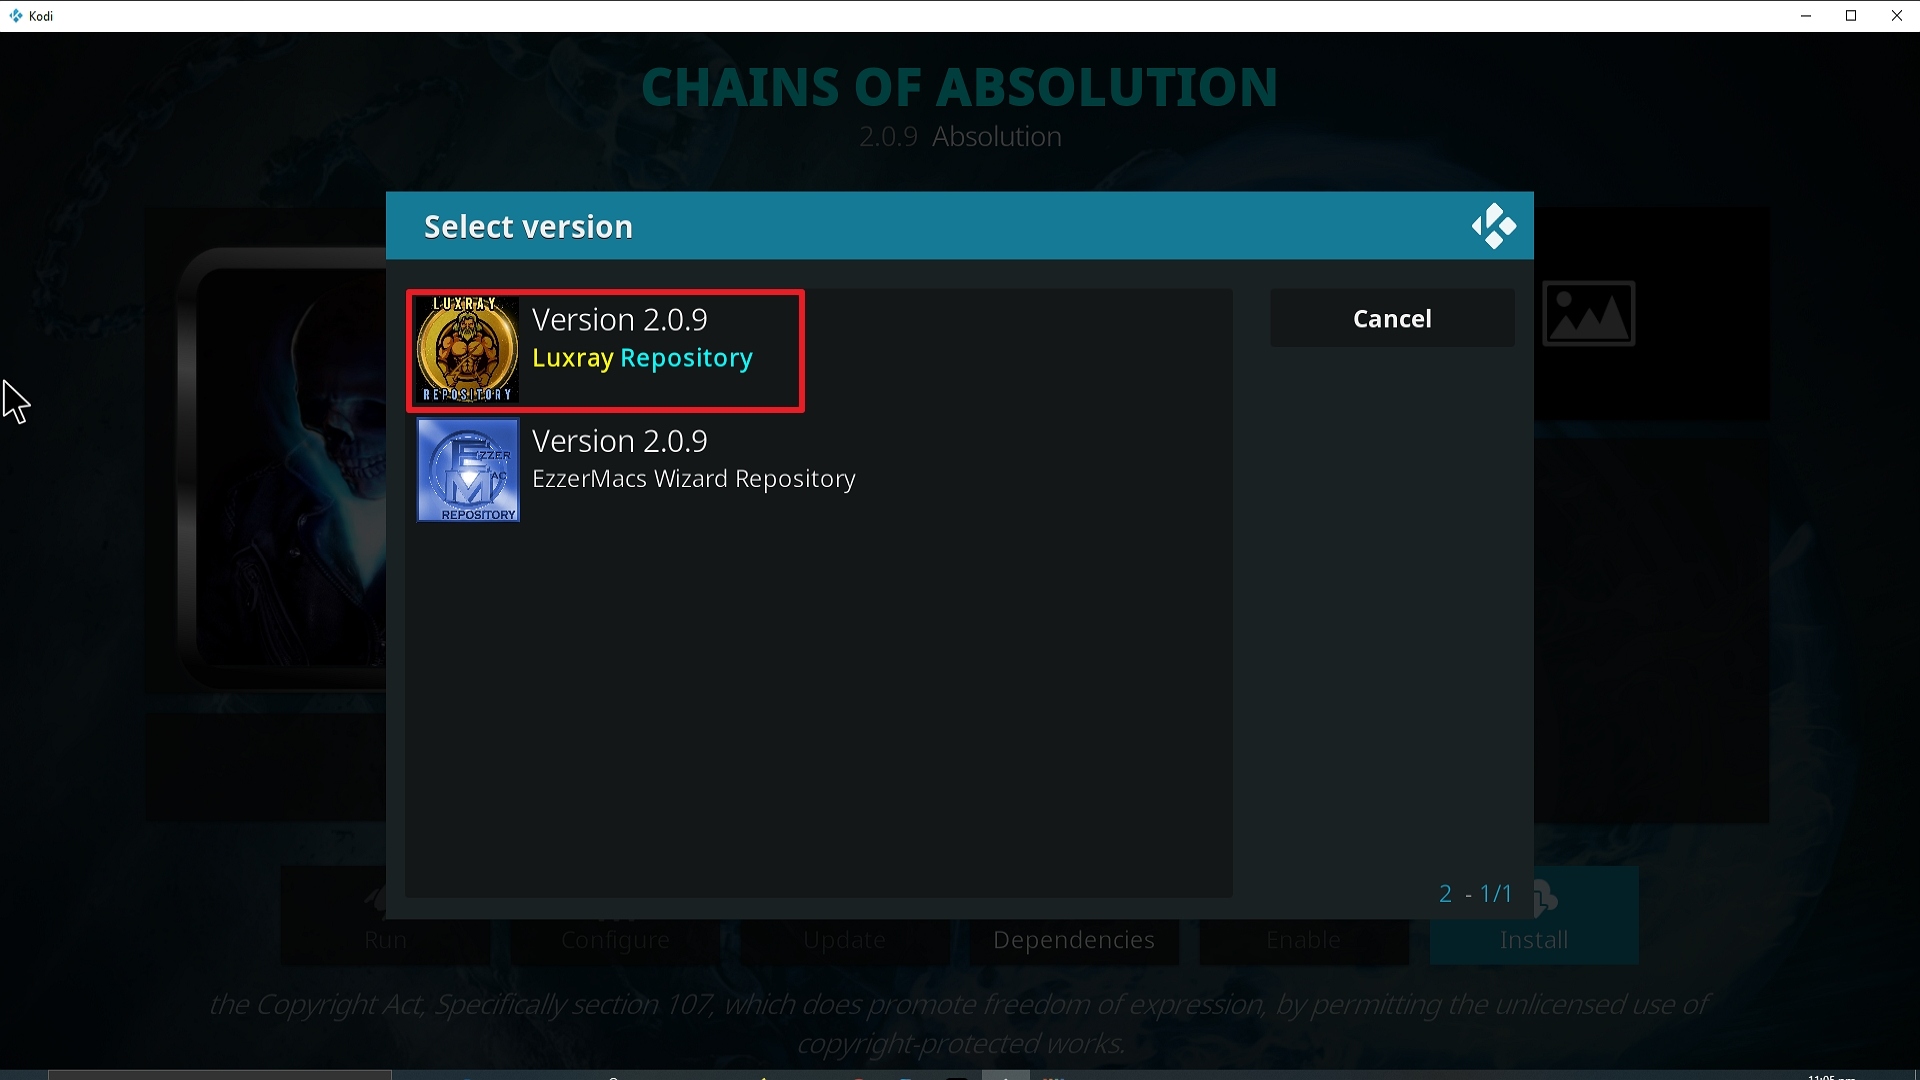
24. Select Version 2.0.9 (Luxry Repo)

Step 24 Installing Chains of Absolution Kodi addon on Kodi


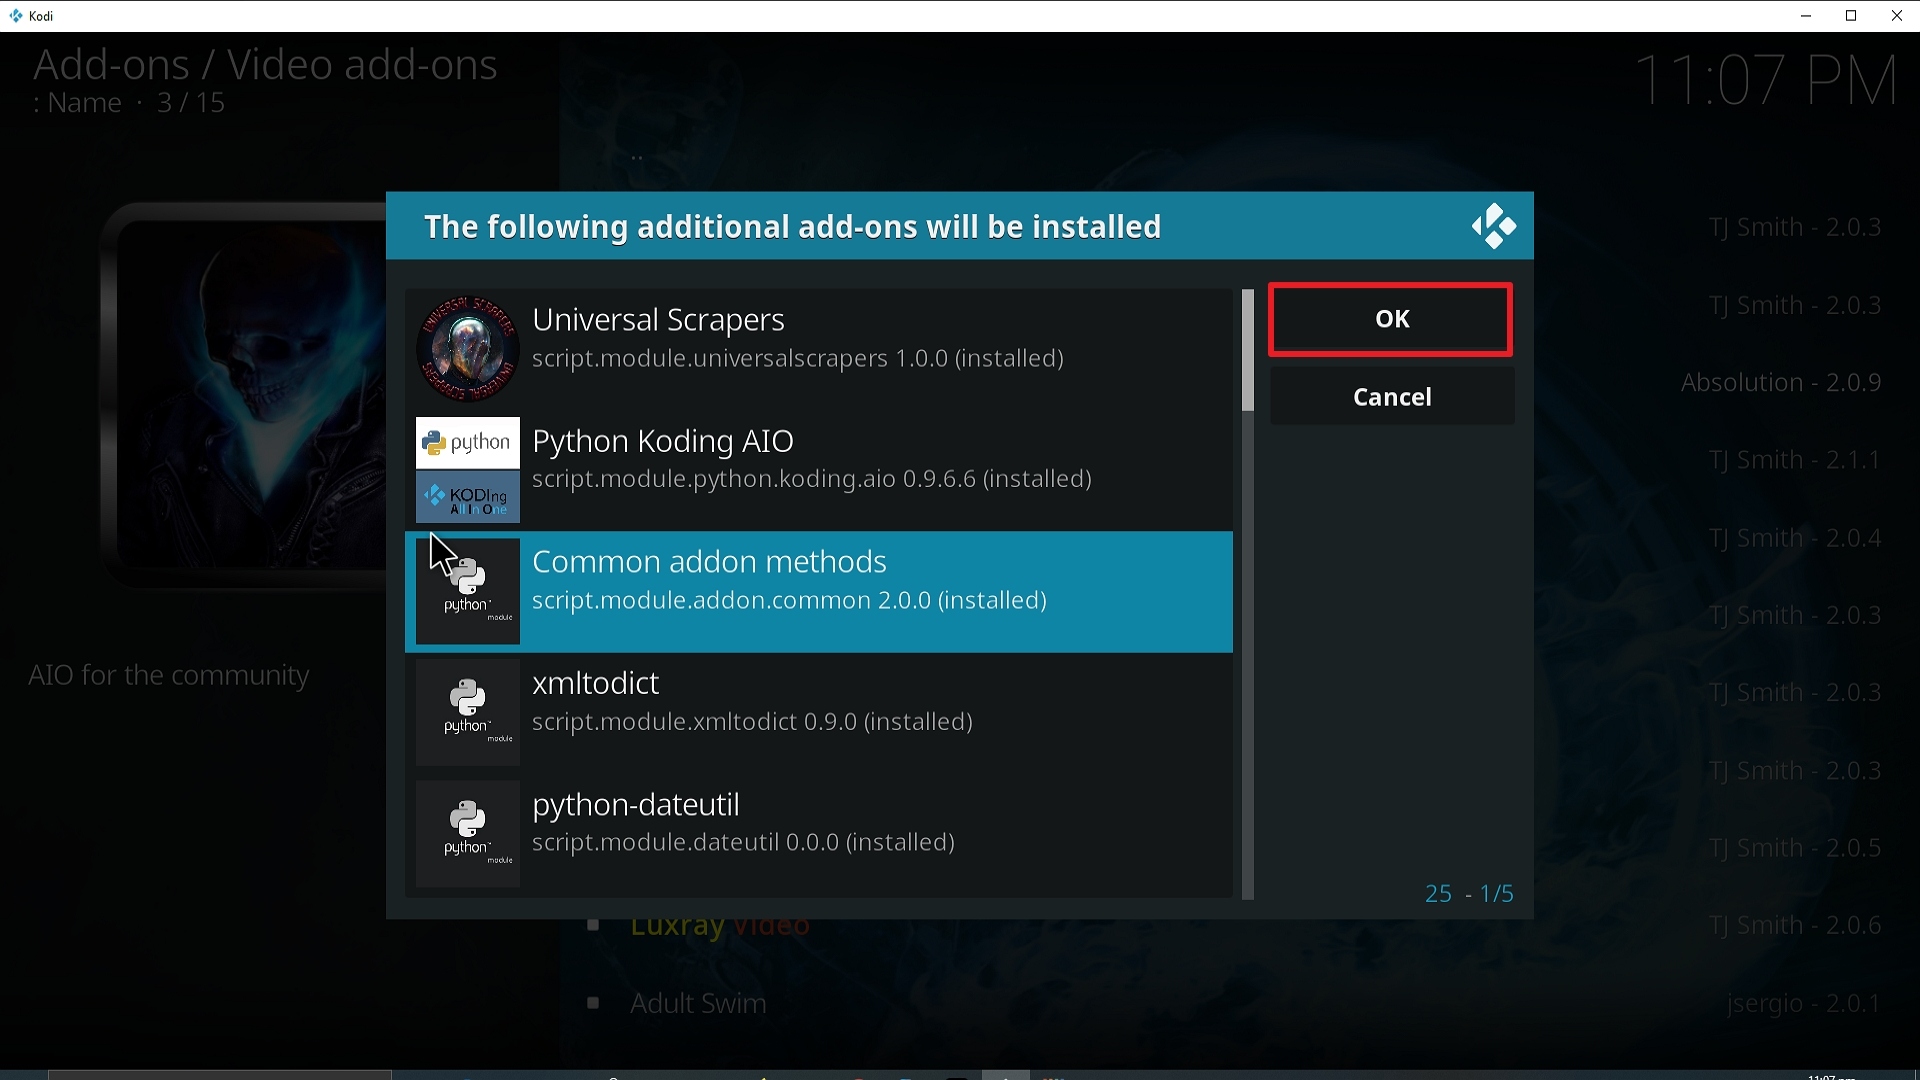
25. Select OK after reviewing the add-ons that will be installed.

Step 25 Installing Chains of Absolution Kodi addon on Kodi


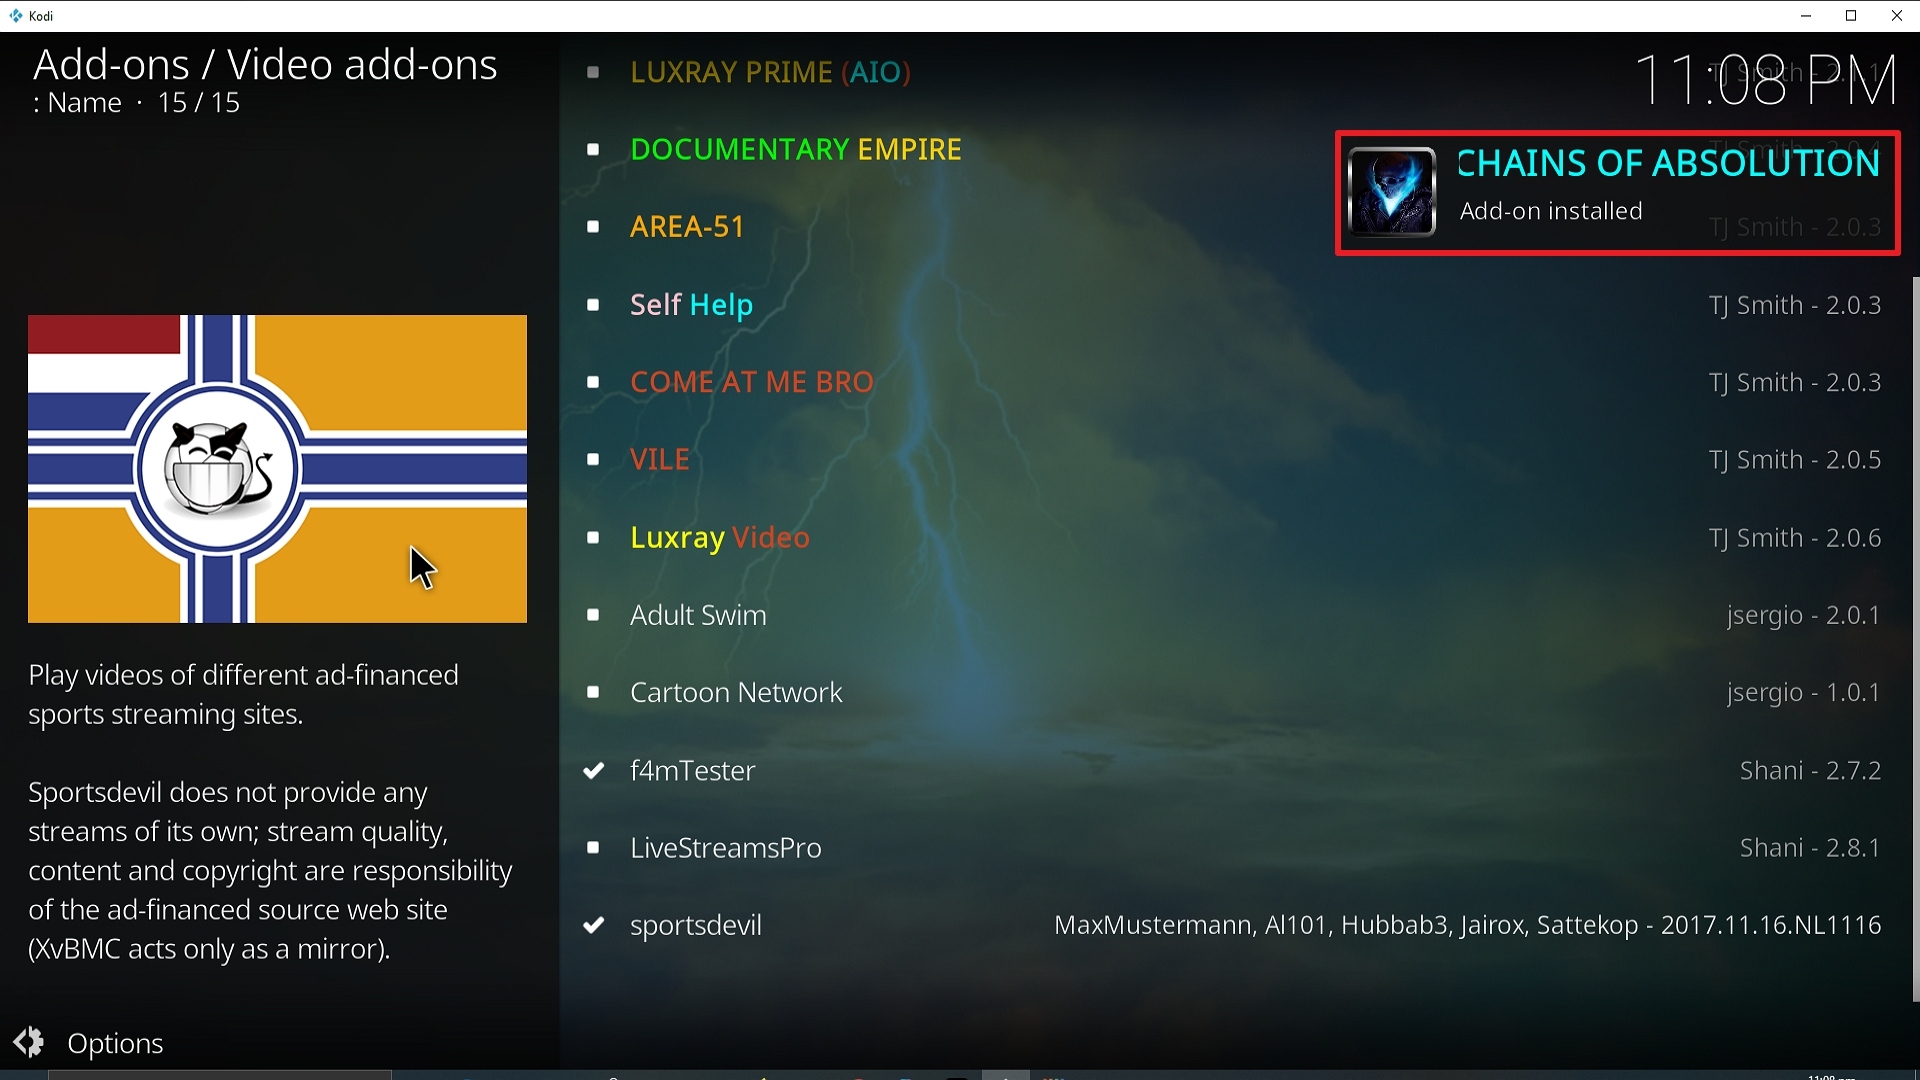
26. You should see a popup in the upper right corner saying Chains of Absolution has installed. There will actually be multiple popups for the various components.

Step 26 Installing Chains of Absolution Kodi addon on Kodi


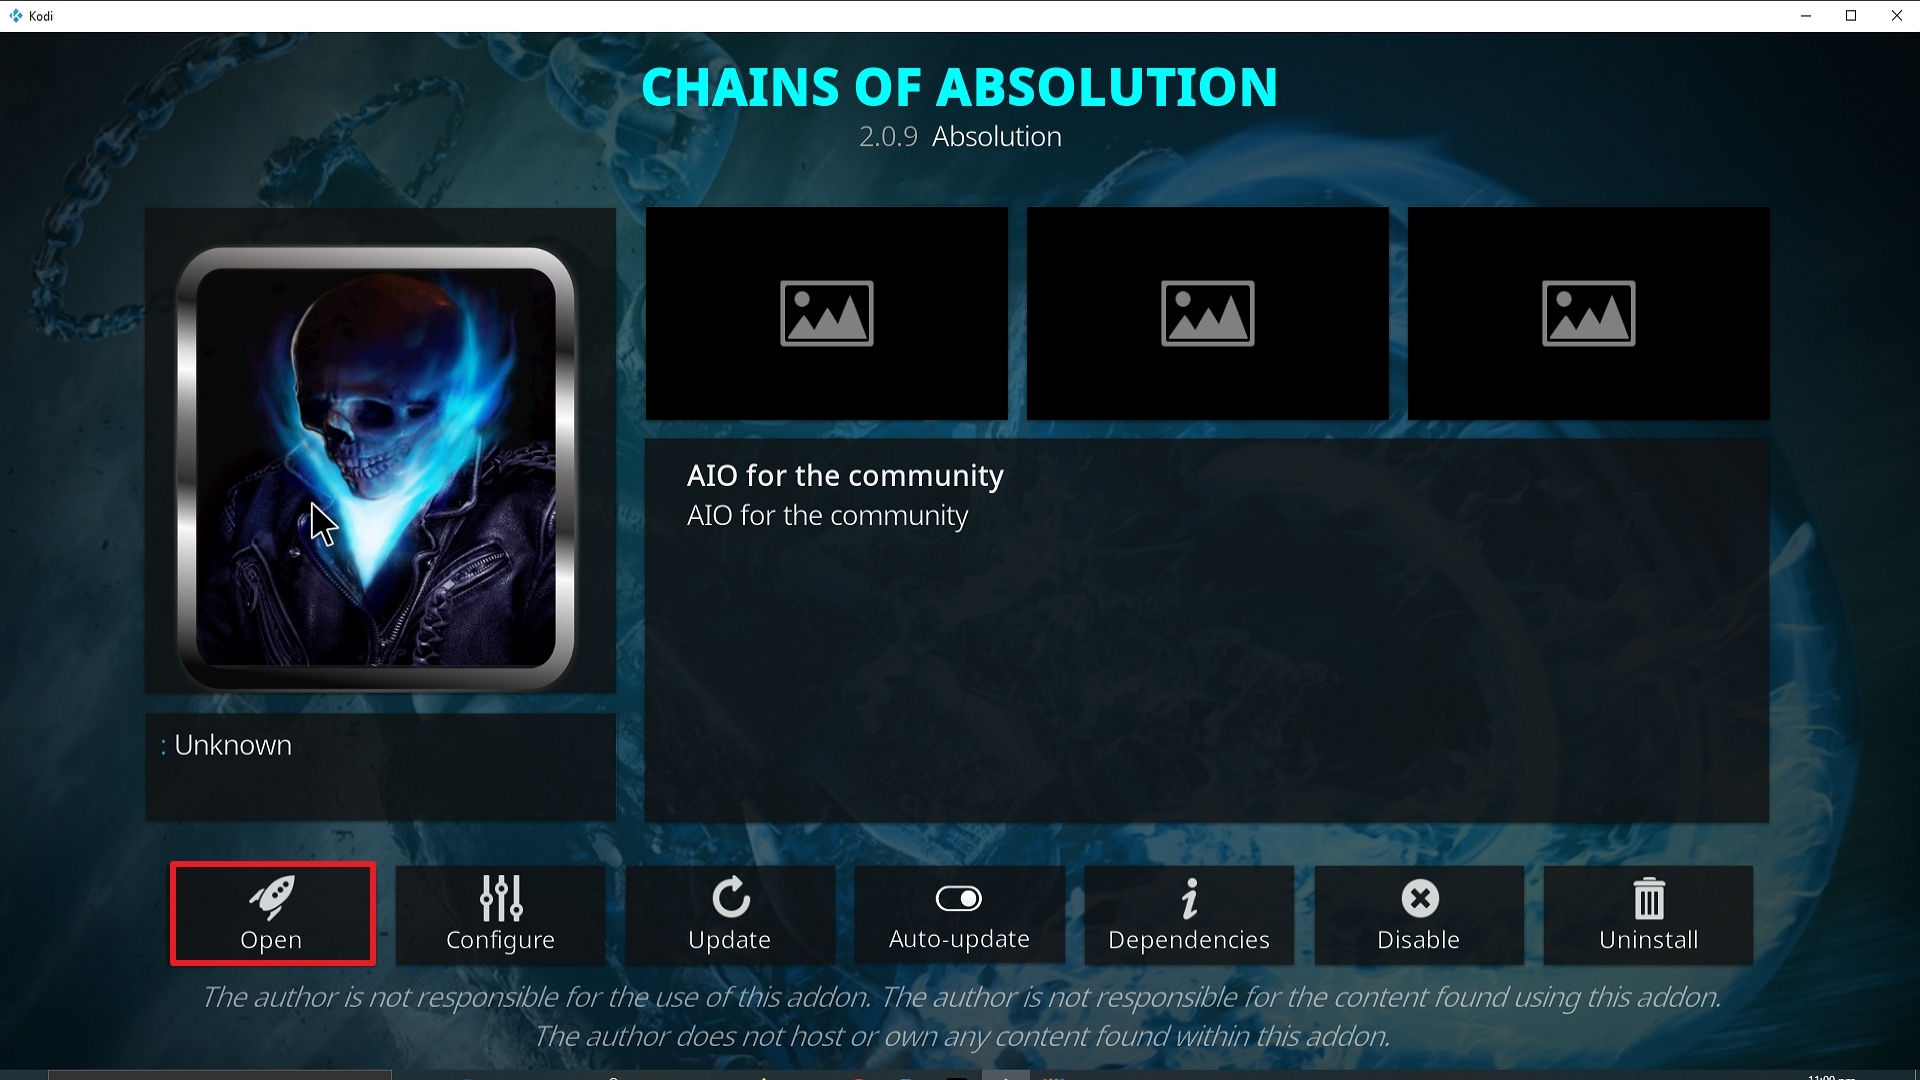
27. Click on Open to start the Chains of Absolution add-on.

Step 27 Installing Chains of Absolution Kodi addon on Kodi


Always Use a VPN On Kodi

It is advisable to install a VPN on your streaming device. This is because any time you are streaming content online, your online data is vulnerable and you are being monitored on the internet service provider’s network. 

Not only that, but you will also experience location restrictions. Using a VPN will save you that headache and stress and you will be safe and secure while streaming content online. We recommend Surfshark as it offers high security and privacy with a zero log policy with DNS leak protection. 

Note: For more information about Surfshark, please read our Surfshark Review.


Grab your subscription now!


How to Install Surfshark VPN on Firestick

If your Firestick still has the older interface, read this article to learn how to update it: Update Firestick Interface.

Follow our screenshots below to install the SurfShark VPN app on your Fire TV stick.

1. Go to the Home screen of your Firestick.

step 1 Install Surfshark VPN on Firestick


2. Navigate towards the Find tab. Press the Search button from the resulting dropdown.

step 2 Install Surfshark VPN on Firestick


3. Type in the keyword of SurfShark and select from the suggestions that will appear.

step 3 Install Surfshark VPN on Firestick


4. Click the official SurfShark icon from your search results.

step 4 Install Surfshark VPN on Firestick


5. Press the Download (You own it) button.

step 5 Install Surfshark VPN on Firestick


6. The SurfShark VPN installer will download on your device.

step 6 Install Surfshark VPN on Firestick


7. SurfShark VPN’s app will automatically install itself on your Fire TV stick.

step 7 Install Surfshark VPN on Firestick


8. Press the Open button after completing SurfShark VPN’s installation process.

step 8 Install Surfshark VPN on Firestick


9. Please wait for the SurfShark VPN to load its user interface.

step 9 Install Surfshark VPN on Firestick


10. You can now log in with your SurfShark VPN account credentials.

step 10 Install Surfshark VPN on Firestick

Learn more about Surfshark and Grab the Best Surfshark Deal Now!


Install Surfshark on Firestick

Best Surfshark Deal


Other VPNs to Consider

NordVPN (Best for Streaming)

Best Features

  • 5000+ Server in 50+ Countries 
  • Military-Grade Encryption
  • Fast Connection Speed
  • Suitable to a lot of devices
  • No-Log Policy

Prices
  • Complete $5.89 per month (64% Discount)
  • Plus $4.59 per month (56% Discount)
  • Standard $3.69 per month (55% Discount)

Best Features

  • 750+ High-speed VPN Servers in 43 Locations
  • Military-Grade Encryption
  • Fastest HD Streaming and Gaming
  • 30-Day Money-Back Guarantee
  • Unlimited Data & Devices
  • No-Log Policy

Prices
  • 3 Years $1.99 per month (82% Discount)
  • 1 Years $3.29 per month (70% Discount)
  • 1 Month $10.99 per month

IPVanish VPN (Most Secure)

Best Features

  • 1200+ Servers in 60+ Countries around the world
  • Unlimited Connections
  • No-Log Policy
  • Top Notch Military-Grade VPN Protocols and Encryptions
  • 100% Safe and Secured
  • Most Trusted VPN
  • Best VPN for Firestick
  • 30-Day Money-Back Guarantee

Prices
  • Yearly $3.99 per month (63% Discount) – 30 days risk free + Ransomware & Malware Protection
  • Quarterly $5.32 per month (51% Discount)
  • Monthly $10.99 per month


For more VPN discounts, go to ReviewVPN Deals and purchase the best VPN for you.

Click here to get the lowest price on Surfshark through our exclusive limited-time offer.


Install Incursion Kodi Addon

Incursion Kodi Addon

The article will help you on how to install Incursion Kodi Addon on Firestick.


Source: http://www.lvtvv.com/repo/

Incursion Kodi addon was probably the addon of the year for 2018. Coming from the talented Nixgate developer team, this Covenant fork went on to become more popular than Covenant, Genesis, or Exodus for several months.

The multi-source add-on drew links from over 50 websites, as well as other Kodi addons, to provide a massive library of content and high-quality working links.

The incursion was also compatible with Trakt, Real Debrid, Premiumize, and Ororo, and like other add ons if you really wanted to get the best out of it, then you would need to pay $2.50+ a month for a Real Debrid subscription. This would give you access to 50+ paid servers and premium links. Meaning you no longer need to trawl through poor quality or broken links.

Incursion had some great unique features like Xbox One support, Debrid links only to discount free scrapers, and pre-Emptive termination, where the link search would be cut after a working link was found to your required media quality.

Incursion has since been replaced by the Nixgate developers, who have released an even better addon called Seren which was coded from the ground up, getting rid of the glitchy Covenant codebase making it sleeker and easy to use.


ANONYMOUSLY

Common Errors

These are the most common errors you can expect to find with Incursion:

  • Source not working/slow/frozen: When linking to a source you always want to make sure you give it at least 10 seconds to get going. Patience really pays off, or you might keep missing working links because you are treating an addon like Netflix. Also, make sure that your connection is secured with a VPN. As most addons don’t host their own content, many of the IP addresses may have been flagged by your ISP and be blocked. To make sure none of your content is being censored, use a reputable VPN. Check here for the best VPN deal. For more fixes read our full guide linked above.


  • Could not connect to URL/Download: As we noted above, Incursion is no longer available to download. Problems with addon URL’s tend to come from repositories which are no longer live or misspelled URL. If you have checked both, then try these other fixes, read our in-depth guide linked above.


  • Kodi check log error: After you have used Kodi for a while you will start coming across check log errors. These are almost always related to your media cache being full. To find out how to clear your Kodi media cache and download the best system cleaning addons for Kodi read our in-depth guide linked above.


Review

Incursion was ahead of its time when it was released and Nixgate has continued to stay ahead of the curve with Seren.

You really did get a fantastic multi-source addon. Importantly Incursion didn’t both to get involved with live TV, they did one thing and did it well. The Movies and TV Shows were easy to search, and you had so many unique features, like the “Sear for similar “button which allowed you to find Netflix-style recommendations based on one title.

If you don’t have Seren in your Kodi addons then you aren’t getting the best out of your viewing experience!

Menu sections in Incursion include:

  • Movies
  • TV Shows
  • My Movies
  • My TV Shows
  • New Movies
  • New Episodes
  • Channels
  • Tools
  • Search

Movies and TV Shows have numerous subcategories, they will each be ordered by:

  • Genre
  • Year
  • Languages
  • Oscars
  • Box office 


YOUR INTERNET ACTIVITY IS BEING WATCHED

ReviewVPN cannot attest to the legality, security and privacy of the applications discussed on this site. It is highly recommended that you use a VPN service while streaming or using Kodi.

Currently, your IP 216.73.217.150 is visible to everyone and your Browser is being tracked by Advertisers & ISP Provider.

Save 65% Now

Limited Time Offer

Here are the main reasons why you must use a VPN:

  • Your activities are hidden from your ISP, the government, and from the apps you are using.
  • You can access additional movies and TV streams.
  • ISP attempts to throttle are thrwarted thus reducing buffering issues.
  • Geographically restricted content like Netflix and Hulu can be unblocked.

A VPN works be replacing your ISP-assigned IP address and creating an encrypted tunnel. We recommend the no log service offered by IPVanish. It works well on a Firestick and offers the fastest possible speeds.

Special Limited Time Offer - Get IPVanish


Legal Disclaimer: ReviewVPN.com does not encourage or endorse any illegal activity involved in the usage of services and applications referenced on this site. We do not verify the licensing agreements of services. The end-user is wholly responsible for ensuring that any media accessed through these services does not violate copyright and/or licensing laws. ReviewVPN does not promote, link to, or receive compensation from any Apps and IPTV services.


Install Surfshark on Firestick

Best Surfshark Deal


How to Install Incursion Addon on Kodi with Screenshots

  1. From the home screen, select the cogwheel at the upper left.

Step 1 Installing Incursion addon on Kodi


2. Select System in the bottom right corner.

Step 2 Installing Incursion addon on Kodi


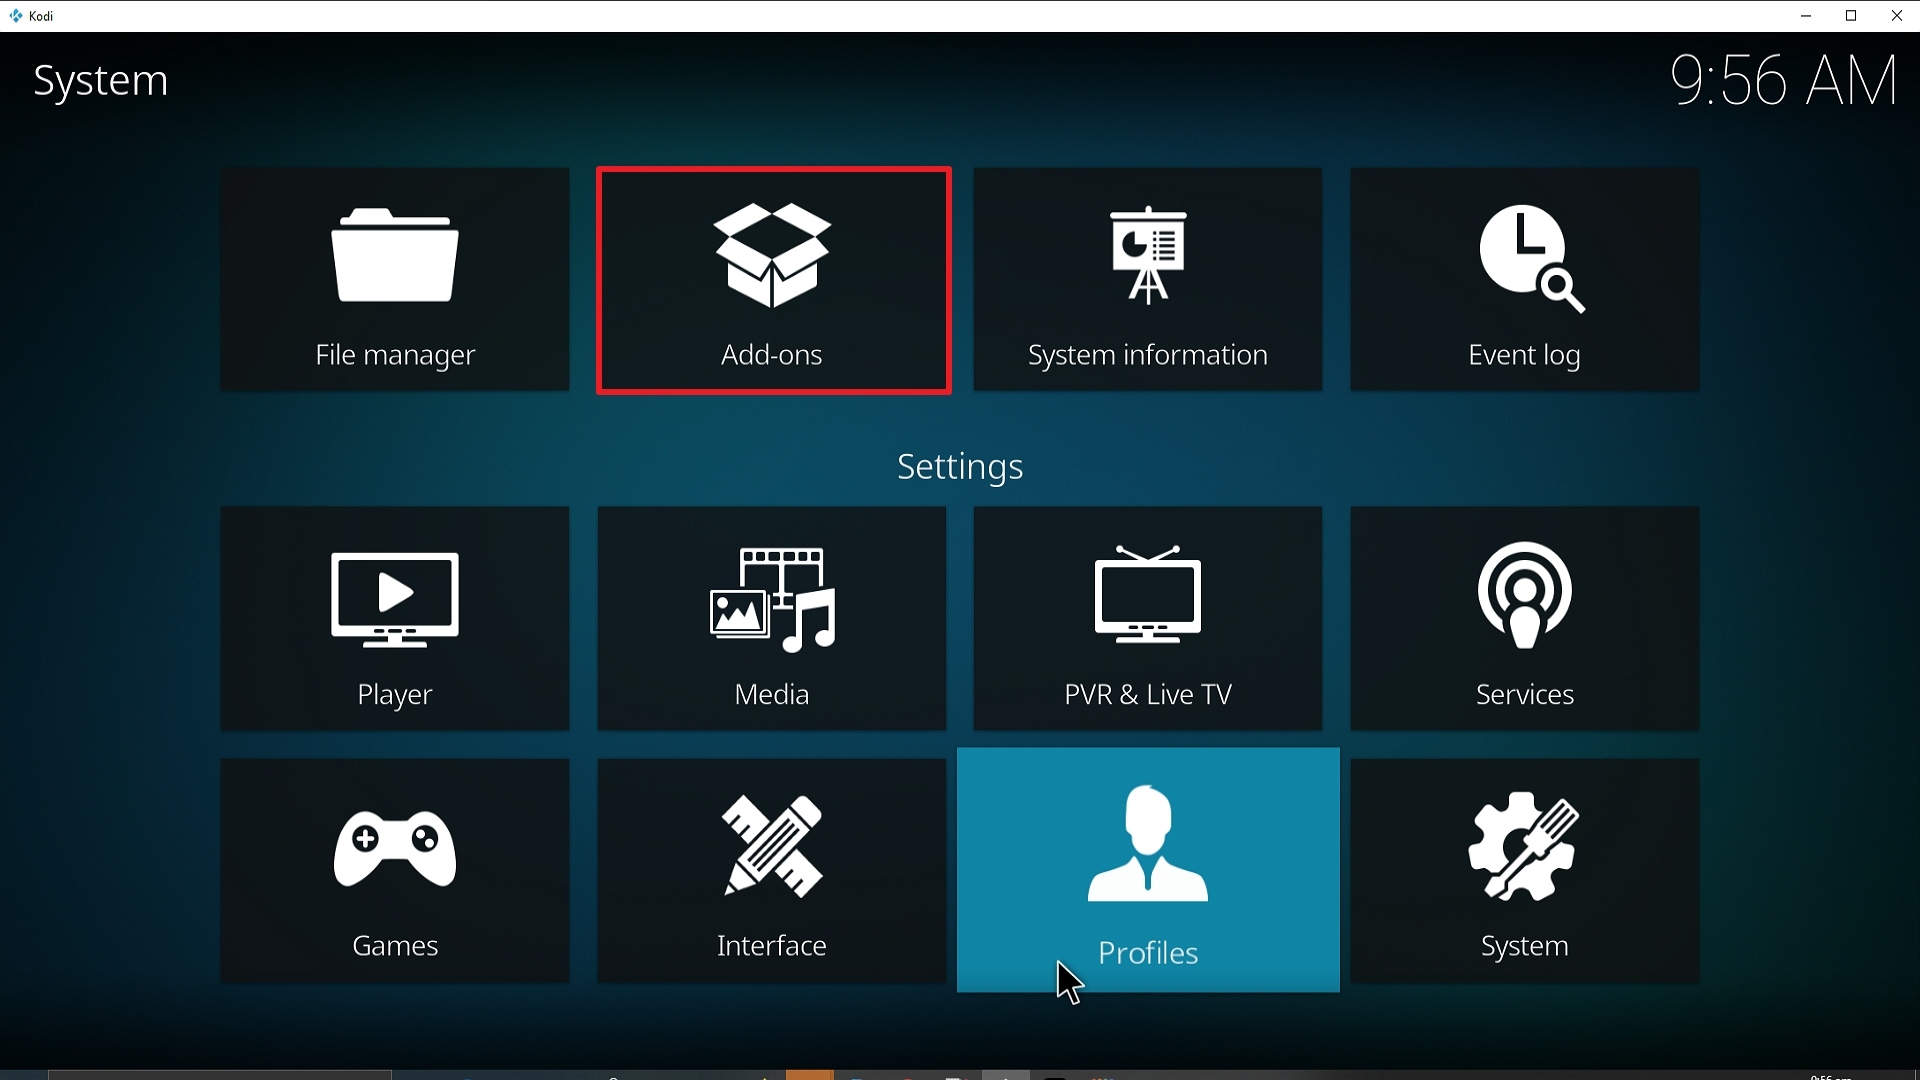
3. Select Add-ons on the left side of the screen.

Step 3 Installing Incursion addon on Kodi


4. Select Unknown sources.

Step 4 Installing Incursion addon on Kodi


5. Click Yes to allow unknown sources.

Step 5 Installing Incursion addon on Kodi


6. Select File manager.

Step 6 Installing Incursion on Kodi


7. Click Add source.

Step 7 Installing Incursion addon on Kodi


8. Click on <None>.

Step 8 Installing Incursion addon on Kodi


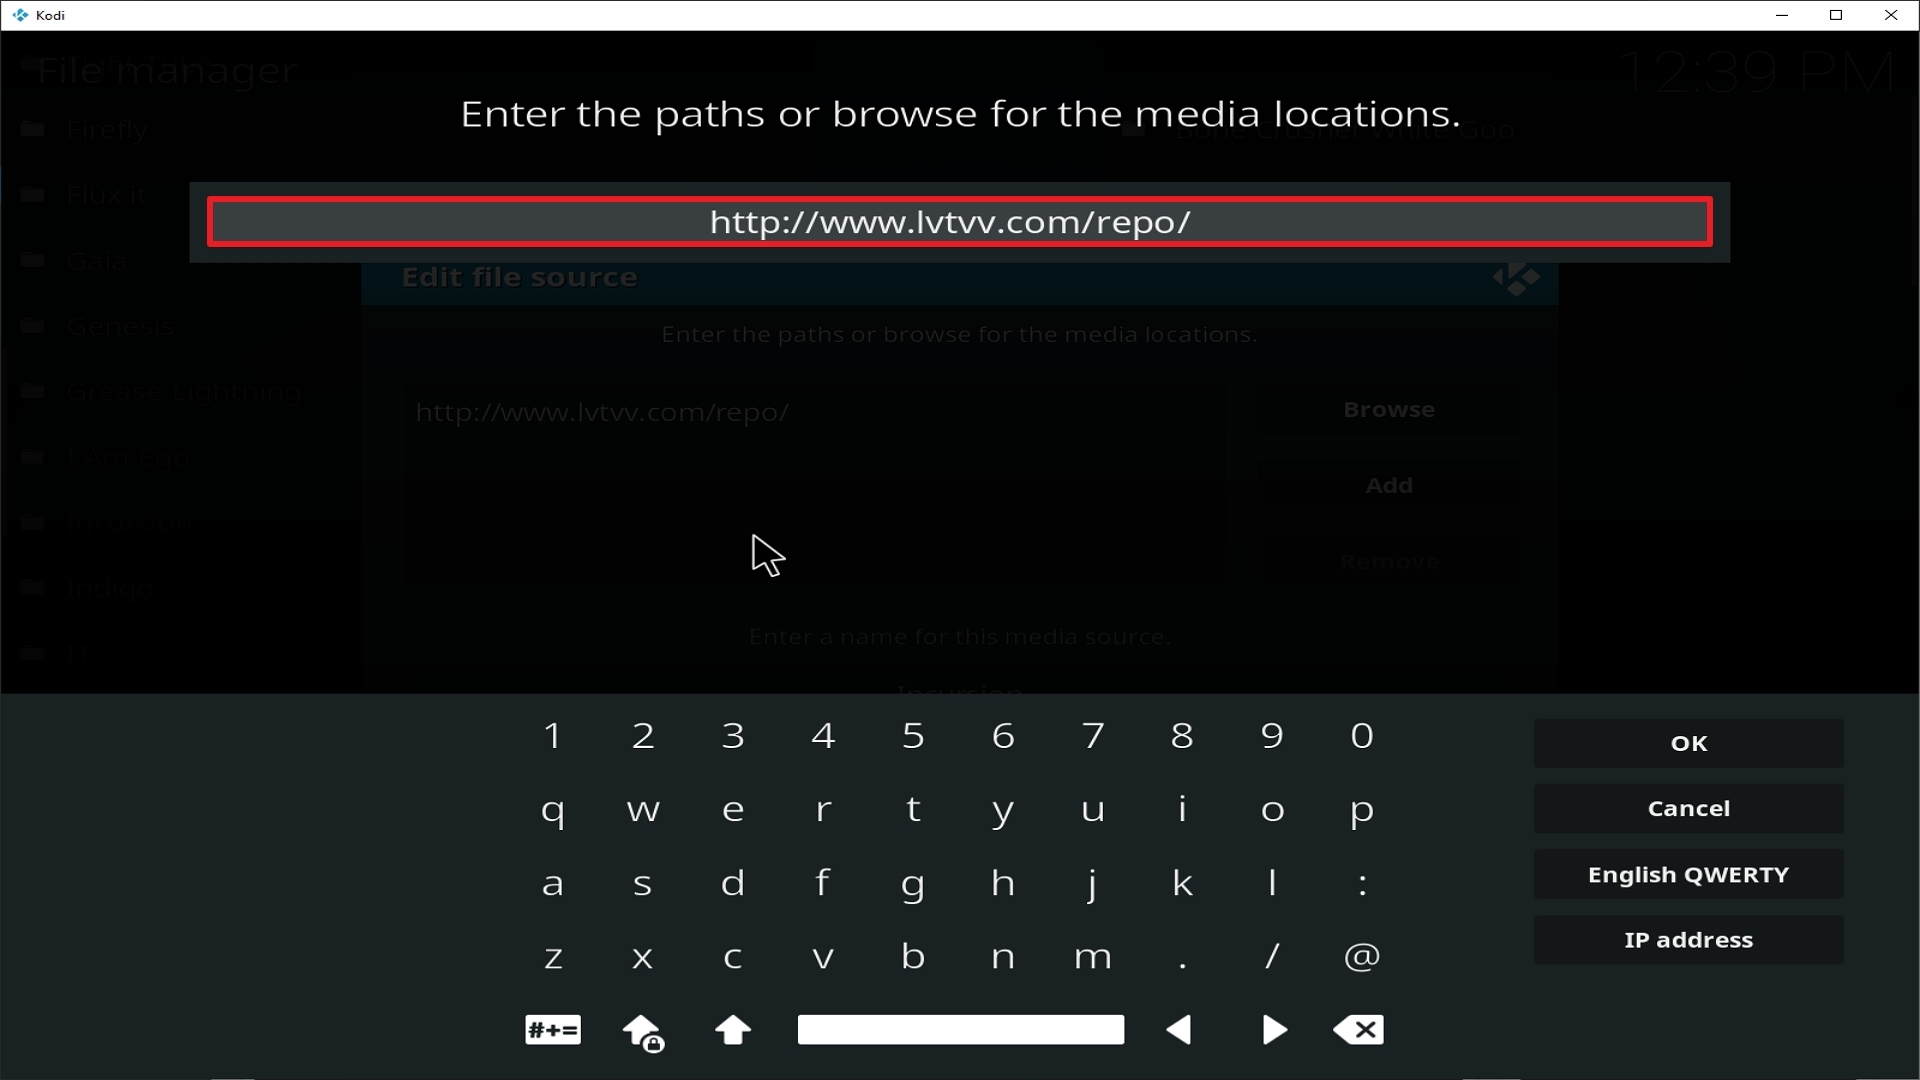
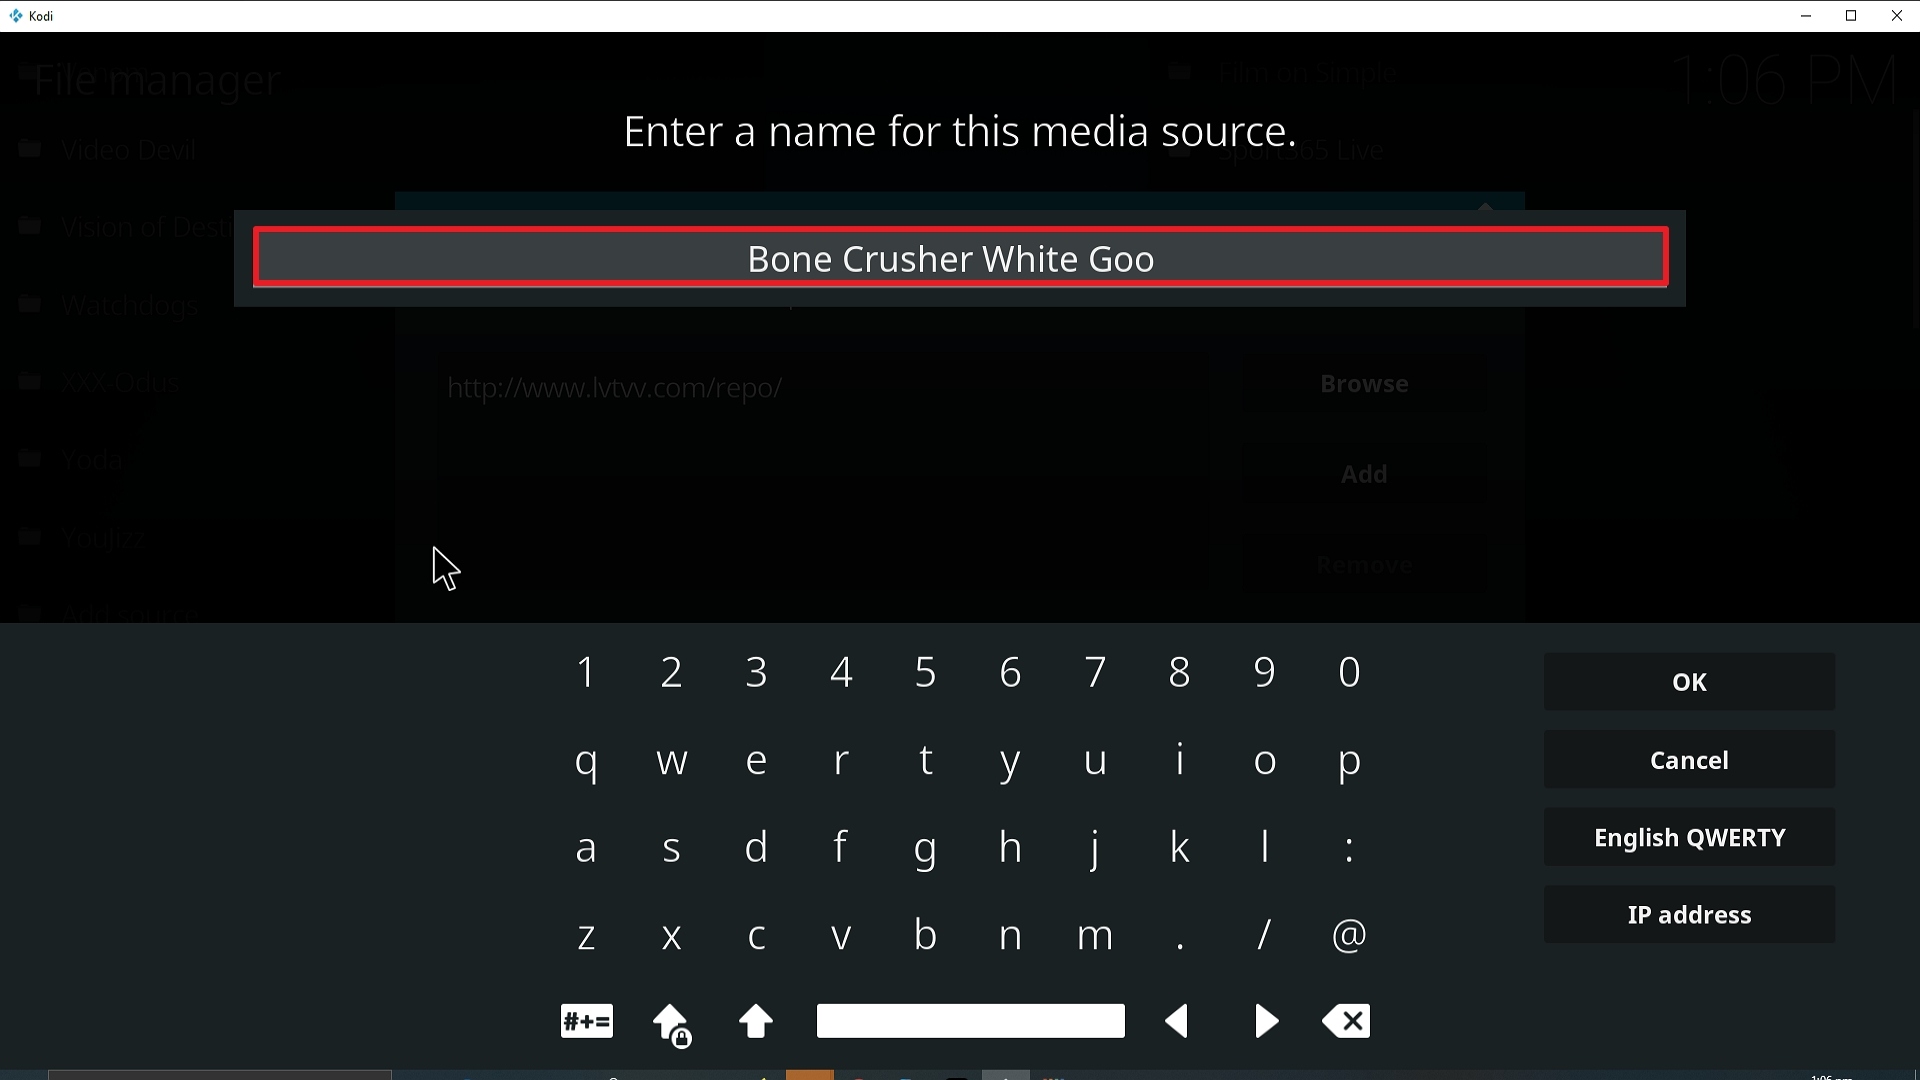
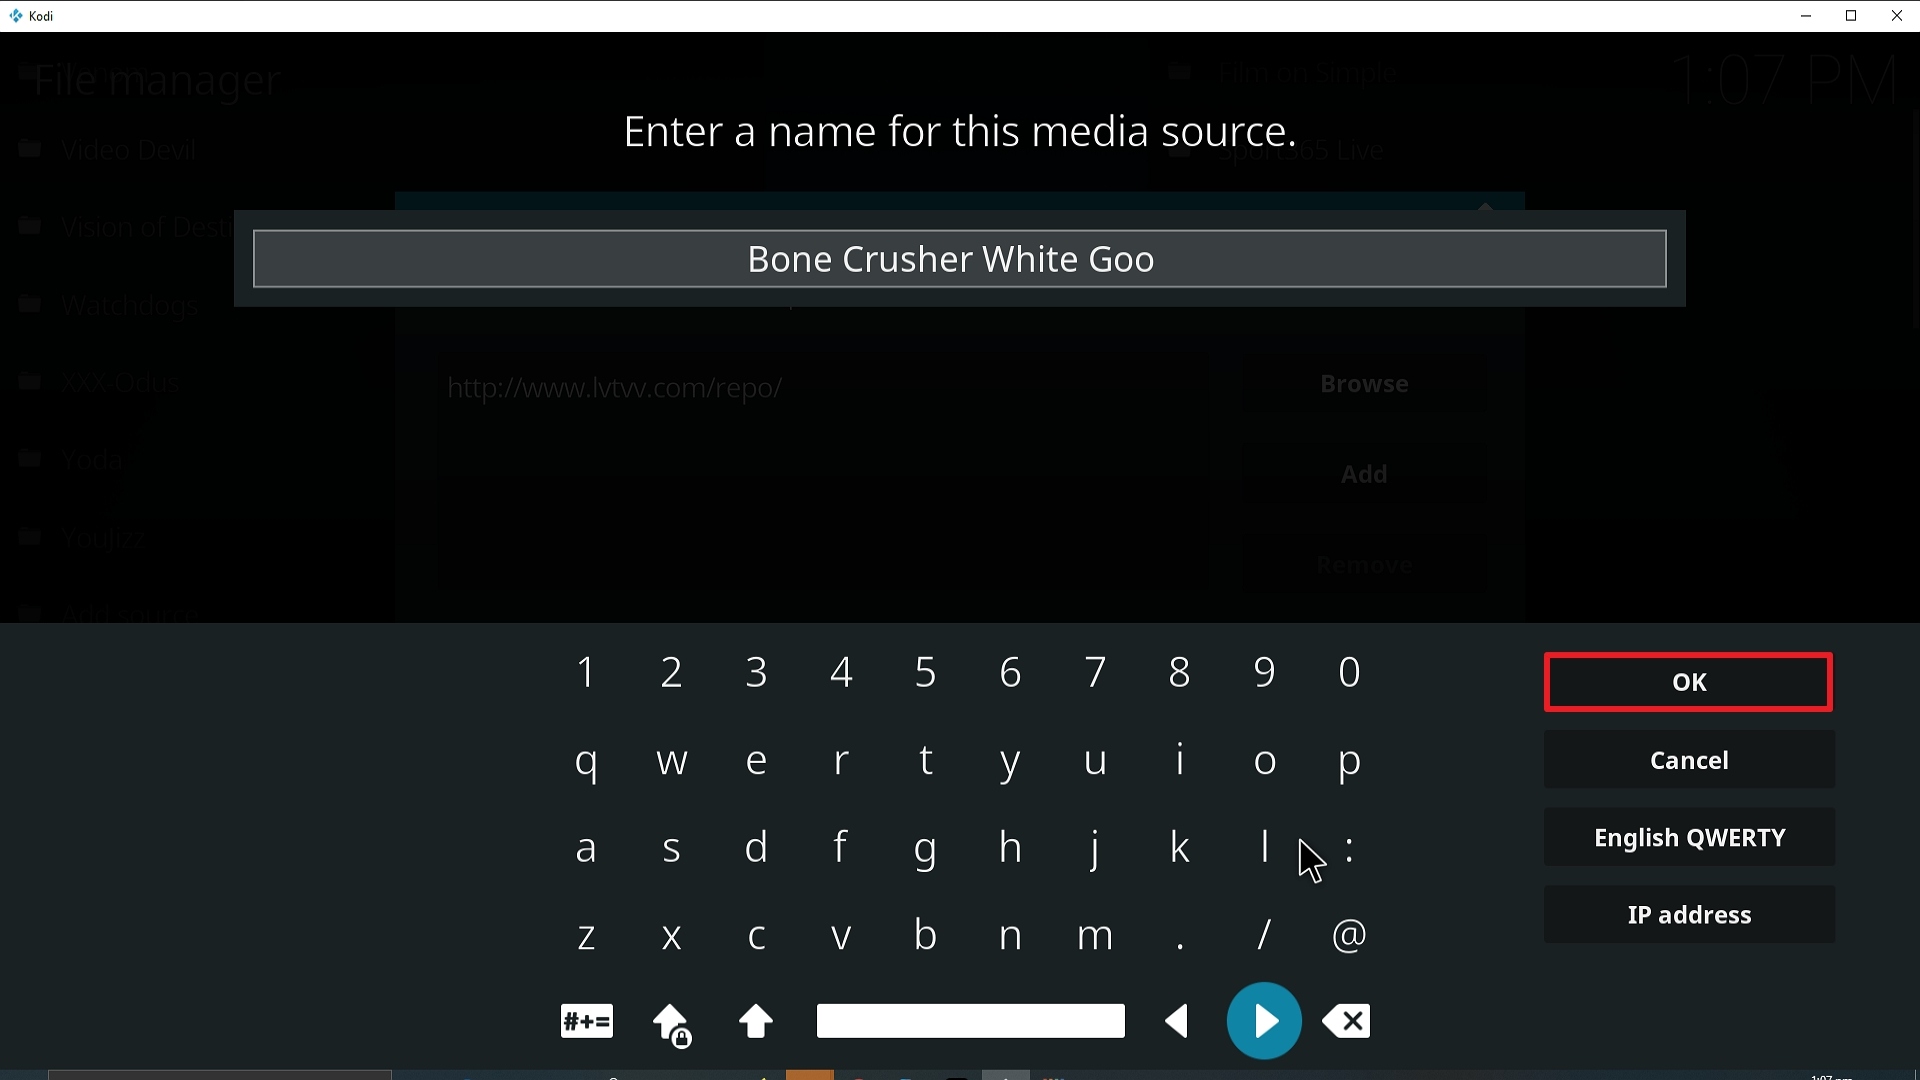
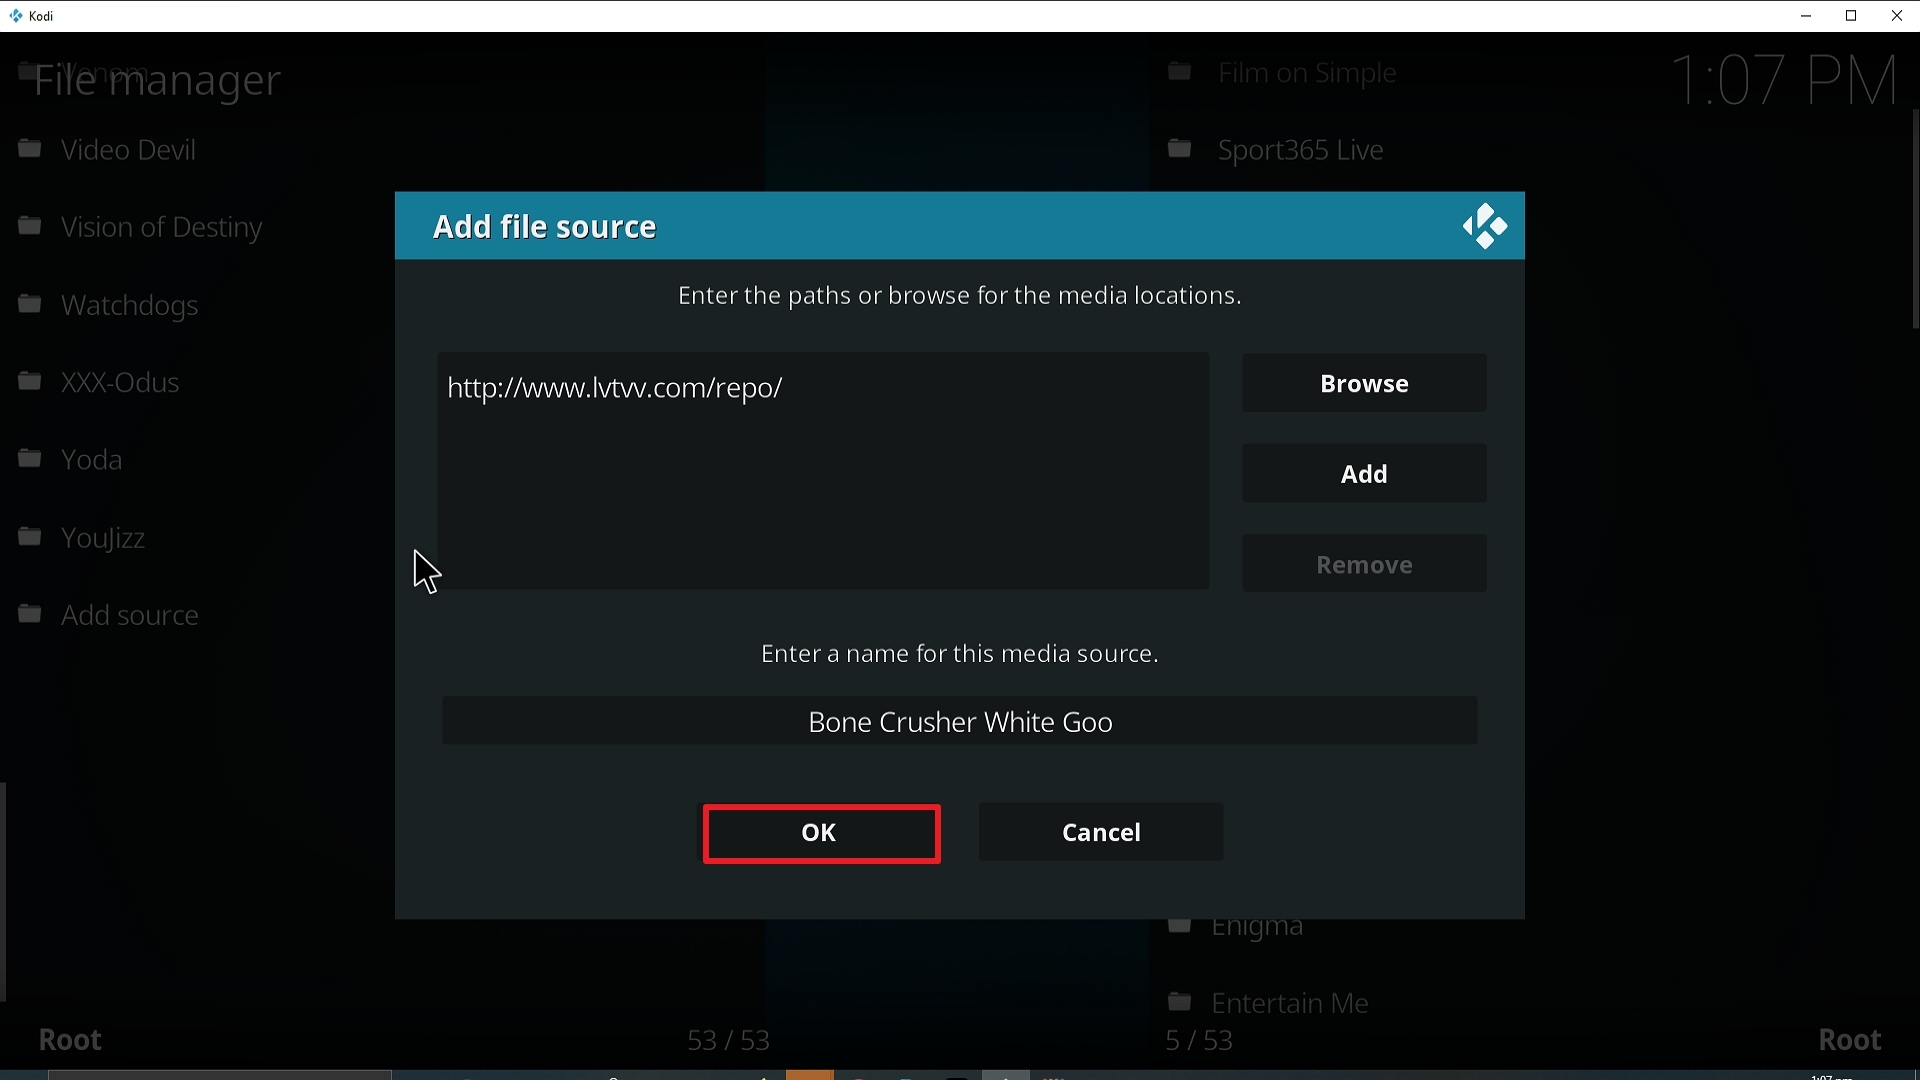
9. Type exactly: http://www.lvtvv.com/repo/

Step 9 Installing Incursion addon on Kodi


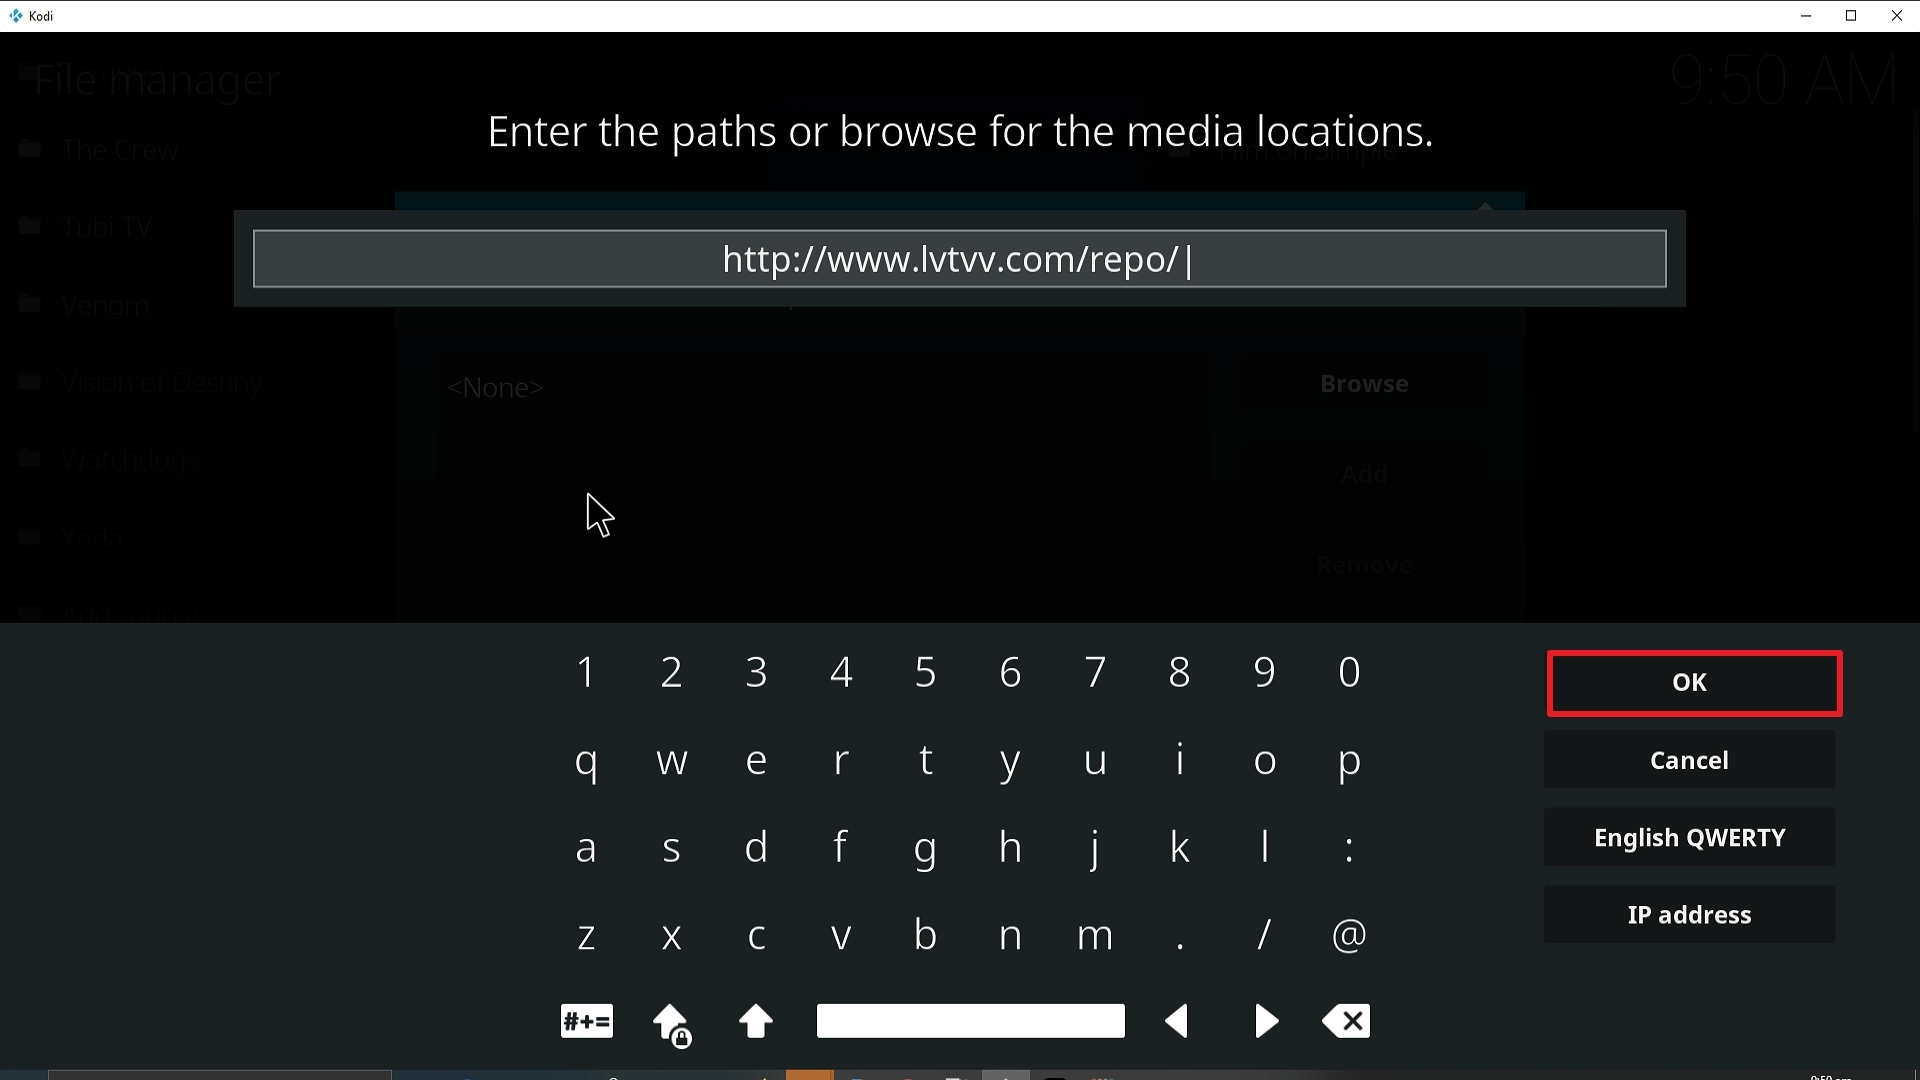
10. Click on OK.

Step 10 Installing Incursion addon on Kodi


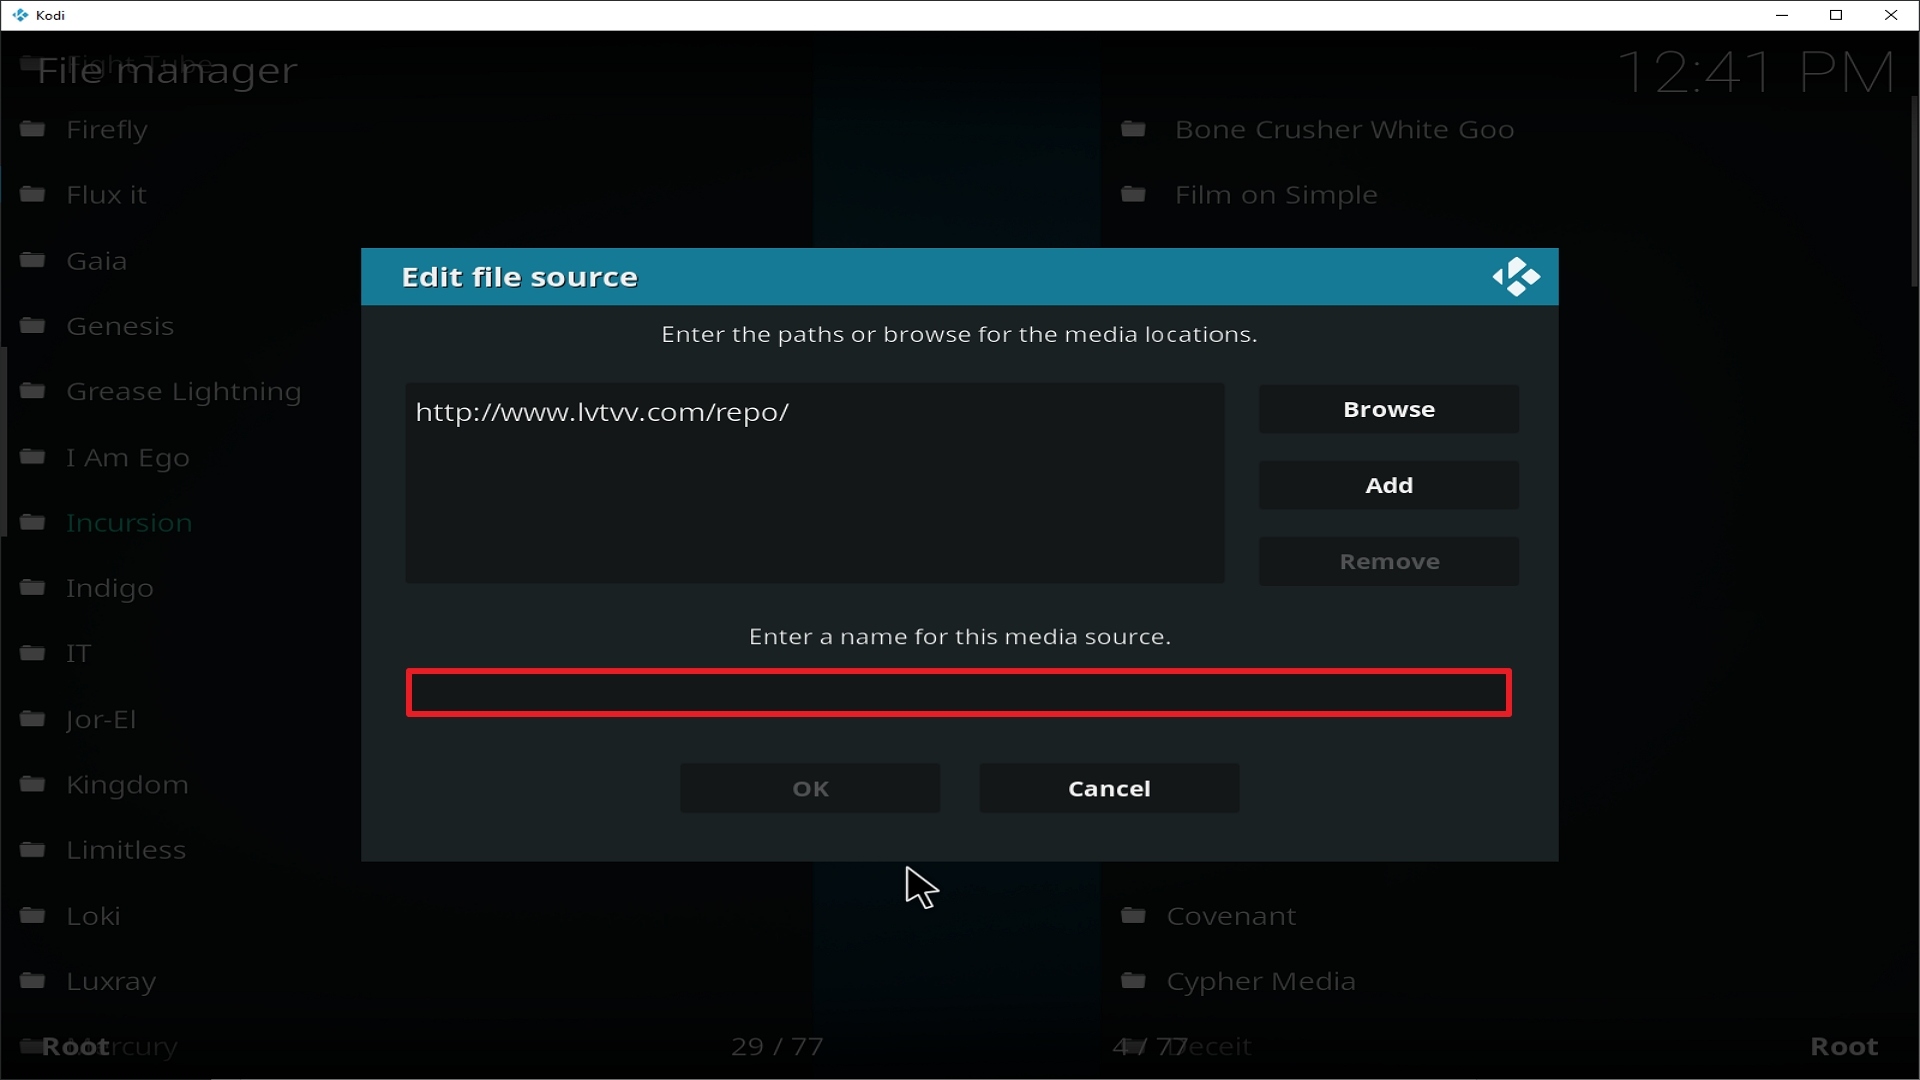
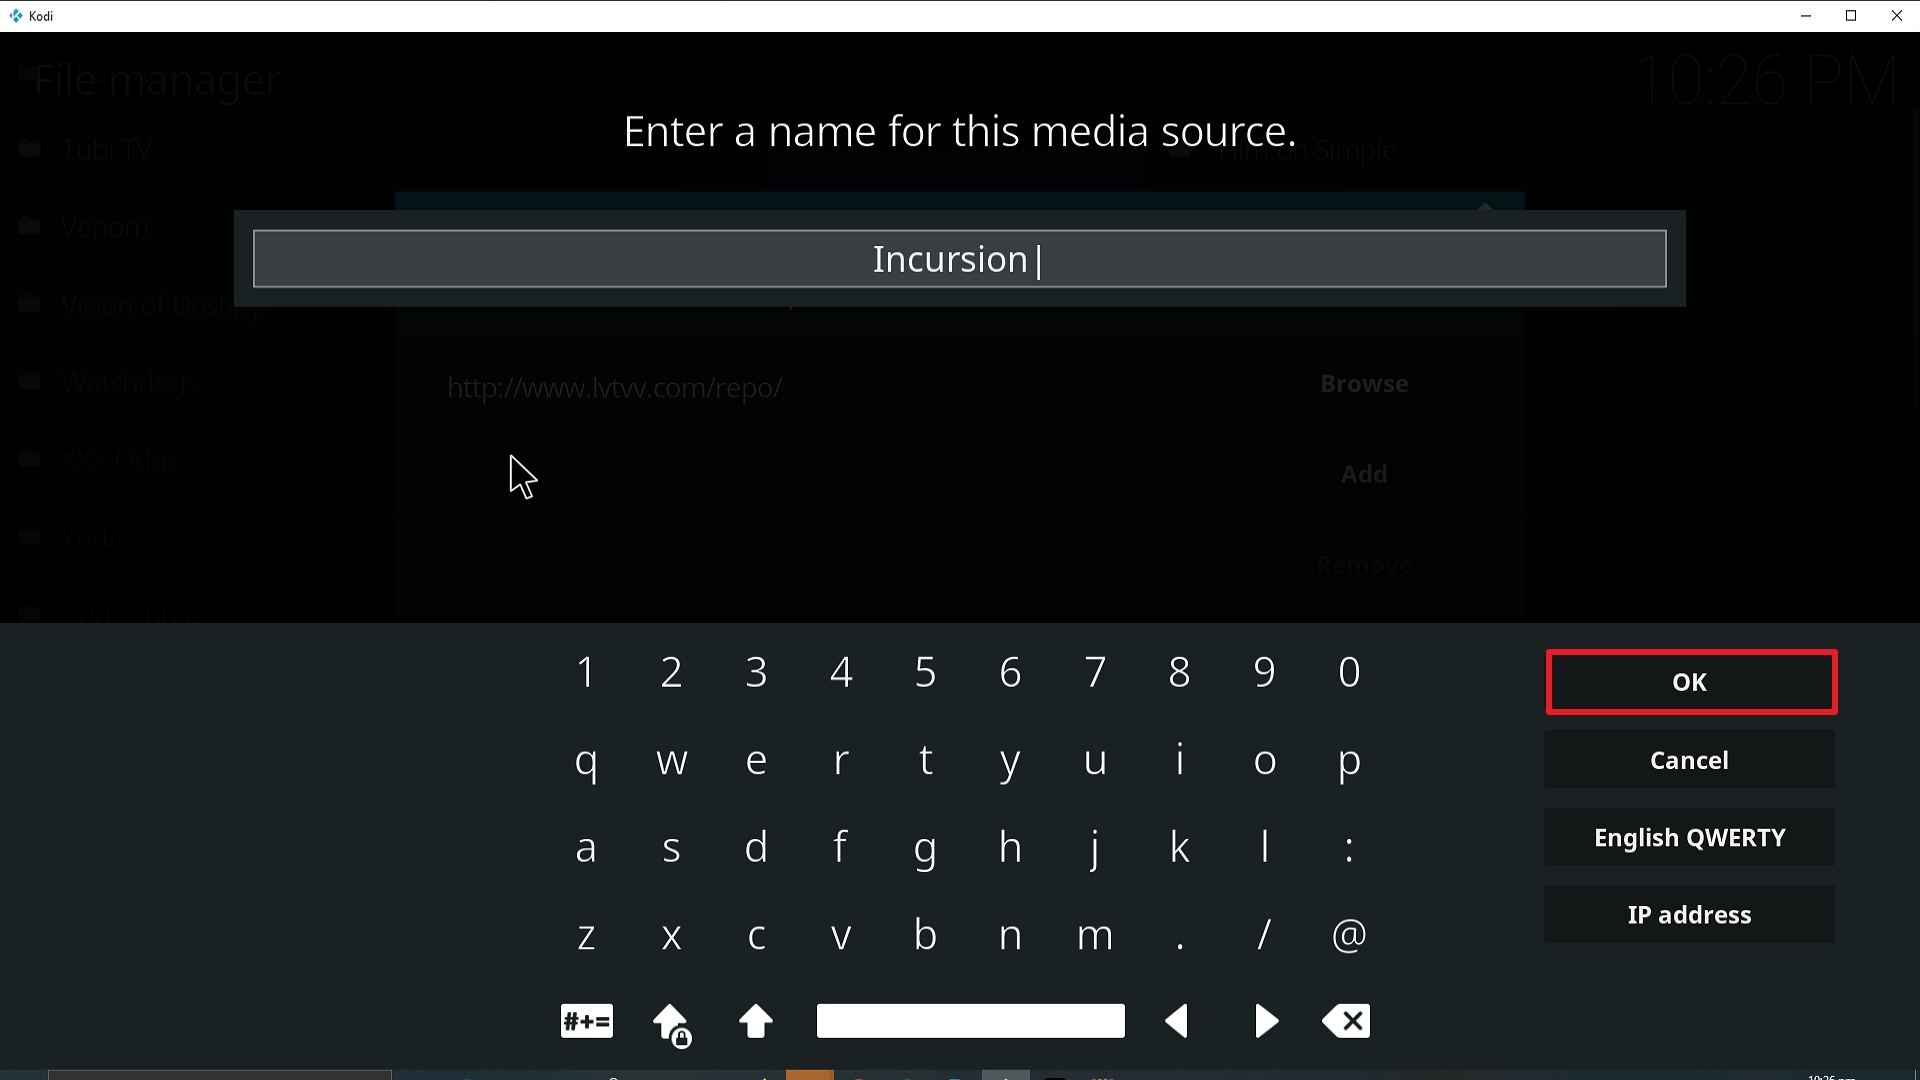
11. Select enter a name for this media source.

Step 11 Installing Incursion addon on Kodi


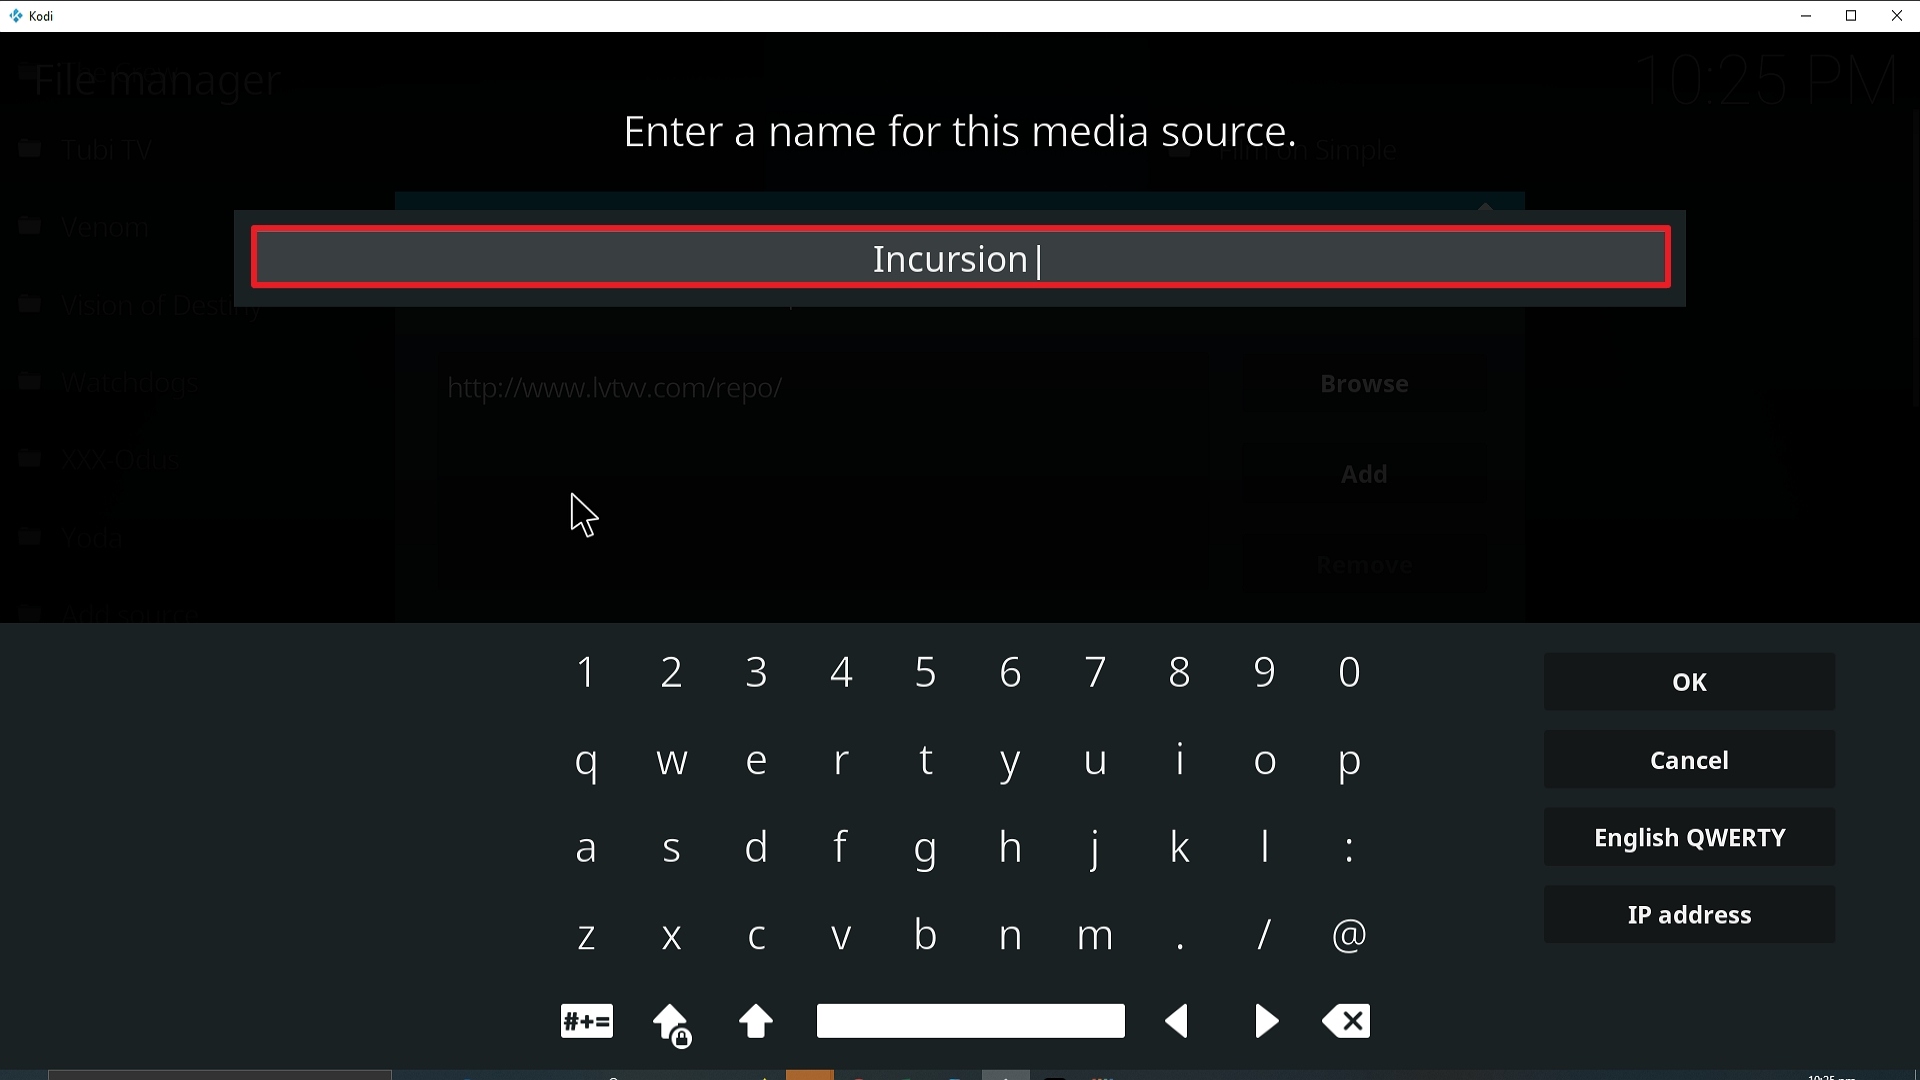
12. Name is Incursion (this part isn’t critical as long as your remember the name).

Step 12 Installing Incursion addon on Kodi


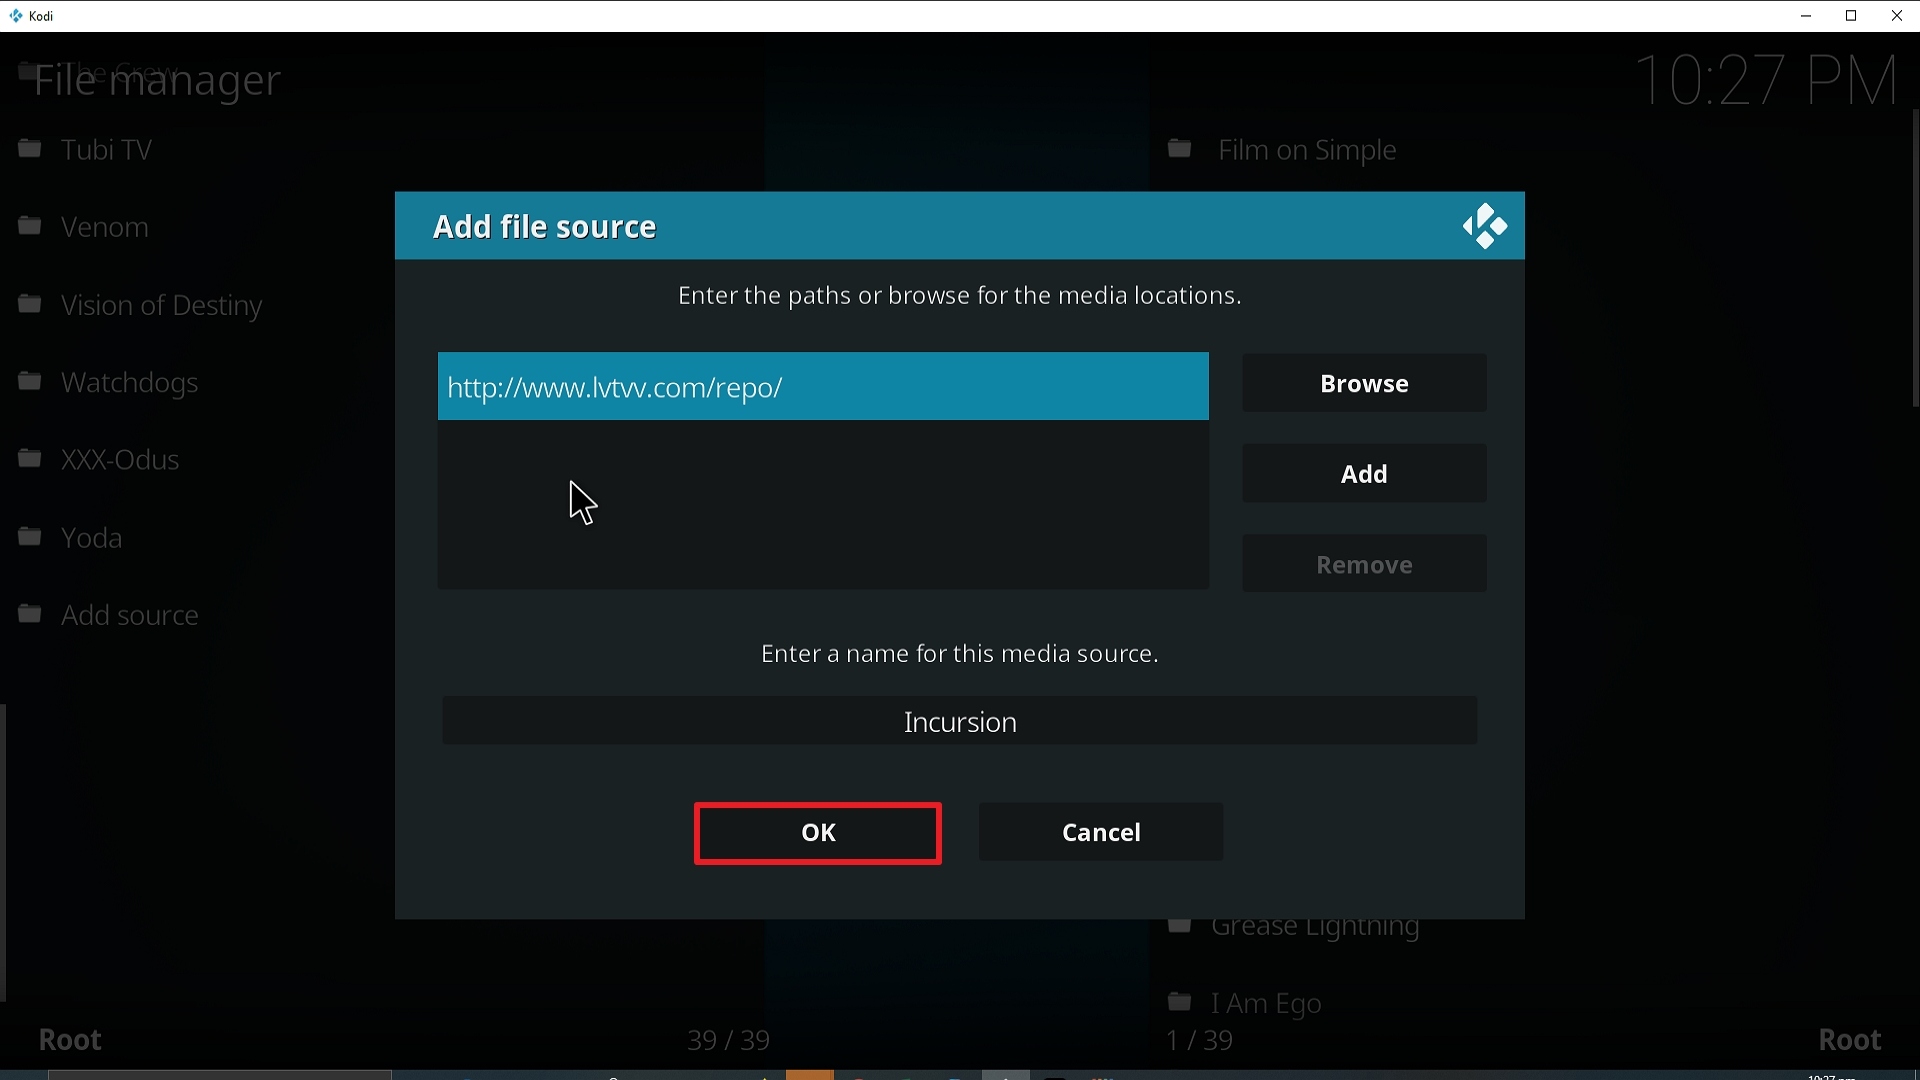
13. Click on OK.

Step 13 Installing Incursion addon on Kodi


14. Click on OK.

Step 14 Installing Incursion addon on Kodi


15. Take one step back and click on Add-ons.

Step 15 Installing Incursion addon on Kodi


16. Select install from zip file.

Step 16 Installing Incursion addon on Kodi


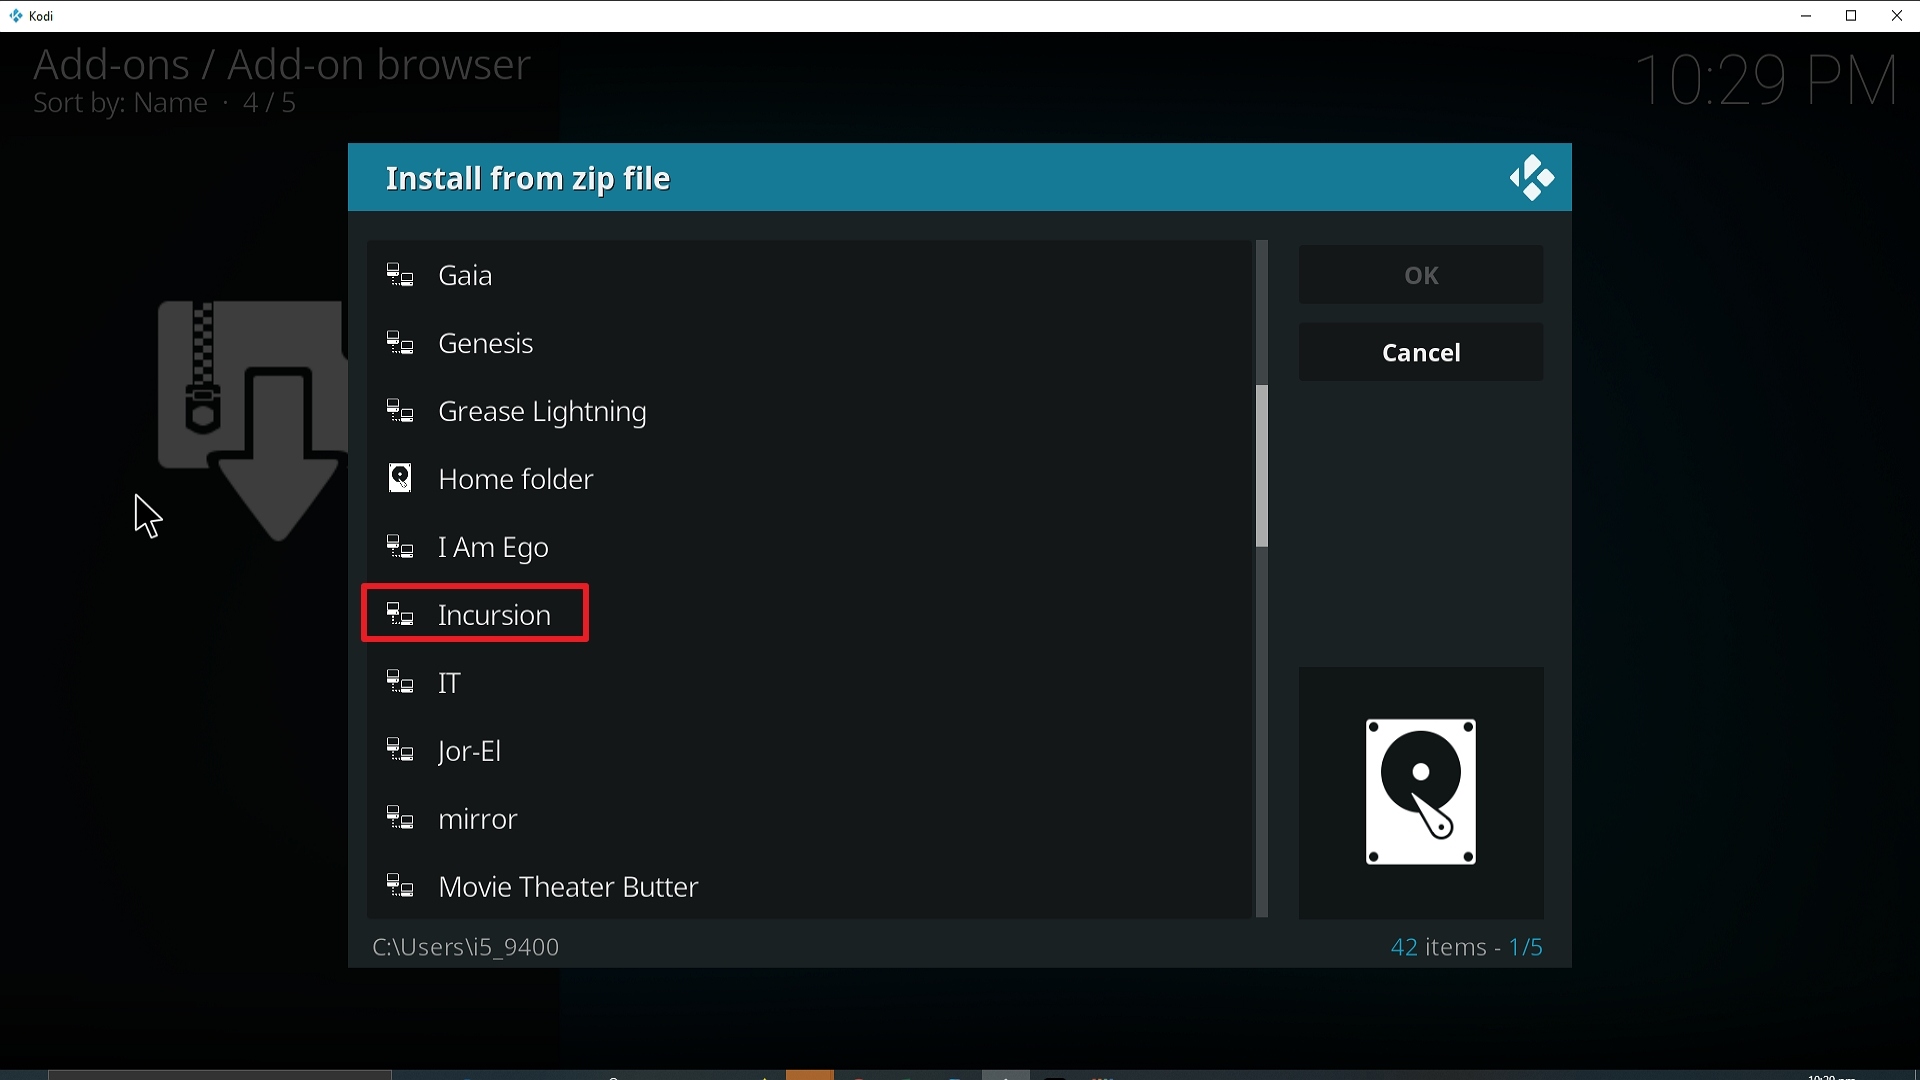
17. Click on Incursion (or whatever you named the source).

Step 17 Installing Incursion addon on Kodi


18. Click on repository.kodil-1.3.zip

Step 18 Installing Incursion addon on Kodi


19. Select on Install from repository.

Step 19 Installing Incursion addon on Kodi


20. Click on kodil Repo.

Step 20 Installing Incursion addon on Kodi


21. Pick Video add-ons.

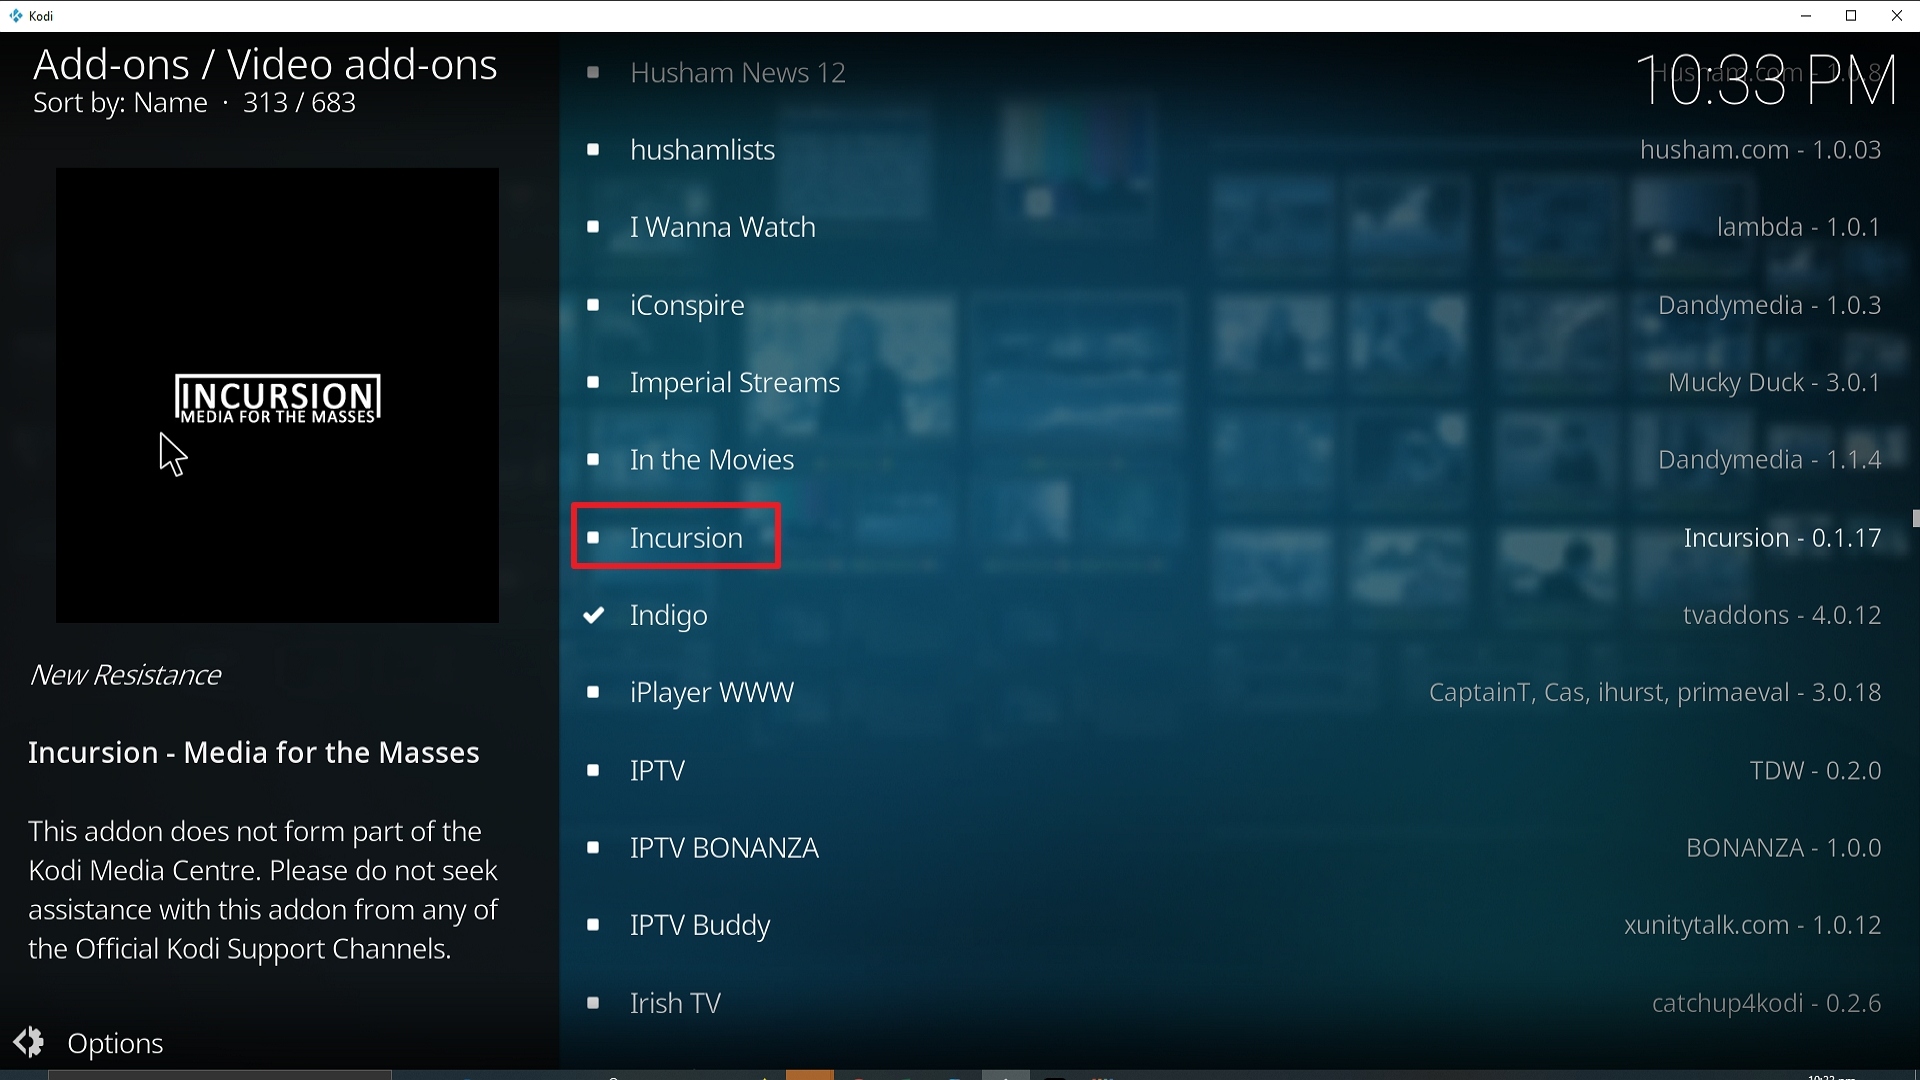
Step 21 Installing Incursion addon on Kodi


22. Select Incursion Video again.

Step 22 Installing Incursion addon on Kodi


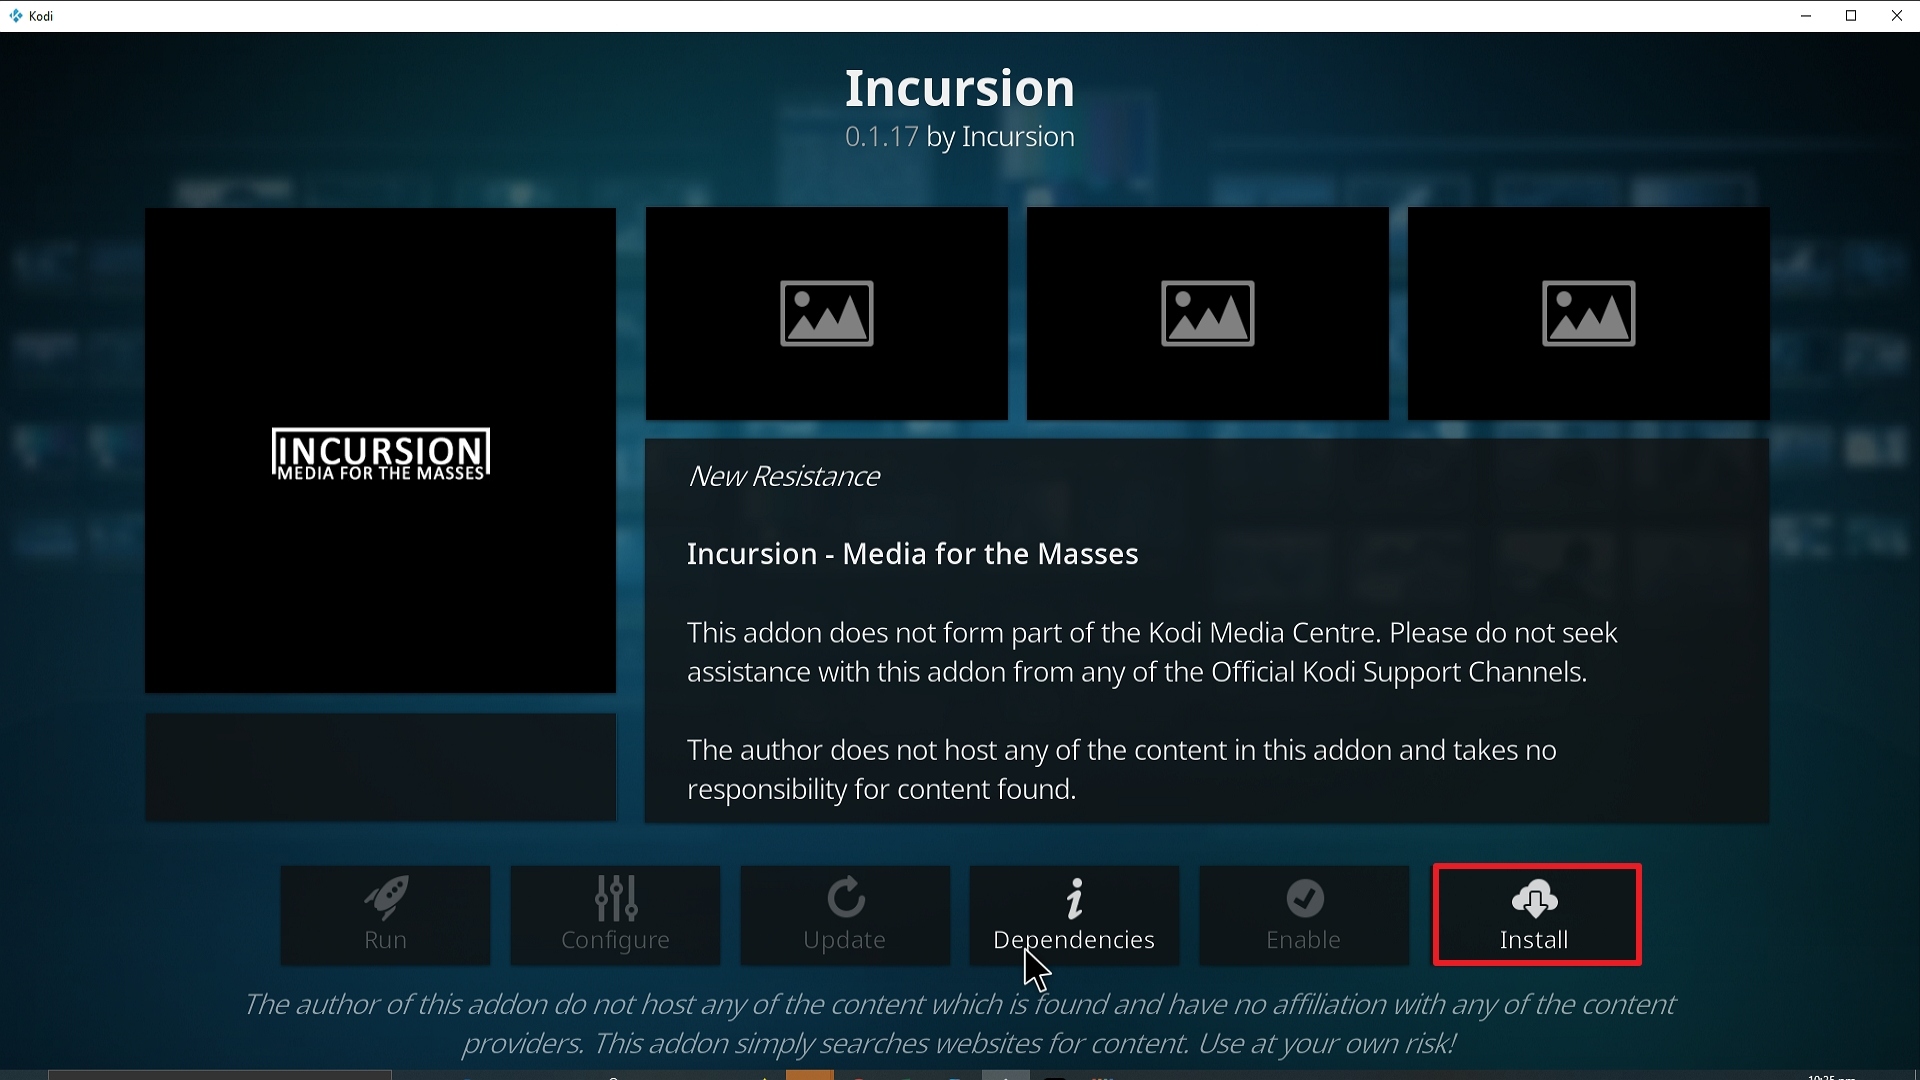
23. Click on Install.

Step 23 Installing Incursion addon on Kodi


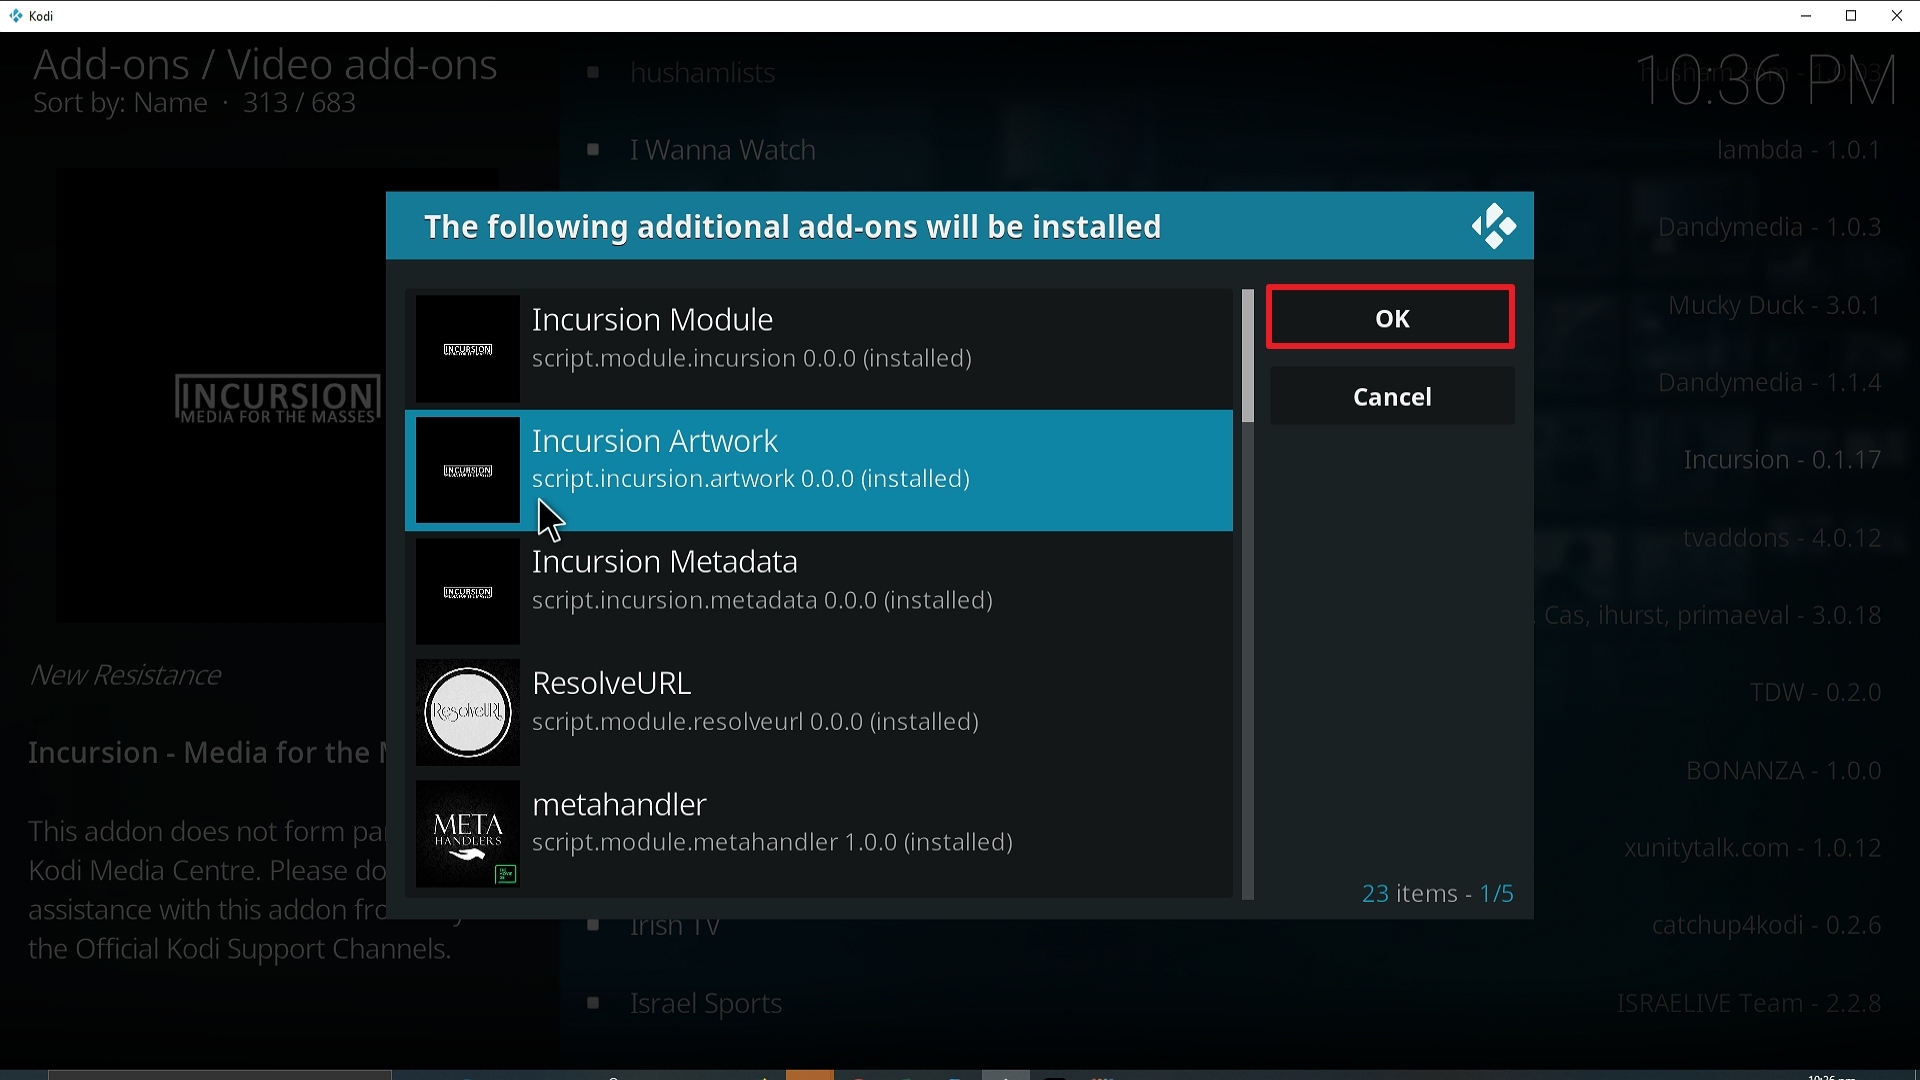
24. Select OK after reviewing the add-ons that will be installed.

Step 24 Installing Incursion addon on Kodi


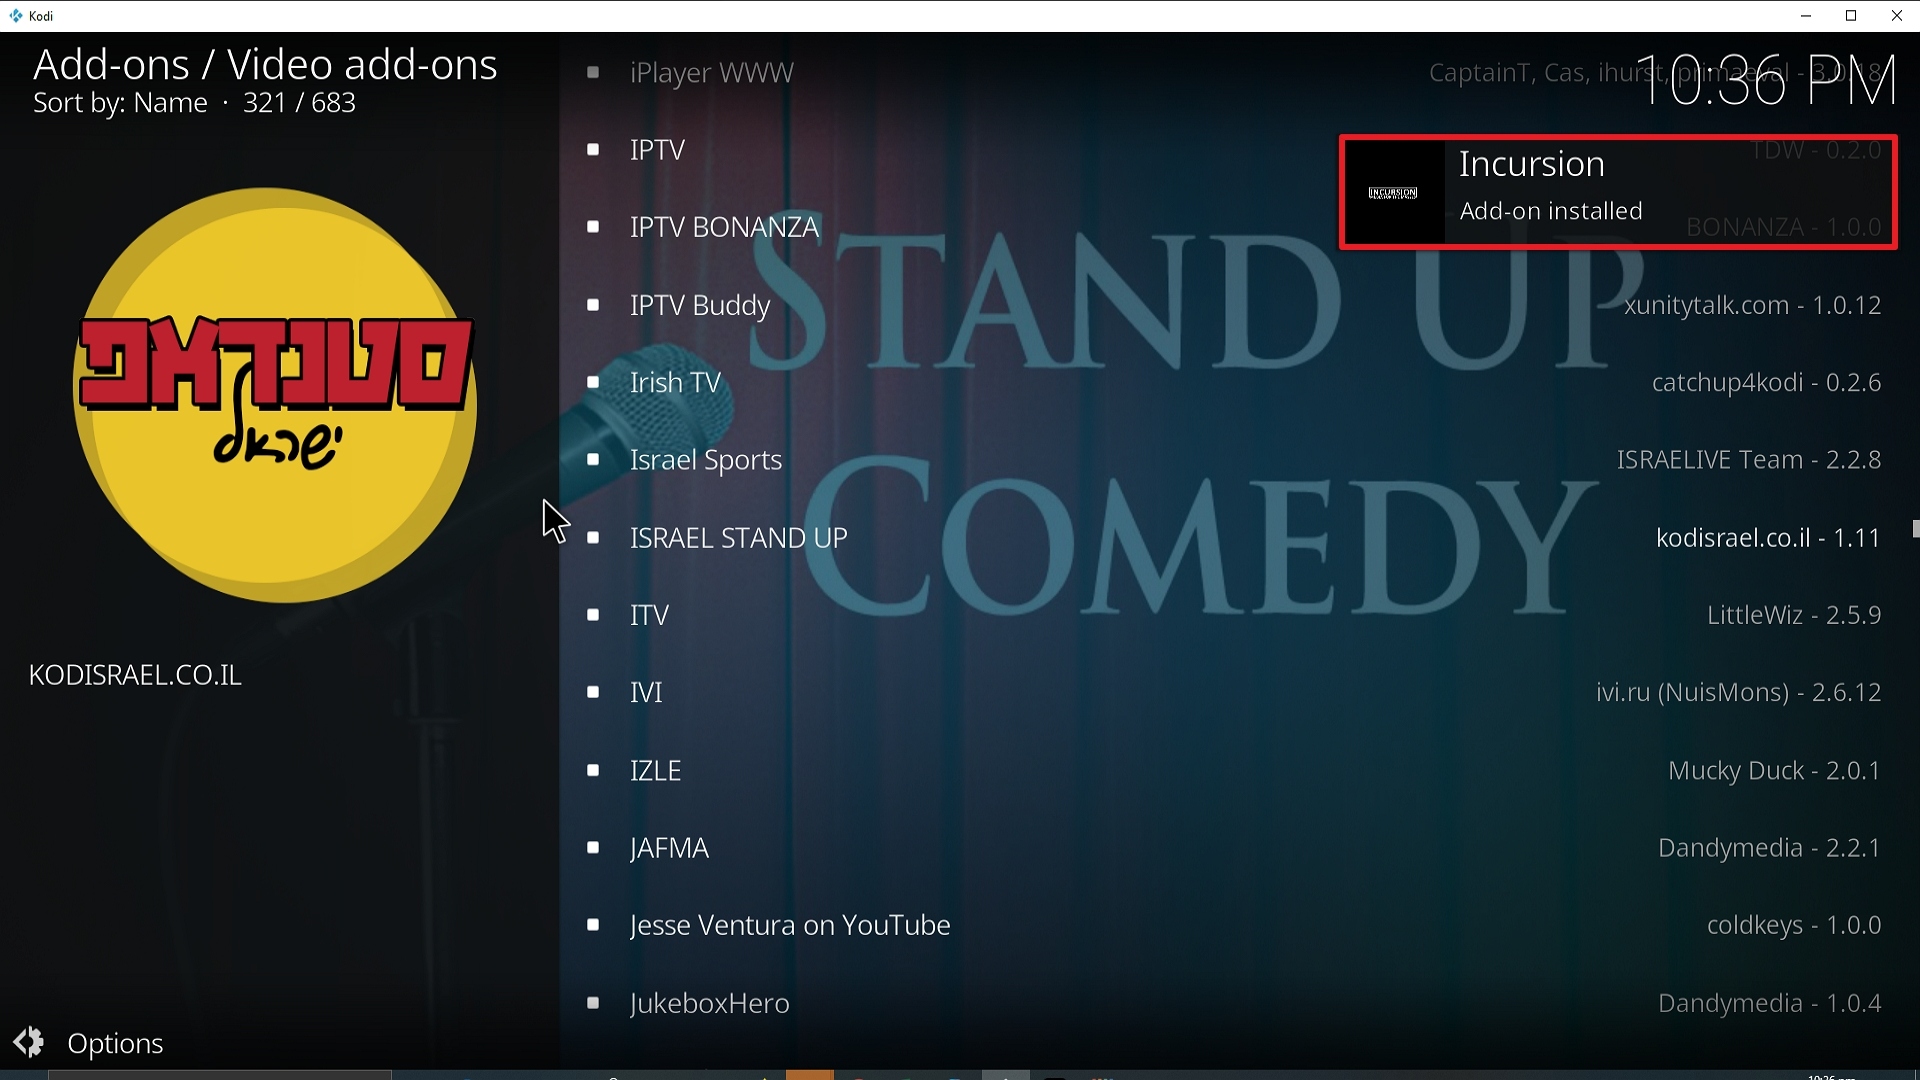
25. You should see a popup in the upper right corner saying Incursion has installed. There will actually be multiple popups for the various components.

Step 25 Installing Incursion addon on Kodi


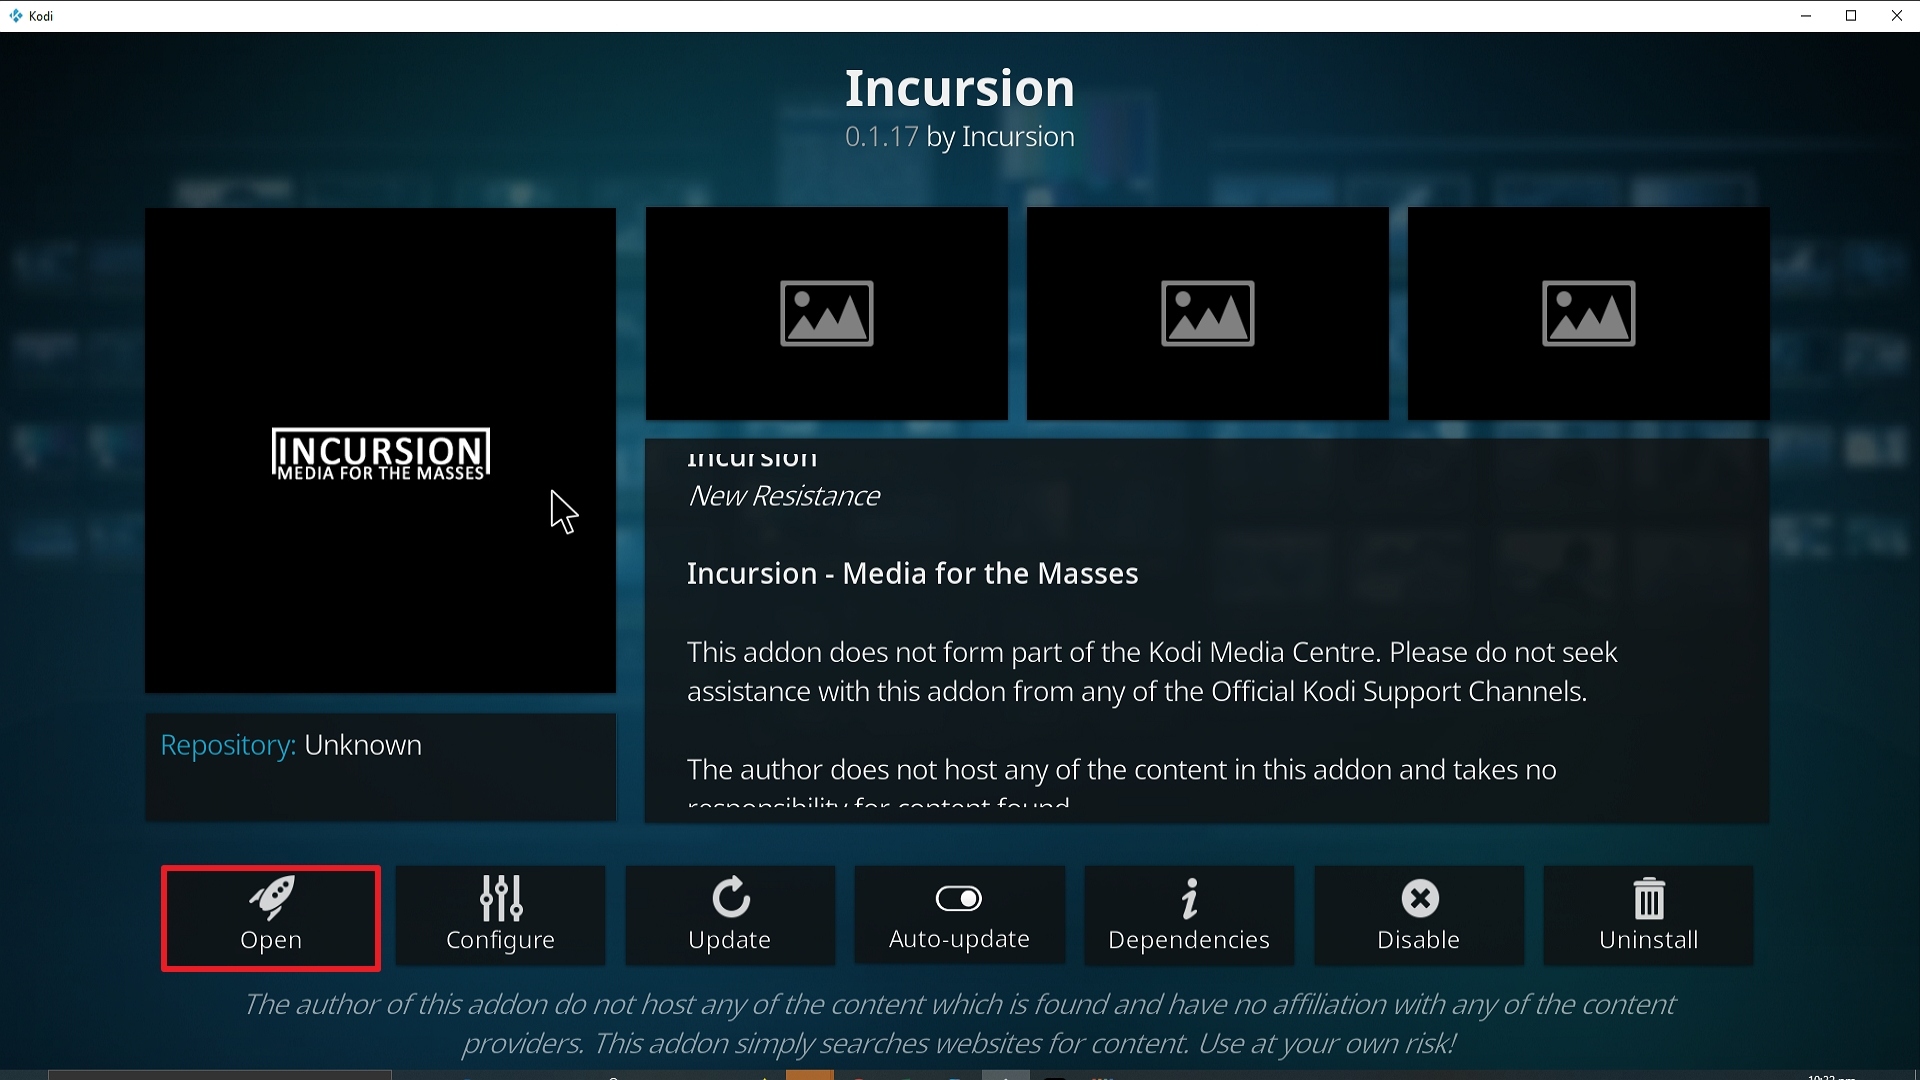
26. Click on Open to start the Incursion add-on.

Step 26 Installing Incursion addon on Kodi


Stream Safely with a VPN

All of your online activities are being tracked by your ISP. Streaming, most especially, is closely monitored because it consumes a lot of data.

Once your ISP discovers that you are exceeding your data cap, it will do everything to disrupt your streaming experience. It will throttle down your connection which results in buffering. And we do not want that for you.

To prevent this from happening, we highly recommend using streaming apps with a premium VPN service like Surfshark.

Here are the other perks of having it on your device:

  • Provides access to geo-restricted content.
  • Protects all of your personal data when accessing public wifi internet.
  • Cloaks all of your online activities and identity that may be used by online threats like hackers and ISP.
  • It is the best solution for Firestick buffering and Kodi Buffering as well.

Note: For more information about Surfshark, please read our Surfshark Review.


Grab your subscription now!

Click here to get the lowest price on Surfshark through our exclusive limited-time offer.


How to Install Surfshark VPN on Firestick

If your Firestick still has the older interface, read this article to learn how to update it: Update Firestick Interface.

Follow our screenshots below to install the SurfShark VPN app on your Fire TV stick.

1. Go to the Home screen of your Firestick.

step 1 Install Surfshark VPN on Firestick


2. Navigate towards the Find tab. Press the Search button from the resulting dropdown.

step 2 Install Surfshark VPN on Firestick


3. Type in the keyword of SurfShark and select from the suggestions that will appear.

step 3 Install Surfshark VPN on Firestick


4. Click the official SurfShark icon from your search results.

step 4 Install Surfshark VPN on Firestick


5. Press the Download (You own it) button.

step 5 Install Surfshark VPN on Firestick


6. The SurfShark VPN installer will download on your device.

step 6 Install Surfshark VPN on Firestick


7. SurfShark VPN’s app will automatically install itself on your Fire TV stick.

step 7 Install Surfshark VPN on Firestick


8. Press the Open button after completing SurfShark VPN’s installation process.

step 8 Install Surfshark VPN on Firestick


9. Please wait for the SurfShark VPN to load its user interface.

step 9 Install Surfshark VPN on Firestick


10. You can now log in with your SurfShark VPN account credentials.

step 10 Install Surfshark VPN on Firestick

Learn more about Surfshark and Grab the Best Surfshark Deal Now!


Install Surfshark on Firestick

Best Surfshark Deal


Other VPNs to Consider

NordVPN (Best for Streaming)

Best Features

  • 5000+ Server in 50+ Countries 
  • Military-Grade Encryption
  • Fast Connection Speed
  • Suitable to a lot of devices
  • No-Log Policy

Prices
  • Complete $5.89 per month (64% Discount)
  • Plus $4.59 per month (56% Discount)
  • Standard $3.69 per month (55% Discount)

Best Features

  • 750+ High-speed VPN Servers in 43 Locations
  • Military-Grade Encryption
  • Fastest HD Streaming and Gaming
  • 30-Day Money-Back Guarantee
  • Unlimited Data & Devices
  • No-Log Policy

Prices
  • 3 Years $1.99 per month (82% Discount)
  • 1 Years $3.29 per month (70% Discount)
  • 1 Month $10.99 per month

IPVanish VPN (Most Secure)

Best Features

  • 1200+ Servers in 60+ Countries around the world
  • Unlimited Connections
  • No-Log Policy
  • Top Notch Military-Grade VPN Protocols and Encryptions
  • 100% Safe and Secured
  • Most Trusted VPN
  • Best VPN for Firestick
  • 30-Day Money-Back Guarantee

Prices
  • Yearly $3.99 per month (63% Discount) – 30 days risk free + Ransomware & Malware Protection
  • Quarterly $5.32 per month (51% Discount)
  • Monthly $10.99 per month


For more VPN discounts, go to ReviewVPN Deals and purchase the best VPN for you.

Click here to get the lowest price on Surfshark through our exclusive limited-time offer.


Install Entertain Me Kodi Addon

Entertain Me Kodi Addon

The article will help you on how to install Entertain Me Kodi Addon on Firestick.


Source: http://streamarmy.co.uk/repo/


ANONYMOUSLY

Common Errors

Here are the most common errors you are likely to come across with Chains of Absolution:

  • Kodi check log error: A check log error can happen for several reasons, there may be a corrupted file that has been downloaded onto your system, or your Kodi installation needs to be upgraded. The most likely reason though is a full media cache. Over time, each item of media you see, or watch is cached in a media file. This allows your system to load faster and work smoother. This cache file fills up, faster if your device has a small or limited amount of storage. A check log error happens when the cache needs to be emptied. Find out how to do that and more, read our in-depth guide linked above.


  • Source not working/slow/frozen: When trying to connect to a media source, almost always this is being hosted on a server not owned by the addon. So, the process can be slow, and sometimes the link will look like it doesn’t work. That’s because it can take up to 20 seconds for the connection to happen. Also bear in mind, due to the illegal nature of your viewing, the link may be blocked by your internet provider. So be sure to use a VPN when watching anything on Kodi or Chains of Absolution. Check here for the best VPN deal. For other problems and fixes read our in-depth guide linked above.


  • Could not connect to URL/Download: Being unable to download the addon, generally means a simple spelling mistake with the URL. Make sure the URL is correct, and you are using a VPN. This prevents your internet provider from blocking your downloading of the addon. For more fixes read our guide linked above.


Review

Entertain Me comes from a great repository pedigree. Stream Army doesn’t host addons that don’t mean business.

Each item of content has 3 links, and for some reason, the 3rd link always seems to work, so if you want to save yourself time just use the 3rd link.

We like that Entertain Me just keeps it really simple. You can arrange titles by different filters like trending, new, year, etc. But basically, this is an addon for someone who wants fast and new content quickly.

No hundreds of sections and libraries to navigate.

A big drawback for us is the lack of 3rd party integration. Currently Entertain Me doesn’t work with either Trakt or Real Debrid, in fairness this isn’t much of a problem if the links keep working. But moving forward we would love to see increased integration with premium service to get the best out of the addon.

One to watch.

Categories in Entertain Me include:

  • Movies
  • TV Shows
  • Upcoming Dates
  • Quit


YOUR INTERNET ACTIVITY IS BEING WATCHED

ReviewVPN cannot attest to the legality, security and privacy of the applications discussed on this site. It is highly recommended that you use a VPN service while streaming or using Kodi.

Currently, your IP 216.73.217.150 is visible to everyone and your Browser is being tracked by Advertisers & ISP Provider.

Save 65% Now

Limited Time Offer

Here are the main reasons why you must use a VPN:

  • Your activities are hidden from your ISP, the government, and from the apps you are using.
  • You can access additional movies and TV streams.
  • ISP attempts to throttle are thrwarted thus reducing buffering issues.
  • Geographically restricted content like Netflix and Hulu can be unblocked.

A VPN works be replacing your ISP-assigned IP address and creating an encrypted tunnel. We recommend the no log service offered by IPVanish. It works well on a Firestick and offers the fastest possible speeds.

Special Limited Time Offer - Get IPVanish


Legal Disclaimer: ReviewVPN.com does not encourage or endorse any illegal activity involved in the usage of services and applications referenced on this site. We do not verify the licensing agreements of services. The end-user is wholly responsible for ensuring that any media accessed through these services does not violate copyright and/or licensing laws. ReviewVPN does not promote, link to, or receive compensation from any Apps and IPTV services.


Install Surfshark on Firestick

Best Surfshark Deal


How to Install Entertain Me Addon on Kodi with Screenshots

  1. From the home screen, select the cogwheel at the upper left.

Step 1 Installing Entertain Me addon on Kodi


2. Select System in the bottom right corner.

Step 2 Installing Entertain Me addon on Kodi


3. Select Add-ons on the left side of the screen.

Step 3 Installing Entertain Me addon on Kodi


4. Select Unknown sources.

Step 4 Installing Entertain Me addon on Kodi


5. Click Yes to allow unknown sources.

Step 5 Installing Entertain Me addon on Kodi


6. Select File manager.

Step 6 Installing Entertain Me on Kodi


7. Click Add source.

Step 7 Installing Entertain Me addon on Kodi


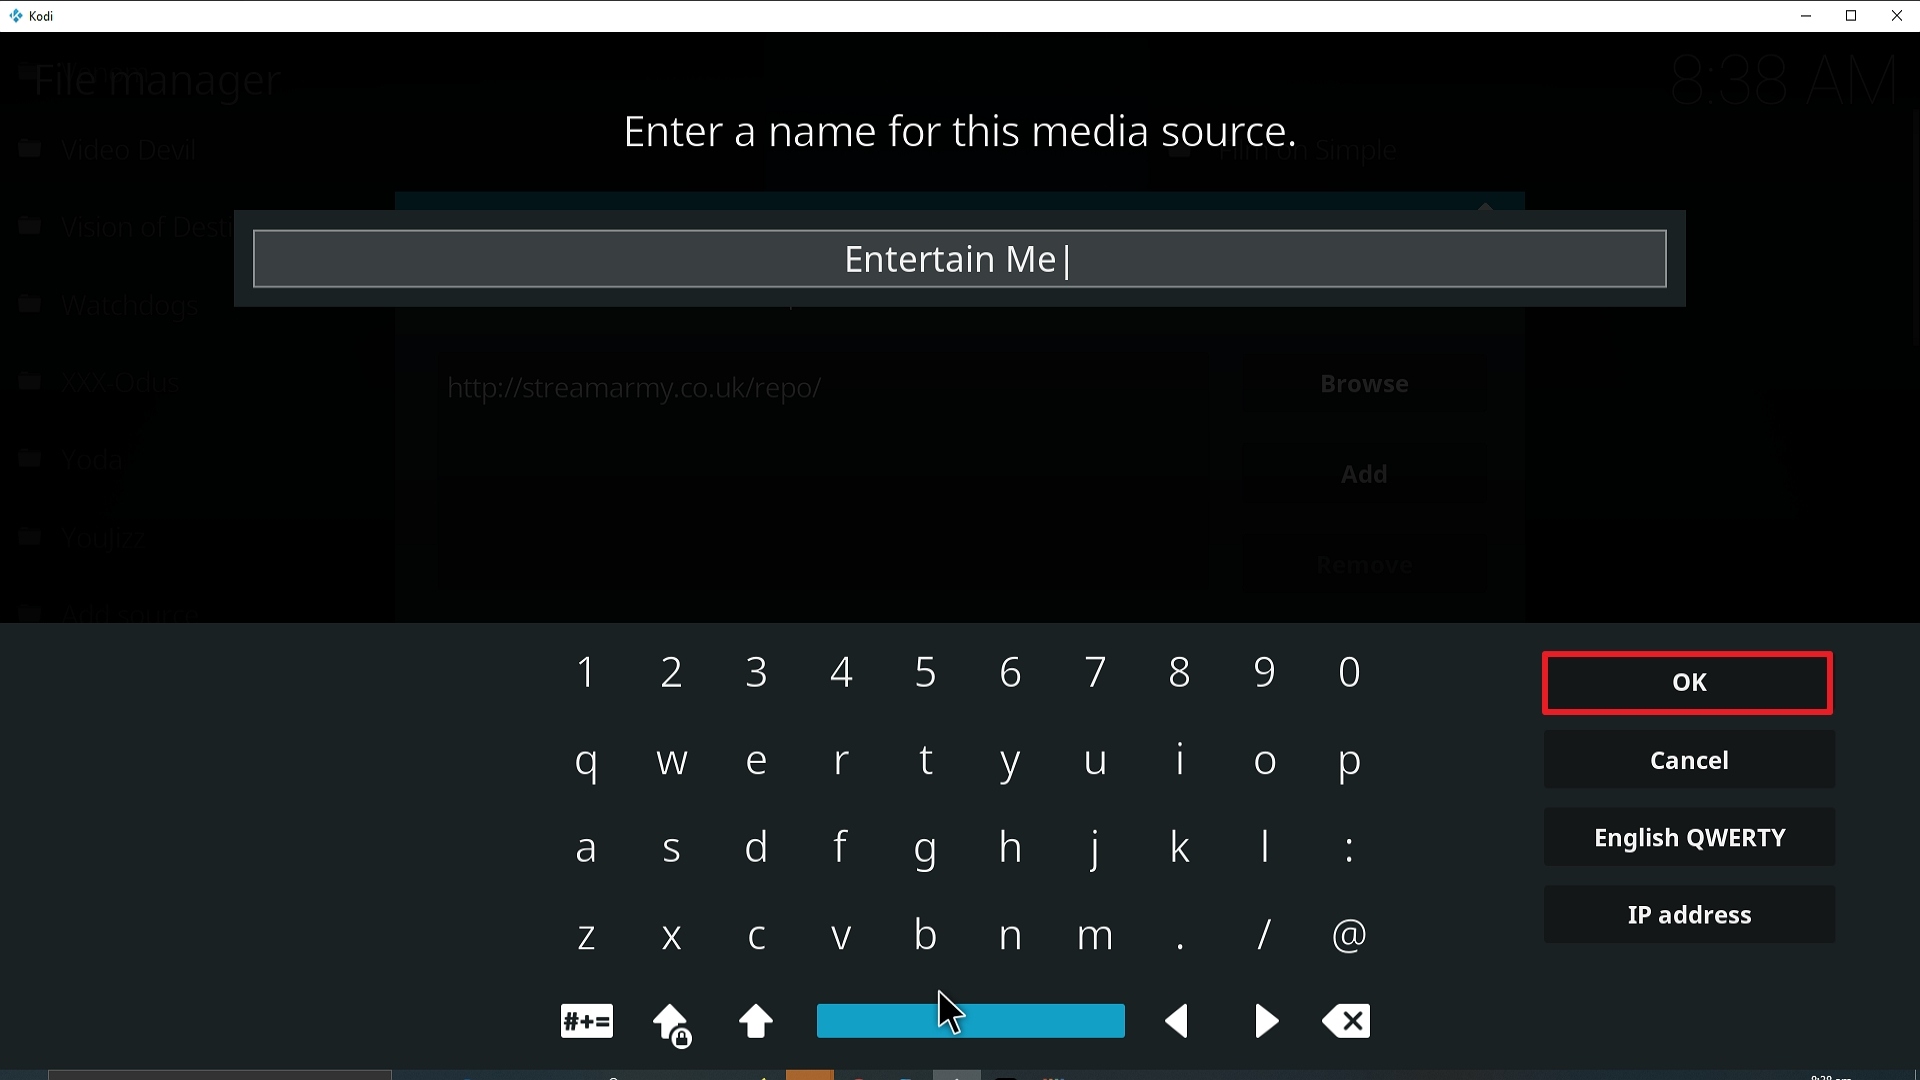
8. Click on <None>.

Step 8 Installing Entertain Me addon on Kodi


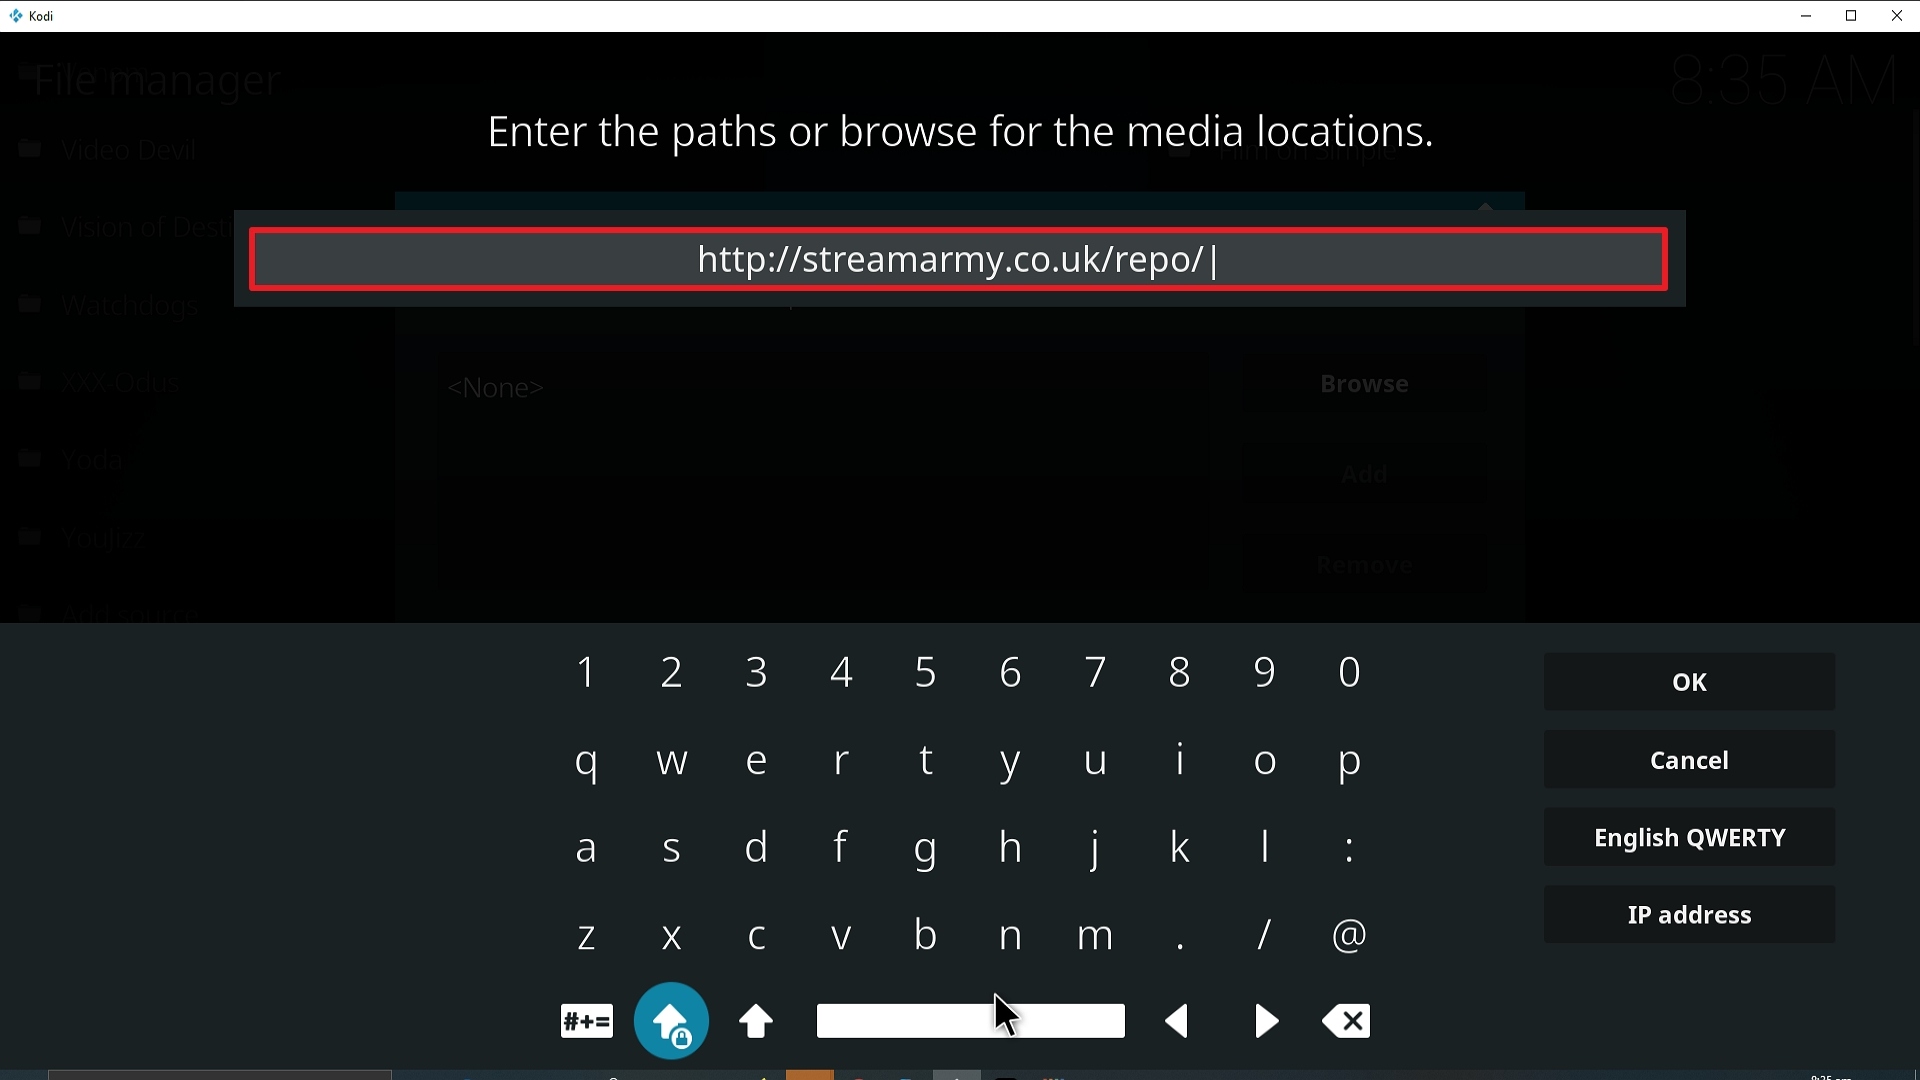
9. Type exactly: http://streamarmy.co.uk/repo/

Step 9 Installing Entertain Me Kodi addon on Kodi


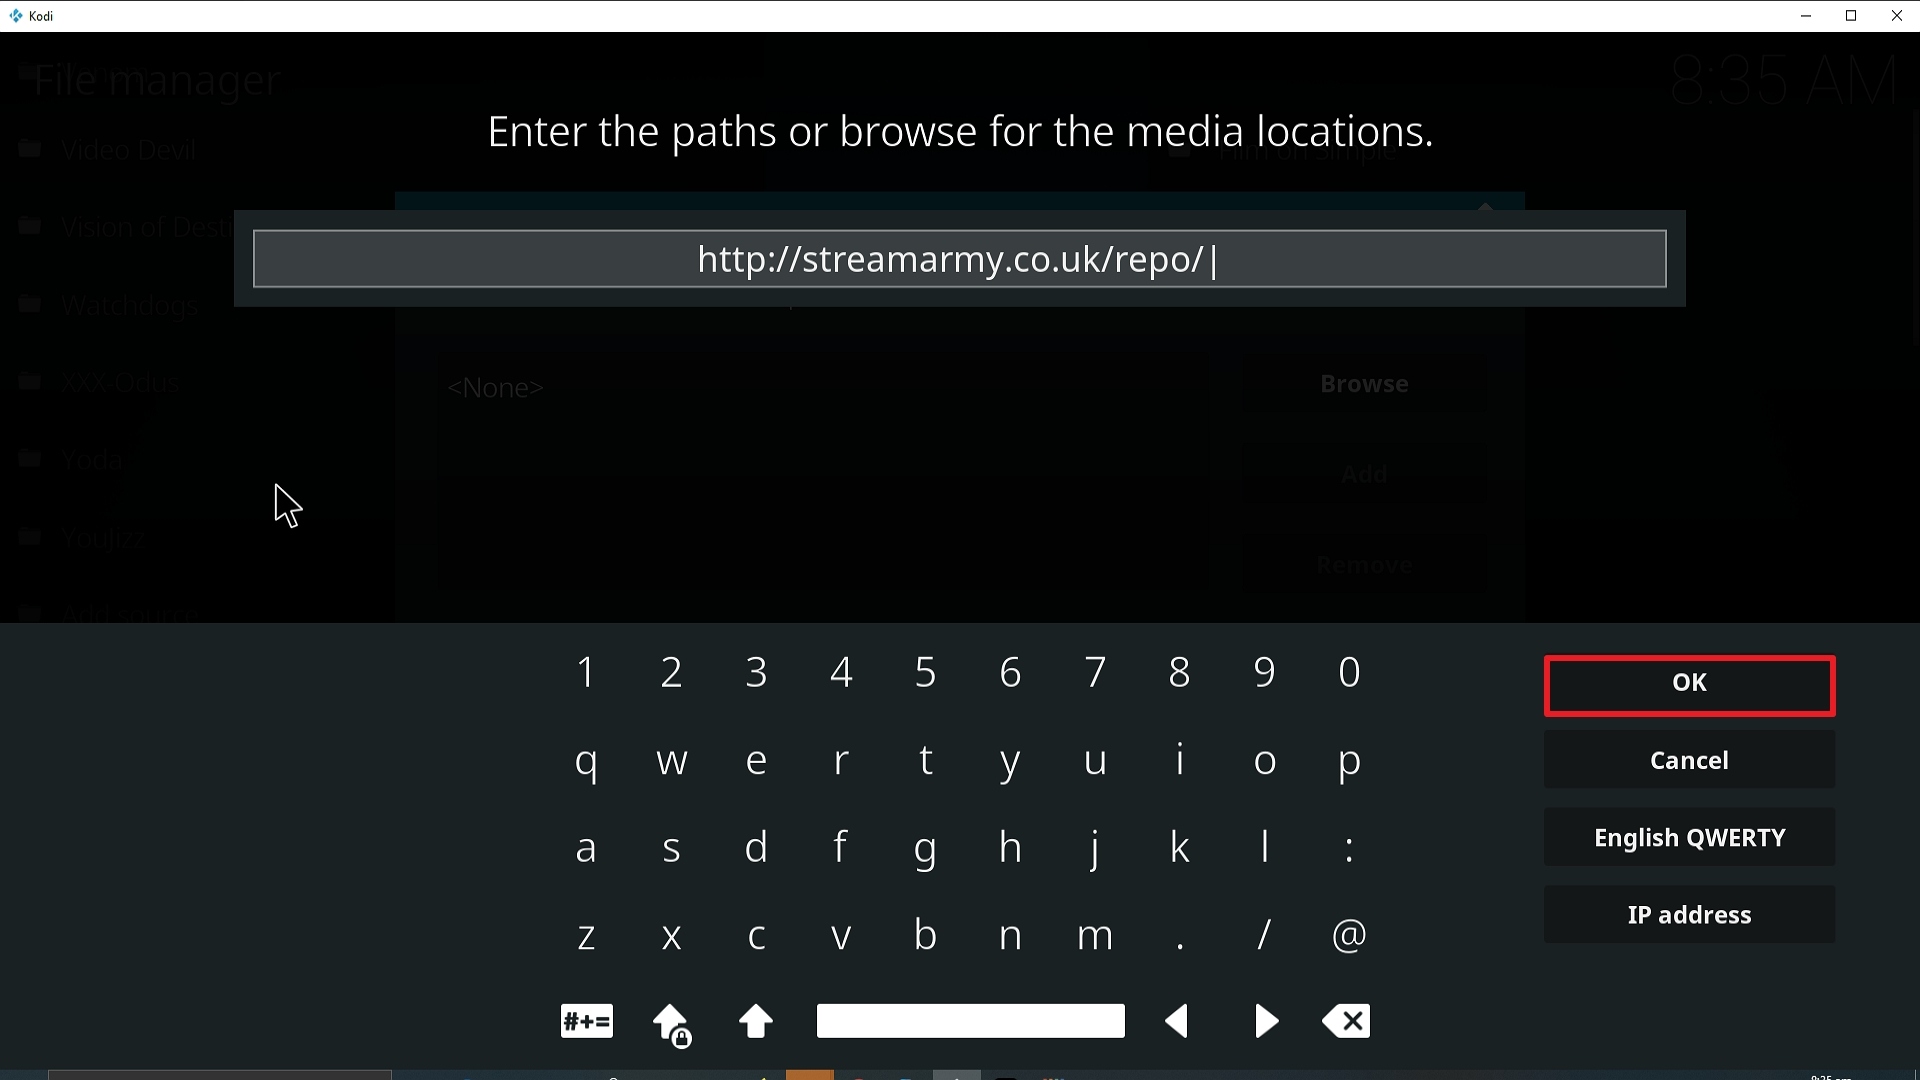
10. Click on OK.

Step 10 Installing Entertain Me Kodi addon on Kodi


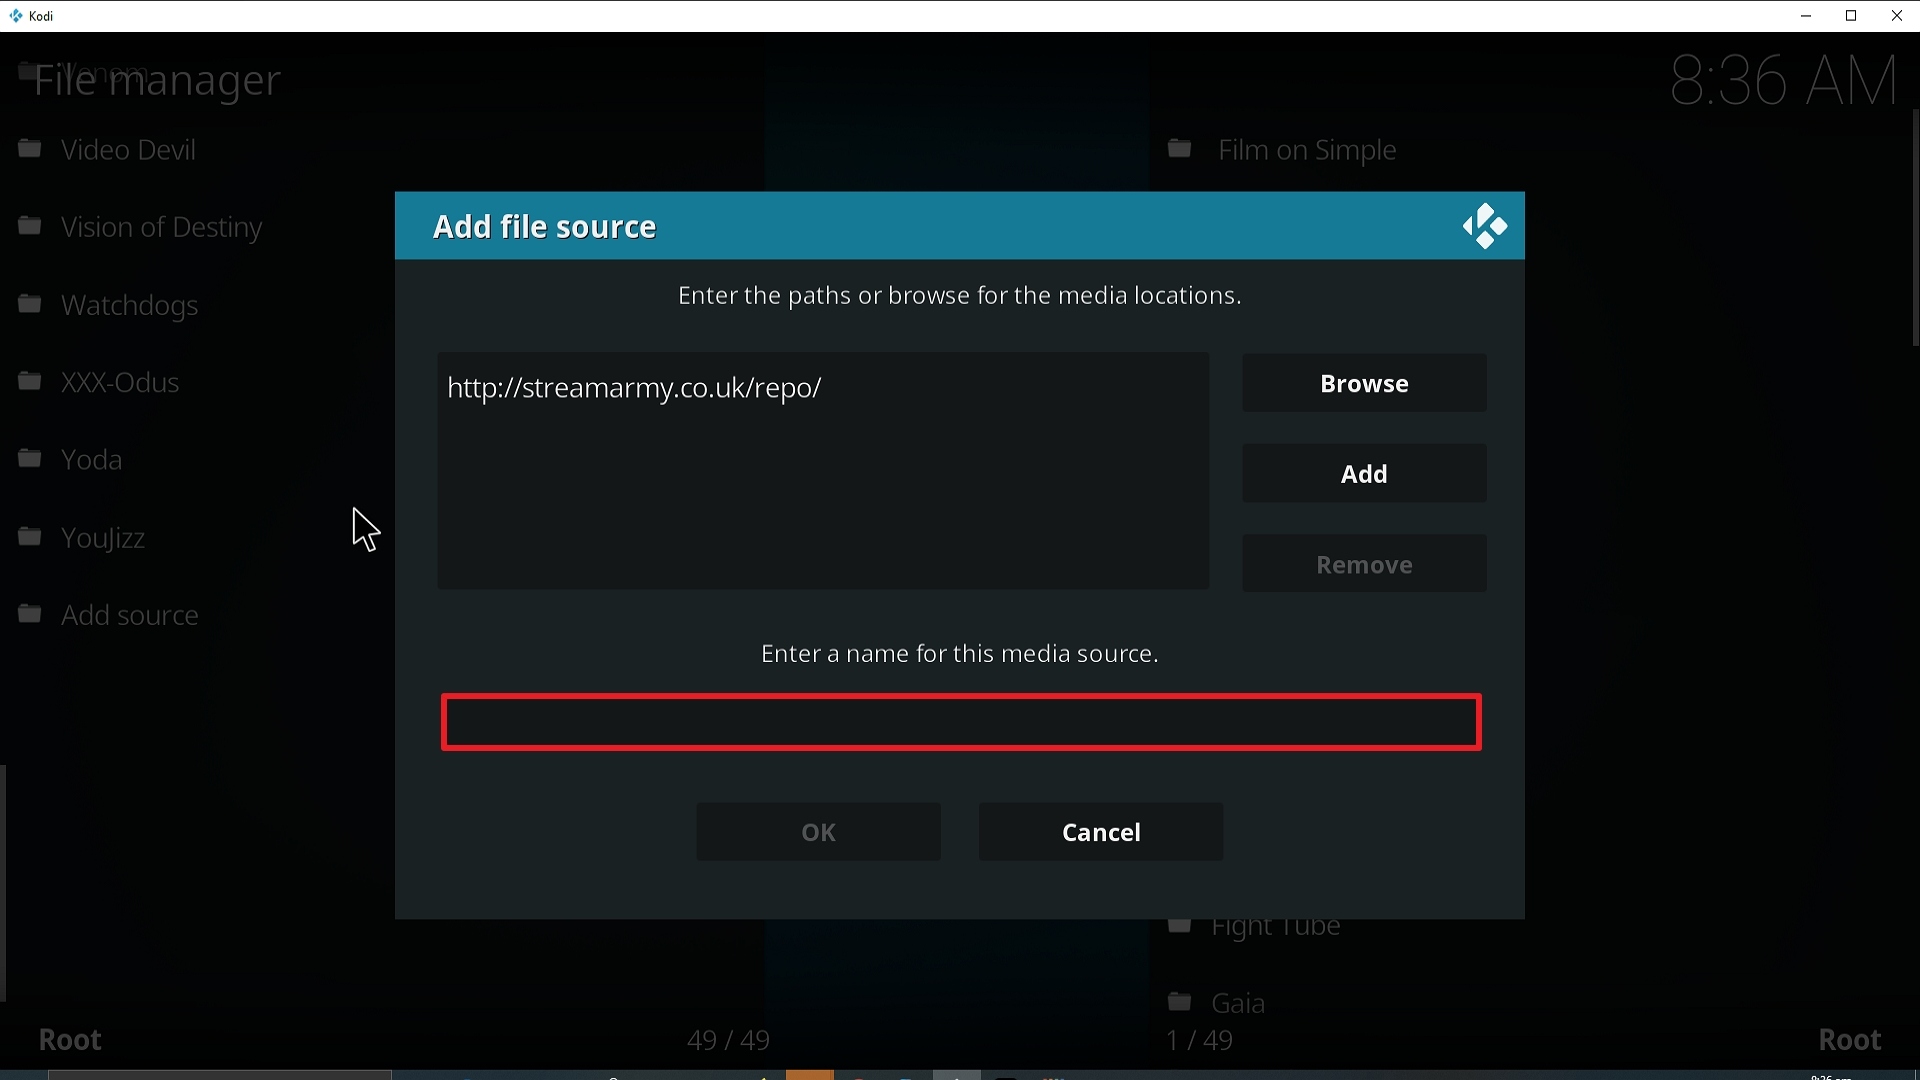
11. Select enter a name for this media source.

Step 11 Installing Entertain Me Kodi addon on Kodi


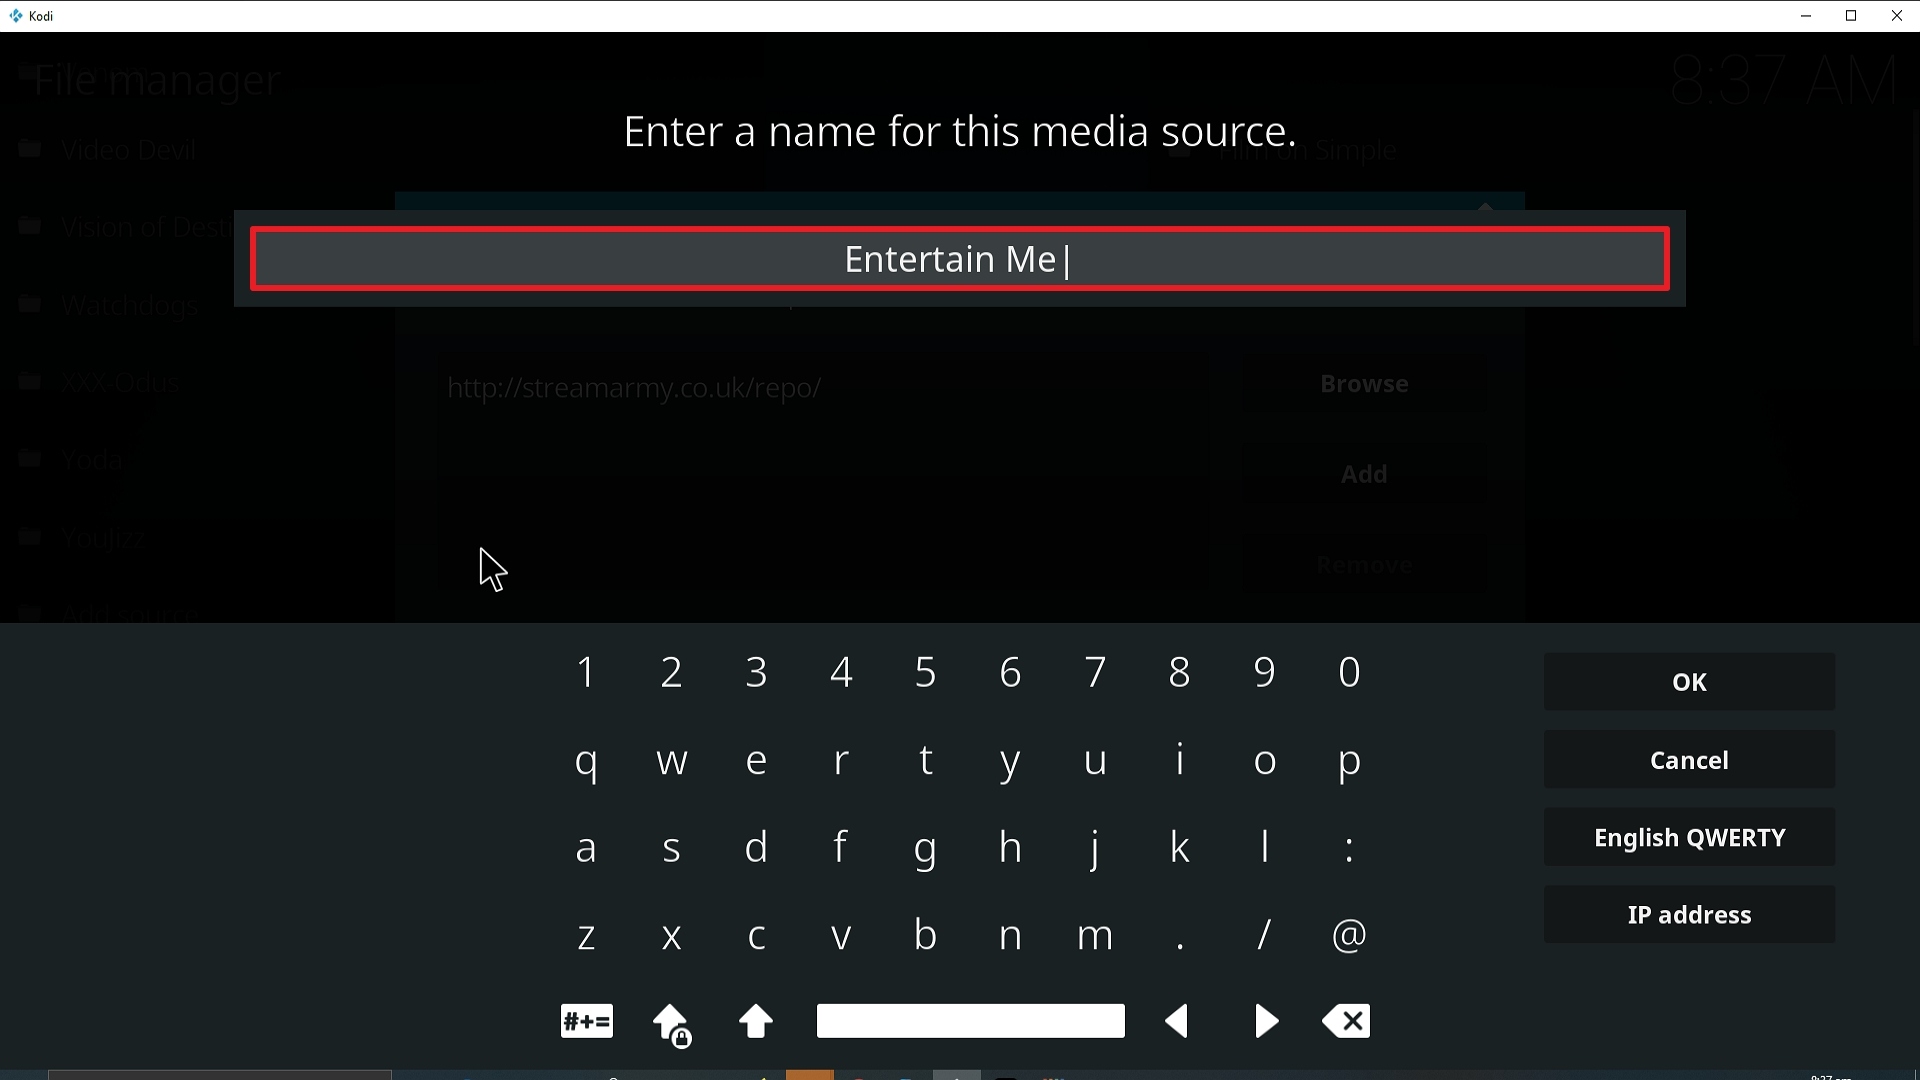
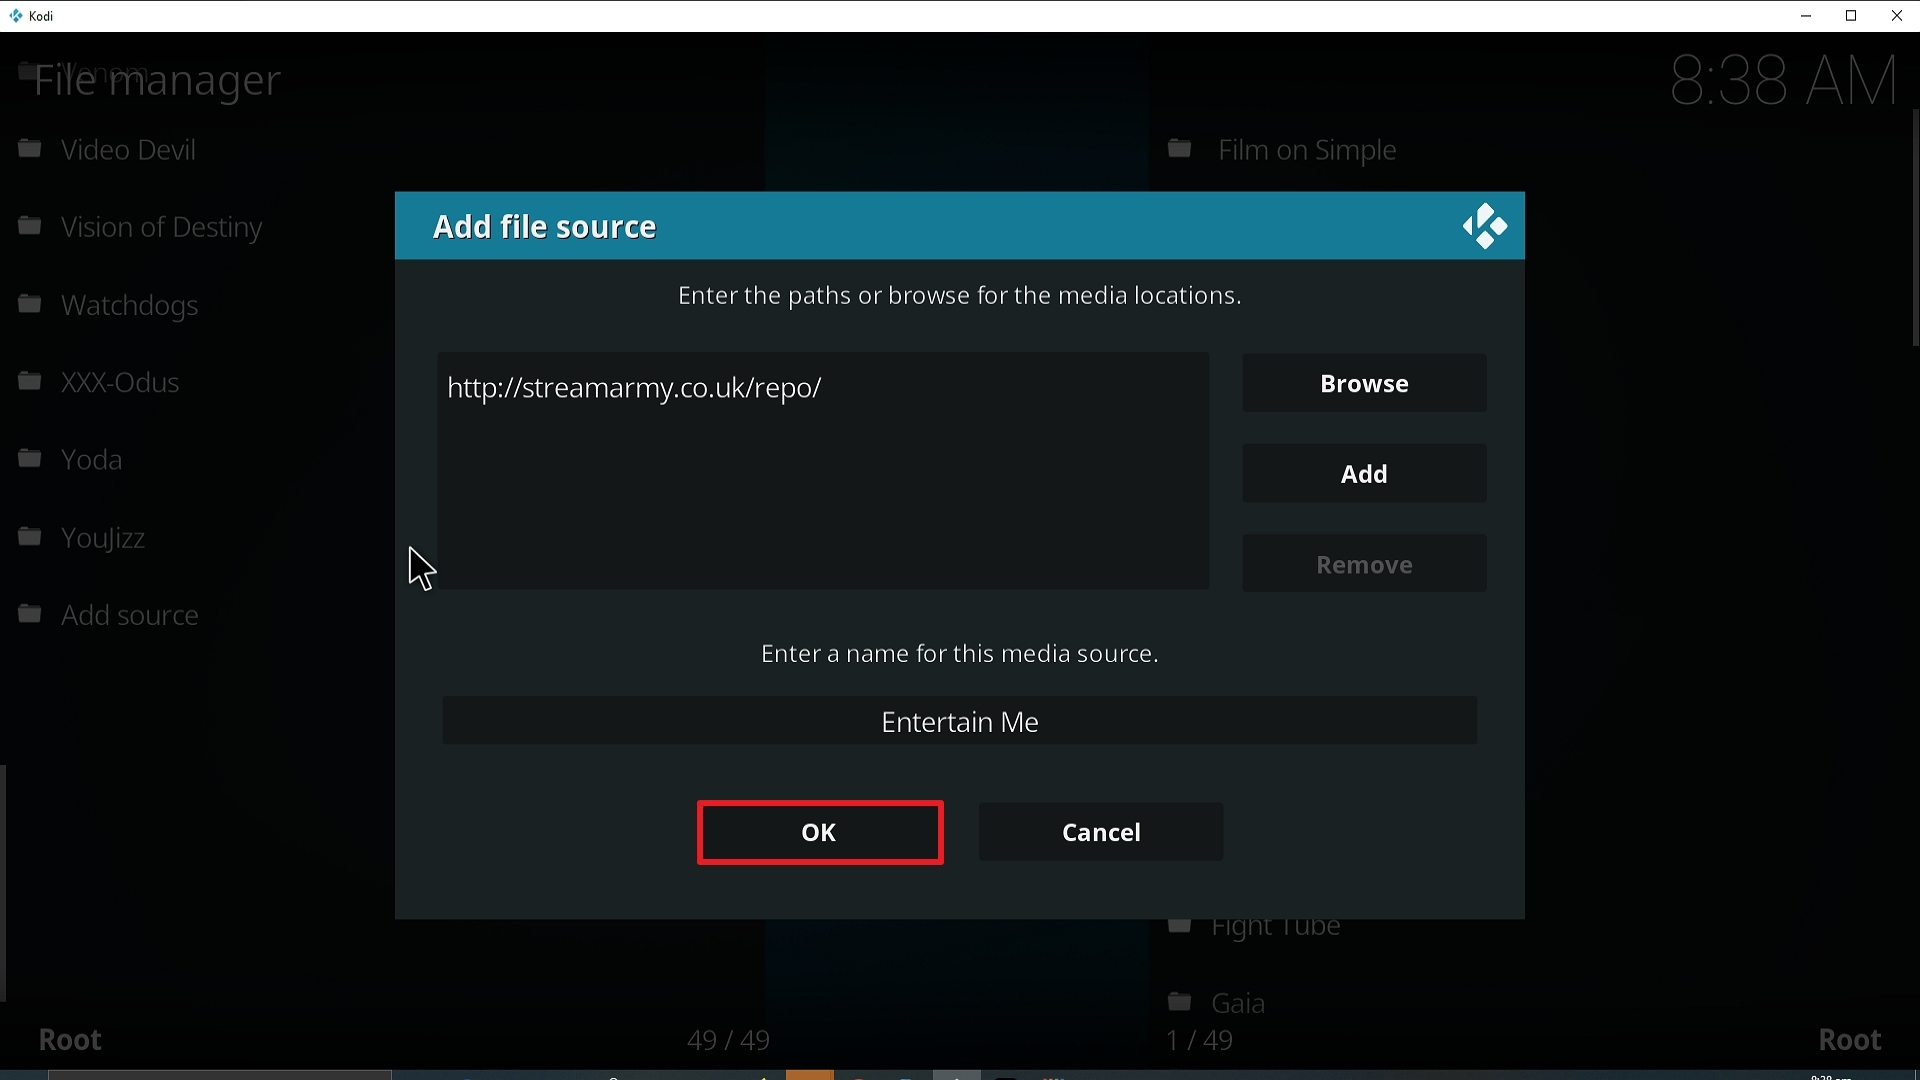
12. Name is Entertain Me (this part isn’t critical as long as you remember the name).

Step 12 Installing Entertain Me Kodi addon on Kodi


13. Click on OK.

Step 13 Installing Entertain Me Kodi addon on Kodi


14. Click on OK.

Step 14 Installing Entertain Me Kodi addon on Kodi


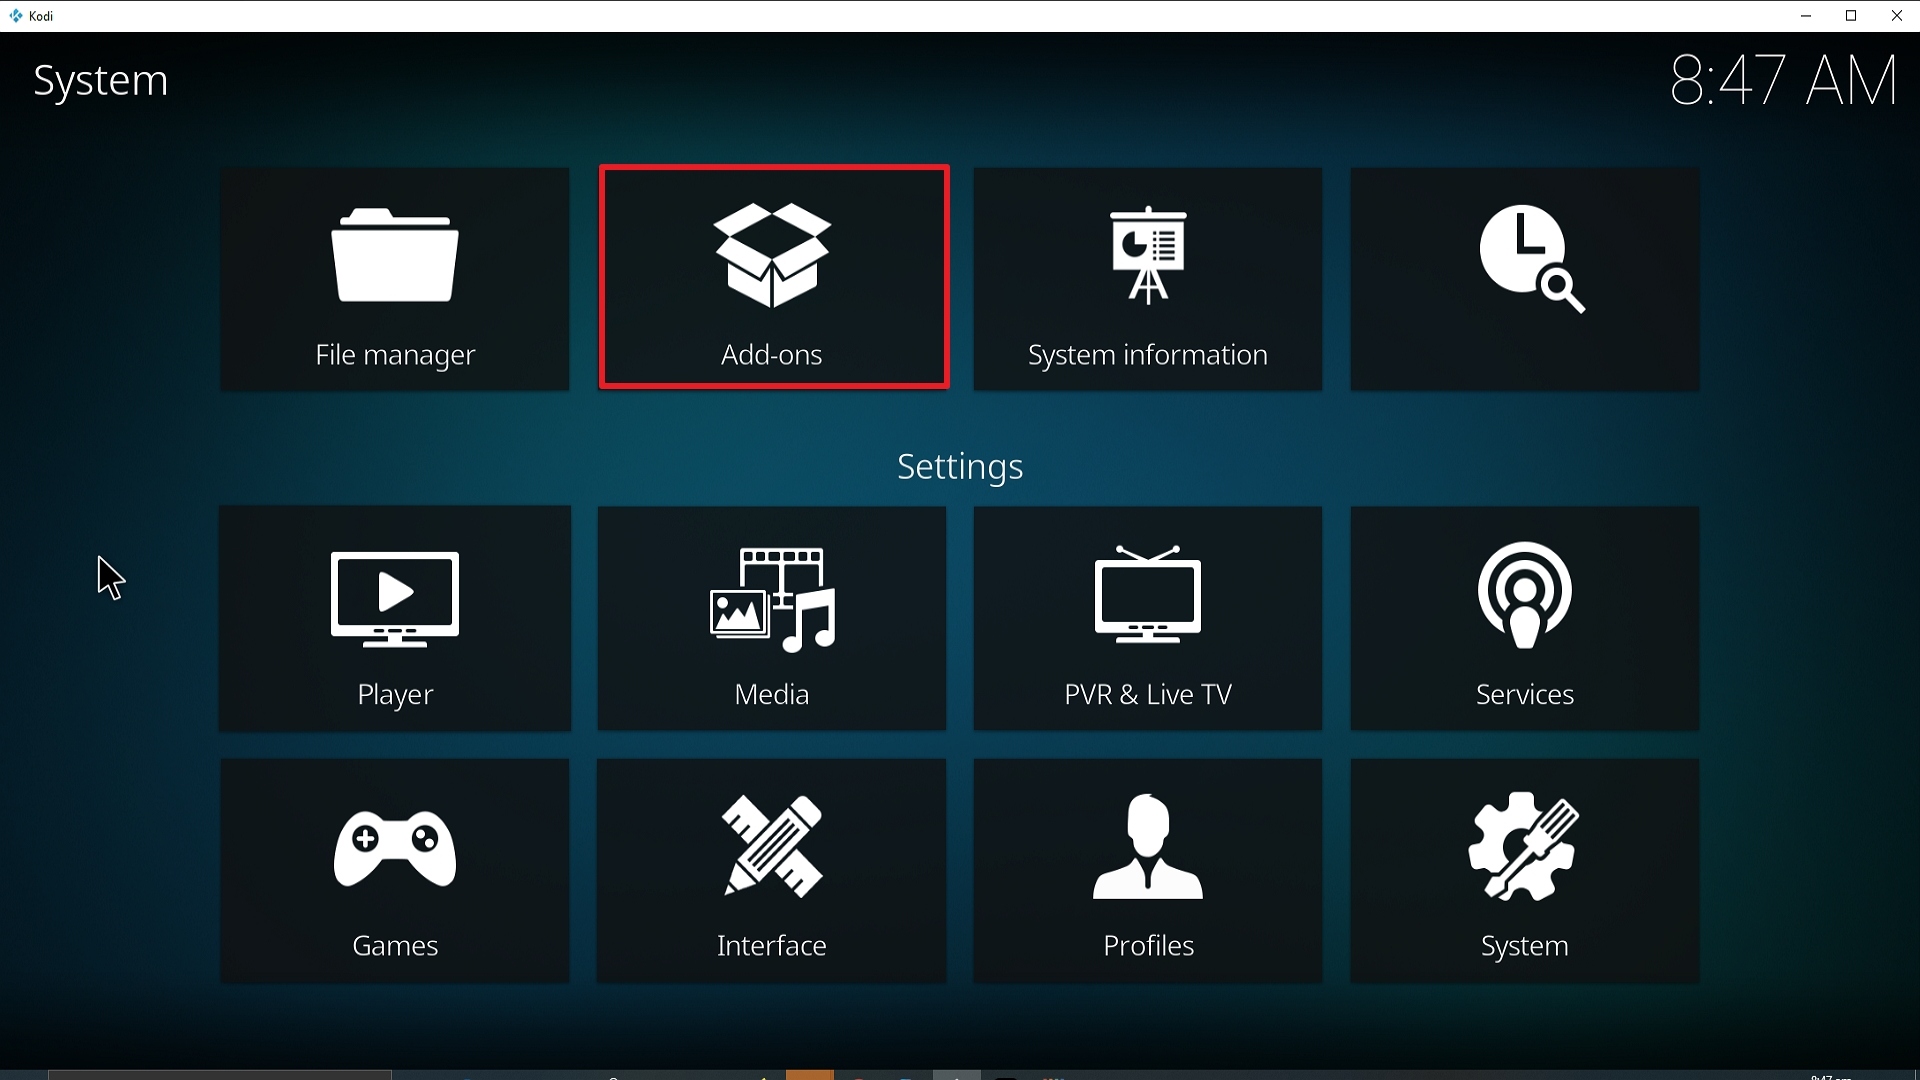
15. Take one step back and click on Add-ons.

Step 15 Installing Entertain Me Kodi addon on Kodi


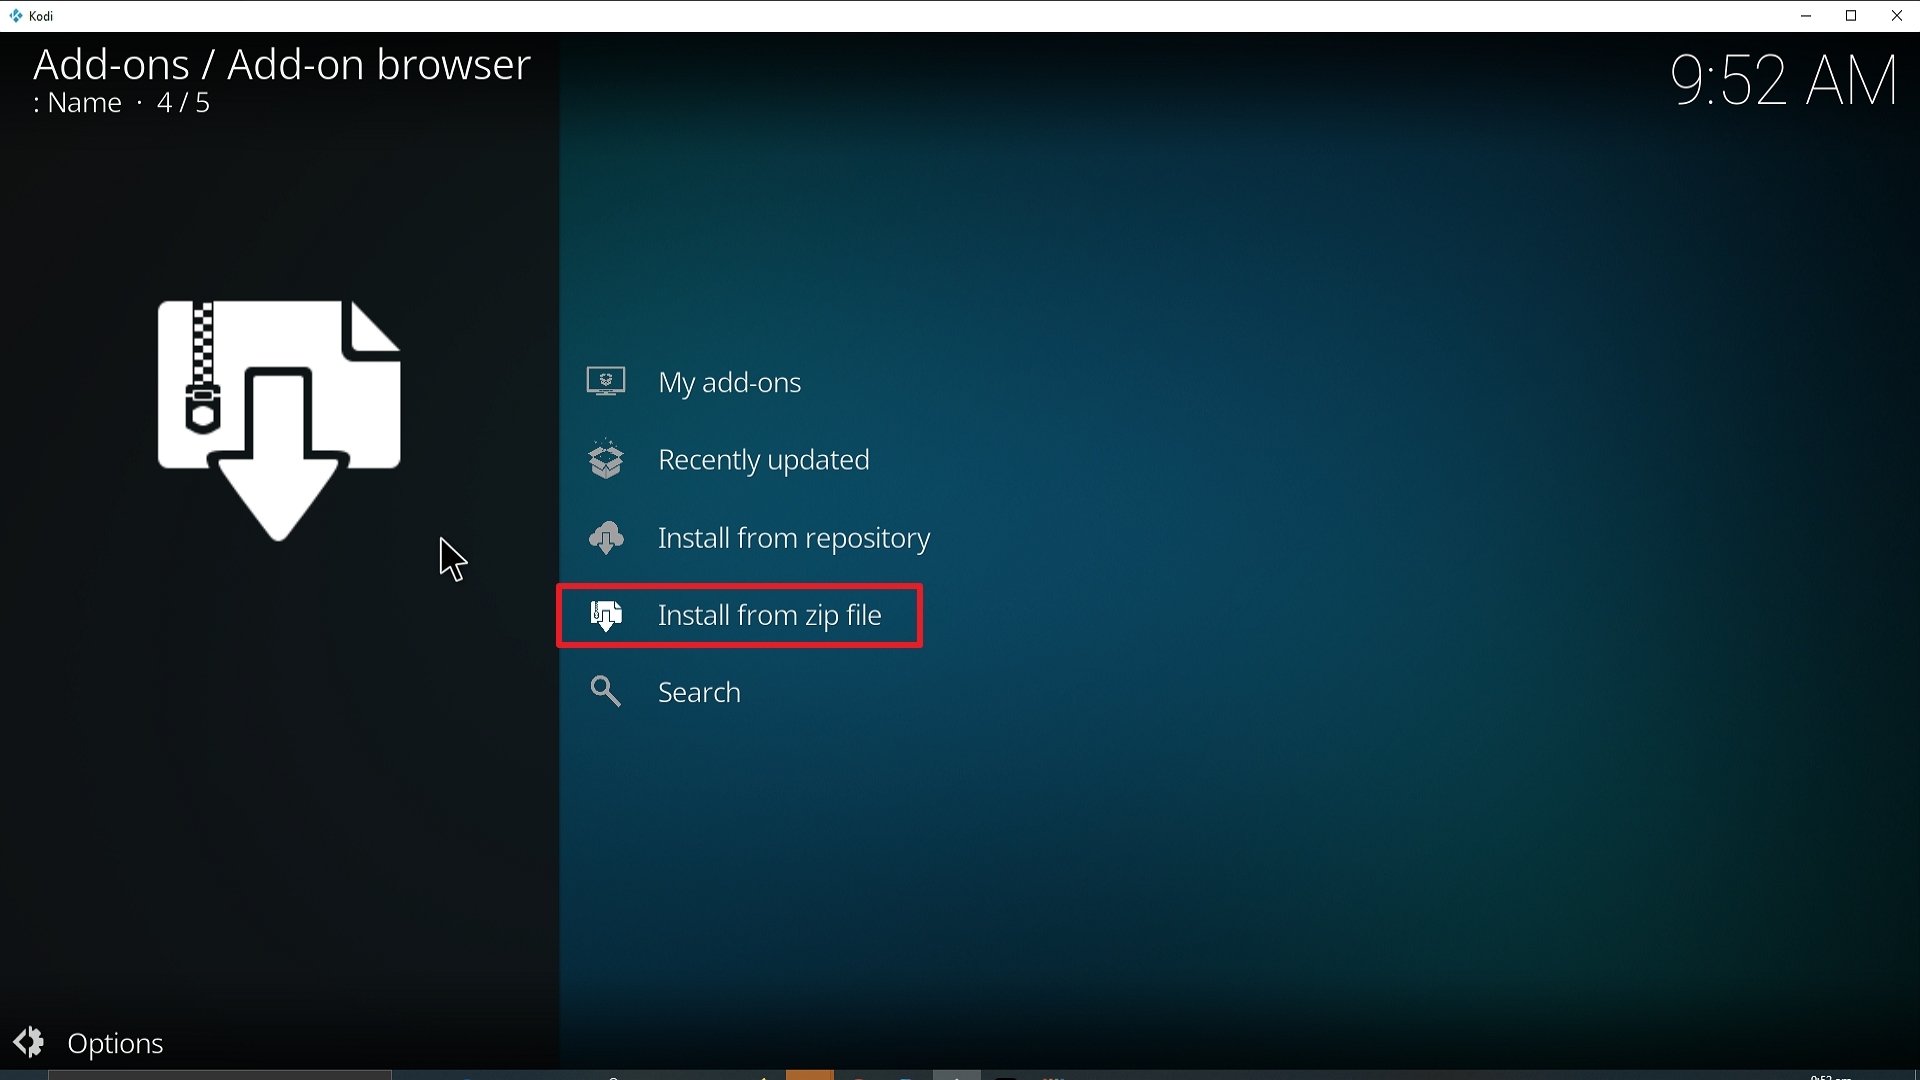
16. Select install from zip file.

Step 16 Installing Entertain Me Kodi addon on Kodi


17. Click on Entertain Me (or whatever you named the source).

Step 17 Installing Entertain Me Kodi addon on Kodi


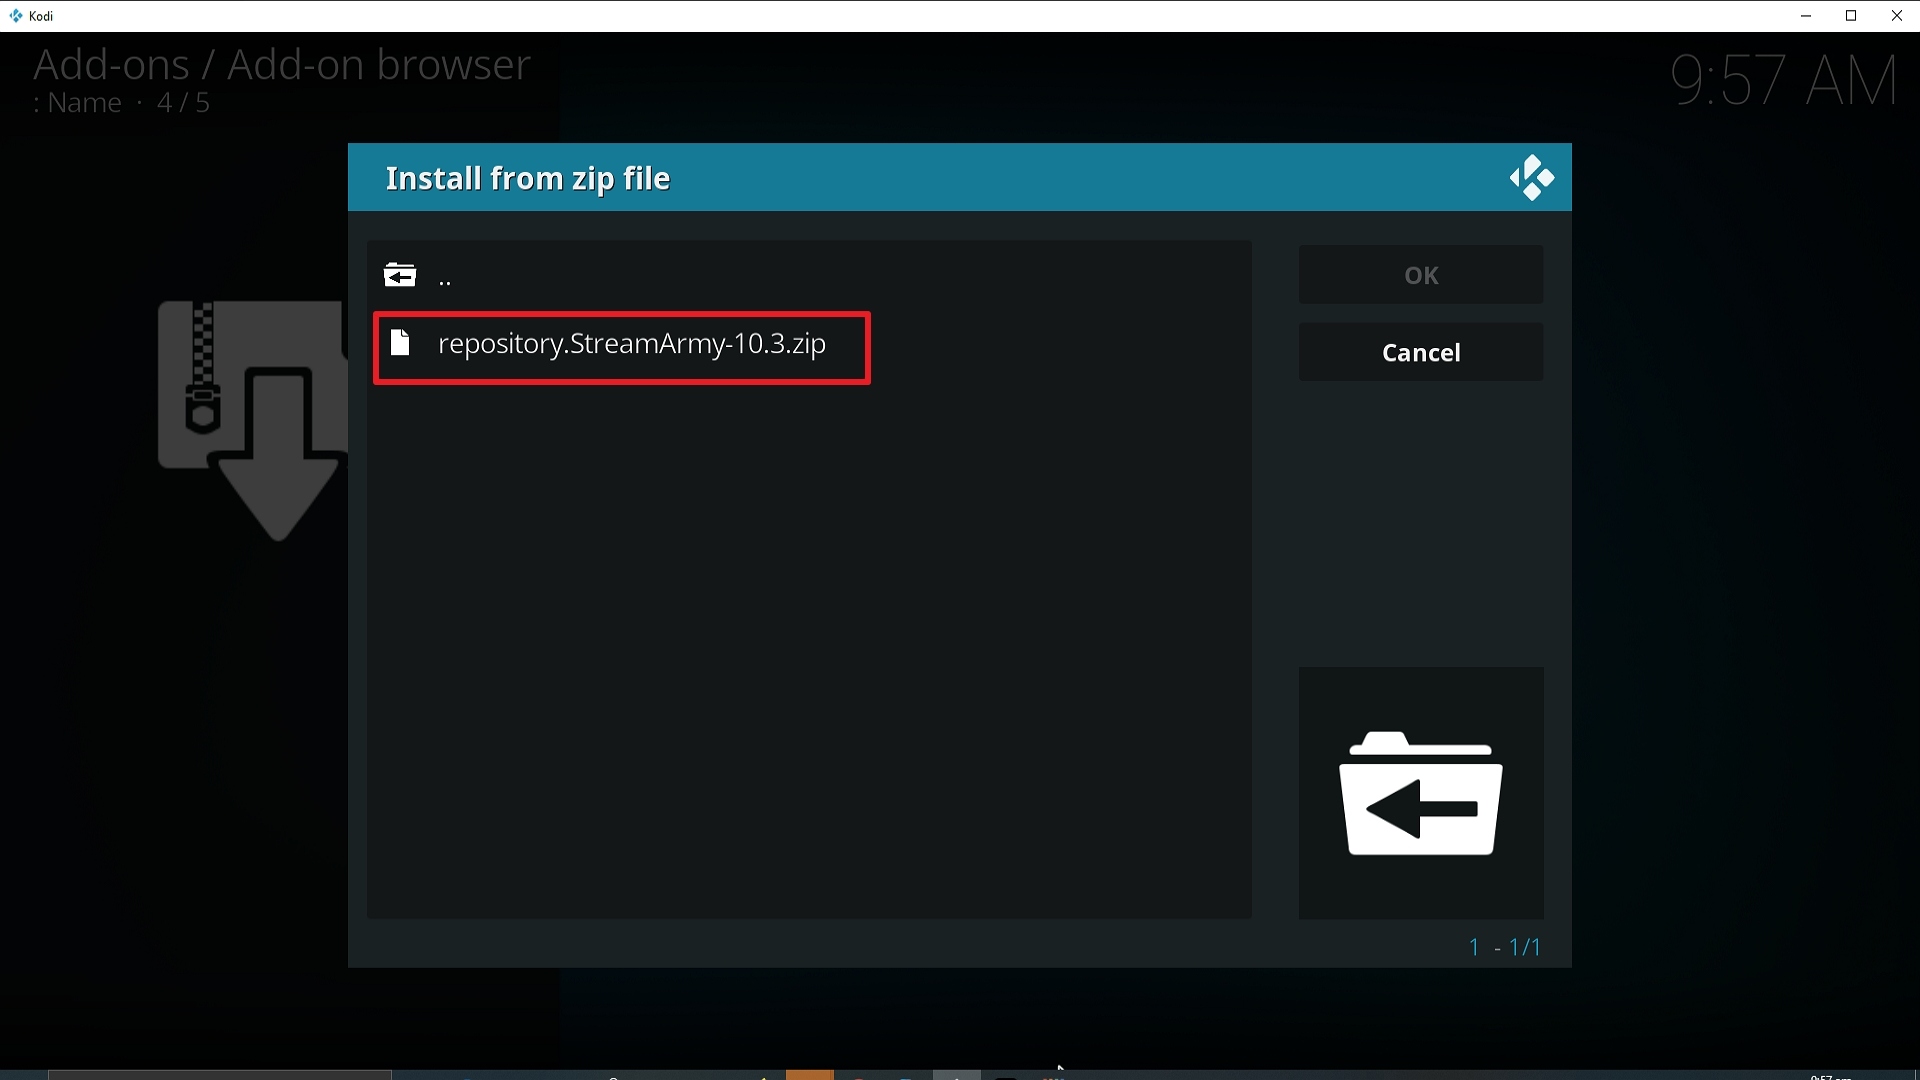
18. Click on repository.streamarmy-10.3.zip

Step 18 Installing Entertain Me Kodi addon on Kodi


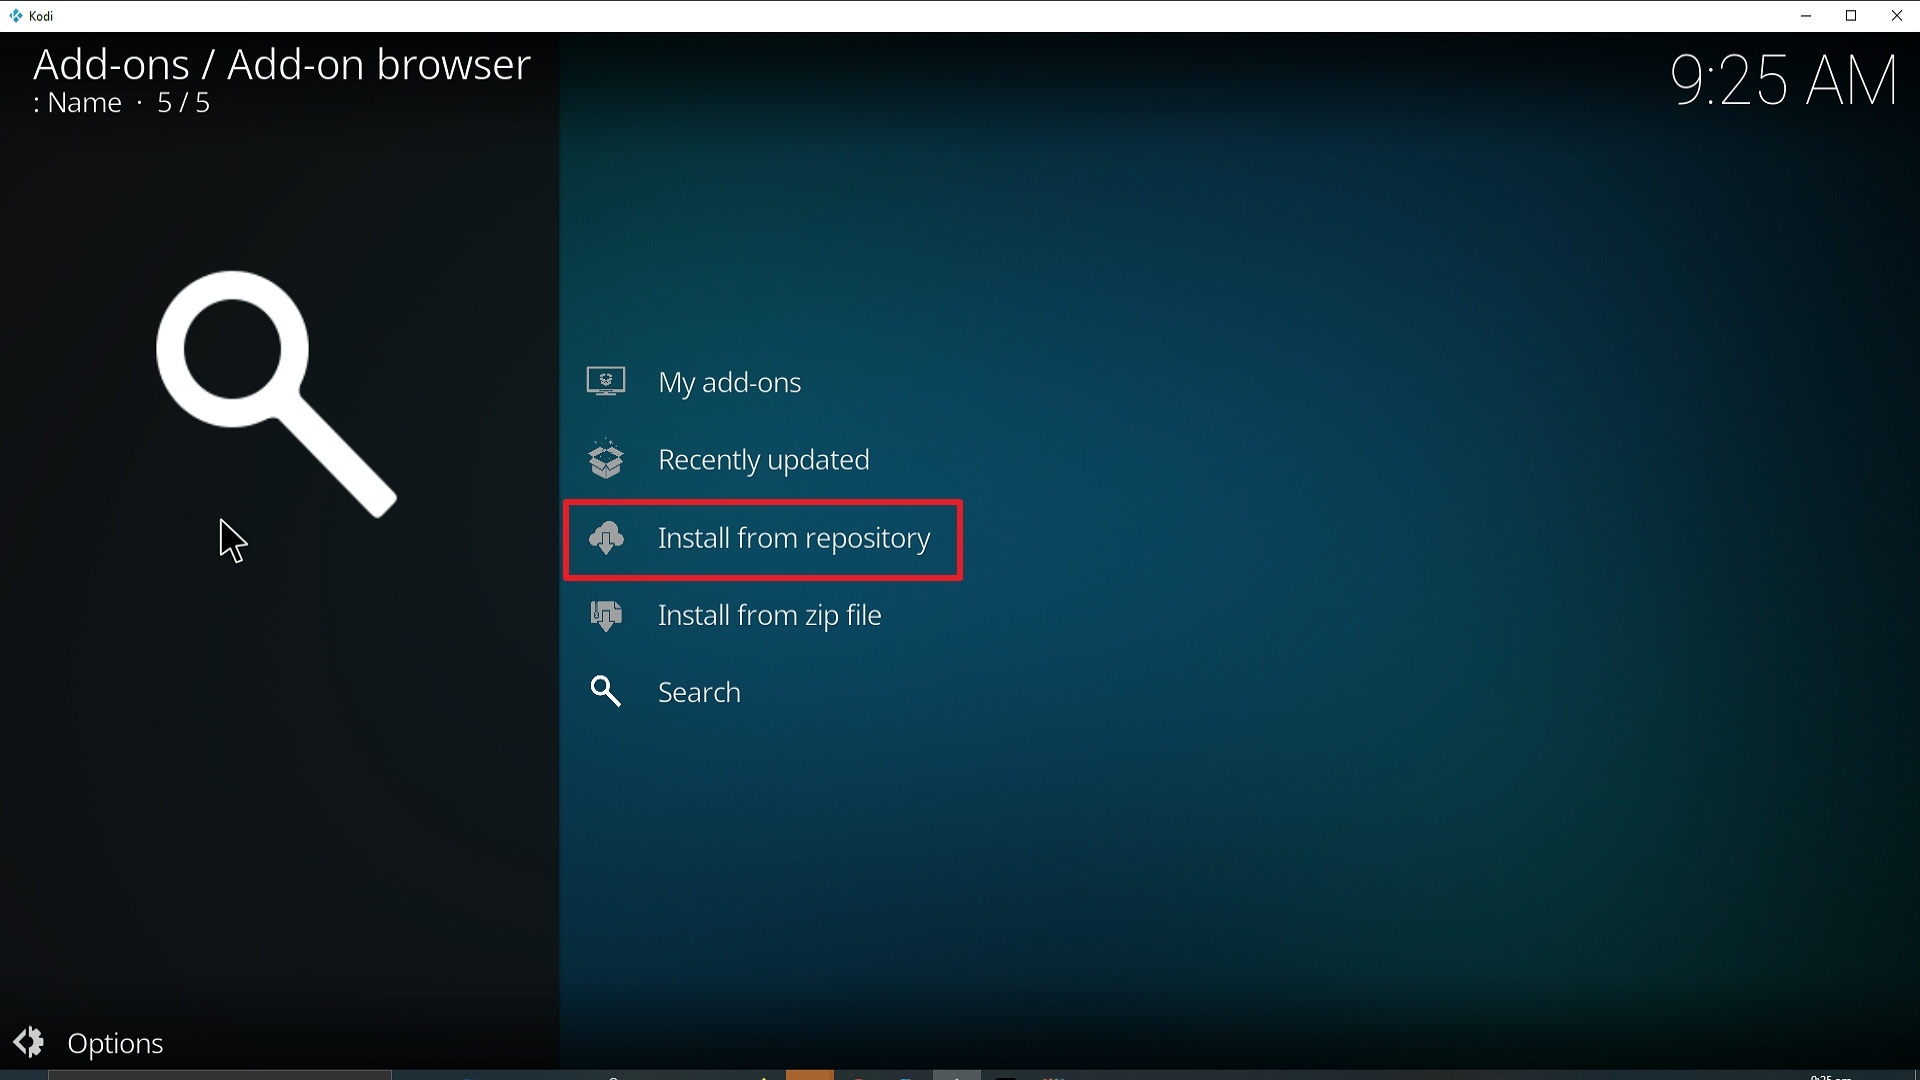
19. Select on Install from repository.

Step 19 Installing Entertain Me Kodi addon on Kodi


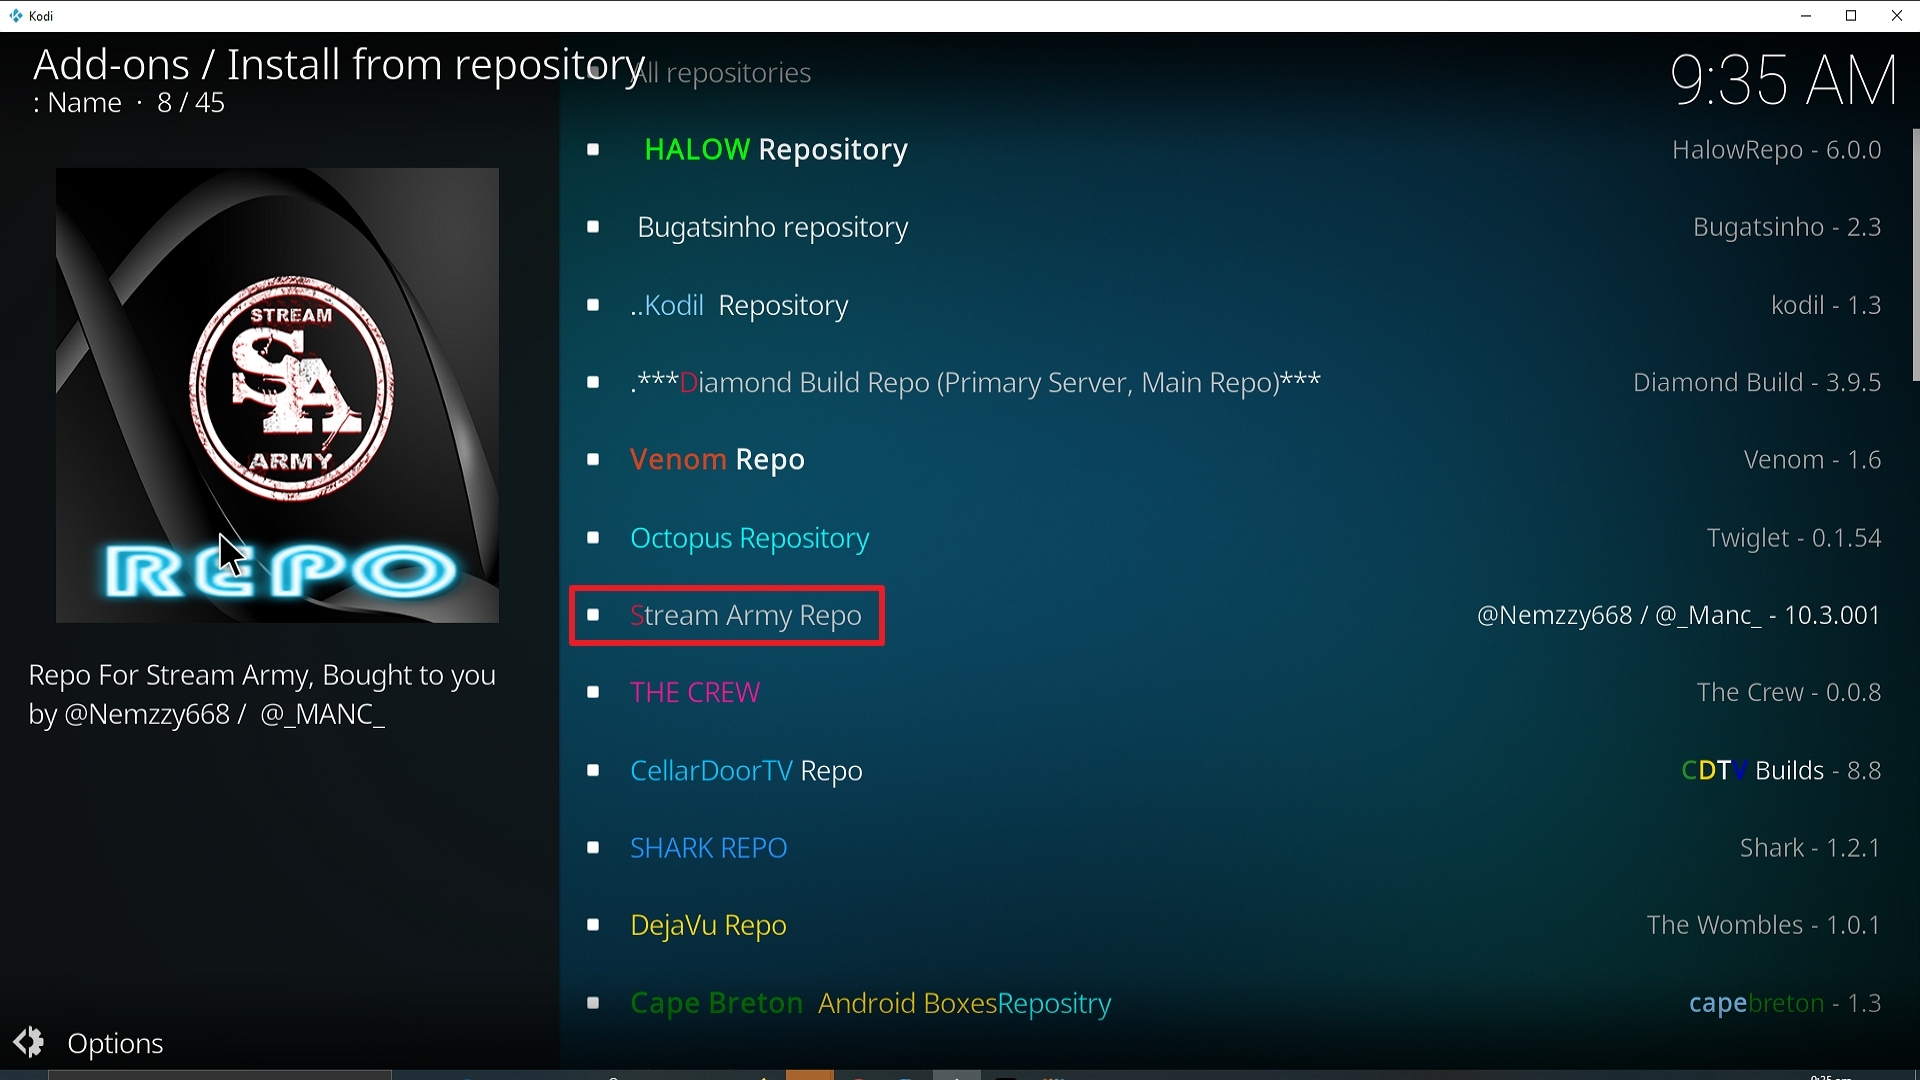
20. Click on Stream Army Repo.

Step 20 Installing Entertain Me Kodi addon on Kodi


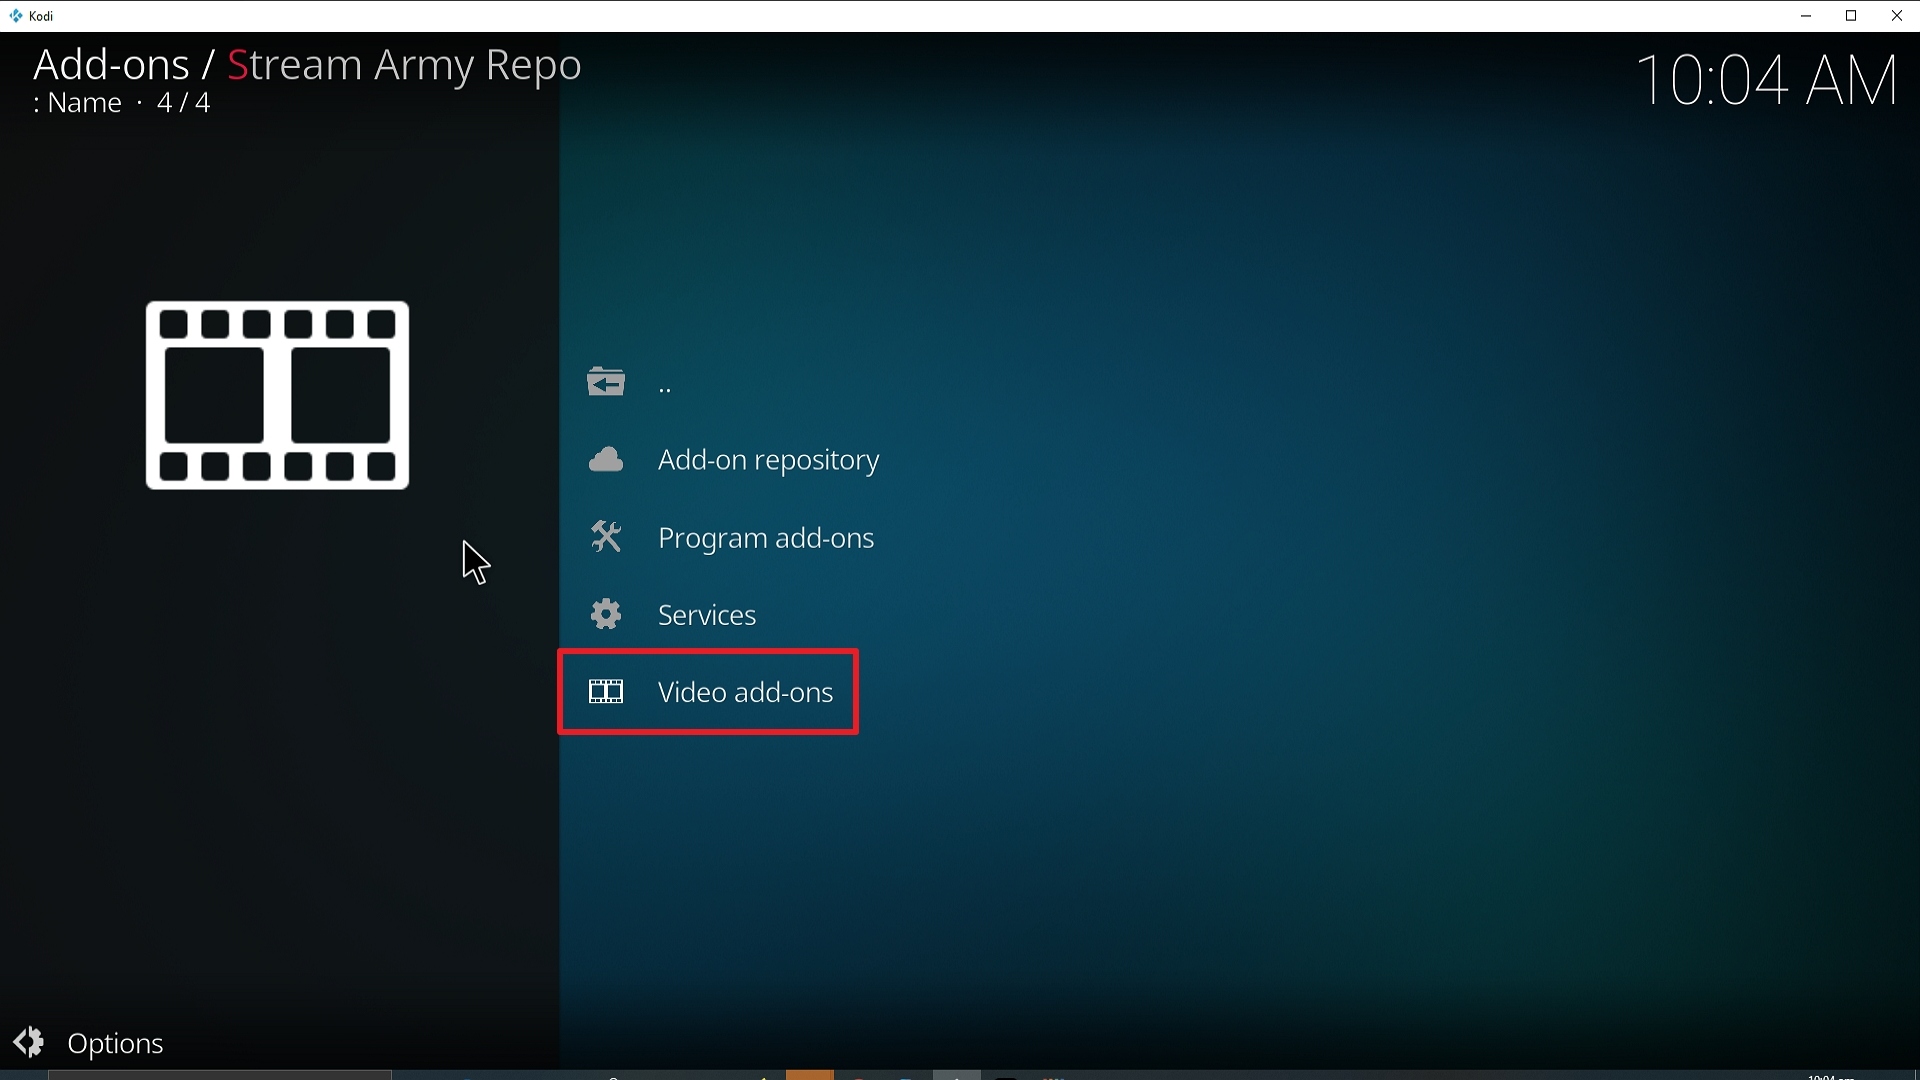
21. Pick Video add-ons.

Step 21 Installing Entertain Me Kodi addon on Kodi


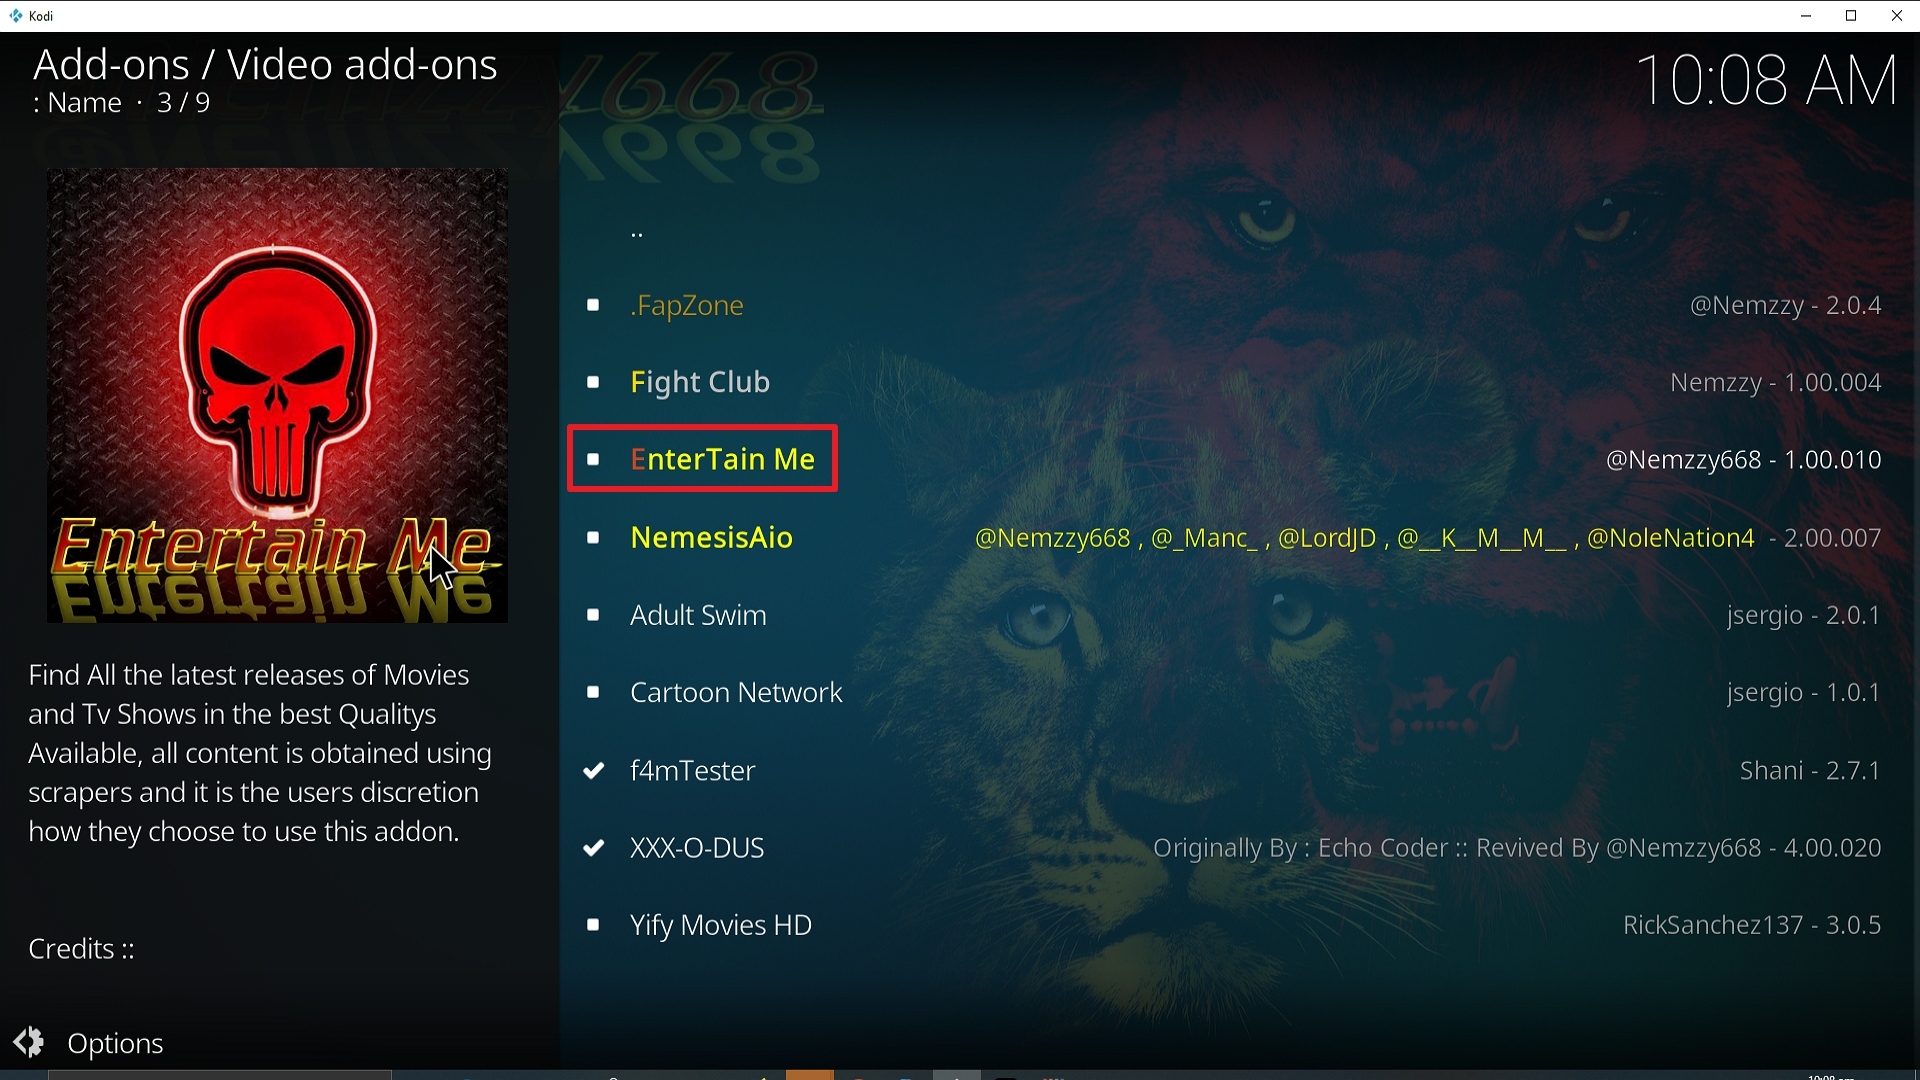
22. Select Entertain Me again.

Step 22 Installing Entertain Me Kodi addon on Kodi


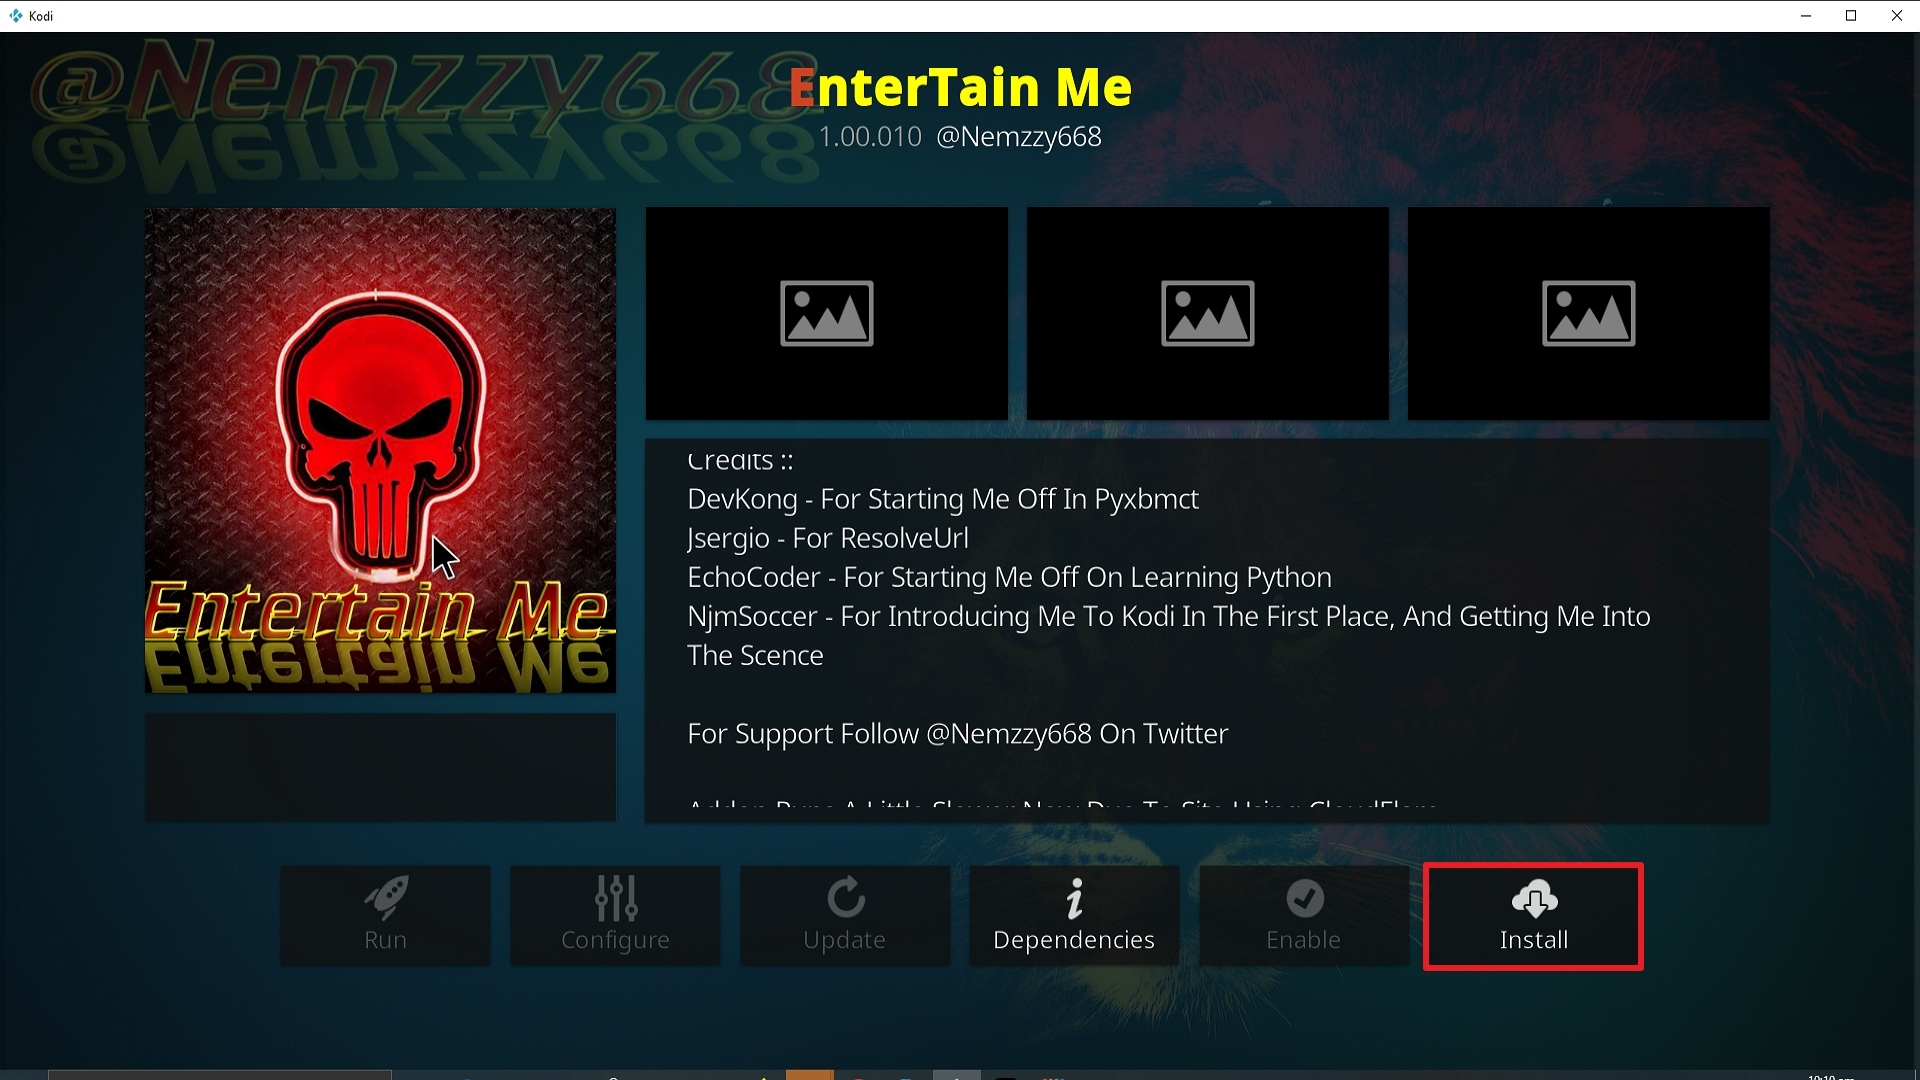
23. Click on Install.

Step 23 Installing Entertain Me Kodi addon on Kodi


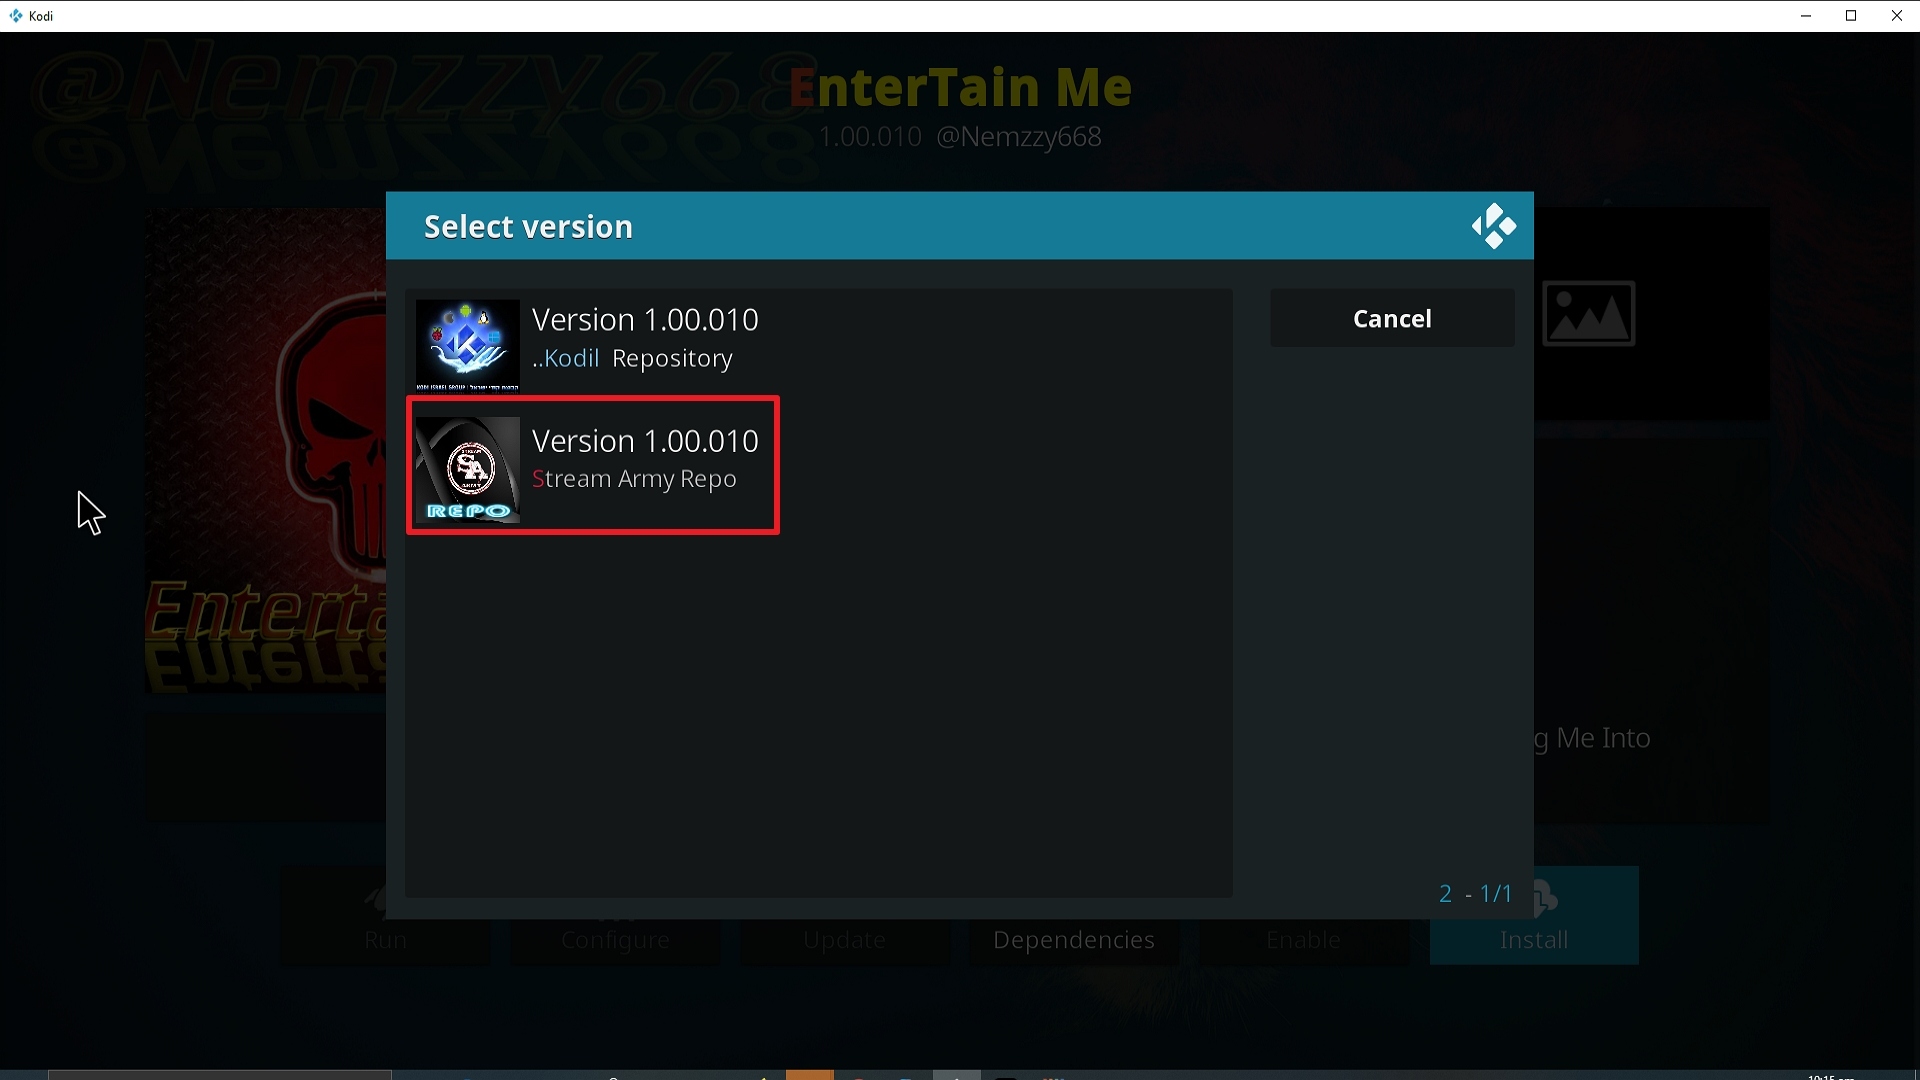
24. Select Version 1.00.010 (Stream Army Repo)

Step 24 Installing Entertain Me Kodi addon on Kodi


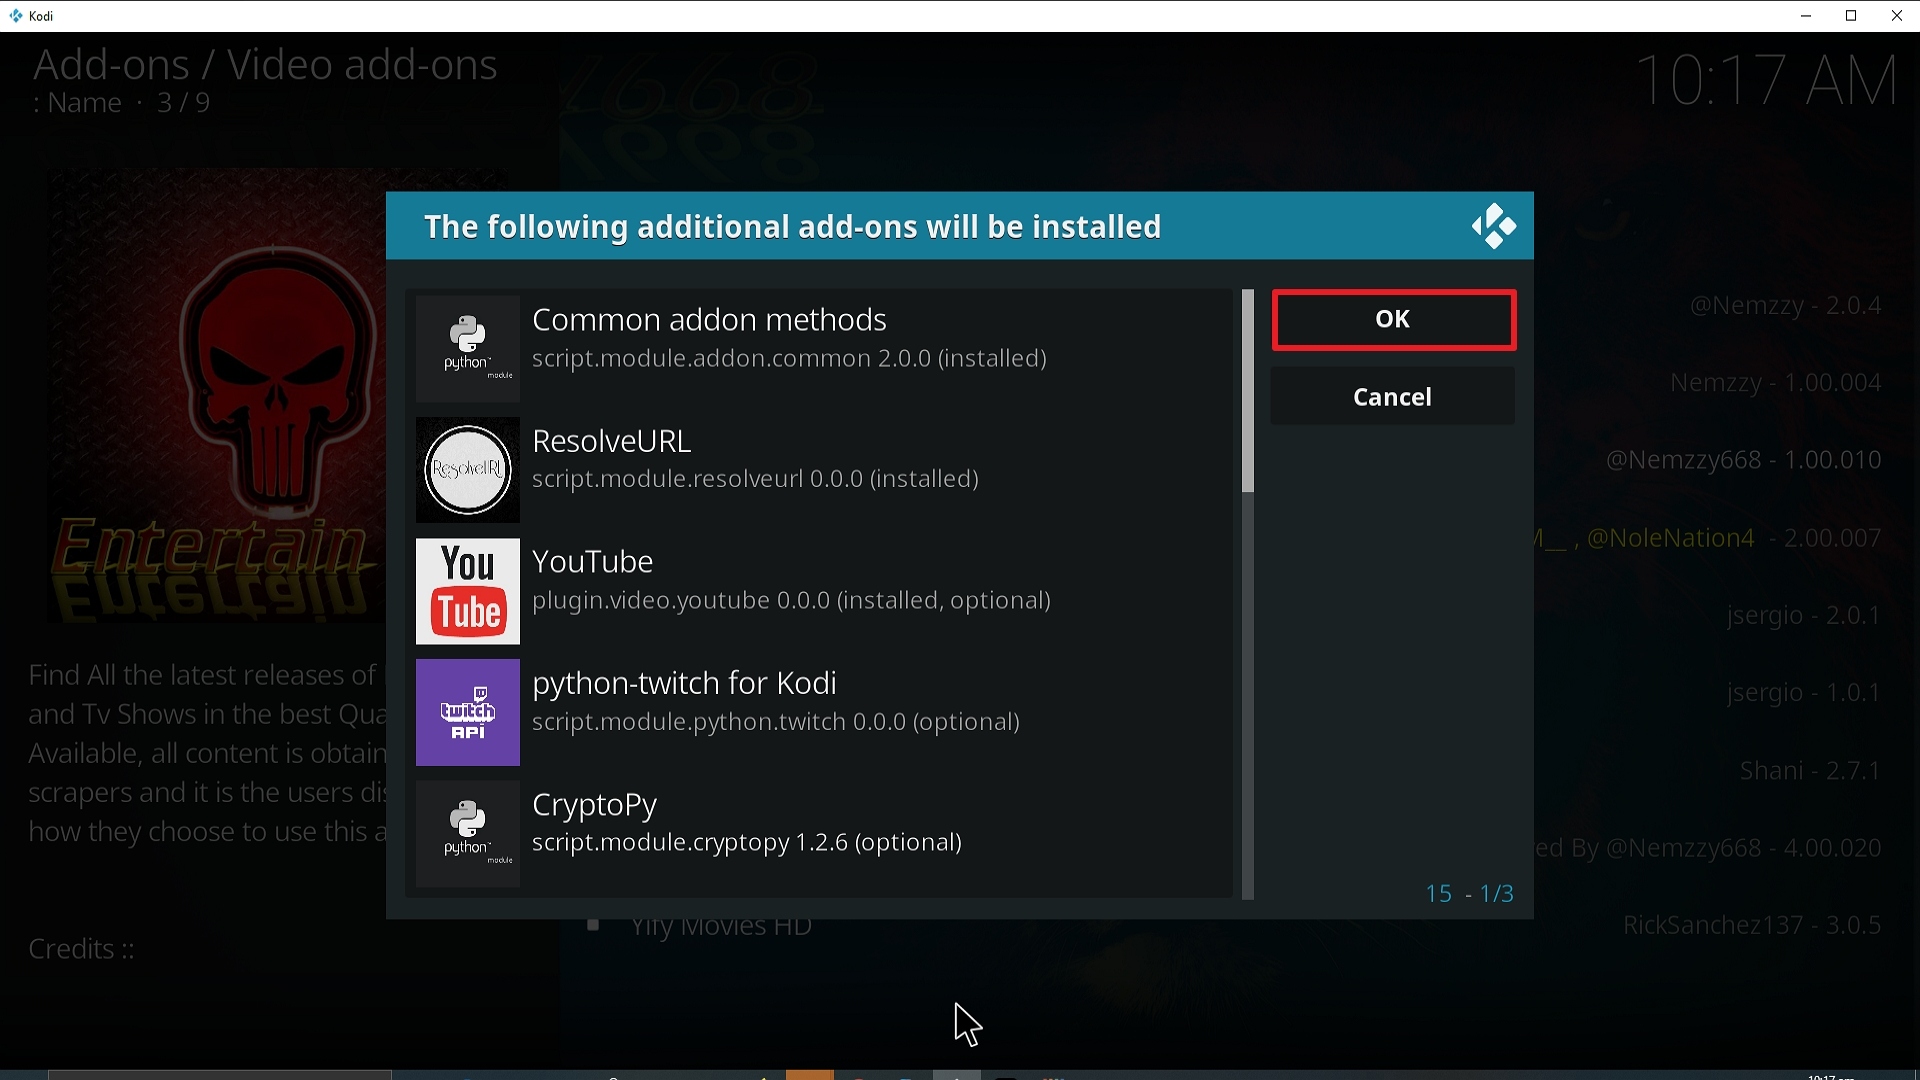
25. Select OK after reviewing the add-ons that will be installed.

Step 25 Installing Entertain Me Kodi addon on Kodi


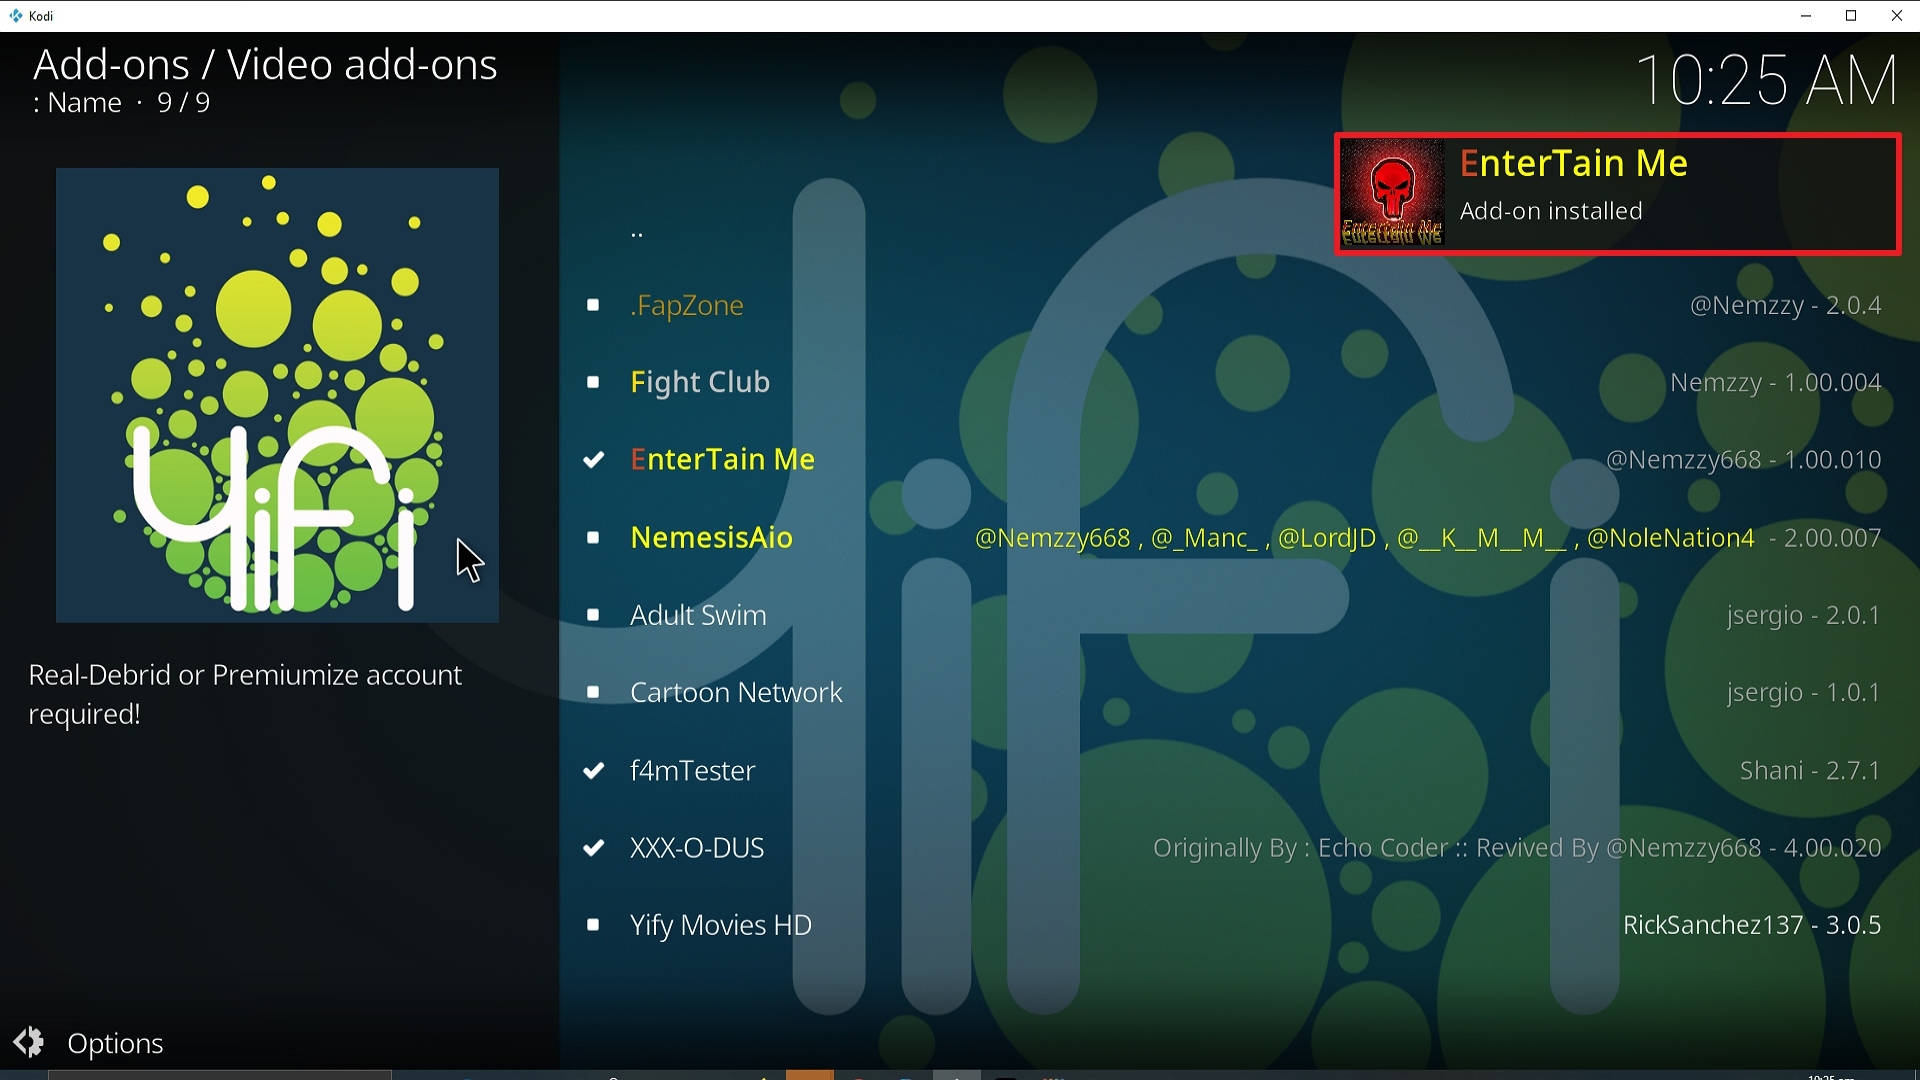
26. You should see a popup in the upper right corner saying Entertain Me has installed. There will actually be multiple popups for the various components.

Step 26 Installing Entertain Me Kodi addon on Kodi


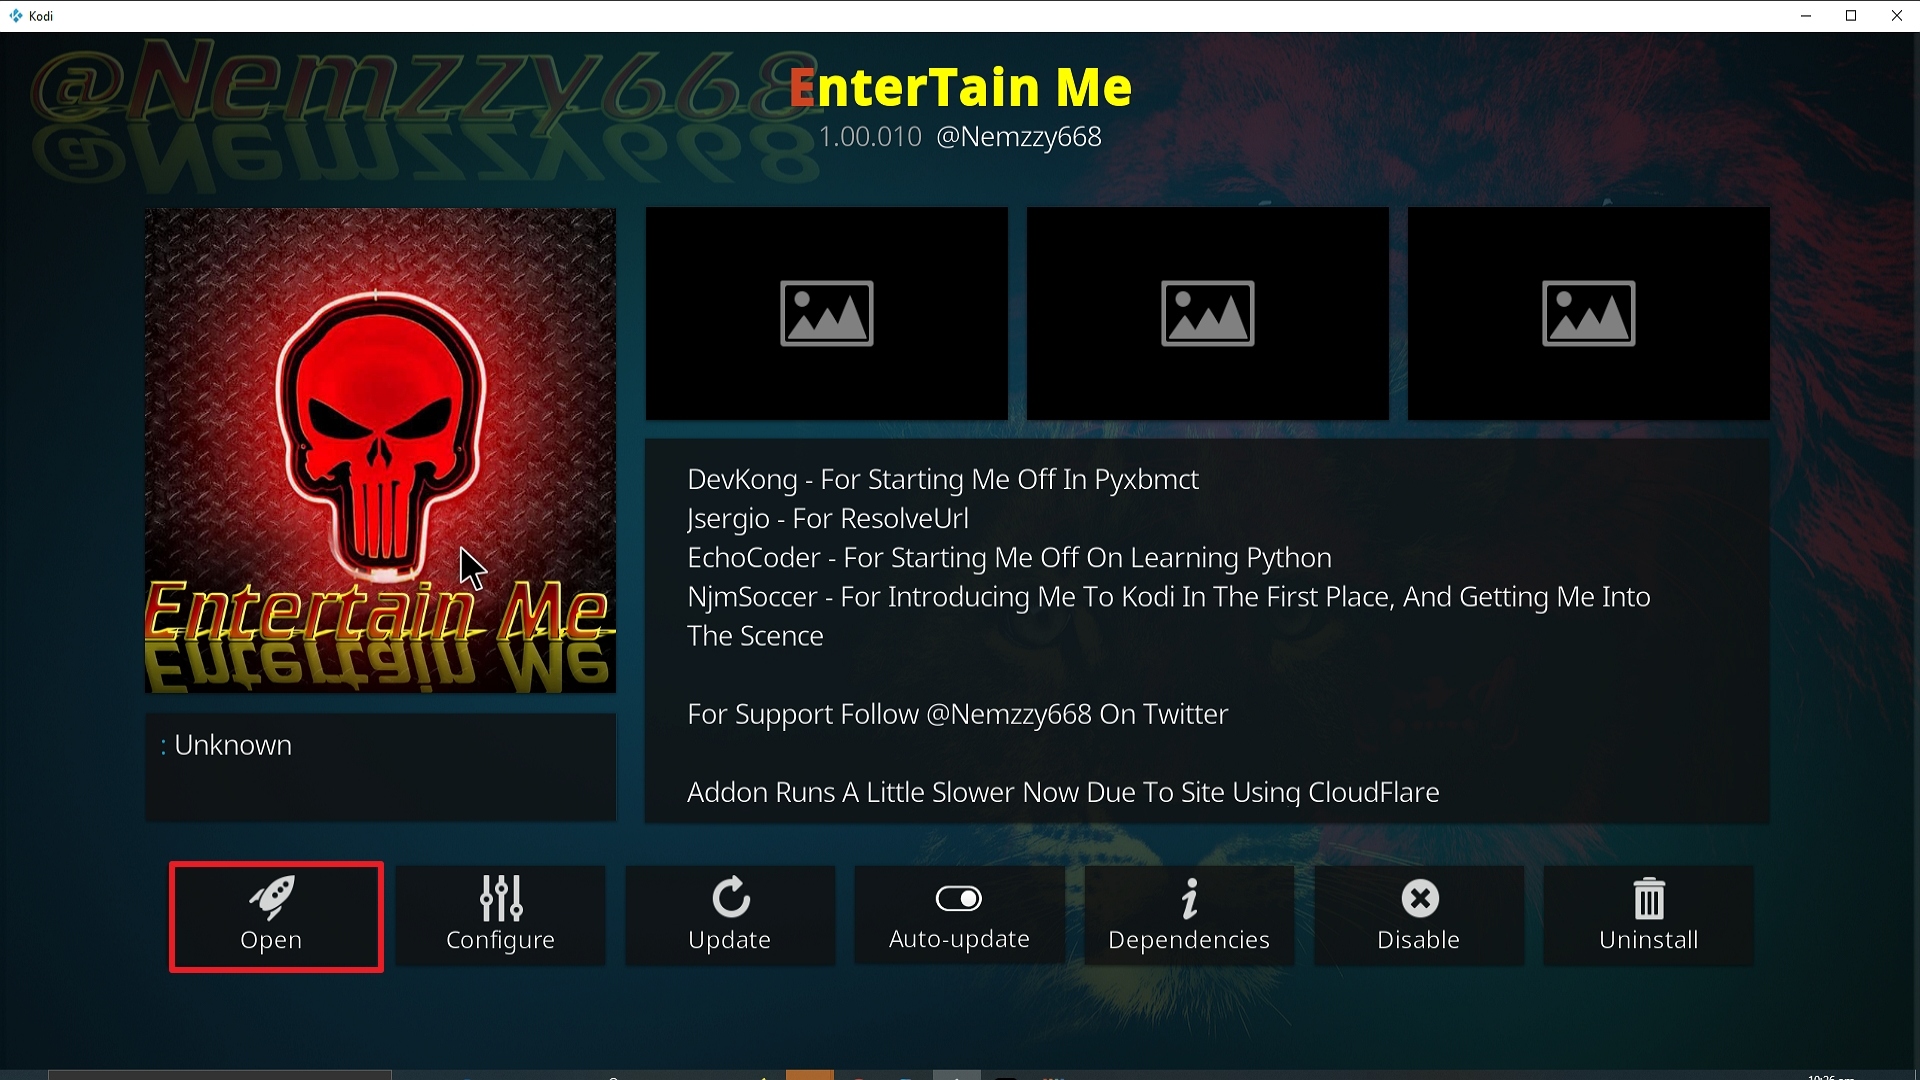
27. Click on Open to start the Entertain Me add-on.

Step 27 Installing Entertain Me Kodi addon on Kodi


Stream Safely with a VPN

All of your online activities are being tracked by your ISP. Streaming, most especially, is closely monitored because it consumes a lot of data.

Once your ISP discovers that you are exceeding your data cap, it will do everything to disrupt your streaming experience. It will throttle down your connection which results in buffering. And we do not want that for you.

To prevent this from happening, we highly recommend using streaming apps with a premium VPN service like Surfshark.

Here are the other perks of having it on your device:

  • Provides access to geo-restricted content.
  • Protects all of your personal data when accessing public wifi internet.
  • Cloaks all of your online activities and identity that may be used by online threats like hackers and ISP.
  • It is the best solution for Firestick buffering and Kodi Buffering as well.

Note: For more information about Surfshark, please read our Surfshark Review.


Grab your subscription now!

Click here to get the lowest price on Surfshark through our exclusive limited-time offer.


How to Install Surfshark VPN on Firestick

If your Firestick still has the older interface, read this article to learn how to update it: Update Firestick Interface.

Follow our screenshots below to install the SurfShark VPN app on your Fire TV stick.

1. Go to the Home screen of your Firestick.

step 1 Install Surfshark VPN on Firestick


2. Navigate towards the Find tab. Press the Search button from the resulting dropdown.

step 2 Install Surfshark VPN on Firestick


3. Type in the keyword of SurfShark and select from the suggestions that will appear.

step 3 Install Surfshark VPN on Firestick


4. Click the official SurfShark icon from your search results.

step 4 Install Surfshark VPN on Firestick


5. Press the Download (You own it) button.

step 5 Install Surfshark VPN on Firestick


6. The SurfShark VPN installer will download on your device.

step 6 Install Surfshark VPN on Firestick


7. SurfShark VPN’s app will automatically install itself on your Fire TV stick.

step 7 Install Surfshark VPN on Firestick


8. Press the Open button after completing SurfShark VPN’s installation process.

step 8 Install Surfshark VPN on Firestick


9. Please wait for the SurfShark VPN to load its user interface.

step 9 Install Surfshark VPN on Firestick


10. You can now log in with your SurfShark VPN account credentials.

step 10 Install Surfshark VPN on Firestick

Learn more about Surfshark and Grab the Best Surfshark Deal Now!


Install Surfshark on Firestick

Best Surfshark Deal


Other VPNs to Consider

NordVPN (Best for Streaming)

Best Features

  • 5000+ Server in 50+ Countries 
  • Military-Grade Encryption
  • Fast Connection Speed
  • Suitable to a lot of devices
  • No-Log Policy

Prices
  • Complete $5.89 per month (64% Discount)
  • Plus $4.59 per month (56% Discount)
  • Standard $3.69 per month (55% Discount)

Best Features

  • 750+ High-speed VPN Servers in 43 Locations
  • Military-Grade Encryption
  • Fastest HD Streaming and Gaming
  • 30-Day Money-Back Guarantee
  • Unlimited Data & Devices
  • No-Log Policy

Prices
  • 3 Years $1.99 per month (82% Discount)
  • 1 Years $3.29 per month (70% Discount)
  • 1 Month $10.99 per month

IPVanish VPN (Most Secure)

Best Features

  • 1200+ Servers in 60+ Countries around the world
  • Unlimited Connections
  • No-Log Policy
  • Top Notch Military-Grade VPN Protocols and Encryptions
  • 100% Safe and Secured
  • Most Trusted VPN
  • Best VPN for Firestick
  • 30-Day Money-Back Guarantee

Prices
  • Yearly $3.99 per month (63% Discount) – 30 days risk free + Ransomware & Malware Protection
  • Quarterly $5.32 per month (51% Discount)
  • Monthly $10.99 per month


For more VPN discounts, go to ReviewVPN Deals and purchase the best VPN for you.

Click here to get the lowest price on Surfshark through our exclusive limited-time offer.
 

Install Limitless Kodi Addon

Limitless Kodi Addon

The article will help you on how to install A Pirate’s Life For Me Kodi Addon on Firestick.


Source: http://luxurywizard.space/luxury/

Limitless is a brand new all-in-one Kodi addon for 2019. Coming from a relatively new repository as well. Not a know fork of any existing addon we have found that Limitless is serving up a lot of content that you wouldn’t find anywhere else.

We recommend you use Limitless with a Real Debrid account. For $2.50 a month you can access thousands of titles from 50+ premium servers. The Real Debrid lounge has hand-picked over 3,000 titles for you to choose from.

With Real Debrid you never need to worry about a low-quality junk link ever again.


ANONYMOUSLY

Common Errors

Here is a list of the most common errors, quick fixes, and links to in-depth guides that you may come across when installing or running Limitless:

  • Kodi check log error: A check log error can come up after you have been using Kodi for a while. There are a variety of reasons, but most of the time it’s as simple as needing to empty your media cache. To help Kodi run faster, it caches media snippets for every addon and piece of content that you watch. This helps Kodi to load faster and behave smoother each time. Over time this cache builds and can become full if your device has a low amount of storage. Like with an Amazon Firestick. To find out how to clear cache and download helpful addons for Kodi read our fix guide linked above.


  • Script Error: A script error means that either the addon or Kodi has a corrupted piece of script. Sometimes this happens if a download is interrupted so try and reinstall Limitless. If the error continues, then you need to update or reinstall Kodi if it has become corrupted. To find out how to do this and other fixes try some more in the guide linked above.


  • Source not working/slow/frozen: Limitless deals with a massive range of the source, from Live TV to movies and TV Shows. A lot of this can be avoided by paying for Real Debrid. But if you don’t fancy that then try these quick fixes. Firstly, give up to 15 seconds for your source to load, particularly for Live TV. Next, try to refresh the source. Also, make sure you are using a VPN with Kodi. Check here for the best VPN deal. For other fixes read our in-depth guide linked above.


Review

Limitless is an impressive new addon. We are always a little bit skeptical of all-in-one addon but so far, Limitless has stayed up to date and very relevant.

There is a good broad range of Live TV including a large amount of content we haven’t seen anywhere else.

The Real Debrid lounge alone has over 3,000 titles. Though of course, you need to have paid for Real Debrid.

Just like any free addon doing Live TV, you will find better content if you pay a bit more for premium. You could pay $7 a month or so and get access to 3,000+ Live HD Channels from around the world with either Player’s Klub or Helix.

Having said that Limitless is well worth downloading and adding to the Kodi addon library.

Menu categories in Limitless include:

  • Real Debrid Lounge
  • Ghost Movies/TV Shows
  • Comedy Night
  • 24/7
  • Movies
  • TV
  • Kids
  • News
  • Sports
  • He’s Goal Games
  • Sports Streams
  • Limitless Tv Tap Sports Channels
  • Limitless SwiftStreamz Sports Channels
  • Air Table Sports Channels
  • All Sports Replays
  • UFC Replays
  • WWE Replays
  • Live TV
  • By Country
  • Tv Tap
  • SwiftStreamz
  • Arraki
  • Air Table


Some sections under movies and TV shows include:

  • Year
  • Genre
  • Blue ray
  • 4K movies
  • Horror


YOUR INTERNET ACTIVITY IS BEING WATCHED

ReviewVPN cannot attest to the legality, security and privacy of the applications discussed on this site. It is highly recommended that you use a VPN service while streaming or using Kodi.

Currently, your IP 216.73.217.150 is visible to everyone and your Browser is being tracked by Advertisers & ISP Provider.

Save 65% Now

Limited Time Offer

Here are the main reasons why you must use a VPN:

  • Your activities are hidden from your ISP, the government, and from the apps you are using.
  • You can access additional movies and TV streams.
  • ISP attempts to throttle are thrwarted thus reducing buffering issues.
  • Geographically restricted content like Netflix and Hulu can be unblocked.

A VPN works be replacing your ISP-assigned IP address and creating an encrypted tunnel. We recommend the no log service offered by IPVanish. It works well on a Firestick and offers the fastest possible speeds.

Special Limited Time Offer - Get IPVanish


Legal Disclaimer: ReviewVPN.com does not encourage or endorse any illegal activity involved in the usage of services and applications referenced on this site. We do not verify the licensing agreements of services. The end-user is wholly responsible for ensuring that any media accessed through these services does not violate copyright and/or licensing laws. ReviewVPN does not promote, link to, or receive compensation from any Apps and IPTV services.


Install Surfshark on Firestick

Best Surfshark Deal


How to Install Limitless Addon on Kodi with Screenshots

  1. From the home screen, select the cogwheel at the upper left.

Step 1 Installing Limitless addon on Kodi


2. Select System in the bottom right corner.

Step 2 Installing Limitless addon on Kodi


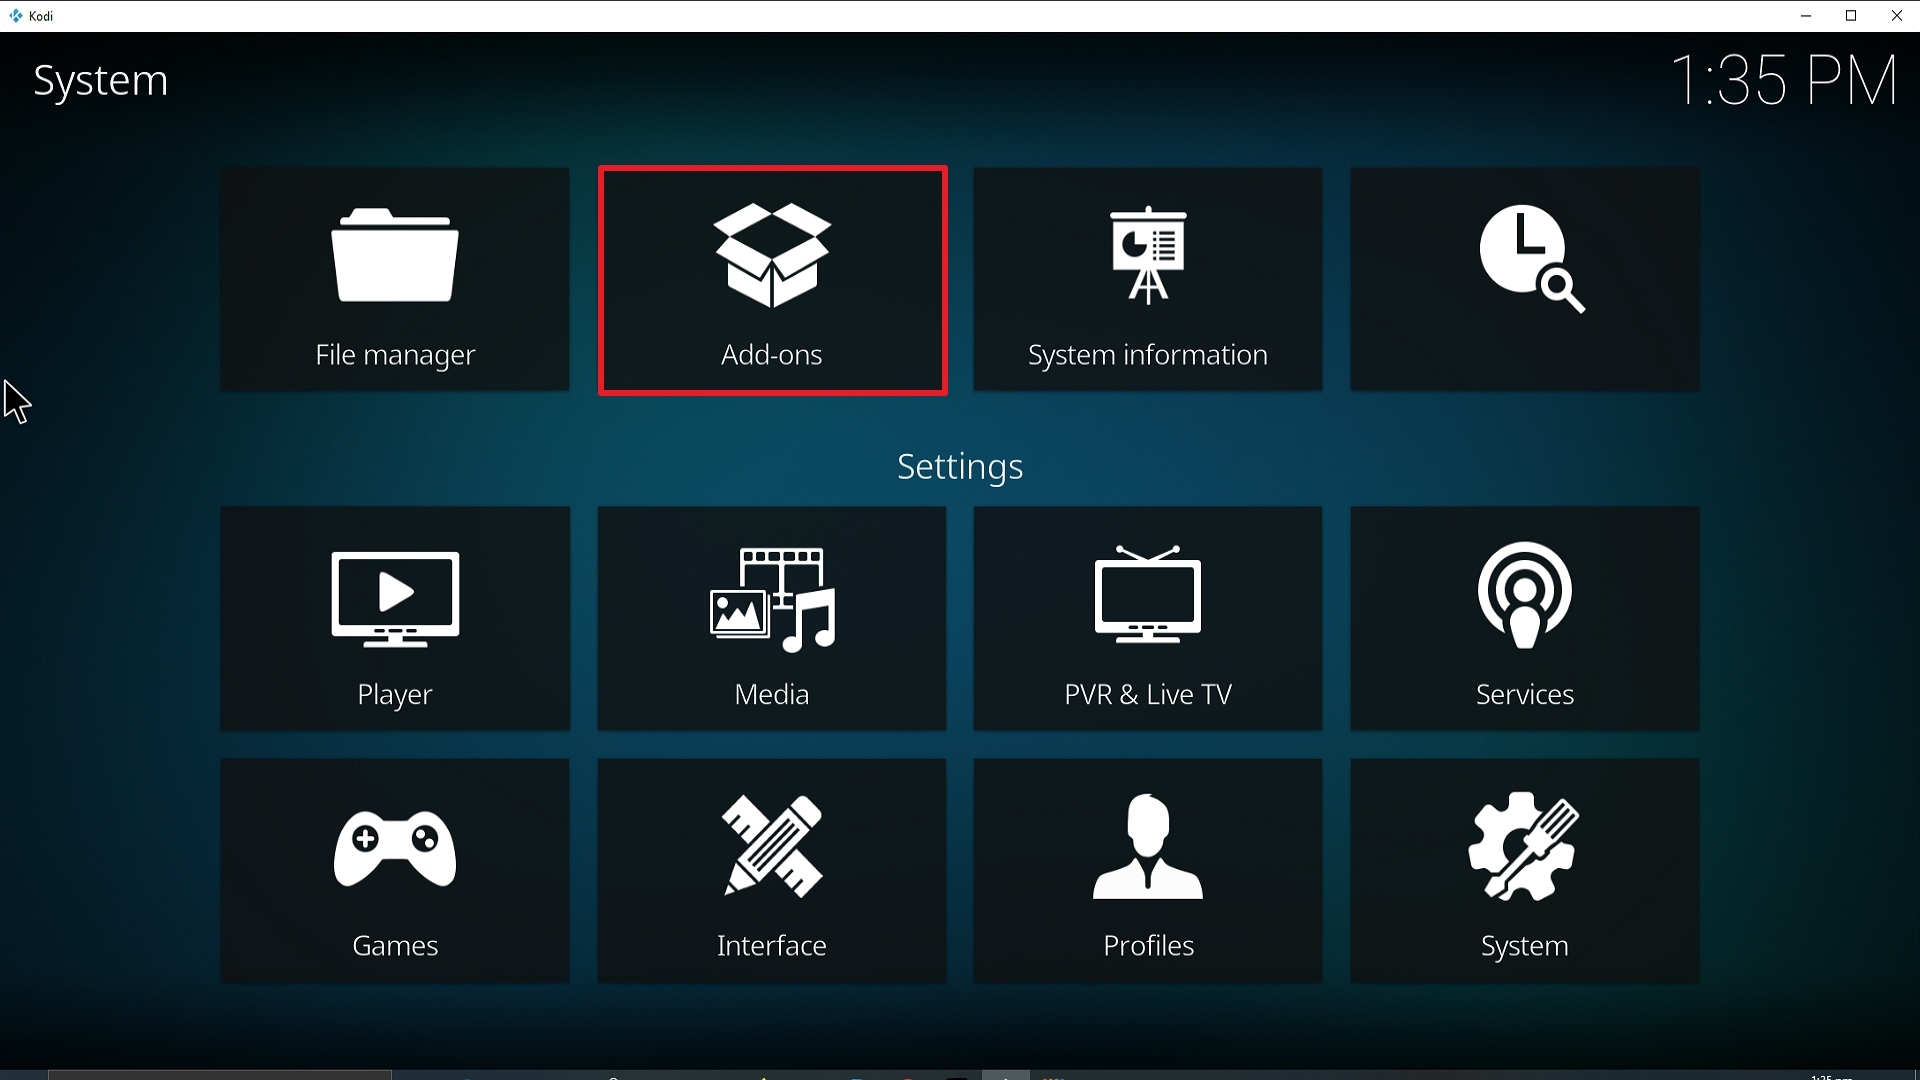
3. Select Add-ons on the left side of the screen.

Step 3 Installing Limitless addon on Kodi


4. Select Unknown sources.

Step 4 Installing Limitless addon on Kodi


5. Click Yes to allow unknown sources.

Step 5 Installing Limitless addon on Kodi


6. Select File manager.

Step 6 Installing Limitless on Kodi


7. Click Add source.

Step 7 Installing Limitless addon on Kodi


8. Click on <None>.

Step 8 Installing Limitless addon on Kodi


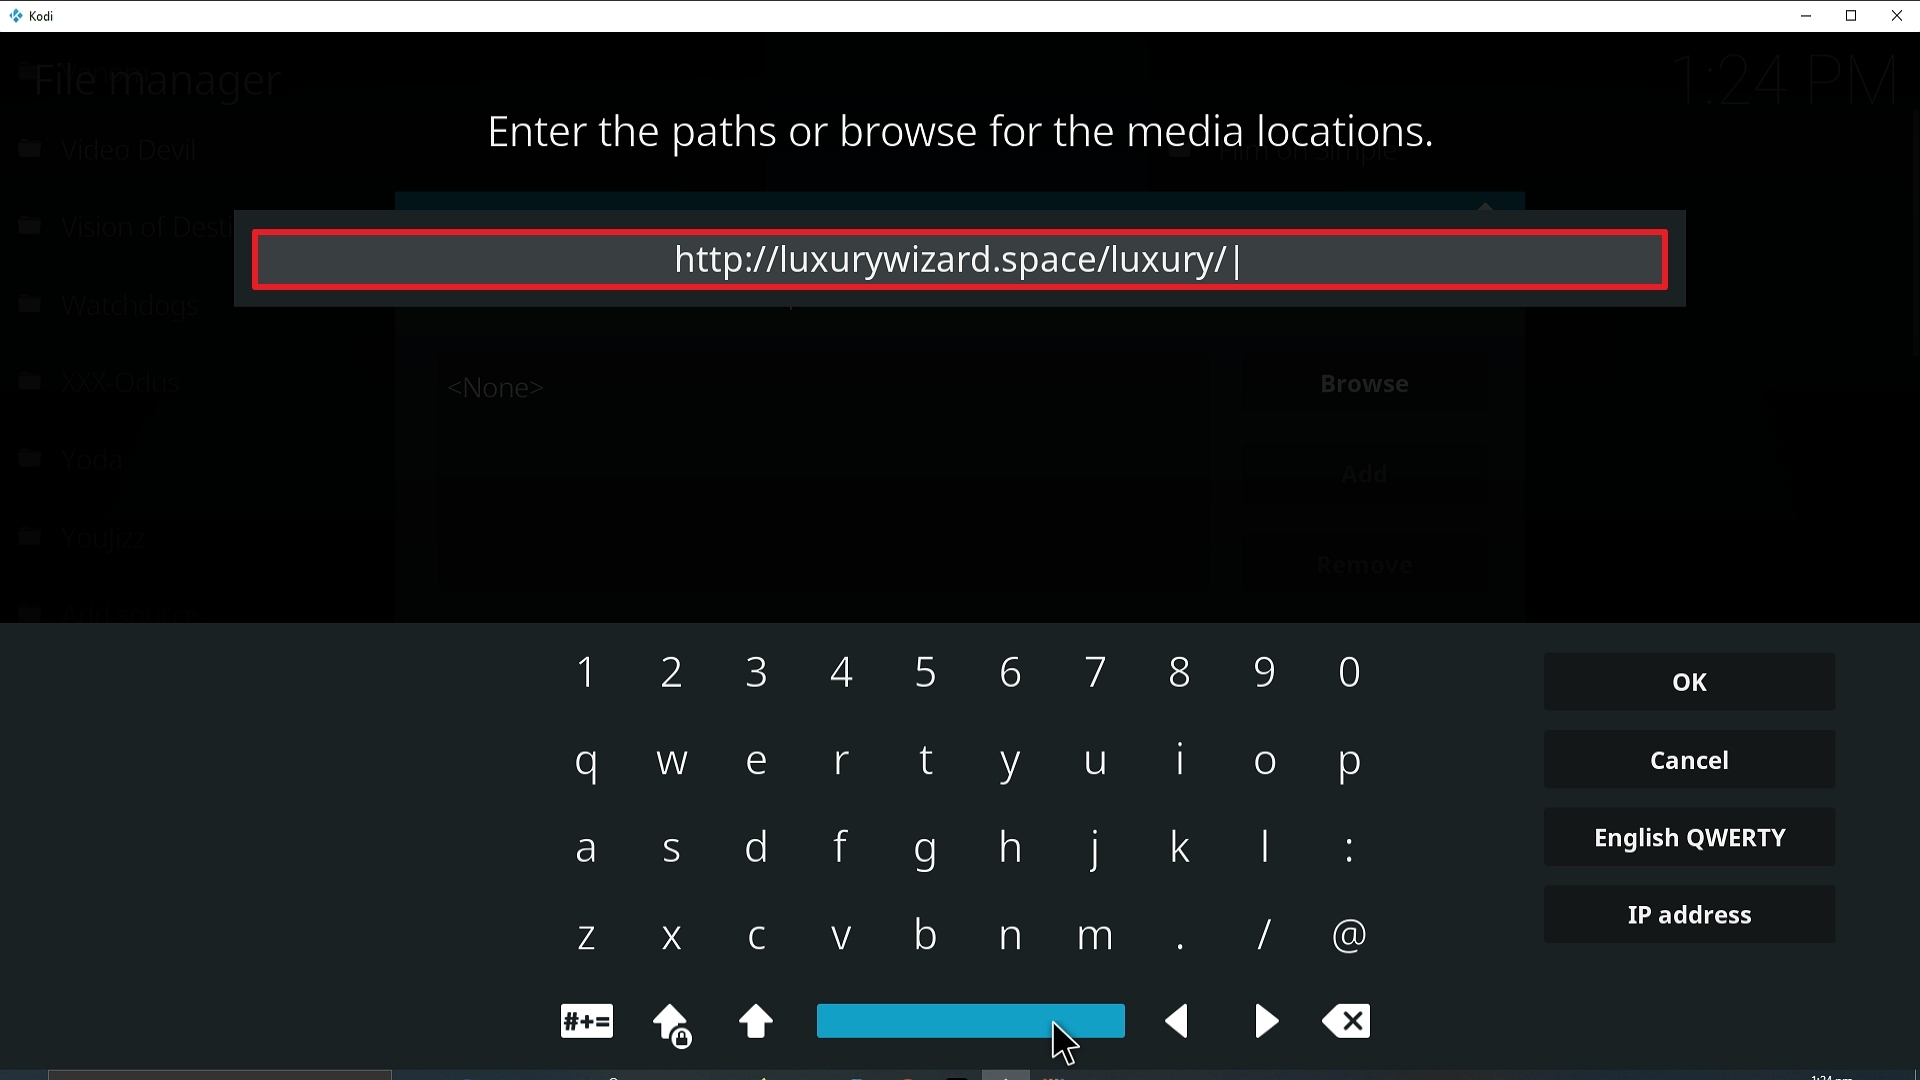
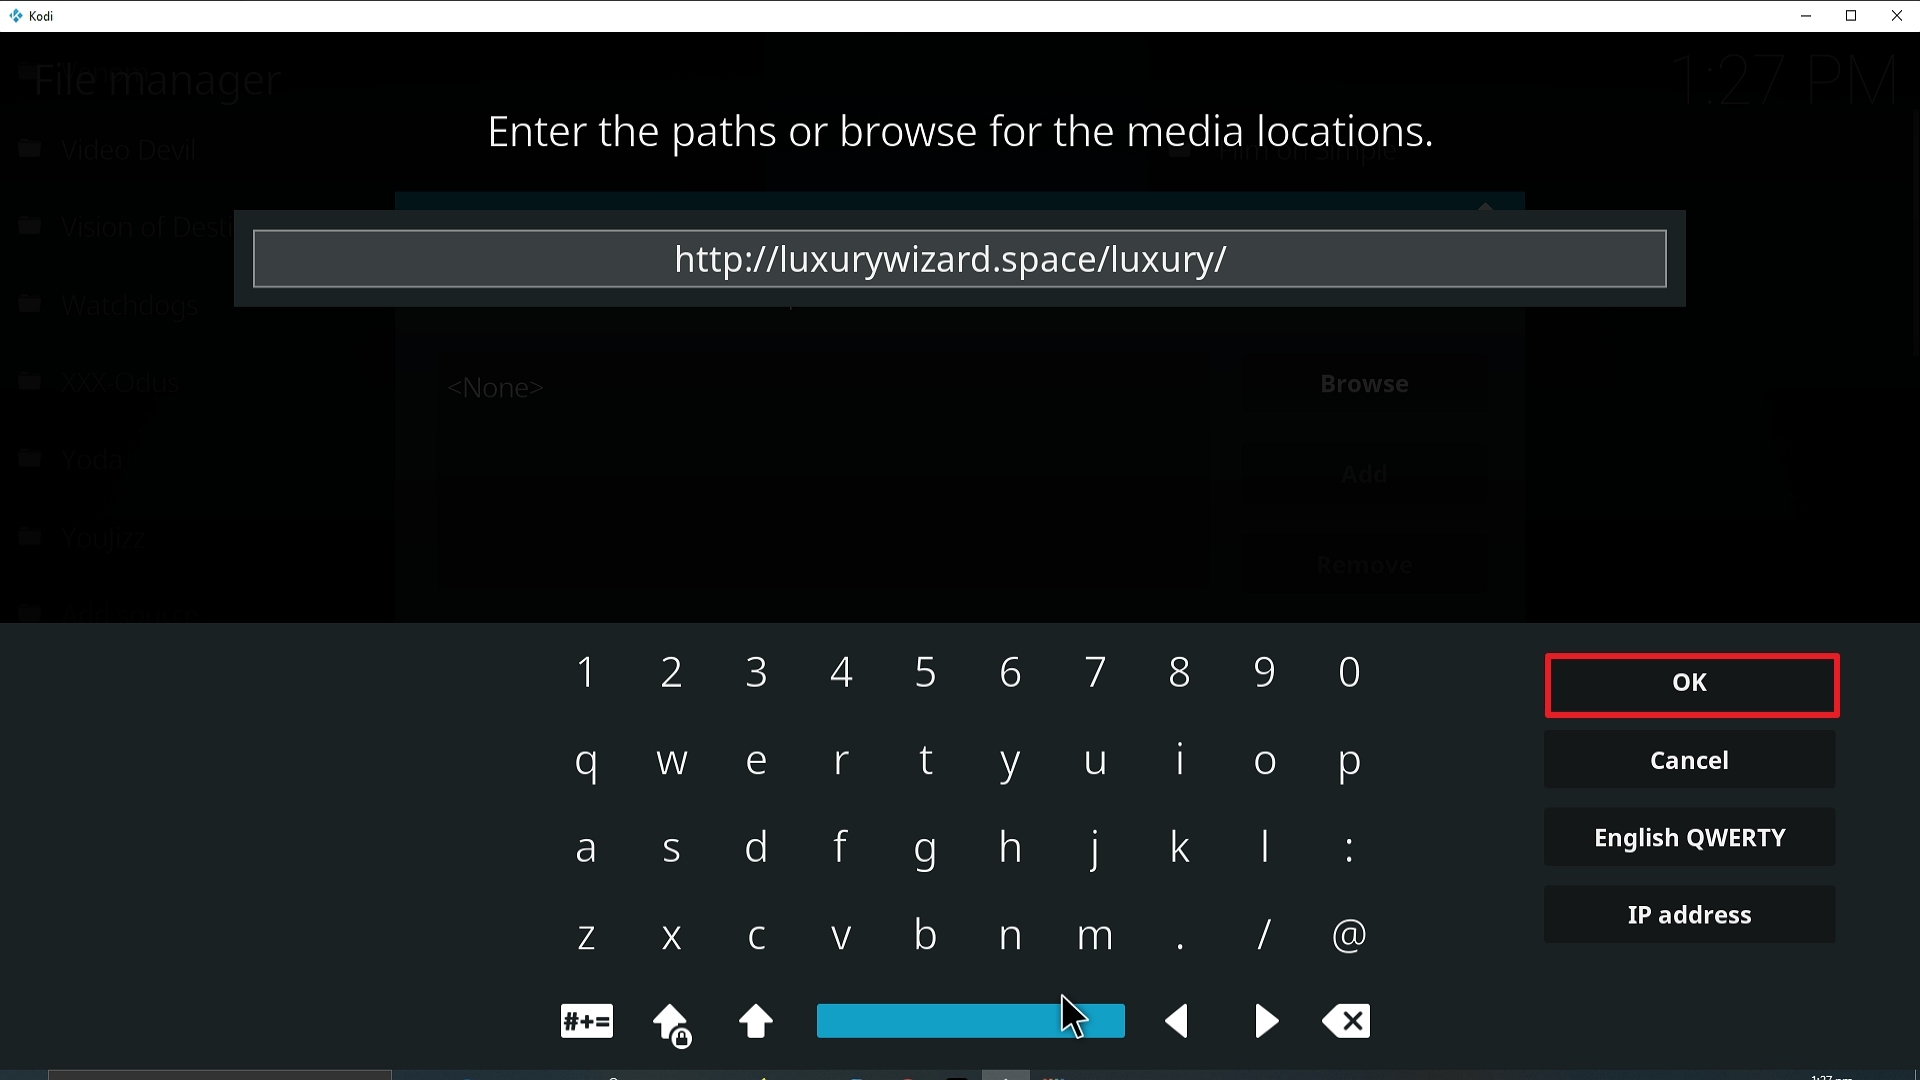
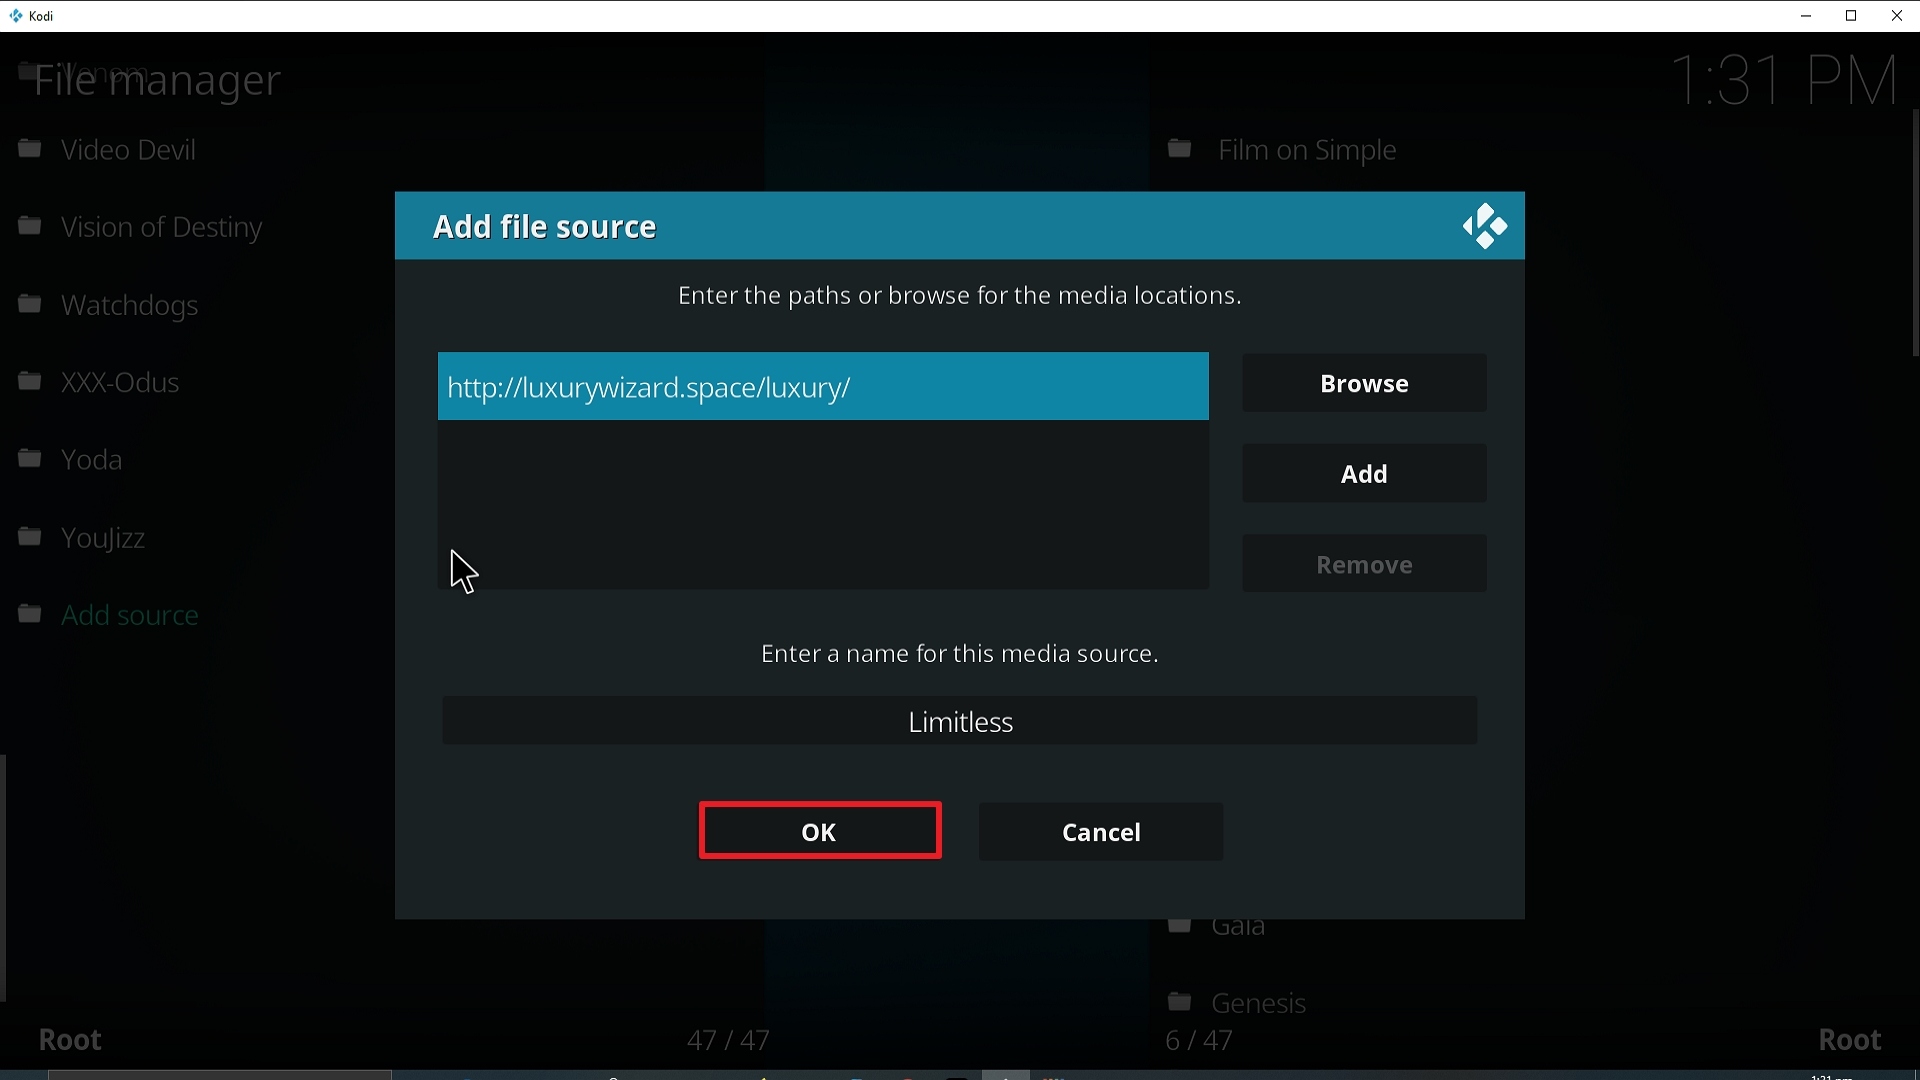
9. Type exactly: http://luxurywizard.space/luxury/

Step 9 Installing Limitless Kodi addon on Kodi


10. Click on OK.

Step 10 Installing Limitless Kodi addon on Kodi


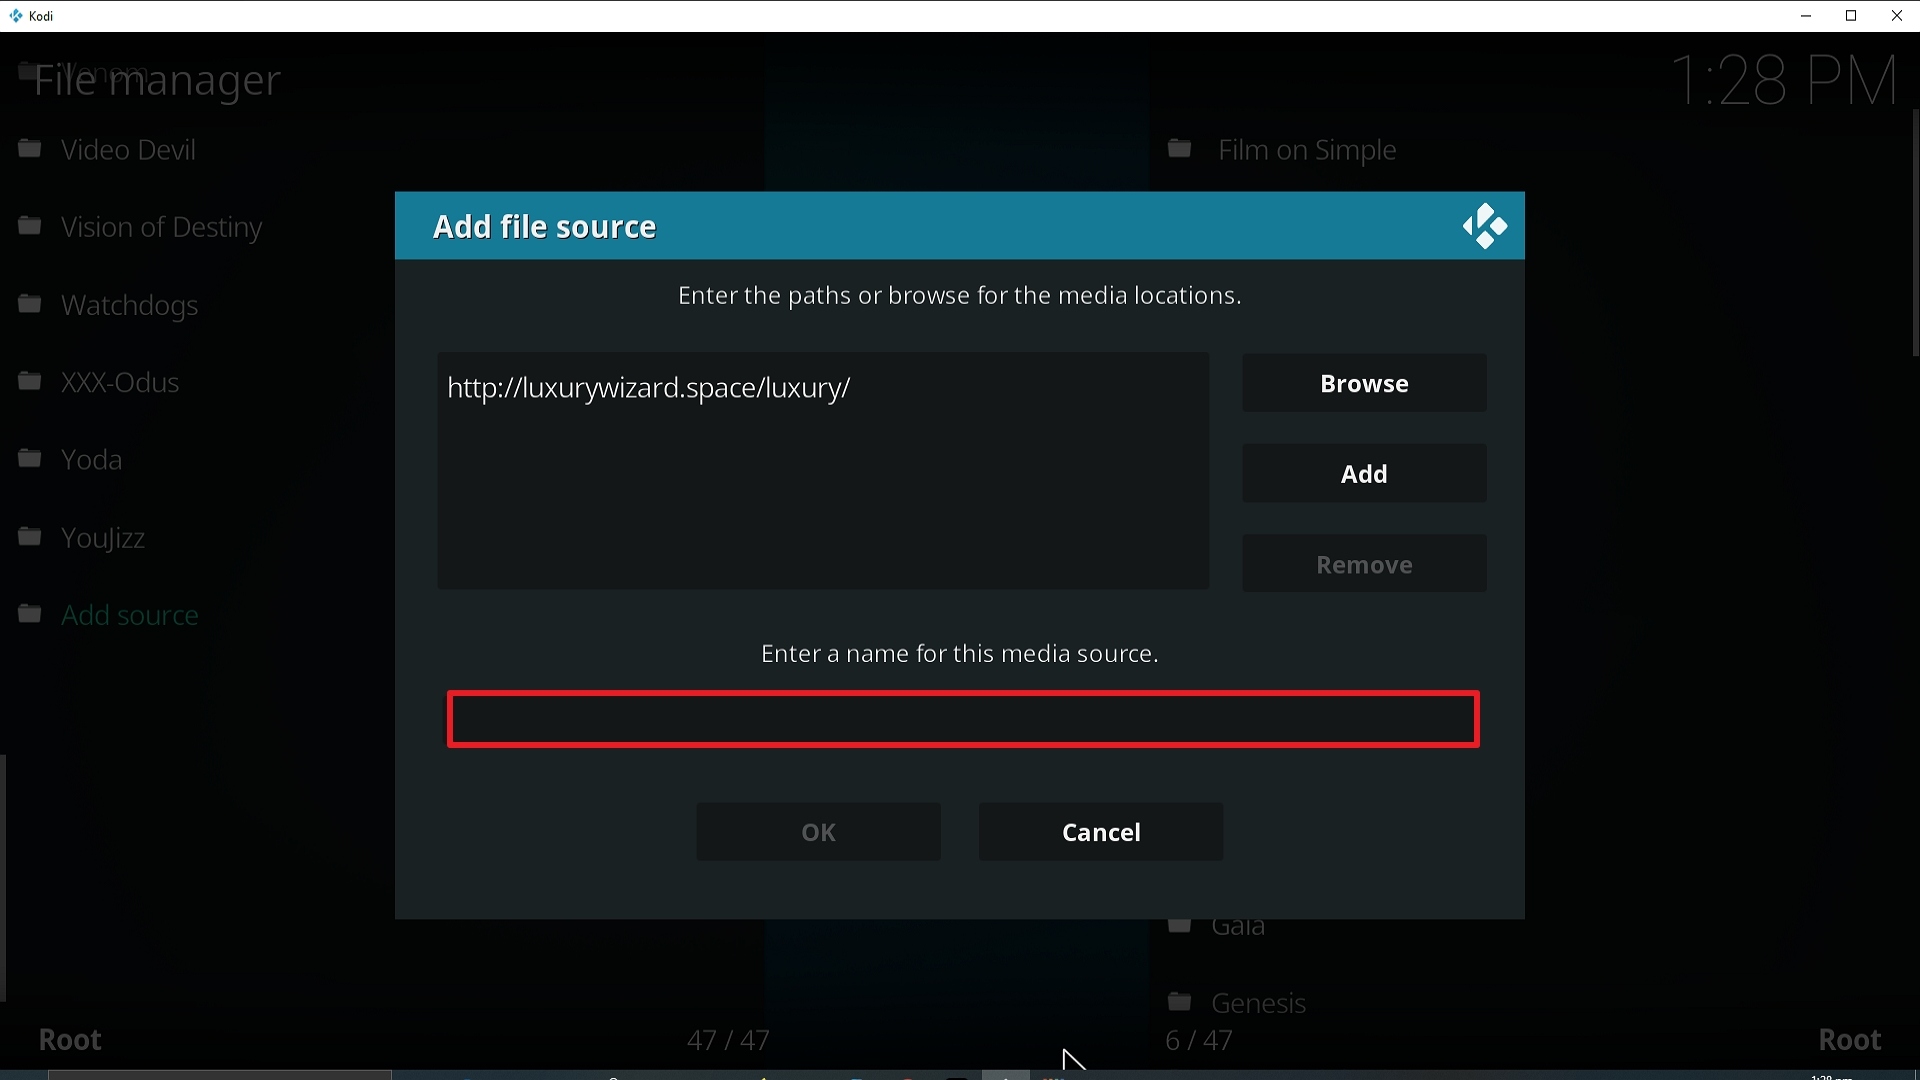
11. Select enter a name for this media source.

Step 11 Installing Limitless Kodi addon on Kodi


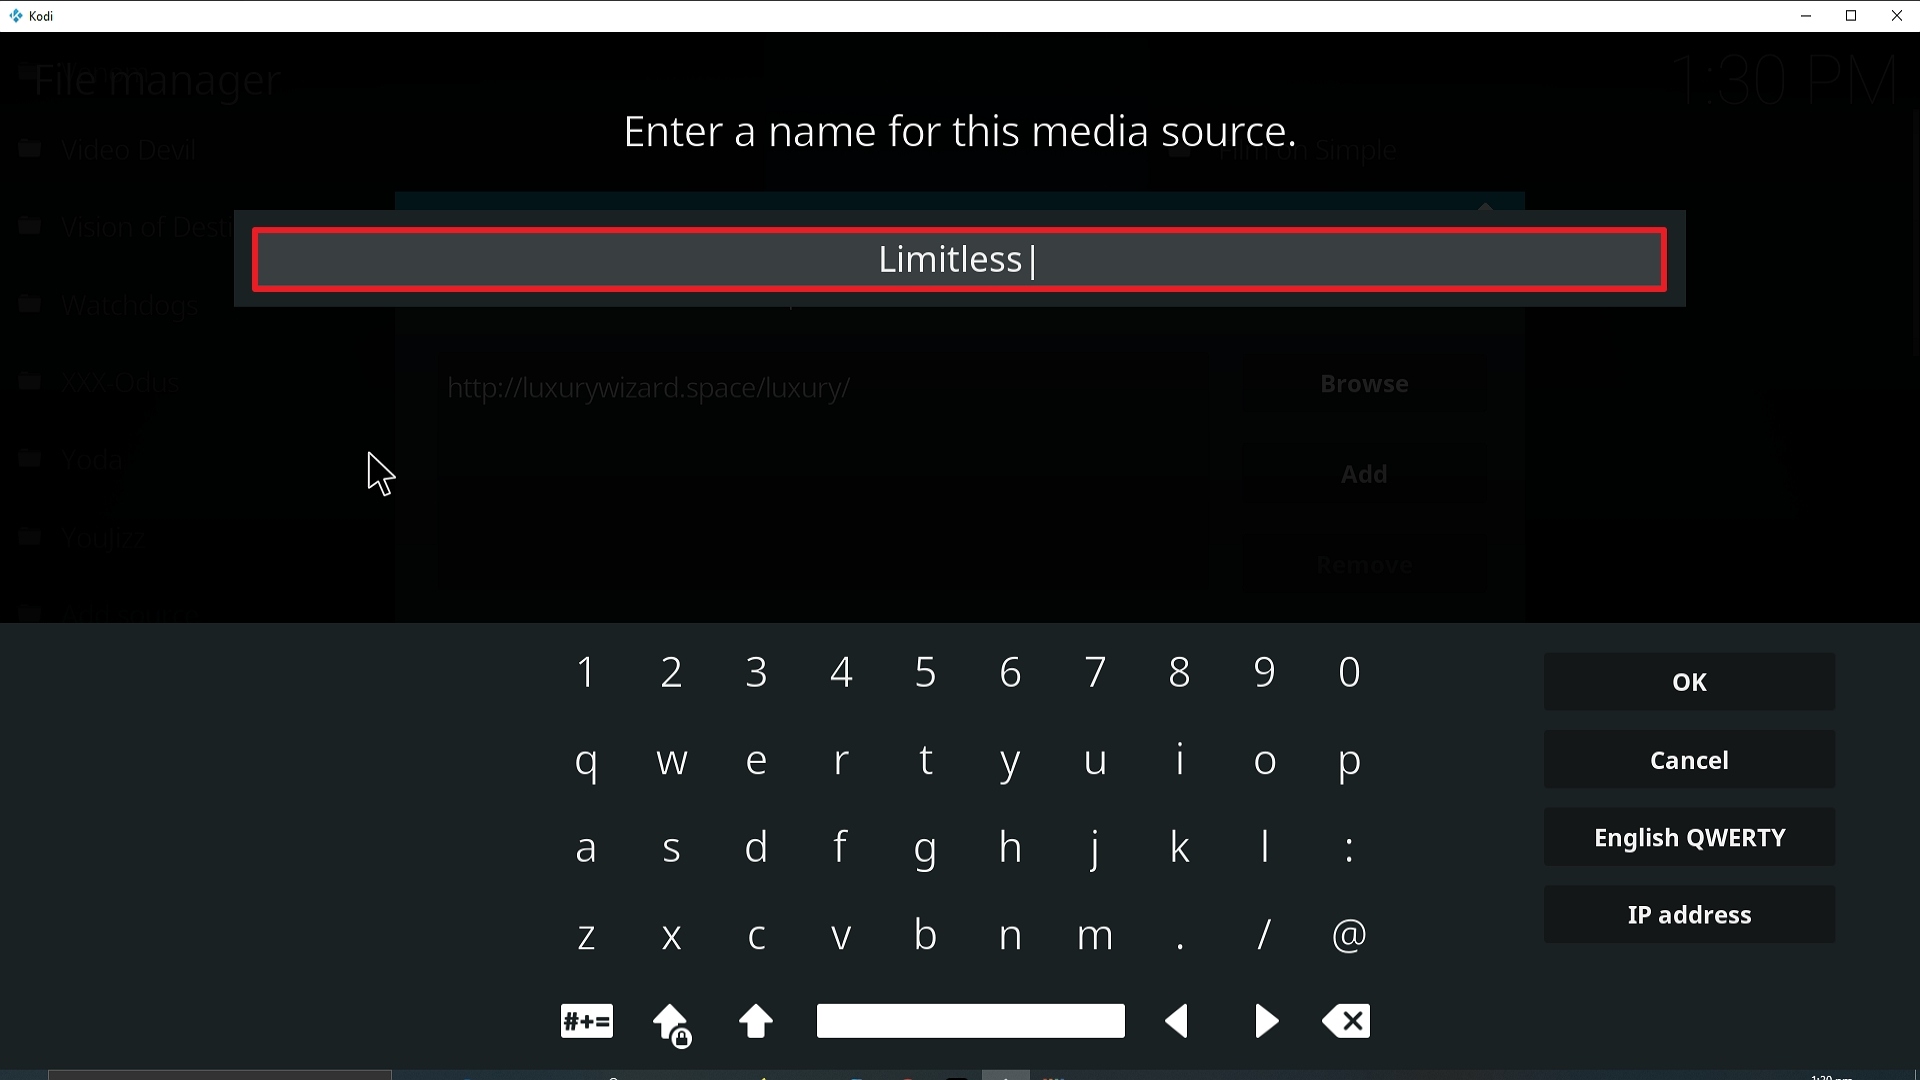
12. Name is Limitless (this part isn’t critical as long as you remember the name).

Step 12 Installing Limitless Kodi addon on Kodi


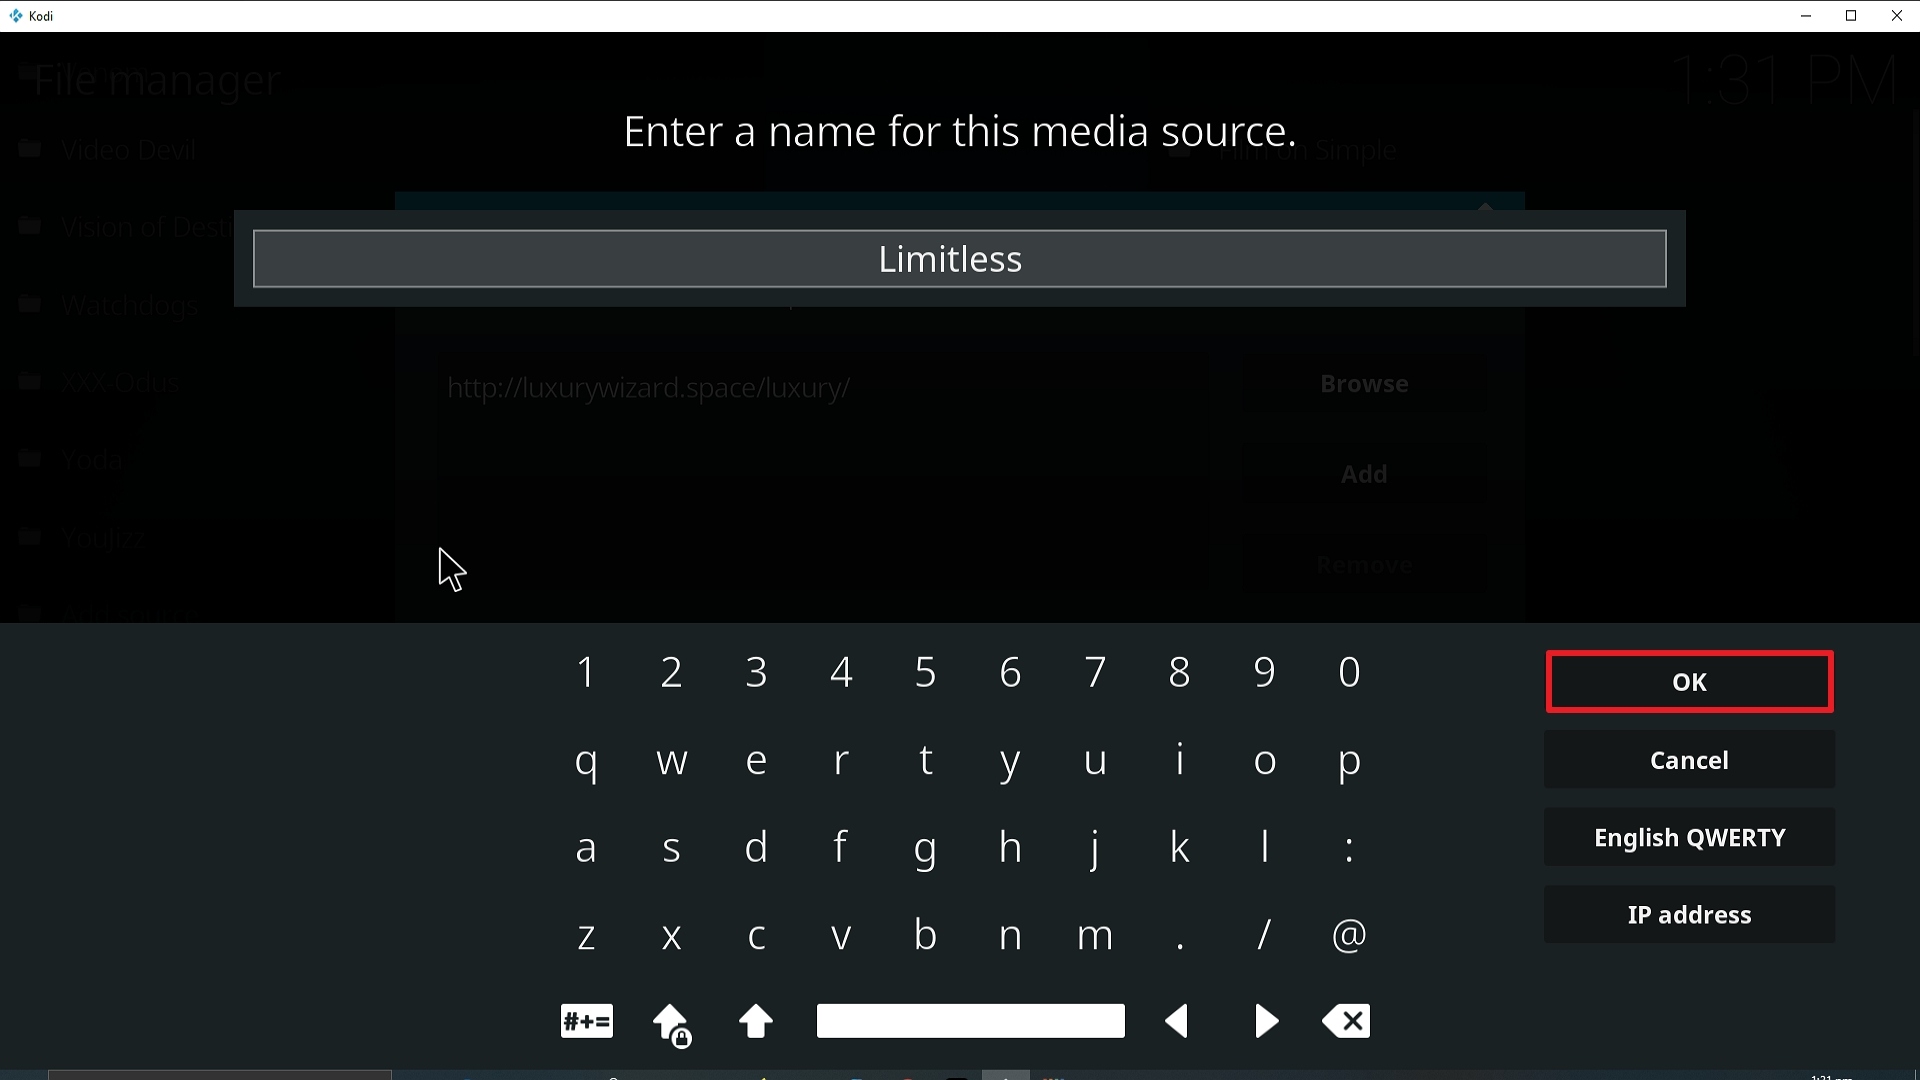
13. Click on OK.

Step 13 Installing Limitless Kodi addon on Kodi


14. Click on OK.

Step 14 Installing Limitless Kodi addon on Kodi


15. Take one step back and click on Add-ons.

Step 15 Installing Limitless Kodi addon on Kodi


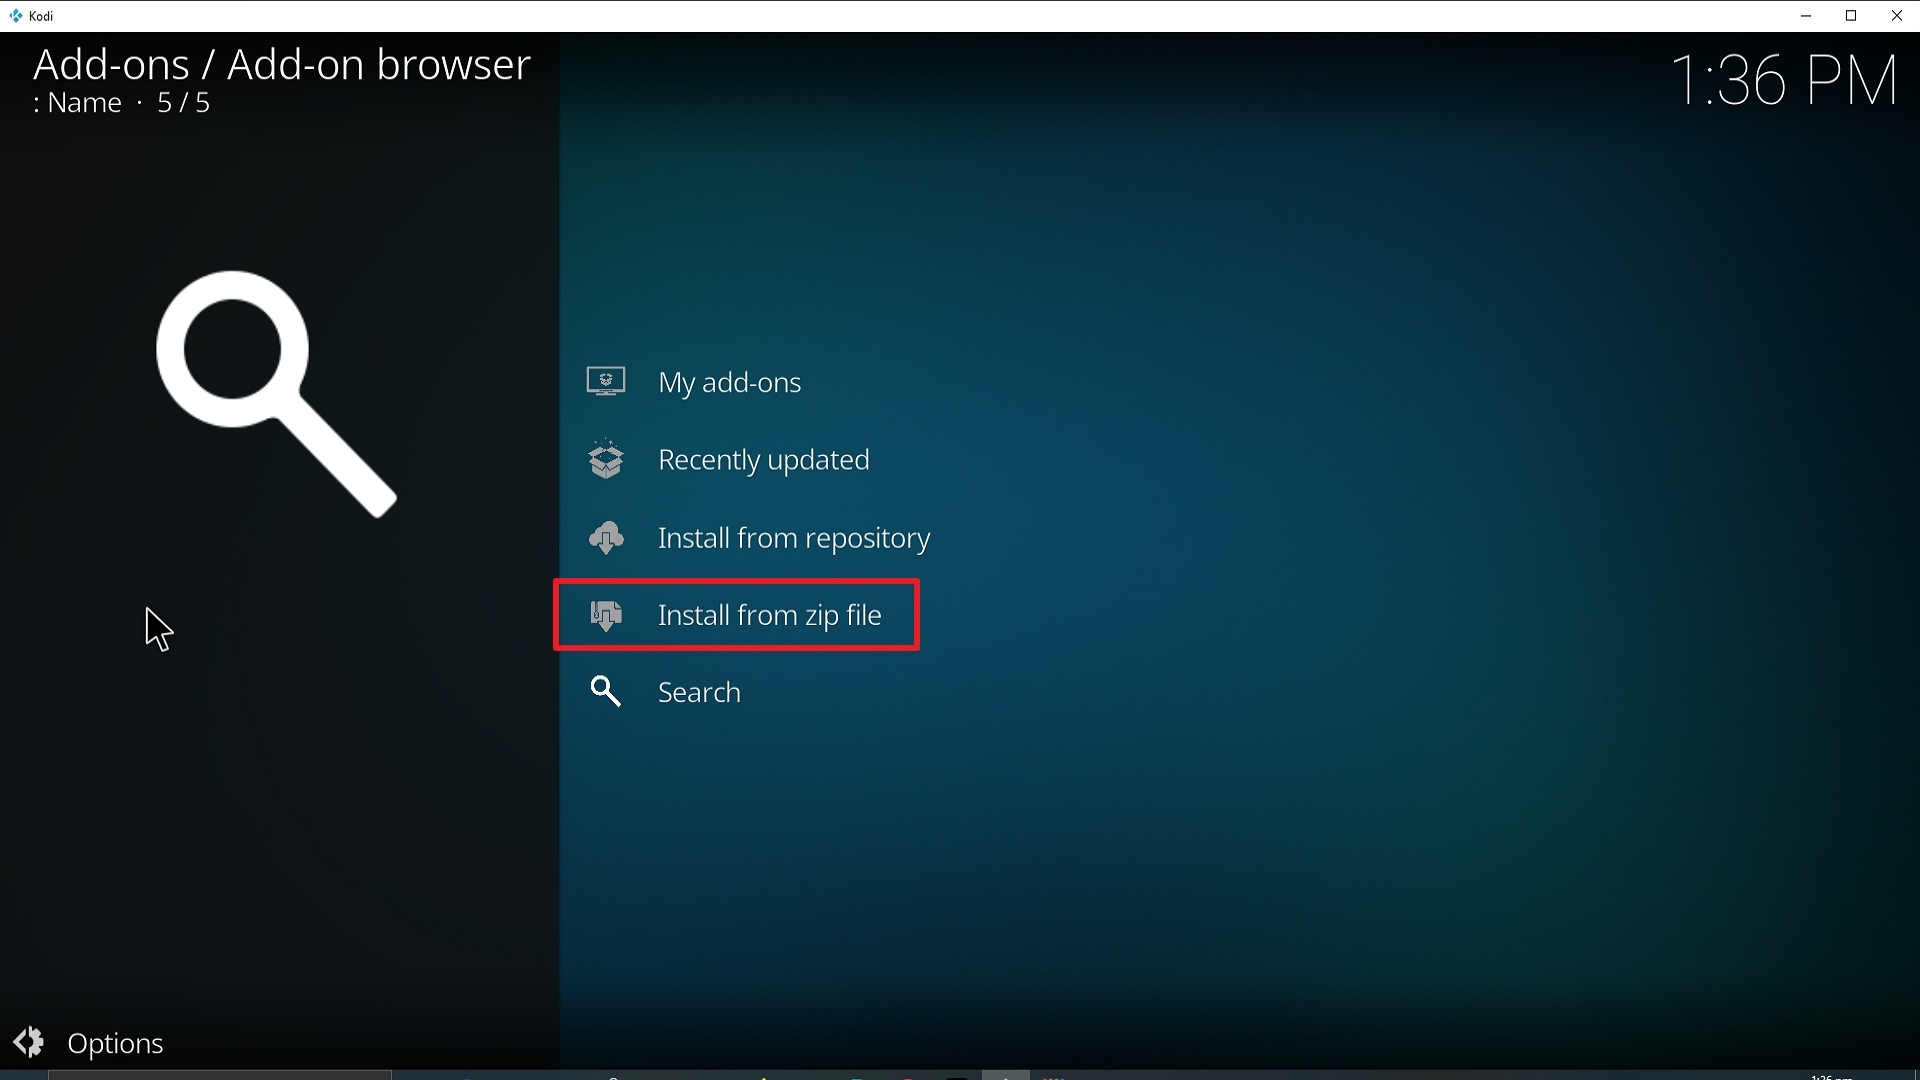
16. Select install from zip file.

Step 16 Installing Limitless Kodi addon on Kodi


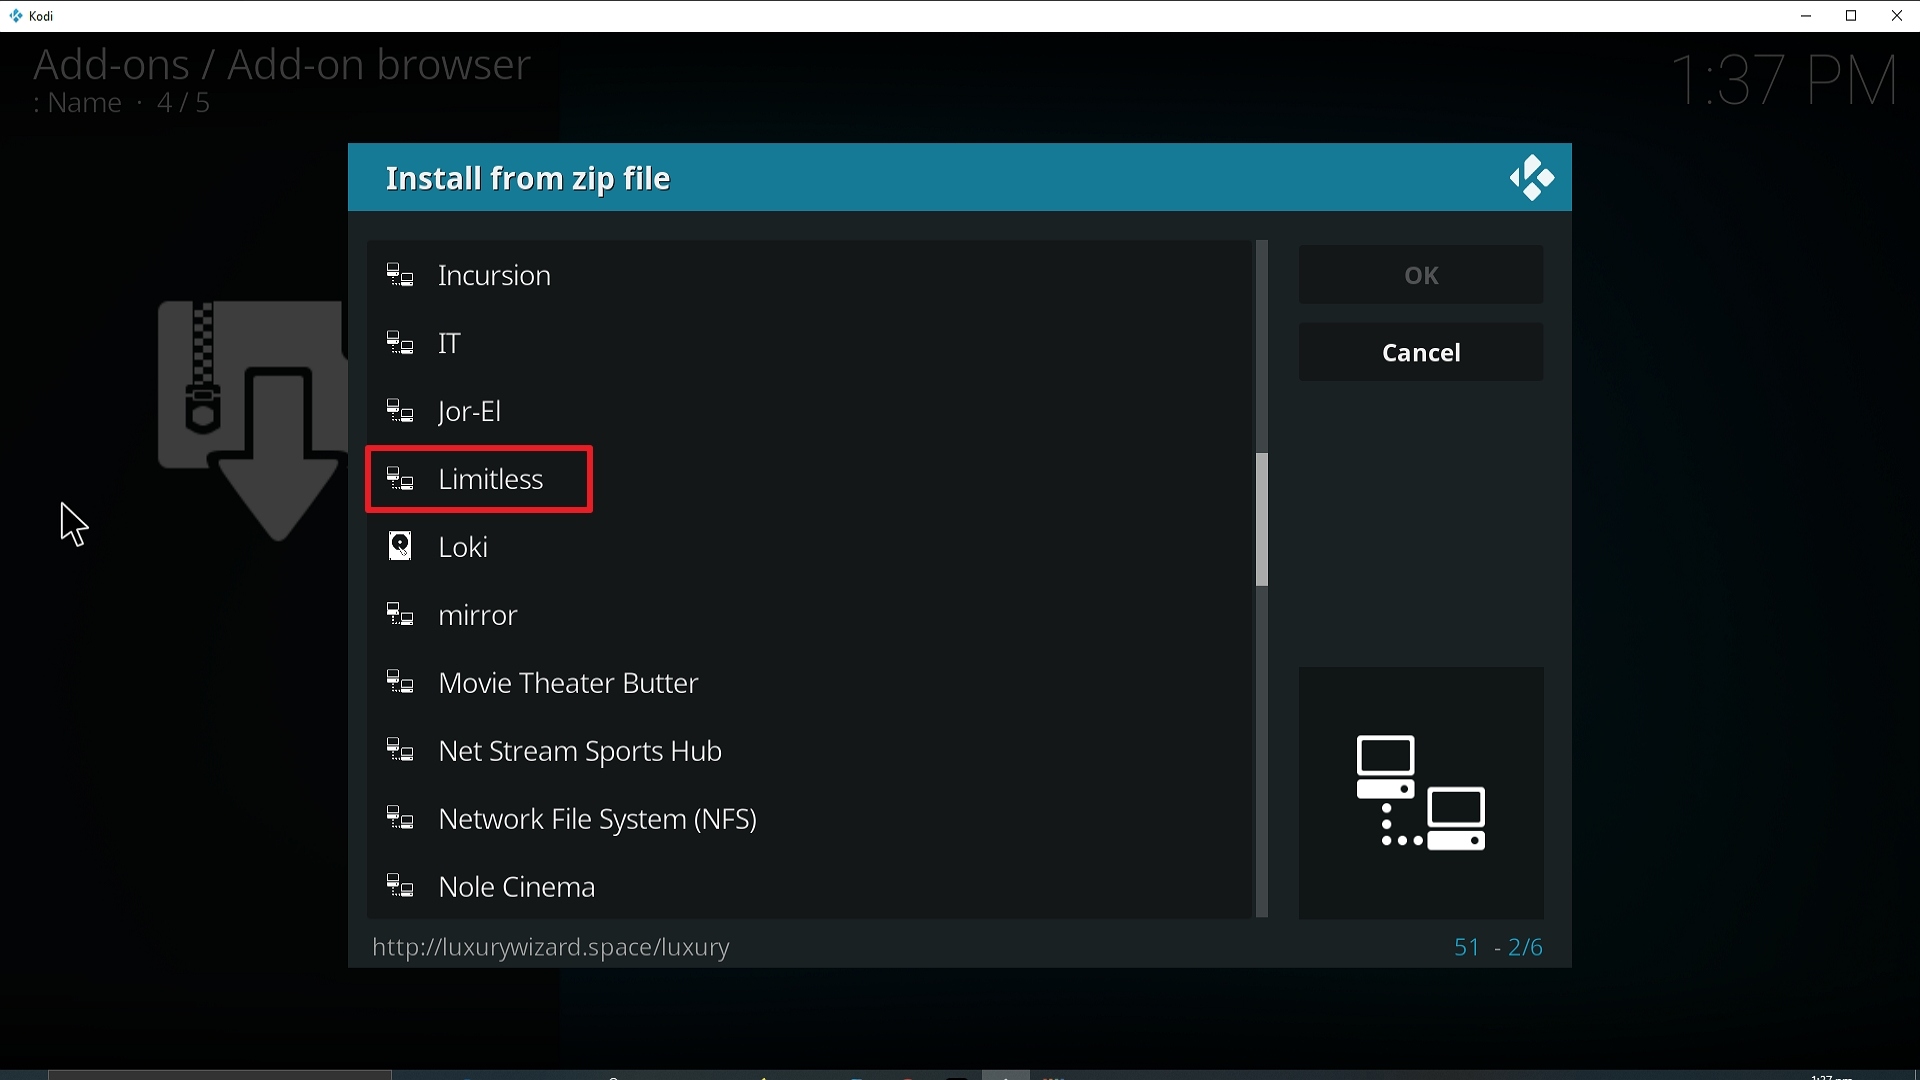
17. Click on Limitless (or whatever you named the source).

Step 17 Installing Limitless Kodi addon on Kodi


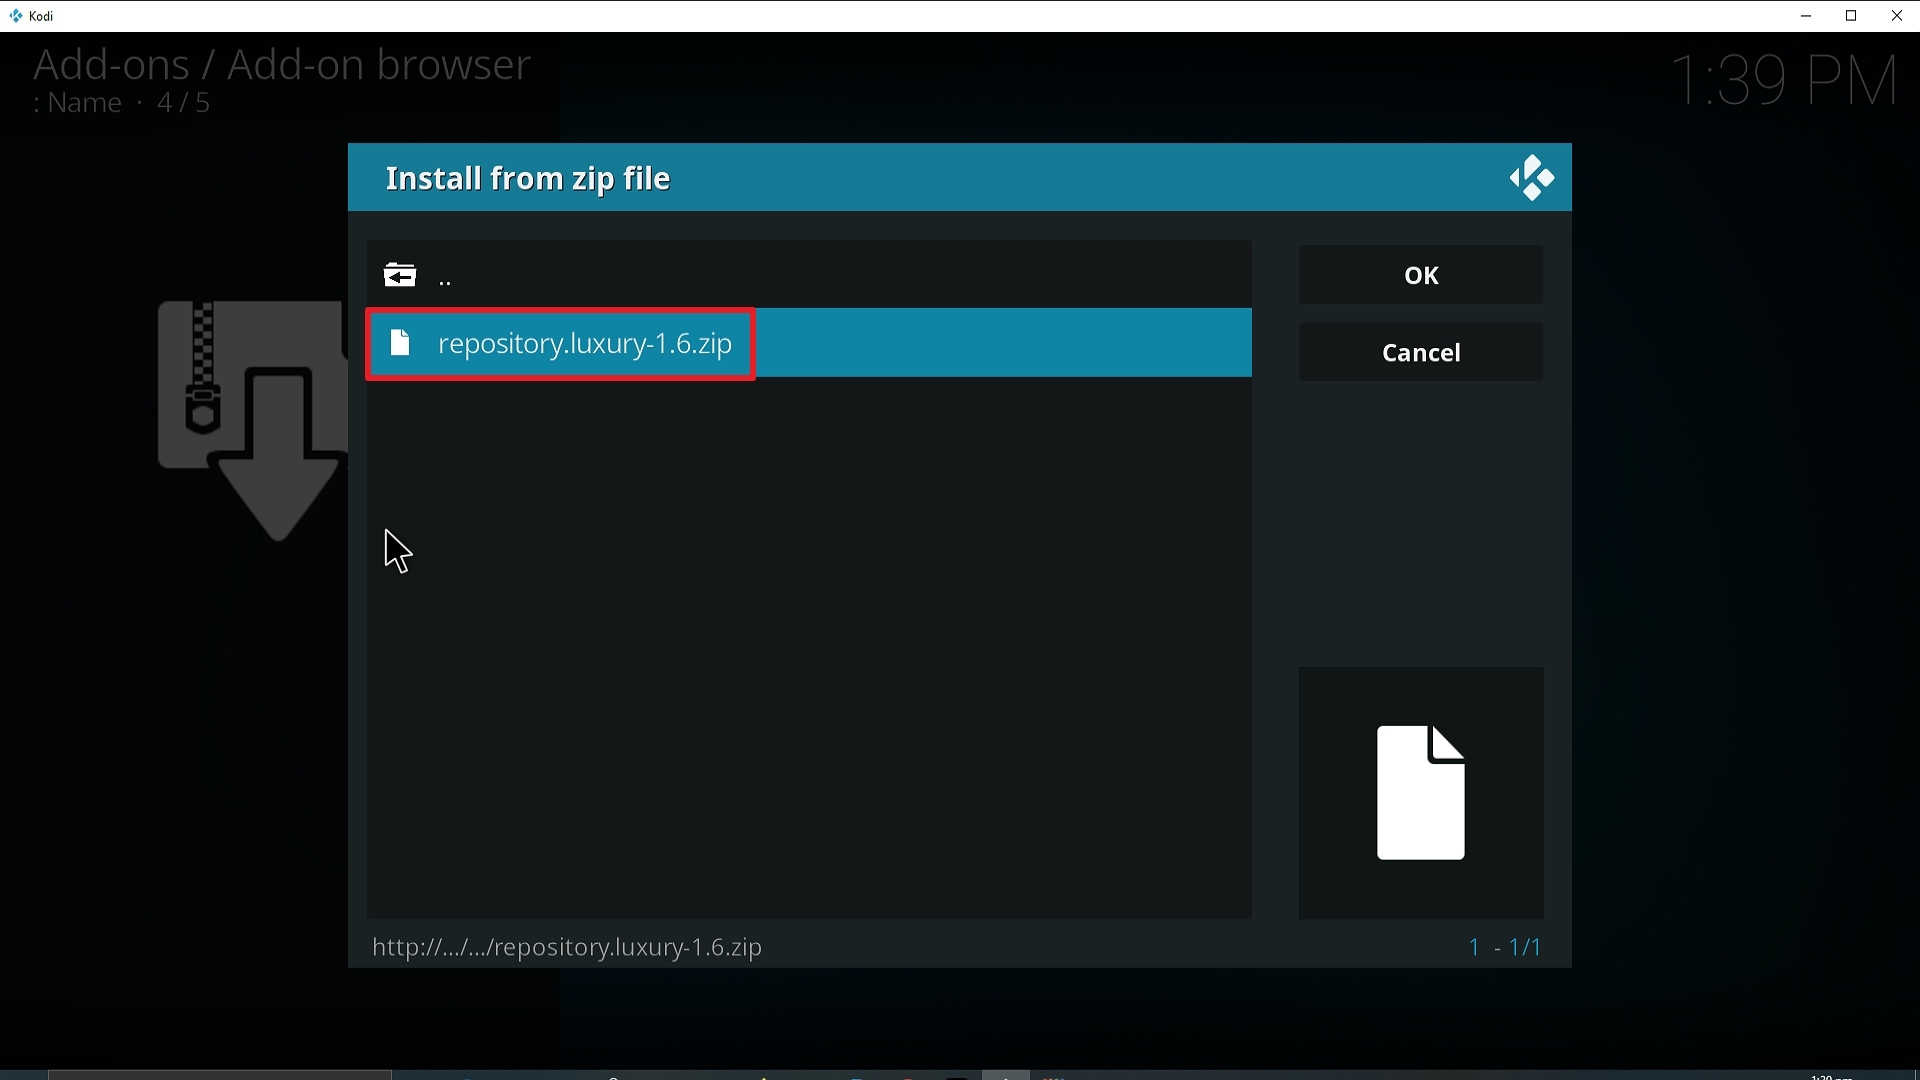
18. Click on repository.luxury-1.6.zip

Step 18 Installing Limitless Kodi addon on Kodi


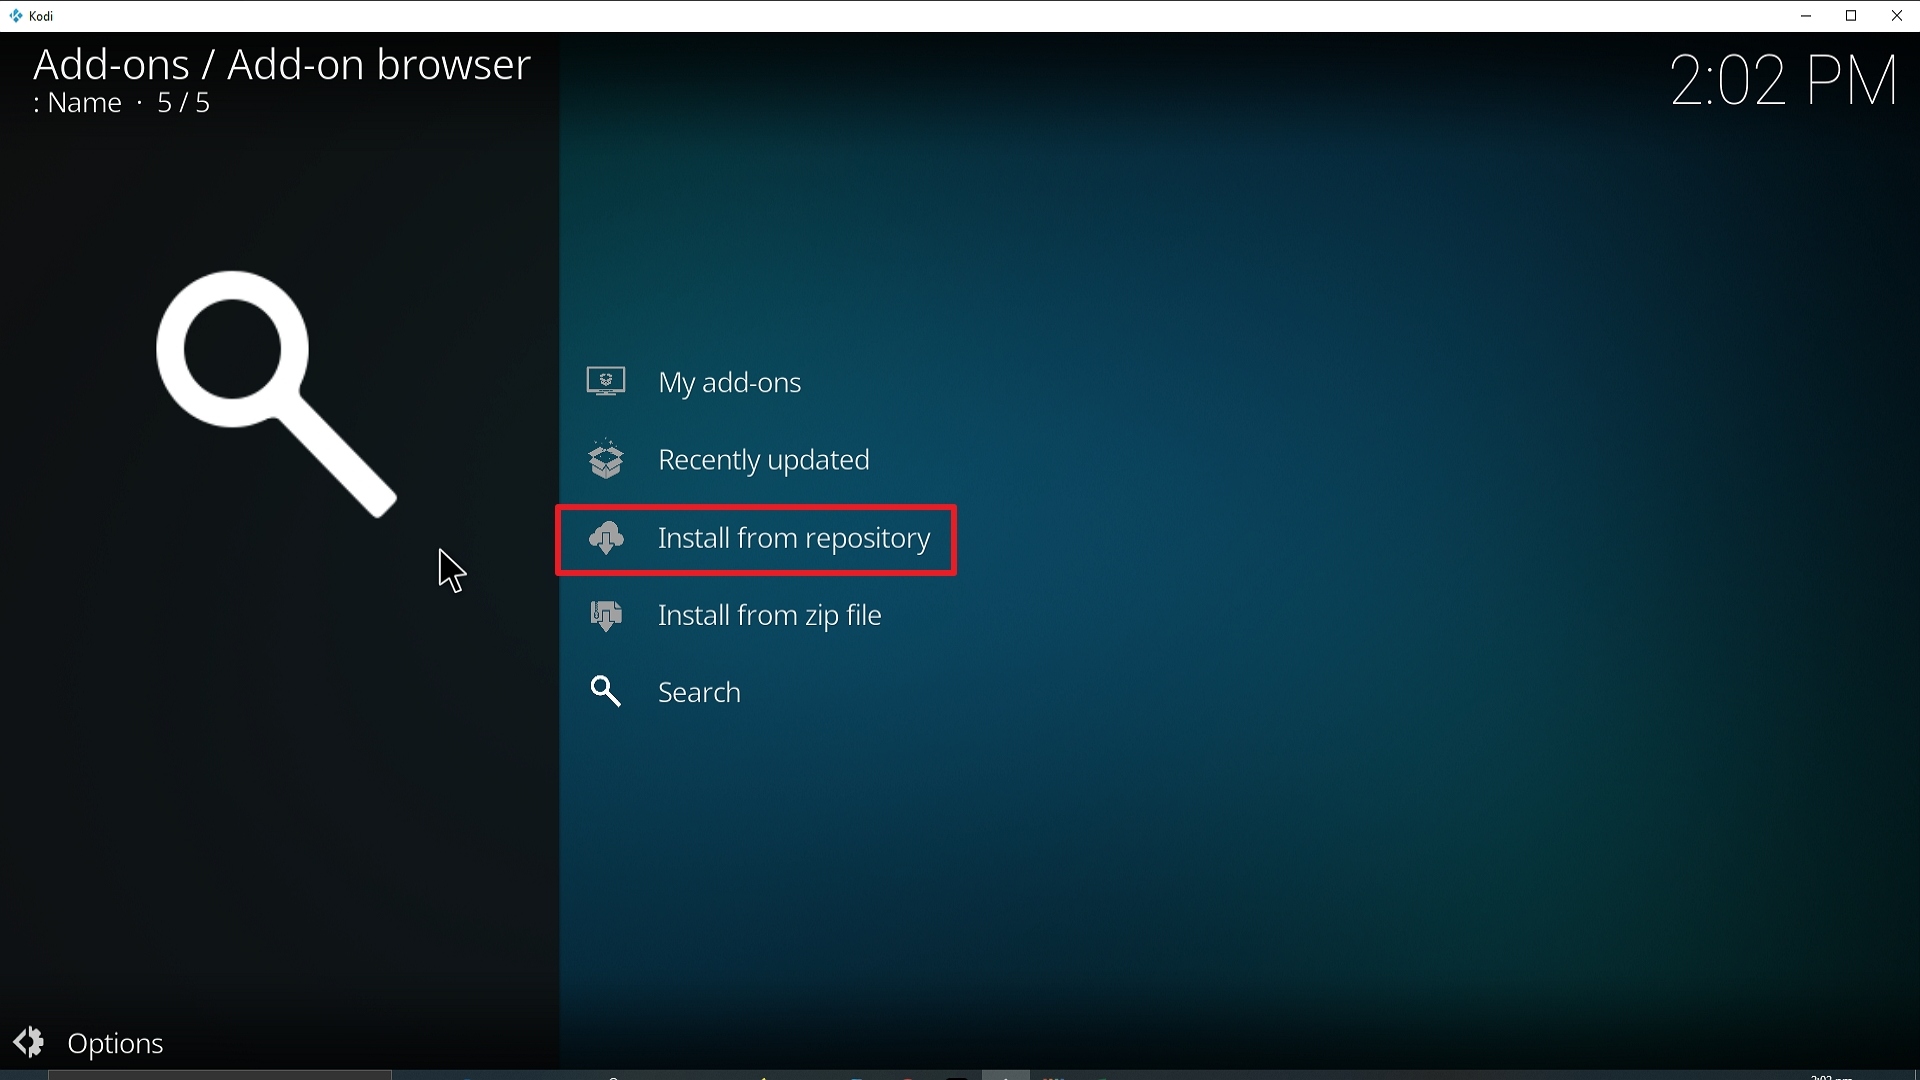
19. Select on Install from repository.

Step 19 Installing Limitless Kodi addon on Kodi


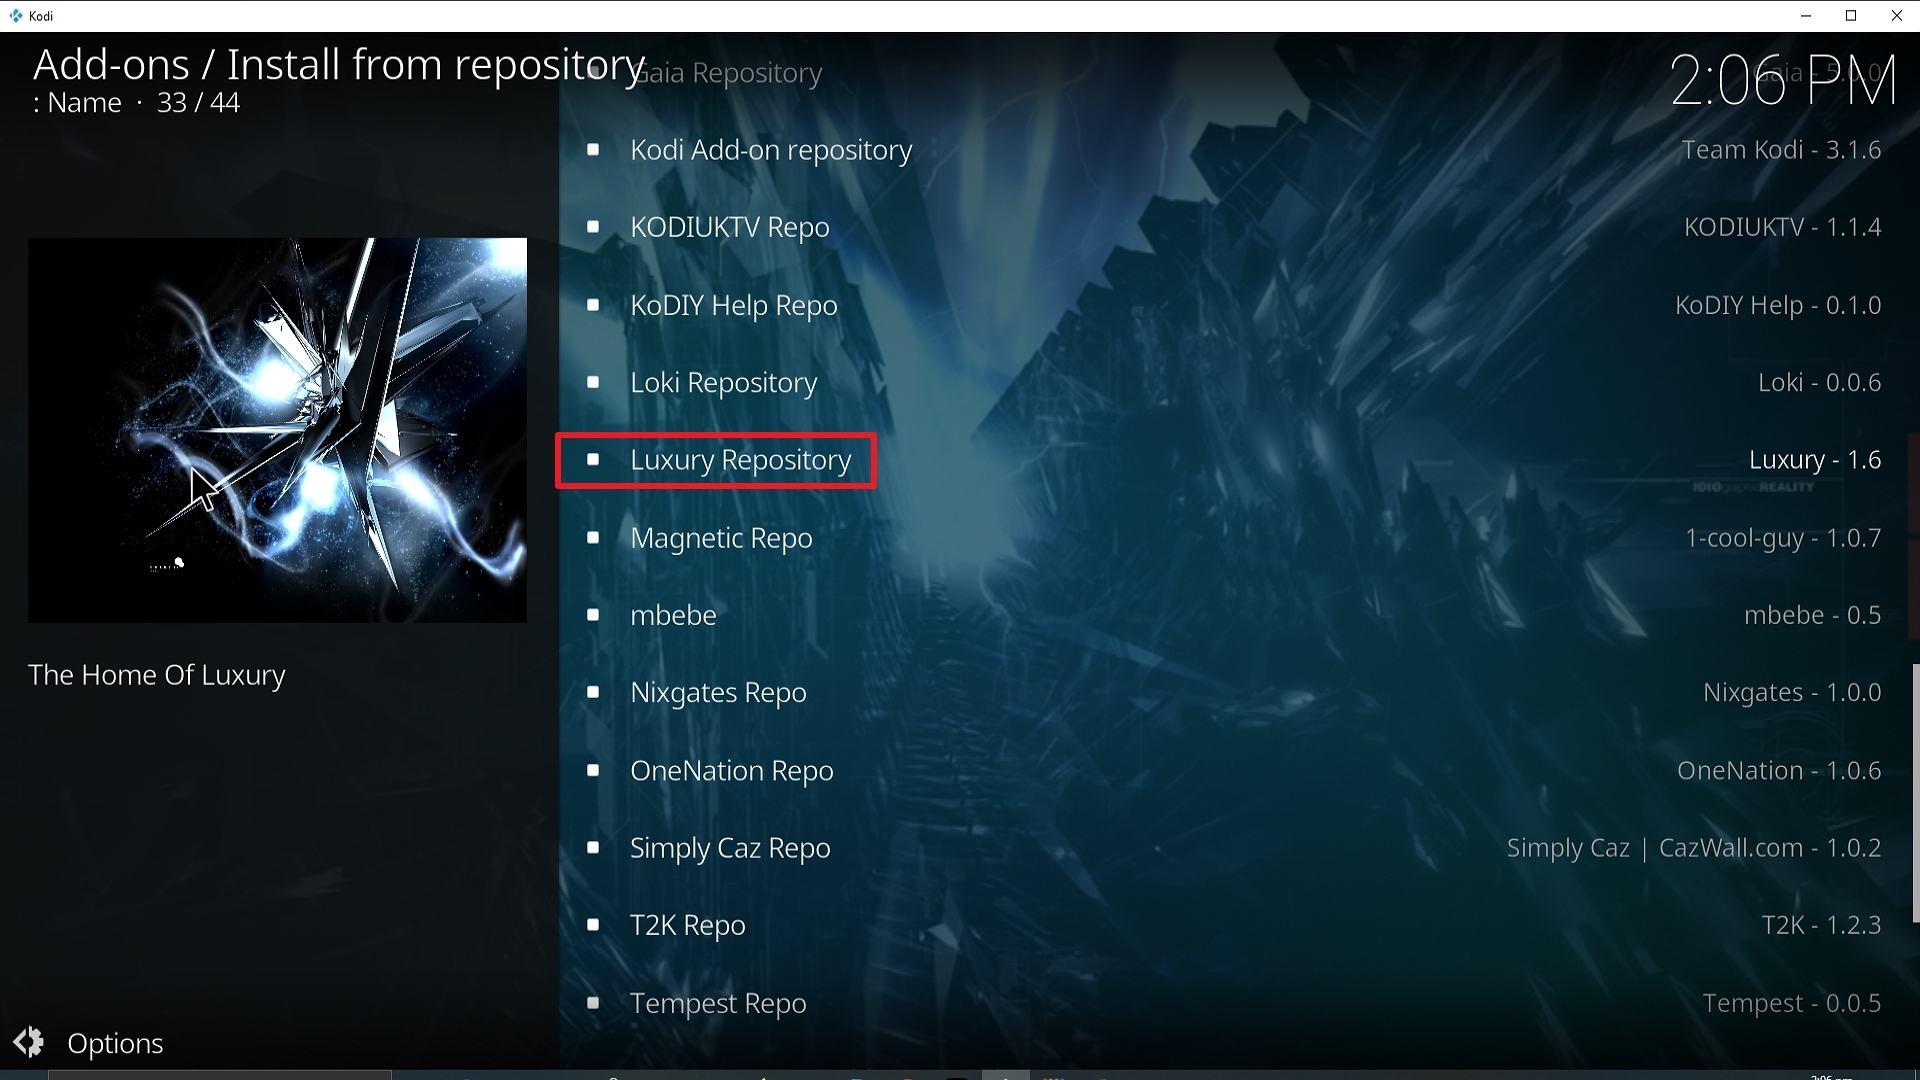
20. Click on Luxury Repo.

Step 20 Installing Limitless Kodi addon on Kodi


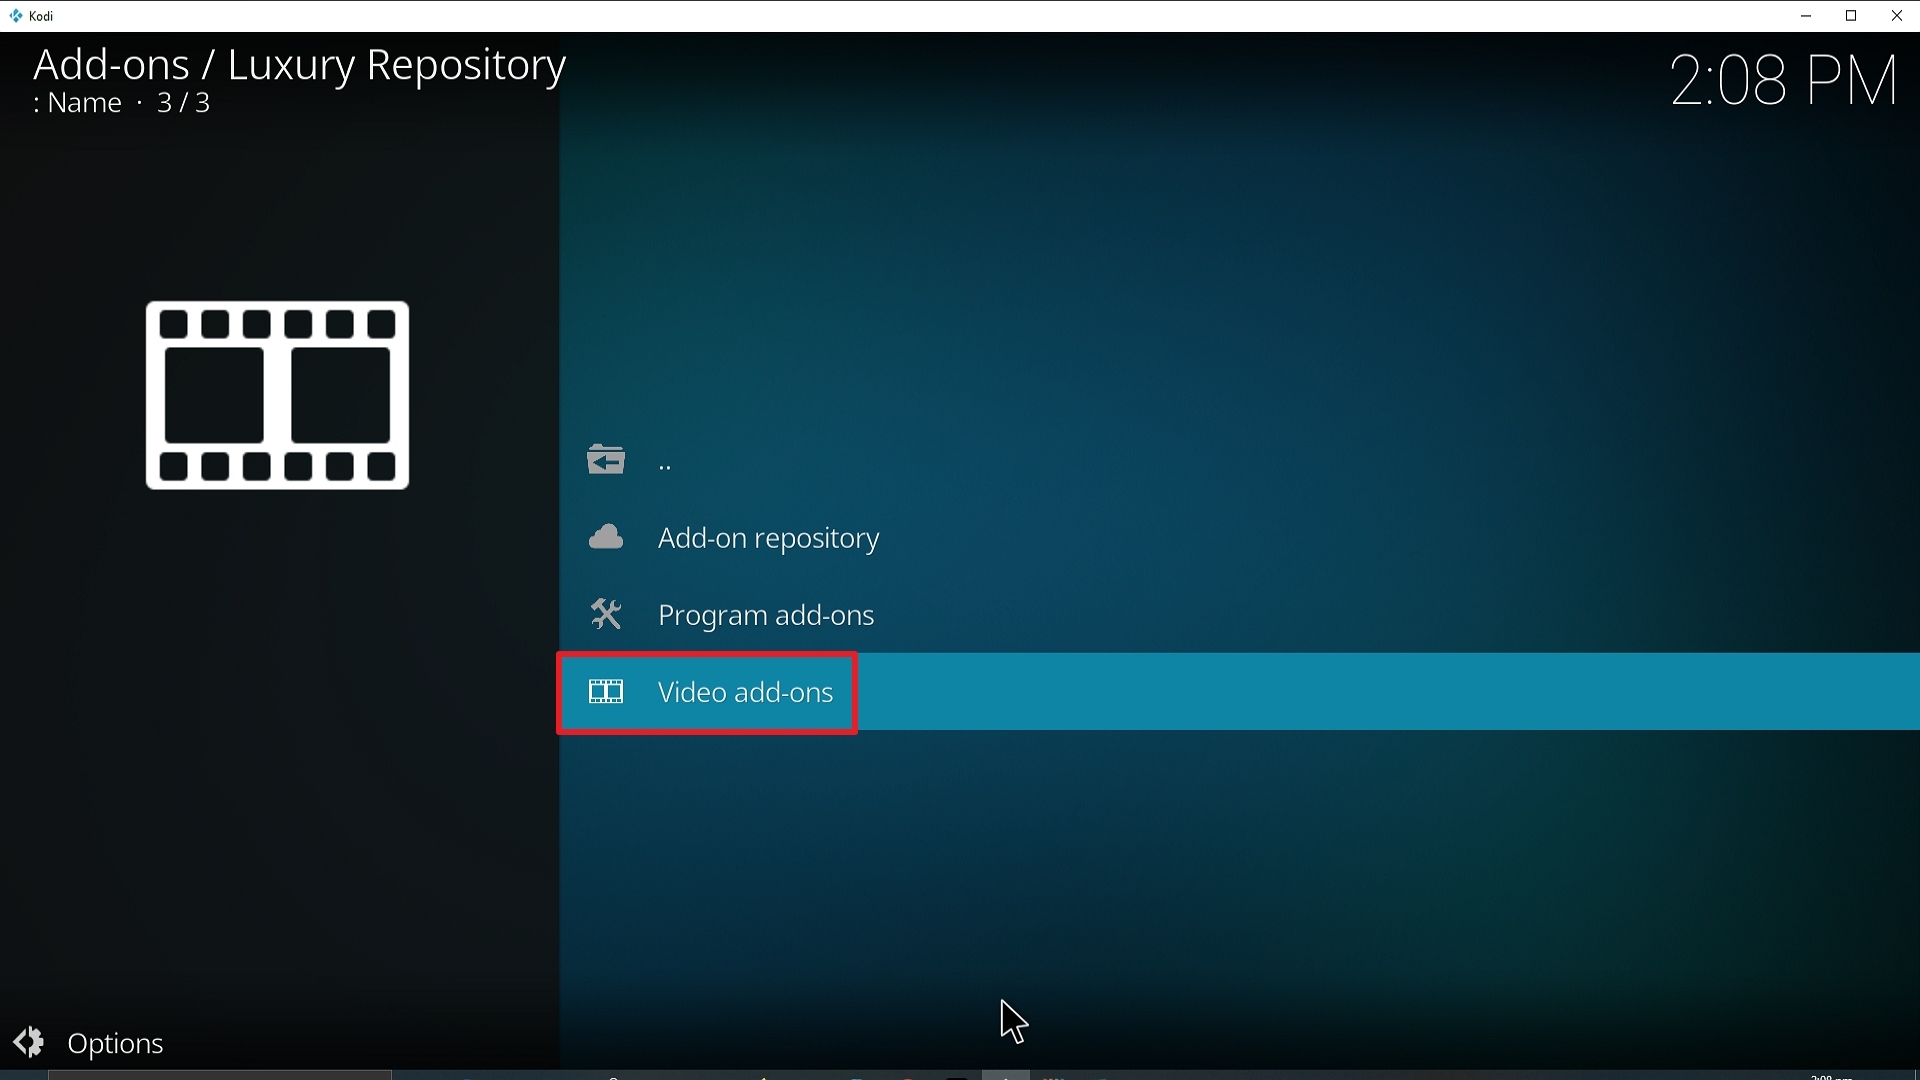
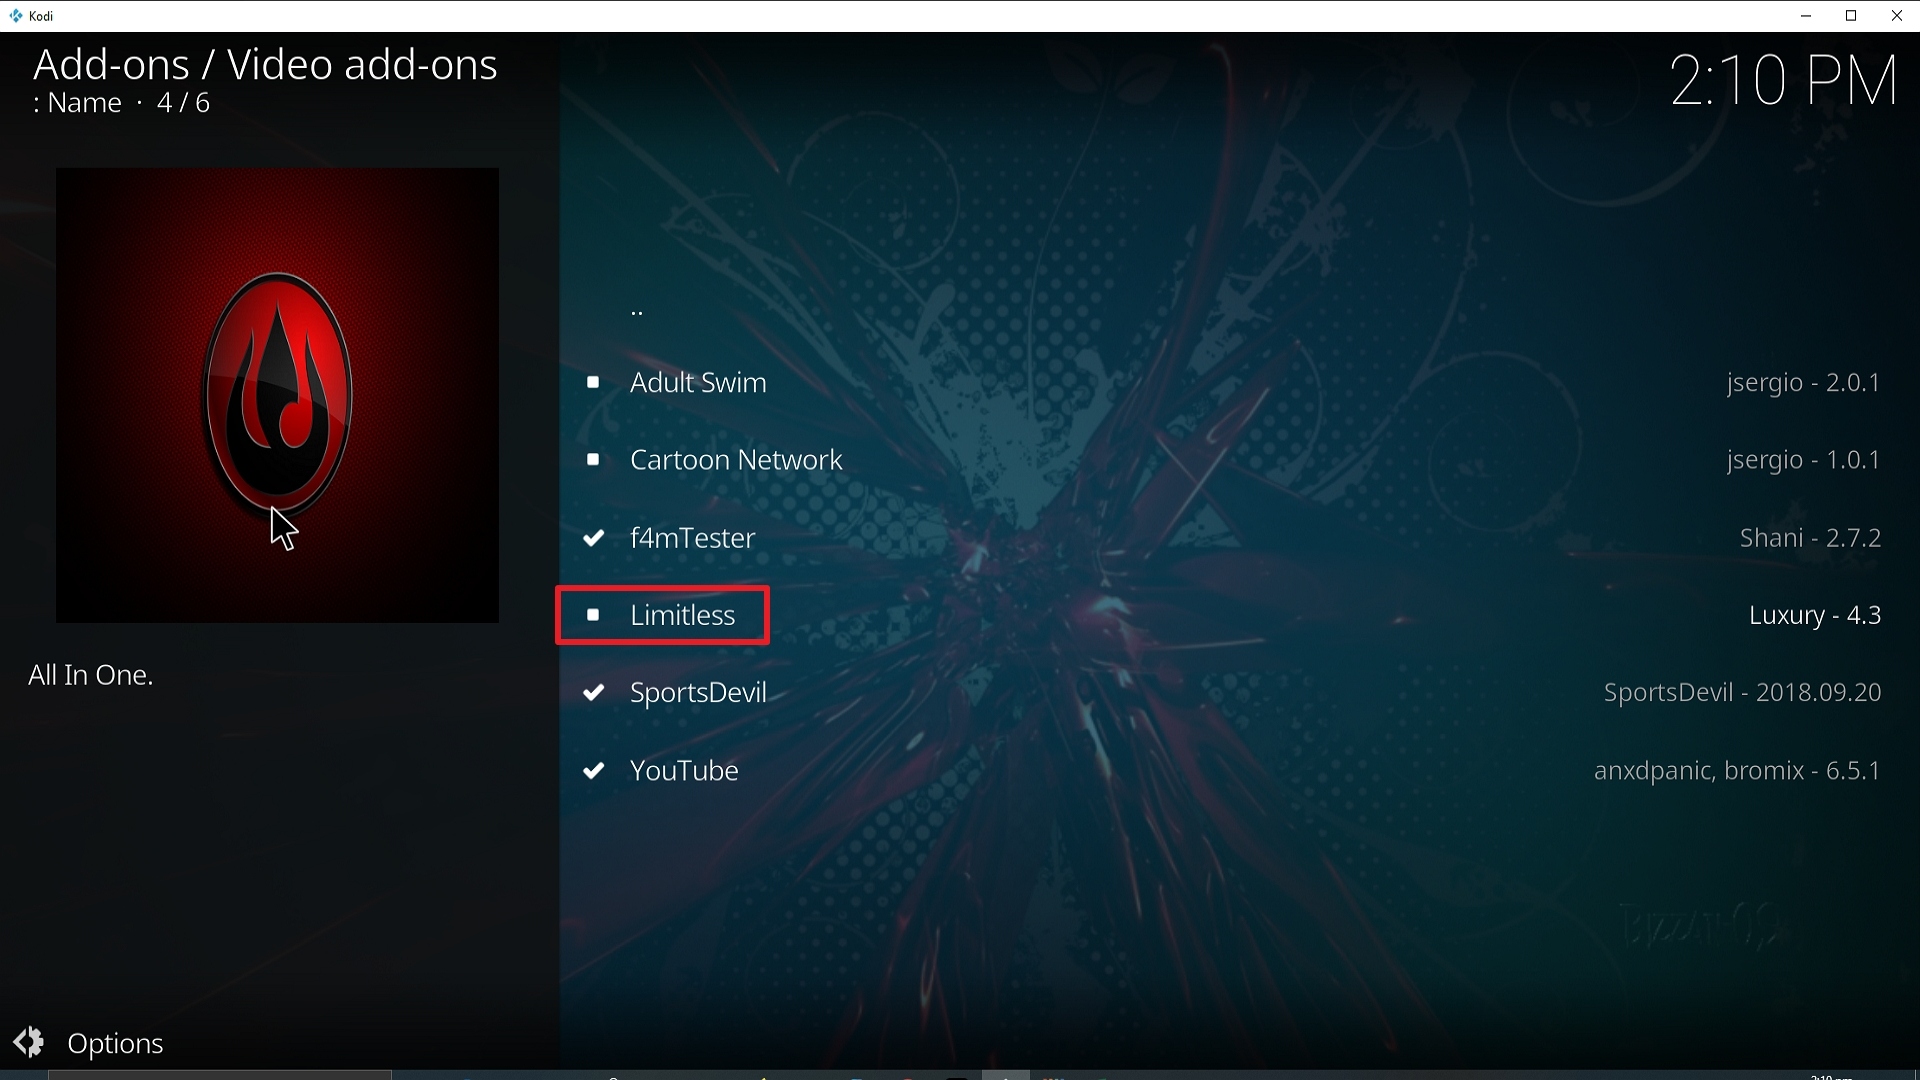
21. Pick Video add-ons.

Step 21 Installing Limitless Kodi addon on Kodi


22. Select Limitless again.

Step 22 Installing Limitless Kodi addon on Kodi


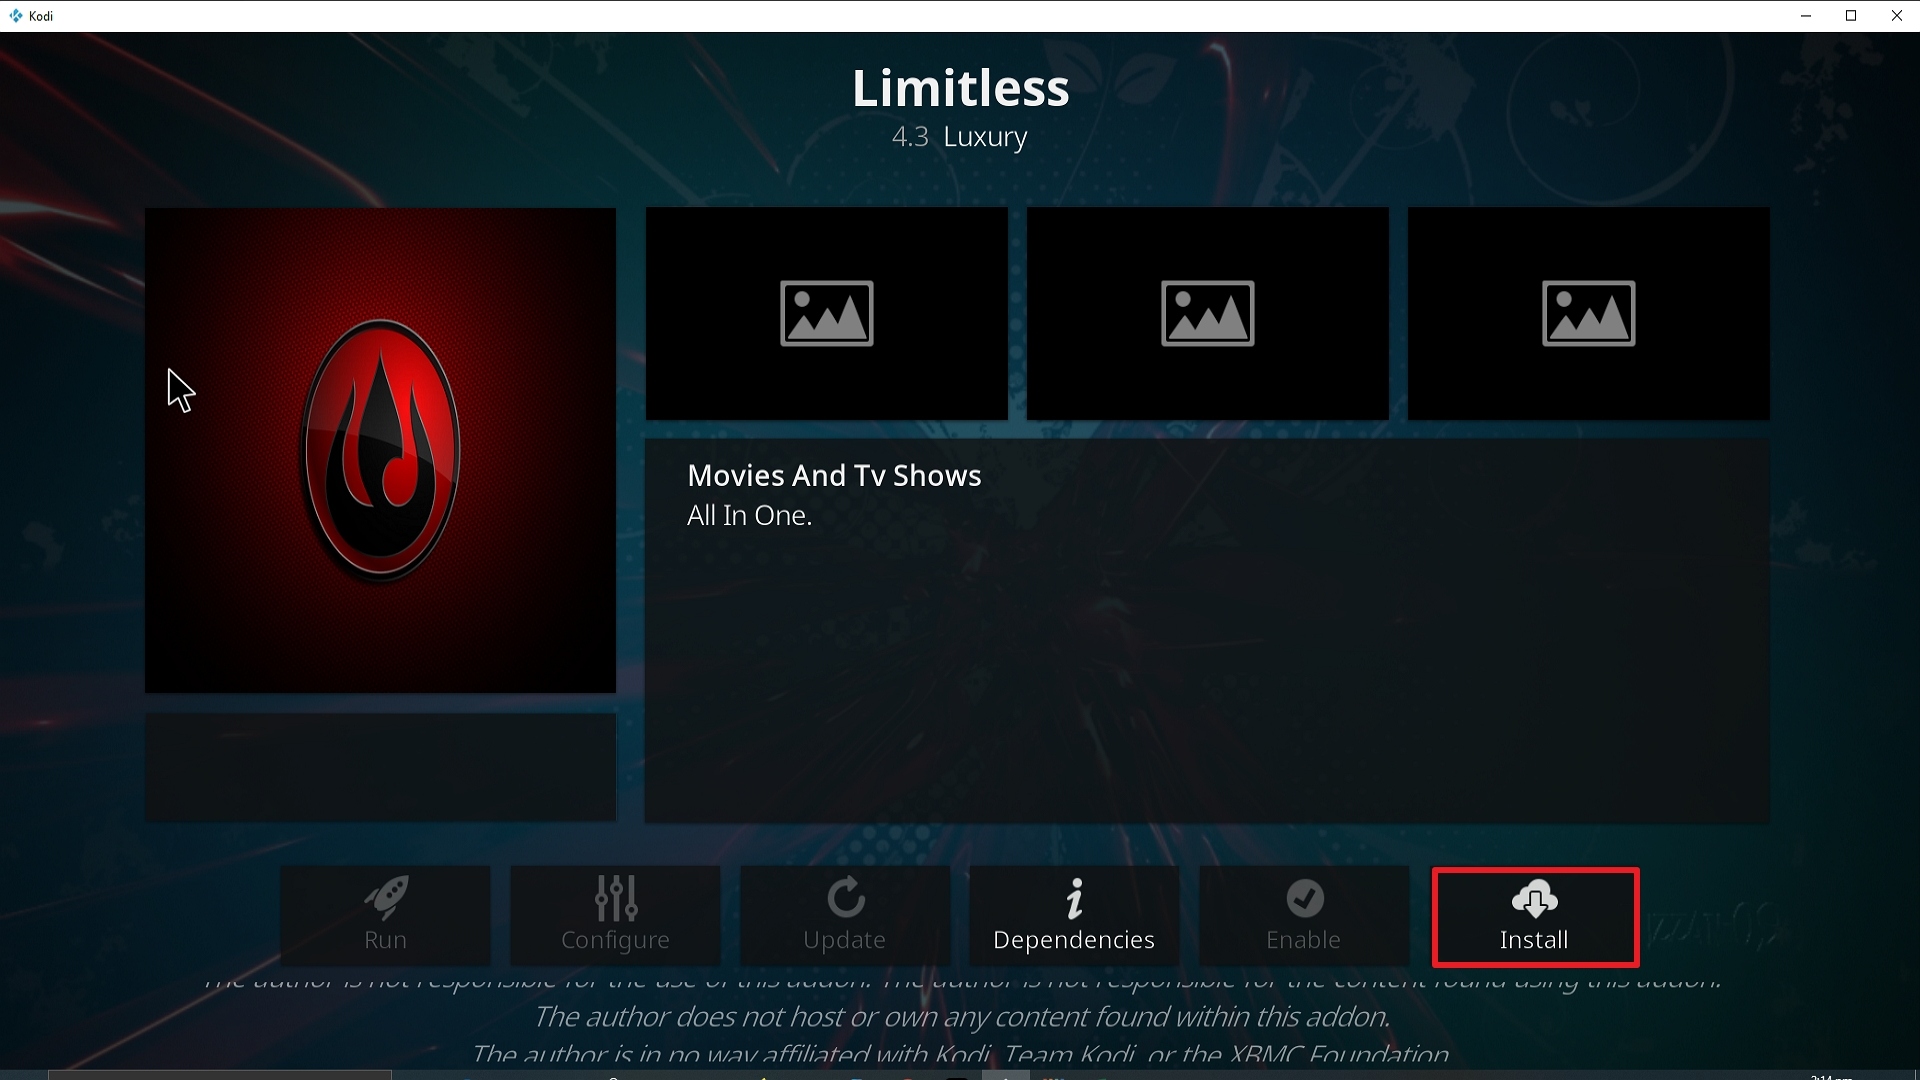
23. Click on Install.

Step 23 Installing Limitless Kodi addon on Kodi


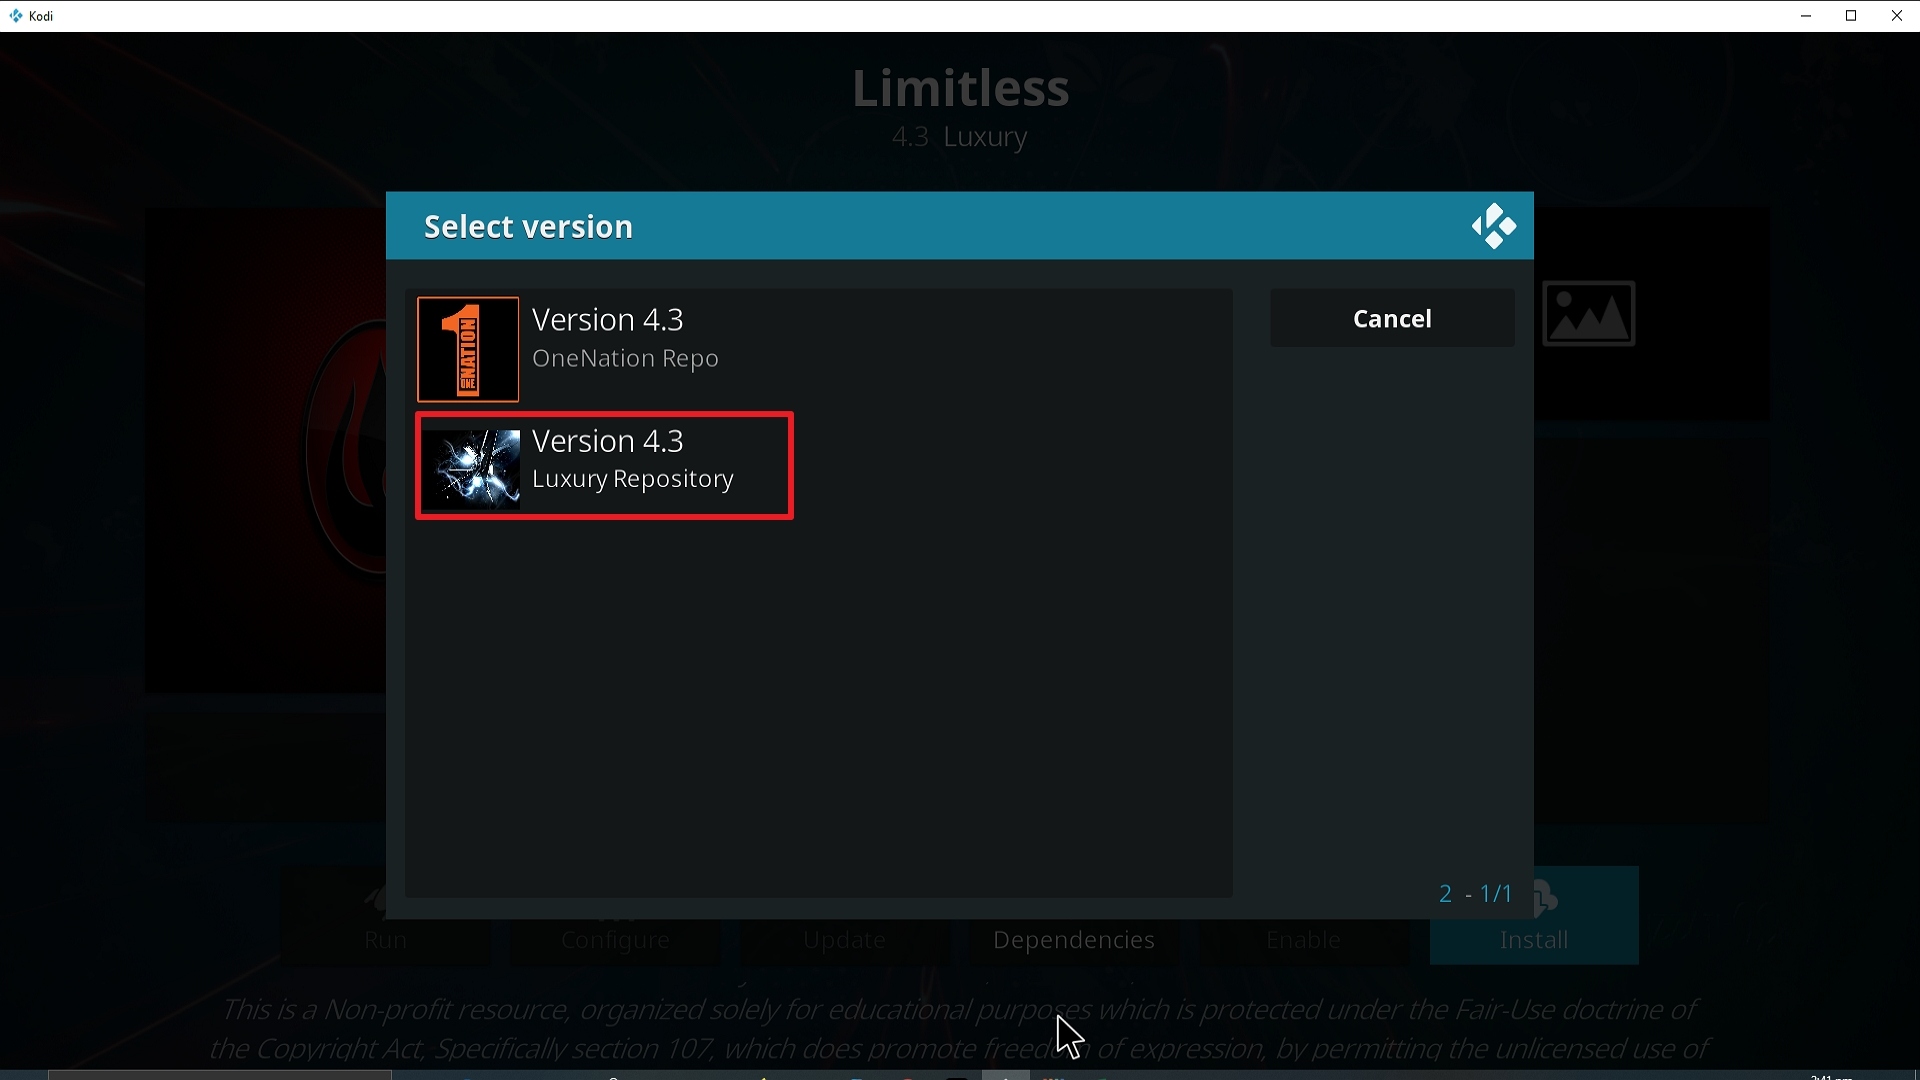
24. Select Version 4.3 (Luxury Repo)

Step 24 Installing Limitless Kodi addon on Kodi


25. Select OK after reviewing the add-ons that will be installed.

Step 25 Installing Limitless Kodi addon on Kodi


26. You should see a popup in the upper right corner saying Limitless has installed. There will actually be multiple popups for the various components.

Step 26 Installing Limitless Kodi addon on Kodi


27. Click on Open to start the Limitless add-on.

Step 27 Installing Limitless Kodi addon on Kodi


Stream Safely with a VPN

All of your online activities are being tracked by your ISP. Streaming, most especially, is closely monitored because it consumes a lot of data.

Once your ISP discovers that you are exceeding your data cap, it will do everything to disrupt your streaming experience. It will throttle down your connection which results in buffering. And we do not want that for you.

To prevent this from happening, we highly recommend using streaming apps with a premium VPN service like Surfshark.

Here are the other perks of having it on your device:

  • Provides access to geo-restricted content.
  • Protects all of your personal data when accessing public wifi internet.
  • Cloaks all of your online activities and identity that may be used by online threats like hackers and ISP.
  • It is the best solution for Firestick buffering and Kodi Buffering as well.

Note: For more information about Surfshark, please read our Surfshark Review.


Grab your subscription now!

Click here to get the lowest price on Surfshark through our exclusive limited-time offer.


How to Install Surfshark VPN on Firestick

If your Firestick still has the older interface, read this article to learn how to update it: Update Firestick Interface.

Follow our screenshots below to install the SurfShark VPN app on your Fire TV stick.

1. Go to the Home screen of your Firestick.

step 1 Install Surfshark VPN on Firestick


2. Navigate towards the Find tab. Press the Search button from the resulting dropdown.

step 2 Install Surfshark VPN on Firestick


3. Type in the keyword of SurfShark and select from the suggestions that will appear.

step 3 Install Surfshark VPN on Firestick


4. Click the official SurfShark icon from your search results.

step 4 Install Surfshark VPN on Firestick


5. Press the Download (You own it) button.

step 5 Install Surfshark VPN on Firestick


6. The SurfShark VPN installer will download on your device.

step 6 Install Surfshark VPN on Firestick


7. SurfShark VPN’s app will automatically install itself on your Fire TV stick.

step 7 Install Surfshark VPN on Firestick


8. Press the Open button after completing SurfShark VPN’s installation process.

step 8 Install Surfshark VPN on Firestick


9. Please wait for the SurfShark VPN to load its user interface.

step 9 Install Surfshark VPN on Firestick


10. You can now log in with your SurfShark VPN account credentials.

step 10 Install Surfshark VPN on Firestick

Learn more about Surfshark and Grab the Best Surfshark Deal Now!


Install Surfshark on Firestick

Best Surfshark Deal


Other VPNs to Consider

NordVPN (Best for Streaming)

Best Features

  • 5000+ Server in 50+ Countries 
  • Military-Grade Encryption
  • Fast Connection Speed
  • Suitable to a lot of devices
  • No-Log Policy

Prices
  • Complete $5.89 per month (64% Discount)
  • Plus $4.59 per month (56% Discount)
  • Standard $3.69 per month (55% Discount)

Best Features

  • 750+ High-speed VPN Servers in 43 Locations
  • Military-Grade Encryption
  • Fastest HD Streaming and Gaming
  • 30-Day Money-Back Guarantee
  • Unlimited Data & Devices
  • No-Log Policy

Prices
  • 3 Years $1.99 per month (82% Discount)
  • 1 Years $3.29 per month (70% Discount)
  • 1 Month $10.99 per month

IPVanish VPN (Most Secure)

Best Features

  • 1200+ Servers in 60+ Countries around the world
  • Unlimited Connections
  • No-Log Policy
  • Top Notch Military-Grade VPN Protocols and Encryptions
  • 100% Safe and Secured
  • Most Trusted VPN
  • Best VPN for Firestick
  • 30-Day Money-Back Guarantee

Prices
  • Yearly $3.99 per month (63% Discount) – 30 days risk free + Ransomware & Malware Protection
  • Quarterly $5.32 per month (51% Discount)
  • Monthly $10.99 per month


For more VPN discounts, go to ReviewVPN Deals and purchase the best VPN for you.

Click here to get the lowest price on Surfshark through our exclusive limited-time offer.
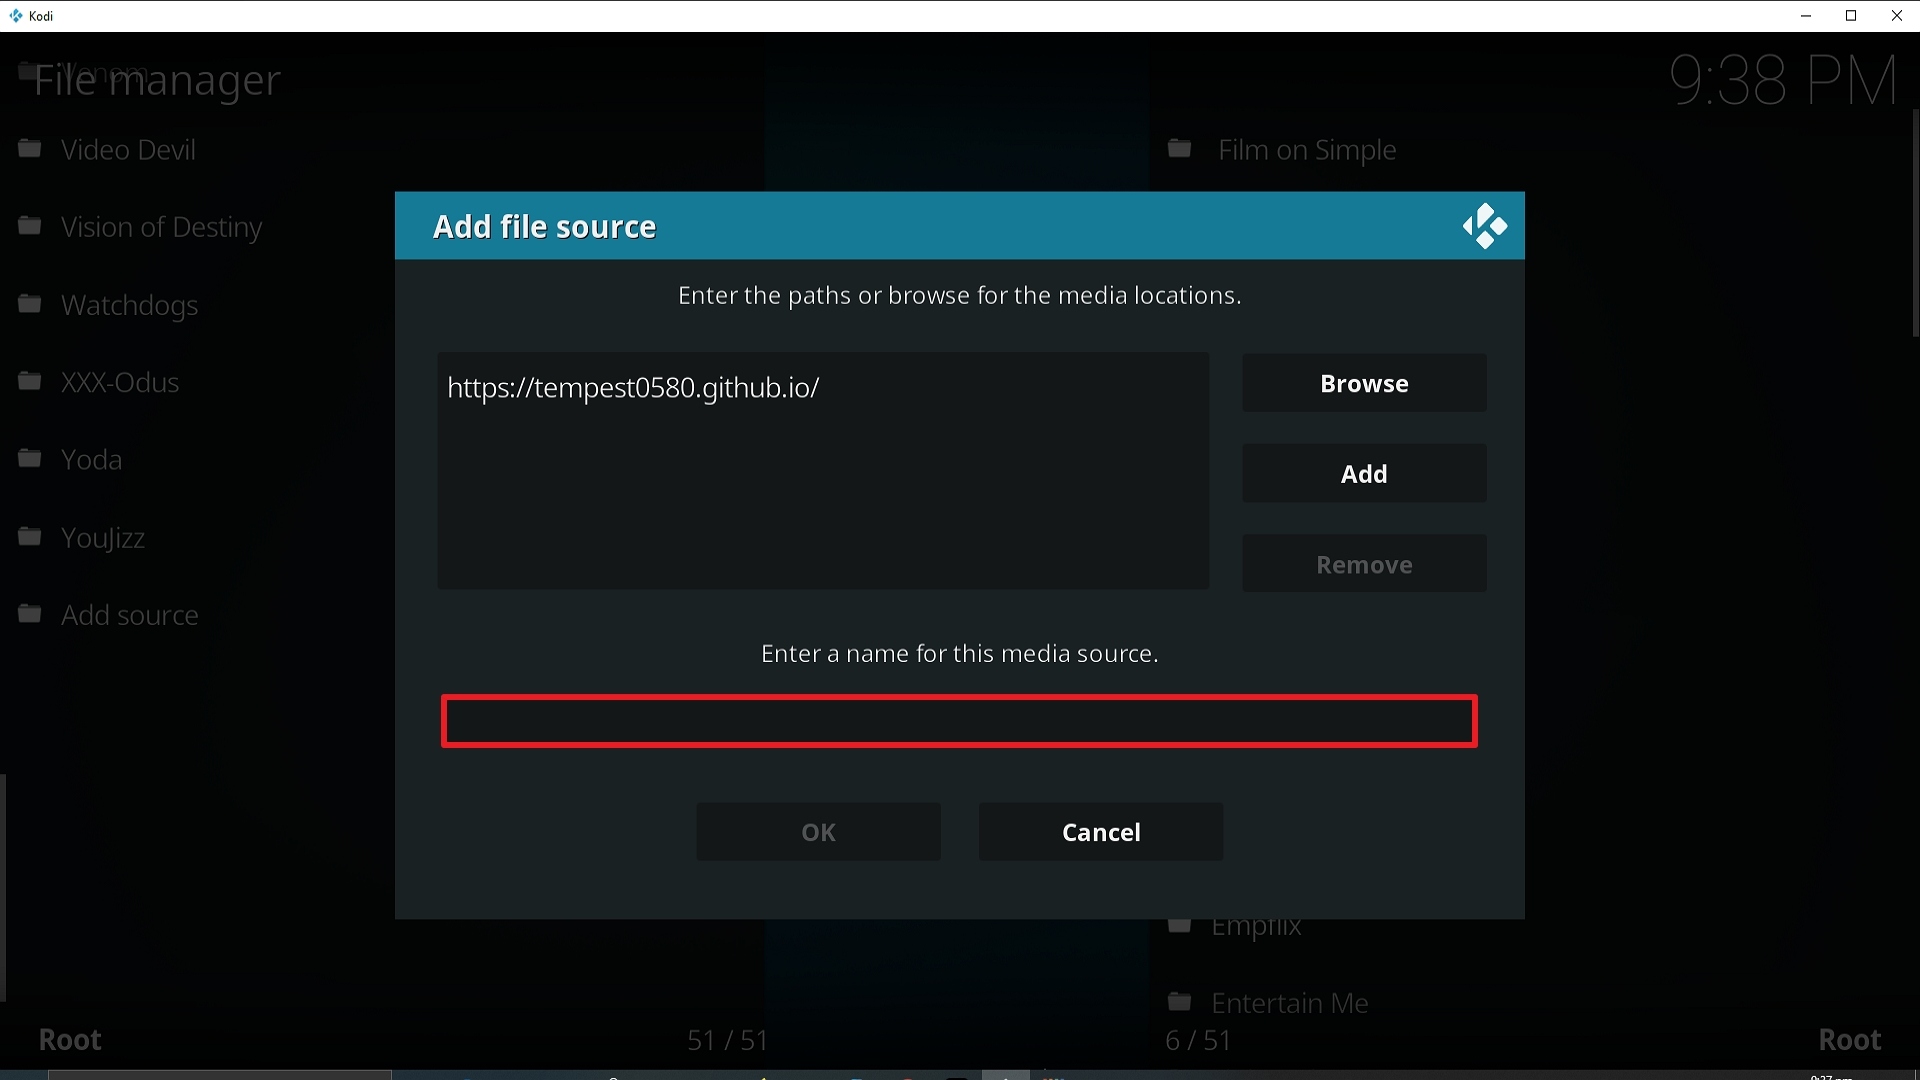
 

Install SelfLess Live Kodi Addon

SelfLess Live Kodi Addon

Source: http://kodighost.gq/grave/

Selfless Live is a Kodi addon that concentrates mainly on drawing Live Tv from a wide range of services including Mobdro, Red Box, and TV Tap amongst other sources.

They also provide a selection of Movies and TV Shows. This is the new and improved version of Selfless Lite.

As far as the Movie and TV Show sections go, we recommend using Real Debrid. For as little as $2.50 a month you can get premium links and lists from 50+ paid servers, drawn directly from Torrent servers. Using Real Debrid you never have to worry again about trawling through dead links, only to find one that works but with crappy quality.


Common Errors

Here are the most common errors you will come across with Selfless Live including some quick fixes and links to in-depth guides:

  • Source not working/slow/frozen: All the sources that Selfless Live is drawing from are from other providers, in many cases other Kodi add ons. So, you have maybe 2 or 3 requests needing to happen in a row. This means you will need to be extra patient when waiting for links to work. Give it up to 20 seconds to process the request, receive a go from the link server, and start to buffer the source. Particularly for Live TV. You may also want to refresh the link, to see if it loads the second time. The link itself may be blocked or Geo-IP locked due to the location of the stream. To circumvent both locks always use Kodi with a VPN, to make sure your connection is secure and encrypted. For more fixes read our fix guide linked above.
  • Could not connect to URL/Download: If the download URL for the addon fails to connect, check the spelling first. Try to connect a few times, to make sure it’s just not a server error, from receiving too many requests. Also, make sure you are using a VPN to discount your ISP blocking the content. Check here for the best VPN deal. If it’s still not working work through our step-by-step error fixing guide linked above.
  • Kodi check log error: This will probably be due to your media cache being full. To find out how to clear your cache and download system tools to read our in-depth fix guide linked above.


ANONYMOUSLY


Review

Selfless Live is a pretty good all-around addon. Just like other addons that attempt to do everything it lacks in certain areas, for example, Live Sports and Live TV are not its strong points. You will find a lot of dead links.

But you can get a great range of Movies and TV Shows, and that’s not to say none of the Live TV works, you will just have to work for it. The links to Mobdro and Red Box aren’t full proof. So, you’re not getting say 7 or 8 great addons in one addon, as the scrapers differ.

If you really want to get the best out of Live TV, then we recommend you pay say $7-8 a month for a good premium IPTV service. We recommend Player’s Klub or Helix. You get a choice of 3,000+ Live TV Channels from all around the world, in HD quality.

There is no free service on Kodi that will compare to a paid premium service.

Sections in Selfless Live include:

  • IPTV SVR.1 (Net.tv)
  • IPTV SVR.2 (Mobdro)
  • IPTV SVR.3 (SwiftStreamz 1)
  • IPTV SVR.4 (SwiftStreamz 2)
  • IPTV SVR.5 (TV TAP)
  • IPTV SVR.6 (RedBox TV)
  • IPTV SVR.7 (USA NEWS)
  • Kodi Ghost: Movies
  • Kodi Ghost: TV Shows

When you drill down into the sections, some of the categories include:

  • 24/7 Shows
  • Video on Demand
  • WWE Live
  • Sports Heaven
  • UK Channels
  • Live Games
  • The Big List
  • Manual Links
  • WWE SmackDown Live
  • Rock’n’Roll
  • USA Channels


YOUR INTERNET ACTIVITY IS BEING WATCHED

ReviewVPN cannot attest to the legality, security and privacy of the applications discussed on this site. It is highly recommended that you use a VPN service while streaming or using Kodi.

Currently, your IP 216.73.217.150 is visible to everyone and your Browser is being tracked by Advertisers & ISP Provider.

Save 65% Now

Limited Time Offer

Here are the main reasons why you must use a VPN:

  • Your activities are hidden from your ISP, the government, and from the apps you are using.
  • You can access additional movies and TV streams.
  • ISP attempts to throttle are thrwarted thus reducing buffering issues.
  • Geographically restricted content like Netflix and Hulu can be unblocked.

A VPN works be replacing your ISP-assigned IP address and creating an encrypted tunnel. We recommend the no log service offered by IPVanish. It works well on a Firestick and offers the fastest possible speeds.

Special Limited Time Offer - Get IPVanish


How to Install Selfless Live Addon on Kodi with Screenshots

  1. From the home screen, select the cogwheel at the upper left.

Step 1 Installing SelfLess addon on Kodi

2. Select System in the bottom right corner.

Step 2 Installing SelfLess addon on Kodi


3. Select Add-ons on the left side of the screen.

Step 3 Installing SelfLess addon on Kodi


4. Select Unknown sources.

Step 4 Installing SelfLess addon on Kodi


5. Click Yes to allow unknown sources.

Step 5 Installing SelfLess addon on Kodi


6. Select File manager.

Step 6 Installing SelfLess on Kodi


7. Click Add source.

Step 7 Installing SelfLess addon on Kodi


8. Click on <None>.

Step 8 Installing SelfLess addon on Kodi


9. Type exactly: http://kodighost.gq/grave/

Step 9 Installing SelfLess Kodi addon on Kodi


10. Click on OK.

Step 10 Installing SelfLess Kodi addon on Kodi


11. Select enter a name for this media source.

Step 11 Installing SelfLess Kodi addon on Kodi


12. Name is SelfLess (this part isn’t critical as long as you remember the name).

Step 12 Installing SelfLess Kodi addon on Kodi


13. Click on OK.

Step 13 Installing SelfLess Kodi addon on Kodi


14. Click on OK.

Step 14 Installing SelfLess Kodi addon on Kodi


15. Take one step back and click on Add-ons.

Step 15 Installing SelfLess Kodi addon on Kodi


16. Select install from zip file.

Step 16 Installing SelfLess Kodi addon on Kodi


17. Click on SelfLess (or whatever you named the source).

Step 17 Installing SelfLess Kodi addon on Kodi


18. Click on repository.kodi_ghost-1.0.zip

Step 18 Installing SelfLess Kodi addon on Kodi


19. Select on Install from repository.

Step 19 Installing SelfLess Kodi addon on Kodi


20. Click on Kodi Ghost Repo.

Step 20 Installing SelfLess Kodi addon on Kodi


21. Pick Video add-ons.

Step 21 Installing SelfLess Kodi addon on Kodi


22. Select SelfLess again.

Step 22 Installing SelfLess Kodi addon on Kodi


23. Click on Install.

Step 23 Installing SelfLess Kodi addon on Kodi


24. Select OK after reviewing the add-ons that will be installed.

Step 24 Installing SelfLess Kodi addon on Kodi


25. You should see a popup in the upper right corner saying SelfLess has installed. There will actually be multiple popups for the various components.

Step 25 Installing SelfLess Kodi addon on Kodi


26. Click on Open to start the SelfLess add-on.

Step 26 Installing SelfLess Kodi addon on Kodi


Install Surfshark on Firestick

Best Surfshark Deal


How to Install Surfshark VPN on Firestick

If your Firestick still has the older interface, read this article to learn how to update it: Update Firestick Interface.

You can download Surfshark directly from the Amazon App store. It will be easy for you to find Surfshark with your Firestick’s Find feature. Refer to our screenshots below.

1. Go to the Home screen of your Firestick.

step 1 Install Surfshark VPN on Firestick


2. Navigate towards the Find tab. Press the Search button from the resulting dropdown.

step 2 Install Surfshark VPN on Firestick


3. Type in the keyword of SurfShark and select from the suggestions that will appear.

step 3 Install Surfshark VPN on Firestick


4. Click the official SurfShark icon from your search results.

step 4 Install Surfshark VPN on Firestick


5. Press the Download (You own it) button.

step 5 Install Surfshark VPN on Firestick


6. The SurfShark VPN installer will download on your device.

step 6 Install Surfshark VPN on Firestick


7. SurfShark VPN’s app will automatically install itself on your Fire TV stick.

step 7 Install Surfshark VPN on Firestick


8. Press the Open button after completing SurfShark VPN’s installation process.

step 8 Install Surfshark VPN on Firestick


9. Please wait for the SurfShark VPN to load its user interface.

step 9 Install Surfshark VPN on Firestick


10. You can now log in with your SurfShark VPN account credentials.

step 10 Install Surfshark VPN on Firestick

Learn more about Surfshark and Grab the Best Surfshark Deal Now!


Install Surfshark on Firestick

Best Surfshark Deal


Other VPNs to Consider

NordVPN (Best for Streaming)

Best Features

  • 5000+ Server in 50+ Countries 
  • Military-Grade Encryption
  • Fast Connection Speed
  • Suitable to a lot of devices
  • No-Log Policy

Prices
  • Complete $5.89 per month (64% Discount)
  • Plus $4.59 per month (56% Discount)
  • Standard $3.69 per month (55% Discount)

Best Features

  • 750+ High-speed VPN Servers in 43 Locations
  • Military-Grade Encryption
  • Fastest HD Streaming and Gaming
  • 30-Day Money-Back Guarantee
  • Unlimited Data & Devices
  • No-Log Policy

Prices
  • 3 Years $1.99 per month (82% Discount)
  • 1 Years $3.29 per month (70% Discount)
  • 1 Month $10.99 per month

IPVanish VPN (Most Secure)

Best Features

  • 1200+ Servers in 60+ Countries around the world
  • Unlimited Connections
  • No-Log Policy
  • Top Notch Military-Grade VPN Protocols and Encryptions
  • 100% Safe and Secured
  • Most Trusted VPN
  • Best VPN for Firestick
  • 30-Day Money-Back Guarantee

Prices
  • Yearly $3.99 per month (63% Discount) – 30 days risk free + Ransomware & Malware Protection
  • Quarterly $5.32 per month (51% Discount)
  • Monthly $10.99 per month


For more VPN discounts, go to ReviewVPN Deals and purchase the best VPN for you.

Click here to get the lowest price on Surfshark through our exclusive limited-time offer.
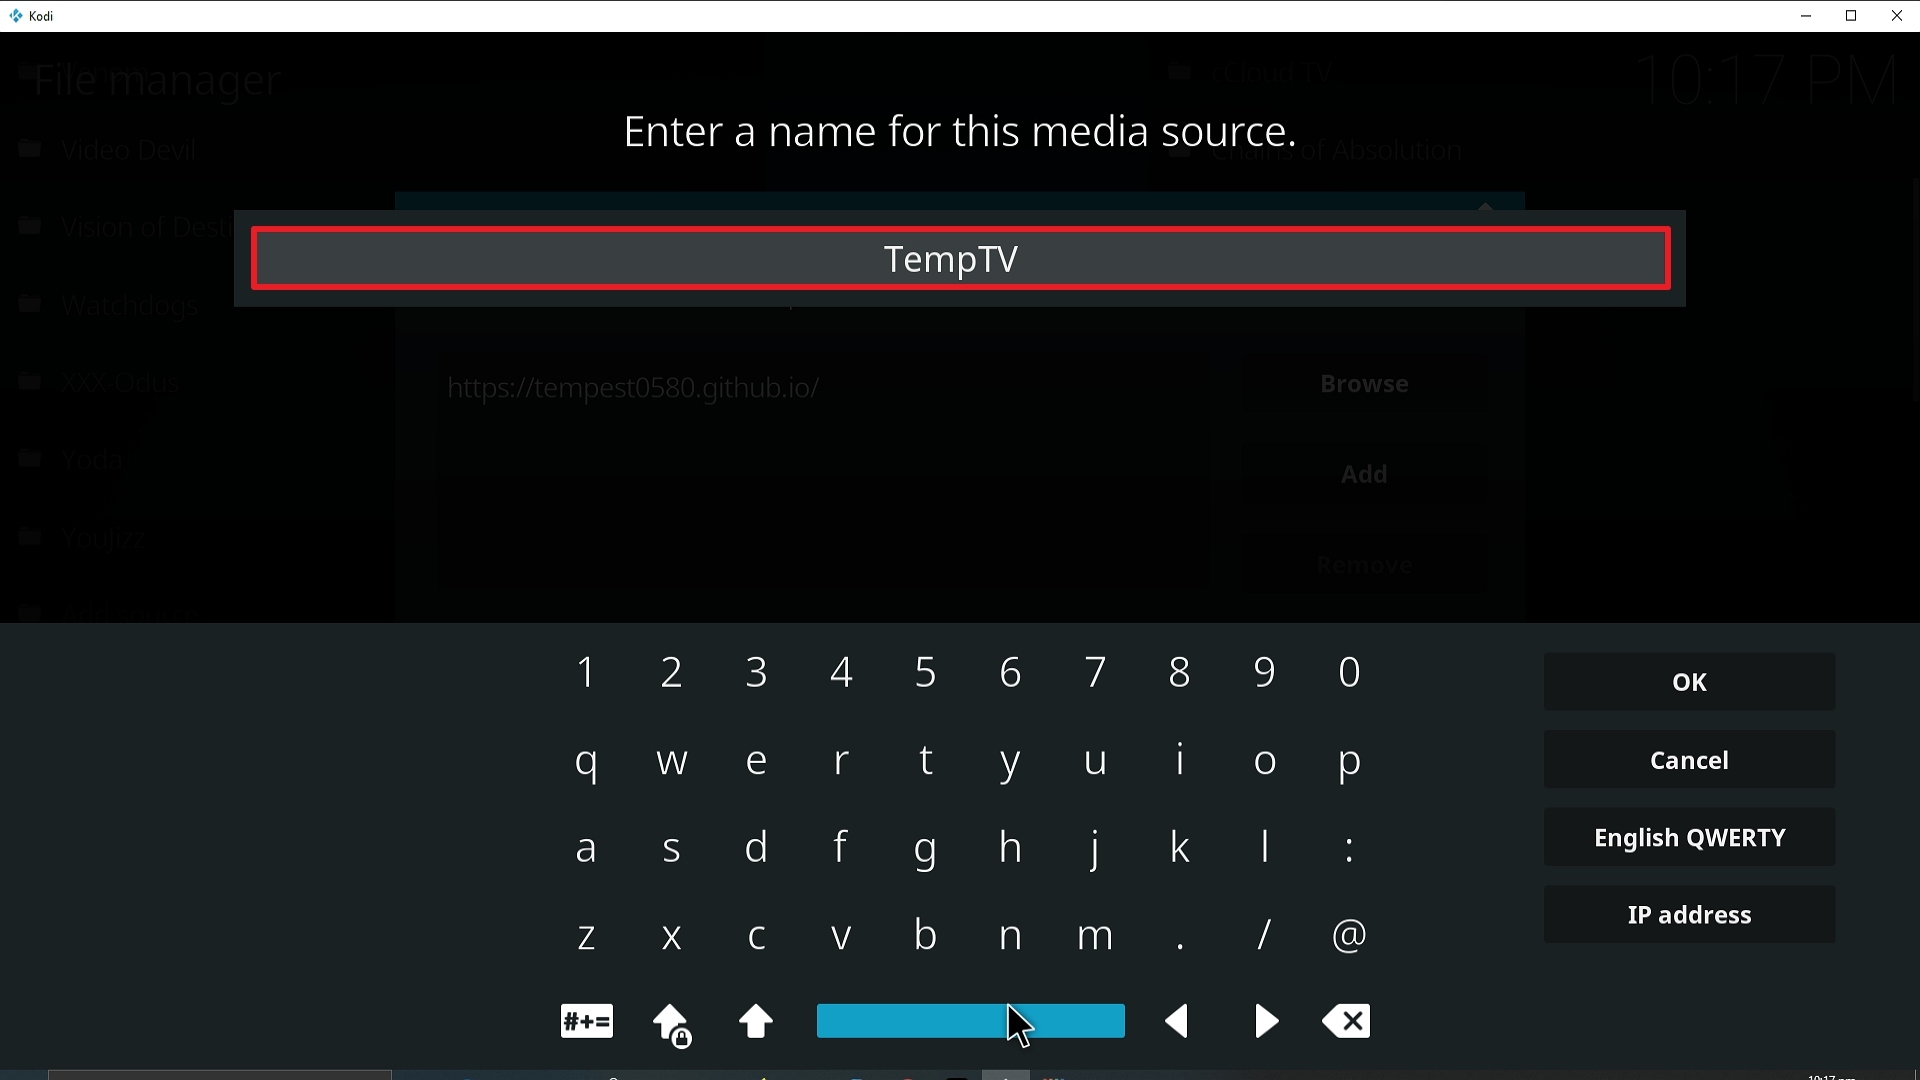
 

Install Bone Crusher White Goo Kodi Addon

Bone Crusher White Goo Kodi Addon

In this article, we will help you install Blue Hats Aeon Terror Kodi Build on Firestick.


Source: https://cy4root2.github.io/zip/

Bone Crusher White Goo Kodi addon is a brand new addon for 2019, a house in the Cy4root repository, which has a reputation for only providing quality addons.

Bone Crushed provides good quality links for Movies and TV Shows.

Currently, it’s not compatible with Real Debrid, but you can tie in your free or premium Trakt account. A Trakt account allows you to keep track of what you have watched across different devices and addons. The premium function for $2.50 gives you access to 20+ premium features, probably the best of which is a curated list of content based on what you watched and liked.


Common Errors

These are lists of common errors and fixes as well as in-depth guides to help you get the best out of Bone Crusher:

  • Source not working/slow/frozen: Bone Crusher does not host any of the content that it serves, using Resolve URL and other scrapers it finds the best working links from across the globe. The lack of Real Debrid compatibility also means that there is no minimum bar set for quality links being served. Also, it means that you need to be patient when links are connecting as you have no idea where they are from. Wait up to 20 seconds and try to refresh the link at least once if it comes to the top. Also always make sure that you are using Kodi with a VPN. Without a VPN many of the links to content may be blocked by your internet provider. They work in conjunction with content producers to stop people from easily accessing illegal streams of their content. Using a VPN, you can encrypt your connection and alter your IP, to allow you to browse and watch whatever you want freely. Check here for the best VPN deal. For more fixes for a broke or slow working source, read our in-depth fix guide linked above.


  • Kodi check log error: A check log error, simply asks you to check the internal log that Kodi must list all its processes and errors. Though an error could be one of a hundred reasons, it tends to only be one of a few. The most common is that your media cache is full and needs to be emptied. This cache contains snippets of all your content and media. When this is full, it will start giving an error, as Kodi doesn’t have an inbuilt cache clearing or warning system. Do this easily with an Amazon Firestick or find out how to download system tools and addons to do this on Kodi, check our fixes guide linked above.


  • Could not connect to URL/Download: Problems with the URL, firstly means check you spelled it correctly and exactly. Next check that the URL is not down, by putting the URL into a browser bar. If the URL works, then you may just need to try it a few times, if the server is getting lots of requests. Sometimes repository URL goes down at a minute’s notice, so Google for news or just find a different addon to download in the meantime. We recommend you have at least 10 addons downloaded so you always have a backup. 


ANONYMOUSLY

Review

Bone Crusher is a good new addon, with working links and easy-to-navigate sections, as well as a simple UI. Is it better than any other Movie and Tv Show addon? No.

A big drawback is the lack of Real Debrid compatibility which would allow you to access high-quality premium links from 50+ servers. This means you don’t have to sift through acres of dead or low-quality links.

Categories in Bone Crusher include:

  • Movies
  • TV Shows
  • Swift Streams
  • Documentaries
  • My TV Shows
  • New Movies (IMDB)
  • New Episodes (Trakt)
  • Recently Aired (TV Maze)
  • Search
  • Tools


YOUR INTERNET ACTIVITY IS BEING WATCHED

ReviewVPN cannot attest to the legality, security and privacy of the applications discussed on this site. It is highly recommended that you use a VPN service while streaming or using Kodi.

Currently, your IP 216.73.217.150 is visible to everyone and your Browser is being tracked by Advertisers & ISP Provider.

Save 65% Now

Limited Time Offer

Here are the main reasons why you must use a VPN:

  • Your activities are hidden from your ISP, the government, and from the apps you are using.
  • You can access additional movies and TV streams.
  • ISP attempts to throttle are thrwarted thus reducing buffering issues.
  • Geographically restricted content like Netflix and Hulu can be unblocked.

A VPN works be replacing your ISP-assigned IP address and creating an encrypted tunnel. We recommend the no log service offered by IPVanish. It works well on a Firestick and offers the fastest possible speeds.

Special Limited Time Offer - Get IPVanish


Legal Disclaimer: ReviewVPN.com does not encourage or endorse any illegal activity involved in the usage of services and applications referenced on this site. We do not verify the licensing agreements of services. The end-user is wholly responsible for ensuring that any media accessed through these services does not violate copyright and/or licensing laws. ReviewVPN does not promote, link to, or receive compensation from any Apps and IPTV services.


Install Surfshark on Firestick

Best Surfshark Deal


How to Install Bone Crusher White Goo Addon on Kodi with Screenshots

  1. From the home screen, select the cogwheel at the upper left.

Step 1 Installing Bone Crusher White Goo addon on Kodi


2. Select System in the bottom right corner.

Step 2 Installing Bone Crusher White Goo addon on Kodi


3. Select Add-ons on the left side of the screen.

Step 3 Installing Bone Crusher White Goo addon on Kodi


4. Select Unknown sources.

Step 4 Installing Bone Crusher White Goo addon on Kodi


5. Click Yes to allow unknown sources.

Step 5 Installing Bone Crusher White Goo addon on Kodi


6. Select File manager.

Step 6 Installing Bone Crusher White Goo on Kodi


7. Click Add source.

Step 7 Installing Bone Crusher White Goo addon on Kodi


8. Click on <None>.

Step 8 Installing Bone Crusher White Goo addon on Kodi


9. Type exactly: https://cy4root2.github.io/zip/

Step 9 Installing Bone Crusher White Goo Kodi addon on Kodi


10. Click on OK.

Step 10 Installing Bone Crusher White Goo Kodi addon on Kodi


11. Select enter a name for this media source.

Step 11 Installing Bone Crusher White Goo Kodi addon on Kodi


12. Name is Bone Crusher White Goo (this part isn’t critical as long as you remember the name).

Step 12 Installing Bone Crusher White Goo Kodi addon on Kodi


13. Click on OK.

Step 13 Installing Bone Crusher White Goo Kodi addon on Kodi


14. Click on OK.

Step 13 Installing Bone Crusher White Goo Kodi addon on Kodi


15. Take one step back and click on Add-ons.

Step 15 Installing Bone Crusher White Goo Kodi addon on Kodi


16. Select install from zip file.

Step 16 Installing Bone Crusher White Goo Kodi addon on Kodi


17. Click on Bone Crusher White Goo (or whatever you named the source).

Step 17 Installing Bone Crusher White Goo Kodi addon on Kodi


18. Click on repository.cy4root-master.zip

Step 18 Installing Bone Crusher White Goo Kodi addon on Kodi


19. Select on Install from repository.

Step 19 Installing Bone Crusher White Goo Kodi addon on Kodi


20. Click on cy4root Repo.

Step 20 Installing Bone Crusher White Goo Kodi addon on Kodi


21. Pick Video add-ons.

Step 21 Installing Bone Crusher White Goo Kodi addon on Kodi


22. Select Bone Crusher White Goo again.

Step 22 Installing Bone Crusher White Goo Kodi addon on Kodi


23. Click on Install.

Step 23 Installing Bone Crusher White Goo Kodi addon on Kodi


24. Select OK after reviewing the add-ons that will be installed.

Step 24 Installing Bone Crusher White Goo Kodi addon on Kodi


25. You should see a popup in the upper right corner saying Bone Crusher White Goo has installed. There will actually be multiple popups for the various components.

Step 25 Installing Bone Crusher White Goo Kodi addon on Kodi


26. Click on Open to start the Bone Crusher White Goo add-on.

Step 26 Installing Bone Crusher White Goo Kodi addon on Kodi


Always Use a VPN On Kodi

It is advisable to install a VPN on your streaming device. This is because any time you are streaming content online, your online data is vulnerable and you are being monitored on the internet service provider’s network. 

Not only that, but you will also experience location restrictions. Using a VPN will save you that headache and stress and you will be safe and secure while streaming content online. We recommend Surfshark as it offers high security and privacy with a zero-log policy with DNS leak protection. 

Note: For more information about Surfshark, please read our Surfshark Review.


Grab your subscription now!


How to Install Surfshark VPN on Firestick

If your Firestick still has the older interface, read this article to learn how to update it: Update Firestick Interface.

Follow our screenshots below to install the SurfShark VPN app on your Fire TV stick.

1. Go to the Home screen of your Firestick.

step 1 Install Surfshark VPN on Firestick


2. Navigate towards the Find tab. Press the Search button from the resulting dropdown.

step 2 Install Surfshark VPN on Firestick


3. Type in the keyword of SurfShark and select from the suggestions that will appear.

step 3 Install Surfshark VPN on Firestick


4. Click the official SurfShark icon from your search results.

step 4 Install Surfshark VPN on Firestick


5. Press the Download (You own it) button.

step 5 Install Surfshark VPN on Firestick


6. The SurfShark VPN installer will download on your device.

step 6 Install Surfshark VPN on Firestick


7. SurfShark VPN’s app will automatically install itself on your Fire TV stick.

step 7 Install Surfshark VPN on Firestick


8. Press the Open button after completing SurfShark VPN’s installation process.

step 8 Install Surfshark VPN on Firestick


9. Please wait for the SurfShark VPN to load its user interface.

step 9 Install Surfshark VPN on Firestick


10. You can now log in with your SurfShark VPN account credentials.

step 10 Install Surfshark VPN on Firestick

Learn more about Surfshark and Grab the Best Surfshark Deal Now!


Install Surfshark on Firestick

Best Surfshark Deal


Other VPNs to Consider

NordVPN (Best for Streaming)

Best Features

  • 5000+ Server in 50+ Countries 
  • Military-Grade Encryption
  • Fast Connection Speed
  • Suitable to a lot of devices
  • No-Log Policy

Prices
  • Complete $5.89 per month (64% Discount)
  • Plus $4.59 per month (56% Discount)
  • Standard $3.69 per month (55% Discount)

Best Features

  • 750+ High-speed VPN Servers in 43 Locations
  • Military-Grade Encryption
  • Fastest HD Streaming and Gaming
  • 30-Day Money-Back Guarantee
  • Unlimited Data & Devices
  • No-Log Policy

Prices
  • 3 Years $1.99 per month (82% Discount)
  • 1 Years $3.29 per month (70% Discount)
  • 1 Month $10.99 per month

IPVanish VPN (Most Secure)

Best Features

  • 1200+ Servers in 60+ Countries around the world
  • Unlimited Connections
  • No-Log Policy
  • Top Notch Military-Grade VPN Protocols and Encryptions
  • 100% Safe and Secured
  • Most Trusted VPN
  • Best VPN for Firestick
  • 30-Day Money-Back Guarantee

Prices
  • Yearly $3.99 per month (63% Discount) – 30 days risk free + Ransomware & Malware Protection
  • Quarterly $5.32 per month (51% Discount)
  • Monthly $10.99 per month


For more VPN discounts, go to ReviewVPN Deals and purchase the best VPN for you.

Click here to get the lowest price on Surfshark through our exclusive limited-time offer.
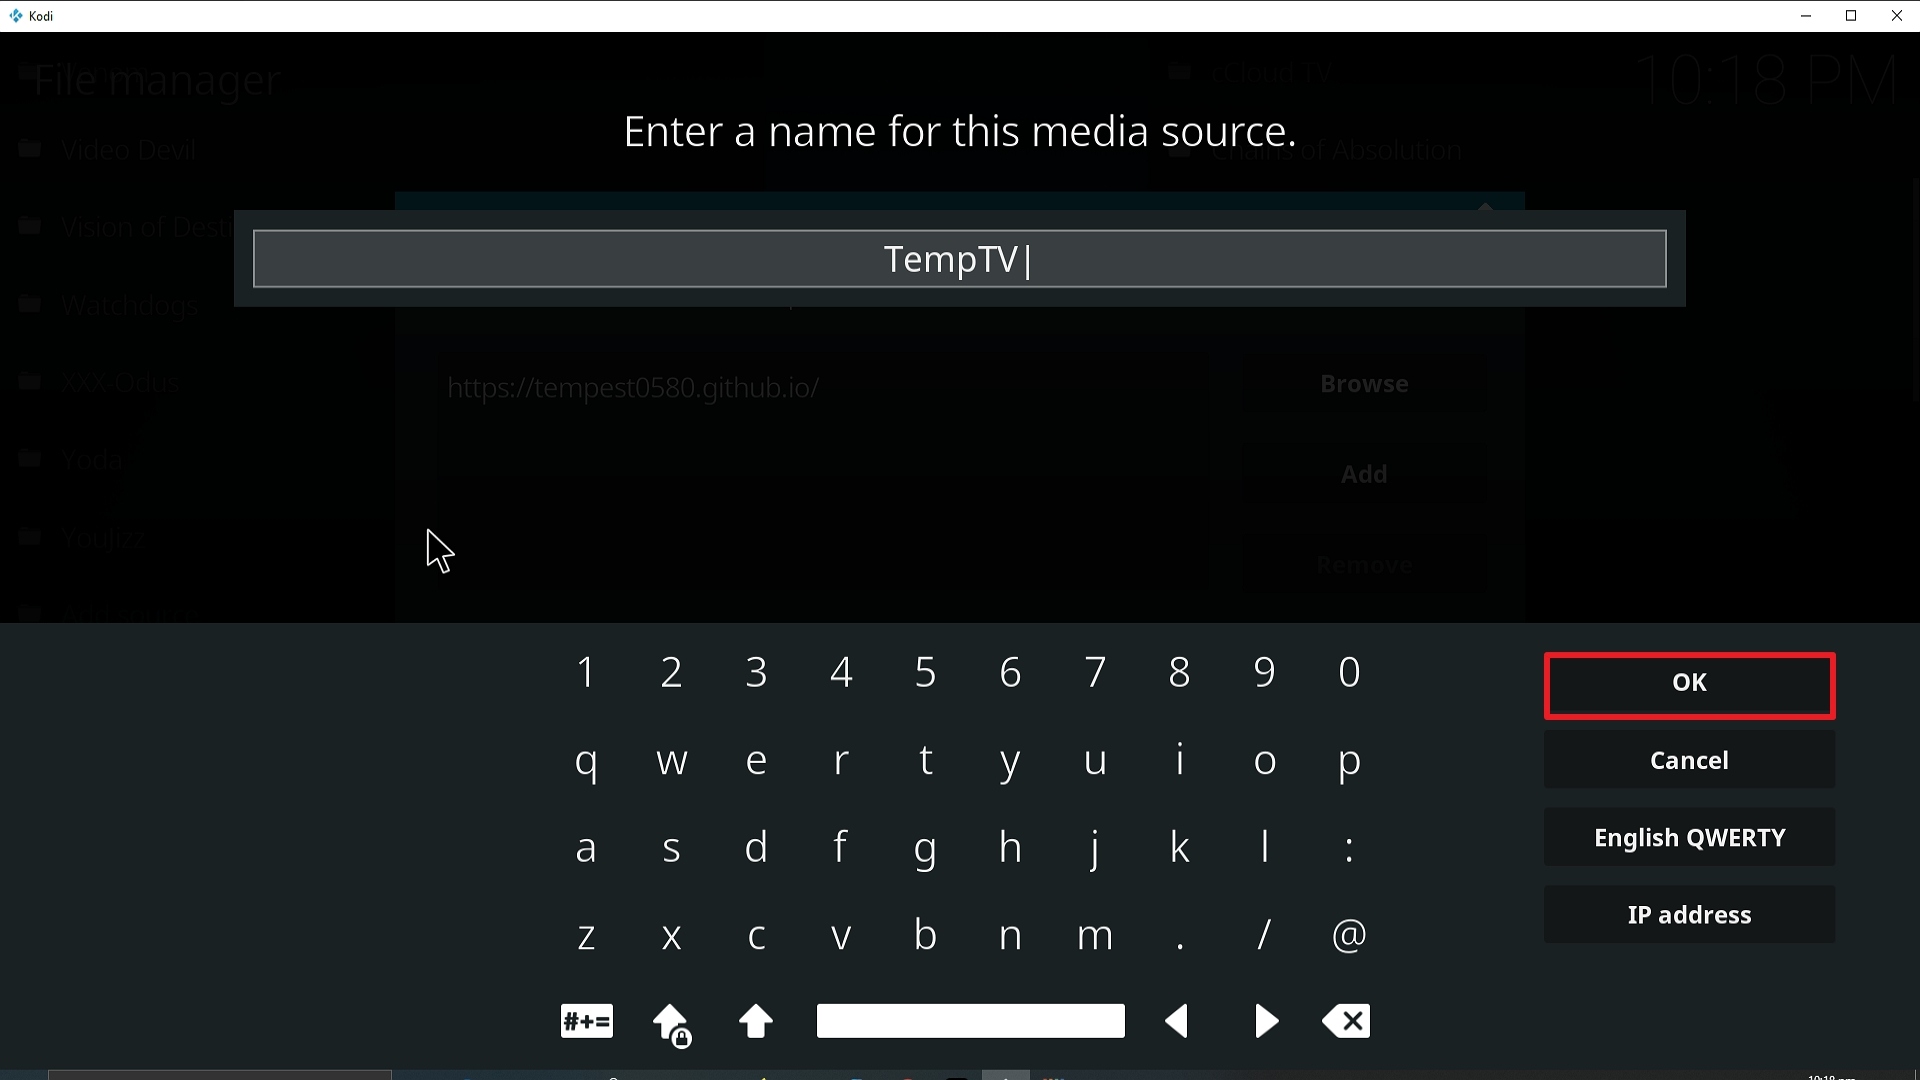
 

Install Sport365 Live Kodi Addon

Sport365 Live Kodi Addon

In this article, we will help you install Sport365 Live Kodi Addon on Firestick.


Source: https://bugatsinho.github.io/repo/

Sport365 Live Kodi Addon is a great resource for watching live sports streams. Unlike the endless live sports addon, it also offers a unique code base, which means it doesn’t draw its streams from Sports Devil, Plexus, or Live Resolver. This gives it the ability to better find working streams where other addons may fail. Also, it means that Sports 365 Live isn’t reliant on another addon to provide you with working links. This is great, seeing as recently Sports Devil has become less reliable.

Instead, all live content is fetched from the sport365.live website. The User Interface for the addon is super simple, simply showing all the live matches that are currently going on right now or coming up today. You can access up to 15 links per match, giving you a great range to choose from.

The Developer Bugatsinho also has a major form in developing successful Kodi addons and has a working GitHub repository where people can flag open issues, and other members of the community can fix the open codebase. This is a great advantage if the developer goes dark, or another developer wants to come in and help with the project.


ANONYMOUSLY

Common Errors

These are the most common errors you might come across when using Sports 365 Live:

  • Source not working/slow/frozen: Dealing with live sports feeds can be more taking on resources than other sources. Firstly it may take longer for the link to connect and loud due to the complexity of tieing into a live feed rather than just a video file. We recommend you wait for up to 20 seconds for the link to load before trying another link. Also due to the bandwidth needed for a live feed, you should have your Kodi box wired in rather than running on WiFI. That will definitely increase the speed and quality of the connection. For more fixes read our fix guide linked above.
  • Could not connect to URL/Download: The most common mistake here is mis-spelling the URL. So go back and double-check that first. Next, you can pop the URL into a web browser and see if it’s working. As it’s a GitHub repo, there shouldn’t be a problem. Check the Sports 365 issues section, to see if anybody has flagged any issues. If there are no issues, also make sure that your internet connection is being used with a VPN, or your ISP may be blocking the link to download the addon. Check here for the best VPN deal. For other fixes read our in-depth fix guide linked above.
  • Kodi check log error: A check log error generally relates to your media cache being full. If you have an Amazon Firestick you will be able to flush the cache using the device settings. However, on other devices, you might need to download a custom service maintenance addon. Kodi does not have an inbuilt function to clear the cache. To find out how to do this and other fixes read our in-depth fix guide linked above.


Review

Sport 365 Live is a fantastic addon and has shown great stability in finding working addons. The fact that it doesn’t rely on other addons is a massive bonus. Most sporting add-ons use Sports Devil, which is become less active and up to date.

The fact that the codebase is open source also increases the chances of the project staying live and being committed to even if the developer goes dark. It’s also great to see an add on from a developer who has come up with so many great addons already.

There are no categories in Sports 365 Live, you just get a massive list of all the live games and times that are happening today, which you can click through to and then search for working links.


YOUR INTERNET ACTIVITY IS BEING WATCHED

ReviewVPN cannot attest to the legality, security and privacy of the applications discussed on this site. It is highly recommended that you use a VPN service while streaming or using Kodi.

Currently, your IP 216.73.217.150 is visible to everyone and your Browser is being tracked by Advertisers & ISP Provider.

Save 65% Now

Limited Time Offer

Here are the main reasons why you must use a VPN:

  • Your activities are hidden from your ISP, the government, and from the apps you are using.
  • You can access additional movies and TV streams.
  • ISP attempts to throttle are thrwarted thus reducing buffering issues.
  • Geographically restricted content like Netflix and Hulu can be unblocked.

A VPN works be replacing your ISP-assigned IP address and creating an encrypted tunnel. We recommend the no log service offered by IPVanish. It works well on a Firestick and offers the fastest possible speeds.

Special Limited Time Offer - Get IPVanish


Legal Disclaimer: ReviewVPN.com does not encourage or endorse any illegal activity involved in the usage of services and applications referenced on this site. We do not verify the licensing agreements of services. The end-user is wholly responsible for ensuring that any media accessed through these services does not violate copyright and/or licensing laws. ReviewVPN does not promote, link to, or receive compensation from any Apps and IPTV services.


Install Surfshark on Firestick

Best Surfshark Deal


How to Install Sport365 Live Addon on Kodi with Screenshots

  1. From the home screen, select the cogwheel at the upper left.

Step 1 Installing Sport365 Live addon on Kodi


2. Select System in the bottom right corner.

Step 2 Installing Sport365 Live addon on Kodi


3. Select Add-ons on the left side of the screen.

Step 3 Installing Sport365 Live addon on Kodi


4. Select Unknown sources.

Step 4 Installing Sport365 Live addon on Kodi


5. Click Yes to allow unknown sources.

Step 5 Installing Sport365 Live addon on Kodi


6. Select File manager.

Step 6 Installing Sport365 Live on Kodi


7. Click Add source.

Step 7 Installing Sport365 Live addon on Kodi


8. Click on <None>.

Step 8 Installing Sport365 Live addon on Kodi


9. Type exactly: https://bugatsinho.github.io/repo/

Step 9 Installing Sport365 Live addon on Kodi


10. Click on OK.

Step 10 Installing Sport365 Live addon on Kodi


11. Select enter a name for this media source.

Step 12 Installing Sport365 Live addon on Kodi


12. Name is Sport365 Live (this part isn’t critical as long as you remember the name).

Step 12 Installing Sport365 Live addon on Kodi


13. Click on OK.

Step 13 Installing Sport365 Live addon on Kodi


14. Click on OK.

Step 14 Installing Sport365 Live addon on Kodi


15. Take one step back and click on Add-ons.

Step 15 Installing Sport365 Live addon on Kodi


16. Select install from zip file.

Step 16 Installing Sport365 Live addon on Kodi


17. Click on Sport365 Live (or whatever you named the source).

Step 17 Installing Sport365 Live addon on Kodi


18. Click on repository.bugatsinho-2.3.zip

Step 18 Installing Sport365 Live addon on Kodi


19. Select on Install from repository.

Step 19 Installing Sport365 Live addon on Kodi


20. Click on Bugatsinho Repo.

Step 20 Installing Sport365 Live addon on Kodi


21. Pick Video add-ons.

Step 21 Installing Sport365 Live addon on Kodi


22. Select Sport365 Live again.

Step 22 Installing Sport365 Live addon on Kodi


23. Click on Install.

Step 23 Installing Sport365 Live addon on Kodi


24. Select Version 2.6.4 Bugatsinho Repo

Step 24 Installing Sport365 Live addon on Kodi


25. Select OK after reviewing the add-ons that will be installed.

Step 25 Installing Sport365 Live addon on Kodi


26. You should see a popup in the upper right corner saying Sport365 Live has installed. There will actually be multiple popups for the various components.

Step 26 Installing Sport365 Live addon on Kodi


27. Click on Open to start the Sport365 Live  add-on.

Step 27 Installing Sport365 Live addon on Kodi


Always Use a VPN On Kodi

It is advisable to install a VPN on your streaming device. This is because any time you are streaming content online, your online data is vulnerable and you are being monitored on the internet service provider’s network. 

Not only that, but you will also experience location restrictions. Using a VPN will save you that headache and stress and you will be safe and secure while streaming content online. We recommend Surfshark as it offers high security and privacy with a zero log policy with DNS leak protection. 

Note: For more information about Surfshark, please read our Surfshark Review.


Grab your subscription now!


How to Install Surfshark VPN on Firestick

If your Firestick still has the older interface, read this article to learn how to update it: Update Firestick Interface.

Follow our screenshots below to install the SurfShark VPN app on your Fire TV stick.

1. Go to the Home screen of your Firestick.

step 1 Install Surfshark VPN on Firestick


2. Navigate towards the Find tab. Press the Search button from the resulting dropdown.

step 2 Install Surfshark VPN on Firestick


3. Type in the keyword of SurfShark and select from the suggestions that will appear.

step 3 Install Surfshark VPN on Firestick


4. Click the official SurfShark icon from your search results.

step 4 Install Surfshark VPN on Firestick


5. Press the Download (You own it) button.

step 5 Install Surfshark VPN on Firestick


6. The SurfShark VPN installer will download on your device.

step 6 Install Surfshark VPN on Firestick


7. SurfShark VPN’s app will automatically install itself on your Fire TV stick.

step 7 Install Surfshark VPN on Firestick


8. Press the Open button after completing SurfShark VPN’s installation process.

step 8 Install Surfshark VPN on Firestick


9. Please wait for the SurfShark VPN to load its user interface.

step 9 Install Surfshark VPN on Firestick


10. You can now log in with your SurfShark VPN account credentials.

step 10 Install Surfshark VPN on Firestick

Learn more about Surfshark and Grab the Best Surfshark Deal Now!


Install Surfshark on Firestick

Best Surfshark Deal


Other VPNs to Consider

NordVPN (Best for Streaming)

Best Features

  • 5000+ Server in 50+ Countries 
  • Military-Grade Encryption
  • Fast Connection Speed
  • Suitable to a lot of devices
  • No-Log Policy

Prices
  • Complete $5.89 per month (64% Discount)
  • Plus $4.59 per month (56% Discount)
  • Standard $3.69 per month (55% Discount)

Best Features

  • 750+ High-speed VPN Servers in 43 Locations
  • Military-Grade Encryption
  • Fastest HD Streaming and Gaming
  • 30-Day Money-Back Guarantee
  • Unlimited Data & Devices
  • No-Log Policy

Prices
  • 3 Years $1.99 per month (82% Discount)
  • 1 Years $3.29 per month (70% Discount)
  • 1 Month $10.99 per month

IPVanish VPN (Most Secure)

Best Features

  • 1200+ Servers in 60+ Countries around the world
  • Unlimited Connections
  • No-Log Policy
  • Top Notch Military-Grade VPN Protocols and Encryptions
  • 100% Safe and Secured
  • Most Trusted VPN
  • Best VPN for Firestick
  • 30-Day Money-Back Guarantee

Prices
  • Yearly $3.99 per month (63% Discount) – 30 days risk free + Ransomware & Malware Protection
  • Quarterly $5.32 per month (51% Discount)
  • Monthly $10.99 per month


For more VPN discounts, go to ReviewVPN Deals and purchase the best VPN for you.

Click here to get the lowest price on Surfshark through our exclusive limited-time offer.
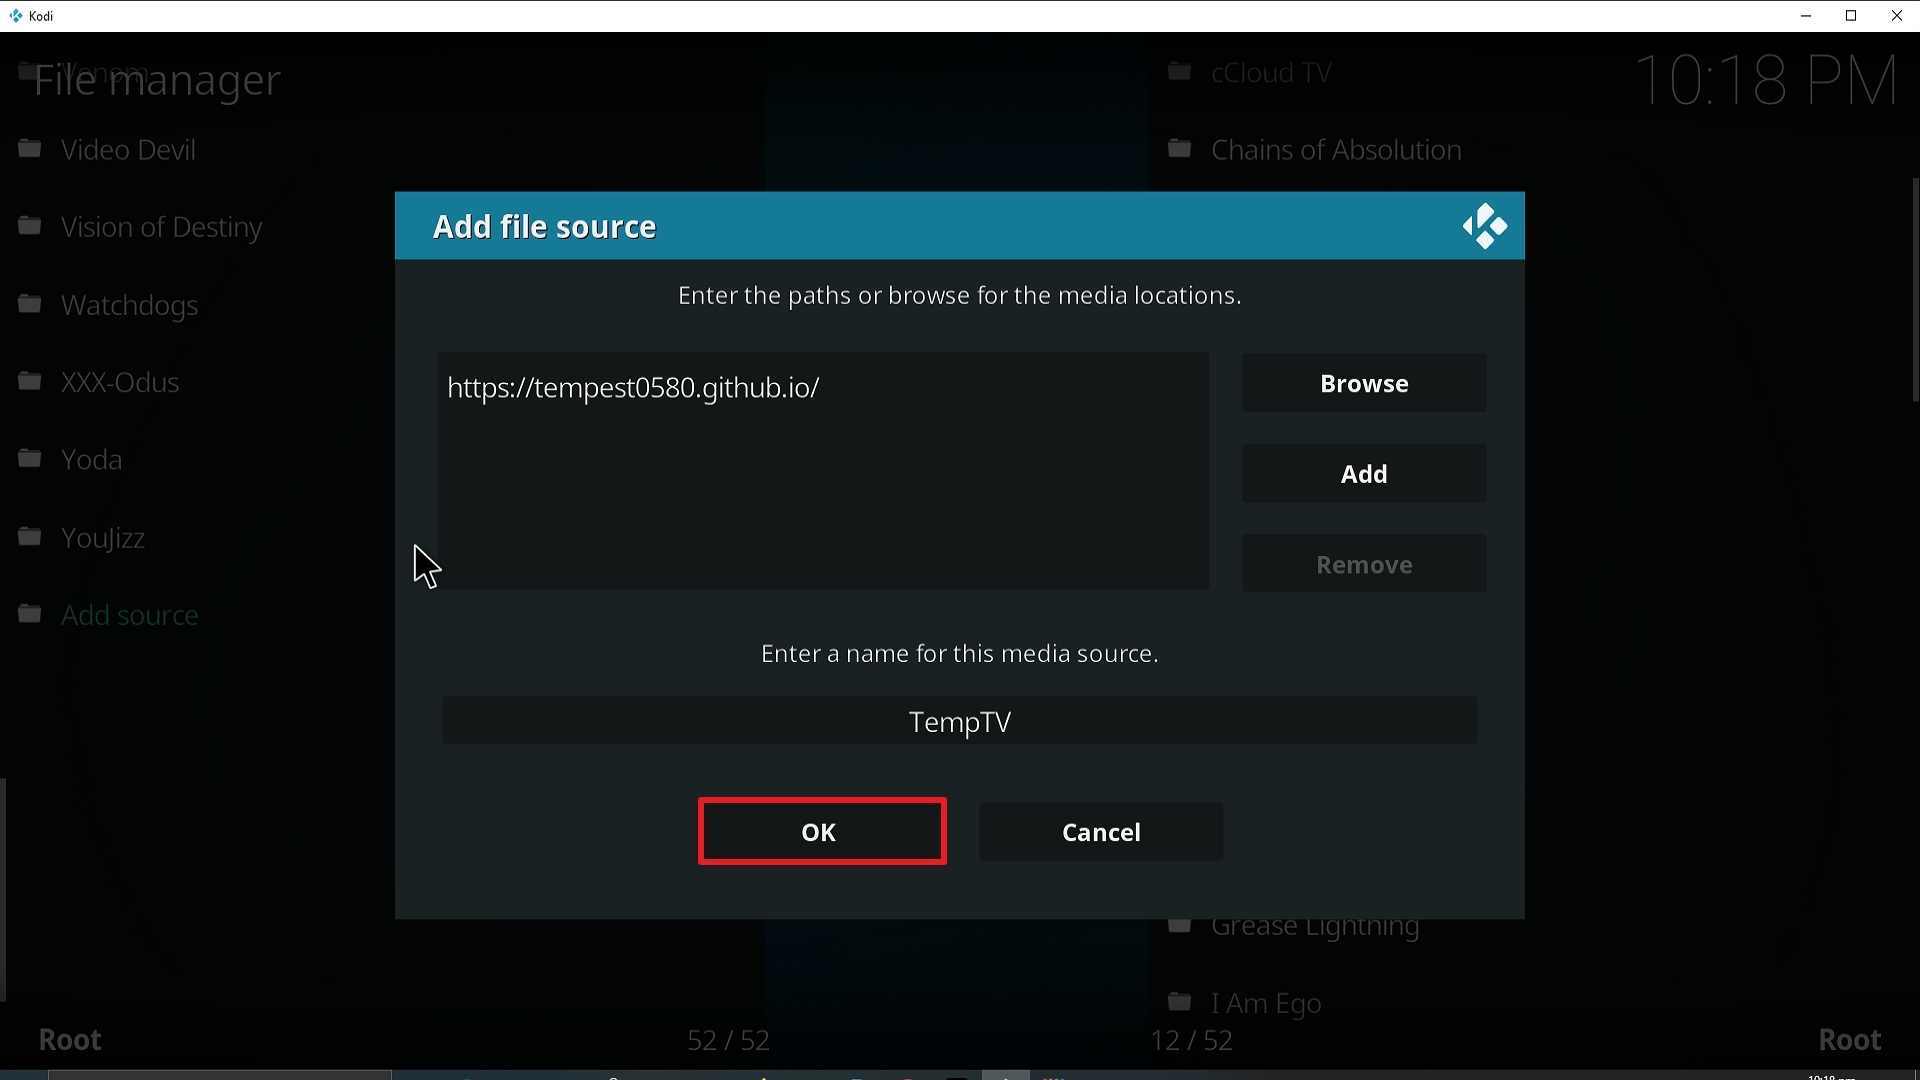
 

2