Firefly Kodi Addon
In this article, we will help you install FireflyKodi Addon on Firestick.

Source: https://huckfinndiesel.github.io/repo/
Firefly Kodi addon is a straight Exodus Redux clone with one key difference, it uses Open Scrapers for link crawling which gives it a better hit rate for finding the link that you are looking for.
Exodus Redux is probably one of the 5 most popular addons on Kodi of all time, so it has been the subject of many clones and is itself a clone of the original Exodus.
Firefly has an identical user interface and enormous content library which concentrates solely on Movies and TV Shows.
The addon is Trak compatible, which means that you can keep track of everything you have watched and carry on where you left off even when switching addons. With a premium account, you can also see what people with similar tastes to you are watching and even download their content lists.
You can also connect a Real Debrid account, which is a must-have with any Kodi addon. Real Debrid will cost as little as $2 a month but provides an invaluable service. Instead of wasting time looking through dead and low-quality links, you can use Real Debrid’s network of premium hosts to help you always find the best working high-quality link.

Common Errors
Here are the most common errors and quick fixes for Firefly.
- Olpair Streaming Error. You won’t encounter this problem if you use Real Debrid. Otherwise, every 4 hours you will need to renew your key to continue using Olpair’s free server. Normally this is as simple as renewing from the prompt box and getting another 4 hours of server time. If the problem persists go through the steps in our guide linked above.
- Kodi check log error: Over time you are more likely to get this error, depending on how much content you browse and watch, and the storage capacity of your device. Every time you load a page of an add on, or a piece of content, a little snippet is stored in your media cache. This allows much faster loading the second time around and means that you don’t have to wait every time you want to watch something, particularly if you watched part of it last night. When it comes to emptying the cache, it depends on your device. Some like the Firestick can be easily done manually, others require you to download an additional addon. To learn about how to empty the cache of your Kodi and other fixes for the check log error read our fix guide linked above.
- Source not working/slow/frozen: If a source doesn’t work, it doesn’t necessarily mean the source is broken. Firstly, it’s important to remember that using Kodi is not like flicking through channels on your TV. It takes time for your device to connect to a server that may be across the world, accesses your source a start to stream it. Give it as much as 15 seconds to load. Next, you want to refresh it and use a VPN to make sure that your ISP is not blocking your content from loading. Check here for the best VPN deal. But if you want to avoid any of these problems with the source, just save yourself the time and get Real Debrid.
Review
Firefly is a good addon but nothing special, one of the many clone addons out there which are almost identical to the original. If you want an add-on that really is pushing boundaries and breaking the mold, we recommend Seren. The best Exodus clone out there is Exodus Redux.
Categories included:
- Movies
- TV Shows
- My Movies
- My TV Shows
- New Movies
- New Episodes
- Channels
- Tools
- Search
ReviewVPN cannot attest to the legality, security and privacy of the applications discussed on this site. It is highly recommended that you use a VPN service while streaming or using Kodi. Currently, your IP 216.73.216.84 is visible to everyone and your Browser is being tracked by Advertisers & ISP Provider. Here are the main reasons why you must use a VPN: A VPN works be replacing your ISP-assigned IP address and creating an encrypted tunnel. We recommend the no log service offered by IPVanish. It works well on a Firestick and offers the fastest possible speeds.
YOUR INTERNET ACTIVITY IS BEING WATCHED
Legal Disclaimer: ReviewVPN.com does not encourage or endorse any illegal activity involved in the usage of services and applications referenced on this site. We do not verify the licensing agreements of services. The end-user is wholly responsible for ensuring that any media accessed through these services does not violate copyright and/or licensing laws. ReviewVPN does not promote, link to, or receive compensation from any Apps and IPTV services.
Install Surfshark on Firestick

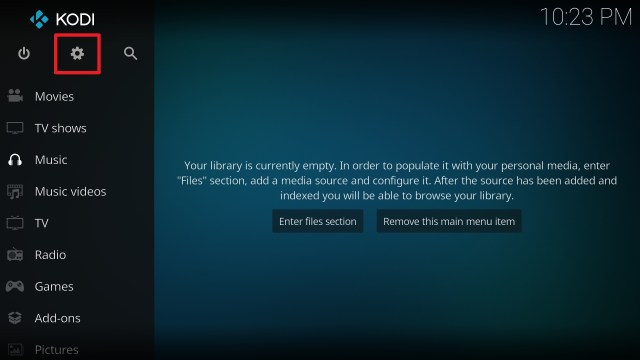
How to Install Firefly Addon on Kodi with Screenshots
- From the home screen, select the cogwheel at the upper left.
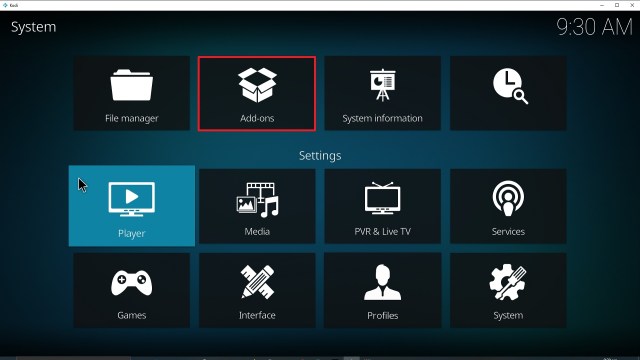
2. Select System in the bottom right corner.

3. Select Add-ons on the left side of the screen.

4. Select Unknown sources.

5. Click Yes to allow uknown sources.

6. Select File manager.

7. Click Add source.

8. Click on <None>.

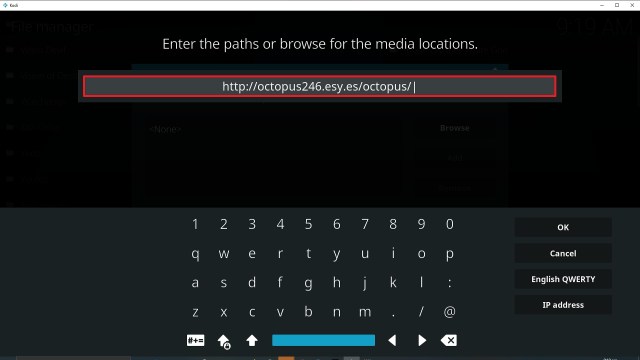
9. Type exactly: https://huckfinndiesel.github.io/repo/

10. Click on OK.

11. Select enter a name for this media source.

12. Name is Firefly (this part isn’t critical as long as you remember the name).

13. Click on OK.

14. Click on OK.

15. Take one step back and click on Add-ons.

16. Select install from zip file.

17. Click on Firefly (or whatever you named the source).

18. Click on repository.firefly-0.0.2.zip

19. Select on Install from repository.

20. Click on Firefly Repo.

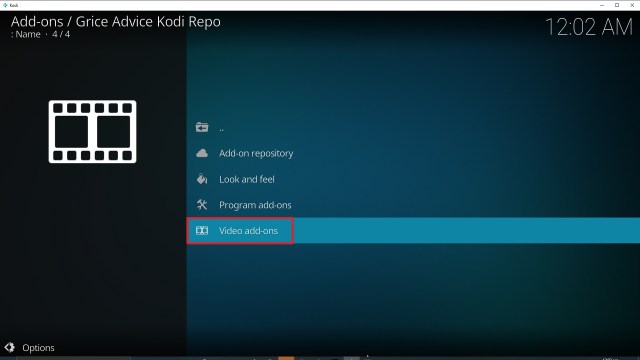
21. Pick Video add-ons.

22. Select Firefly again.

23. Click on Install.

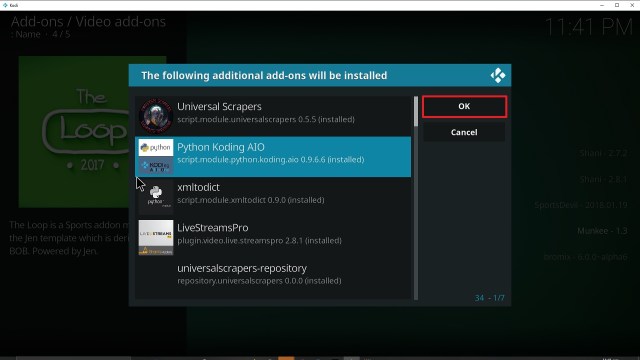
24. Select OK after reviewing the add-ons that will be installed.

25. You should see a popup in the upper right corner saying Firefly has installed. There will actually be multiple popups for the various components.

26. Click on Open to start Firefly add-on.

Should I Use This App With a VPN?
![]()
We recommend you use a VPN for the following reasons:
- Many of the addons you will access in Streamline will direct you to links for illegally distributed content. Without a VPN you may find many of these links do not work because your ISP is blocking your access
- If you try to access Live TV Channels in other countries through Streamline your access may also be blocked. This is because these channels can detect your IP is not in that country and will block you from accessing their channels.
- Using a VPN, you can encrypt your requests, change your IP, and also the location where your IP originates from. Thus, allowing you to circumvent any blocks or firewalls in place to do your accessing most restricted content
- A VPN also helps you maintain anonymity, safety, and privacy online from unwanted third parties.
Note: For more information about Surfshark, please read our Surfshark Review.
How to Install Surfshark VPN on Firestick
If your Firestick still has the older interface, read this article to learn how to update it: Update Firestick Interface.
Follow our screenshots below to install the SurfShark VPN app on your Fire TV stick.
1. Go to the Home screen of your Firestick.

2. Navigate towards the Find tab. Press the Search button from the resulting dropdown.

3. Type in the keyword of SurfShark and select from the suggestions that will appear.

4. Click the official SurfShark icon from your search results.

5. Press the Download (You own it) button.

6. The SurfShark VPN installer will download on your device.

7. SurfShark VPN’s app will automatically install itself on your Fire TV stick.

8. Press the Open button after completing SurfShark VPN’s installation process.

9. Please wait for the SurfShark VPN to load its user interface.

10. You can now log in with your SurfShark VPN account credentials.

Learn more about Surfshark and Grab the Best Surfshark Deal Now!
Install Surfshark on Firestick


For more VPN discounts, go to ReviewVPN Deals and purchase the best VPN for you.
Click here to get the lowest price on Surfshark through our exclusive limited-time offer.