Install Wolf Pack Kodi Addon

Wolf Pack Kodi Addon

Source: http://www.midian.appboxes.co/repo

The Wolf Pack Kodi addon is a complete video addon that can be found under the “Where The Monsters Live” Repository. It provides high-quality streaming links to its users which has tons of movies and tv shows. It is also highly recommended to be used in conjunction with Real-Debrid to improve its quality, run, and performance. 
 

 Longstanding Kodi users are very familiar with the Wolf Pack add-on. This add-on has been up and running for quite some time. However, throughout its history, it has changed from one developer to another. A lot of you may also know that Wolf Pack has been inactive for quite a while, so we want to make something very clear. We will be discussing the latest version of this addon, which gives highly improved performance and tons of new content.


ANONYMOUSLY


Features

  • Real-Debrid Integration for better performance
  • Ease of navigation with a very simple UI
  • Extensive library of high-quality movies and tv shows
  • New releases update
  • Kids TV
  • A huge array of category selection
  • Access to music, radio, and live sport as well
  • Customizable search by content, popularity, and rating


Installation Steps

Here is a step-by-step guide on how to install Wolf Pack

By default, Kodi doesn’t allow media and files from unknown sources. What you want to do is to change this setting for Wolf Pack to be downloadable. To make this happen, open Kodi and select “Settings”. Click “Add-ons” on the “System Settings” and allow “Unknown Sources” by clicking “Yes”. By now, you can already install Wolf Pack on your device.

  1. On the Kodi Home Screen, select the “Gear Icon” and select ‘File Manager.
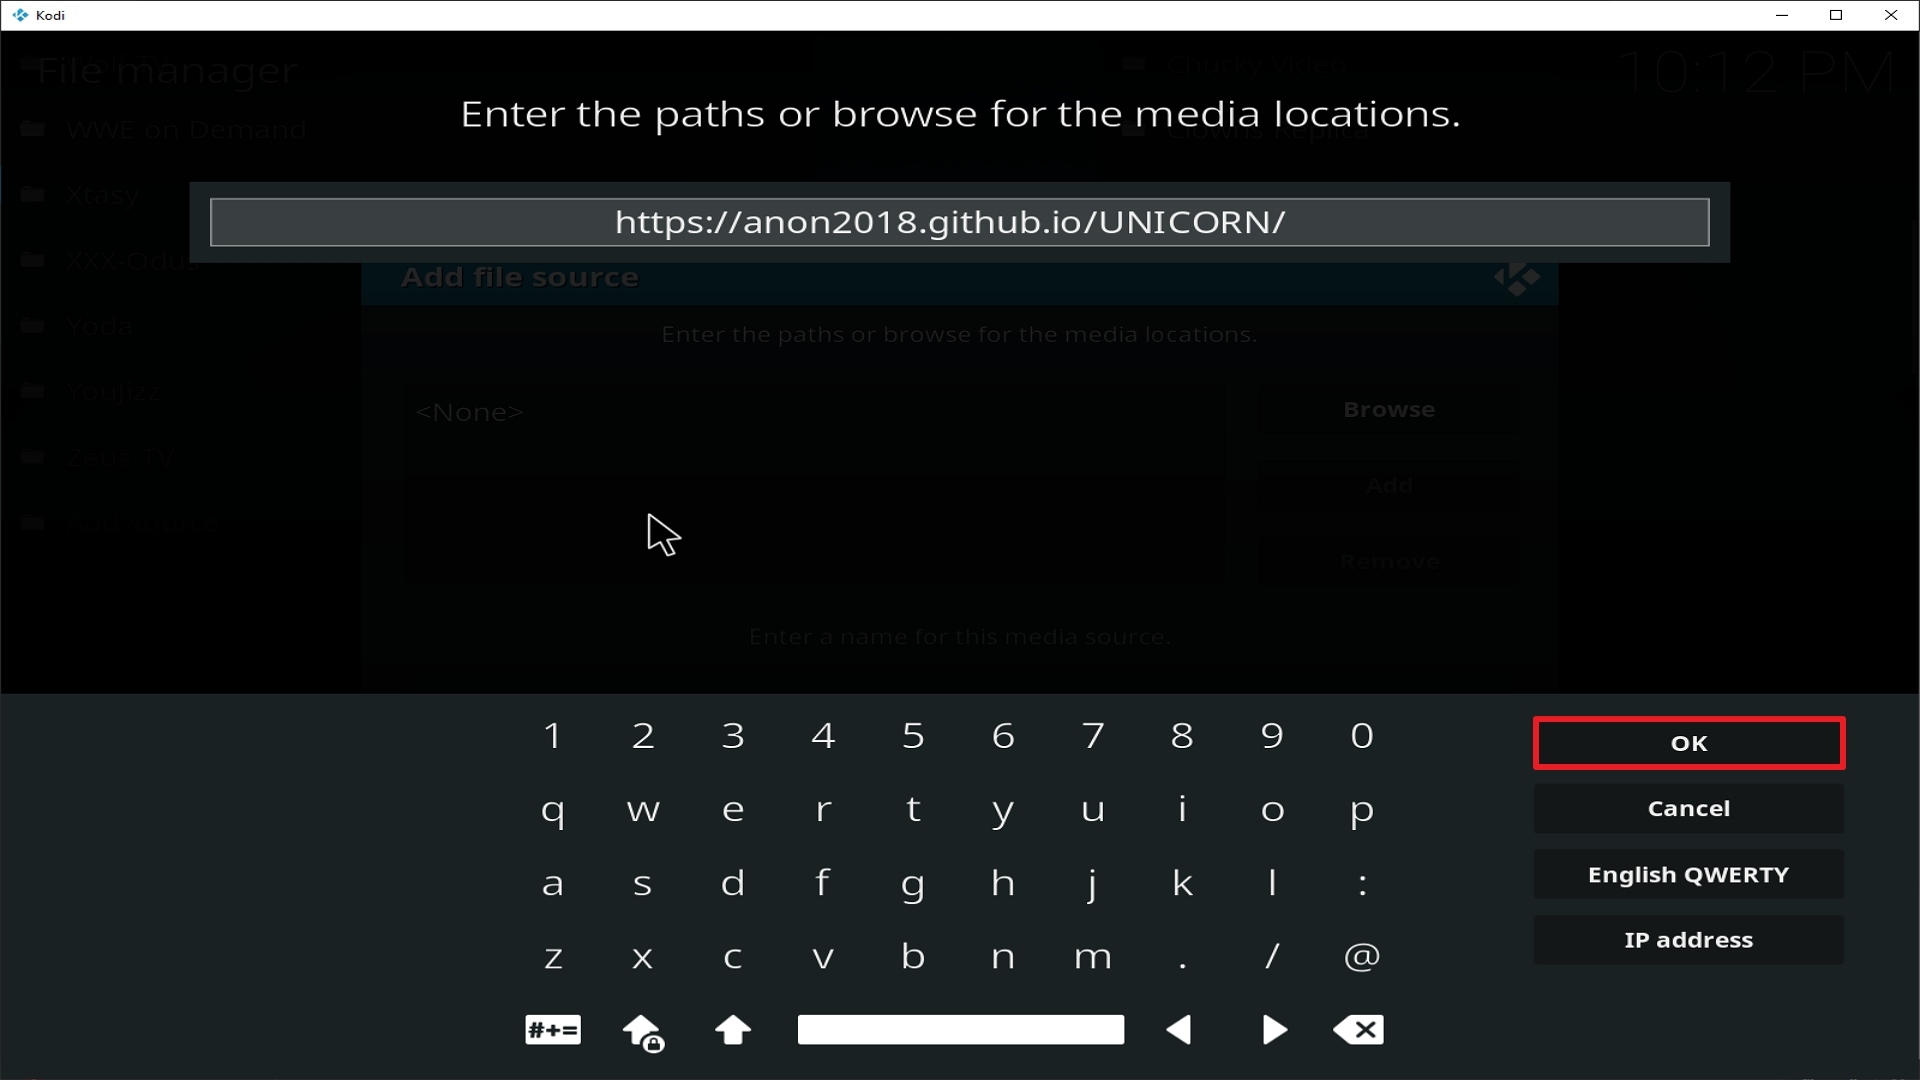
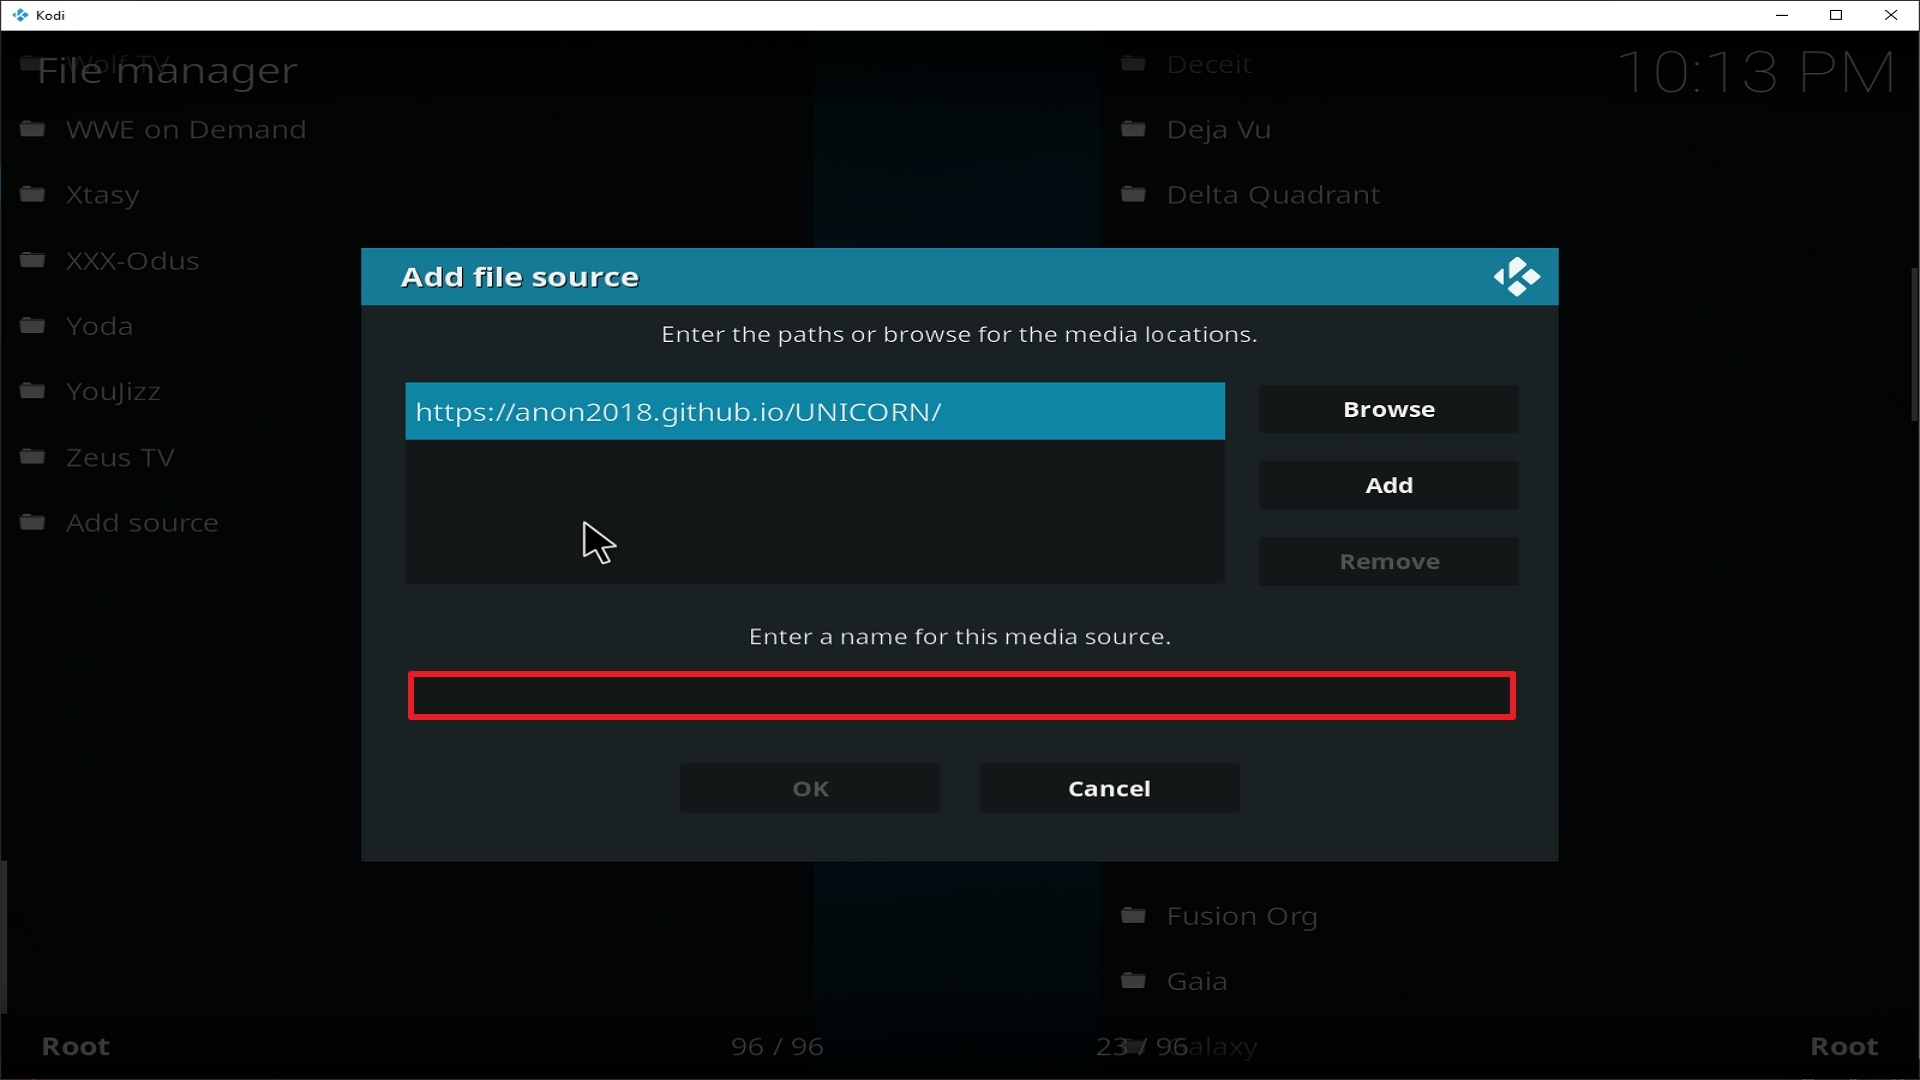
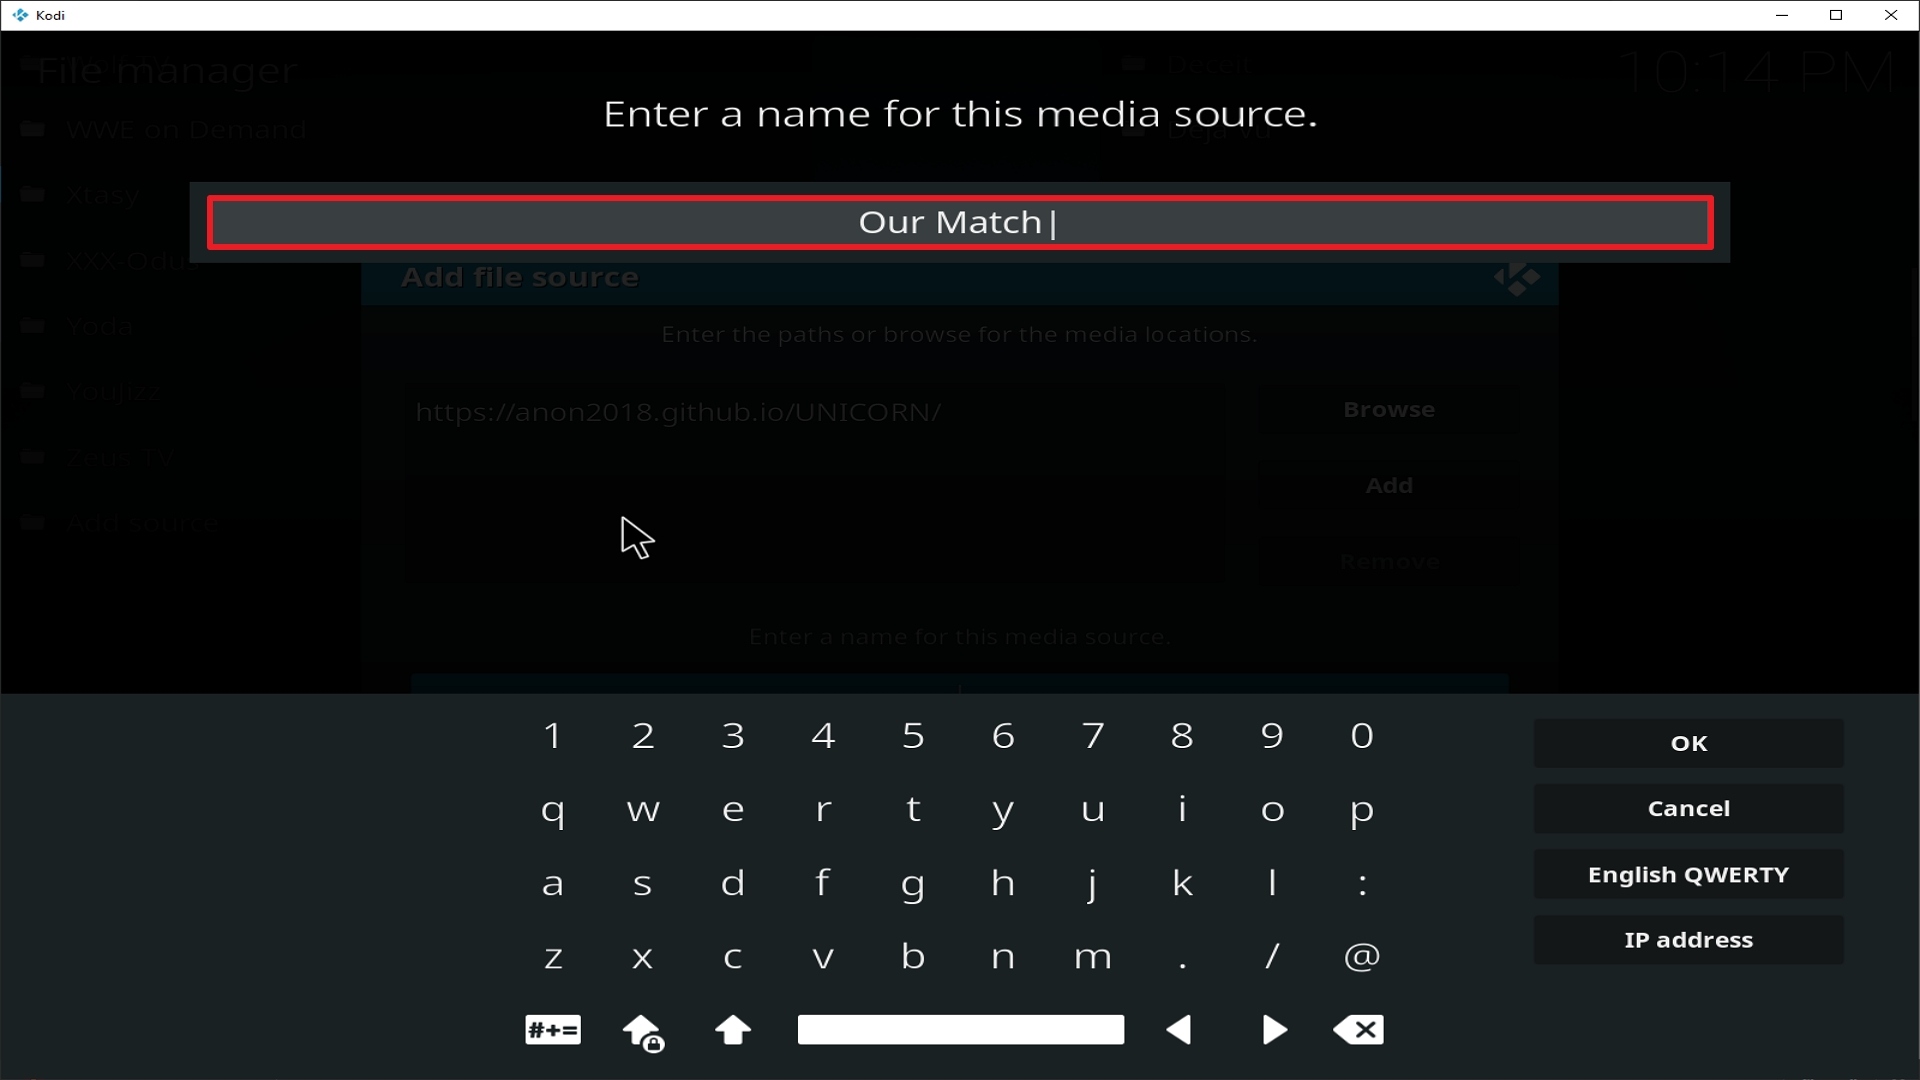
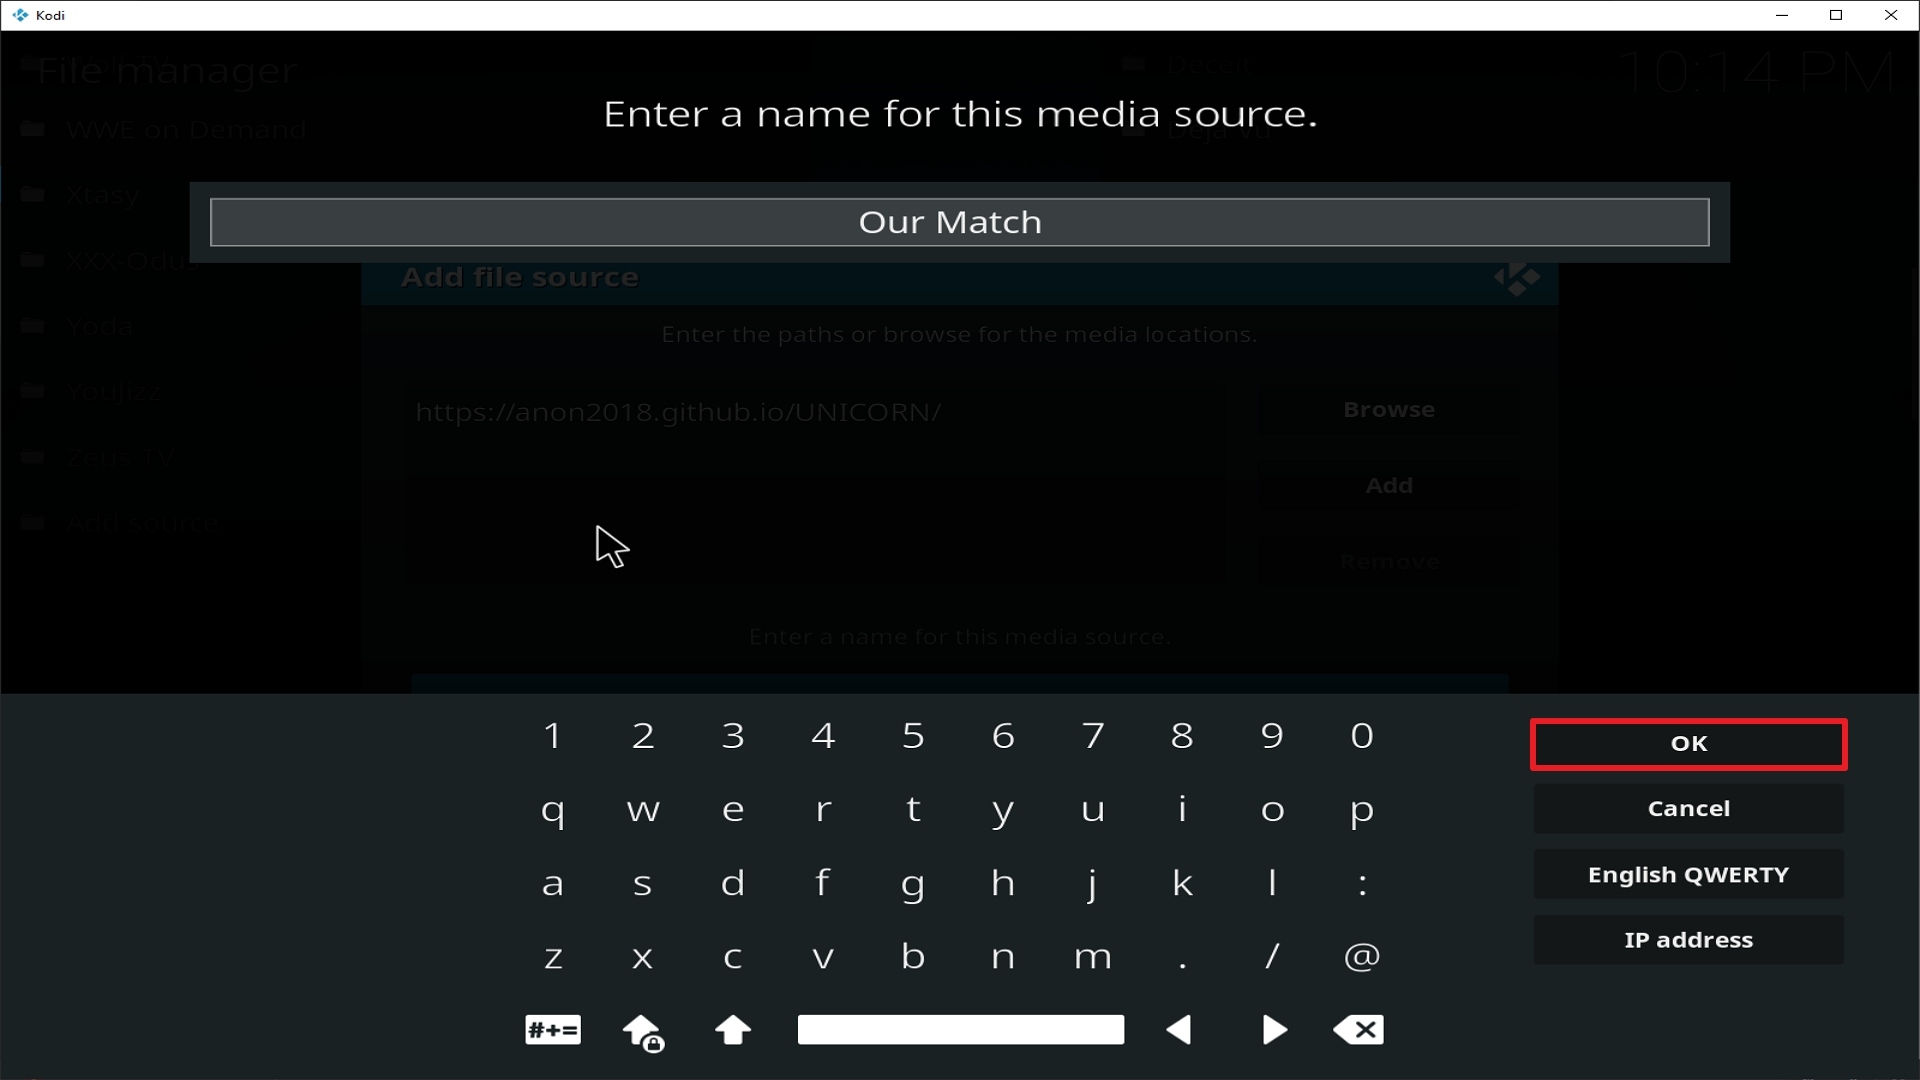
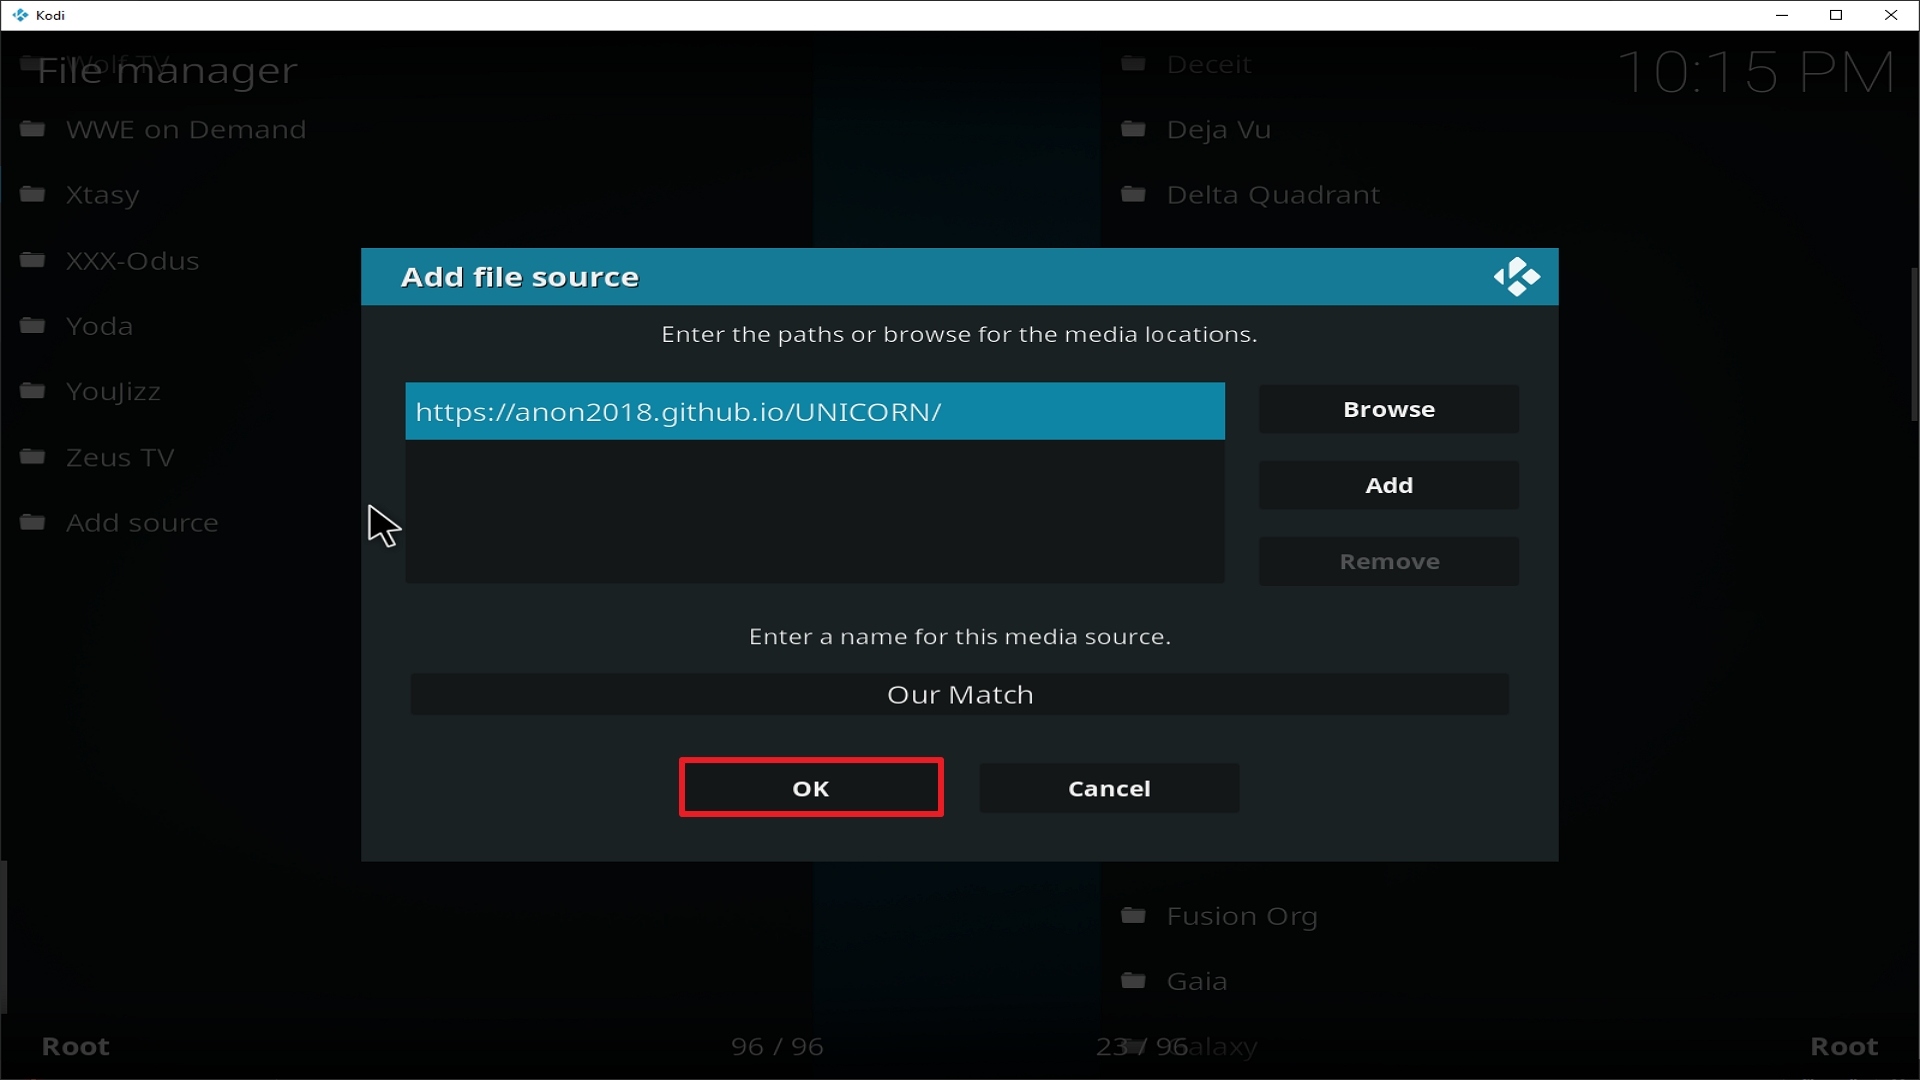
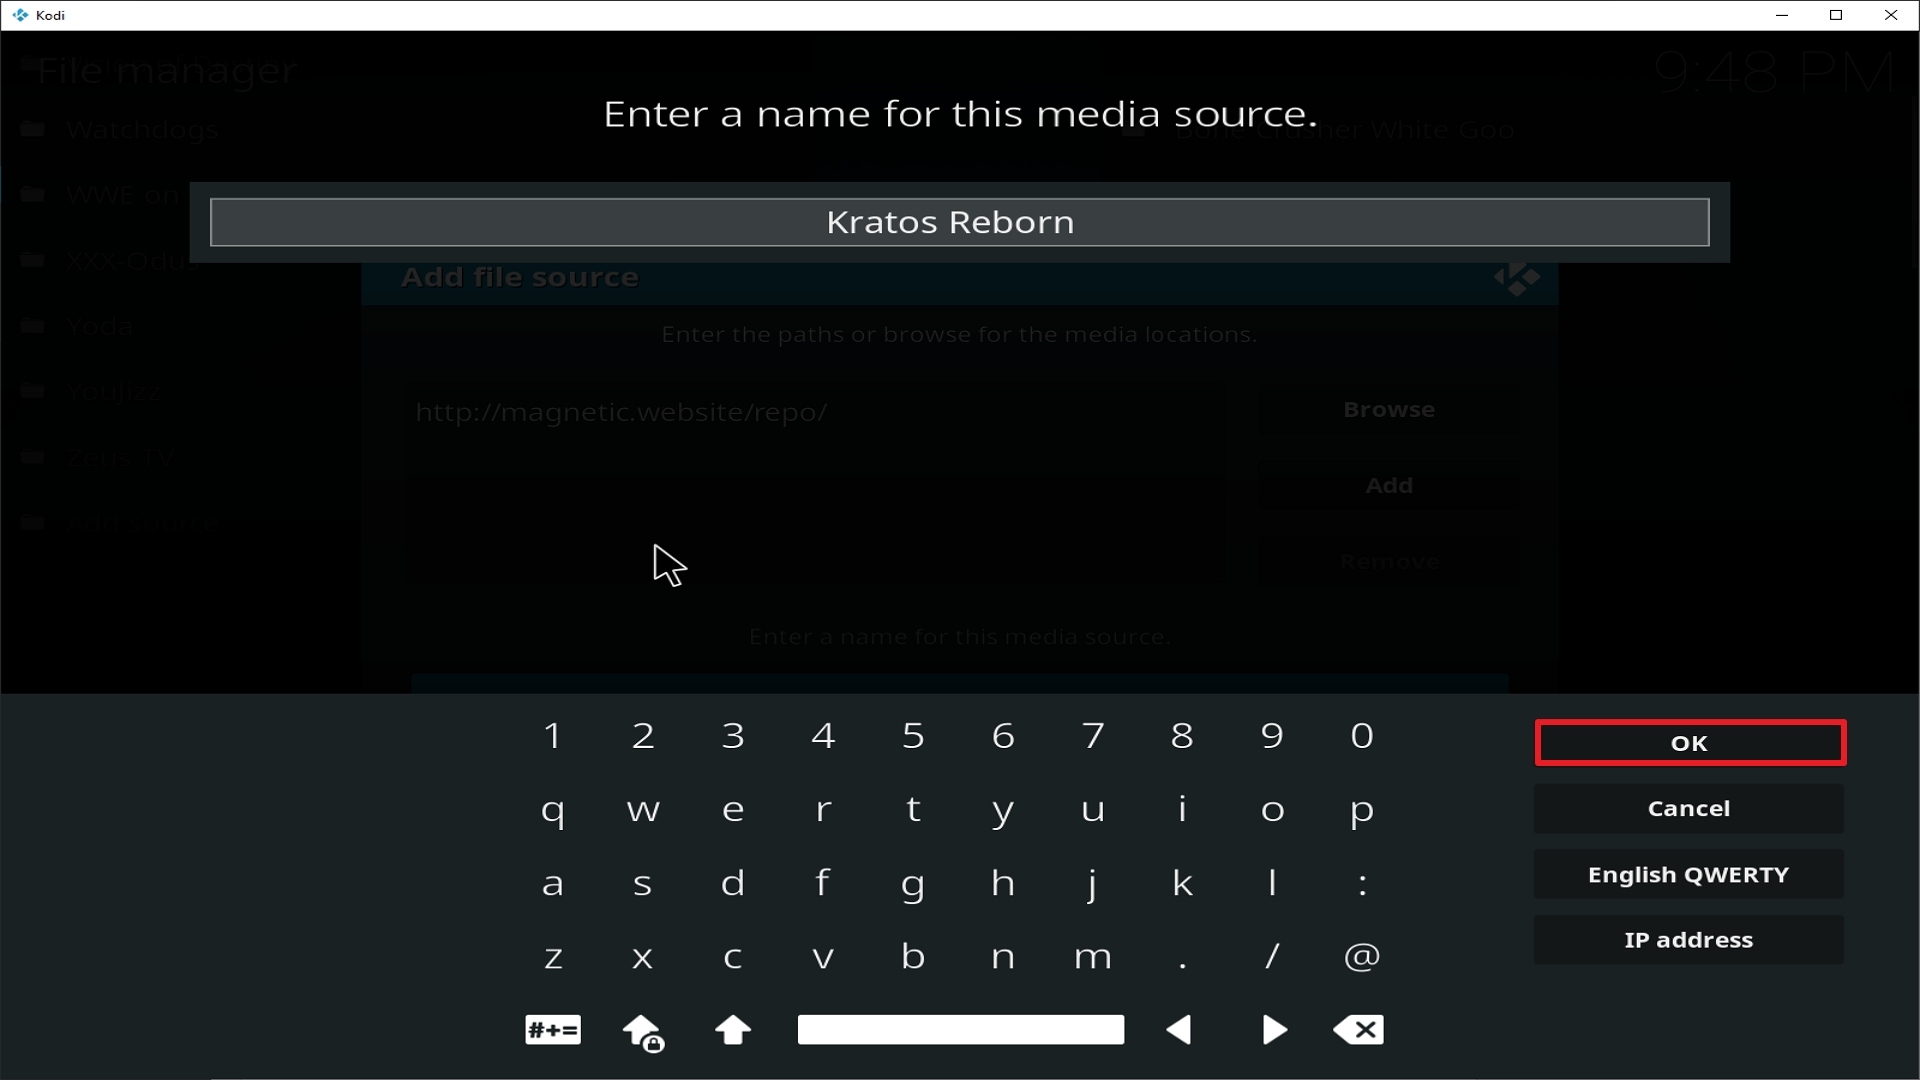
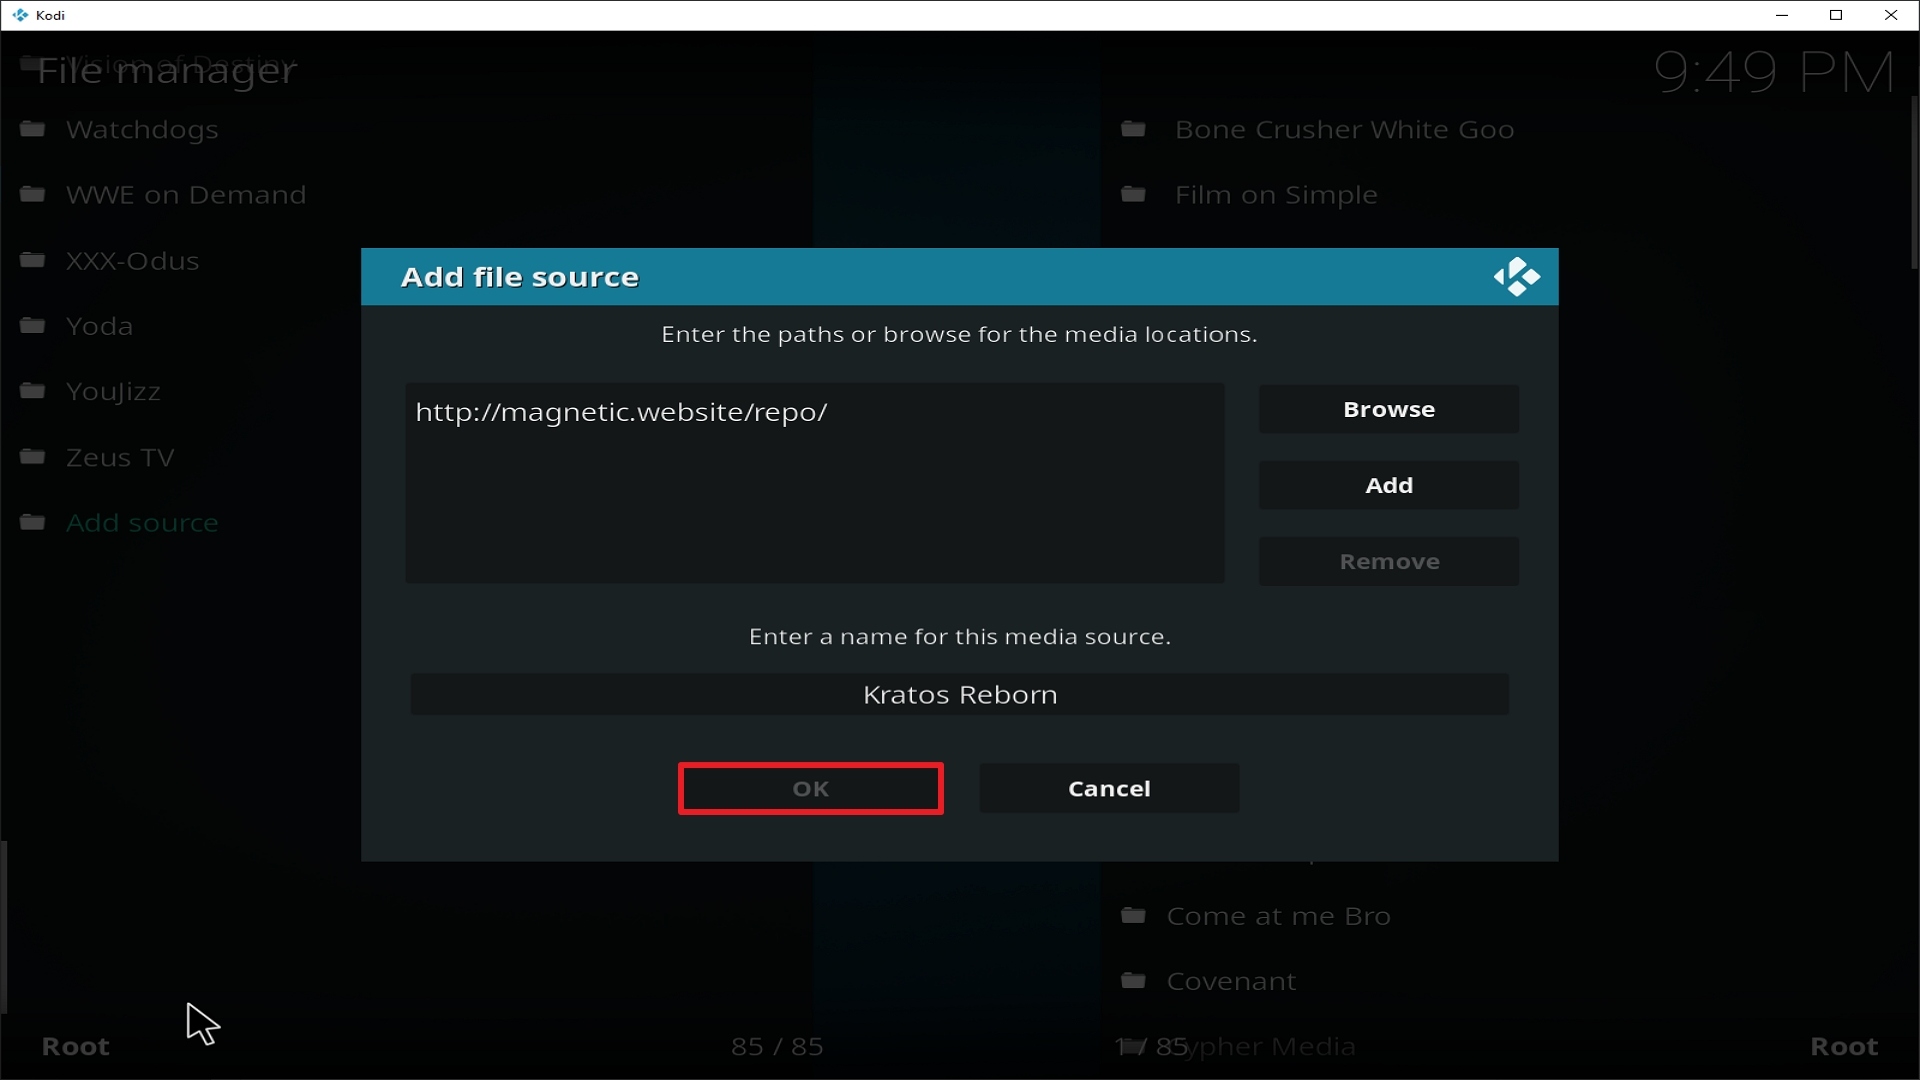
  2. On the left side, click on ‘Add Source’. A window will appear and you must choose “None” and proceed to paste this URL https://www.midian.appboxes.co/repo/ in the area under it rename it to “Monsters” and click “OK”.
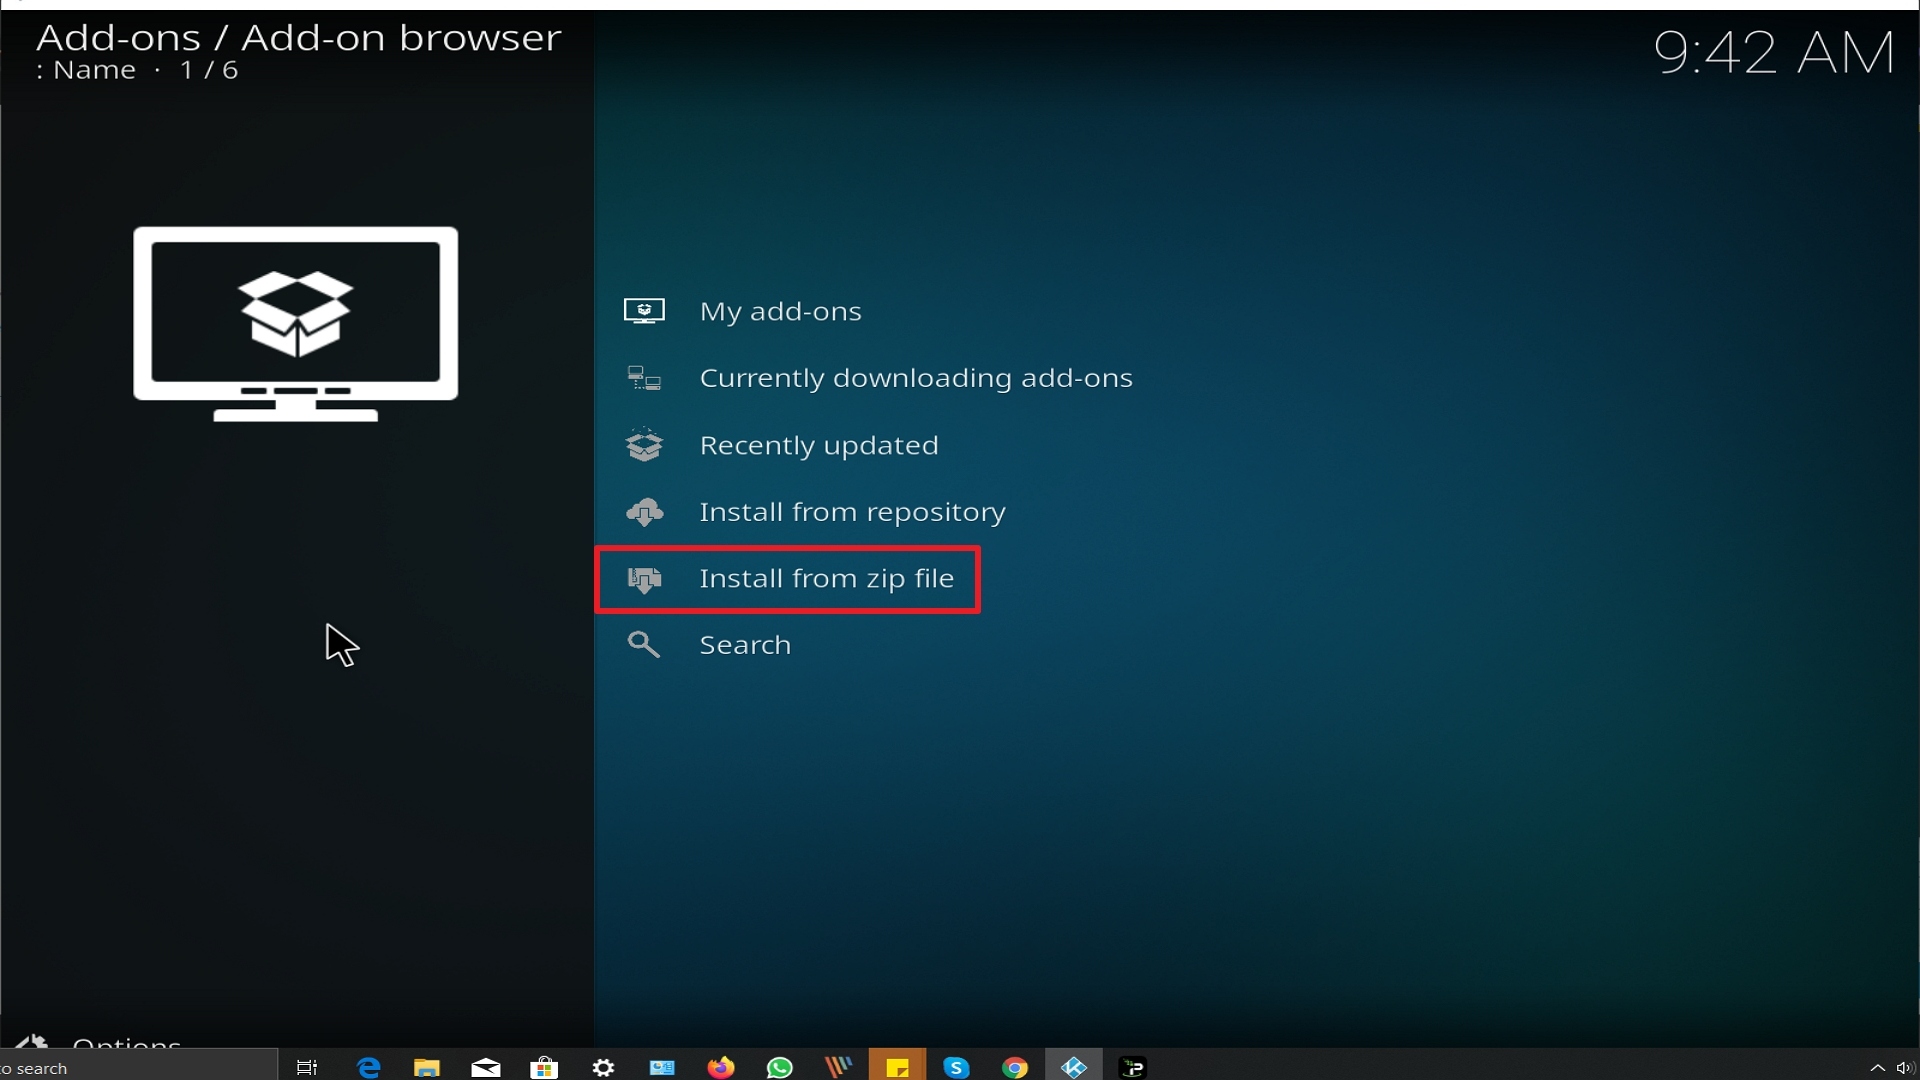
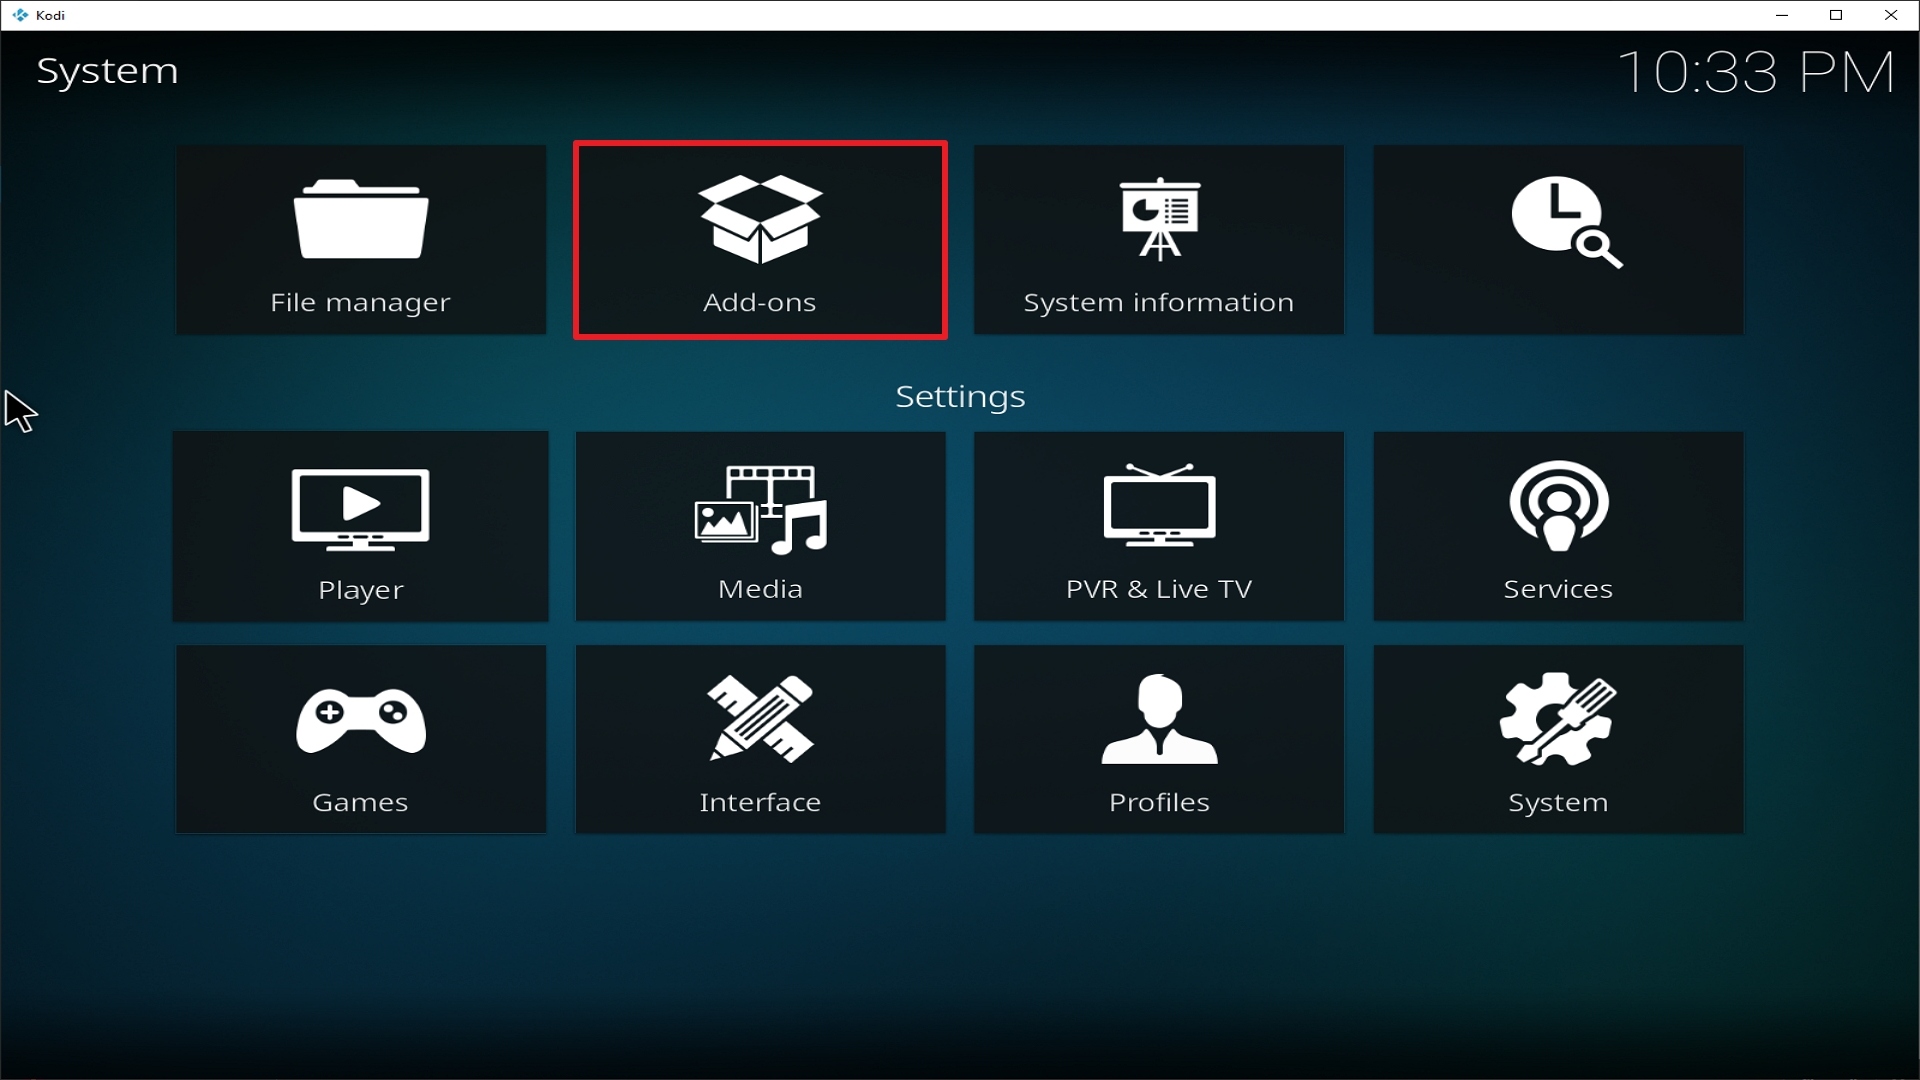
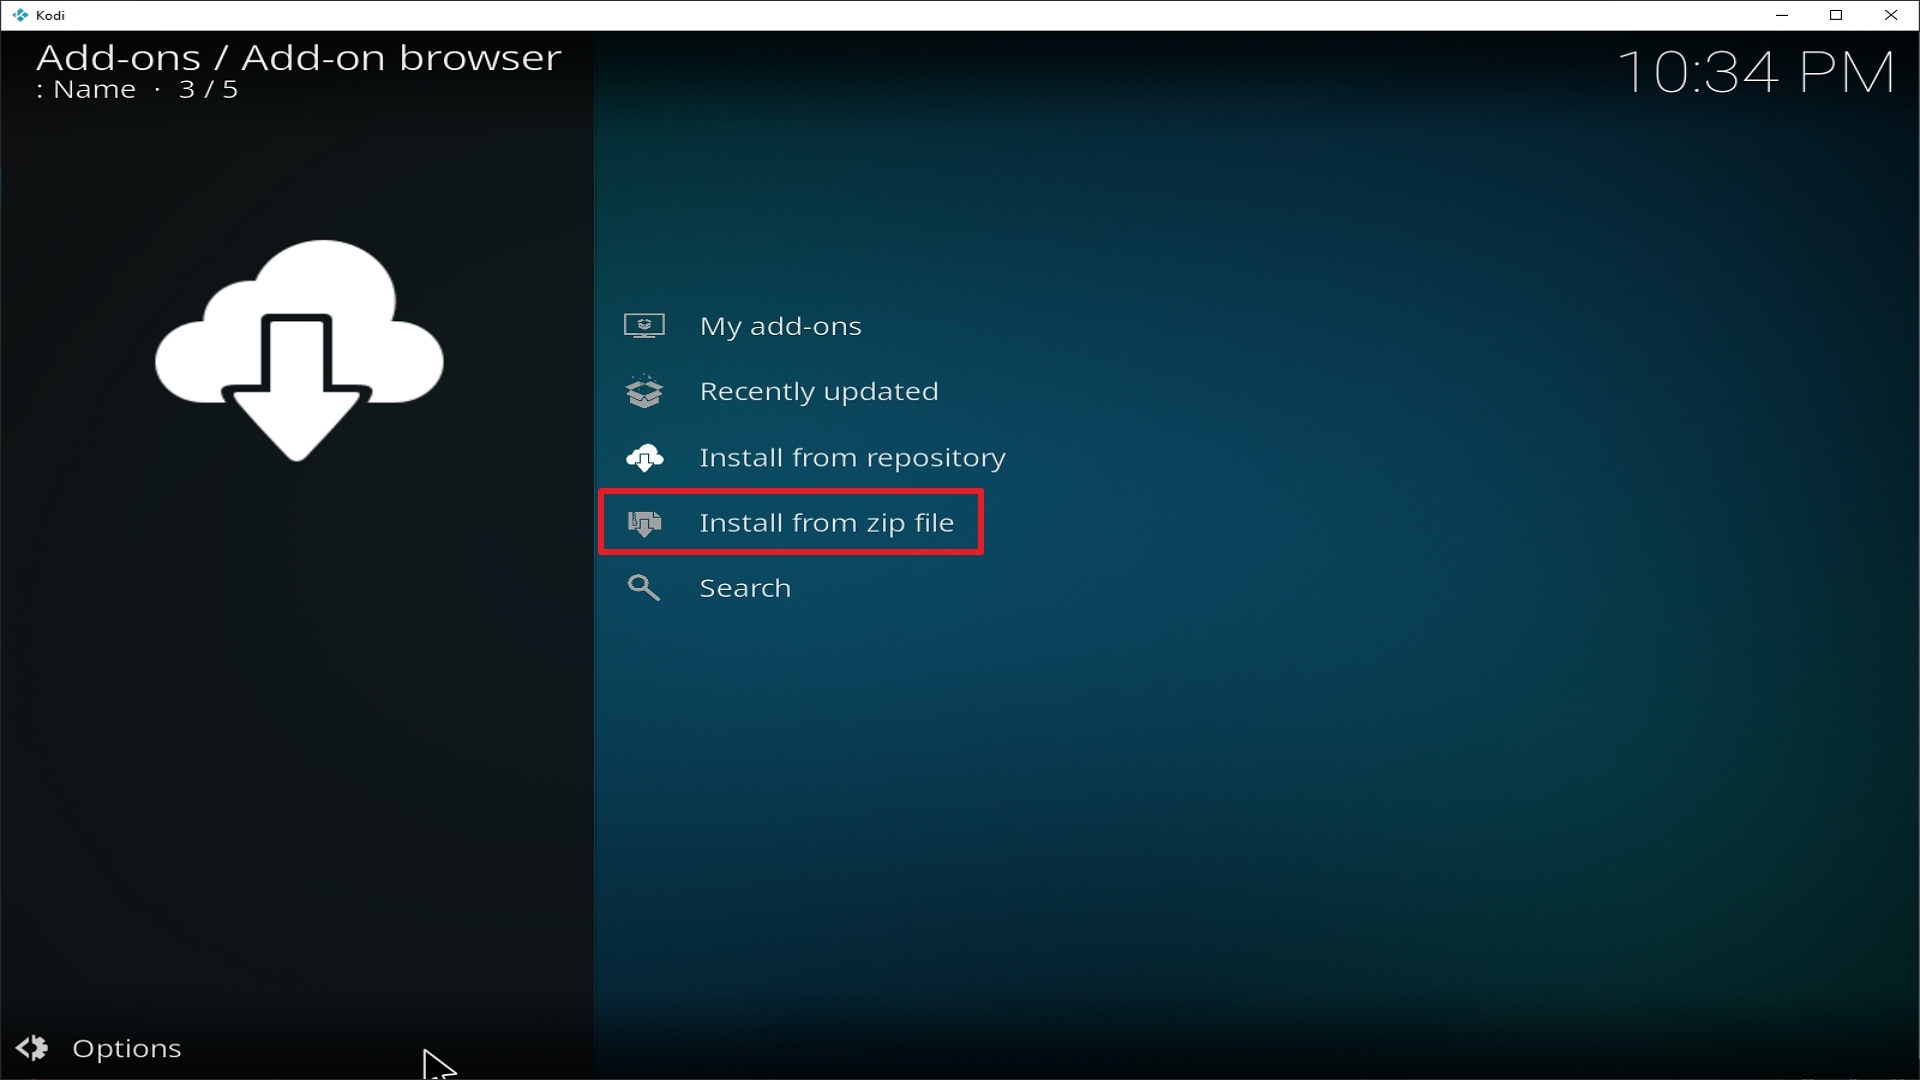
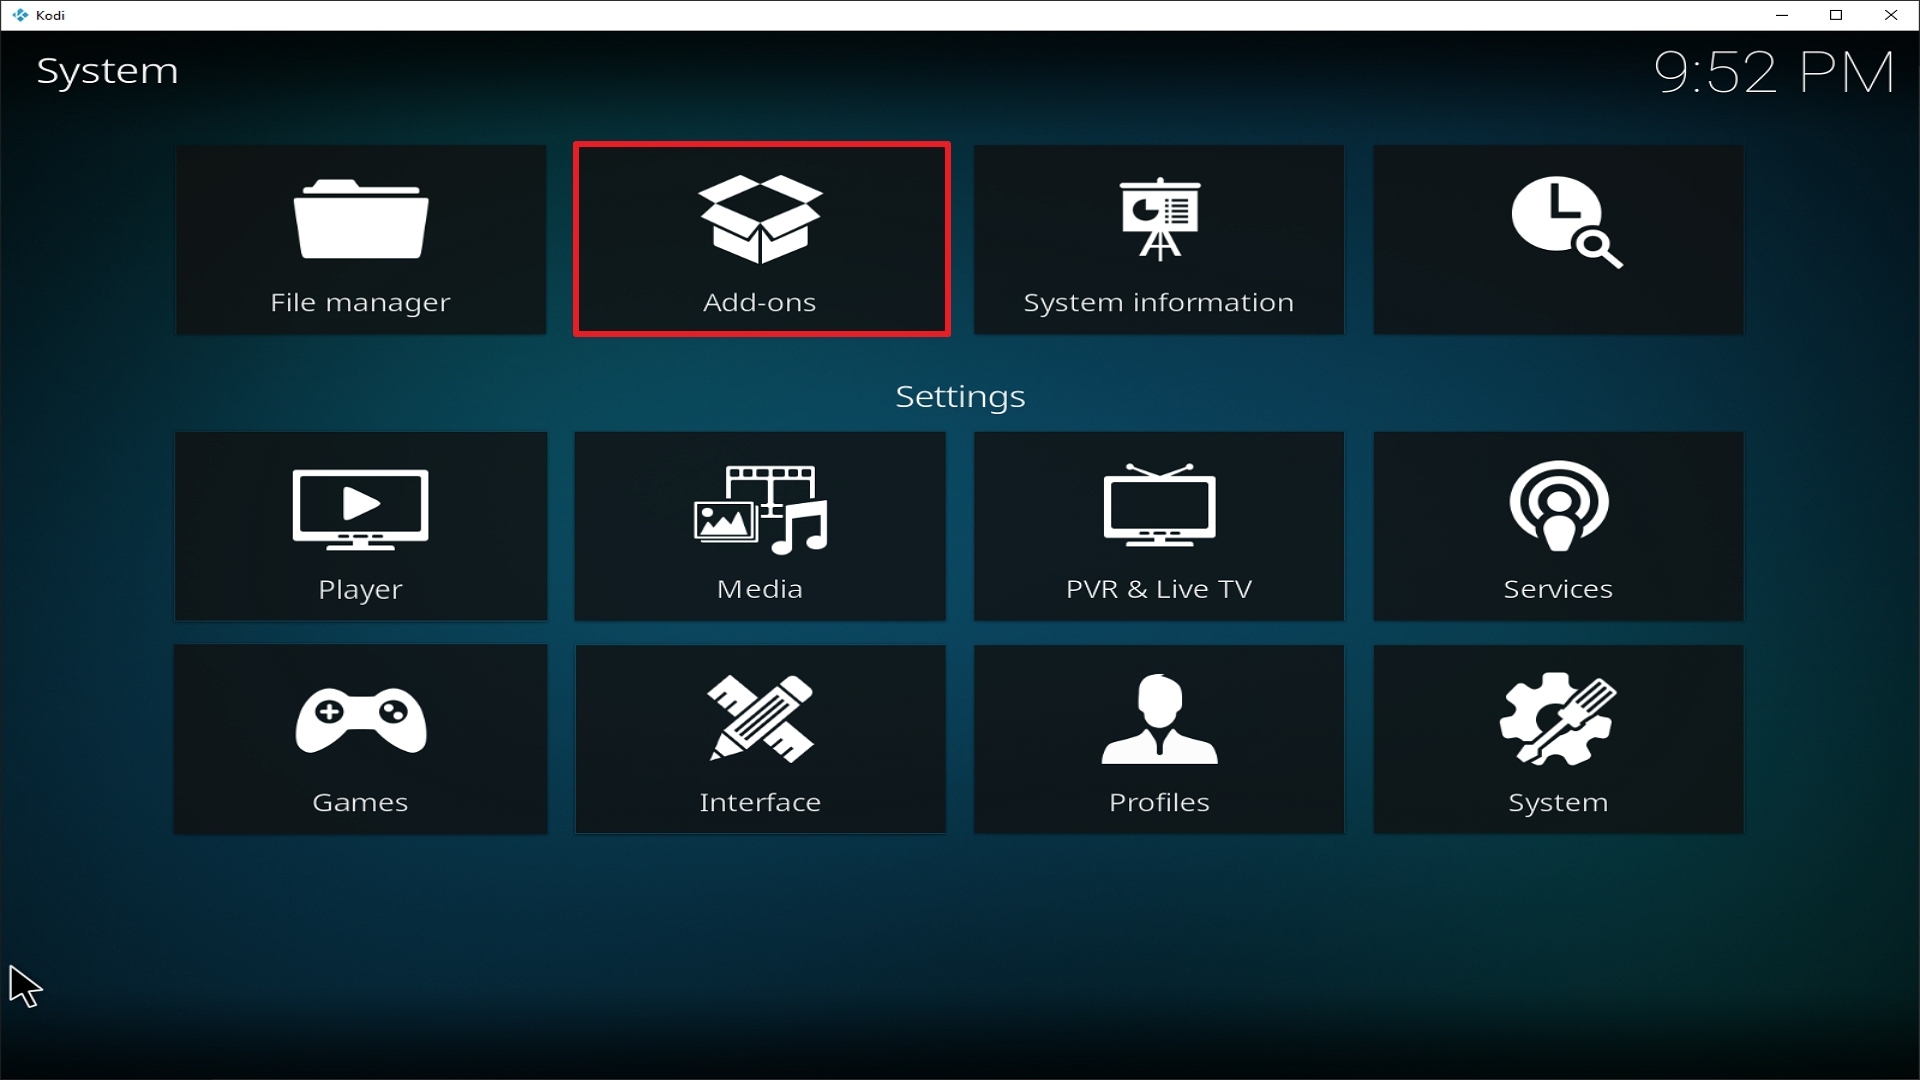
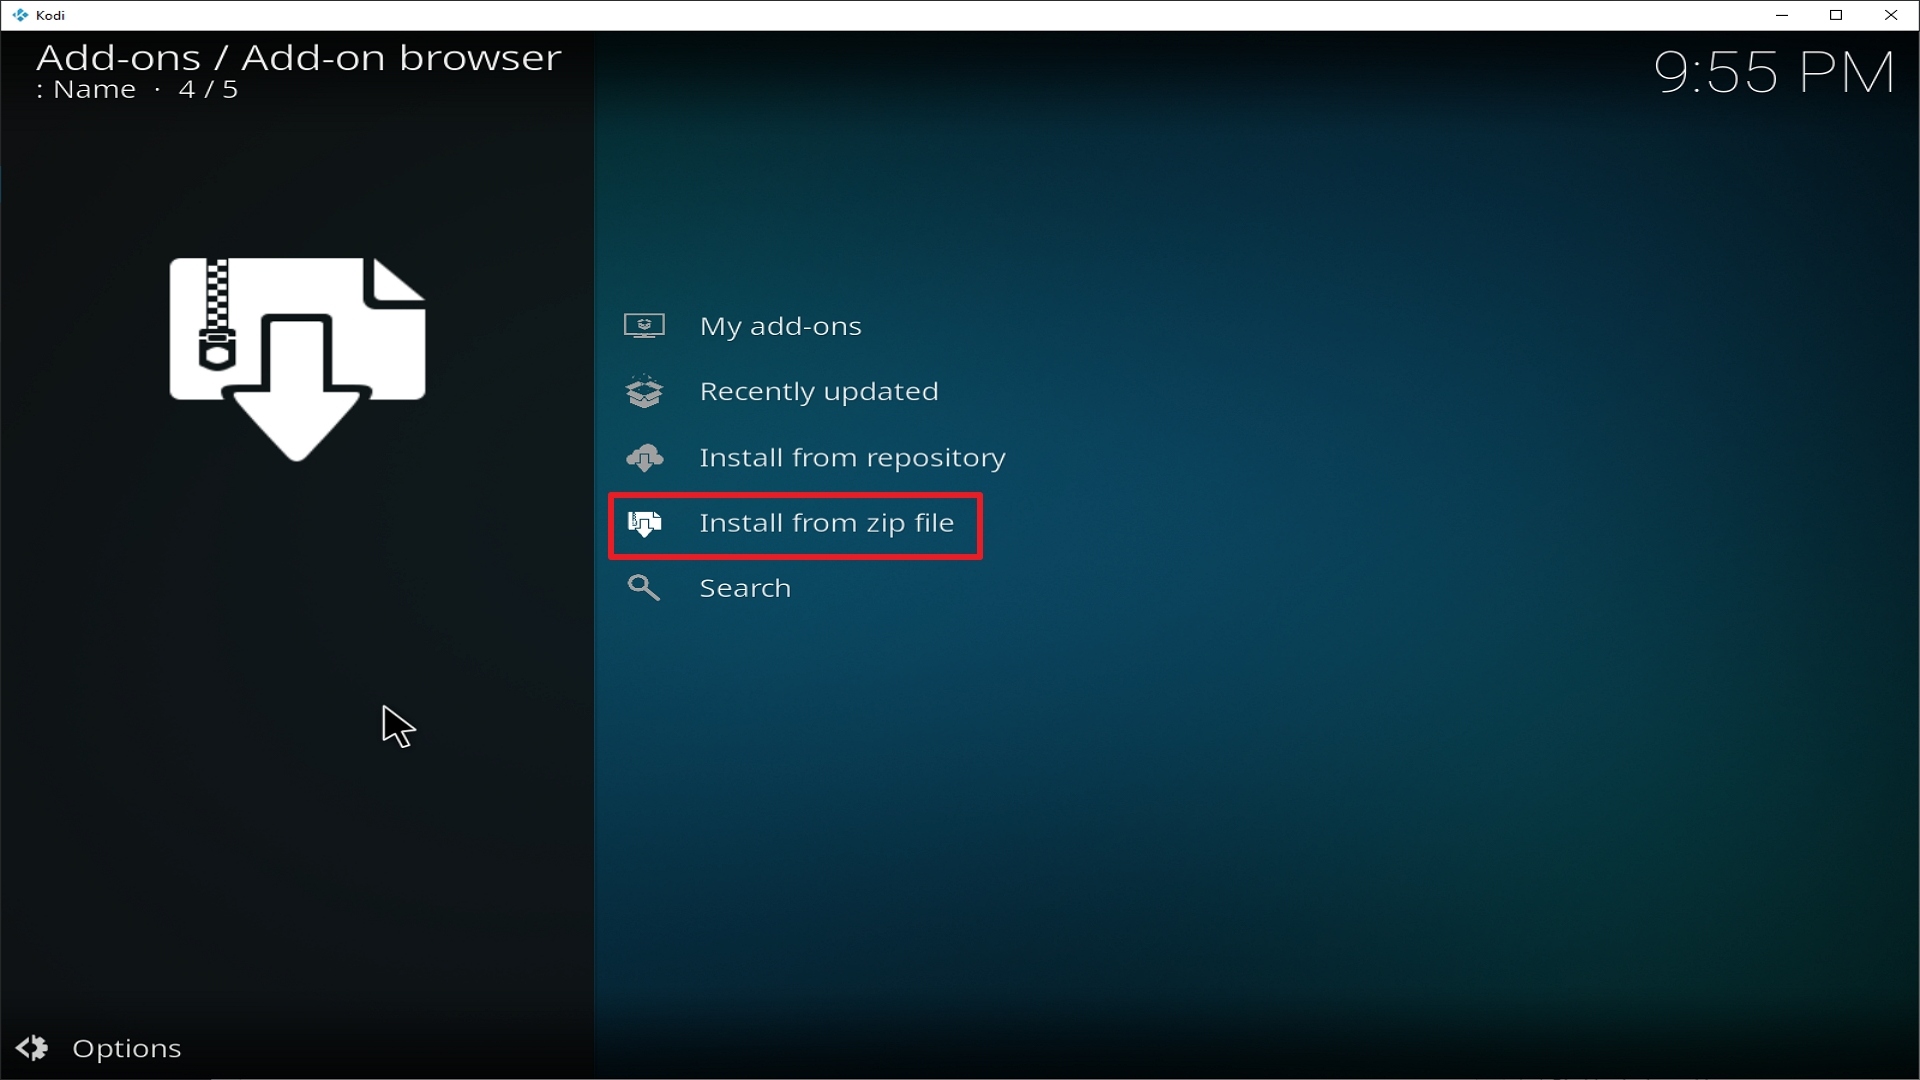
  3. Go back to the Home Screen and click on ‘Add-ons’ on the left side. Choose the ‘Add-on Package Installer’ icon and then, choose ‘Install from zip file’.
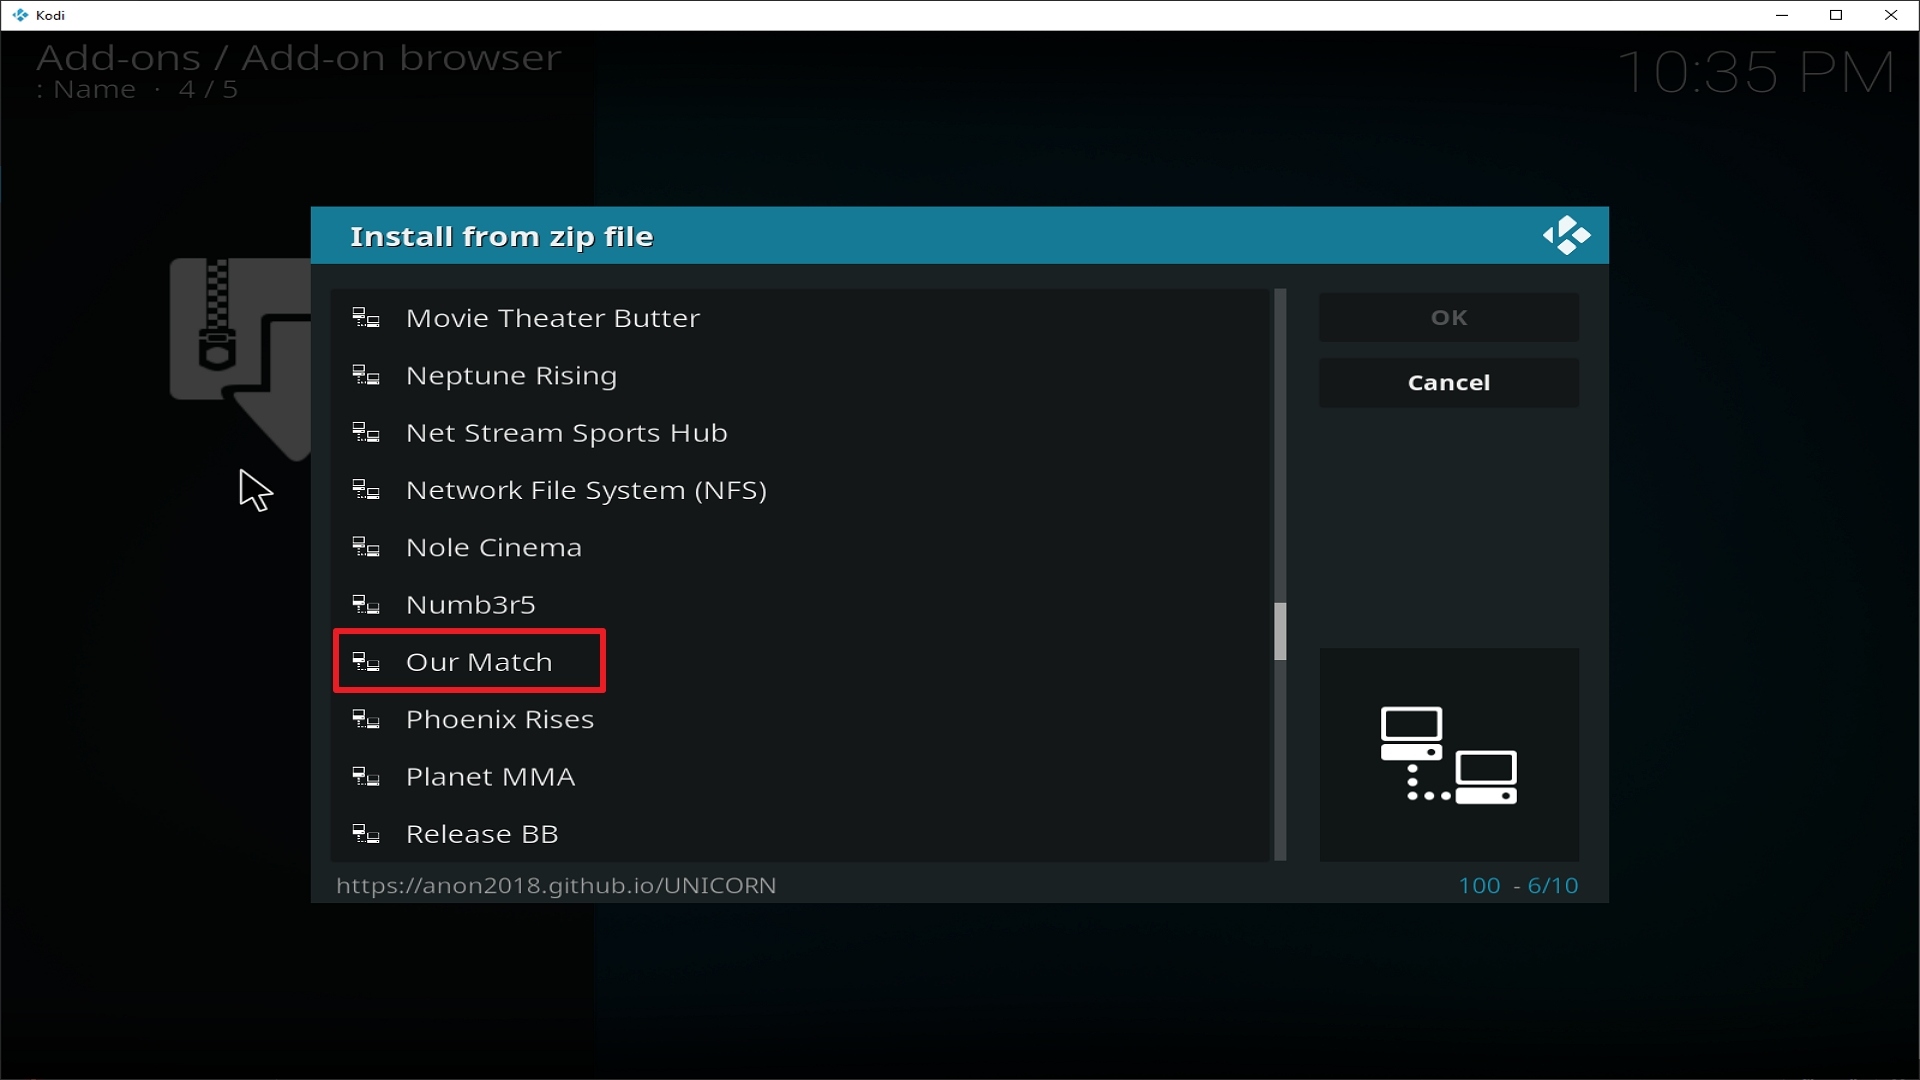
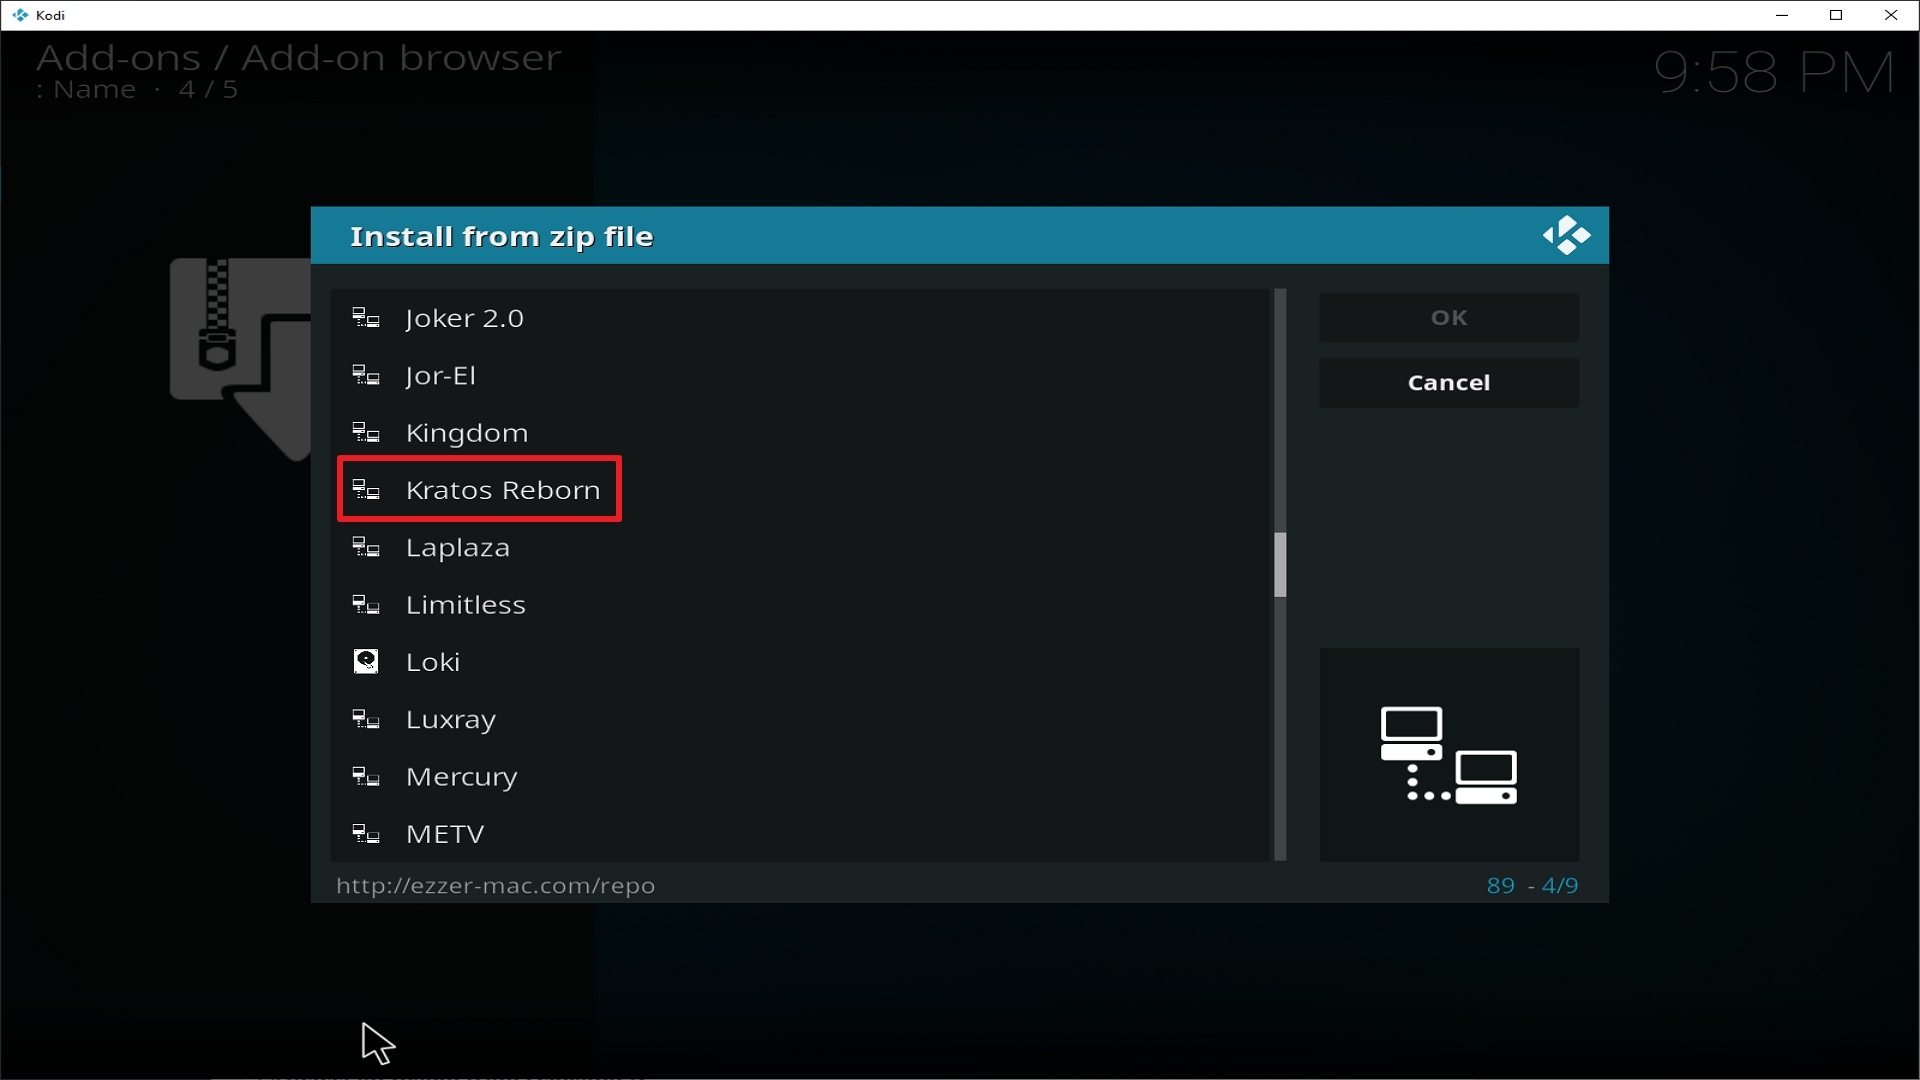
  4. A box will appear, select ‘Monsters’
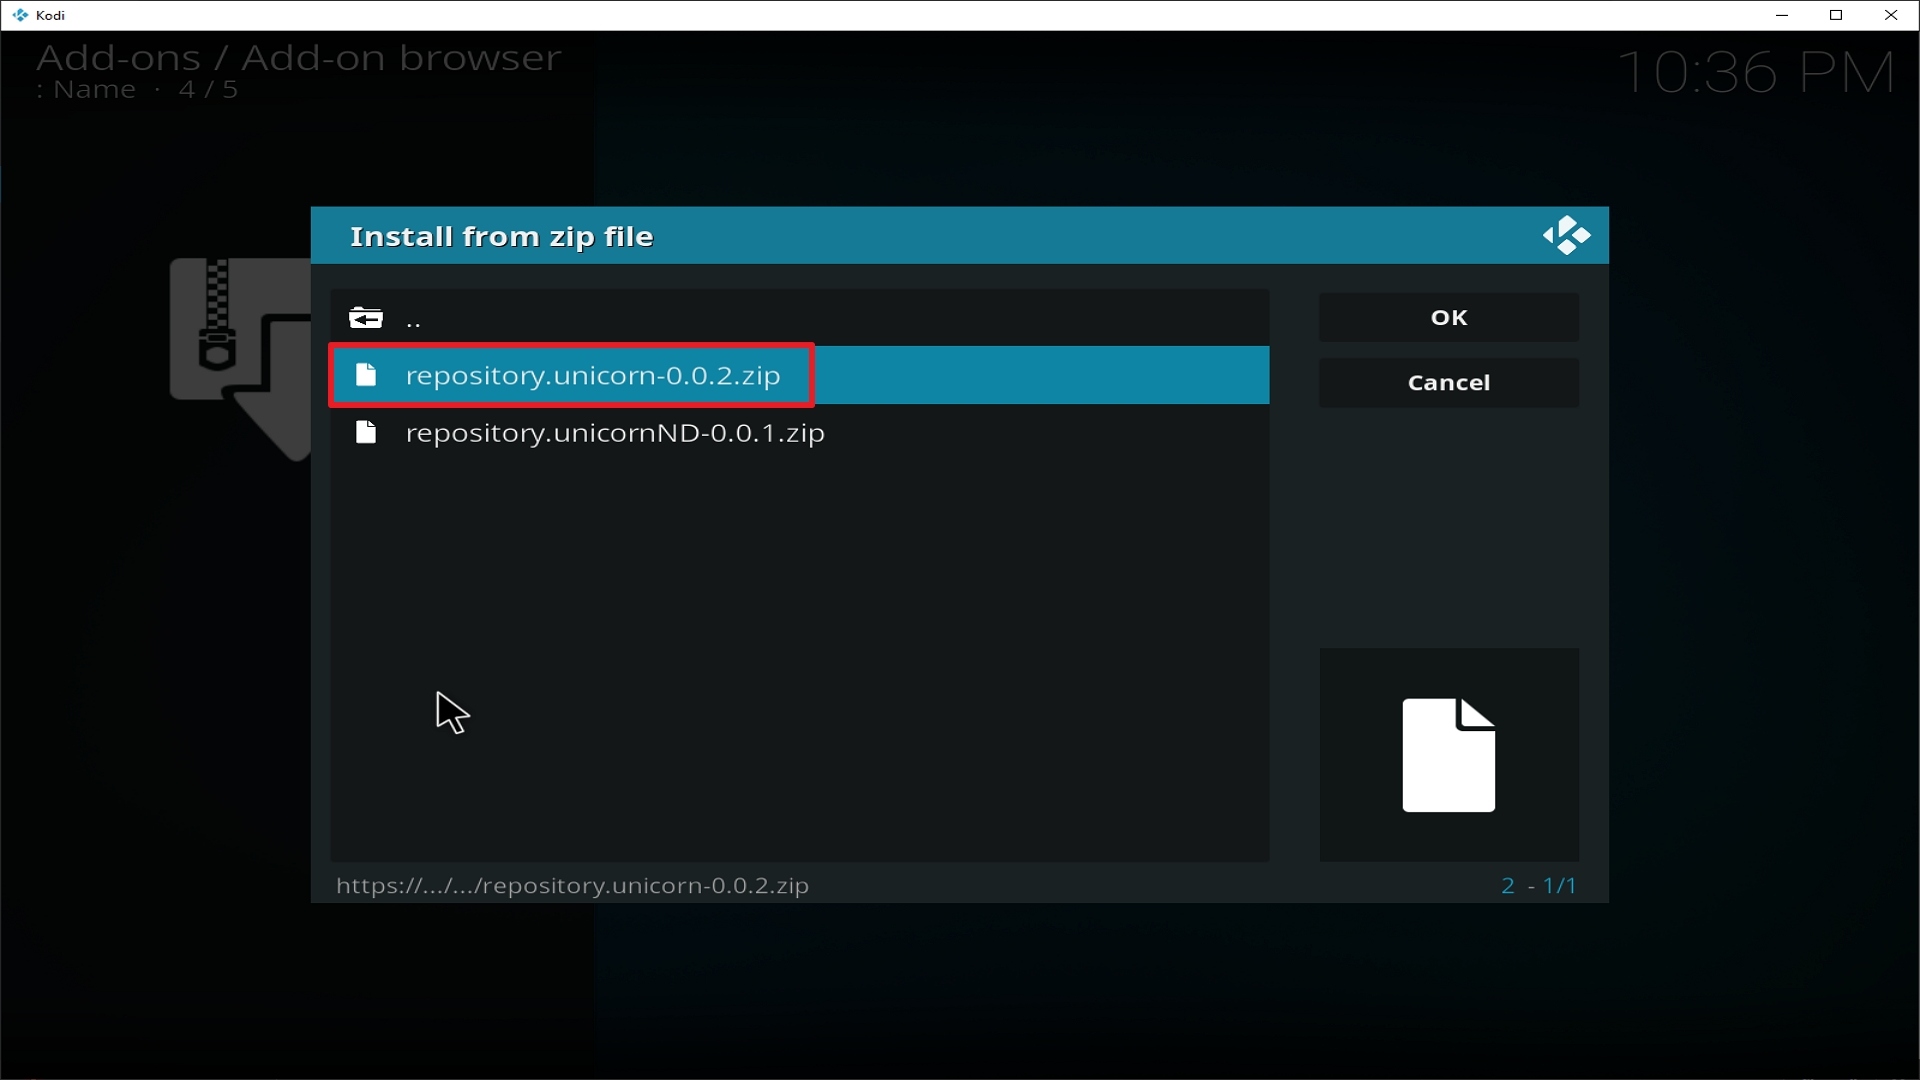
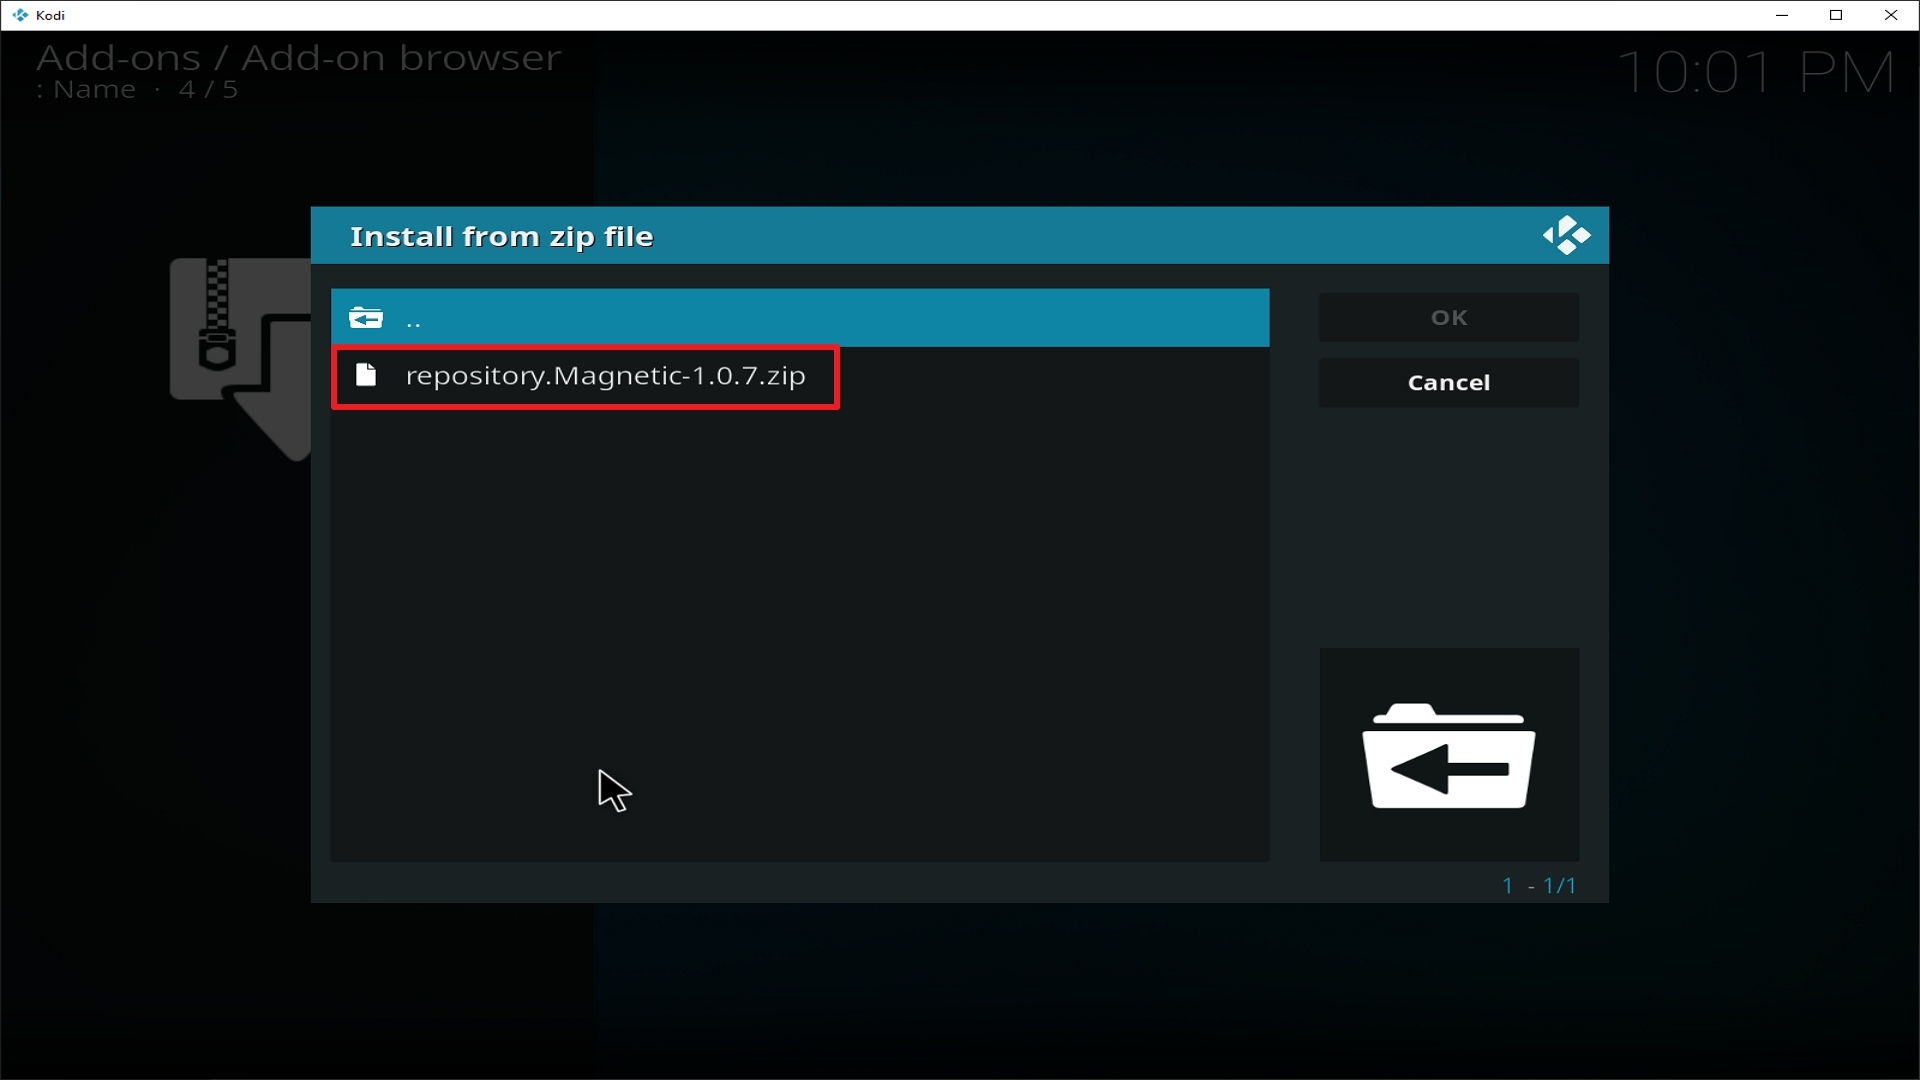
  5. Now click on ‘repository.Wherethemonsterslive.zip’  and then wait for a notification.
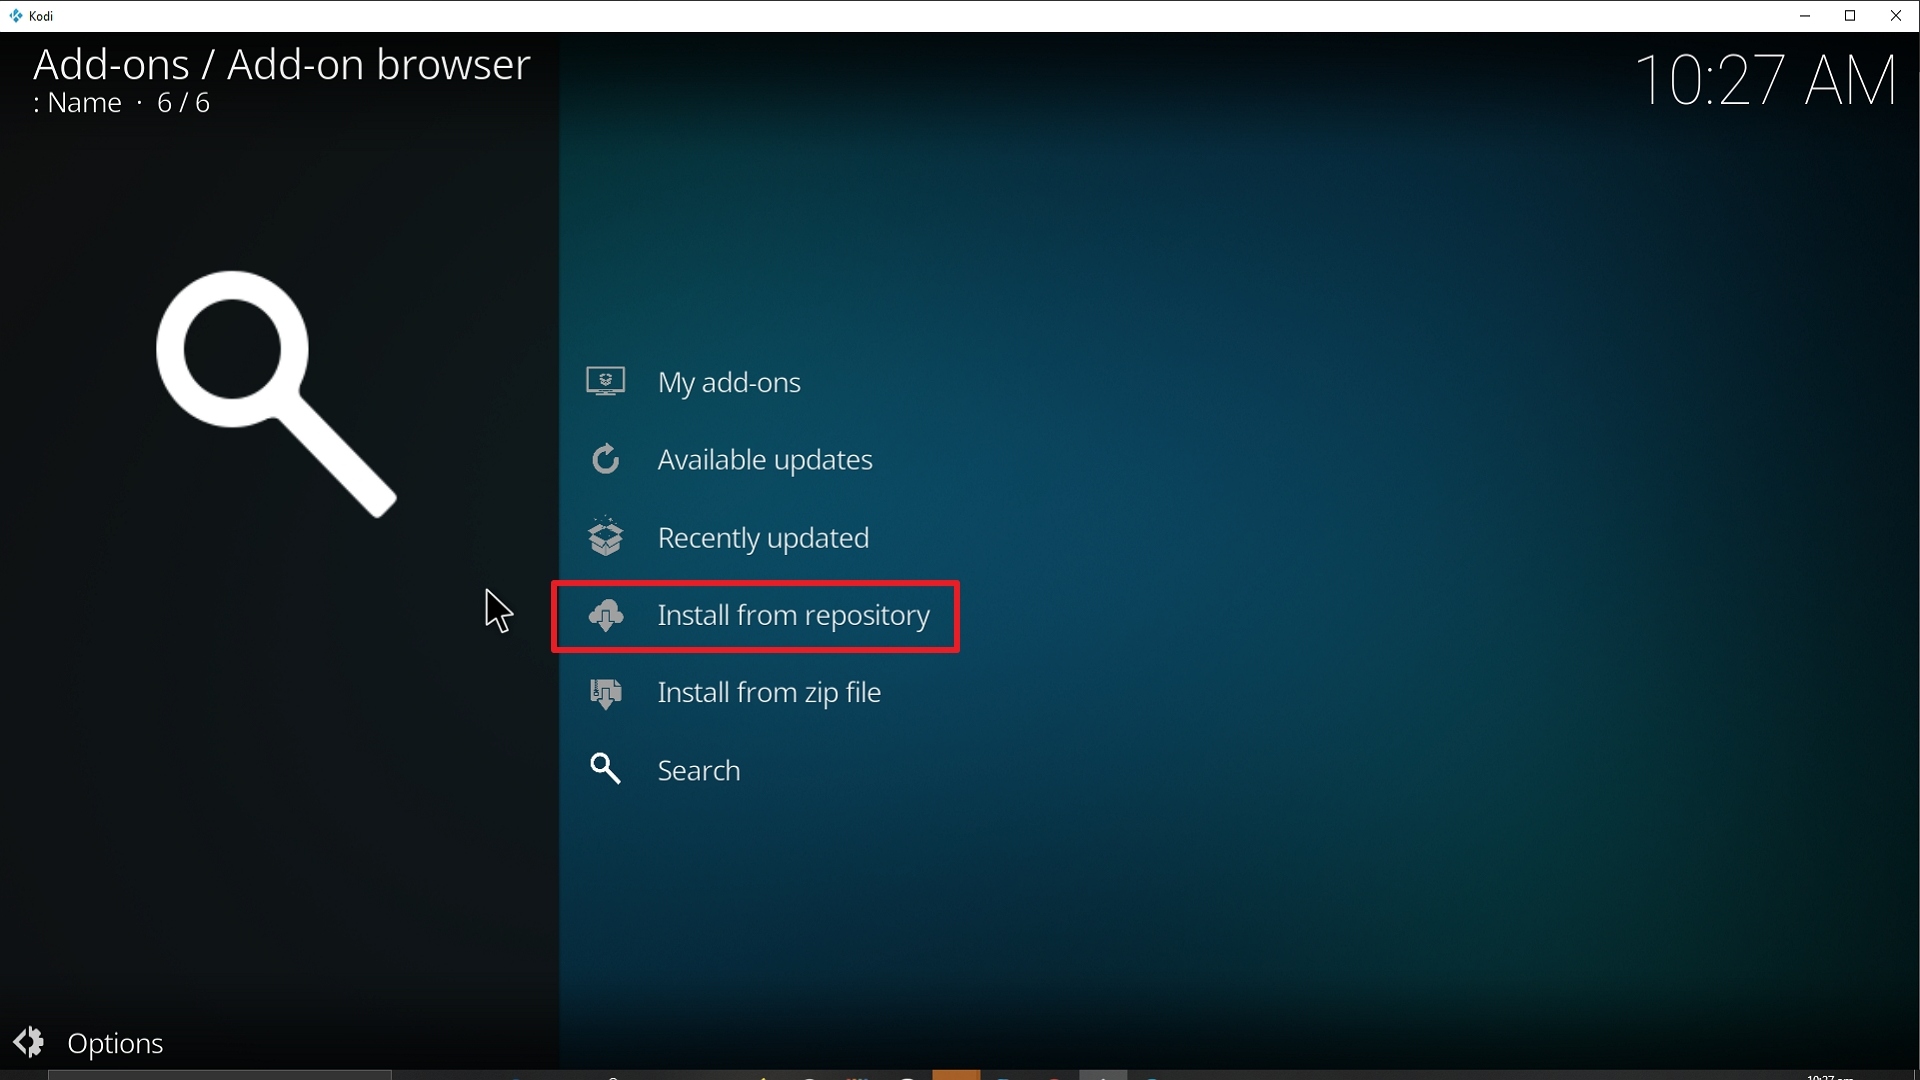
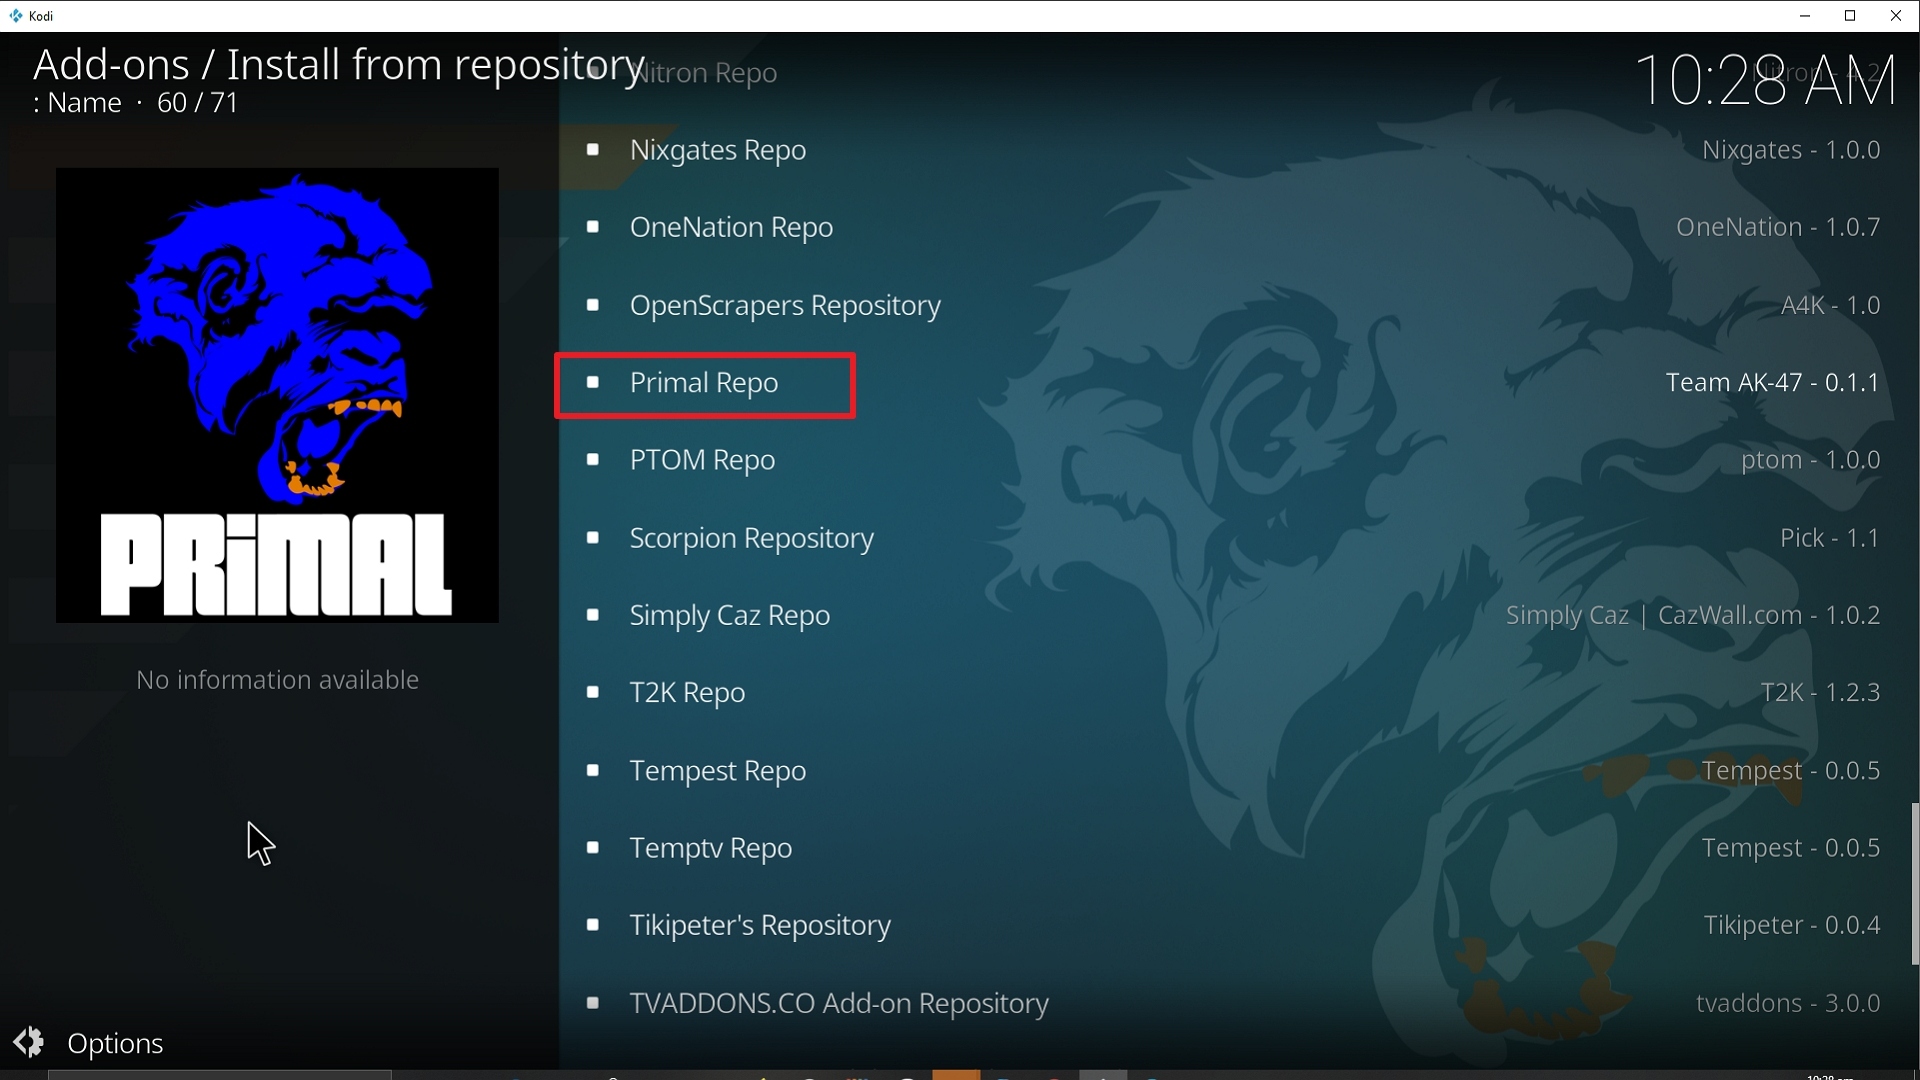
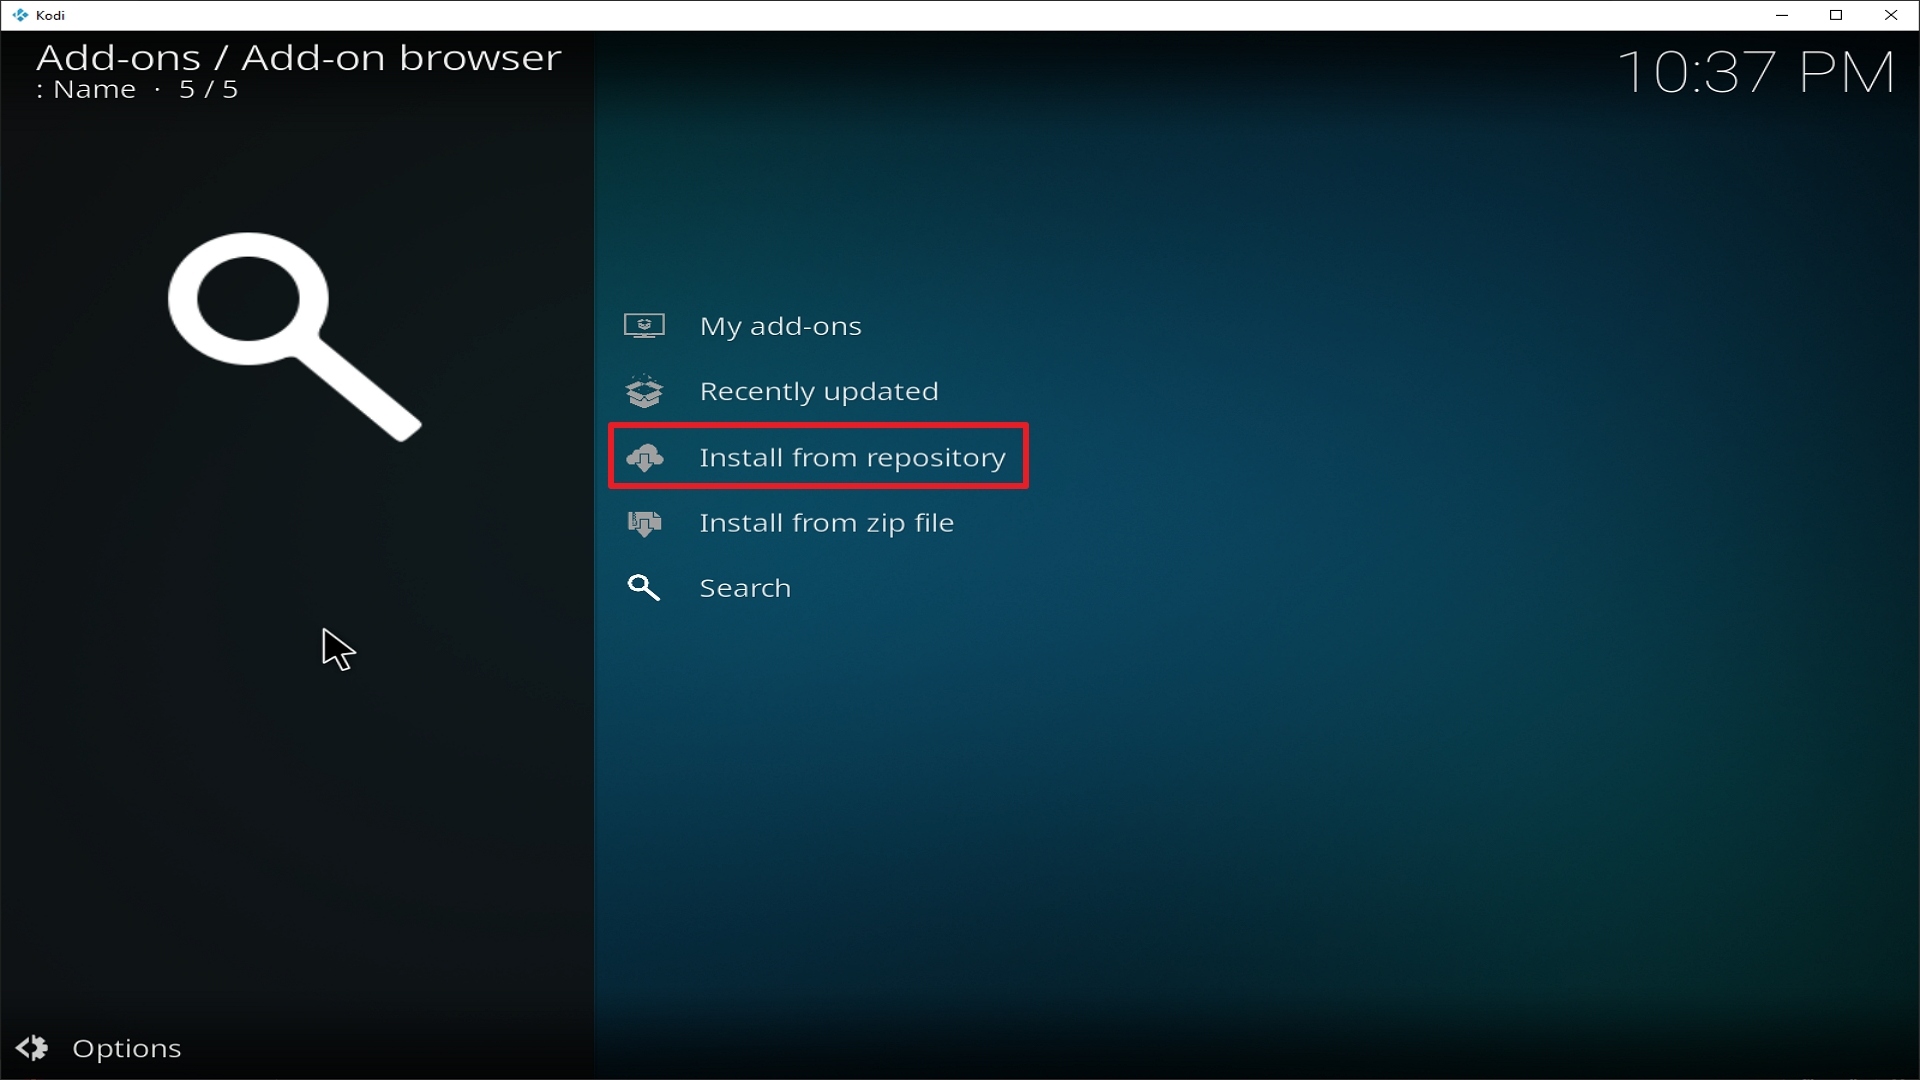
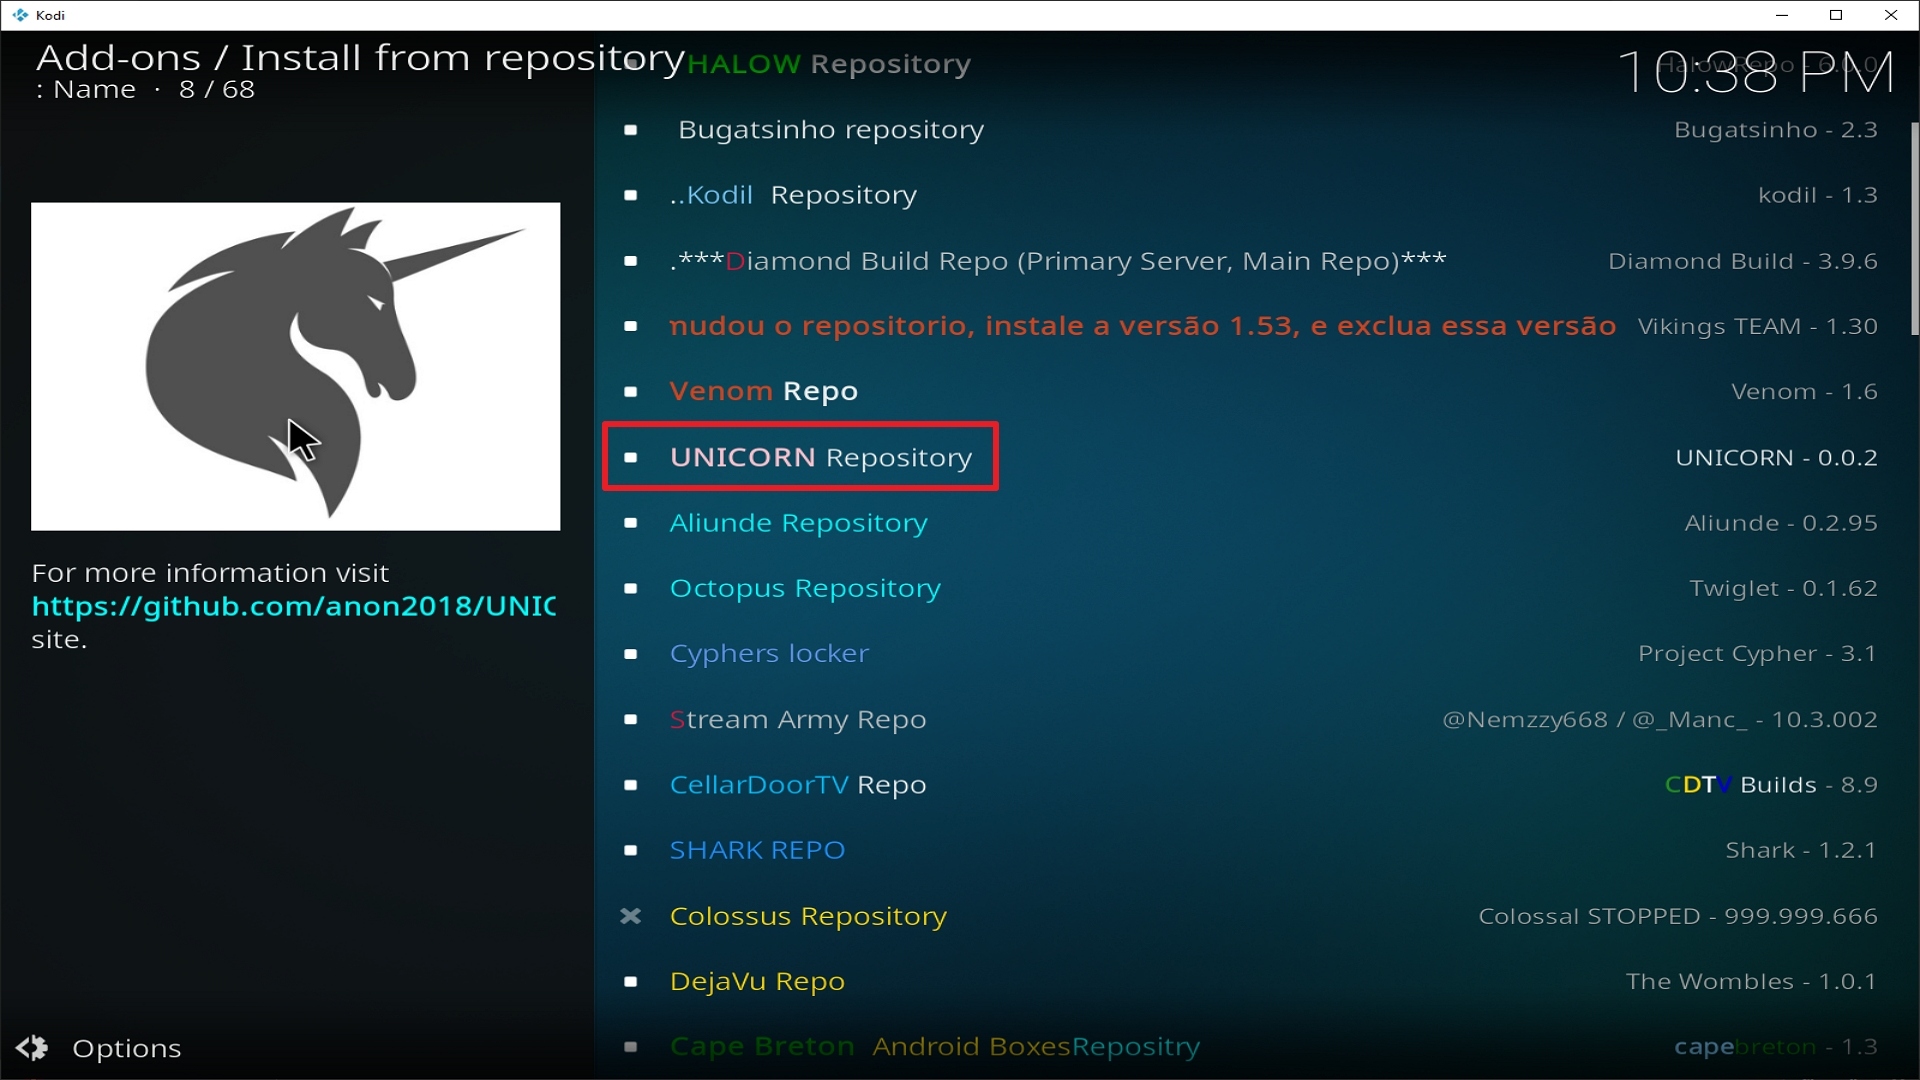
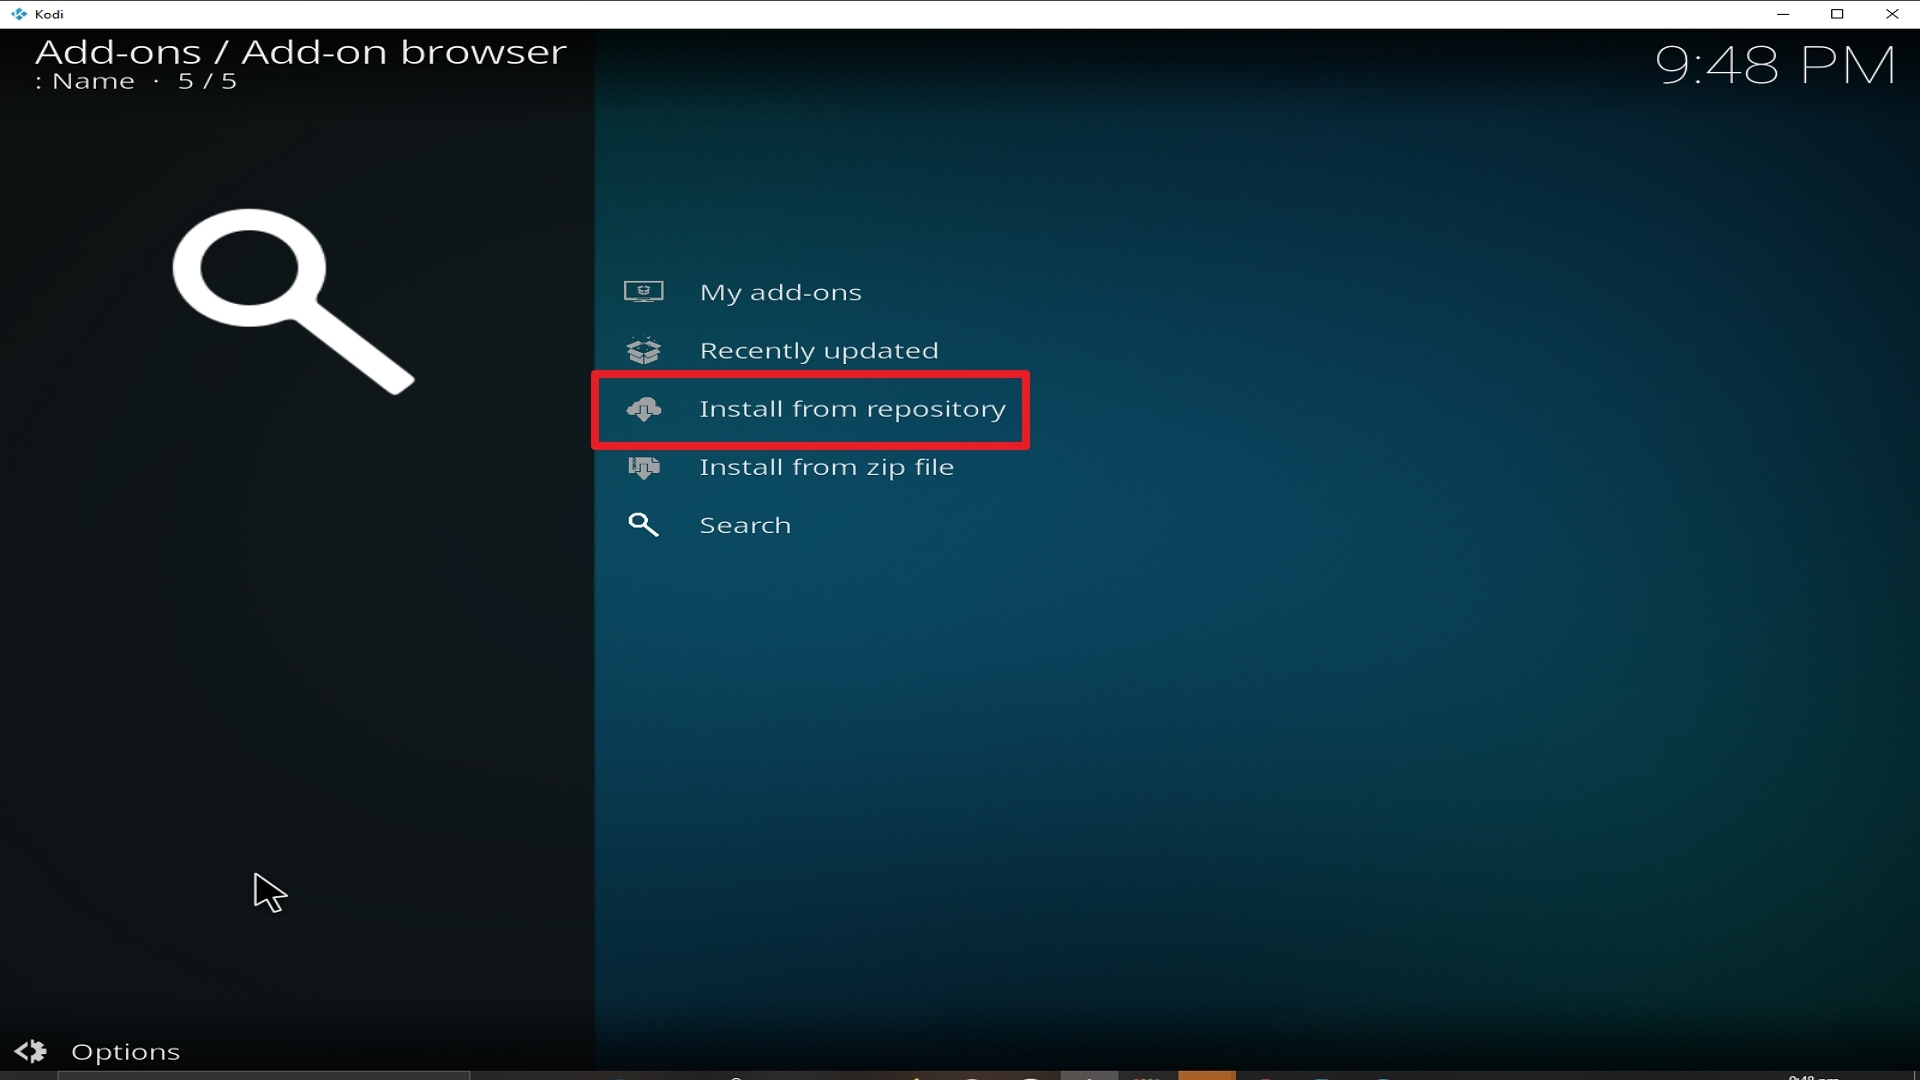
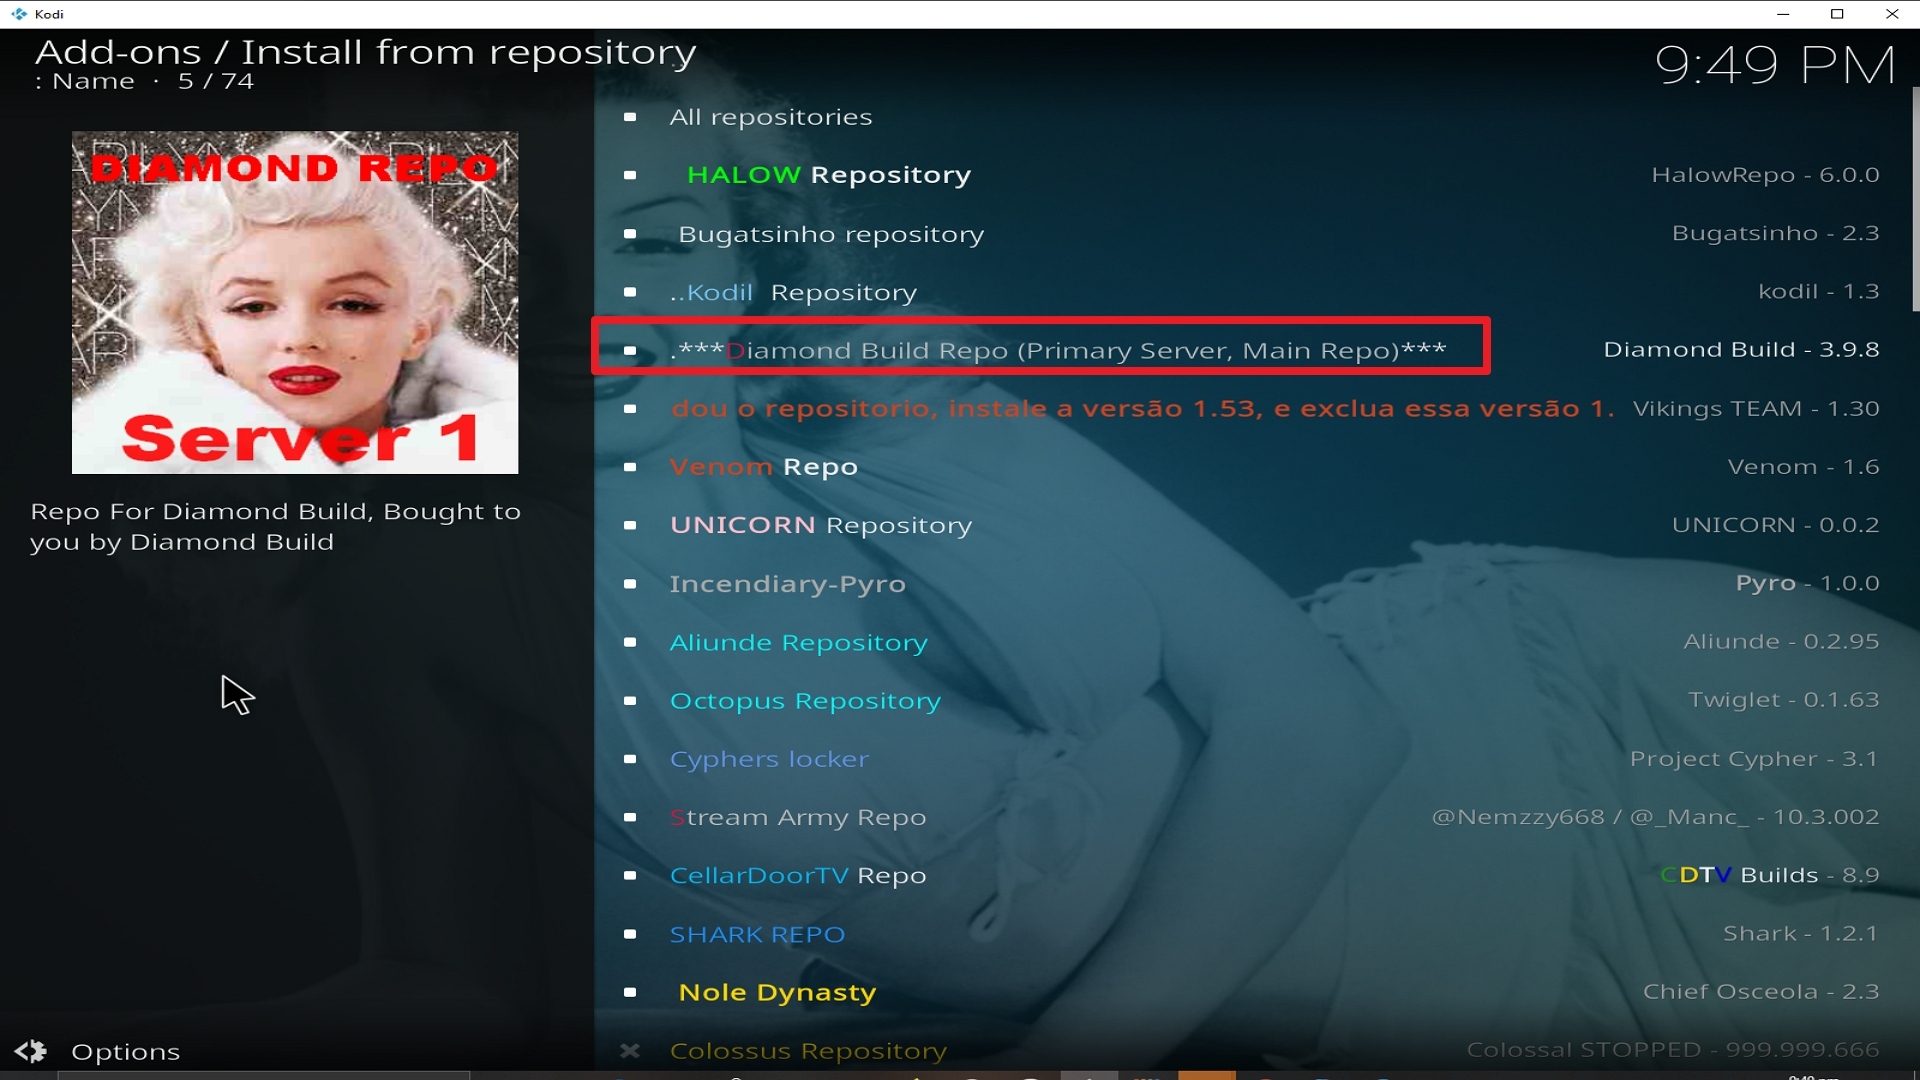
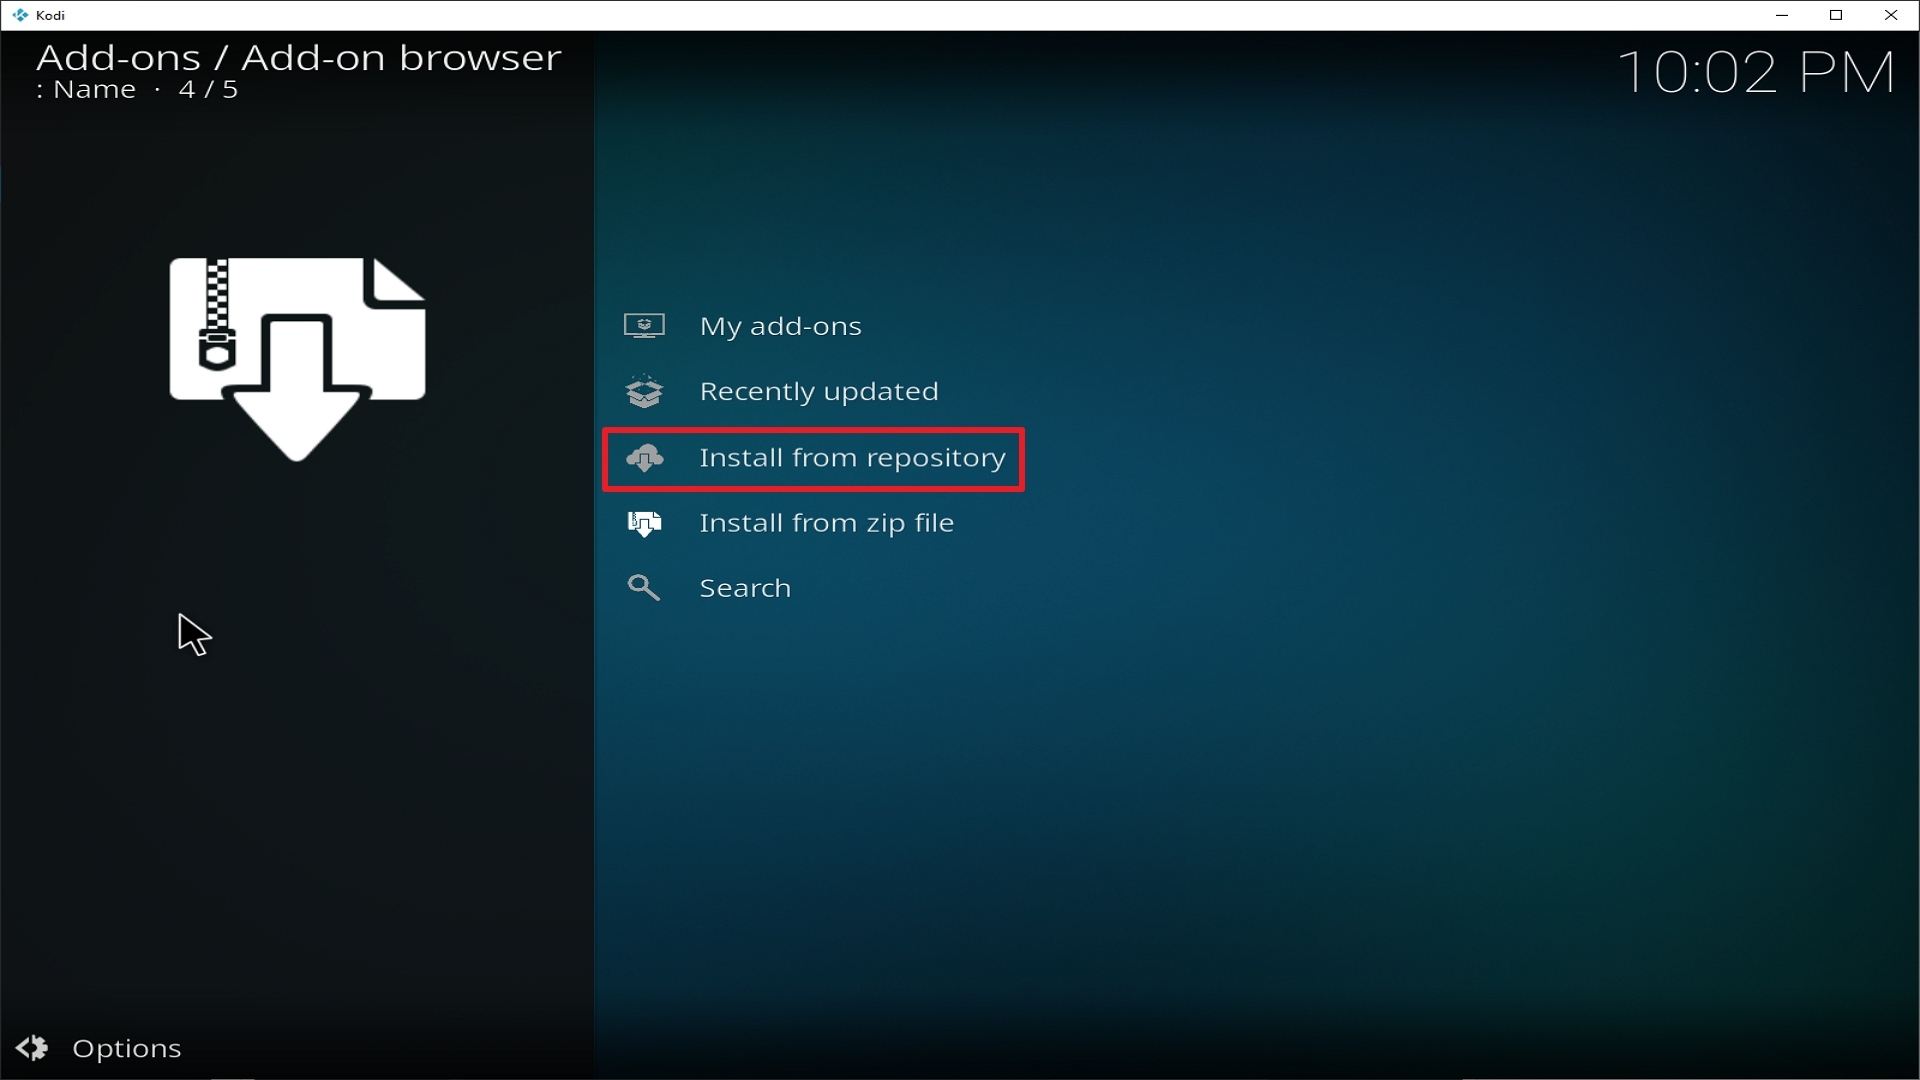
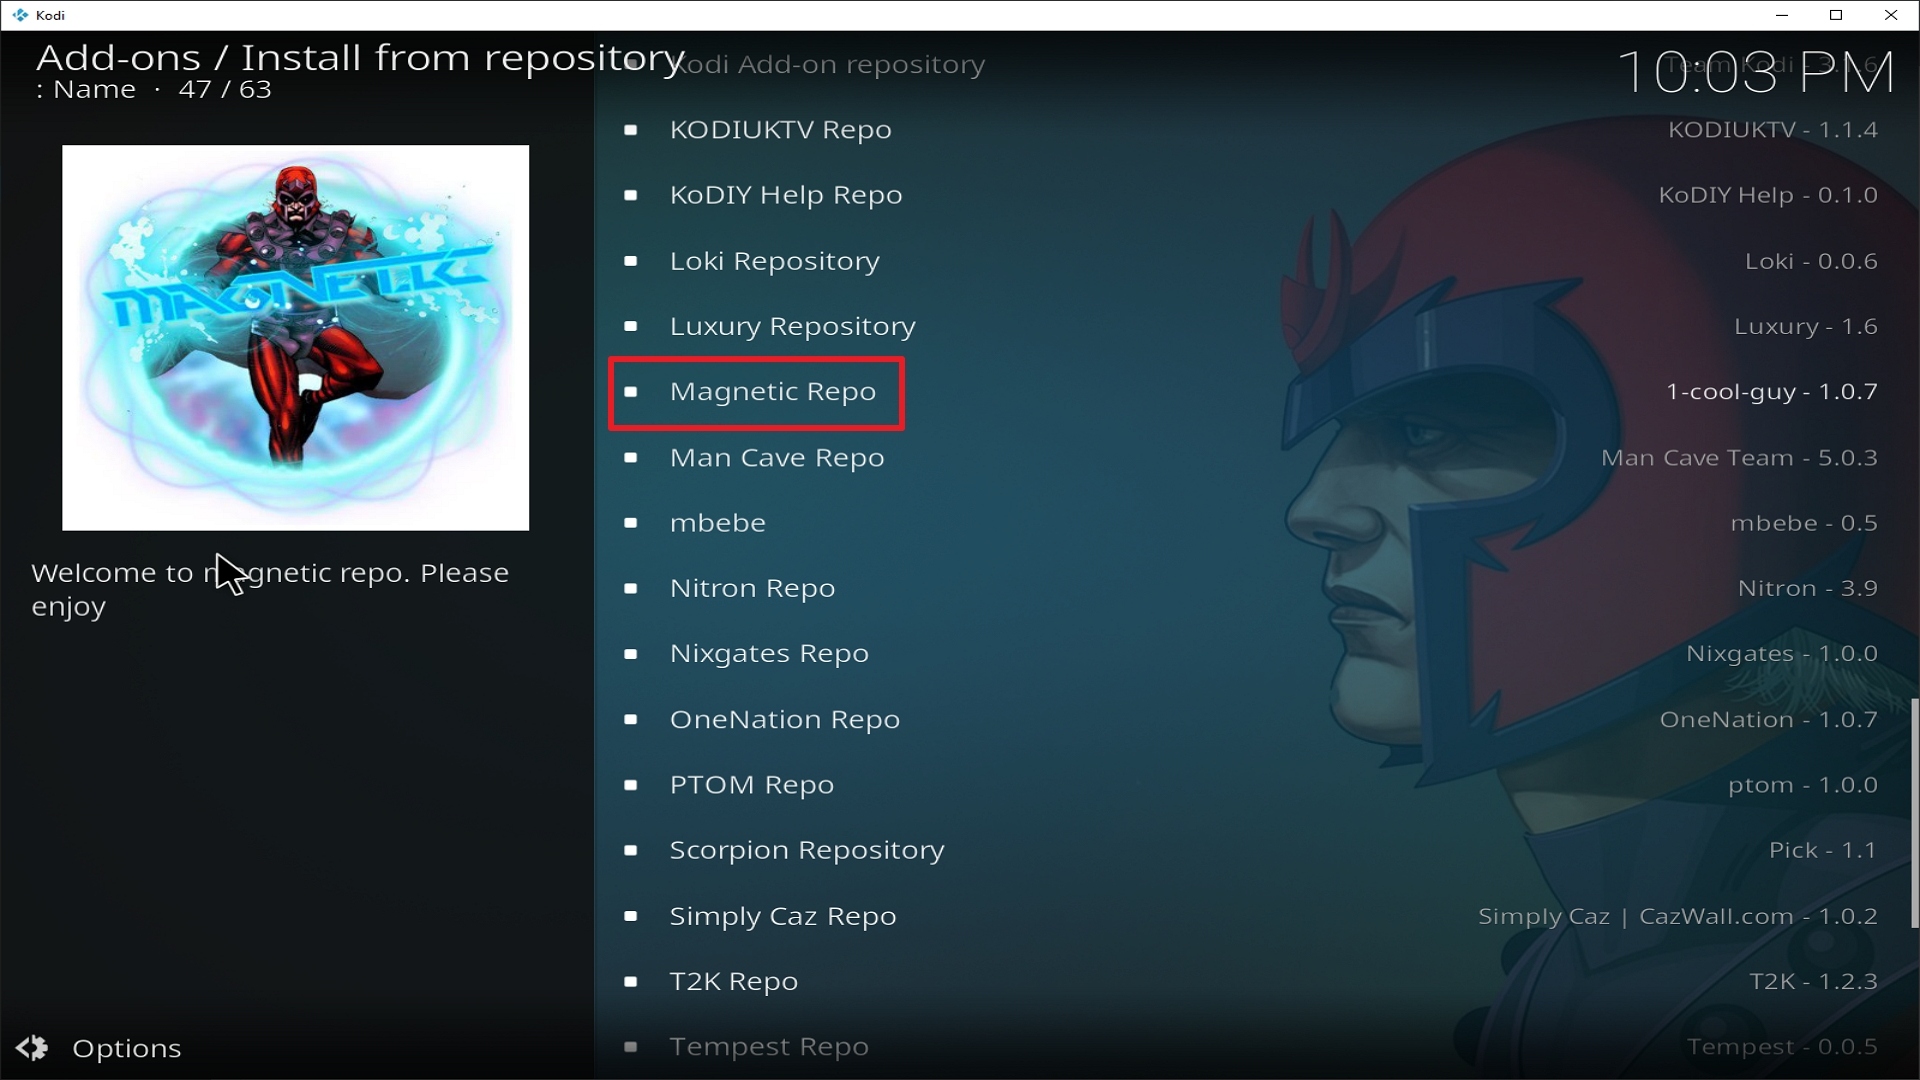
  6. Click on ‘Install from repository and choose ‘Where The Monsters Live’.
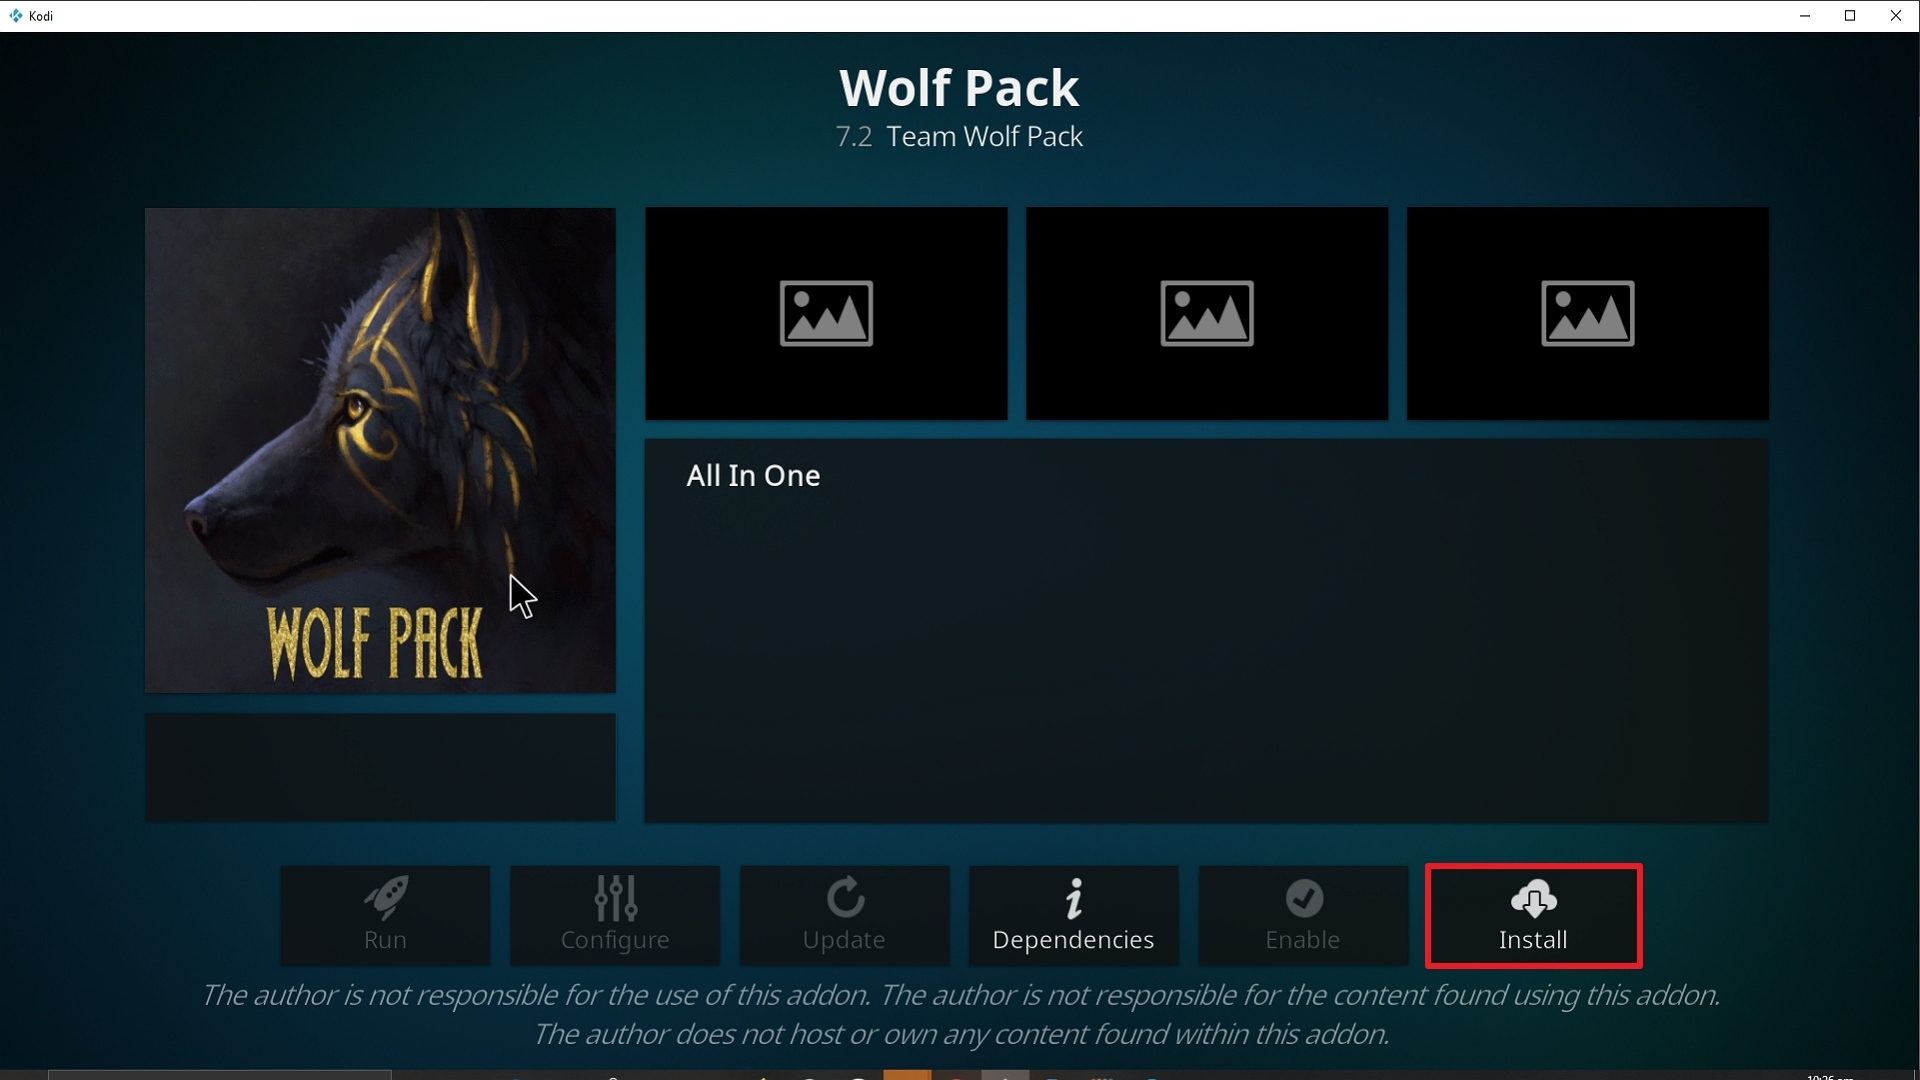
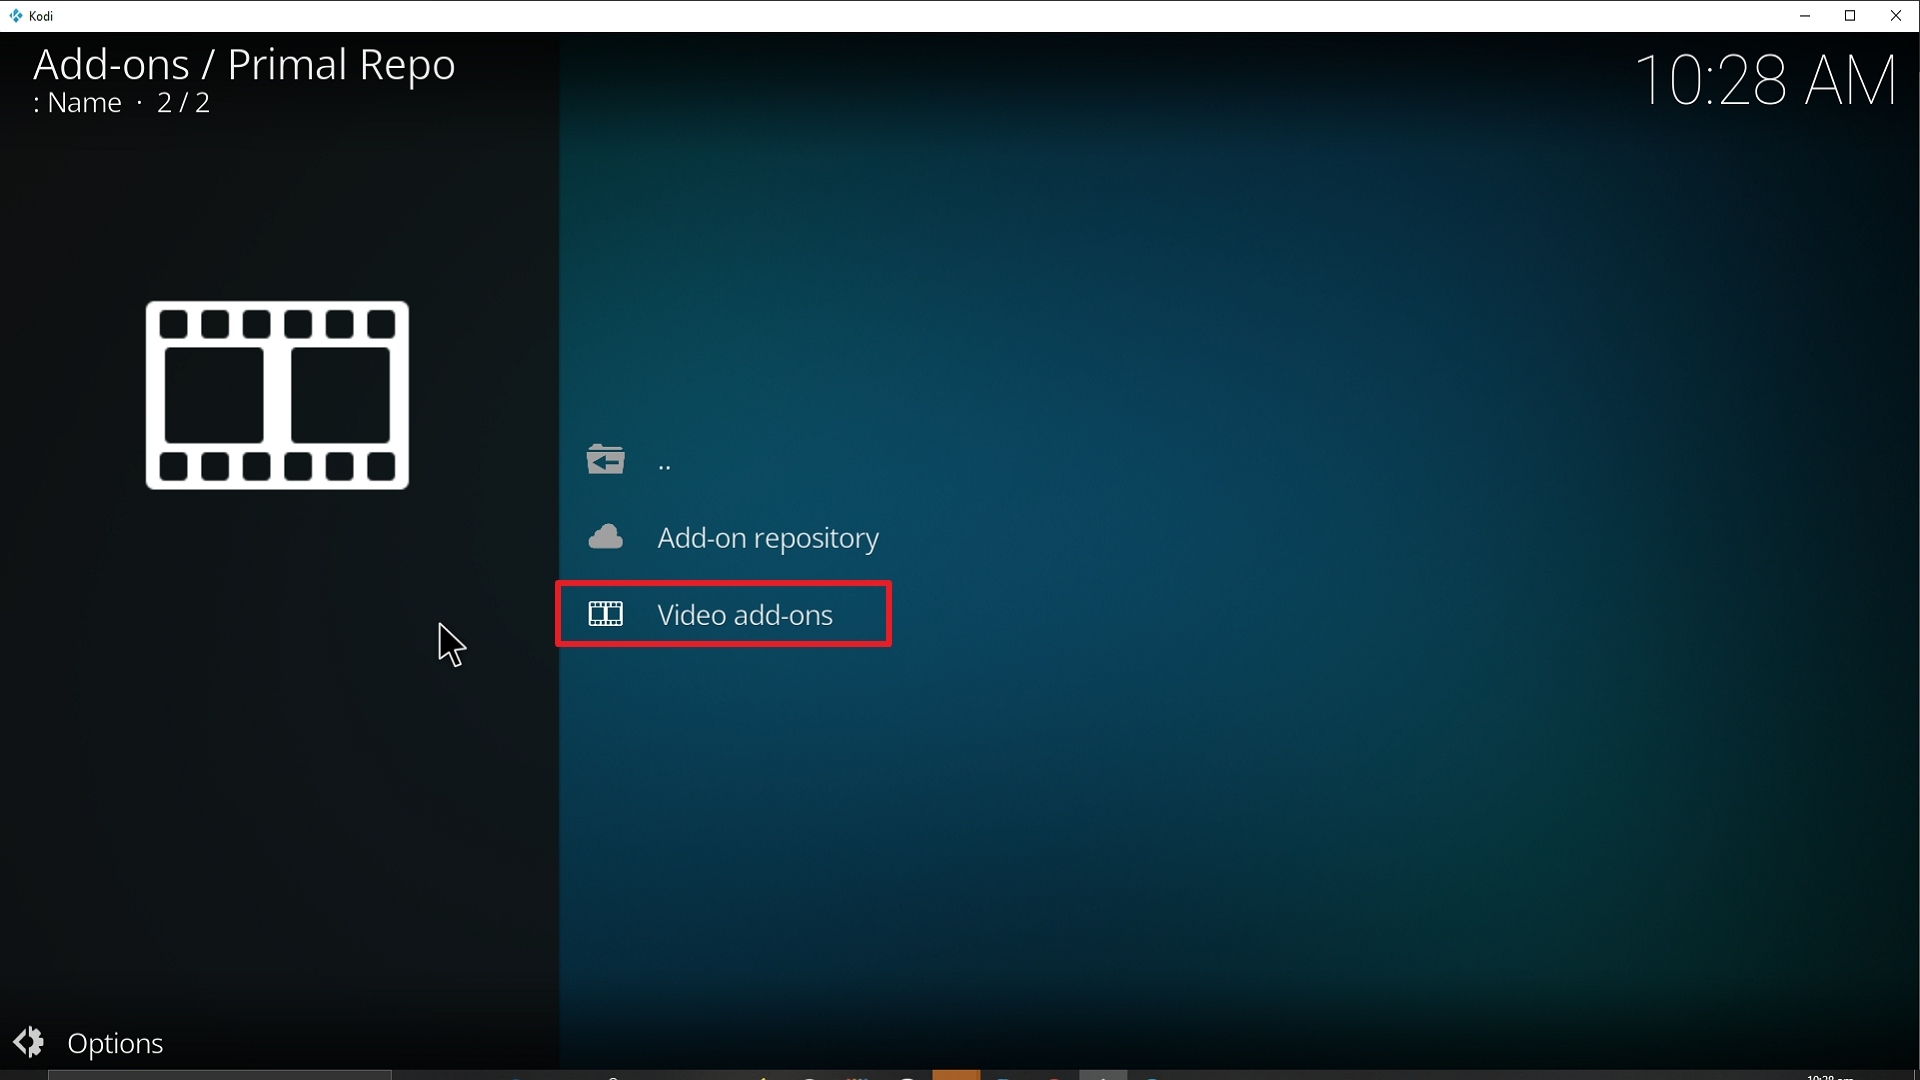
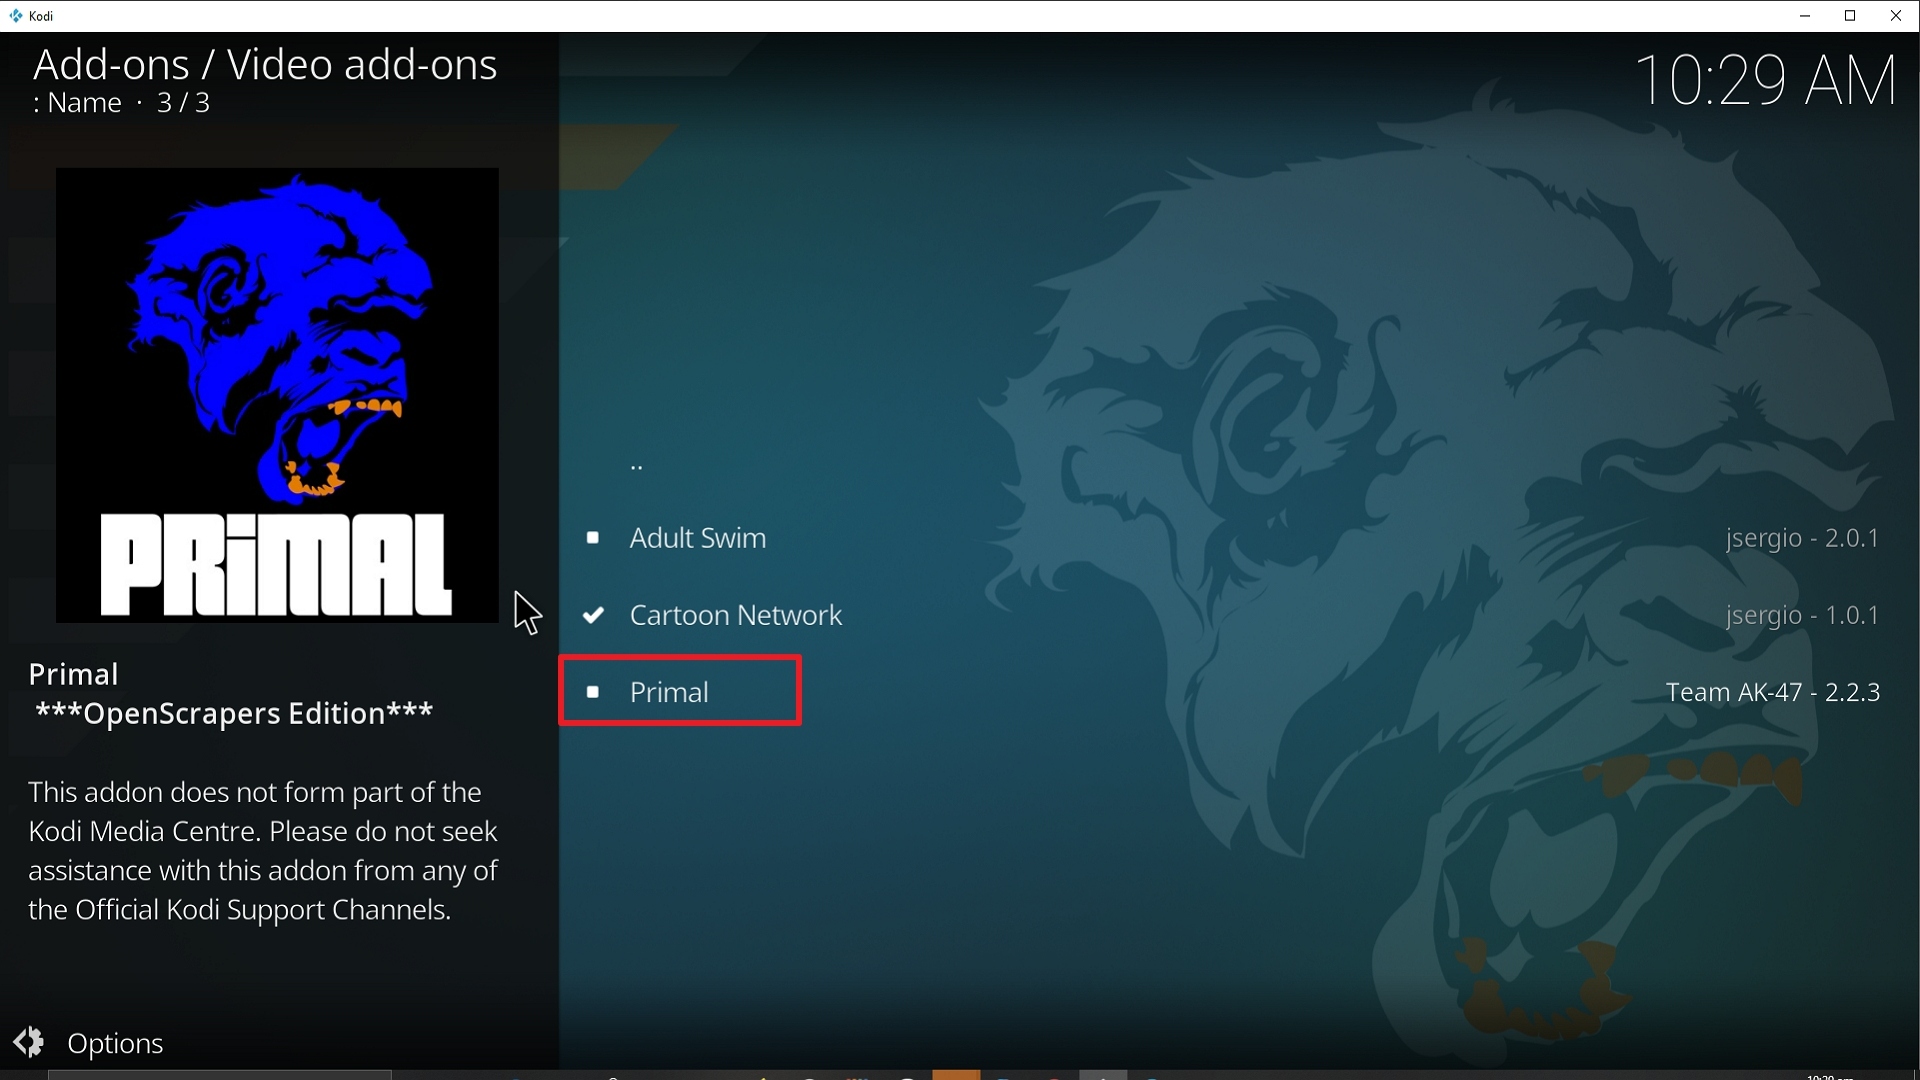
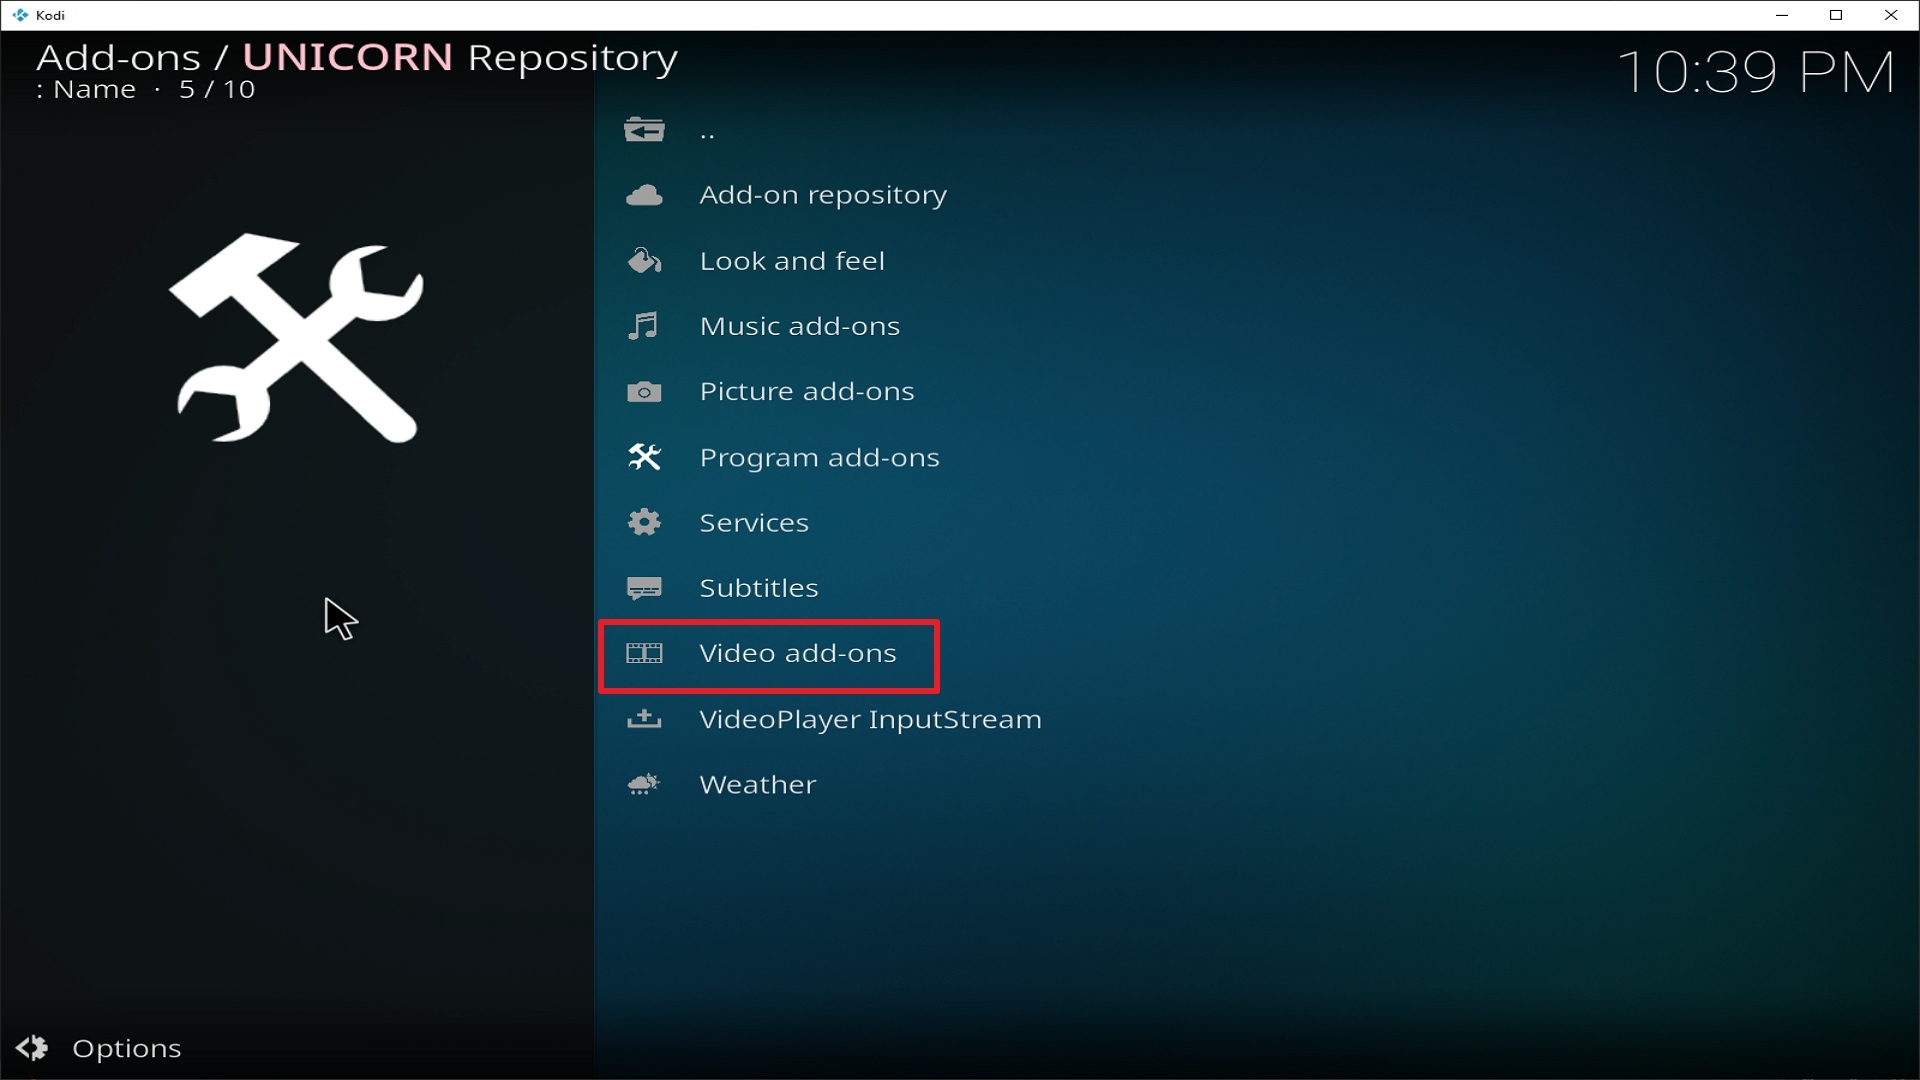
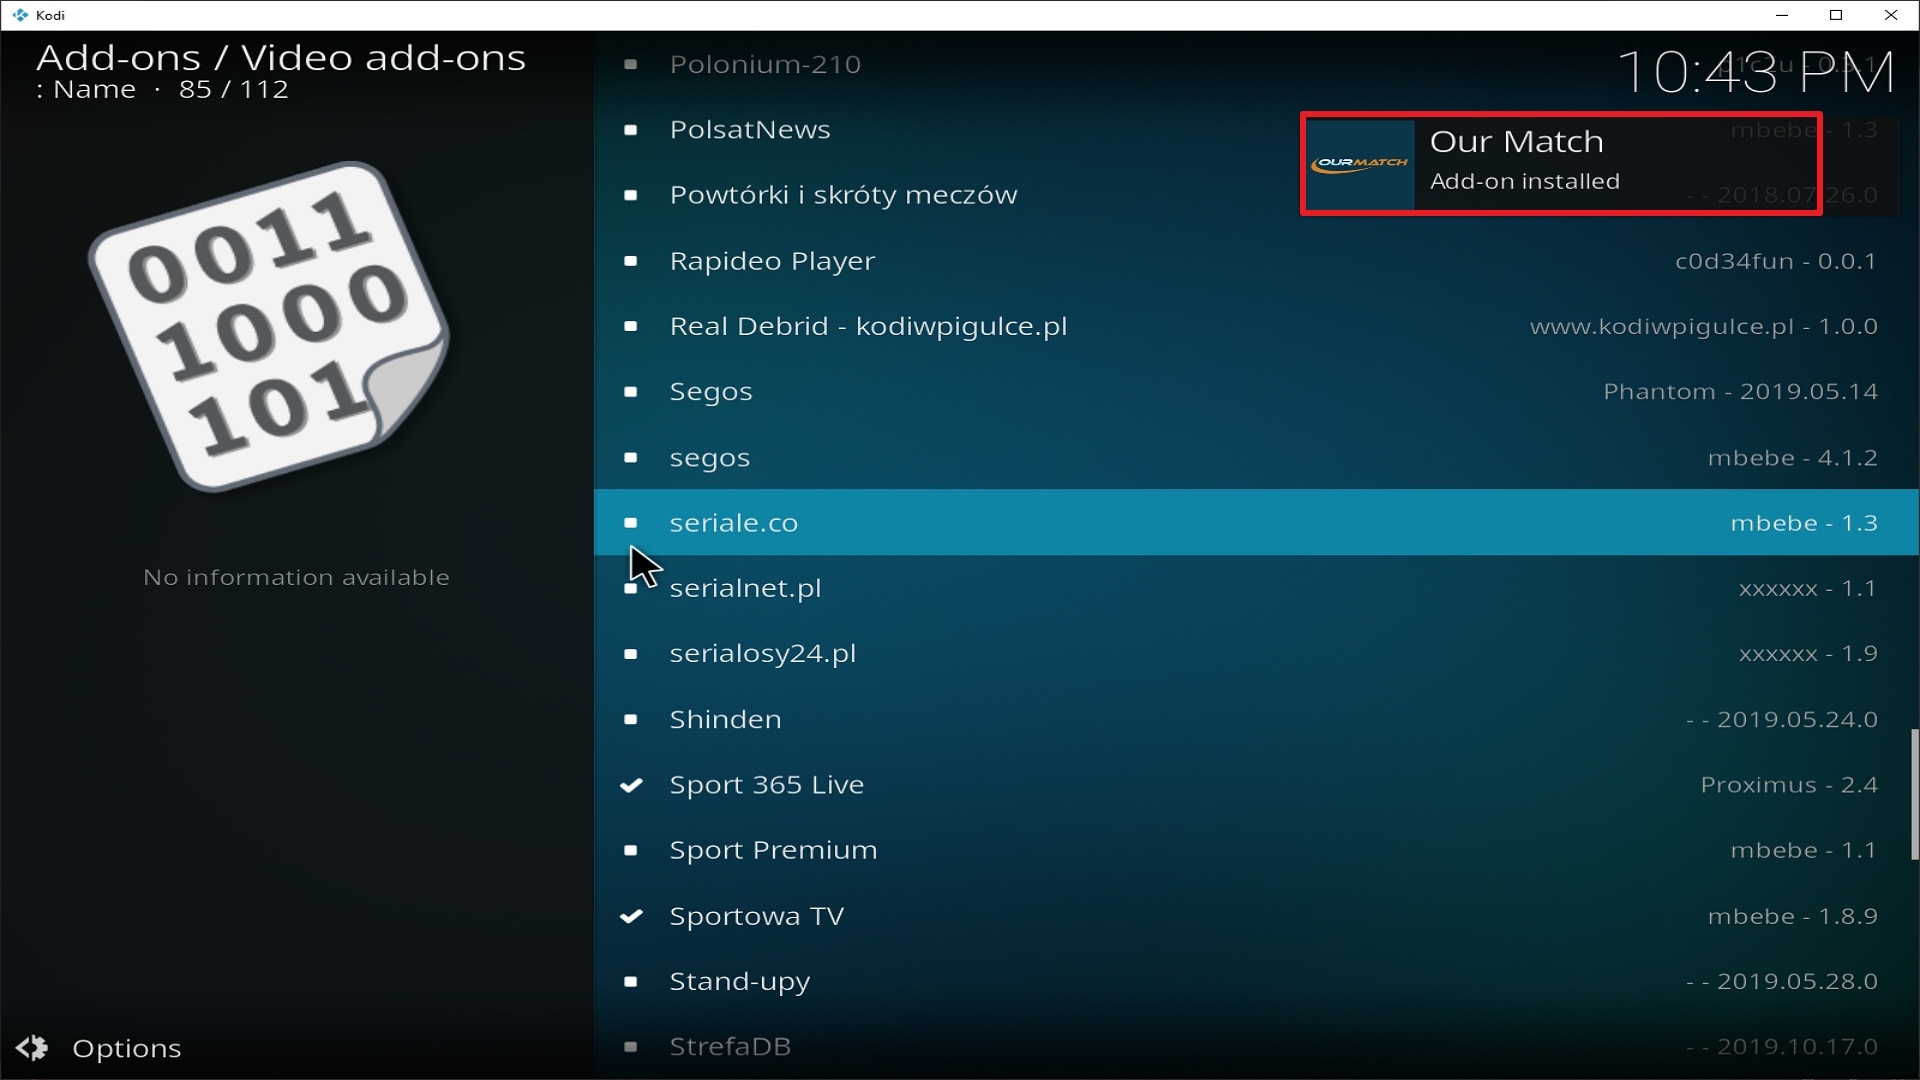
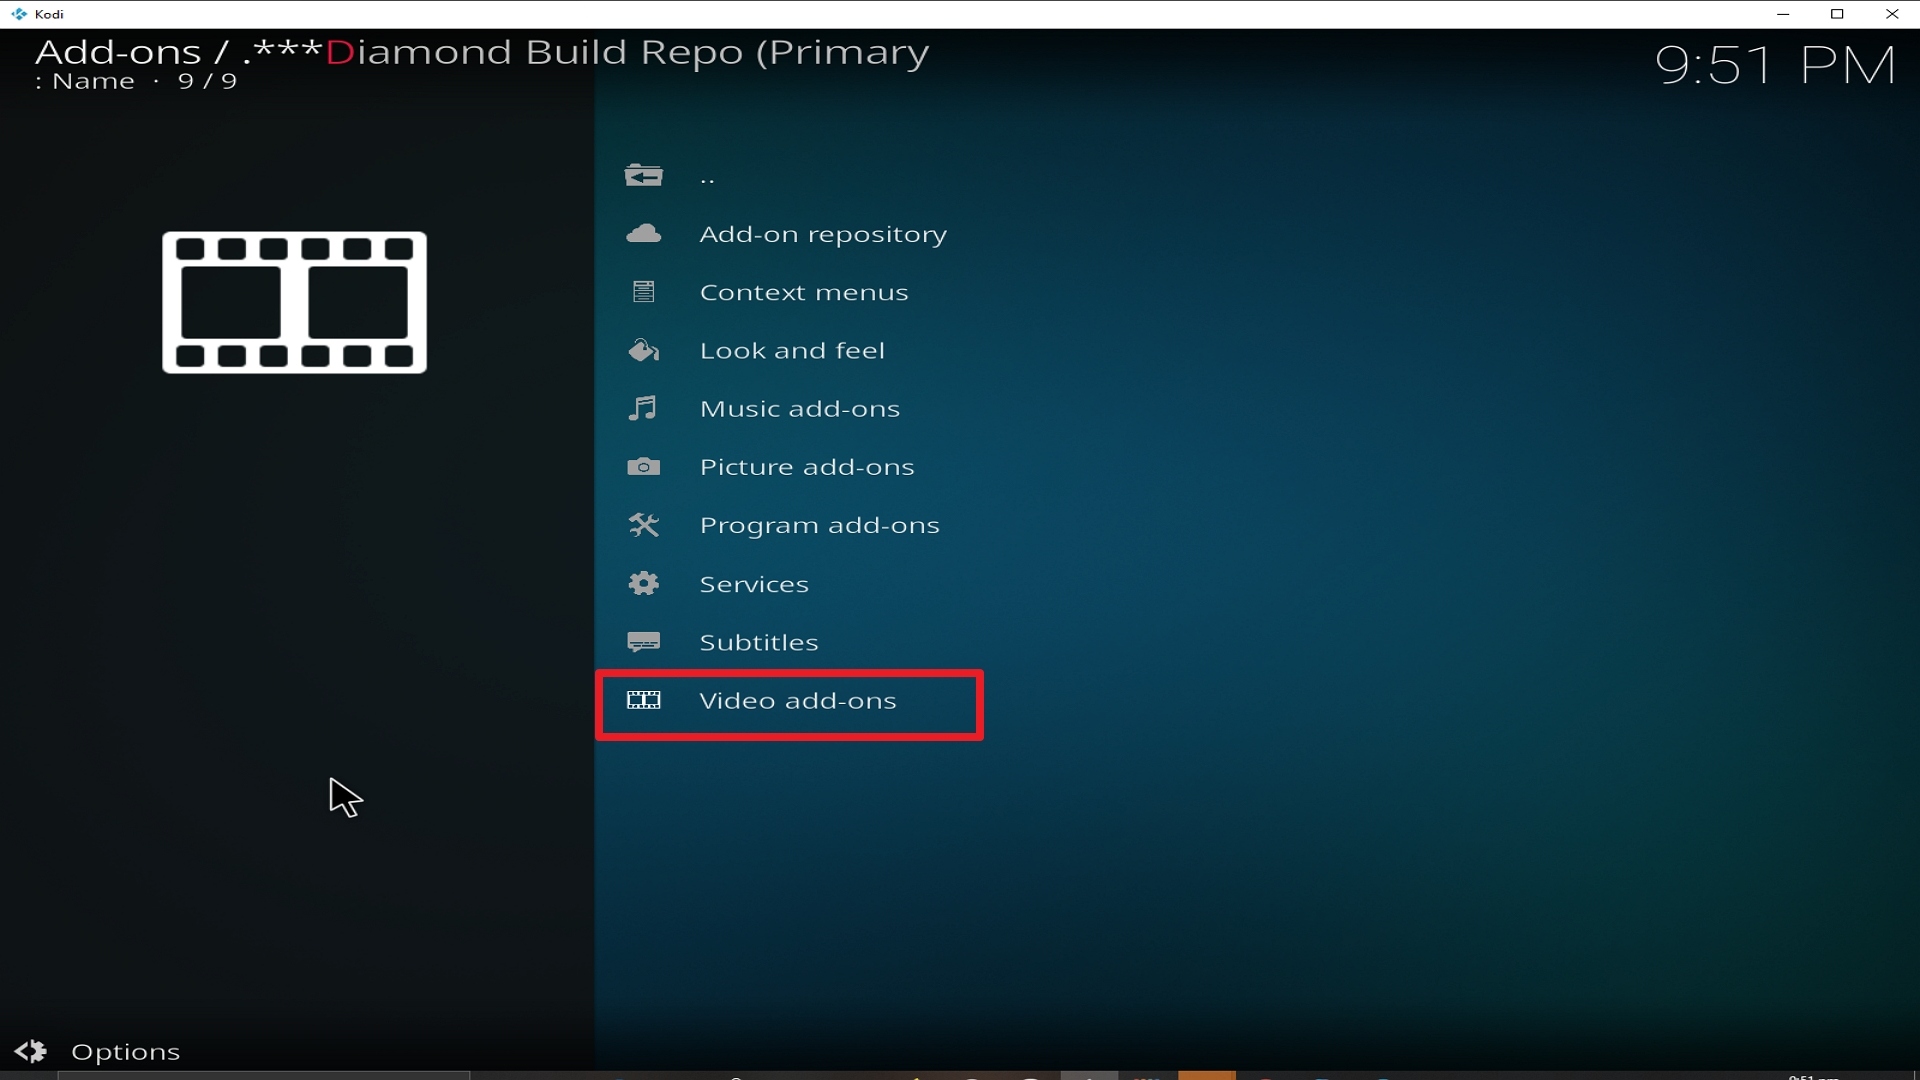
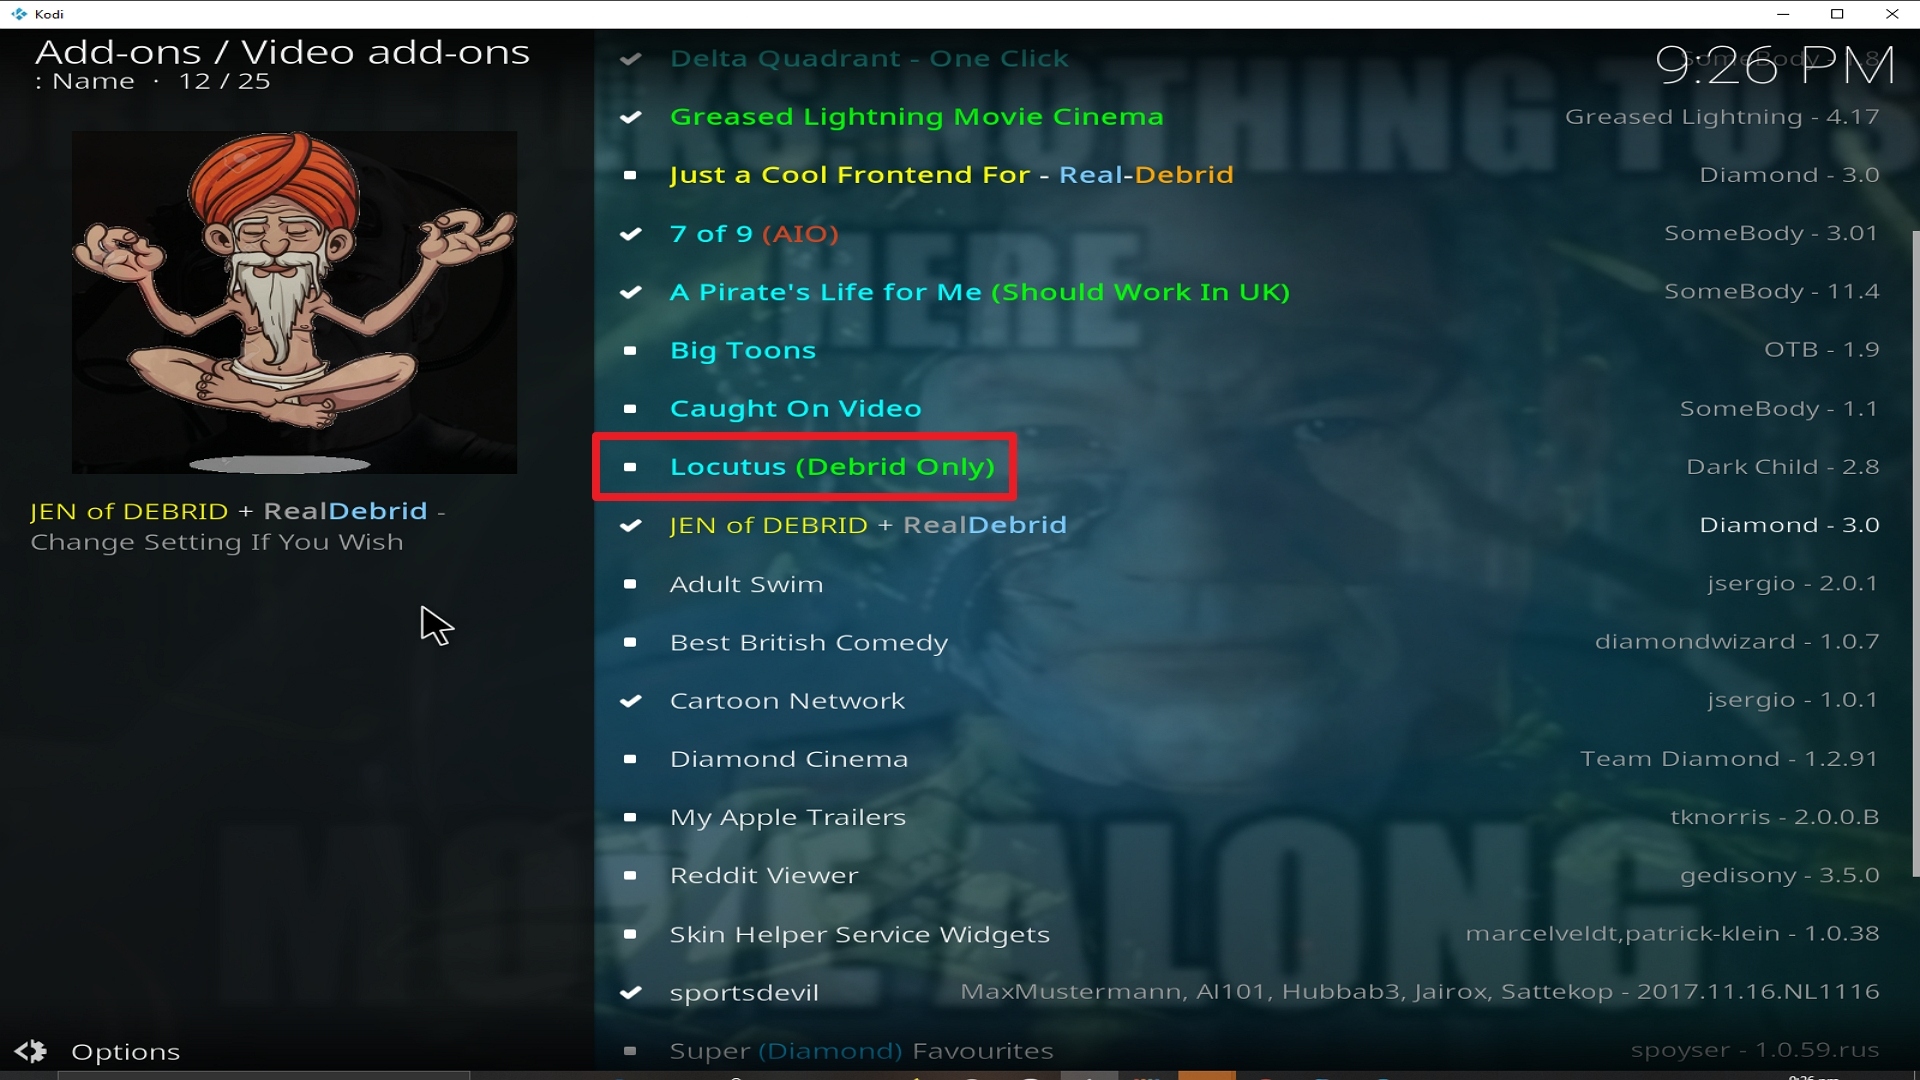
  7. Select ‘Video Add-ons’ then choose ‘Wolfpack’ and click on ‘Install’. After this, a notification will appear saying that the add-on has been installed.
  8. Reboot Kodi and enjoy your Wolf Pack add-on


YOUR INTERNET ACTIVITY IS BEING WATCHED

ReviewVPN cannot attest to the legality, security and privacy of the applications discussed on this site. It is highly recommended that you use a VPN service while streaming or using Kodi.

Currently, your IP 216.73.217.150 is visible to everyone and your Browser is being tracked by Advertisers & ISP Provider.

Save 65% Now

Limited Time Offer

Here are the main reasons why you must use a VPN:

  • Your activities are hidden from your ISP, the government, and from the apps you are using.
  • You can access additional movies and TV streams.
  • ISP attempts to throttle are thrwarted thus reducing buffering issues.
  • Geographically restricted content like Netflix and Hulu can be unblocked.

A VPN works be replacing your ISP-assigned IP address and creating an encrypted tunnel. We recommend the no log service offered by IPVanish. It works well on a Firestick and offers the fastest possible speeds.

Special Limited Time Offer - Get IPVanish


How to Install Wolf Pack Addon on Kodi with Screenshots

1. From the home screen, select the cogwheel at the upper left.

Step 1 Installing Wolf Pack addon on Kodi

2. Select System in the bottom right corner.

Step 2 Installing Wolf Pack addon on Kodi


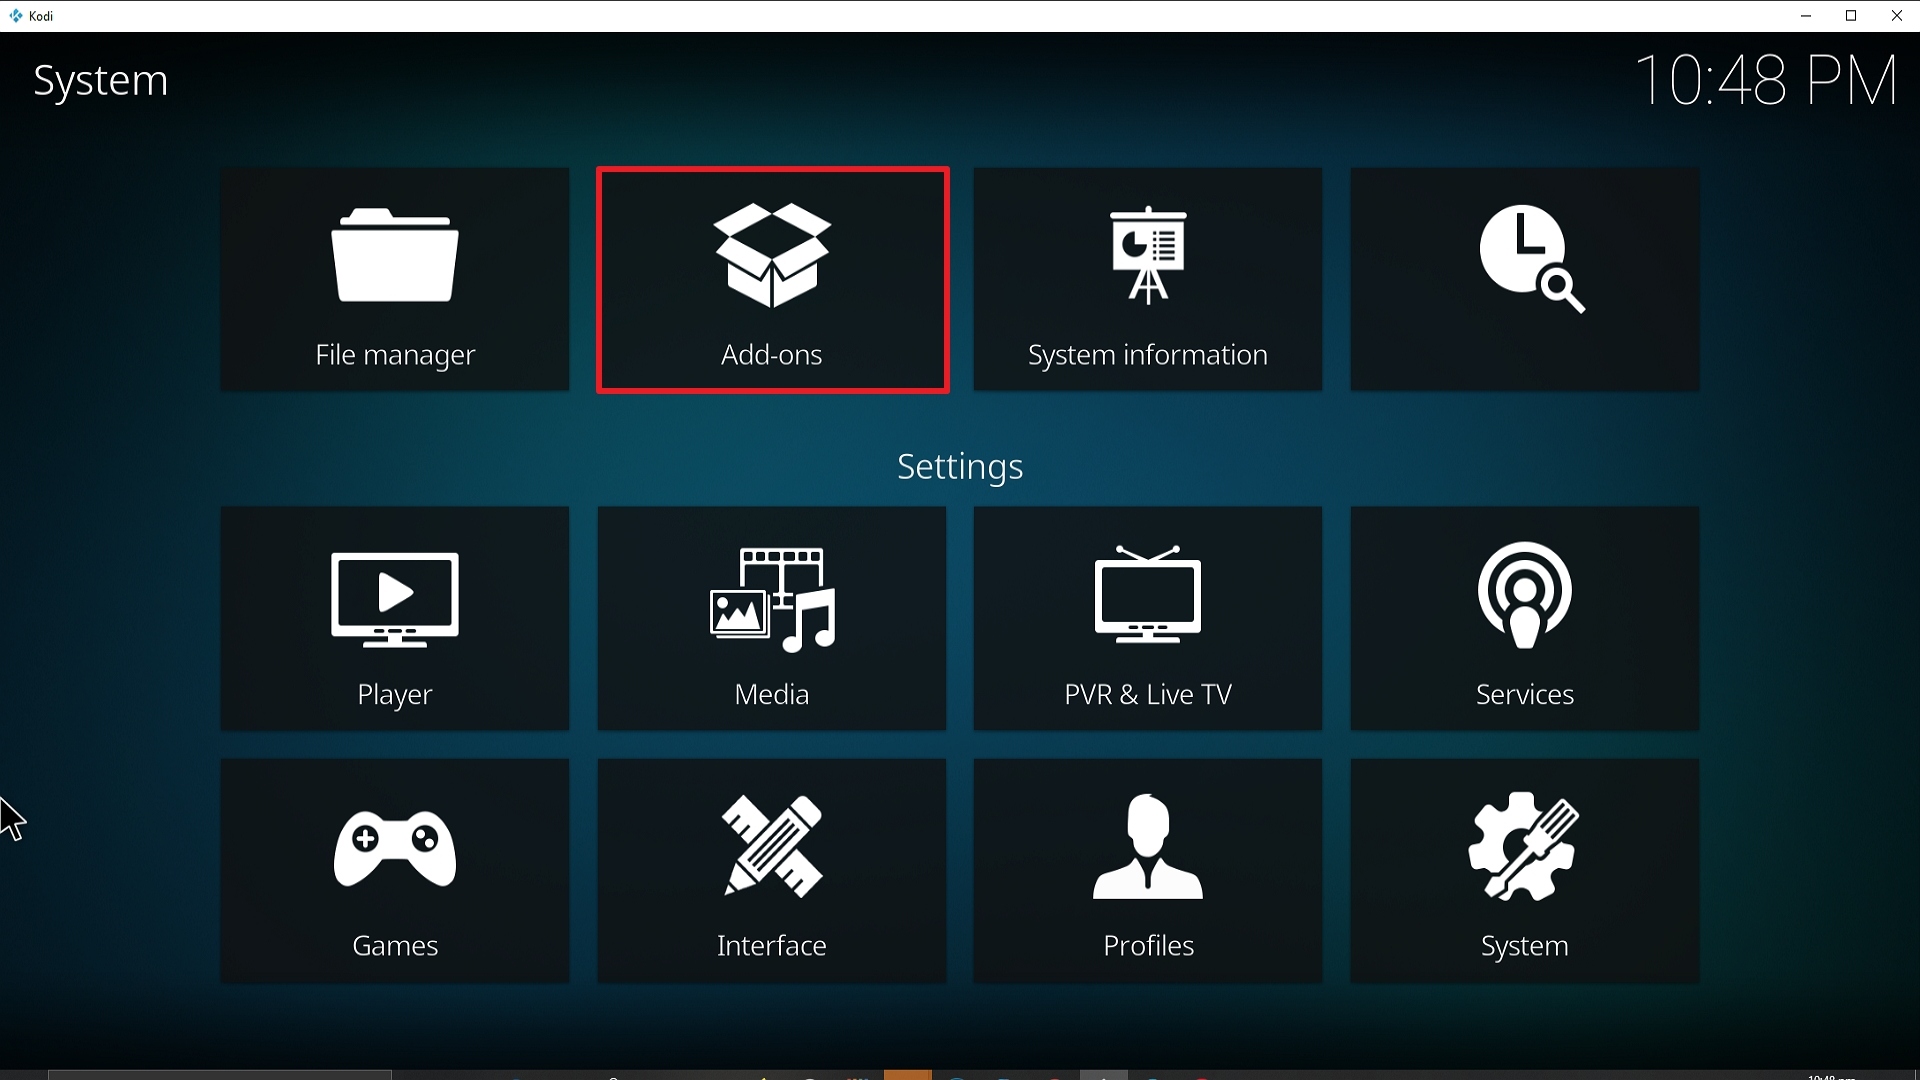
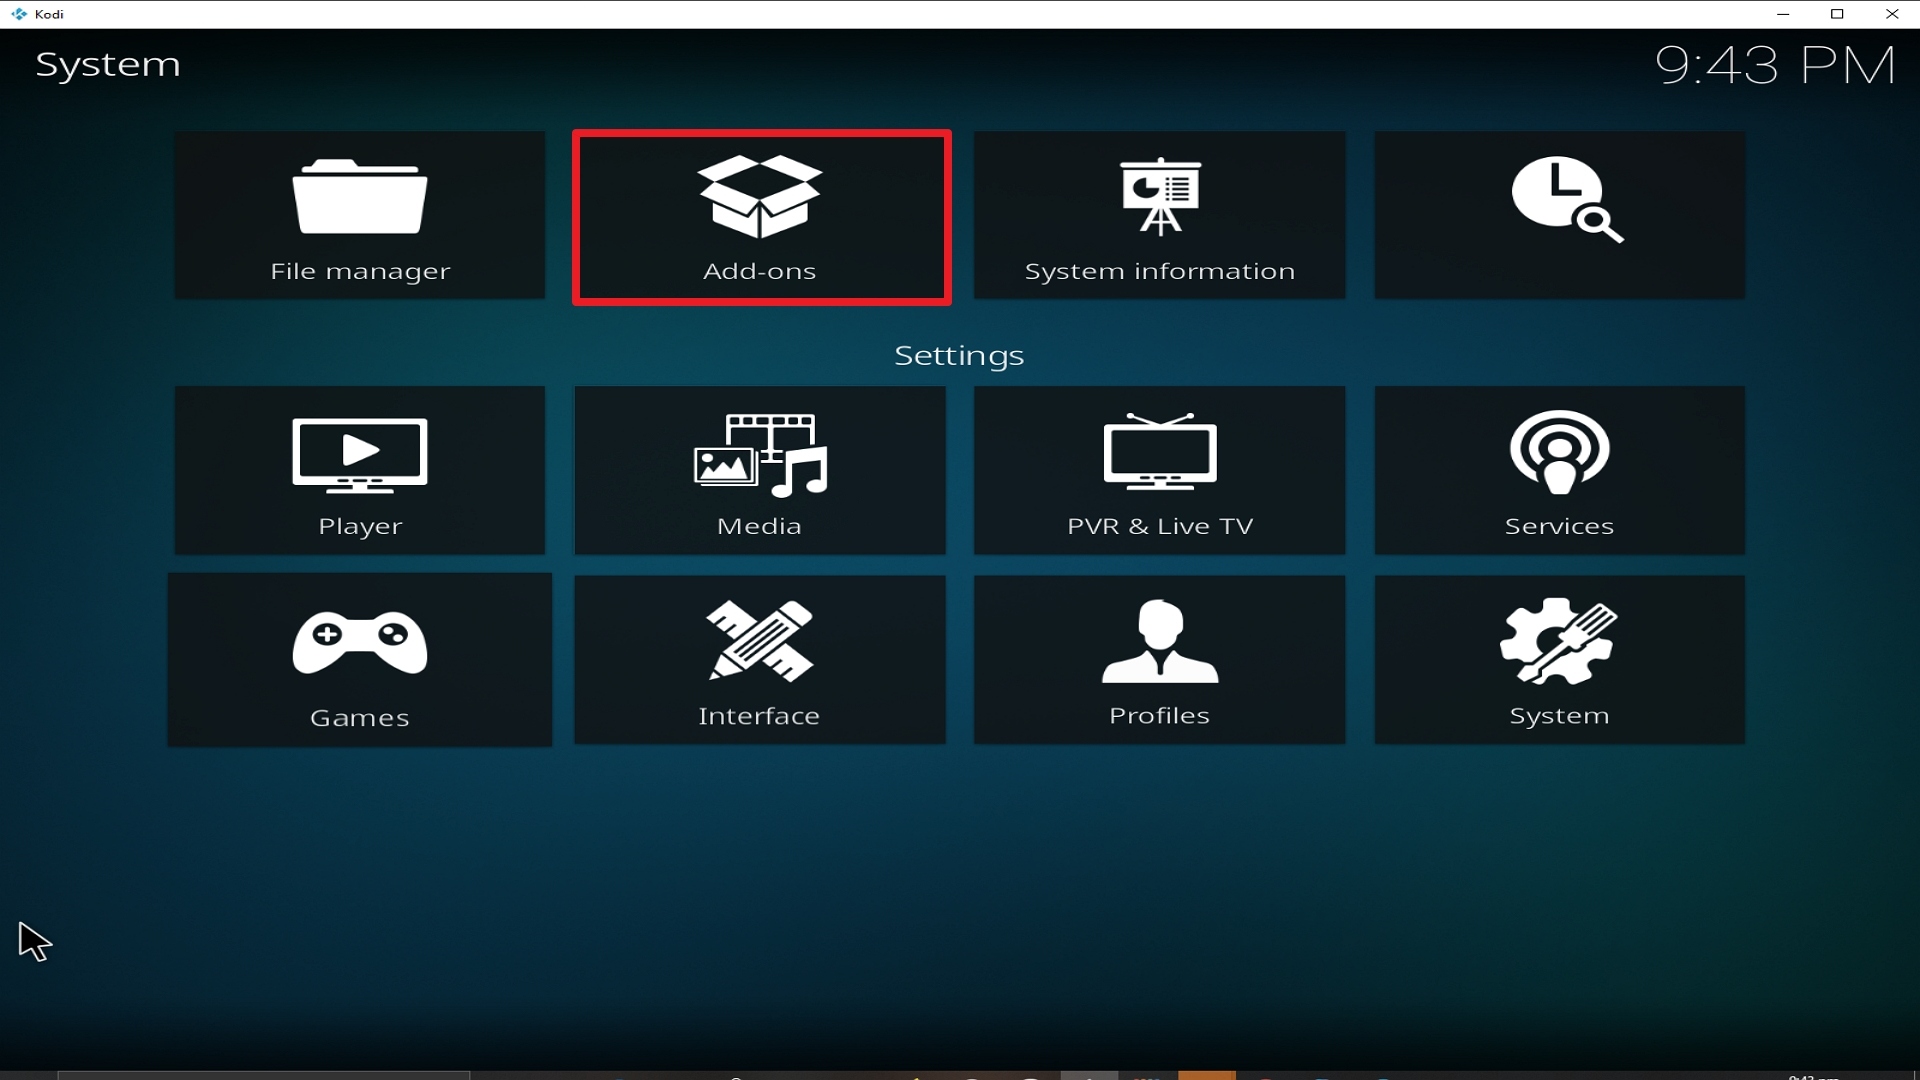
3. Select Add-ons on the left side of the screen.

Step 3 Installing Wolf Pack addon on Kodi


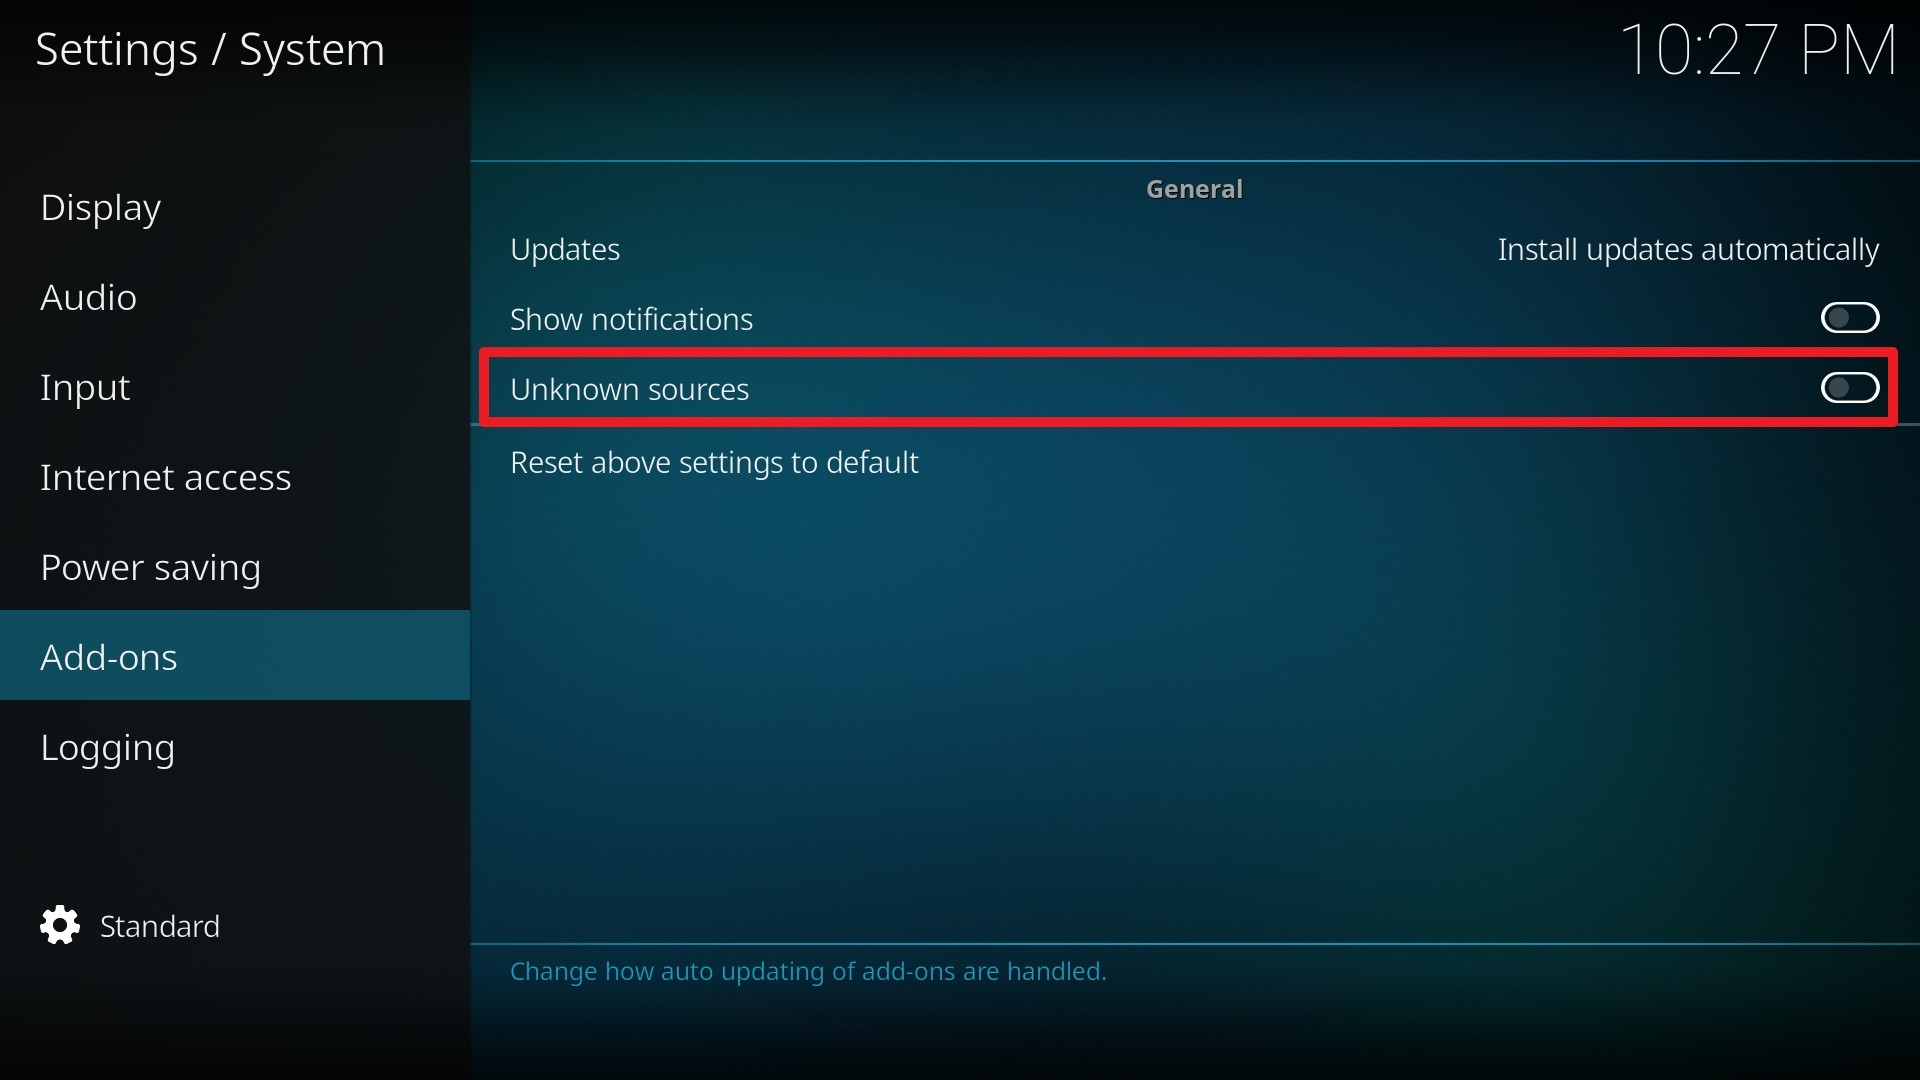
4. Select Unknown sources.

Step 4 Installing Wolf Pack addon on Kodi


5. Click Yes to allow unknown sources.

Step 5 Installing Wolf Pack addon on Kodi


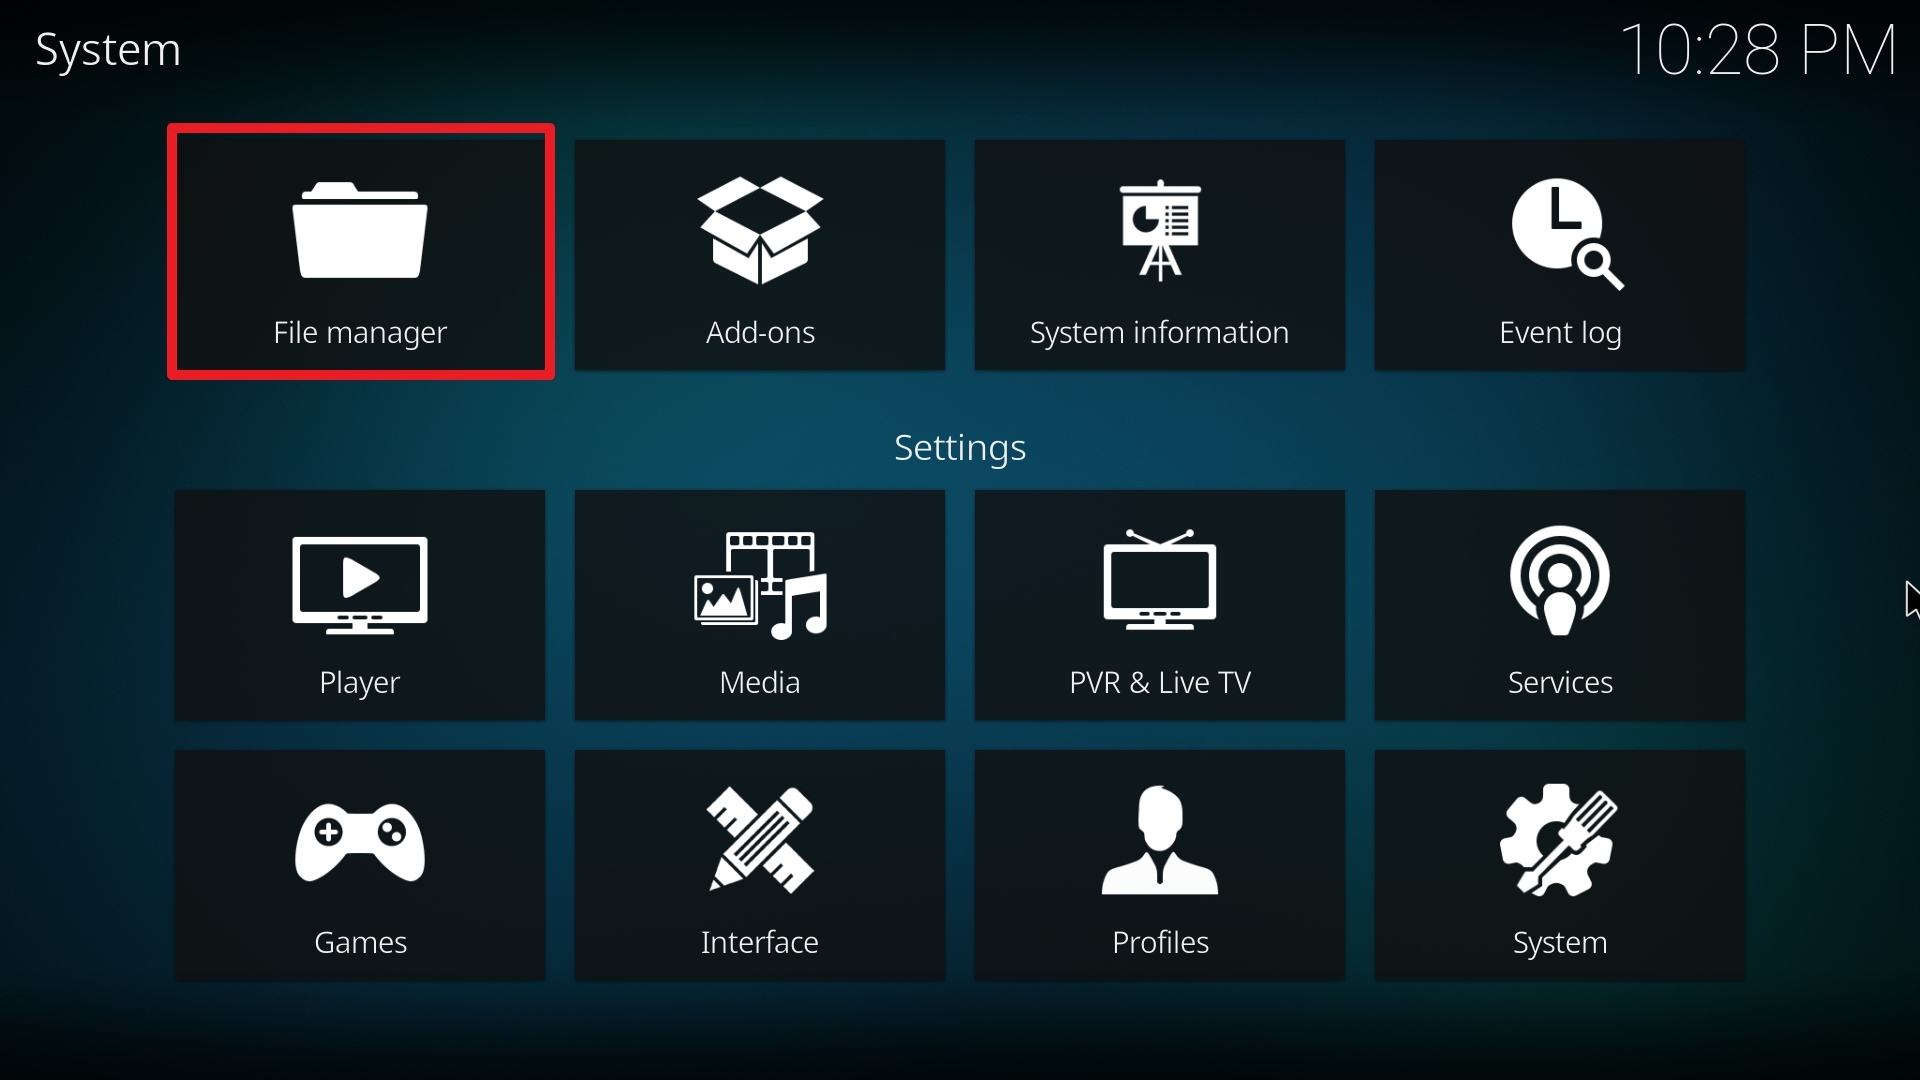
6. Select File manager.

Step 6 Installing Wolf Pack on Kodi


7. Click Add source.

Step 7 Installing Wolf Pack addon on Kodi


8. Click on <None>.

Step 8 Installing Wolf Pack addon on Kodi


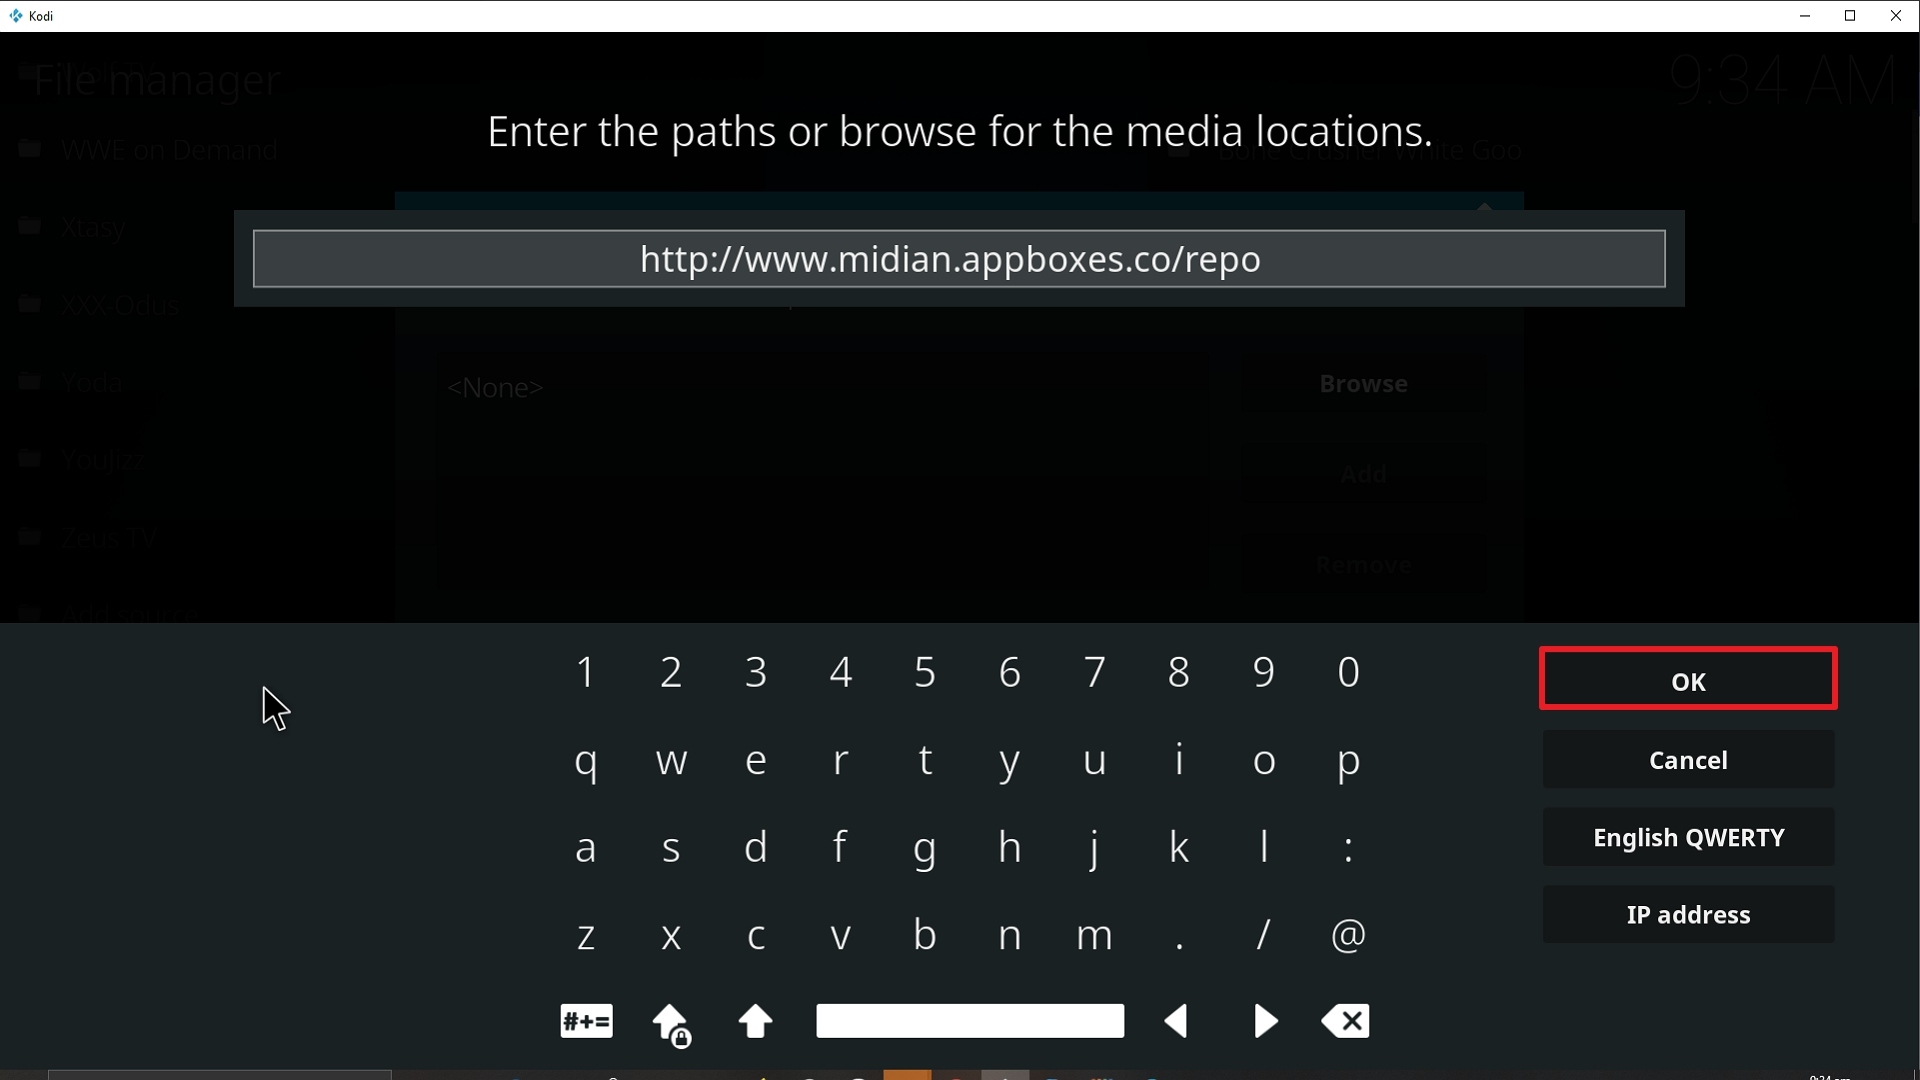
9. Type exactly: http://www.midian.appboxes.co/repo
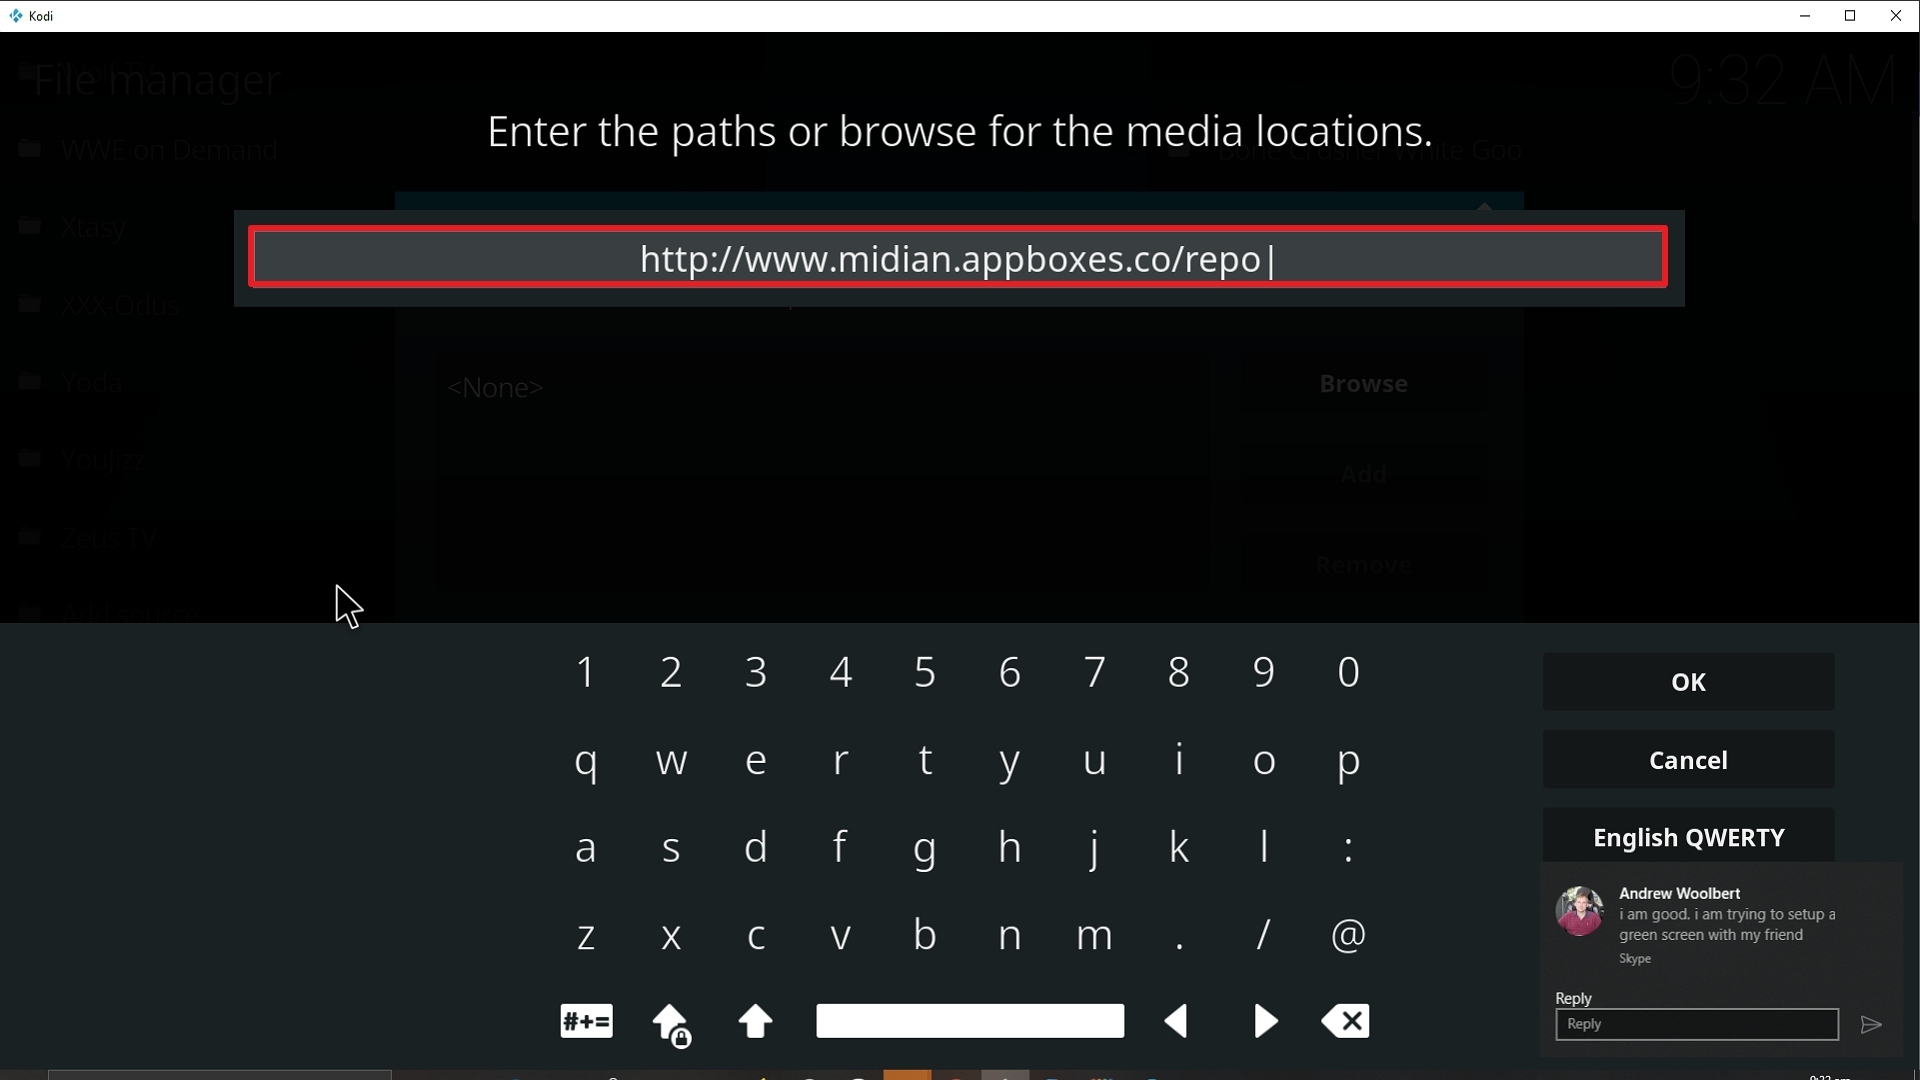
Step 9 Installing Wolf Pack addon on Kodi


10. Click on OK.

Step 10 Installing Wolf Pack addon on Kodi


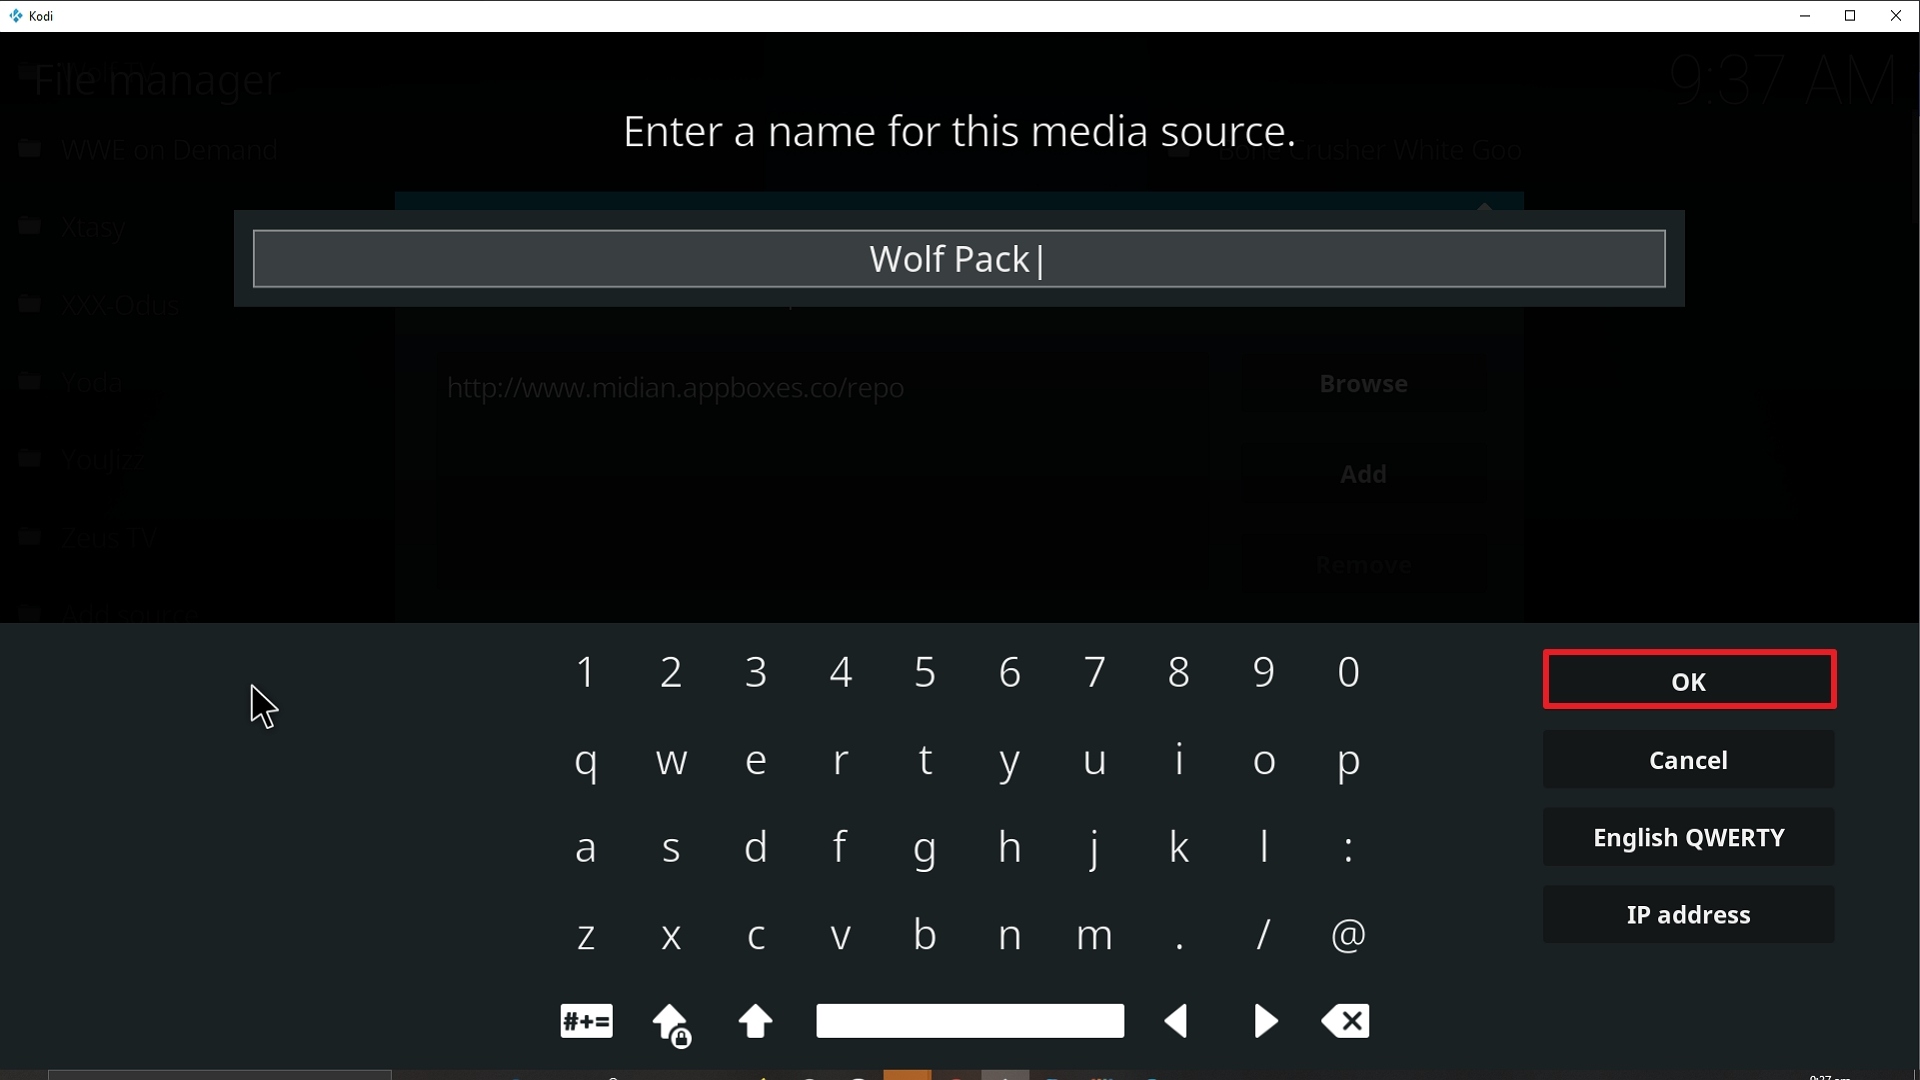
11. Select enter a name for this media source.
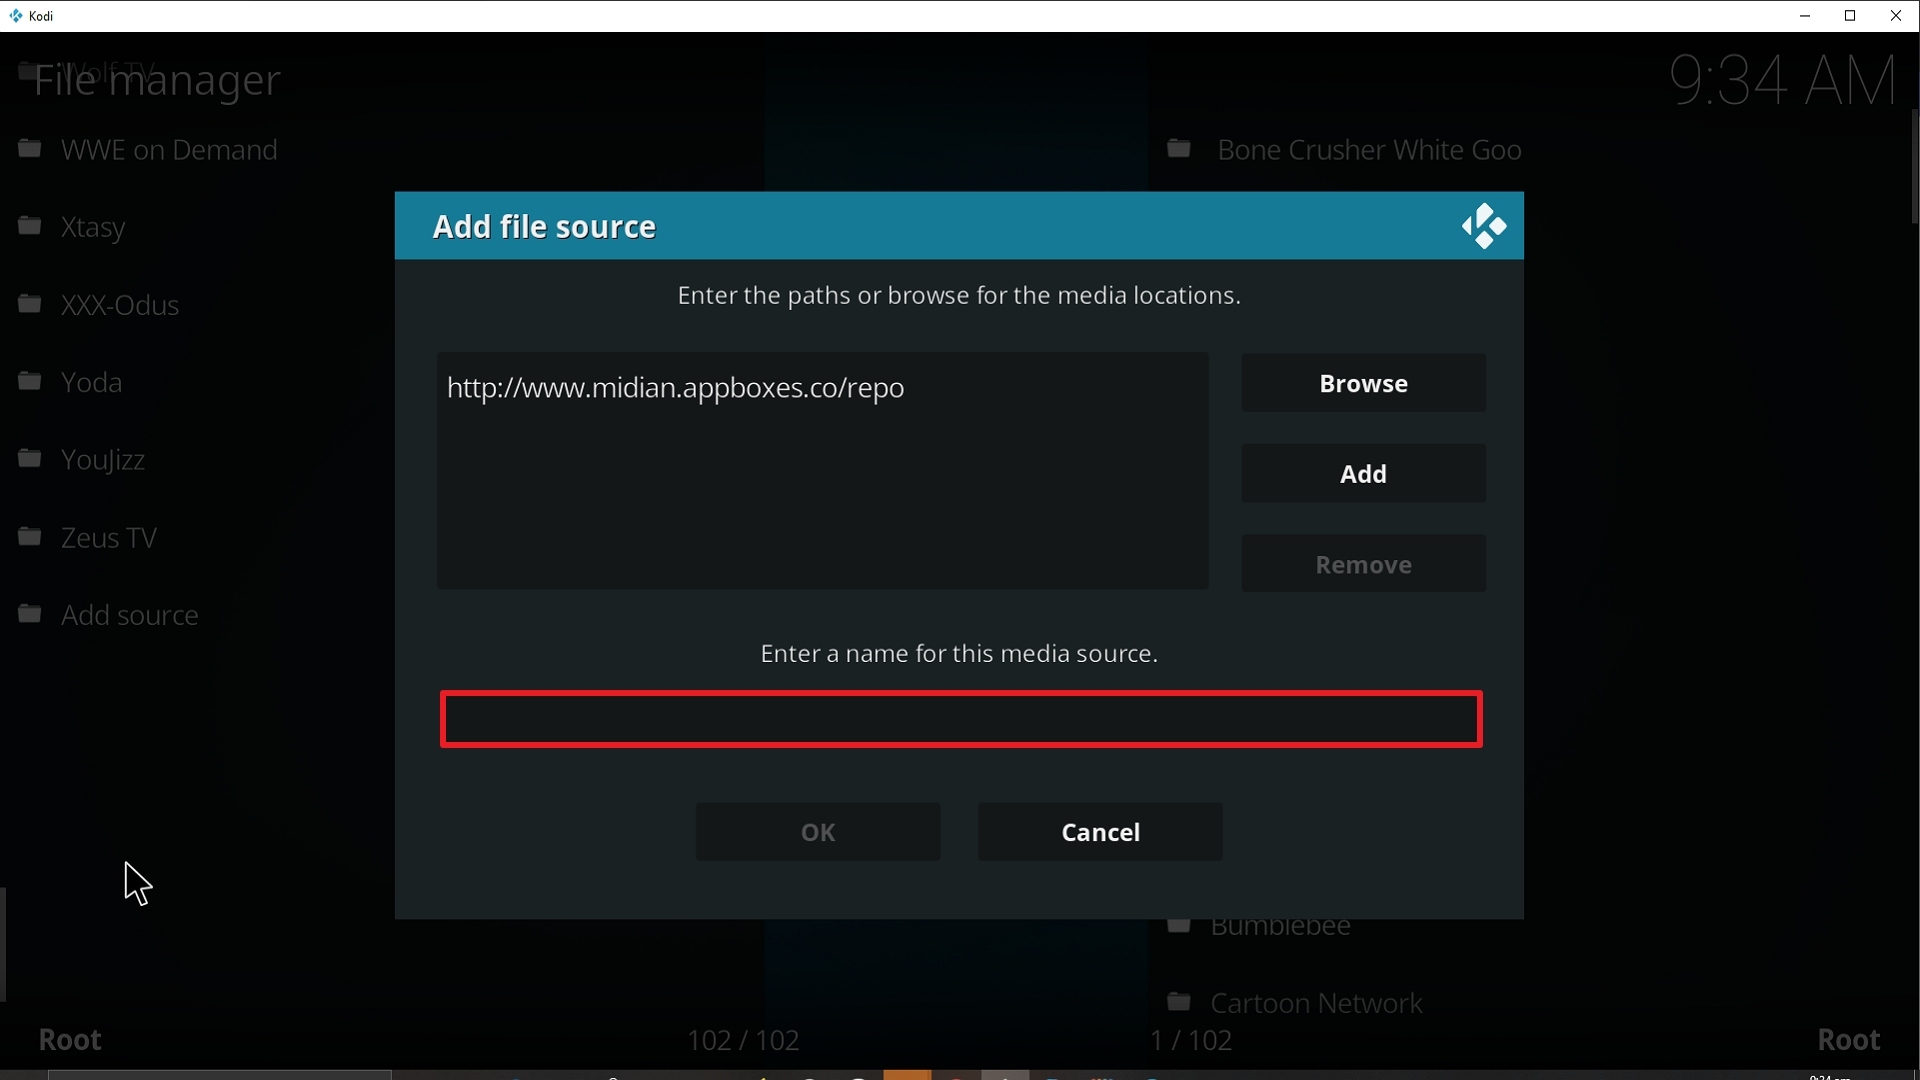
Step 11 Installing Wolf Pack addon on Kodi


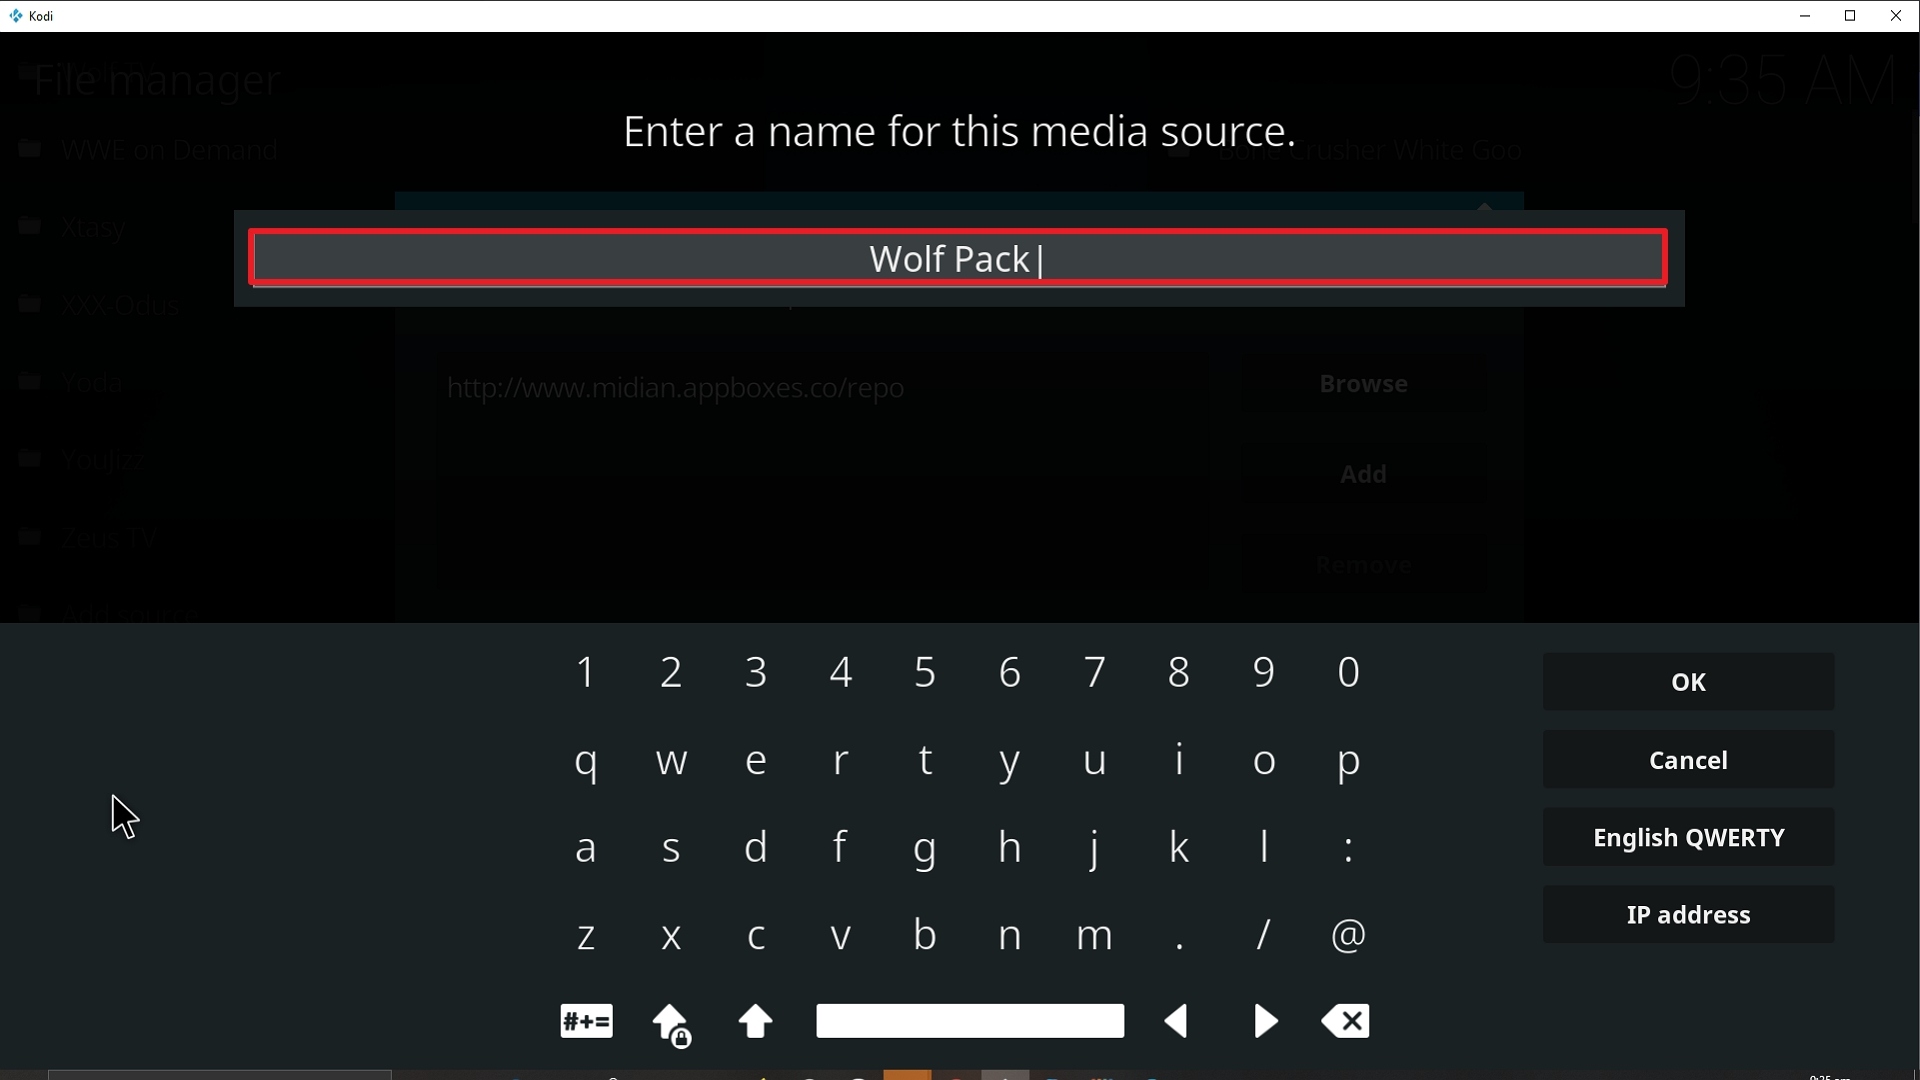
12. Name is Wolf Pack

Step 12 Installing Wolf Pack addon on Kodi


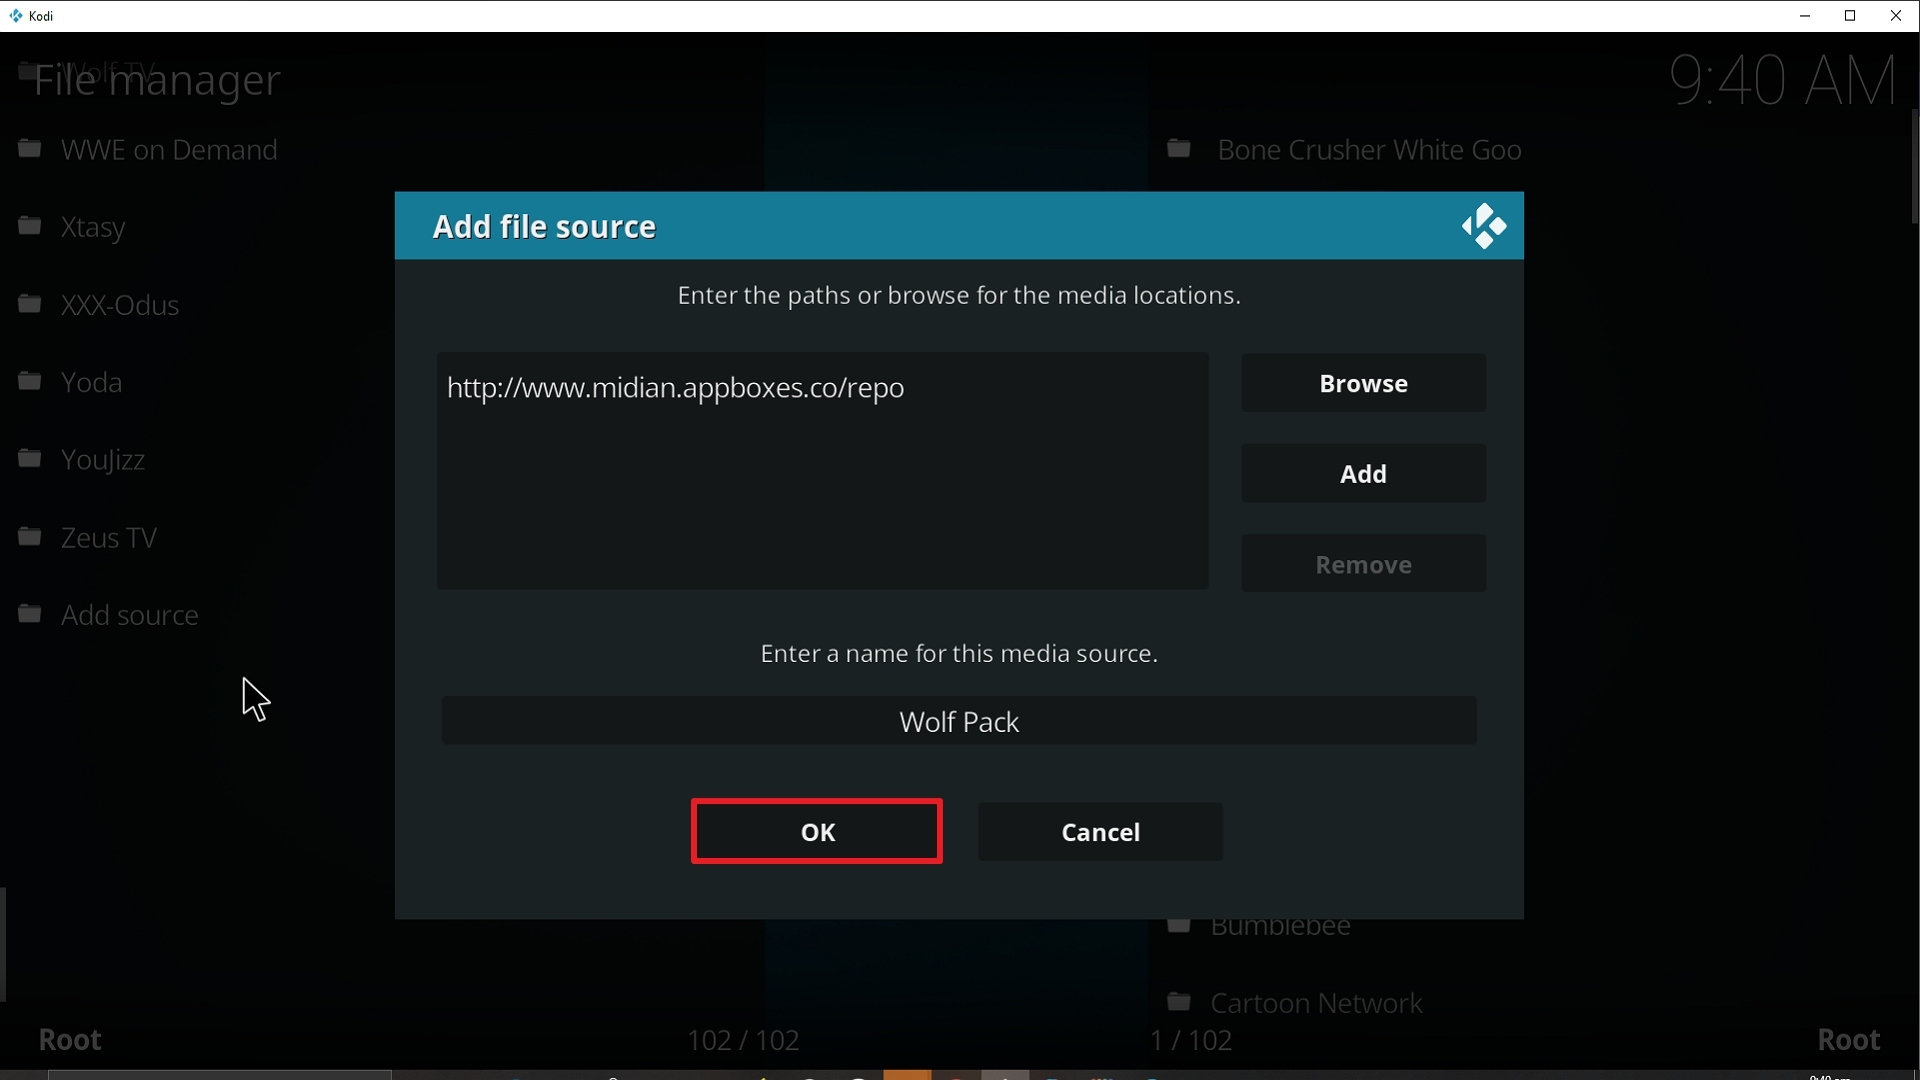
13. Click on OK.

Step 13 Installing Wolf Pack addon on Kodi


14. Click on OK.

Step 14 Installing Wolf Pack addon on Kodi


15. Take one step back and click on Add-ons.
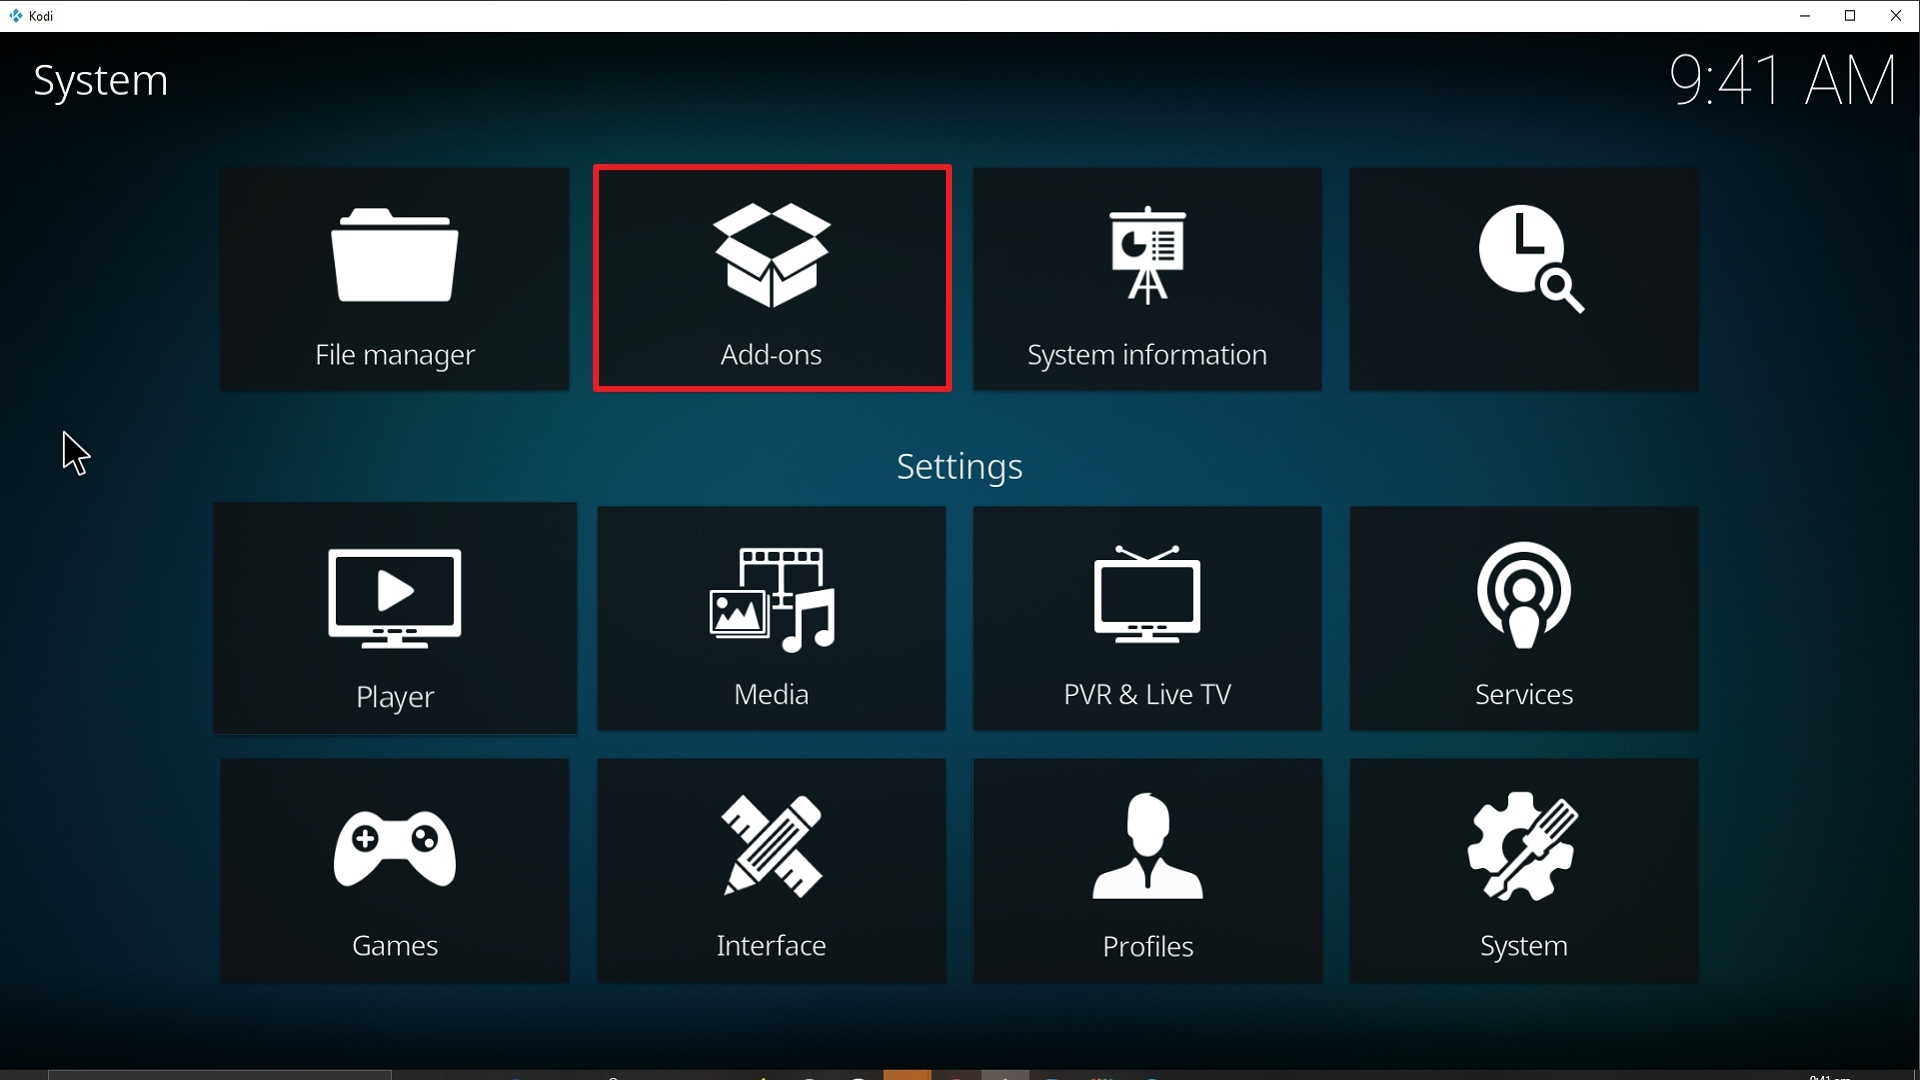
Step 15 Installing Wolf Pack addon on Kodi


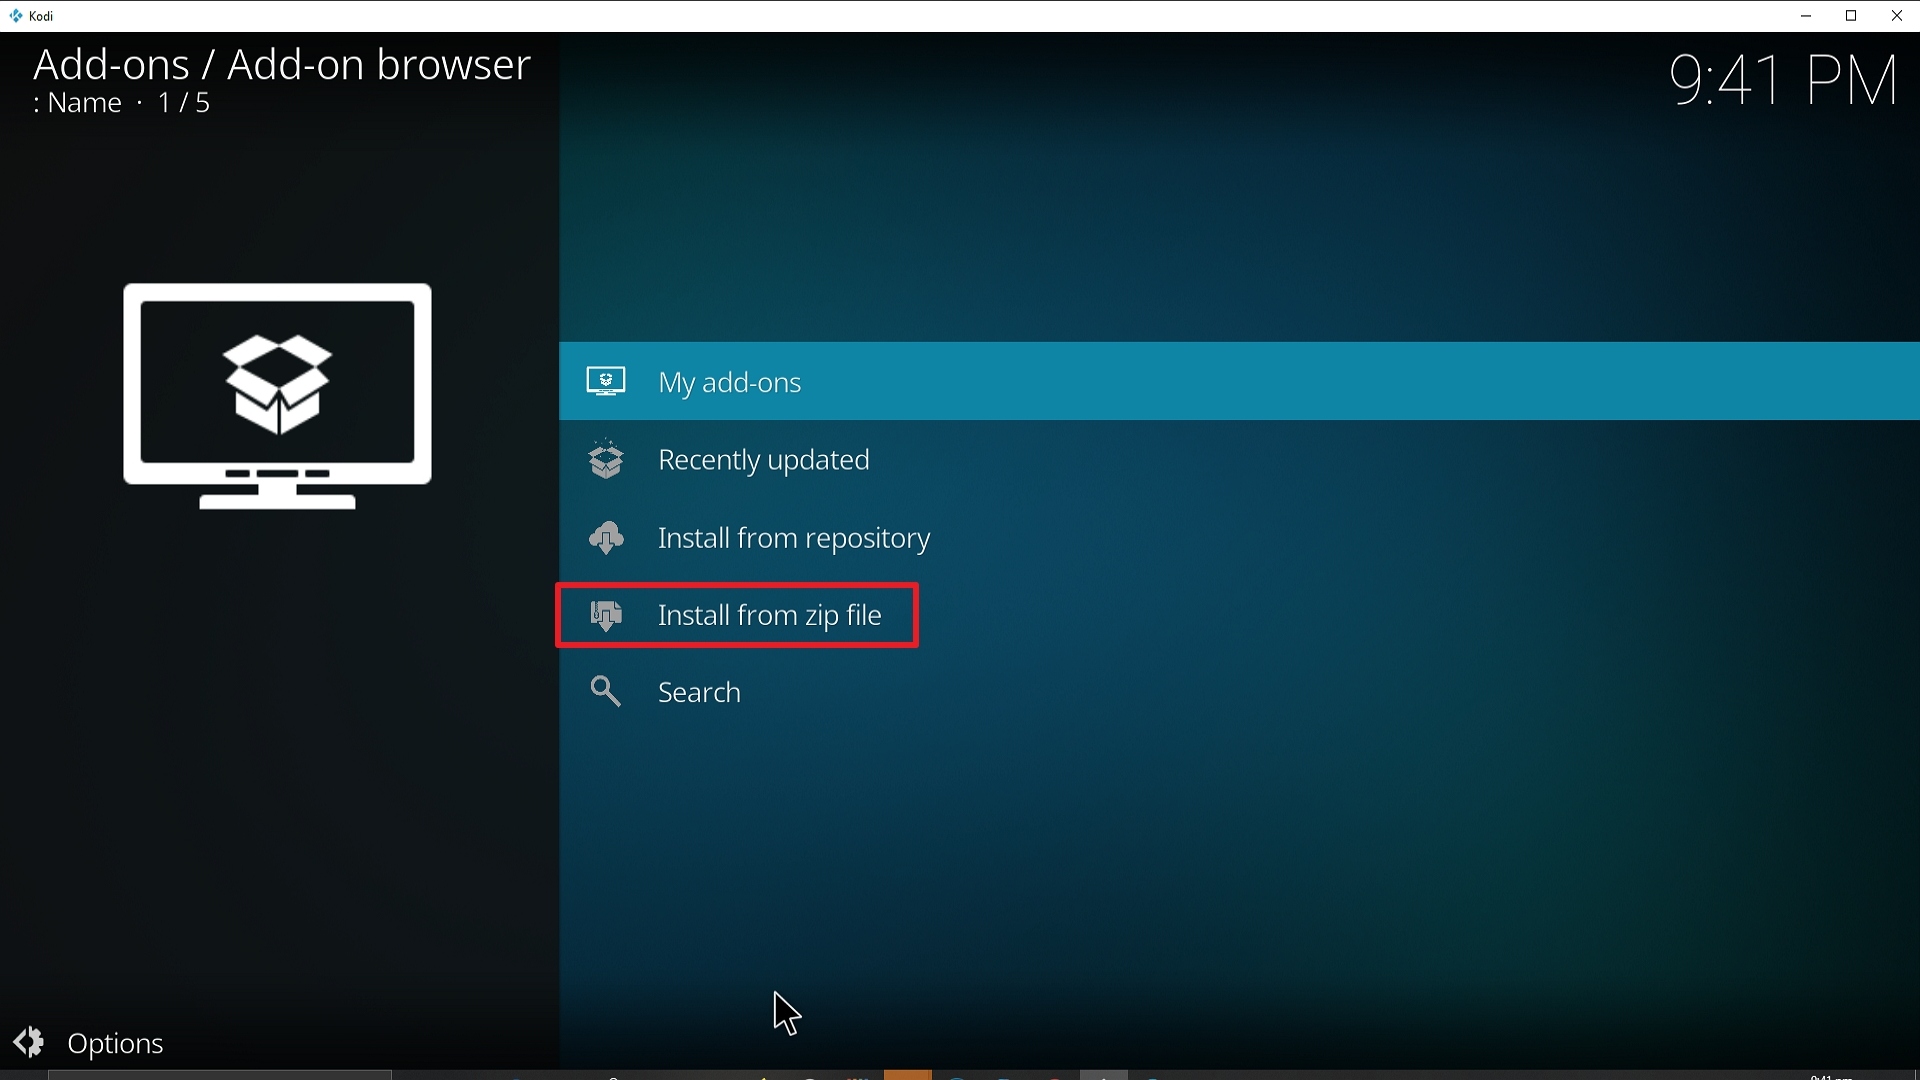
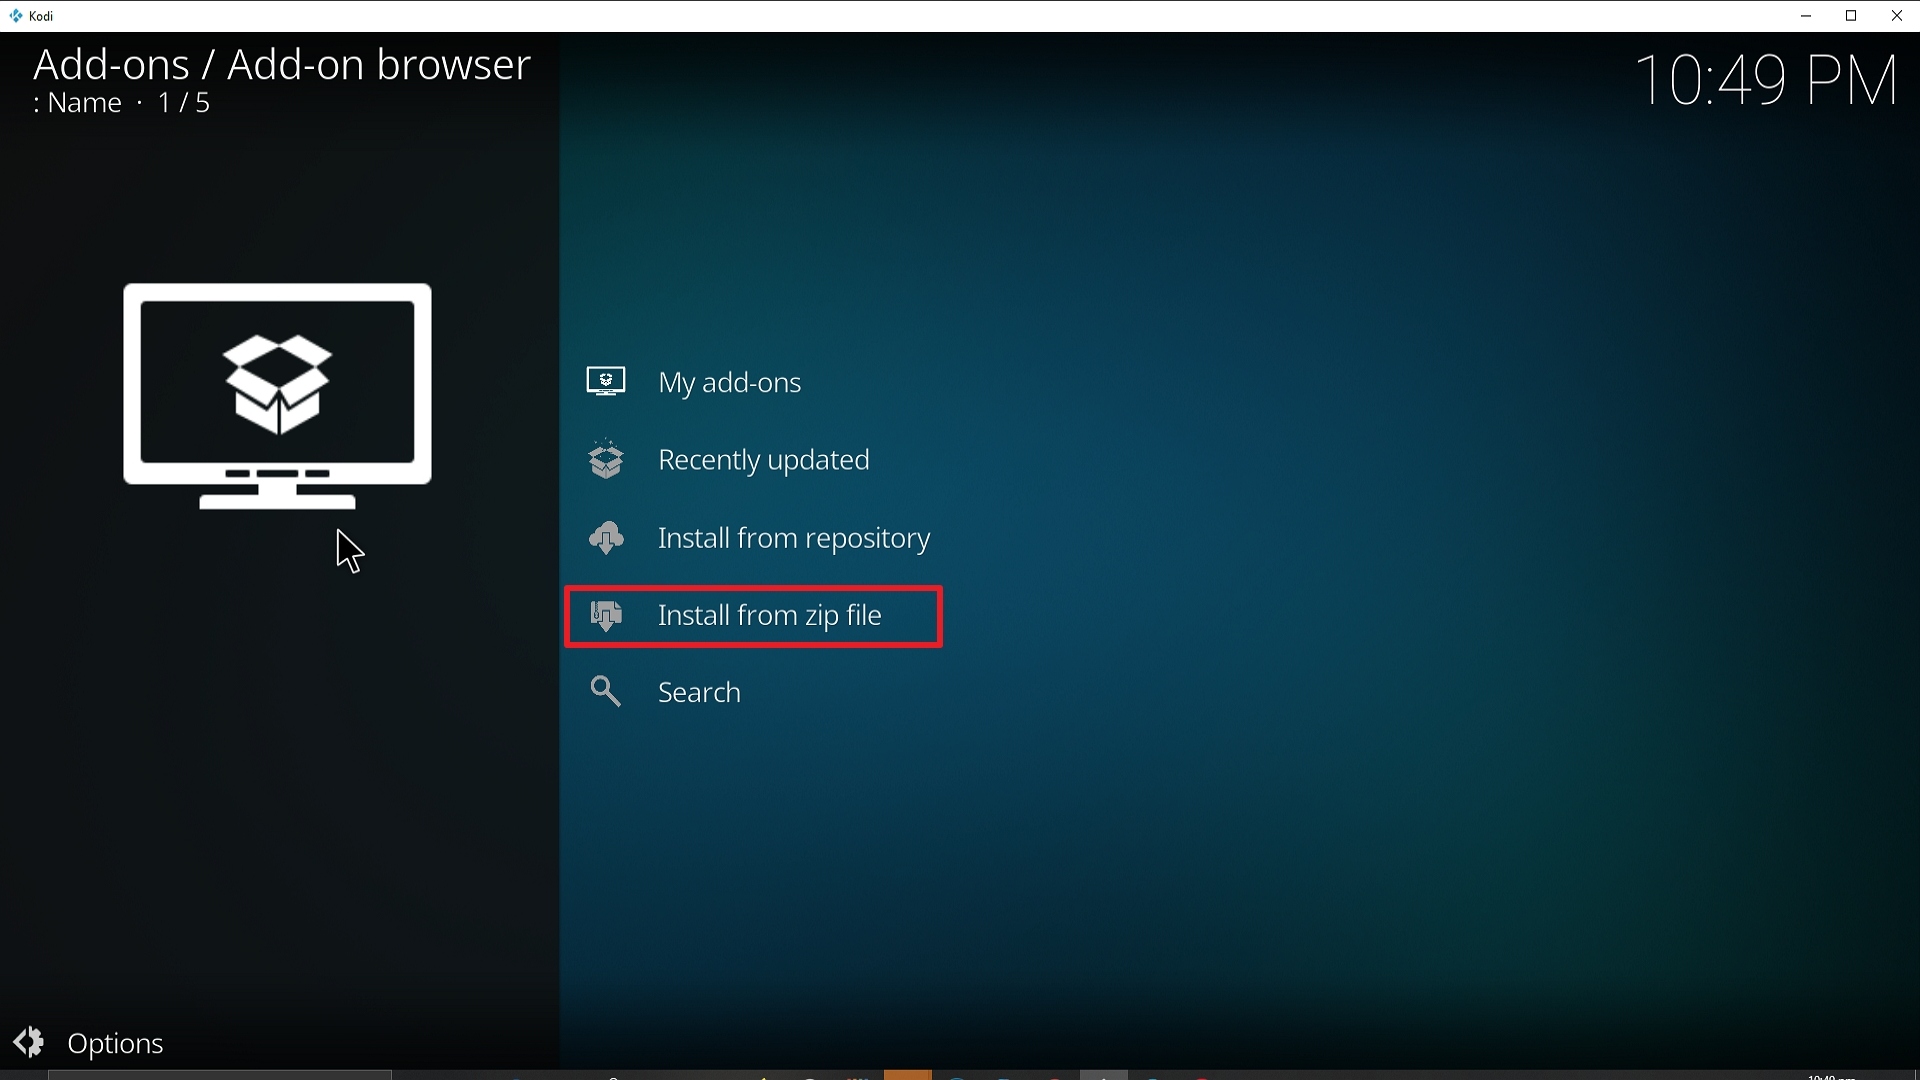
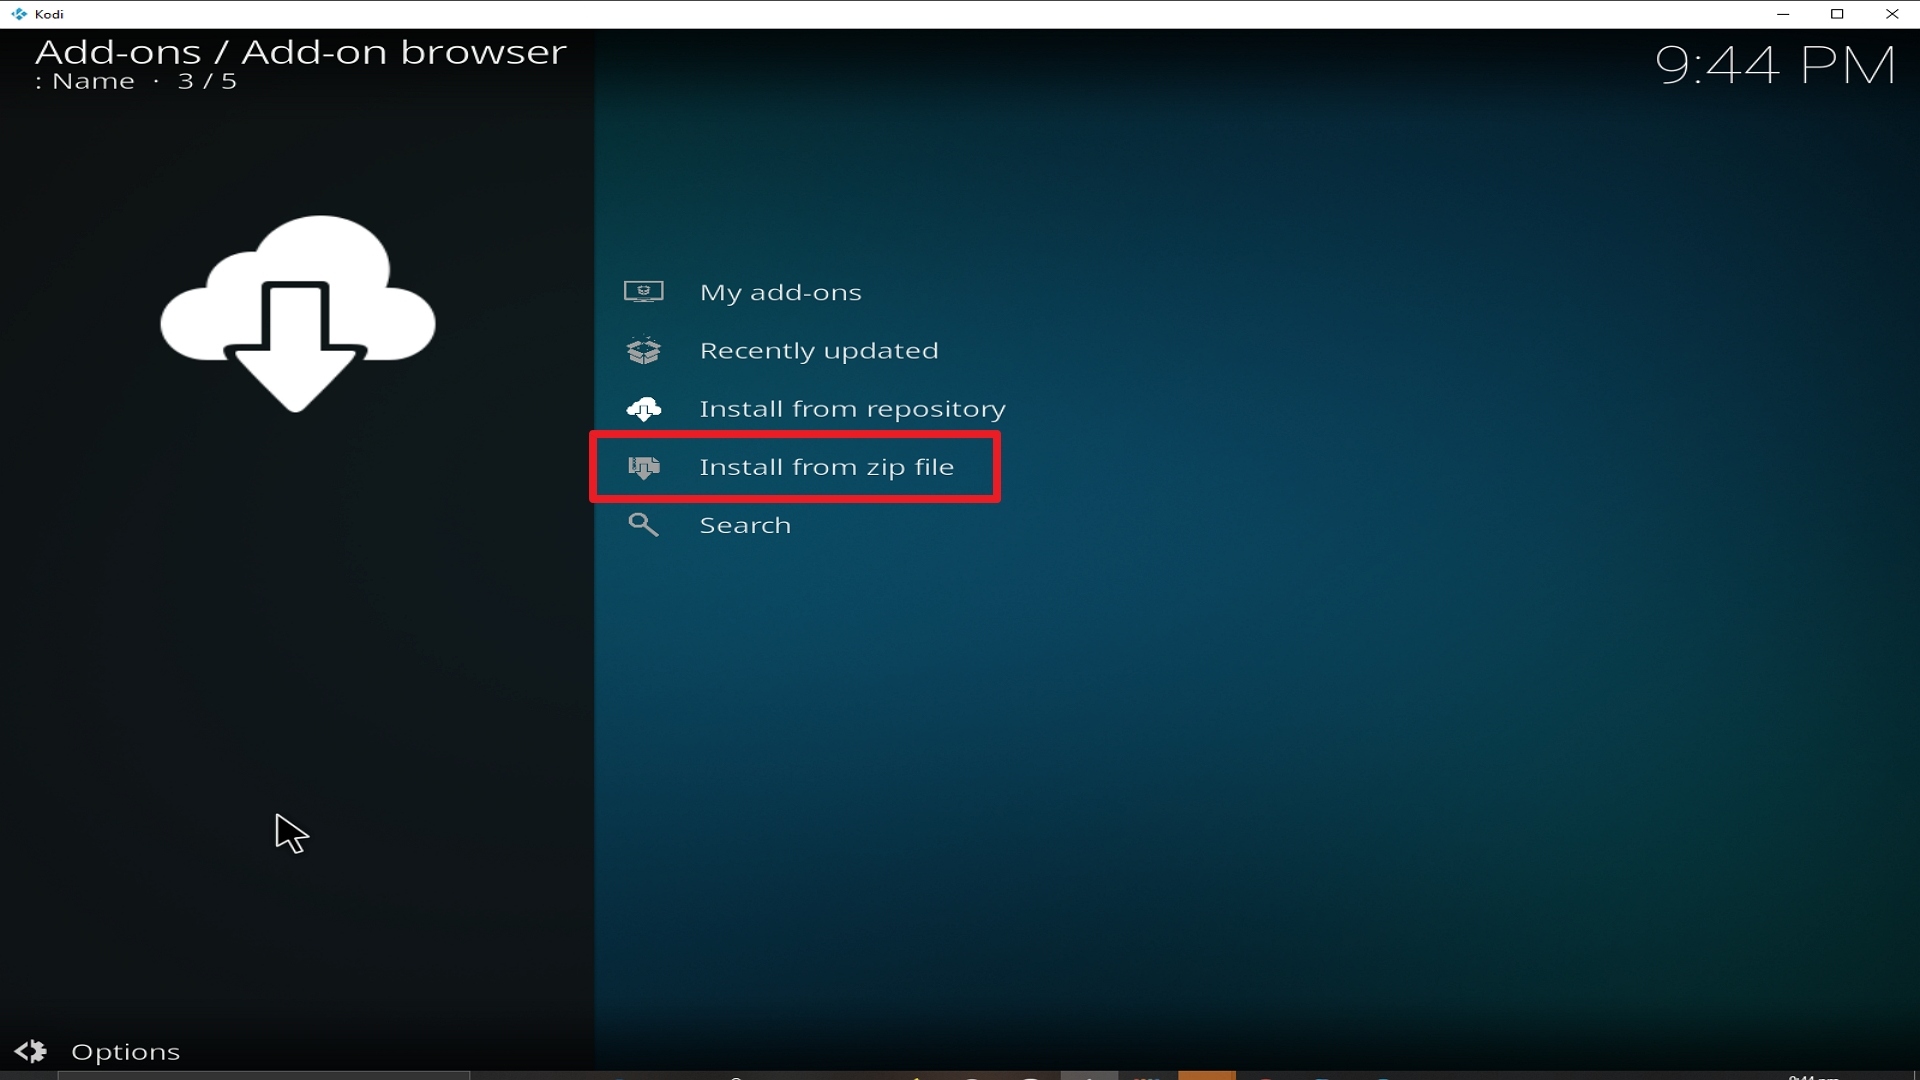
16. Select install from zip file.


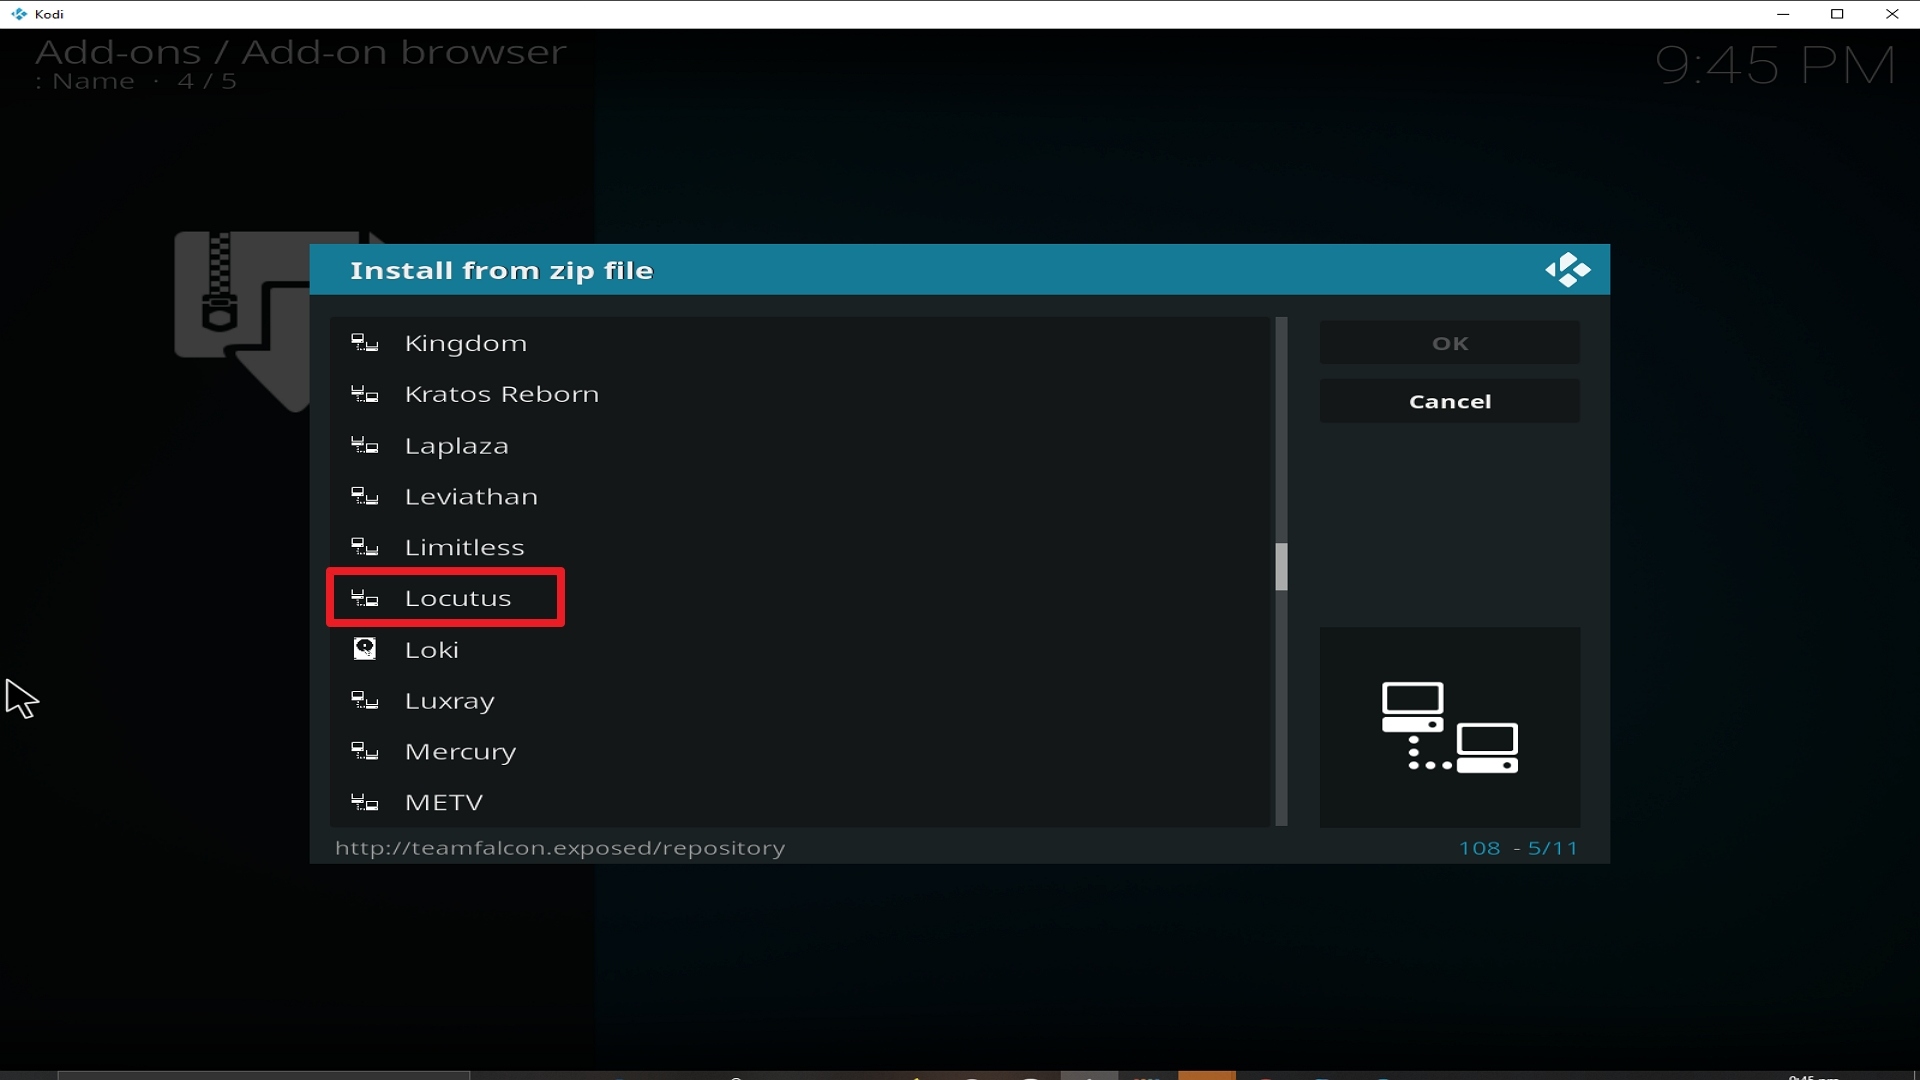
17. Click on Wolf Pack (or whatever you named the source).
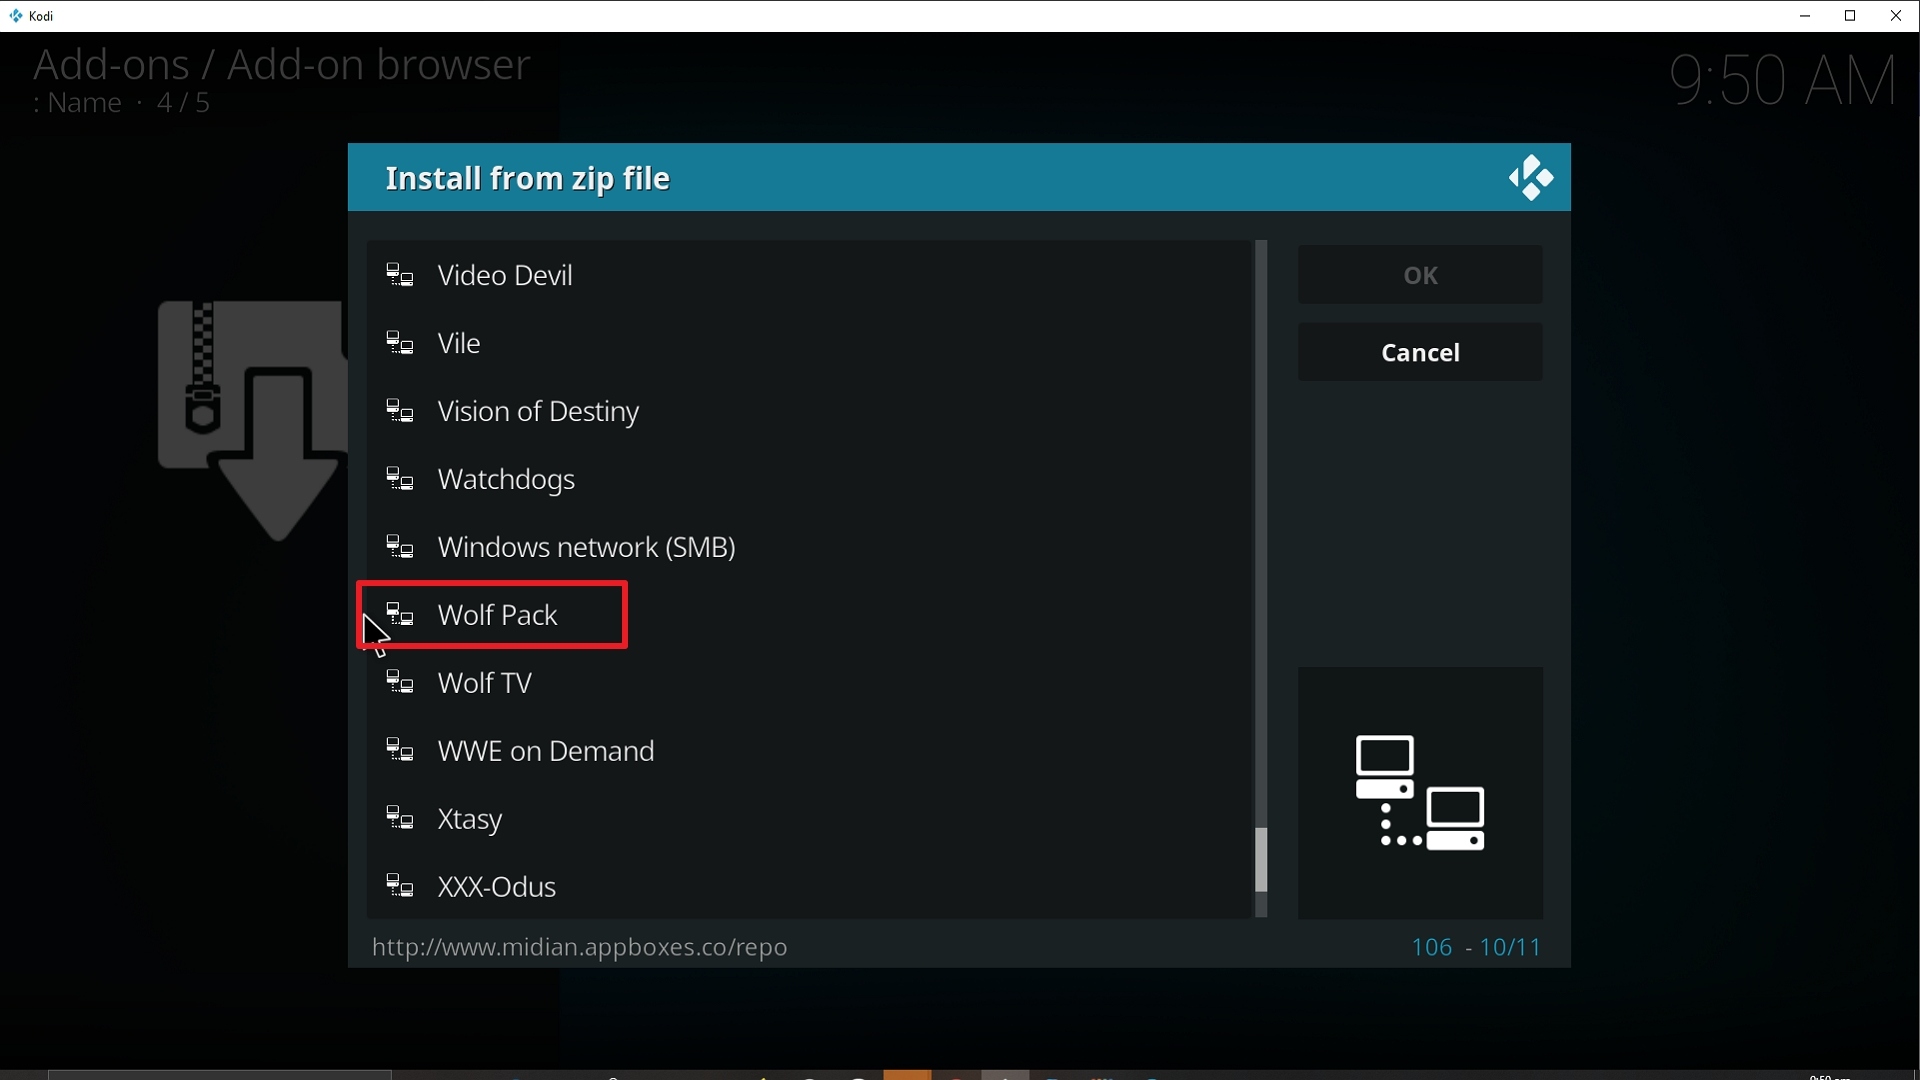
Step 17 Installing Wolf Pack addon on Kodi


18. Click on repository.Wherethemonsterslive.zip
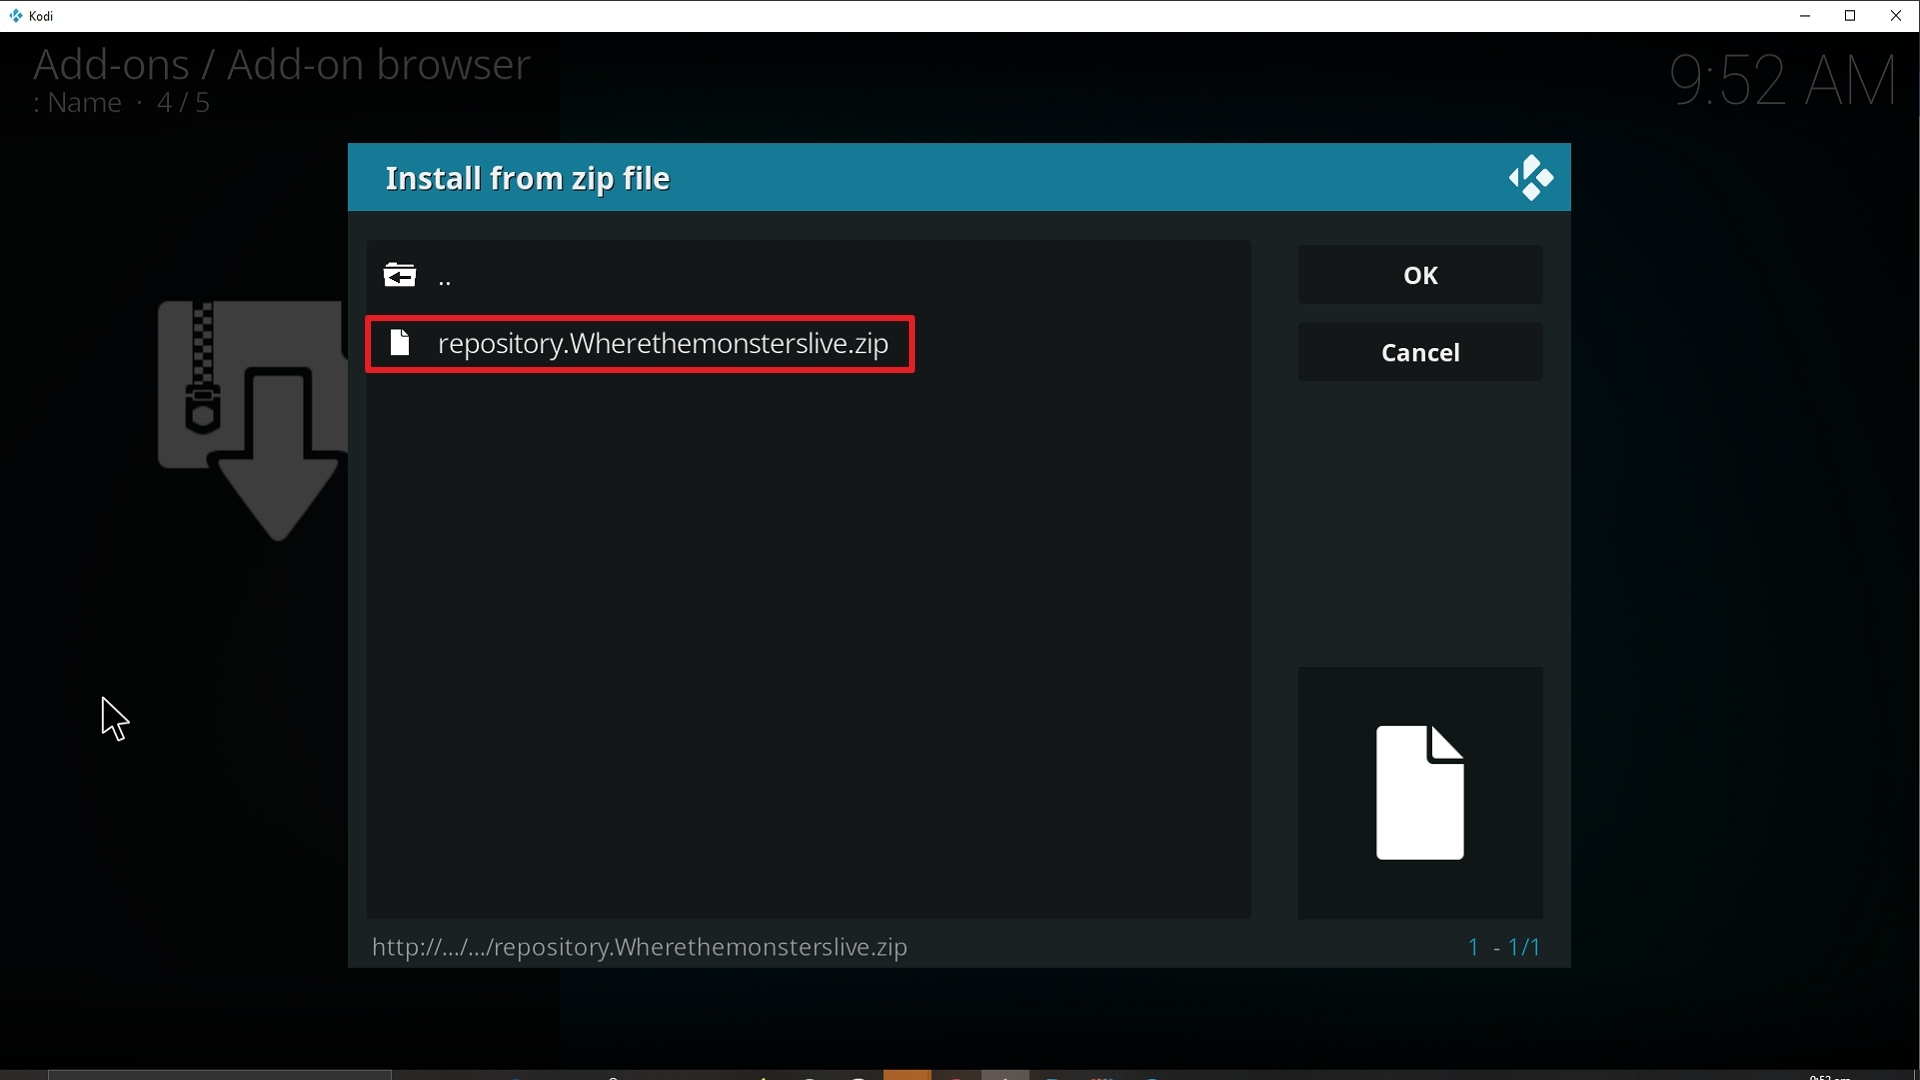
Step 18 Installing Wolf Pack addon on Kodi


19. Select on Install from repository.
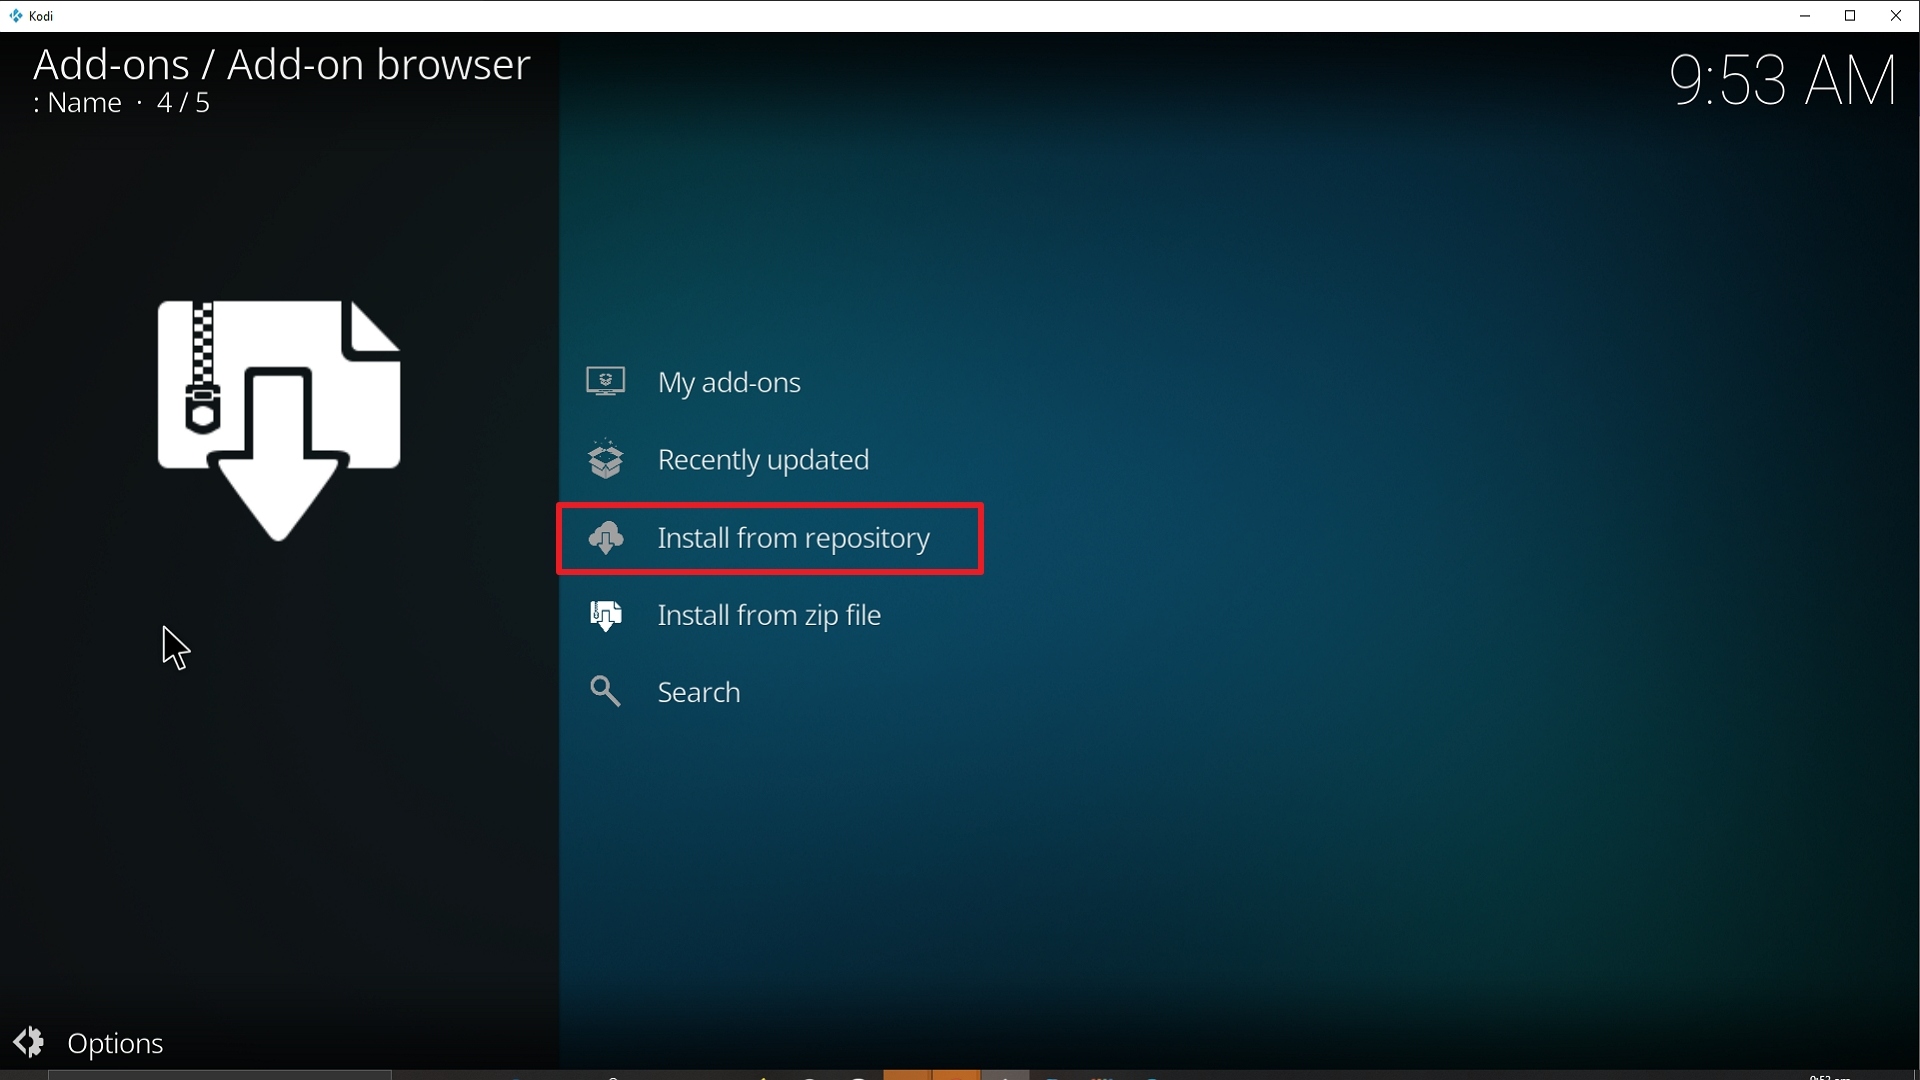
Step 19 Installing Wolf Pack addon on Kodi


20. Click on Where The Monsters Live Repo
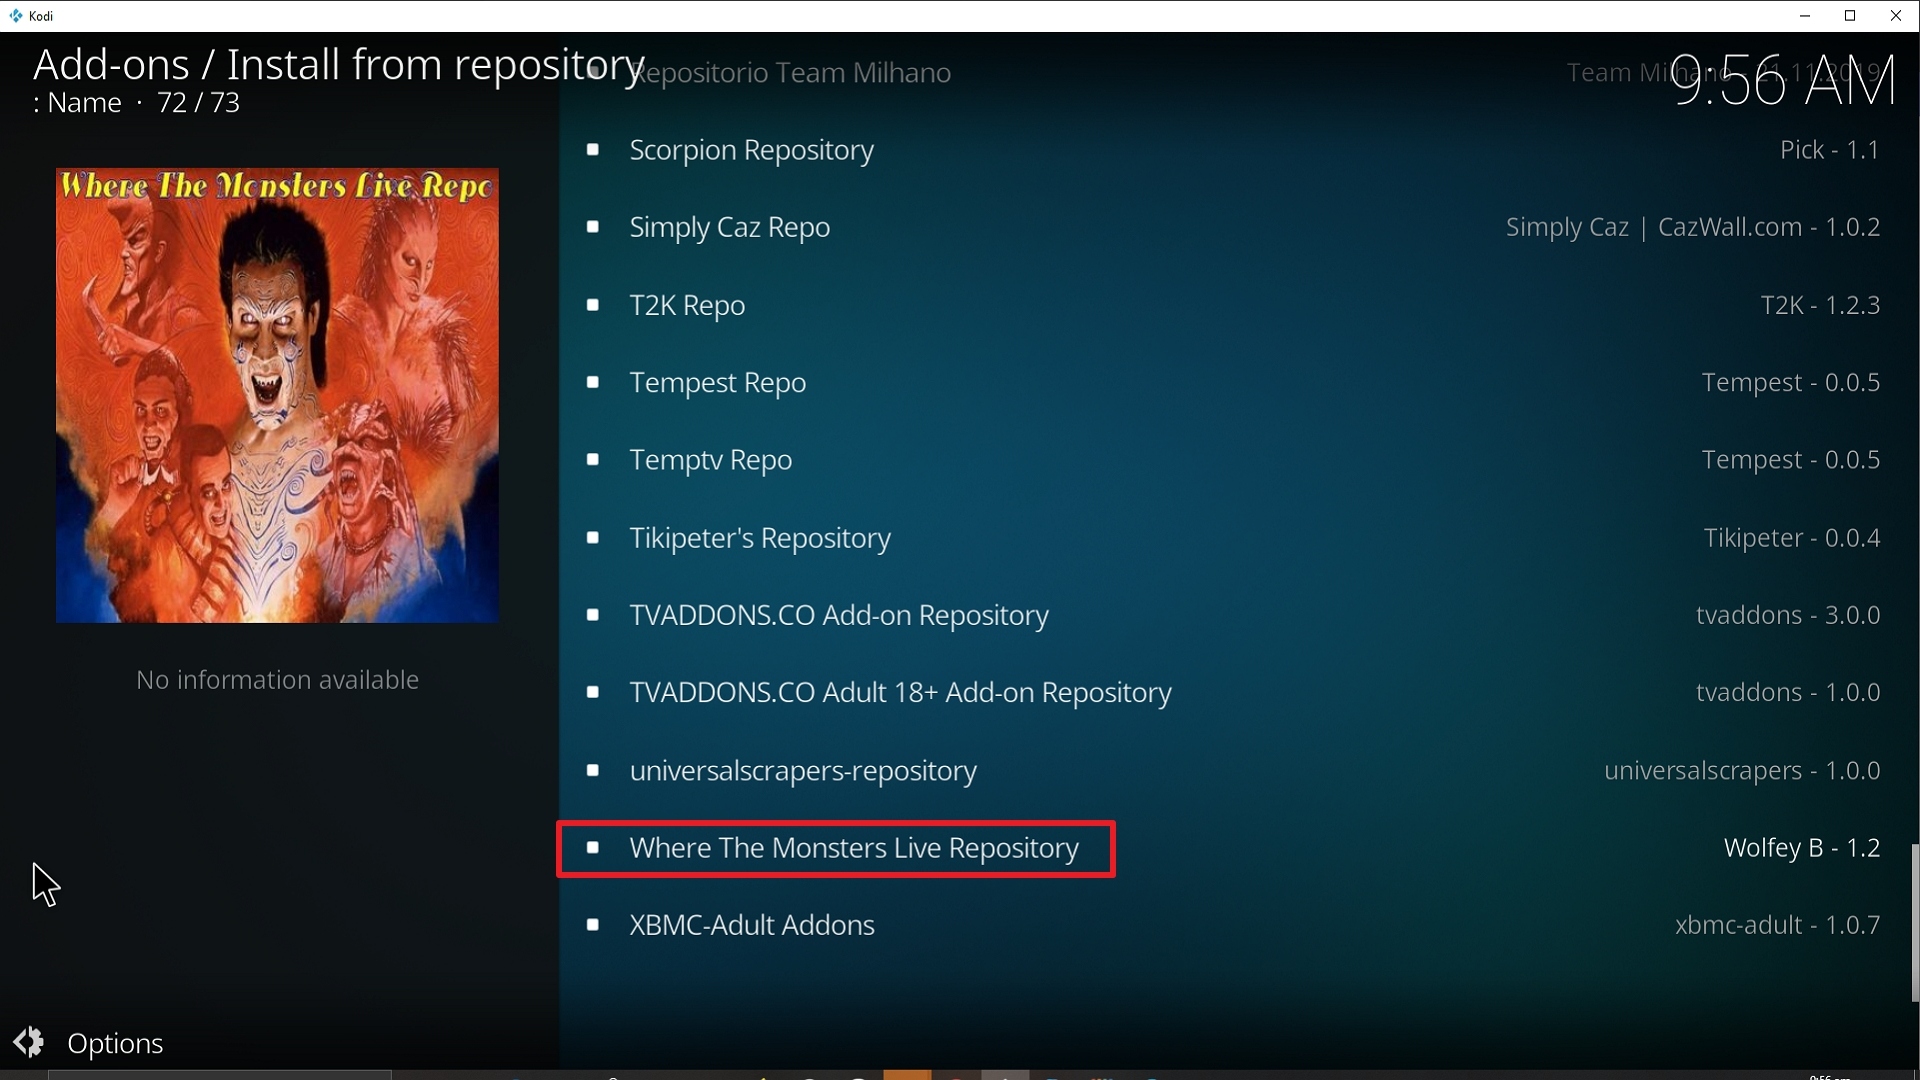
Step 20 Installing Wolf Pack addon on Kodi


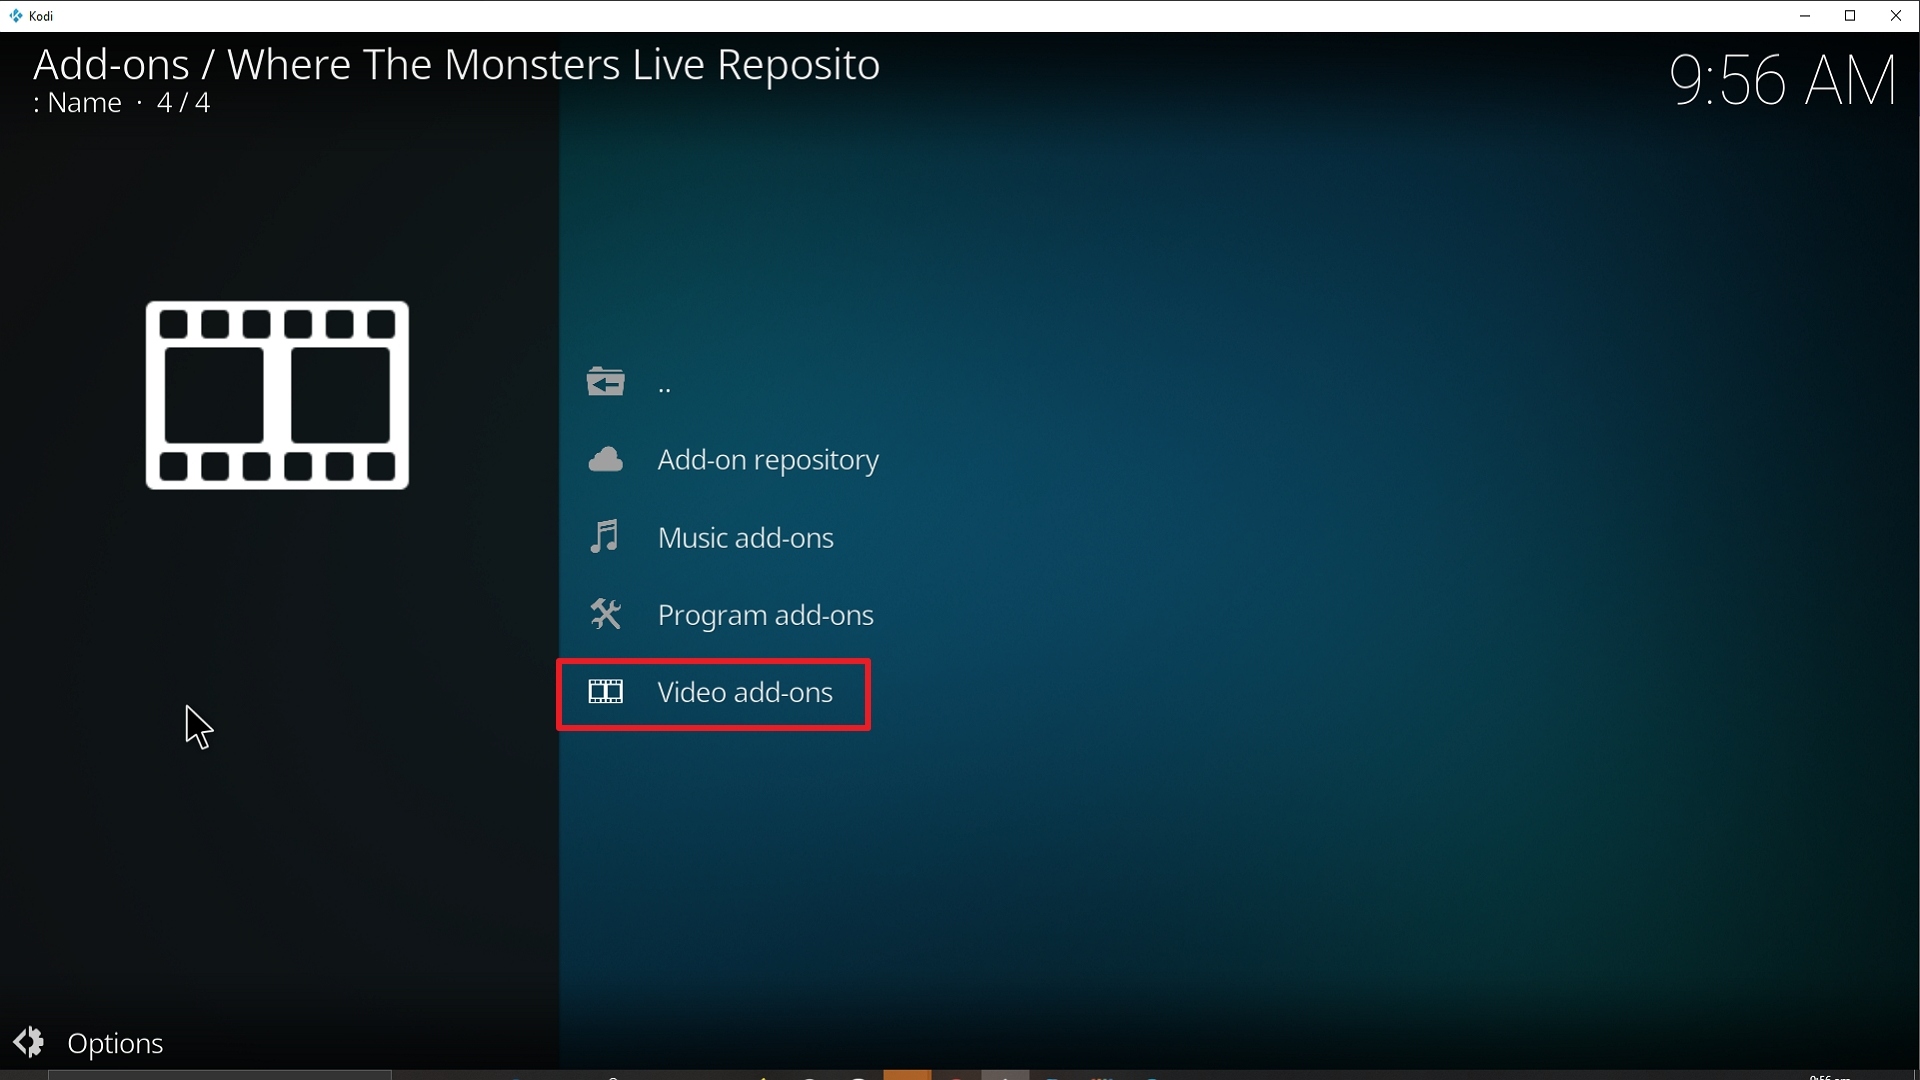
21. Pick Video add-ons.

Step 21 Installing Wolf Pack addon on Kodi


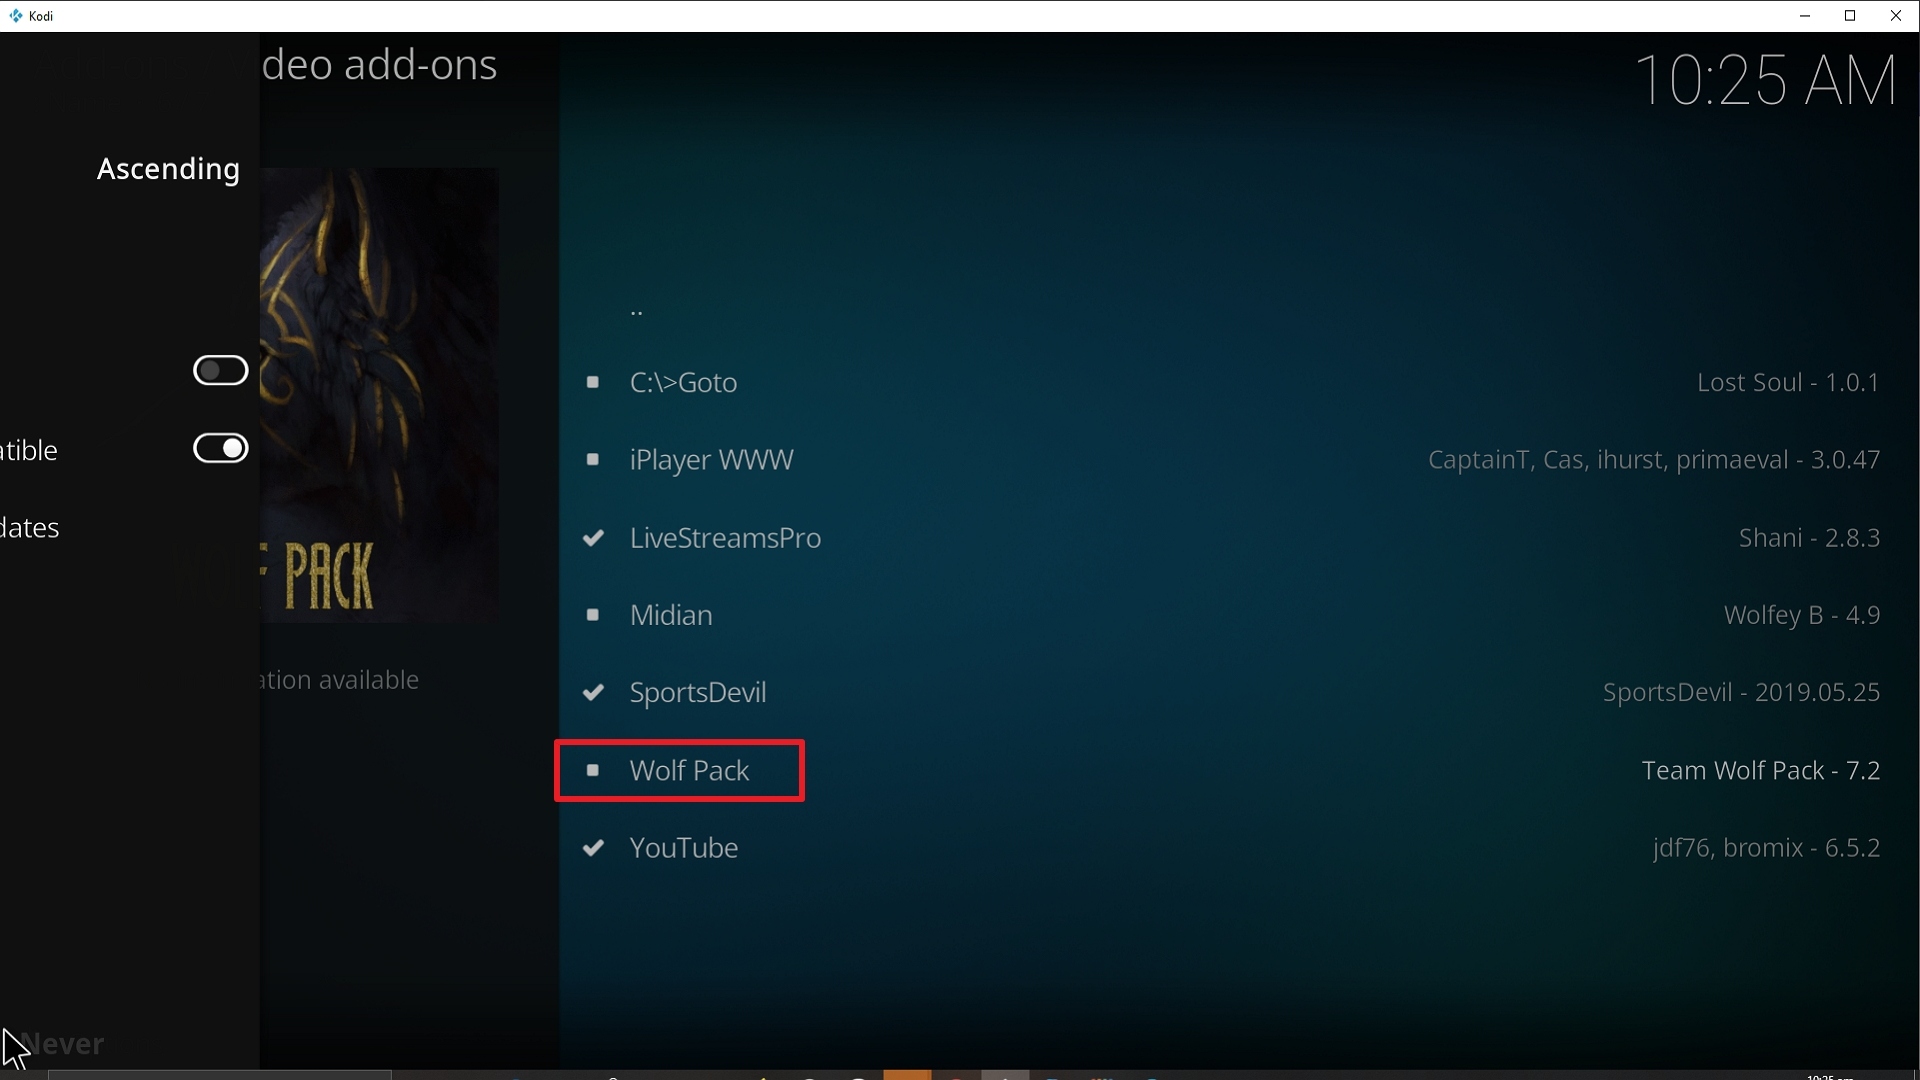
22. Select Wolf Pack again.

Step 22 Installing Wolf Pack addon on Kodi


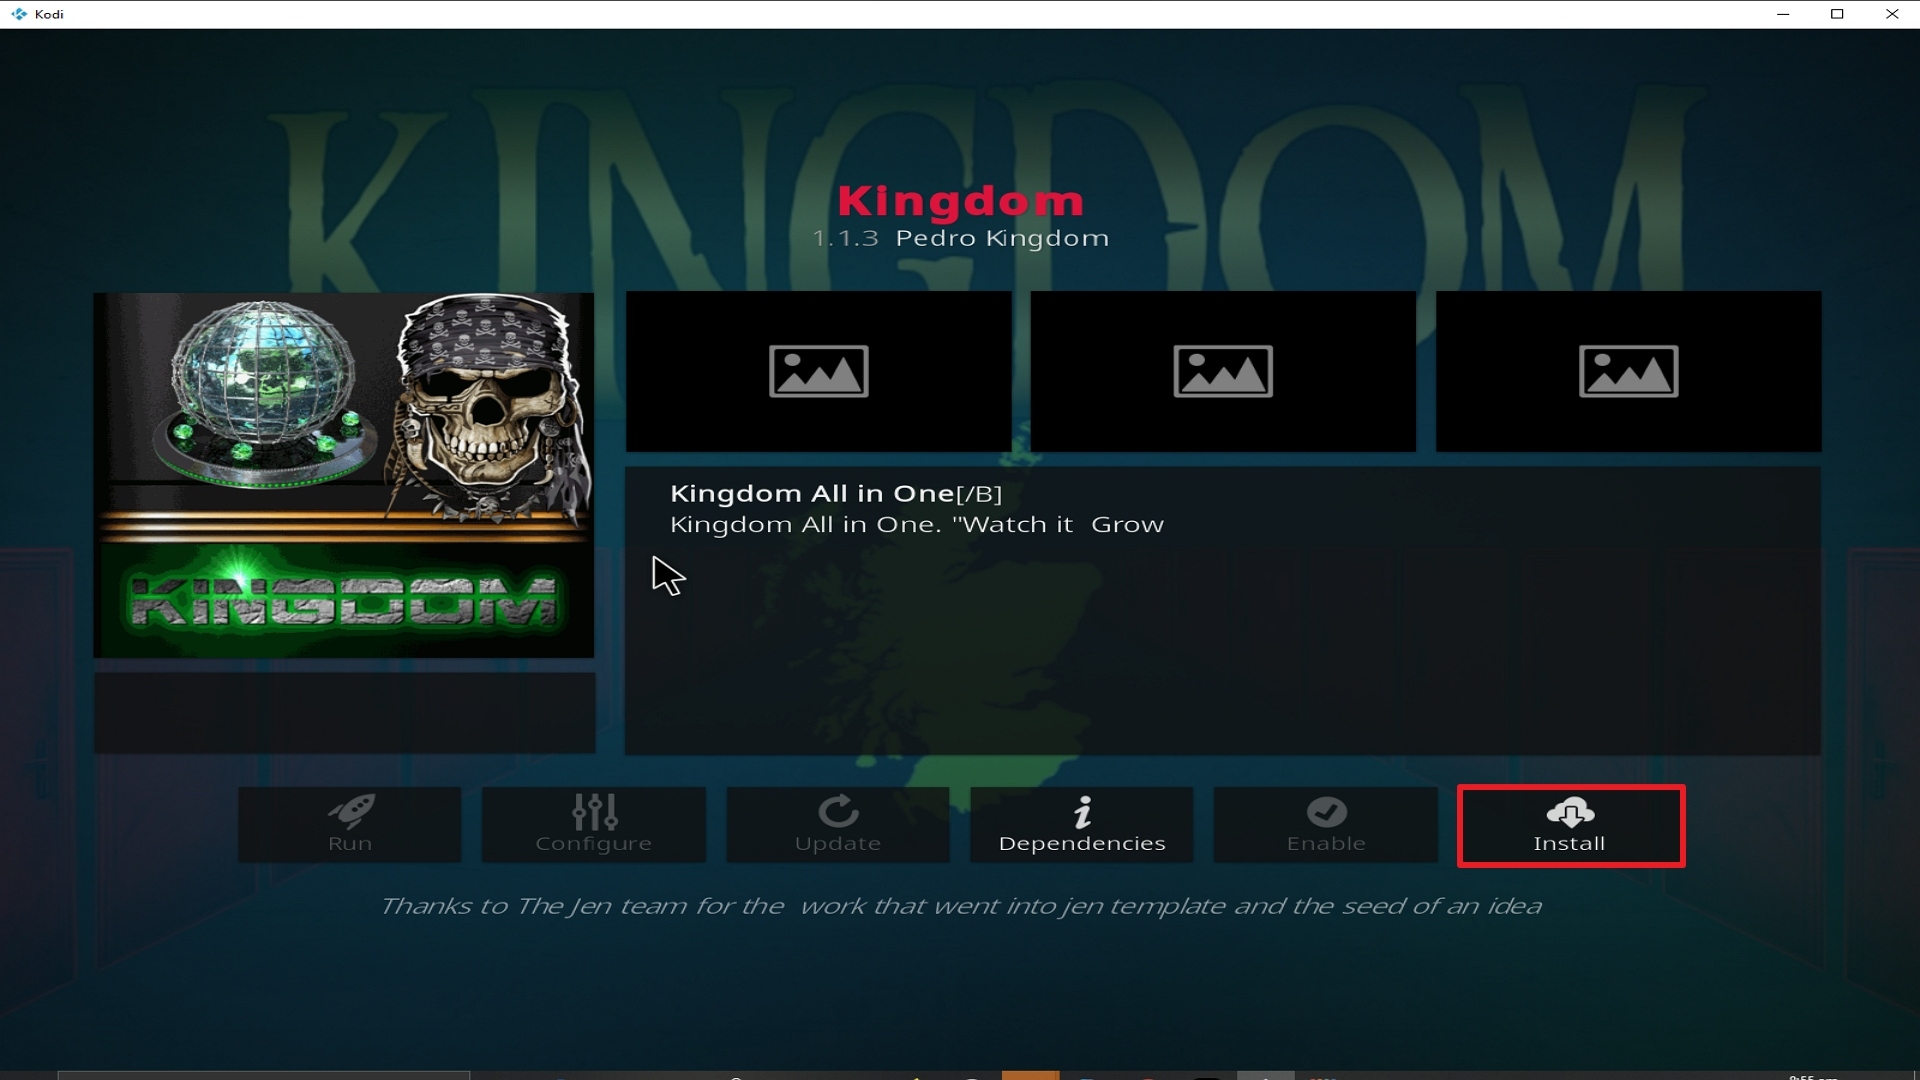
23. Click on Install.

Step 23 Installing Wolf Pack addon on Kodi


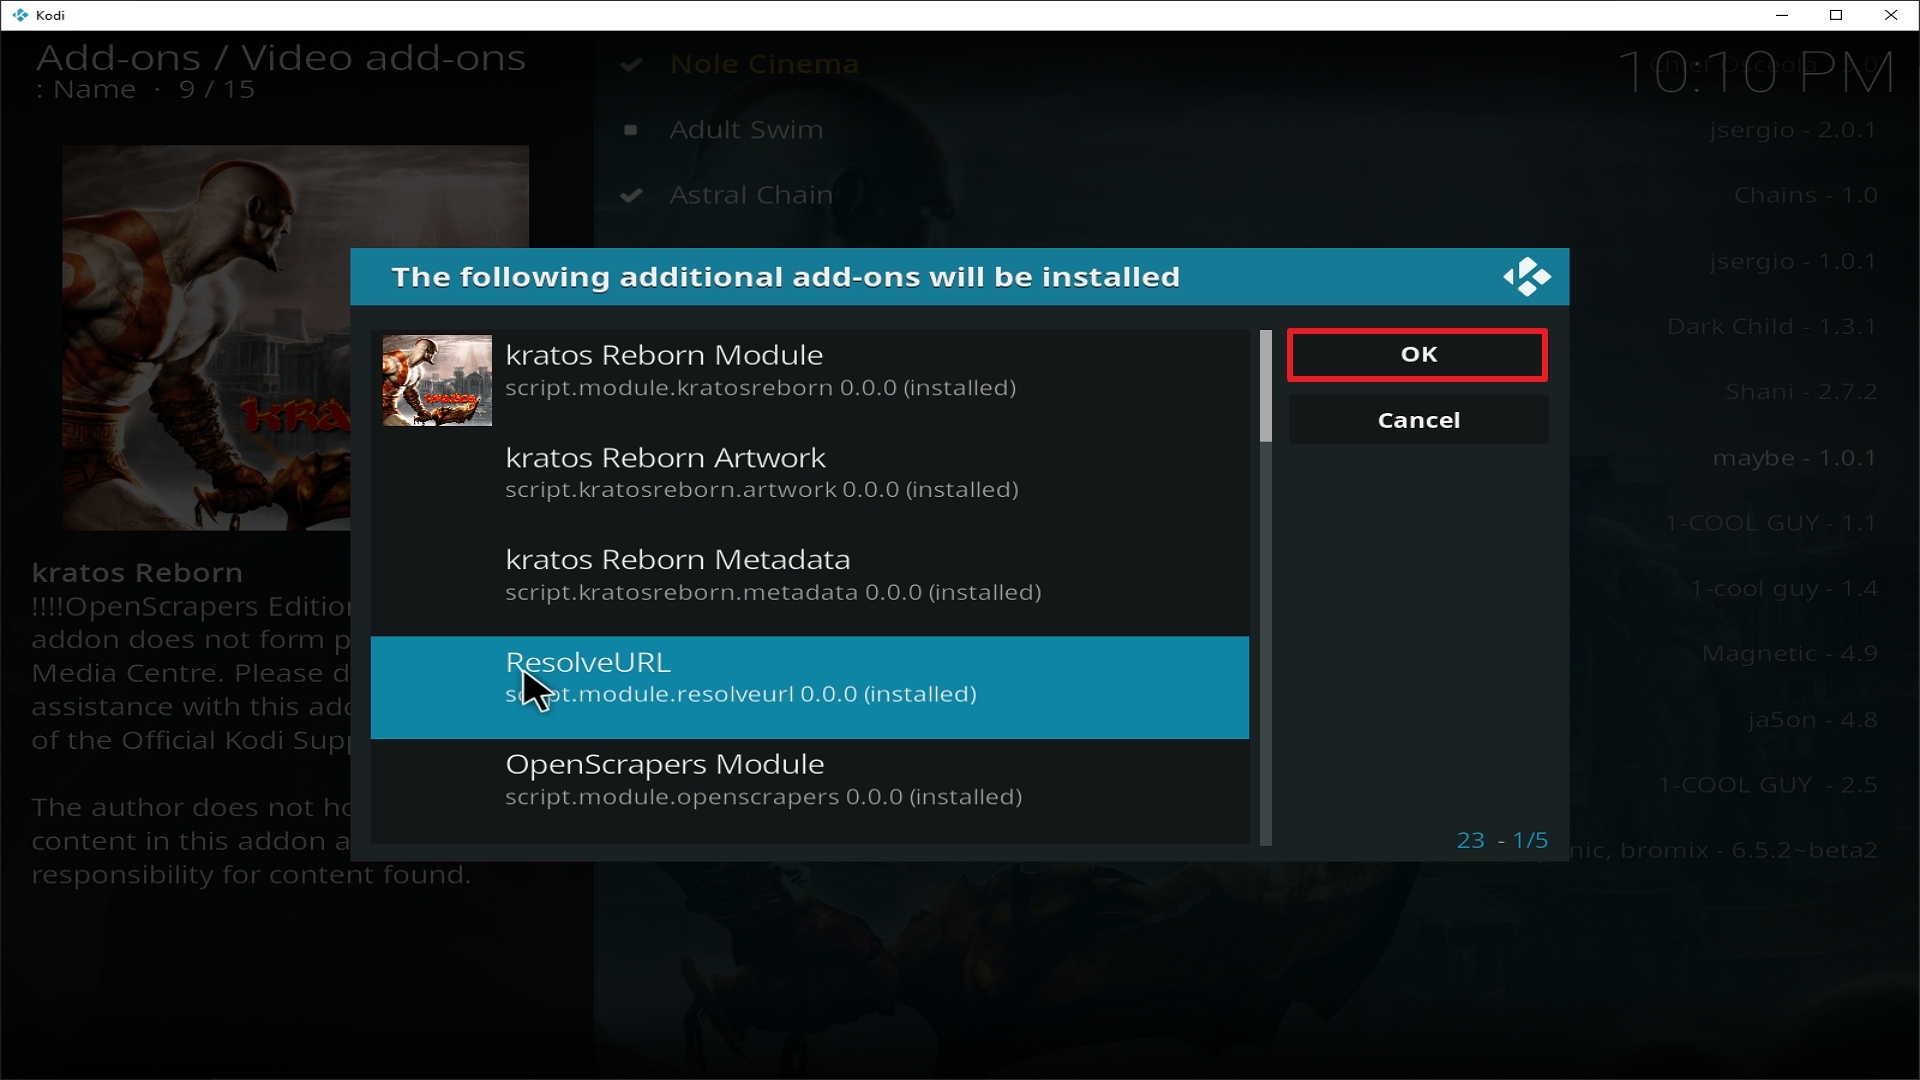
24.  Select OK after reviewing the add-ons that will be installed.
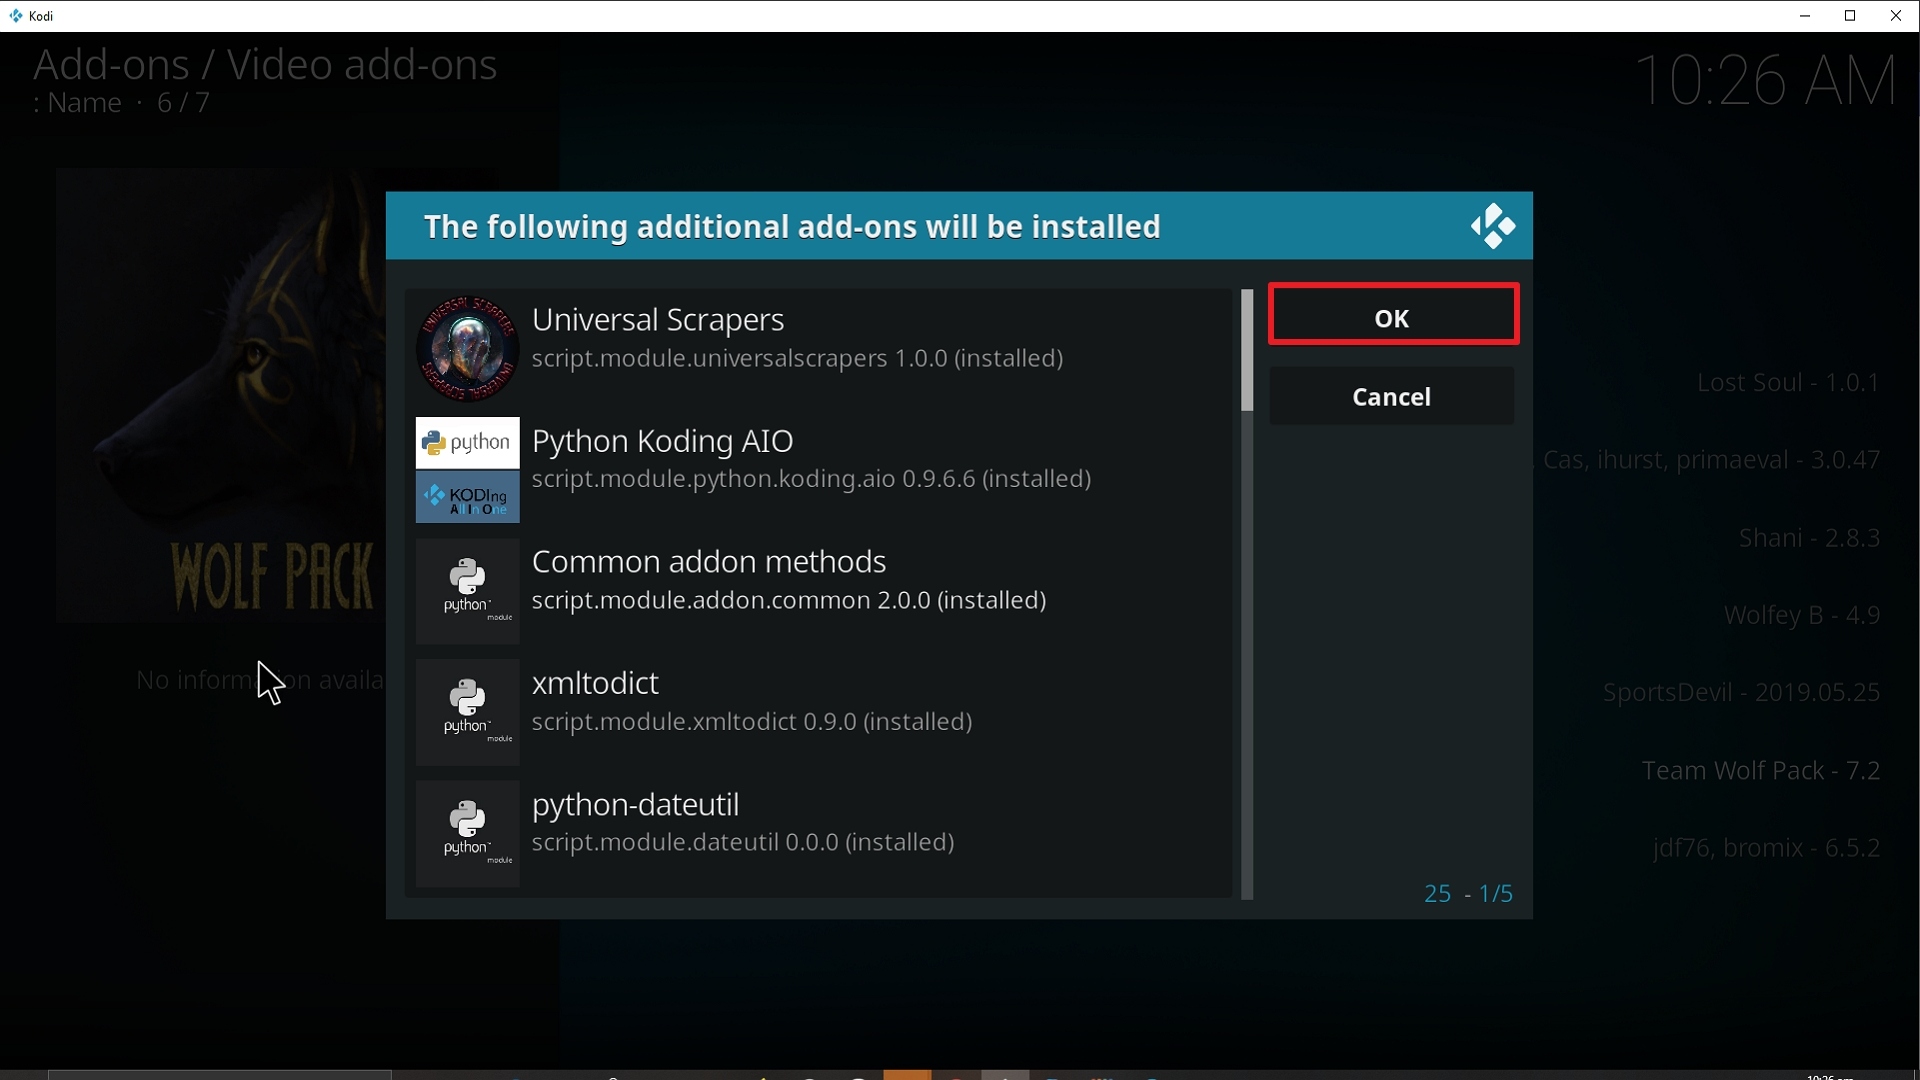
Step 24 Installing Wolf Pack addon on Kodi


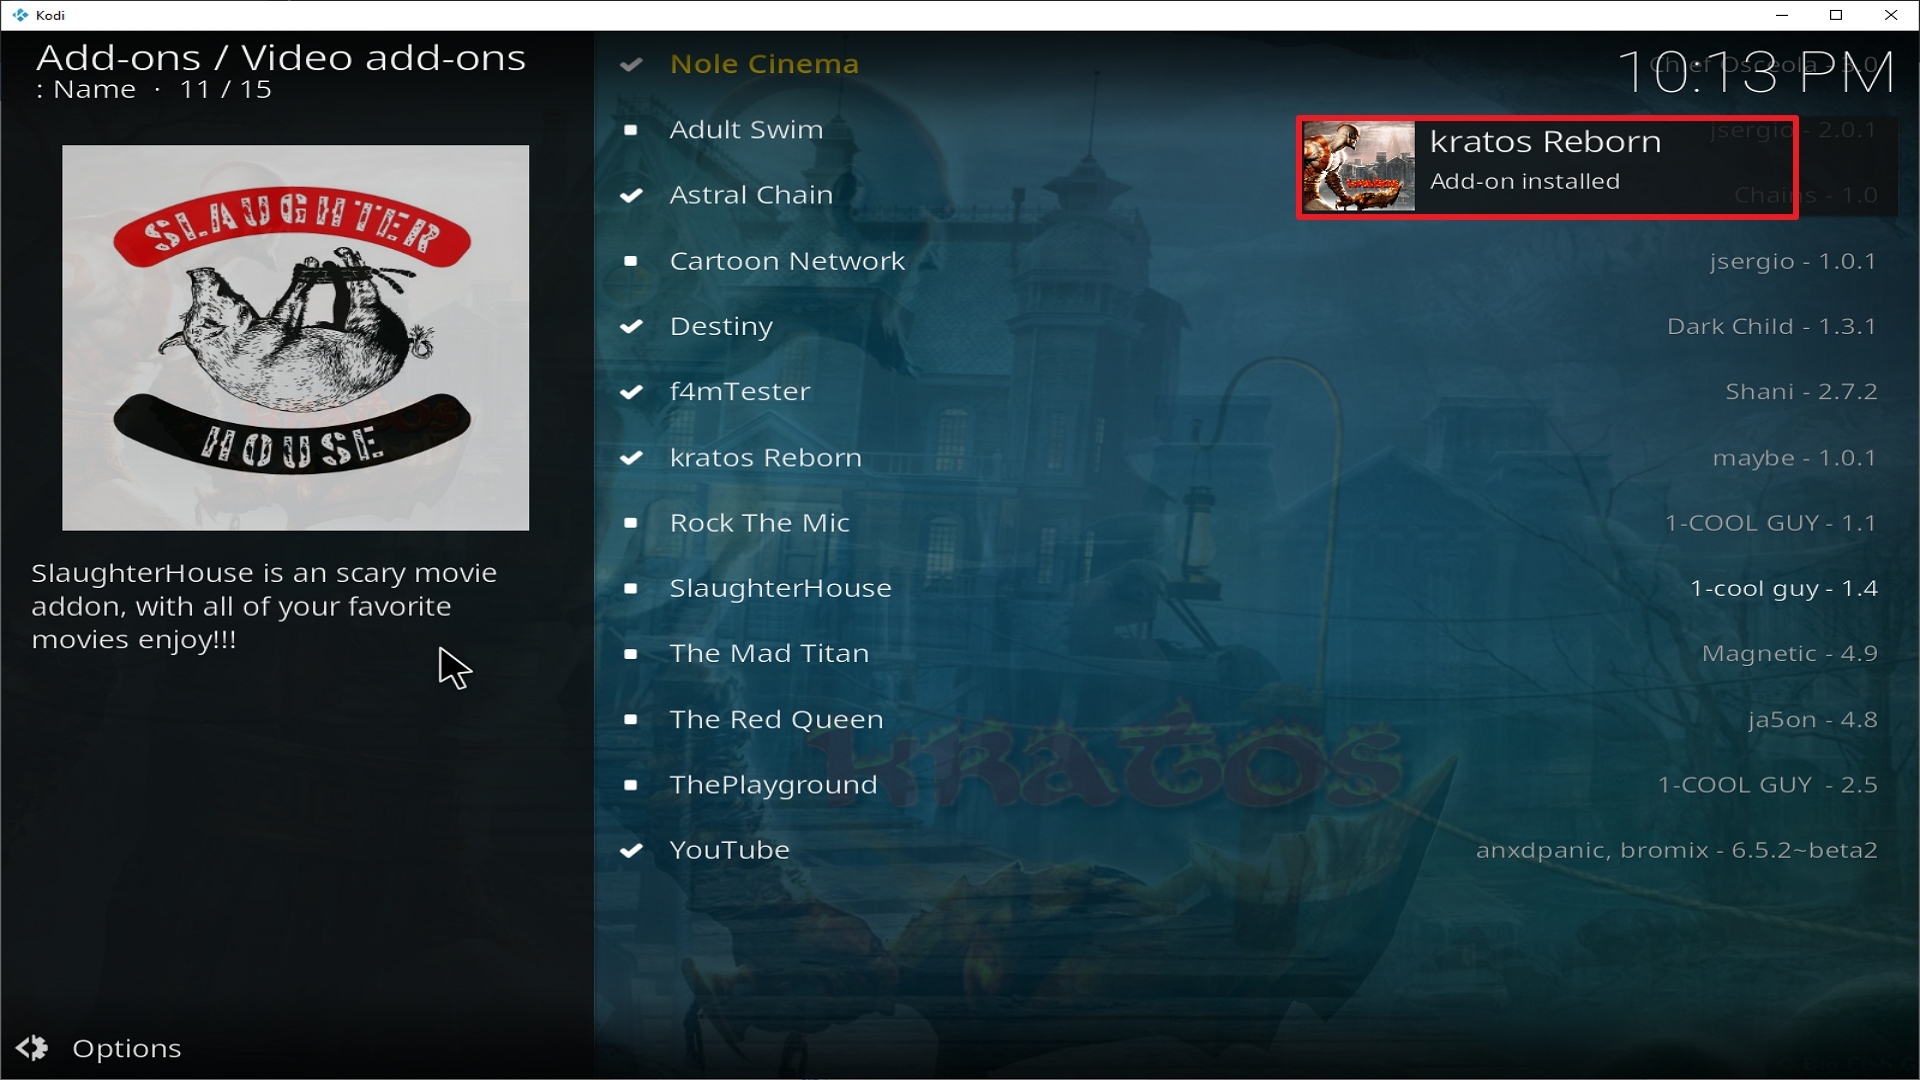
25. You should see a popup in the upper right corner saying Wolf Pack has been installed.
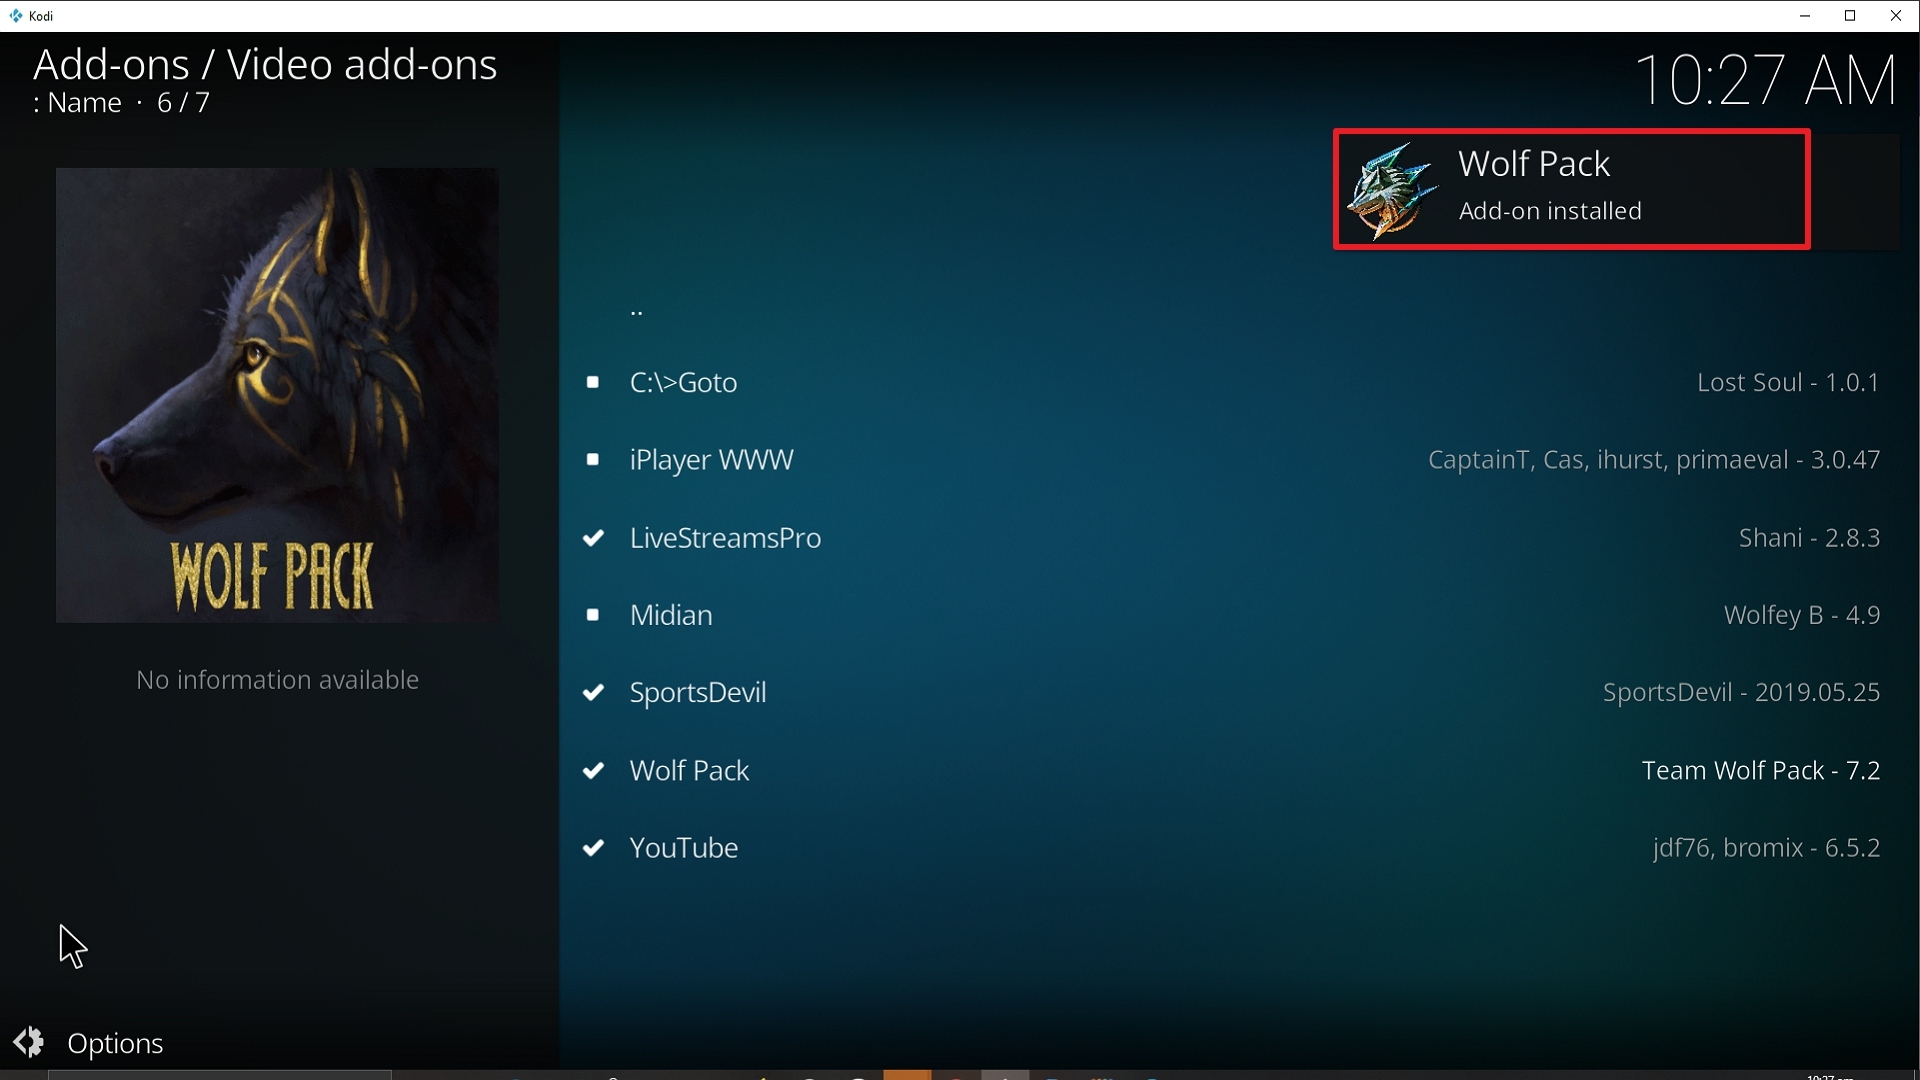
Step 25 Installing Wolf Pack addon on Kodi


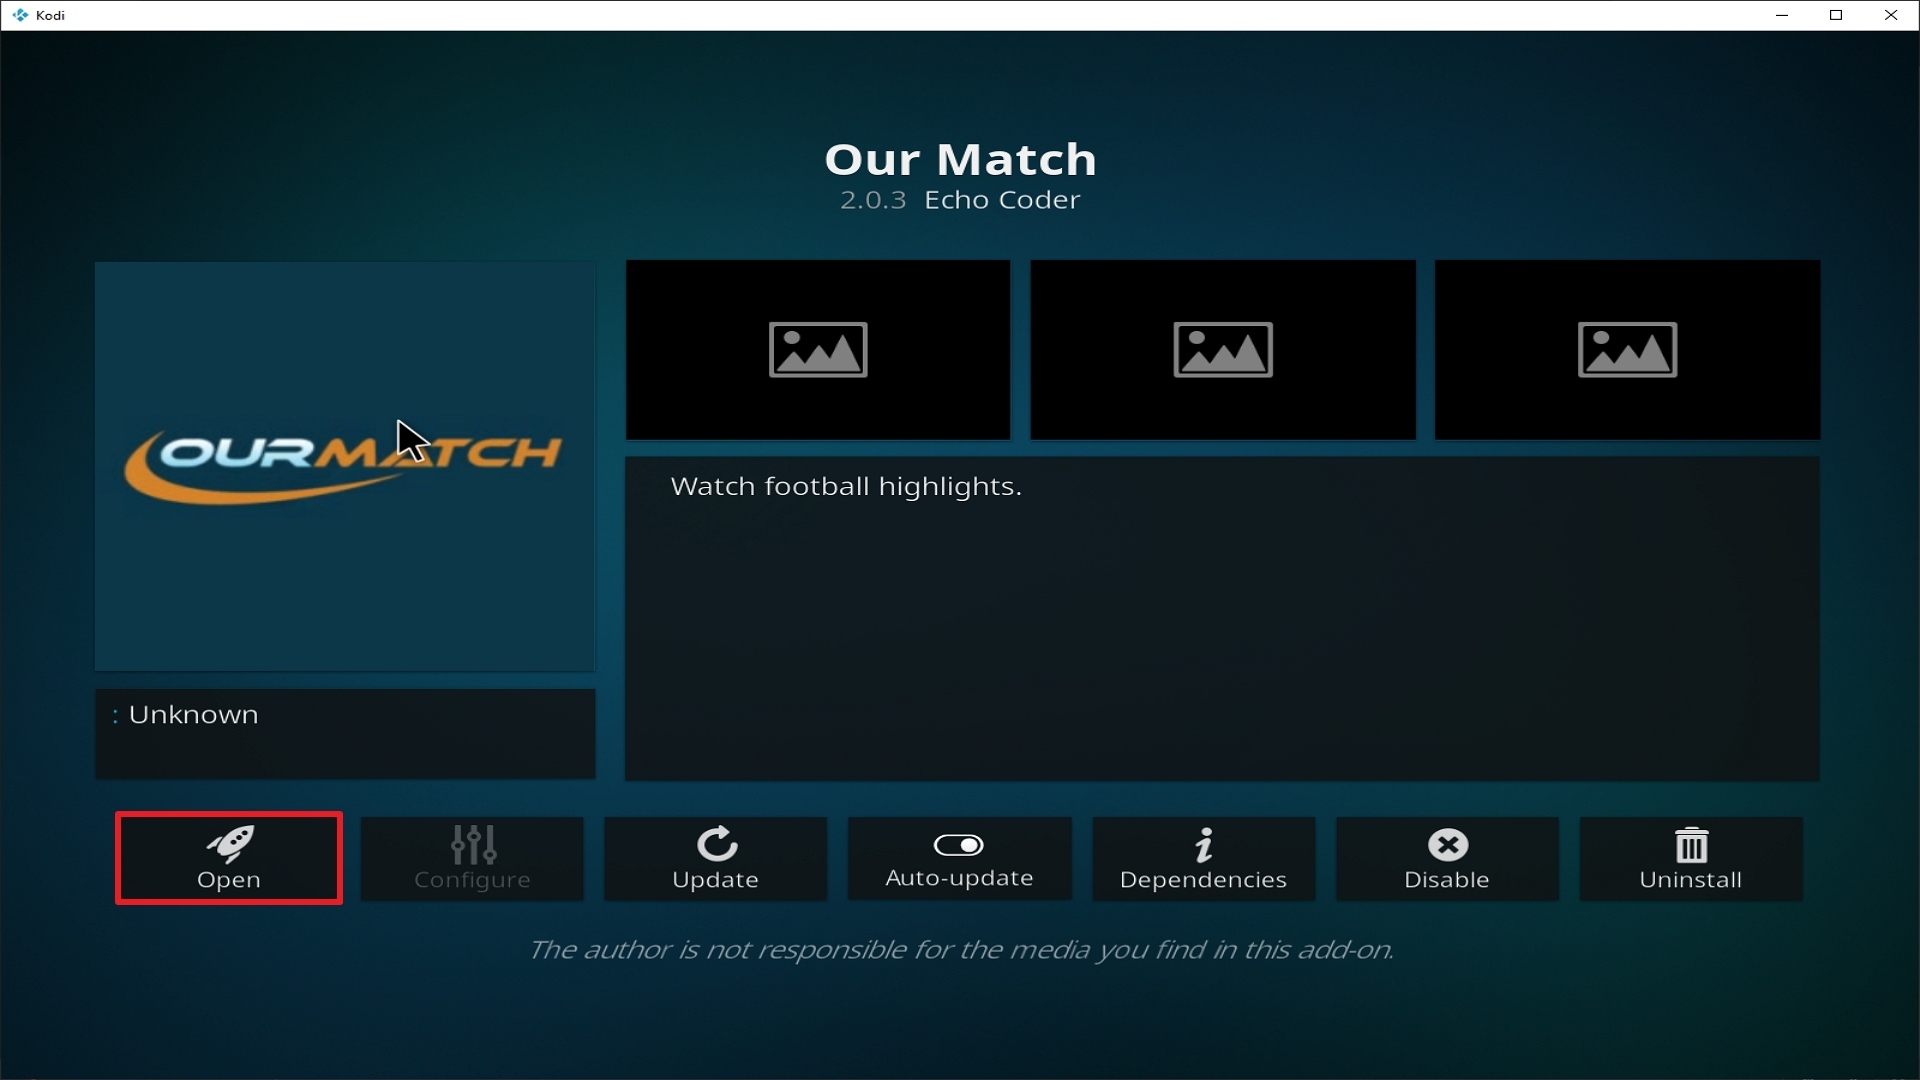
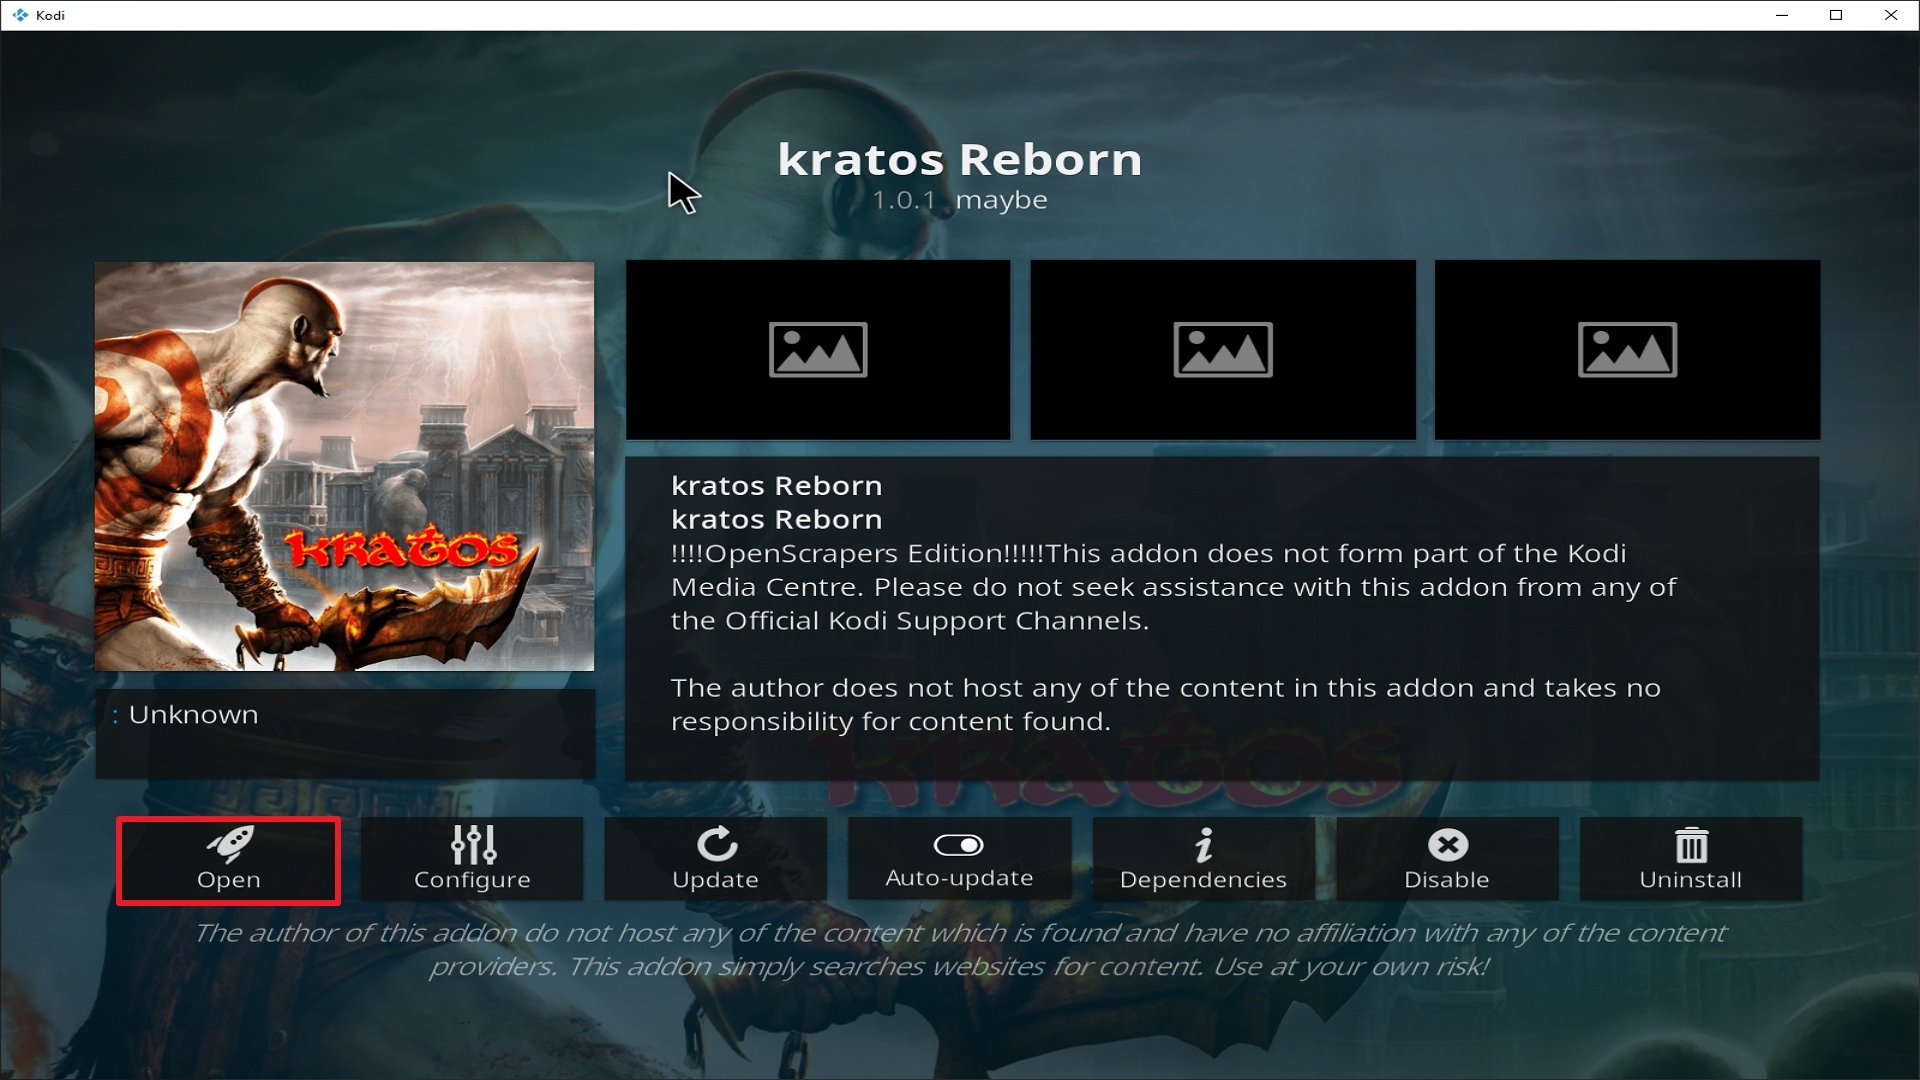
26. Click on Open to start Wolf Pack add-on.
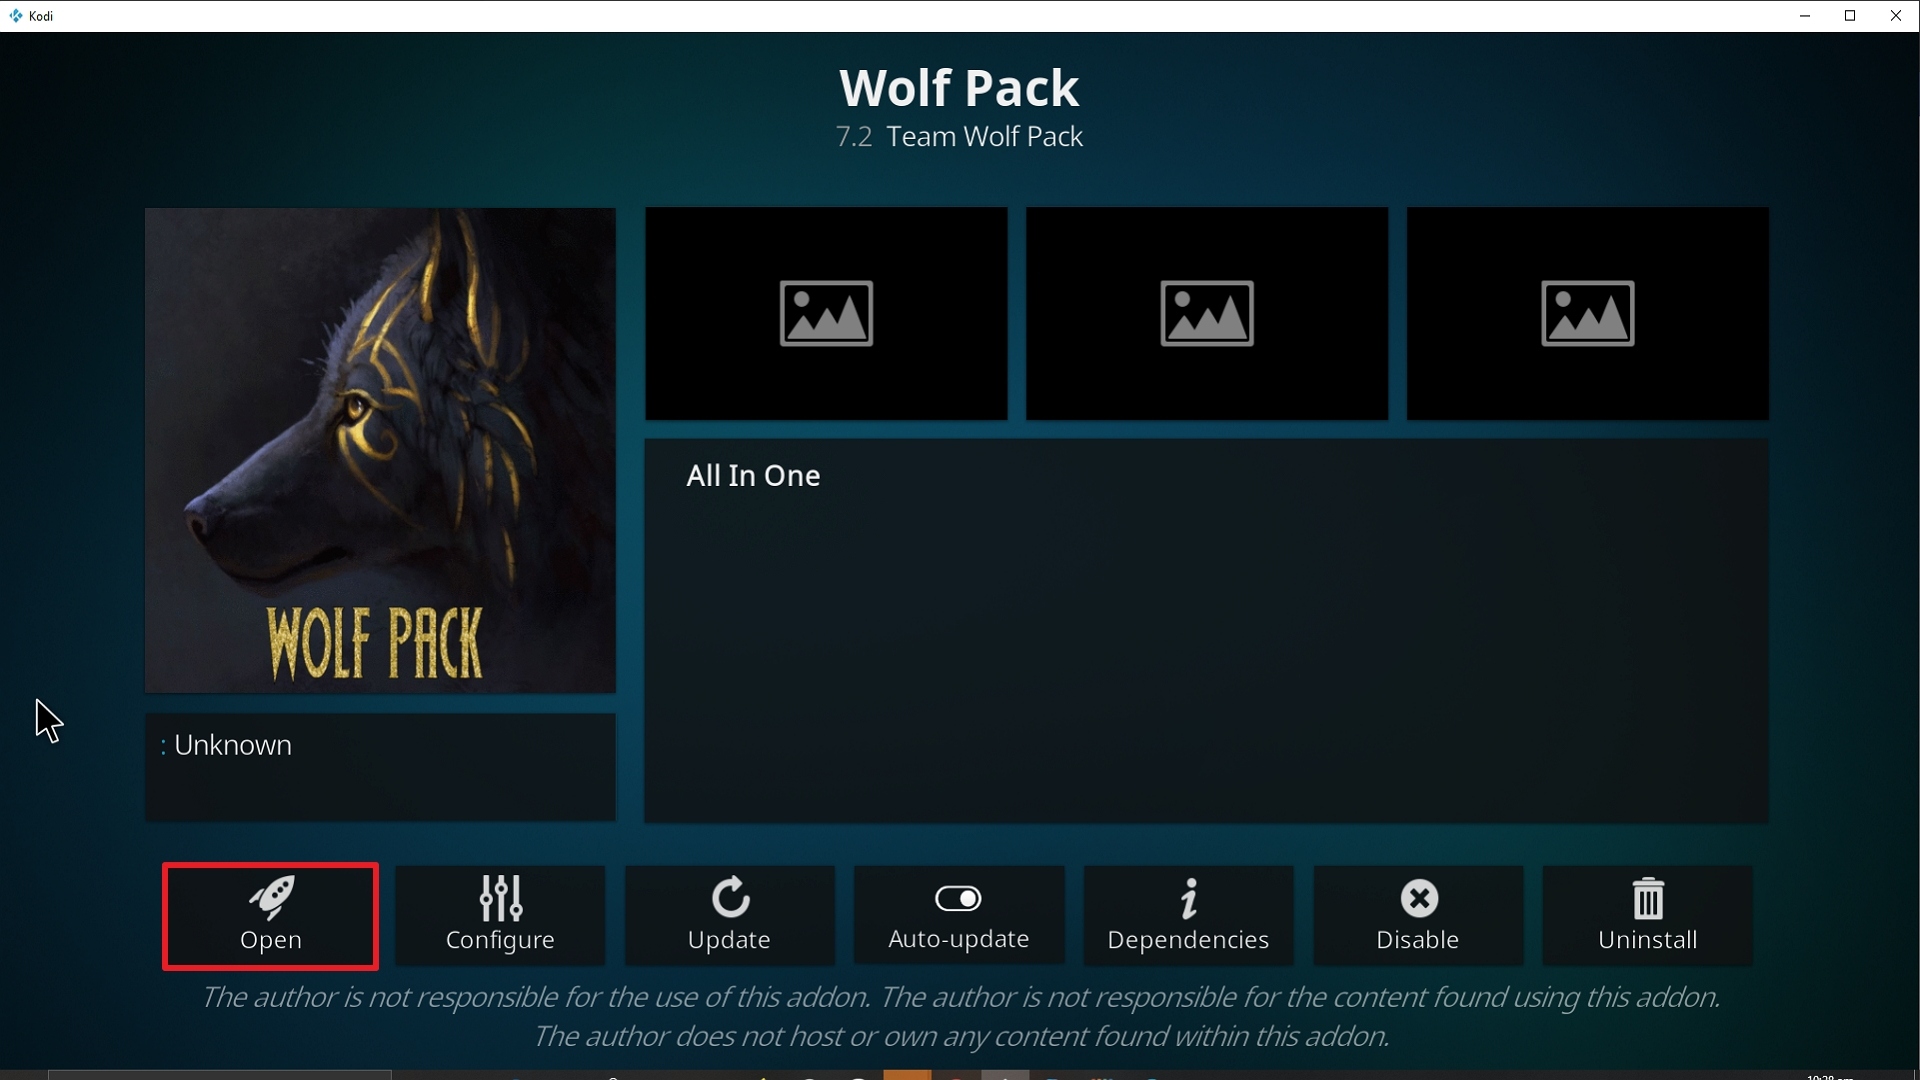
Step 26 Installing Wolf Pack addon on Kodi

Wolf Pack Kodi Addon Alternatives

It is always a must to have many add-ons installed on Kodi because there are few instances that one or more will be down each day. Having a good number of backups is highly recommended to ensure a smooth and uninterruptable Kodi experience.

Aside from Wolf Pack, here is a list of other add-ons that earned our favor:

  • Deathstar
  • Destiny
  • Exodus Redux
  • Gaia (requires Real Debrid)
  • Seren (requires Real Debrid)
  • Yoda

You can always try out new add-ons by searching through Google which is added daily. Always use official add-ons most especially the ones we recommend here at Review VPN. 


Common Errors

These are some of the things that may cause an issue when installing Wolf Pac:

  1.    Unable to connect to URL/Download

If you are having difficulties downloading Wolf Pack this may mean that the repository is unstable and that the IP may be unavailable. It is also worth checking out if you have typed the correct URL that you have downloaded Wolf Pack from the right repository. Also, make sure that you have a stable internet connection and that you are secured by a VPN.

If your country has stricter rules regarding censorship, you may find that it is blocked because it may contain adult content and that it is collected illegally. Your ISP constantly monitors your activity and may block certain websites from being accessed. To fix this, use a VPN to make your connection encrypted and anonymous so that your tracks are hidden. Check here for the best VPN deal.


  1.     Script Error

This error occurs due to the add-on itself or on the manner Kodi has been installed. Make sure that you have installed everything properly. If this problem persists, try reinstalling the add-on or there may be a need to update or reinstall Kodi. To figure out how to do this and other fixes read our in-depth guide linked above.


  1.     Kodi Check Log Error

Check Log Errors usually happen often as you use Kodi until you get familiar with it. This usually happens when your media cache is full. Your device will always cache a clip every time you watch media to allow faster loading time. In the long run, this cache gets full thus creating this issue. An in-depth guide on how to empty your cache is provided at the link above.


  1.     Source not working/slow/frozen

The Wolf Pack does not keep any of the content on its servers, these are all coursed through 3rd party sites. Give the source up to 15 seconds to load and then you can try other suggestions. For other solutions please take time to read our in-depth guide linked above.


Why do I need a virtual private network (VPN)?

Surfshark vpn

Geo-blocking content is one issue that always detracts from the enjoyment of entertainment. Some streaming services, on the other hand, have geo-block content that can only be played and used in a specified area. You won’t be able to watch these videos anyplace else, which is why you’ll need to use a Virtual Private Network (VPN) to bypass geo-blocks.

We recommend SurfShark as the best option because it safely removes geo-blocks, allowing you to access their content from anywhere. With over 3,200 servers in 65 locations worldwide, this VPN reliably bypasses geo-blocks by allowing you to connect to any IP address of your choice. You may now watch any content you want without any issues thanks to SurfShark, which bypasses censorship/restrictions imposed by the developers.

If you want to know more about this VPN, kindly read our SurfShark Review.


Grab your subscription now!

Click here to get the lowest price on SurfShark through our exclusive limited-time offer.


How to Install Surfshark on Firestick with Screenshots

If your Firestick still has the older interface, read this article to learn how to update it: Update Firestick Interface.

You can download Surfshark directly from the Amazon App store. It will be easy for you to find Surfshark with your Firestick’s Find feature. Refer to our screenshots below.

Follow our screenshots below to install the SurfShark VPN app on your Fire TV stick.

1. Go to the Home screen of your Firestick.
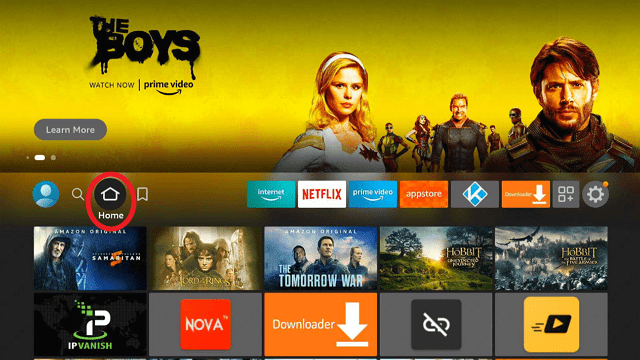
step 1 Install Surfshark VPN on Firestick


2. Navigate towards the Find tab. Press the Search button from the resulting dropdown.
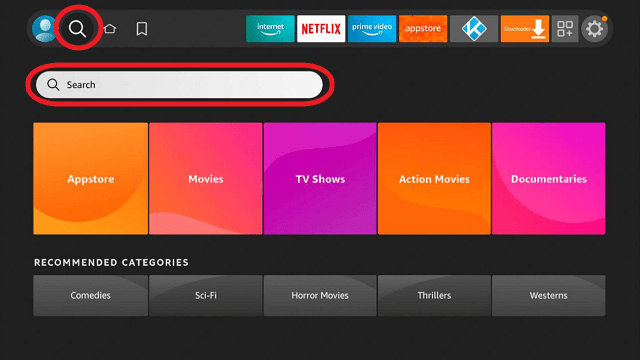
step 2 Install Surfshark VPN on Firestick


3. Type in the keyword of SurfShark and select from the suggestions that will appear.
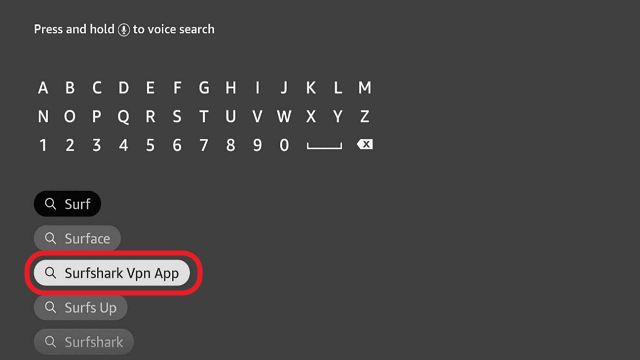
step 3 Install Surfshark VPN on Firestick


4. Click the official SurfShark icon from your search results.
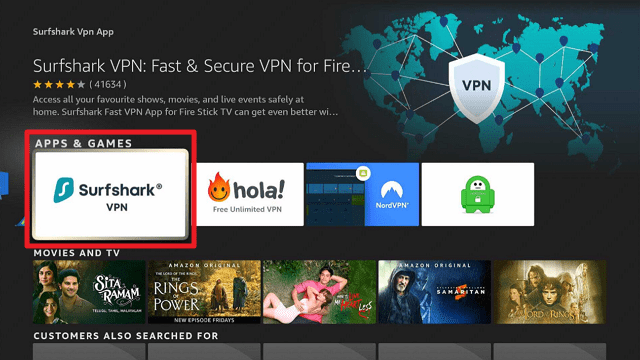
step 4 Install Surfshark VPN on Firestick


5. Press the Download (You own it) button.
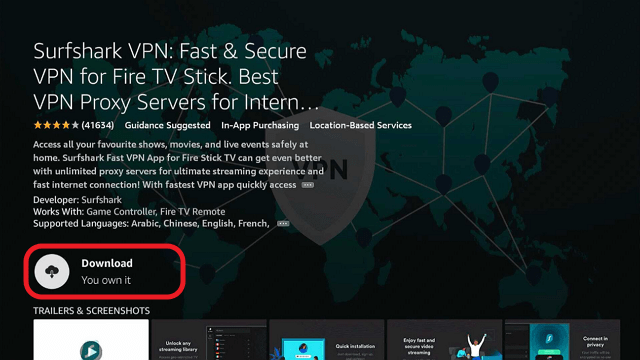
step 5 Install Surfshark VPN on Firestick


6. The SurfShark VPN installer will download on your device.
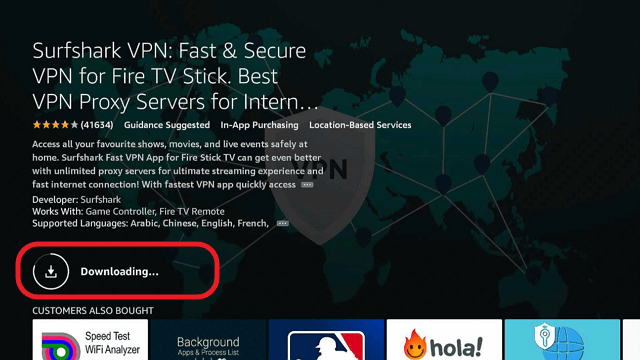
step 6 Install Surfshark VPN on Firestick


7. SurfShark VPN’s app will automatically install itself on your Fire TV stick.
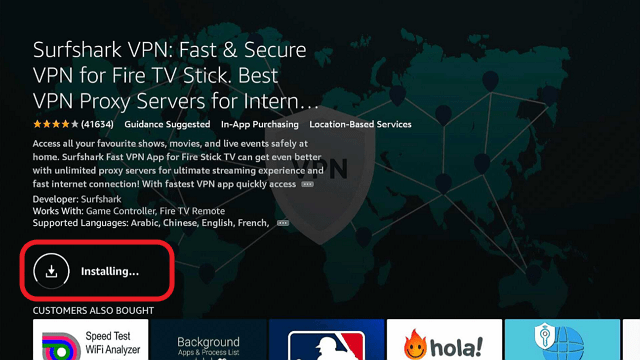
step 7 Install Surfshark VPN on Firestick


8. Press the Open button after completing SurfShark VPN’s installation process.
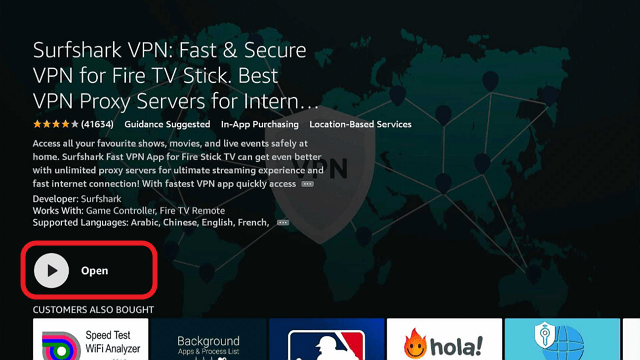
step 8 Install Surfshark VPN on Firestick


9. Please wait for the SurfShark VPN to load its user interface.
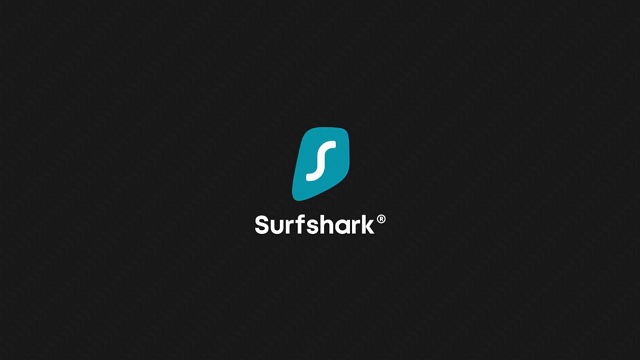
step 9 Install Surfshark VPN on Firestick


10. You can now log in with your SurfShark VPN account credentials.
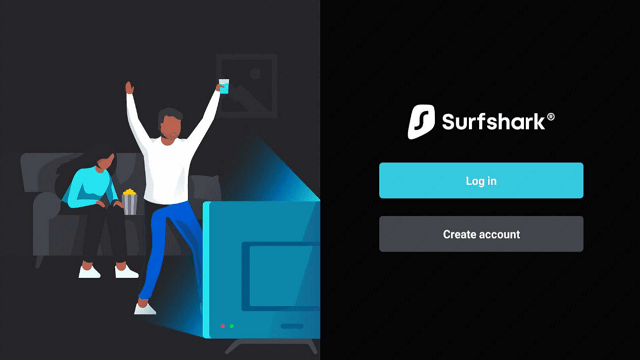
step 10 Install Surfshark VPN on Firestick

Learn more about Surfshark and Grab the Best Surfshark Deal Now!


Install Surfshark on Firestick
Best Surfshark Deal

Other VPNs to Consider

NordVPN (Best for Streaming)

Best Features

  • 5000+ Server in 50+ Countries 
  • Military-Grade Encryption
  • Fast Connection Speed
  • Suitable to a lot of devices
  • No-Log Policy

Prices
  • Complete $5.89 per month (64% Discount)
  • Plus $4.59 per month (56% Discount)
  • Standard $3.69 per month (55% Discount)

Best Features

  • 750+ High-speed VPN Servers in 43 Locations
  • Military-Grade Encryption
  • Fastest HD Streaming and Gaming
  • 30-Day Money-Back Guarantee
  • Unlimited Data & Devices
  • No-Log Policy

Prices
  • 3 Years $1.99 per month (82% Discount)
  • 1 Years $3.29 per month (70% Discount)
  • 1 Month $10.99 per month

IPVanish VPN (Most Secure)

Best Features

  • 1200+ Servers in 60+ Countries around the world
  • Unlimited Connections
  • No-Log Policy
  • Top Notch Military-Grade VPN Protocols and Encryptions
  • 100% Safe and Secured
  • Most Trusted VPN
  • Best VPN for Firestick
  • 30-Day Money-Back Guarantee

Prices
  • Yearly $3.99 per month (63% Discount) – 30 days risk free + Ransomware & Malware Protection
  • Quarterly $5.32 per month (51% Discount)
  • Monthly $10.99 per month

For more VPN discounts, go to ReviewVPN Deals and purchase the best VPN for you.


Conclusion

The Wolf Pack Kodi add-on has been running in the game for a while now. It has quite the reputation making it easily one of the more favored add-ons on Kodi. It has a very easy user interface and a straightforward installation process. We always consider accessibility, quality, stability, and reliability when we recommend anything here at ReviewVpn, and so far The Wolf Pack add-on does not disappoint. It provides high-quality streaming links that have tons of great movies and tv shows. It is very flexible in terms of content and it can cater to anyone of all sizes and ages. We hope that this guide has been helpful in any way to you. Please feel free to drop a comment or query to our site and our other social media so that we can further assist you. Thank you and have a great Kodi experience!

Install The Uss Defiant Kodi Addon

The Uss Defiant Kodi Addon

In this article, we will help you install The Uss Defiant Kodi Addon on Firestick.


Source: http://repo.rubyjewelwizard.com/

In the world that we live in today, technology has continued to proactively evolve in the service of the many. Our day-to-day lives comprise a lot of stressors that highly contribute to our general well-being. Survival is a must in this world that we live in today and one of the ways we cope up is by having good entertainment whenever we get home from work. Luckily for us, there are platforms that we can use to divert our attention from the busyness of life.

There are social media, entertainment, books, and many more. One of the greatest facets of this century is the creation of Kodi. It aids us by way of entertainment with the fraction of a cost without sacrificing quality and integrity. One of the many advantages of having Kodi is the huge list of add-ons you can download to it and one of those wonderful add-ons happen to be featured in this article and that is The USS Defiant Video Add-on

The USS Defiant is a Kodi Video Add-on that is found under the Diamond Wizard Repository that offers content that ranges from Movies, TV Shows, Documentaries, Music, Podcasts, Kids, and Fitness to name a few.


ANONYMOUSLY


Features

  1.     Real-Debrid Integration
  2.     A simple UI that makes it easy to navigate through
  3.     A huge library of high-quality movies and tv shows
  4.     Trakt Integration
  5.     Brief Summary of Videos per title
  6.     Retro TV Feature
  7.     Customizable search by content, popularity, and rating


Easy Installation Guide

  1. Launch Kodi on your device
  2. Click on the “Gear Icon” and select “System”
  3. At the add-ons menu, turn on the “Unknown Sources” by clicking “yes”
  4. Go back to the “systems” page and choose “File Manager”
  5. Choose Add source and select “none”
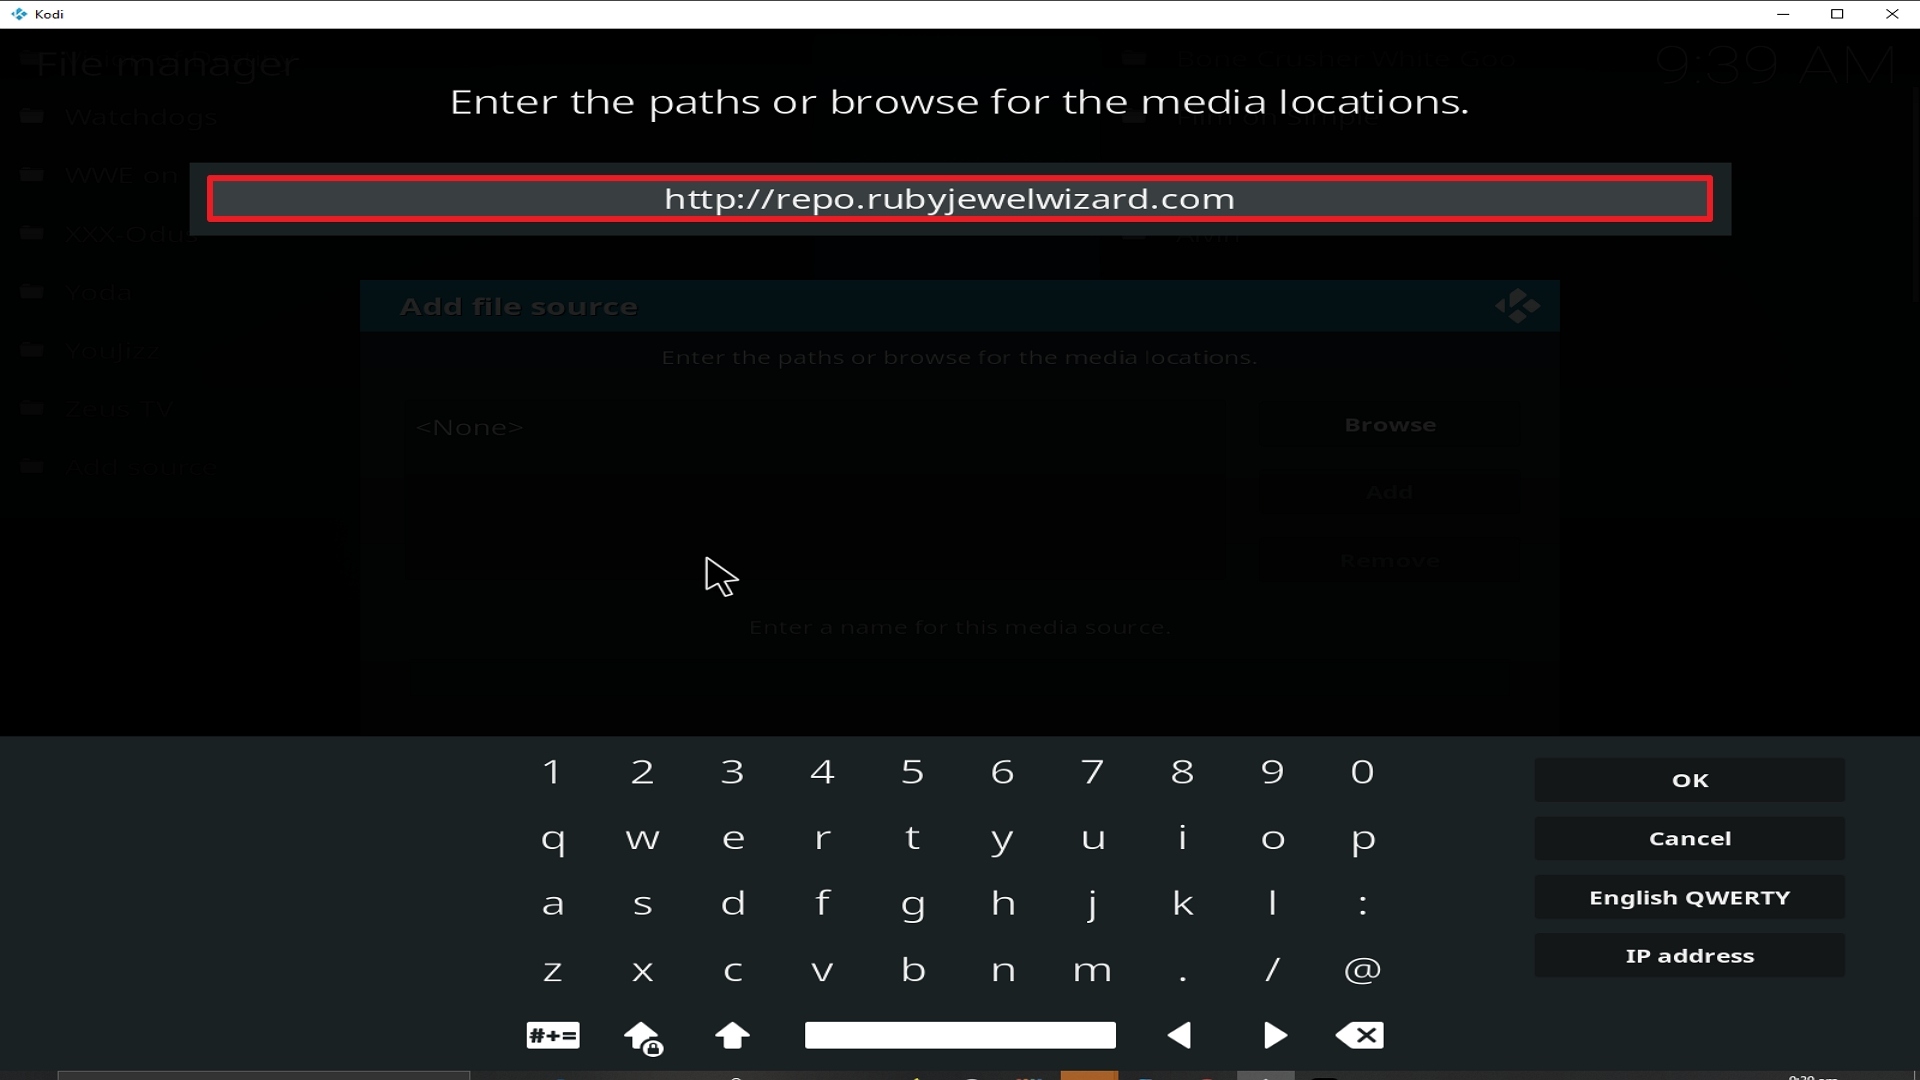
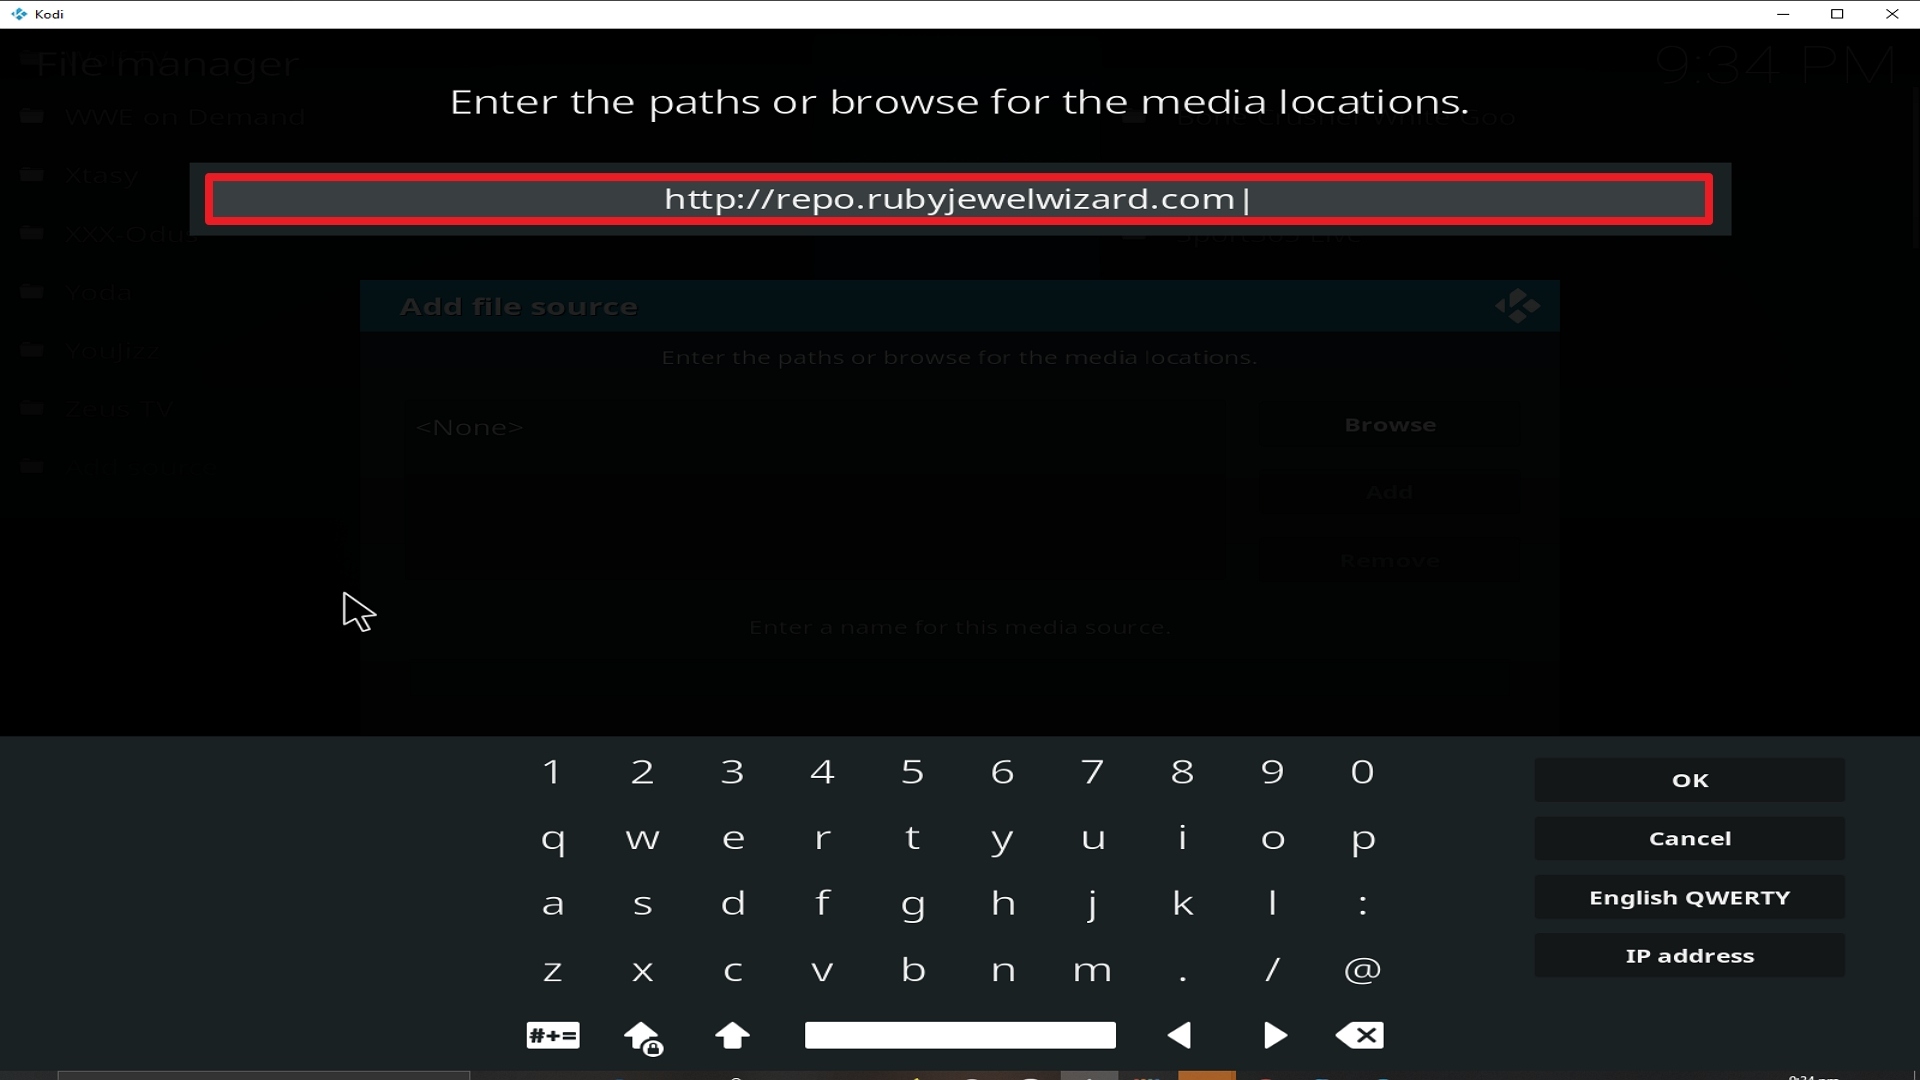
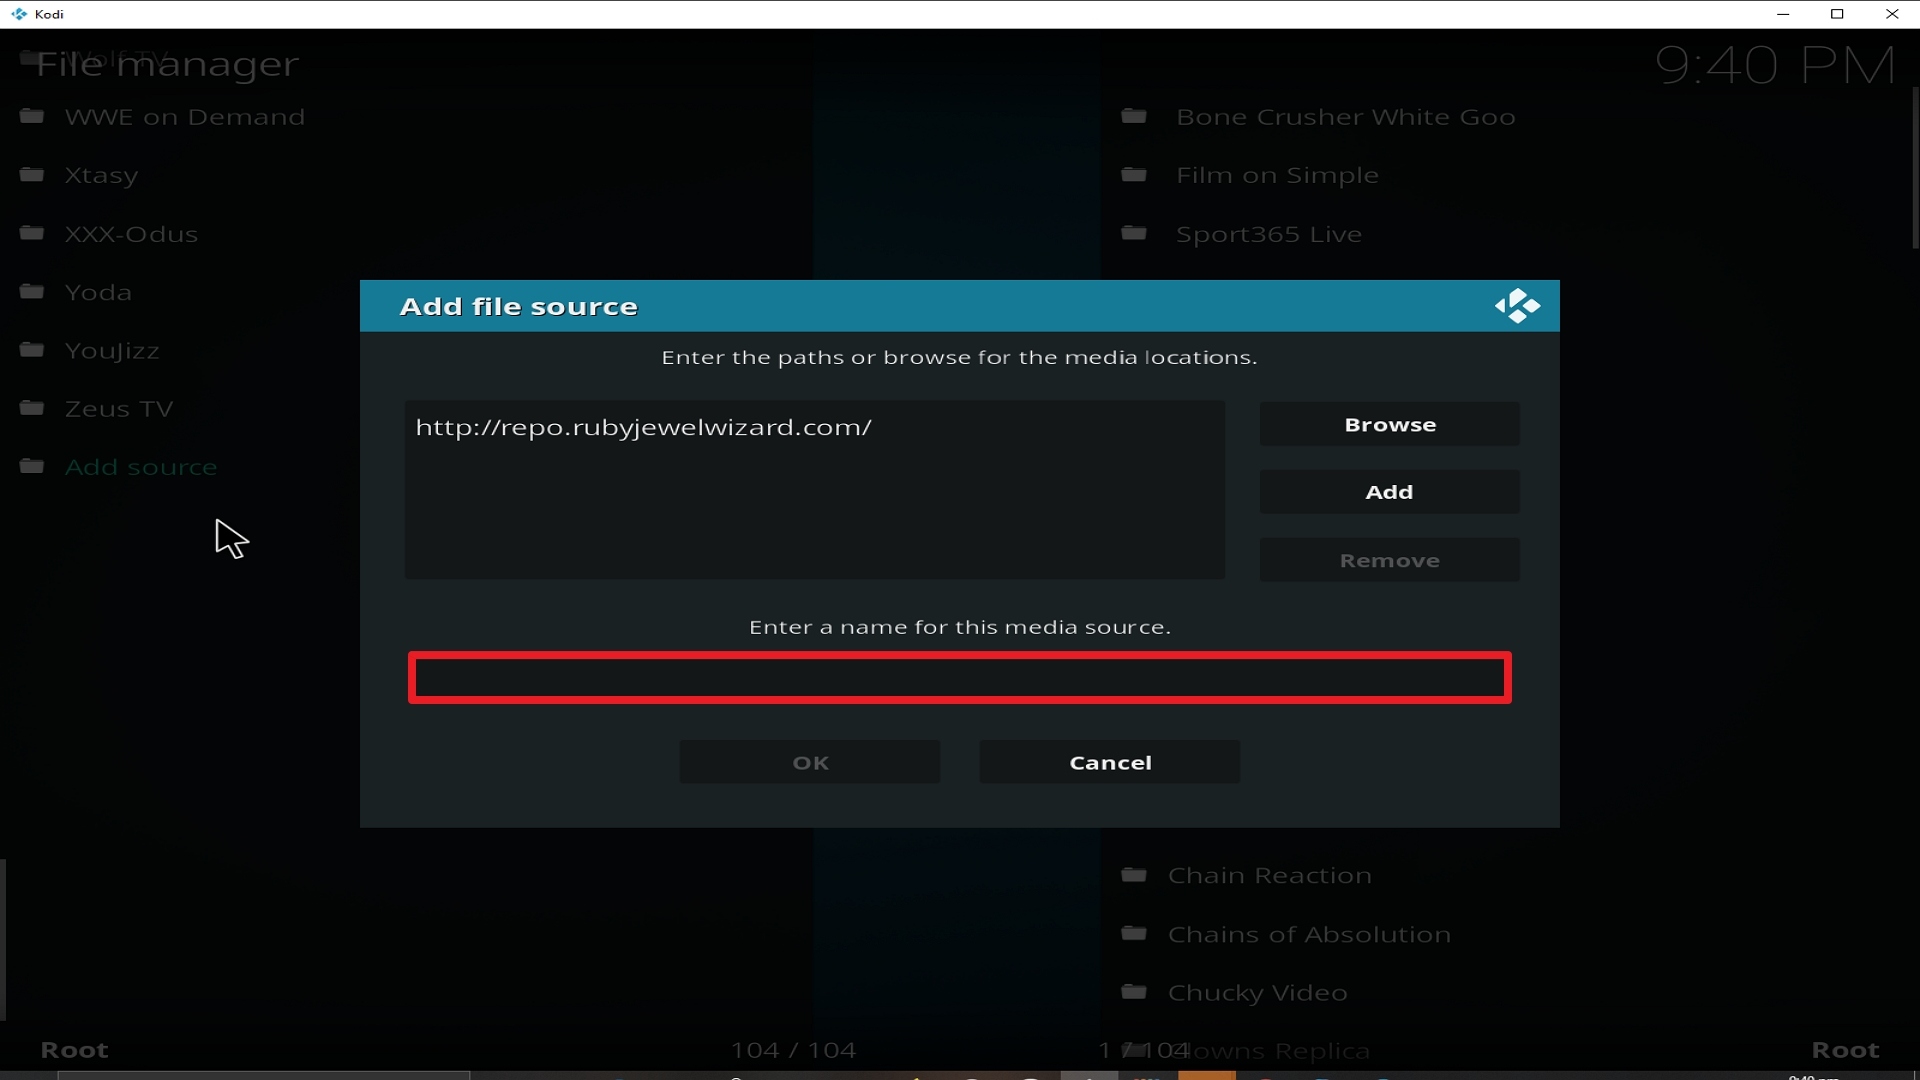
  6. Type in http://repo.rubyjewelwizard.com
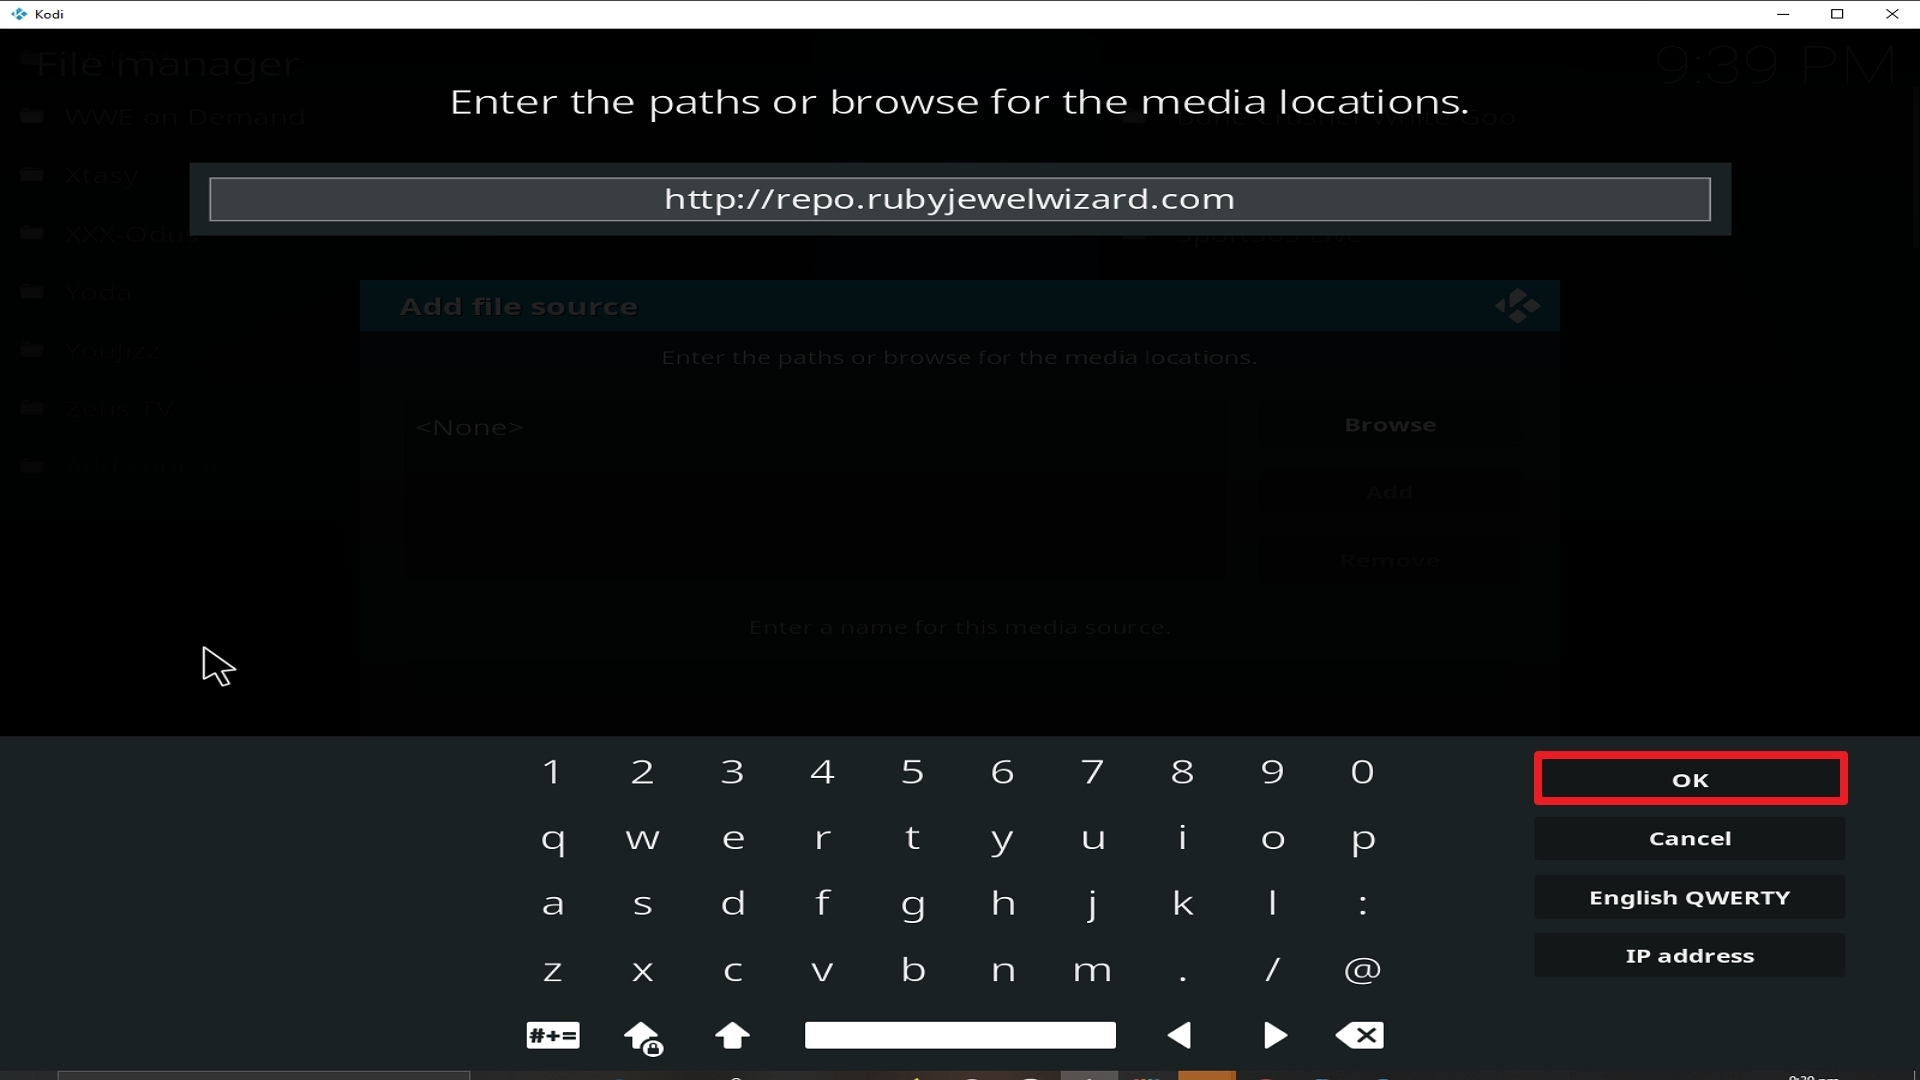
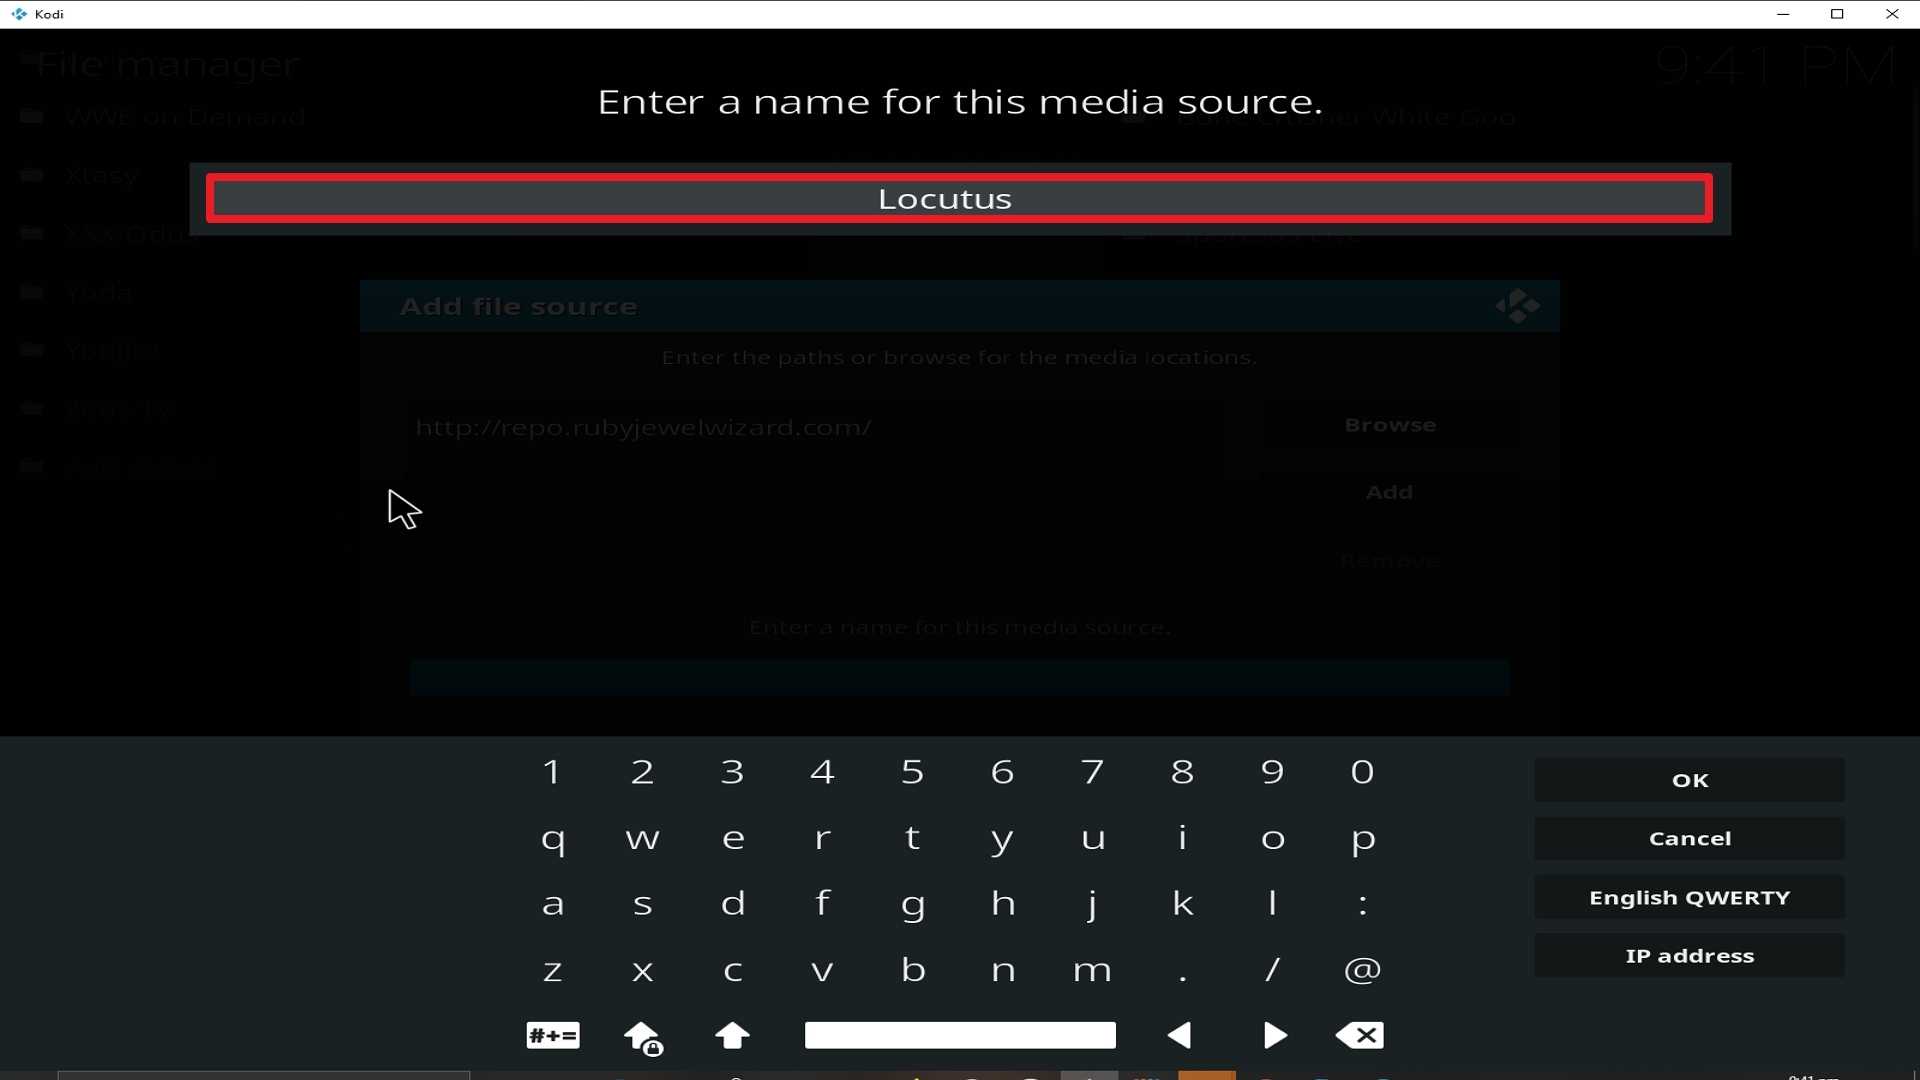
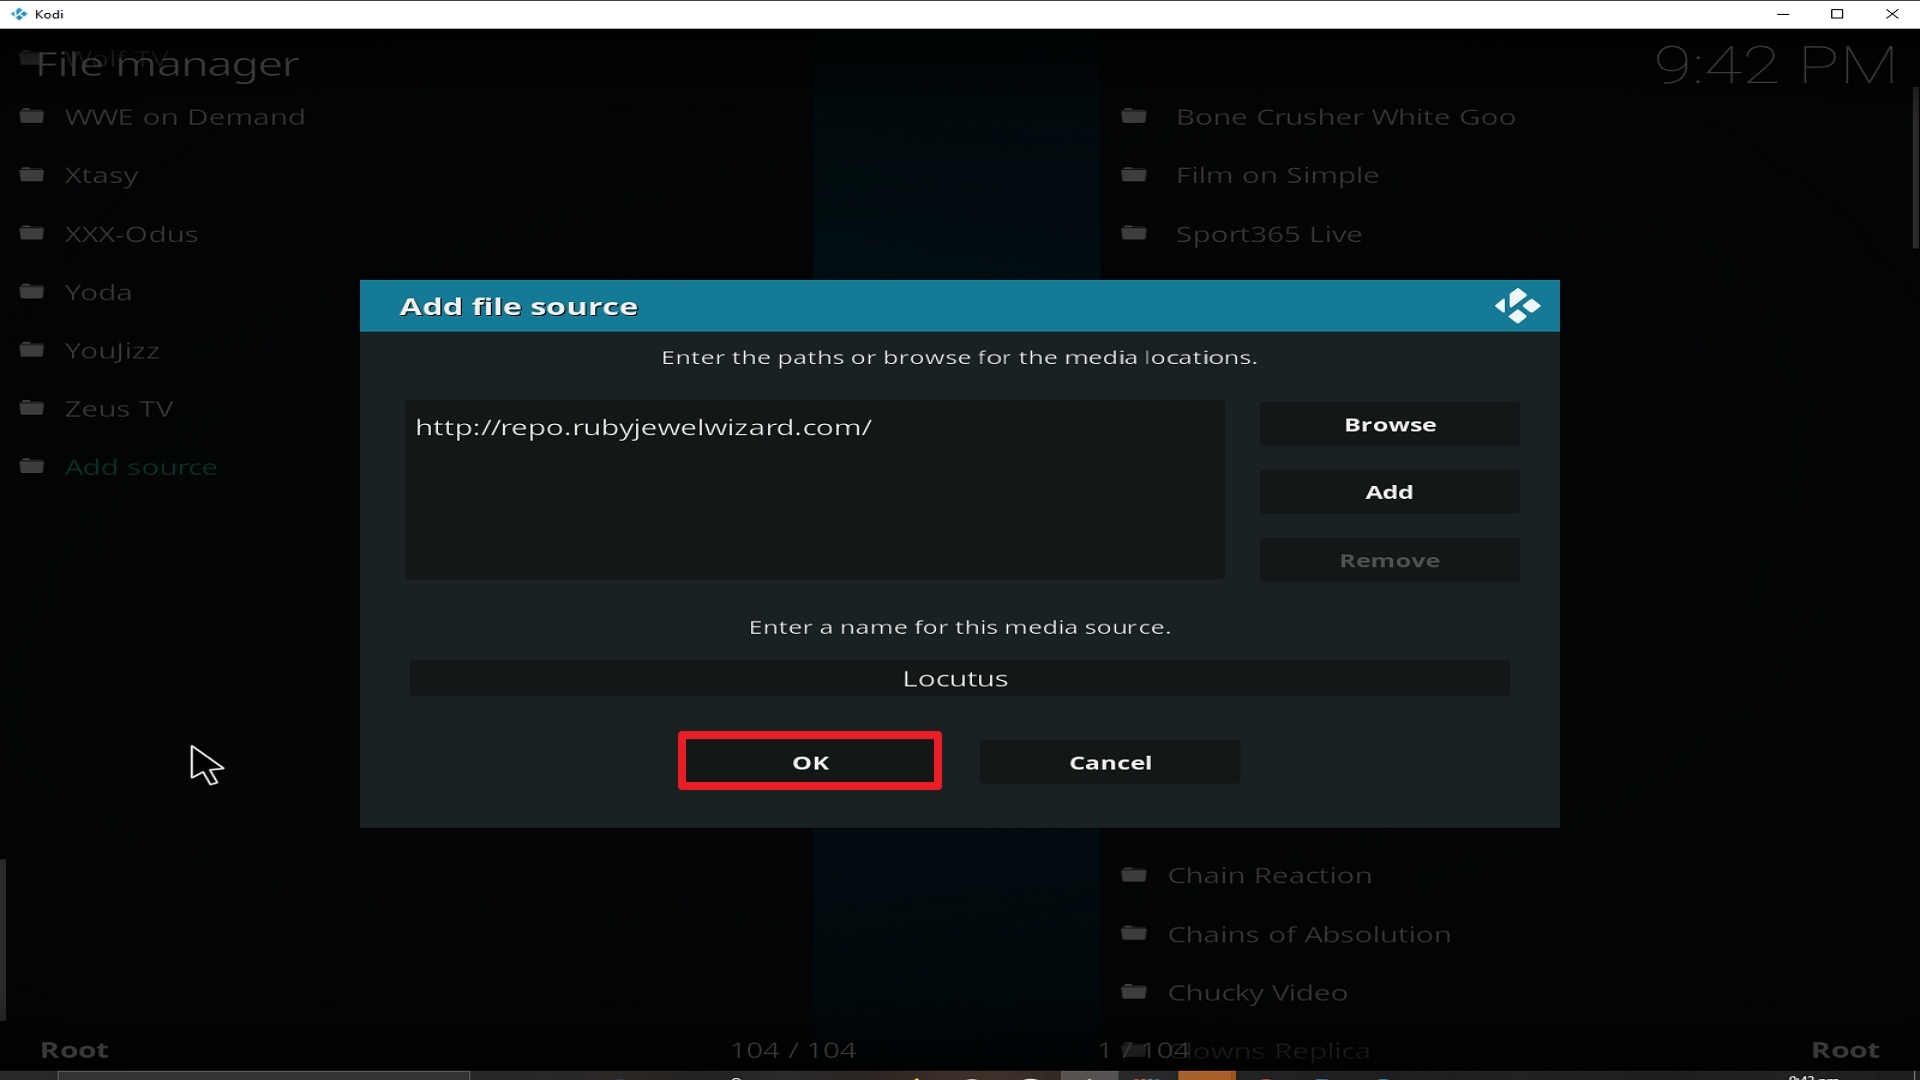
  7. Highlight the source and rename it to “diamond” or any name you would like to use to identify this particular source and click “ok”
  8. Go back to the System Screen and click “Add-ons”
  9. Select “Install Zip File” choose “diamond” or whatever you renamed the file.
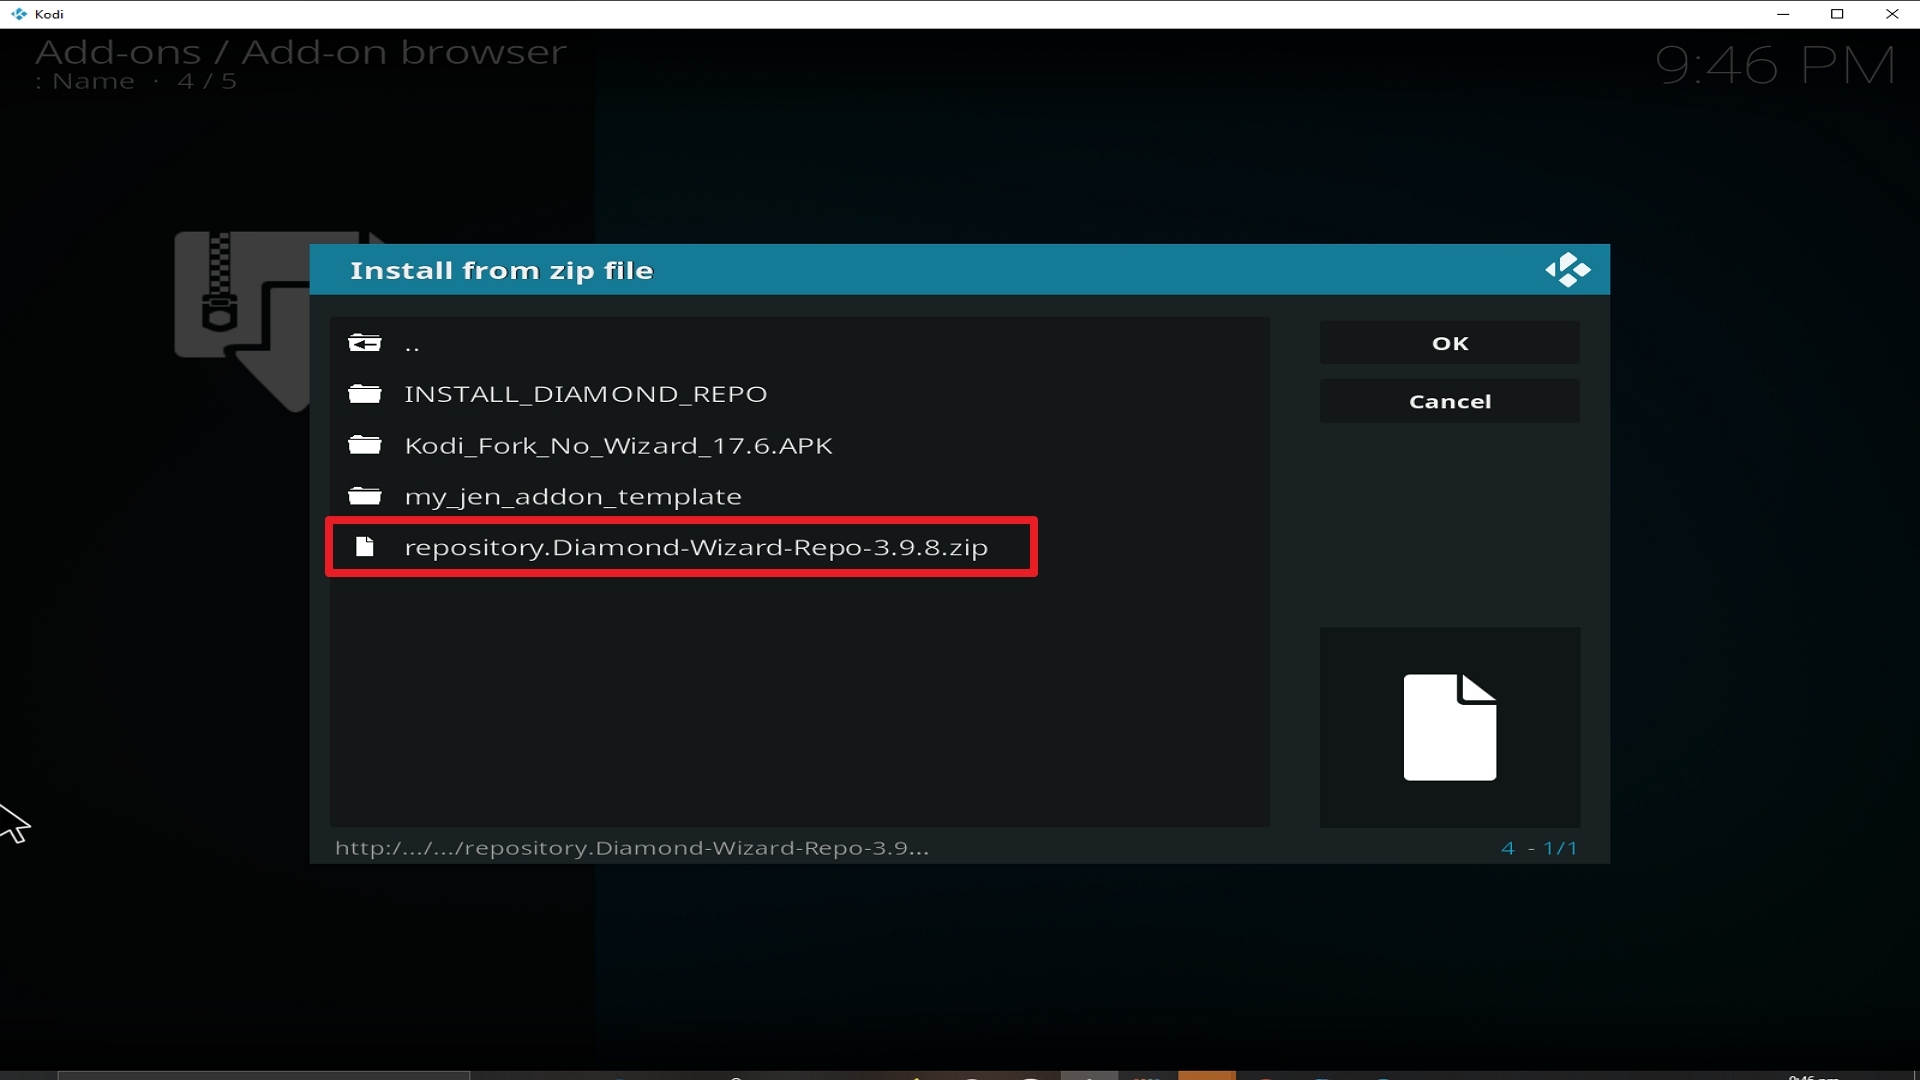
  10. Select the zip file URL- repository.Diamond-Wizard-Repo-3.9.6.zip
  11. Wait for the notification “Diamond Build Add-on Repo Installed” to appear.
  12. Select “Install Repository”
  13. Choose “Diamond Build Repo”
  14. Click on “Video Add-ons” and select “The USS Defiant” and “Install”
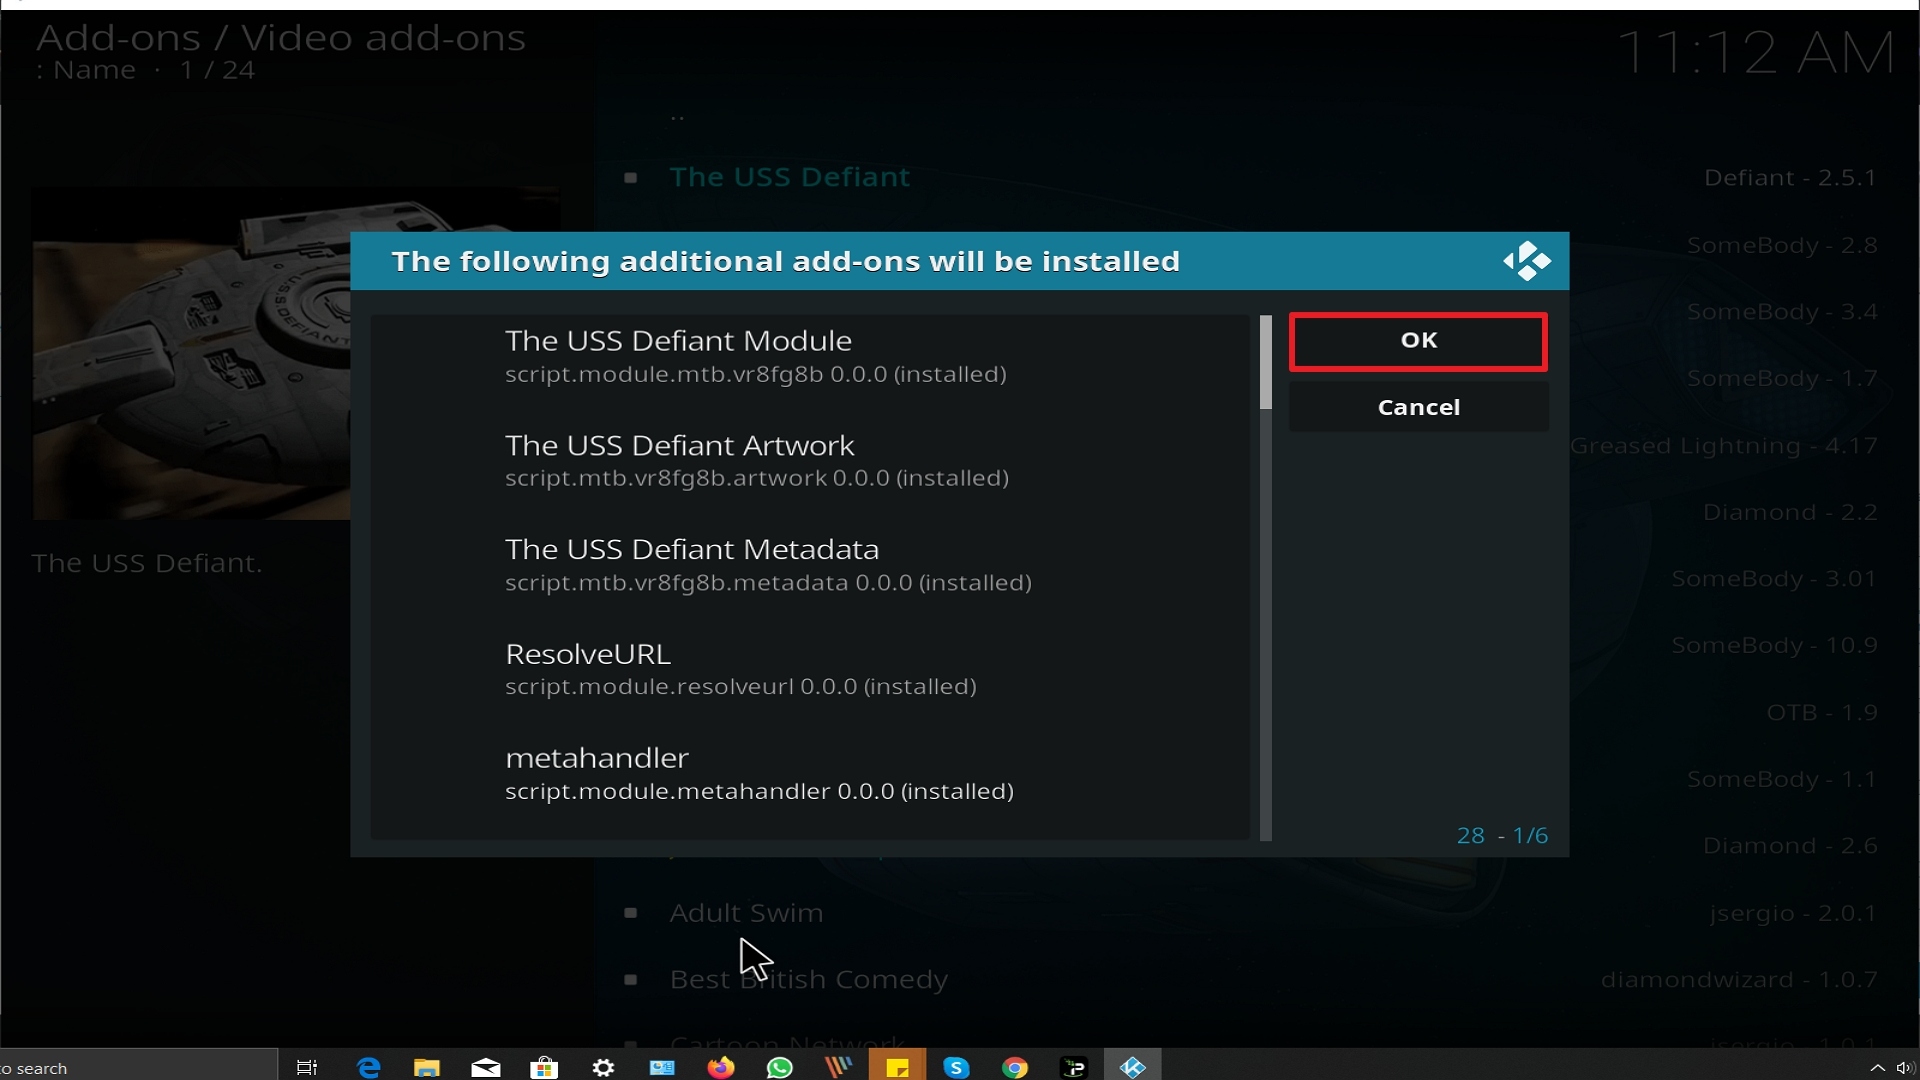
  15. Click “Ok” when a notification “the following add-ons will be installed” appears and wait for The USS Defiant Add-on to install
  16. Once the add-on is installed go back to the home screen and select “add-ons”
  17. Choose “Video add-ons” and select “The USS Defiant”
  18. There you go, The USS Defiant is now installed.


Real-Debrid Integration

  1. If you don’t possess a Real-Debrid account yet, you must register.
  2. When Launching The USS Defiant add-on you will be notified with this message. Write down the code that will be given.
  3. Launch a web browser on a different device and enter https://real-debrid.com/device.
  4. Type in the code you got and select “Continue”
  5. You will then be granted your Real-Debrid Account
  6. Go back to The USS Defiant and a notification that shows another successful authorization message will appear, select “ok”
  7. If notified with a changelog, just press the “ok” button on your remote and voila! The USS Defiant is now Real-Debrid ready.


YOUR INTERNET ACTIVITY IS BEING WATCHED

ReviewVPN cannot attest to the legality, security and privacy of the applications discussed on this site. It is highly recommended that you use a VPN service while streaming or using Kodi.

Currently, your IP 216.73.217.150 is visible to everyone and your Browser is being tracked by Advertisers & ISP Provider.

Save 65% Now

Limited Time Offer

Here are the main reasons why you must use a VPN:

  • Your activities are hidden from your ISP, the government, and from the apps you are using.
  • You can access additional movies and TV streams.
  • ISP attempts to throttle are thrwarted thus reducing buffering issues.
  • Geographically restricted content like Netflix and Hulu can be unblocked.

A VPN works be replacing your ISP-assigned IP address and creating an encrypted tunnel. We recommend the no log service offered by IPVanish. It works well on a Firestick and offers the fastest possible speeds.

Special Limited Time Offer - Get IPVanish


Legal Disclaimer: ReviewVPN.com does not encourage or endorse any illegal activity involved in the usage of services and applications referenced on this site. We do not verify the licensing agreements of services. The end-user is wholly responsible for ensuring that any media accessed through these services does not violate copyright and/or licensing laws. ReviewVPN does not promote, link to, or receive compensation from any Apps and IPTV services.


Install Surfshark on Firestick

Best Surfshark Deal


How to Install The Uss Defiant on Kodi with Screenshots

1. From the home screen, select the cogwheel at the upper left.

Step 1 Installing The Uss Defiant addon on Kodi


2. Select System in the bottom right corner.

Step 2 Installing The Uss Defiant addon on Kodi


3. Select Add-ons on the left side of the screen.

Step 3 Installing The Uss Defiant addon on Kodi


4. Select Unknown sources.

Step 4 Installing The Uss Defiant addon on Kodi


5. Click Yes to allow unknown sources.

Step 5 Installing The Uss Defiant addon on Kodi


6. Select File manager.

Step 6 Installing The Uss Defiant on Kodi


7. Click Add source.

Step 7 Installing The Uss Defiant addon on Kodi


8. Click on <None>.

Step 8 Installing The Uss Defiant addon on Kodi


9. Type exactly: http://repo.rubyjewelwizard.com/

Step 9 Installing The Uss Defiant addon on Kodi


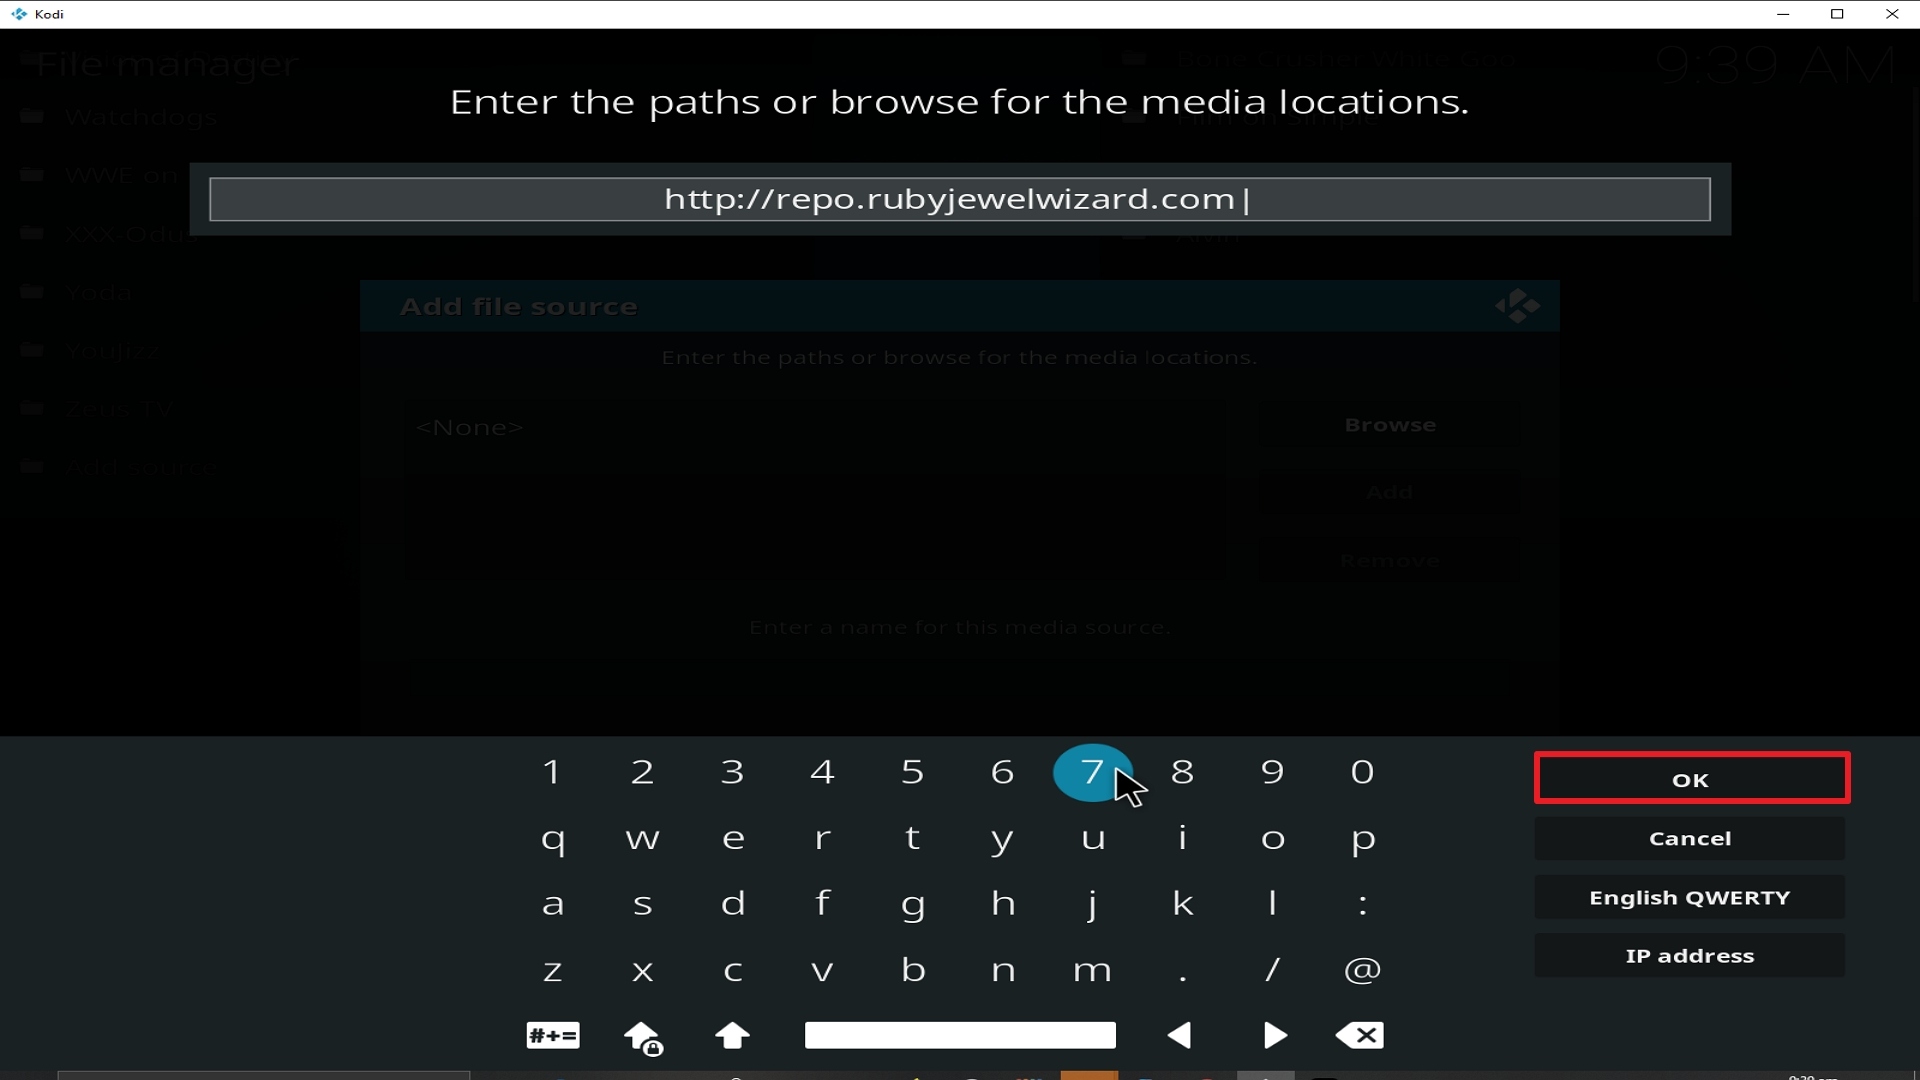
10. Click on OK.

Step 10 Installing The Uss Defiant addon on Kodi


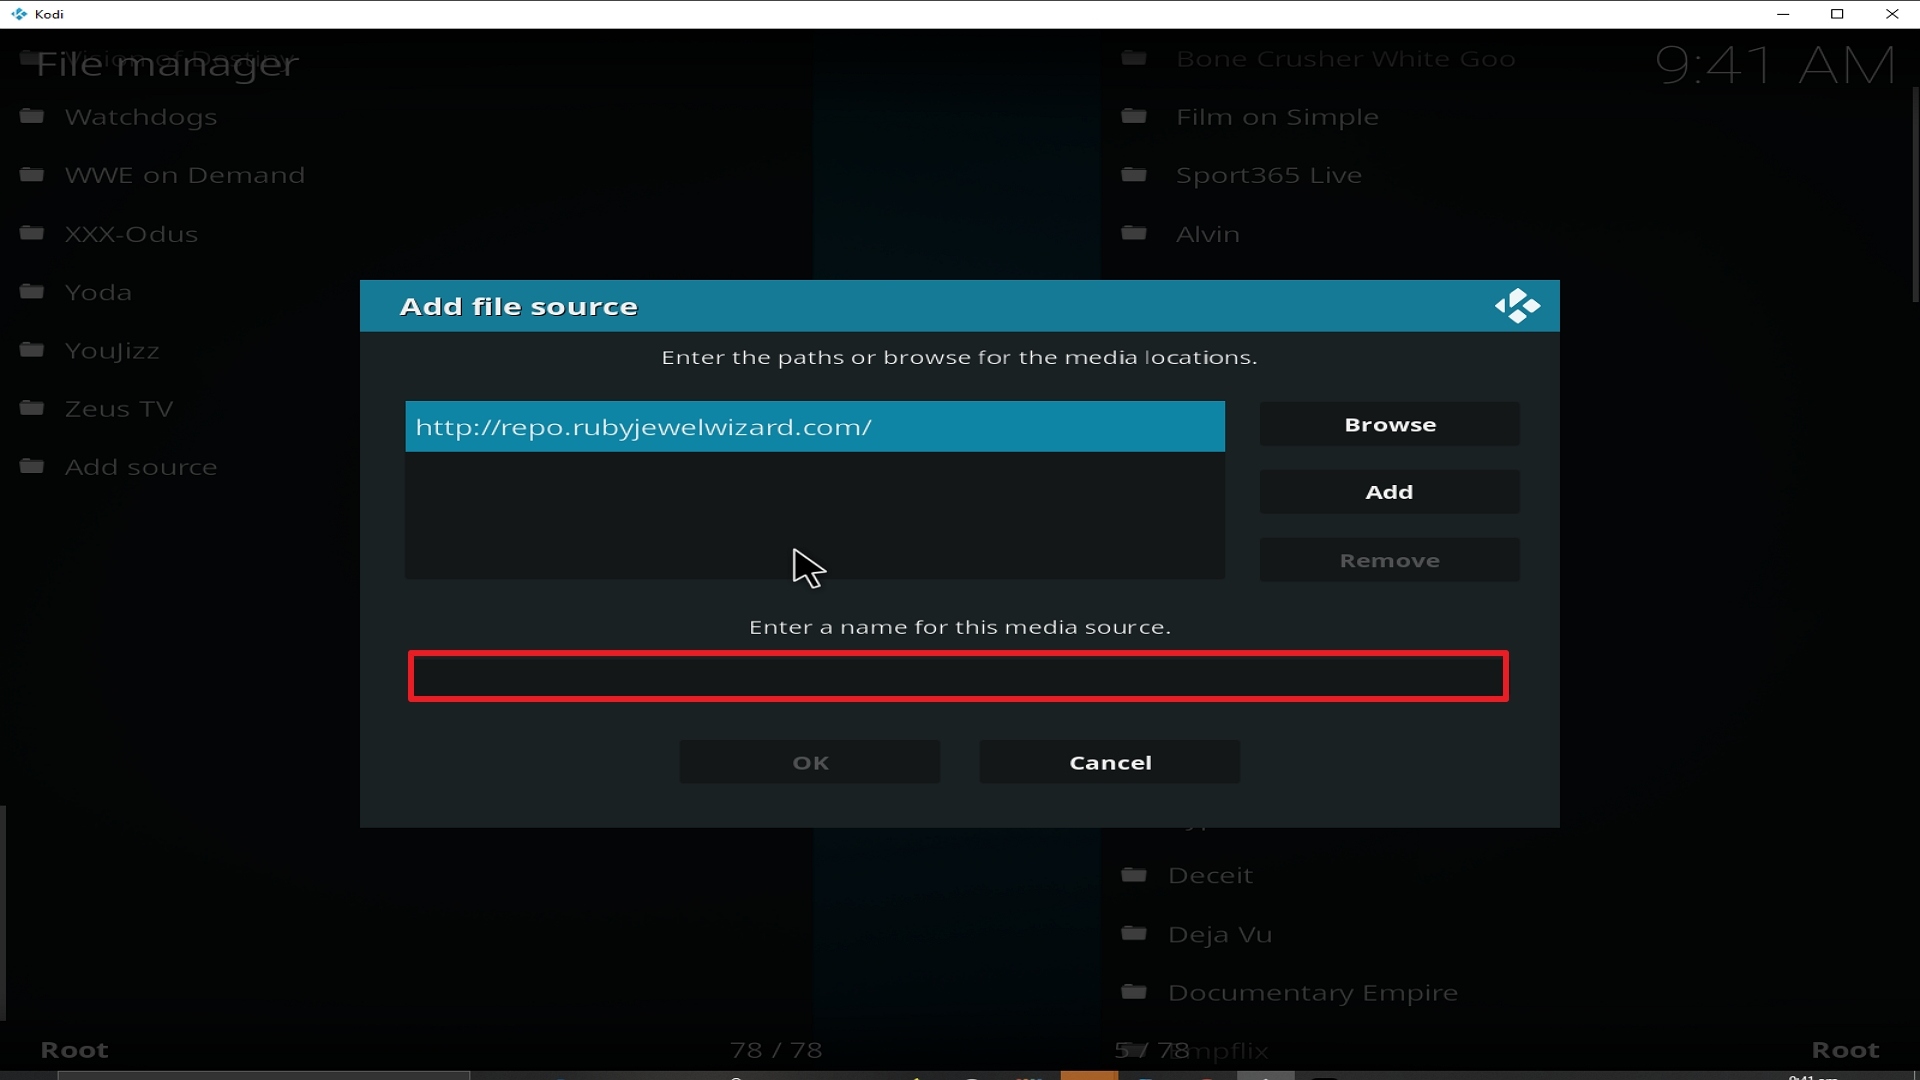
11. Select enter a name for this media source.

Step 11 Installing The Uss Defiant addon on Kodi


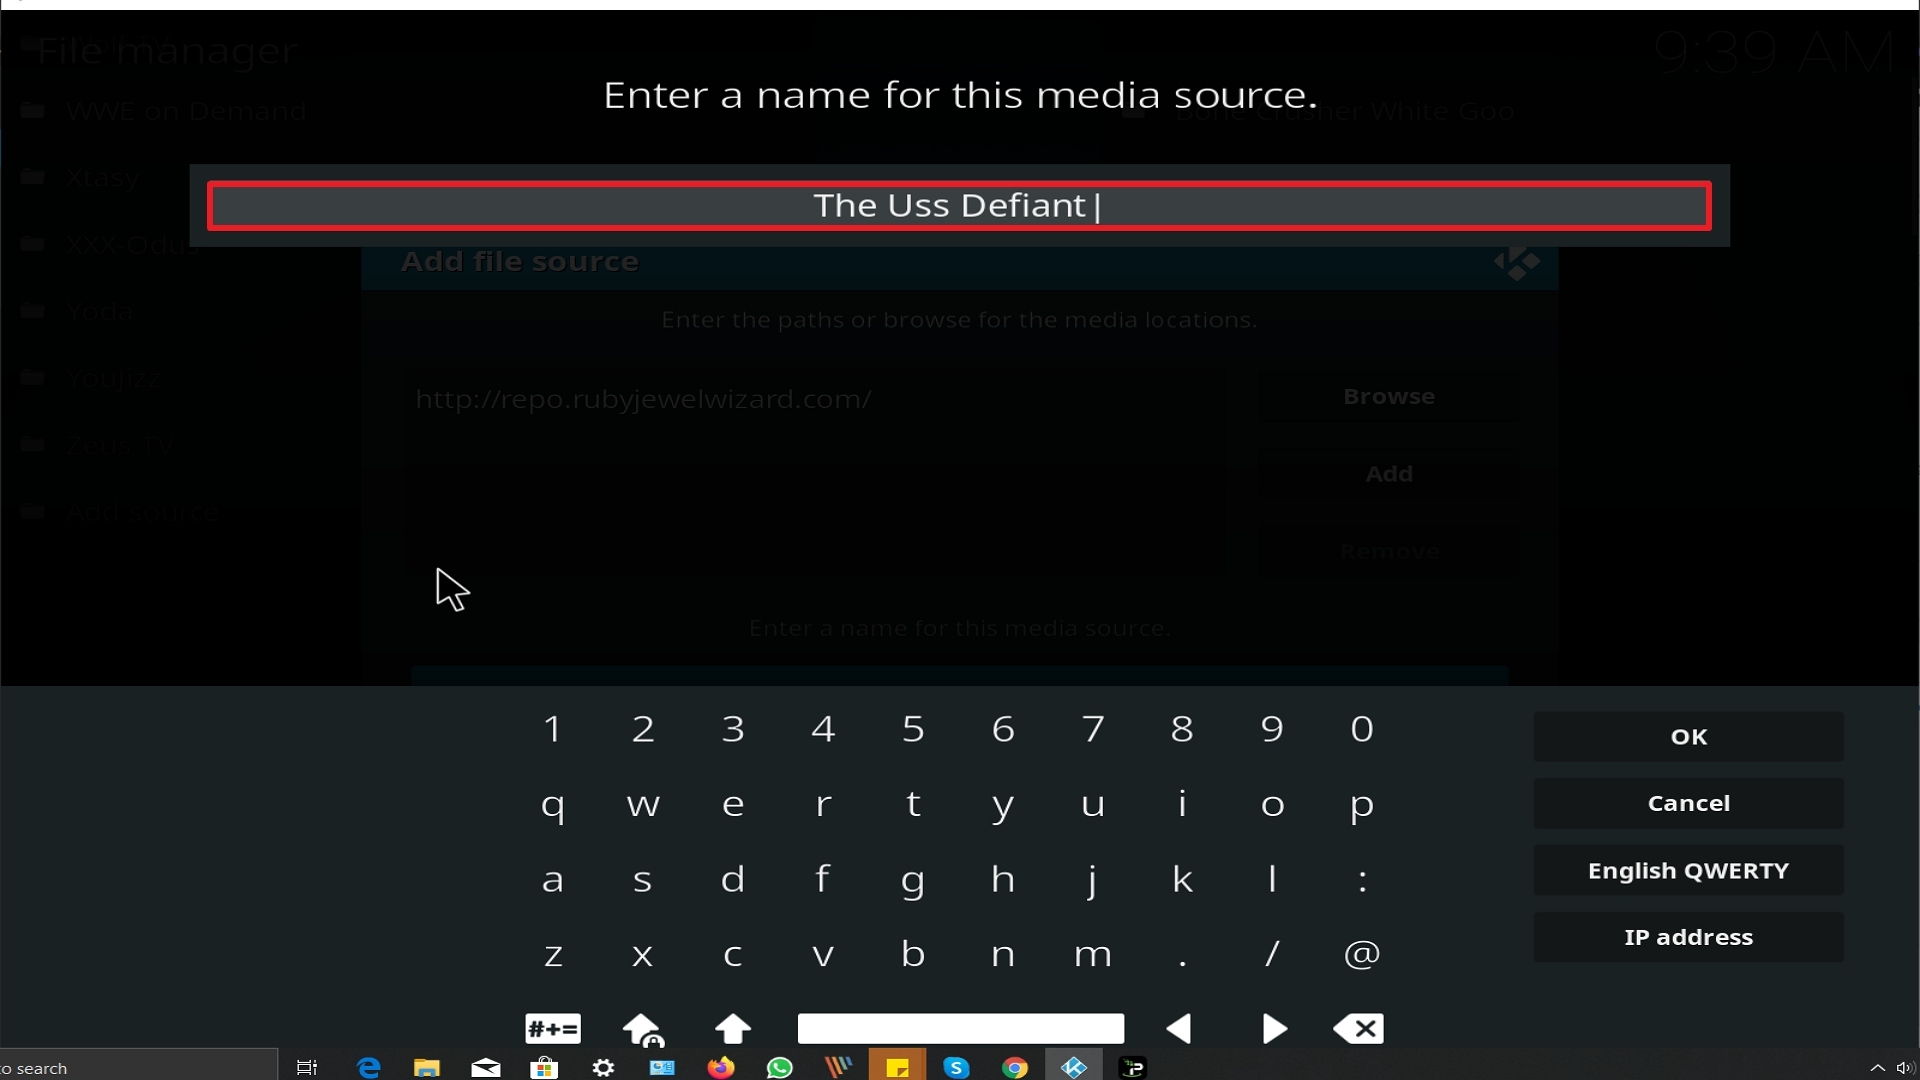
12. Name is The Uss Defiant (this part isn’t critical as long as you remember the name).

Step 12 Installing The Uss Defiant addon on Kodi


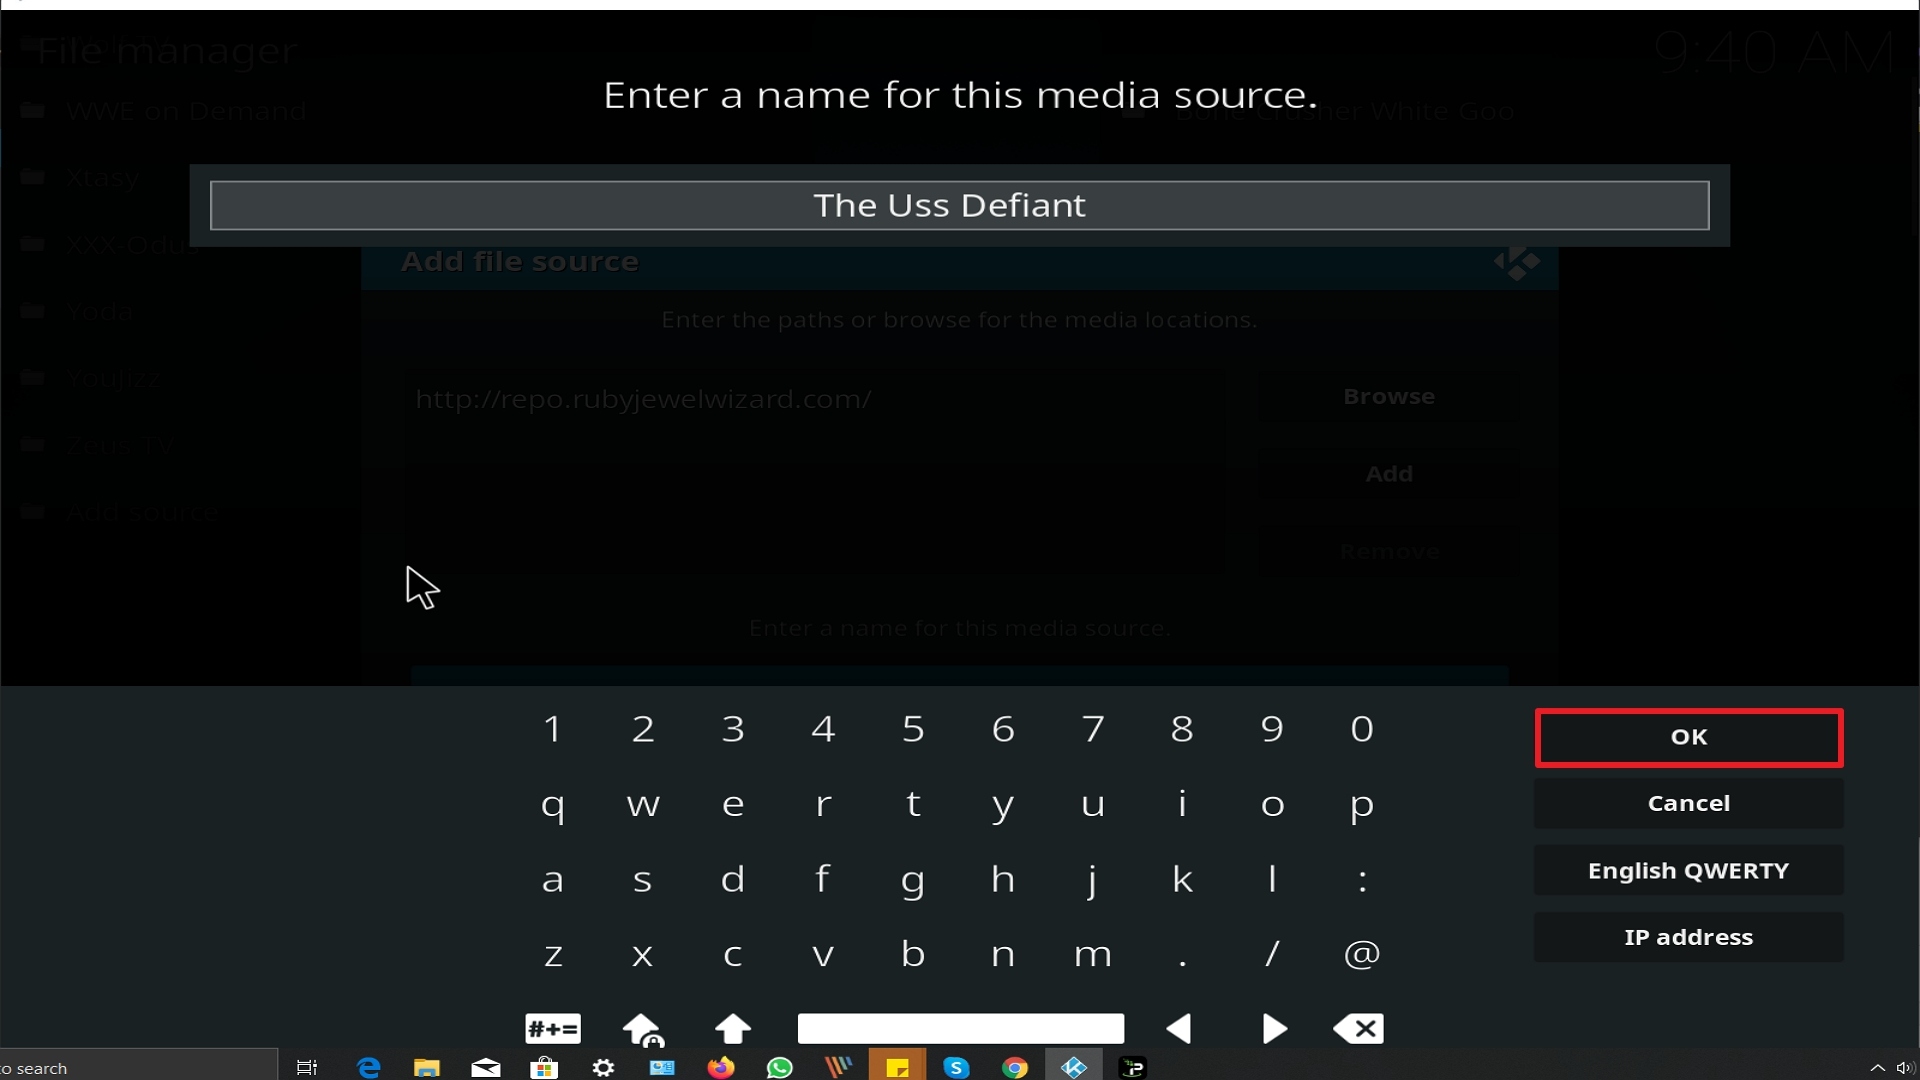
13. Click on OK.

Step 13 Installing The Uss Defiant addon on Kodi


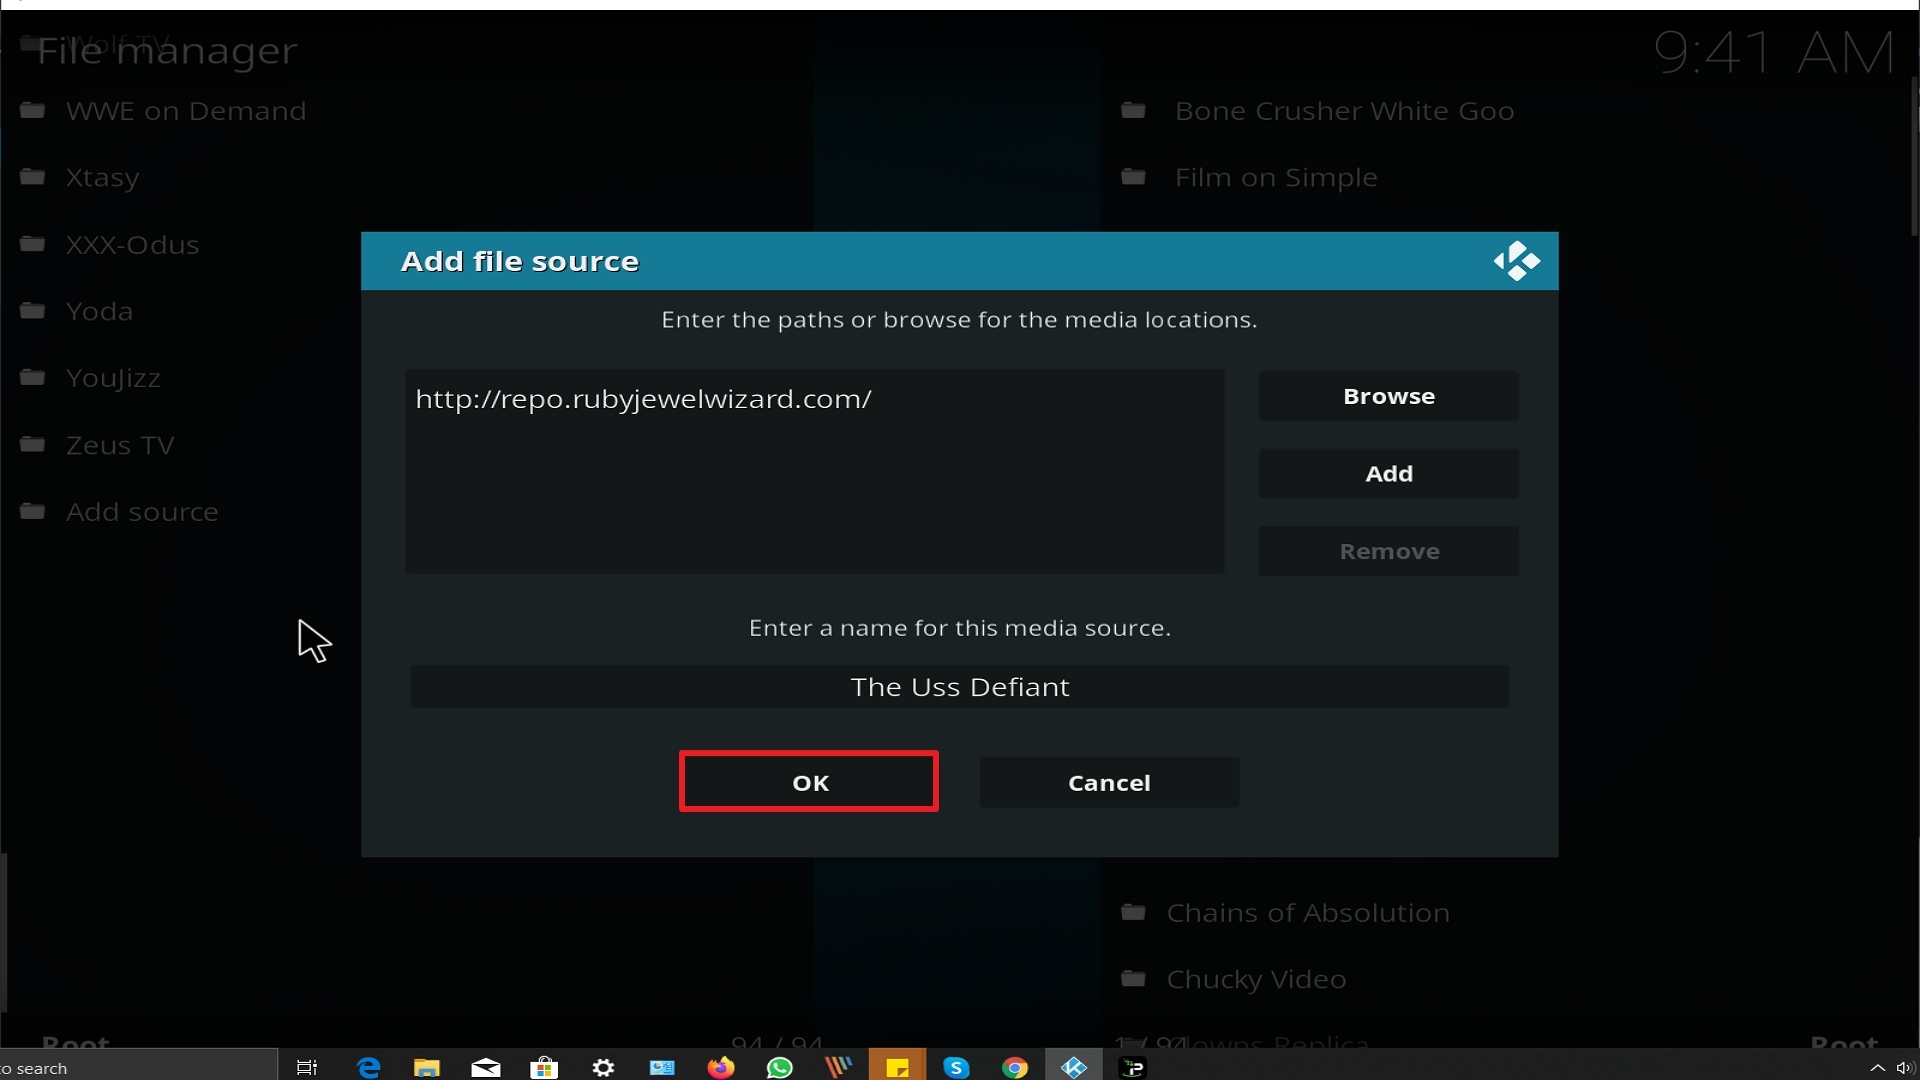
14. Click on OK.

Step 14 Installing The Uss Defiant addon on Kodi


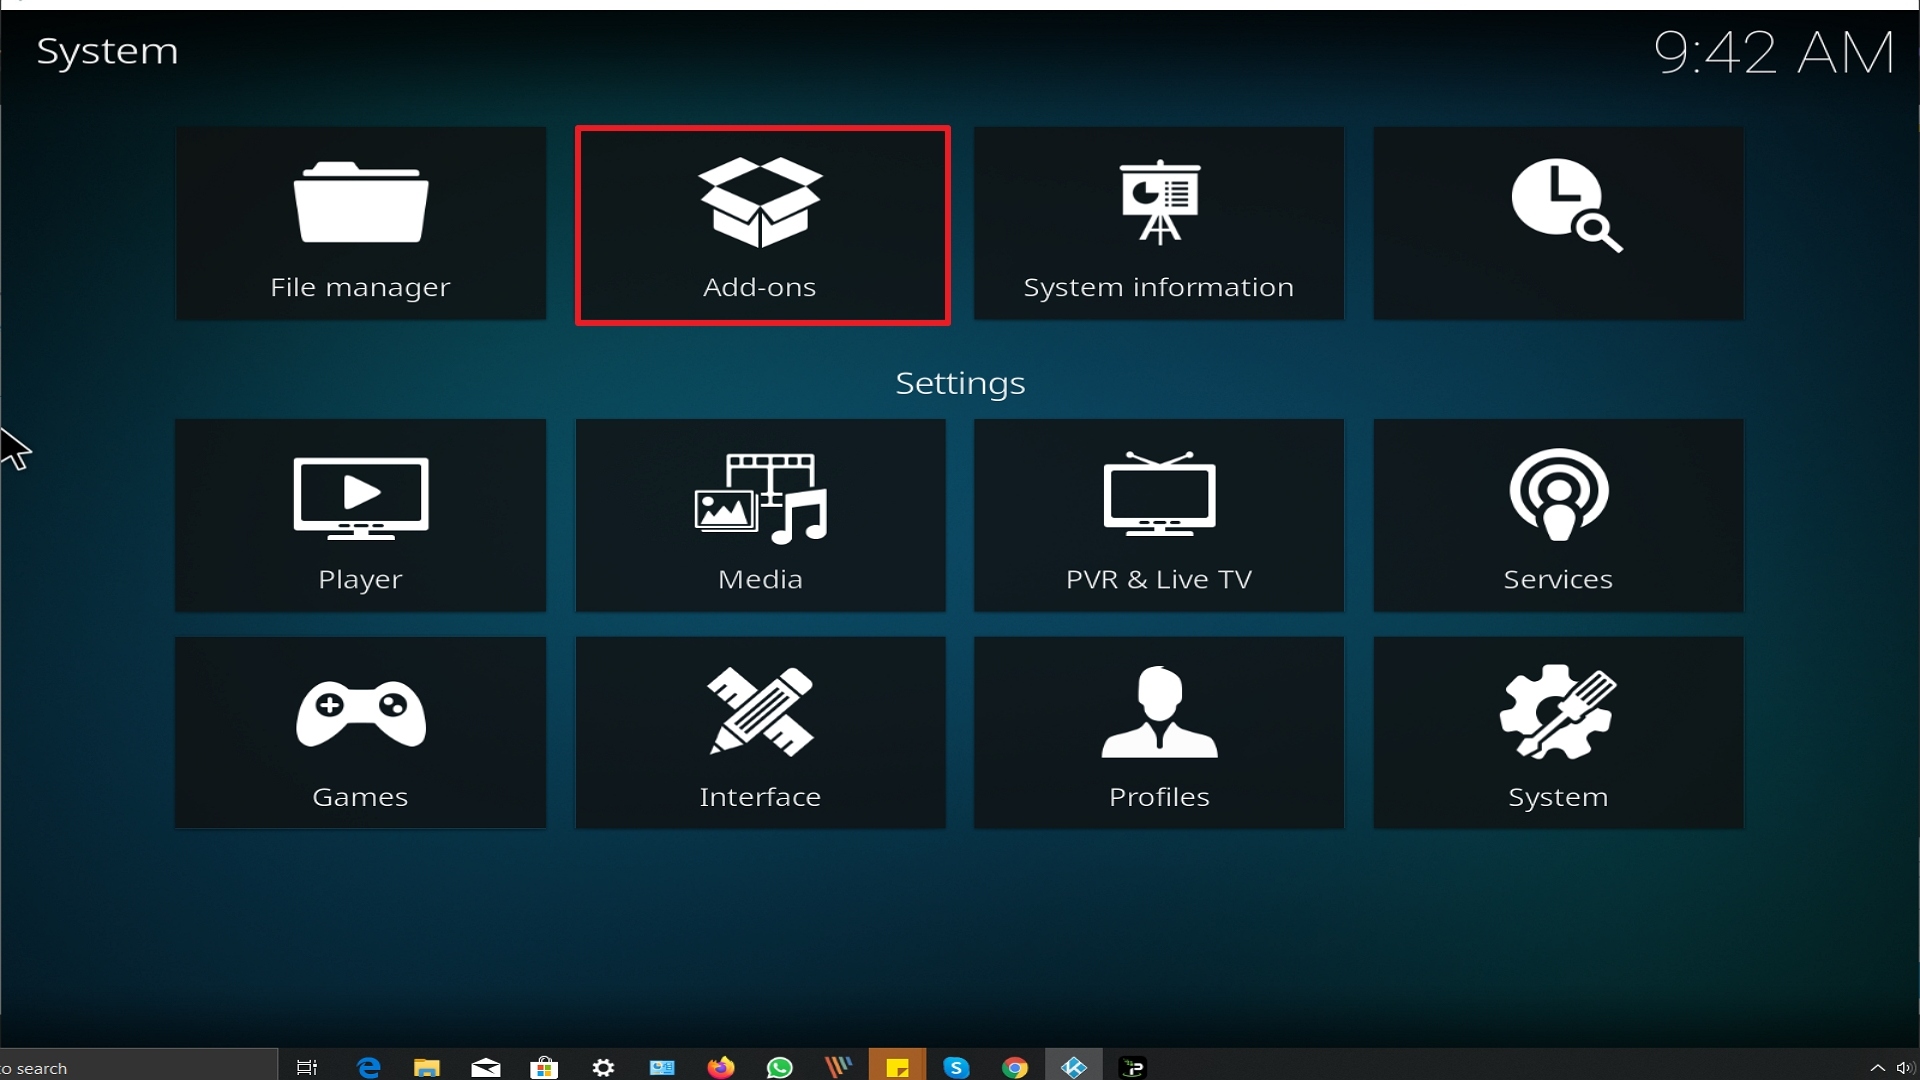
15. Take one step back and click on Add-ons.

Step 15 Installing The Uss Defiant addon on Kodi


16. Select install from zip file.

Step 16 Installing The Uss Defiant addon on Kodi


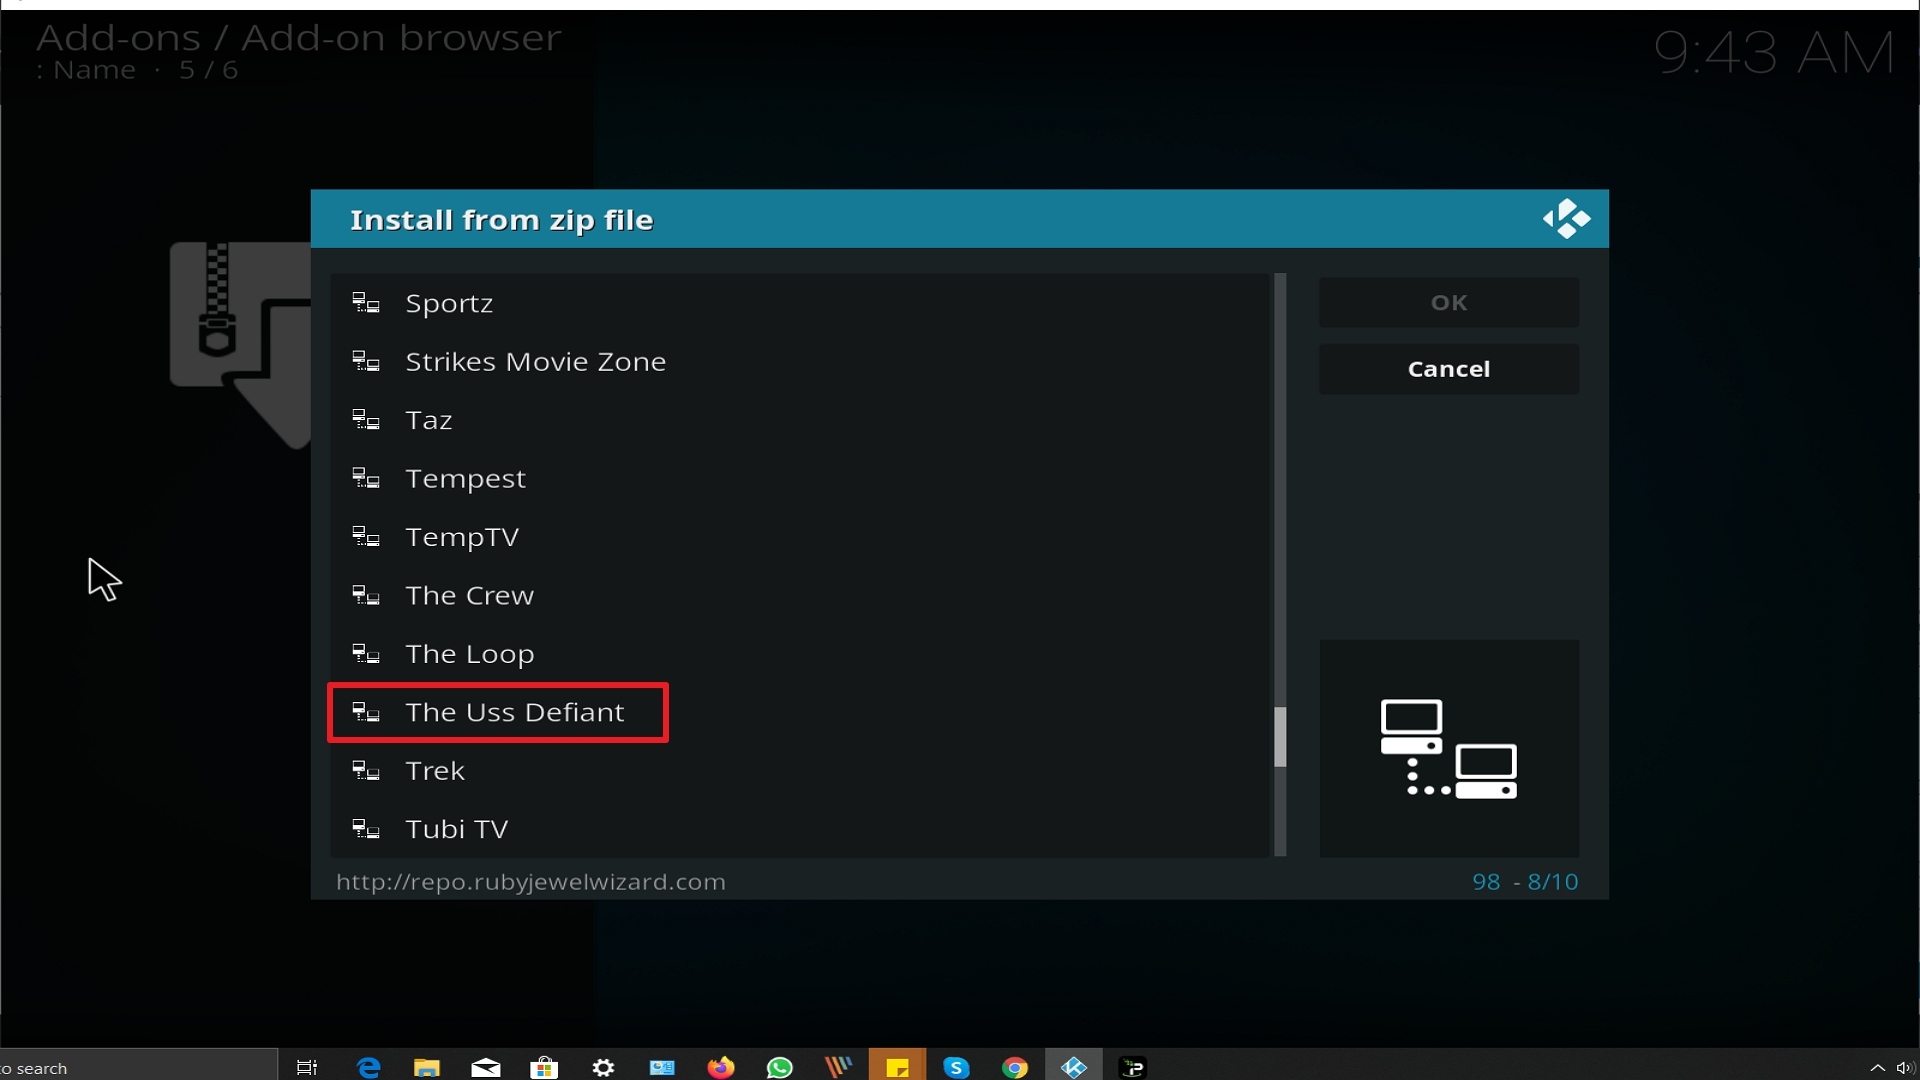
17. Click on The Uss Defiant (or whatever you named the source).

Step 17 Installing The Uss Defiant addon on Kodi


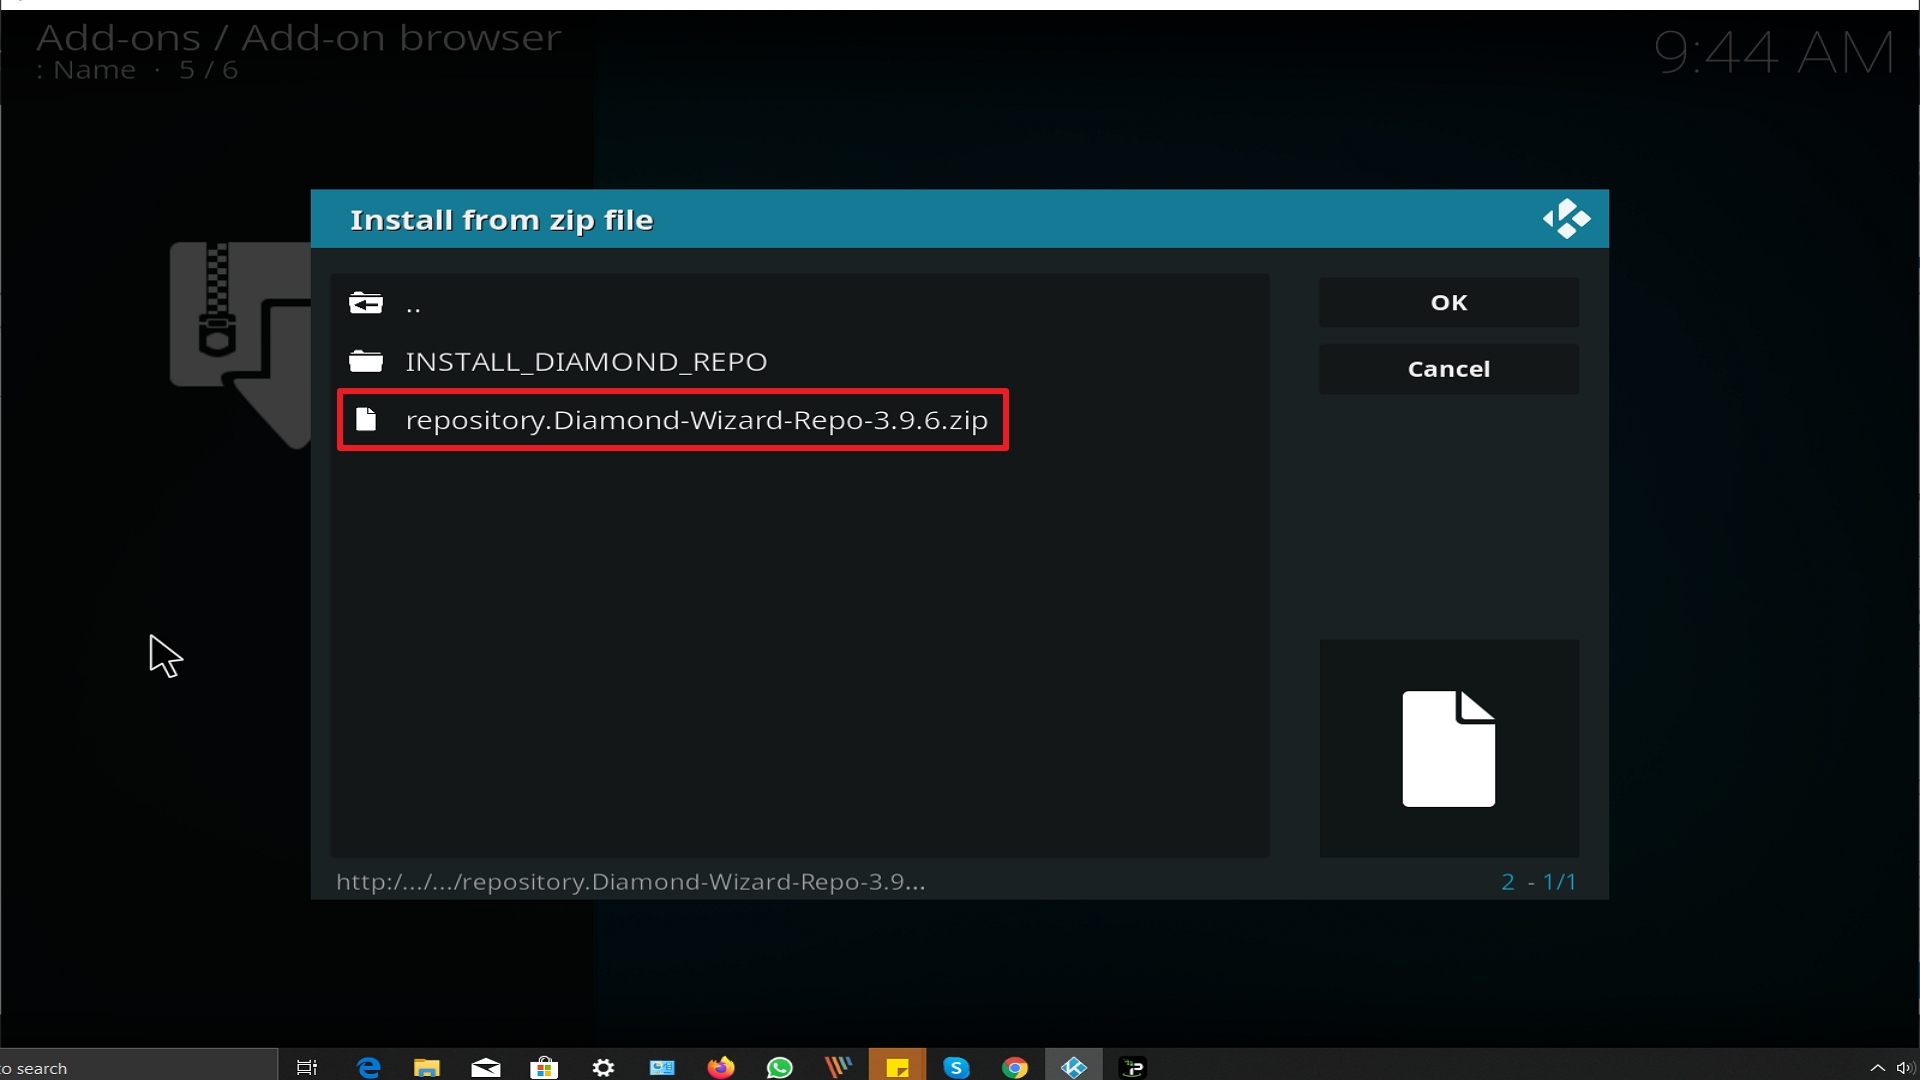
18. Click on repository.Diamond-Wizard-Repo-3.9.6.zip

Step 18 Installing The Uss Defiant addon on Kodi


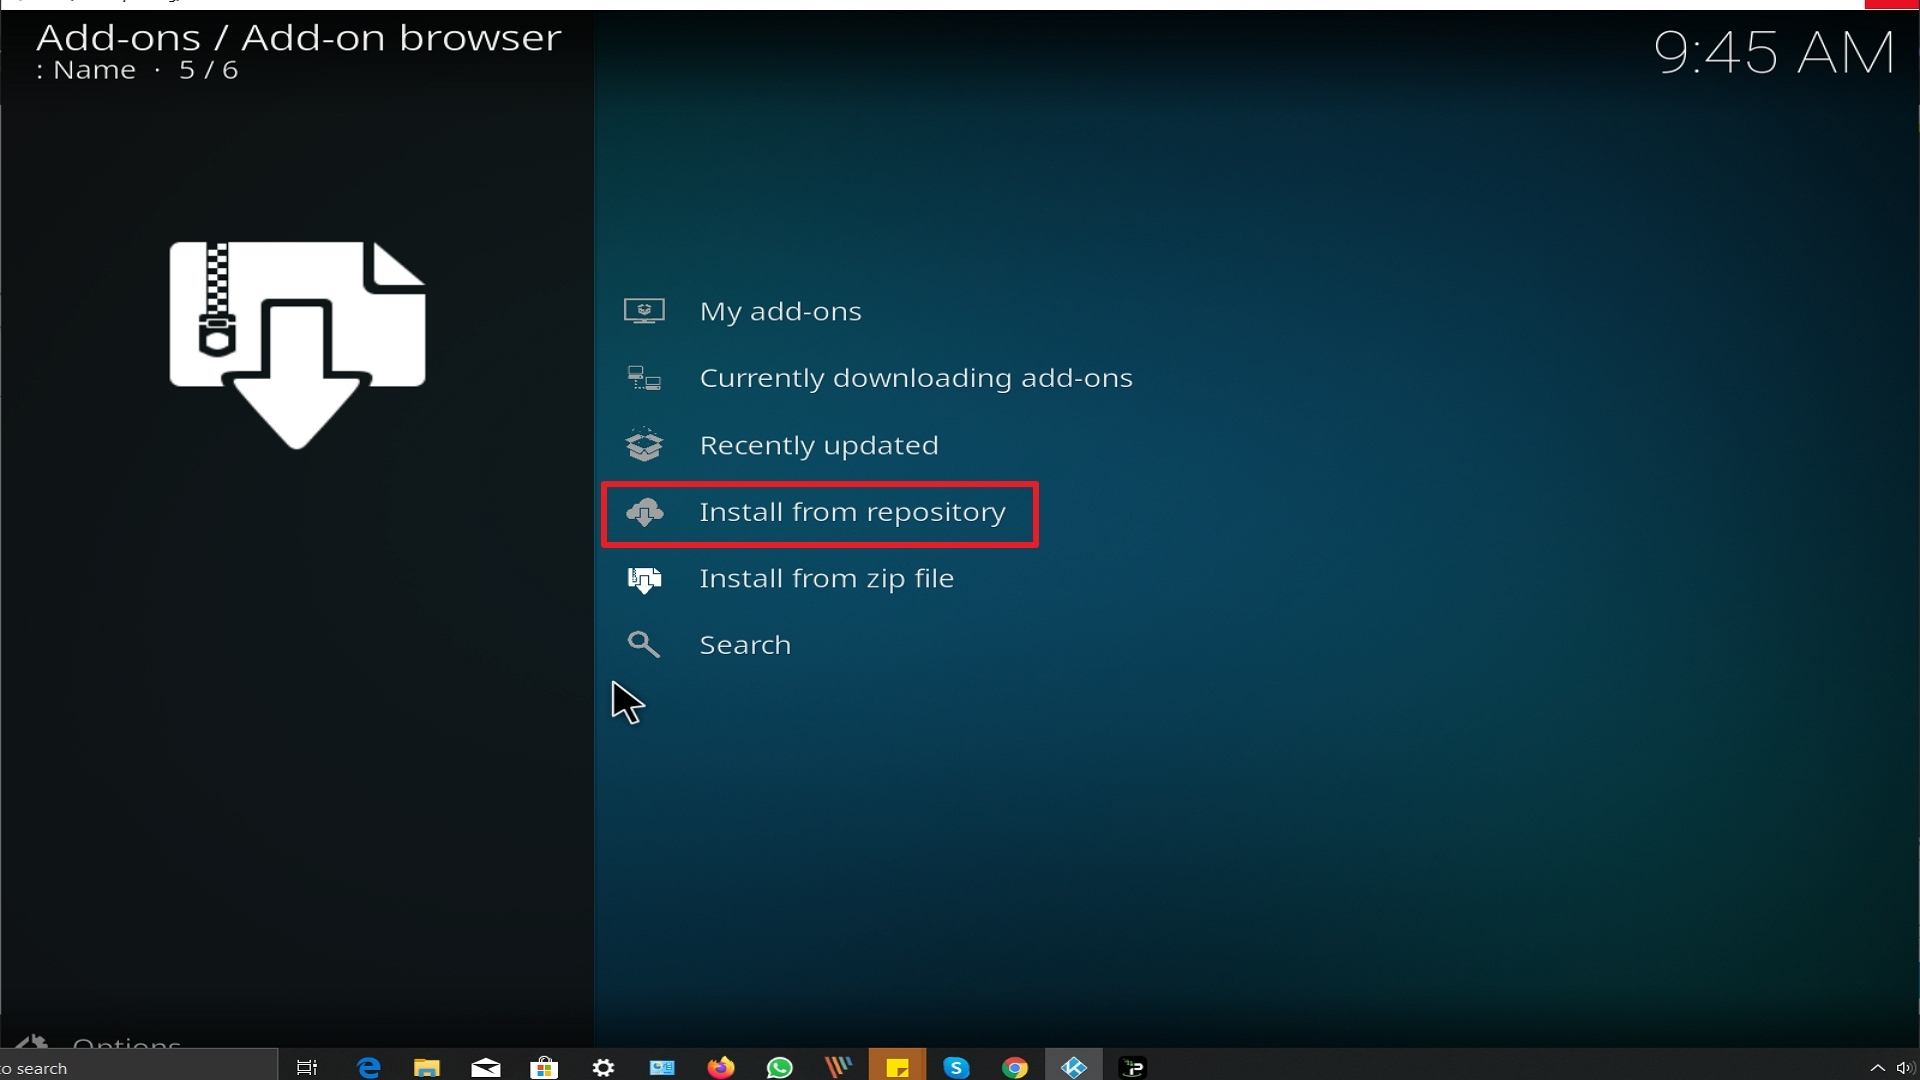
19. Select on Install from repository.

Step 19 Installing The Uss Defiant addon on Kodi


20. Click on Diamond Repo.

Step 20 Installing The Uss Defiant addon on Kodi


21. Pick Video add-ons.

Step 21 Installing The Uss Defiant addon on Kodi


22. Select The Uss Defiant again.

Step 22 Installing The Uss Defiant addon on Kodi


23. Click on Install.

Step 23 Installing The Uss Defiant addon on Kodi


24. Select OK after reviewing the add-ons that will be installed.

Step 24 Installing The Uss Defiant addon on Kodi


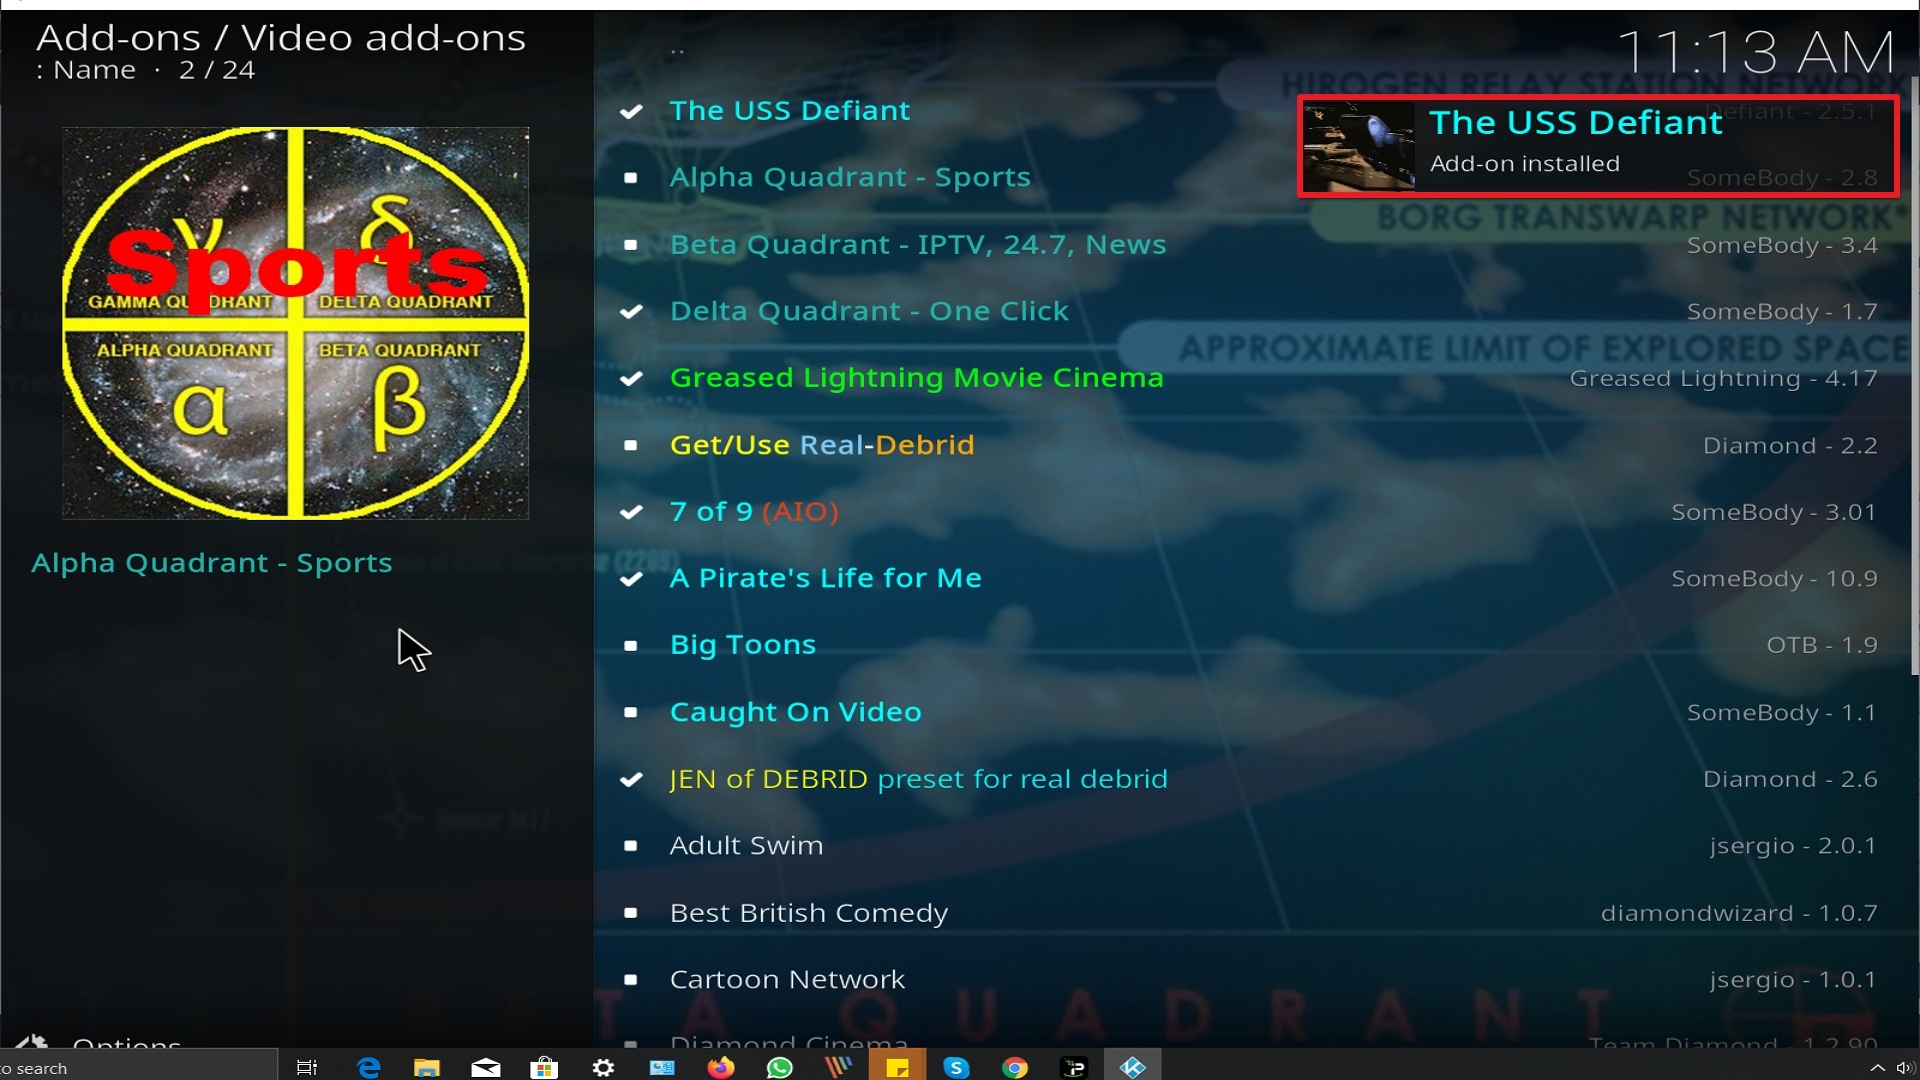
25. You should see a popup in the upper right corner saying The Uss Defiant has installed. There will actually be multiple popups for the various components.

Step 25 Installing The Uss Defiant addon on Kodi


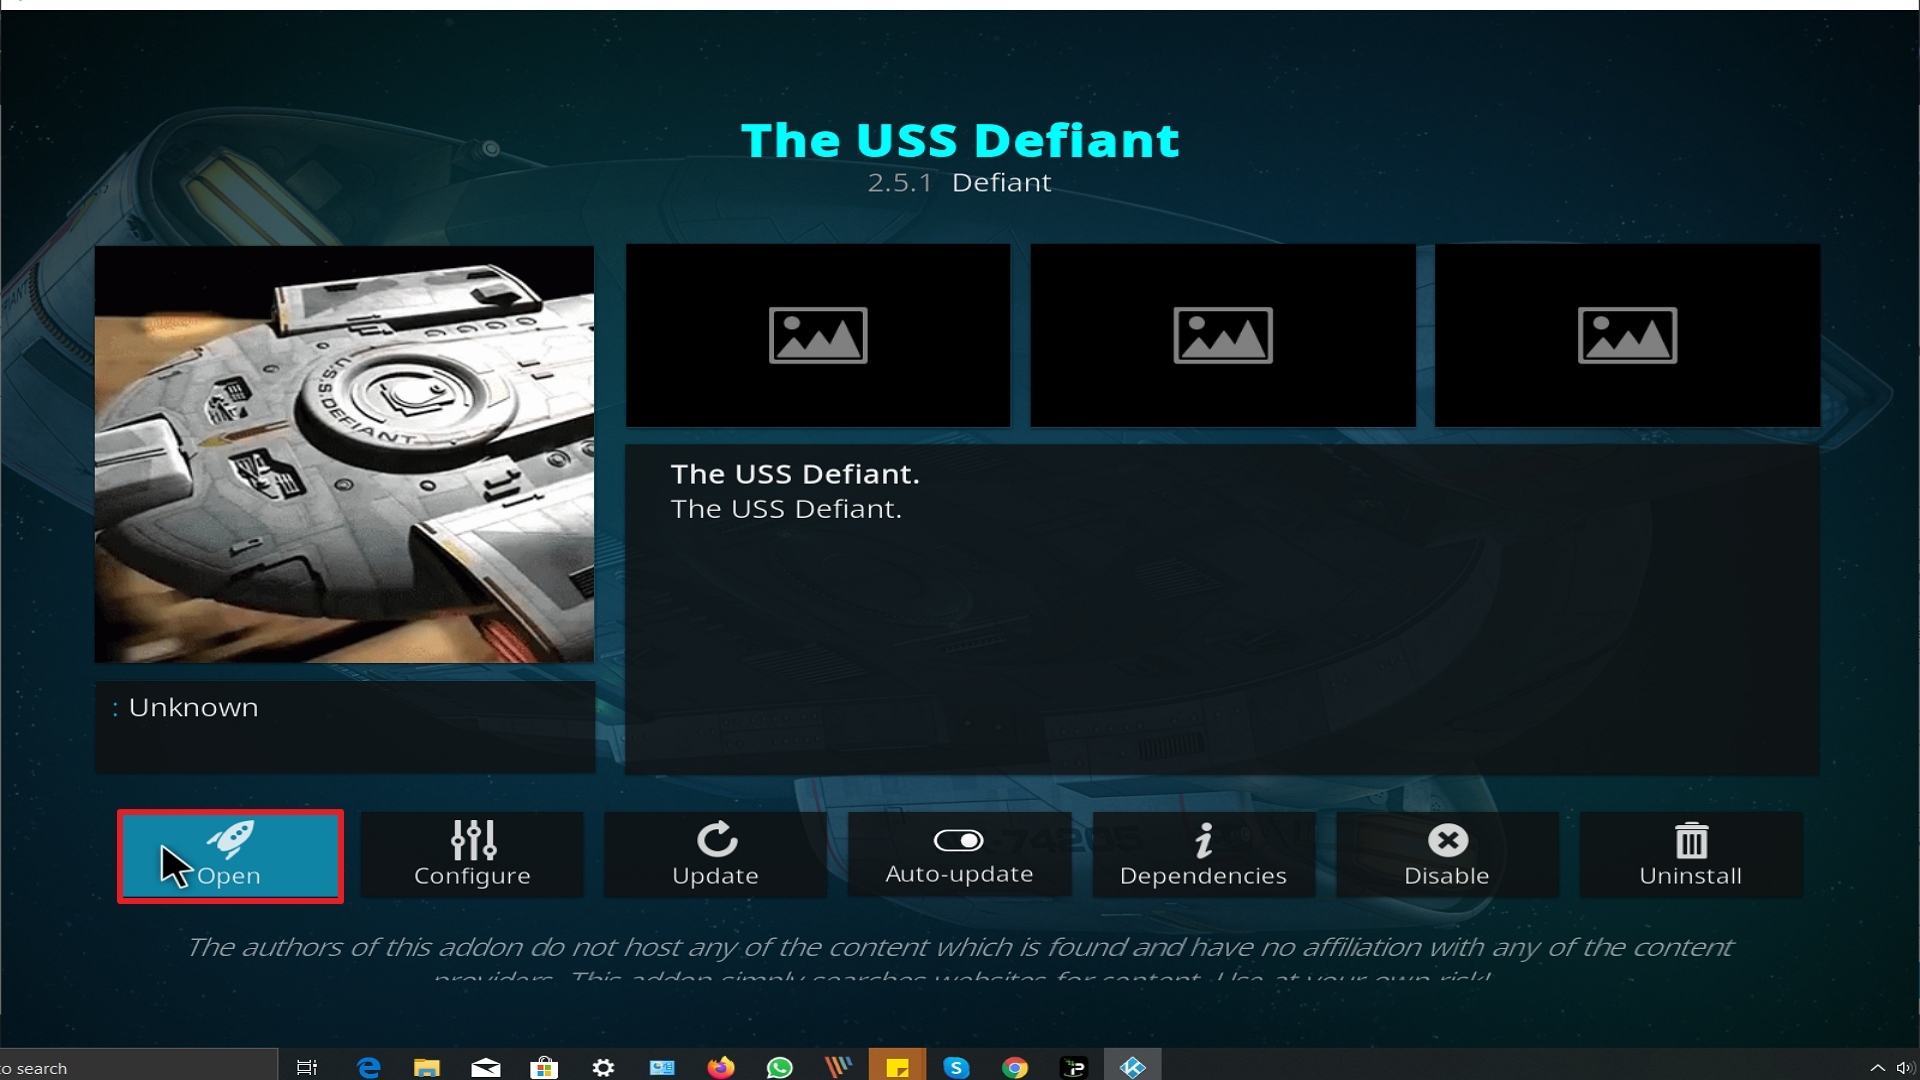
26. Click on Open to start The Uss Defiant add-on.

Step 26 Installing The Uss Defiant addon on Kodi


Alternatives

When The USS Defiant add-on encounters issues rendering it unable to function properly what do we do? We always suggest that our users create a back-up plan so as to have their entertainment experience uninterrupted. This back-up should be procured from a trusted source and here at ReviewVPN, we only suggest the best out of the best. The following add-ons can serve as a stand-in for The USS Defiant:

        Locutus Add-on

        Primal Add-on

        The Magic Dragon

These add-ons have similar capabilities like The USS Defiant due to the fact that they belong to one Repository and creator. So you are guaranteed to have the same viewing experience as compared to The USS Defiant.

Common Errors

These are some of the things that may cause an issue when installing The USS Defiant

  1.    Unable to connect to URL/Download

One of the main reasons why this happens is that you might have written the wrong URL. Please be careful when typing in the URL because the slightest mistake can totally ruin your download. Secondly, having a stable internet connection is always desired as it does not impend the speed of your download. Lastly, to protect your identity and internet trail, you must have a reliable VPN to mask your online activities and will help you remain anonymous. Check here for the best VPN deal.


  1.     Script Error

This issue usually arises when Kodi is not properly installed or has lacking features for it to work properly. If that is the case, you can redownload Kodi and install it properly. An in-depth guide on how to install the Kodi app is provided on our website. Lastly, if the issue is with the add-on itself, you can reinstall it by following the procedure given above.


  1.     Kodi Check Log Error

A check log error only happens when your media cache is full. You can remedy this situation by emptying your cache. 


  1.     Source not working/slow/frozen

The USS Defiant does not keep any of the content on its servers. It is distributed by 3rd party apps. Patience is key here, just wait for a couple of seconds for the other suggestions and click on them. For other solutions please take time to read our in-depth guide linked above. 


Should I Use This App With a VPN?

surfshark logo

We recommend you use a VPN for the following reasons:

  • Many of the addons you will access in Streamline will direct you to links for illegally distributed content. Without a VPN you may find many of these links do not work because your ISP is blocking your access
  • If you try to access Live TV Channels in other countries through Streamline your access may also be blocked. This is because these channels can detect your IP is not in that country and will block you from accessing their channels.
  • Using a VPN, you can encrypt your requests, change your IP, and also the location where your IP originates from. Thus, allowing you to circumvent any blocks or firewalls in place to do your accessing most restricted content
  • A VPN also helps you maintain anonymity, safety, and privacy online from unwanted third parties.

Note: For more information about Surfshark, please read our Surfshark Review.


Grab your subscription now!


How to Install Surfshark VPN on Firestick

If your Firestick still has the older interface, read this article to learn how to update it: Update Firestick Interface.

Follow our screenshots below to install the SurfShark VPN app on your Fire TV stick.

1. Go to the Home screen of your Firestick.

step 1 Install Surfshark VPN on Firestick


2. Navigate towards the Find tab. Press the Search button from the resulting dropdown.

step 2 Install Surfshark VPN on Firestick


3. Type in the keyword of SurfShark and select from the suggestions that will appear.

step 3 Install Surfshark VPN on Firestick


4. Click the official SurfShark icon from your search results.

step 4 Install Surfshark VPN on Firestick


5. Press the Download (You own it) button.

step 5 Install Surfshark VPN on Firestick


6. The SurfShark VPN installer will download on your device.

step 6 Install Surfshark VPN on Firestick


7. SurfShark VPN’s app will automatically install itself on your Fire TV stick.

step 7 Install Surfshark VPN on Firestick


8. Press the Open button after completing SurfShark VPN’s installation process.

step 8 Install Surfshark VPN on Firestick


9. Please wait for the SurfShark VPN to load its user interface.

step 9 Install Surfshark VPN on Firestick


10. You can now log in with your SurfShark VPN account credentials.

step 10 Install Surfshark VPN on Firestick

Learn more about Surfshark and Grab the Best Surfshark Deal Now!


Install Surfshark on Firestick

Best Surfshark Deal


Other VPNs to Consider

NordVPN (Best for Streaming)

Best Features

  • 5000+ Server in 50+ Countries 
  • Military-Grade Encryption
  • Fast Connection Speed
  • Suitable to a lot of devices
  • No-Log Policy

Prices
  • Complete $5.89 per month (64% Discount)
  • Plus $4.59 per month (56% Discount)
  • Standard $3.69 per month (55% Discount)

Best Features

  • 750+ High-speed VPN Servers in 43 Locations
  • Military-Grade Encryption
  • Fastest HD Streaming and Gaming
  • 30-Day Money-Back Guarantee
  • Unlimited Data & Devices
  • No-Log Policy

Prices
  • 3 Years $1.99 per month (82% Discount)
  • 1 Years $3.29 per month (70% Discount)
  • 1 Month $10.99 per month

IPVanish VPN (Most Secure)

Best Features

  • 1200+ Servers in 60+ Countries around the world
  • Unlimited Connections
  • No-Log Policy
  • Top Notch Military-Grade VPN Protocols and Encryptions
  • 100% Safe and Secured
  • Most Trusted VPN
  • Best VPN for Firestick
  • 30-Day Money-Back Guarantee

Prices
  • Yearly $3.99 per month (63% Discount) – 30 days risk free + Ransomware & Malware Protection
  • Quarterly $5.32 per month (51% Discount)
  • Monthly $10.99 per month


For more VPN discounts, go to ReviewVPN Deals and purchase the best VPN for you.

Click here to get the lowest price on Surfshark through our exclusive limited-time offer.


Conclusion

Being under the Diamond Wizard Repository, there is no wonder why The USS Defiant is capable of such performance. Add-ons under this repository are one of the best out there and it is very dynamic that a lot of users are actually enjoying using them. Its extensive library and customized search set it apart from other add-ons that have similar capabilities. We are giving it a two thumbs up because of this. Should there be comments, questions, or suggestions, please feel free to do so by dropping them here on our website or any of our other social media platforms. Thank you for your time in reading this guide! God Speed!

Install Team Milhanos Kodi Addon

Team Milhanos Kodi Addon

Source: http://vkodi.net/repo/


Team Milhano is a Kodi video add-on that can be found under the Vikings repository. It provides a sufficient amount of Portuguese channels that may include tv shows, sports tv, and documentaries. If you are of Portuguese or Brazilian descent and you miss home, Team Milhanos Kodi Addon is perfect for you. It also features channels from the US, UK, France, and etc.


Features

  • IPTV feature
  • Kuala tv, Zeus Tv, Alado Tv, Martunis, M.Team TV, Divino Tv, Odin, Wolf, Alado Kids
  • Portuguese tv-shows
  • Sports channel
  • Best used in conjunction with F4m Tester


ANONYMOUSLY

Notable Categories

  • Portugal Tv
  • Portugal TV2
  • TV Cine
  • Desporto Pt
  • ElevenS PT

Under each category holds multiple channels that range from Portugal TV up to English TV channels. So you will have many options on the content you want to watch.


Installation Procedure of Milhano Kodi Video Add-on

  1. Choose the “settings” icon on the left-hand side of the home screen.
  2. Click on “File manager”.
  3. Choose the “Add source file” on the left side.
  4. After the “Add source file” tab will appear, then choose “none”.
  5. Type in the URL http://vkodi.net/repo/ and press “ok”.
  6. Type in “Team Milhanos” as the name of the source file.
  7. Double-check the URL and source file name and choose “ok”
  8. Head back to the homepage and choose  “Add-ons”.
  9. At the top left side, choose the “Package installer” icon.
  10. Choose “Install from zip file”.
  11. Select “Team Milhanos”
  12. Choose plugin.video.tvtuga.milhano-0.1.zip
  13. In a matter of seconds, the add-on will be installed and then after that, a notification will appear confirming that the installation is a success.

So there, we are now all set to use the Milhano Add-on.

How to Install Team Milhanos on Kodi with Screenshots

1. From the home screen, select the cogwheel at the upper left.

Step 1 Installing Team Milhanos addon on Kodi


2. Select System in the bottom right corner.

Step 2 Installing Team Milhanos addon on Kodi

3. Select Add-ons on the left side of the screen.

Step 3 Installing Team Milhanos addon on Kodi

4. Select Unknown sources.

Step 4 Installing Team Milhanos addon on Kodi

5. Click Yes to allow unknown sources.

Step 5 Installing Team Milhanos addon on Kodi

6. Select File manager.

Step 6 Installing Team Milhanos on Kodi

7. Click Add source.

Step 7 Installing Team Milhanos addon on Kodi

8. Click on <None>.

Step 8 Installing Team Milhanos addon on Kodi

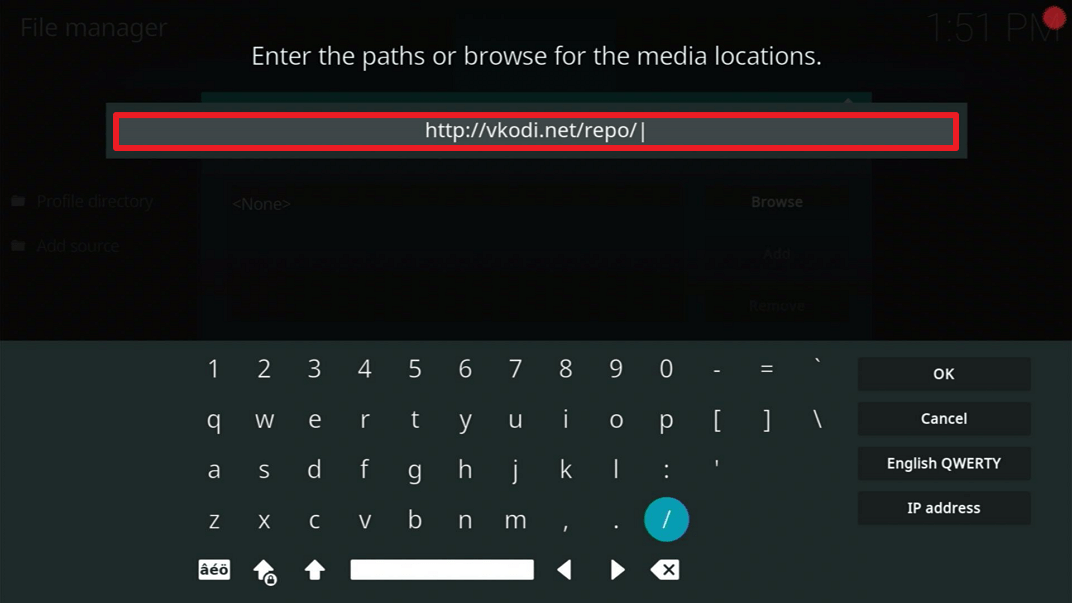
9. Type exactly: http://vkodi.net/repo/

Team Milhanos

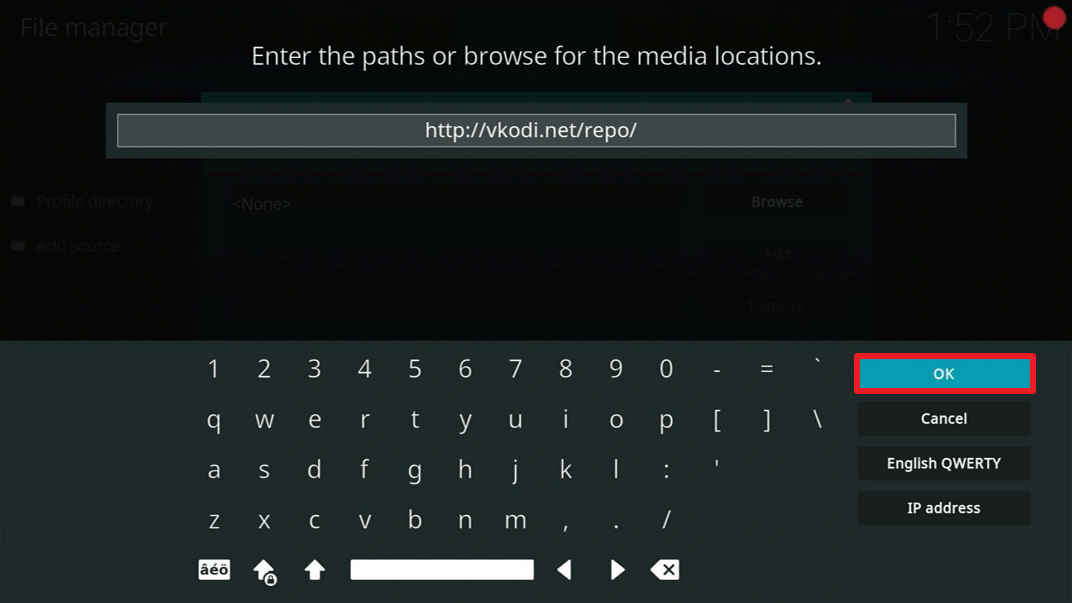
10. Click on OK.

Team Milhanos 1

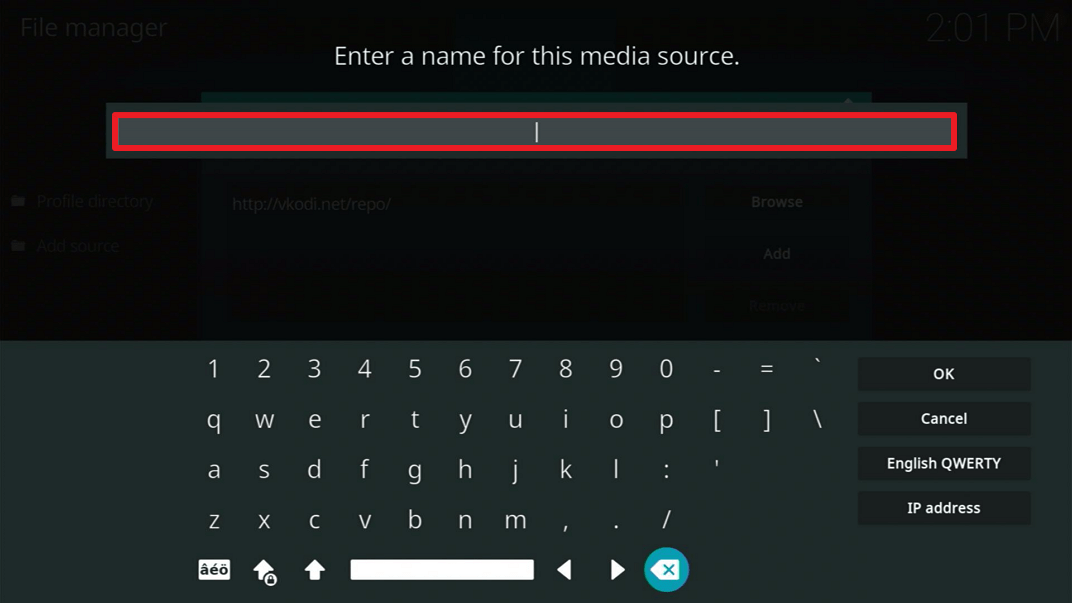
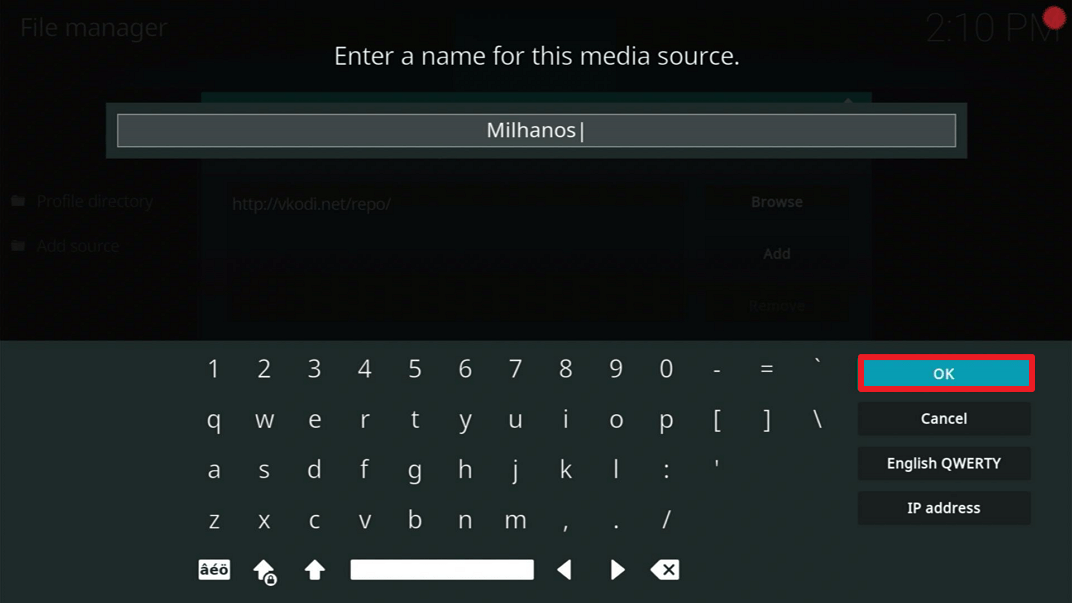
11. Select enter a name for this media source.

Team Milhanos 2

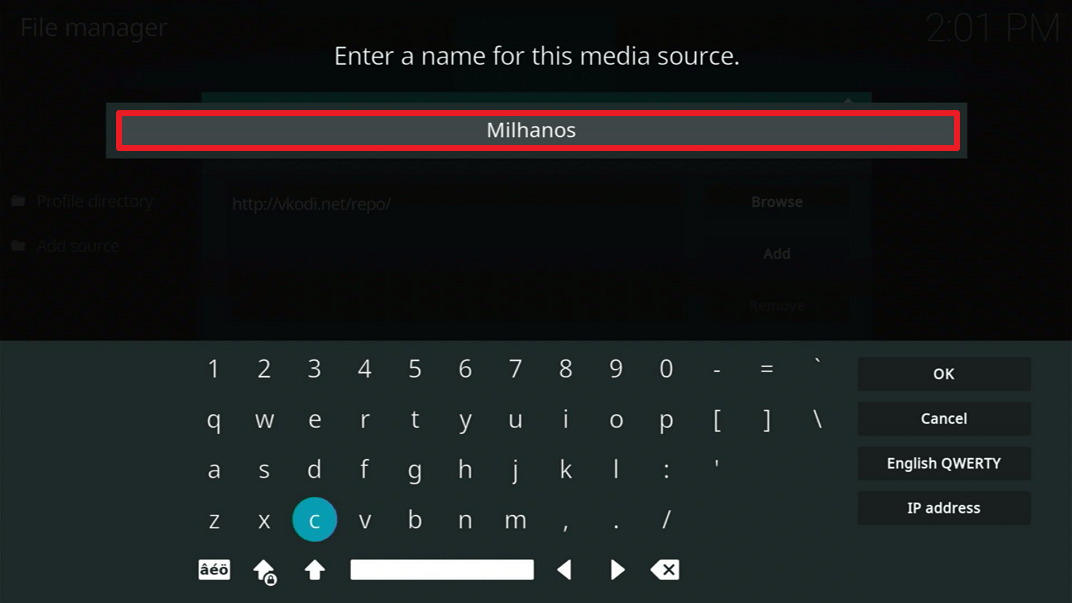
12. Name is Milhanos (this part isn’t critical as long as you remember the name).

Team Milhanos 3

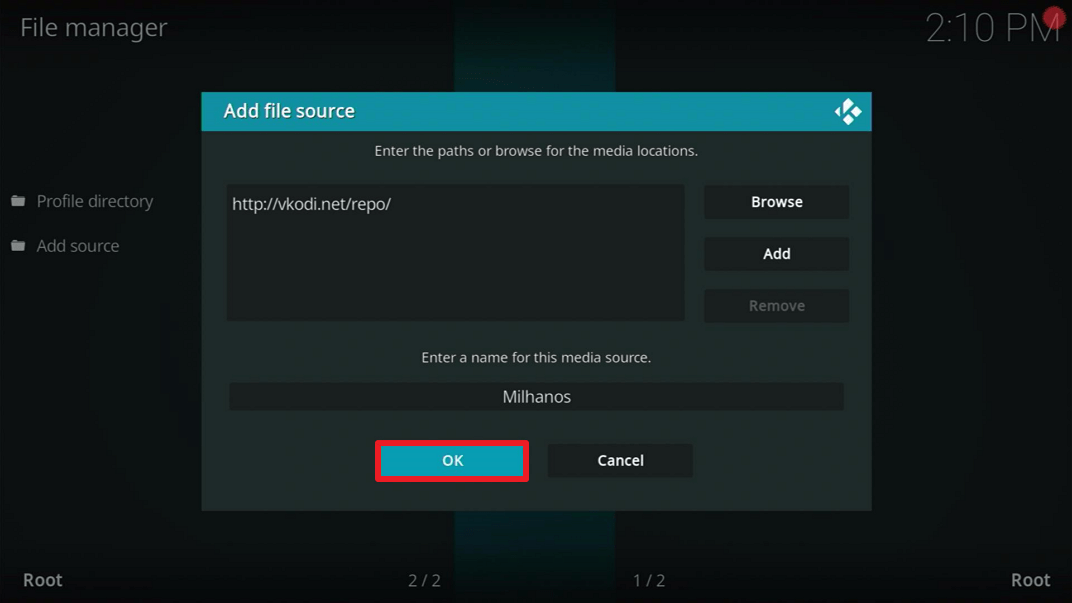
13. Click on OK.

Team Milhanos 4

14. Click on OK.

Team Milhanos 5

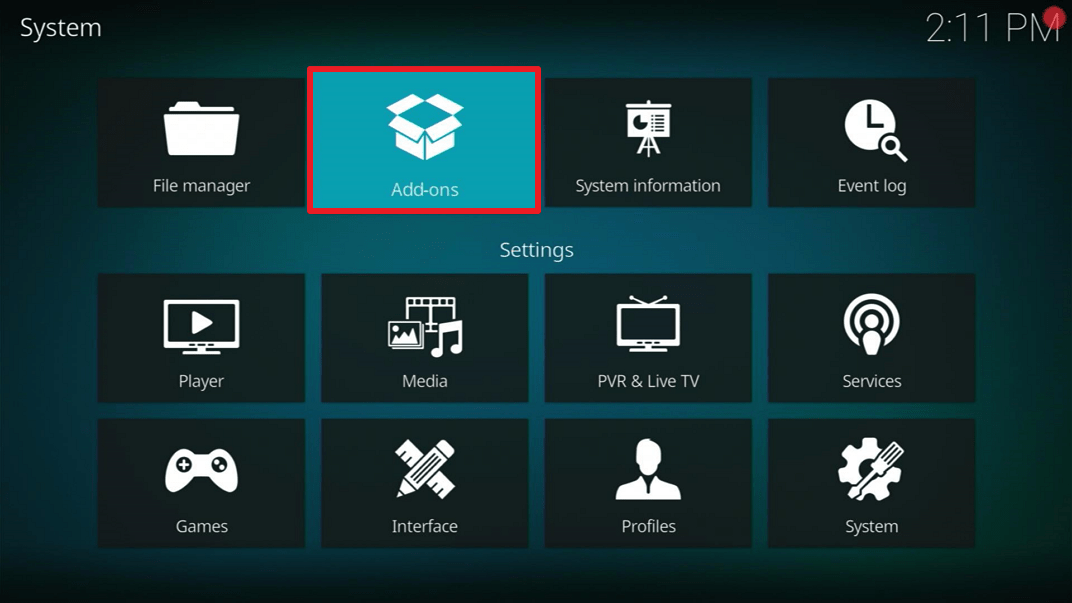
15. Take one step back and click on Add-ons.

Team Milhanos 6

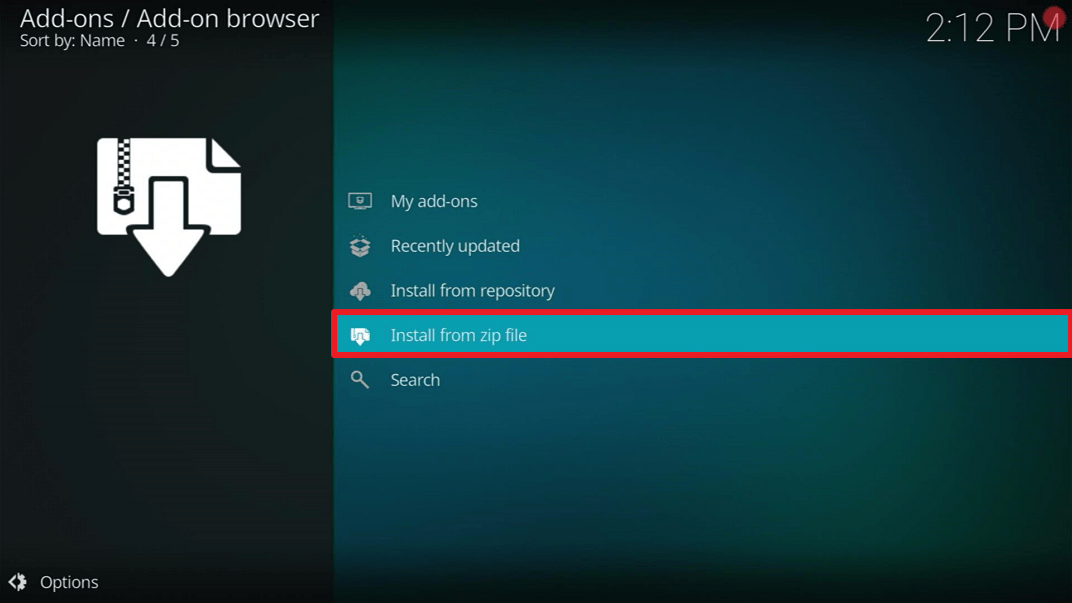
16. Select install from zip file.

Team Milhanos 7

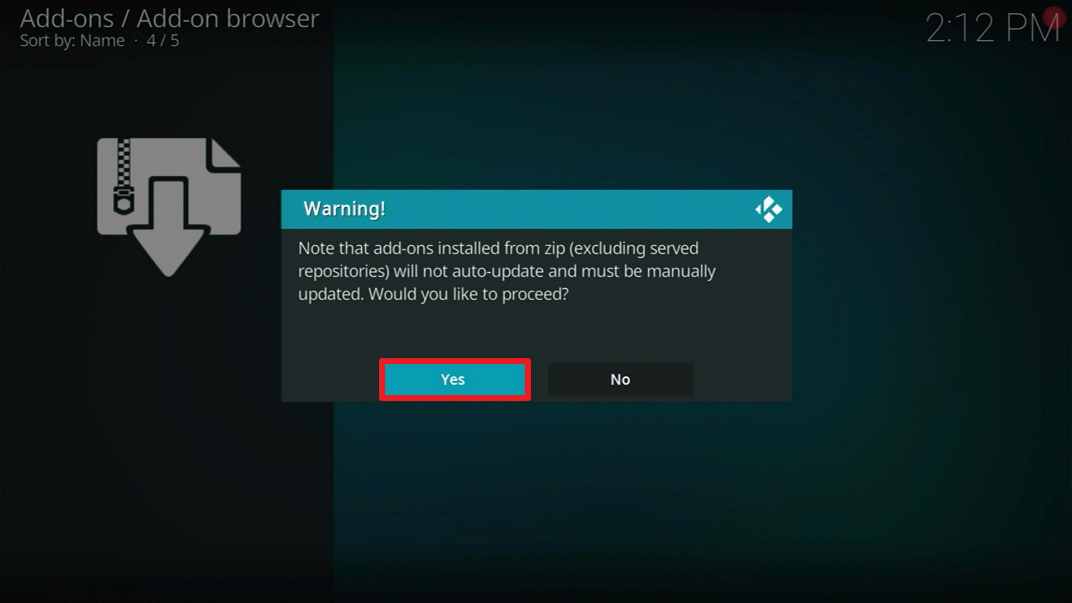
17. Click Yes.

Team Milhanos 7

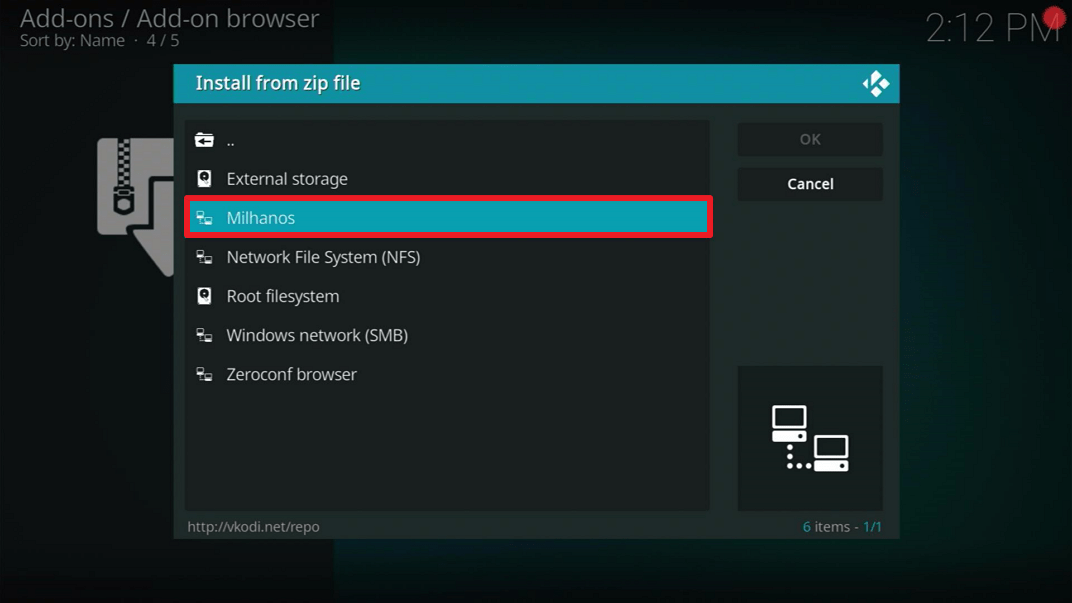
18. Click on Team Milhanos  (or whatever you named the source).

Team Milhanos 8

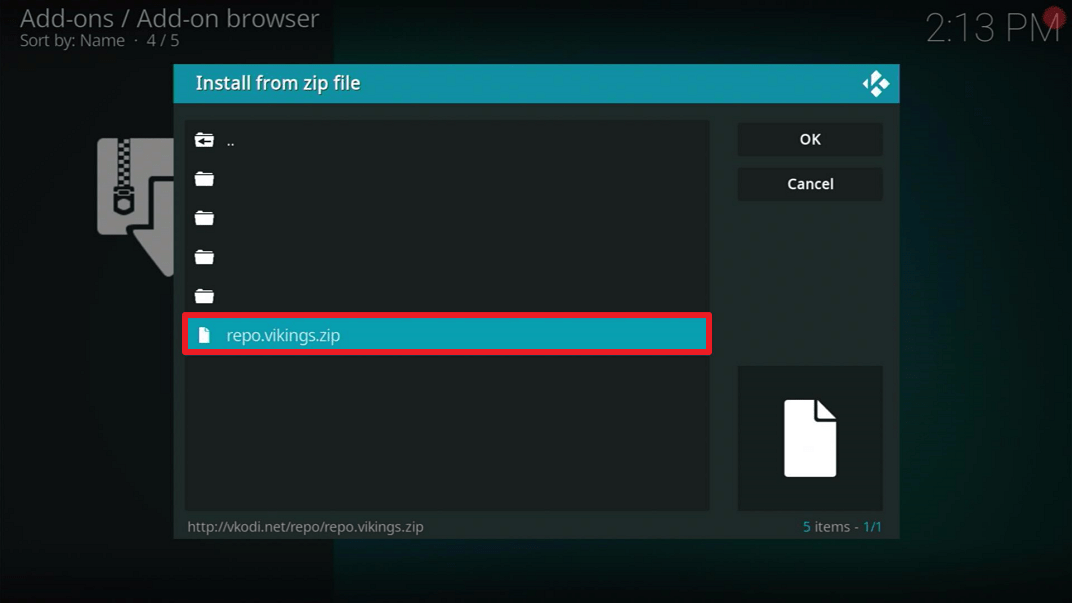
19. Click on repo.vikings.zip

Team Milhanos 9

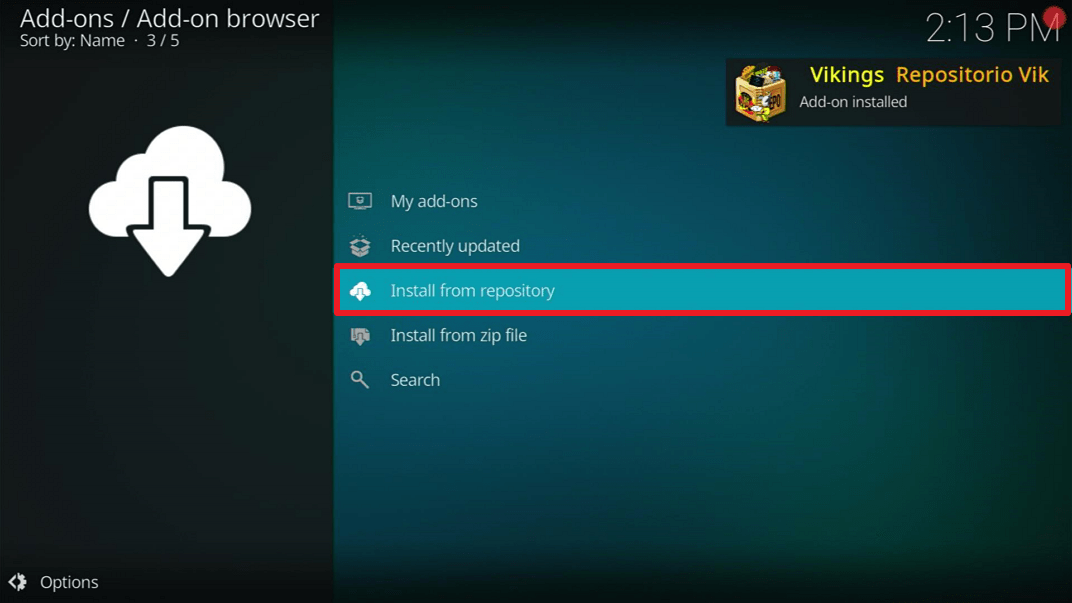
20. Select on Install from repository.

Team Milhanos 10

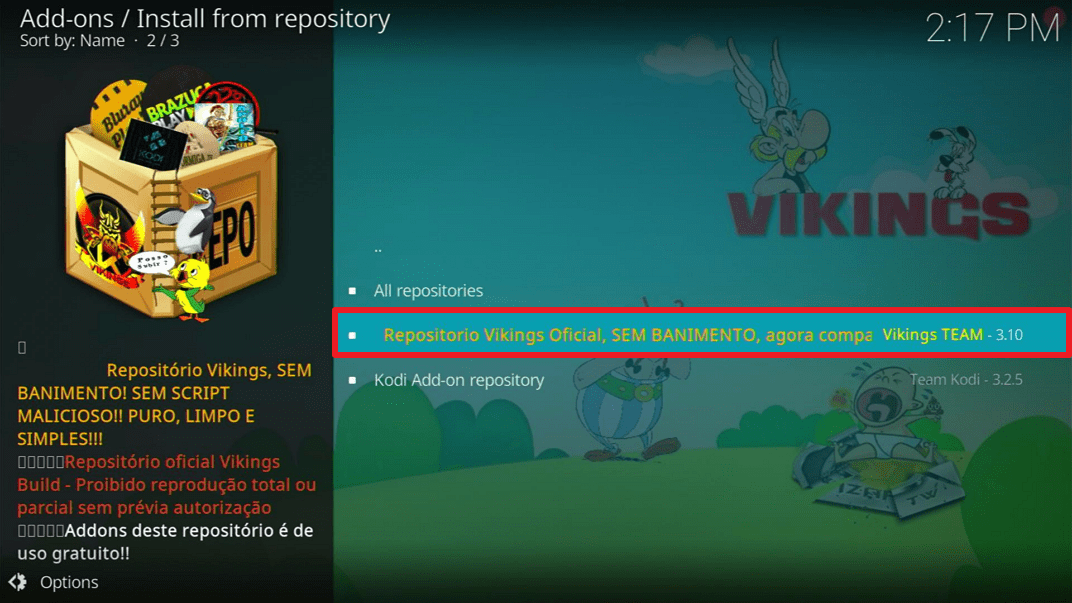
21. Click on Repositorio Vikings Official, SEM BANIMENTO

Team Milhanos 11

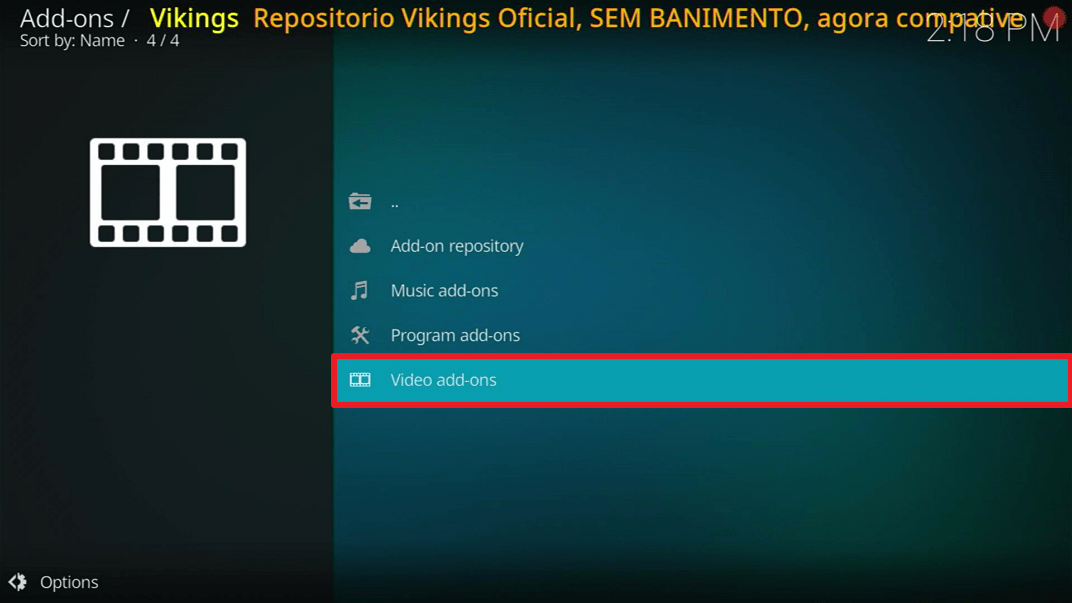
22. Pick Video add-ons.

Team Milhanos 12

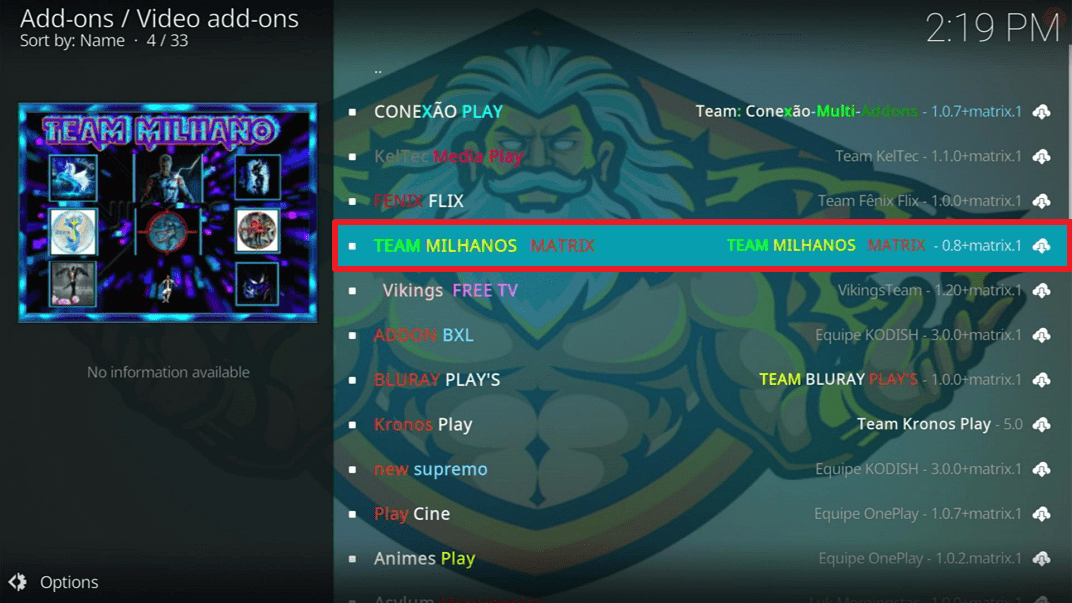
23. Select Team Milhanos .

Team Milhanos 13

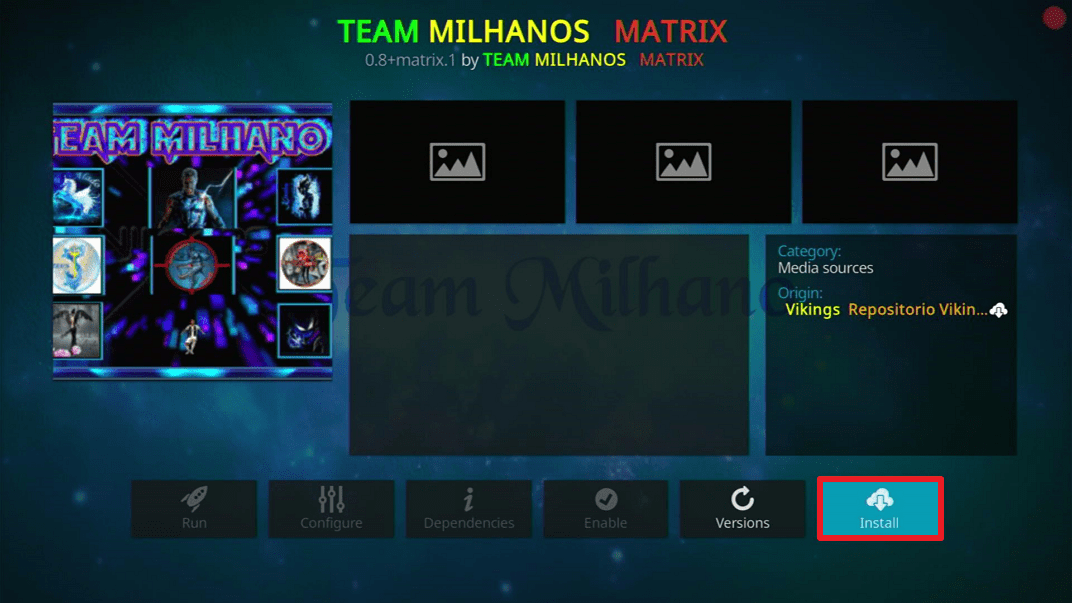
24. Click on Install.

Team Milhanos 14

25. You should see a popup in the upper right corner saying Team Milhanos has installed. There will actually be multiple popups for the various components.

Team Milhanos 16

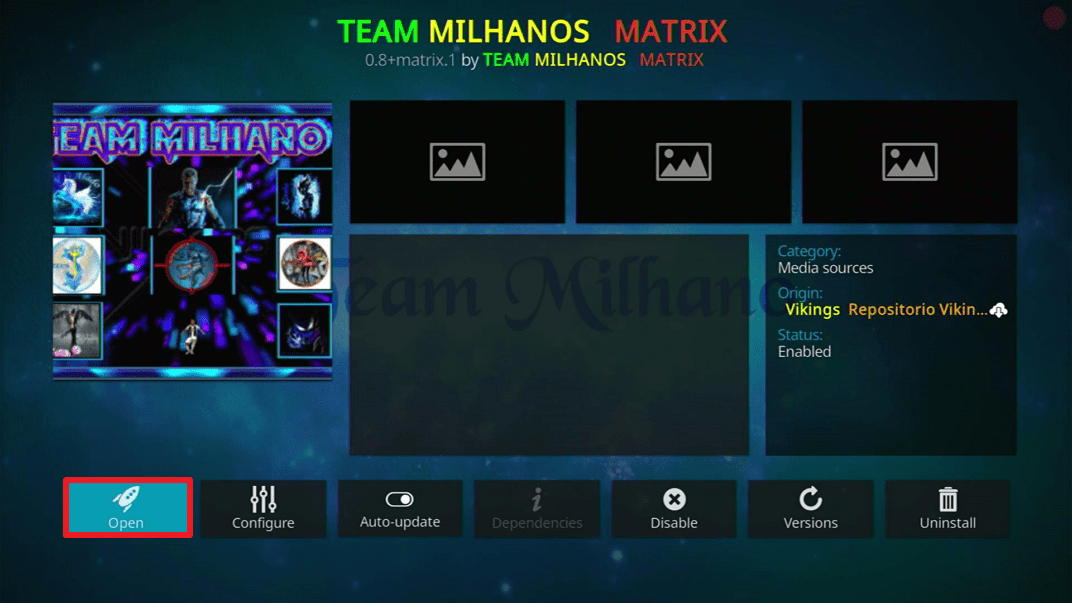
26. Click on Open to start Team Milhanos add-on.

Team Milhanos 15


Why Should You Use A VPN On Your Fire Stick?

If you are dealing with geo-restrictions trying to stream the entertainment content on your Fire Stick, a Virtual Private Network or VPN is the best solution. Even though the Amazon Fire TV and Fire Stick have built-in Virtual Private Network services, you can still acquire all of the Surfshark service’s advantages. The Surfshark service will encrypt the internet traffic of your Fire Stick and hide your location to go around geo-restrictions. Thus, you can easily stream your favorite videos, movies, and TV shows on your Fire Stick even if the content isn’t available in your region, regardless of where you are. 


Best VPN Deal

The first thing a VPN service asks for is a username and a password. Surfshark is a premium service but it has an exclusive discount that offers 83% OFF. To obtain the user name & password and avail of the huge discount, type https://reviewvpn.com/deal into any browser.

If you want to know about the other service and features it offers, kindly read our  Surfshark Review.


Grab your subscription now!

Click here to get the lowest price on Surfshark through our exclusive limited-time offer.


How to Install Surfshark VPN on Firestick

If your Firestick still has the older interface, read this article to learn how to update it: Update Firestick Interface.

Follow our screenshots below to install the SurfShark VPN app on your Fire TV stick.

1. Go to the Home screen of your Firestick.

step 1 Install Surfshark VPN on Firestick


2. Navigate towards the Find tab. Press the Search button from the resulting dropdown.

step 2 Install Surfshark VPN on Firestick


3. Type in the keyword of SurfShark and select from the suggestions that will appear.

step 3 Install Surfshark VPN on Firestick


4. Click the official SurfShark icon from your search results.

step 4 Install Surfshark VPN on Firestick


5. Press the Download (You own it) button.

step 5 Install Surfshark VPN on Firestick


6. The SurfShark VPN installer will download on your device.

step 6 Install Surfshark VPN on Firestick


7. SurfShark VPN’s app will automatically install itself on your Fire TV stick.

step 7 Install Surfshark VPN on Firestick


8. Press the Open button after completing SurfShark VPN’s installation process.

step 8 Install Surfshark VPN on Firestick


9. Please wait for the SurfShark VPN to load its user interface.

step 9 Install Surfshark VPN on Firestick


10. You can now log in with your SurfShark VPN account credentials.

step 10 Install Surfshark VPN on Firestick

Learn more about Surfshark and Grab the Best Surfshark Deal Now!


Install Surfshark on Firestick

Best Surfshark Deal


Other VPNs to Consider

NordVPN (Best for Streaming)

Best Features

  • 5000+ Server in 50+ Countries 
  • Military-Grade Encryption
  • Fast Connection Speed
  • Suitable to a lot of devices
  • No-Log Policy

Prices
  • Complete $5.89 per month (64% Discount)
  • Plus $4.59 per month (56% Discount)
  • Standard $3.69 per month (55% Discount)

Best Features

  • 750+ High-speed VPN Servers in 43 Locations
  • Military-Grade Encryption
  • Fastest HD Streaming and Gaming
  • 30-Day Money-Back Guarantee
  • Unlimited Data & Devices
  • No-Log Policy

Prices
  • 3 Years $1.99 per month (82% Discount)
  • 1 Years $3.29 per month (70% Discount)
  • 1 Month $10.99 per month

IPVanish VPN (Most Secure)

Best Features

  • 1200+ Servers in 60+ Countries around the world
  • Unlimited Connections
  • No-Log Policy
  • Top Notch Military-Grade VPN Protocols and Encryptions
  • 100% Safe and Secured
  • Most Trusted VPN
  • Best VPN for Firestick
  • 30-Day Money-Back Guarantee

Prices
  • Yearly $3.99 per month (63% Discount) – 30 days risk free + Ransomware & Malware Protection
  • Quarterly $5.32 per month (51% Discount)
  • Monthly $10.99 per month


For more VPN discounts, go to ReviewVPN Deals and purchase the best VPN for you.

Click here to get the lowest price on Surfshark through our exclusive limited-time offer.


Alternatives

Always get your content from trusted sources as it will help prevent from encountering issues that may pose risk to your device. Here at ReviewVPN, we always suggest that our subscribers have a back-up in times of unforeseen circumstances. In that way, our entertainment does not get interrupted. The following add-ons are similar to Team Milhano in terms of content. They also provide tv shows and movies that cater mainly to Portuguese users. They are as follows:

  • One Play Add-on
  • Alado Tv Add-on
  • Masteruga Add-on
  • Iberika Add-on

Looking for these add-ons is pretty straightforward, you can find it in Google and any other search engine there is. But always remember to secure them from reliable and trusted sources.

Common Errors

These are some of the things that may cause an issue when installing Team Milhano:

  1.    Unable to connect to URL/Download

Always verify if you have written the correct URL. Also, recheck if you have downloaded the right repository. Always make sure that your internet connection is stable and also you must be protected by a very reliable VPN. Check here for the best VPN deal.


  1.     Script Error

This usually appears when Kodi is not properly installed. Also, it is worth noting that the add-on may be improperly installed as well. To resolve this, you must reinstall the add-on by following the guide we provided above. You can also reinstall Kodi if this problem still continues to persist.


  1.     Kodi Check Log Error

This happens when your media cache is full of memory. Our cache usually produces what we call snippets that make loading faster. Over time, this will fill out your entire cache. SO the best solution to this issue is to just simply empty your cache and use trusted tools that will optimize the performance of Kodi on your device.


  1.     Source not working/slow/frozen

Team Milhanos Kodi Addon does not store any of the content on its servers, it only provides streams that provide that particular content it is meant for. You should try other sources that may only take a matter of seconds to load up. For other solutions please take time to read our in-depth guide linked above.

Conclusion

Team Milhanos Kodi Addon is a pretty decent add-on if you want to diversify the content you have on Kodi. It offers channels that other add-ons may not offer so there is no harm if you want to have it in your roster. Overall, it becomes handy if ever you have guests who are of Portuguese descent that are coming over. It adds up to your hospitality whenever you host which actually creates more meaningful memories for you and your guests.

We hope that this guide will help you in your search for the best add-on that will cater to your needs and preferences. Please do drop us a comment and suggestion here on our website and on our other social media platforms. Have a wonderful day ahead!

Install Apocalypse 720 Kodi Addon

Apocalypse 720 Kodi Addon

Source: http://repo.noledynasty.xyz/

You may be intrigued by its name, heck you may also be wondering why it is called Apocalypse 720. But let us tell you, do not be fooled by its name because it will just be the beginning of wonderful things once you get this add-on on your device.


Apocalypse 720 is a Kodi Video Add-on under the Nole Dynasty Repository. The 720 signifies that this add-on only provides videos that are of 720p quality. This will be very exciting for users who are very particular when it comes to video quality and why is that? Having this kind of format actually is very pleasing to the eyes due to its vivid colors and sharp images.  Also, this add-on provides a very extensive list of subcategories that will cater to anyone of any age and size. So basically, it is an add-on that provides almost limitless content.


ANONYMOUSLY


Features

        Free and Premium Sources

        720p quality videos

        Movies

        TV Shows

        Descriptions per Title that will help you have a vague idea what you are about to watch is all about

        Subcategories that range from Christmas, 24/7 Shows, New Releases, Action, Adventure, Animation, Classics, Comedy, Crime, DC Comics, Disney, Drama, Horror, Marvel Universe, Romance, Sci-fi, Sports, Stand up Comedy, Thriller, and War.


YOUR INTERNET ACTIVITY IS BEING WATCHED

ReviewVPN cannot attest to the legality, security and privacy of the applications discussed on this site. It is highly recommended that you use a VPN service while streaming or using Kodi.

Currently, your IP 216.73.217.150 is visible to everyone and your Browser is being tracked by Advertisers & ISP Provider.

Save 65% Now

Limited Time Offer

Here are the main reasons why you must use a VPN:

  • Your activities are hidden from your ISP, the government, and from the apps you are using.
  • You can access additional movies and TV streams.
  • ISP attempts to throttle are thrwarted thus reducing buffering issues.
  • Geographically restricted content like Netflix and Hulu can be unblocked.

A VPN works be replacing your ISP-assigned IP address and creating an encrypted tunnel. We recommend the no log service offered by IPVanish. It works well on a Firestick and offers the fastest possible speeds.

Special Limited Time Offer - Get IPVanish


Apocalypse 720 Installation Guide

  1. Open Kodi
  2. Choose “Settings” and click on “System
  3. On the “Addons” menu turn on “Unknown sources” and click “Yes
  4. Head back to the “System Page” and choose “File Manager
  5. Select “Add Source”
  6. Click “None”
  7. Type this URL as it is – http://repo.noledynasty.xyz
  8. Highlight the box under the source and rename it to “Nole” and choose “Ok”
  9. Head back to the System page and select “add-ons”
  10. Choose “Install from Zip File”
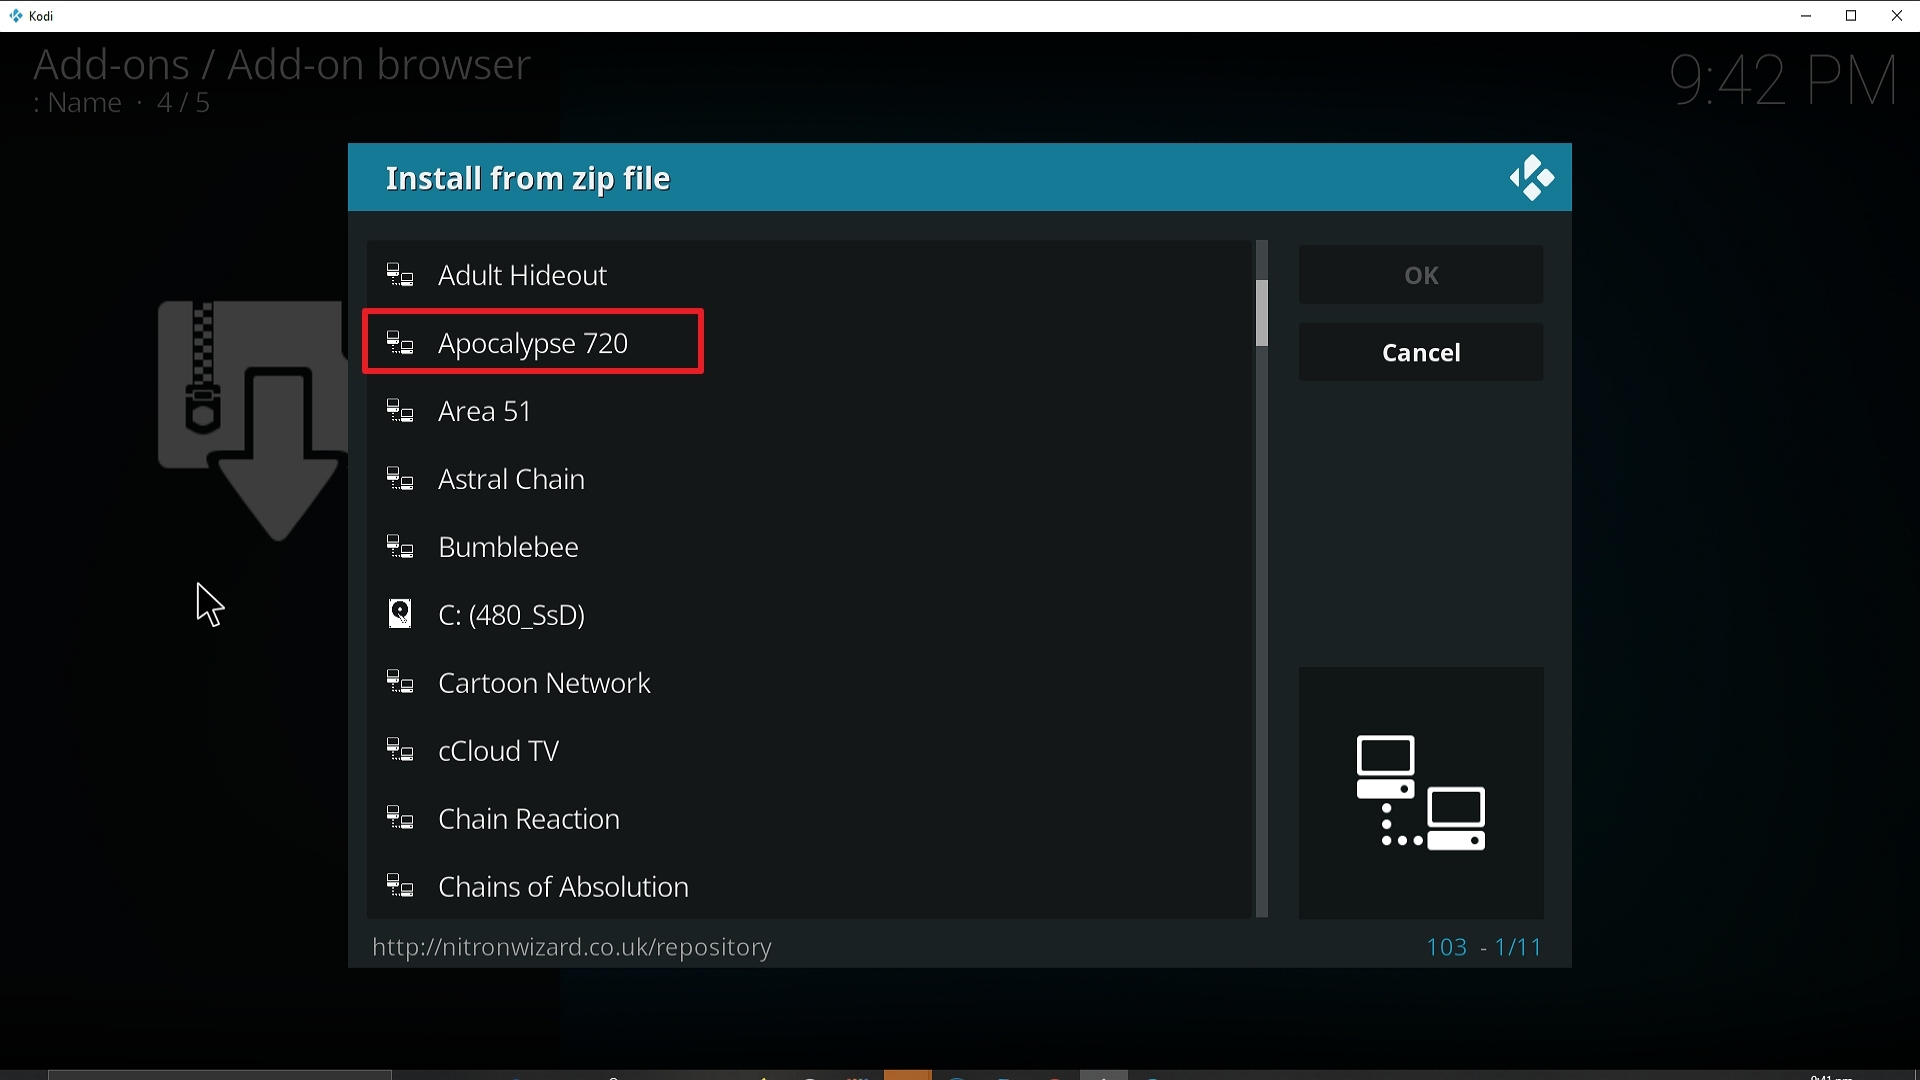
  11. Select “Nole”
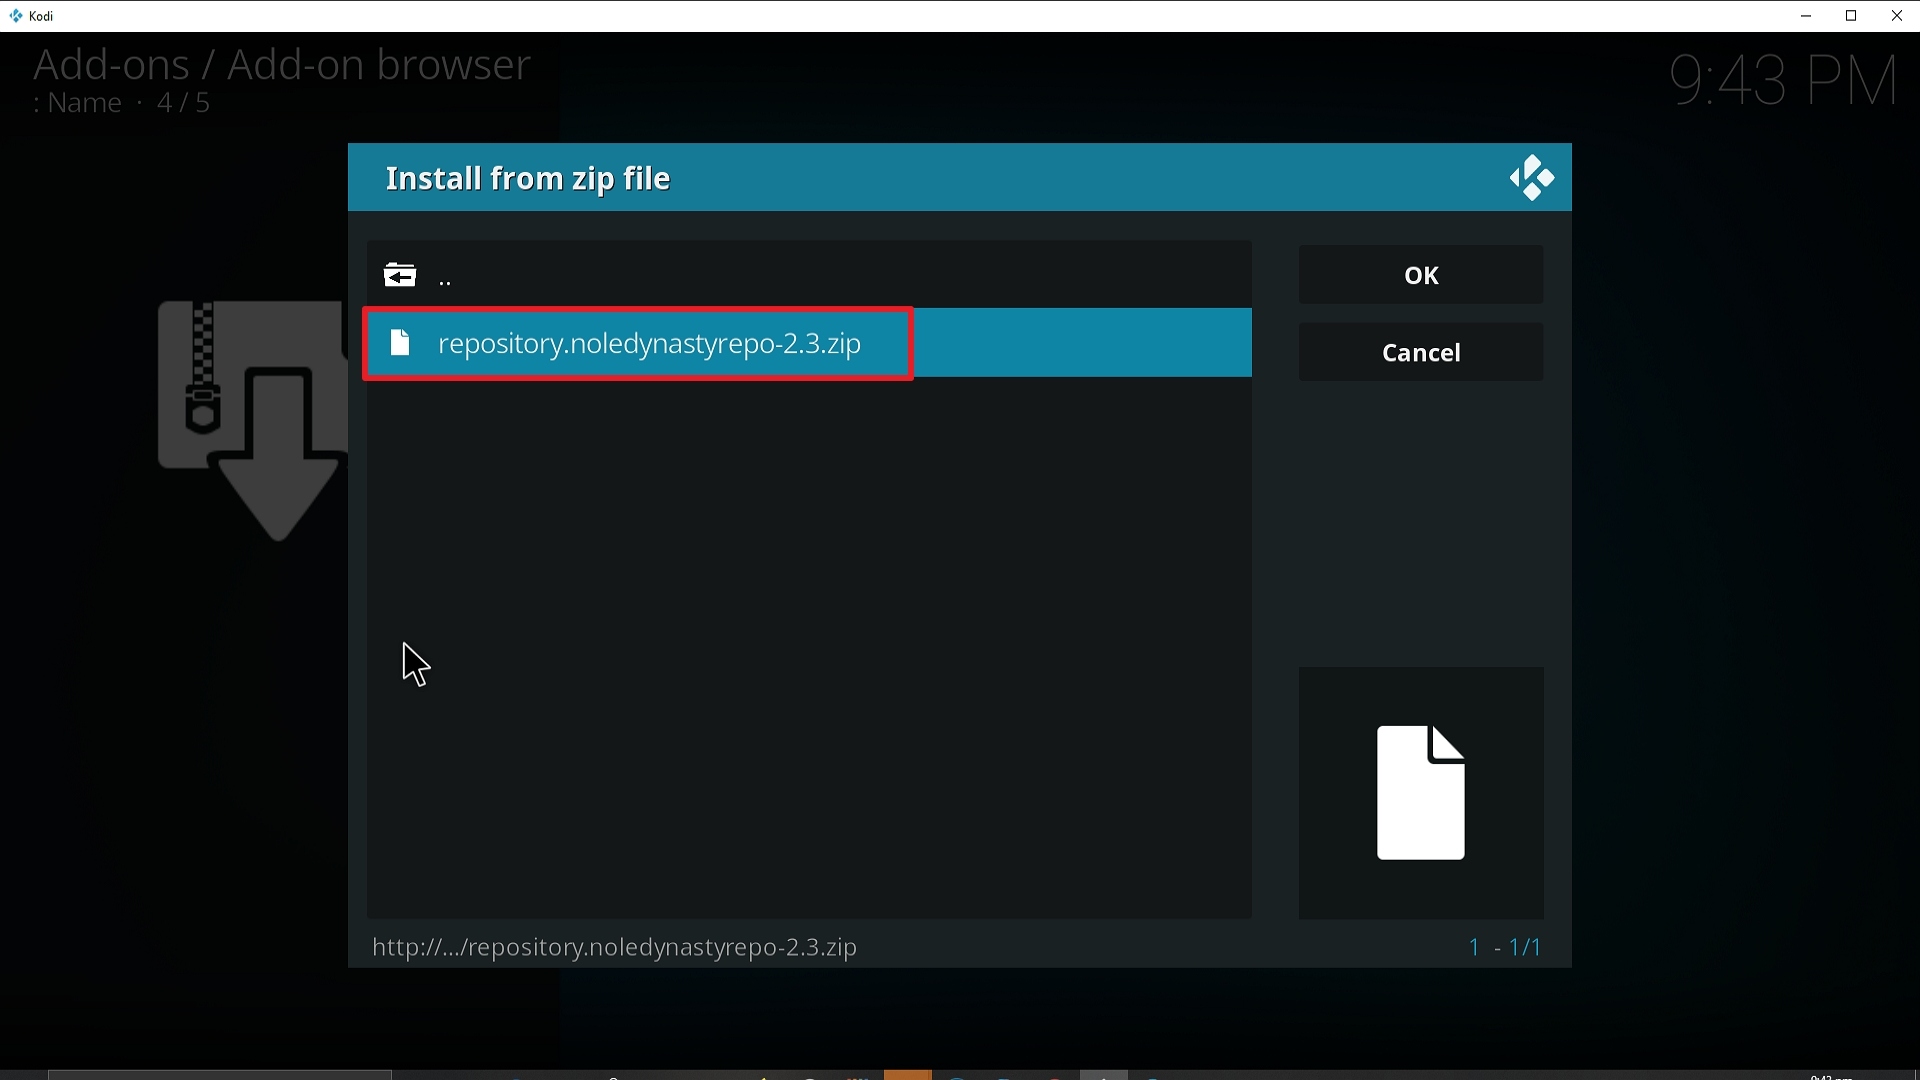
  12. Choose the zip file URL – repository.noledynasty-2.3.zip
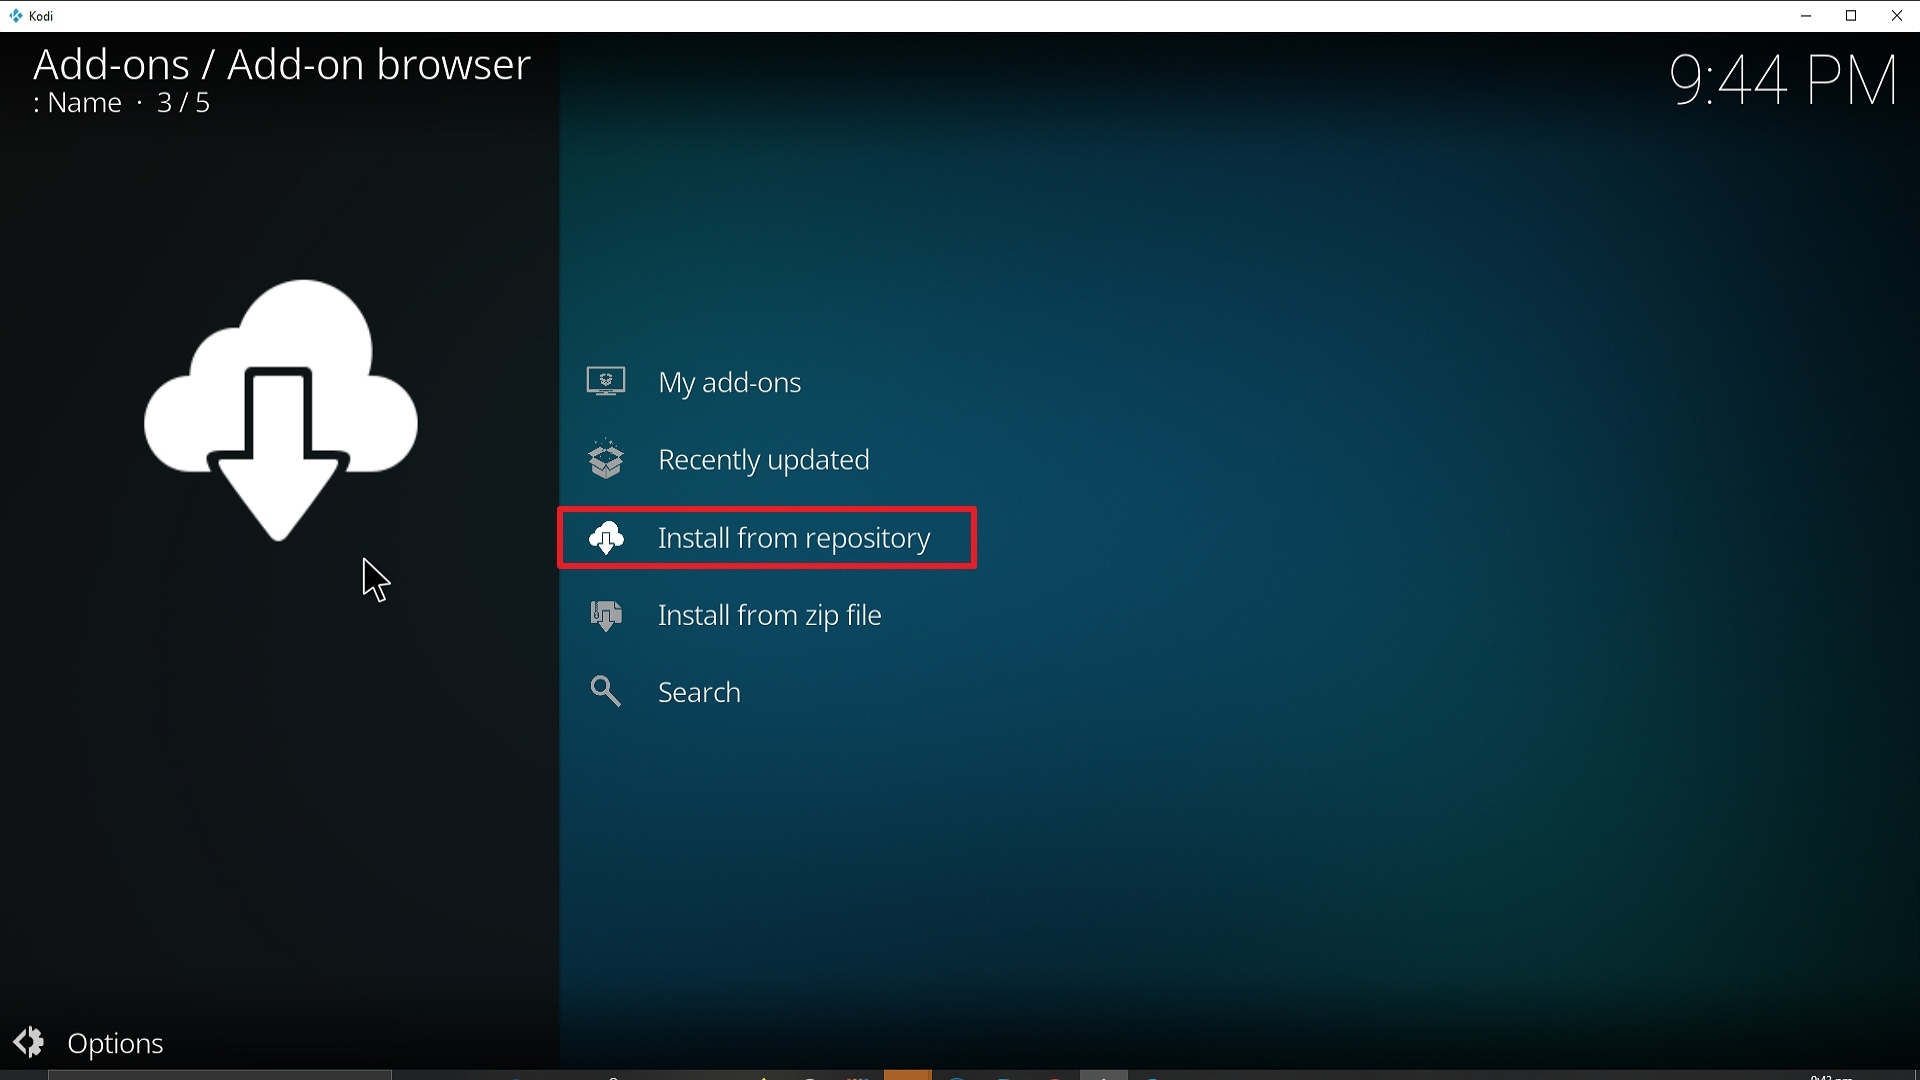
  13. A “Nole Dynasty Add-on installed” notification will then appear, wait for a while and then select “Install from Repository”
  14. Choose “Nole Dynasty
  15. Open “Video addons
  16. Choose “Apocalypse 720” and select “Install”
  17. “The following additional add-ons will be installed” notification will appear after that click “Ok
  18. Once it is installed, head back to the Home Screen and choose “Addons
  19. Select “Video add-ons” and choose “Apocalypse 720”
  20. You will be required to enter a pin. To secure a pin please visit Pin System Website on another device
  21. On the Pin System Website, scroll down and select “generate a pin code”
  22. A count will ensue, after which select “view pin”
  23. Write your pin code down and head back to Kodi then enter you pin
  24. Voila, you can now use Apocalypse 720


How to Install Apocalypse 720 on Kodi with Screenshots

1. From the home screen, select the cogwheel at the upper left.

Step 1 Installing Apocalypse 720 addon on Kodi

2. Select System in the bottom right corner.

Step 2 Installing Apocalypse 720 addon on Kodi


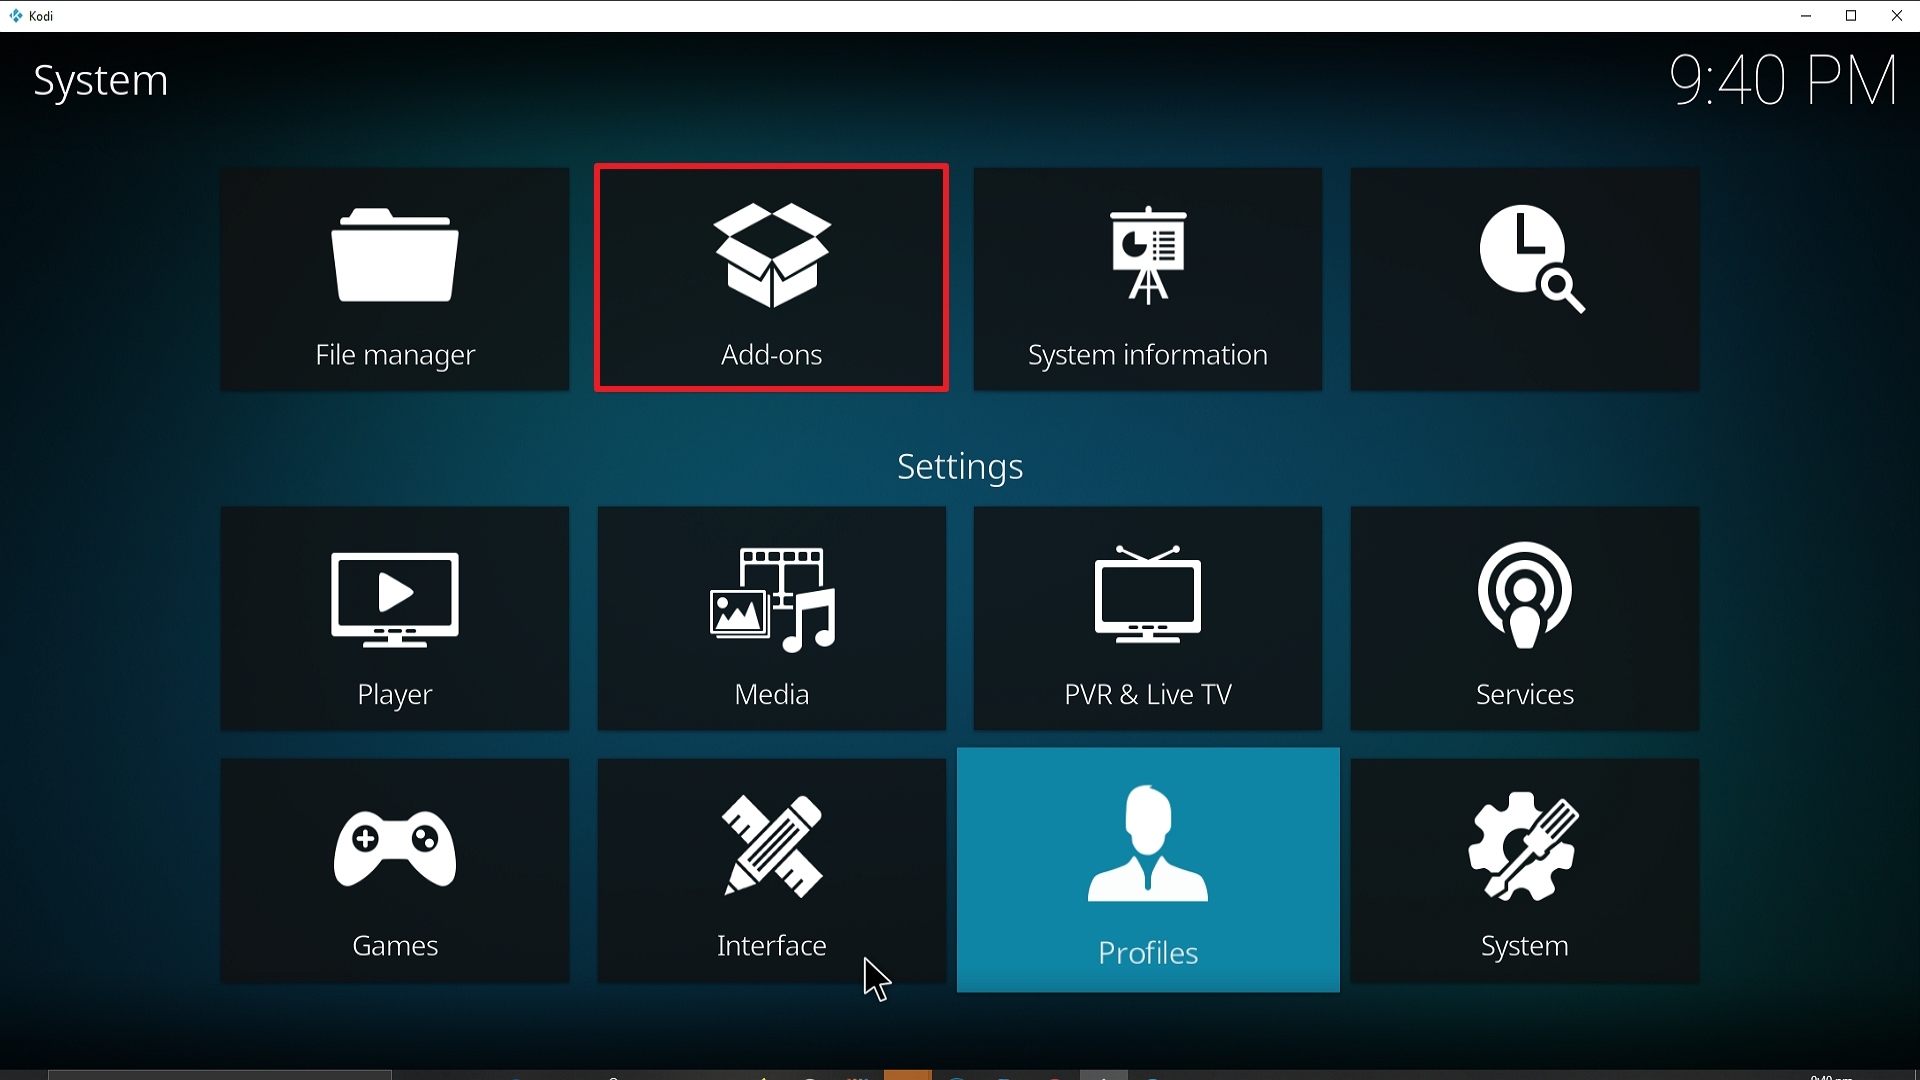
3. Select Add-ons on the left side of the screen.

Step 3 Installing Apocalypse 720 addon on Kodi


4. Select Unknown sources.

Step 4 Installing Apocalypse 720 addon on Kodi


5. Click Yes to allow unknown sources.

Step 5 Installing Apocalypse 720 addon on Kodi


6. Select File manager.

Step 6 Installing Apocalypse 720 on Kodi


7. Click Add source.

Step 7 Installing Apocalypse 720 addon on Kodi


8. Click on <None>.

Step 8 Installing Apocalypse 720 addon on Kodi


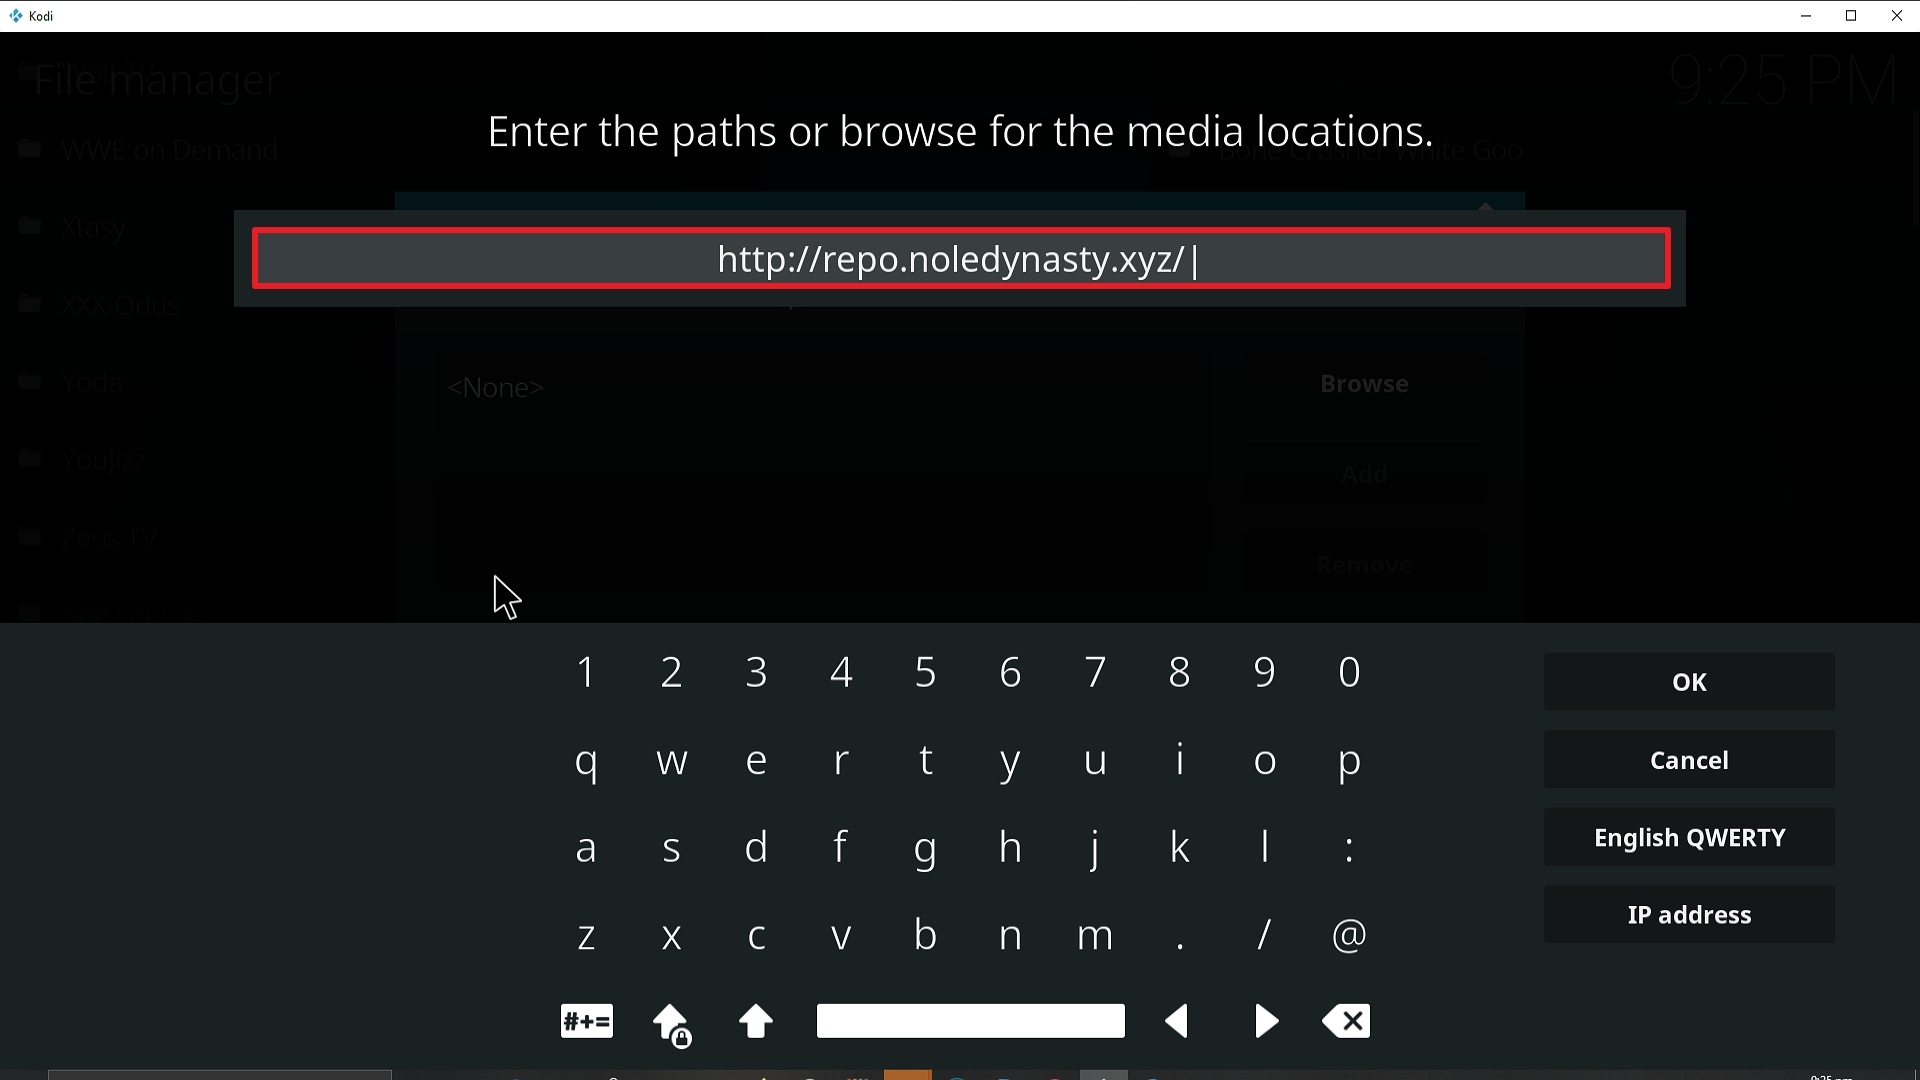
9. Type exactly: http://repo.noledynasty.xyz/

Step 9 Installing Apocalypse 720 addon on Kodi


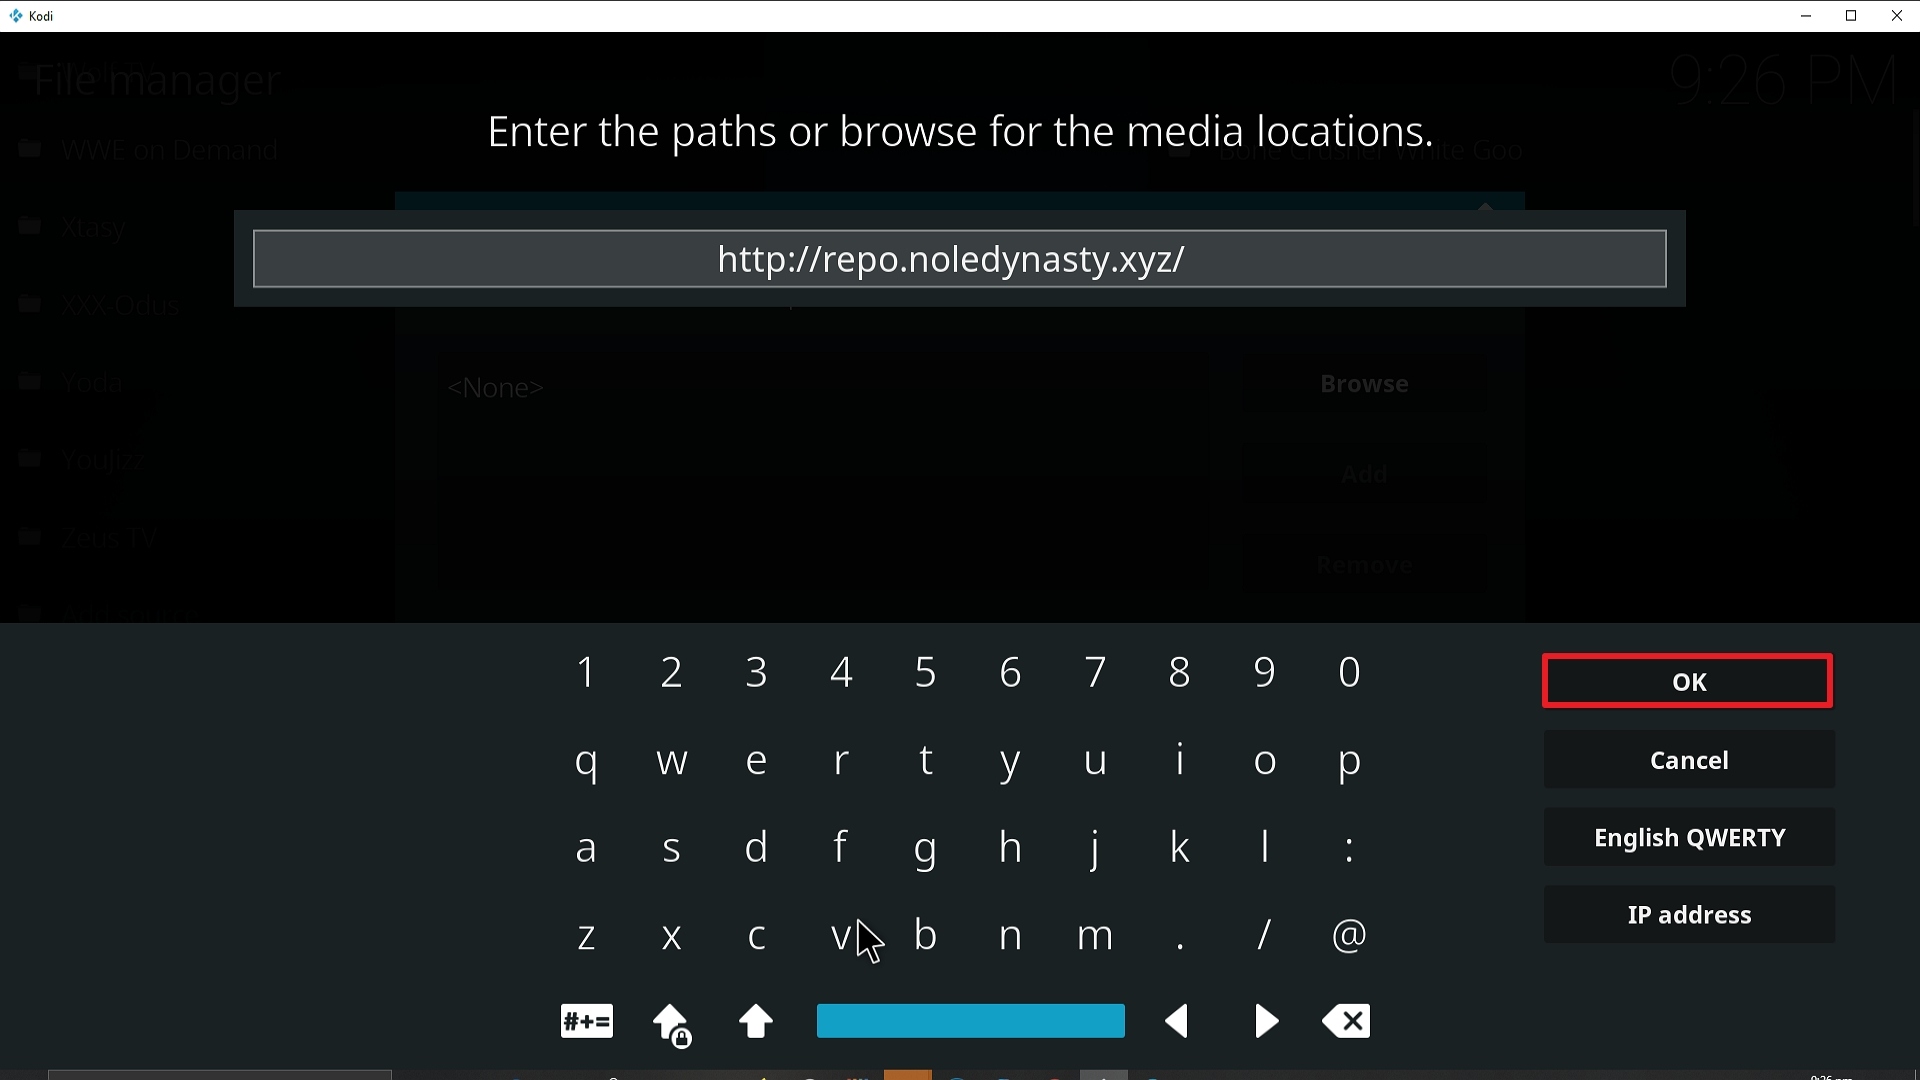
10. Click on OK.

Step 10 Installing Apocalypse 720 addon on Kodi


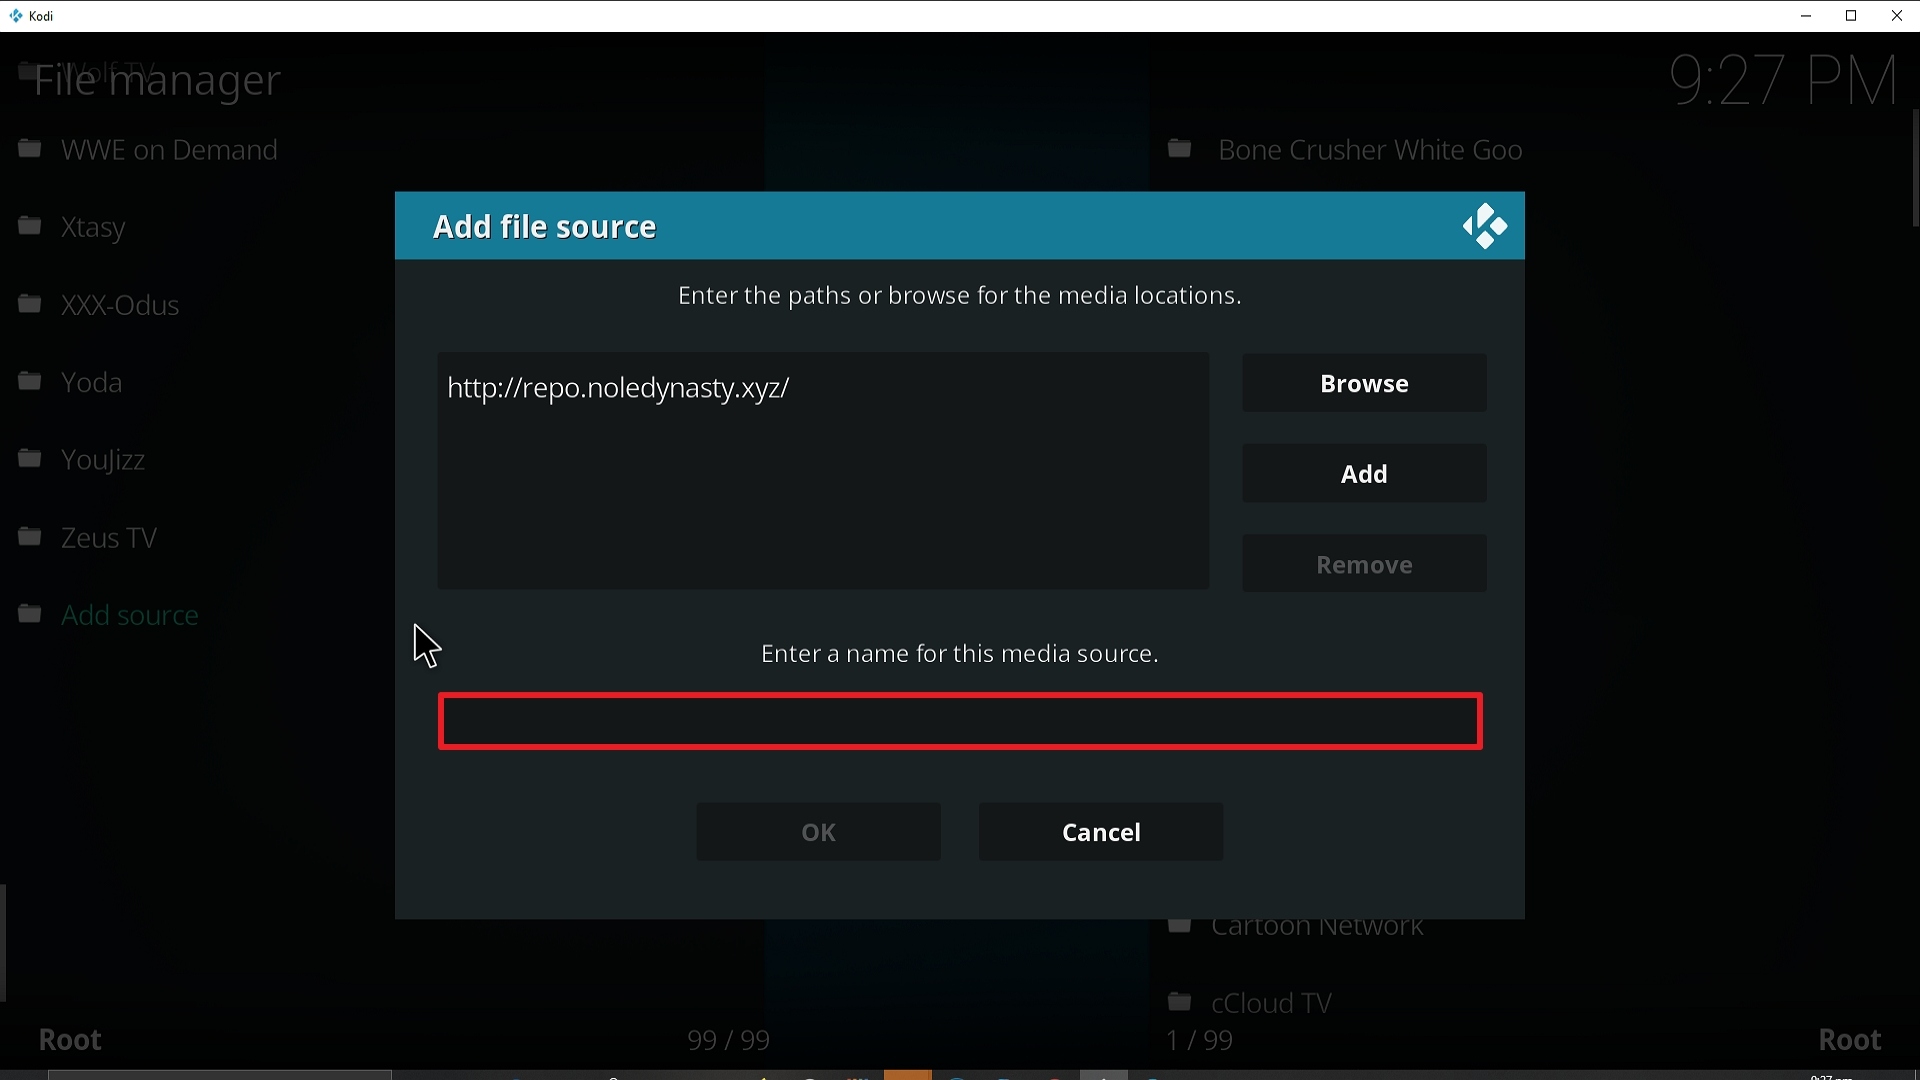
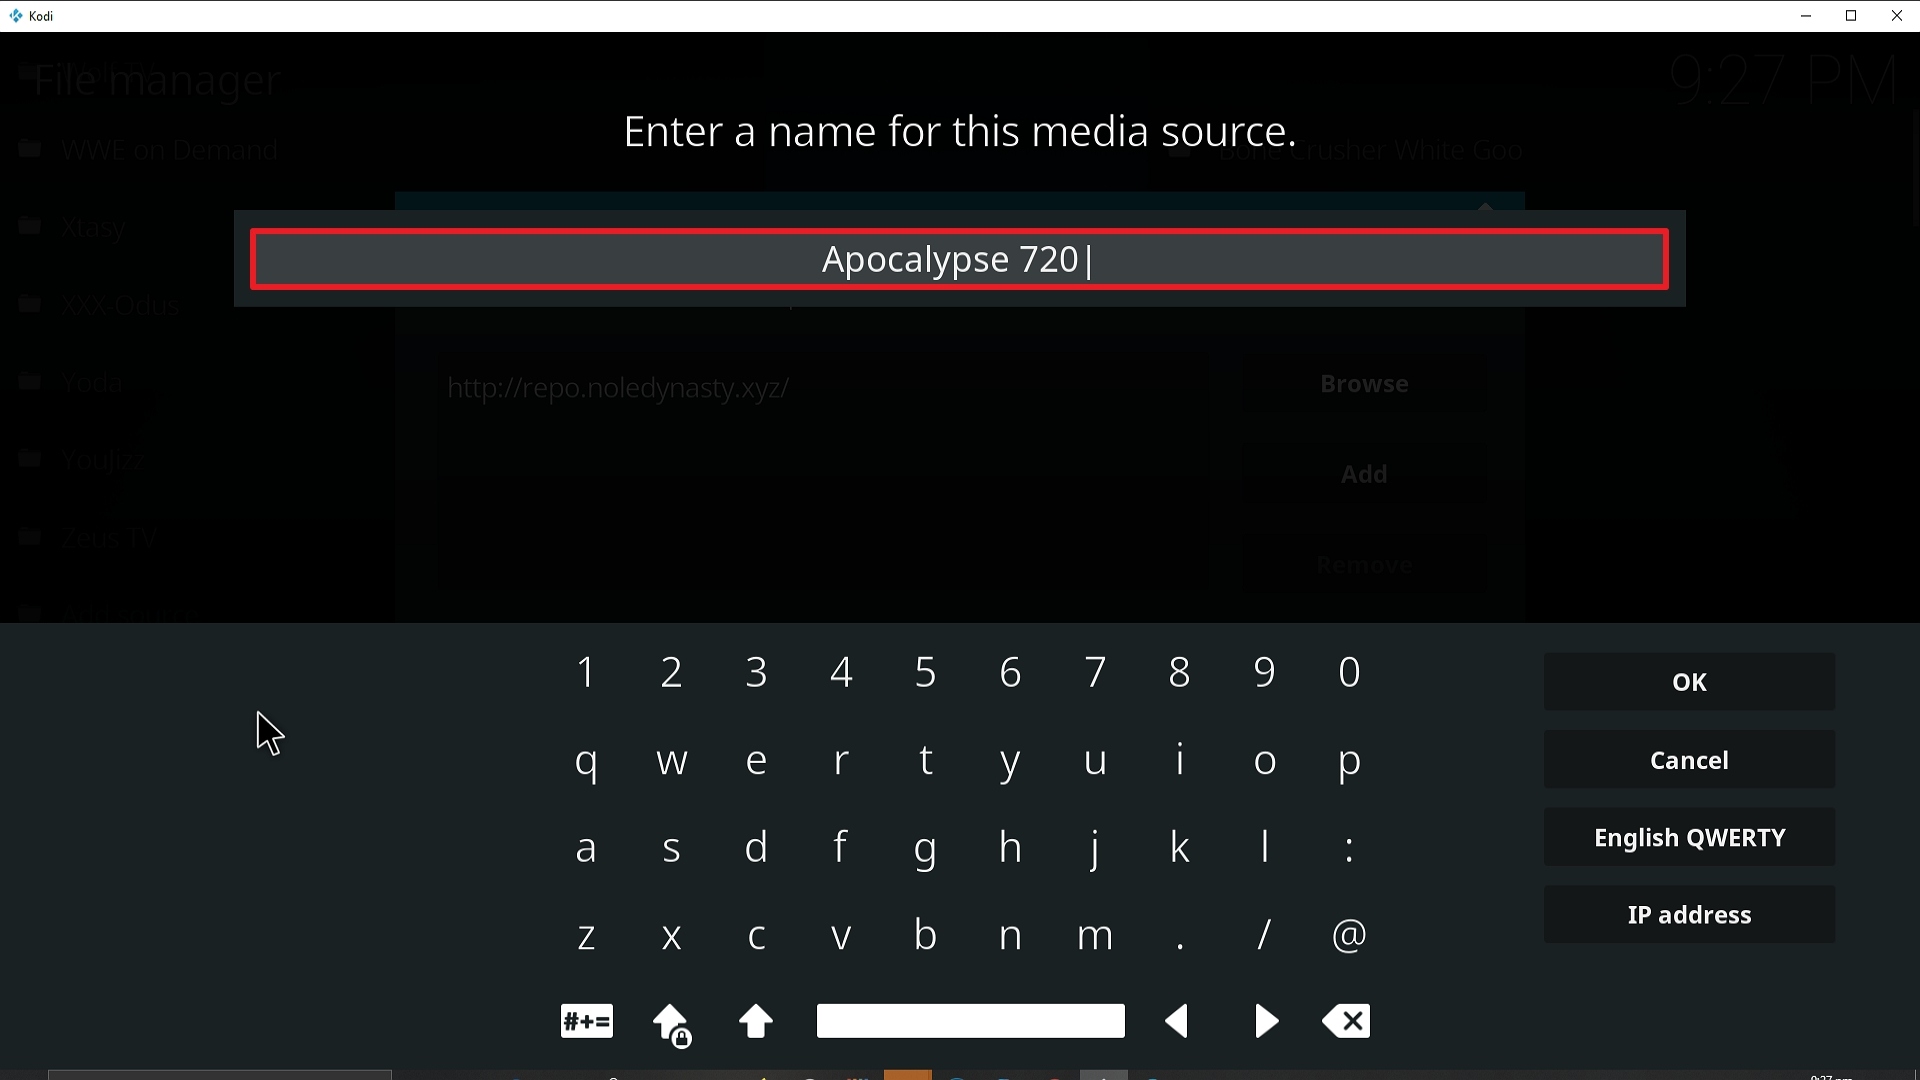
11. Select enter a name for this media source.

Step 11 Installing Apocalypse 720 addon on Kodi


12. Name is Apocalypse 720  (this part isn’t critical as long as you remember the name).

Step 12 Installing Apocalypse 720 addon on Kodi


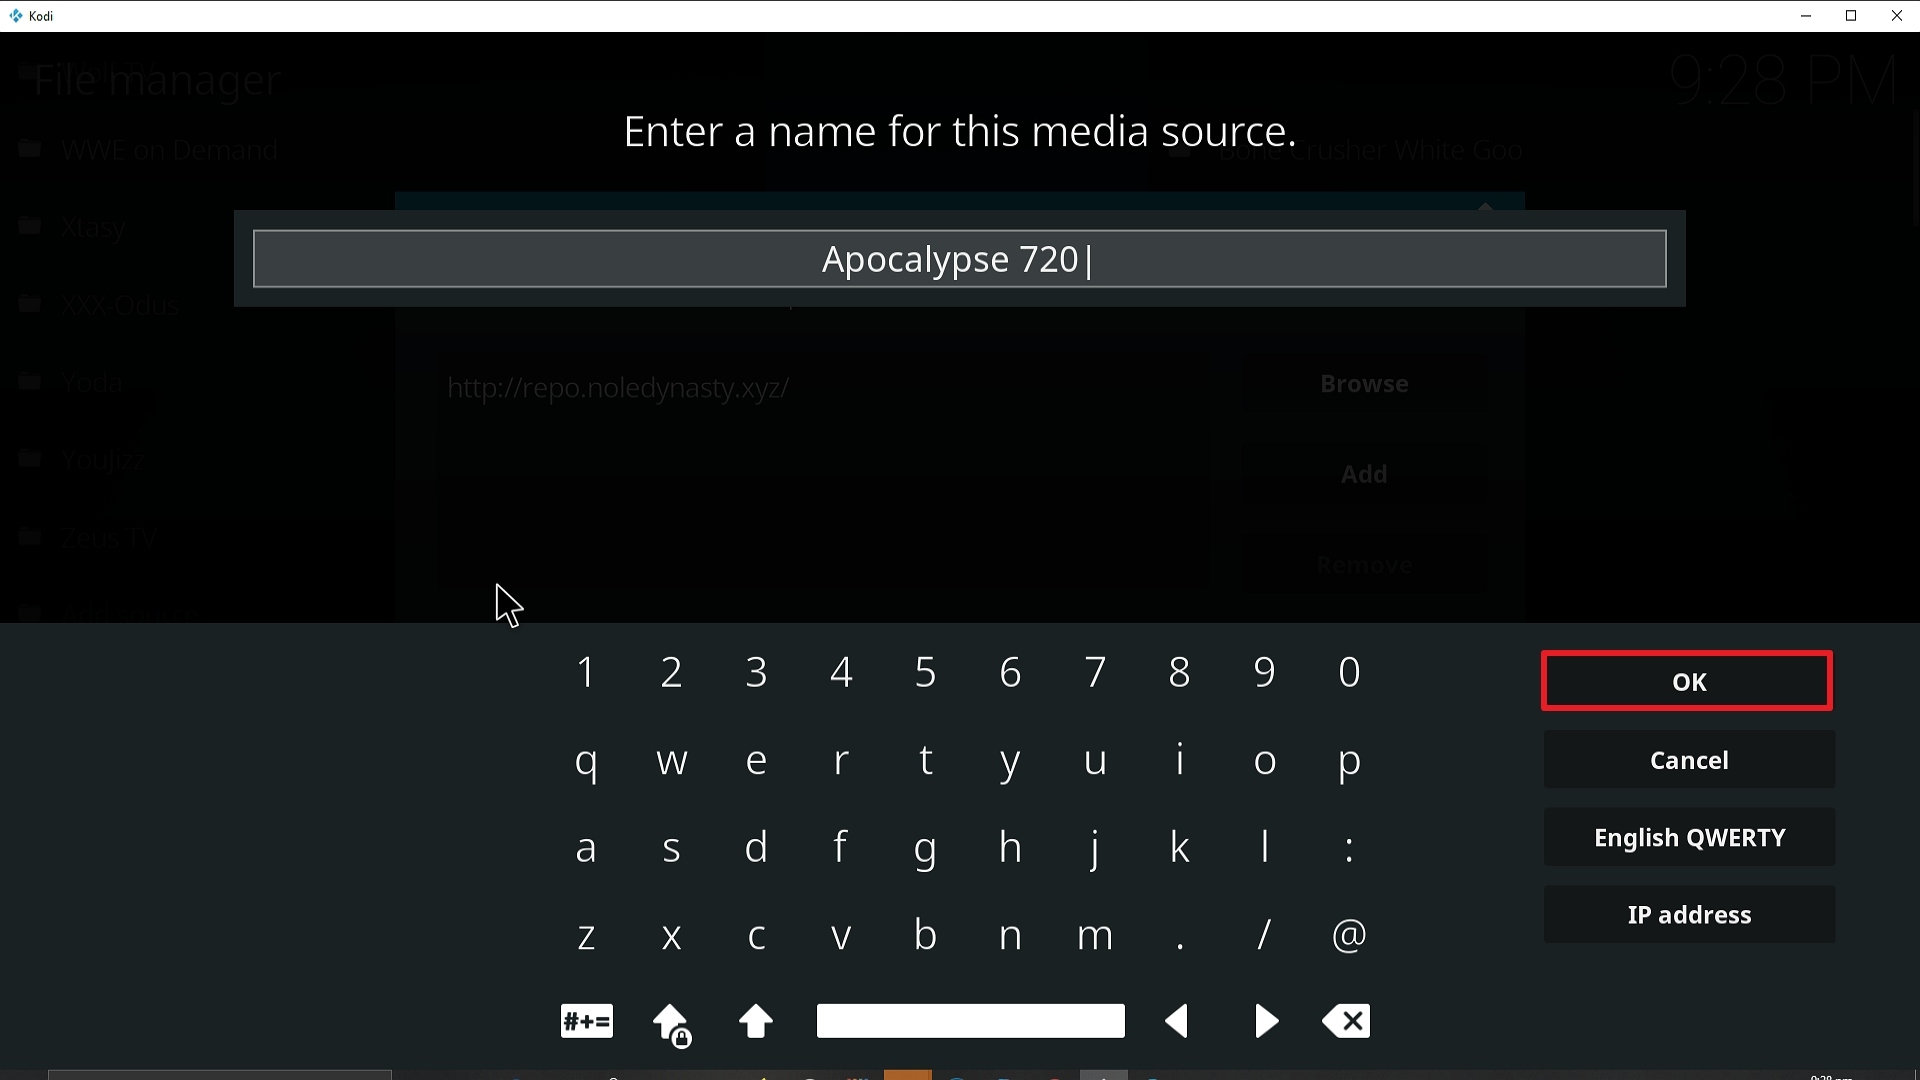
13. Click on OK.

Step 13 Installing Apocalypse 720 addon on Kodi


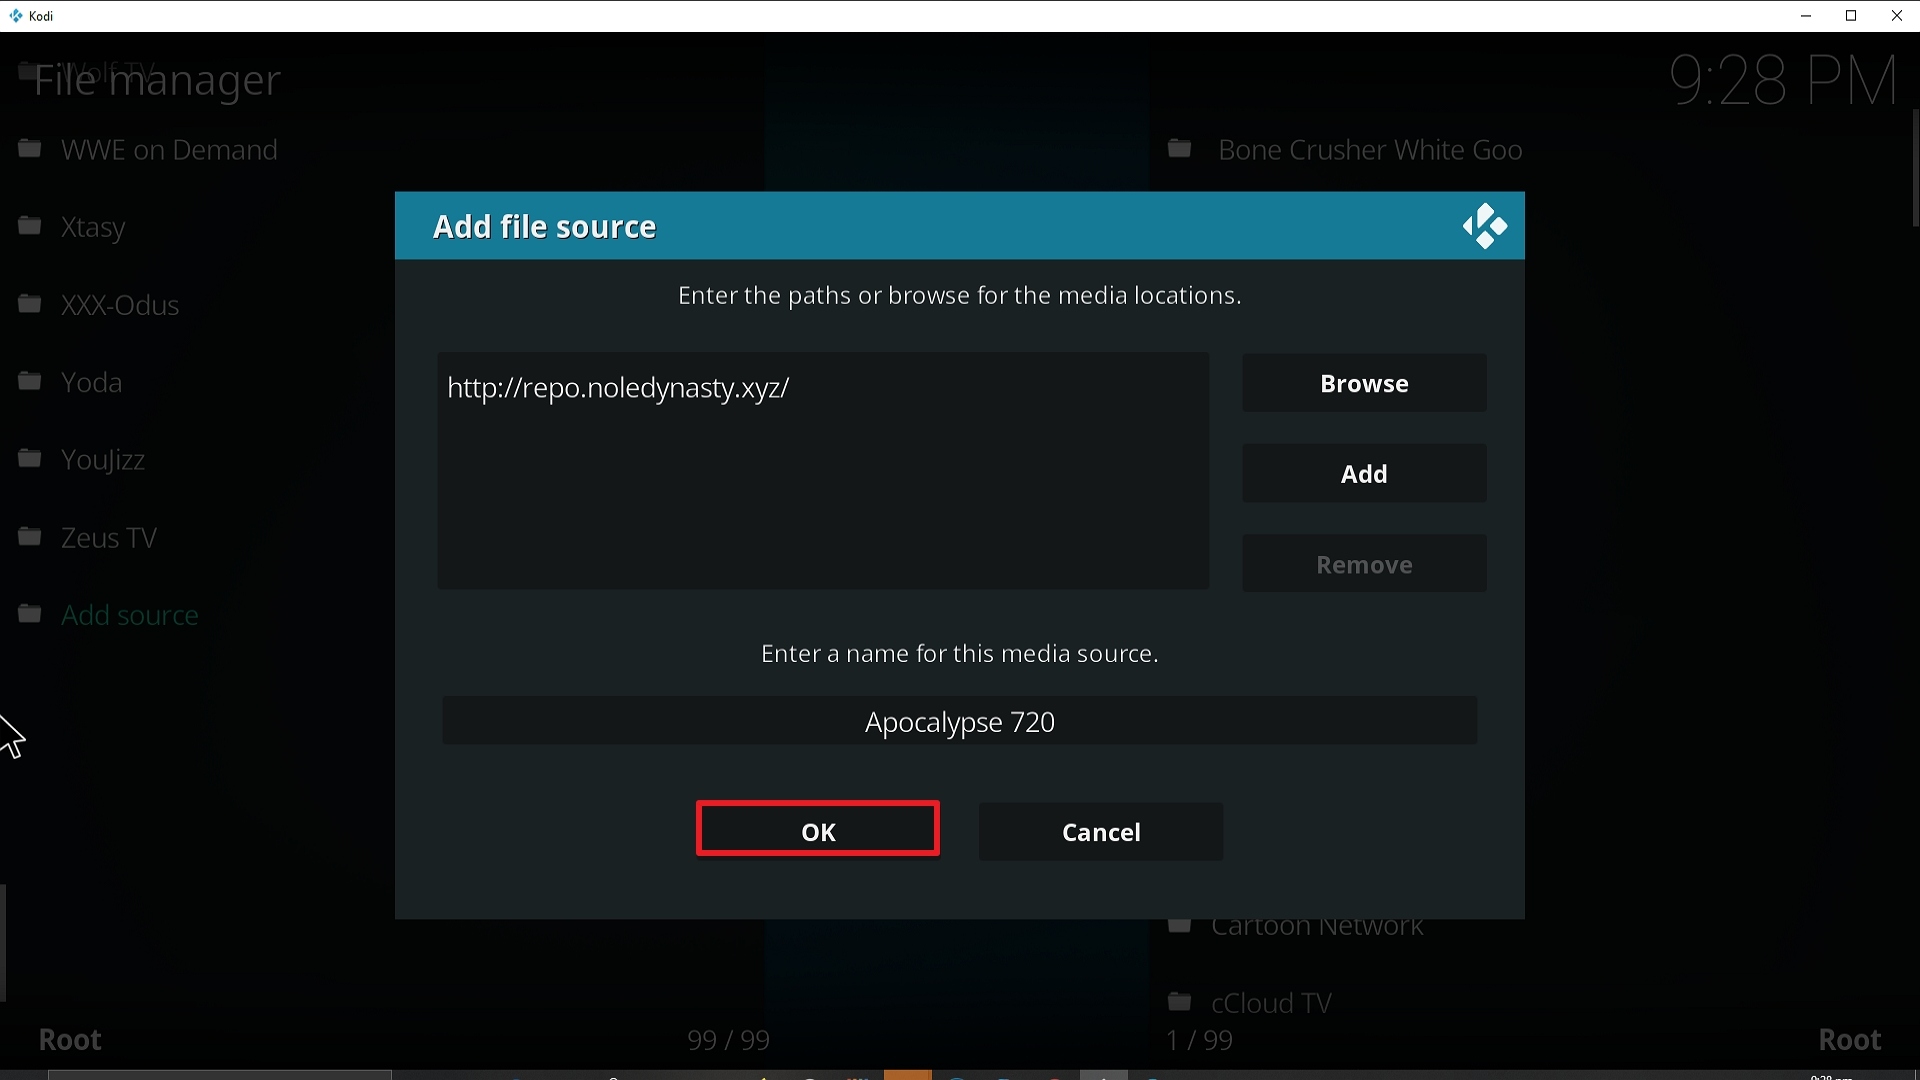
14. Click on OK.

Step 14 Installing Apocalypse 720 addon on Kodi


15. Take one step back and click on Add-ons.

Step 15 Installing Apocalypse 720 addon on Kodi


16. Select install from zip file.

Step 16 Installing Apocalypse 720 addon on Kodi


17. Click on Apocalypse 720 (or whatever you named the source).

Step 17 Installing Apocalypse 720 addon on Kodi


18. Click on repository.noledynastyrepo-2.3.zip

Step 18 Installing Apocalypse 720 addon on Kodi


19. Select on Install from repository.

Step 19 Installing Apocalypse 720 addon on Kodi


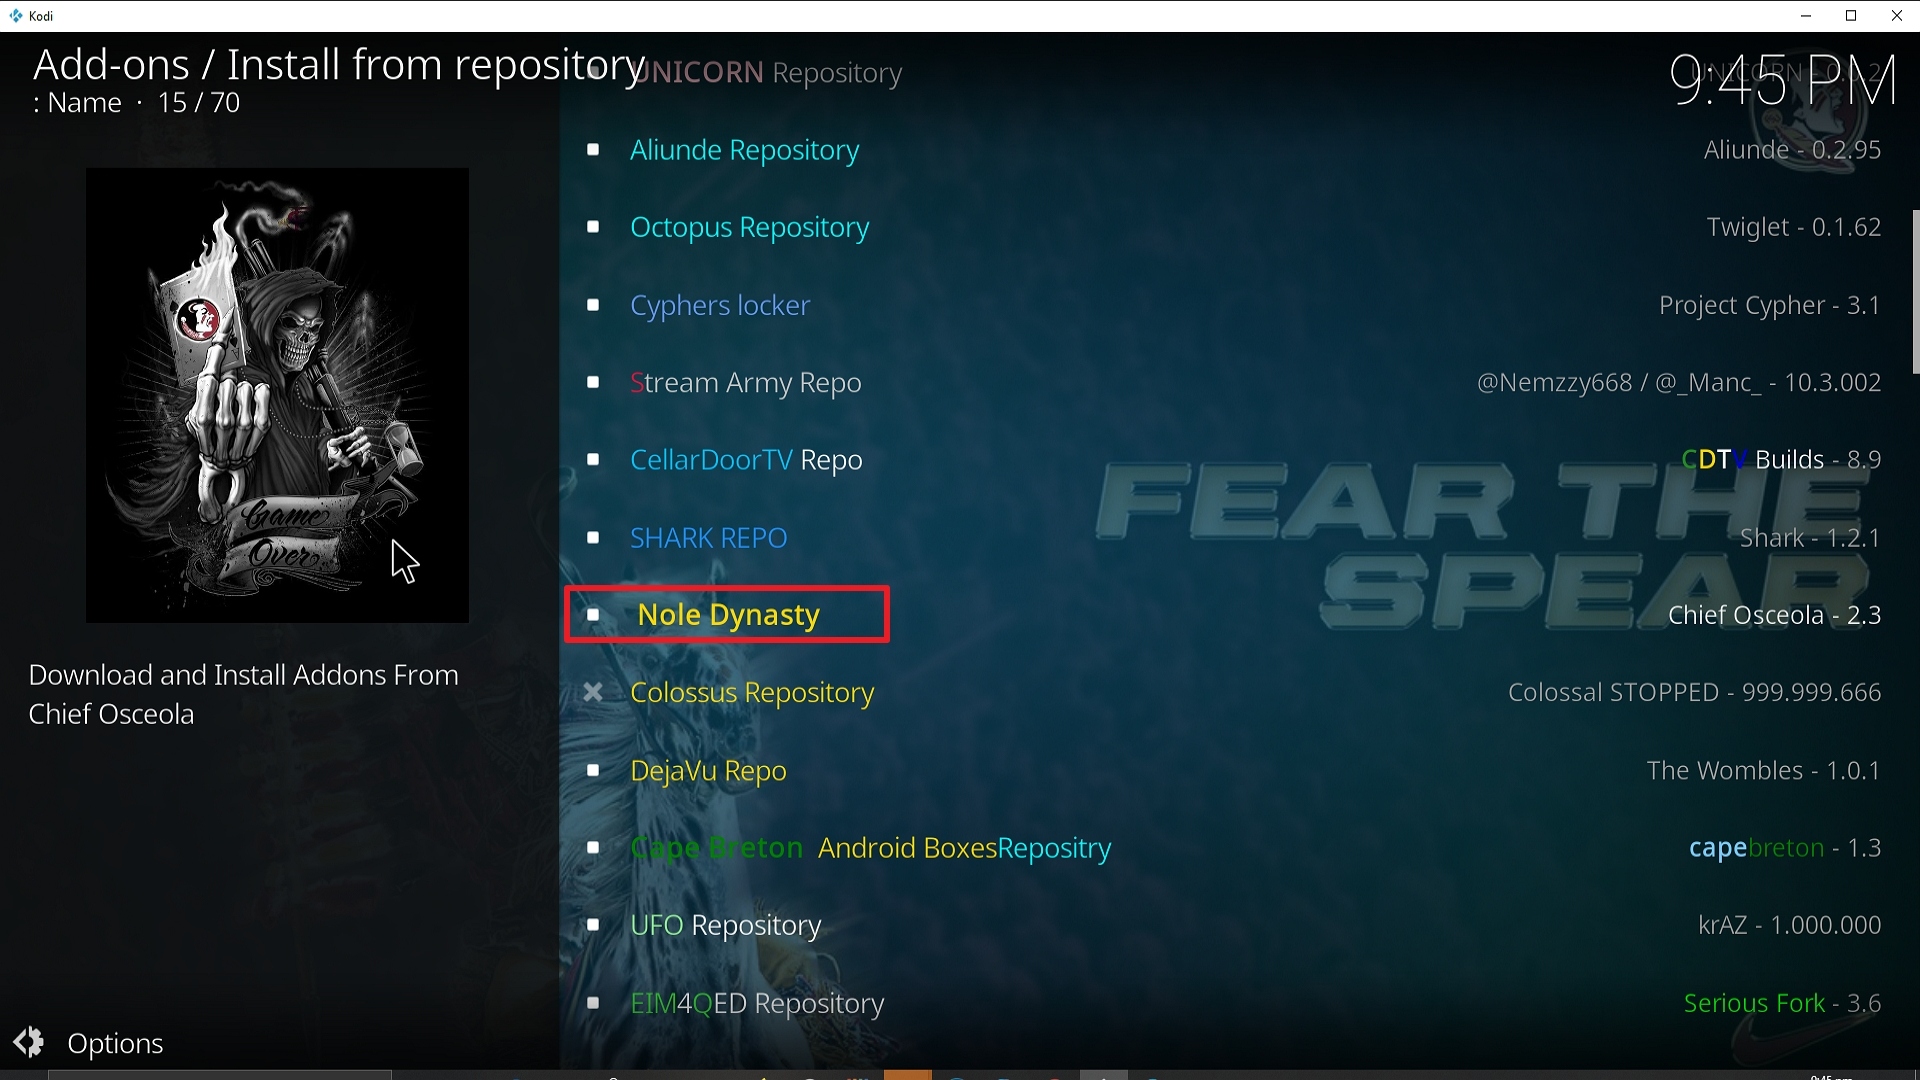
20. Click on Nole Dynasty

Step 20 Installing Apocalypse 720 addon on Kodi


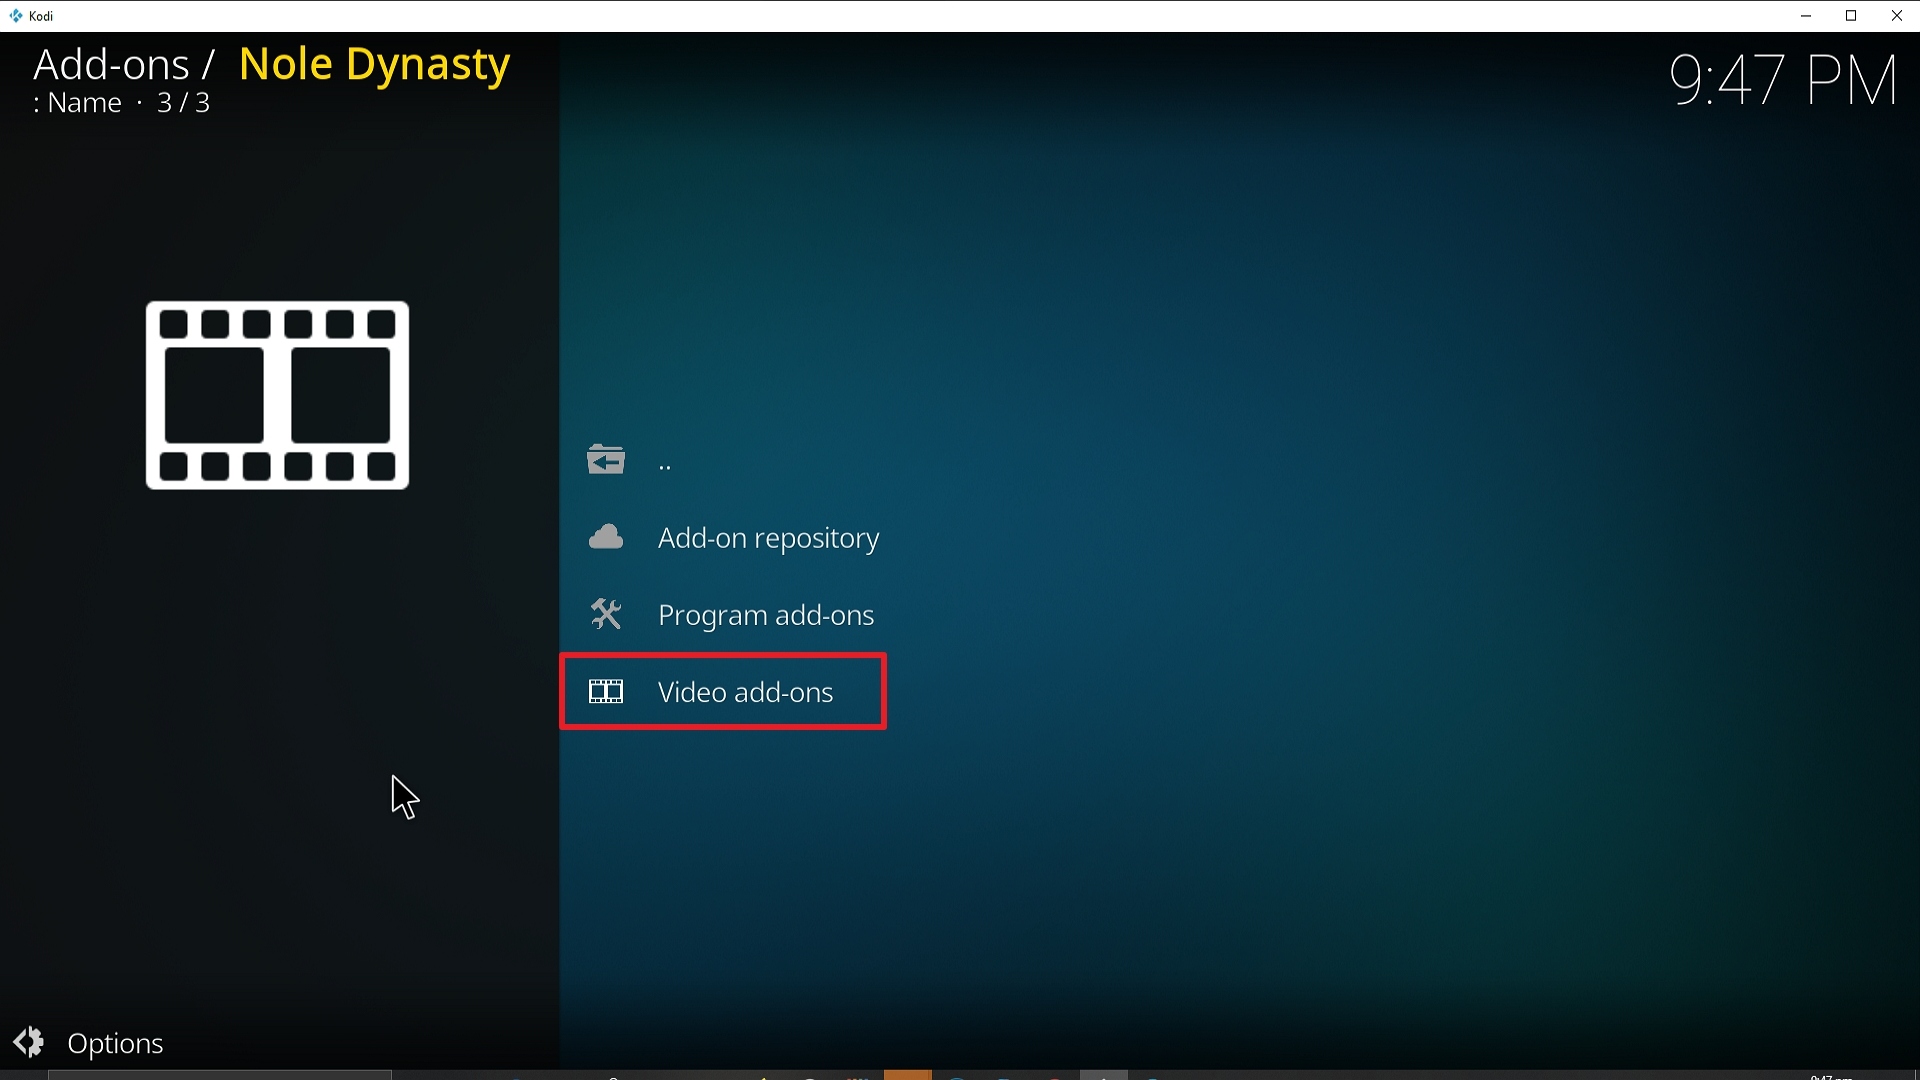
21. Pick Video add-ons.

Step 21 Installing Apocalypse 720 addon on Kodi


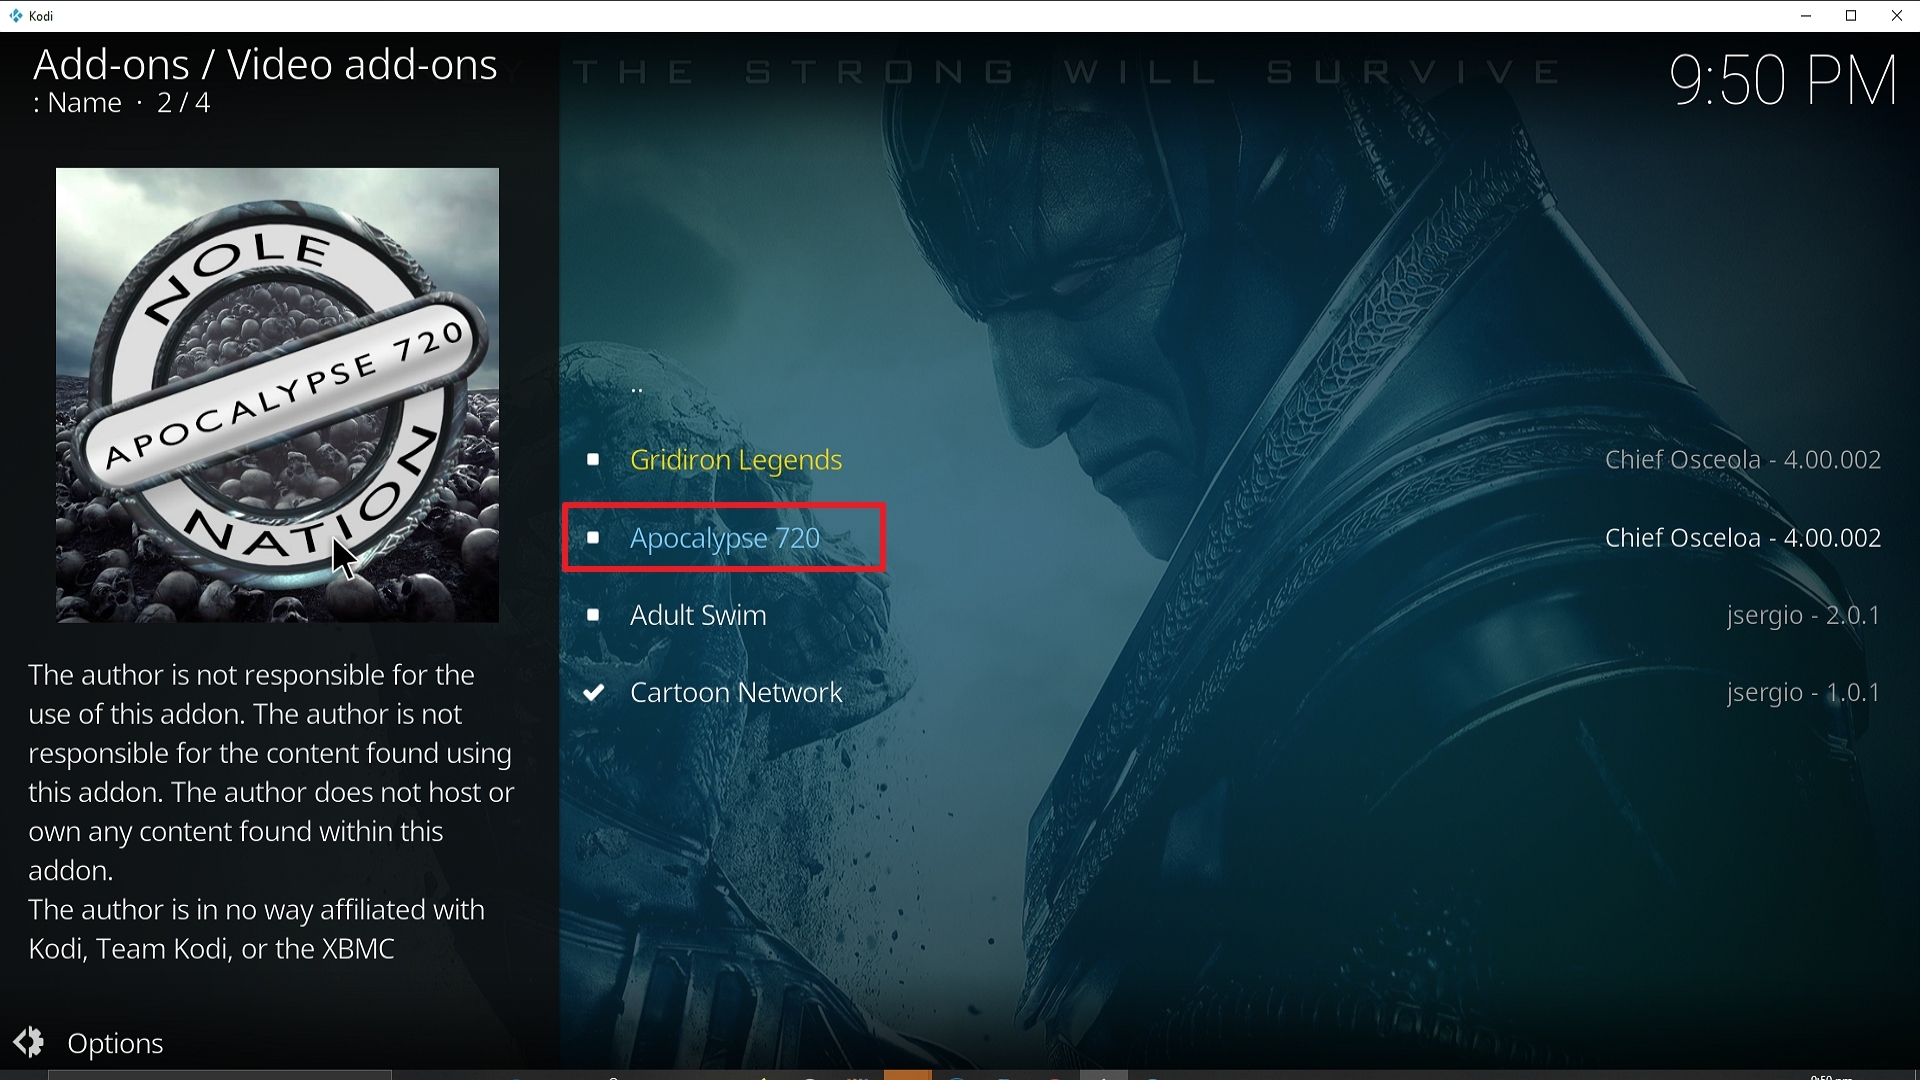
22. Select Apocalypse 720 again.

Step 22 Installing Apocalypse 720 addon on Kodi


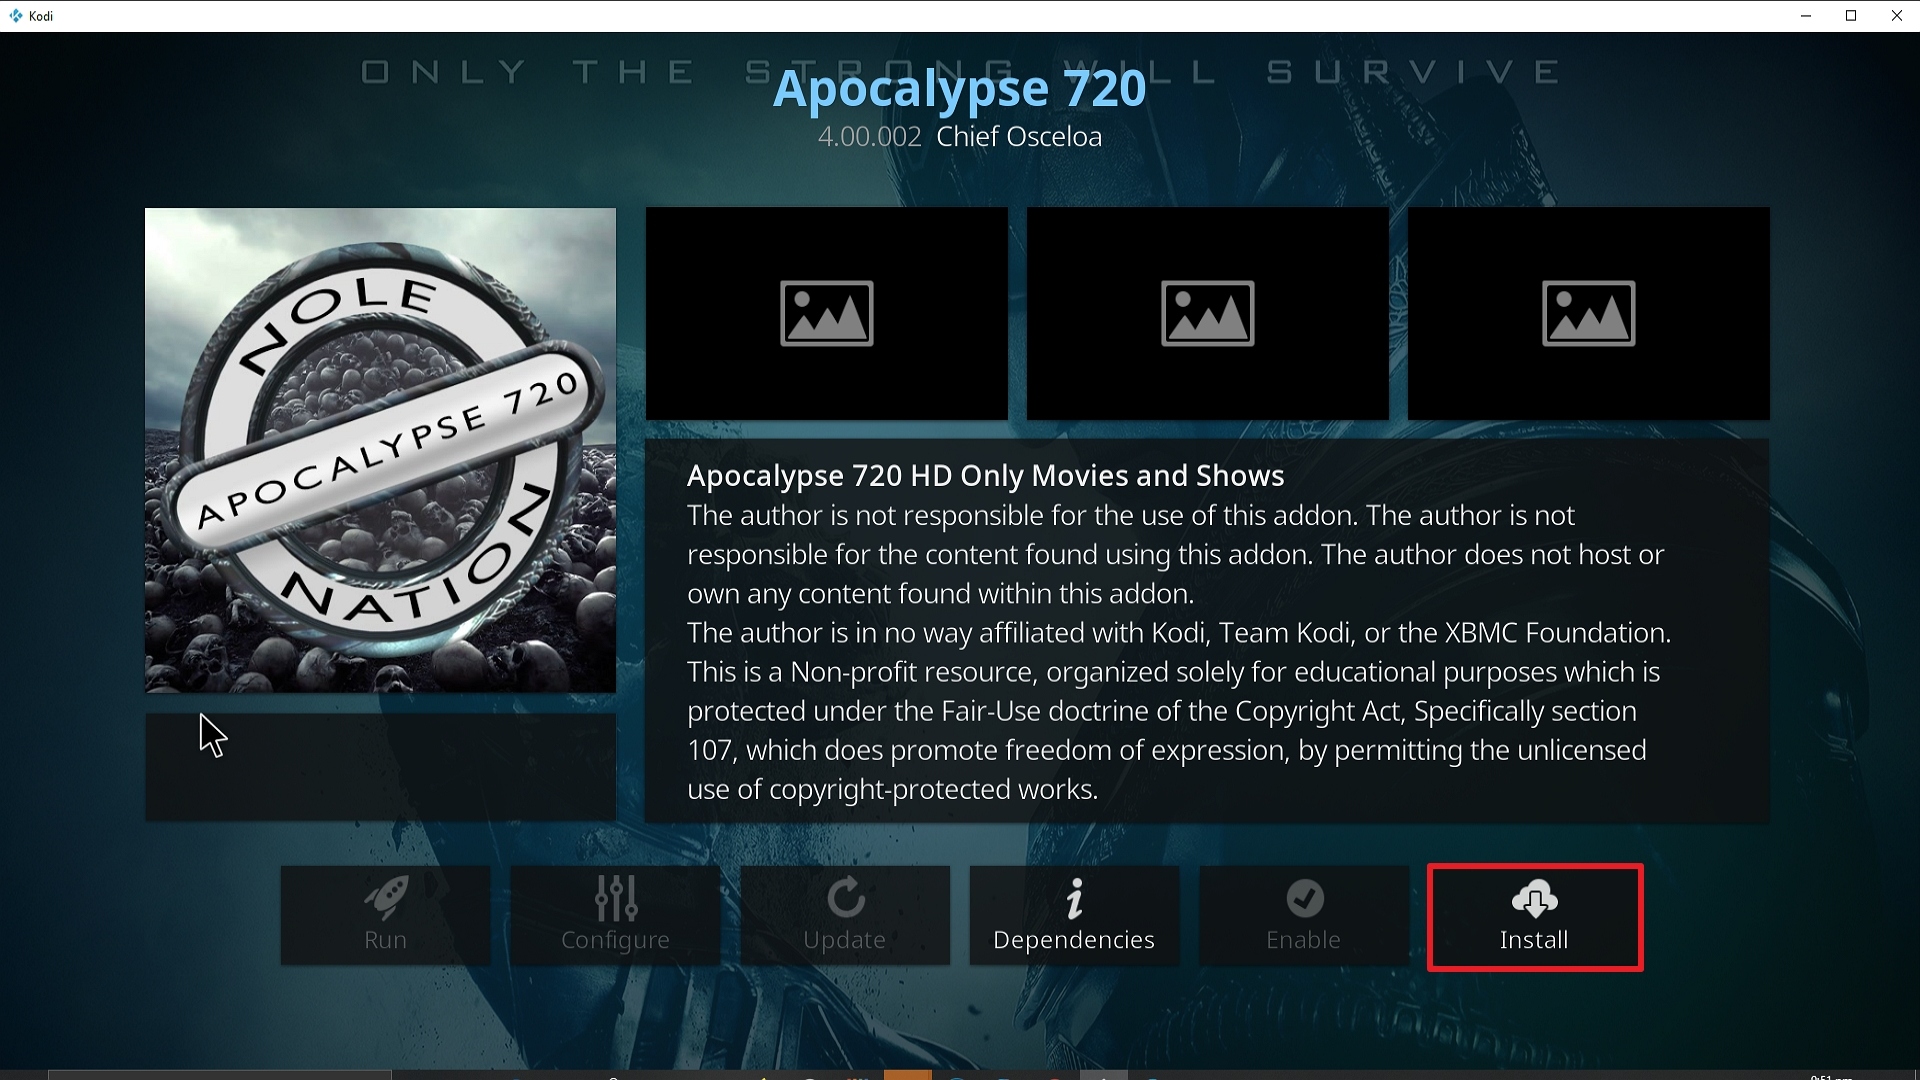
23. Click on Install.

Step 23 Installing Apocalypse 720 addon on Kodi


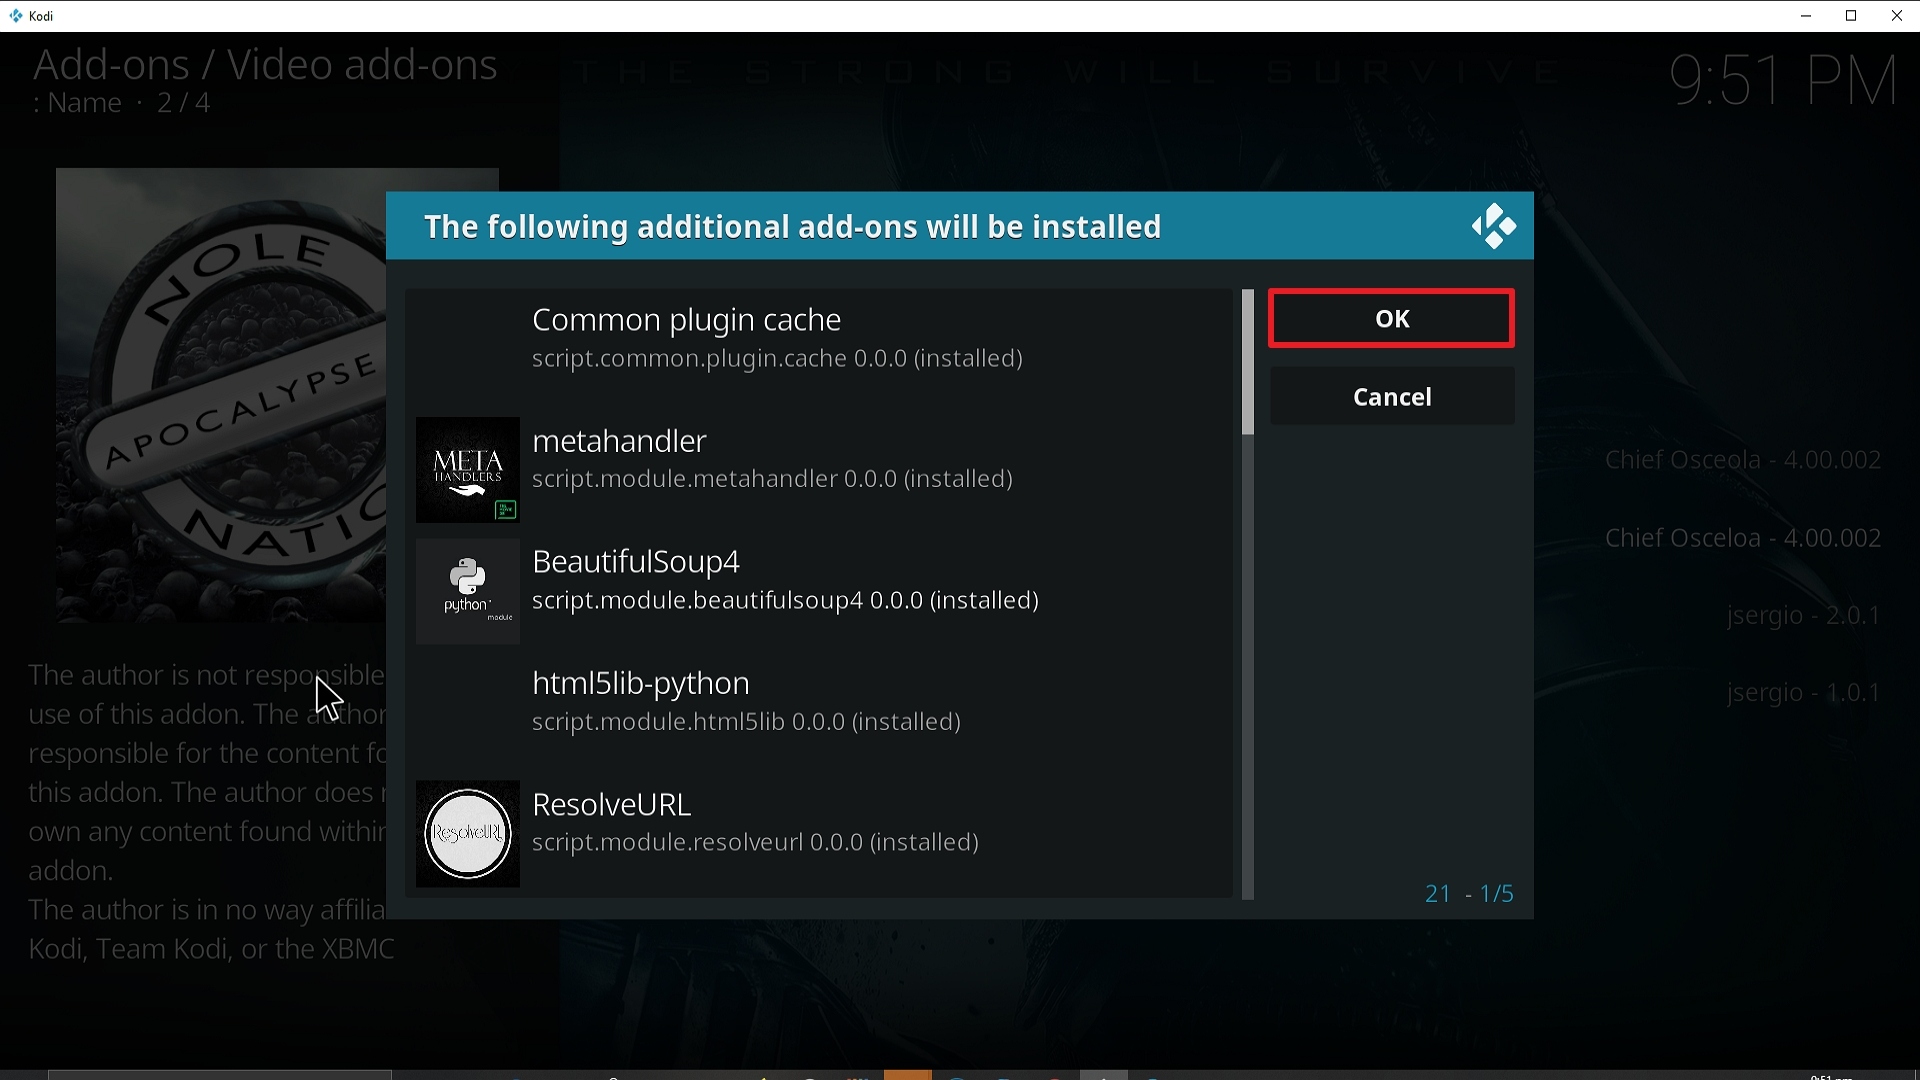
24. Select OK after reviewing the add-ons that will be installed.

Step 24 Installing Apocalypse 720 addon on Kodi


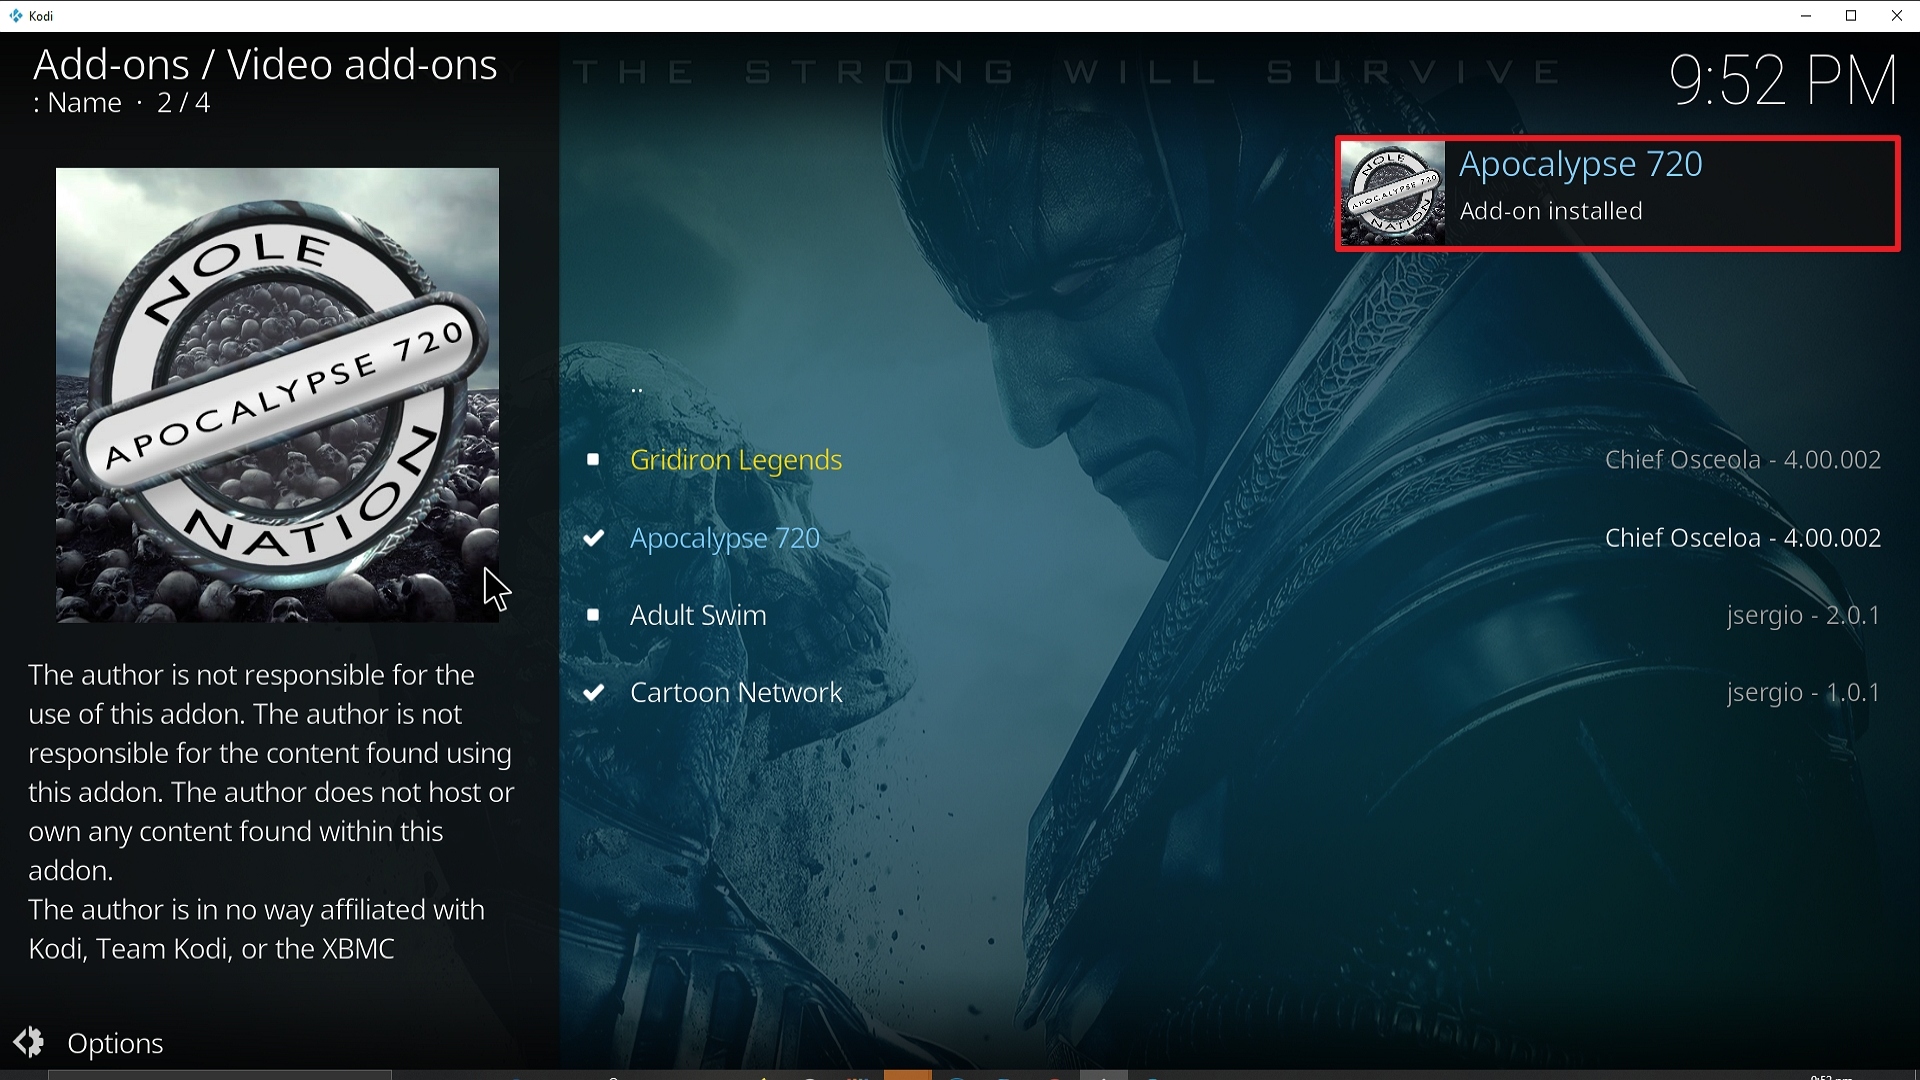
25. You should see a popup in the upper right corner saying Apocalypse 720 has installed. There will actually be multiple popups for the various components.

Step 25 Installing Apocalypse 720 addon on Kodi


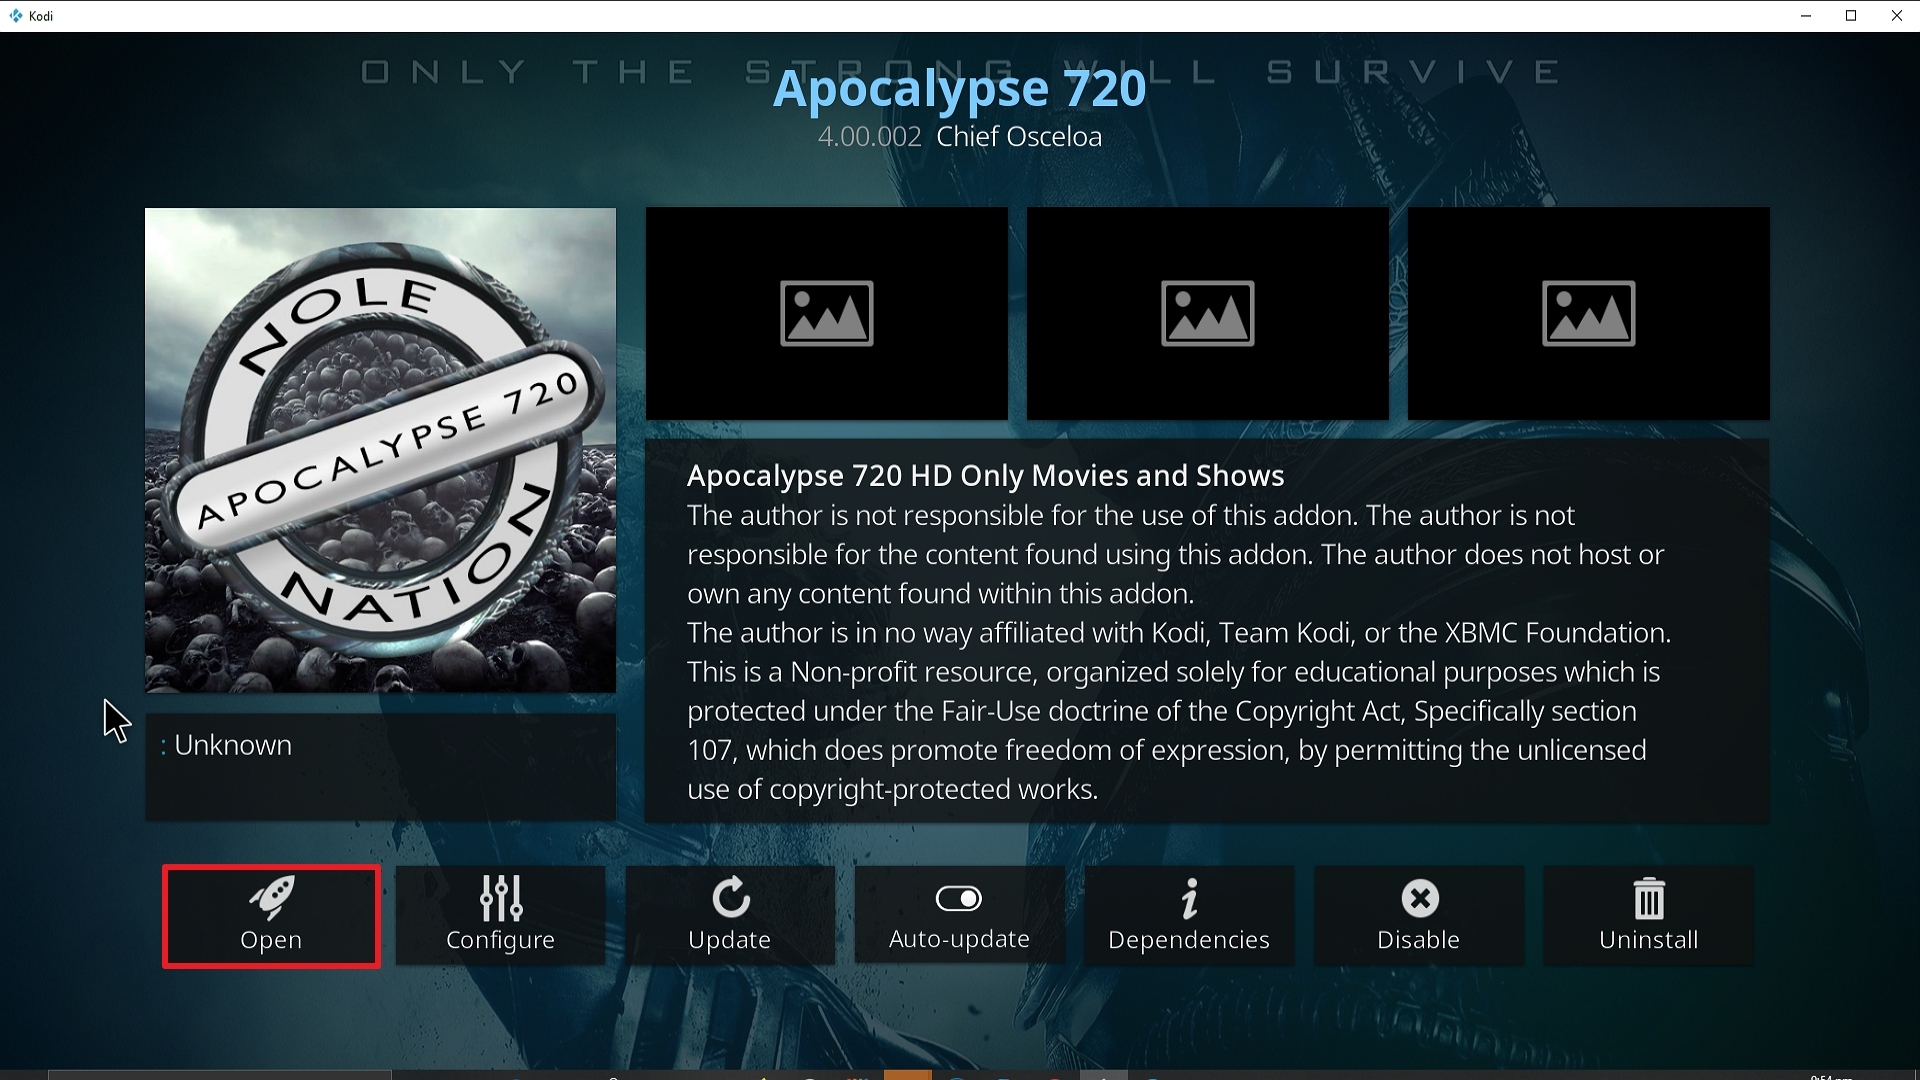
26. Click on Open to start the Apocalypse 720 add-on.

Step 26 Installing Apocalypse 720 addon on Kodi


Install Surfshark on Firestick

Best Surfshark Deal


Alternatives

As it is, Apocalypse 720 is already an add-on that you can consider to have it all. From its extensive library of options, you can already enjoy watching anything under the sun. But that wouldn’t be the case all the time because issues may arise during its run. Here at ReviewVPN, we always remind our subscribers to have a contingency plan. If a certain add-on encounters issues, we always advise that you have a back-up so that your entertainment experience doesn’t get affected whenever an issue arises with Apocalypse 720. Here is a list of add-ons that we also trust to cater to your needs:

        Primal Add-on

        Exodus Add-on

        Exodus Redux Add-on

        The Magic Dragon Add-on

The suggested add-ons above are very similar to Apocalypse 720’s content. So if ever a need arises, these add-ons are very much capable and will surely satisfy your needs and preferences.

Common Errors

These are some of the things that may cause an issue when installing Apocalypse 720:

  1.    Unable to connect to URL/Download

If you are having difficulties downloading Apocalypse 720 this may mean that the repository is unstable and that the IP may be unavailable. It is also worth checking out if you have typed the correct URL that you have downloaded Wolf Pack from the right repository. Also, make sure that you have a stable internet connection and that you are secured by a VPN. If your country has stricter rules regarding censorship, you may find that it is blocked because it may contain adult content and that it is collected illegally. Your ISP constantly monitors your activity and may block certain websites from being accessed. To fix this, use a VPN to make your connection encrypted and anonymous so that your tracks will be covered. Check here for the best VPN deal.


  1.     Script Error

This error occurs due to the add-on itself or on the manner Kodi has been installed. Make sure that you have installed everything properly. If this problem persists, try reinstalling the add-on or there may be a need to update or reinstall Kodi. To figure out how to do this and other fixes read our in-depth guide linked above.


  1.     Kodi Check Log Error

Check Log Errors usually happen often as you use Kodi until you get familiar with it. This usually happens when your media cache is full. Your device will always cache a clip every time you watch media to allow faster loading time. In the long run, this cache gets full thus creating this issue. An in-depth guide on how to empty your cache is provided at the link above.


  1.     Source not working/slow/frozen

Apocalypse 720 does not keep any of the content on its servers, these are all coursed through 3rd party sites. Give the source up to 15 seconds to load and then you can try other suggestions. For other solutions please take time to read our in-depth guide linked above.


How to Install Surfshark VPN on Firestick

If your Firestick still has the older interface, read this article to learn how to update it: Update Firestick Interface.

Follow our screenshots below to install the SurfShark VPN app on your Fire TV stick.

1. Go to the Home screen of your Firestick.

step 1 Install Surfshark VPN on Firestick


2. Navigate towards the Find tab. Press the Search button from the resulting dropdown.

step 2 Install Surfshark VPN on Firestick


3. Type in the keyword of SurfShark and select from the suggestions that will appear.

step 3 Install Surfshark VPN on Firestick


4. Click the official SurfShark icon from your search results.

step 4 Install Surfshark VPN on Firestick


5. Press the Download (You own it) button.

step 5 Install Surfshark VPN on Firestick


6. The SurfShark VPN installer will download on your device.

step 6 Install Surfshark VPN on Firestick


7. SurfShark VPN’s app will automatically install itself on your Fire TV stick.

step 7 Install Surfshark VPN on Firestick


8. Press the Open button after completing SurfShark VPN’s installation process.

step 8 Install Surfshark VPN on Firestick


9. Please wait for the SurfShark VPN to load its user interface.

step 9 Install Surfshark VPN on Firestick


10. You can now log in with your SurfShark VPN account credentials.

step 10 Install Surfshark VPN on Firestick

Learn more about Surfshark and Grab the Best Surfshark Deal Now!


Install Surfshark on Firestick

Best Surfshark Deal


Other VPNs to Consider

NordVPN (Best for Streaming)

Best Features

  • 5000+ Server in 50+ Countries 
  • Military-Grade Encryption
  • Fast Connection Speed
  • Suitable to a lot of devices
  • No-Log Policy

Prices
  • Complete $5.89 per month (64% Discount)
  • Plus $4.59 per month (56% Discount)
  • Standard $3.69 per month (55% Discount)

Best Features

  • 750+ High-speed VPN Servers in 43 Locations
  • Military-Grade Encryption
  • Fastest HD Streaming and Gaming
  • 30-Day Money-Back Guarantee
  • Unlimited Data & Devices
  • No-Log Policy

Prices
  • 3 Years $1.99 per month (82% Discount)
  • 1 Years $3.29 per month (70% Discount)
  • 1 Month $10.99 per month

IPVanish VPN (Most Secure)

Best Features

  • 1200+ Servers in 60+ Countries around the world
  • Unlimited Connections
  • No-Log Policy
  • Top Notch Military-Grade VPN Protocols and Encryptions
  • 100% Safe and Secured
  • Most Trusted VPN
  • Best VPN for Firestick
  • 30-Day Money-Back Guarantee

Prices
  • Yearly $3.99 per month (63% Discount) – 30 days risk free + Ransomware & Malware Protection
  • Quarterly $5.32 per month (51% Discount)
  • Monthly $10.99 per month


For more VPN discounts, go to ReviewVPN Deals and purchase the best VPN for you.

Click here to get the lowest price on Surfshark through our exclusive limited-time offer.


Conclusion

Contrary to the meaning of its name, Apocalypse 720 doesn’t spell “the end” or “doom”. It is a very reliable go-to add-on that seemingly provides unlimited content. With its 720p-only provision, you will get only the best and high-quality streaming links for a maximum visual experience. For DC and Marvel fans out there, this add-on is a must on your devices because it will surely satisfy your cravings for your superheroes and the like. Thus, that makes Apocalypse 720 one of our favorite add-ons here at ReviewVPN. We sincerely hope that this guide will be able to provide guidance and insight into what this add-on is really all about. For further assistance or queries, please feel free to comment and contact us here at the website or in any of our other social media platforms. Enjoy!

Install Fusion Org Kodi Addon

Fusion Org Kodi Addon

In this article, we will help you install Fusion Org Kodi Addon on Firestick.


Source: http://repositorio.fusionorg.net/repository.Fusion.org/

A lot of add-ons are readily available to be downloaded on the web. A lot of those add-ons basically provide English content that ranges from Movies, TV Shows, and a whole lot more. Seldom do we see add-ons that feature Dubbed content especially Spanish dubs for that matter. A lot of people who hail from the Latin Americas would really appreciate content that specifically caters to their needs because sometimes, it is better to watch content that is dubbed in your native language. Luckily for our Hispanic brothers and sisters, there is such an add-on and it is Fusion Org.

 Fusion Org is an add-on under the Fusion Org Repository that features popular Movies and TV Shows that are all Spanish-Dubbed. Everything around this add-on is written in Spanish too making it easier to understand for Latinos and Latinas alike.


ANONYMOUSLY


Features

        Peliculas (Movies)

        Colleciones (Collections)

        Buscador (Search)

        Herramientas (Tools)

        Brief Summary for every title

        HQ Content

        Works well with Open Meta Add-on


Easy Installation Guide

  1. Launch Kodi on your device
  2. Click on the “Gear Icon” and select “System”
  3. At the add-ons menu, turn on the “Unknown Sources” by clicking “yes”
  4. Go back to the “systems” page and choose “File Manager”
  5. Choose Add source and select “none”
  6. Type in http://repositorio.fusionorg.net/repository.Fusion.org/
  7. Highlight the source and rename it to “Fusion” or any name you would like to use to identify this particular source and click “ok”
  8. Go back to the System Screen and click “Add-ons”
  9. Select “Install Zip File” choose “Fusion” or whatever you renamed the file.
  10. Select the zip file URL- repository.fusion.org-1.2.zip
  11. Wait for the notification “Fusion Add-on Repo Installed” to appear.
  12. Select “Install Repository”
  13. Choose “Fusion Build Repo”
  14. Click on “Video Add-ons” and select “Fusion Org” and “Install”
  15. Click “Ok” when a notification “the following add-ons will be installed” appears and wait for Fusion Org Add-on to install
  16. Once the add-on is installed go back to the home screen and select “add-ons”
  17. Choose “Video add-ons” and select “Fusion Org”
  18. There you go, Fusion Org add-on is now installed.


YOUR INTERNET ACTIVITY IS BEING WATCHED

ReviewVPN cannot attest to the legality, security and privacy of the applications discussed on this site. It is highly recommended that you use a VPN service while streaming or using Kodi.

Currently, your IP 216.73.217.150 is visible to everyone and your Browser is being tracked by Advertisers & ISP Provider.

Save 65% Now

Limited Time Offer

Here are the main reasons why you must use a VPN:

  • Your activities are hidden from your ISP, the government, and from the apps you are using.
  • You can access additional movies and TV streams.
  • ISP attempts to throttle are thrwarted thus reducing buffering issues.
  • Geographically restricted content like Netflix and Hulu can be unblocked.

A VPN works be replacing your ISP-assigned IP address and creating an encrypted tunnel. We recommend the no log service offered by IPVanish. It works well on a Firestick and offers the fastest possible speeds.

Special Limited Time Offer - Get IPVanish


Legal Disclaimer: ReviewVPN.com does not encourage or endorse any illegal activity involved in the usage of services and applications referenced on this site. We do not verify the licensing agreements of services. The end-user is wholly responsible for ensuring that any media accessed through these services does not violate copyright and/or licensing laws. ReviewVPN does not promote, link to, or receive compensation from any Apps and IPTV services.


Install Surfshark on Firestick

Best Surfshark Deal


How to Install Fusion Org on Kodi with Screenshots

1. From the home screen, select the cogwheel at the upper left.

Step 1 Installing Fusion Org addon on Kodi


2. Select System in the bottom right corner.

Step 2 Installing Fusion Org addon on Kodi


3. Select Add-ons on the left side of the screen.

Step 3 Installing Fusion Org addon on Kodi


4. Select Unknown sources.

Step 4 Installing Fusion Org addon on Kodi


5. Click Yes to allow unknown sources.

Step 5 Installing Fusion Org addon on Kodi


6. Select File manager.

Step 6 Installing Fusion Org on Kodi


7. Click Add source.

Step 7 Installing Fusion Org on Kodi


8. Click on <None>.

Step 8 Installing Fusion Org on Kodi


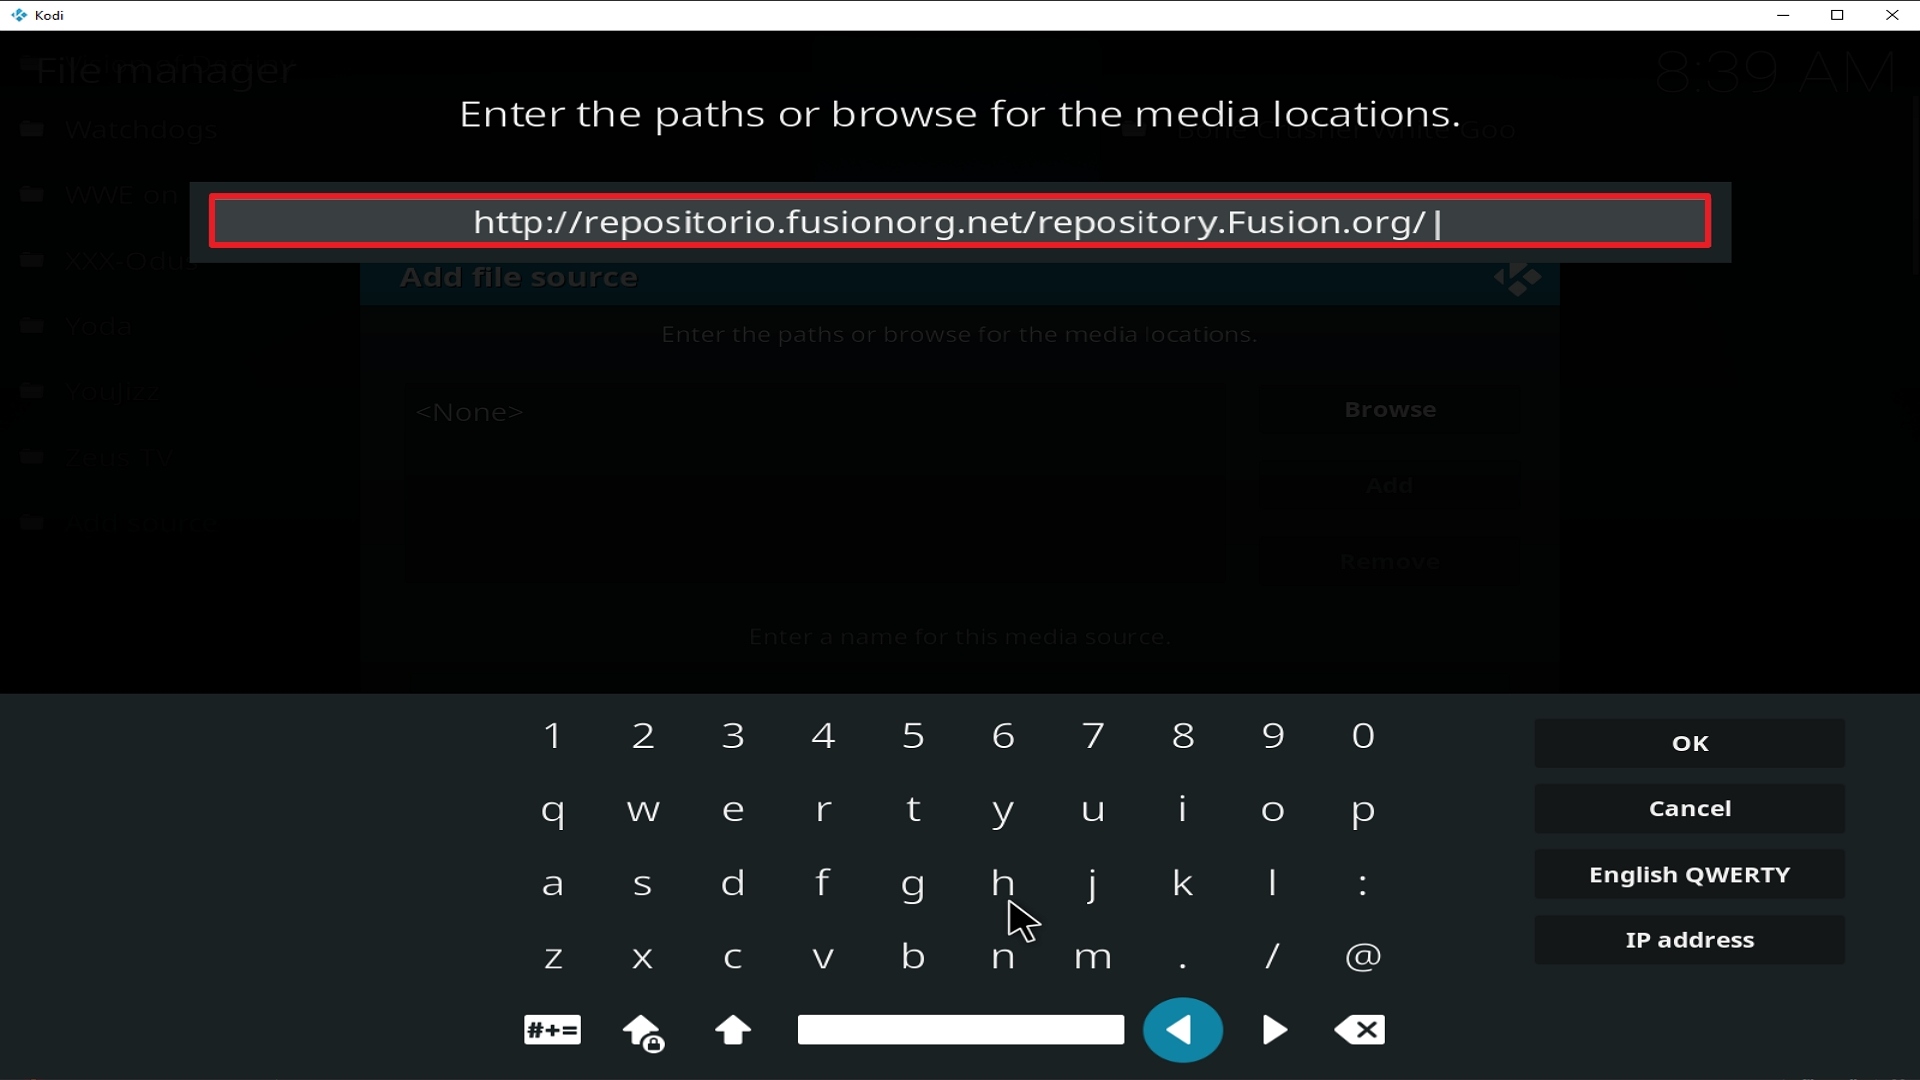
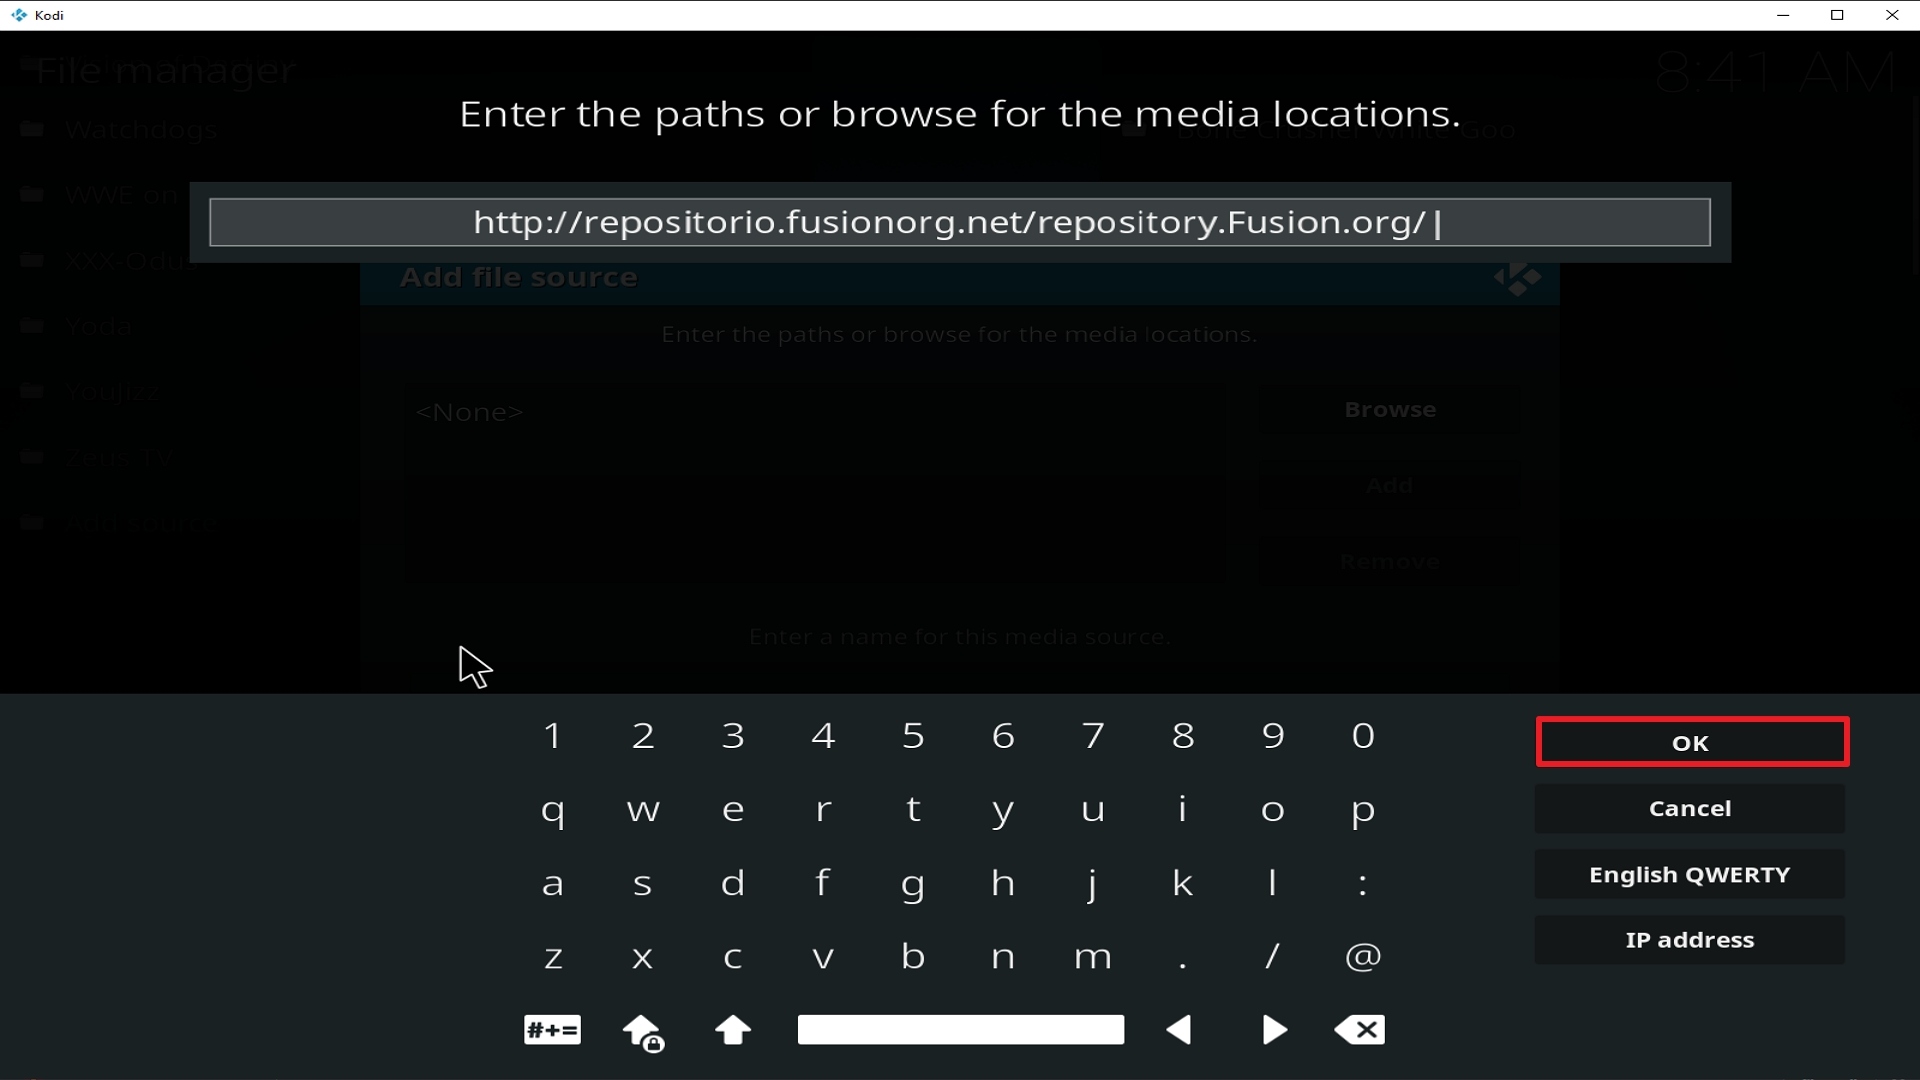
9. Type exactly: http://repositorio.fusionorg.net/repository.Fusion.org/

Step 9 Installing Fusion Org addon on Kodi


10. Click on OK.

Step 10 Installing Fusion Org addon on Kodi


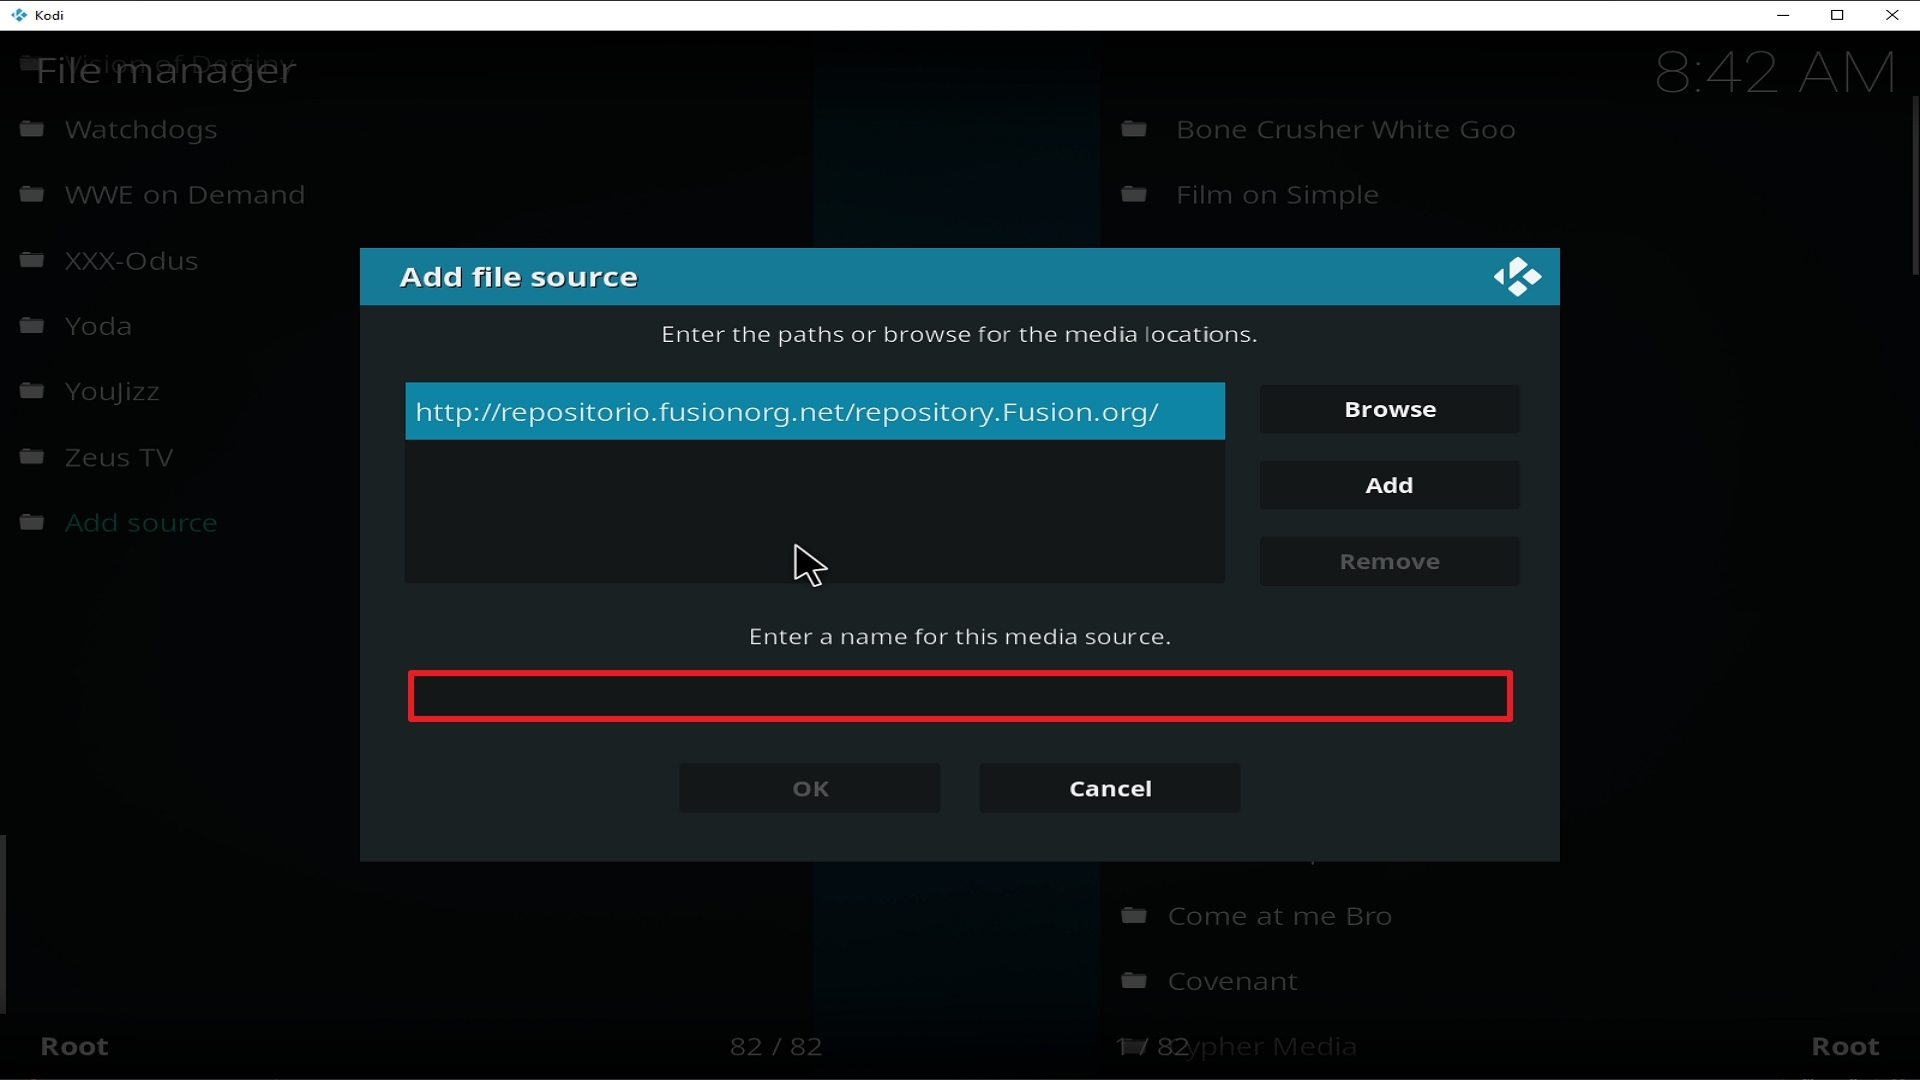
11. Select enter a name for this media source.

Step 11 Installing Fusion Org addon on Kodi


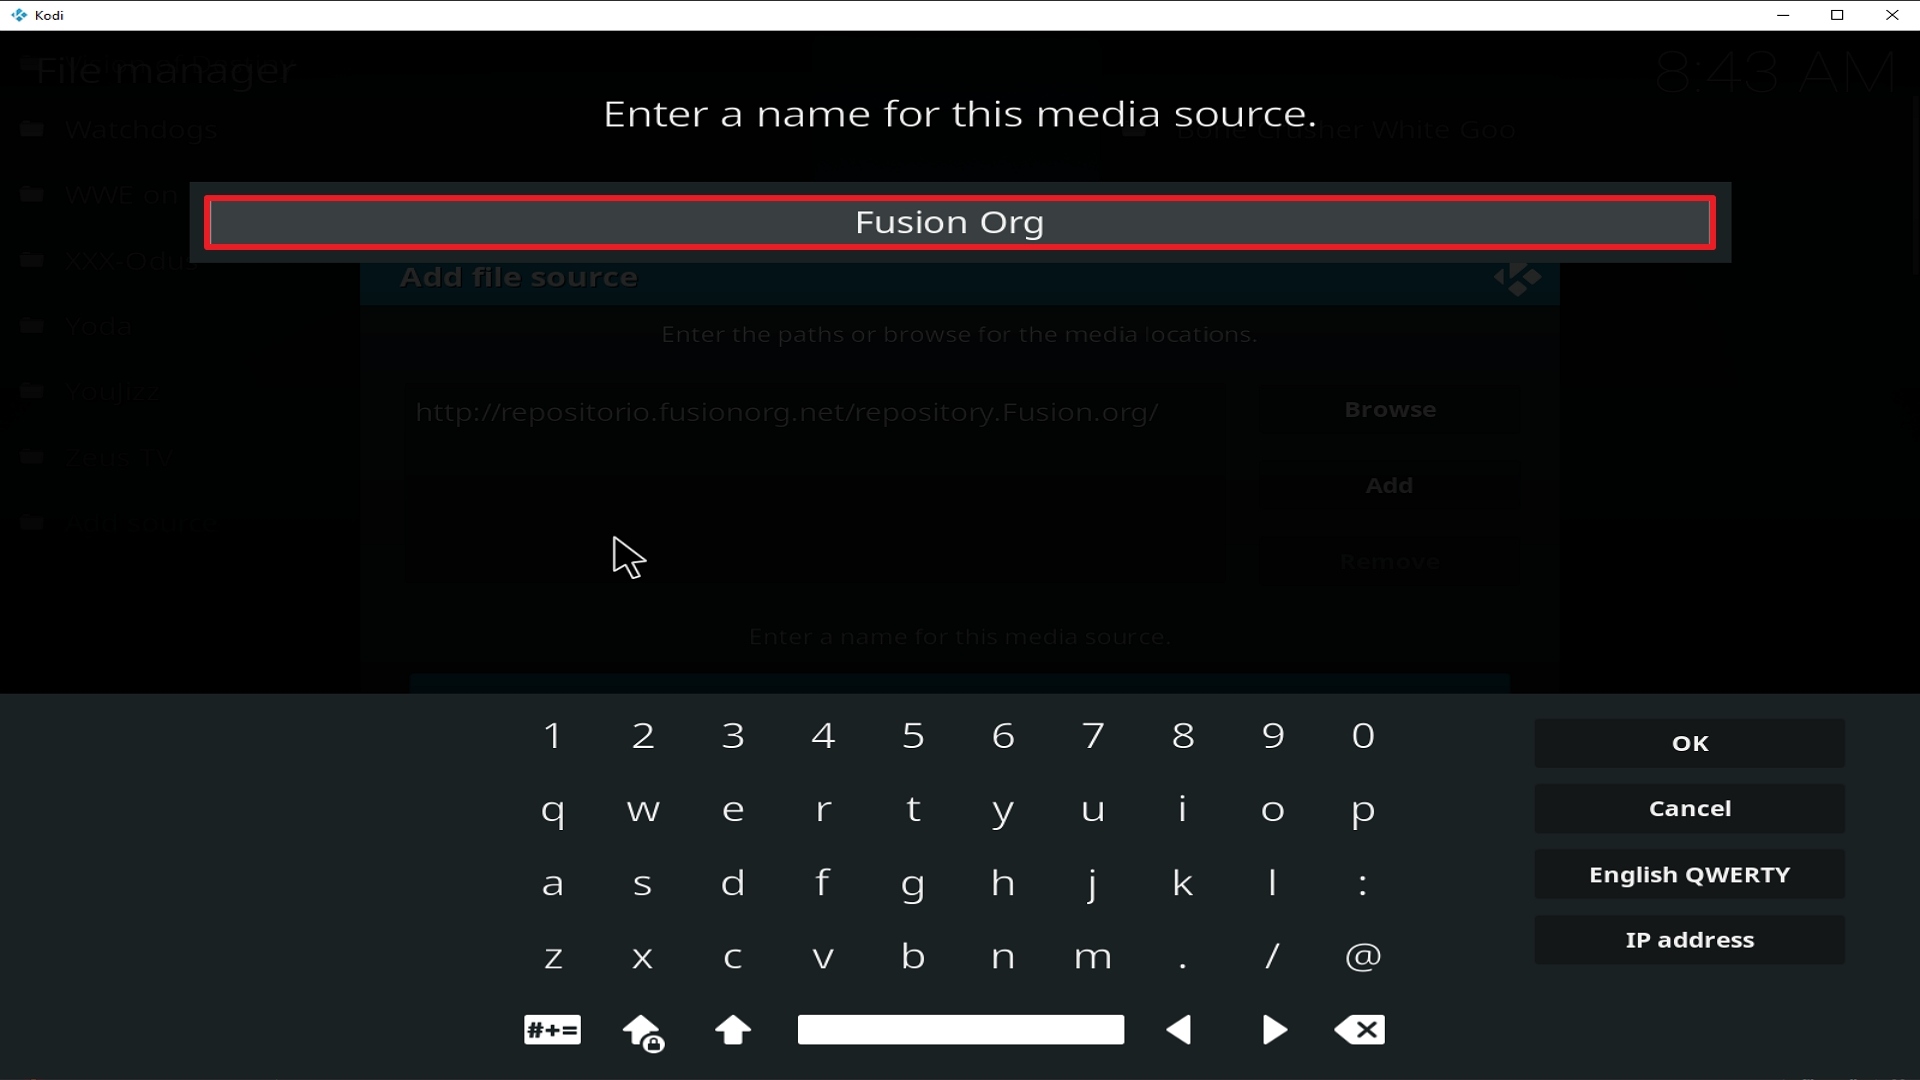
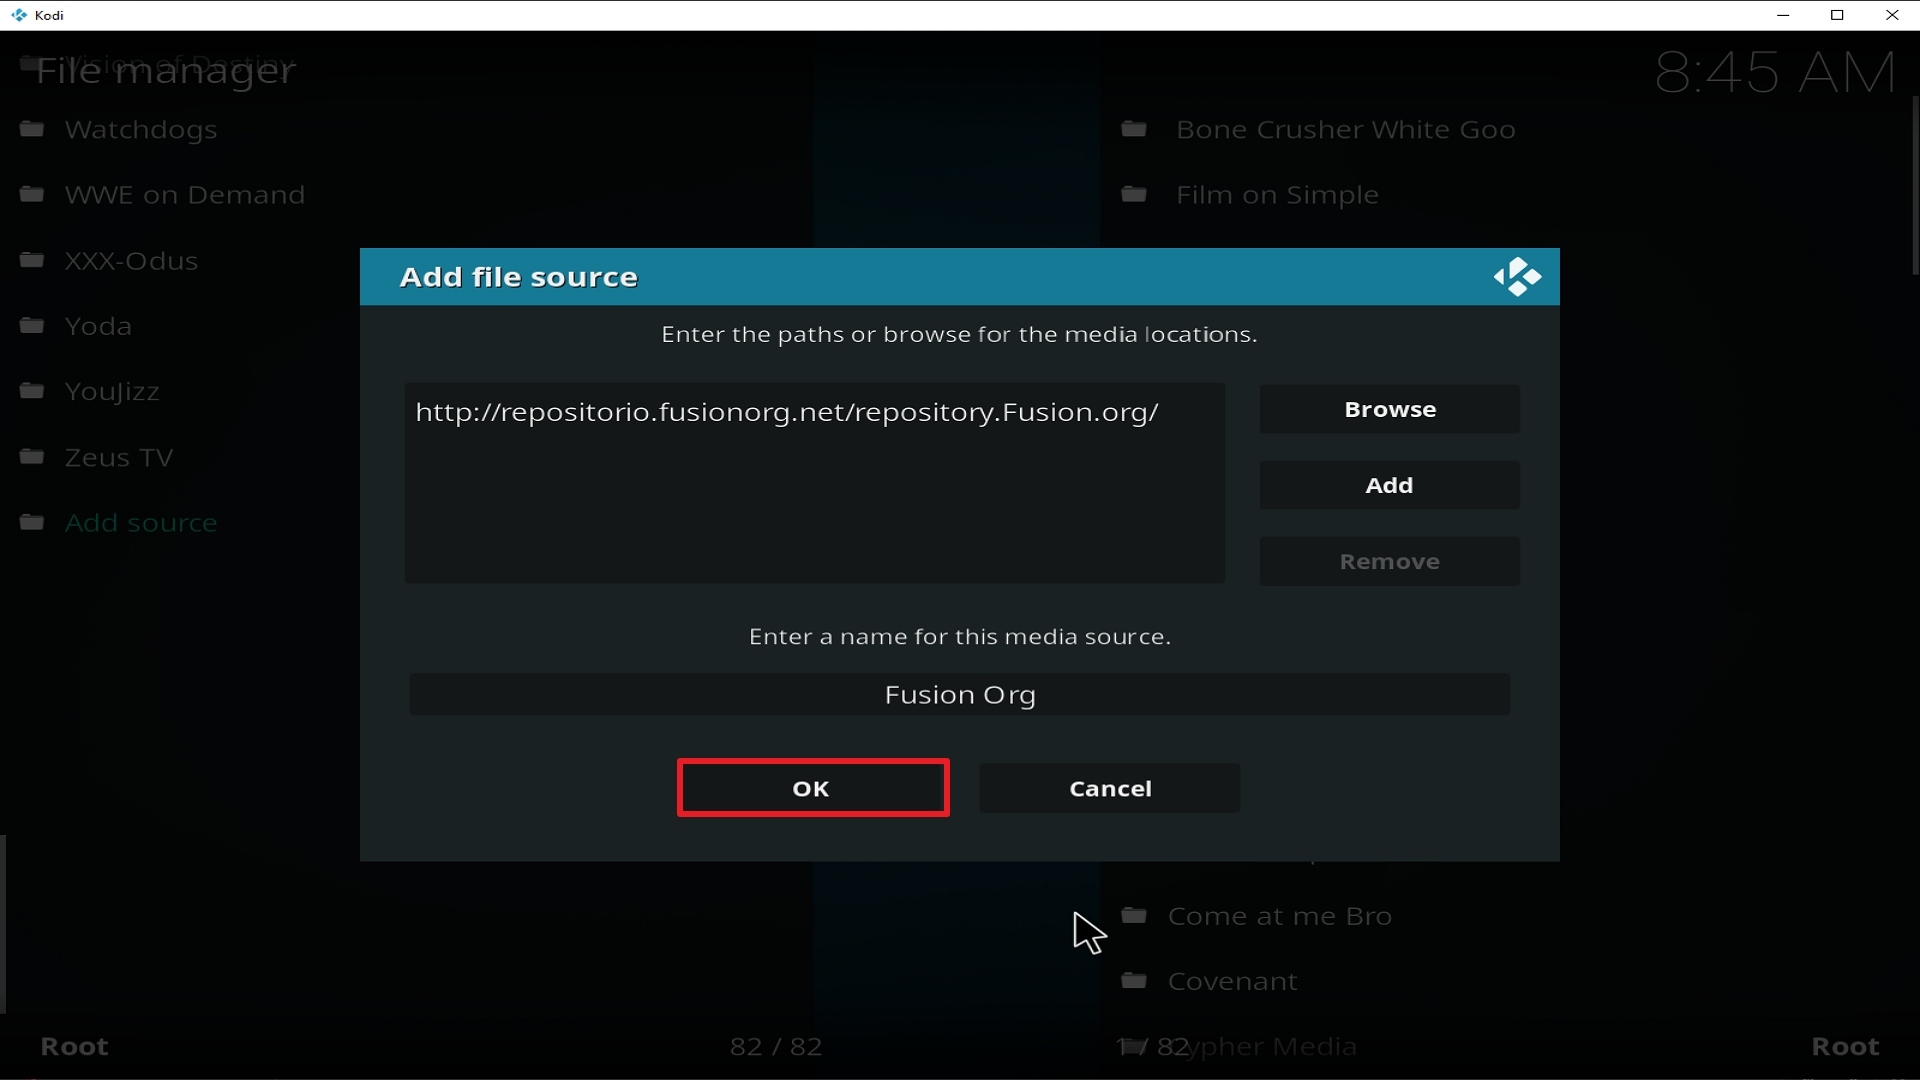
12. Name is Fusion Org (this part isn’t critical as long as you remember the name).

Step 12 Installing Fusion Org addon on Kodi


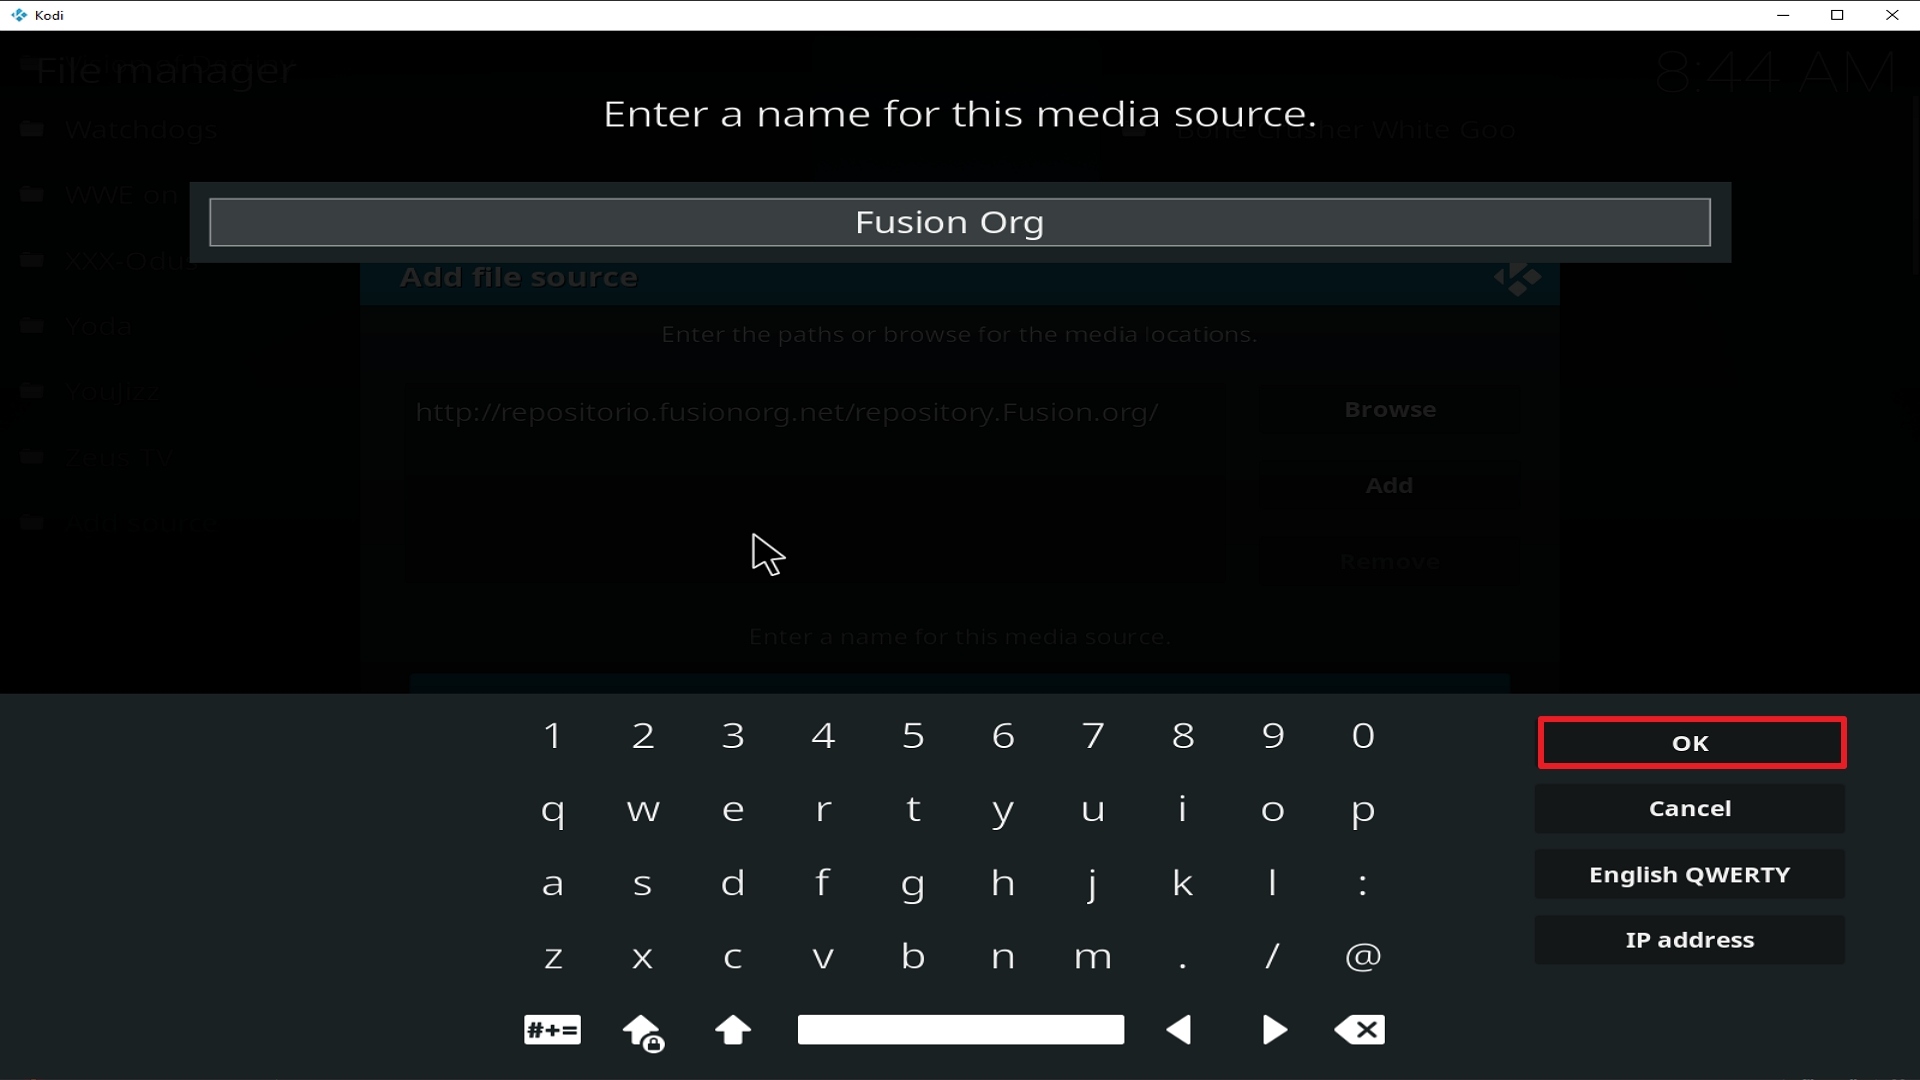
13. Click on OK.

Step 13 Installing Fusion Org addon on Kodi


14. Click on OK.

Step 14 Installing Fusion Org addon on Kodi


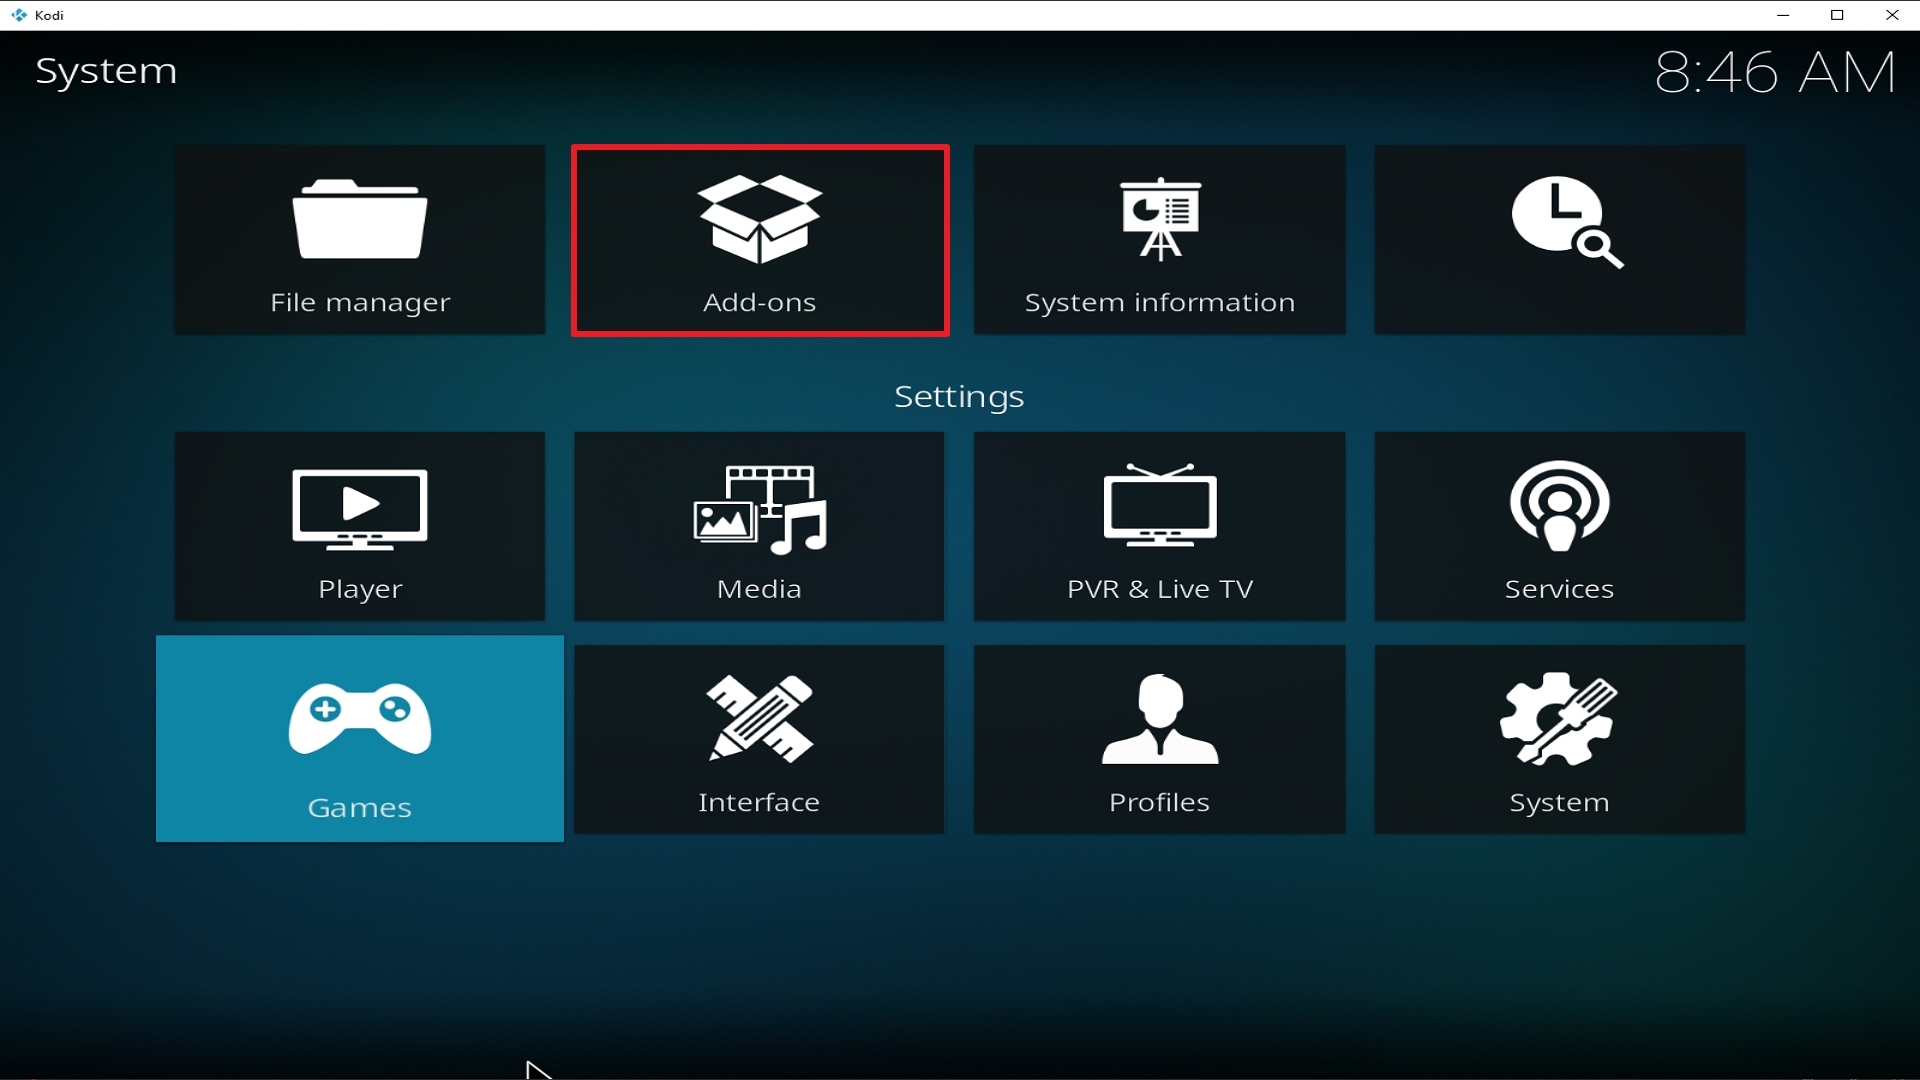
15. Take one step back and click on Add-ons.

Step 15 Installing Fusion Org addon on Kodi


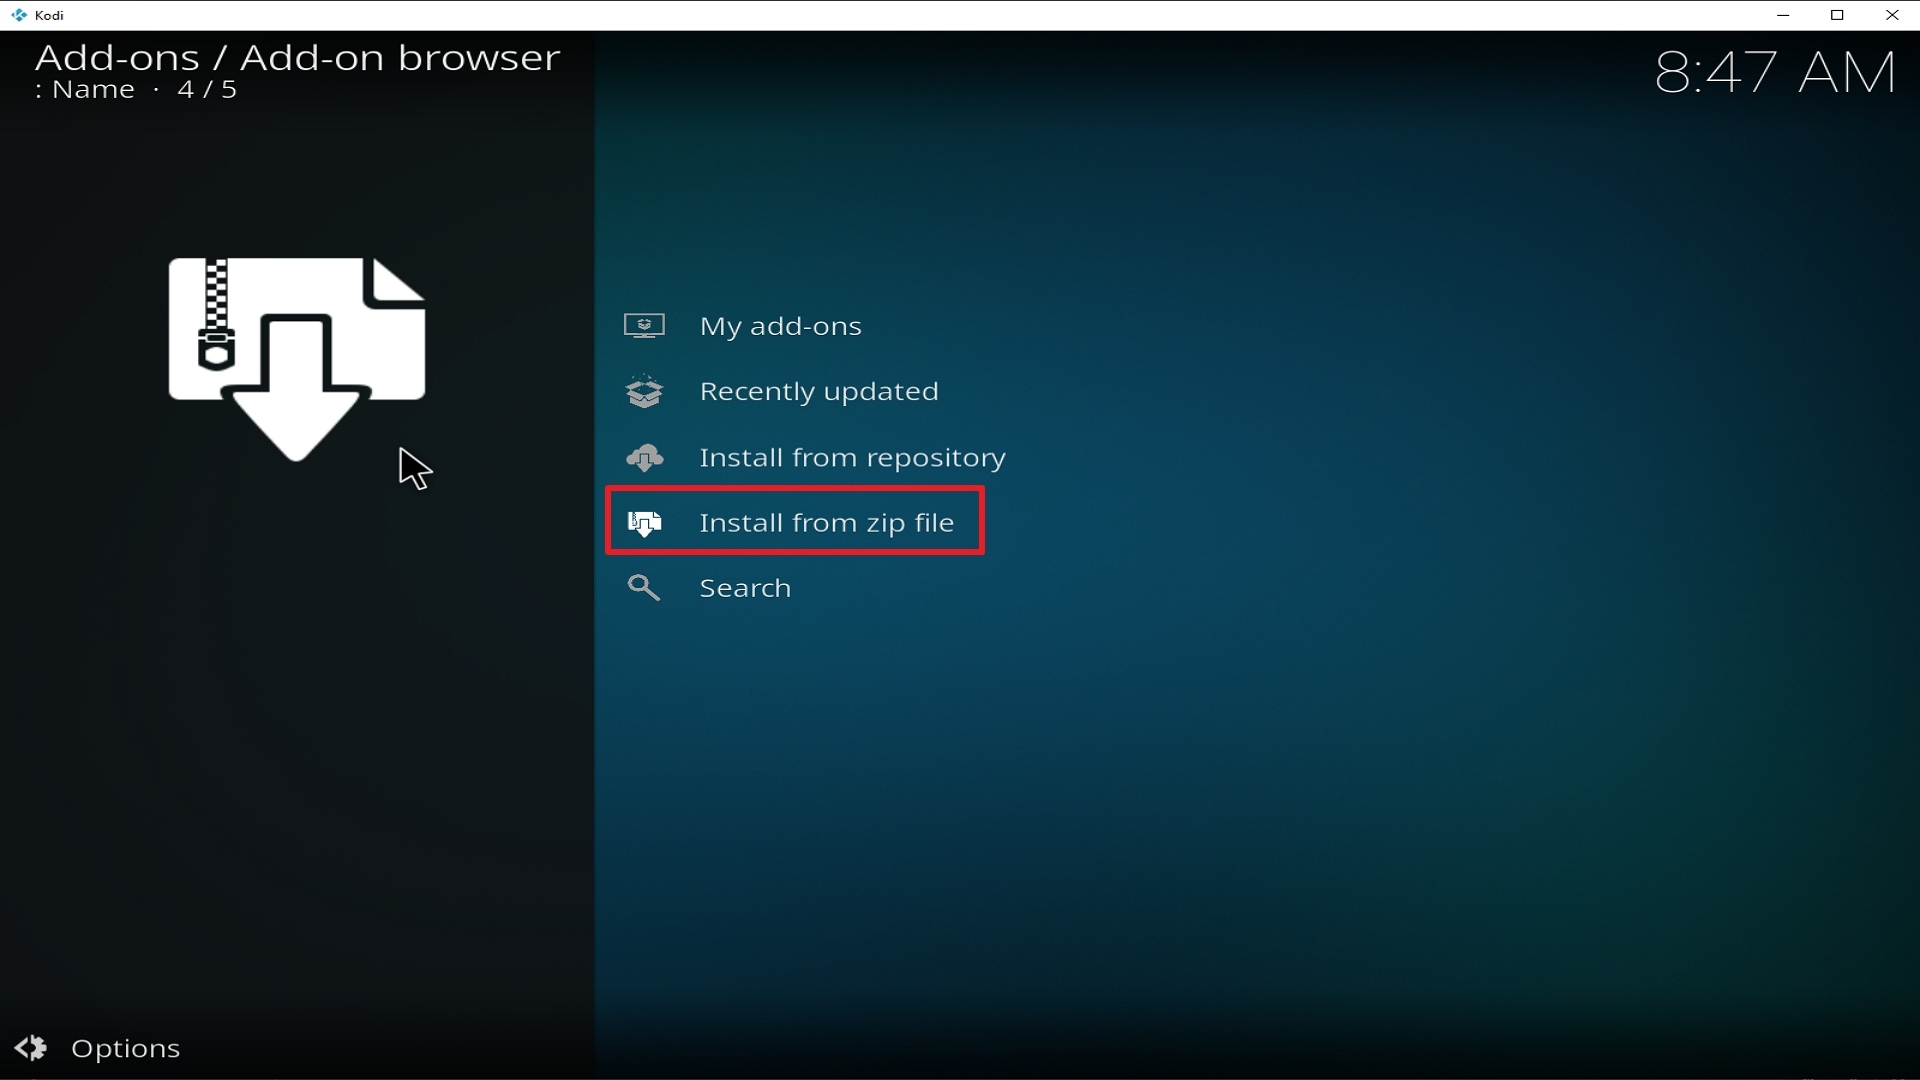
16. Select install from zip file.

Step 16 Installing Fusion Org addon on Kodi


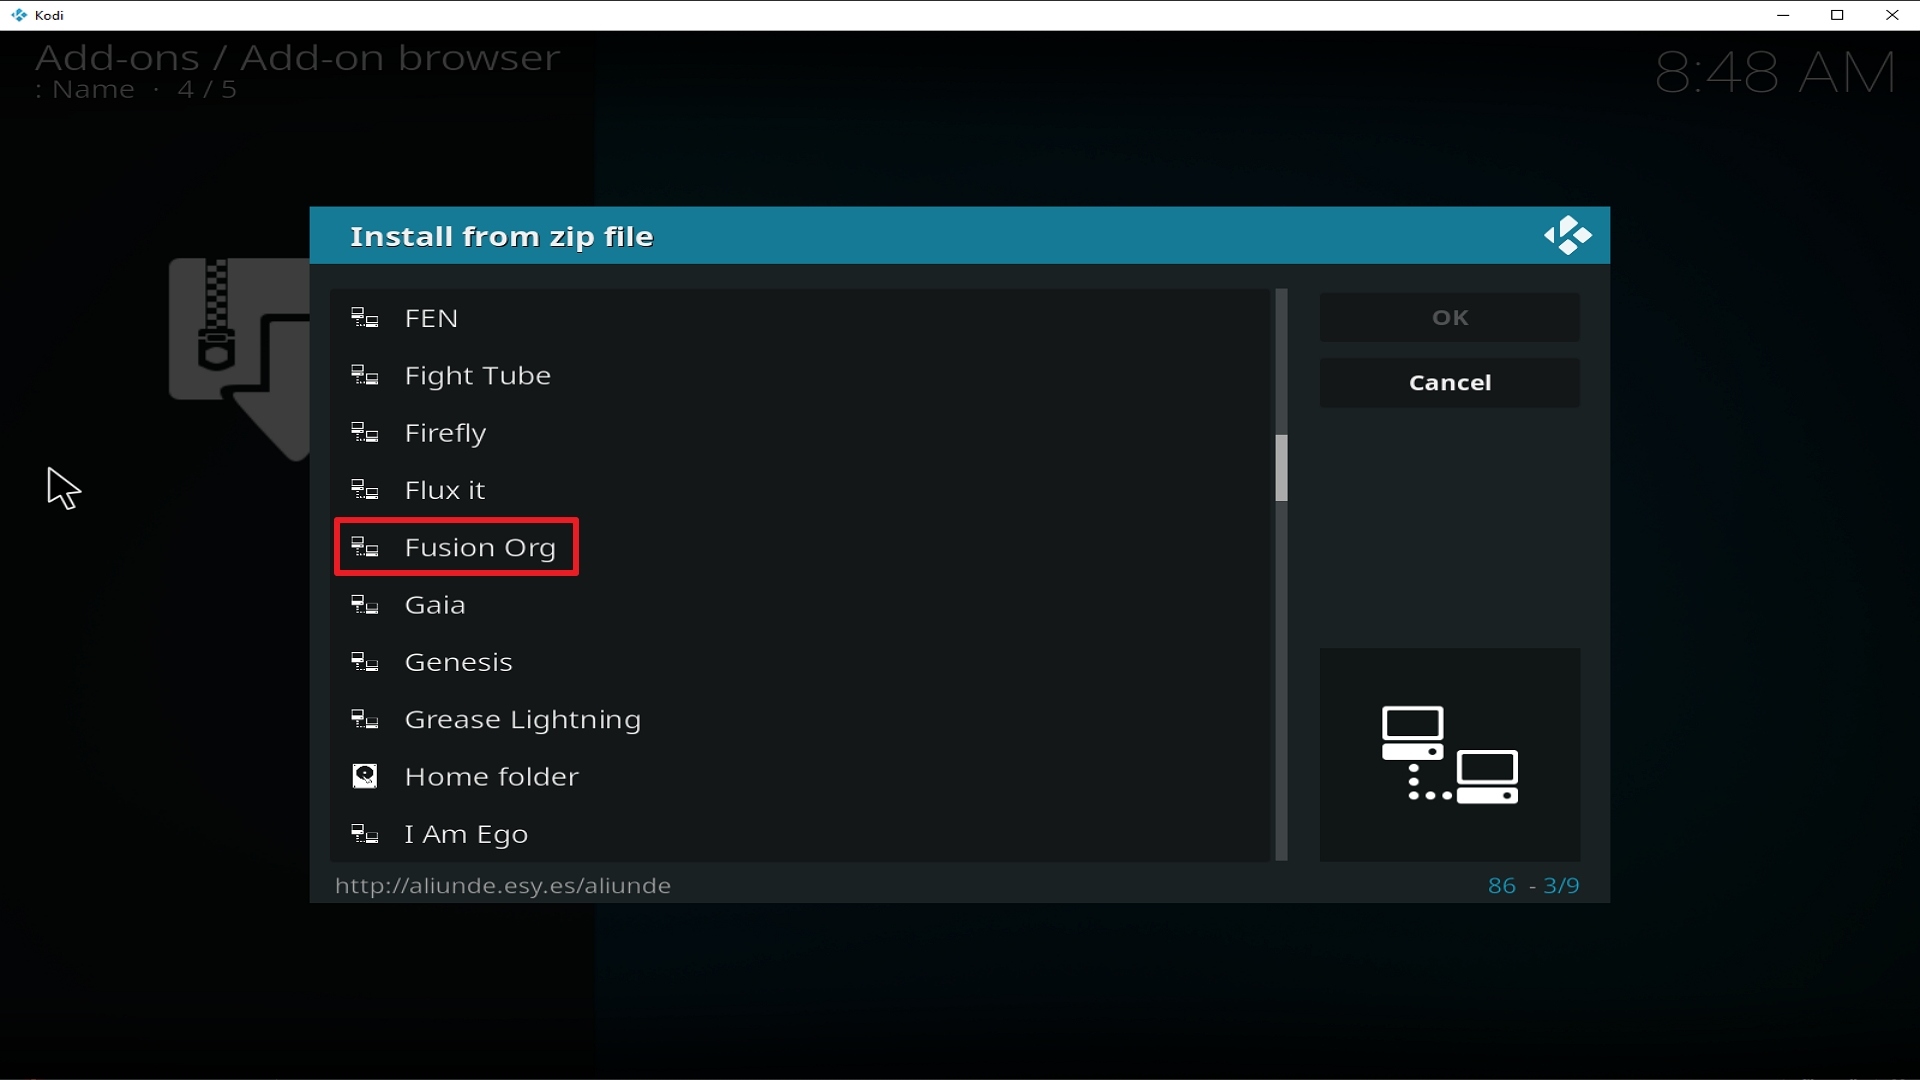
17. Click on Fusion Org  (or whatever you named the source).

Step 17 Installing Fusion Org addon on Kodi


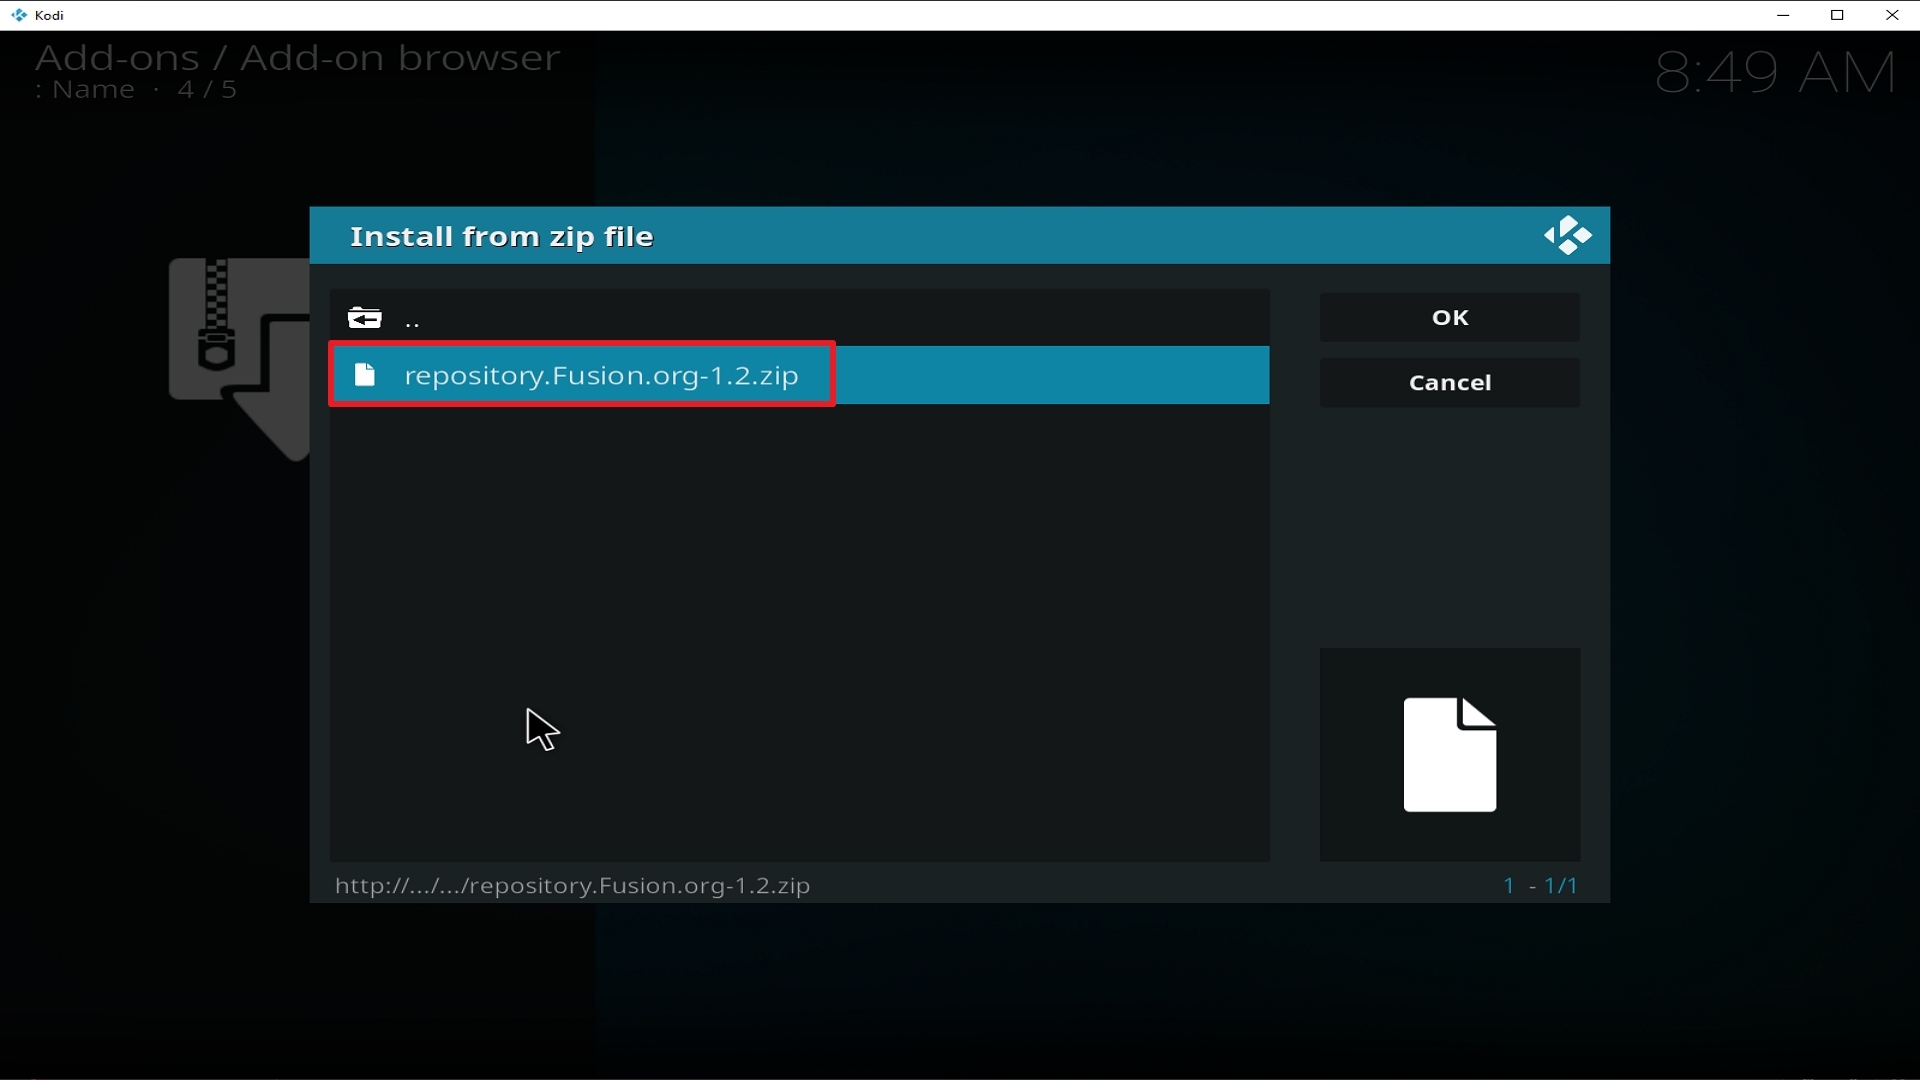
18. Click on repository.Fusion.org-1.2.zip

Step 18 Installing Fusion Org addon on Kodi


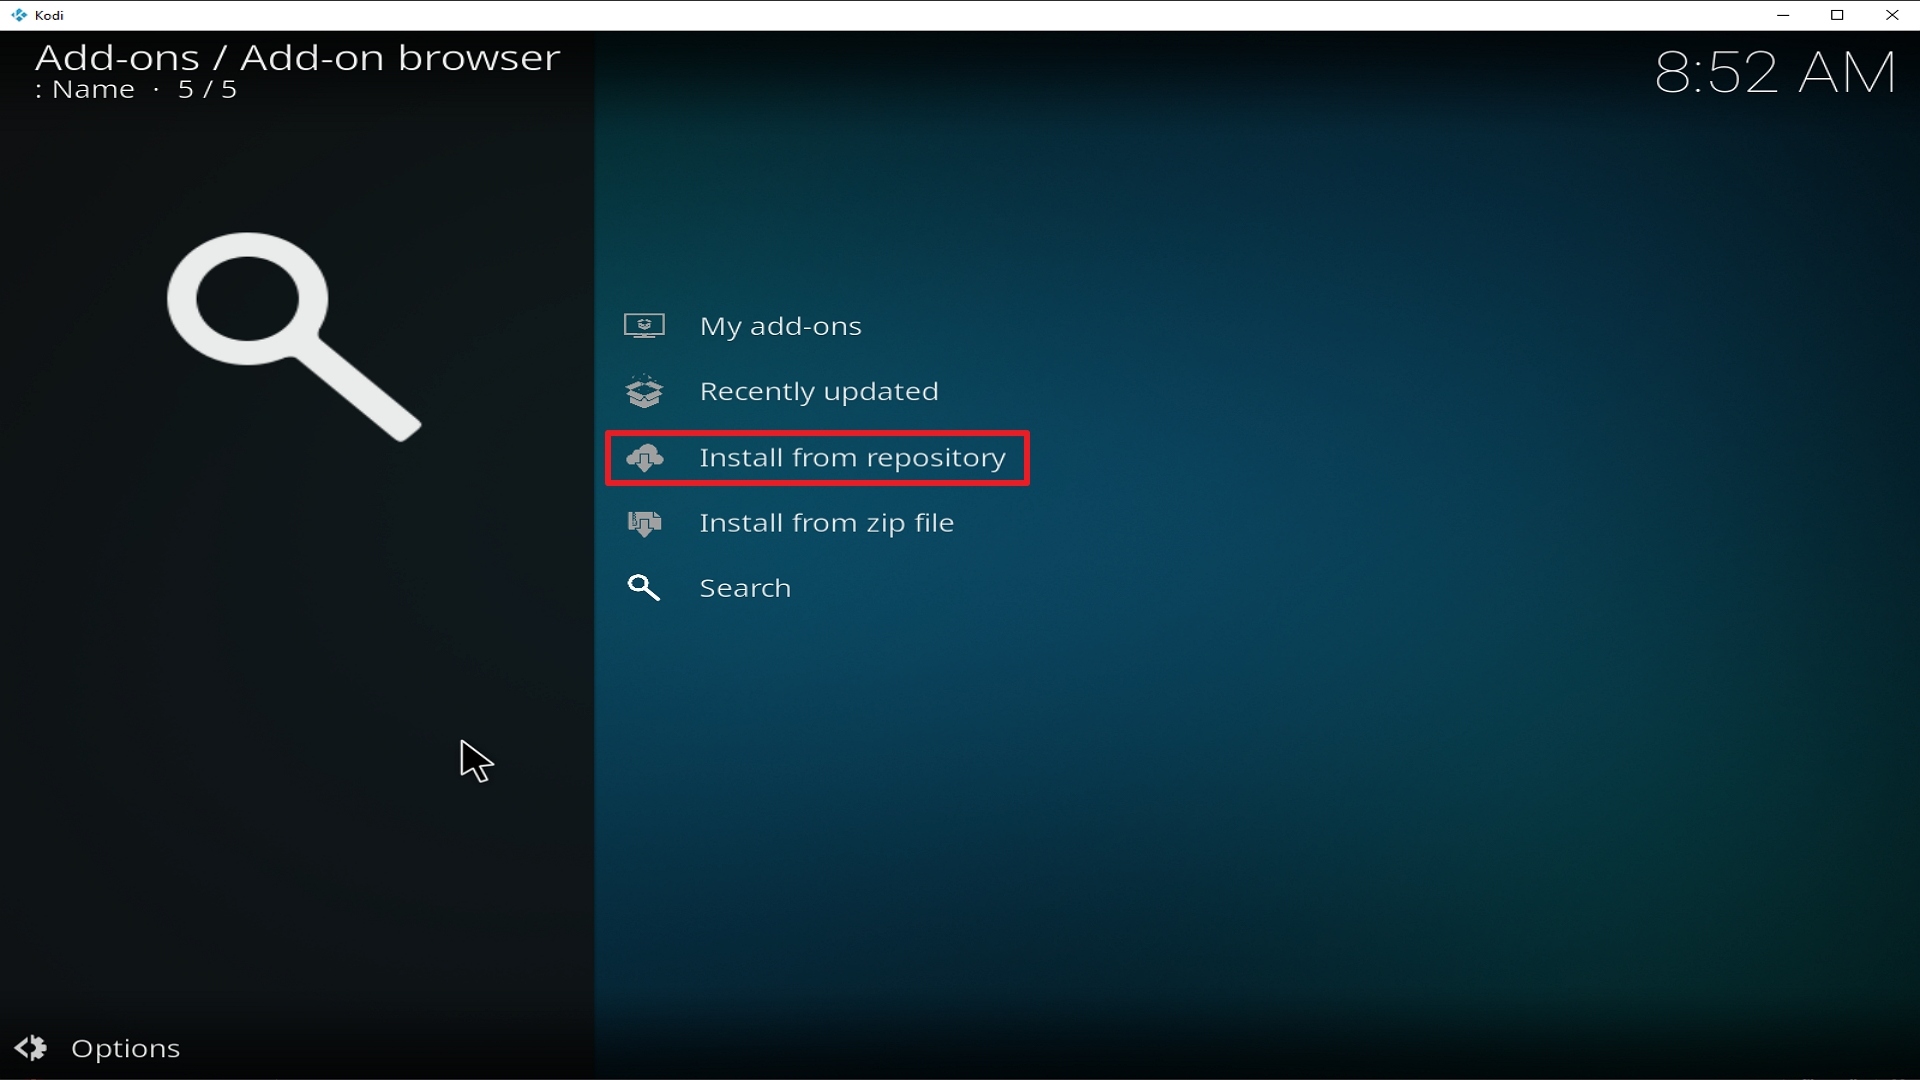
19. Select on Install from repository.

Step 19 Installing Fusion Org addon on Kodi


20. Click on Fusion.org Repo.

Step 20 Installing Fusion Org addon on Kodi


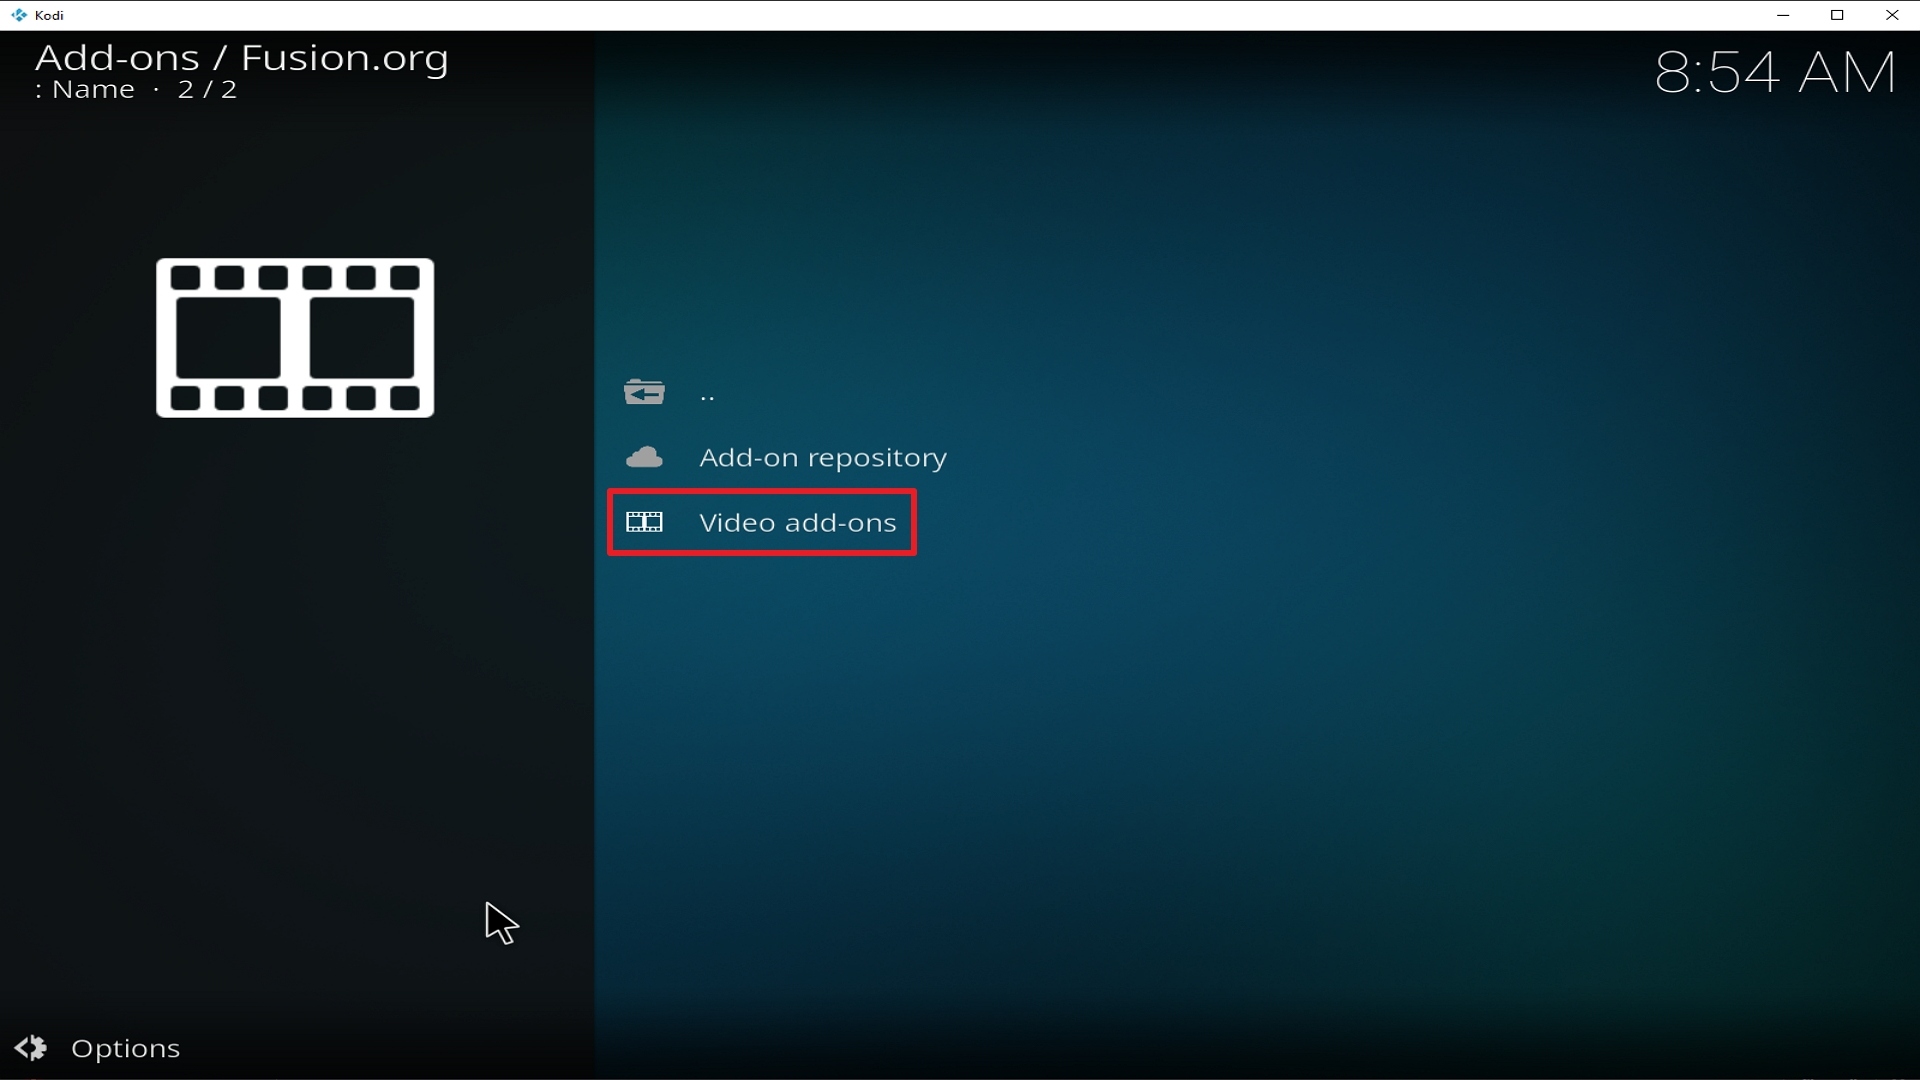
21. Pick Video add-ons.

Step 21 Installing Fusion Org addon on Kodi


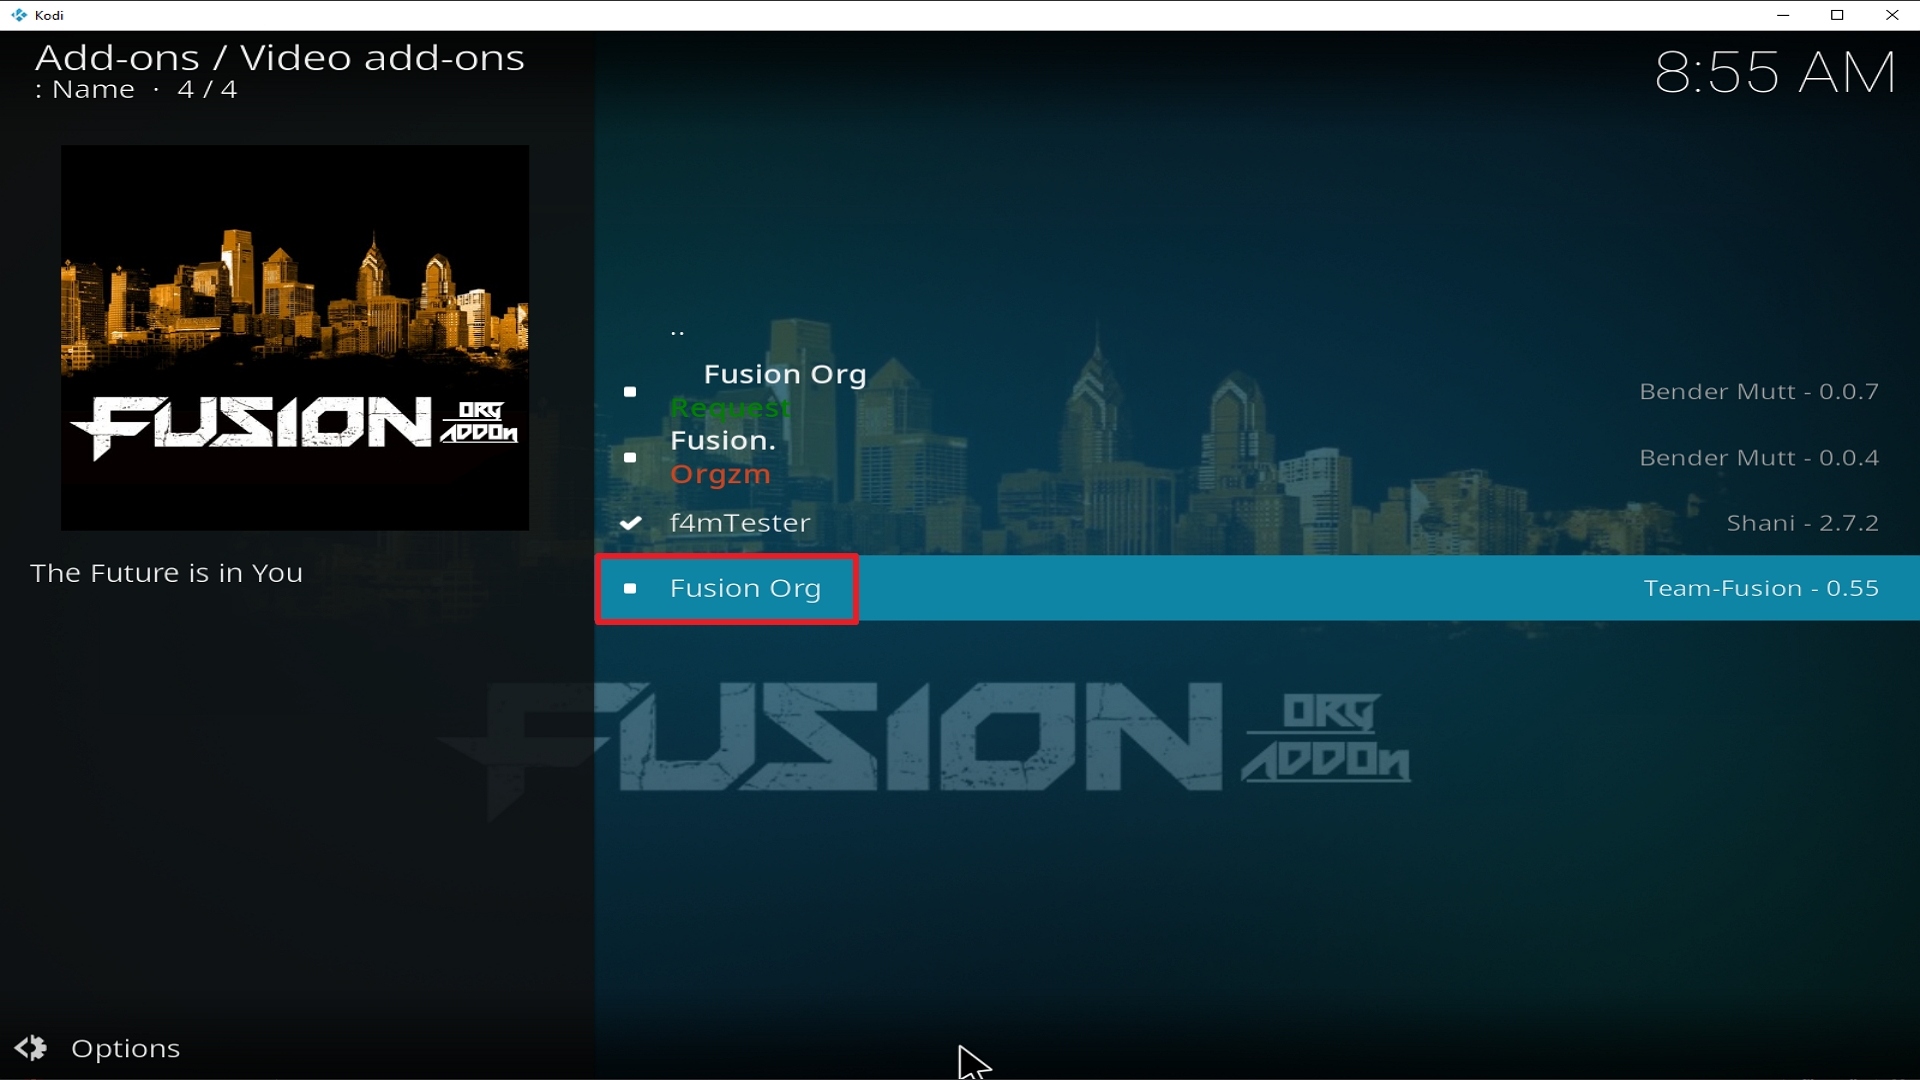
22. Select Fusion Org again.

Step 22 Installing Fusion Org addon on Kodi


23. Click on Install.

Step 23 Installing Fusion Org addon on Kodi


24. Select OK after reviewing the add-ons that will be installed.

Step 24 Installing Fusion Org addon on Kodi


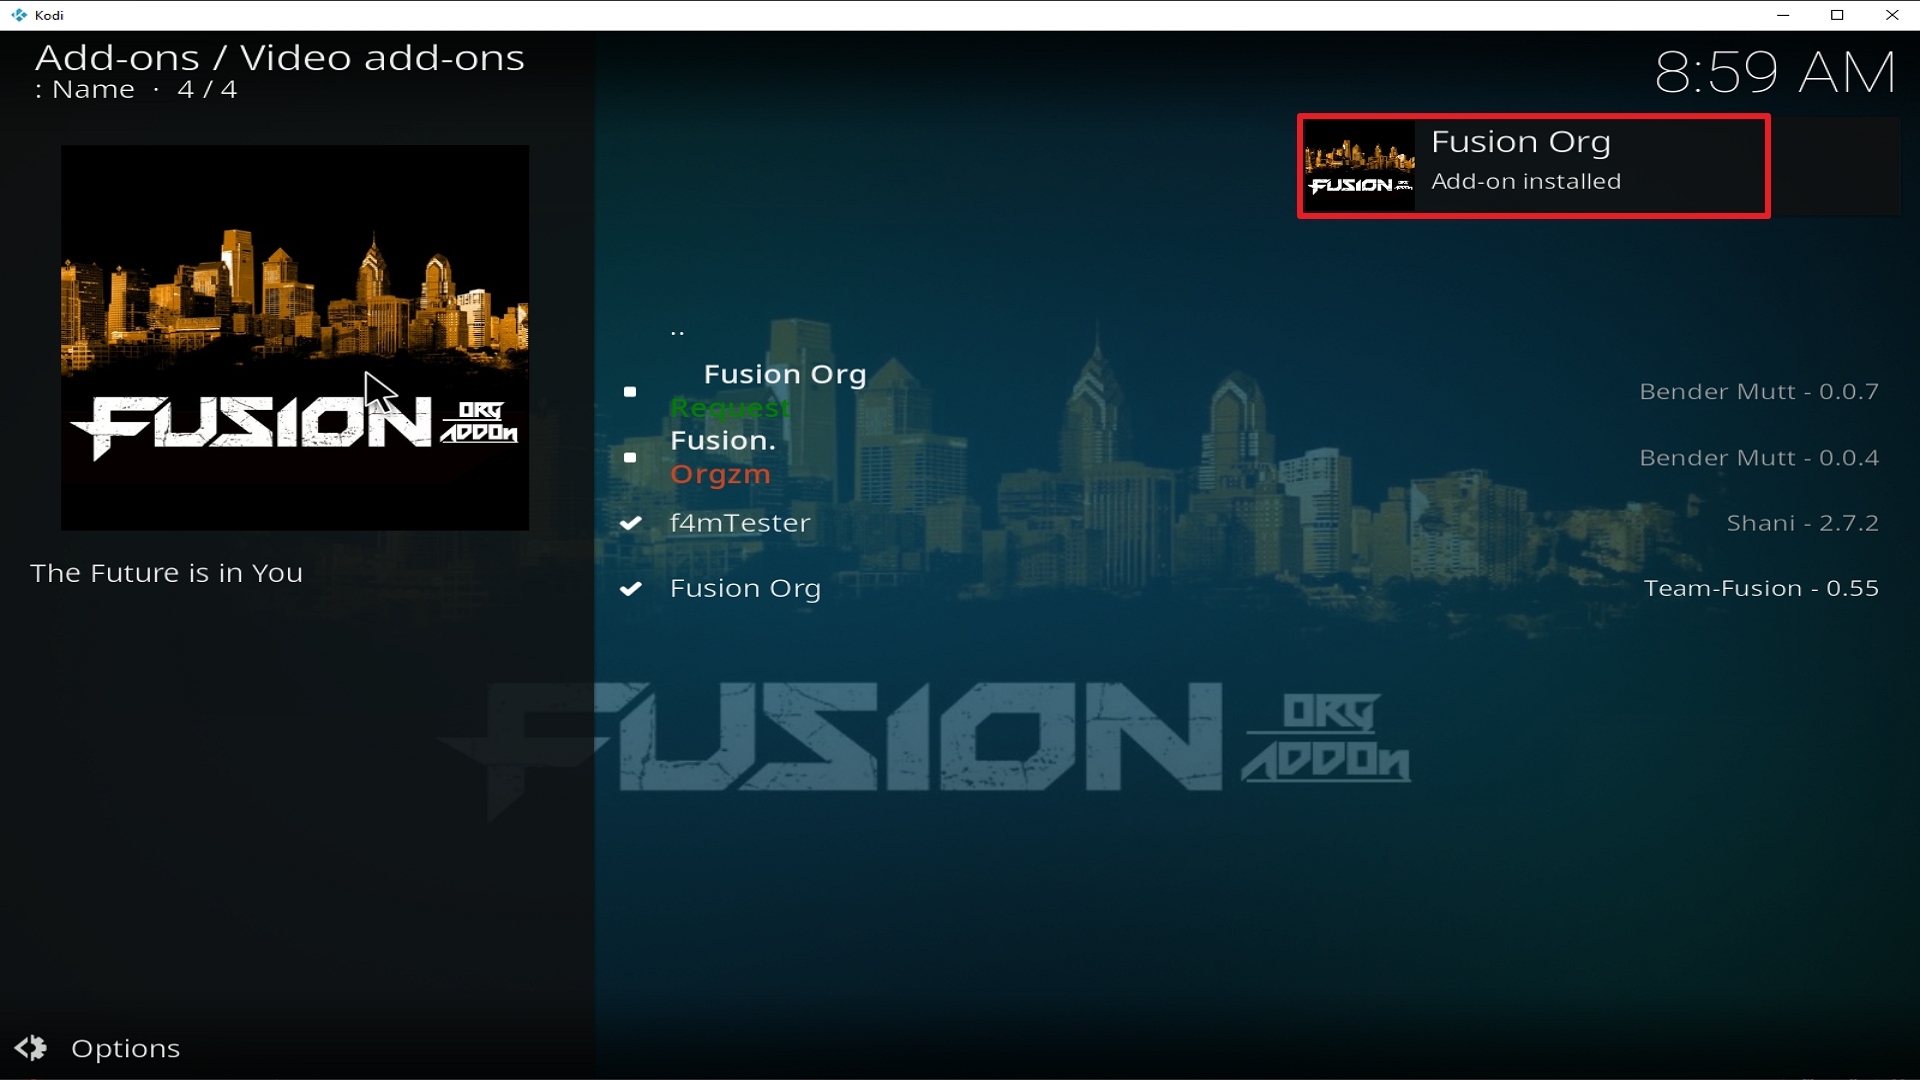
25. You should see a popup in the upper right corner saying Fusion Org has installed. There will actually be multiple popups for the various components.

Step 25 Installing Fusion Org addon on Kodi


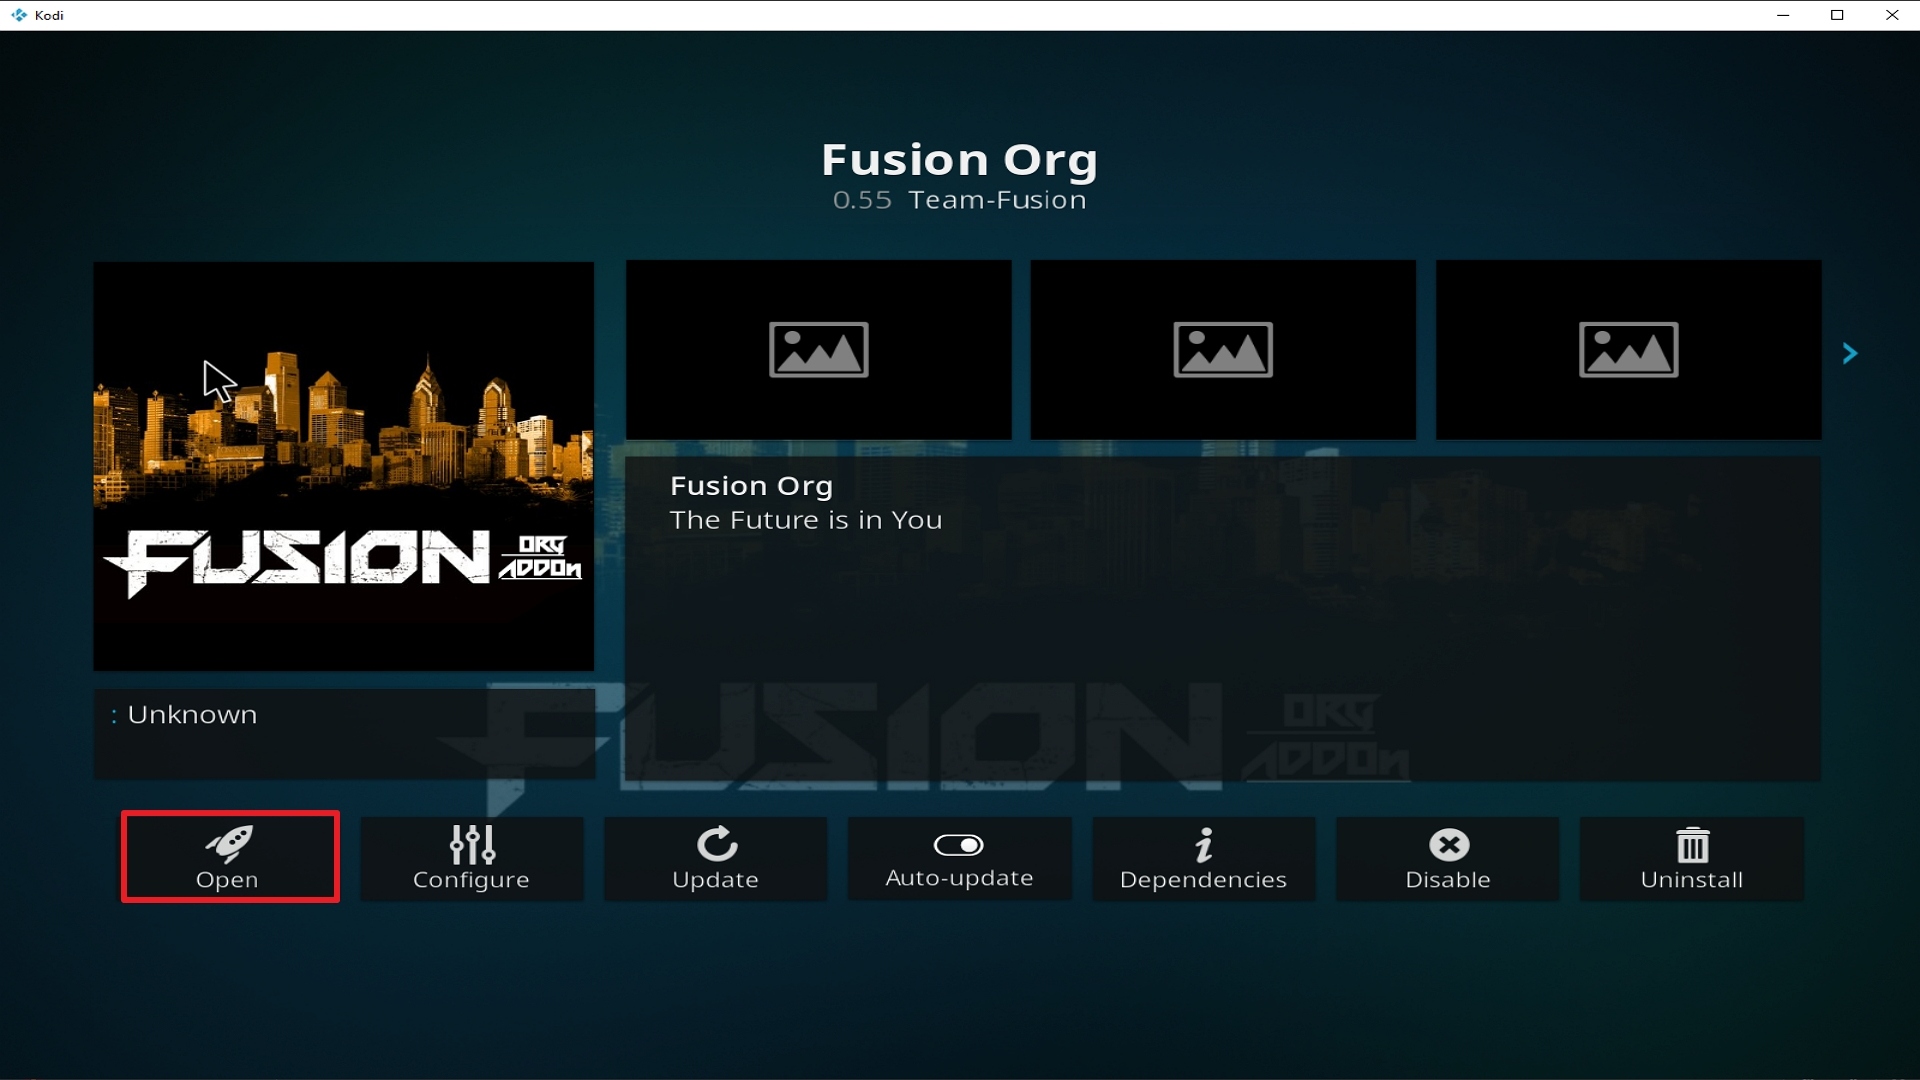
26. Click on Open to start the Fusion Org add-on.


Step 26 Installing Fusion Org addon on Kodi


Alternatives

Fusion Org is a very unique add-on. Not a lot of add-ons feature dubbed content and we believe that this is its major selling point. Although Fusion Org may be one of the best in its niche, issues may arise in the future and we always remind our readers to always have a back-up plan. A good back-up plan also means having a few good numbers of add-ons that have similar capabilities and obtained from trusted and reliable sources. We always strive to provide an honest review that educates our readers on what are the best add-ons out there. The following are good alternatives for Fusion Org:

        Palantir Add-on

        Alpha Add-on

         Real Stream Add-on,

        Armageddon Add-on

         TV Chopo,

        SR Regio Add-on

        Pelis Plus TV Add-on


Common Errors

These are some of the things that may cause an issue when installing Fusion Org:

  1.     Unable to connect to URL/Download

One of the main reasons why this happens is that you might have written the wrong URL. Please be careful when typing in the URL because the slightest mistake can totally ruin your download. Secondly, having a stable internet connection is always desired as it does not impend the speed of your download. Lastly, to protect your identity and internet trail, you must have a reliable VPN to mask your online activities which will help you remain anonymous. Check here for the best VPN deal.

  1.     Script Error

This issue usually arises when Kodi is not properly installed or has lacking features for it to work properly. If that is the case, you can redownload Kodi and install it properly. An in-depth guide on how to install the Kodi app is provided on our website. Lastly, if the issue is with the add-on itself, you can reinstall it by following the procedure given above.

  1.     Kodi Check Log Error

A check log error only happens when your media cache is full. You can remedy this situation by emptying your cache. 

  1.     Source not working/slow/frozen

Fusion Org does not keep any of the content on its servers. It is distributed by 3rd party apps. Patience is key here, just wait for a couple of seconds for the other suggestions and click on them. For other solutions please take the time to read our in-depth guide linked above. 


Always Use a VPN On Kodi

It is advisable to install a VPN on your streaming device. This is because any time you are streaming content online, your online data is vulnerable and you are being monitored on the internet service provider’s network. 

Not only that, but you will also experience location restrictions. Using a VPN will save you that headache and stress and you will be safe and secure while streaming content online. We recommend Surfshark as it offers high security and privacy with a zero-log policy with DNS leak protection. 

Note: For more information about SurfShark, please read our SURFSHARK REVIEW.


Grab your subscription now!


How to Install Surfshark VPN on Firestick

If your Firestick still has the older interface, read this article to learn how to update it: Update Firestick Interface.

You can download Surfshark directly from the Amazon App store. It will be easy for you to find Surfshark with your Firestick’s Find feature. Refer to our screenshots below.

1. Go to the Home screen of your Firestick.

step 1 Install Surfshark VPN on Firestick


2. Navigate towards the Find tab. Press the Search button from the resulting dropdown.

step 2 Install Surfshark VPN on Firestick


3. Type in the keyword of SurfShark and select from the suggestions that will appear.

step 3 Install Surfshark VPN on Firestick


4. Click the official SurfShark icon from your search results.

step 4 Install Surfshark VPN on Firestick


5. Press the Download (You own it) button.

step 5 Install Surfshark VPN on Firestick


6. The SurfShark VPN installer will download on your device.

step 6 Install Surfshark VPN on Firestick


7. SurfShark VPN’s app will automatically install itself on your Fire TV stick.

step 7 Install Surfshark VPN on Firestick


8. Press the Open button after completing SurfShark VPN’s installation process.

step 8 Install Surfshark VPN on Firestick


9. Please wait for the SurfShark VPN to load its user interface.

step 9 Install Surfshark VPN on Firestick


10. You can now log in with your SurfShark VPN account credentials.

step 10 Install Surfshark VPN on Firestick

Learn more about Surfshark and Grab the Best Surfshark Deal Now!


Install Surfshark on Firestick

Best Surfshark Deal


Other VPNs to Consider

NordVPN (Best for Streaming)

Best Features

  • 5000+ Server in 50+ Countries 
  • Military-Grade Encryption
  • Fast Connection Speed
  • Suitable to a lot of devices
  • No-Log Policy

Prices
  • Complete $5.89 per month (64% Discount)
  • Plus $4.59 per month (56% Discount)
  • Standard $3.69 per month (55% Discount)

Best Features

  • 750+ High-speed VPN Servers in 43 Locations
  • Military-Grade Encryption
  • Fastest HD Streaming and Gaming
  • 30-Day Money-Back Guarantee
  • Unlimited Data & Devices
  • No-Log Policy

Prices
  • 3 Years $1.99 per month (82% Discount)
  • 1 Years $3.29 per month (70% Discount)
  • 1 Month $10.99 per month

IPVanish VPN (Most Secure)

Best Features

  • 1200+ Servers in 60+ Countries around the world
  • Unlimited Connections
  • No-Log Policy
  • Top Notch Military-Grade VPN Protocols and Encryptions
  • 100% Safe and Secured
  • Most Trusted VPN
  • Best VPN for Firestick
  • 30-Day Money-Back Guarantee

Prices
  • Yearly $3.99 per month (63% Discount) – 30 days risk free + Ransomware & Malware Protection
  • Quarterly $5.32 per month (51% Discount)
  • Monthly $10.99 per month


For more VPN discounts, go to ReviewVPN Deals and purchase the best VPN for you.

Click here to get the lowest price on Surfshark through our exclusive limited-time offer.


Conclusion

Fusion Org is a very unique add-on such that it caters to a specific market. Although it is not an add-on suited for everyone, it definitely performs and delivers to its market. It actually performs better compared to other add-ons that are English but if you are not fluent in Spanish, you may find it difficult to navigate through this app. So there, we hope that this guide was able to help you. If you have comments and suggestions, please drop a comment below or at any of our other social media platforms. Thank you for reading!

Install Primal Kodi Addon

Primal Kodi Addon

Source: https://github.com/TeamAK47/zips/tree/master/repository.primal

Primal Kodi add-on is a new version of  Exodus/Covenant under the Primal Repository that offers Movies, TV Shows, and Documentaries from a huge list of sources. Its sections are carefully segregated so that users can choose which content are they really interested in. Such sections include the following:

  1. Genres
  2. Year
  3. People
  4. Languages
  5. Certificates
  6. People Watching
  7. Most Popular
  8. Most Viewed
  9. Box Office
  10. Oscar Winners
  11. In Theaters
  12. New Movies
  13. My Movies
  14. People Search
  15. Search


Here alone we can see how meticulously it was crafted to help users choose what to watch. Not only that but the genre section also includes an extensive amount of subsections which are divided by the following:

  1. Action
  2. Adventure
  3. Animation
  4. Anime
  5. Biography
  6. Comedy
  7. Crime
  8. Documentary
  9. Drama
  10. Family
  11. Fantasy
  12. History
  13. Horror
  14. Music
  15. Musical
  16. Mystery 
  17. Romance
  18. Science Fiction
  19. Sports
  20. Thriller 
  21. War

This shows how diligent and compassionate is the creator of this add-on. Creating such a detailed section truly requires patience and knowledge. It is a magnificent marketing strategy wherein you give what your consumers need and ultimately suggest what they may want in the future. It is a beautiful art carefully crafted by what we can call geniuses.


ANONYMOUSLY


Features

  • An extensive list of content to choose from
  • Shows which type of video formats are available I.E. 1080p, 720p, and SD
  • Shows a detailed list of the video sources
  • It provides a brief summary for each Title helping users get an idea of what the video is all about and helping them decide if it is worth watching or not.
  •  Almost unlimited video sources to choose from

How to Install Primal Kodi Addon?

  1. Launch Kodi on your device
  2. Open the “Gear Icon” and choose “System”
  3. Select the add-ons menu, turn on the “Unknown Sources” by clicking “yes”
  4. Go back to the “systems” page and choose “File Manager”
  5. Choose Add source and select “none”
  6. Go to https://github.com/TeamAK47/zips/tree/master/repository.primal
  7. Highlight the source and rename it to “primal” or any name you would like to use to identify this particular source and click “ok”
  8. Go back to the System Screen and click “Add-ons”
  9. Choose ‘Install Zip File” choose “primal” or whatever you renamed the file.
  10. Choose the zip file URL- repository.primal-0.1.1.zip
  11. Wait for the notification “Primal Build Add-on Repo Installed” to appear.
  12. Click on “Install Repository”
  13. Select “Primal Build Repo”
  14. Open “Video Add-ons” and Choose “Primal” and “Install”
  15. Select “Ok” when a notification “the following add-ons will be installed” appears and wait for Primal Add-on to install
  16. Once the add-on is installed go back to the home screen and select “add-ons”
  17. Choose “Video add-ons” and select “Primal”
  18. There you go, Primal is now installed.

YOUR INTERNET ACTIVITY IS BEING WATCHED

ReviewVPN cannot attest to the legality, security and privacy of the applications discussed on this site. It is highly recommended that you use a VPN service while streaming or using Kodi.

Currently, your IP 216.73.217.150 is visible to everyone and your Browser is being tracked by Advertisers & ISP Provider.

Save 65% Now

Limited Time Offer

Here are the main reasons why you must use a VPN:

  • Your activities are hidden from your ISP, the government, and from the apps you are using.
  • You can access additional movies and TV streams.
  • ISP attempts to throttle are thrwarted thus reducing buffering issues.
  • Geographically restricted content like Netflix and Hulu can be unblocked.

A VPN works be replacing your ISP-assigned IP address and creating an encrypted tunnel. We recommend the no log service offered by IPVanish. It works well on a Firestick and offers the fastest possible speeds.

Special Limited Time Offer - Get IPVanish

How to Install Primal on Kodi with Screenshots

1. From the home screen, select the cogwheel at the upper left.

Step 1 Installing Primal addon on Kodi

2. Select System in the bottom right corner.

Step 2 Installing Primal addon on Kodi


3. Select Add-ons on the left side of the screen.

Step 3 Installing Primal addon on Kodi


4. Select Unknown sources.

Step 4 Installing Primal addon on Kodi


5. Click Yes to allow unknown sources.

Step 5 Installing Primal addon on Kodi


6. Select File manager.

Step 6 Installing Primal on Kodi


7. Click Add source.

Step 7 Installing Primal addon on Kodi


8. Click on <None>.

Step 8 Installing Primal addon on Kodi


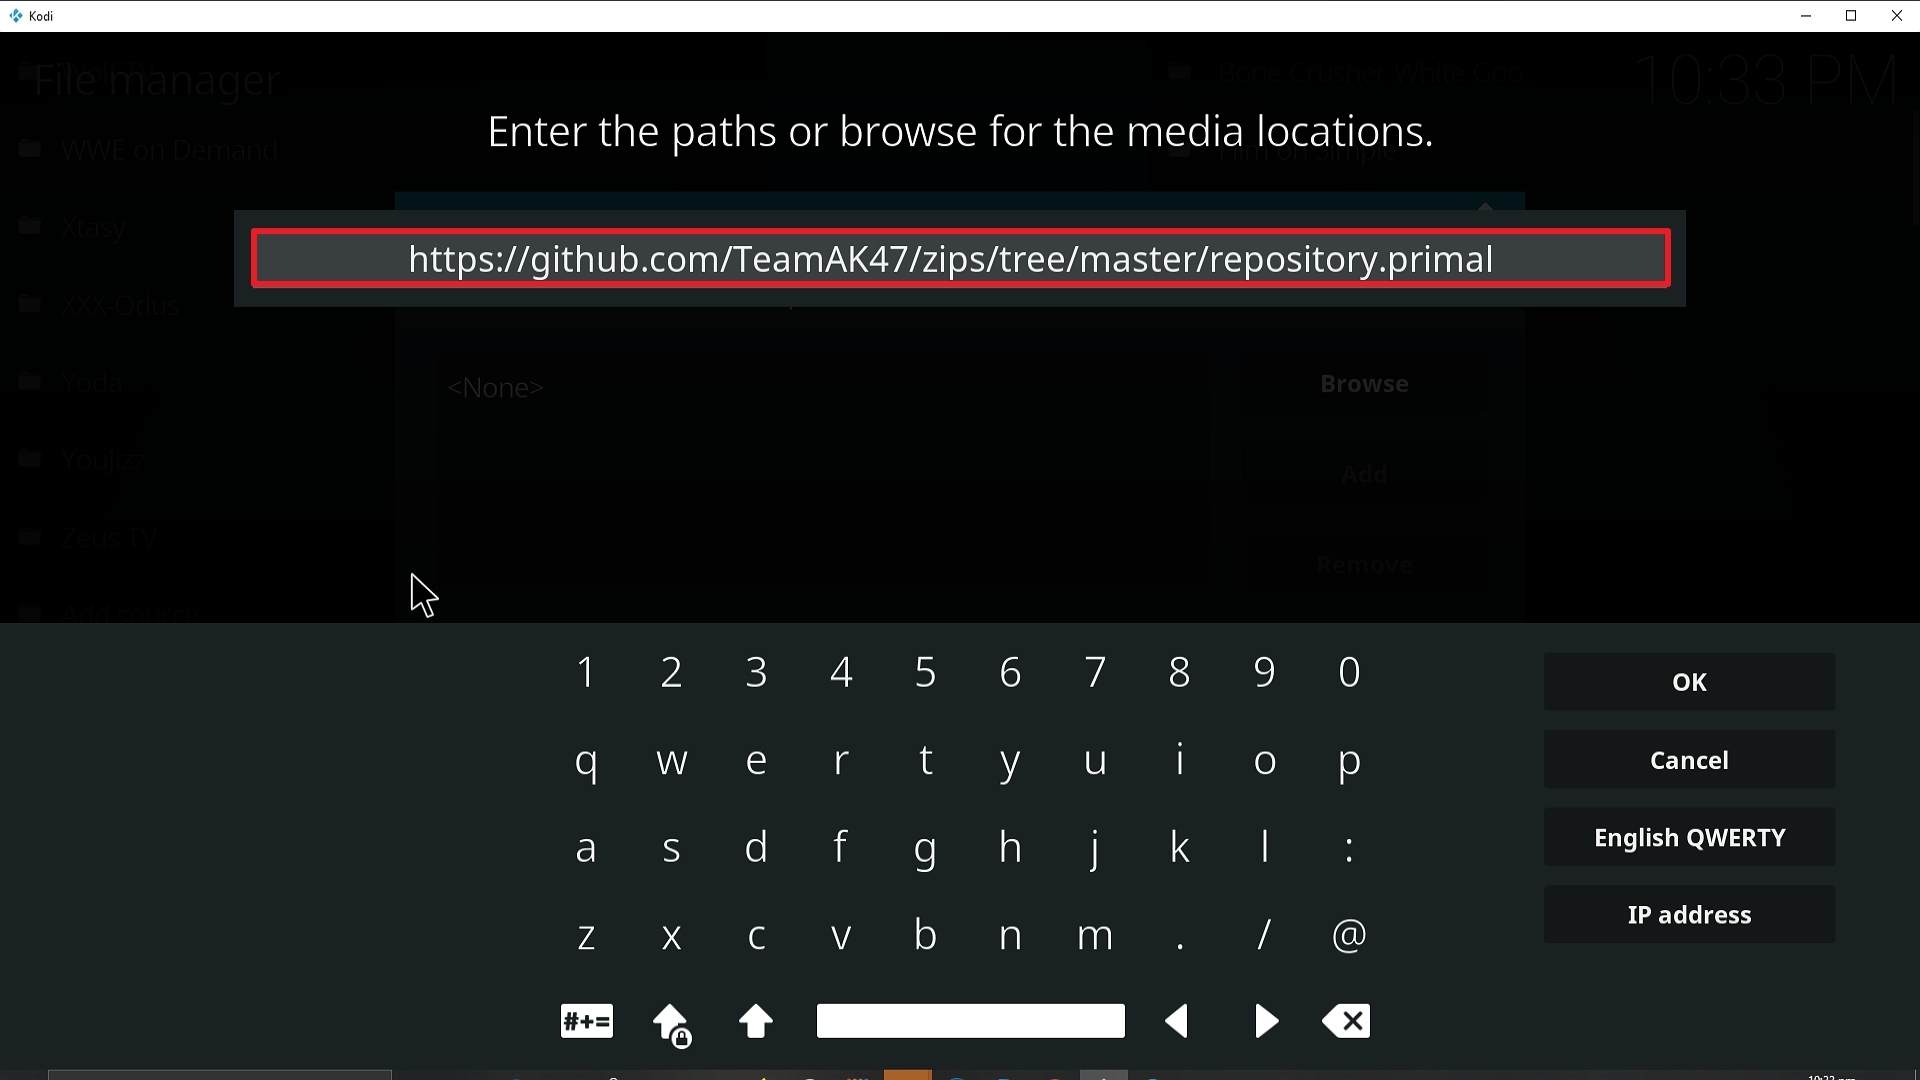
9. Type exactly: https://github.com/TeamAK47/zips/tree/master/repository.primal

Step 9 Installing Primal addon on Kodi


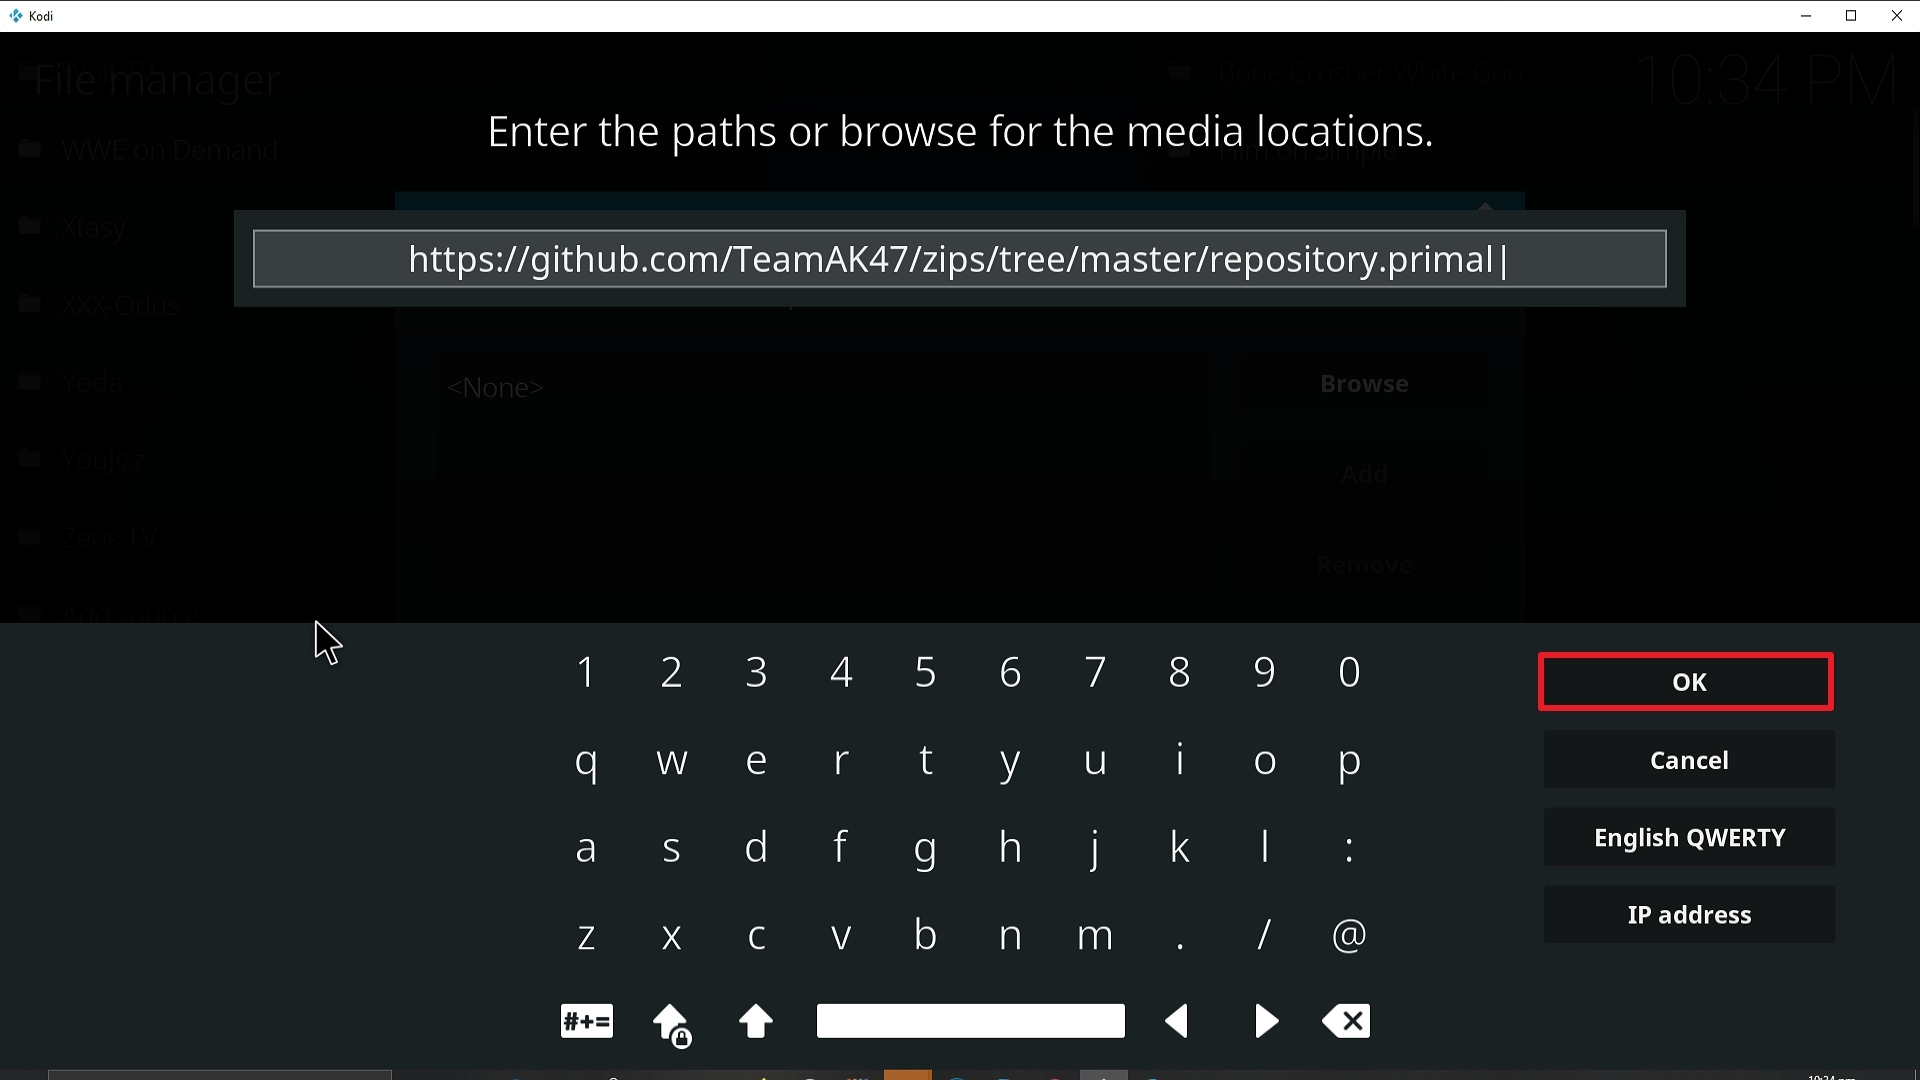
10. Click on OK.

Step 10 Installing Primal addon on Kodi


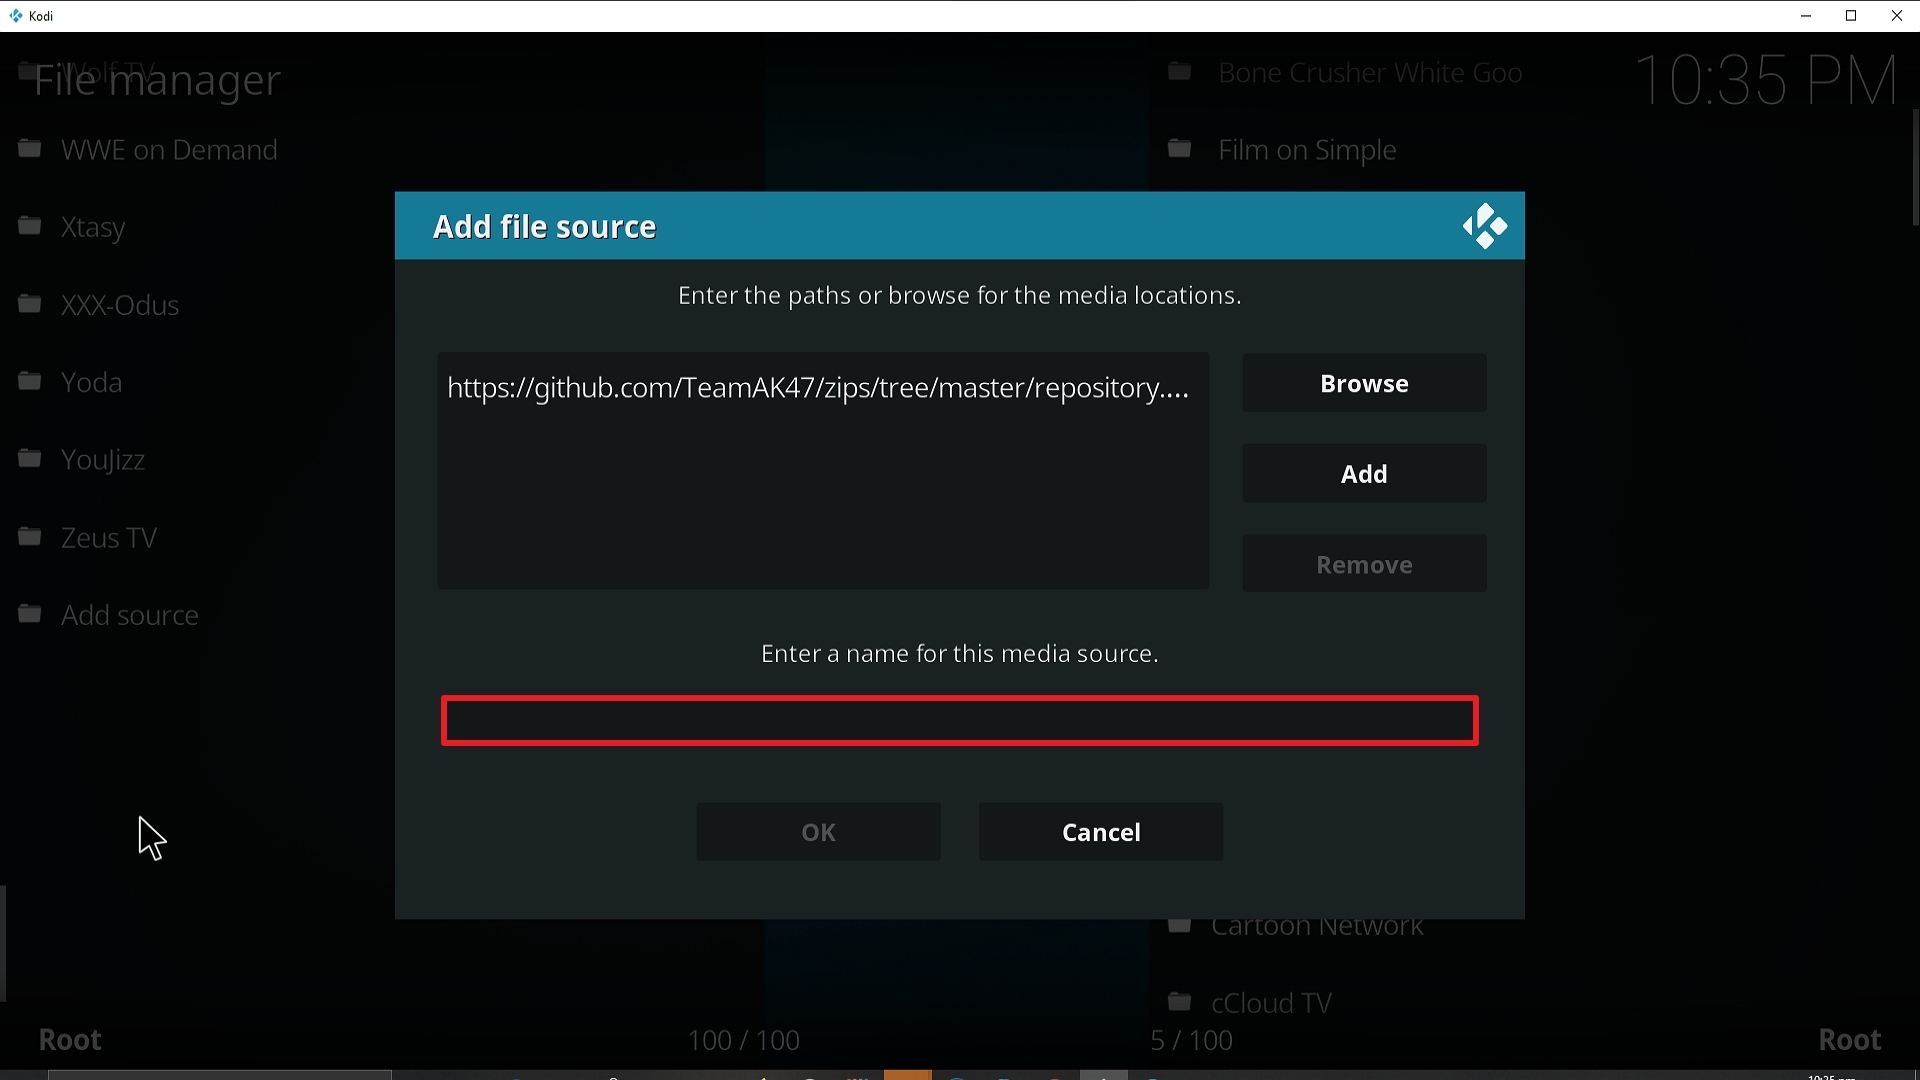
11. Select enter a name for this media source.

Step 11 Installing Primal addon on Kodi


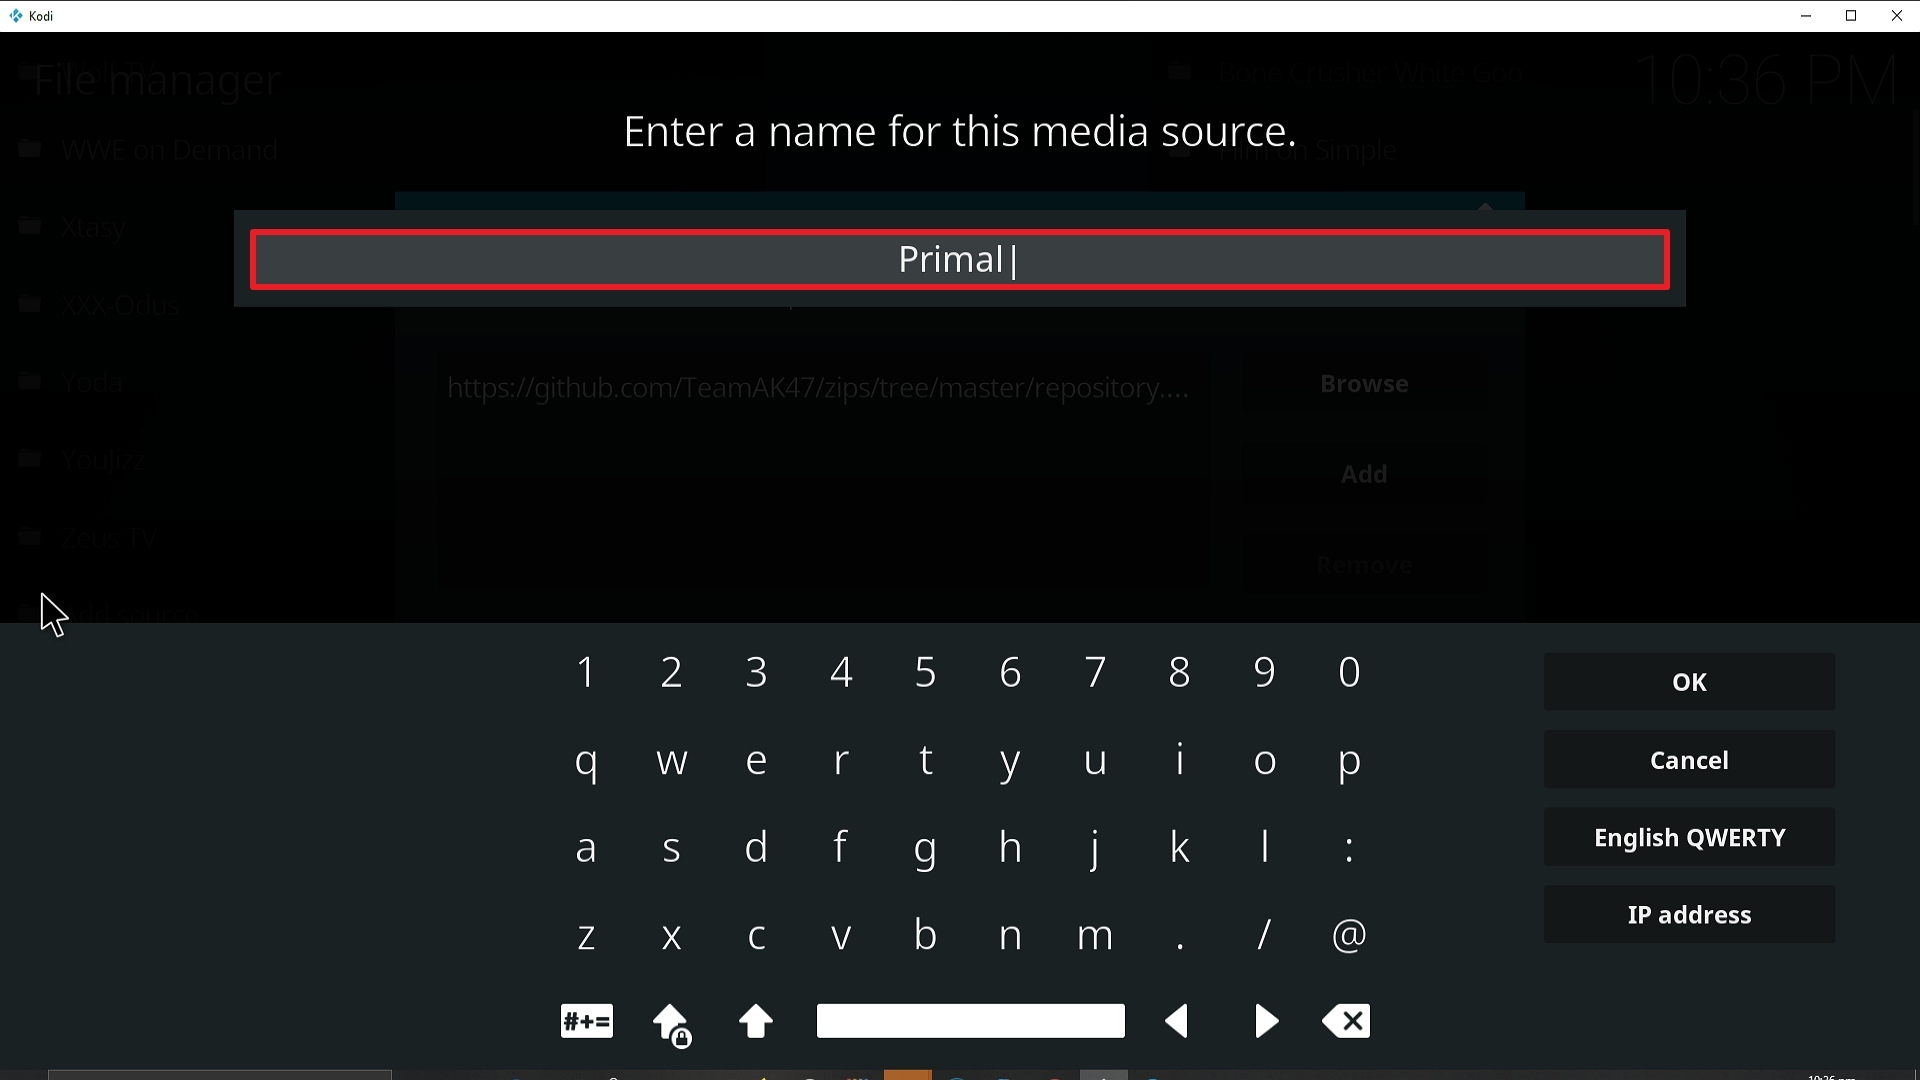
12. Name is Primal (this part isn’t critical as long as you remember the name).

Step 12 Installing Primal addon on Kodi


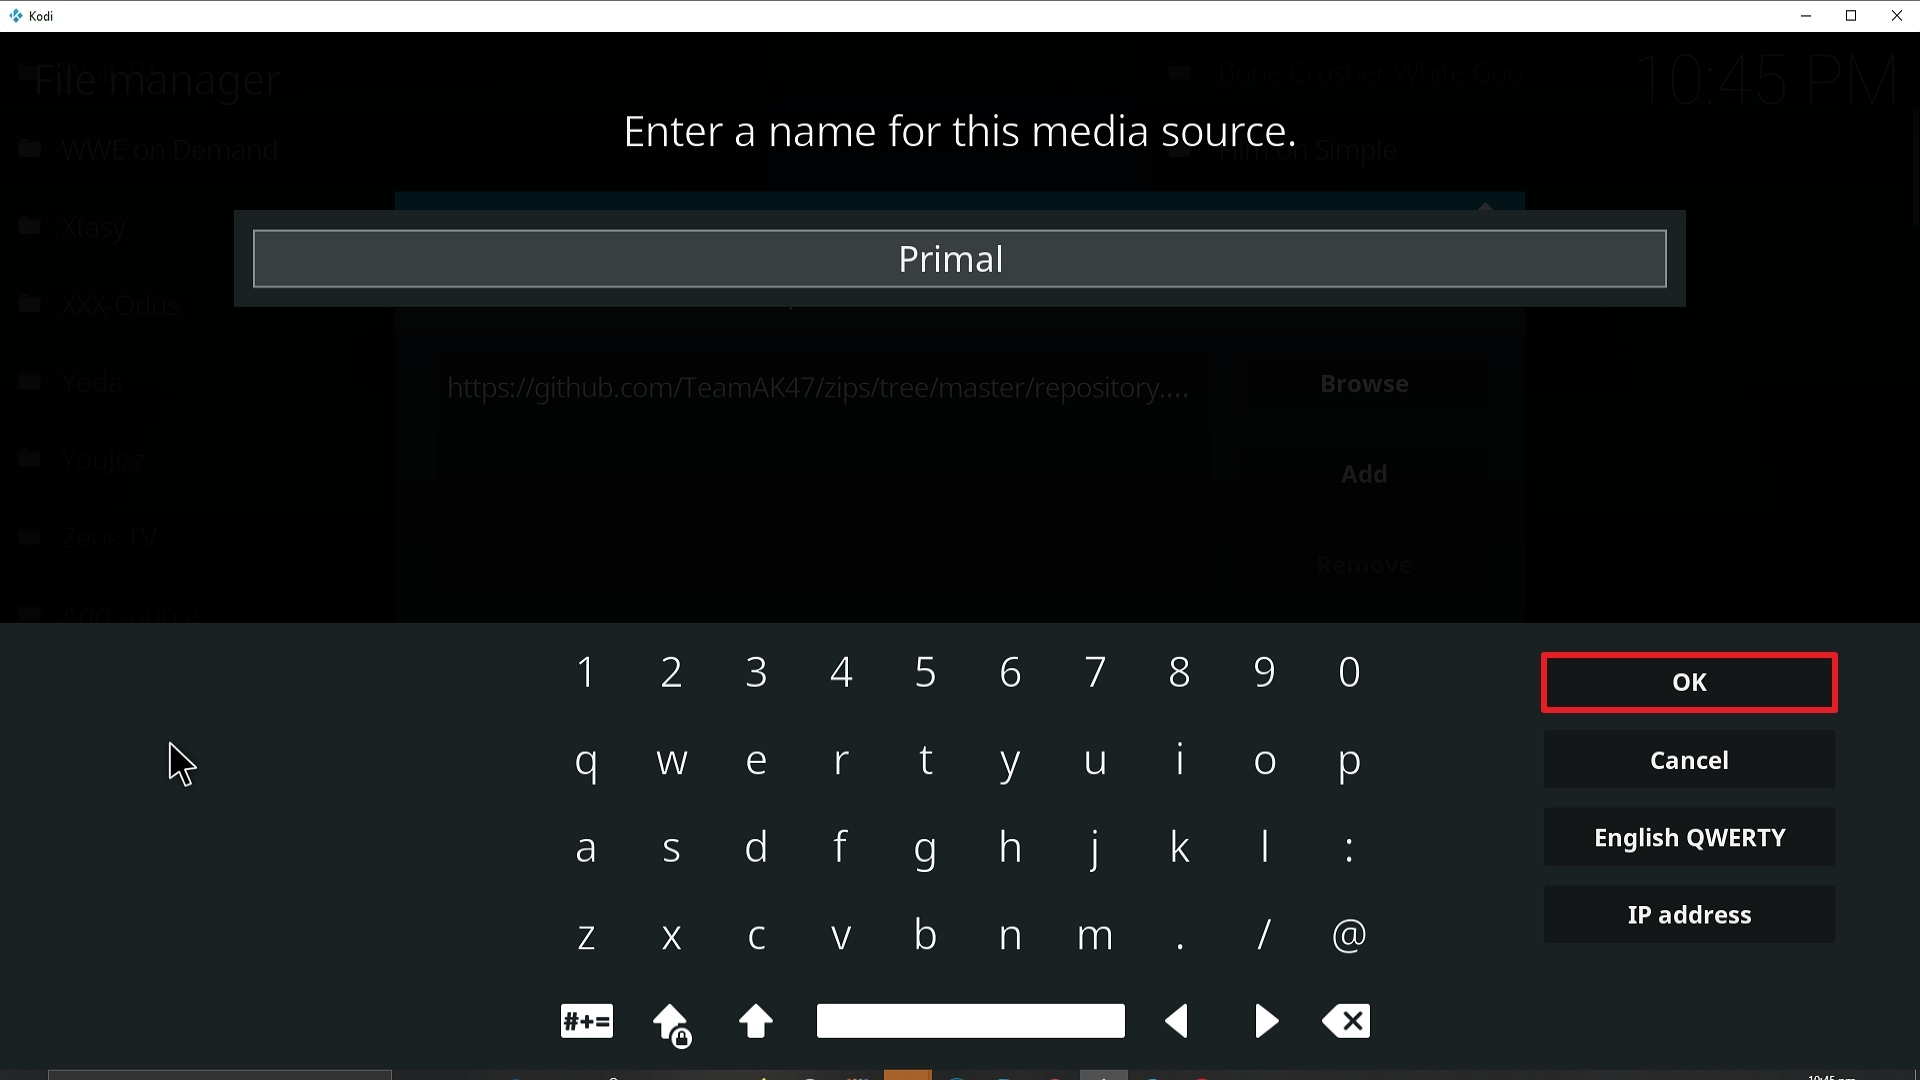
13. Click on OK.

Step 13 Installing Primal addon on Kodi


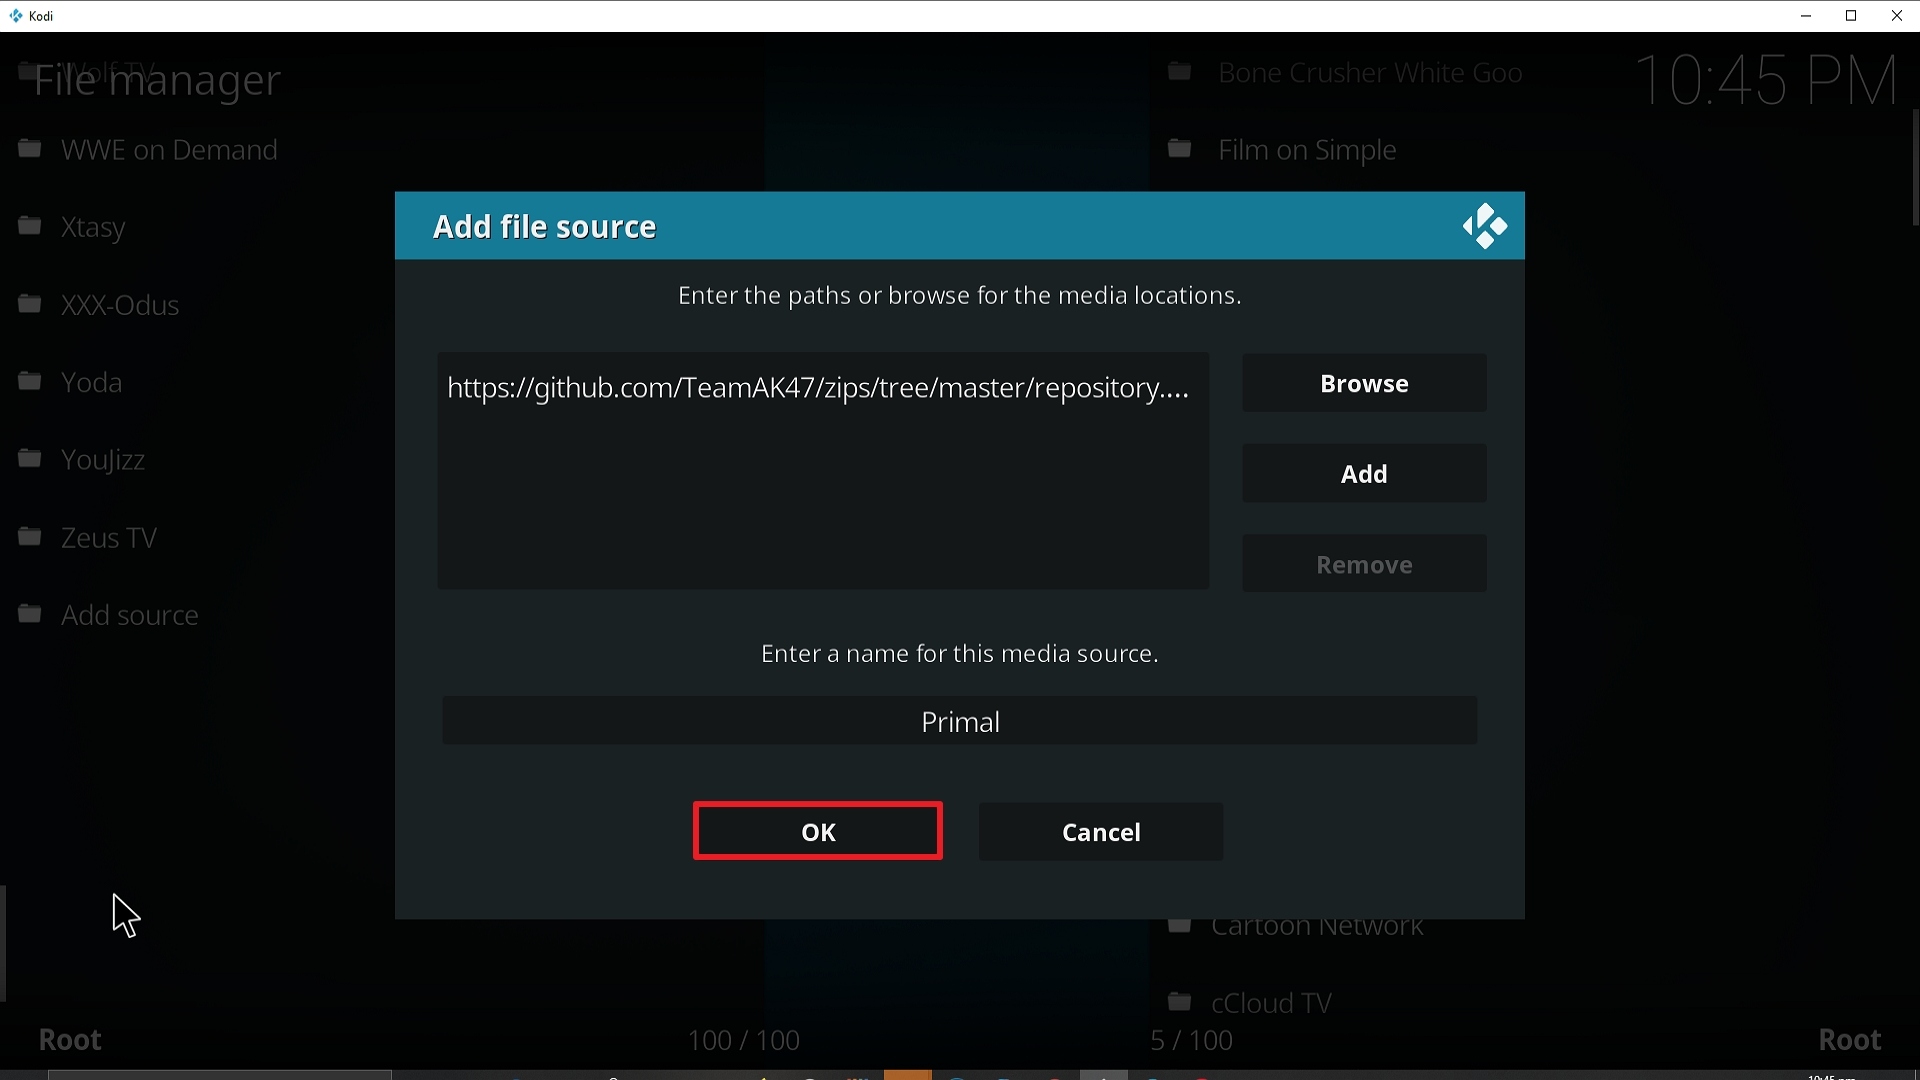
14. Click on OK.

Step 14 Installing Primal addon on Kodi


15. Take one step back and click on Add-ons.

Step 15 Installing Primal addon on Kodi


16. Select install from zip file.

Step 16 Installing Primal addon on Kodi


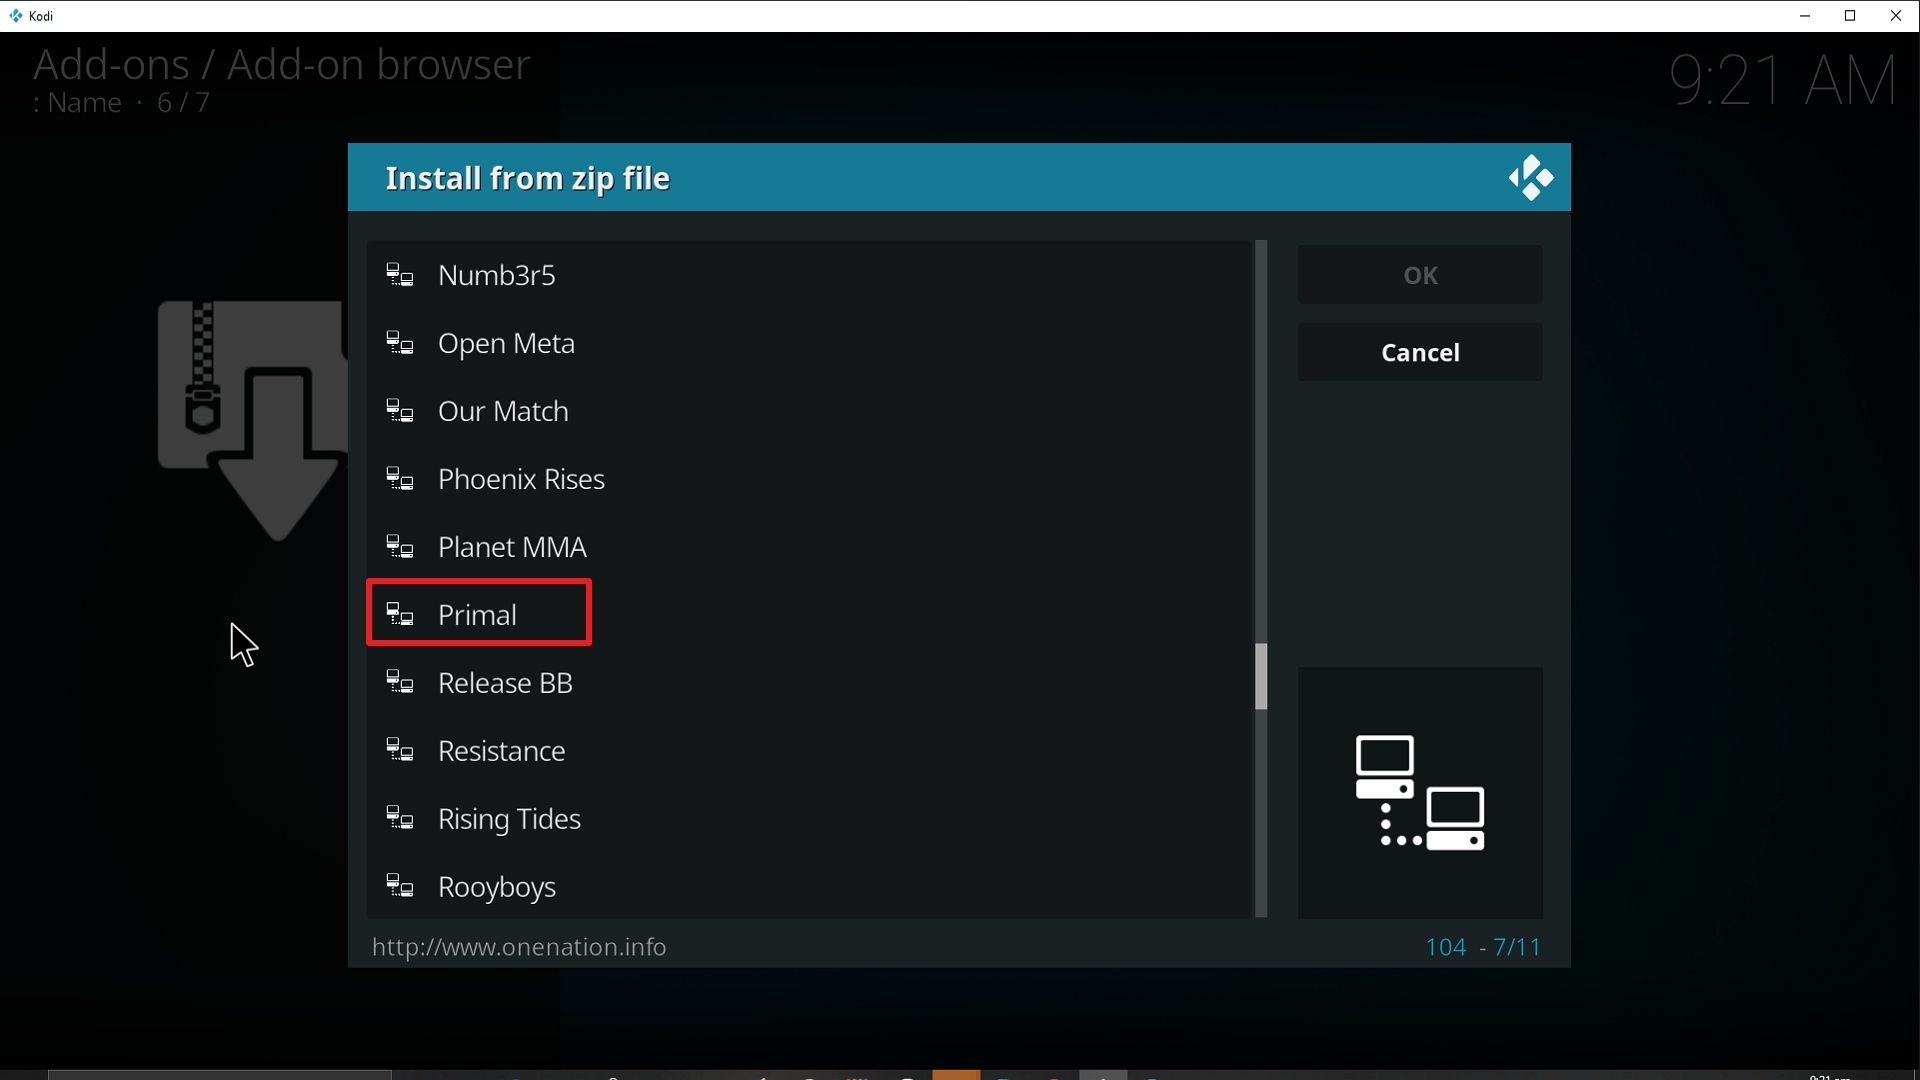
17. Click on Primal (or whatever you named the source).

Step 17 Installing Primal addon on Kodi


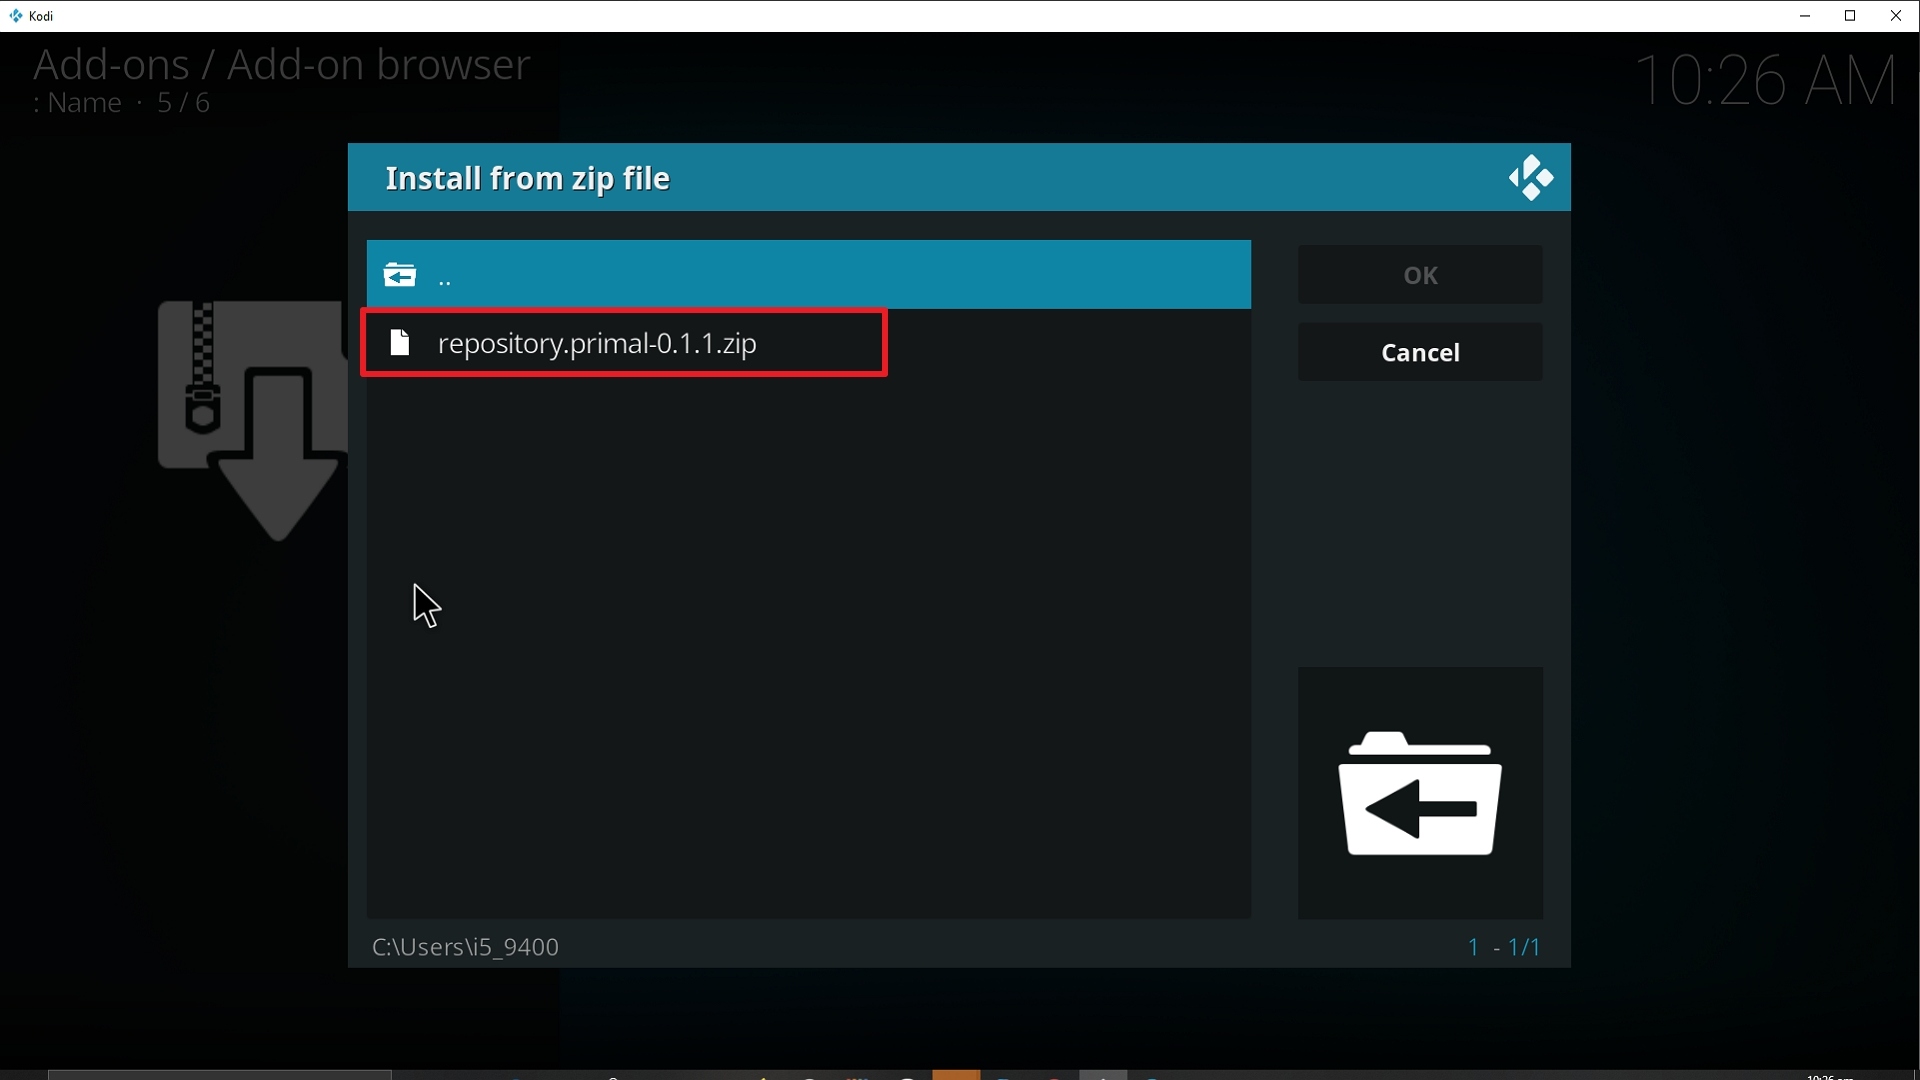
18. Click on repository.primal-0.0.1.zip

Step 18 Installing Primal addon on Kodi


19. Select on Install from repository.

Step 19 Installing Primal addon on Kodi


20. Click on Primal Repo

Step 20 Installing Primal addon on Kodi


21. Pick Video add-ons.

Step 21 Installing Primal addon on Kodi


22. Select Primal again.

Step 22 Installing Primal addon on Kodi


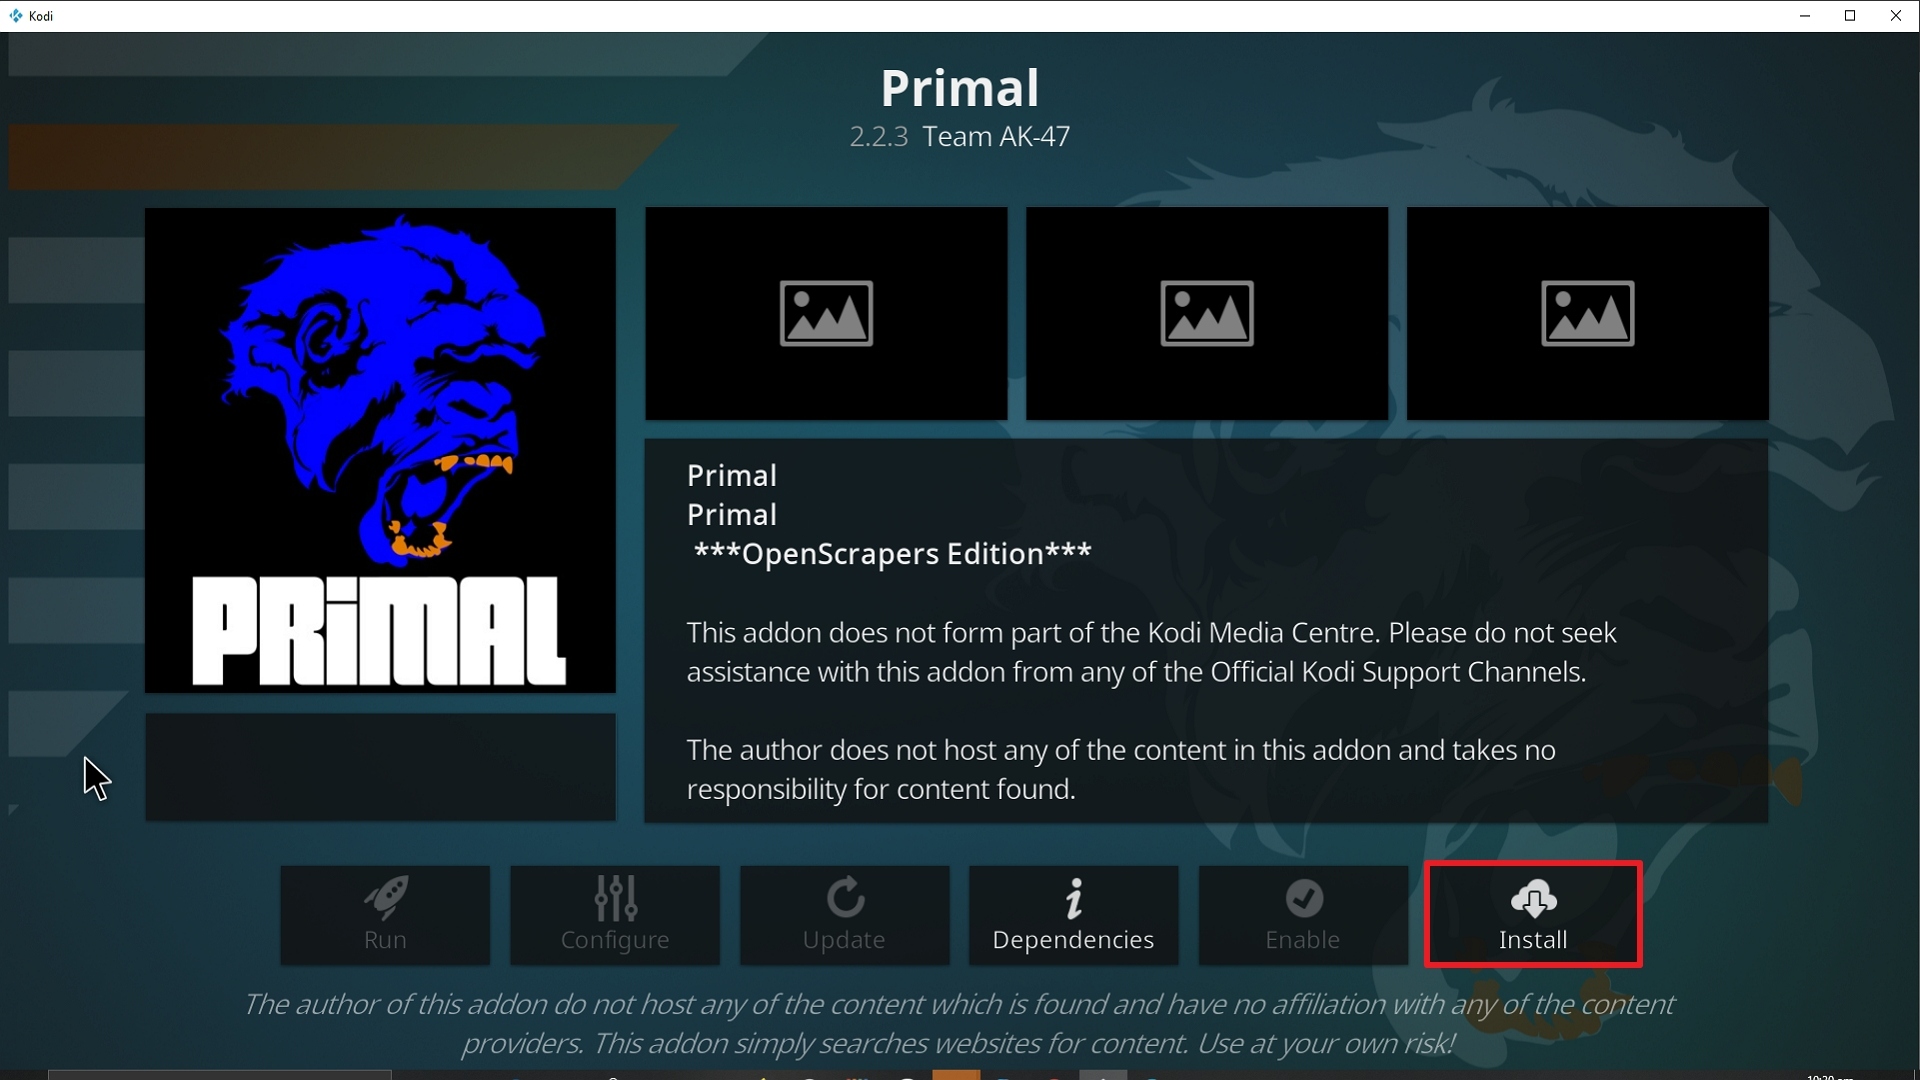
23. Click on Install.

Step 23 Installing Primal addon on Kodi


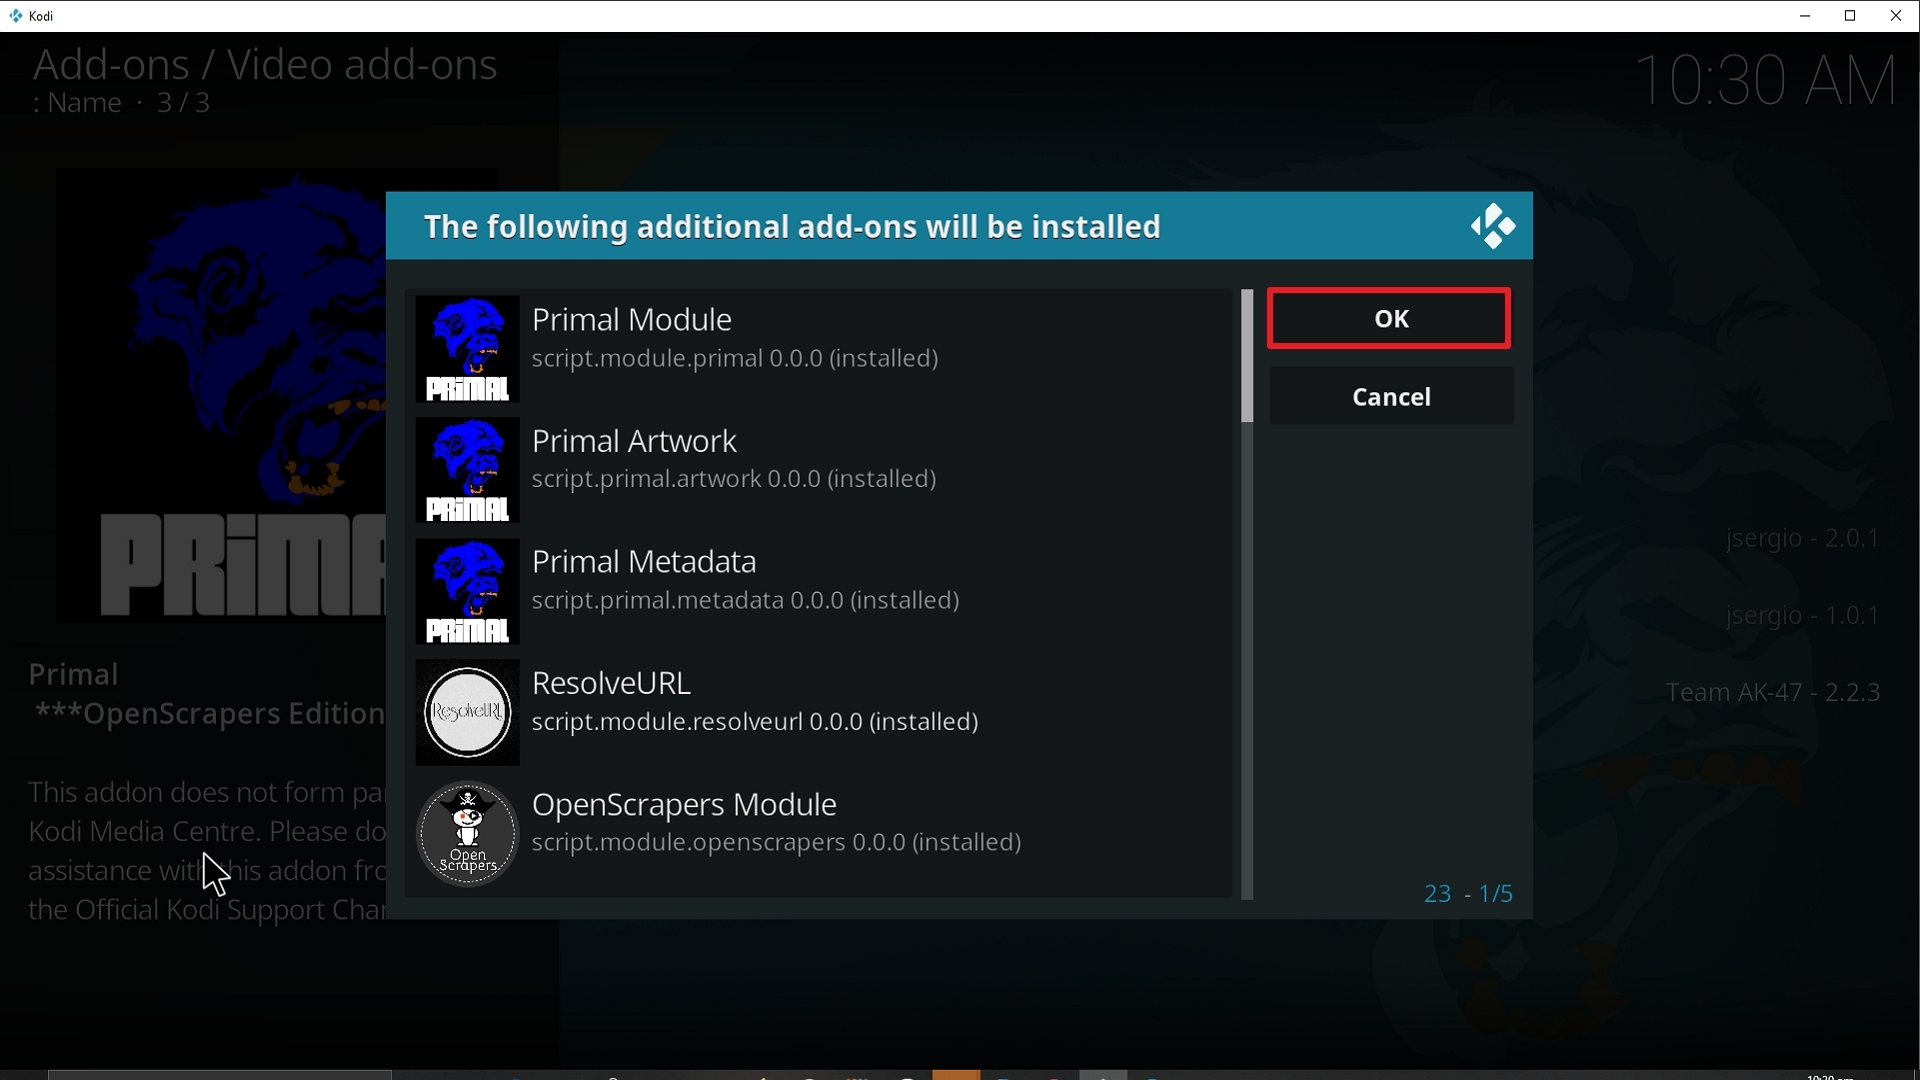
24.  Select OK after reviewing the add-ons that will be installed.

Step 24 Installing Primal addon on Kodi


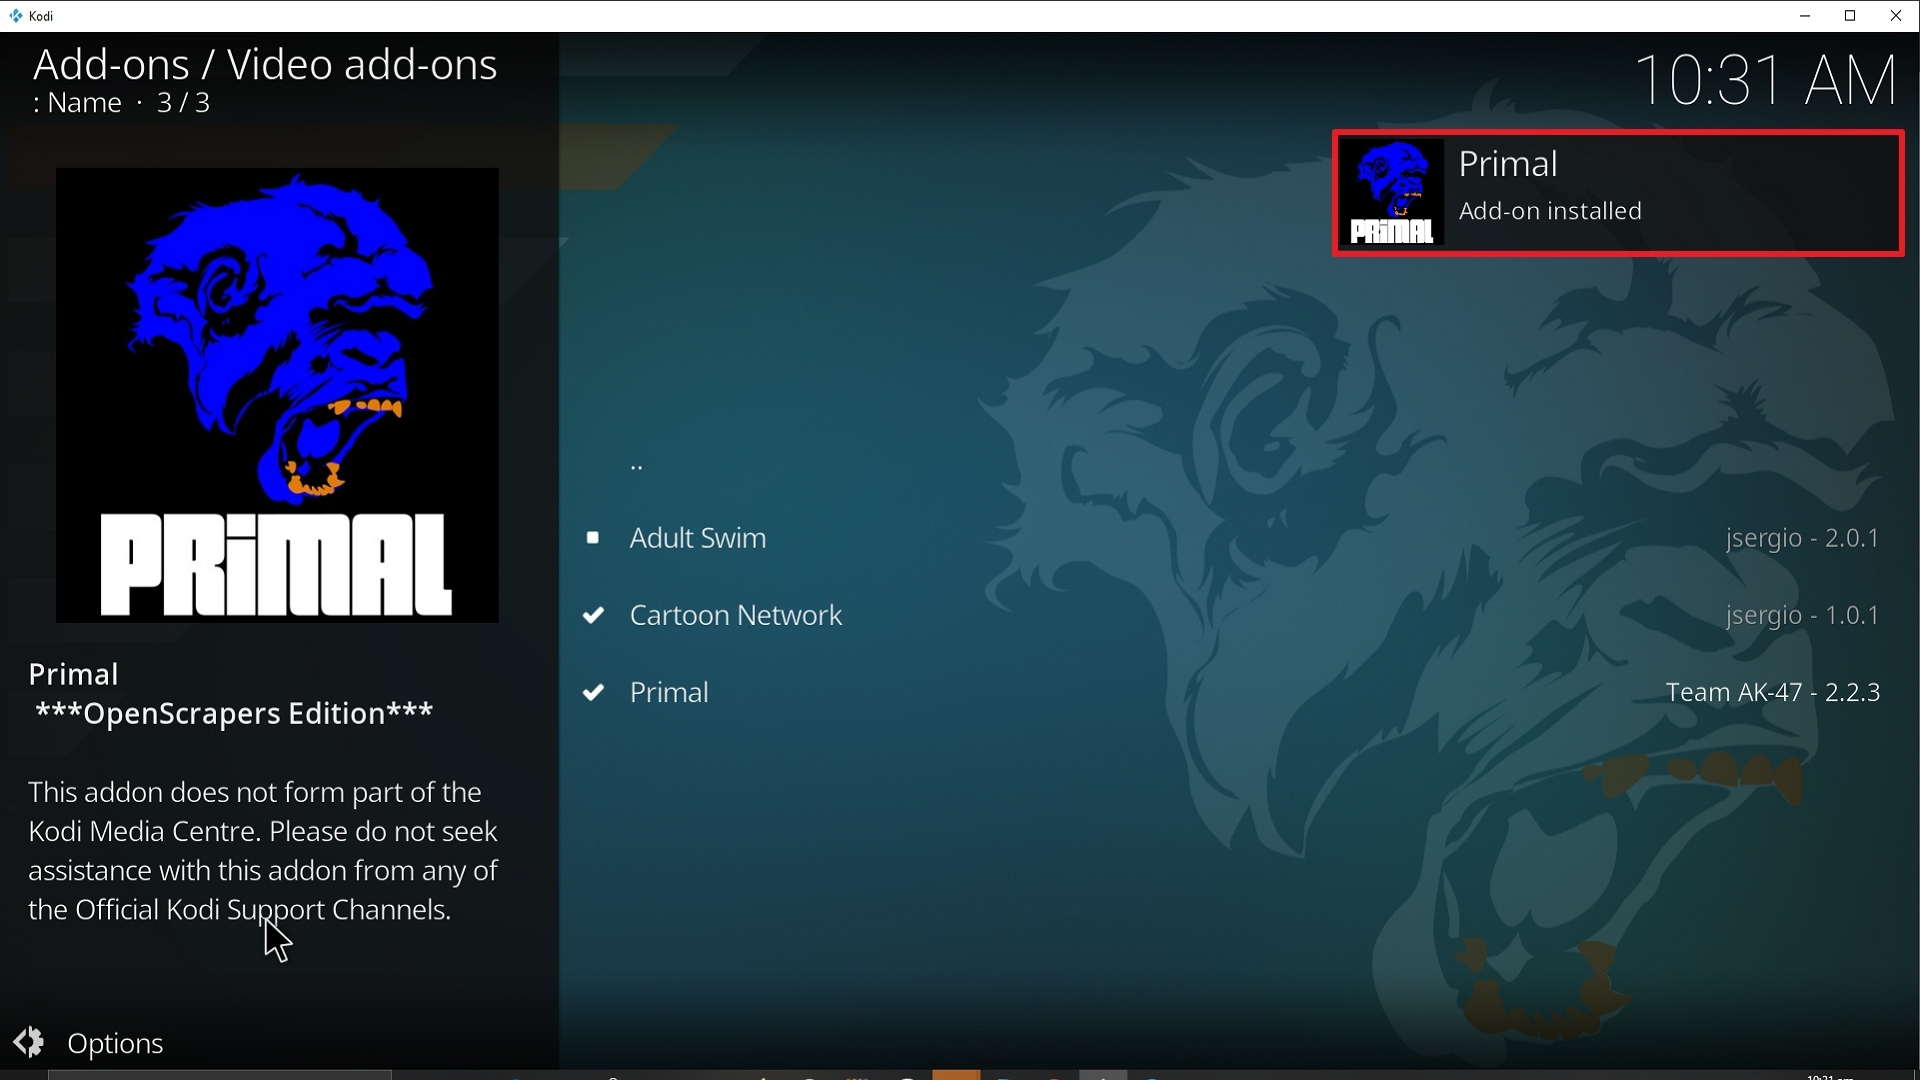
25. You should see a popup in the upper right corner saying Primal has installed. There will actually be multiple popups for the various components.

Step 25 Installing Primal addon on Kodi


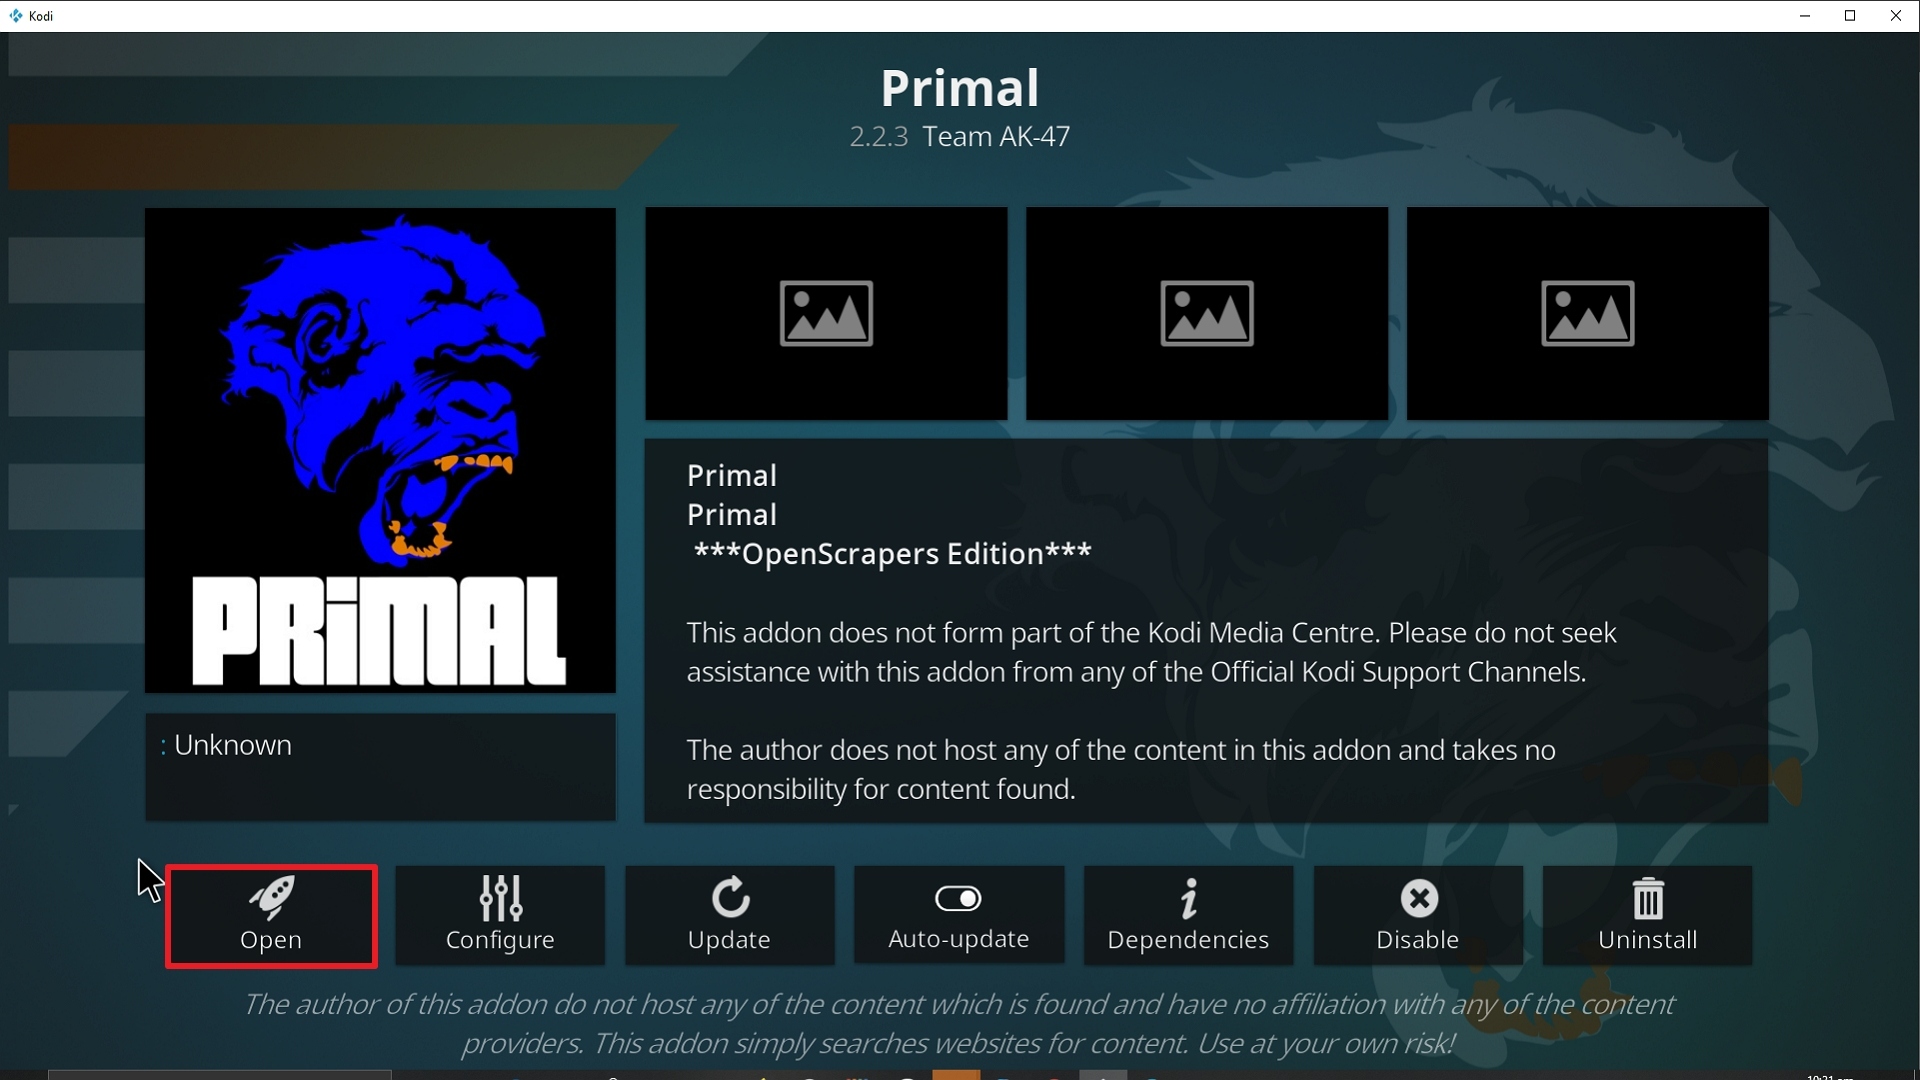
26. Click on Open to start Primal add-on.

Step 26 Installing Primal addon on Kodi


Install Surfshark on Firestick

Best Surfshark Deal


Alternatives

Here at ReviewVPN, we always remind you guys to have a back-up. Meaning, if a problem arises with the Primal add-on, you can always rely on a back-up to act on its behalf. There are a lot of other add-ons that are very similar to Prima but to an extent only. So far, we have seen that Primal has a very detailed interface. It has a lot of sections that users can choose from so in that aspect, Primal is a very good choice. But in case Primal encounters a problem, the following add-ons are very reliable as well. They are as follows:

  • Exodus
  • Exodus Redux
  • Covenant

These alternative add-ons actually came from the same repository as Primal, so you can expect the same quality and performance that Primal gives.


Common Errors

These are some of the things that may cause an issue when installing Primal:

  1.    Unable to connect to URL/Download

Be sure to check that the URL you have typed in is correct. Inputting the wrong URL will indeed produce this error. Also, you have to make sure that you have a reliable internet connection so that your download will not be interrupted. You will also have to check if you have downloaded the right repository to avoid this error. Lastly, always use a reliable VPN to avoid any connection throttling that is caused by your ISP. Check here for the best VPN deal.


  1.     Script Error

This normally happens when Kodi is not installed properly. We have a detailed guide here on how to properly install Kodi on your device. Also, this issue can also arise if your add-on is not installed in the right way. If it was not installed properly, you can always reinstall it and we advise that you refer to the installation steps we have here.


  1.     Kodi Check Log Error

If this error occurs, it only means that your cache is already full. The media cache usually catches clips of the media to make loading faster and along the way, it fills up to the maximum cap. In order to resolve this problem, you simply have to empty your cache. 


  1.     Source not working/slow/frozen

Primal provides streams and it does not store any content on its servers. If a link is not working, just wait for a few seconds for the results to reload and you can pick a link that works. For other solutions, we have provided an in-depth guide that is linked in this post.


Grab your subscription now!

Click here to get the lowest price on Surfshark through our exclusive limited-time offer.


How to Install Surfshark VPN on Firestick

If your Firestick still has the older interface, read this article to learn how to update it: Update Firestick Interface.

Follow our screenshots below to install the SurfShark VPN app on your Fire TV stick.

1. Go to the Home screen of your Firestick.

step 1 Install Surfshark VPN on Firestick


2. Navigate towards the Find tab. Press the Search button from the resulting dropdown.

step 2 Install Surfshark VPN on Firestick


3. Type in the keyword of SurfShark and select from the suggestions that will appear.

step 3 Install Surfshark VPN on Firestick


4. Click the official SurfShark icon from your search results.

step 4 Install Surfshark VPN on Firestick


5. Press the Download (You own it) button.

step 5 Install Surfshark VPN on Firestick


6. The SurfShark VPN installer will download on your device.

step 6 Install Surfshark VPN on Firestick


7. SurfShark VPN’s app will automatically install itself on your Fire TV stick.

step 7 Install Surfshark VPN on Firestick


8. Press the Open button after completing SurfShark VPN’s installation process.

step 8 Install Surfshark VPN on Firestick


9. Please wait for the SurfShark VPN to load its user interface.

step 9 Install Surfshark VPN on Firestick


10. You can now log in with your SurfShark VPN account credentials.

step 10 Install Surfshark VPN on Firestick

Learn more about Surfshark and Grab the Best Surfshark Deal Now!


Install Surfshark on Firestick

Best Surfshark Deal


Other VPNs to Consider

NordVPN (Best for Streaming)

Best Features

  • 5000+ Server in 50+ Countries 
  • Military-Grade Encryption
  • Fast Connection Speed
  • Suitable to a lot of devices
  • No-Log Policy

Prices
  • Complete $5.89 per month (64% Discount)
  • Plus $4.59 per month (56% Discount)
  • Standard $3.69 per month (55% Discount)

Best Features

  • 750+ High-speed VPN Servers in 43 Locations
  • Military-Grade Encryption
  • Fastest HD Streaming and Gaming
  • 30-Day Money-Back Guarantee
  • Unlimited Data & Devices
  • No-Log Policy

Prices
  • 3 Years $1.99 per month (82% Discount)
  • 1 Years $3.29 per month (70% Discount)
  • 1 Month $10.99 per month

IPVanish VPN (Most Secure)

Best Features

  • 1200+ Servers in 60+ Countries around the world
  • Unlimited Connections
  • No-Log Policy
  • Top Notch Military-Grade VPN Protocols and Encryptions
  • 100% Safe and Secured
  • Most Trusted VPN
  • Best VPN for Firestick
  • 30-Day Money-Back Guarantee

Prices
  • Yearly $3.99 per month (63% Discount) – 30 days risk free + Ransomware & Malware Protection
  • Quarterly $5.32 per month (51% Discount)
  • Monthly $10.99 per month


For more VPN discounts, go to ReviewVPN Deals and purchase the best VPN for you.


Conclusion

One of the main advantages of Primal over other add-ons is that it has an extensive gallery. You can choose what content you’d like to watch. It features a lot of subcategories so that you can navigate what you want to see. This is helpful to users who don’t really have a particular inclination on what to watch. Also, this add-on is very family-friendly. You can watch a lot of stuff with your kids and actually have fun watching what parents also like to see. Primal truly does have a good reputation that is why it is one of the better add-ons we suggest. We hope that this post was enlightening and helpful. If you have questions on anything, feel free to drop us a comment below and we would address your query promptly. Thank you!

Install Our Match Kodi Addon

Our Match Kodi Video Addon

Source: https://anon2018.github.io/UNICORN/ 

Liver Pool FC, Bayern Munchen, Barcelona, Manchester City, and Juventus are some of the biggest names in the field of Soccer. All around the globe, there are millions upon millions of soccer fans that eagerly watch soccer games in support of their favorite teams. But sometimes there are unavoidable circumstances where you won’t be able to watch the games live. You get stuck in traffic, in a meeting, or even forget to wake up on time to watch. You resent the moment that you weren’t able to watch your favorite team play and your only recourse is to watch it online. But sometimes, you won’t be able to watch it online due to restrictions and copyright issues. So what do you do? Well, the good news is there is a Kodi add-on that can help you with that dilemma and that is Our Match Add-on. If you haven’t installed Kodi yet, you better do it now if you know what is right for you.


Our Match Kodi Video Add-on under the Unicorn Repository provides soccer content to its subscribers. Anything that has to do with soccer it can deliver. 


ANONYMOUSLY


Features

  • Replays
  • Game Highlights
  • Soccer Team Information

Installation Guide for Our Match Addon

  1. Launch Kodi on your device
  2. At the top left corner of your device, click on the “System Setting” icon
  3. Select “File Manager”
  4. Choose “Add source”
  5. Click on “None”
  6. Type in the URL address https://anon2018.github.io/UNICORN/
  7. A box under will appear, name it “Unicorn” and select “Ok”
  8. Double-check and then click “Ok”
  9. Head back to the main menu and select “Add-ons”
  10. At the top left corner, click on the “Add-on Package Installer” icon
  11. Select “Install from zip file” and then a pop-up will appear
  12. Choose “Unicorn”
  13. Select repository.unicorn-0.0.2.zip
  14. It will download and wait for a few seconds for a pop-up saying “Repo Installed”
  15. Choose “Install from Repository”
  16. Select “Unicorn Repository”
  17. And then go to “Video Add-ons”
  18. Select “Our Match” and choose “Install”
  19. Select “Ok”

YOUR INTERNET ACTIVITY IS BEING WATCHED

ReviewVPN cannot attest to the legality, security and privacy of the applications discussed on this site. It is highly recommended that you use a VPN service while streaming or using Kodi.

Currently, your IP 216.73.217.150 is visible to everyone and your Browser is being tracked by Advertisers & ISP Provider.

Save 65% Now

Limited Time Offer

Here are the main reasons why you must use a VPN:

  • Your activities are hidden from your ISP, the government, and from the apps you are using.
  • You can access additional movies and TV streams.
  • ISP attempts to throttle are thrwarted thus reducing buffering issues.
  • Geographically restricted content like Netflix and Hulu can be unblocked.

A VPN works be replacing your ISP-assigned IP address and creating an encrypted tunnel. We recommend the no log service offered by IPVanish. It works well on a Firestick and offers the fastest possible speeds.

Special Limited Time Offer - Get IPVanish


How to Install  the Our Match on Kodi with Screenshots

1. From the home screen, select the cogwheel at the upper left.

Step 1 Installing Galaxy addon on Kodi

2. Select System in the bottom right corner.

Step 2 Installing Our Match addon on Kodi


3. Select Add-ons on the left side of the screen.

Step 3 Installing Our Match addon on Kodi


4. Select Unknown sources.

Step 4 Installing Our Match addon on Kodi


5. Click Yes to allow unknown sources.

Step 5 Installing Our Match addon on Kodi


6. Select File manager.

Step 6 Installing Our Match on Kodi


7. Click Add source.

Step 7 Installing Our Match addon on Kodi


8. Click on <None>.

Step 8 Installing Our Match addon on Kodi


9. Type exactly: https://anon2018.github.io/UNICORN/

Step 9 Installing Our Match addon on Kodi


10. Click on OK.

Step 10 Installing Our Match addon on Kodi


11. Select enter a name for this media source.

Step 11 Installing Our Match addon on Kodi


12. Name is Our Match (this part isn’t critical as long as you remember the name).

Step 12 Installing Our Match addon on Kodi


13. Click on OK.

Step 13 Installing Our Match addon on Kodi


14. Click on OK.

Step 14 Installing Our Match addon on Kodi


15. Take one step back and click on Add-ons.

Step 15 Installing Our Match addon on Kodi


16. Select install from zip file.

Step 16 Installing Our Match addon on Kodi


17. Click on Our Match (or whatever you named the source).

Step 17 Installing Our Match addon on Kodi


18. Click on repository.unicorn-0.0.2.zip

Step 18 Installing Our Match addon on Kodi


19. Select on Install from repository.

Step 19 Installing Our Match addon on Kodi


20. Click on Unicorn Repo.

Step 20 Installing Our Match addon on Kodi


21. Pick Video add-ons.

Step 21 Installing Our Match addon on Kodi


22. Select Our Match again.

Step 22 Installing Our Match addon on Kodi


23. Click on Install.

Step 23 Installing Our Match addon on Kodi


24. Select Version 2.0.3 Unicorn Repo

Step 24 Installing Our Match addon on Kodi


25. Select OK after reviewing the add-ons that will be installed.

Step 25 Installing Our Match addon on Kodi


26. You should see a popup in the upper right corner saying Our Match has installed. There will actually be multiple popups for the various components.

Step 26 Installing Our Match addon on Kodi


27. Click on Open to start Our Match add-on.

Step 27 Installing Our Match addon on Kodi

Alternatives

At times you may encounter an issue with an add-on and that is usually governed by the creator of the add-on. We always recommend that you get your content from trusted sources and always protect your browsing history with a reliable VPN. What if Our Match add-on encounters an issue? That would mean your viewing experience gets interrupted so here at ReviewVPN, we decided to come up with a list of alternatives that offer the same content as Our Match does. The list of alternative add-ons is as follows:

  • Halow TV Live Add-on
  • Sports Devil Add-on
  • BoB Unleashed Add-on
  • DC Sports Add-on
  • UK Turk Playlist Add-on
  • Maverick TV Add-on

A friendly reminder, these alternatives provide sports content in general but not very specific on Soccer like Our Match.

Common Errors

These are some of the things that may cause an issue when installing Our Match:

  1.     Unable to connect to URL/Download

Always verify if you have written the correct URL. Also, recheck if you have downloaded the right repository. Always make sure that your internet connection is stable and also you must be protected by a very reliable VPN. Check here for the best VPN deal.


  1.     Script Error

This usually appears when Kodi is not properly installed. Also, it is worth noting that the add-on may be improperly installed as well. To resolve this, you must reinstall the add-on by following the guide we provided above. You can also reinstall Kodi if this problem still continues to persist.


  1.     Kodi Check Log Error

This happens when your media cache is full of memory. Our cache usually produces what we call snippets that make loading faster. Over time, this will fill out your entire cache. So the best solution to this issue is to just simply empty your cache and use trusted tools that will optimize the performance of Kodi on your device.


  1.     Source not working/slow/frozen

Our Match does not store any of the content on its servers, it only provides streams that provide that particular content it is meant for. You should try other sources that may only take a matter of seconds to load up. For other solutions please take the time to read our in-depth guide linked above.


Grab your subscription now!

Click here to get the lowest price on Surfshark through our exclusive limited-time offer.


How to Install Surfshark VPN on Firestick

If your Firestick still has the older interface, read this article to learn how to update it: Update Firestick Interface.

You can download Surfshark directly from the Amazon App store. It will be easy for you to find Surfshark with your Firestick’s Find feature. Refer to our screenshots below.

1. Go to the Home screen of your Firestick.

step 1 Install Surfshark VPN on Firestick


2. Navigate towards the Find tab. Press the Search button from the resulting dropdown.

step 2 Install Surfshark VPN on Firestick


3. Type in the keyword of SurfShark and select from the suggestions that will appear.

step 3 Install Surfshark VPN on Firestick


4. Click the official SurfShark icon from your search results.

step 4 Install Surfshark VPN on Firestick


5. Press the Download (You own it) button.

step 5 Install Surfshark VPN on Firestick


6. The SurfShark VPN installer will download on your device.

step 6 Install Surfshark VPN on Firestick


7. SurfShark VPN’s app will automatically install itself on your Fire TV stick.

step 7 Install Surfshark VPN on Firestick


8. Press the Open button after completing SurfShark VPN’s installation process.

step 8 Install Surfshark VPN on Firestick


9. Please wait for the SurfShark VPN to load its user interface.

step 9 Install Surfshark VPN on Firestick


10. You can now log in with your SurfShark VPN account credentials.

step 10 Install Surfshark VPN on Firestick

Learn more about Surfshark and Grab the Best Surfshark Deal Now!


Install Surfshark on Firestick

Best Surfshark Deal


Other VPNs to Consider

NordVPN (Best for Streaming)

Best Features

  • 5000+ Server in 50+ Countries 
  • Military-Grade Encryption
  • Fast Connection Speed
  • Suitable to a lot of devices
  • No-Log Policy

Prices
  • Complete $5.89 per month (64% Discount)
  • Plus $4.59 per month (56% Discount)
  • Standard $3.69 per month (55% Discount)

Best Features

  • 750+ High-speed VPN Servers in 43 Locations
  • Military-Grade Encryption
  • Fastest HD Streaming and Gaming
  • 30-Day Money-Back Guarantee
  • Unlimited Data & Devices
  • No-Log Policy

Prices
  • 3 Years $1.99 per month (82% Discount)
  • 1 Years $3.29 per month (70% Discount)
  • 1 Month $10.99 per month

IPVanish VPN (Most Secure)

Best Features

  • 1200+ Servers in 60+ Countries around the world
  • Unlimited Connections
  • No-Log Policy
  • Top Notch Military-Grade VPN Protocols and Encryptions
  • 100% Safe and Secured
  • Most Trusted VPN
  • Best VPN for Firestick
  • 30-Day Money-Back Guarantee

Prices
  • Yearly $3.99 per month (63% Discount) – 30 days risk free + Ransomware & Malware Protection
  • Quarterly $5.32 per month (51% Discount)
  • Monthly $10.99 per month


For more VPN discounts, go to ReviewVPN Deals and purchase the best VPN for you.

Click here to get the lowest price on Surfshark through our exclusive limited-time offer.


Conclusion

Our Match is the perfect add-on for you if you are a Soccer fan. It gives you replays and highlights if ever you miss live games. You can enjoy this add-on with your buddies. Have them come over and enjoy a few rounds of beer and experience sports entertainment at its finest. We hope that this guide will be of help to you and if you have questions, please do not hesitate to contact us through our website and our other social media platforms. As the popular soccer cheer goes, Know ‘em down! Happy viewing!

Install Locutus Kodi Addon

Locutus Kodi Addon

In this article, we will help you install Locutus Kodi Addon on Firestick.


Source: http://repo.rubyjewelwizard.com

Locutus is a Kodi Video Addon that is found under the Diamond Wizard Repository. It can be considered as the modernized version of the add-on 7 of 9. With its newly upgraded capabilities, Locutus offers more content from high-quality movies, Tv-Shows, Sports, Kids, and many more. Although not much can be expected from its Live Tv feature it is a great addition nonetheless. Locutus also offers more content because it combined both ace streams and m3u8 playlists. It gives you more stuff compared to other add-ons.


ANONYMOUSLY


Other Notable Categories Are:

        1-Click movies

        Movies

        Tv Shows

        Kids

        Youtube Theater

        Trakt

        Last Played and others


Features

  1.     Custom Made for Real-Debrid users.
  2.     A simple UI that makes it easy to navigate through
  3.     A huge library of high-quality movies and tv shows
  4.     Trakt Playlist Integration
  5.     Automatically chooses the best stream for you
  6.      A huge array of category selection
  7.     Access to music, radio, and live sport as well
  8.     Customizable search by content, popularity, and rating
  9.     Torrent capable


Easy Installation Guide

  1. Open Kodi
  2. Click on the “Gear Icon” and select “System”
  3. At the add-ons menu, turn on the “Unknown Sources” by clicking “yes”
  4. Go back to the “systems” page and choose “File Manager”
  5. Choose Add source and select “none”
  6. Type in http://repo.rubyjewelwizard.com
  7. Highlight the source and rename it to “diamond” or any name you would like to use to identify this particular source and click “ok”
  8. Go back to the System Screen and click “Add-ons”
  9. Select ‘Install Zip File” choose “diamond” or whatever you renamed the file.
  10. Select the zip file URL- repository.Diamond-Wizard-Repo-3.9.8.zip
  11. Wait for the notification “Diamond Build Add-on Repo Installed” to appear.
  12. Select “Install Repository”
  13. Choose “Diamond Build Repo”
  14. Click on “Video Add-ons” and select “Locutus (Debrid Only)” and “Install”
  15. Click “Ok” when a notification “the following add-ons will be installed” appears and wait for Locutus Add-on to install
  16. Once the add-on is installed go back to the home screen and select “add-ons”
  17. Choose “video add-ons” and select “Locutus(Debrid only)”
  18. There you go, Locutus is now installed.


Real-Debrid Integration

  1. If you don’t possess a Real-Debrid account yet, you must register.
  2. When Launching the Locutus add-on you will be notified with this message. Jut down the code that will be given.
  3. Launch a web browser on a different device and enter https://real-debrid.com/device.
  4. Type in the code you got and select “Continue”
  5. You will then be granted your Real-Debrid Account
  6. Go back to Locutus and a notification that shows another successful authorization message will appear, select “ok”
  7. If notified with a changelog, just press the “ok” button on your remote and voila! Locutus is now Real-Debrid ready.

YOUR INTERNET ACTIVITY IS BEING WATCHED

ReviewVPN cannot attest to the legality, security and privacy of the applications discussed on this site. It is highly recommended that you use a VPN service while streaming or using Kodi.

Currently, your IP 216.73.217.150 is visible to everyone and your Browser is being tracked by Advertisers & ISP Provider.

Save 65% Now

Limited Time Offer

Here are the main reasons why you must use a VPN:

  • Your activities are hidden from your ISP, the government, and from the apps you are using.
  • You can access additional movies and TV streams.
  • ISP attempts to throttle are thrwarted thus reducing buffering issues.
  • Geographically restricted content like Netflix and Hulu can be unblocked.

A VPN works be replacing your ISP-assigned IP address and creating an encrypted tunnel. We recommend the no log service offered by IPVanish. It works well on a Firestick and offers the fastest possible speeds.

Special Limited Time Offer - Get IPVanish


Legal Disclaimer: ReviewVPN.com does not encourage or endorse any illegal activity involved in the usage of services and applications referenced on this site. We do not verify the licensing agreements of services. The end-user is wholly responsible for ensuring that any media accessed through these services does not violate copyright and/or licensing laws. ReviewVPN does not promote, link to, or receive compensation from any Apps and IPTV services.


Install Surfshark on Firestick

Best Surfshark Deal


How to Install Locutus Addon on Kodi with Screenshots

1. From the home screen, select the cogwheel at the upper left.

Step 1 Installing Locutus addon on Kodi


2. Select System in the bottom right corner.

Step 2 Installing Locutus addon on Kodi


3. Select Add-ons on the left side of the screen.

Step 3 Installing Locutus addon on Kodi


4. Select Unknown sources.

Step 4 Installing Locutus addon on Kodi


5. Click Yes to allow unknown sources.

Step 5 Installing Locutus addon on Kodi


6. Select File manager.

Step 6 Installing Locutus on Kodi


7. Click Add source.

Step 7 Installing Locutus addon on Kodi


8. Click on <None>.

Step 8 Installing Locutus addon on Kodi


9. Type exactly: http://repo.rubyjewelwizard.com

Step 9 Installing Locutus addon on Kodi


10. Click on OK.

Step 10 Installing Locutus addon on Kodi


11. Select enter a name for this media source.

Step 11 Installing Locutus addon on Kodi


12. Name is Locutus (this part isn’t critical as long as you remember the name).

Step 12 Installing Locutus addon on Kodi


13. Click on OK.

Step 13 Installing Locutus addon on Kodi


14. Click on OK.

Step 14 Installing Locutus addon on Kodi


15. Take one step back and click on Add-ons.

Step 15 Installing Locutus addon on Kodi


16. Select install from zip file.

Step 16 Installing Locutus addon on Kodi


17. Click on Locutus (or whatever you named the source).

Step 17 Installing Locutus addon on Kodi


18. Click on repository.Diamond-Wizard-Repo-3.9.8.zip

Step 18 Installing Locutus addon on Kodi


19. Select on Install from repository.

Step 19 Installing Locutus addon on Kodi


20. Click on Diamond Repo

Step 20 Installing Locutus addon on Kodi


21. Pick Video add-ons.

Step 21 Installing Locutus addon on Kodi


22. Select Locutus again.

Step 22 Installing Locutus addon on Kodi


23. Click on Install.

Step 23 Installing Locutus addon on Kodi


24.  Select OK after reviewing the add-ons that will be installed.

Step 24 Installing Locutus addon on Kodi


25. You should see a popup in the upper right corner saying Locutus has installed. There will actually be multiple popups for the various components.

Step 25 Installing Locutus addon on Kodi


26. Click on Open to start Locutus add-on.

Step 26 Installing Locutus addon on Kodi


Alternatives

Here at ReviewVPN, we always remind you, our dear subscribers that having a plan b is always optimal. There will be times when some of the popular add-ons will have an issue or malfunction so it is best to be prepared for that.

Aside from Locutus, here is a list of other add-ons we recommend for you to try:

        The Magic Dragon

        Gaia

        Movie Theater Butter

        Yoda

Searching for new add-ons is a breeze. You can google them easily and find out new stuff. But we highly recommend that you obtain them from trusted sources that have credibility and a good reputation. The ones that we recommend are very good and won’t cause you any trouble.

Common Errors

These are some of the things that may cause an issue when installing Locutus:

  1.    Unable to connect to URL/Download

Having a hard time downloading Locutus? This can only mean that the repository is incorrect, so please check if you have typed in the correct URL. Also, you make sure that you have installed the correct repository. Checking your internet connection for stability can also help and make sure that you are protected by a VPN. Your ISP constantly monitors your activity and may block certain websites from being accessed. To fix this, use a VPN to make your connection encrypted and anonymous so that your tracks will be covered. Check here for the best VPN deal.


  1.     Script Error

This error can occur maybe because of how Kodi was installed on your device. Follow the proper steps on how to install Kodi to avoid this type of issue. If the issue persists, you can proceed in reinstalling the add-on. If it should persist further, there may be a need to uninstall and reinstall the whole Kodi app itself.


  1.     Kodi Check Log Error

This occurs when your media cache is full. We can prevent this by emptying your cache and making sure that it gets cleaned on a regular basis. Cache build is quite common nowadays because it is one way of making our streaming experience smoother.


  1.     Source not working/slow/frozen

Locutus does not keep any of the content on its servers, these are all coursed through 3rd party sites. Wait for the source to load up to 15 seconds and then you can try other suggestions. For other solutions please take time to read our in-depth guide linked above.


Should I Use This App With a VPN?

surfshark logo

We recommend you use a VPN for the following reasons:

  • Many of the addons you will access in Streamline will direct you to links for illegally distributed content. Without a VPN you may find many of these links do not work because your ISP is blocking your access
  • If you try to access Live TV Channels in other countries through Streamline your access may also be blocked. This is because these channels can detect your IP is not in that country and will block you from accessing their channels.
  • Using a VPN, you can encrypt your requests, change your IP, and also the location where your IP originates from. Thus, allowing you to circumvent any blocks or firewalls in place to do your accessing most restricted content
  • A VPN also helps you maintain anonymity, safety, and privacy online from unwanted third parties.

Note: For more information about Surfshark, please read our Surfshark Review.


Grab your subscription now!


How to Install Surfshark VPN on Firestick

If your Firestick still has the older interface, read this article to learn how to update it: Update Firestick Interface.

Follow our screenshots below to install the SurfShark VPN app on your Fire TV stick.

1. Go to the Home screen of your Firestick.

step 1 Install Surfshark VPN on Firestick


2. Navigate towards the Find tab. Press the Search button from the resulting dropdown.

step 2 Install Surfshark VPN on Firestick


3. Type in the keyword of SurfShark and select from the suggestions that will appear.

step 3 Install Surfshark VPN on Firestick


4. Click the official SurfShark icon from your search results.

step 4 Install Surfshark VPN on Firestick


5. Press the Download (You own it) button.

step 5 Install Surfshark VPN on Firestick


6. The SurfShark VPN installer will download on your device.

step 6 Install Surfshark VPN on Firestick


7. SurfShark VPN’s app will automatically install itself on your Fire TV stick.

step 7 Install Surfshark VPN on Firestick


8. Press the Open button after completing SurfShark VPN’s installation process.

step 8 Install Surfshark VPN on Firestick


9. Please wait for the SurfShark VPN to load its user interface.

step 9 Install Surfshark VPN on Firestick


10. You can now log in with your SurfShark VPN account credentials.

step 10 Install Surfshark VPN on Firestick

Learn more about Surfshark and Grab the Best Surfshark Deal Now!


Install Surfshark on Firestick

Best Surfshark Deal


Other VPNs to Consider

NordVPN (Best for Streaming)

Best Features

  • 5000+ Server in 50+ Countries 
  • Military-Grade Encryption
  • Fast Connection Speed
  • Suitable to a lot of devices
  • No-Log Policy

Prices
  • Complete $5.89 per month (64% Discount)
  • Plus $4.59 per month (56% Discount)
  • Standard $3.69 per month (55% Discount)

Best Features

  • 750+ High-speed VPN Servers in 43 Locations
  • Military-Grade Encryption
  • Fastest HD Streaming and Gaming
  • 30-Day Money-Back Guarantee
  • Unlimited Data & Devices
  • No-Log Policy

Prices
  • 3 Years $1.99 per month (82% Discount)
  • 1 Years $3.29 per month (70% Discount)
  • 1 Month $10.99 per month

IPVanish VPN (Most Secure)

Best Features

  • 1200+ Servers in 60+ Countries around the world
  • Unlimited Connections
  • No-Log Policy
  • Top Notch Military-Grade VPN Protocols and Encryptions
  • 100% Safe and Secured
  • Most Trusted VPN
  • Best VPN for Firestick
  • 30-Day Money-Back Guarantee

Prices
  • Yearly $3.99 per month (63% Discount) – 30 days risk free + Ransomware & Malware Protection
  • Quarterly $5.32 per month (51% Discount)
  • Monthly $10.99 per month


For more VPN discounts, go to ReviewVPN Deals and purchase the best VPN for you.

Click here to get the lowest price on Surfshark through our exclusive limited-time offer.


Conclusion

To put it simply, The Locutus add-on is a beefed-up version of the add-on 7 of 9. It is very user-friendly and is not complicated when you install it. Here at ReviewVPN, we always provide an honest review and try to recommend accessible, high-quality, stable, and reliable add-ons that we believe will be beneficial to our followers. The Locutus Video add-on is a very versatile add-on that gives its users content that can cater to the whole family.

We hope that this guide has been helpful in any way to you. Please feel free to drop a comment or query to our site and our other social media so that we can further assist you. Thank you and have a great Kodi experience!


Install Kratos Reborn Kodi Addon

Kratos Reborn Kodi Addon

http://magnetic.website/repo

Kratos Reborn Kodi Video Add-on

You would have probably heard of the name Kratos through the popular game anthology, God of War. Kratos is the main protagonist and has battled almost all of the Gods of Olympus to seek revenge. Anyone who has played the game will never forget the thrill and excitement that the game brought to them. In that aspect, we believe that the developer of a certain add-on wishes to exude the same appeal and that add-on is named Kratos Reborn.


Kratos Reborn was previously called “Kratos Add-on” and it was under the UKodi1 Repository but when that repository went down, the original Kratos Add-on went down with it. Luckily, the Kratos Add-on was renamed Kratos Reborn and now lies within the roster of Magnetic Repository. It offers streaming links for Movies, TV Shows, Documentaries, and many more.


ANONYMOUSLY


Features

        Trakt Integration

        Real-Debrid Integration

        Premiumize Integration

        Access to Torrent Caches via Real-Debrid

        HQ Streaming Links

        Compatible with Firestick, Firestick 4k, Android Boxes, Windows and Mac Computers, Linux, and Raspberry Pi.

Installation Guide

  1. Launch Kodi on your device
  2. Click on the “Gear Icon” and select “System”
  3. At the add-ons menu, turn on the “Unknown Sources” by clicking “yes”
  4. Go back to the “systems” page and choose “File Manager”
  5. Choose Add source and select “none”
  6. Type in http://magnetic.website/repo
  7. Highlight the source and rename it to “Kratos Reborn” or any name you would like to use to identify this particular source and click “ok”
  8. Go back to the System Screen and click “Add-ons”
  9. Select “Install Zip File” choose “Fusion” or whatever you renamed the file.
  10. Select the zip file URL- repository.Magnetic-1.0.7.zip
  11. Wait for the notification “Magnetic Add-on Repo Installed” to appear.
  12. Select “Install Repository”
  13. Choose “Magnetic Repo”
  14. Click on “Video Add-ons” and select “Kratos Reborn” and “Install”
  15. Click “Ok” when a notification “the following add-ons will be installed” appears and wait for Fusion Org Add-on to install
  16. Once the add-on is installed go back to the home screen and select “add-ons”
  17. Choose “Video add-ons” and select “Kratos Reborn”
  18. There you go, Kratos Reborn add-on is now installed.


YOUR INTERNET ACTIVITY IS BEING WATCHED

ReviewVPN cannot attest to the legality, security and privacy of the applications discussed on this site. It is highly recommended that you use a VPN service while streaming or using Kodi.

Currently, your IP 216.73.217.150 is visible to everyone and your Browser is being tracked by Advertisers & ISP Provider.

Save 65% Now

Limited Time Offer

Here are the main reasons why you must use a VPN:

  • Your activities are hidden from your ISP, the government, and from the apps you are using.
  • You can access additional movies and TV streams.
  • ISP attempts to throttle are thrwarted thus reducing buffering issues.
  • Geographically restricted content like Netflix and Hulu can be unblocked.

A VPN works be replacing your ISP-assigned IP address and creating an encrypted tunnel. We recommend the no log service offered by IPVanish. It works well on a Firestick and offers the fastest possible speeds.

Special Limited Time Offer - Get IPVanish


How to Install Kratos Reborn on Kodi with Screenshots

1. From the home screen, select the cogwheel at the upper left.

Step 1 Installing Kratos Reborn addon on Kodi

2. Select System in the bottom right corner.

Step 2 Installing Kratos Reborn addon on Kodi


3. Select Add-ons on the left side of the screen.

Step 3 Installing Kratos Reborn addon on Kodi


4. Select Unknown sources.

Step 4 Installing Kratos Reborn addon on Kodi


5. Click Yes to allow unknown sources.

Step 5 Installing Kratos Reborn addon on Kodi


6. Select File manager.

Step 6 Installing Kratos Reborn on Kodi


7. Click Add source.

Step 7 Installing Kratos Reborn addon on Kodi


8. Click on <None>.

Step 8 Installing Kratos Reborn addon on Kodi


9. Type exactly: http://magnetic.website/repo/

Step 9 Installing Kratos Reborn addon on Kodi


10. Click on OK.

Step 10 Installing Kratos Reborn addon on Kodi


11. Select enter a name for this media source.

Step 11 Installing Kratos Reborn addon on Kodi


12. Name is Kratos Reborn (this part isn’t critical as long as you remember the name).

Step 12 Installing Kratos Reborn addon on Kodi


13. Click on OK.

Step 13 Installing Kratos Reborn addon on Kodi


14. Click on OK.

Step 14 Installing Kratos Reborn addon on Kodi


15. Take one step back and click on Add-ons.

Step 15 Installing Kratos Reborn addon on Kodi


16. Select install from zip file.

Step 16 Installing Kratos Reborn addon on Kodi


17. Click on Kratos Reborn (or whatever you named the source).

Step 17 Installing Kratos Reborn addon on Kodi


18. Click on repository.Magnetic-1.0.7.zip

Step 18 Installing Kratos Reborn addon on Kodi


19. Select on Install from repository.

Step 19 Installing Kratos Reborn addon on Kodi


20. Click on Magnetic Repo.

Step 20 Installing Kratos Reborn addon on Kodi


21. Pick Video add-ons.

Step 21 Installing Kratos Reborn addon on Kodi


22. Select Kratos Reborn again.

Step 22 Installing Kratos Reborn addon on Kodi


23. Click on Install.

Step 23 Installing Kratos Reborn addon on Kodi


24. Select Version 1.0 (Magnetic Repo)

Step 24 Installing Kratos Reborn addon on Kodi


25. Select OK after reviewing the add-ons that will be installed.

Step 25 Installing Kratos Reborn addon on Kodi


26. You should see a popup in the upper right corner saying Kratos Reborn has installed. There will actually be multiple popups for the various components.

Step 26 Installing Kratos Reborn addon on Kodi


27. Click on Open to start the Kratos Reborn add-on.

Step 27 Installing Kratos Reborn addon on Kodi


Install Surfshark on Firestick

Best Surfshark Deal


Alternatives

Problems during the run of an add-on may arise depending on your internet connection and the stability of the add-on. Sometimes, the problem lies with the add-on thus here at ReviewVPN, we always remind our readers to have a short list of alternatives. Choose alternatives that have similar capabilities to Kratos Reborn and make sure that you obtain them from reputable sources so as to avoid further issues from arising. We always recommend the best add-ons and we believe that the following can serve as substitutes for Kratos Reborn:

        Midian Add-on

        Chucky Add-on

        Chain Reaction Add-on

        Leviathan Add-on

Should issues arise during the run of Kratos Reborn, we are very confident that the add-ons listed above can also perform very well and provide an excellent viewing experience.


Common Errors

These are some of the things that may cause an issue when installing Kratos Reborn:

  1.    Unable to connect to URL/Download

The wrong URL usually messes up the entire process of installation. Be sure to input the correct URL so that the process runs smoothly. Also, be sure to have a reliable VPN service because, at times, your ISP blocks content and throttles your internet connection. So to avoid that, be sure that you have secured a trusted VPN like Surfshark on your device. Check here for the best VPN deal.


  1.     Script Error

This issue usually arises when Kodi is not properly installed or has lacking features for it to work properly. If that is the case, you can redownload Kodi and install it properly. An in-depth guide on how to install the Kodi app is provided on our website. Lastly, if the issue is with the add-on itself, you can reinstall it by following the procedure given above.


  1.     Kodi Check Log Error

A check log error only happens when your media cache is full. You can remedy this situation by emptying your cache. 


  1.     Source not working/slow/frozen

Kratos Reborn does not keep any of the content on its servers. It is distributed by 3rd party apps. Patience is key here, just wait for a couple of seconds for the other suggestions and click on them. For other solutions please take the time to read our in-depth guide linked above. 


How to Install Surfshark VPN on Firestick

If your Firestick still has the older interface, read this article to learn how to update it: Update Firestick Interface.

You can download Surfshark directly from the Amazon App store. It will be easy for you to find Surfshark with your Firestick’s Find feature. Refer to our screenshots below.

1. Go to the Home screen of your Firestick.

step 1 Install Surfshark VPN on Firestick


2. Navigate towards the Find tab. Press the Search button from the resulting dropdown.

step 2 Install Surfshark VPN on Firestick


3. Type in the keyword of SurfShark and select from the suggestions that will appear.

step 3 Install Surfshark VPN on Firestick


4. Click the official SurfShark icon from your search results.

step 4 Install Surfshark VPN on Firestick


5. Press the Download (You own it) button.

step 5 Install Surfshark VPN on Firestick


6. The SurfShark VPN installer will download on your device.

step 6 Install Surfshark VPN on Firestick


7. SurfShark VPN’s app will automatically install itself on your Fire TV stick.

step 7 Install Surfshark VPN on Firestick


8. Press the Open button after completing SurfShark VPN’s installation process.

step 8 Install Surfshark VPN on Firestick


9. Please wait for the SurfShark VPN to load its user interface.

step 9 Install Surfshark VPN on Firestick


10. You can now log in with your SurfShark VPN account credentials.

step 10 Install Surfshark VPN on Firestick

Learn more about Surfshark and Grab the Best Surfshark Deal Now!
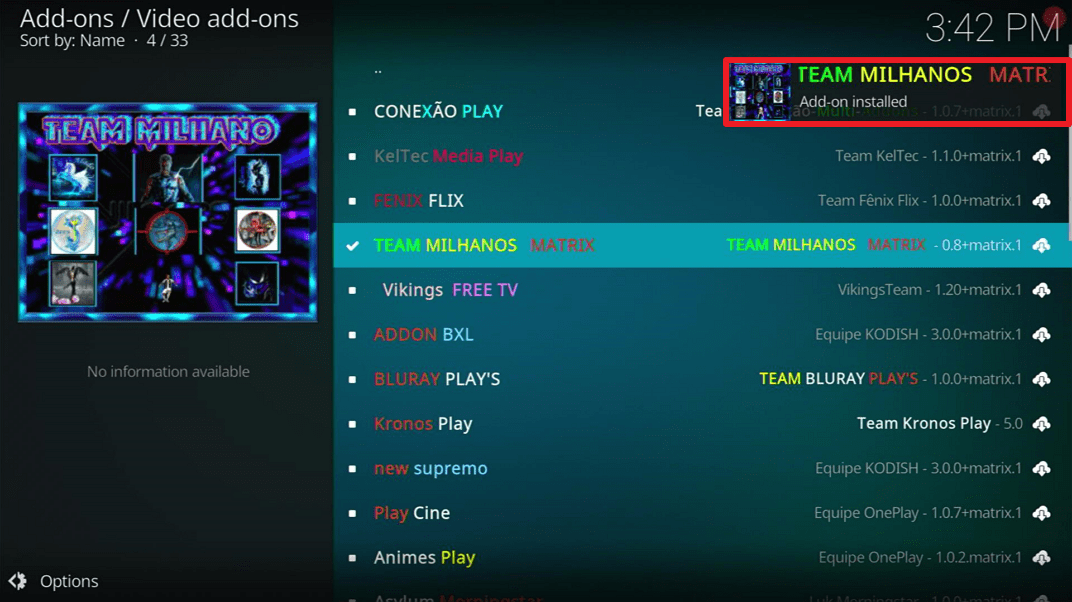
 

Install Surfshark on Firestick

Best Surfshark Deal


Other VPNs to Consider

NordVPN (Best for Streaming)

Best Features

  • 5000+ Server in 50+ Countries 
  • Military-Grade Encryption
  • Fast Connection Speed
  • Suitable to a lot of devices
  • No-Log Policy

Prices
  • Complete $5.89 per month (64% Discount)
  • Plus $4.59 per month (56% Discount)
  • Standard $3.69 per month (55% Discount)

Best Features

  • 750+ High-speed VPN Servers in 43 Locations
  • Military-Grade Encryption
  • Fastest HD Streaming and Gaming
  • 30-Day Money-Back Guarantee
  • Unlimited Data & Devices
  • No-Log Policy

Prices
  • 3 Years $1.99 per month (82% Discount)
  • 1 Years $3.29 per month (70% Discount)
  • 1 Month $10.99 per month

IPVanish VPN (Most Secure)

Best Features

  • 1200+ Servers in 60+ Countries around the world
  • Unlimited Connections
  • No-Log Policy
  • Top Notch Military-Grade VPN Protocols and Encryptions
  • 100% Safe and Secured
  • Most Trusted VPN
  • Best VPN for Firestick
  • 30-Day Money-Back Guarantee

Prices
  • Yearly $3.99 per month (63% Discount) – 30 days risk free + Ransomware & Malware Protection
  • Quarterly $5.32 per month (51% Discount)
  • Monthly $10.99 per month


For more VPN discounts, go to ReviewVPN Deals and purchase the best VPN for you.

Click here to get the lowest price on Surfshark through our exclusive limited-time offer.


Conclusion

True to its name, this add-on has truly been reborn. Not only does it do what it did before but also exceeded them. The amazing thing about Kratos Reborn lies within its ability to be integrated with Trakt, Real-Debrid, and torrents. These three features make this add-on run smoothly and provide content far beyond your imagination. With its huge library and high-quality streaming links, it is no wonder why a lot of Kodi users prefer this rather than others. We believe that the aim of the developer/s to make this one of the go-to add-ons has already been fulfilled and will continue to do so for a very long time. So there, we hope that this article will be able to provide you with everything that you need to know regarding Kratos Reborn. If you have questions, please feel free to contact us through the comment section or at any of our other social media platforms. Thank you and God Speed!
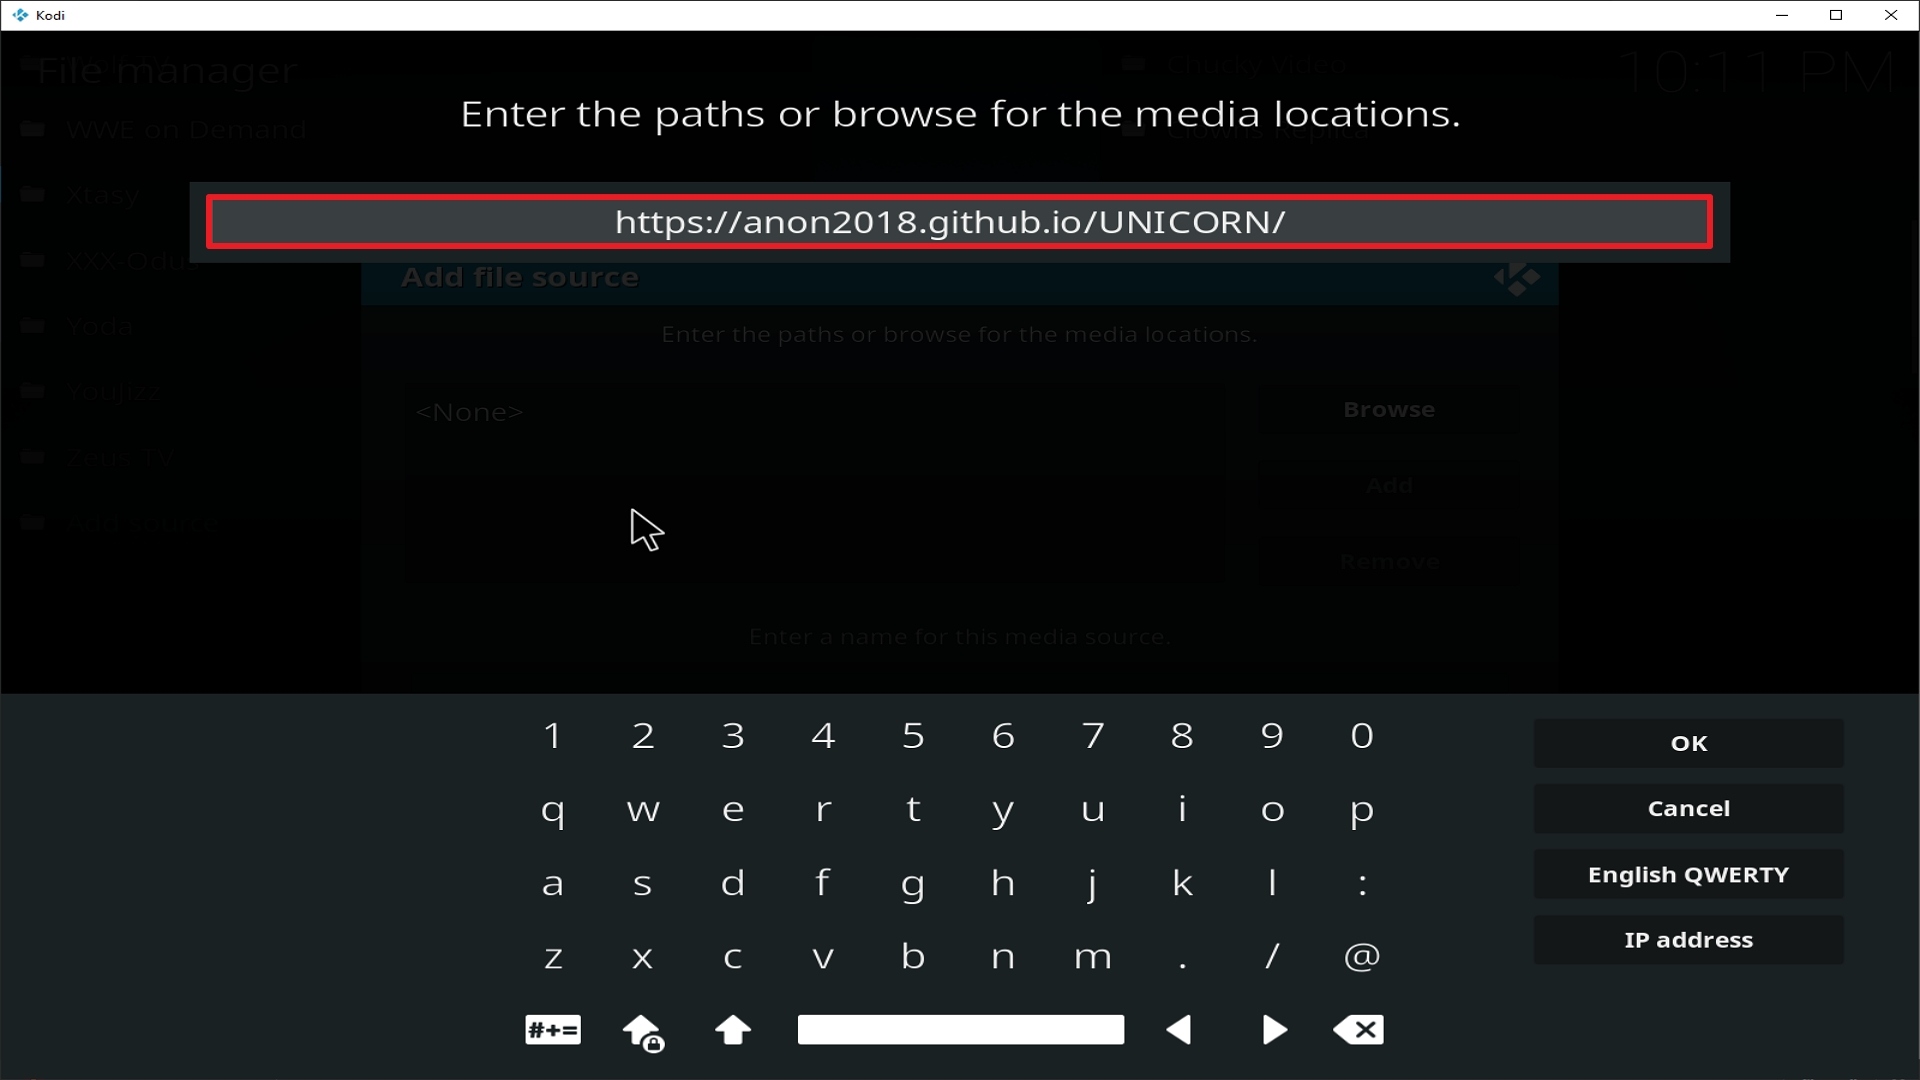
Install Kingdom Kodi Addon

Kingdom Kodi Addon

In this article, we will help you install Kingdom Kodi Addon on Firestick.


https://www.t2k-cloud.co.uk/Repo/

The Kingdom of Kodi has truly expanded all around the globe. A lot of users are very delighted because they get to enjoy high-quality movies and TV Shows for a fraction of the cost compared to cable and satellite subscriptions. We believe that the very essence of Kodi is large because of the creation of add-ons. These add-ons are heaven-sent and make people’s lives easier by providing unlimited content that satisfies the needs and wants of Kodi users. Speaking of Kingdom, there is such an app that also makes people happy and it goes by the name (Drum roll), KINGDOM!

Kingdom Kodi Video Add-on is under the T2k Repository that provides the content of high quality. It works well with almost all of the platforms available in the market. Also, it covers a lot of areas in terms of content and also has a good reputation within the Kodi community. If you are a first time user, sit back, relax, and let us help you get familiarized with this awesome add-on.


ANONYMOUSLY

Feature

        Real-Debrid Integration

        Christmas Section

        Trakt Integration

        Xmas Grotto

        3D Movies

        TV Shows

        Movies

        House of Horror (Scary Content)

        Ghosts and Paranormal

        Comedy

        Documentaries

        LIVE TV

        Sports Xtra

        Music

        Hobbies & More

        Search Trakt

        Search TMDB


YOUR INTERNET ACTIVITY IS BEING WATCHED

ReviewVPN cannot attest to the legality, security and privacy of the applications discussed on this site. It is highly recommended that you use a VPN service while streaming or using Kodi.

Currently, your IP 216.73.217.150 is visible to everyone and your Browser is being tracked by Advertisers & ISP Provider.

Save 65% Now

Limited Time Offer

Here are the main reasons why you must use a VPN:

  • Your activities are hidden from your ISP, the government, and from the apps you are using.
  • You can access additional movies and TV streams.
  • ISP attempts to throttle are thrwarted thus reducing buffering issues.
  • Geographically restricted content like Netflix and Hulu can be unblocked.

A VPN works be replacing your ISP-assigned IP address and creating an encrypted tunnel. We recommend the no log service offered by IPVanish. It works well on a Firestick and offers the fastest possible speeds.

Special Limited Time Offer - Get IPVanish


Legal Disclaimer: ReviewVPN.com does not encourage or endorse any illegal activity involved in the usage of services and applications referenced on this site. We do not verify the licensing agreements of services. The end-user is wholly responsible for ensuring that any media accessed through these services does not violate copyright and/or licensing laws. ReviewVPN does not promote, link to, or receive compensation from any Apps and IPTV services.


Install Surfshark on Firestick

Best Surfshark Deal


Easy Installation Guide

  1. Launch Kodi on your device
  2. Click on the “Gear Icon” and select “System”
  3. At the add-ons menu, turn on the “Unknown Sources” by clicking “yes”
  4. Go back to the “systems” page and choose “File Manager”
  5. Choose Add source and select “none”
  6. Type in http://www.t2k-cloud.co.uk/Repo
  7. Highlight the source and rename it to “T2k Repo” or any name you would like to use to identify this particular source and click “ok”
  8. Go back to the System Screen and click “Add-ons”
  9. Select “Install Zip File” choose “T2k Repo” or whatever you renamed the file.
  10. Select the zip file URL- repository.T2K-1.2.3.zip
  11. Wait for the notification “T2k Add-on Repo Installed” to appear.
  12. Select “Install Repository”
  13. Choose “T2k Build Repo”
  14. Click on “Video Add-ons” and select “Kingdom” and “Install”
  15. Click “Ok” when a notification “the following add-ons will be installed” appears and wait for Kingdom Add-on to install
  16. Once the add-on is installed go back to the home screen and select “add-ons”
  17. Choose “Video add-ons” and select “Kingdom”
  18. There you go, Kingdom add-on is now installed.


How to Install Kingdom on Kodi with Screenshots

1. From the home screen, select the cogwheel at the upper left.

Step 1 Installing Kingdom addon on Kodi


2. Select System in the bottom right corner.

Step 2 Installing Kingdom addon on Kodi


3. Select Add-ons on the left side of the screen.

Step 3 Installing Kingdom addon on Kodi


4. Select Unknown sources.

Step 4 Installing Kingdom addon on Kodi


5. Click Yes to allow unknown sources.

Step 5 Installing Kingdom addon on Kodi


6. Select File manager.

Step 6 Installing Kingdom on Kodi


7. Click Add source.

Step 7 Installing Kingdom addon on Kodi


8. Click on <None>.

Step 8 Installing Kingdom addon on Kodi


9. Type exactly: https://www.t2k-cloud.co.uk/Repo/

Step 9 Installing Kingdom addon on Kodi


10. Click on OK.

Step 10 Installing Kingdom addon on Kodi


11. Select enter a name for this media source.

Step 11 Installing Kingdom addon on Kodi


12. Name is Kingdom  (this part isn’t critical as long as you remember the name).

Step 12 Installing Kingdom addon on Kodi


13. Click on OK.

Step 13 Installing Kingdom addon on Kodi


14. Click on OK.

Step 14 Installing Kingdom addon on Kodi


15. Take one step back and click on Add-ons.

Step 15 Installing Kingdom addon on Kodi


16. Select install from zip file.

Step 16 Installing Kingdom addon on Kodi


17. Click on Kingdom (or whatever you named the source).

Step 17 Installing Kingdom addon on Kodi


18. Click on repository.T2K-1.2.3.zip

Step 18 Installing Kingdom addon on Kodi


19. Select on Install from repository.

Step 19 Installing Kingdom addon on Kodi


20. Click on T2K Repo.

Step 20 Installing Kingdom addon on Kodi


21. Pick Video add-ons.

Step 21 Installing Kingdom addon on Kodi


22. Select Kingdom again.

Step 22 Installing Kingdom addon on Kodi


23. Click on Install.

Step 23 Installing Kingdom addon on Kodi


24. Select OK after reviewing the add-ons that will be installed.

Step 24 Installing Kingdom addon on Kodi


25. You should see a popup in the upper right corner saying Kingdom has installed. There will actually be multiple popups for the various components.

Step 25 Installing Kingdom addon on Kodi


26. Click on Open to start the Kingdom add-on.

Step 26 Installing Kingdom addon on Kodi


Real-Debrid Integration

  1. If you don’t possess a Real-Debrid account yet, you must register.
  2. When Launching Kingdom add-on you will be notified with this message. Write down the code that will be given.
  3. Launch a web browser on a different device and enter https://real-debrid.com/device.
  4. Type in the code you got and select “Continue”
  5. You will then be granted your Real-Debrid Account
  6. Go back to Kingdom and a notification that shows another successful authorization message will appear, select “ok”
  7. If notified with a changelog, just press the “ok” button on your remote and voila! Kingdom is now Real-Debrid ready.


Alternatives

It is not always sunshine and rainbows when running an add-on. You will surely encounter issues along the way. But we always remind our readers that one of the best ways to avoid this is by having a good alternative. Always obtain your content from trusted sources, this will ensure that you get non-stop entertainment. We always try our best in providing you what is the best out there that’s why we came up with a list of the best alternatives for Kingdom and they are as follows:

        The Magic Dragon Add-on

        Bumblebee Add-on

        Chain Reaction Add-on

        A Pirates Life For Me (Cached Torrent Streaming)

        Kratos reborn Add-on

Common Errors

These are some of the things that may cause an issue when installing Kingdom:

  1.    Unable to connect to URL/Download

One of the main reasons why this happens is that you might have written the wrong URL. Please be careful when typing in the URL because the slightest mistake can totally ruin your download. Secondly, having a stable internet connection is always desired as it does not impend the speed of your download. Lastly, to protect your identity and internet trail, you must have a reliable VPN to mask your online activities and will help you remain anonymous. Check here for the best VPN deal.


  1.     Script Error

This issue usually arises when Kodi is not properly installed or has lacking features for it to work properly. If that is the case, you can redownload Kodi and install it properly. An in-depth guide on how to install the Kodi app is provided on our website. Lastly, if the issue is with the add-on itself, you can reinstall it by following the procedure given above.


  1.     Kodi Check Log Error

A check log error only happens when your media cache is full. You can remedy this situation by emptying your cache. 


  1.     Source not working/slow/frozen

Kingdom does not keep any of the content on its servers. It is distributed by 3rd party apps. Patience is key here, just wait for a couple of seconds for the other suggestions and click on them. For other solutions please take the time to read our in-depth guide linked above. 


Should I Use This App With a VPN?

https://get.surfshark.net/aff_c?offer_id=865&aff_id=12312

We recommend you use a VPN for the following reasons:

  • Many of the addons you will access in Streamline will direct you to links for illegally distributed content. Without a VPN you may find many of these links do not work because your ISP is blocking your access
  • If you try to access Live TV Channels in other countries through Streamline your access may also be blocked. This is because these channels can detect your IP is not in that country and will block you from accessing their channels.
  • Using a VPN, you can encrypt your requests, change your IP, and also the location where your IP originates from. Thus, allowing you to circumvent any blocks or firewalls in place to do your accessing most restricted content
  • A VPN also helps you maintain anonymity, safety, and privacy online from unwanted third parties.

Note: For more information about SurfShark, please read our SURFSHARK REVIEW.


Grab your subscription now!


How to Install Surfshark VPN on Firestick

If your Firestick still has the older interface, read this article to learn how to update it: Update Firestick Interface.

You can download Surfshark directly from the Amazon App store. It will be easy for you to find Surfshark with your Firestick’s Find feature. Refer to our screenshots below.

1. Go to the Home screen of your Firestick.

step 1 Install Surfshark VPN on Firestick


2. Navigate towards the Find tab. Press the Search button from the resulting dropdown.

step 2 Install Surfshark VPN on Firestick


3. Type in the keyword of SurfShark and select from the suggestions that will appear.

step 3 Install Surfshark VPN on Firestick


4. Click the official SurfShark icon from your search results.

step 4 Install Surfshark VPN on Firestick


5. Press the Download (You own it) button.

step 5 Install Surfshark VPN on Firestick


6. The SurfShark VPN installer will download on your device.

step 6 Install Surfshark VPN on Firestick


7. SurfShark VPN’s app will automatically install itself on your Fire TV stick.

step 7 Install Surfshark VPN on Firestick


8. Press the Open button after completing SurfShark VPN’s installation process.

step 8 Install Surfshark VPN on Firestick


9. Please wait for the SurfShark VPN to load its user interface.

step 9 Install Surfshark VPN on Firestick


10. You can now log in with your SurfShark VPN account credentials.

step 10 Install Surfshark VPN on Firestick

Learn more about Surfshark and Grab the Best Surfshark Deal Now!


Install Surfshark on Firestick

Best Surfshark Deal


Other VPNs to Consider

NordVPN (Best for Streaming)

Best Features

  • 5000+ Server in 50+ Countries 
  • Military-Grade Encryption
  • Fast Connection Speed
  • Suitable to a lot of devices
  • No-Log Policy

Prices
  • Complete $5.89 per month (64% Discount)
  • Plus $4.59 per month (56% Discount)
  • Standard $3.69 per month (55% Discount)

Best Features

  • 750+ High-speed VPN Servers in 43 Locations
  • Military-Grade Encryption
  • Fastest HD Streaming and Gaming
  • 30-Day Money-Back Guarantee
  • Unlimited Data & Devices
  • No-Log Policy

Prices
  • 3 Years $1.99 per month (82% Discount)
  • 1 Years $3.29 per month (70% Discount)
  • 1 Month $10.99 per month

IPVanish VPN (Most Secure)

Best Features

  • 1200+ Servers in 60+ Countries around the world
  • Unlimited Connections
  • No-Log Policy
  • Top Notch Military-Grade VPN Protocols and Encryptions
  • 100% Safe and Secured
  • Most Trusted VPN
  • Best VPN for Firestick
  • 30-Day Money-Back Guarantee

Prices
  • Yearly $3.99 per month (63% Discount) – 30 days risk free + Ransomware & Malware Protection
  • Quarterly $5.32 per month (51% Discount)
  • Monthly $10.99 per month


For more VPN discounts, go to ReviewVPN Deals and purchase the best VPN for you.

Click here to get the lowest price on Surfshark through our exclusive limited-time offer.


Conclusion

It is true that a lot of add-ons have already surfaced on the web but not all can provide fast and reliable runs like Kingdom. With its very simple user interface, no one will get lost along the way. We believe that the main selling point of this add-on is its Christmas Feature. Not a lot of add-ons focus on a theme like this and we believe that this is actually something that other add-ons are unable to do. Having said that, Kingdom is also a very family-friendly add-on that can cater to the whole family. There is no need to censure anything as it is wholesome and very child-friendly.

Please help us by giving us your questions, suggestions, and comments, it would be of high importance to us to read everything that you have to say, our loyal readers. Feel free to contact us here on the website and on any of our other social media platforms. Thank you and God Speed!

2