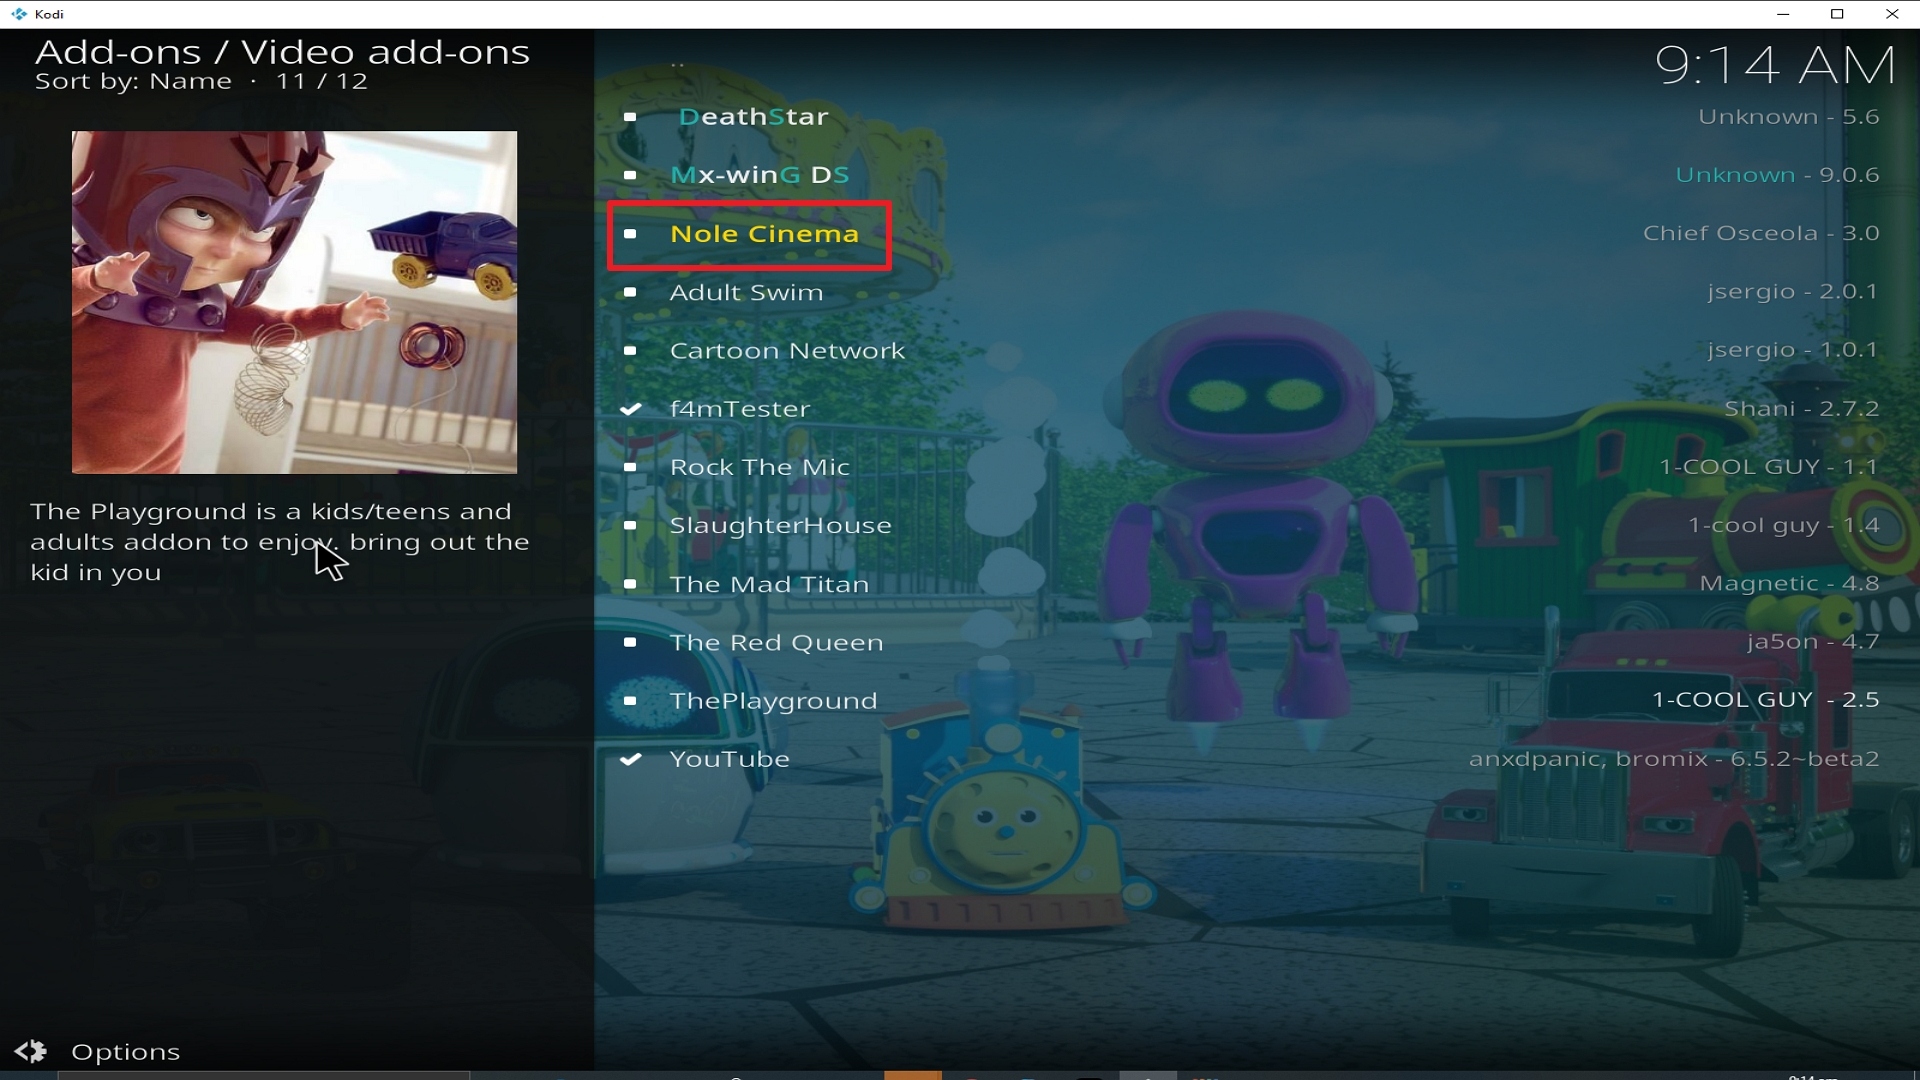
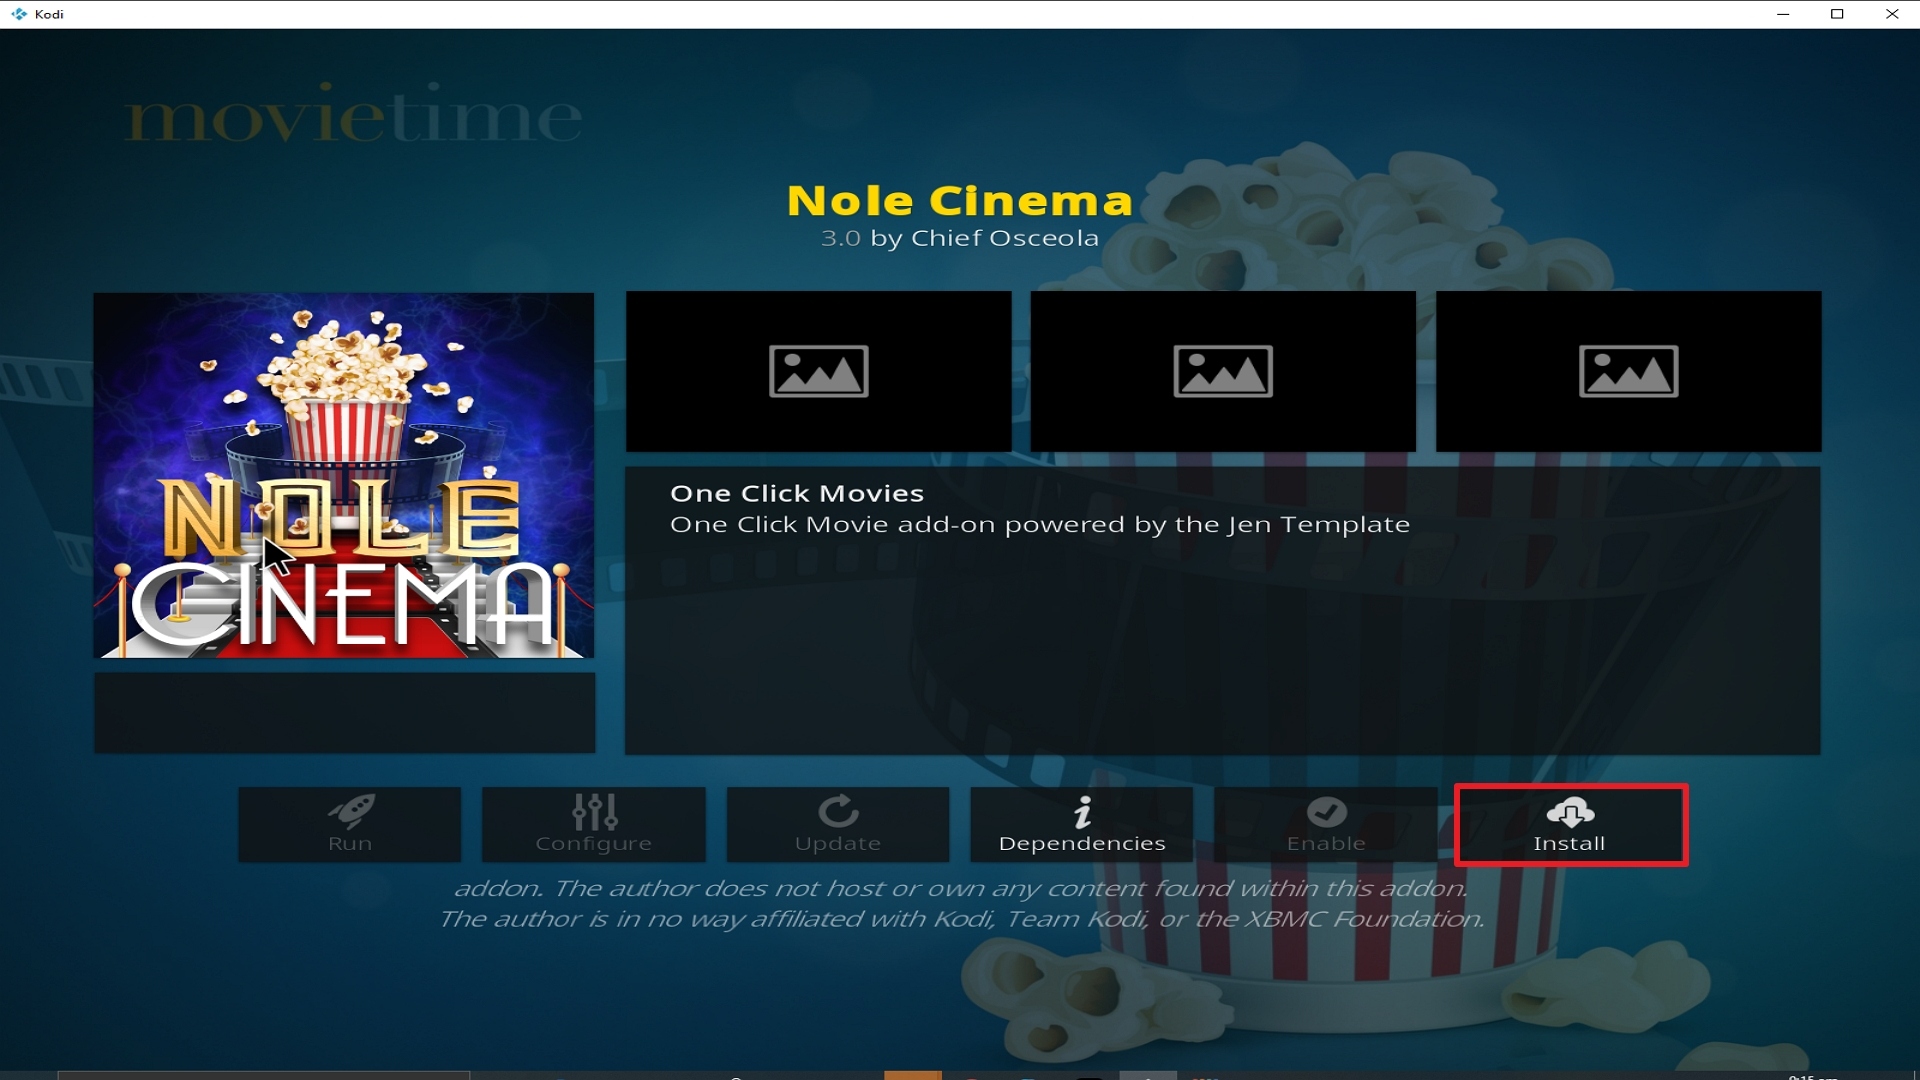
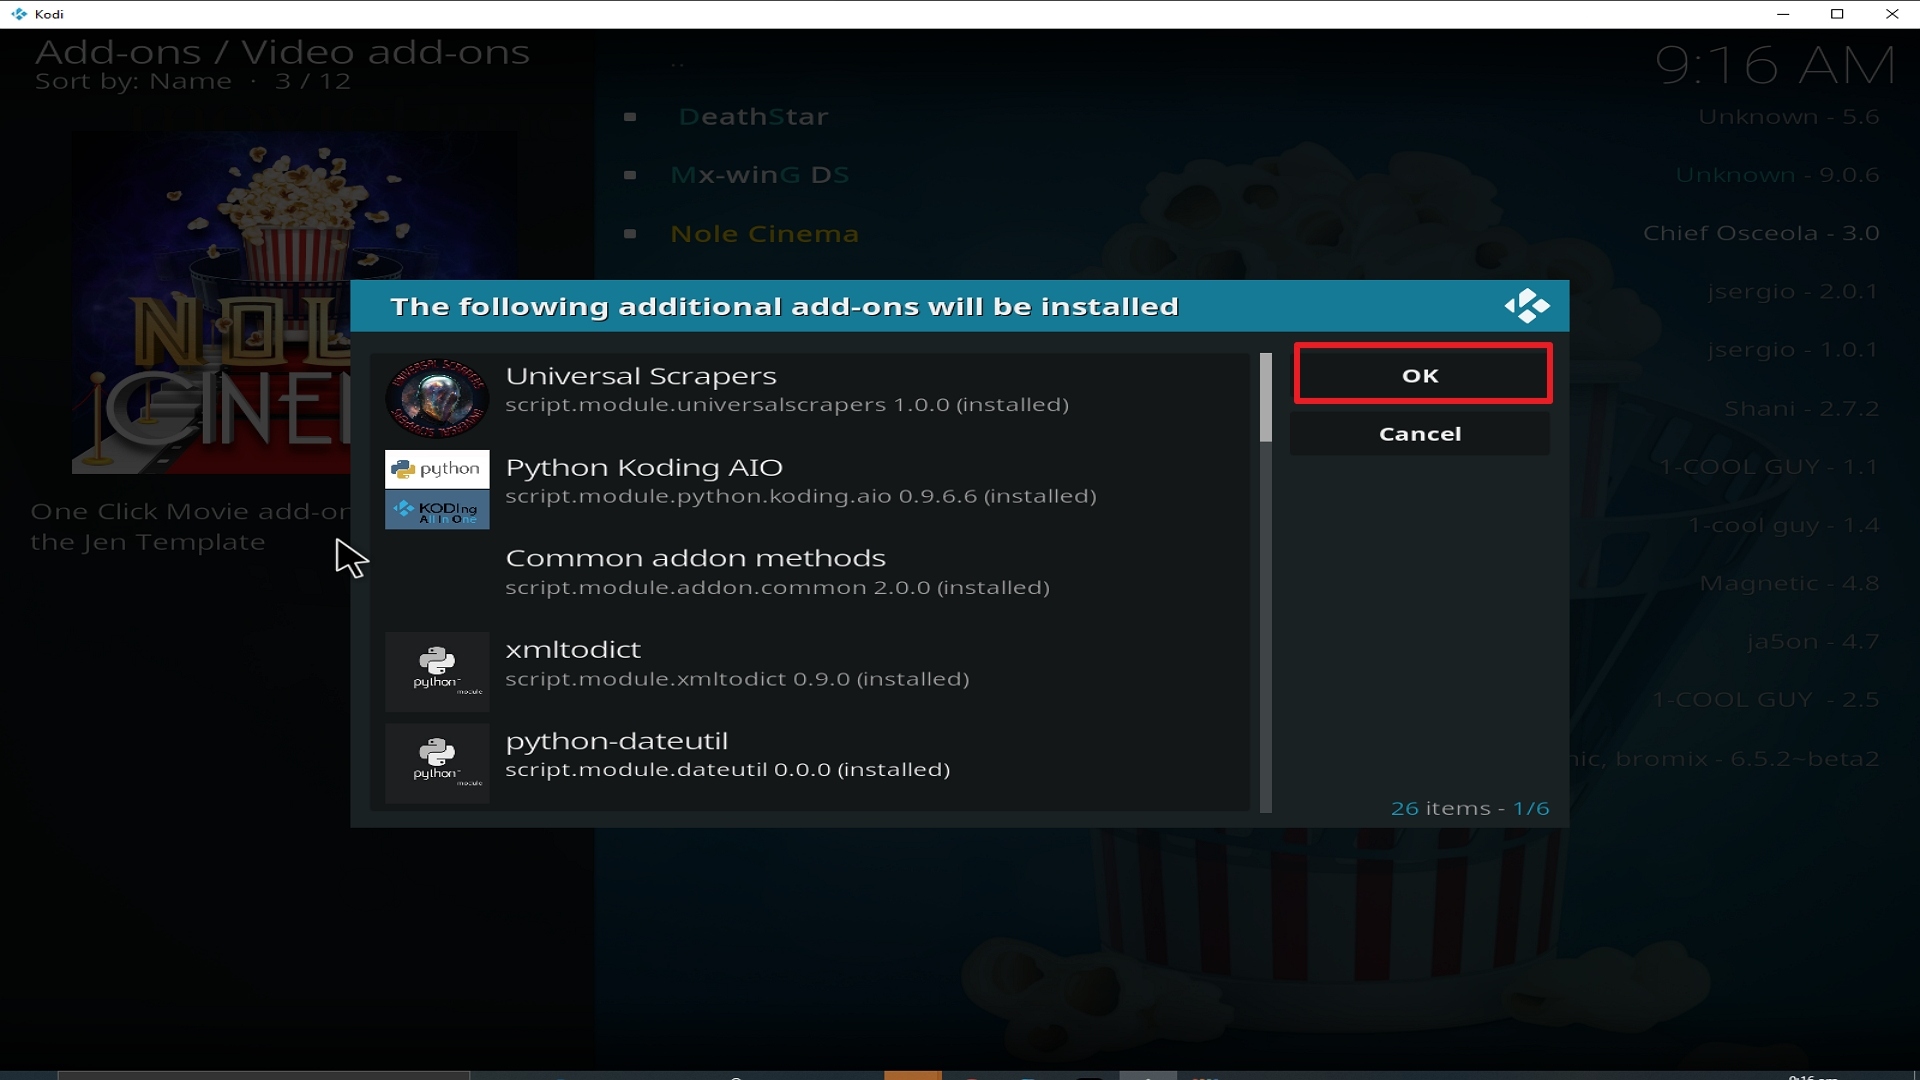
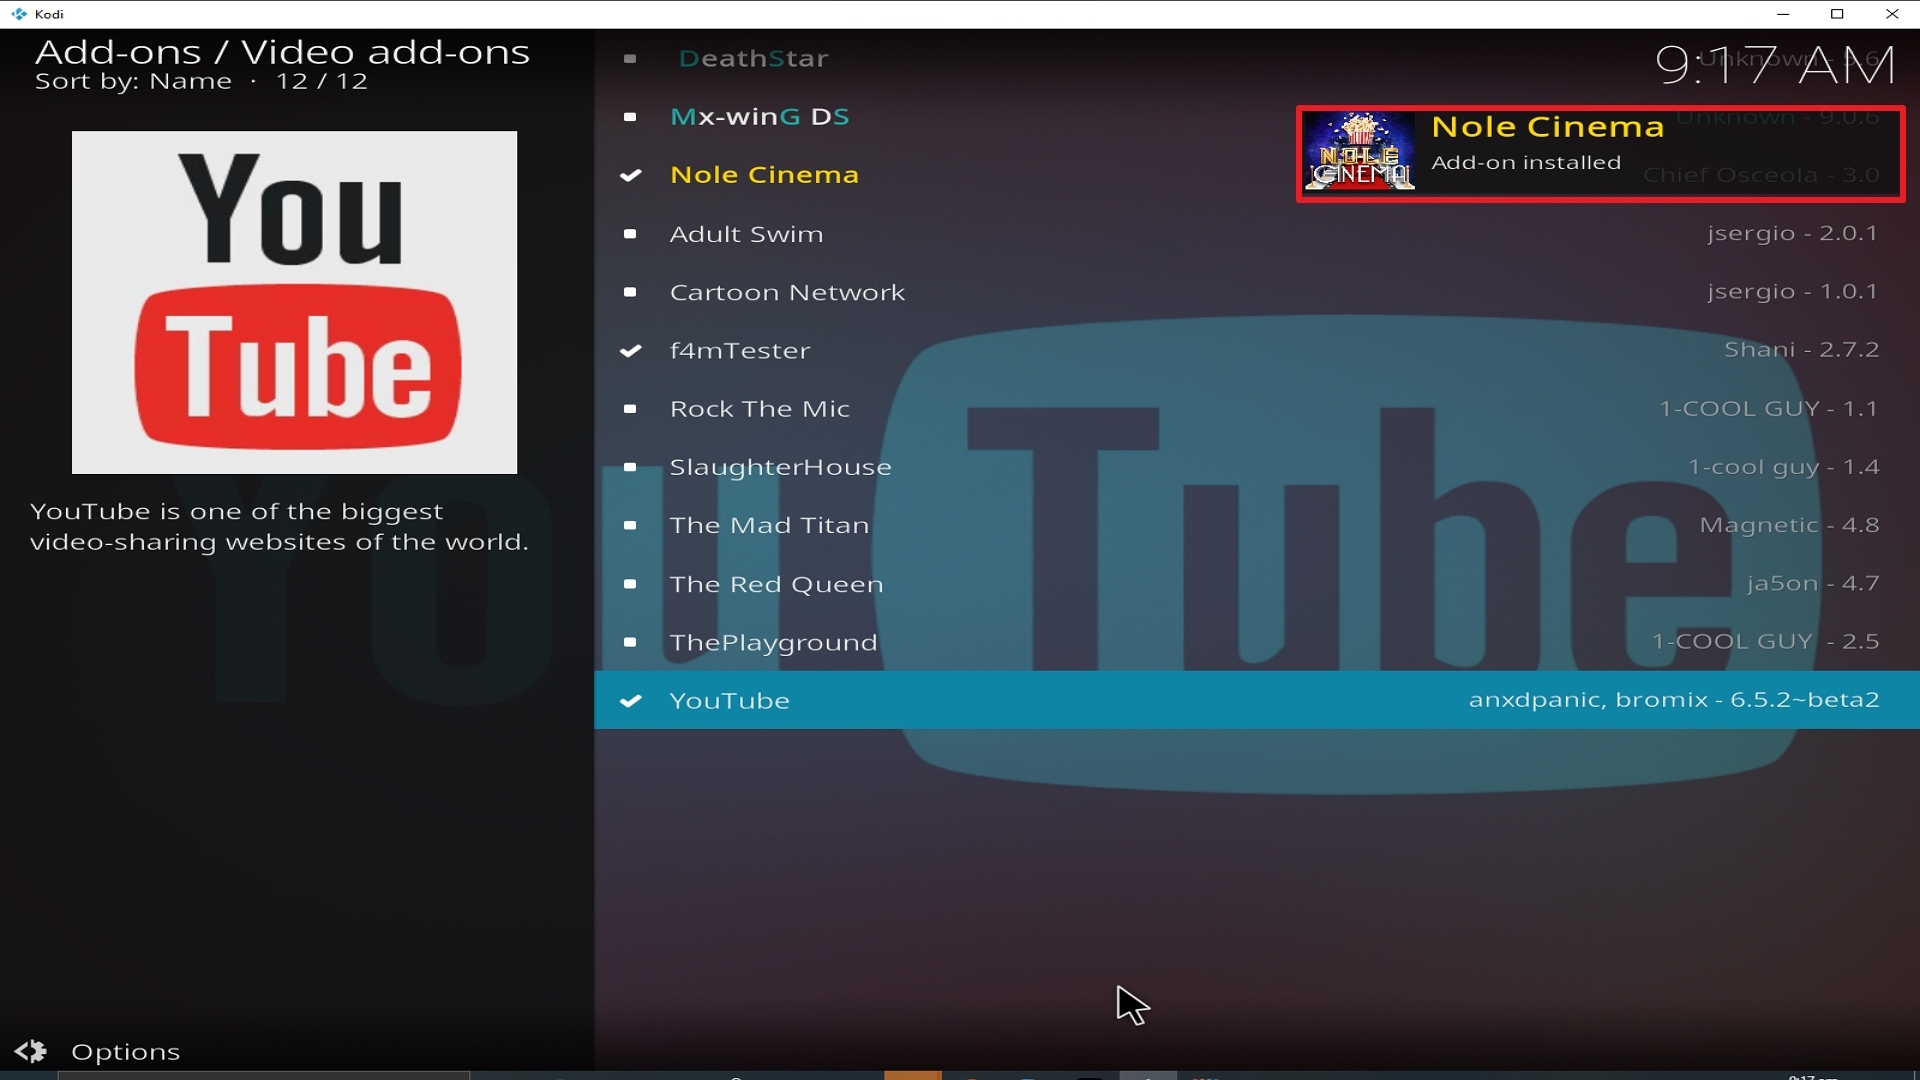
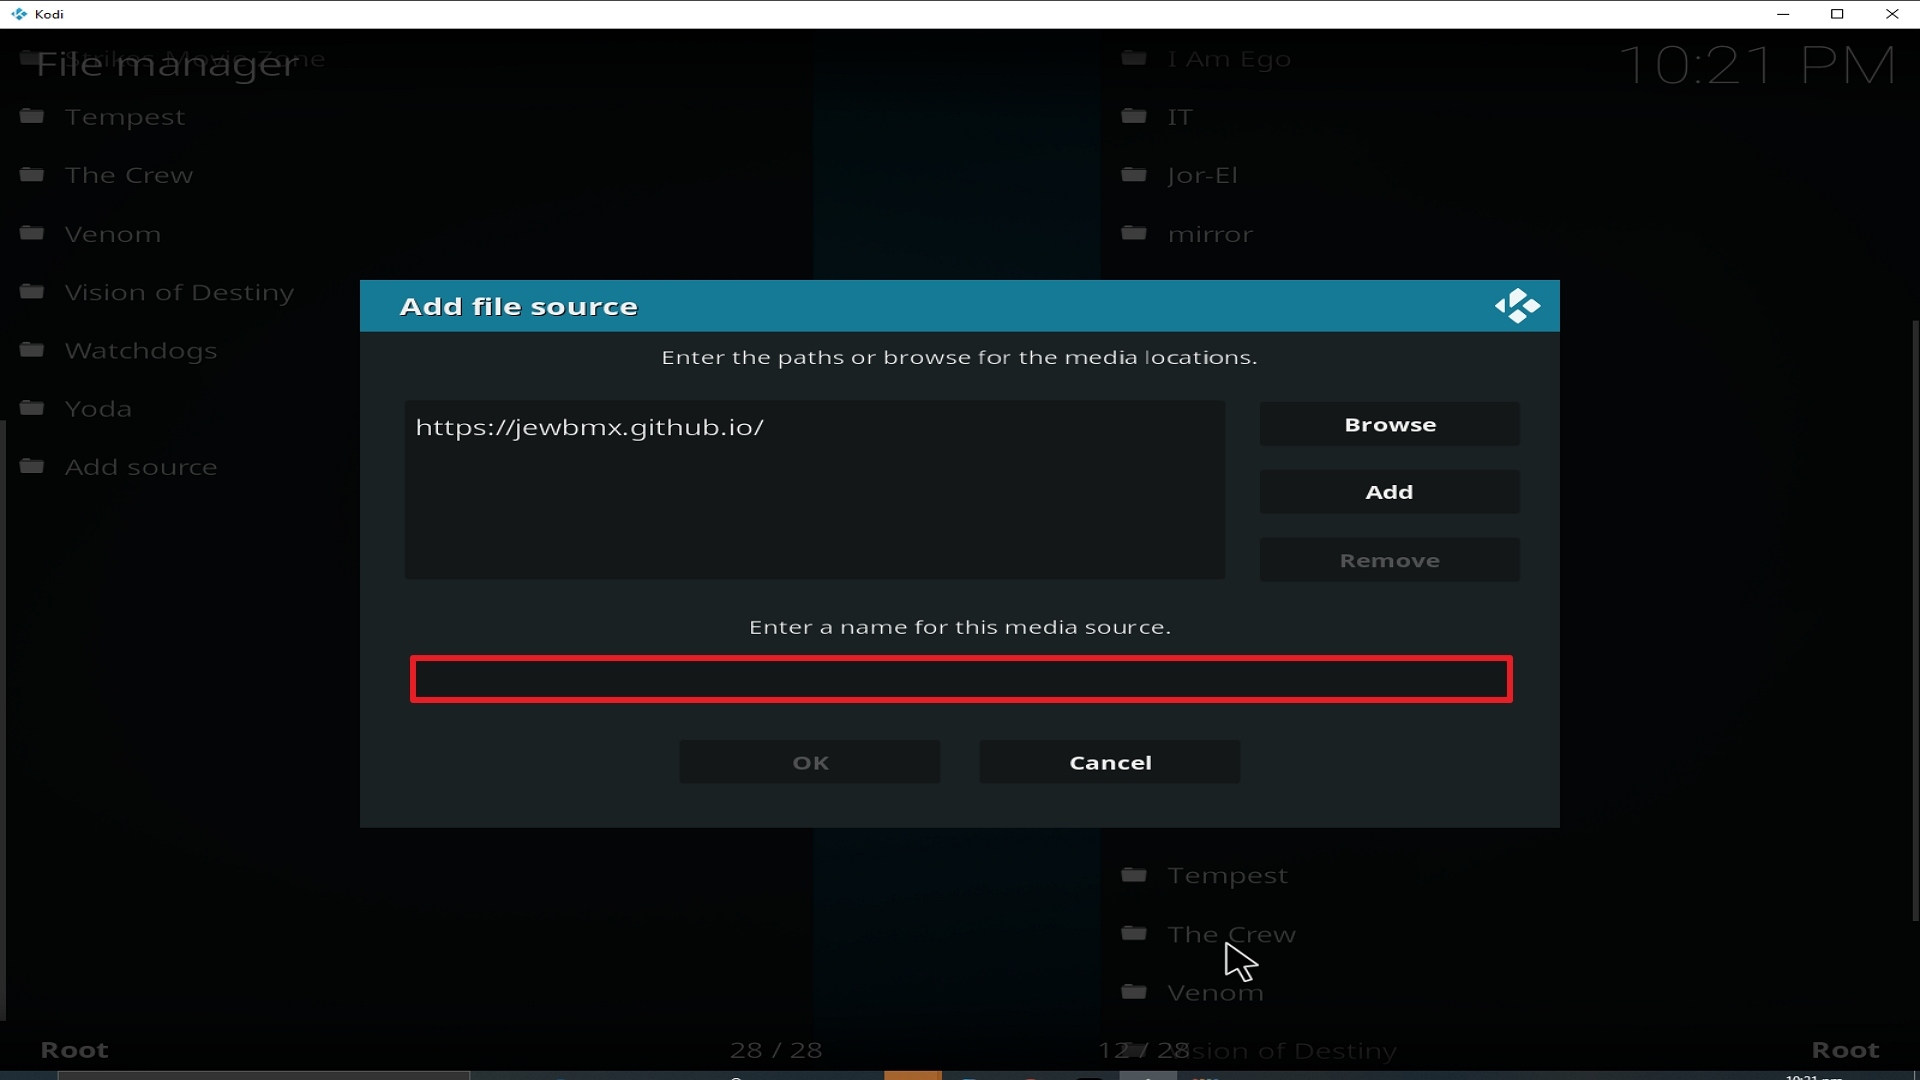
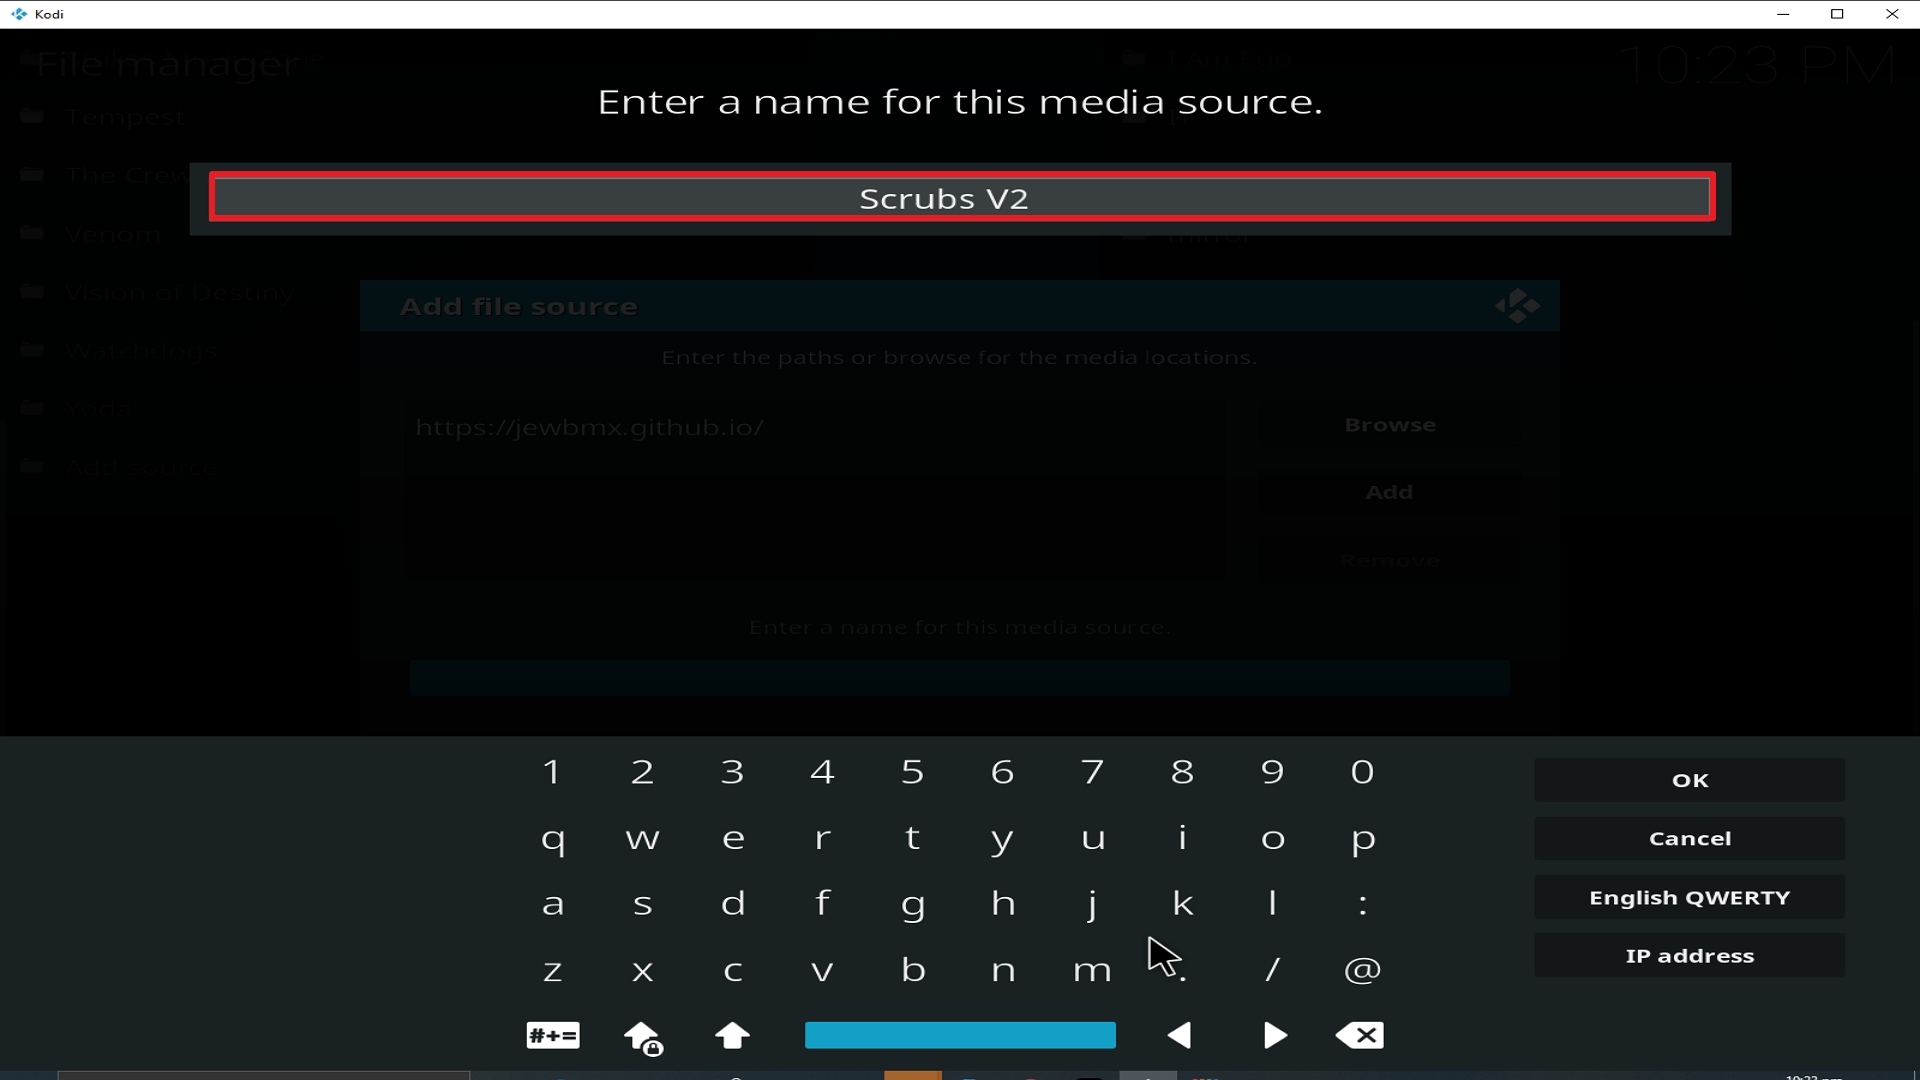
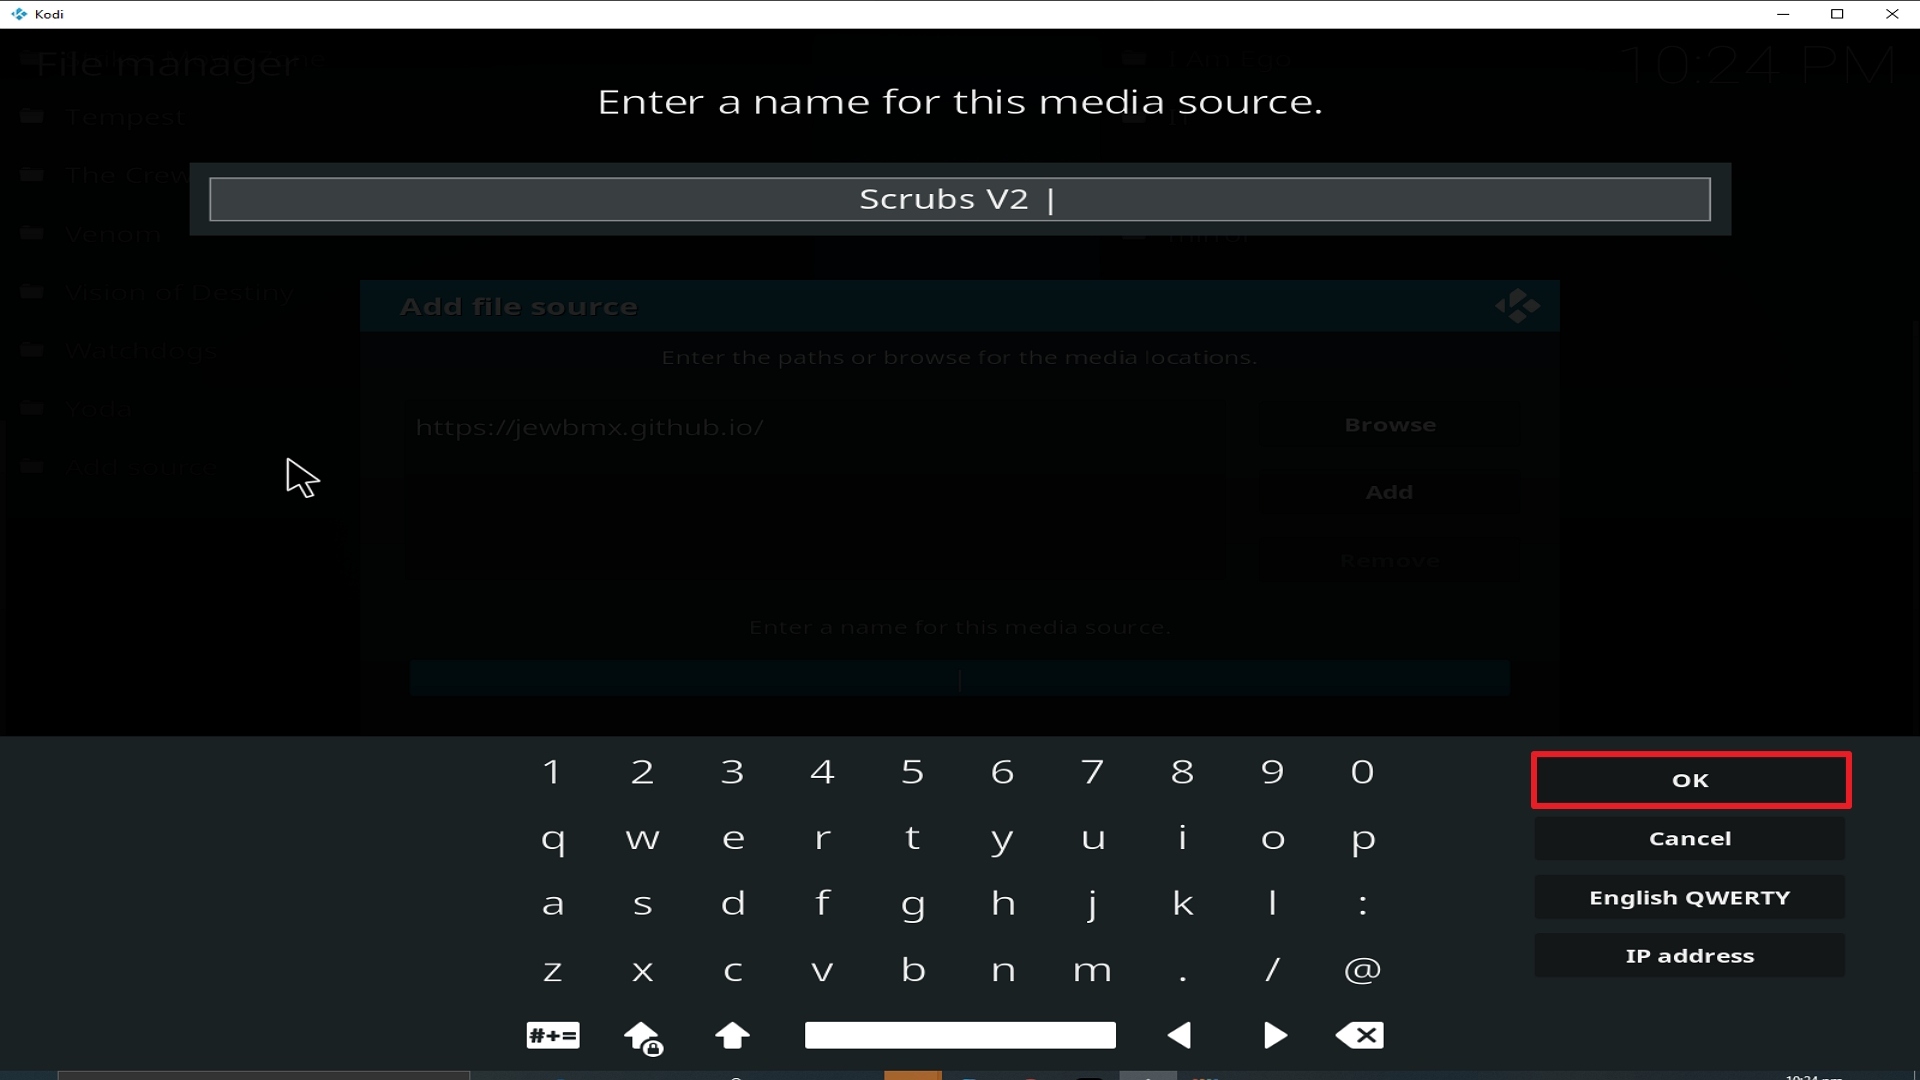
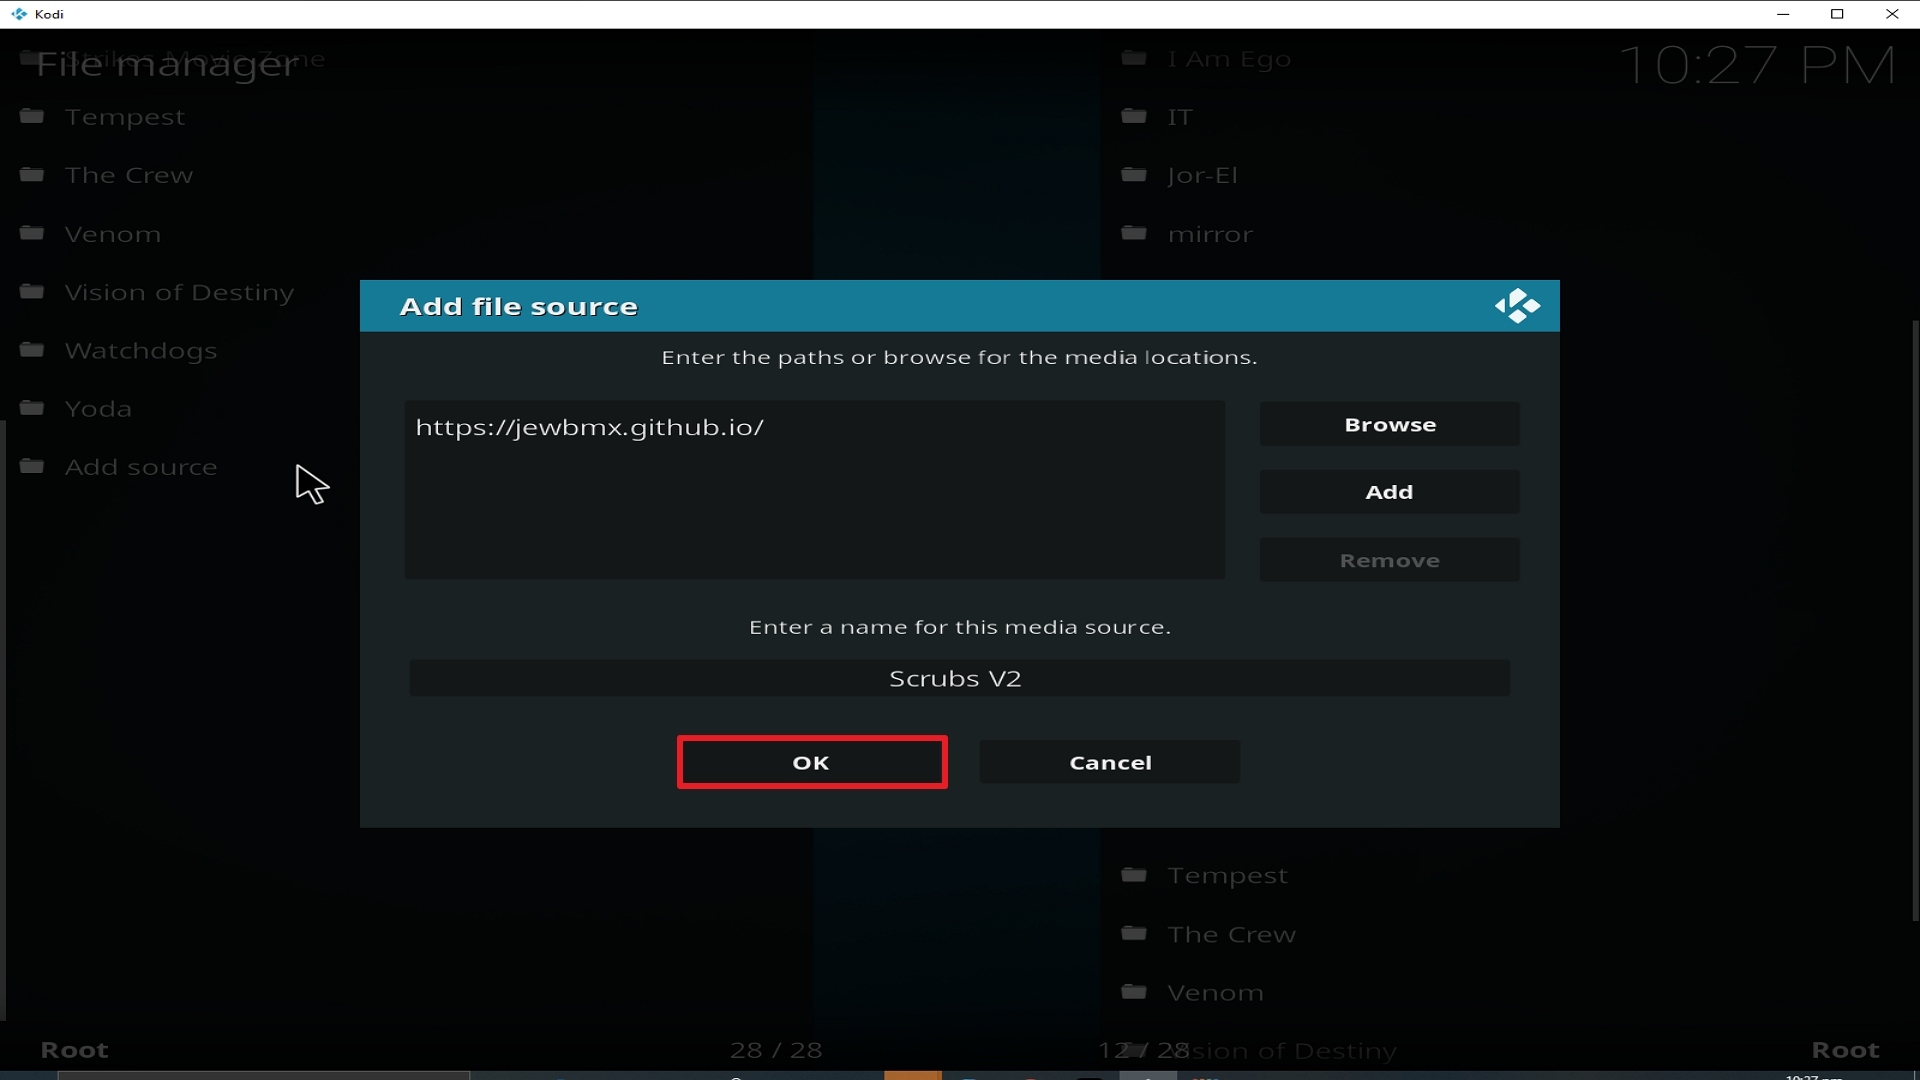
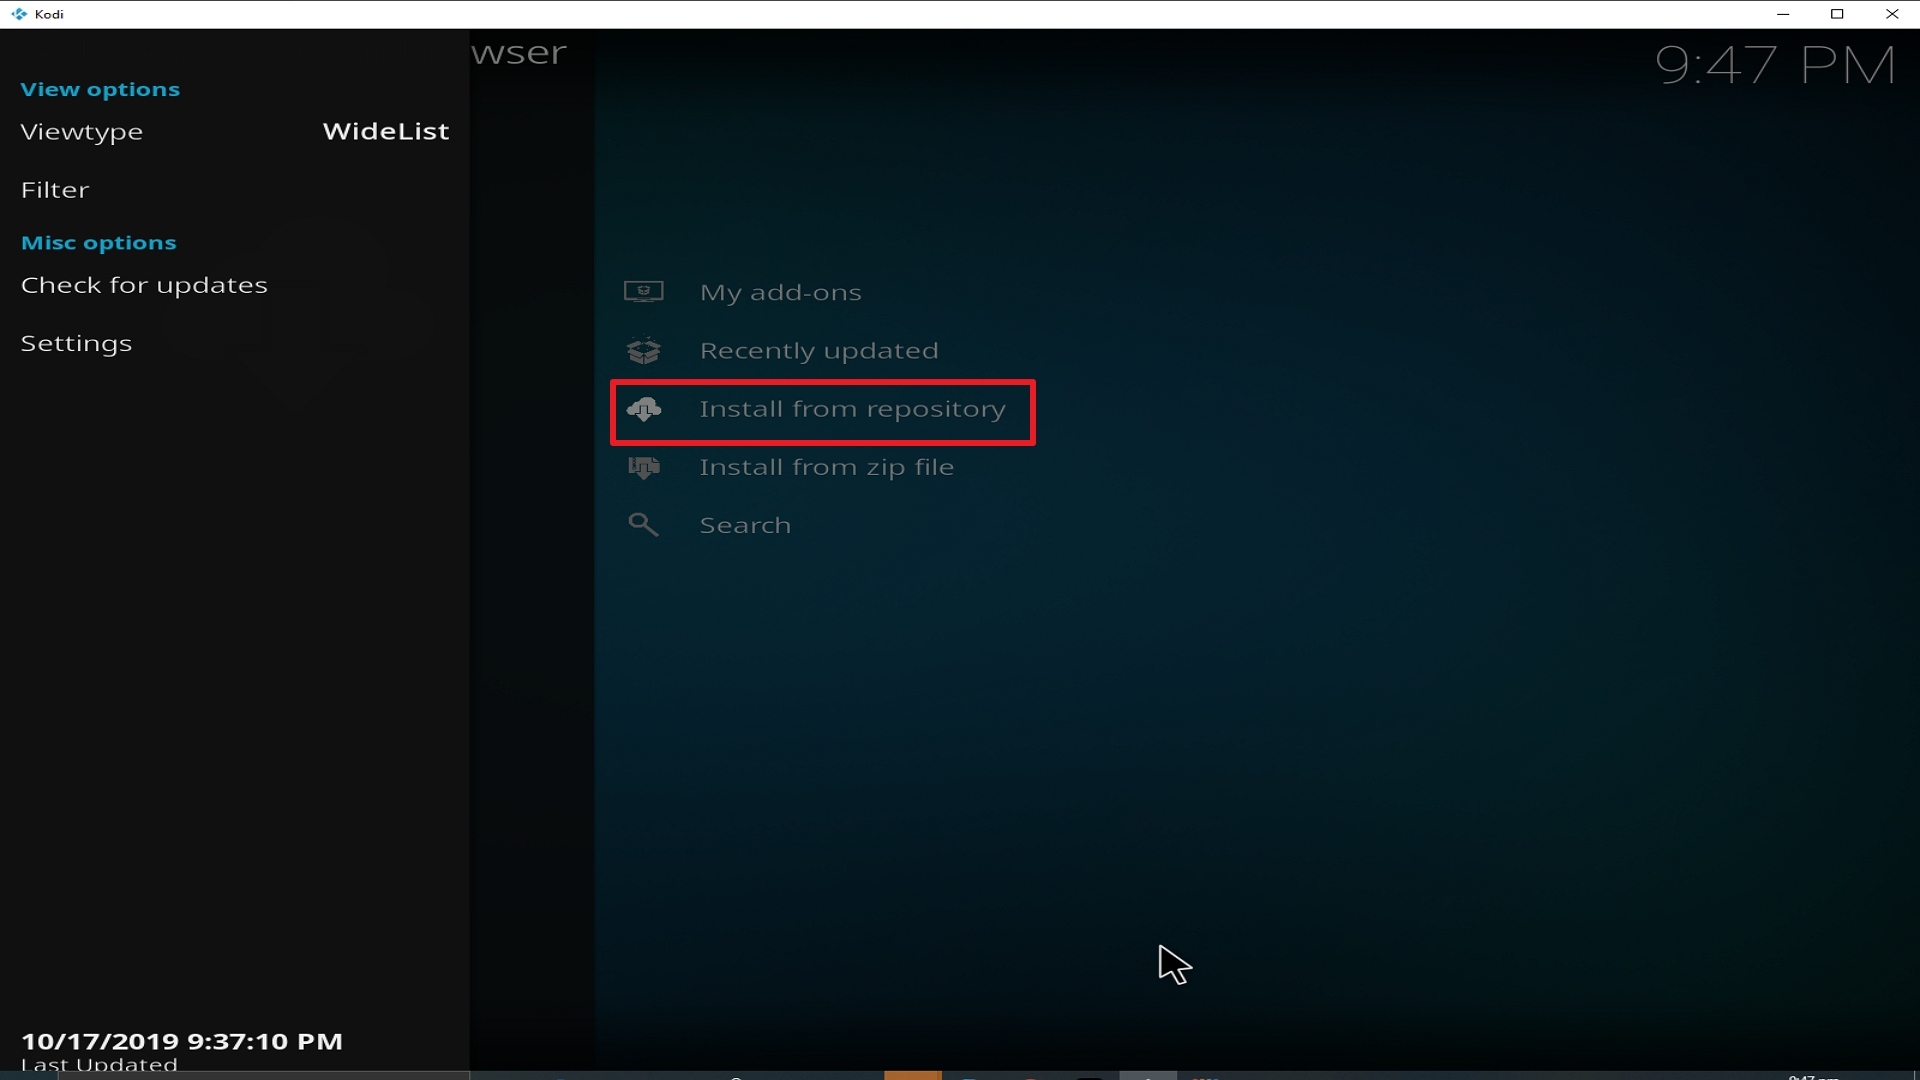
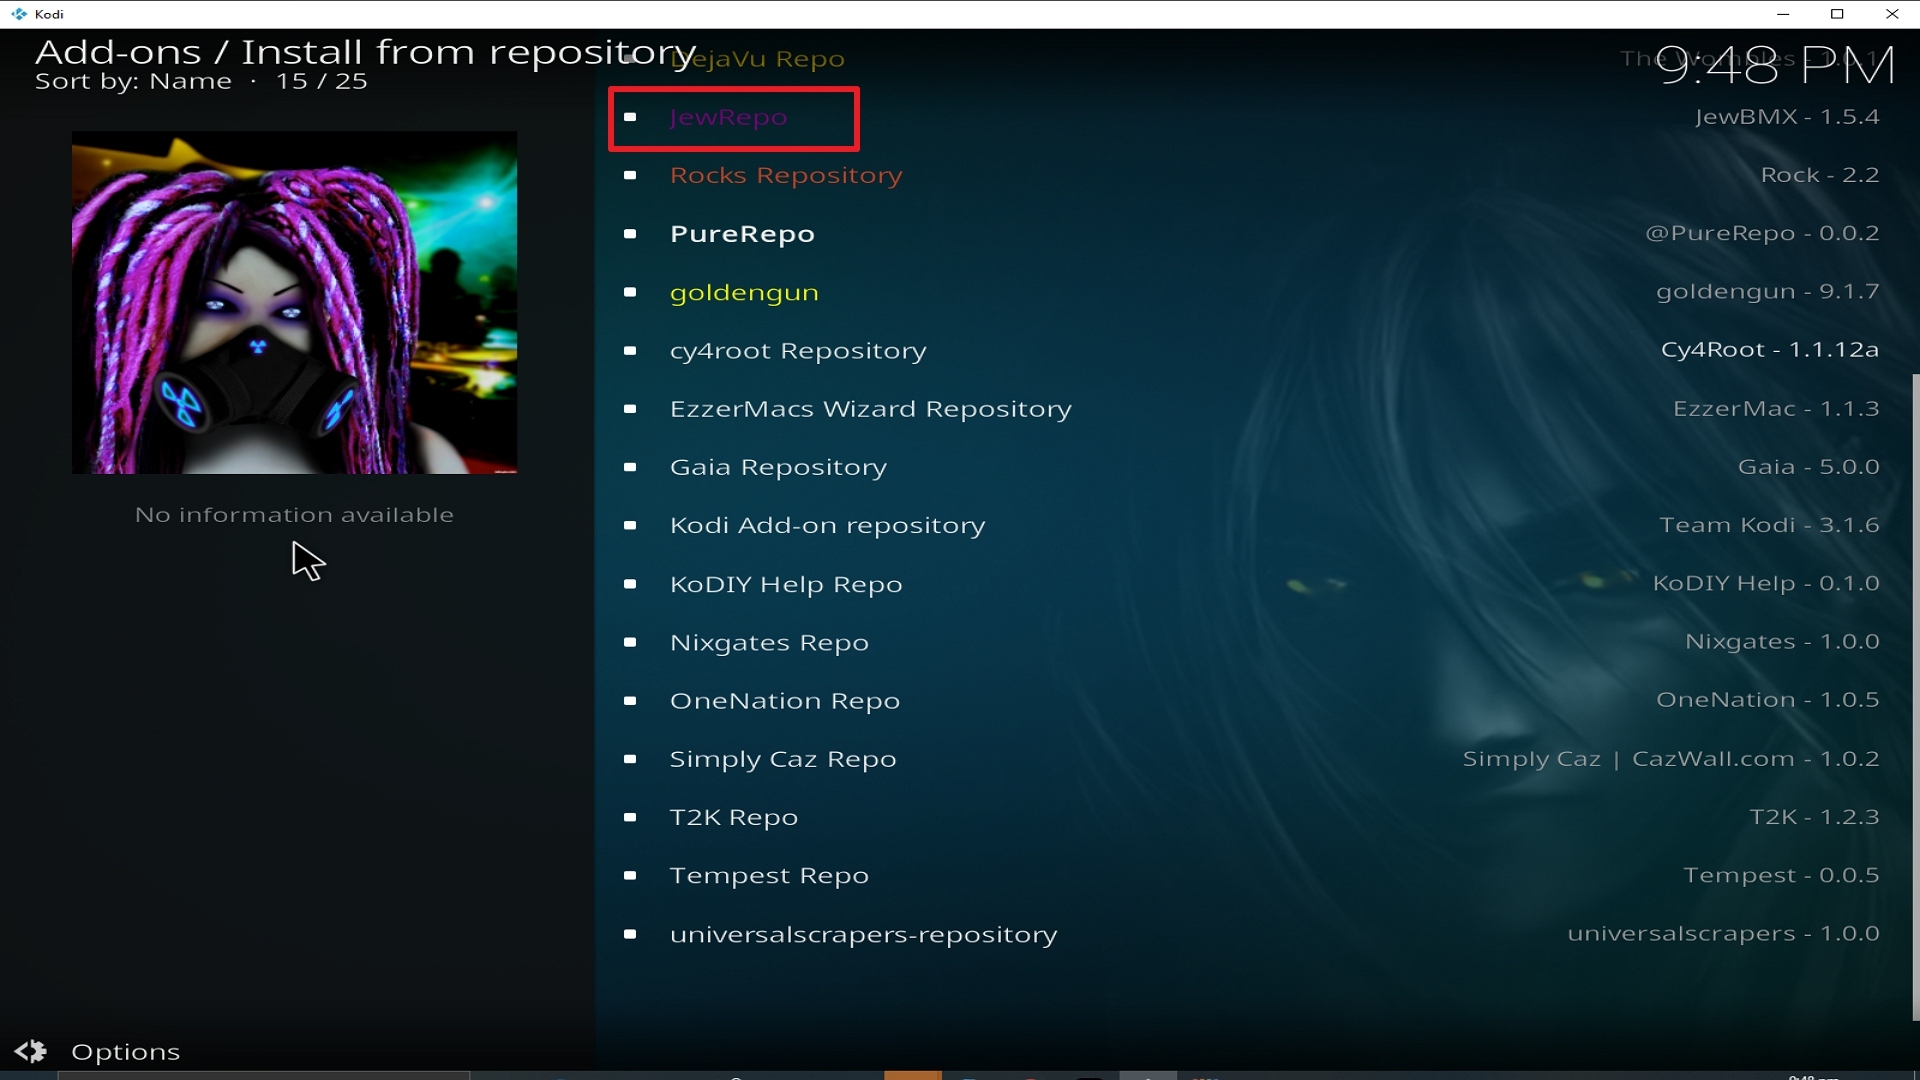
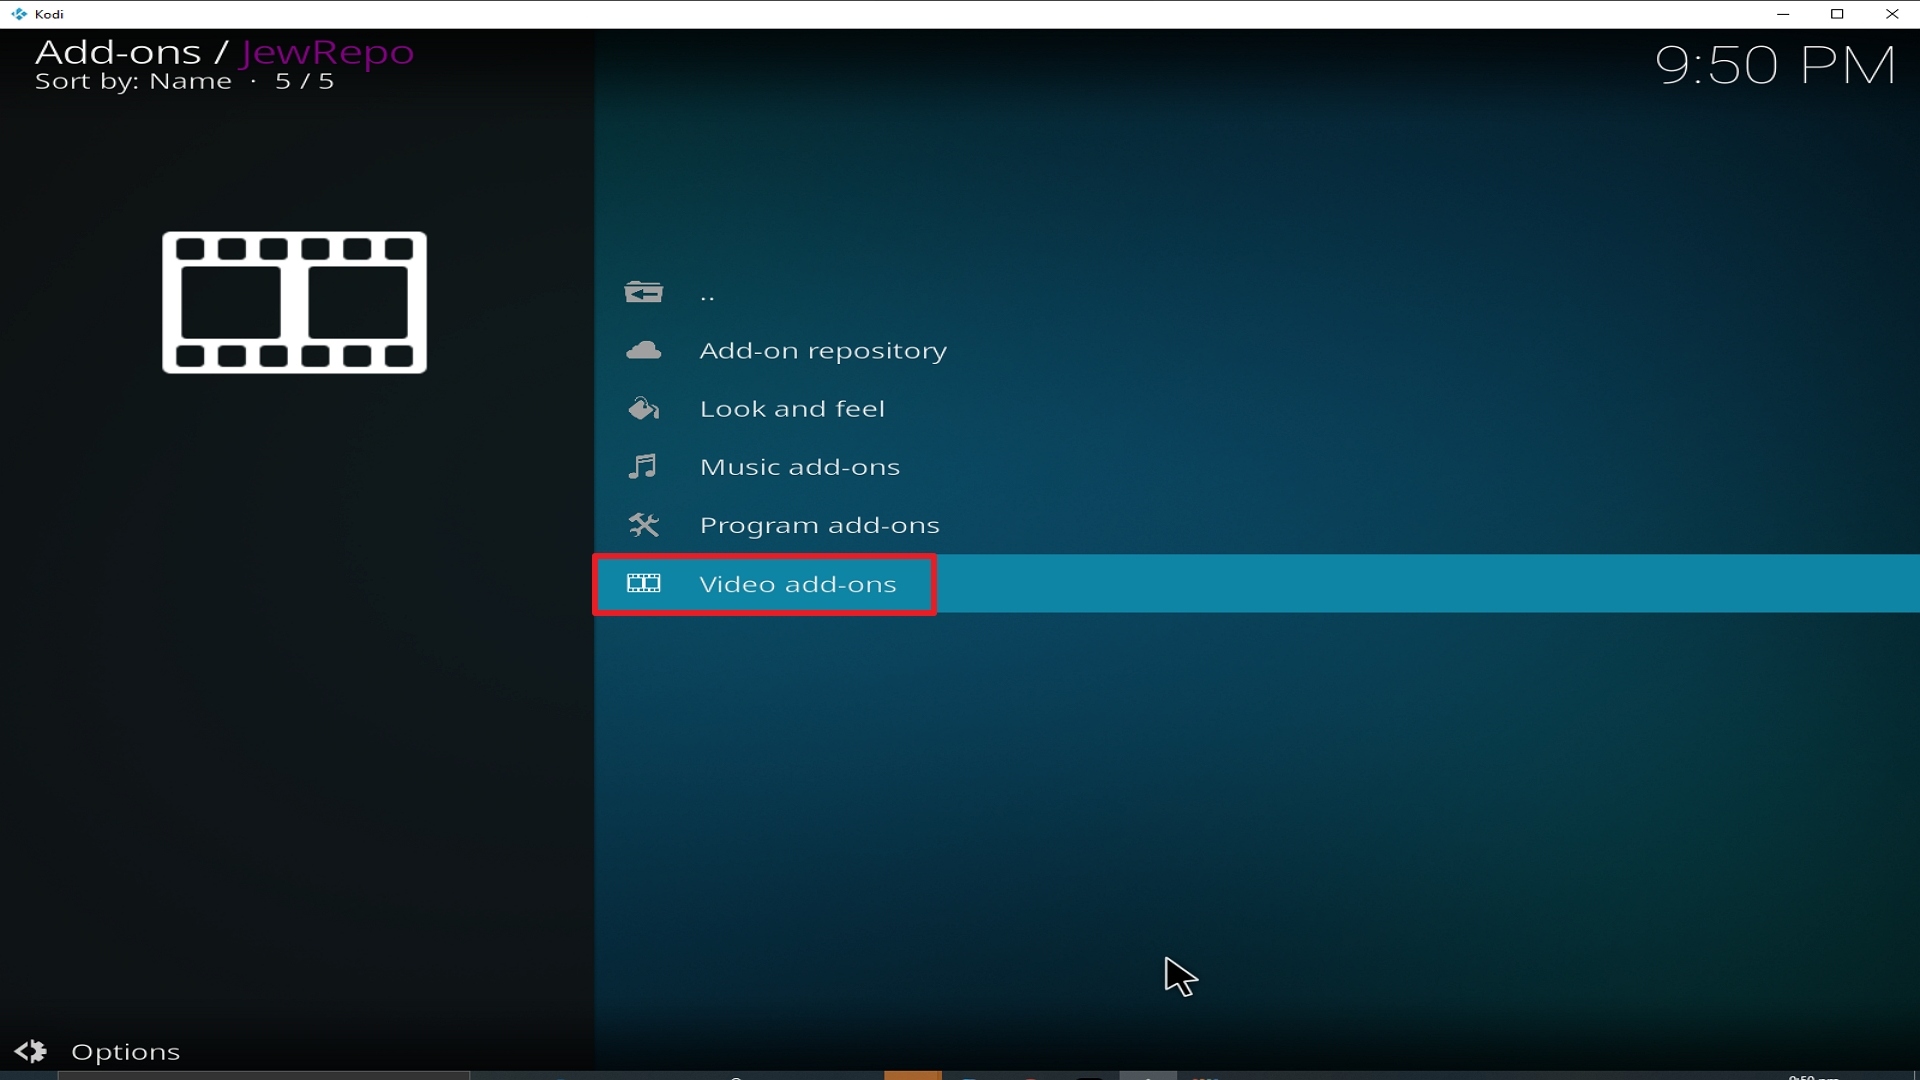
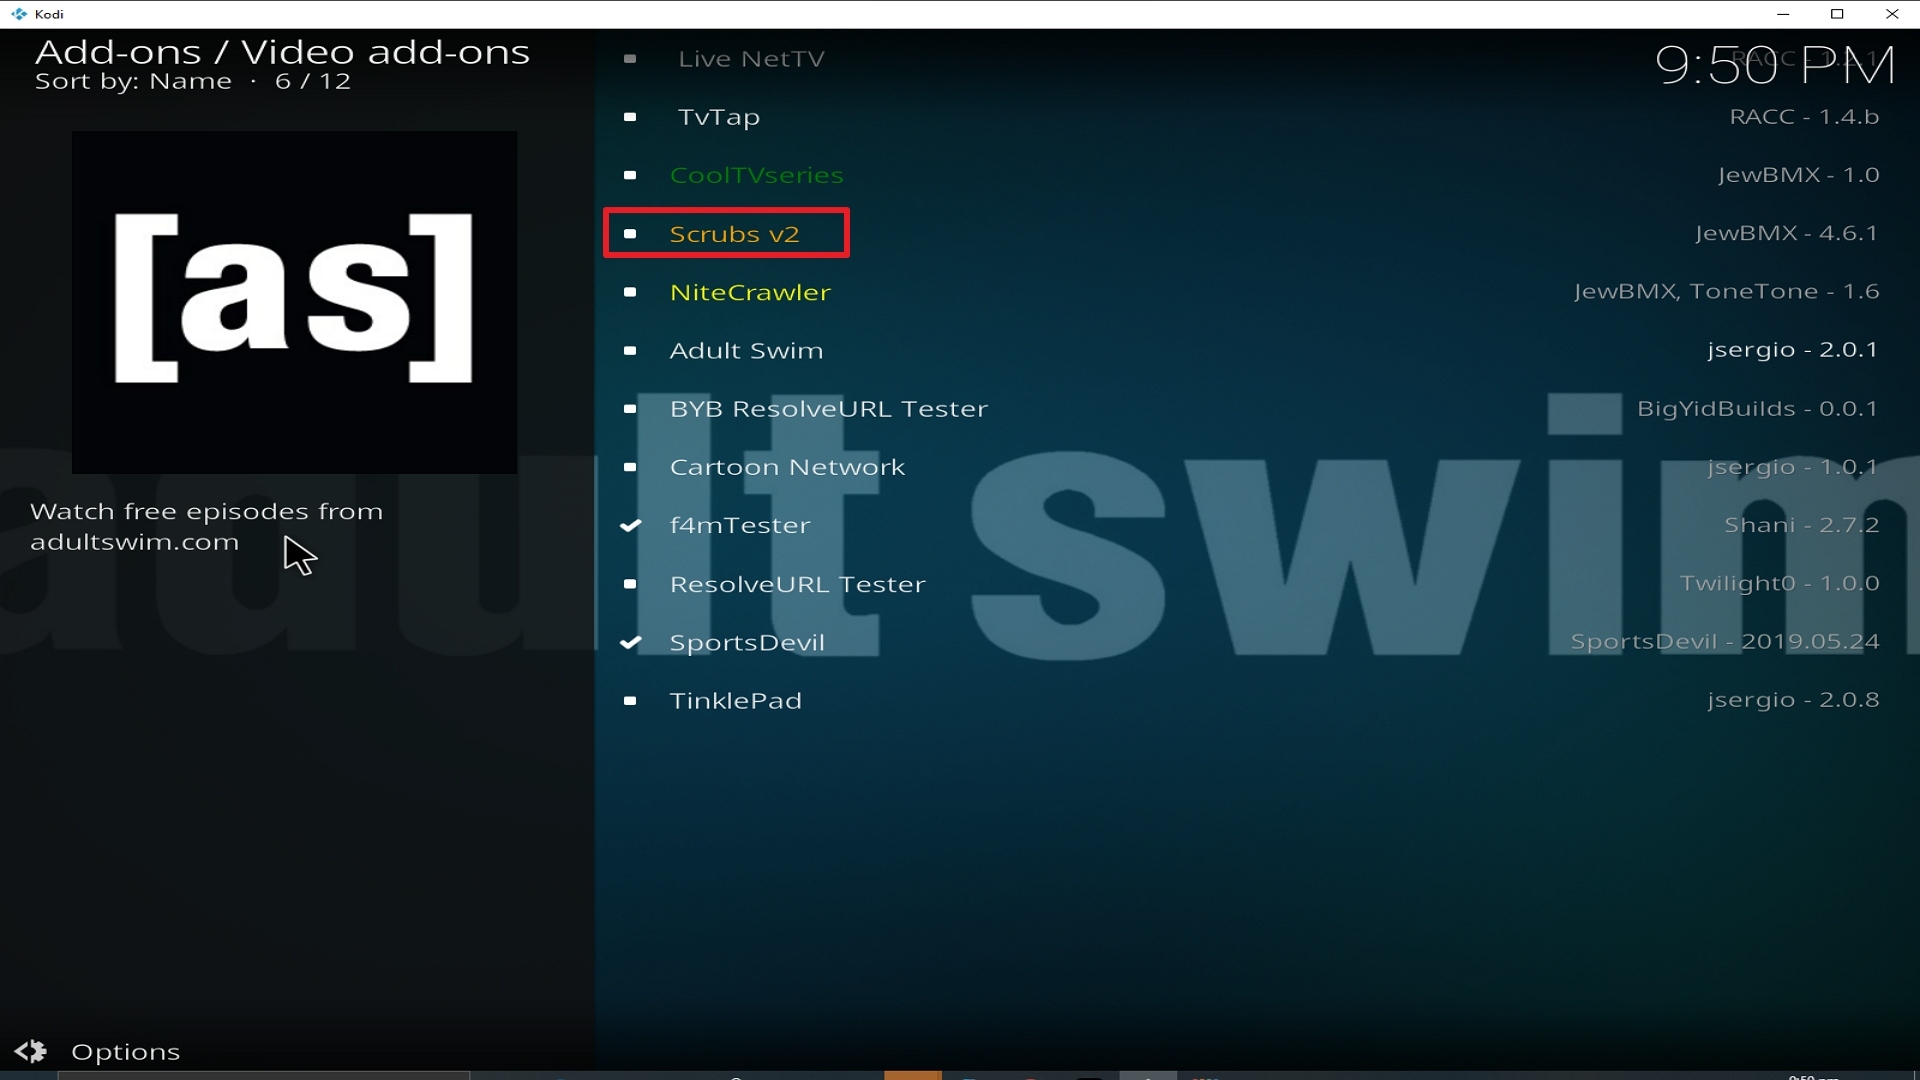
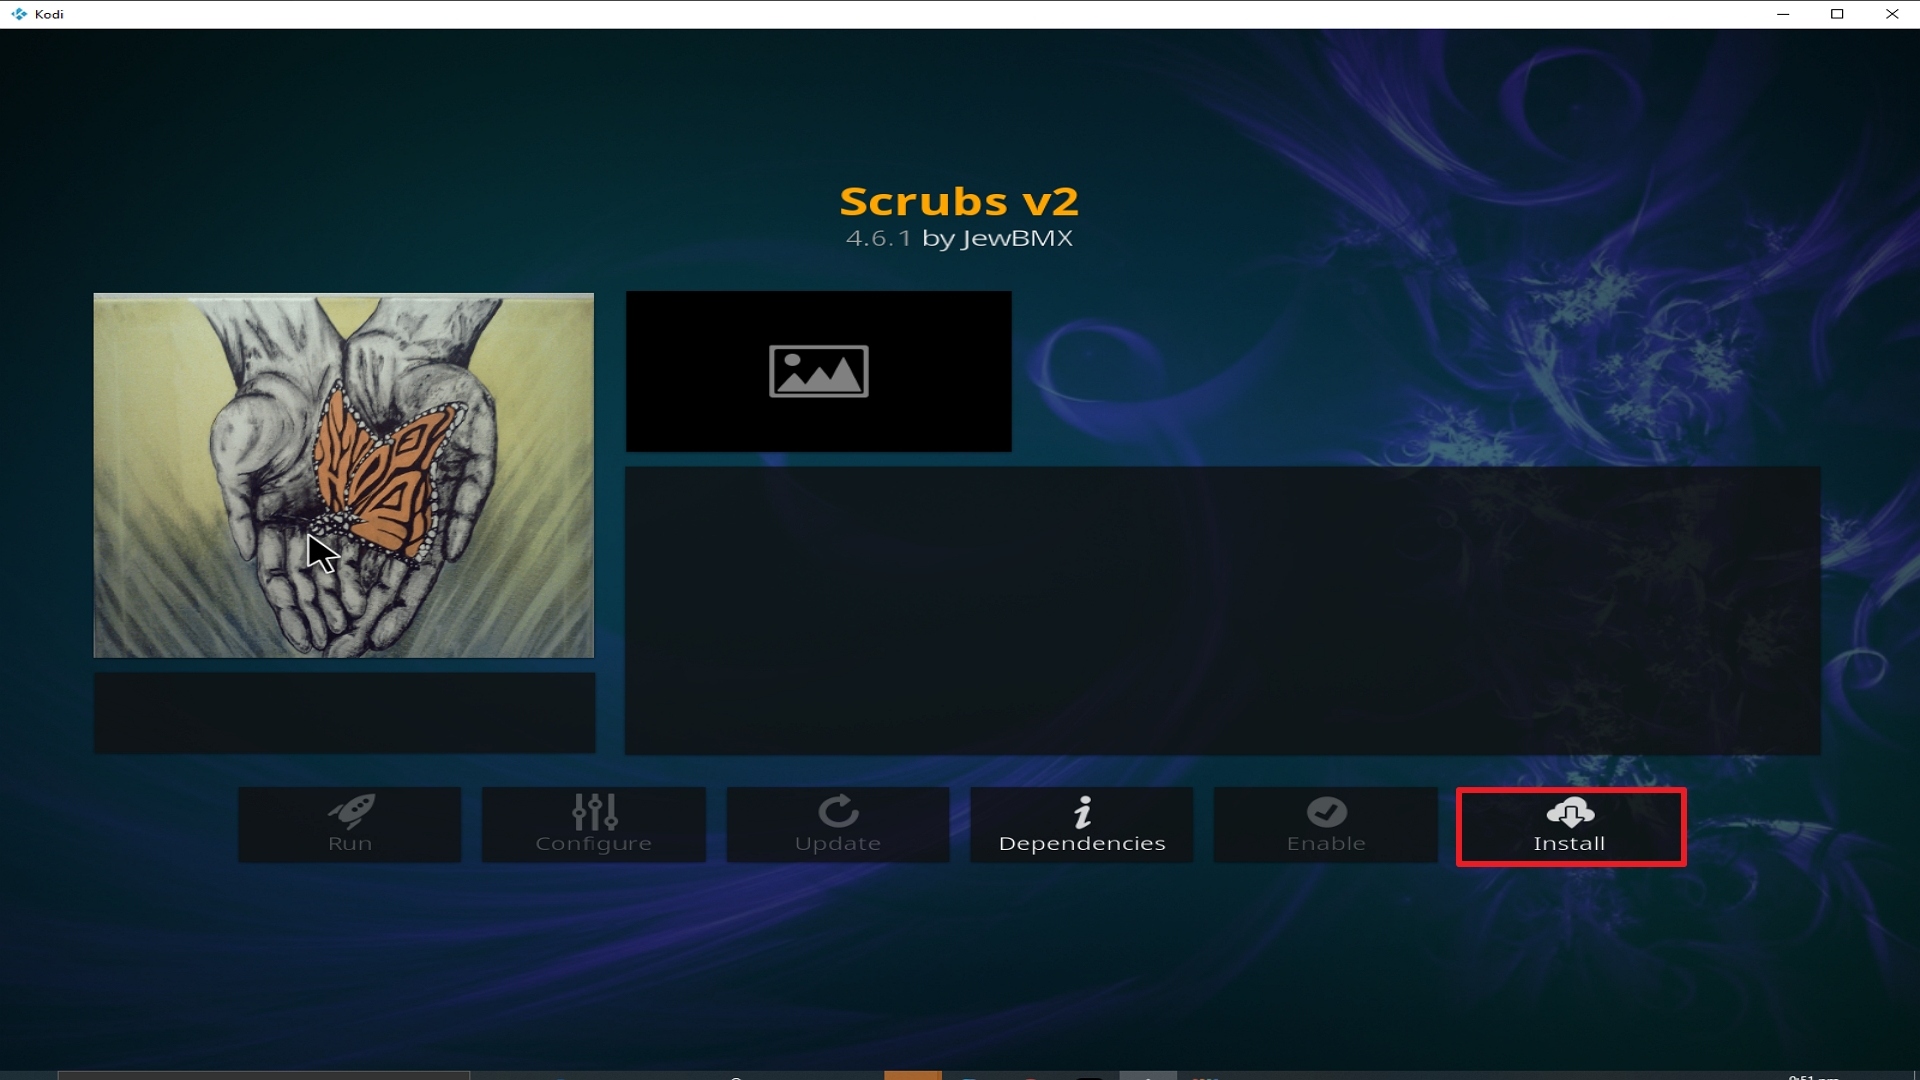
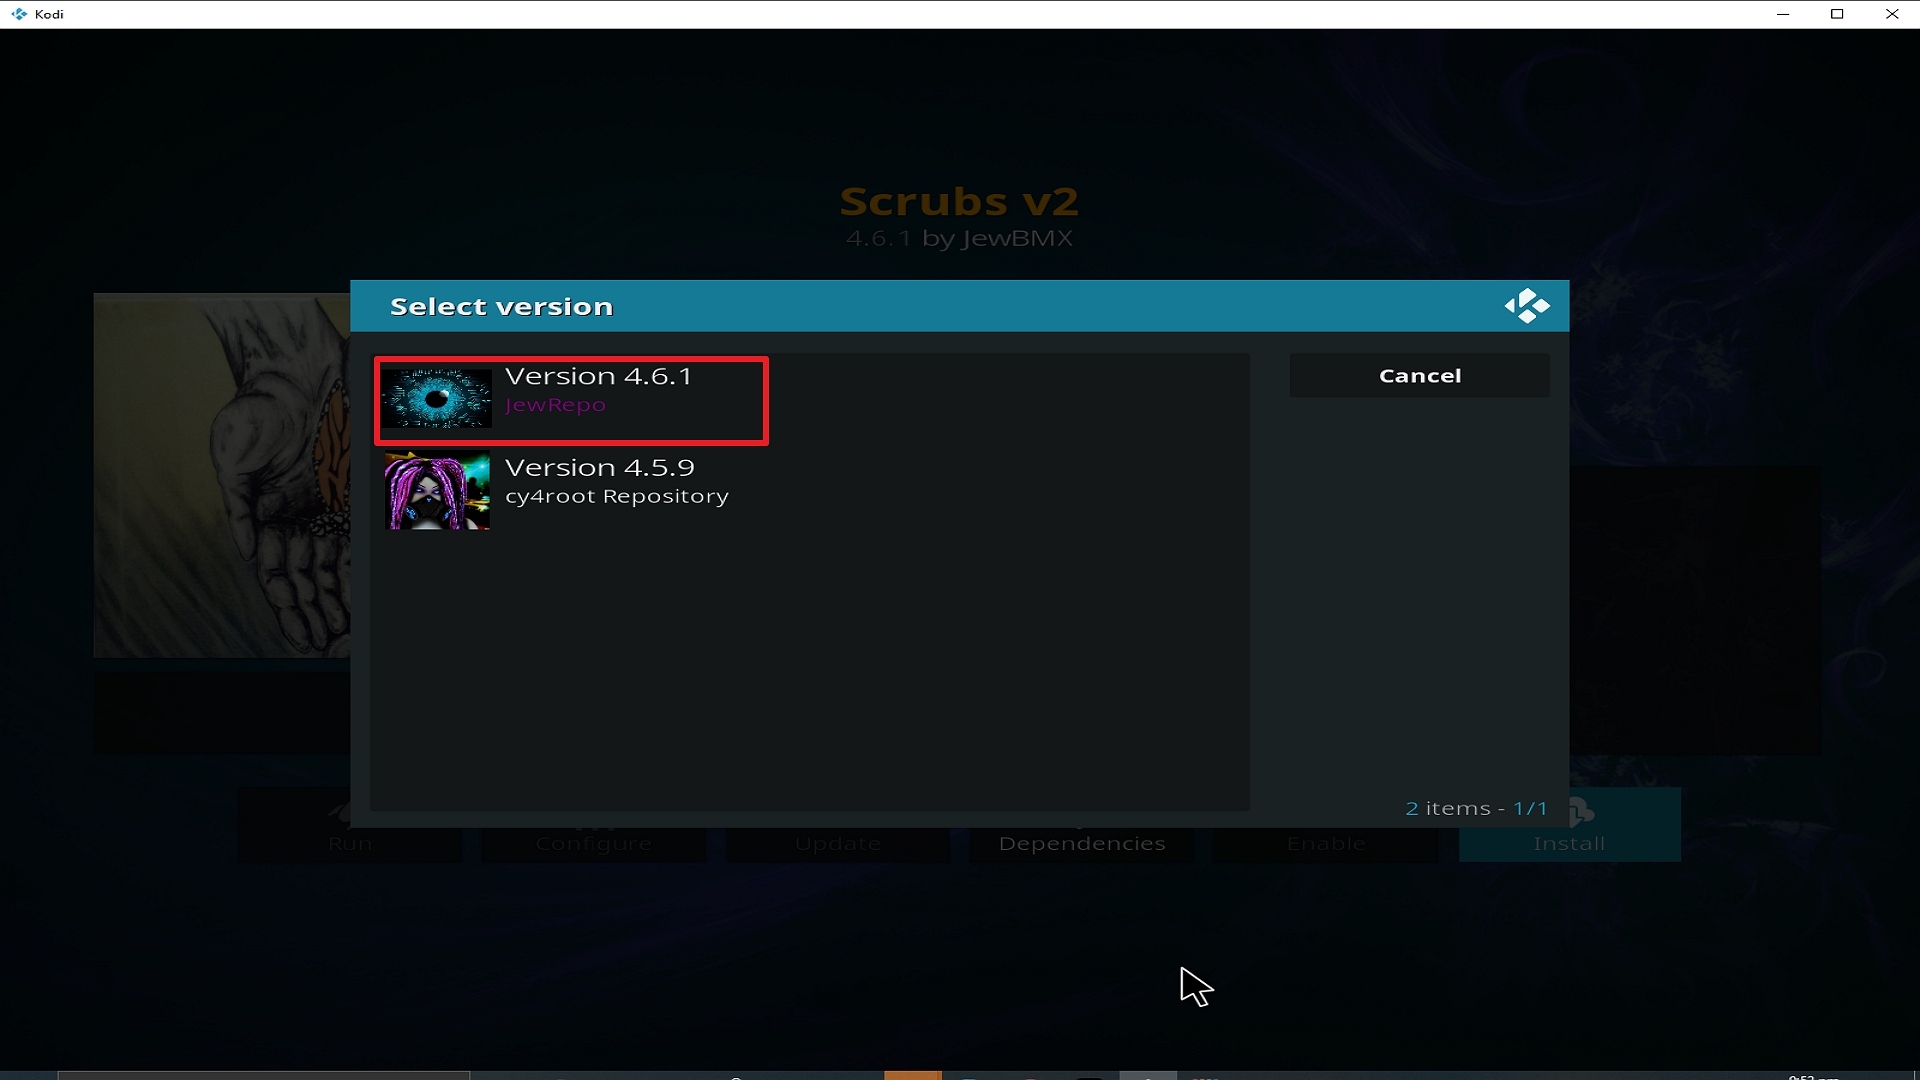
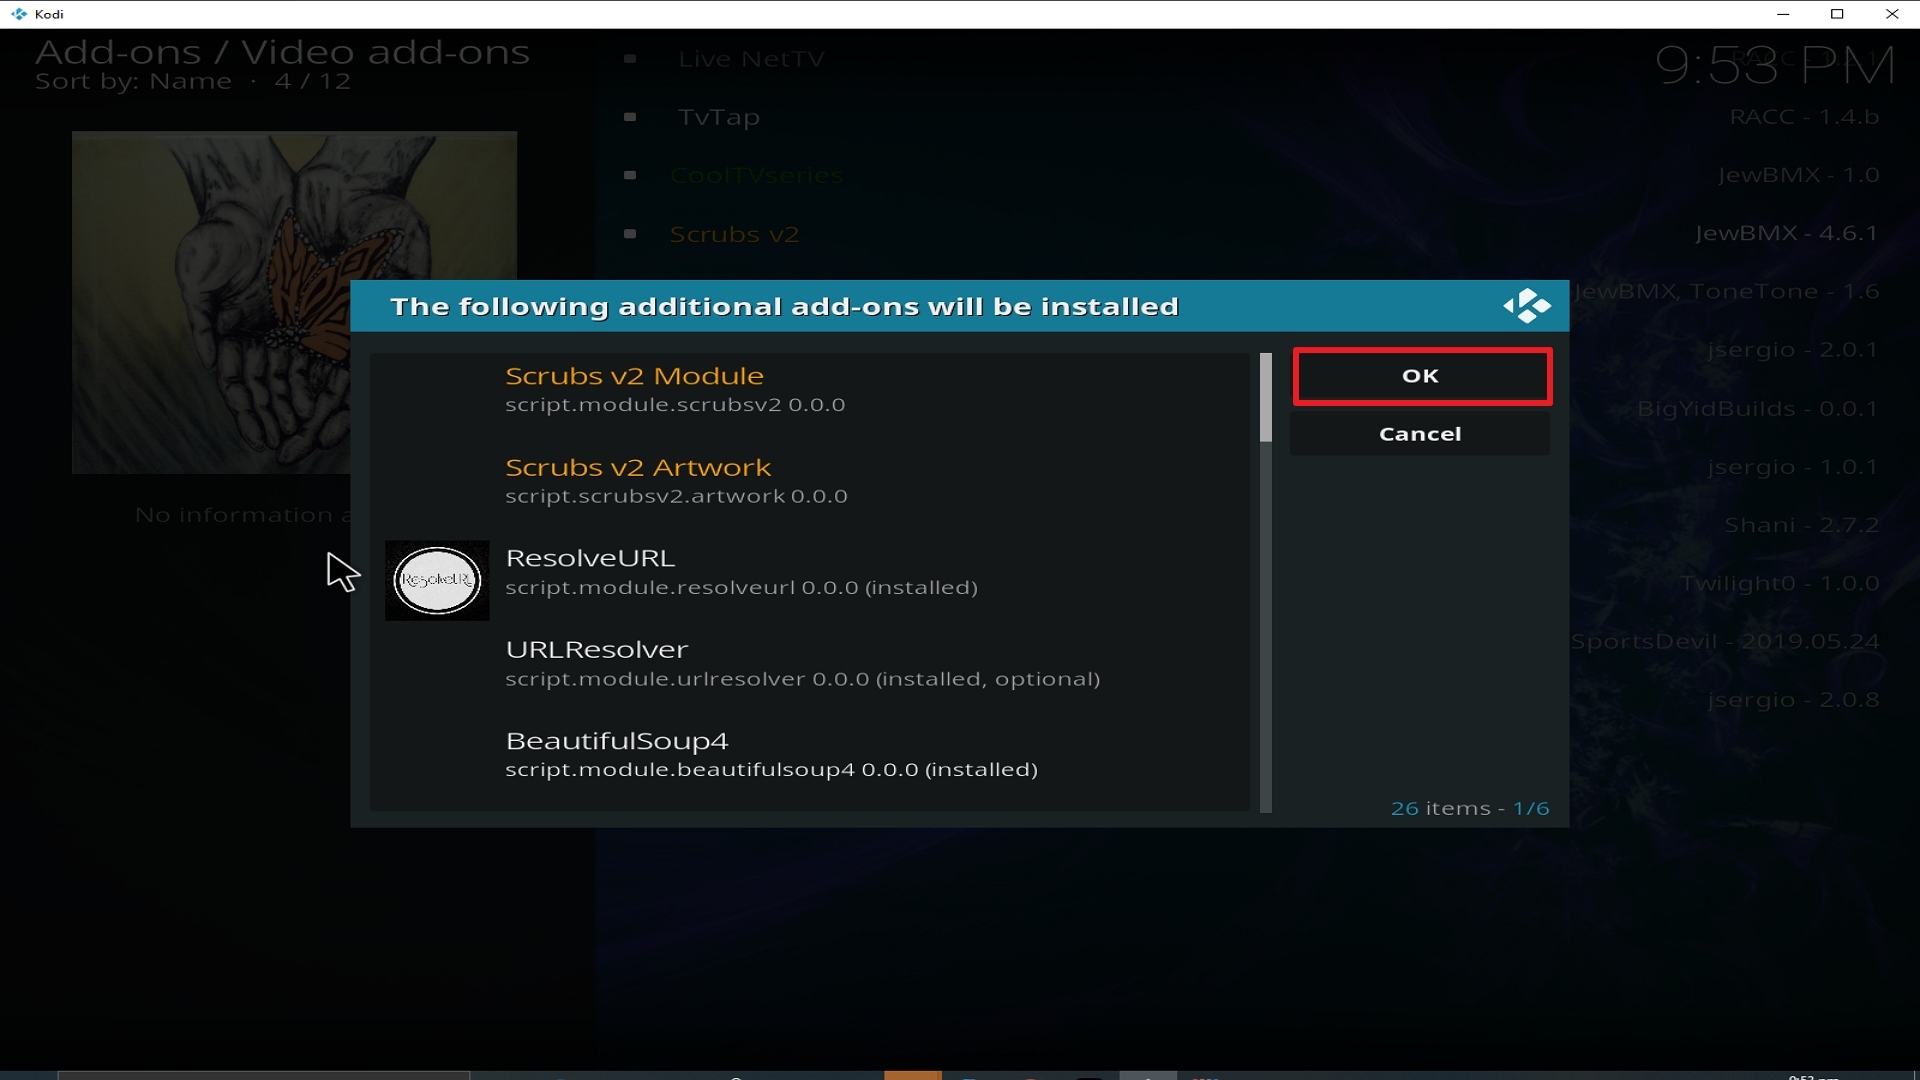
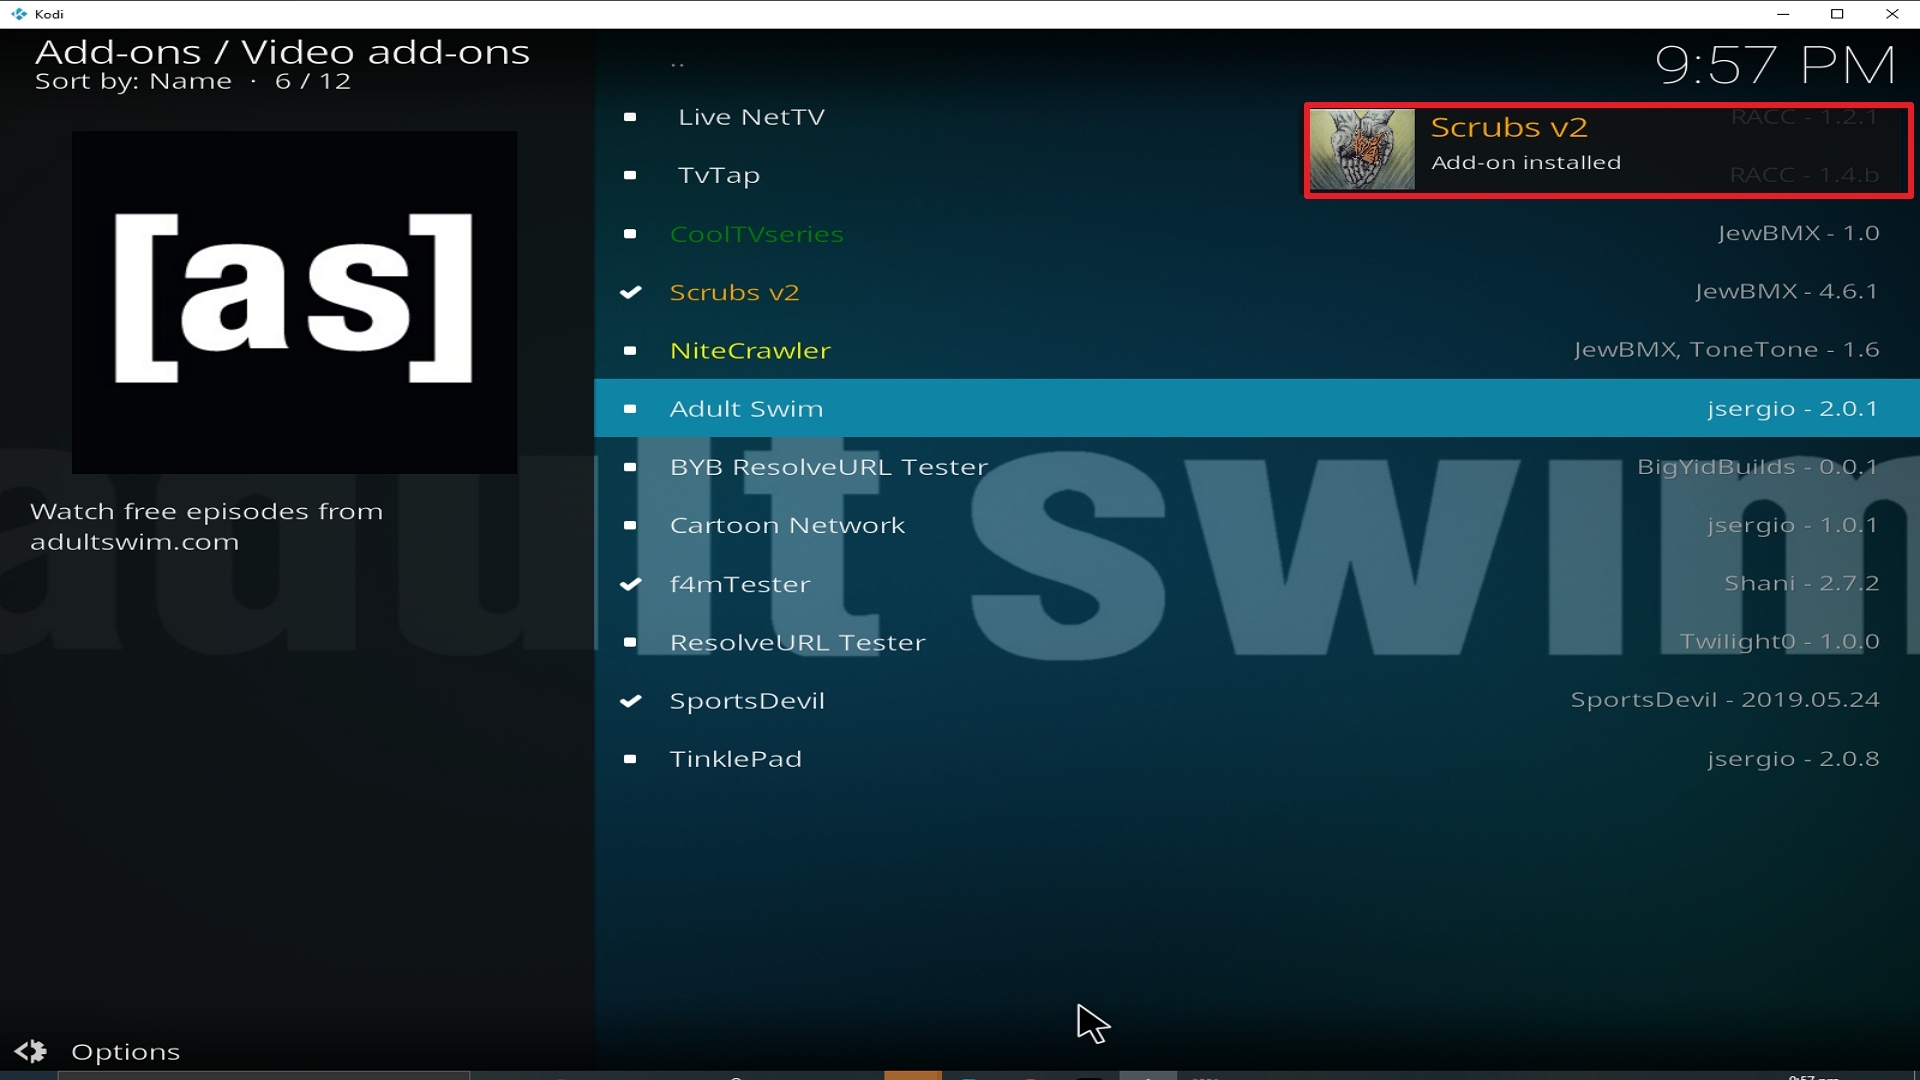
Install Halow TV Kodi Addon

Halow TV Kodi Addon

In this article, we will help you install Halow TV Kodi Addon on Firestick.

 

halow-live-tv-image

Source: http://kurdmovie.net/repo/

Halow TV first hit the scene in 2017 as a Kodi add-on. At that time there was a big crackdown on Live TV add-on, with TV Addons getting sued and forced to take down their massively successful add on. Following this, the developer decided to take the add on down temporarily and release an unofficial Android application.

The Android application was available on the Google Play Store but was taken down like many other streaming applications for breach of terms of service. Despite this, you can still find it on Aptoide.

Halow TV has since re-released its Kodi addon which offers an enormous selection of Live TV from countries all over the world.

A big fan favorite for foreign TV channels, particularly Kurdish and Turkish channels. Importantly there is something on Halow TV for everyone. Also, many of the channels tend to be in HD quality.

Halow is more than just a great source for Live TV. Without a doubt, they are one of the most consistent streaming providers for popular sports games, for everything from NBA and NFL to European football.


ANONYMOUSLY

Common Errors

You’ll get a few common errors with Halow TV, the most common being with streams that cannot be connected or are not working:

  • Stream not working/ Not available. The most common error by far you will have with Halow Live TV. First, check that you gave the stream 10 seconds to load, depending on the server and country you may need this long to connect. Second, have you tried to refresh the stream to check if it was just a server glitch? Finally, make sure that you are using Halow TV with a VPN to stop your ISP from blocking any outgoing IP addresses to your content. Lastly check for the content which is Geo-IP locked by changing your VPN to the country the channel is coming from, or the closest country to it. Check here for the best VPN deal. If none of that works, then try some more fixes guide linked above.
  • Could not Download/ Web URL failure. Obviously, make sure that you have entered the correct URL and beware of downloading the add-on from other links or repositories. Subsequently, check your internet connection and that you are using a VPN. If that doesn’t work read more of our fix guide linked above.
  • Kodi error check log. This tends to be a caching error. To read how to clear your cache and more fixes, check our guide linked above.

Review

Halow TV has grown from strength to strength. On the other hand, the user interface looks dated. Nevertheless, Halow has continued to be consistent from 2017 up until now. Covering a wide range of channels and keeping its TV streams and links up to date.

Importantly, they cover a massive range of channels and are especially good at picking up obscure channels and countries. Besides this, they are great for foreigners looking for a touch of home while abroad.

Categories include:

  • Live TV
  • Moves
  • TV Shows
  • Sports
  • Webcams


Halow TV offers a massive range of Live TV Channels from countries including:

  • Australia
  • Greece
  • Sweden
  • Turkey
  • UK
  • USA
  • Canada
  • Costa Rica
  • Mexico
  • Columbia
  • Argentina
  • Trinidad
  • Ghana
  • Ireland
  • Canada
  • China
  • Africa
  • Macedonia
  • Bangladesh 
  • Czechoslovakia

Whereas if you are looking for a nicer looking UI use Mobdro as they have thousands of channels, and are probably the best Live TV Kodi addon.

Alternatively, for consistency and the biggest range of channels particularly for more obscure countries and channels try paying $7+ a month for premium IPTV and 3,000+ channels from Player’s Klub or Helix IPTV.


YOUR INTERNET ACTIVITY IS BEING WATCHED

ReviewVPN cannot attest to the legality, security and privacy of the applications discussed on this site. It is highly recommended that you use a VPN service while streaming or using Kodi.

Currently, your IP 216.73.217.150 is visible to everyone and your Browser is being tracked by Advertisers & ISP Provider.

Save 65% Now

Limited Time Offer

Here are the main reasons why you must use a VPN:

  • Your activities are hidden from your ISP, the government, and from the apps you are using.
  • You can access additional movies and TV streams.
  • ISP attempts to throttle are thrwarted thus reducing buffering issues.
  • Geographically restricted content like Netflix and Hulu can be unblocked.

A VPN works be replacing your ISP-assigned IP address and creating an encrypted tunnel. We recommend the no log service offered by IPVanish. It works well on a Firestick and offers the fastest possible speeds.

Special Limited Time Offer - Get IPVanish


Legal Disclaimer: ReviewVPN.com does not encourage or endorse any illegal activity involved in the usage of services and applications referenced on this site. We do not verify the licensing agreements of services. The end-user is wholly responsible for ensuring that any media accessed through these services does not violate copyright and/or licensing laws. ReviewVPN does not promote, link to, or receive compensation from any Apps and IPTV services.


Install Surfshark on Firestick
Best Surfshark Deal


How to Install Halow TV on Kodi with Screenshots

  1. From the home screen, select the cogwheel at the upper left.

Step 1 Installing Halow TV addon on Kodi


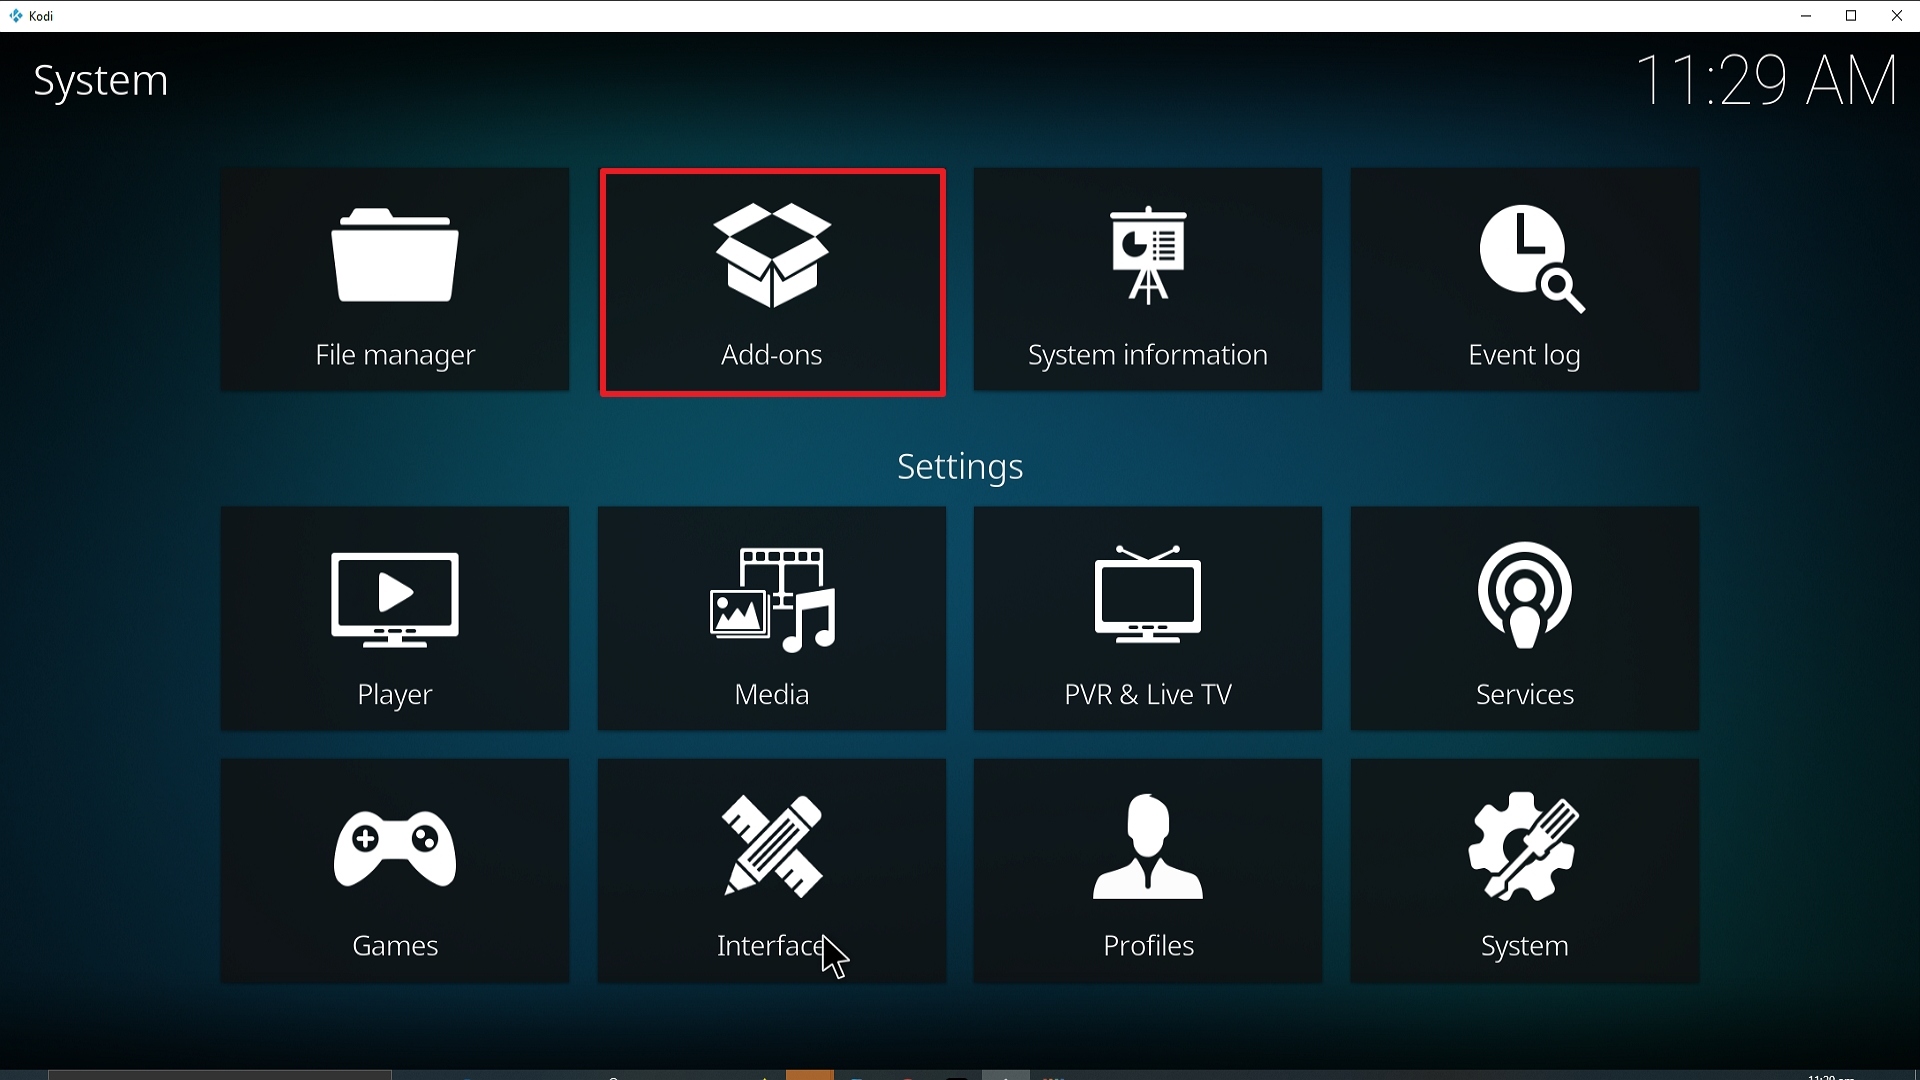
2. Select System in the bottom right corner.

Step 2 Installing Halow TV addon on Kodi


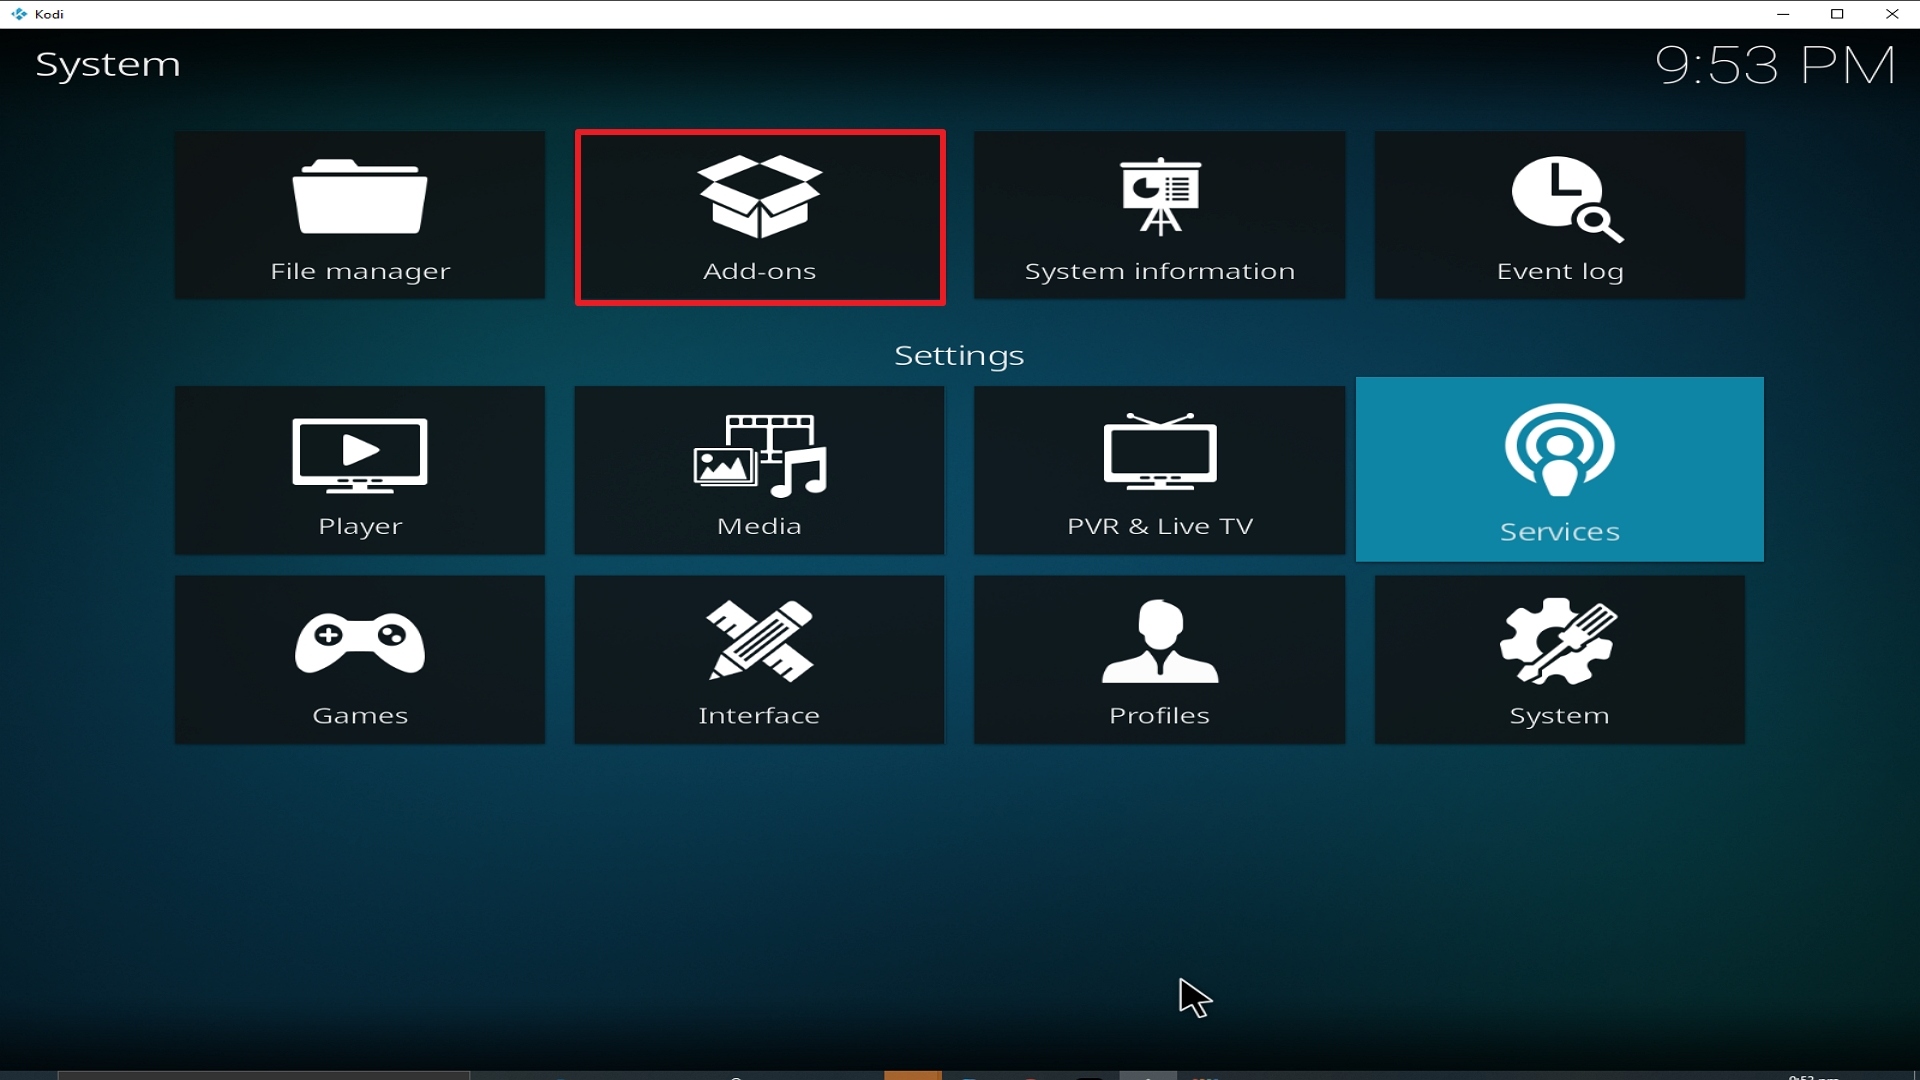
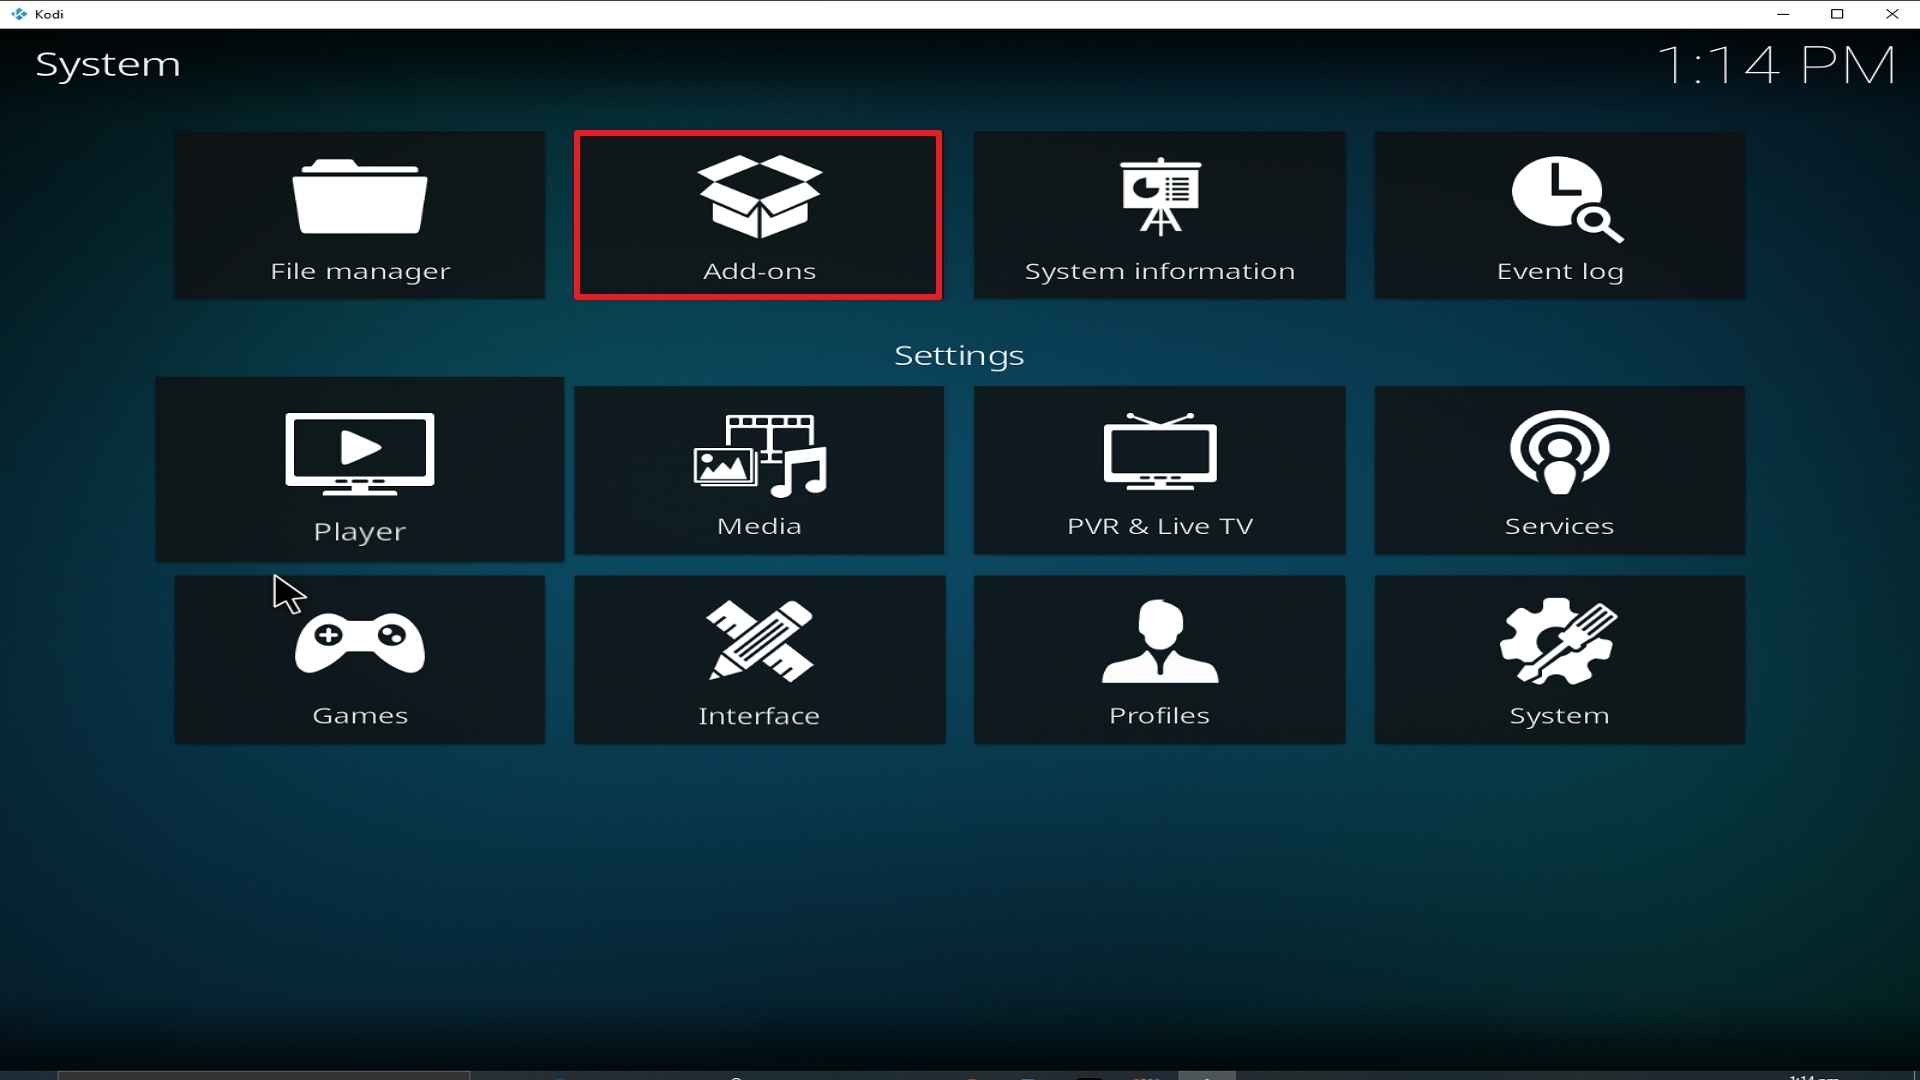
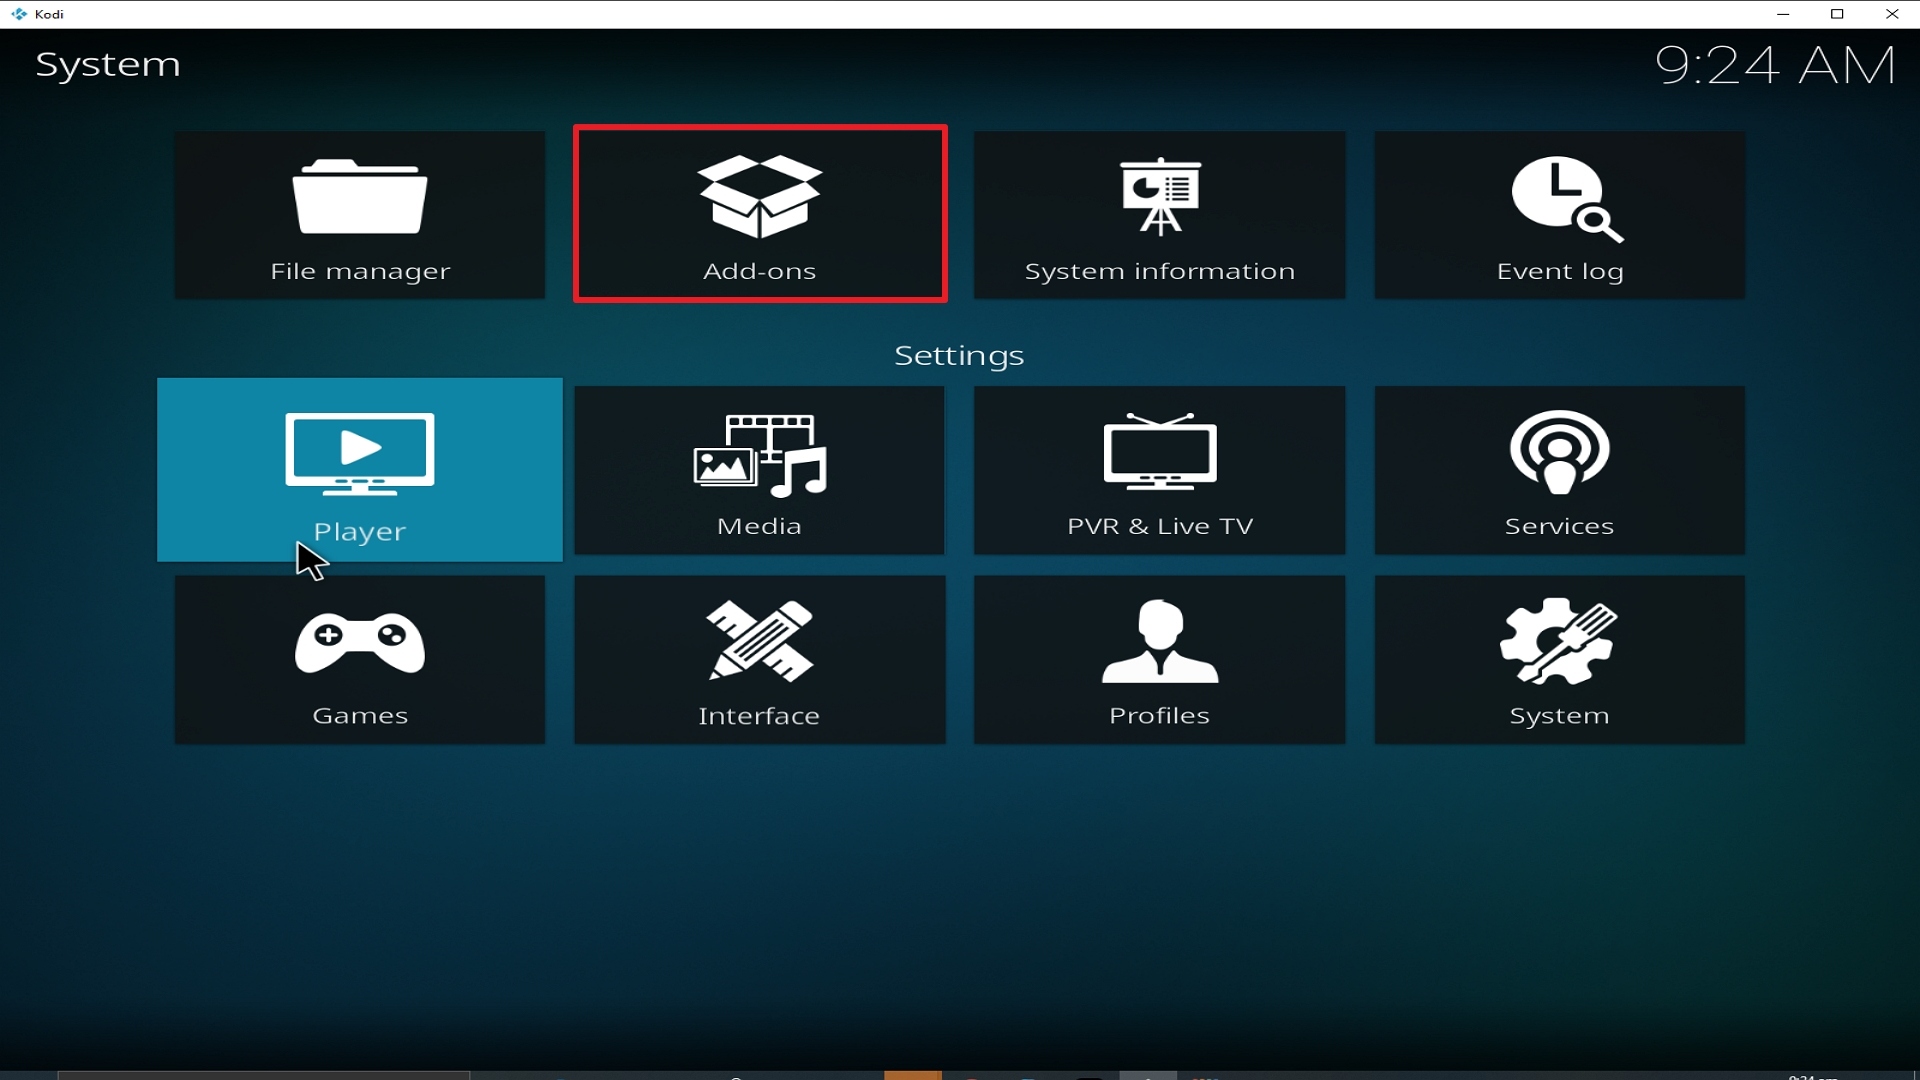
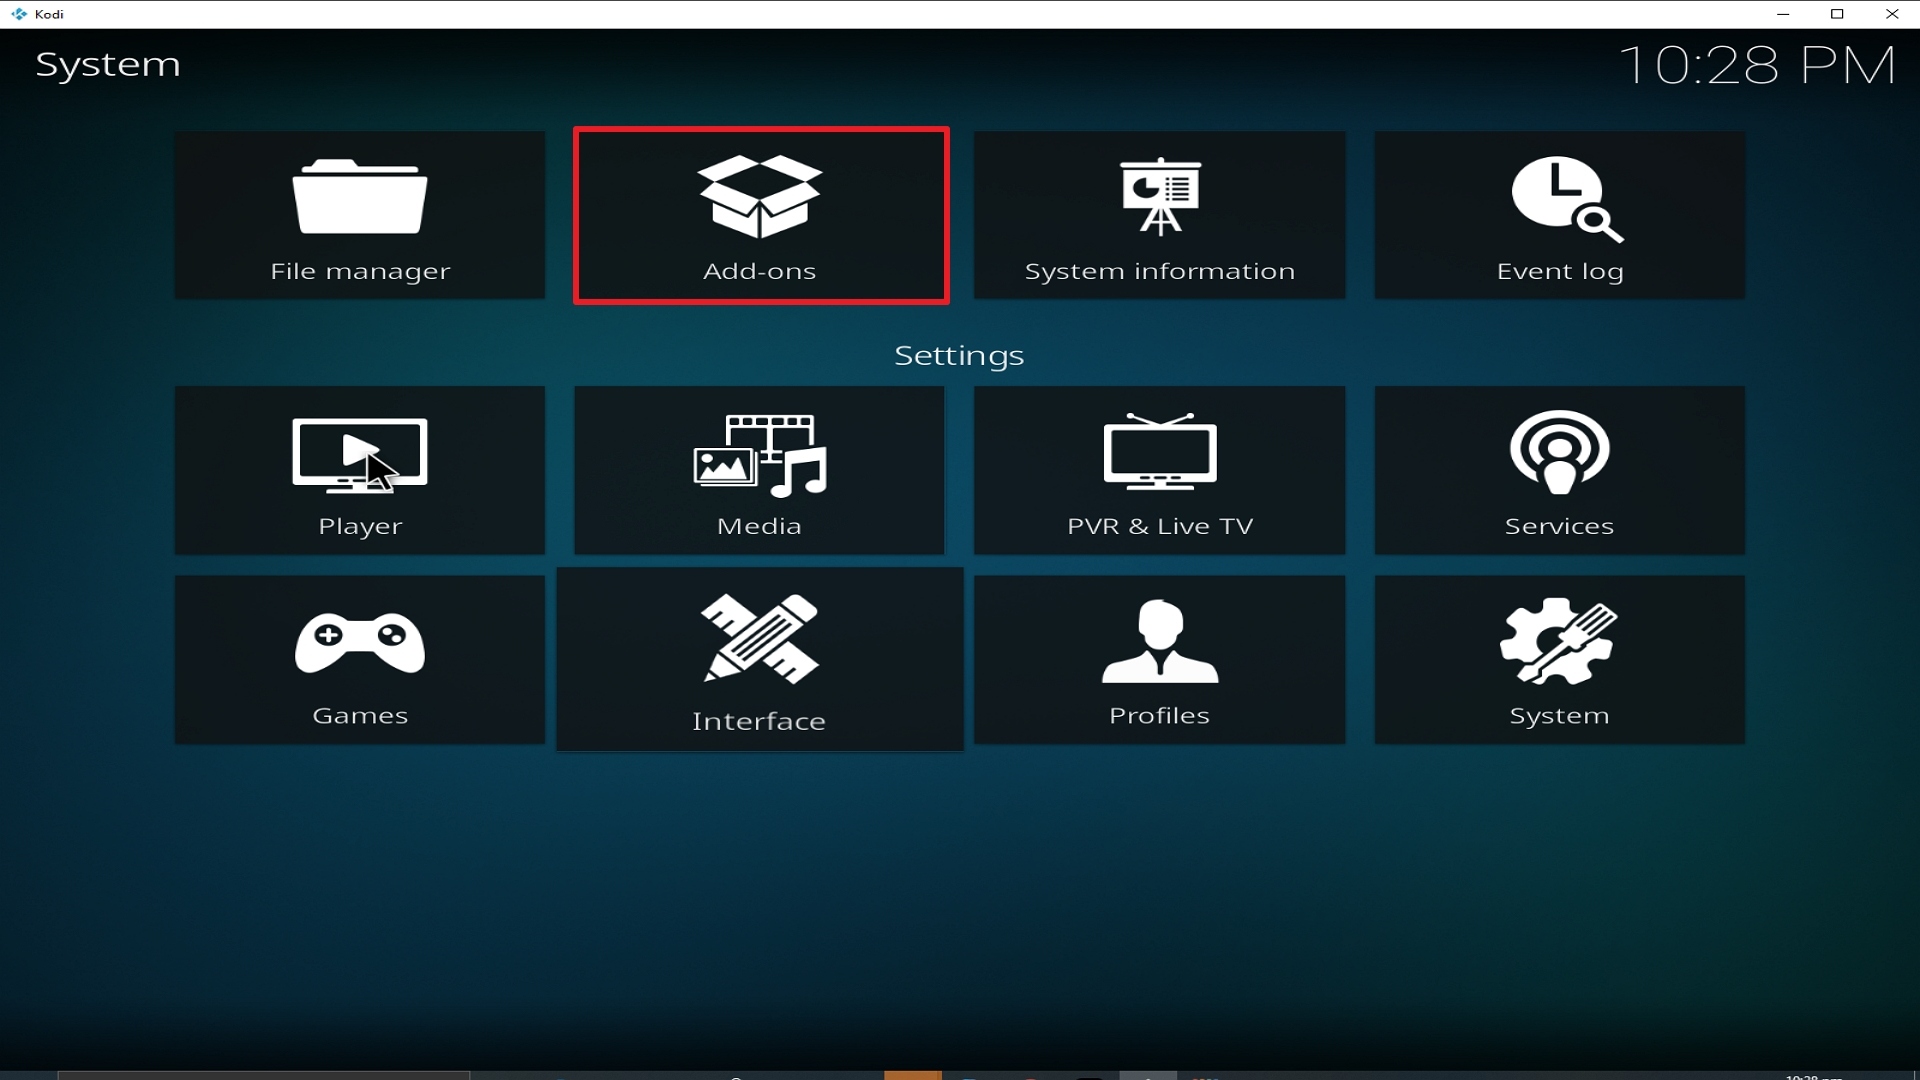
3. Select Add-ons on the left side of the screen.

Step 3 Installing Halow TV addon on Kodi


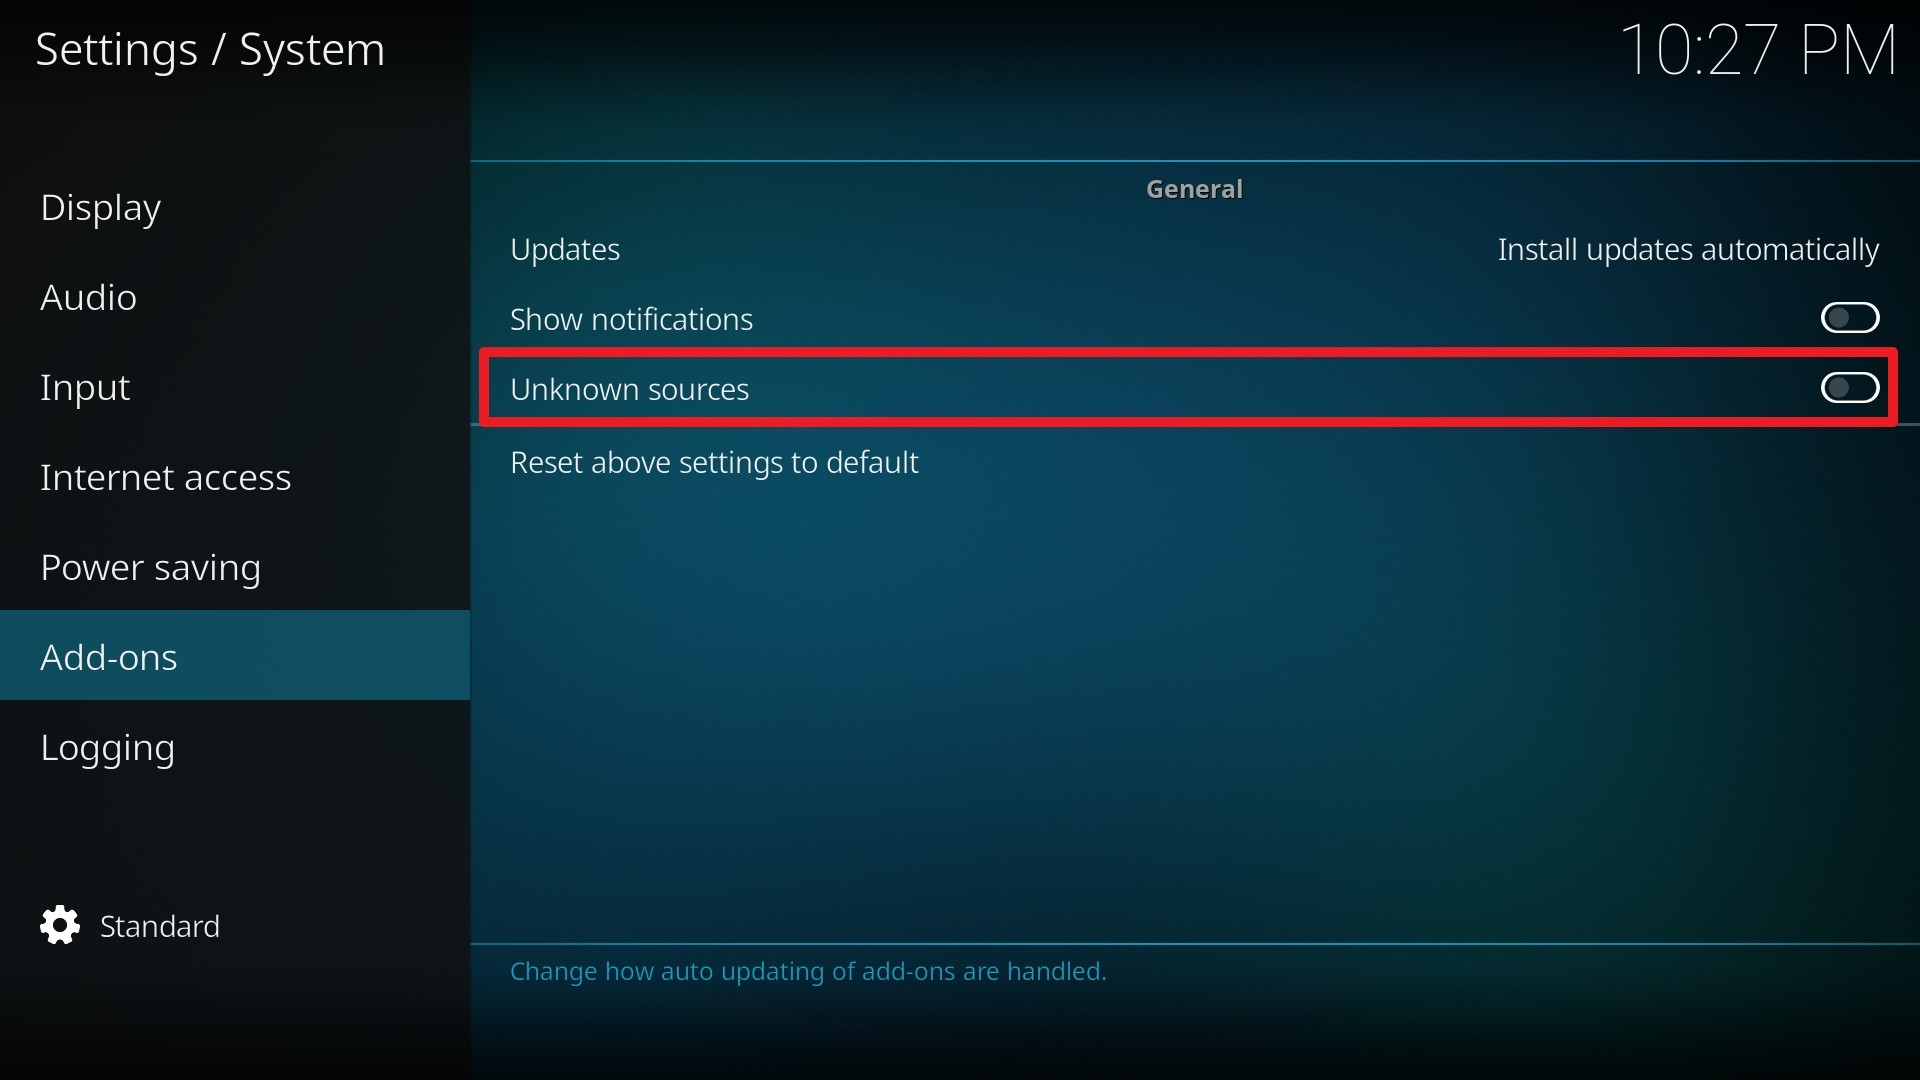
4. Select Unknown sources.

Step 4 Installing Halow TV addon on Kodi


5. Click Yes to allow unknown sources.

Step 5 Installing Halow TV addon on Kodi


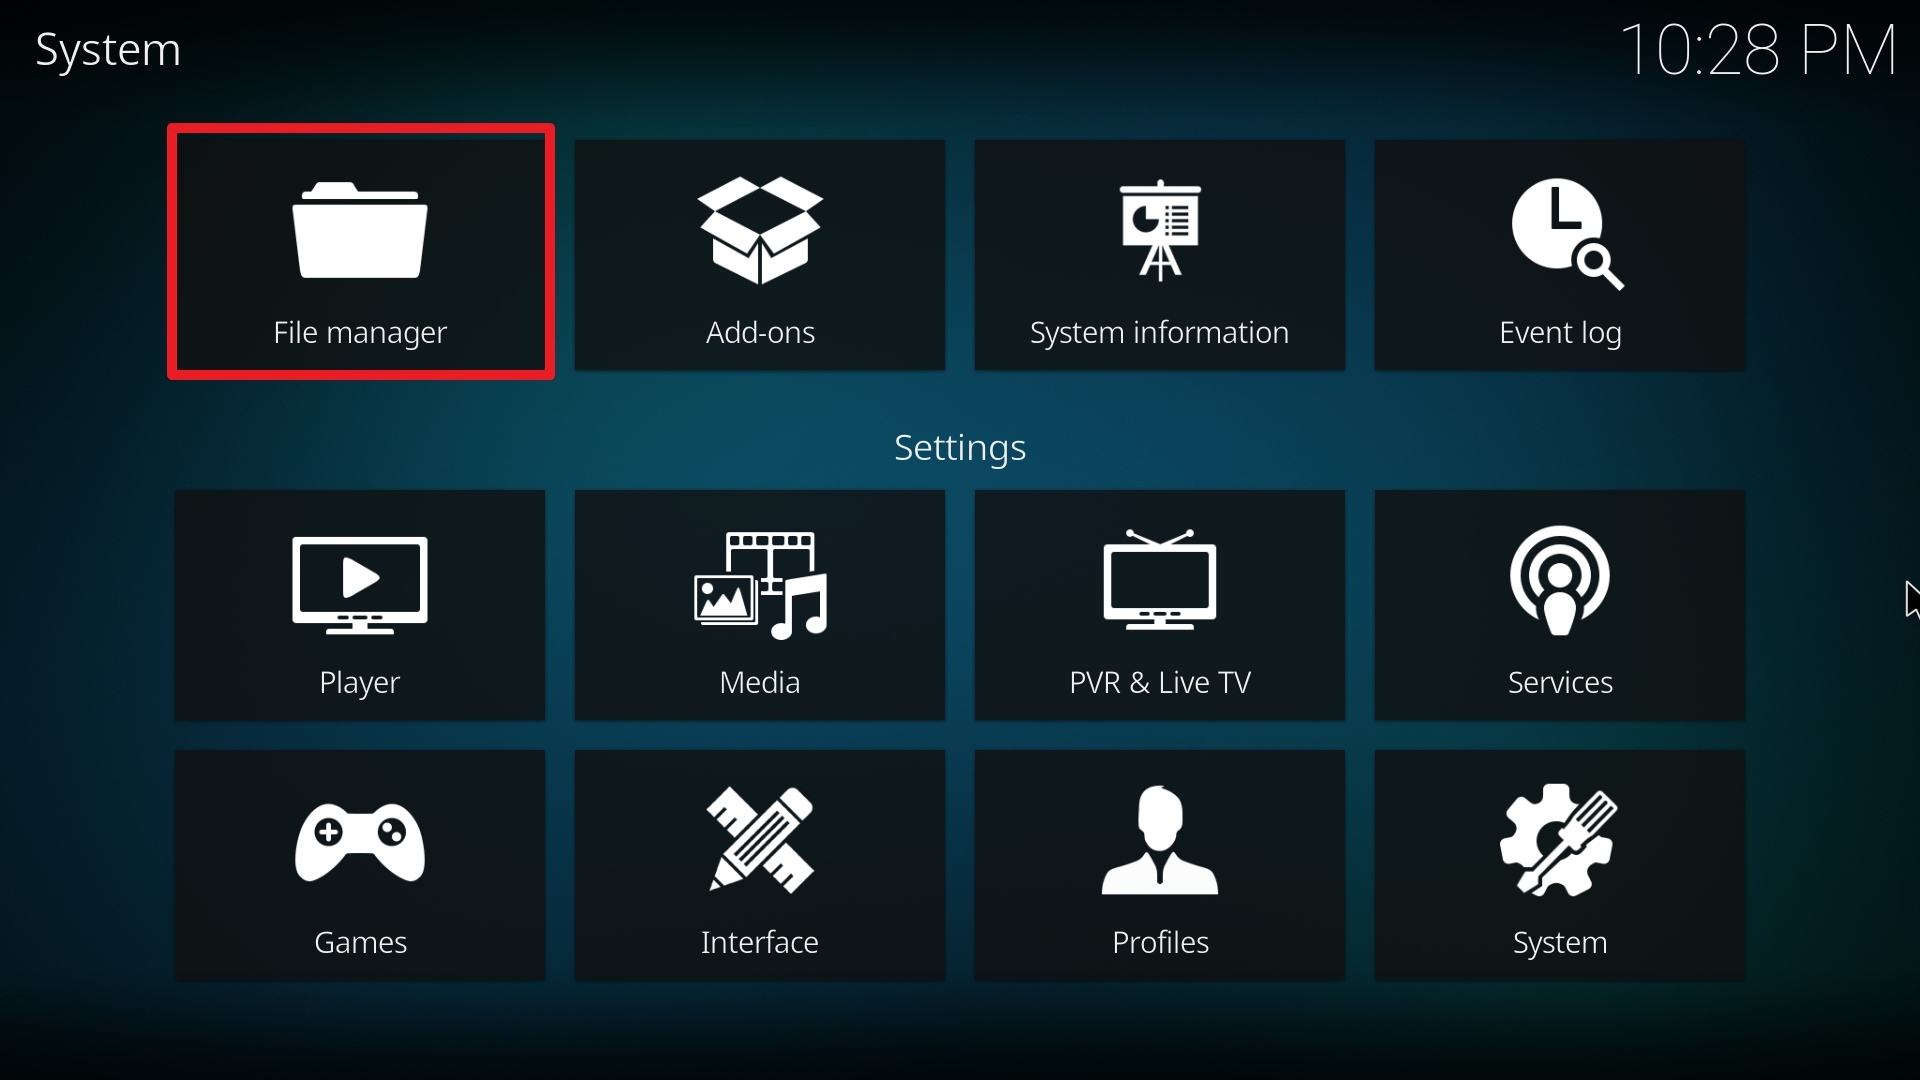
6. Select File manager.

Step 6 Installing Halow TV addon on Kodi


7. Click Add source.

Step 7 Installing Halow TV addon on Kodi


8. Click on <None>.

Step 8 Installing Halow TV addon on Kodi


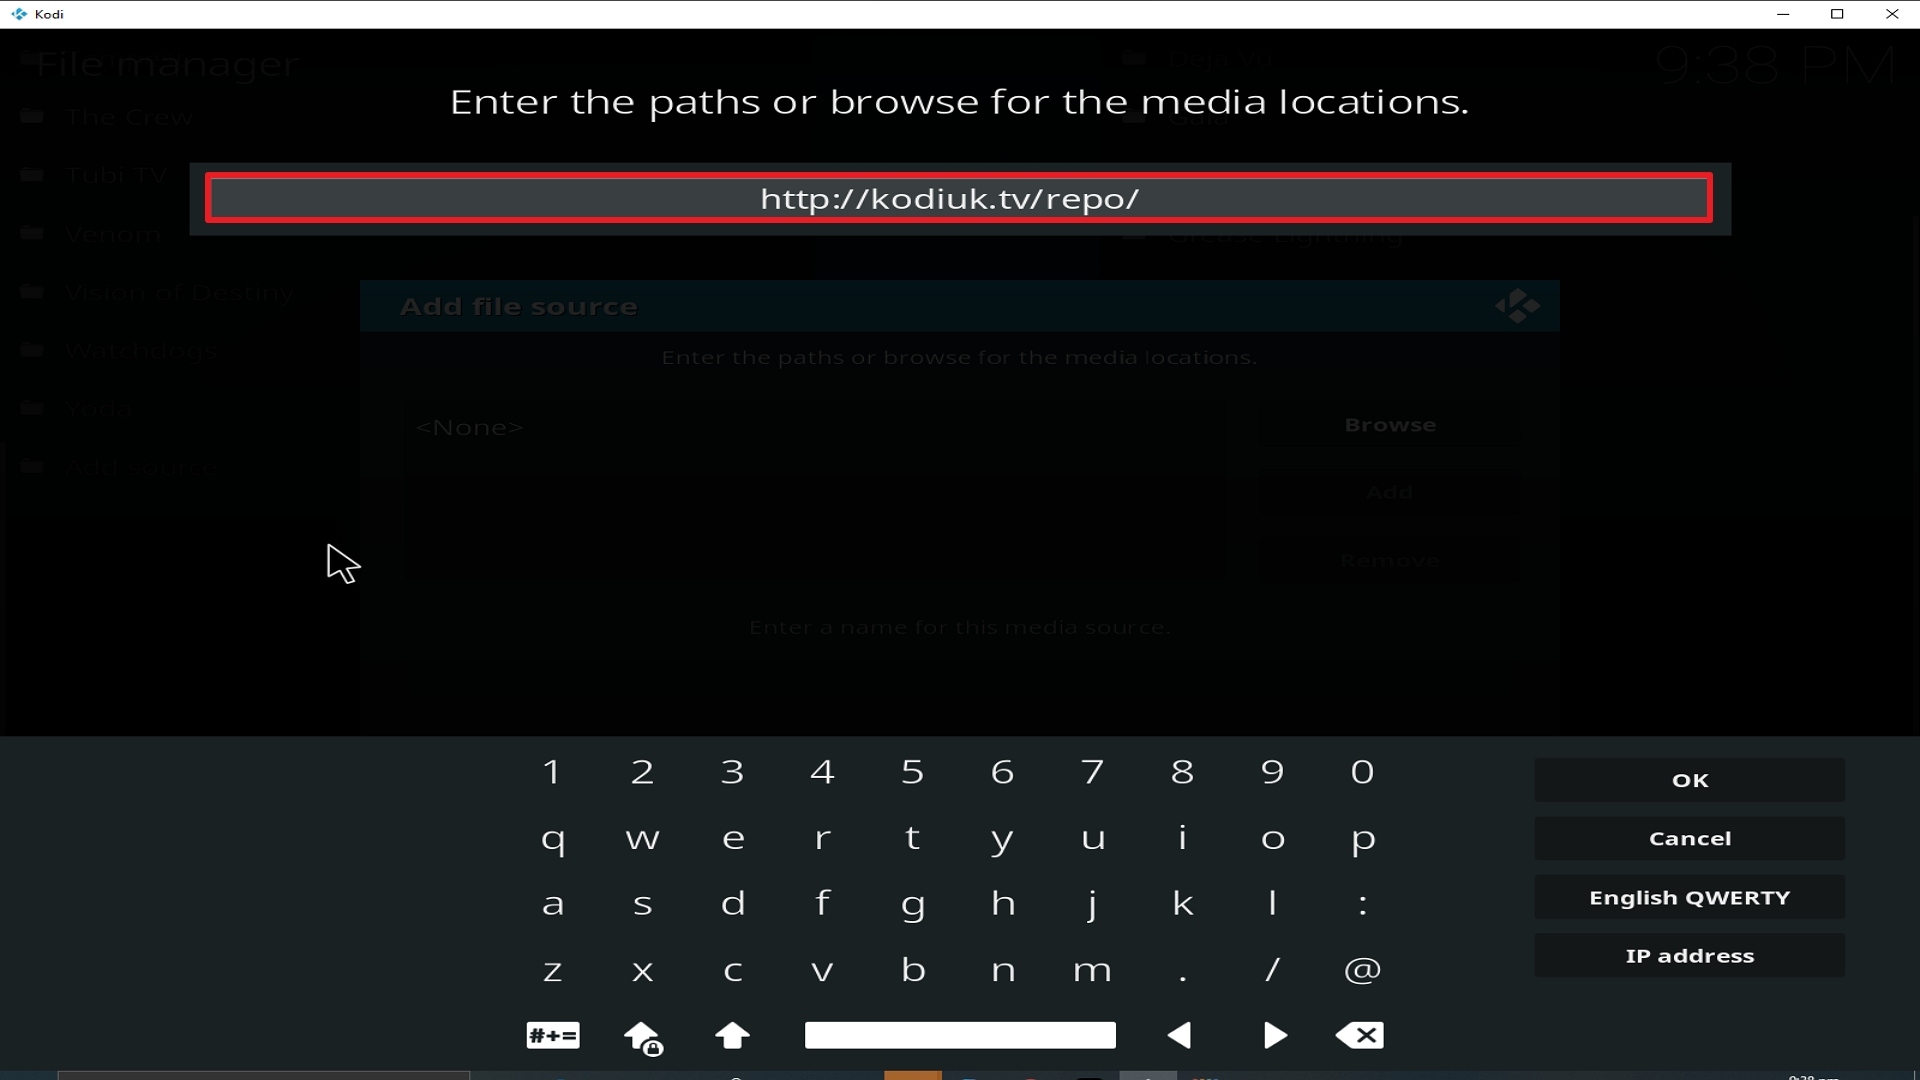
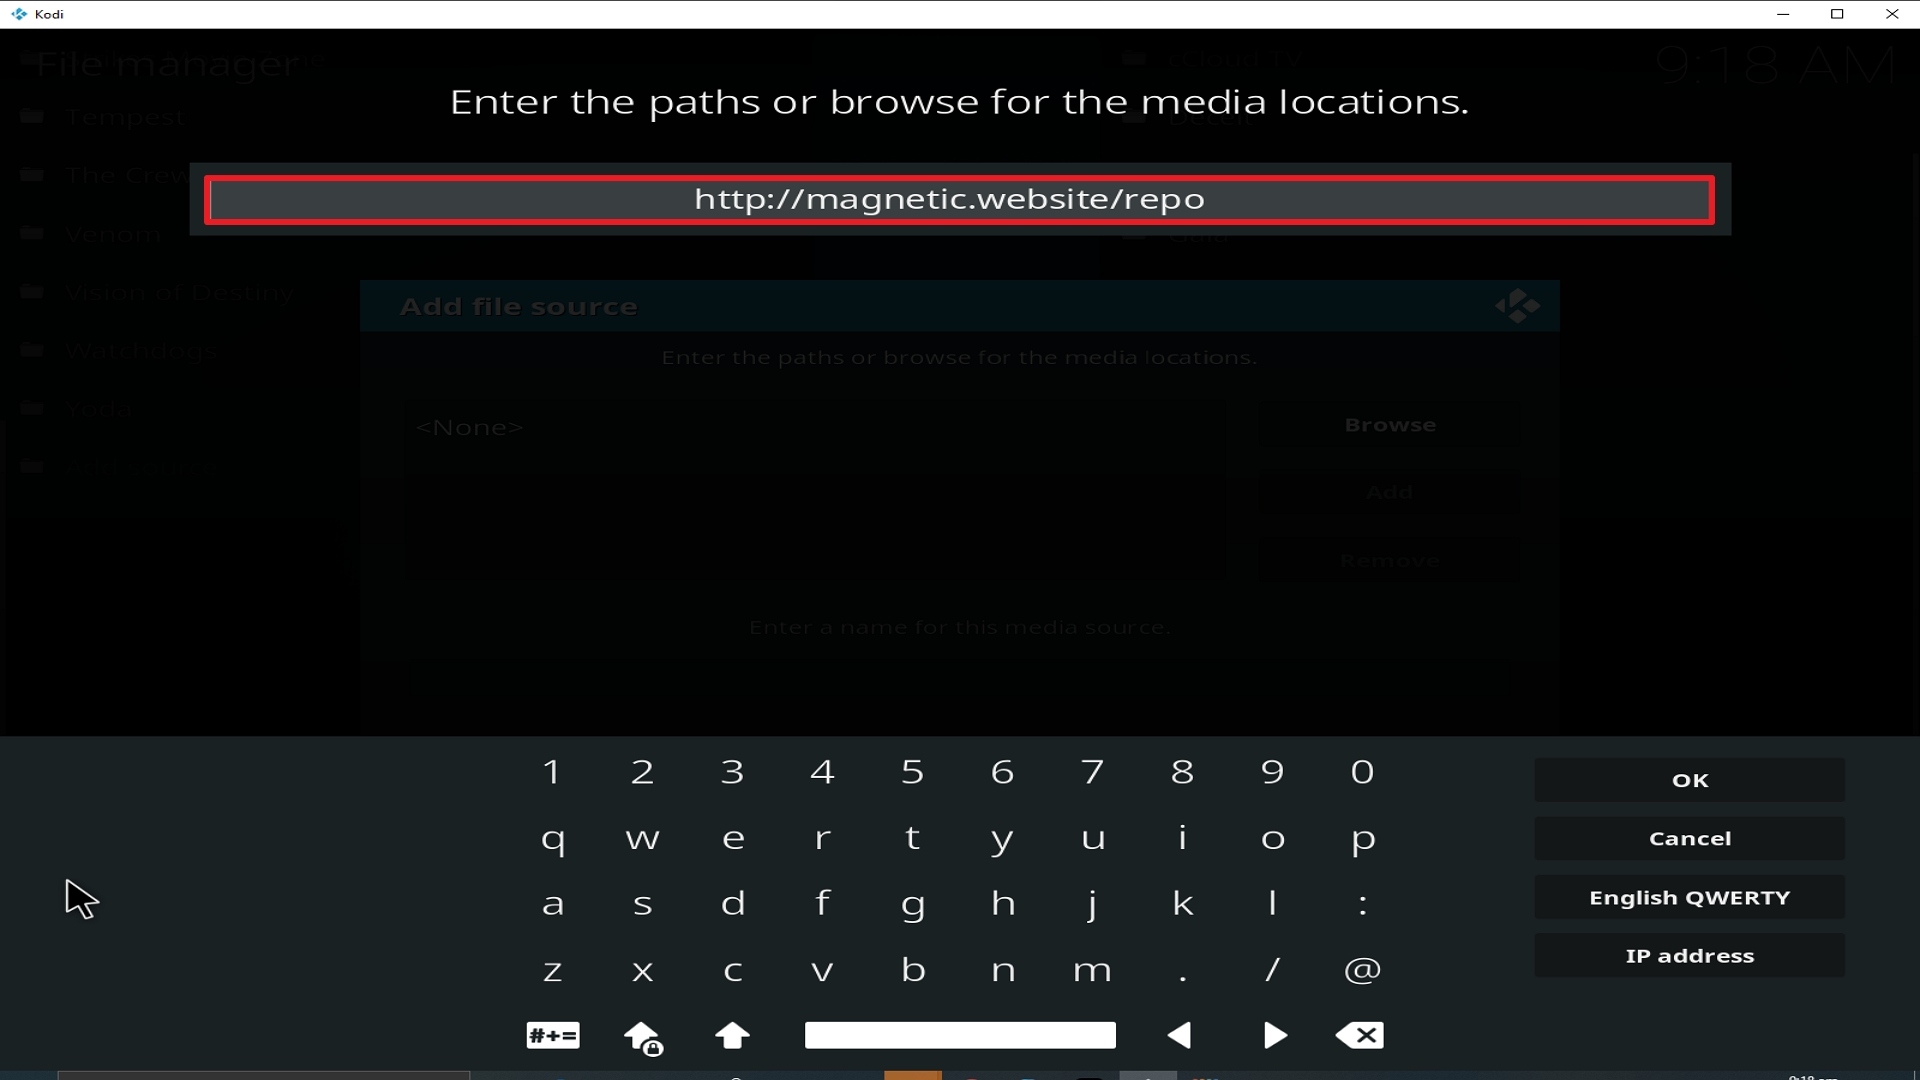
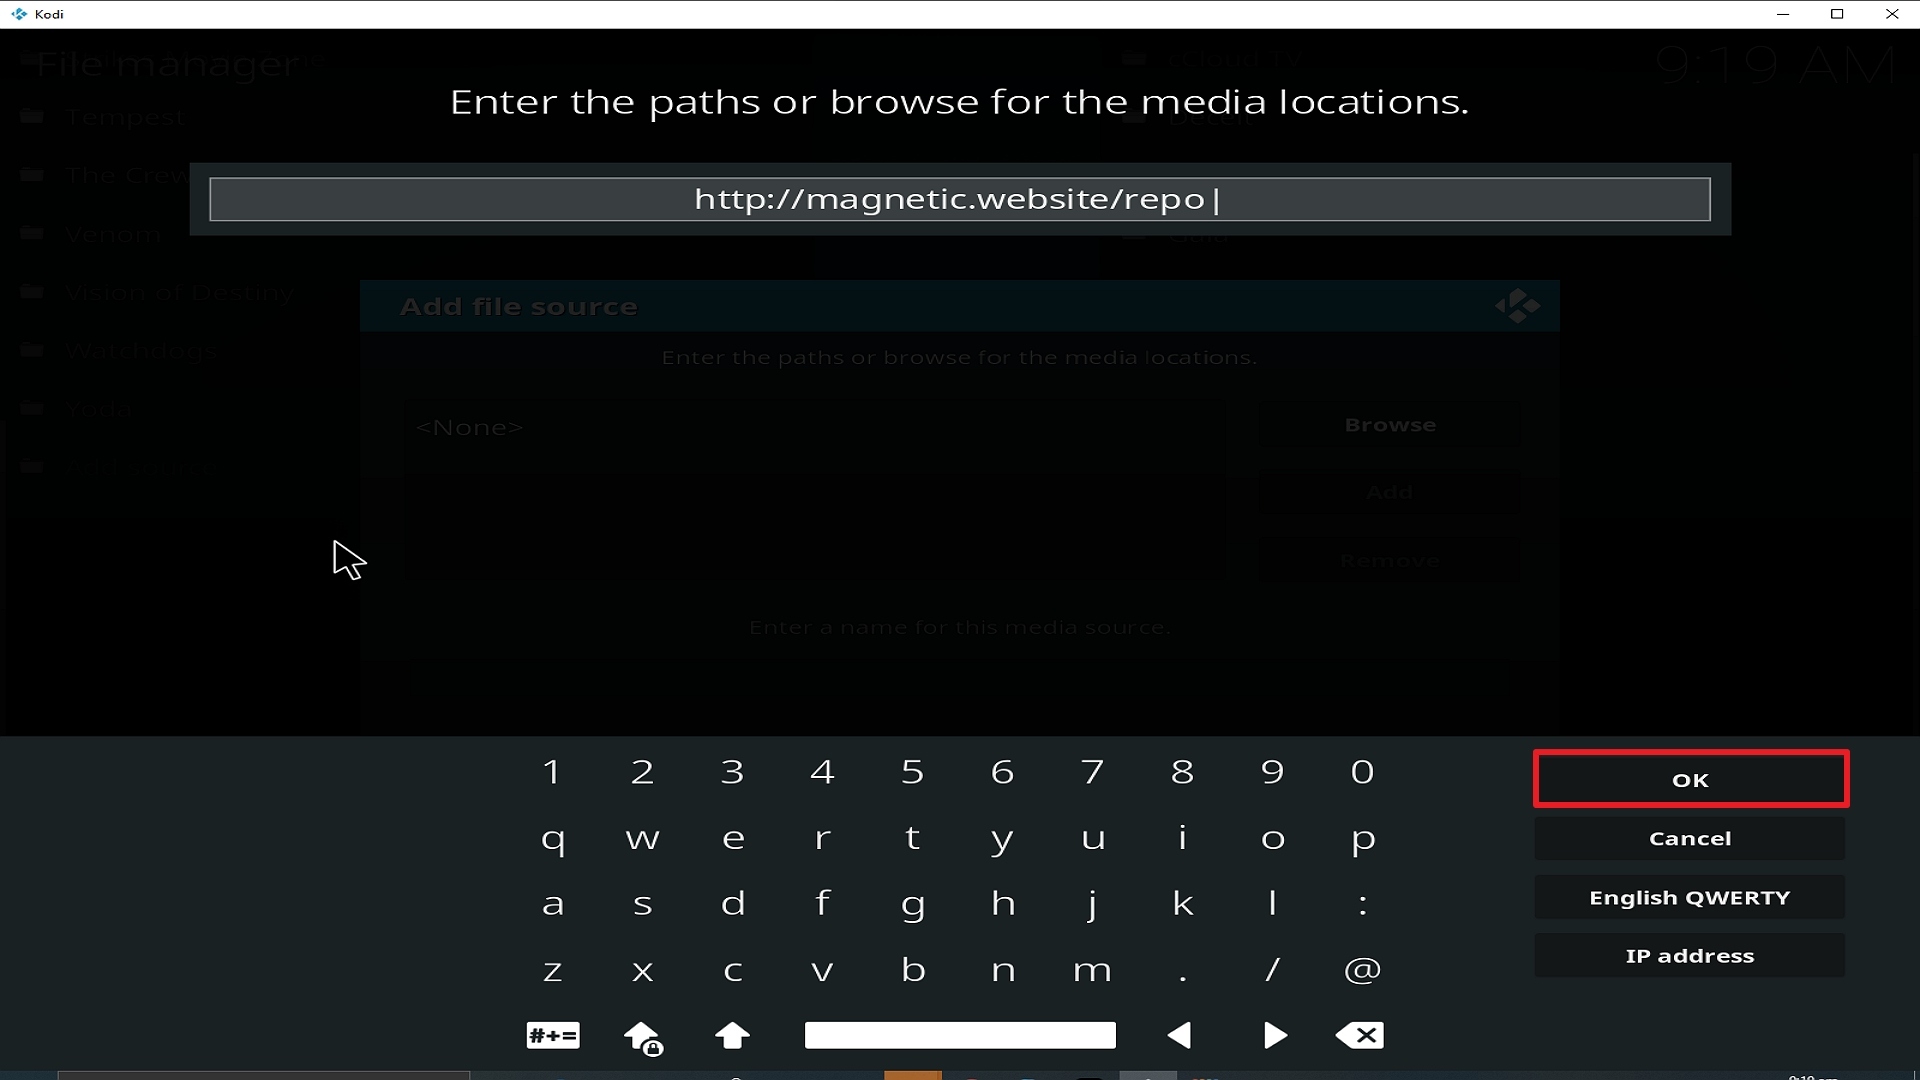
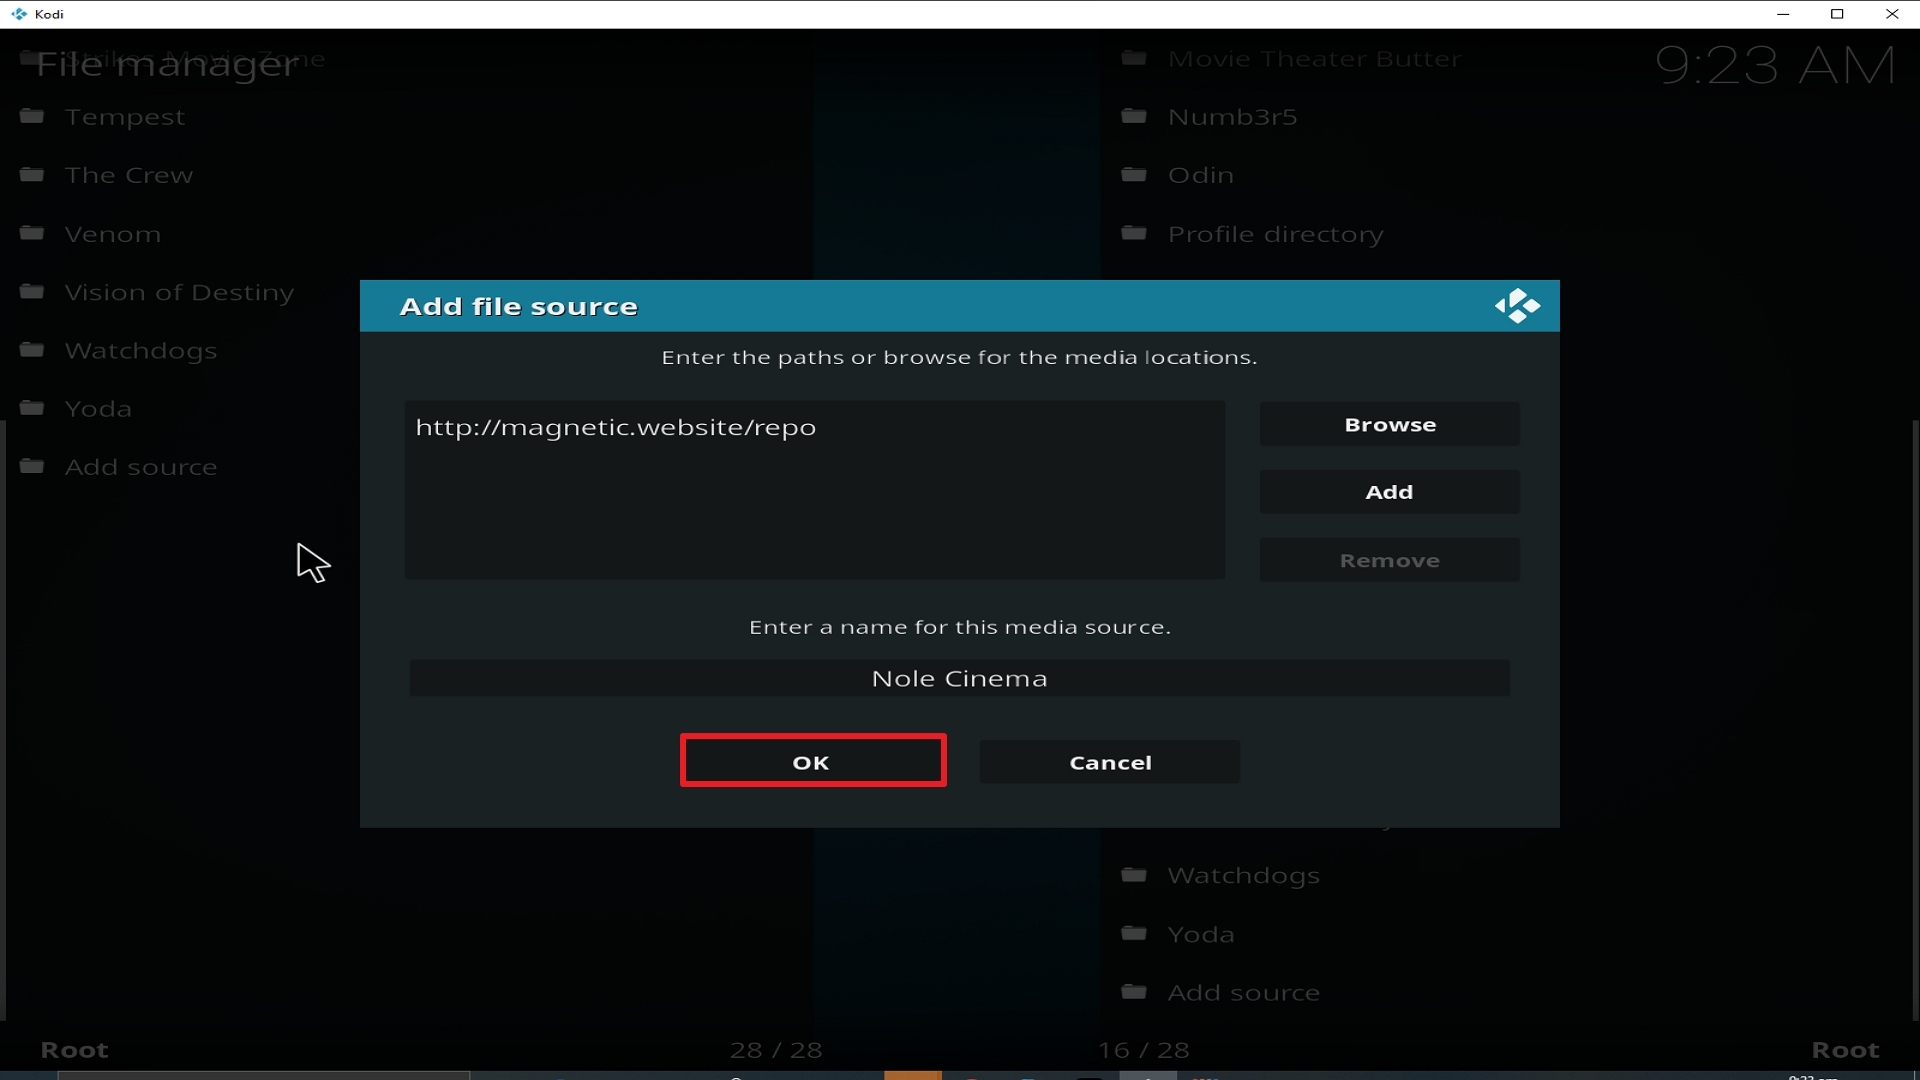
9. Type exactly: http://kurdmovie.net/repo/

Step 9 Installing Halow TV addon on Kodi


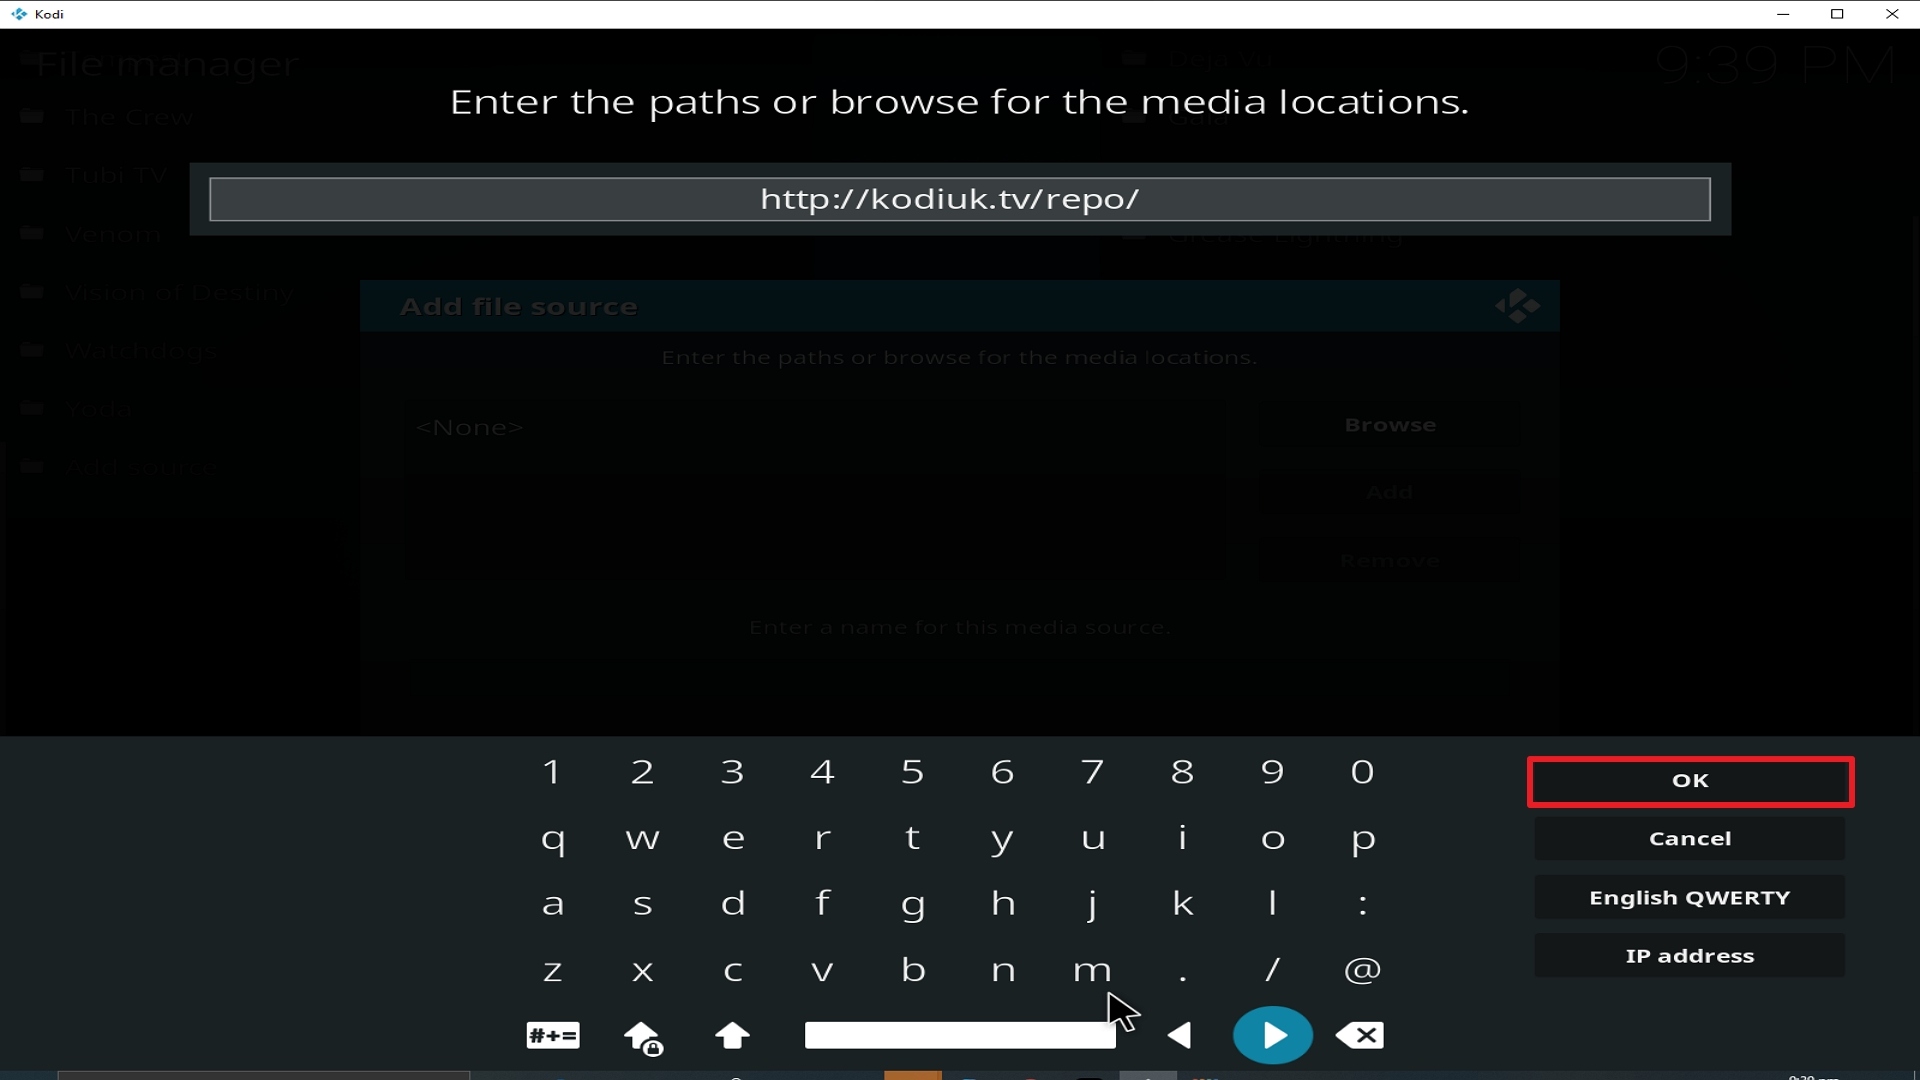
10. Click on OK.

Step 10 Installing Halow TV addon on Kodi


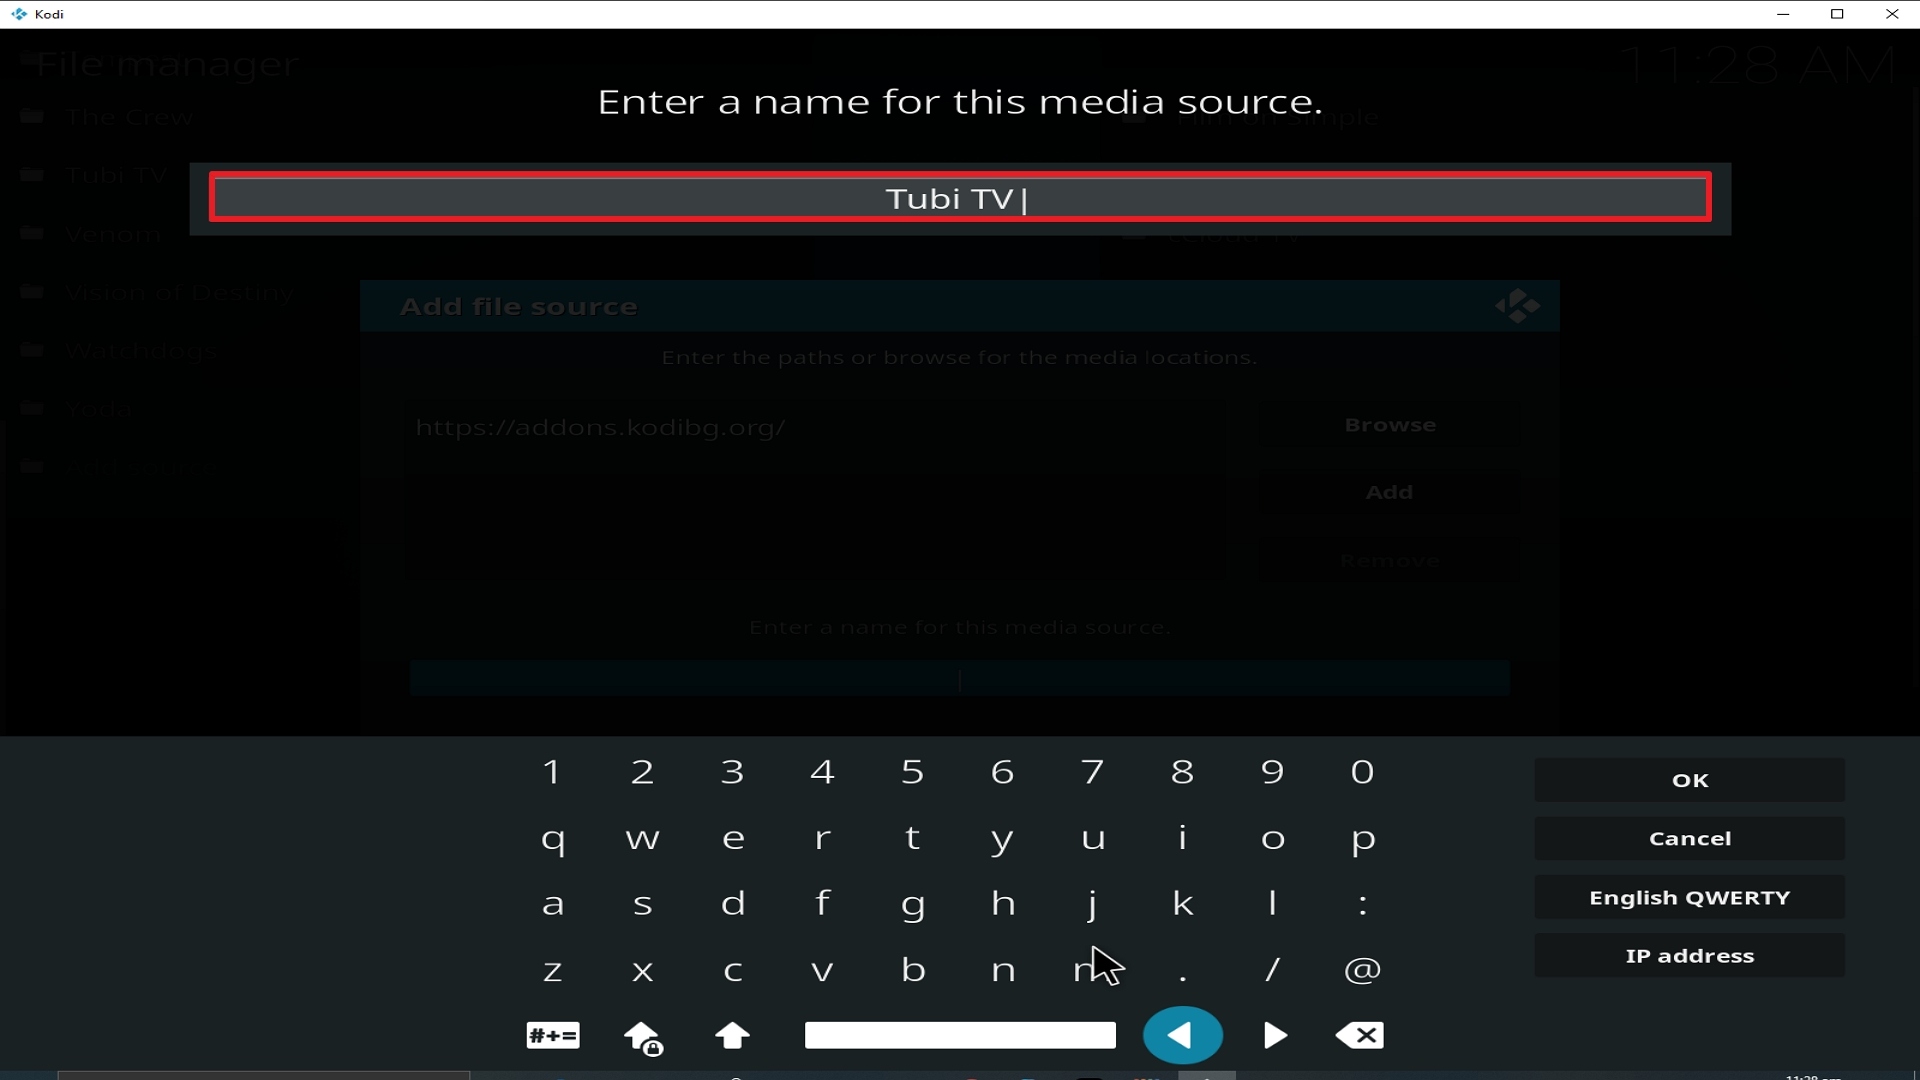
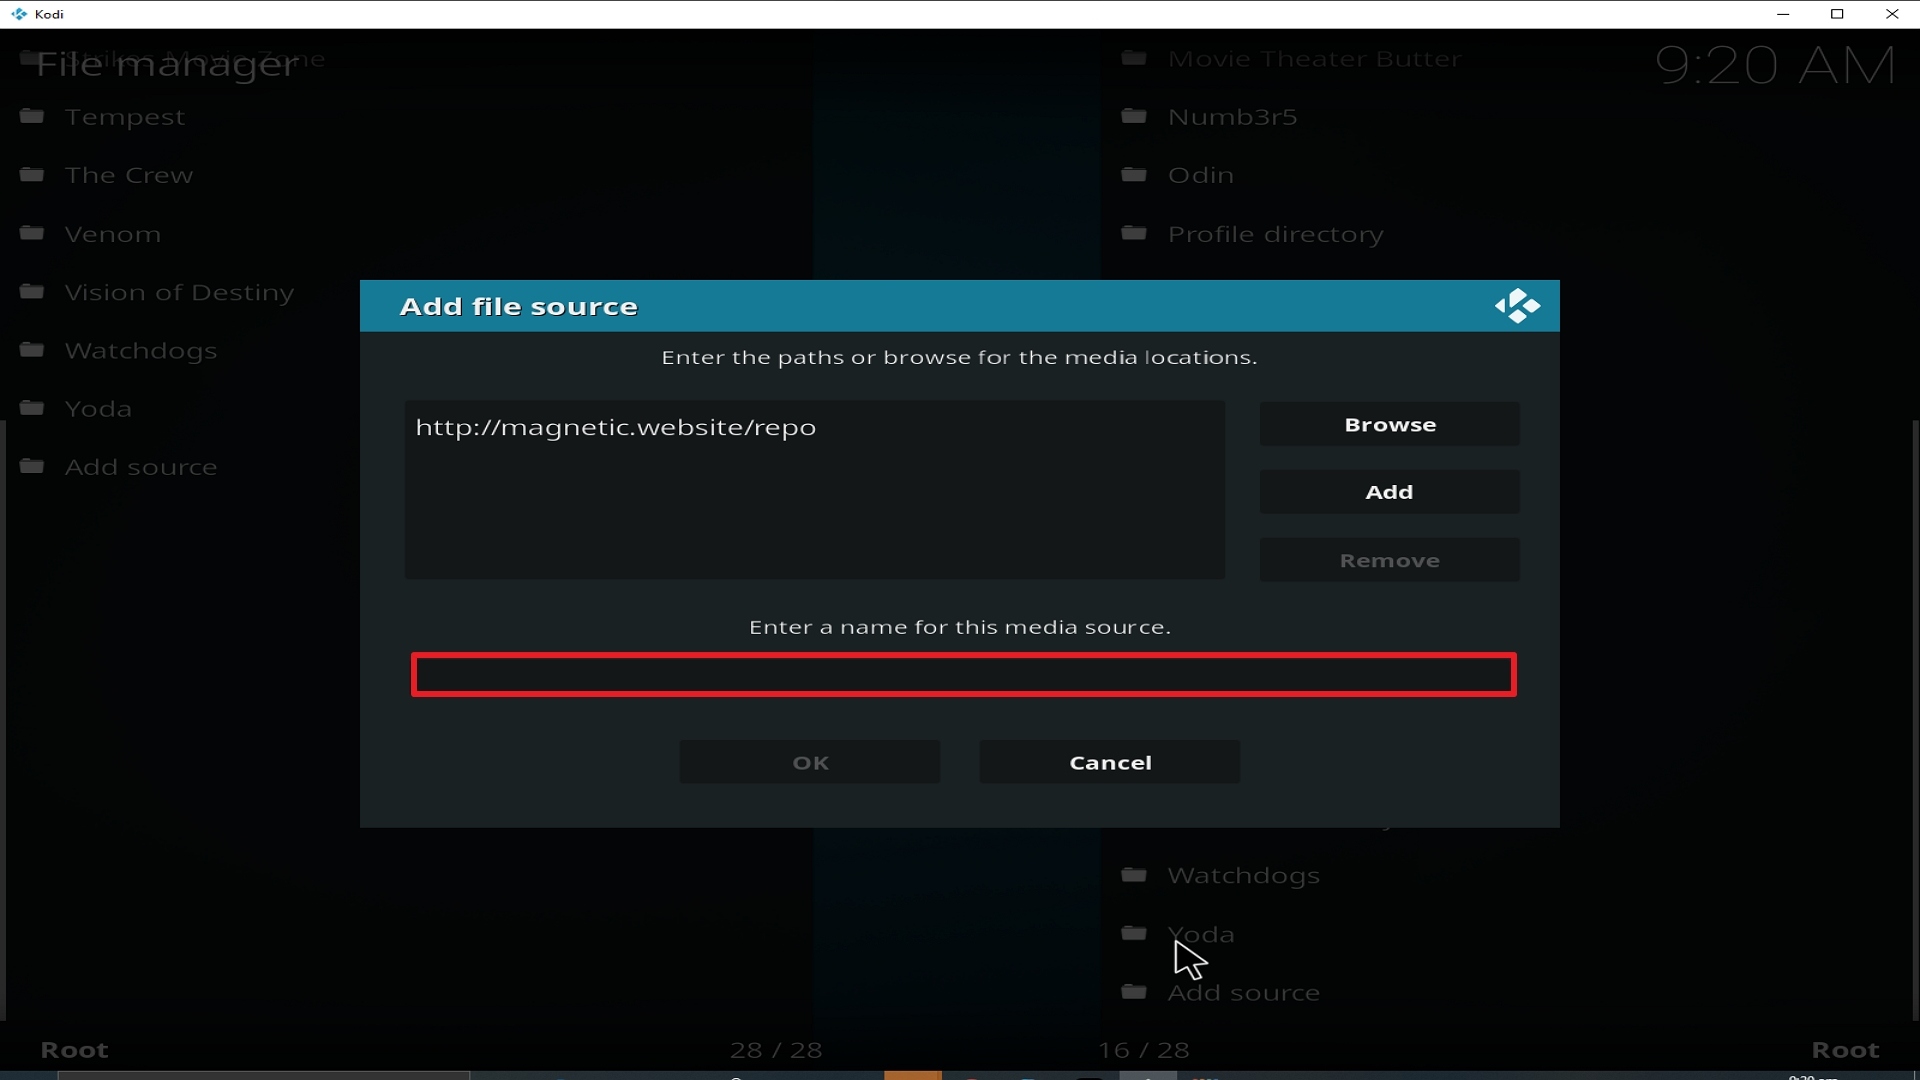
11. Select enter a name for this media source.

Step 11 Installing Halow TV addon on Kodi


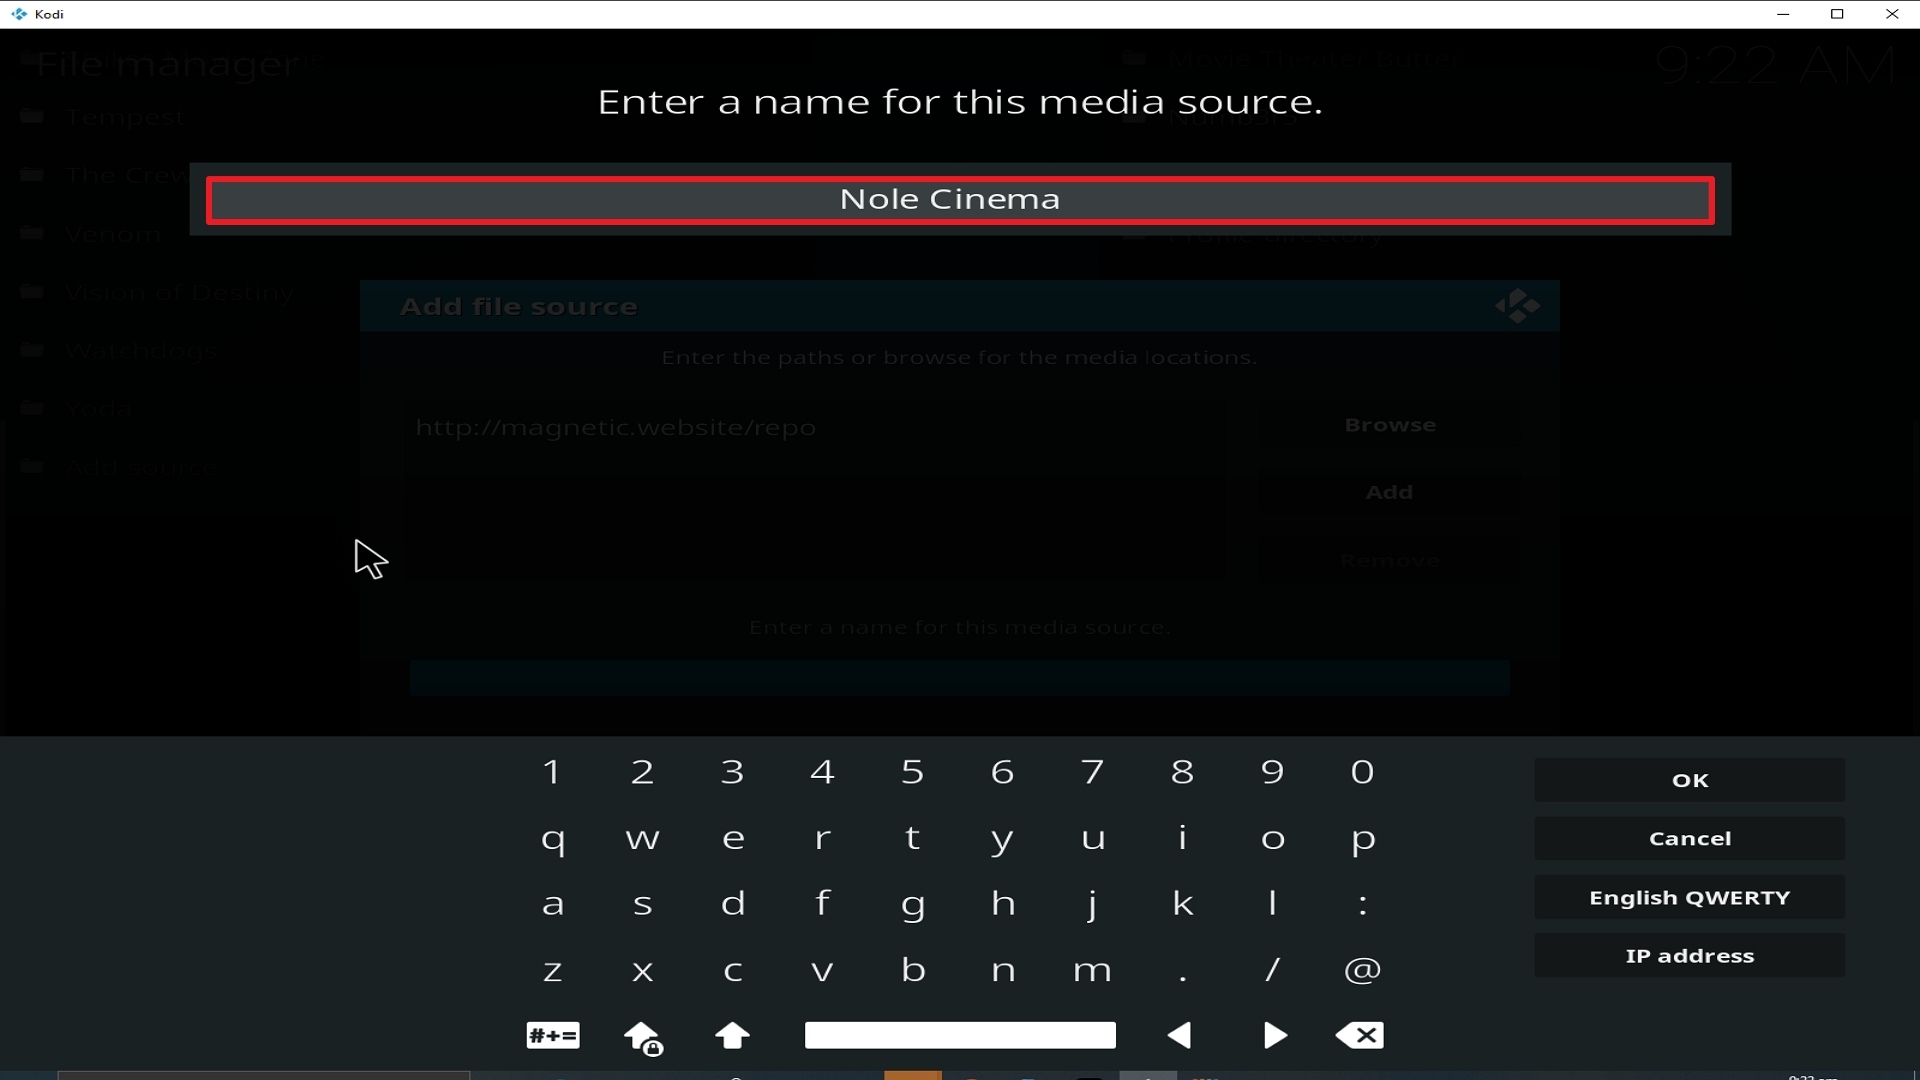
12. Name is Halow TV (this part isn’t critical as long as you remember the name).

Step 12 Installing Halow TV addon on Kodi


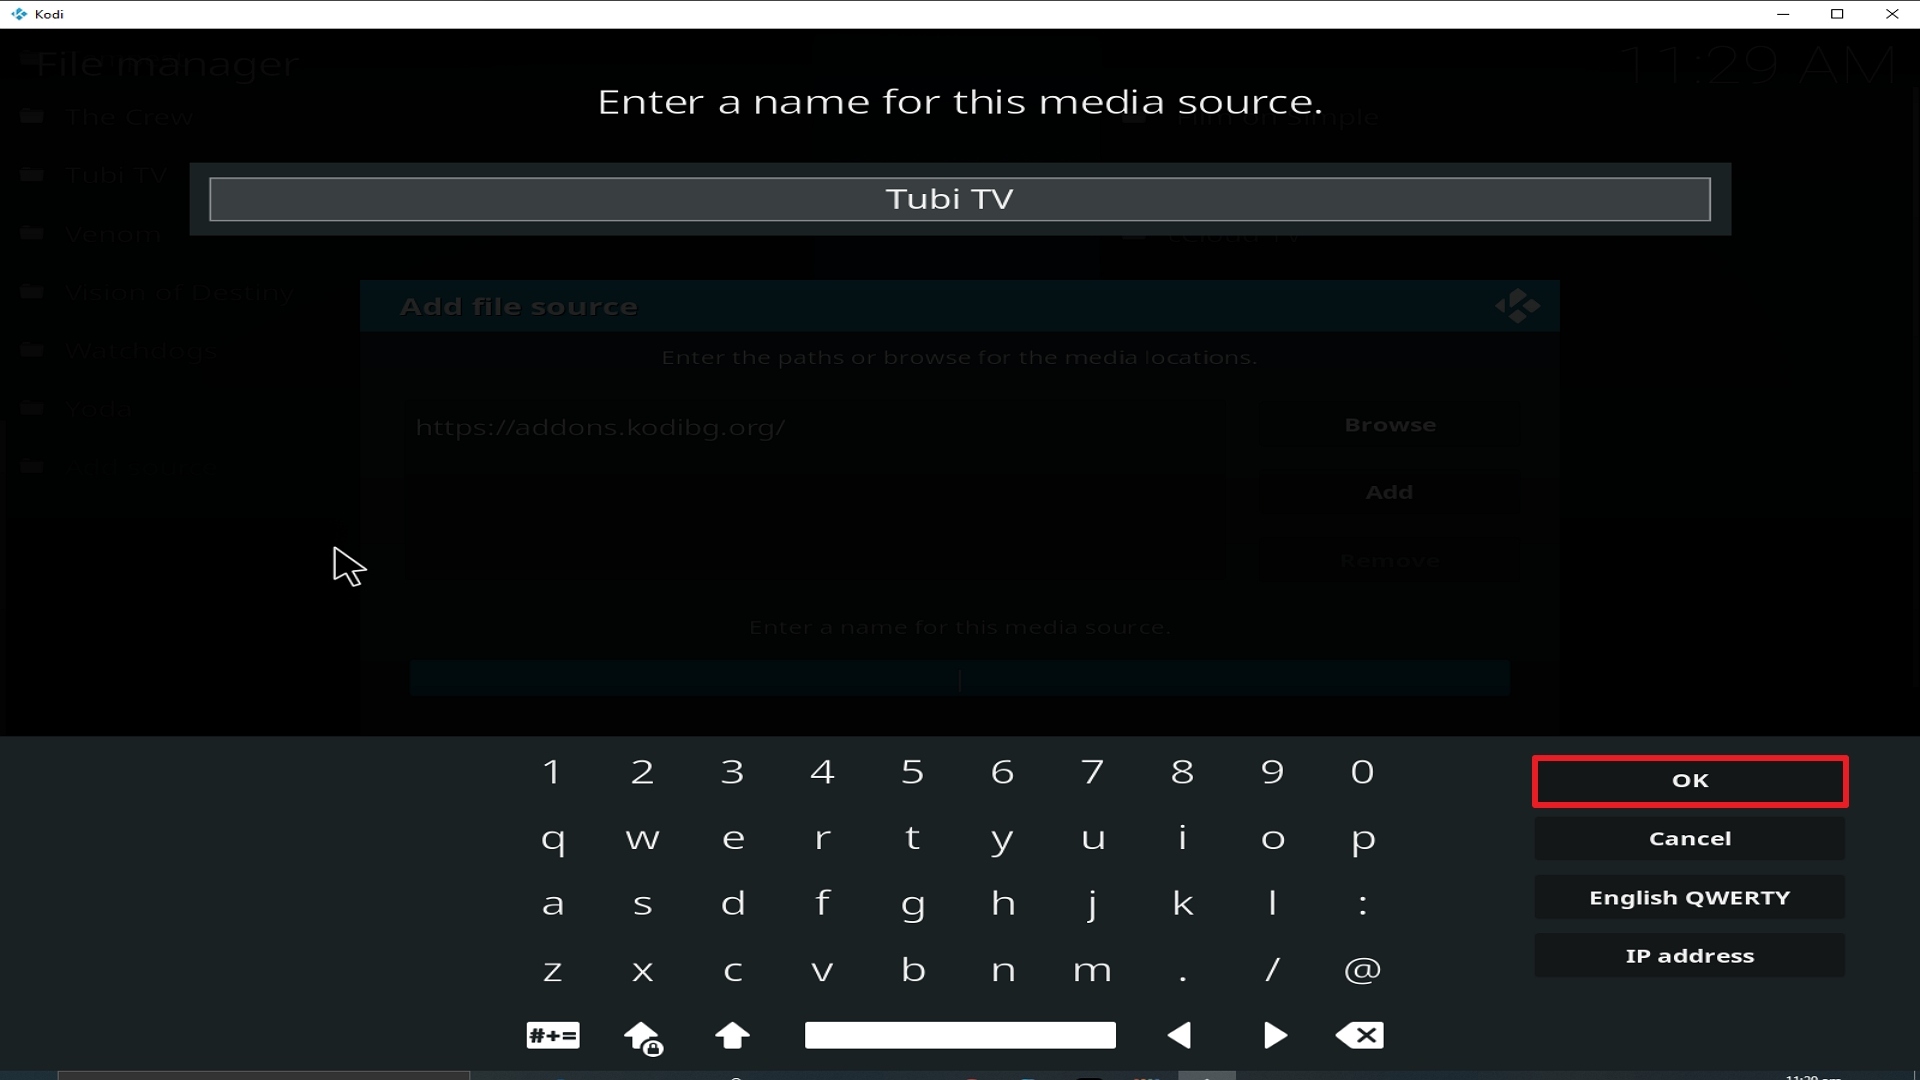
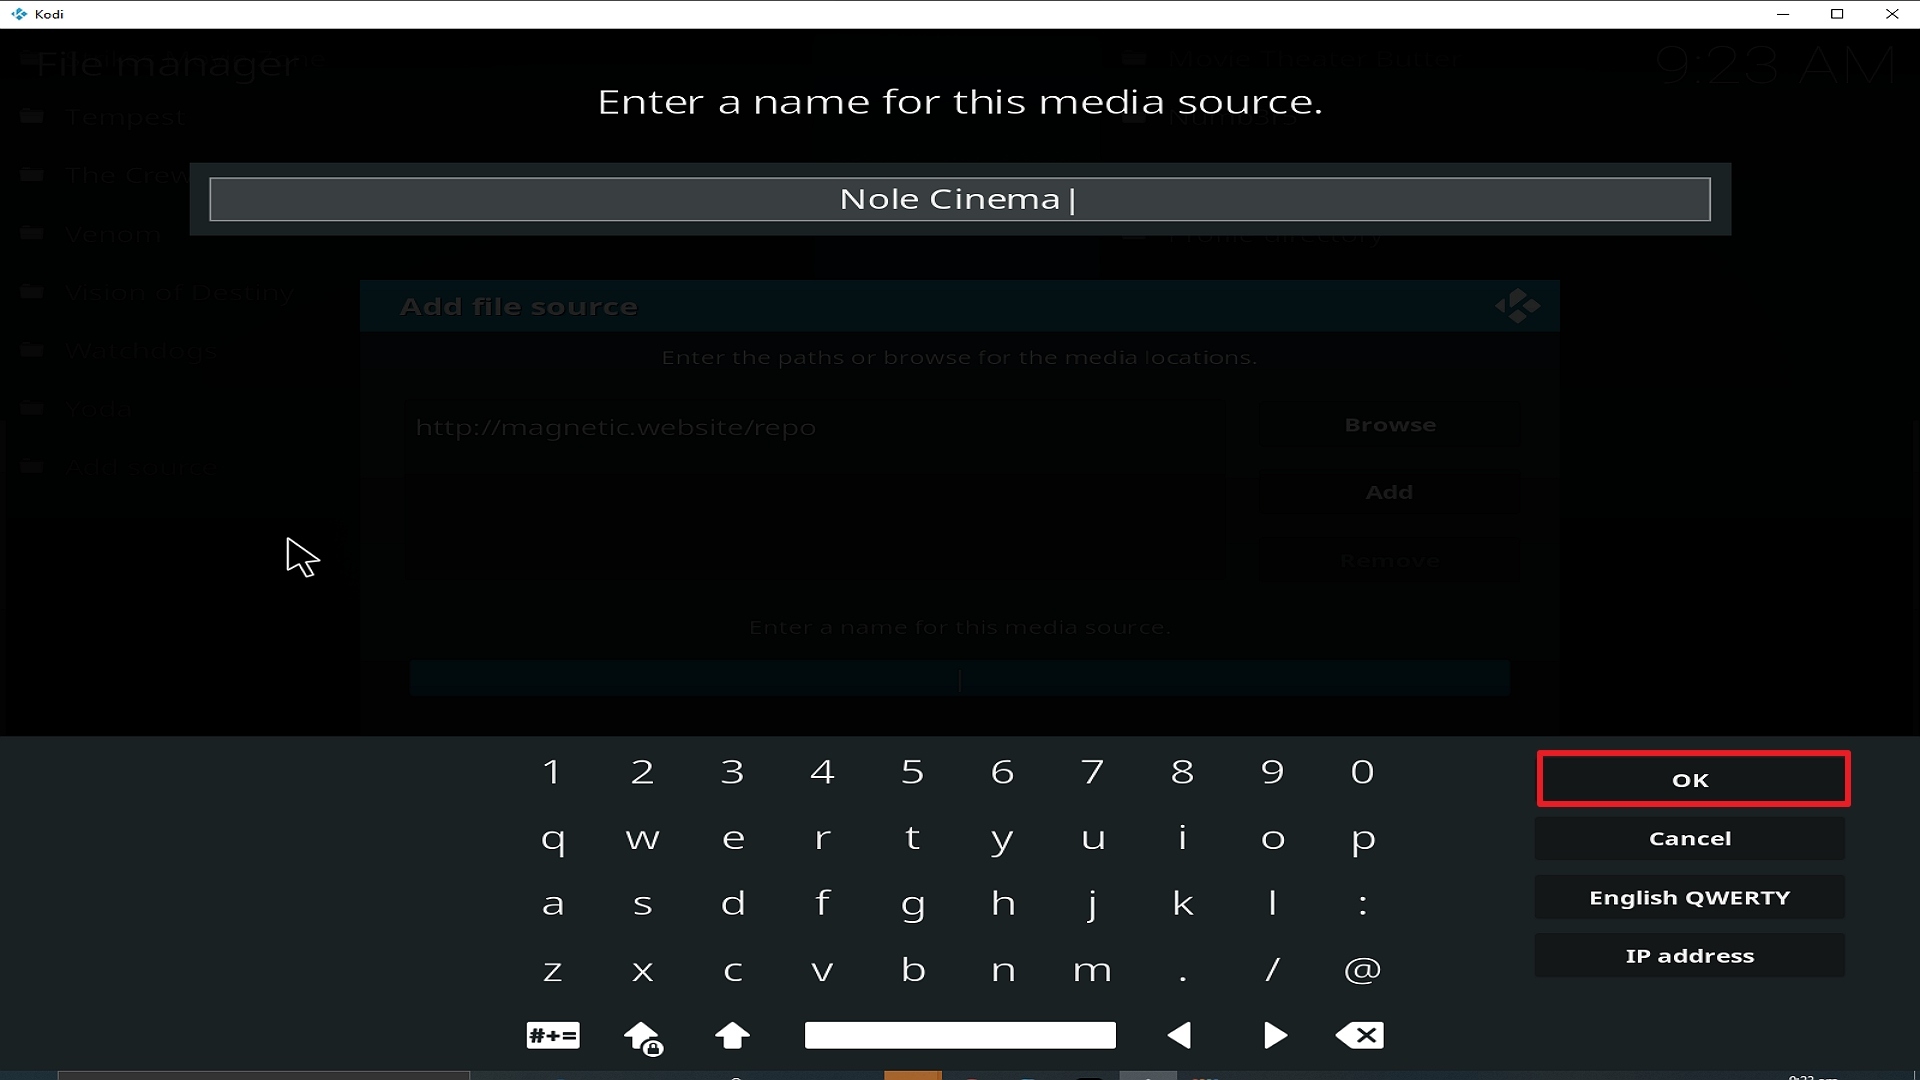
13. Click on OK.

Step 13 Installing Halow TV addon on Kodi


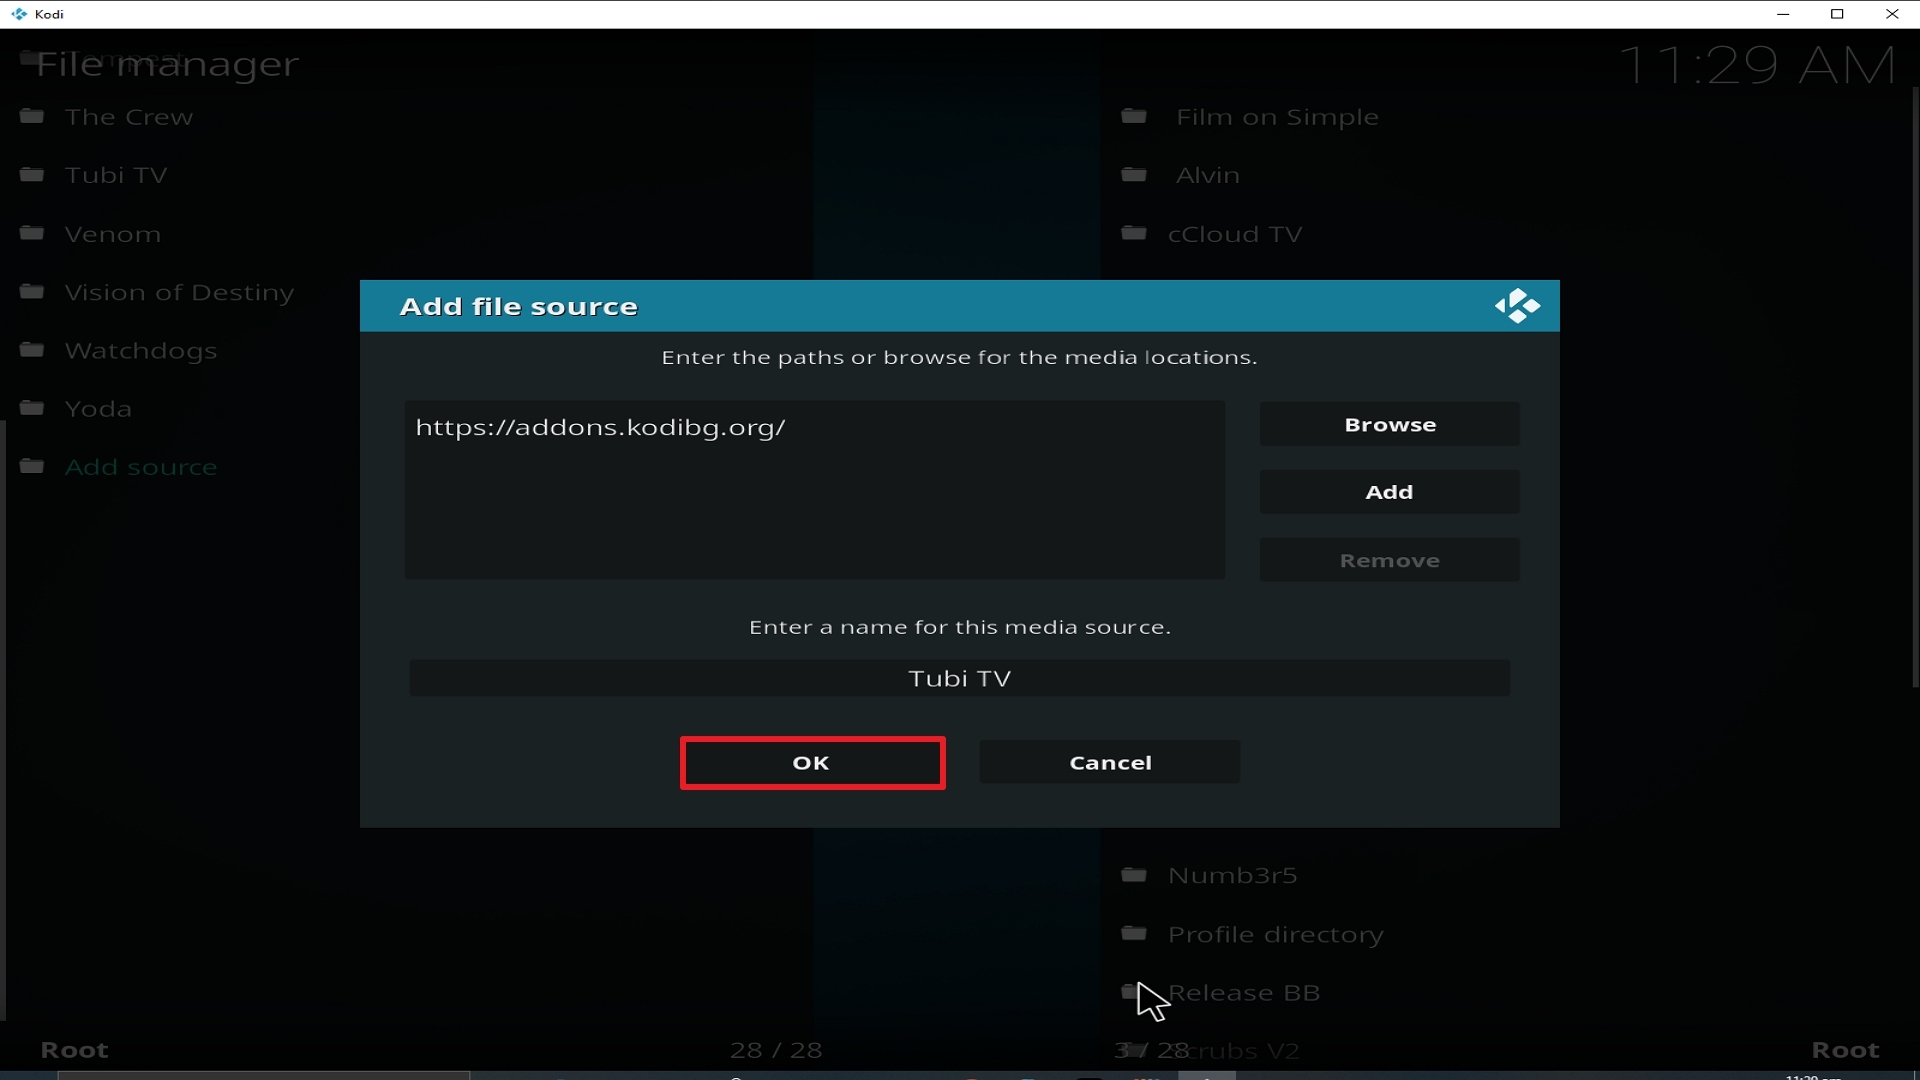
14. Click on OK.

Step 14 Installing Halow TV addon on Kodi


15. Take one step back and click on Add-ons.

Step 15 Installing Halow TV addon on Kodi


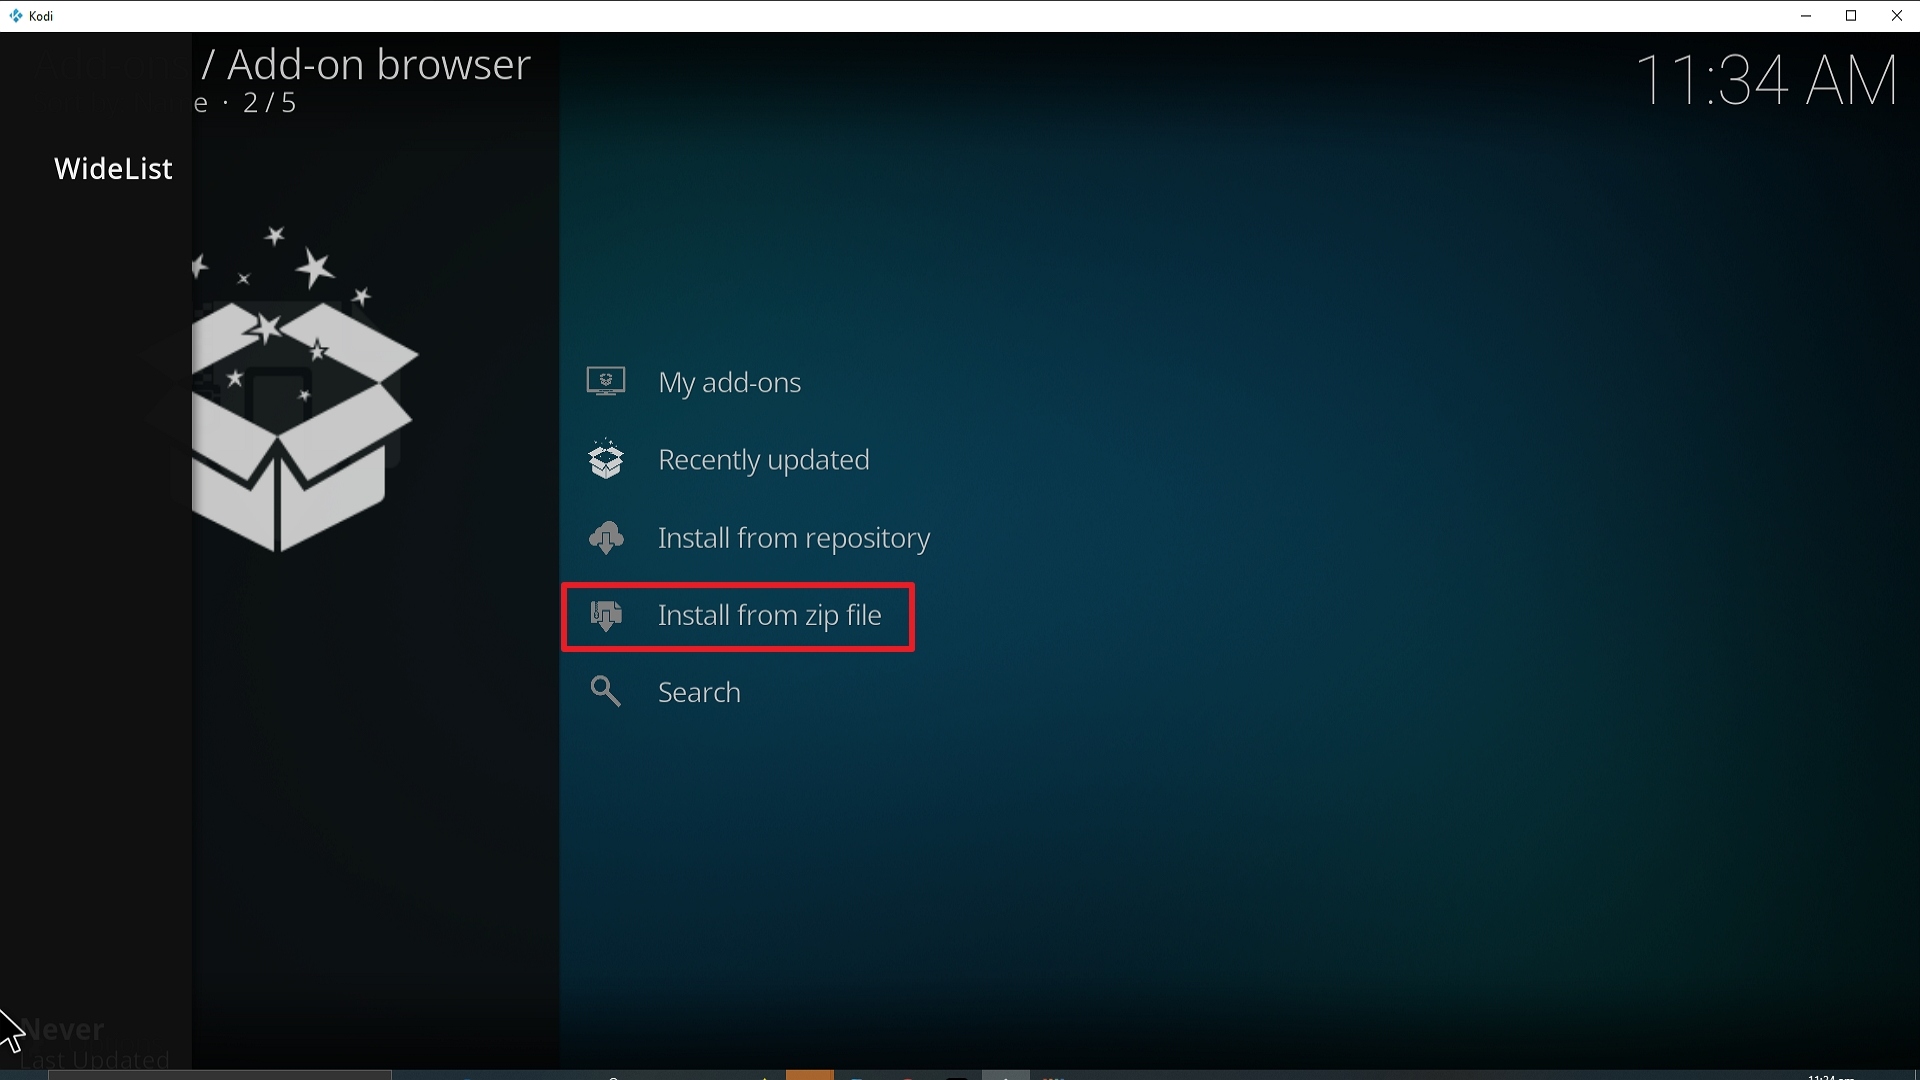
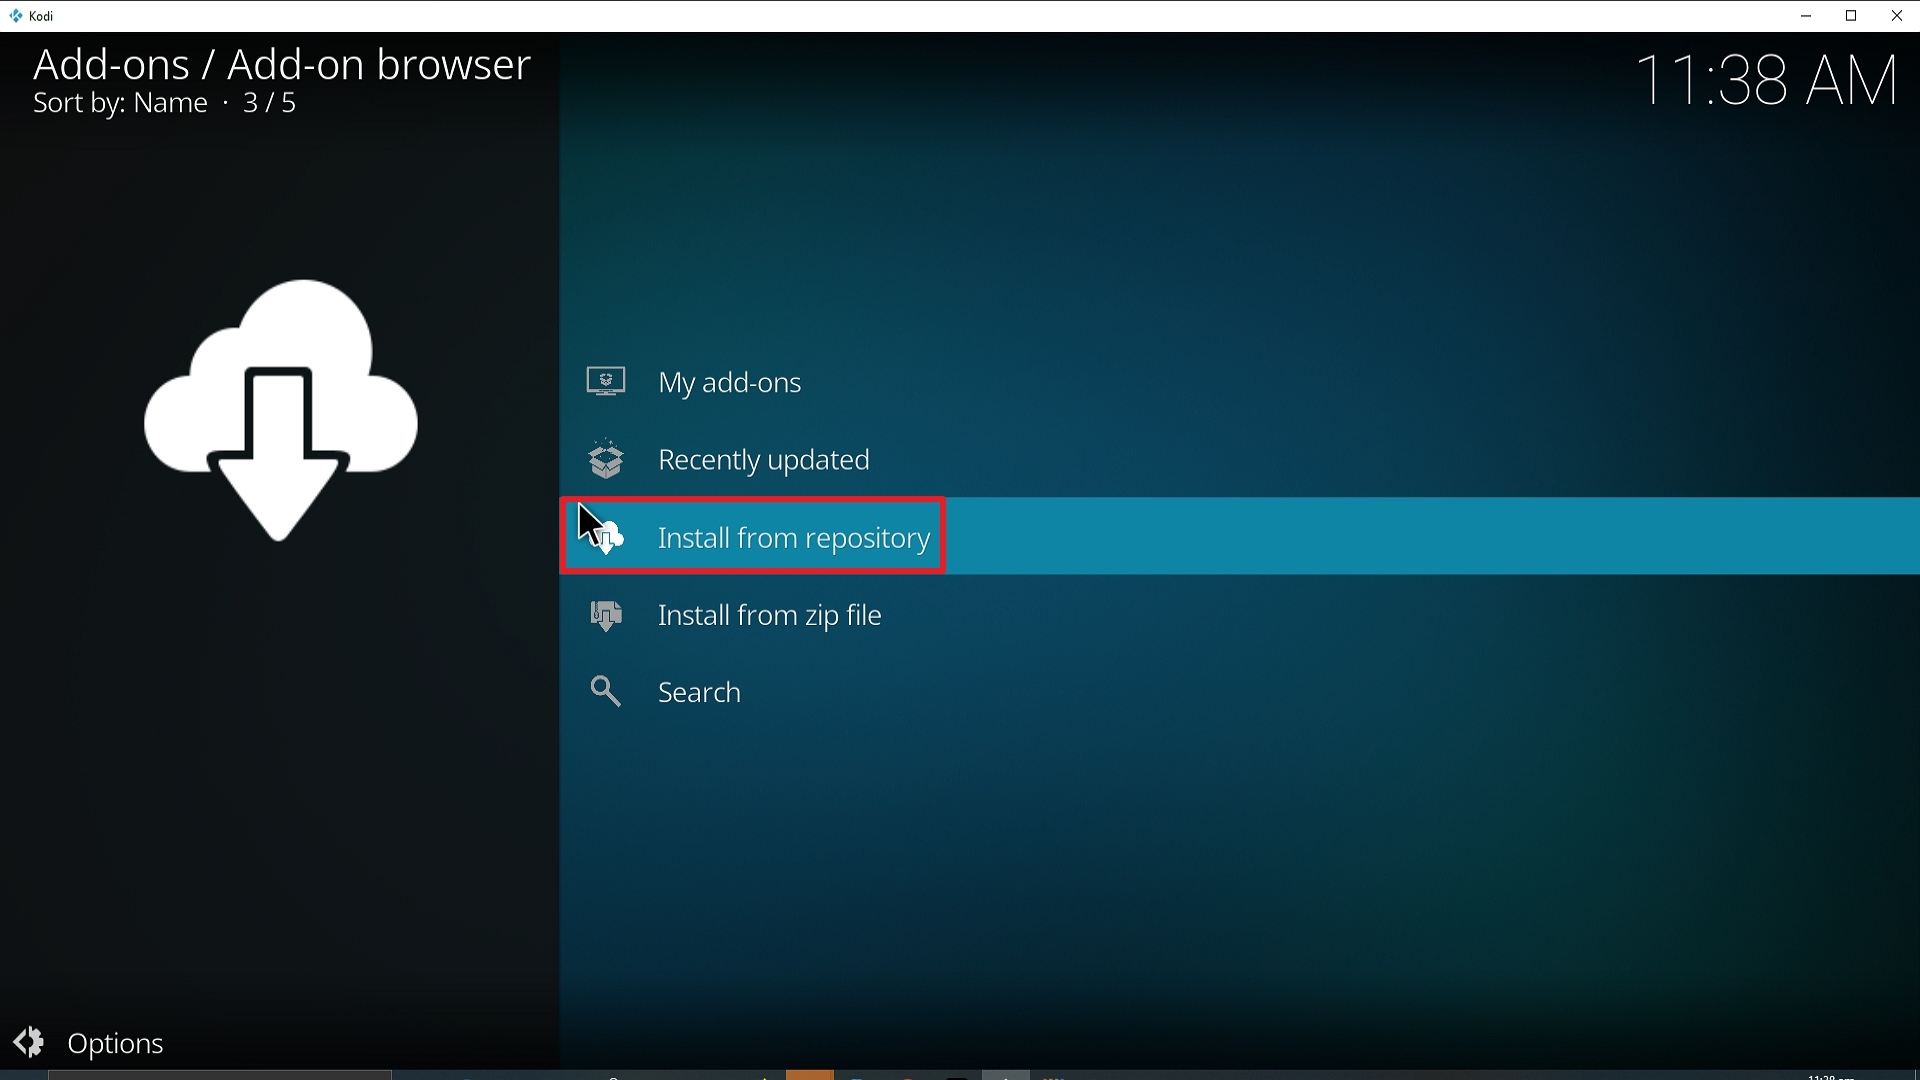
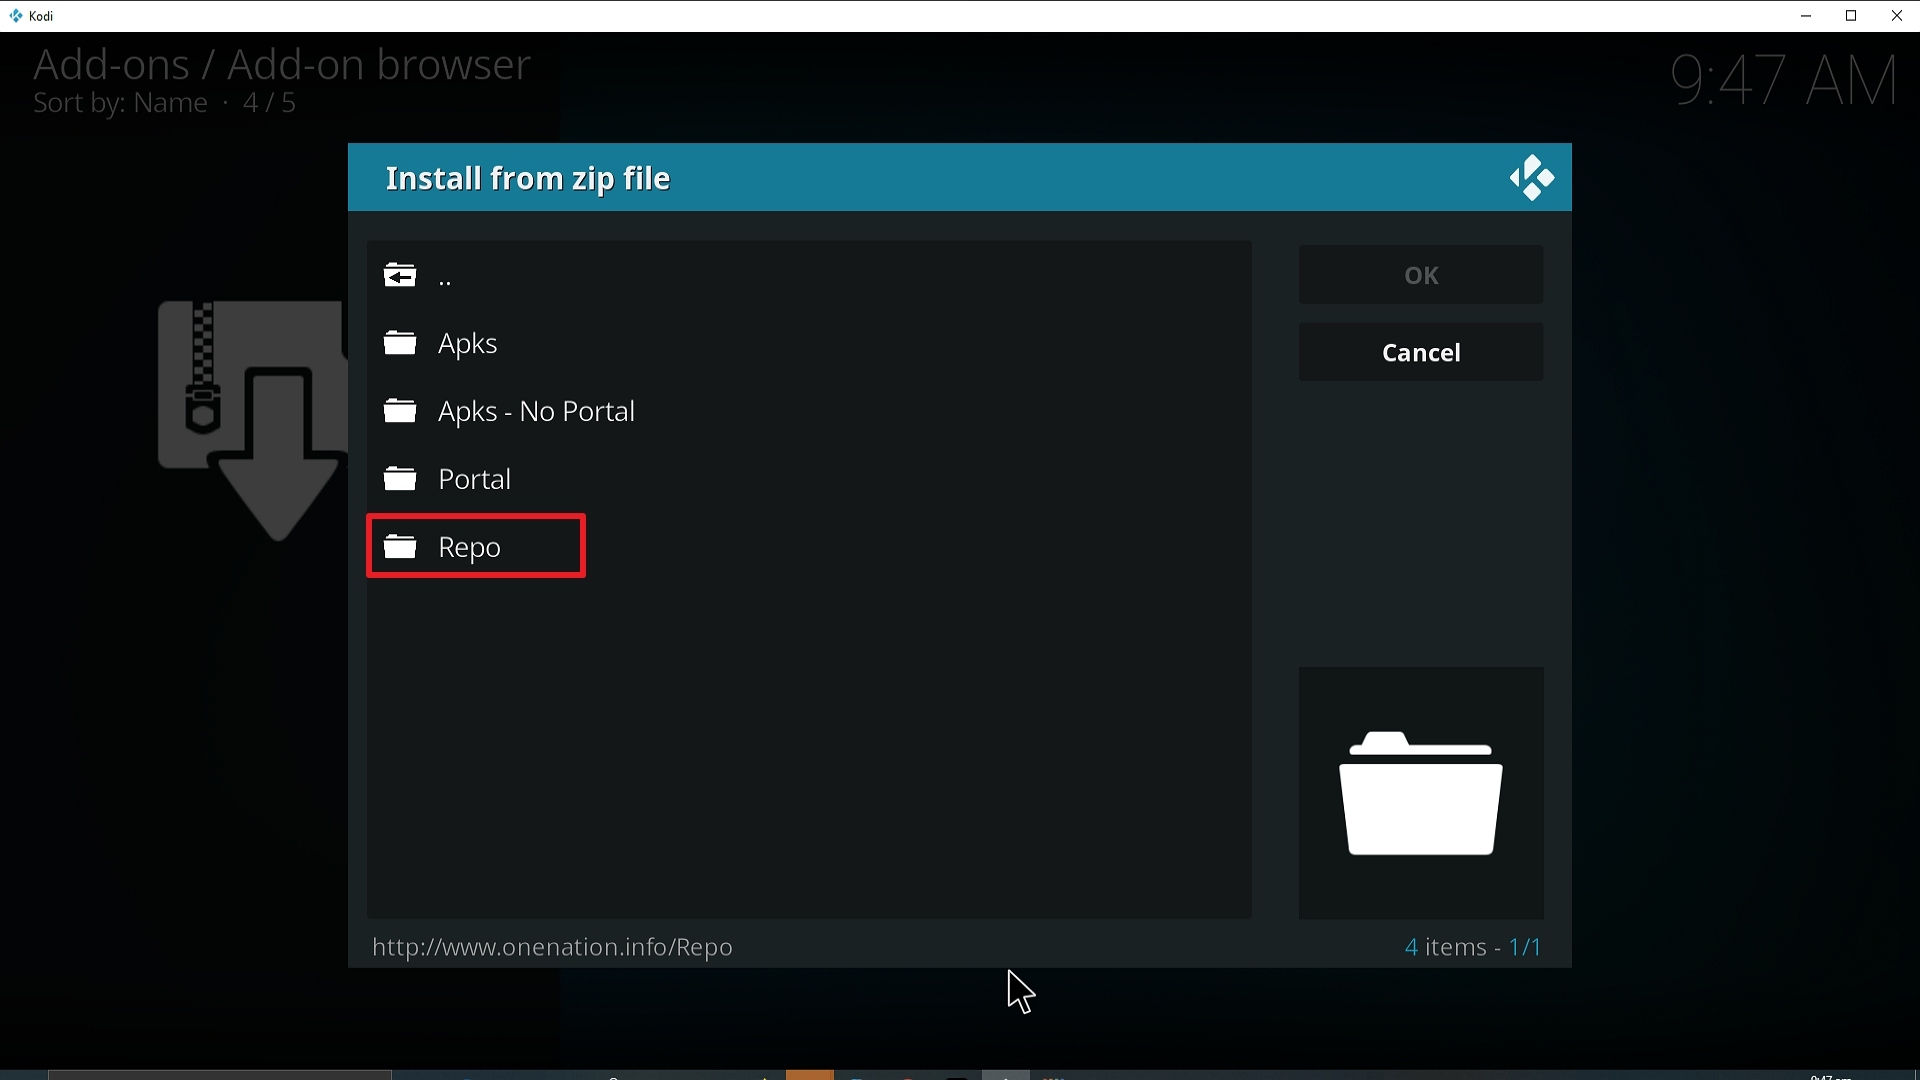
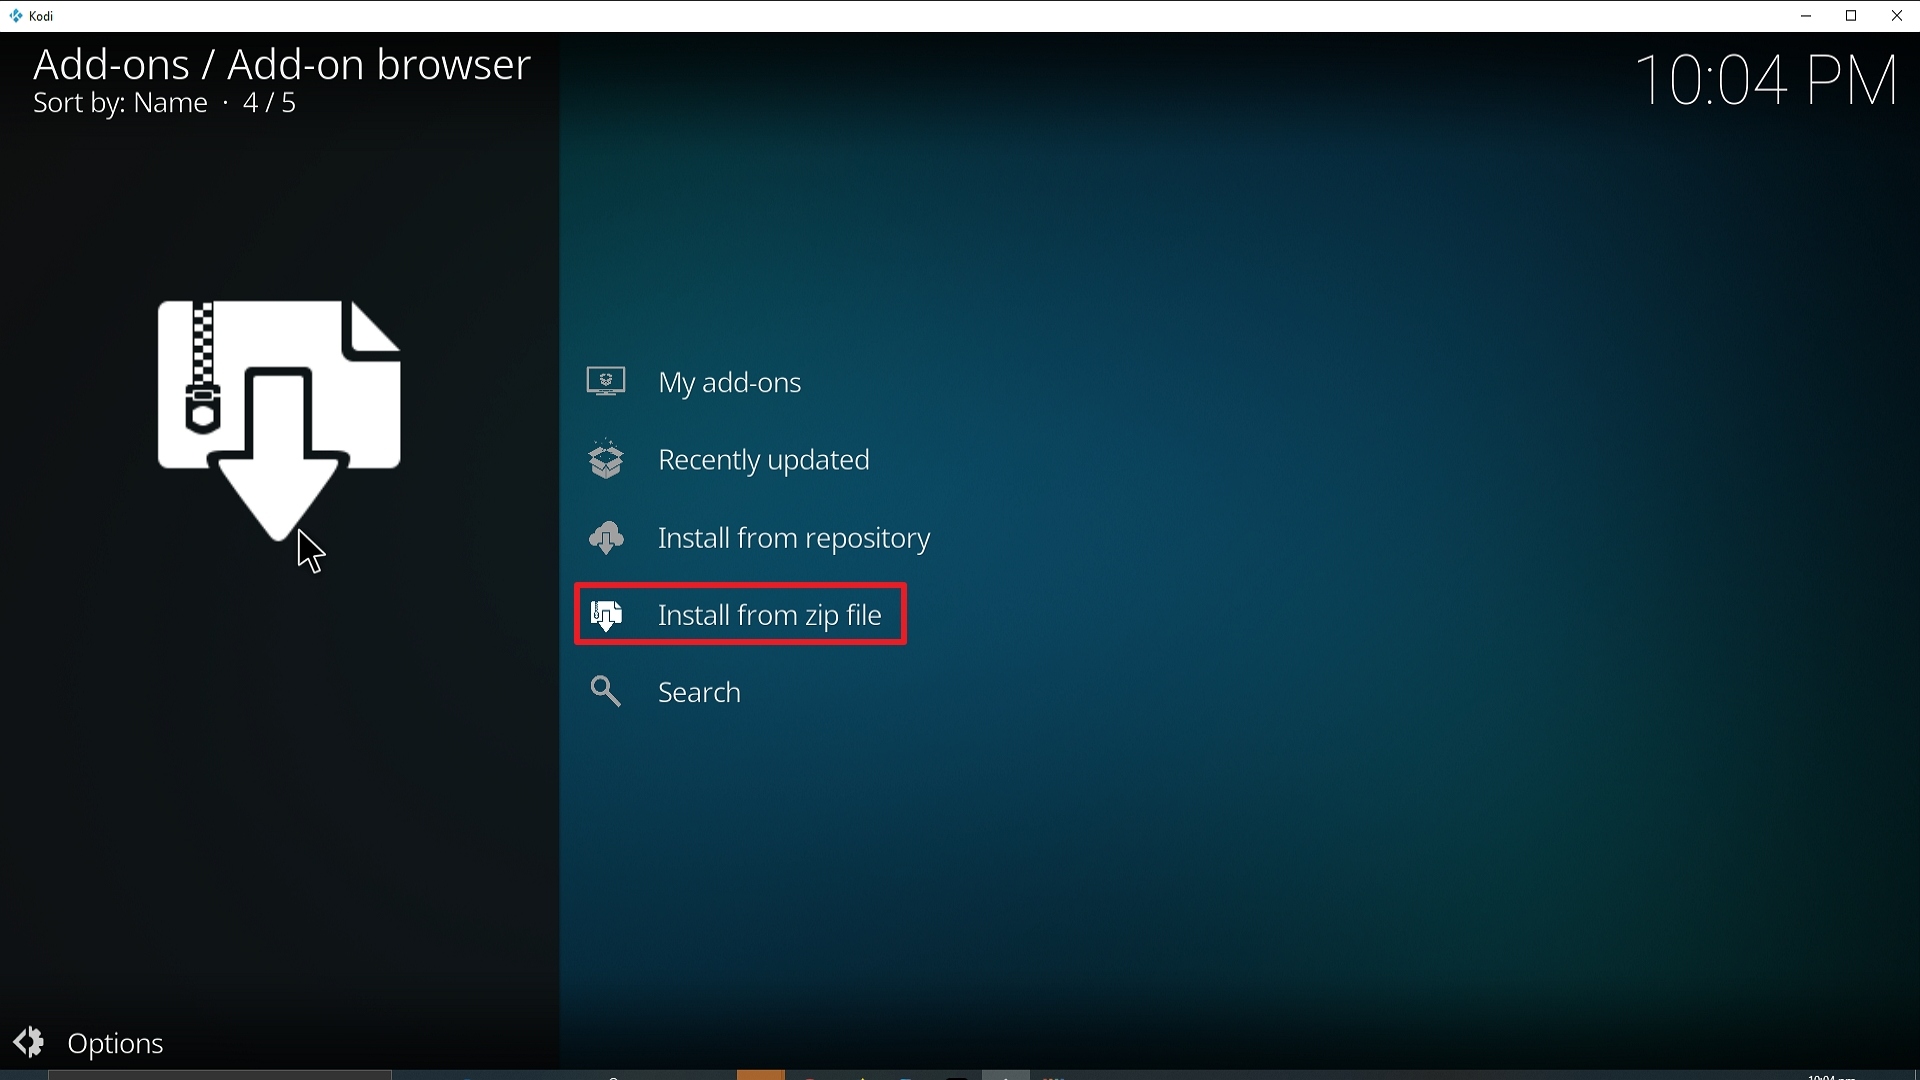
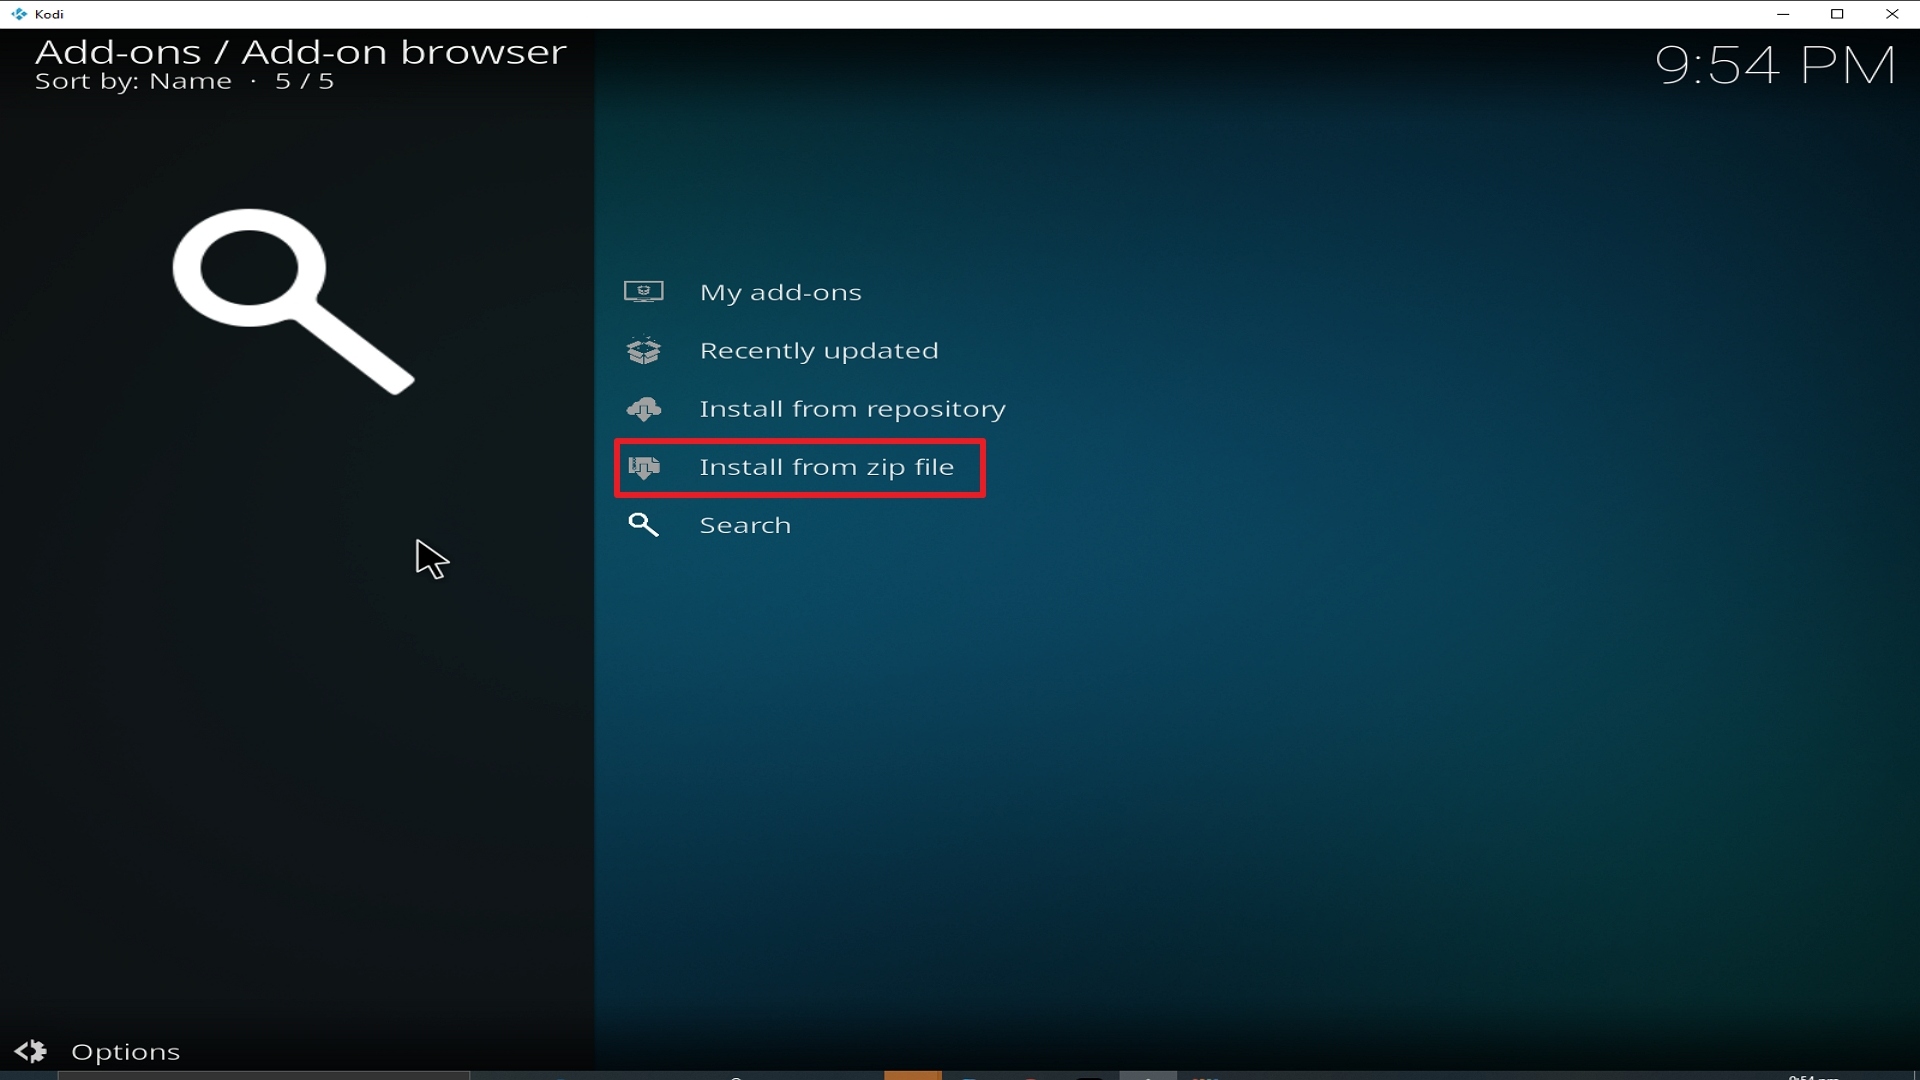
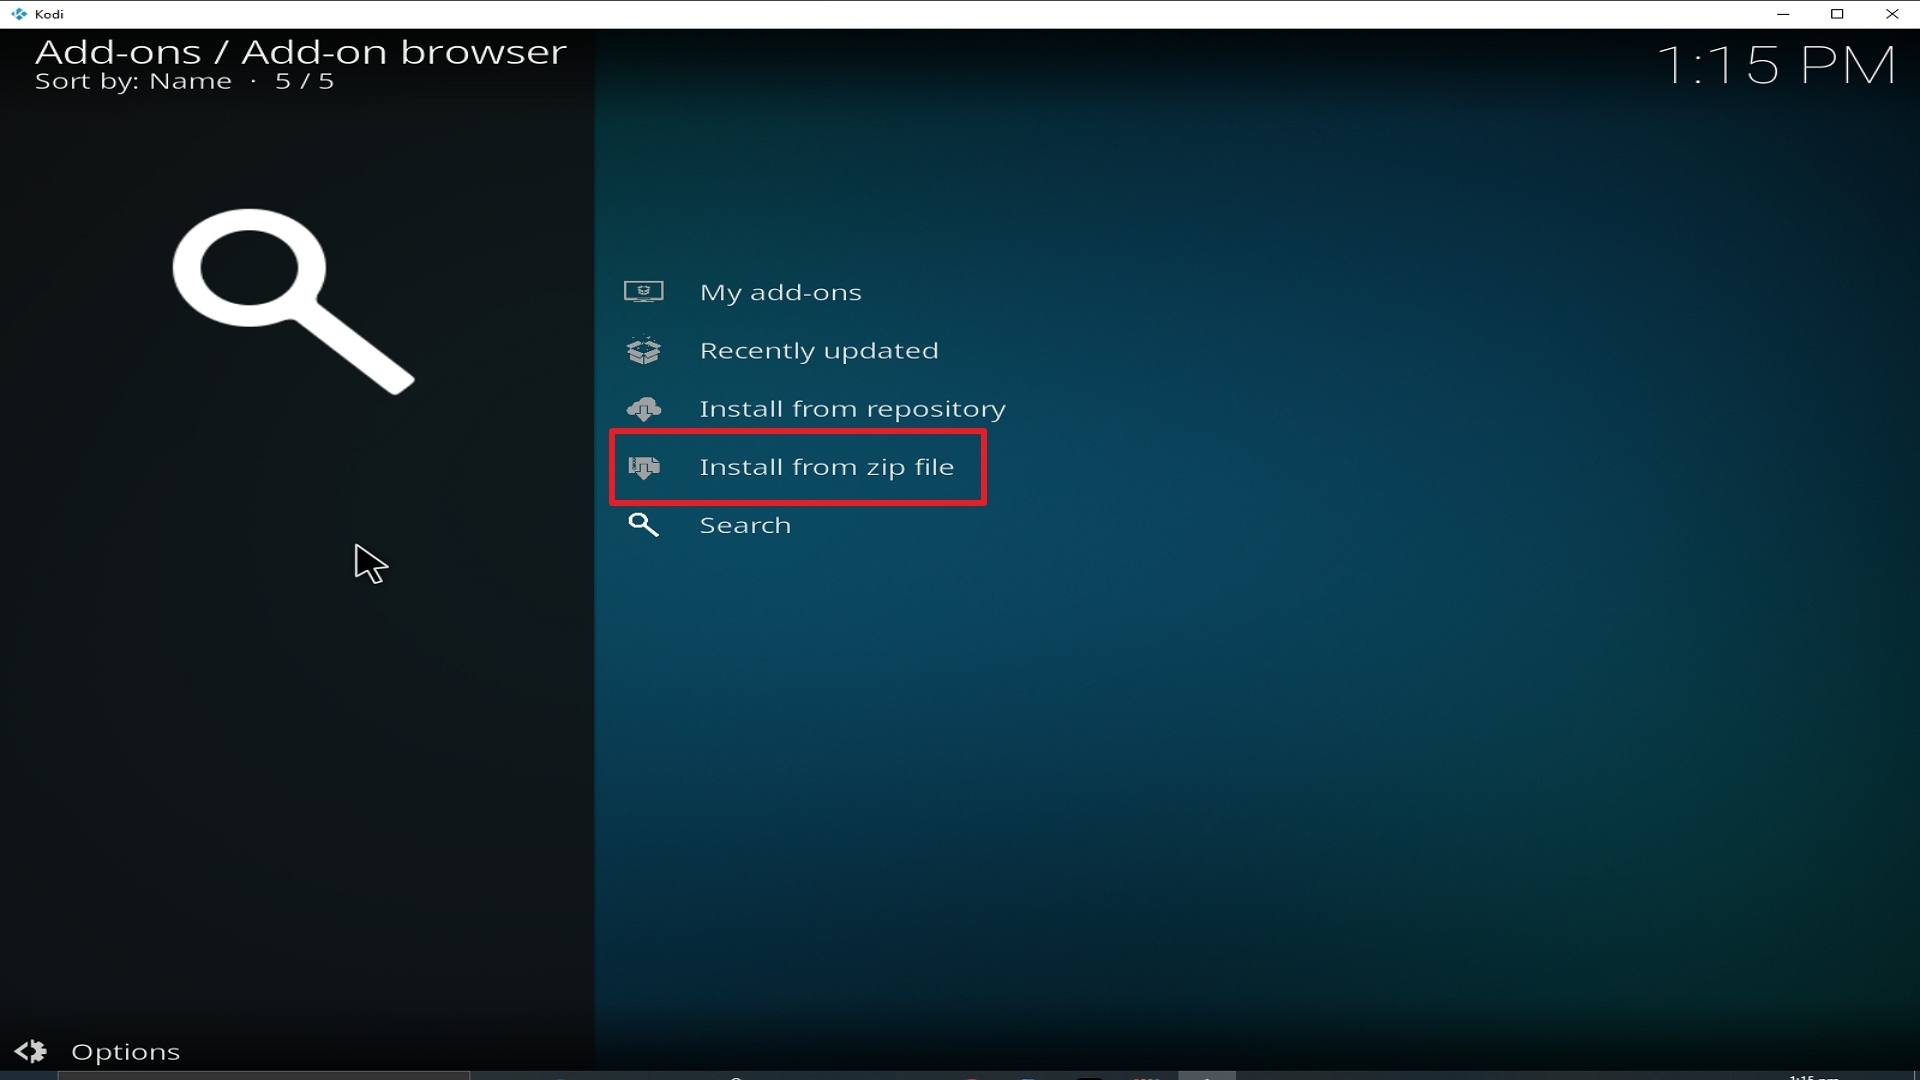
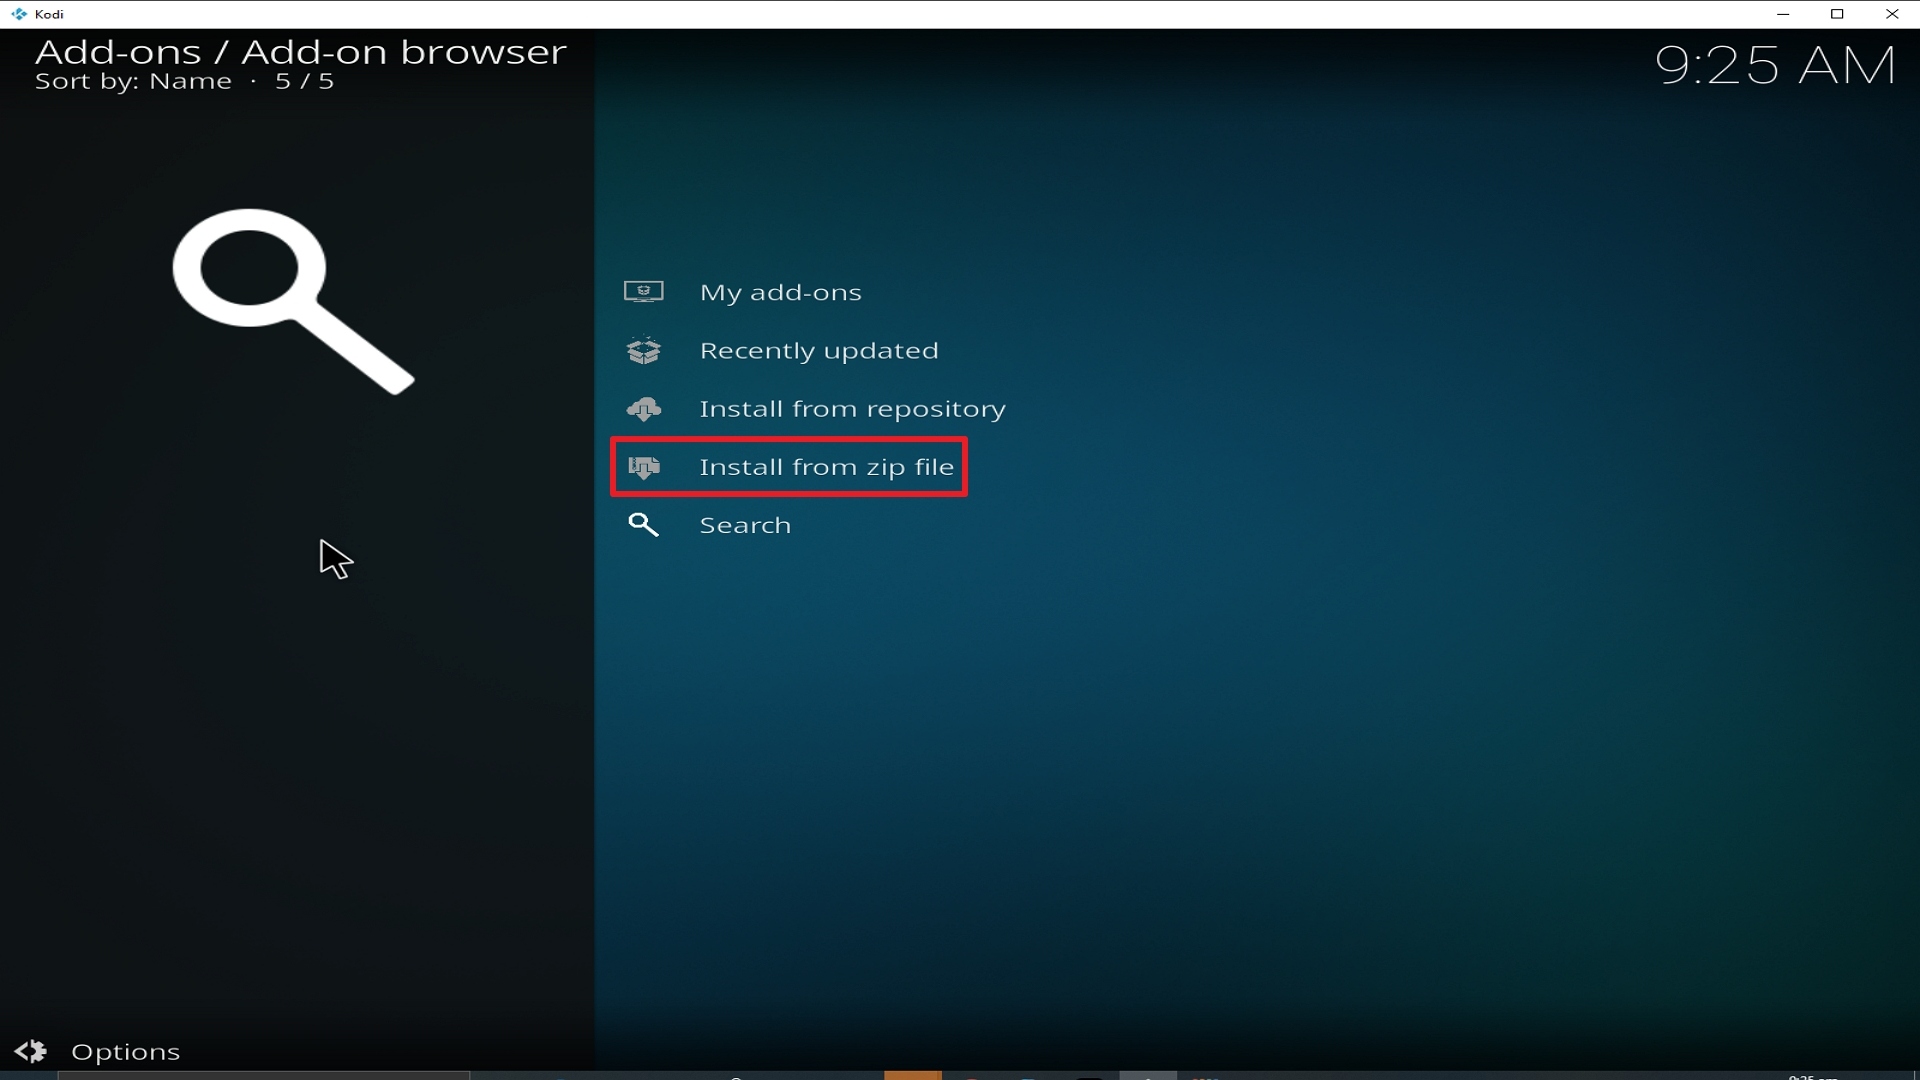
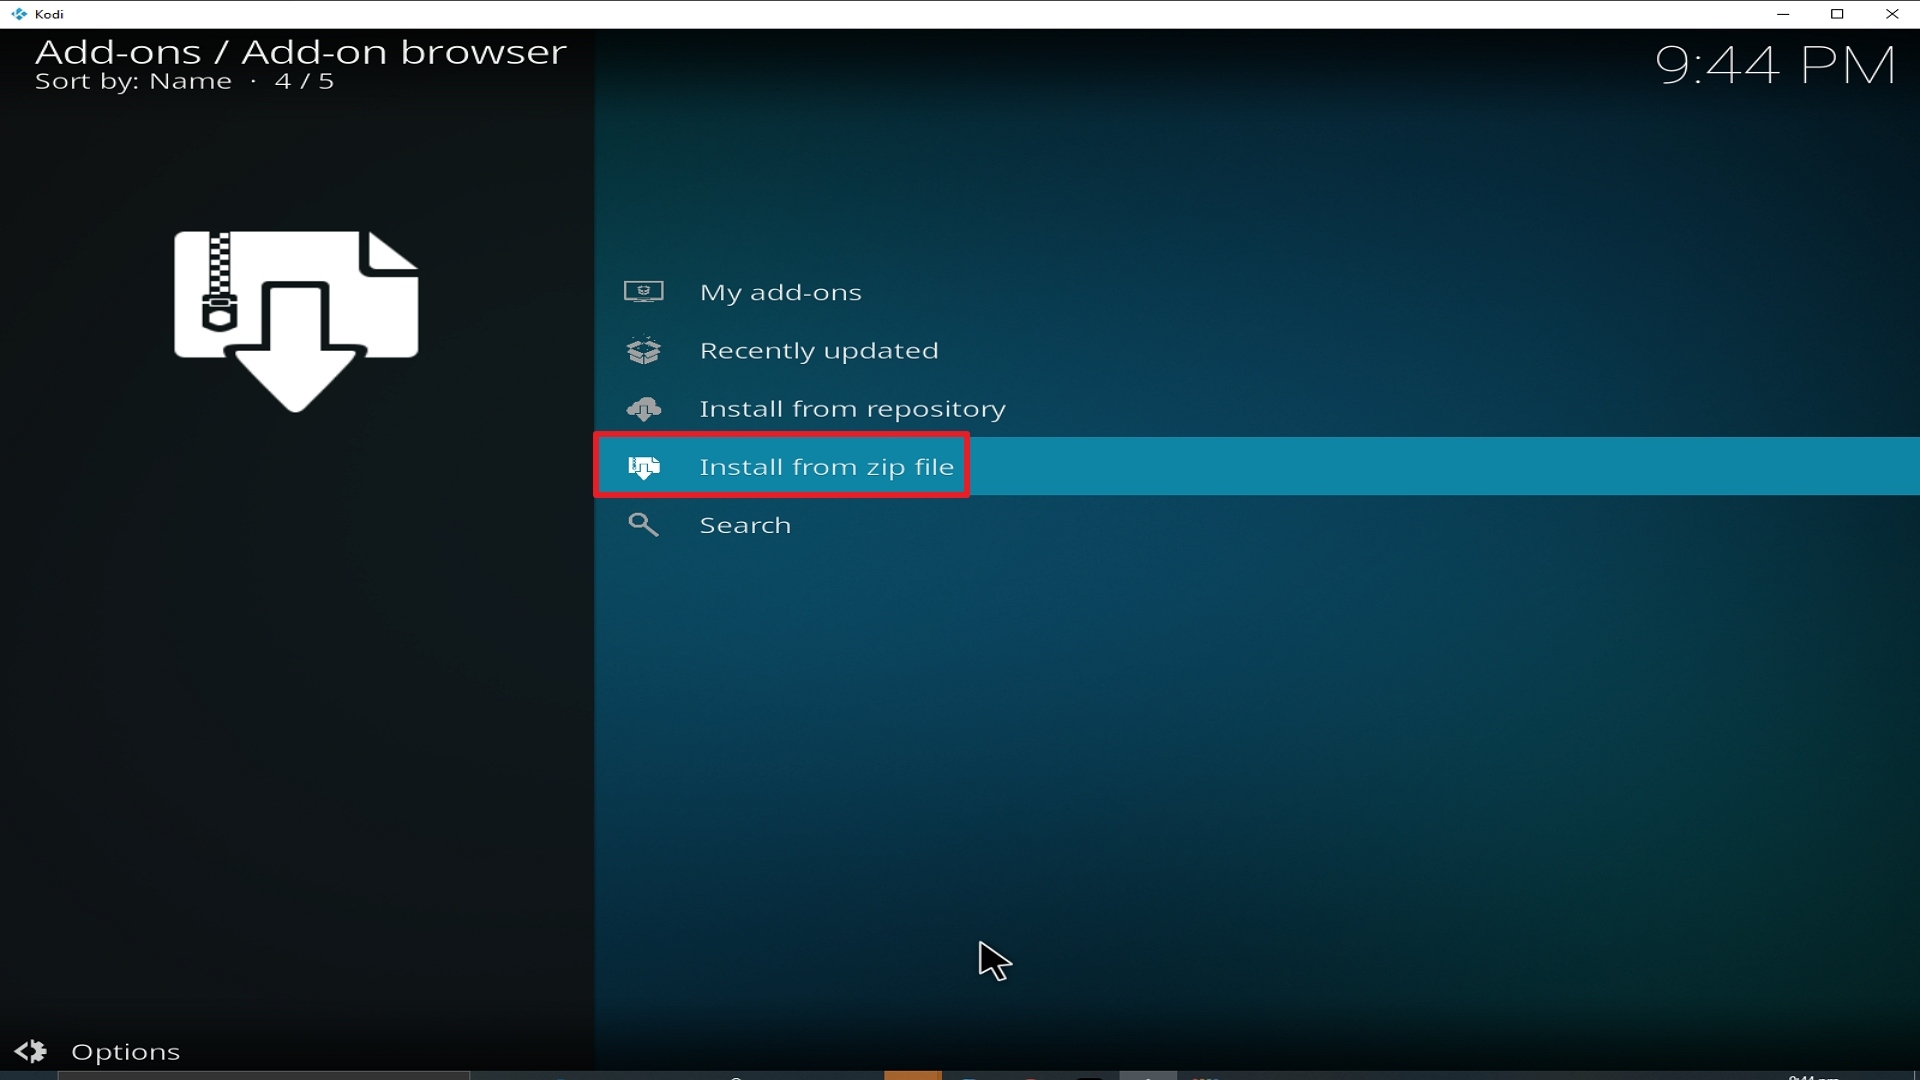
16. Select install from zip file.

Step 16 Installing Halow TV addon on Kodi


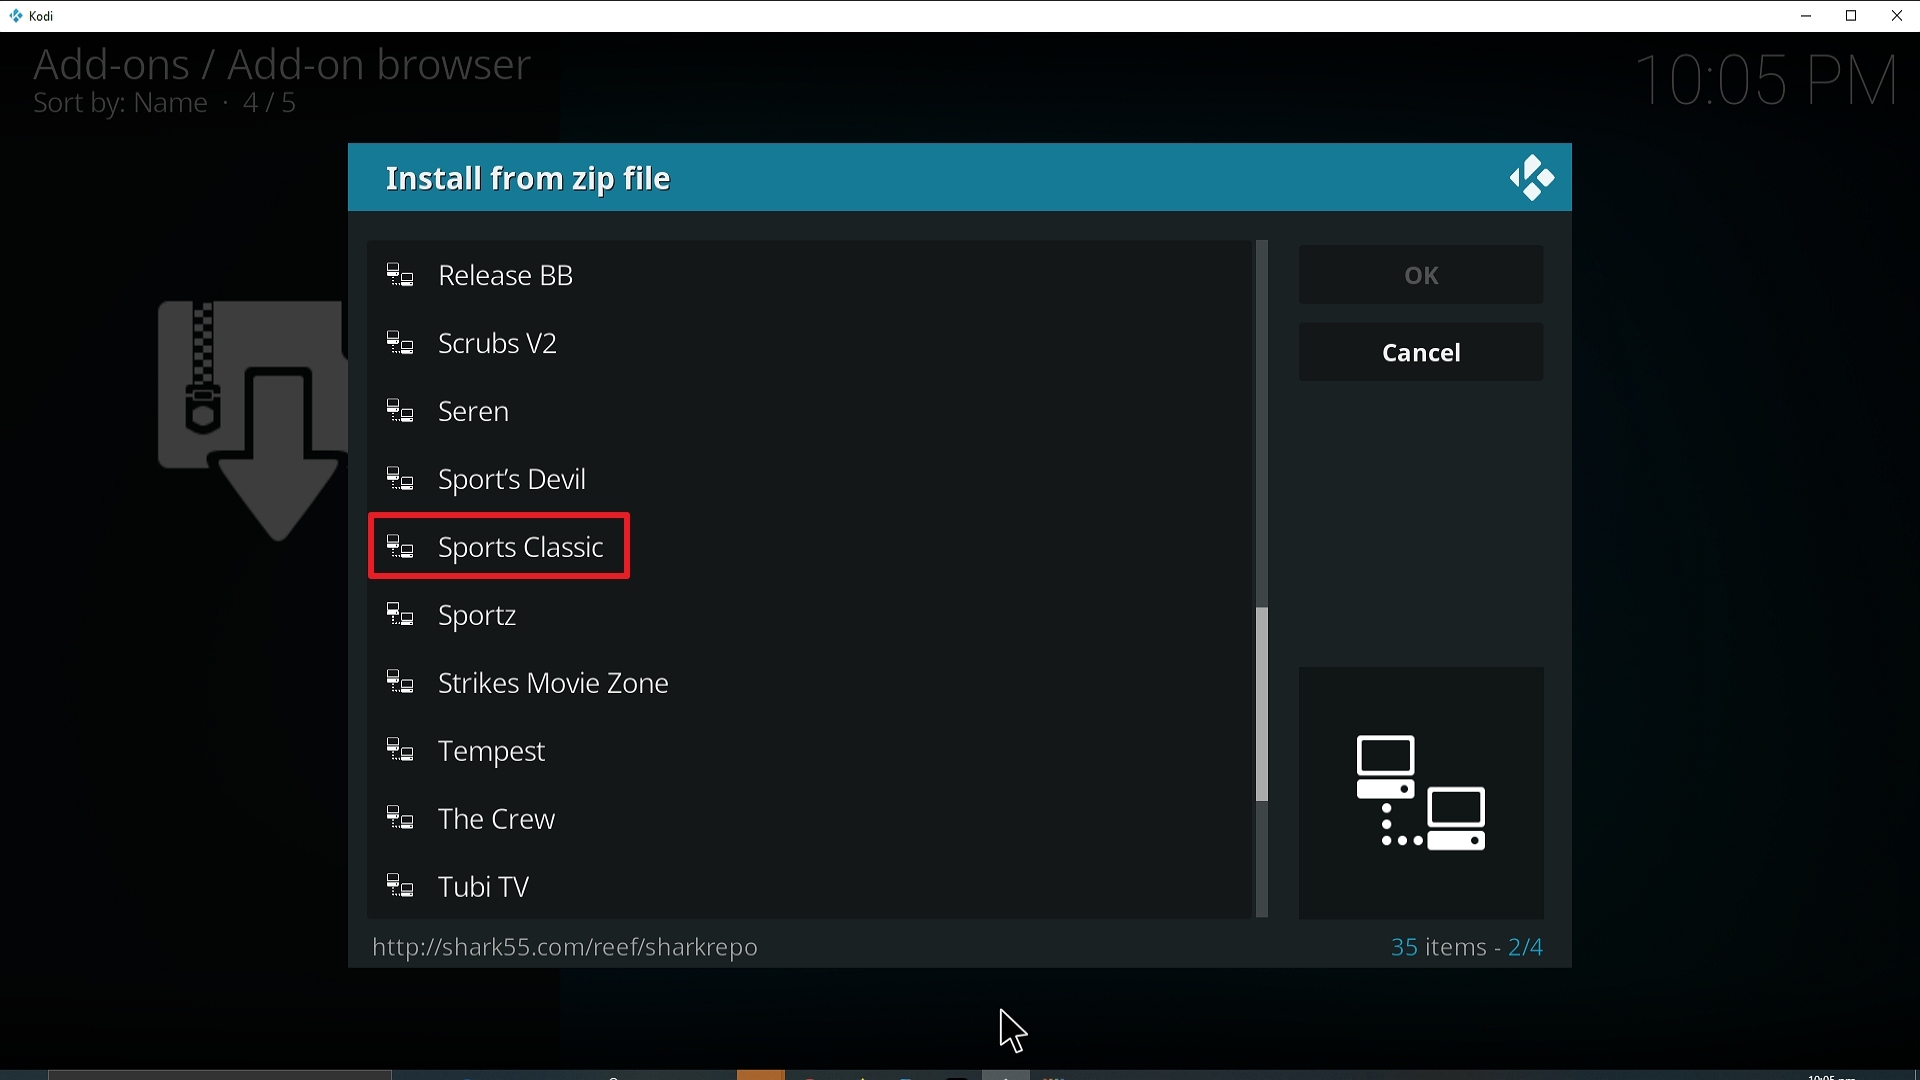
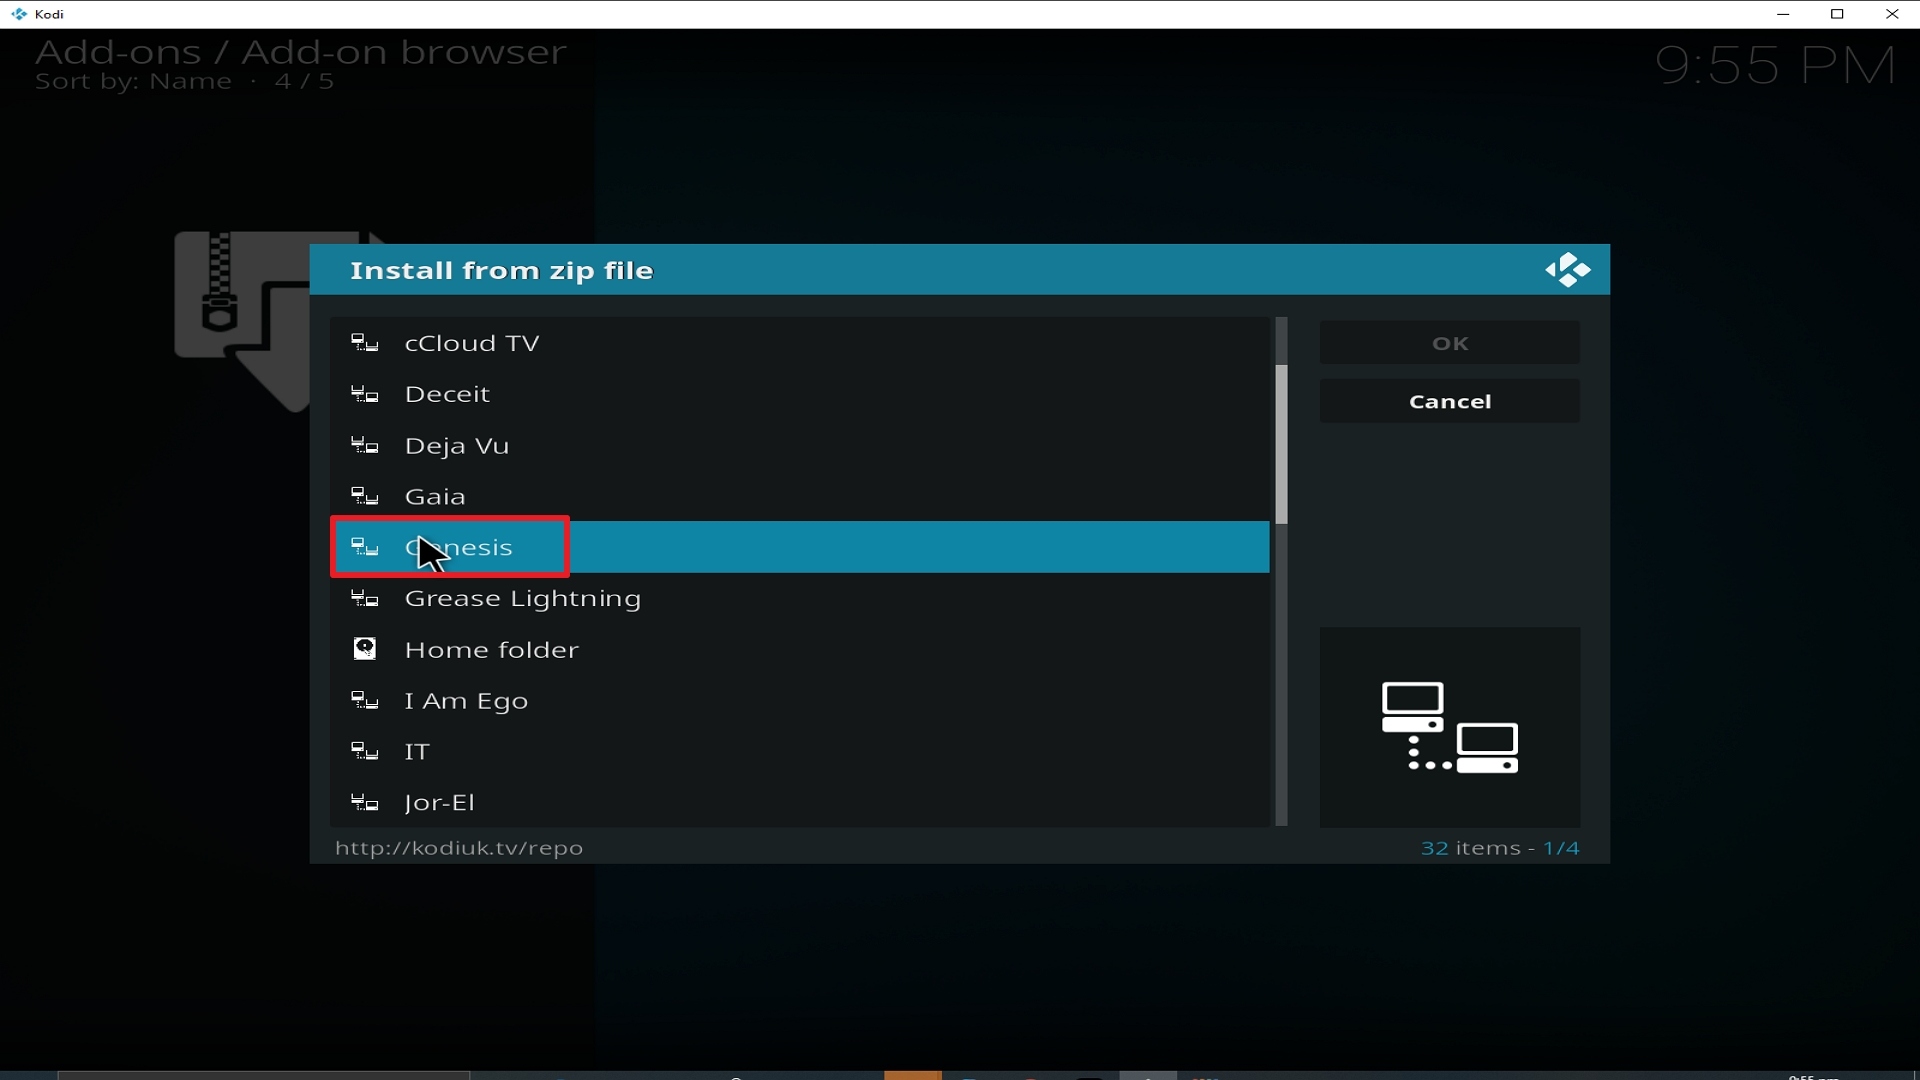
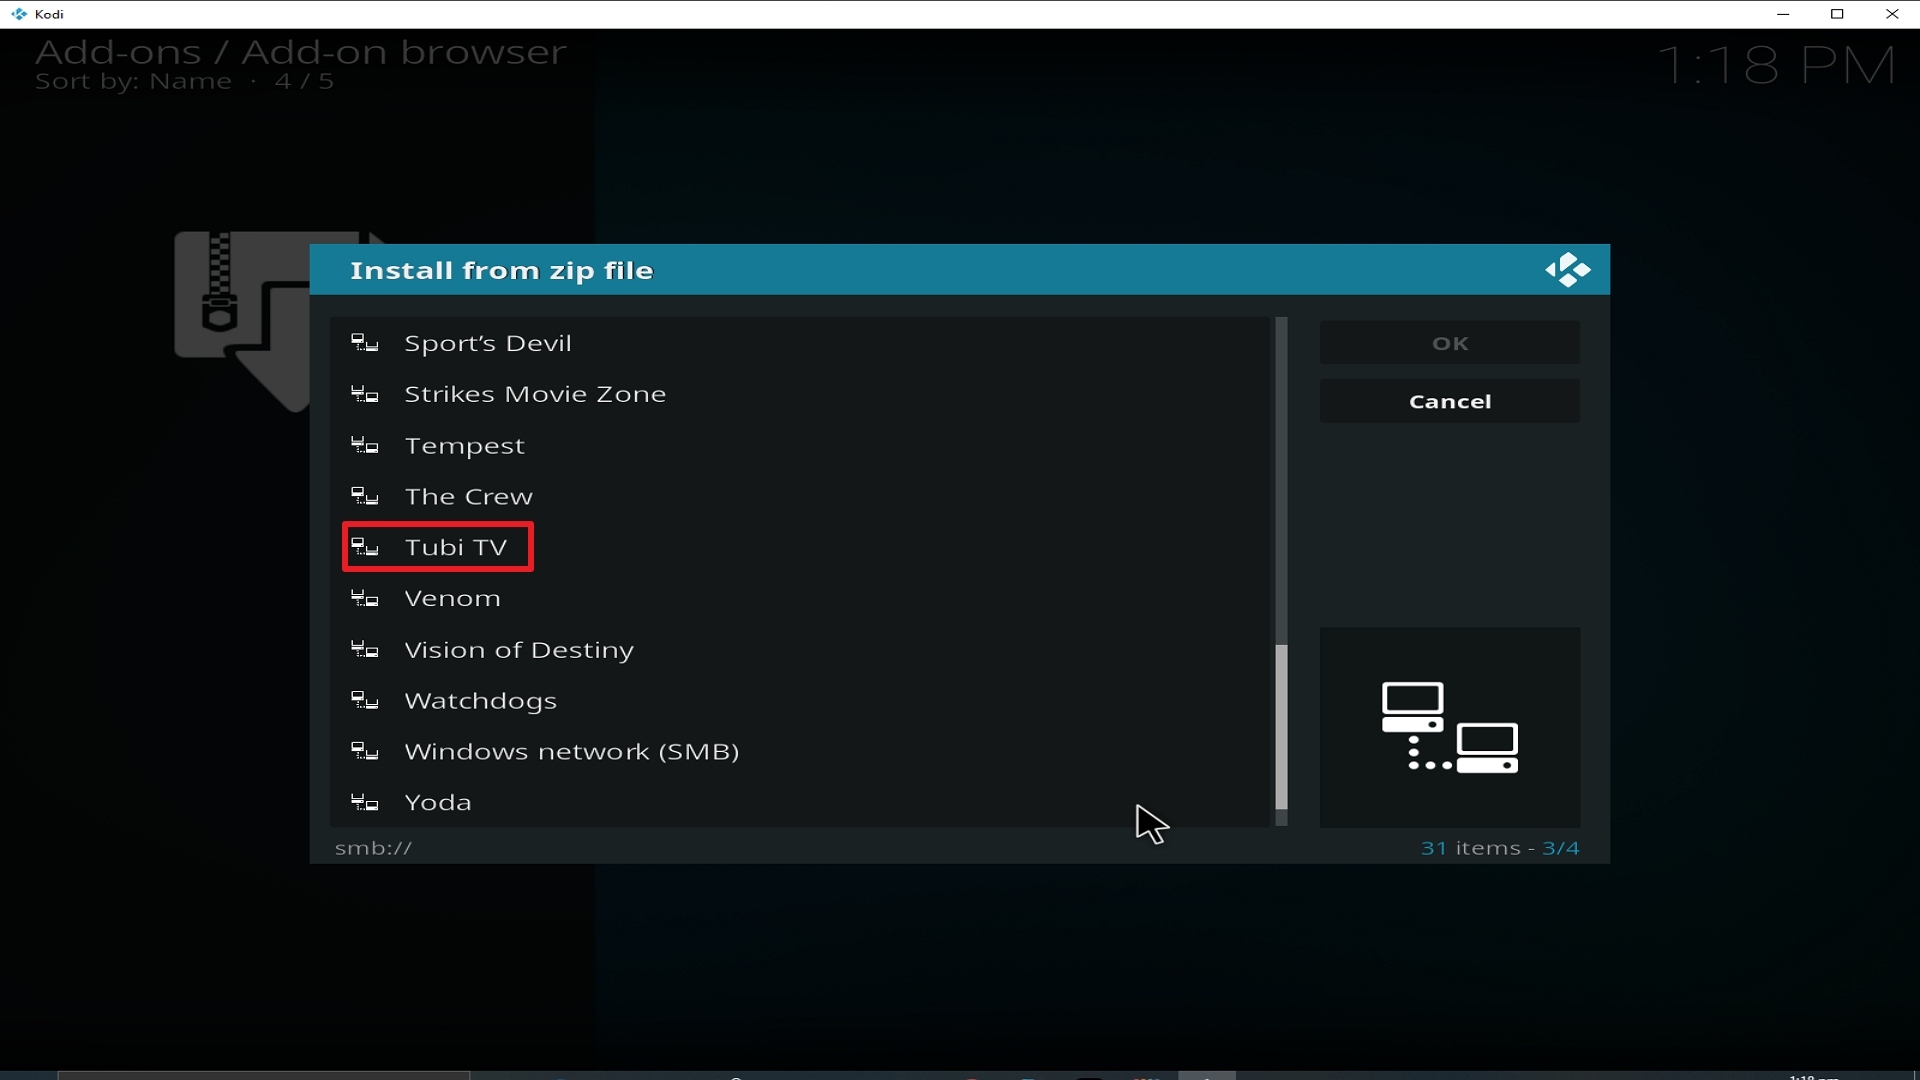
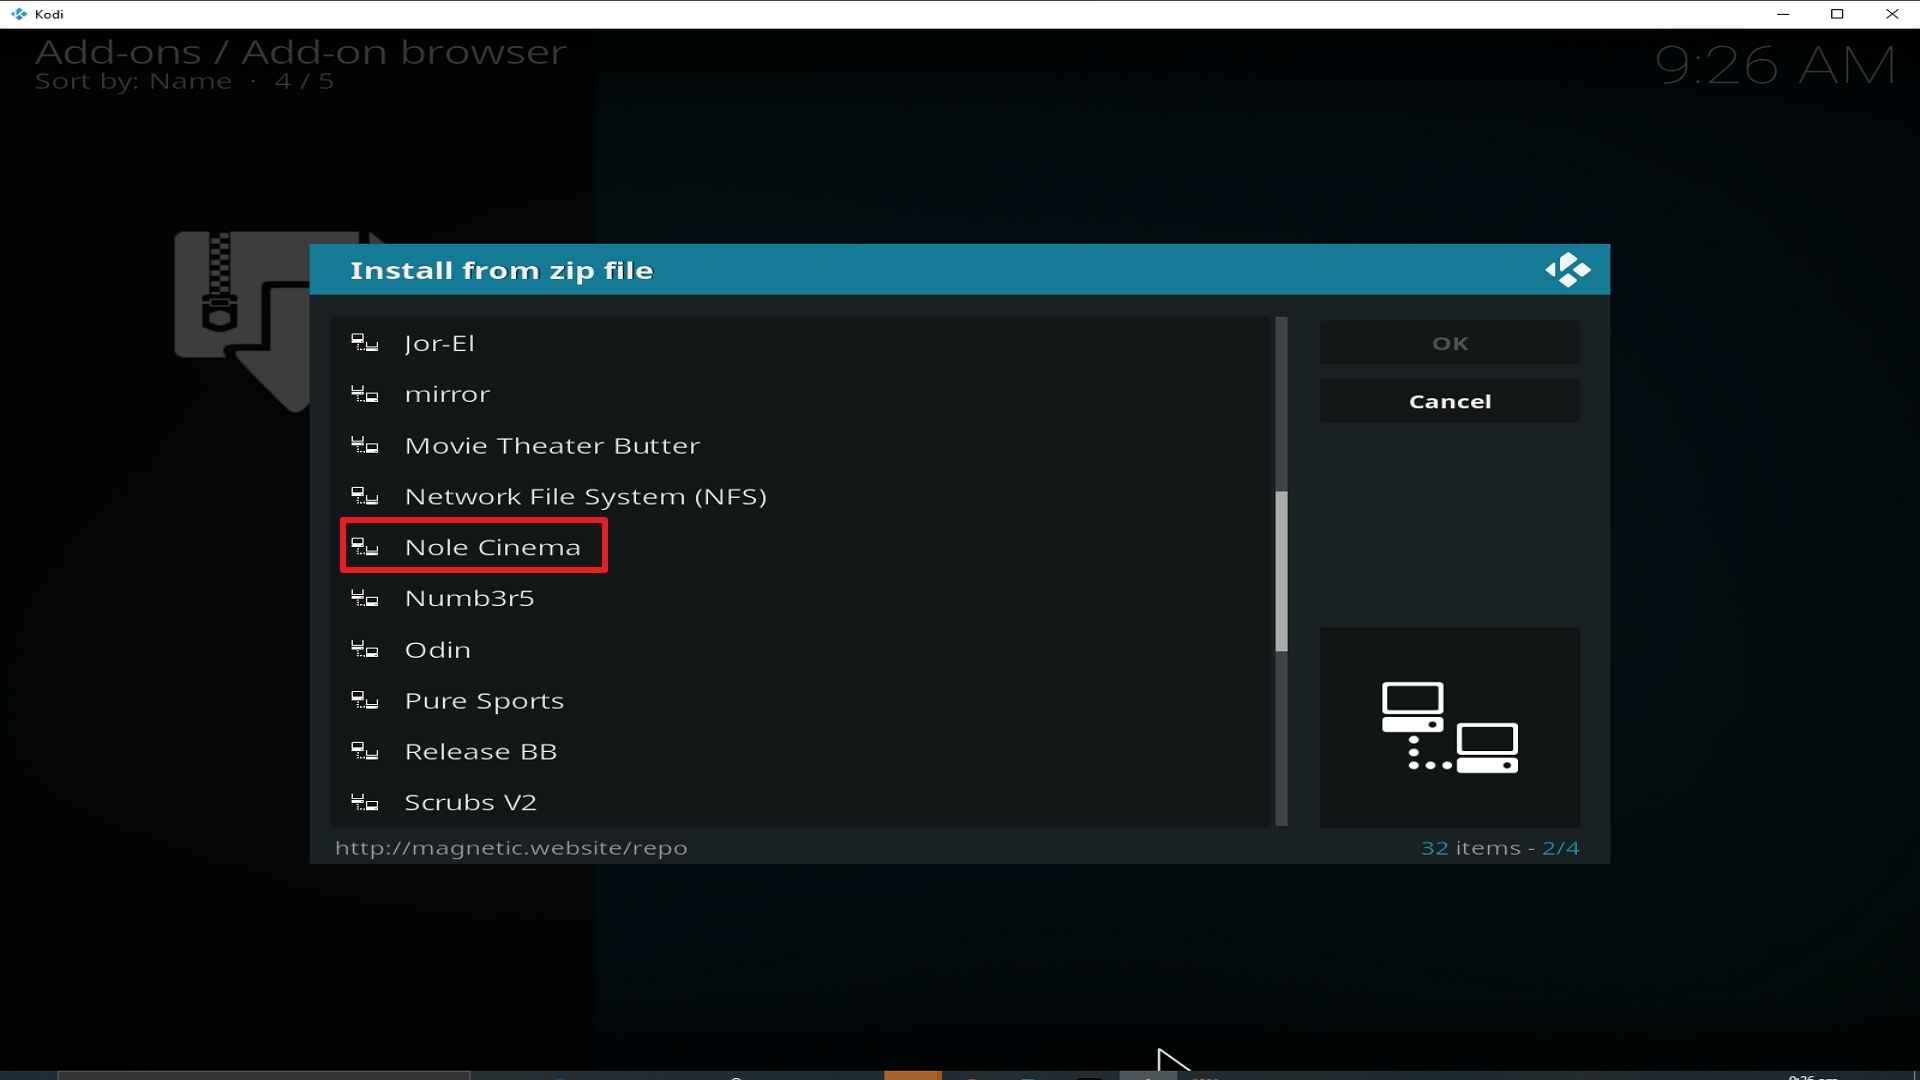
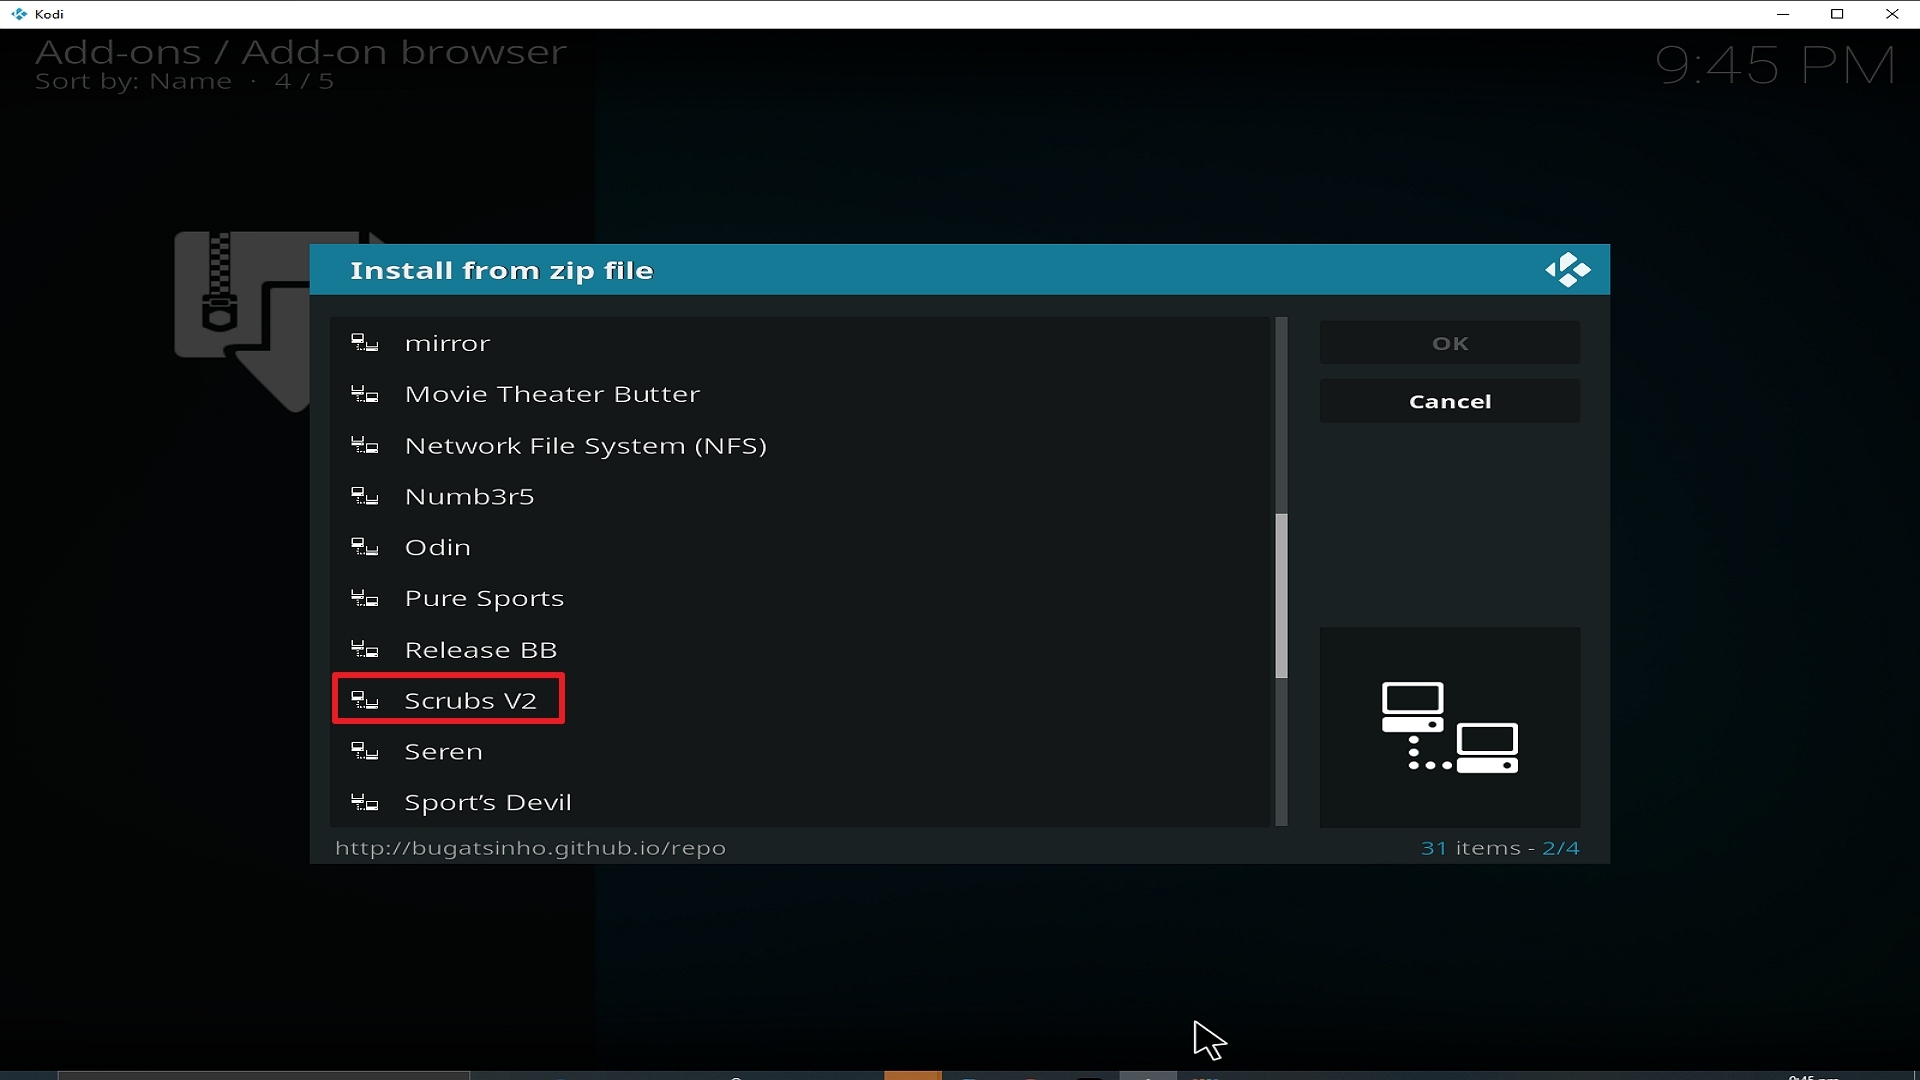
17. Click on Halow TV (or whatever you named the source).

Step 17 Installing Halow TV addon on Kodi


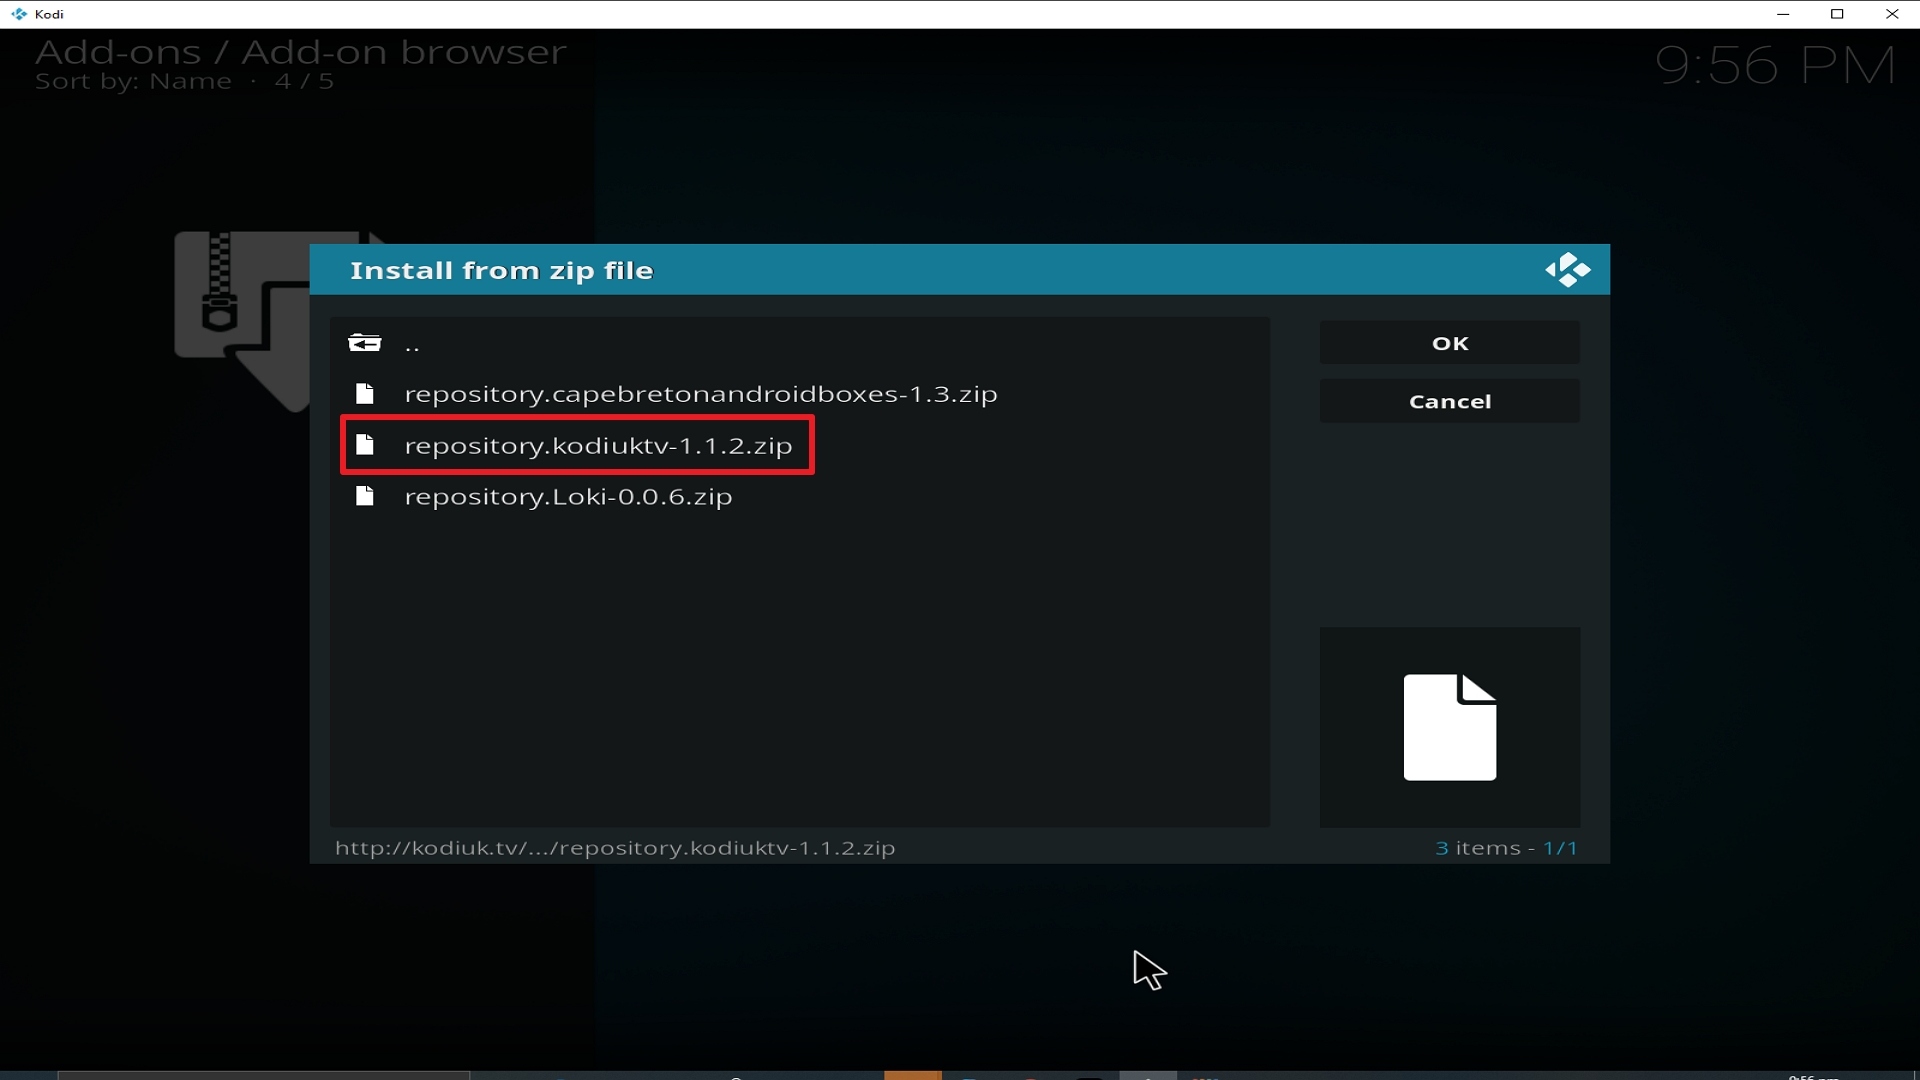
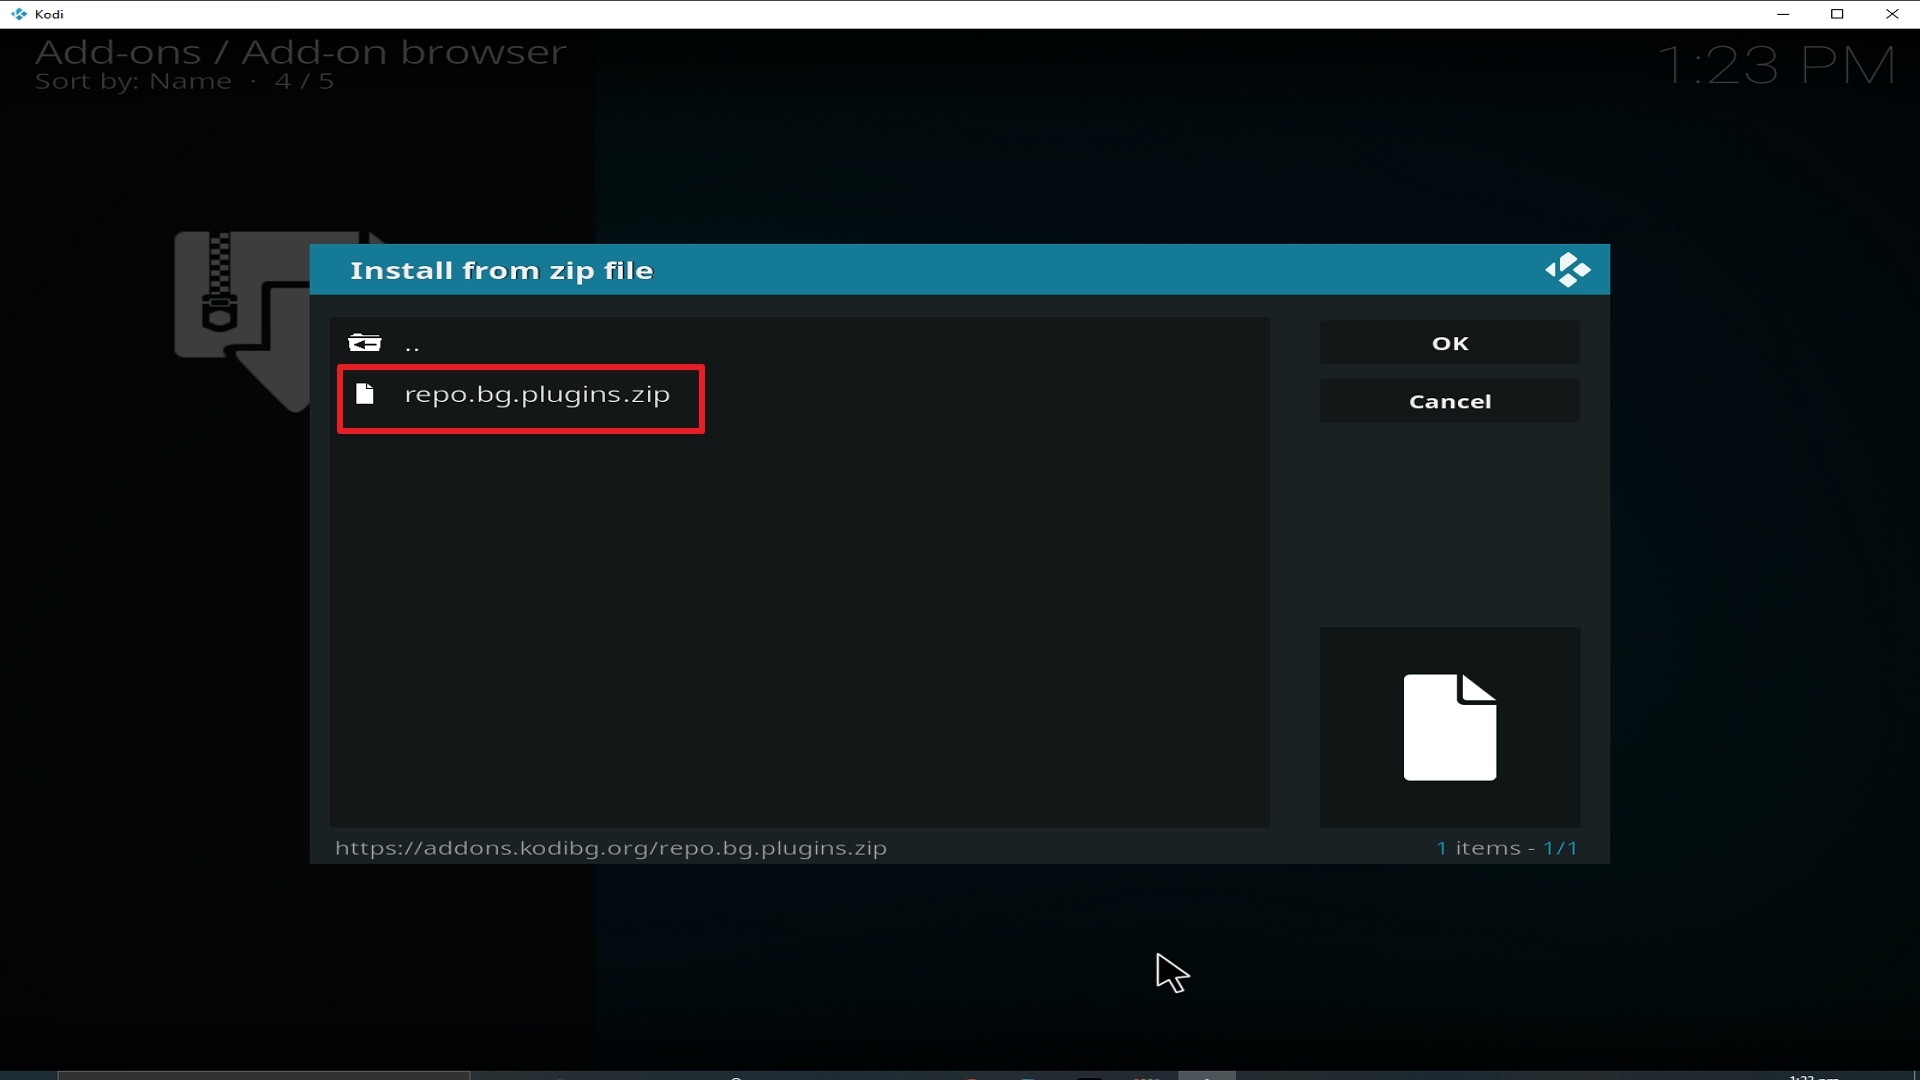
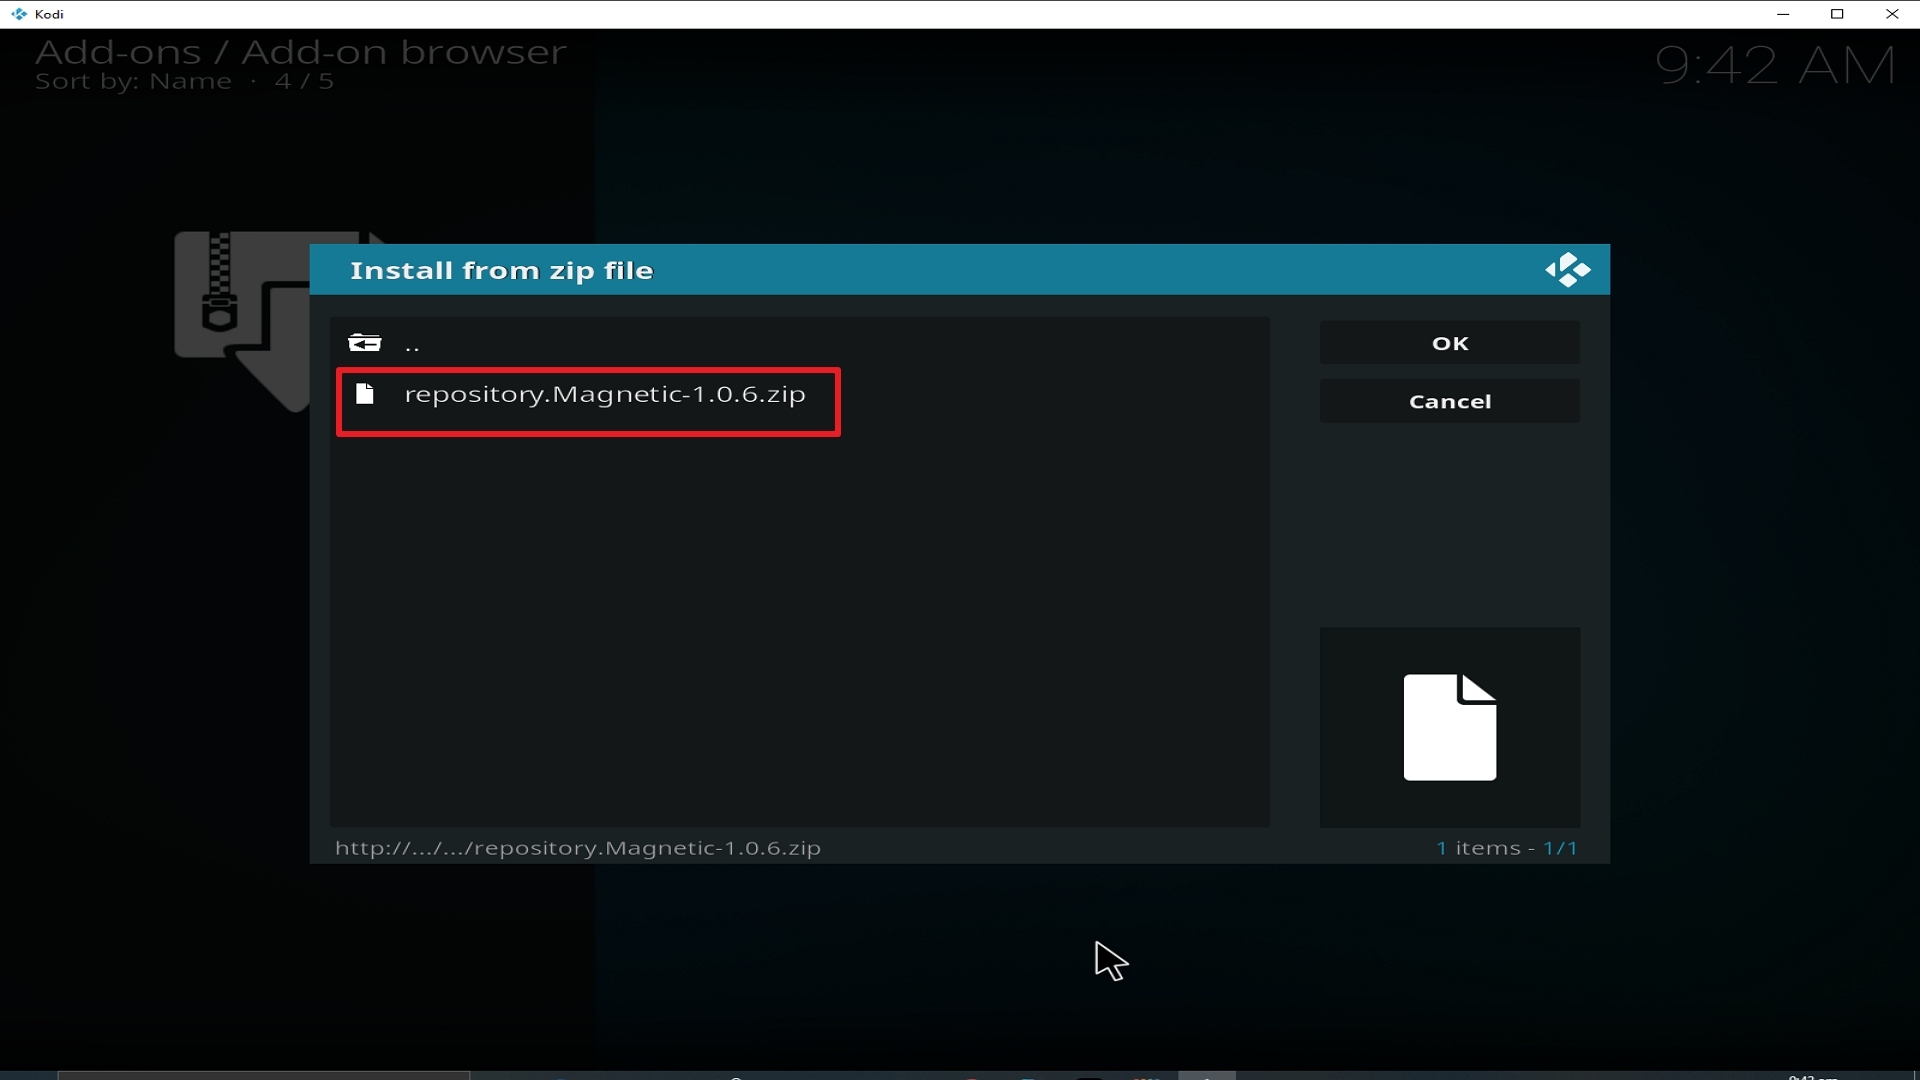
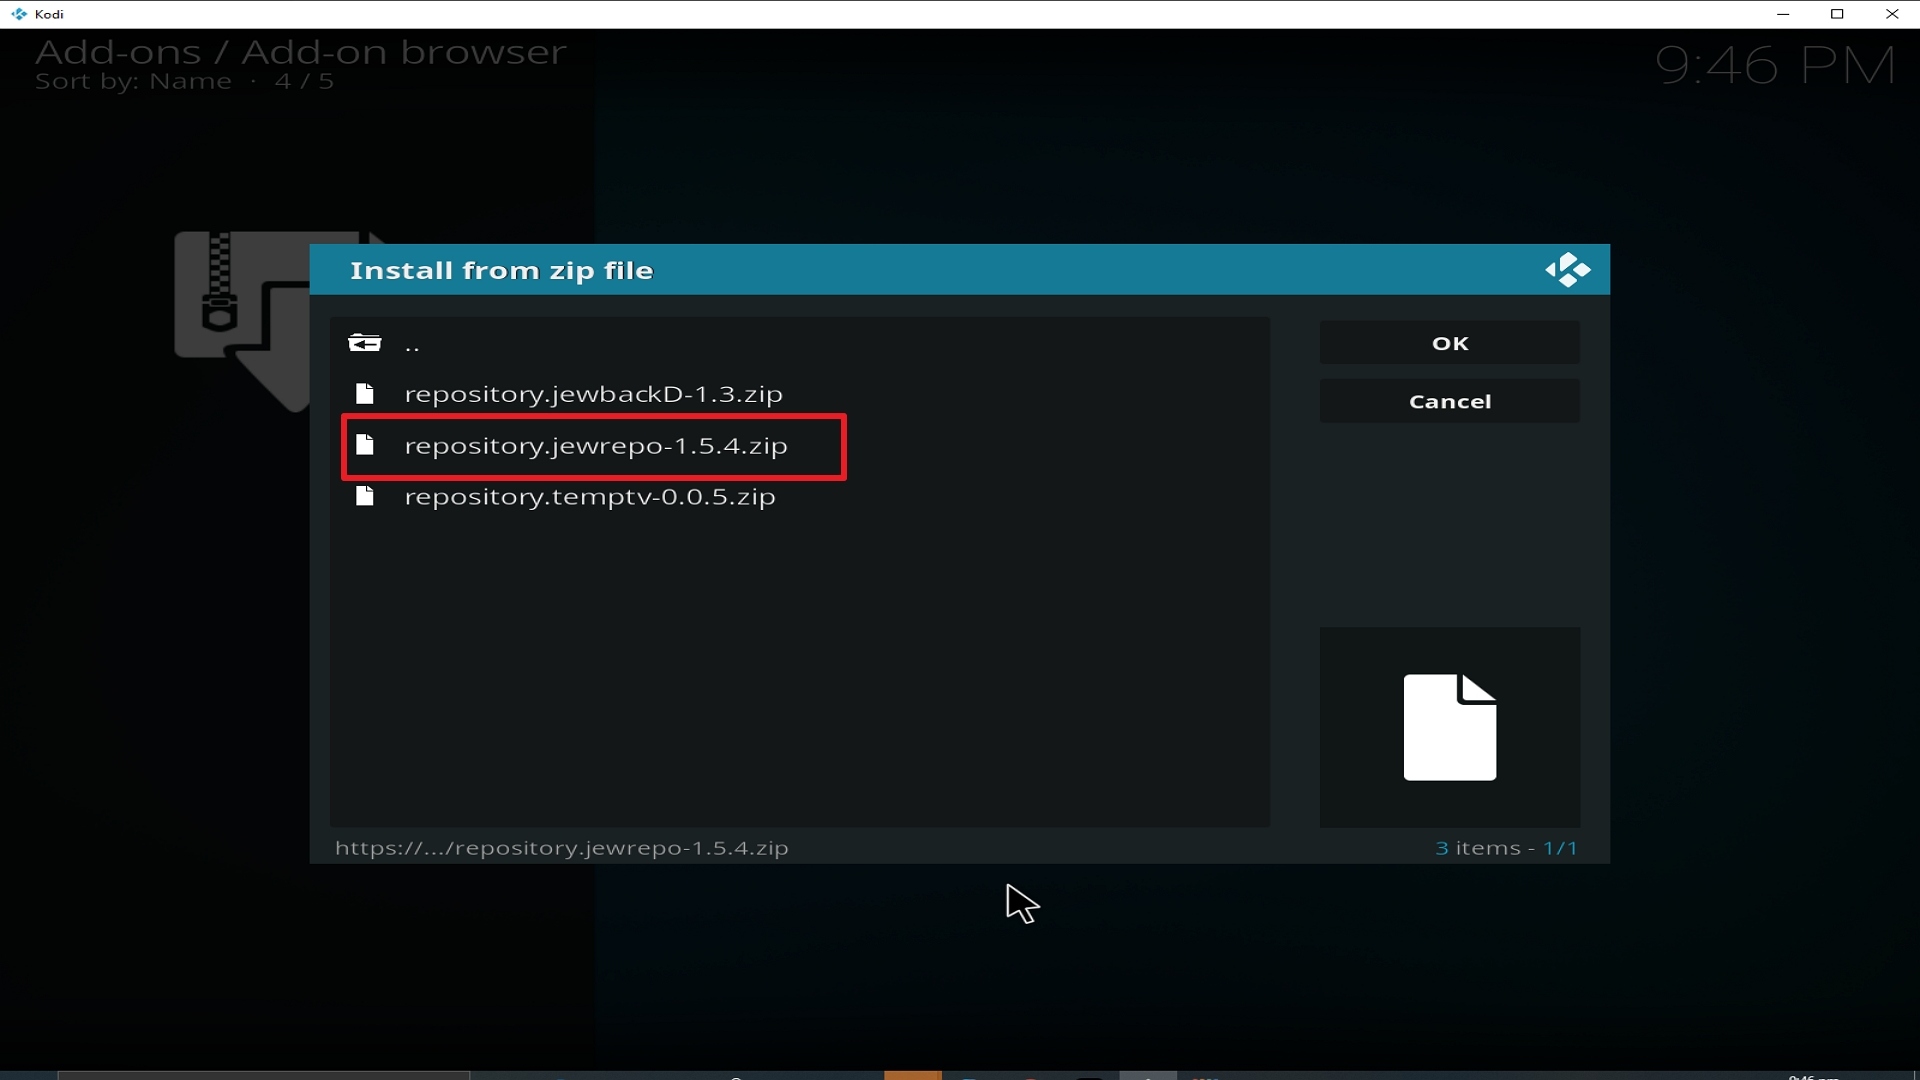
18. Click on repository.HalowTV-6.0.0.zip.

Step 18 Installing Halow TV addon on Kodi


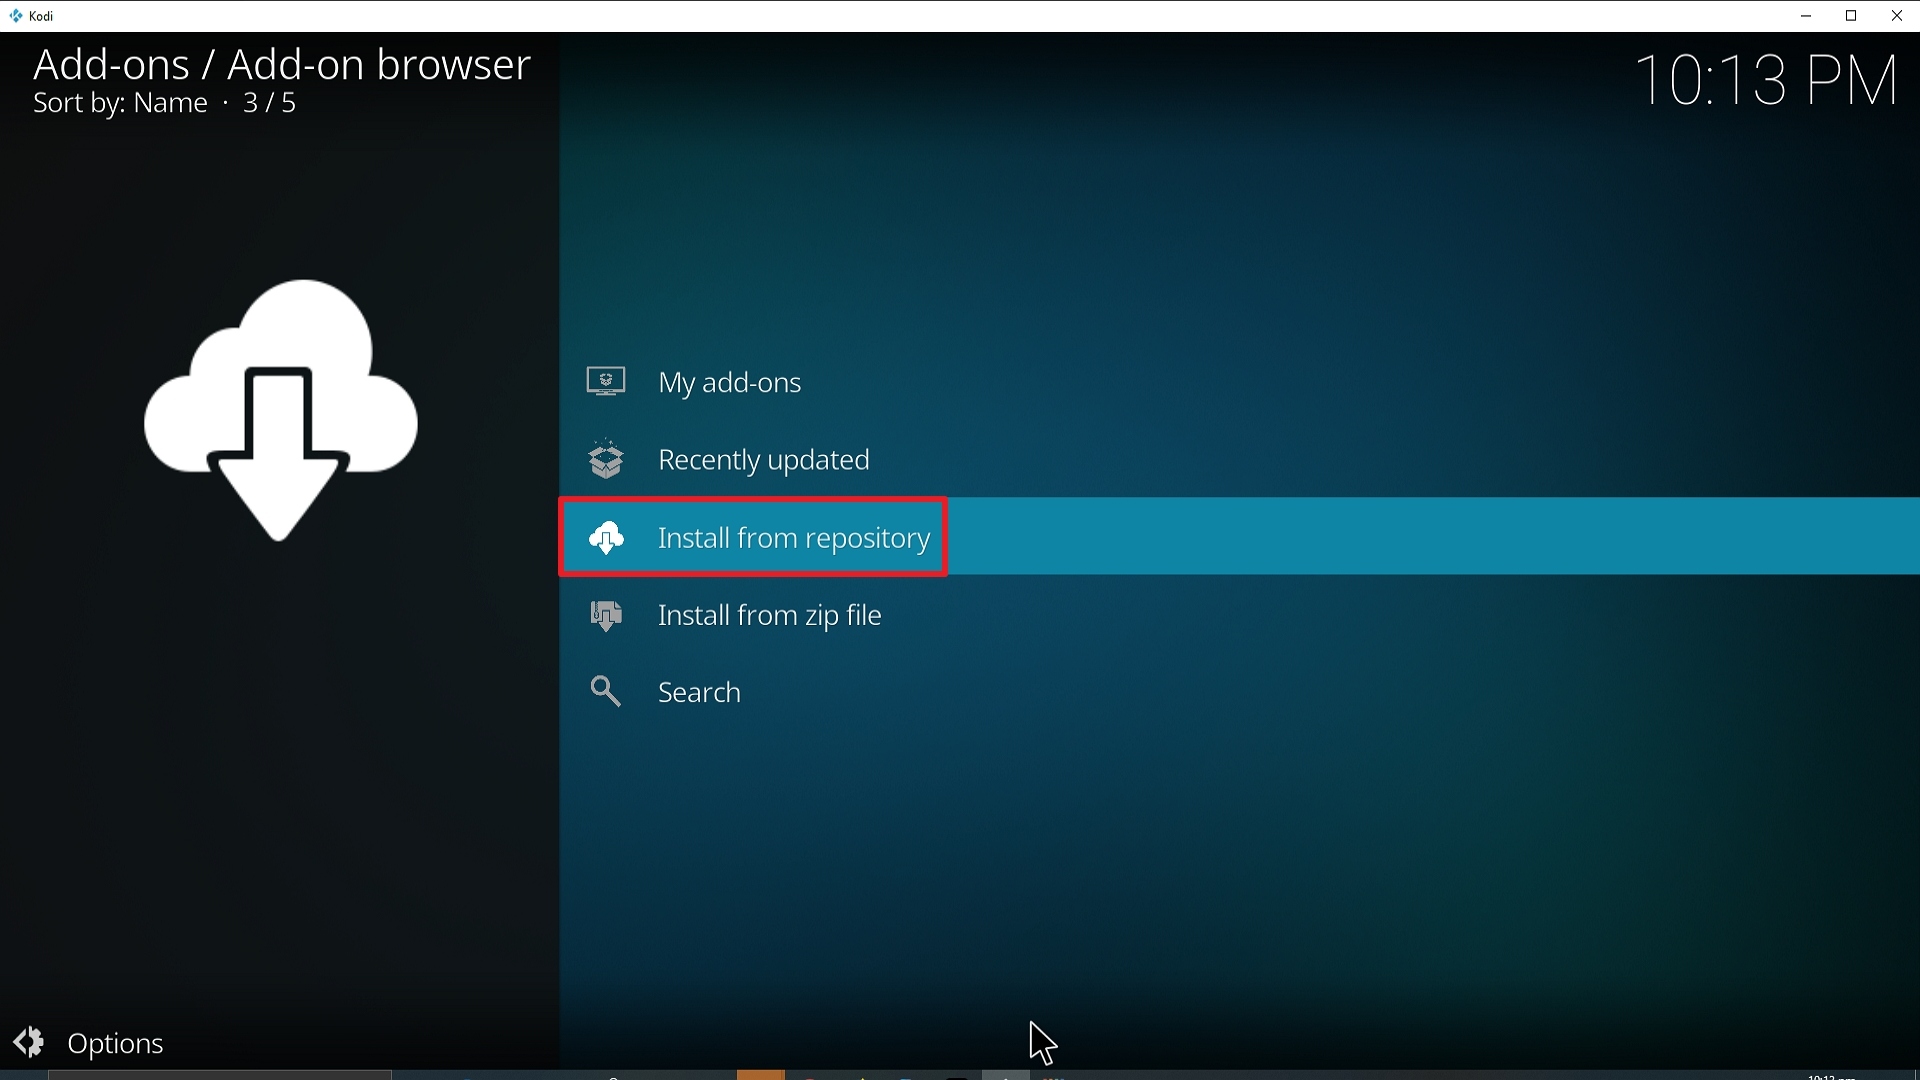
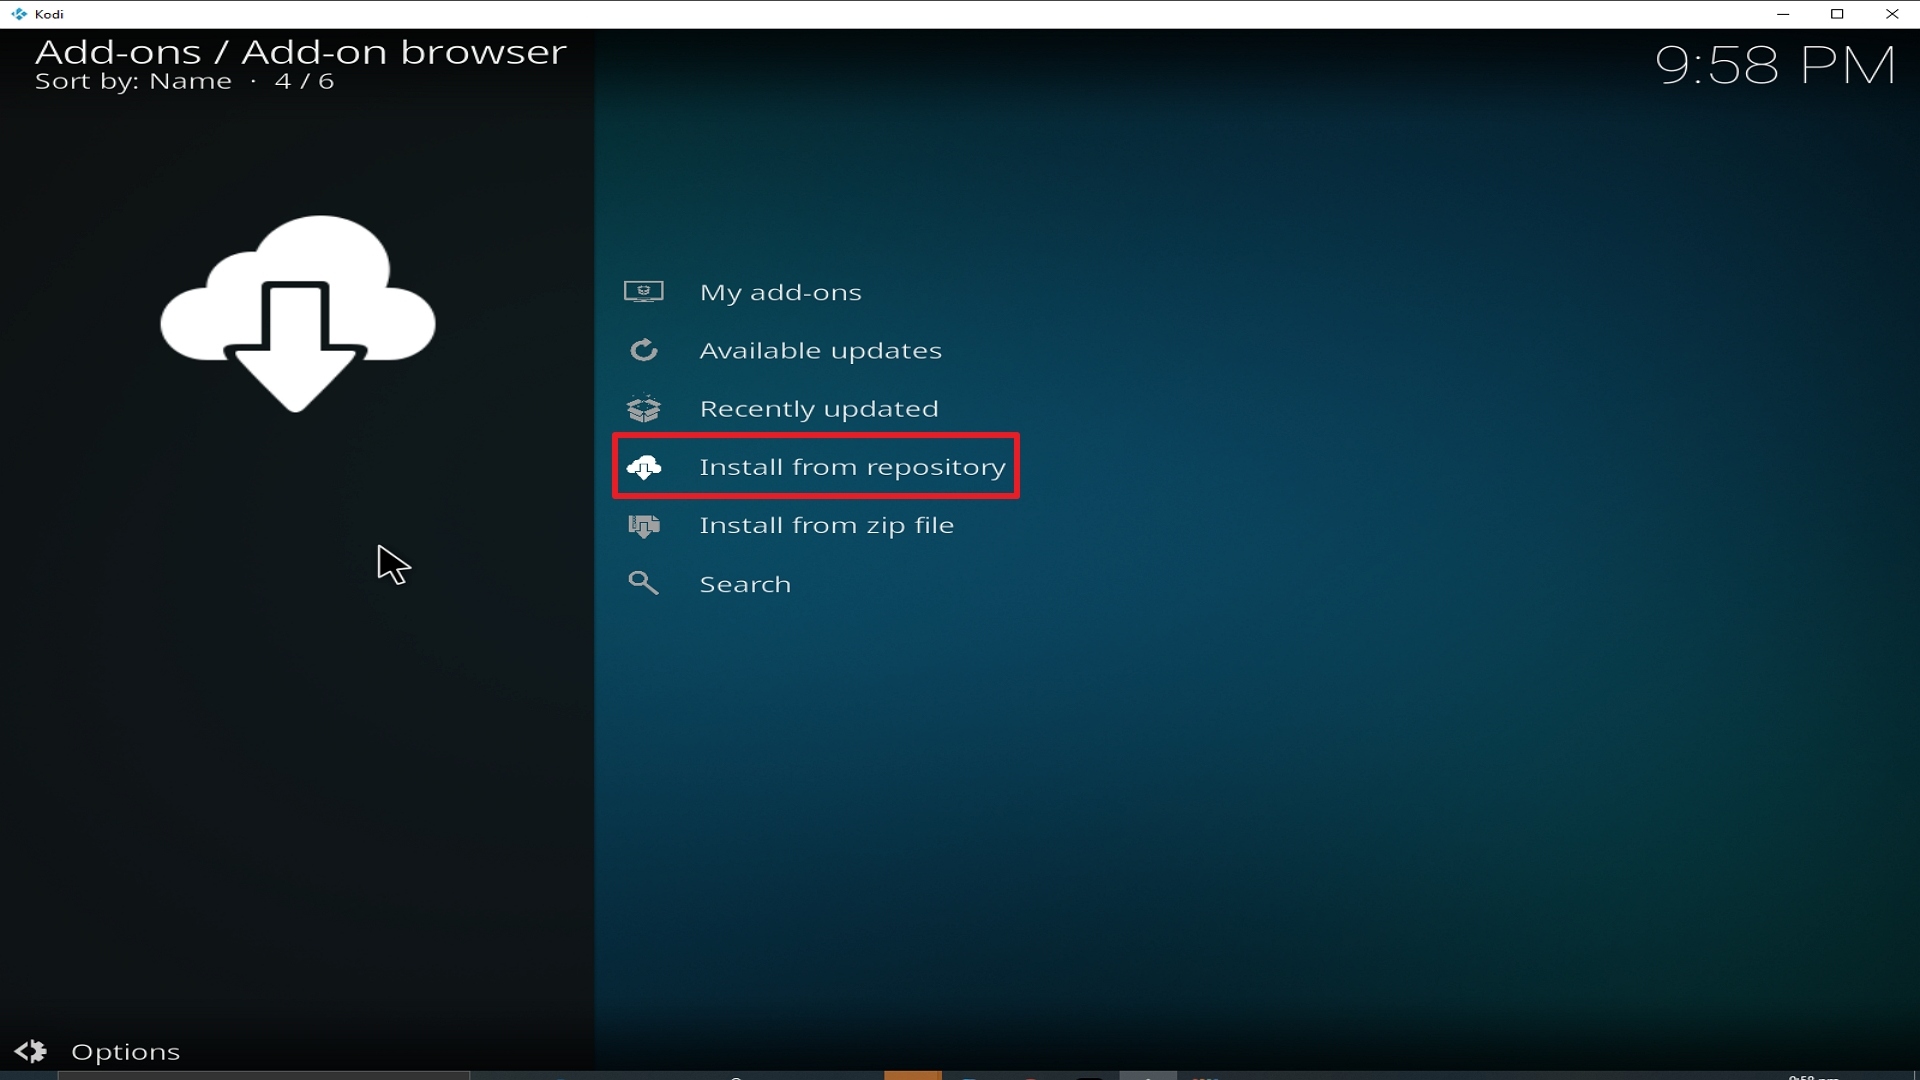
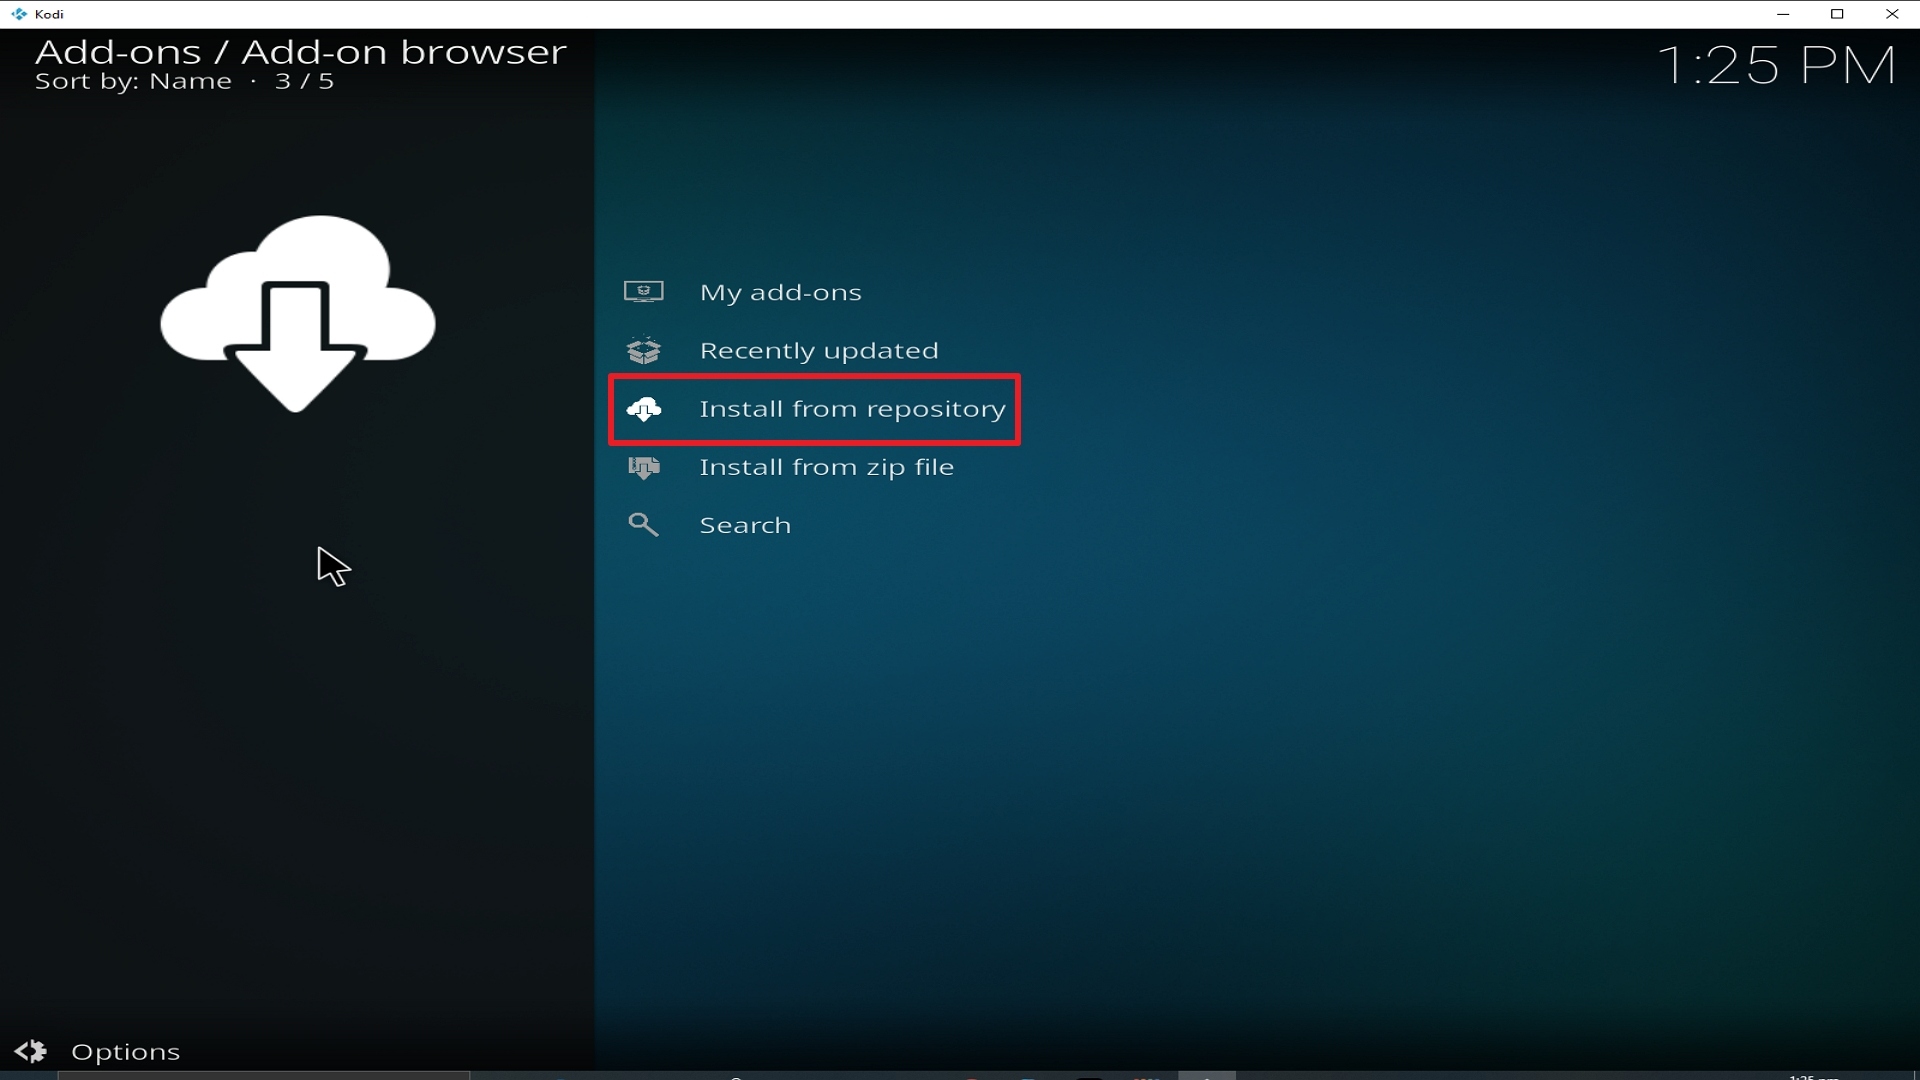
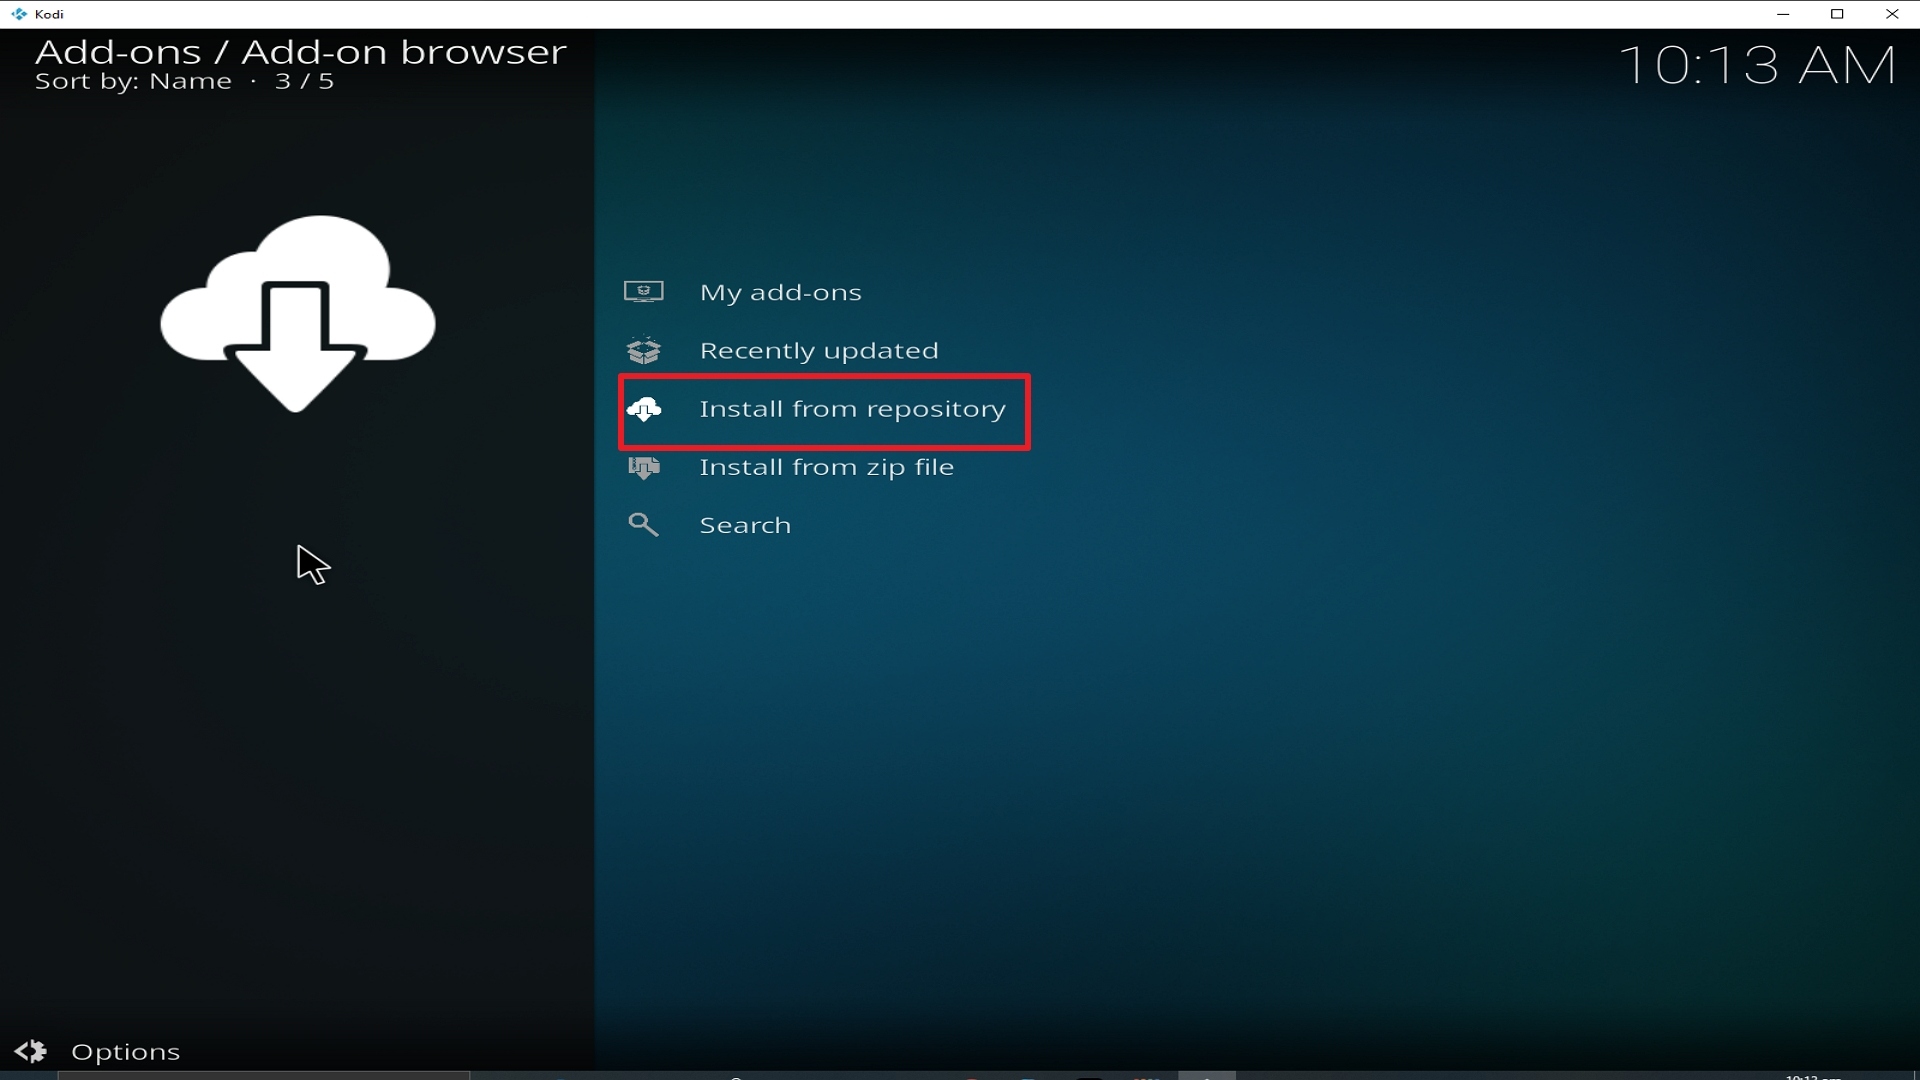
19. Select on Install from repository.

Step 19 Installing Halow TV addon on Kodi


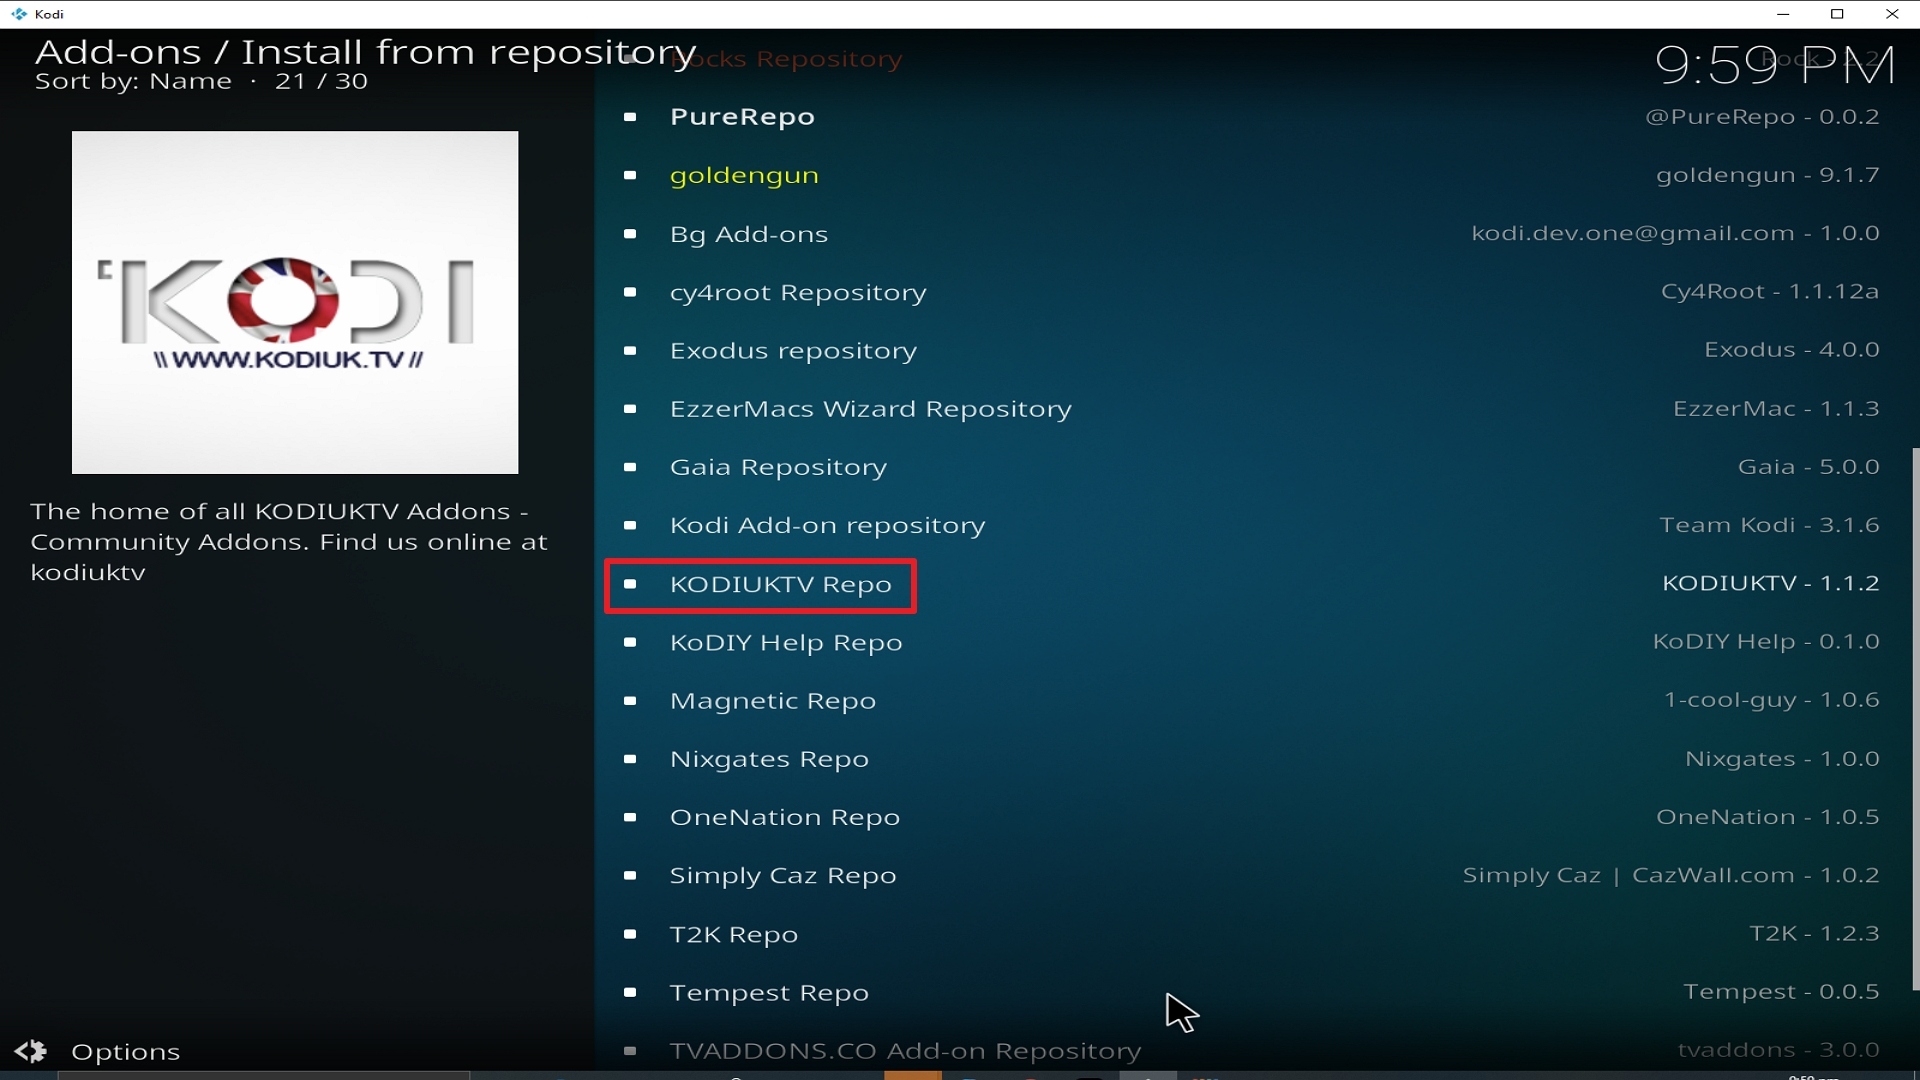
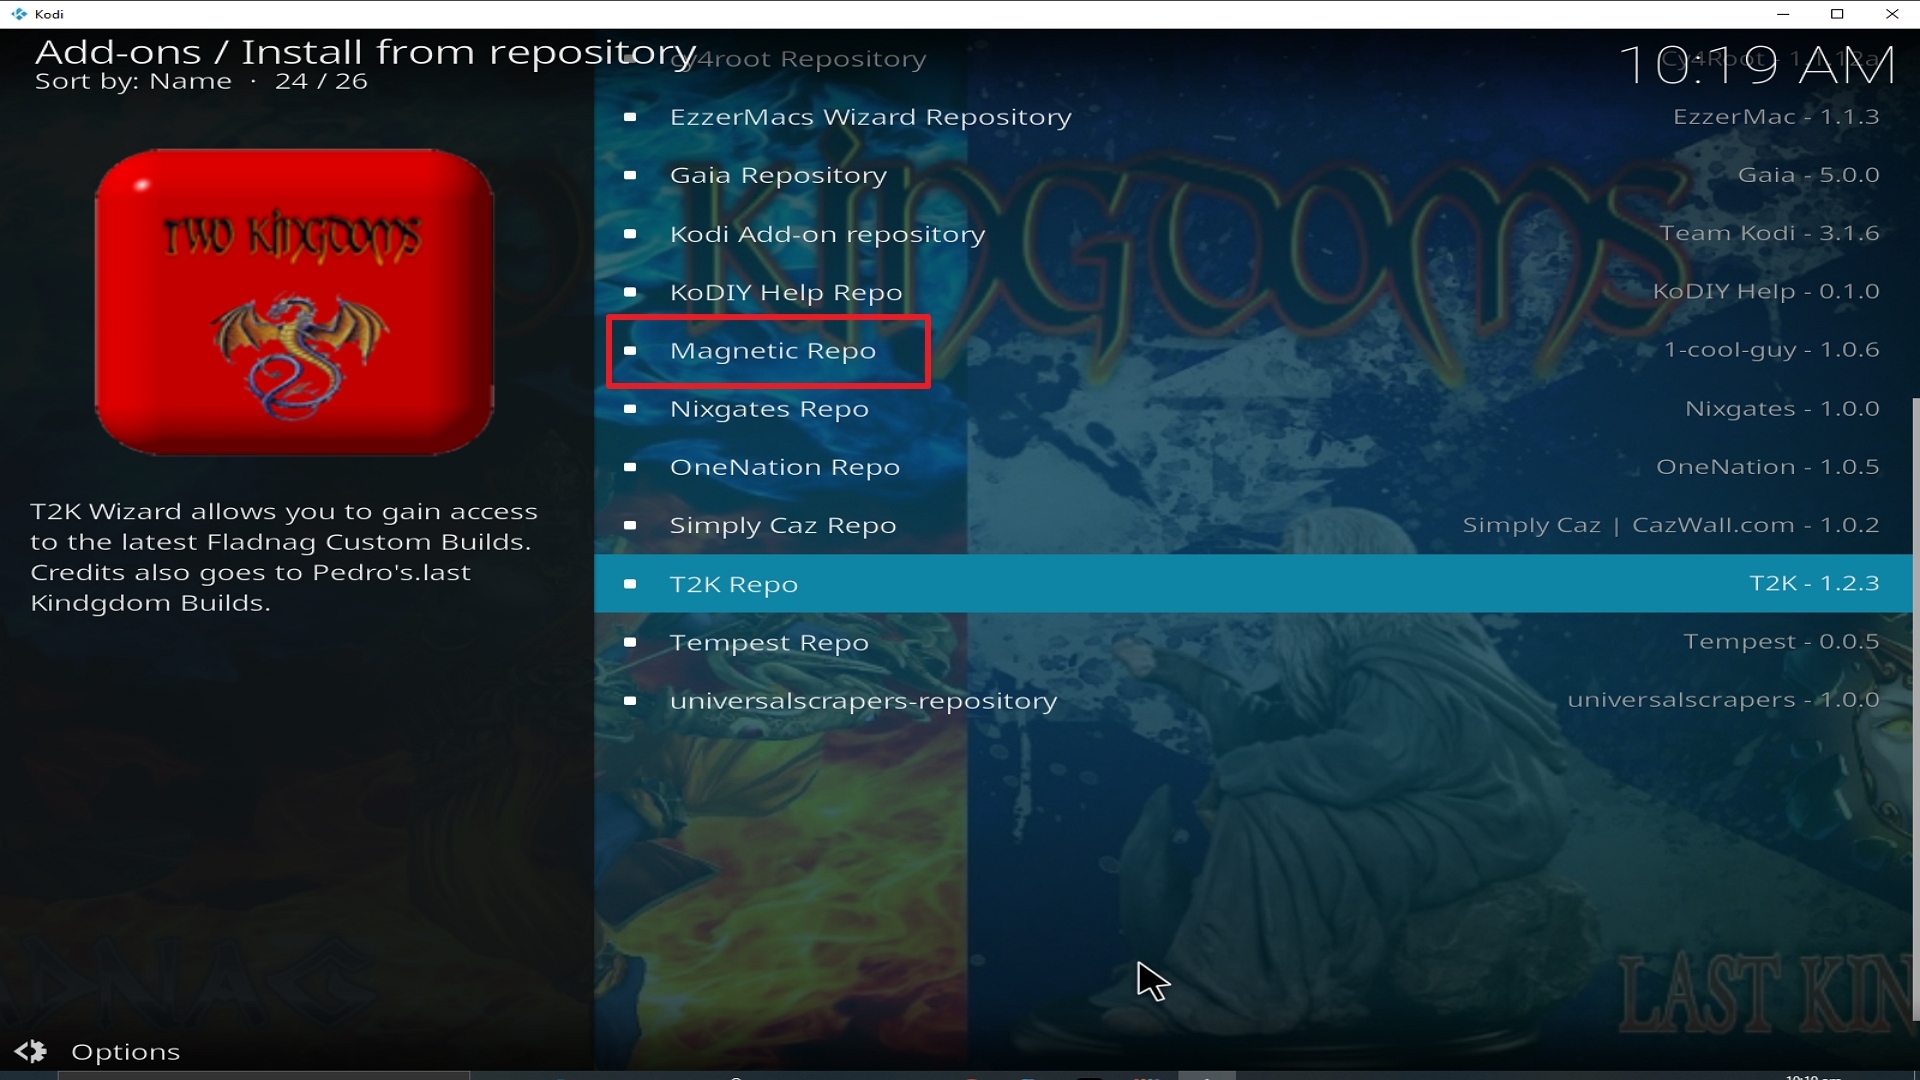
20. Click on Halow Repo

Step 20 Installing Halow TV addon on Kodi


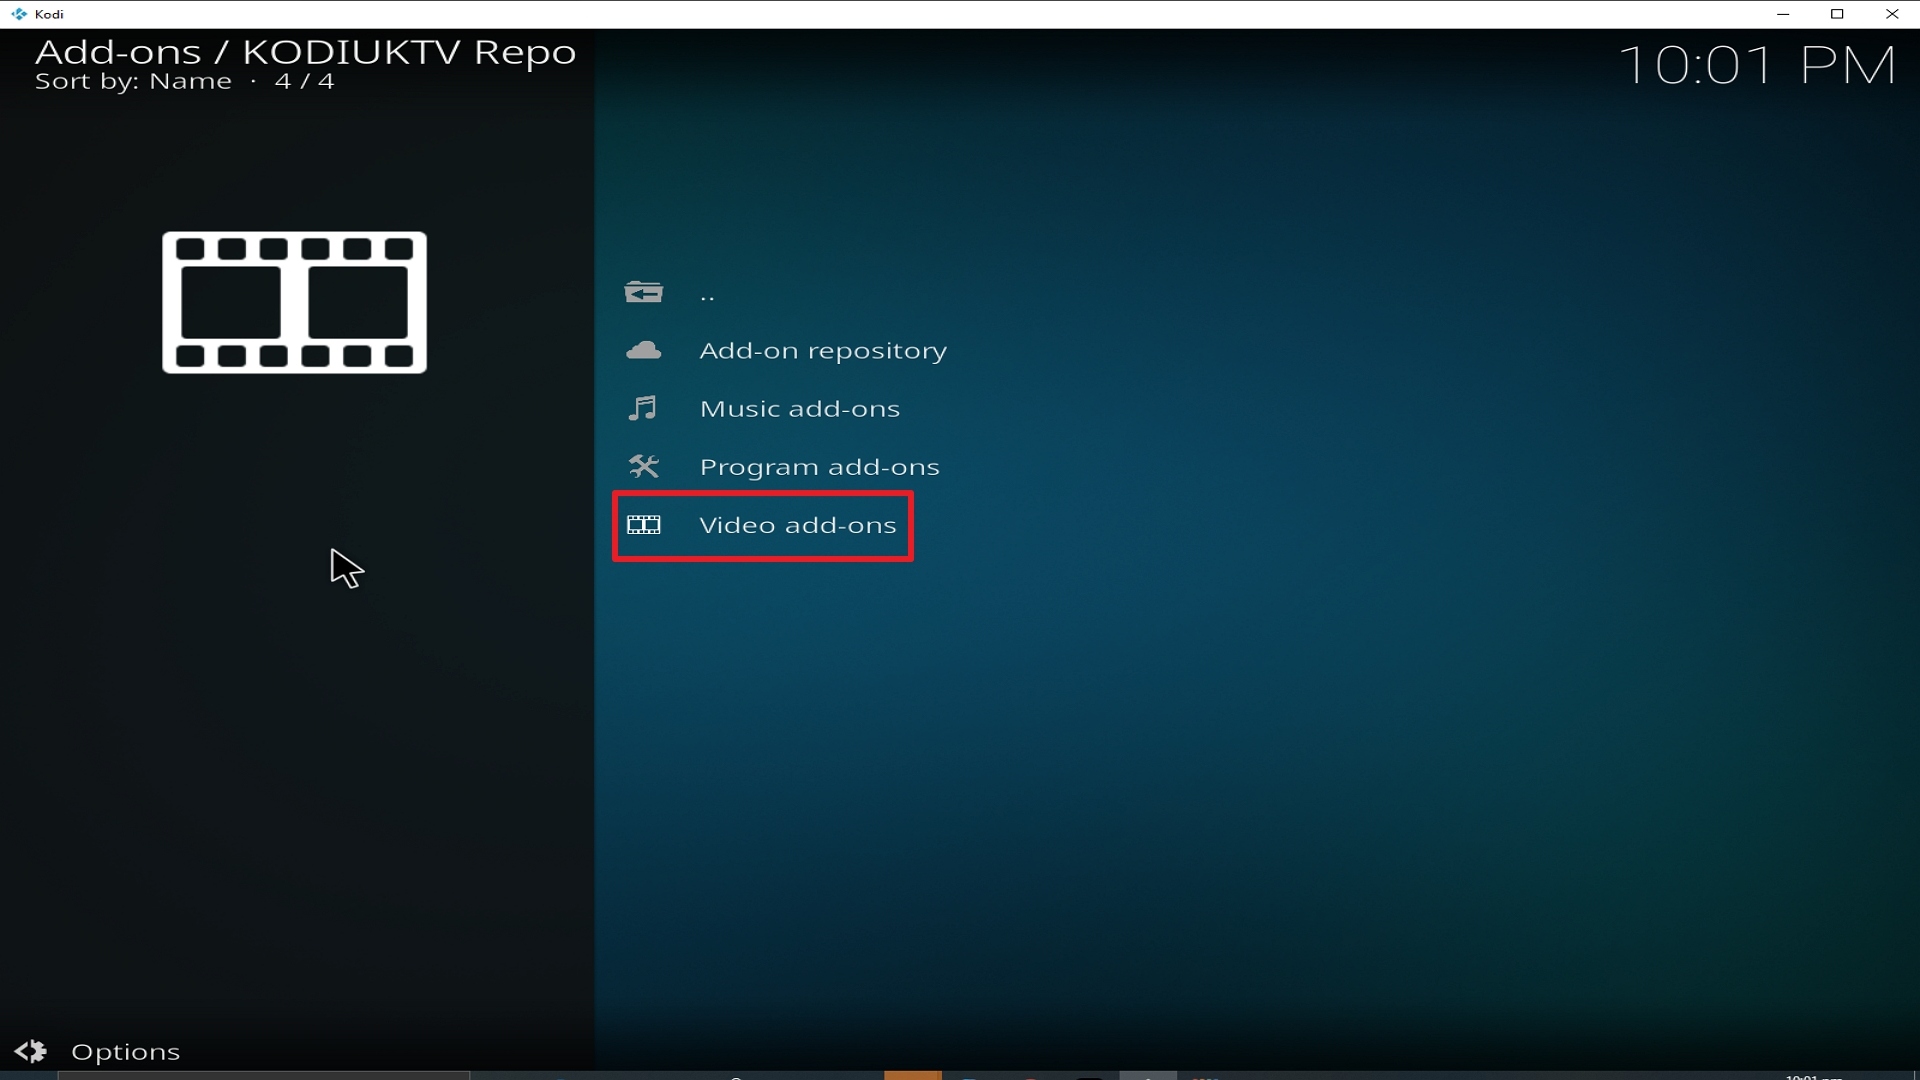
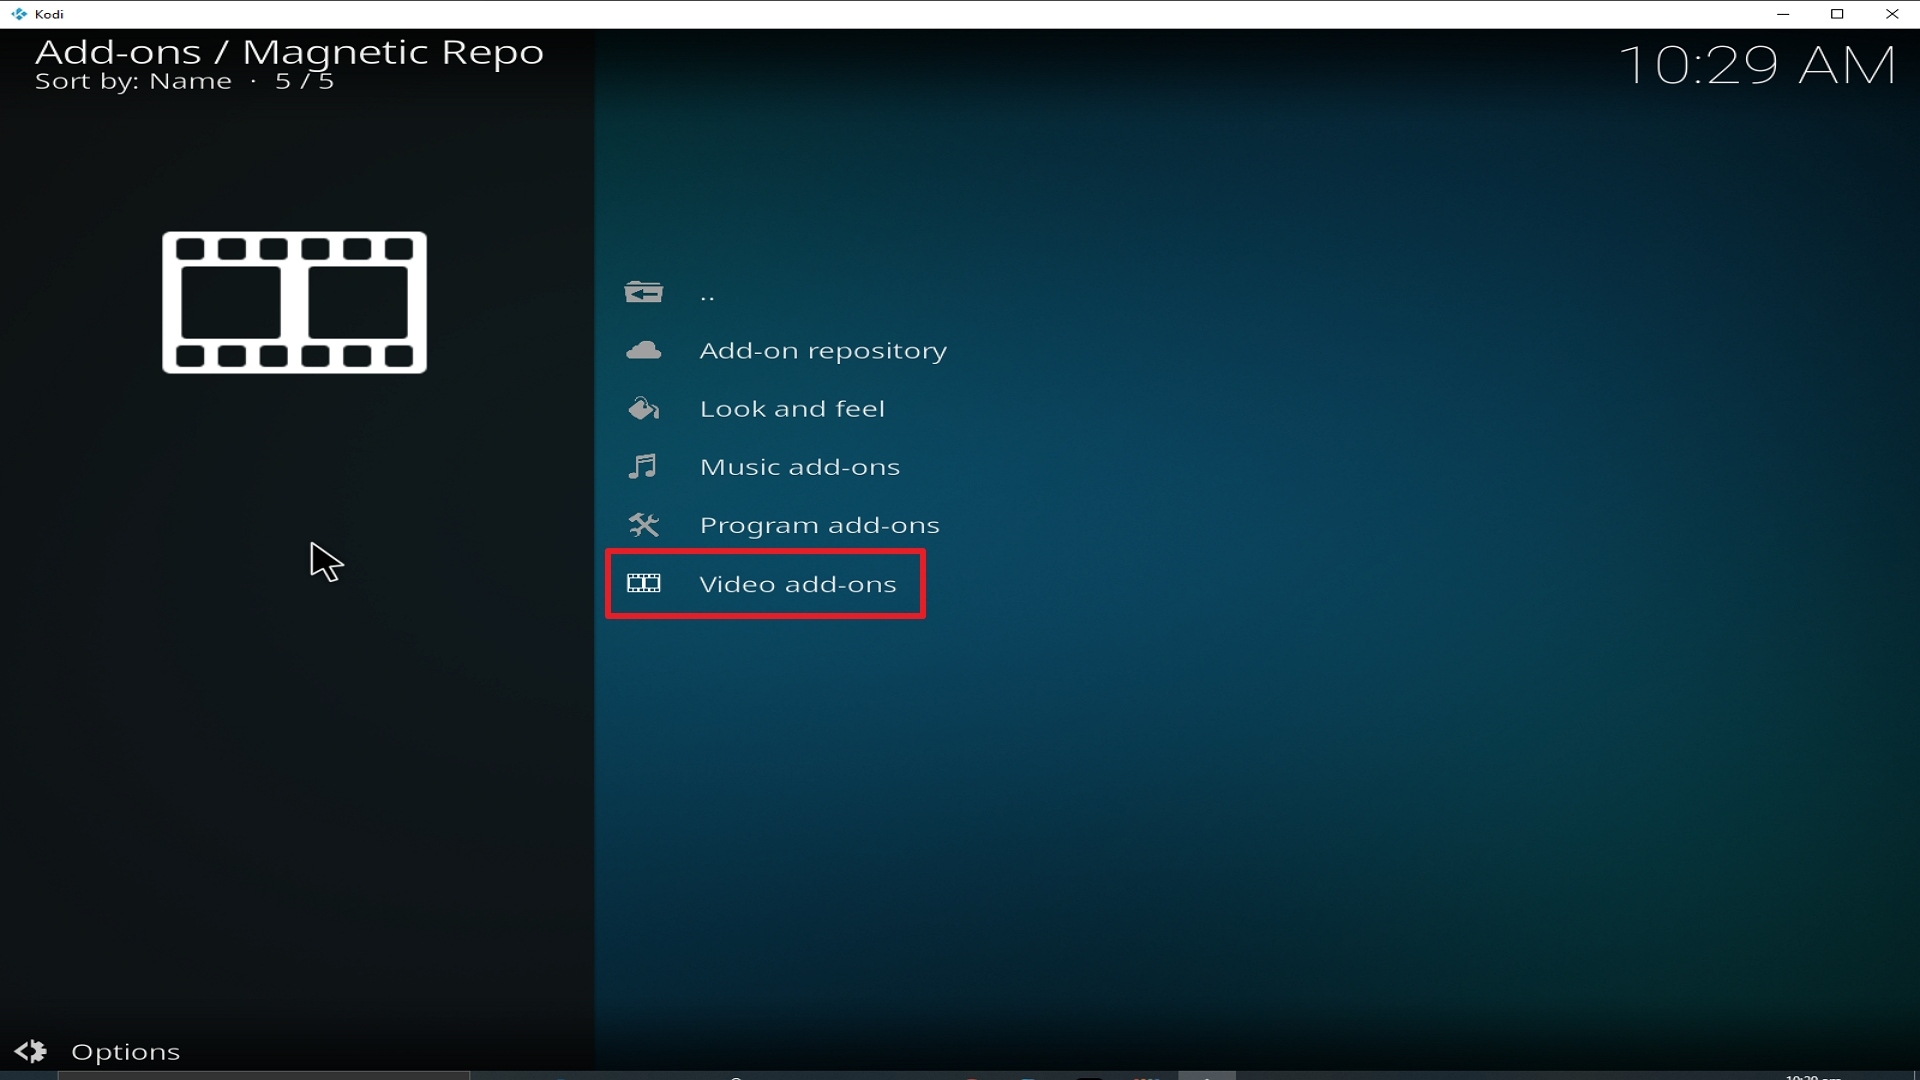
21. Pick Video add-ons.

Step 21 Installing Halow TV addon on Kodi


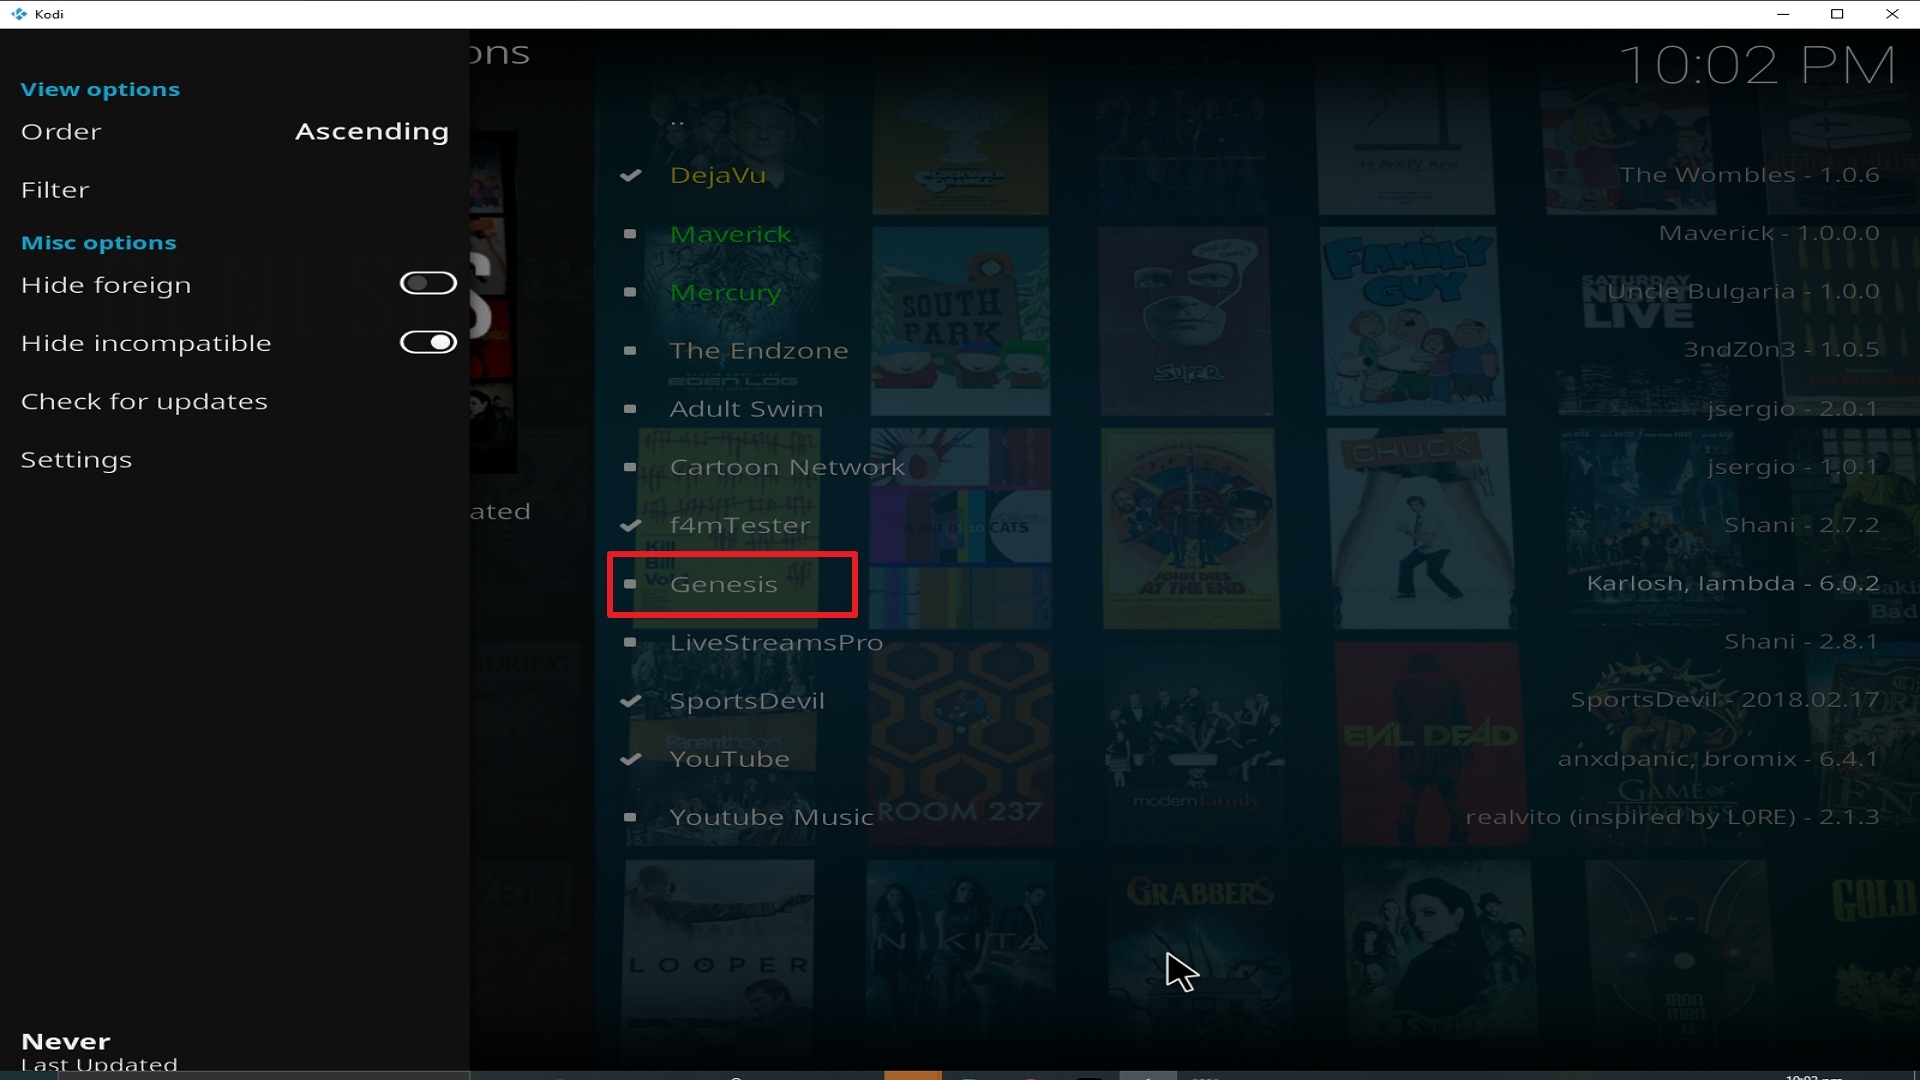
22. Select Halow TV again.

Step 22 Installing Halow TV addon on Kodi


23. Click on Install. 

Step 23 Installing Halow TV addon on Kodi


24. Select OK after reviewing the add-ons that will be installed.

Step 24 Installing Halow TV addon on Kodi


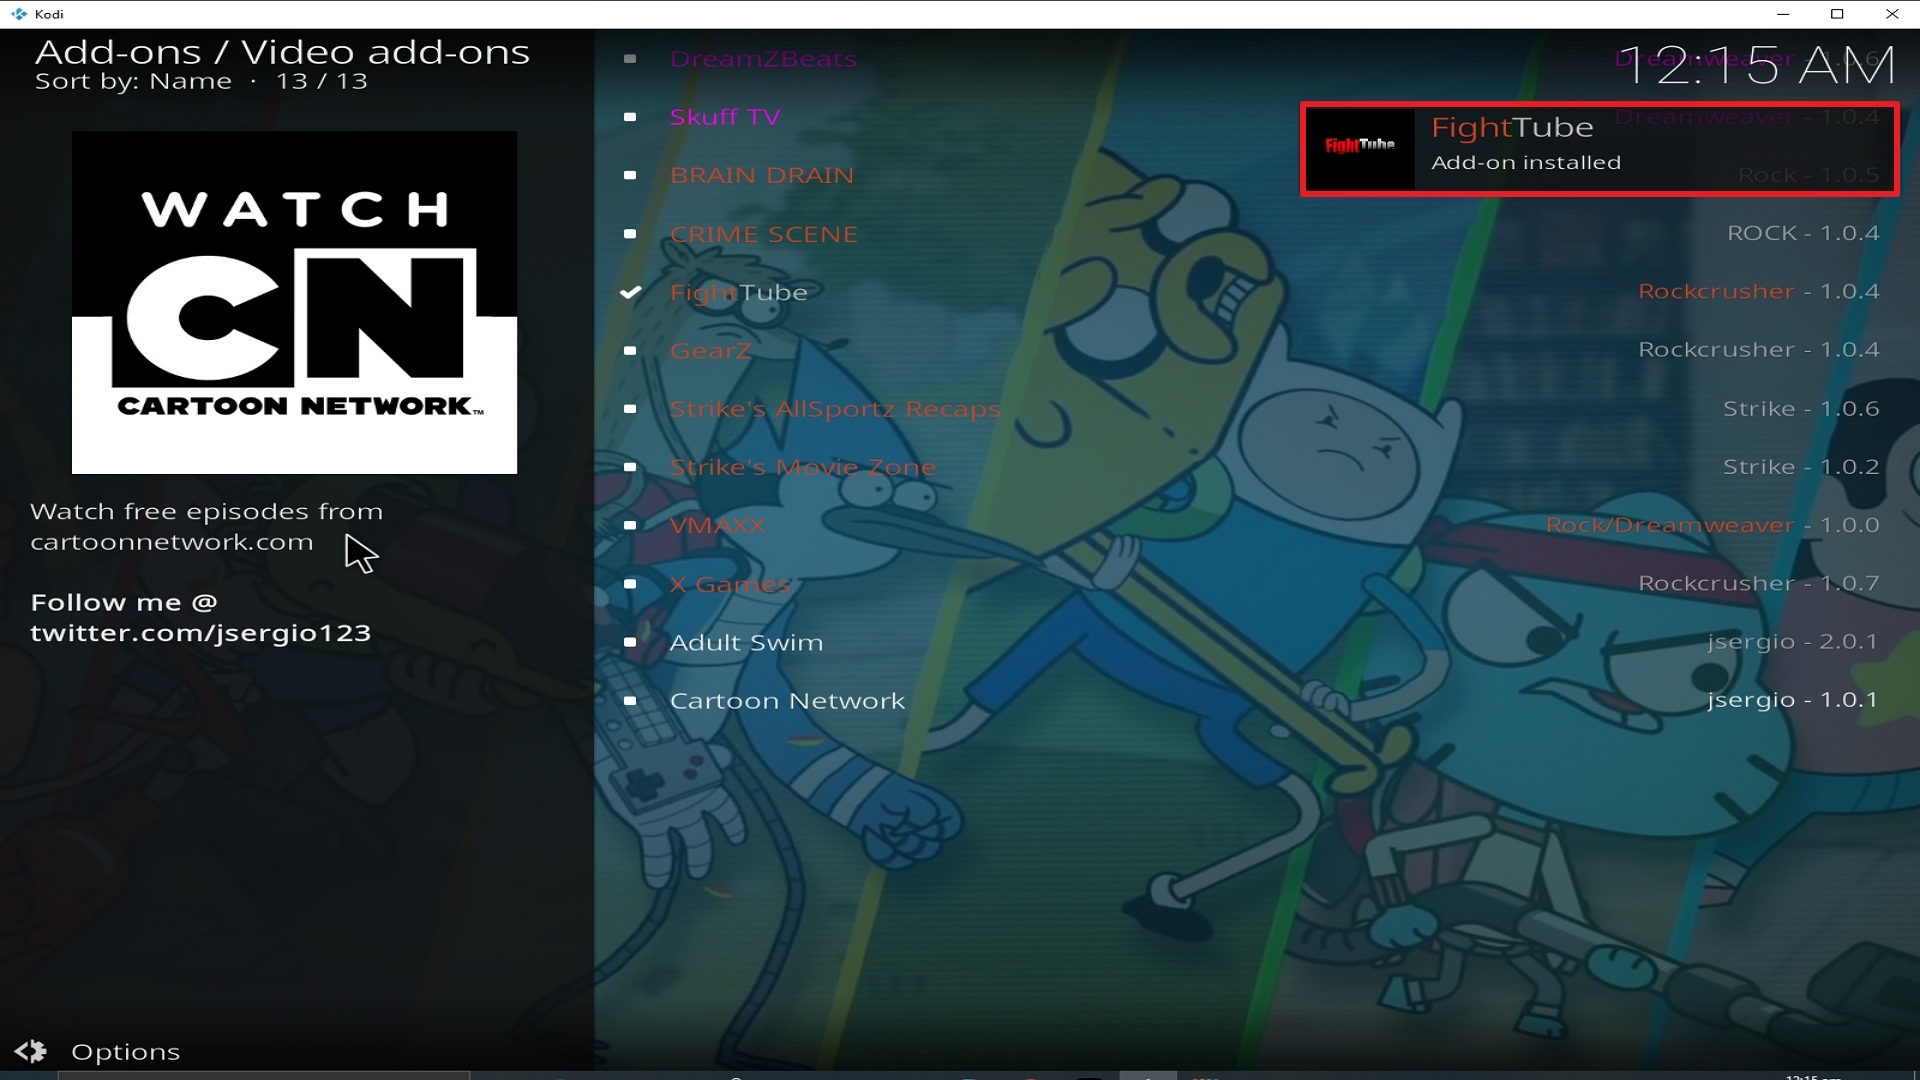
25. You should see a popup in the upper right corner saying Halow TV has installed. There will actually be multiple popups for the various components.

Step 25 Installing Halow TV addon on Kodi


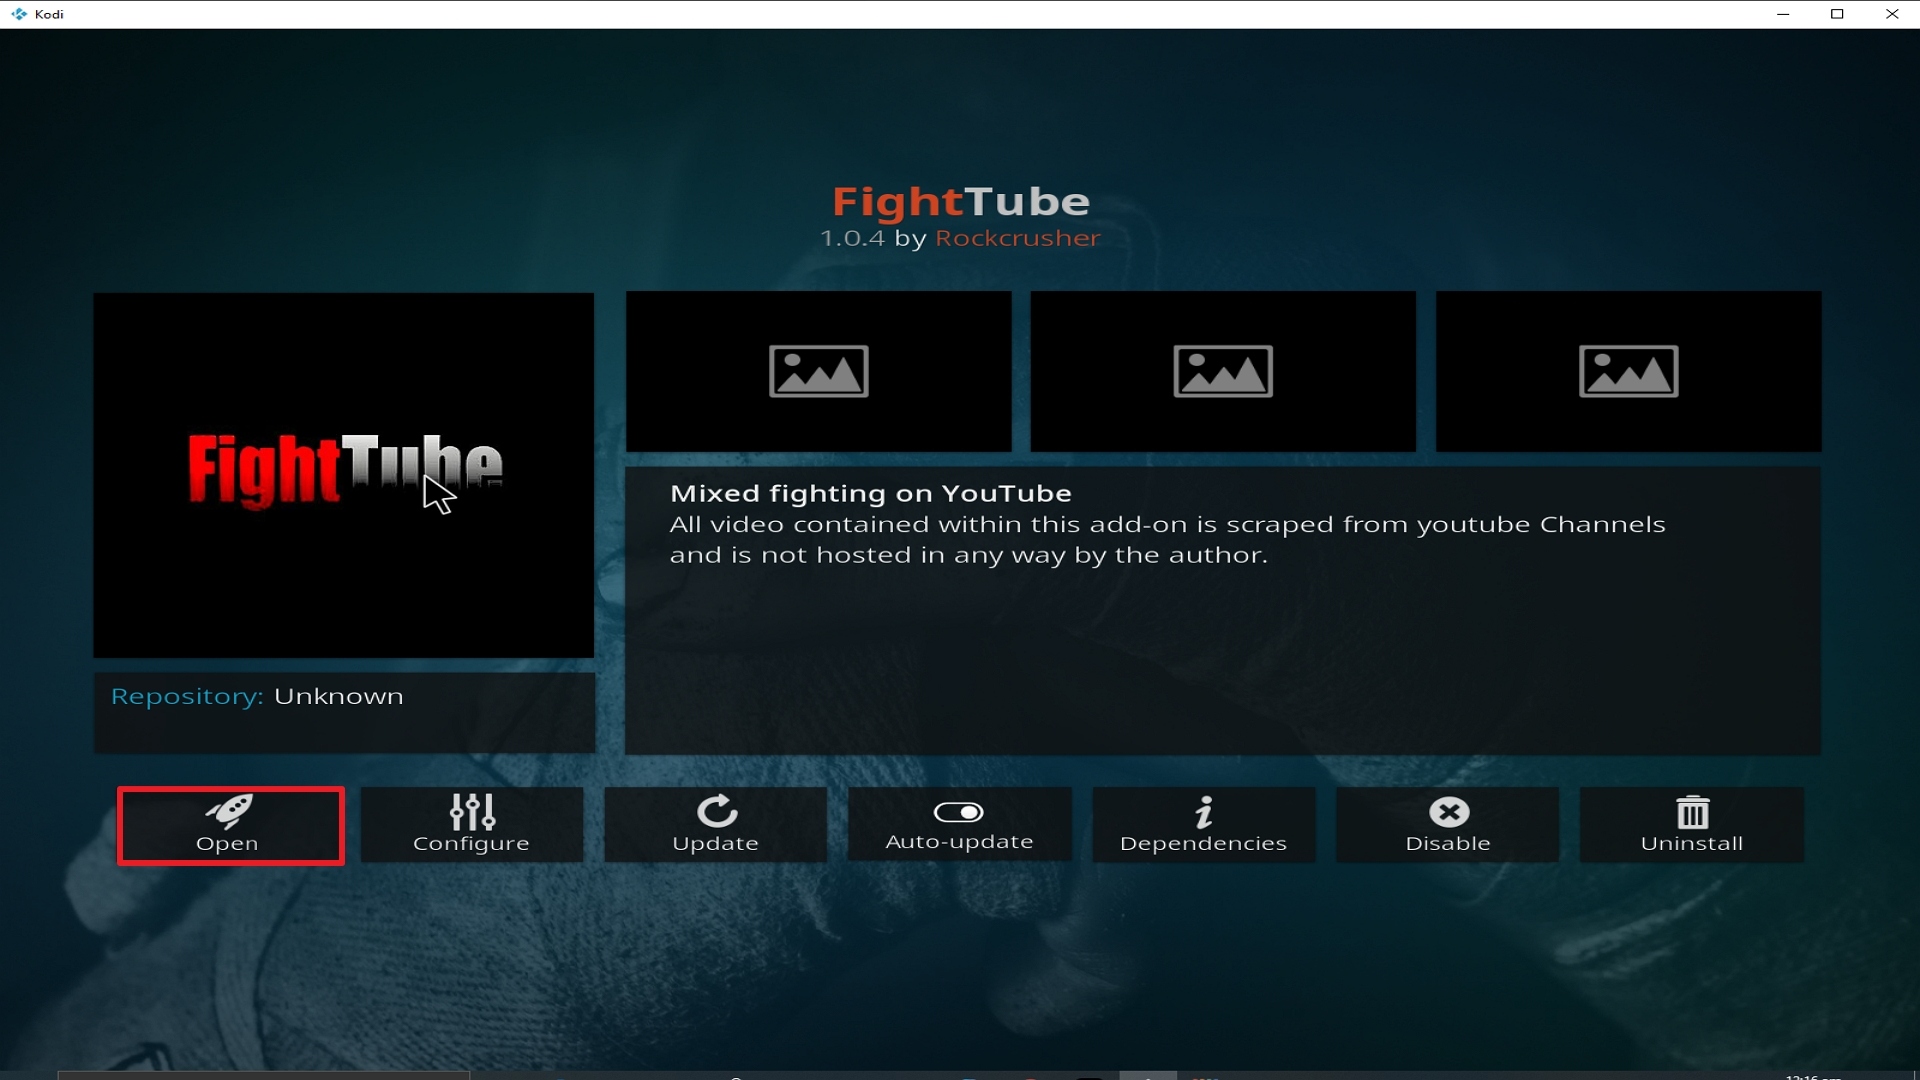
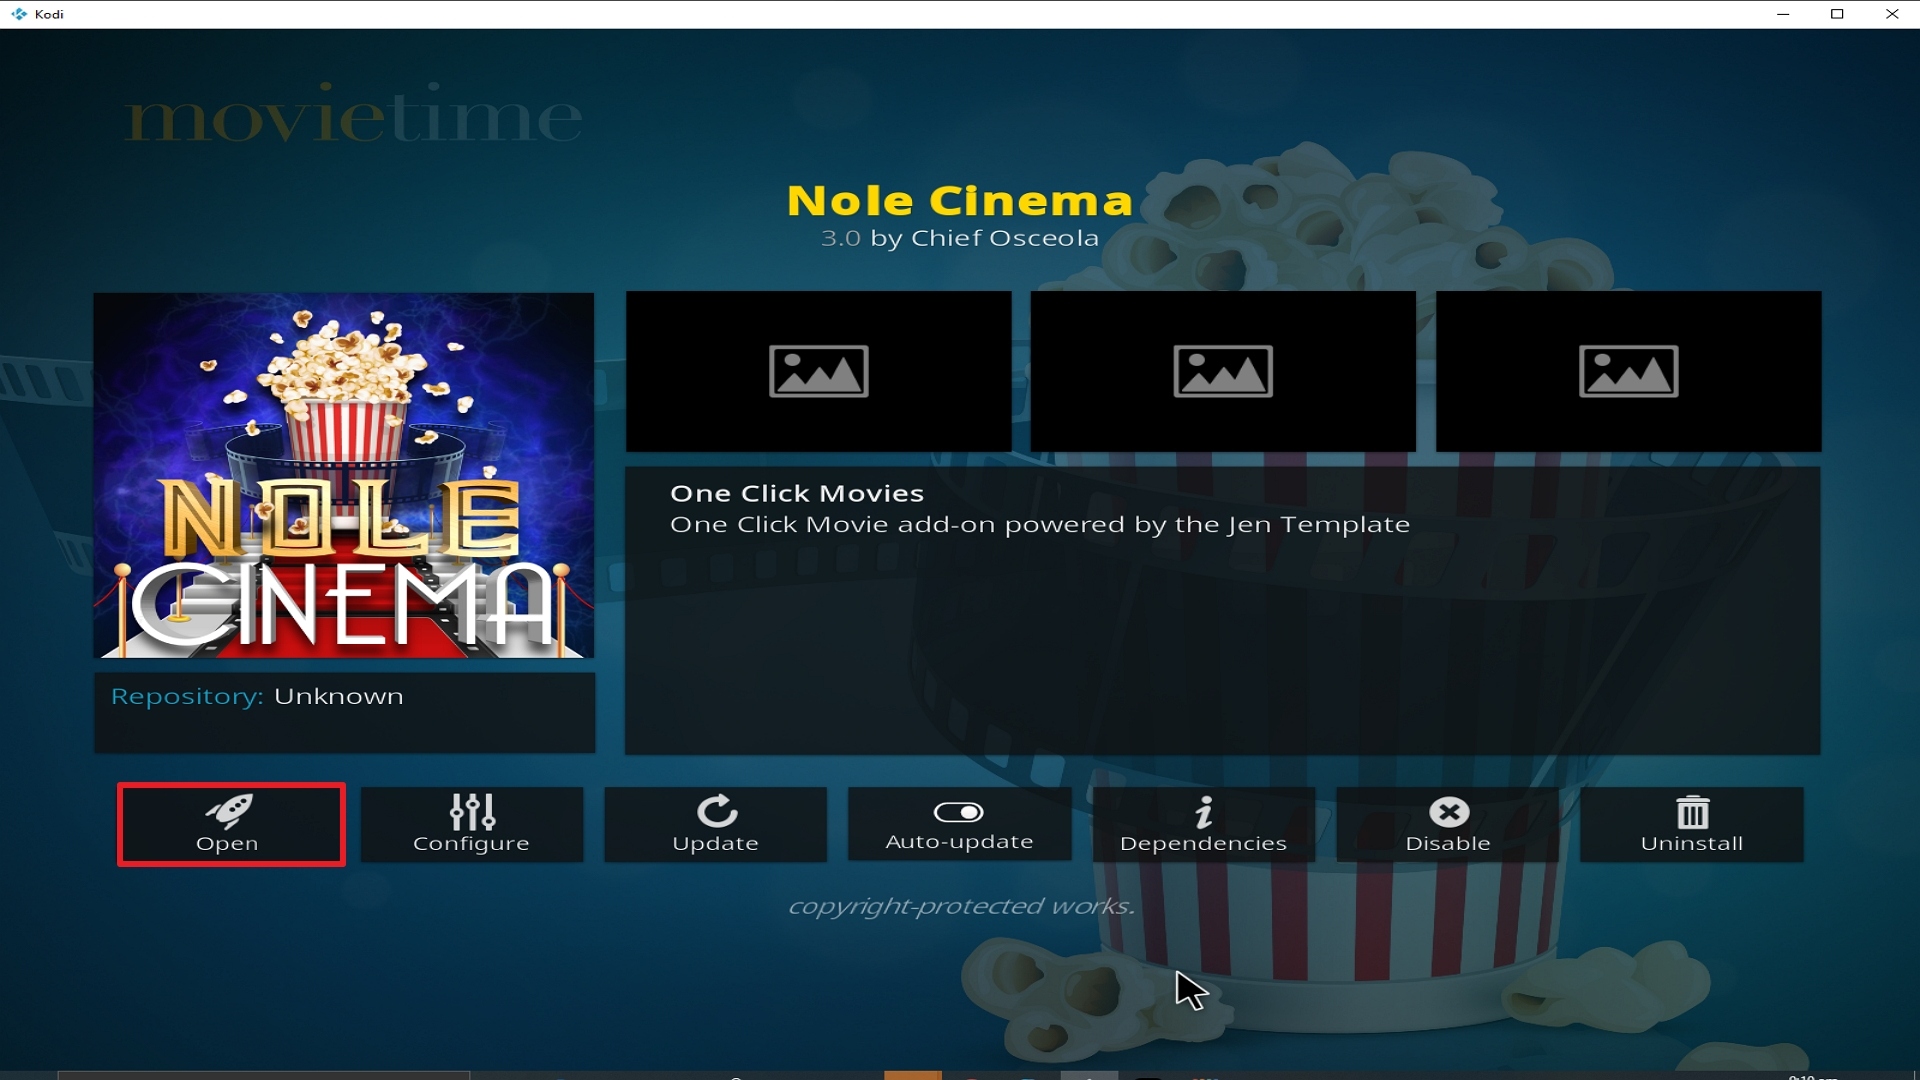
26. Click on Open to start the Halow TV add-on.

Step 26 Installing Halow TV addon on Kodi


Why should I use a VPN?

We recommend using a Virtual Private Network on your device if you’re using a third-party Kodi build to safeguard your safety and privacy. However, these builds are sometimes prone to malware and viruses, which might harm your device. It can also put your privacy at risk since they will use your identity for personal benefit.
When it comes to these types of concerns, Surfshark is one of the best VPNs you can use. This VPN is a tried-and-true VPN dedicated to providing the best service to its users. It also offers remarkable security measures that will keep you safe 24/7. This VPN also hides all of your online activities to keep you anonymous and safe from your snooping ISP.

Here’s are the reasons why it is our VPN of choice:
  • Bypass restrictions and geo-blocks to access lots of content.
  • This VPN service has more than 3200+ servers in 65 countries. 
  • Military-grade AES-256 encryption follows FIPS (Federal Information Processing Standards) that oversees the handling of sensitive data.
  • It follows a strict No-Logs Policy
  • No Bandwidth limits – you can enjoy a full-speed VPN connection without any throttling.
  • One of the Fastest as its raging speed
  • It works on all devices and can secure up to unlimited Devices.
  • 24/7 customer support.


Note: For more information about Surfshark, please read our Surfshark Review.


Grab your subscription now!


How to Install Surfshark VPN on Firestick

If your Firestick still has the older interface, read this article to learn how to update it: Update Firestick Interface.

Follow our screenshots below to install the SurfShark VPN app on your Fire TV stick.

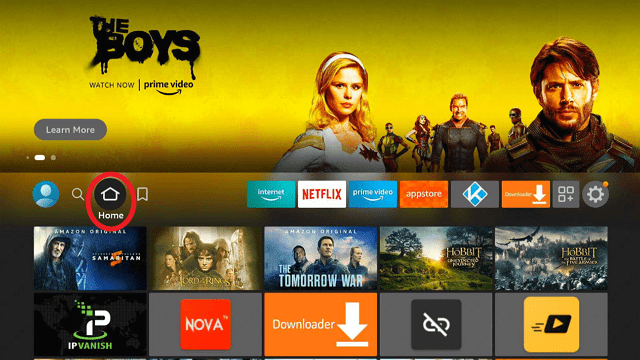
1. Go to the Home screen of your Firestick.
step 1 Install Surfshark VPN on Firestick


2. Navigate towards the Find tab. Press the Search button from the resulting dropdown.
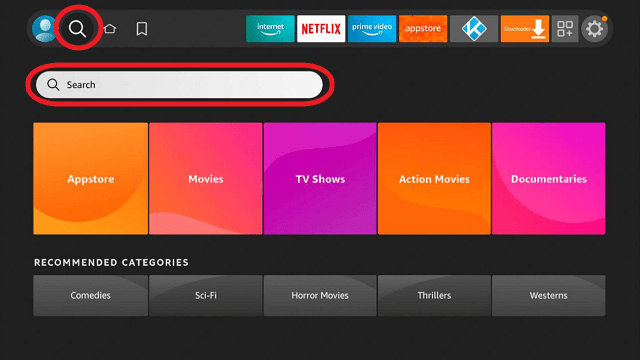
step 2 Install Surfshark VPN on Firestick


3. Type in the keyword of SurfShark and select from the suggestions that will appear.
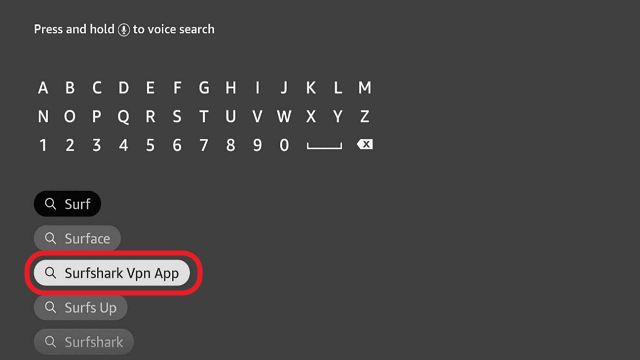
step 3 Install Surfshark VPN on Firestick


4. Click the official SurfShark icon from your search results.
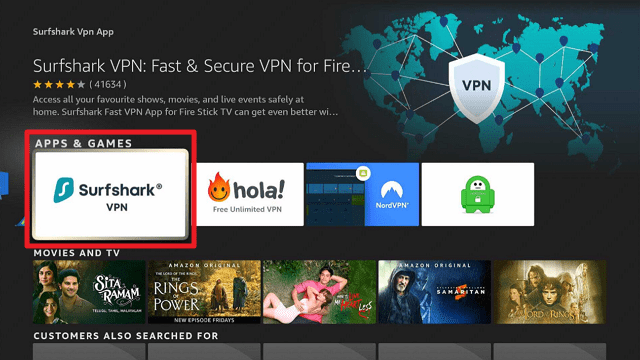
step 4 Install Surfshark VPN on Firestick


5. Press the Download (You own it) button.
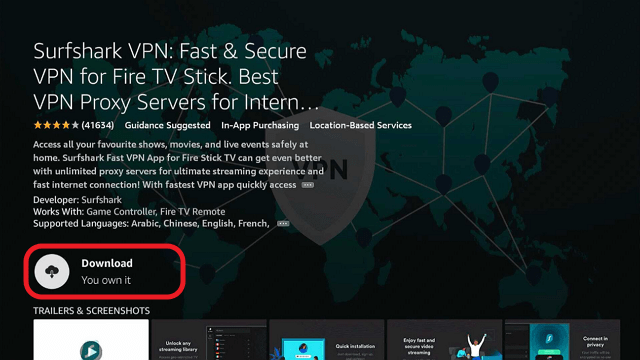
step 5 Install Surfshark VPN on Firestick


6. The SurfShark VPN installer will download on your device.
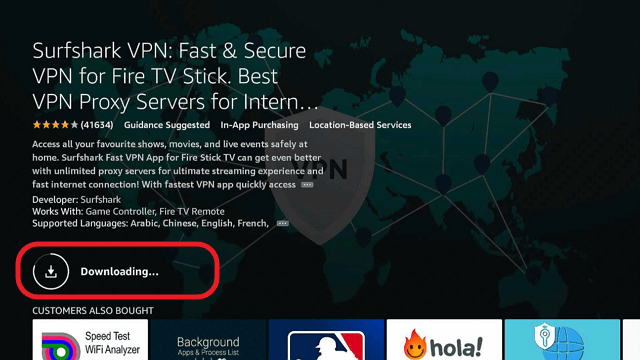
step 6 Install Surfshark VPN on Firestick


7. SurfShark VPN’s app will automatically install itself on your Fire TV stick.
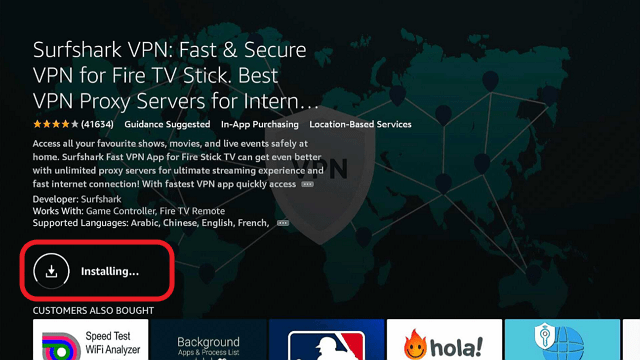
step 7 Install Surfshark VPN on Firestick


8. Press the Open button after completing SurfShark VPN’s installation process.
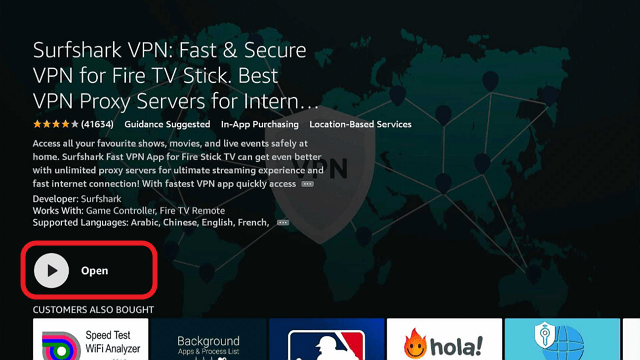
step 8 Install Surfshark VPN on Firestick


9. Please wait for the SurfShark VPN to load its user interface.
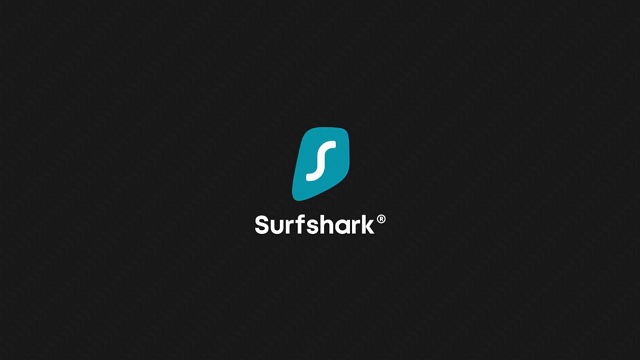
step 9 Install Surfshark VPN on Firestick


10. You can now log in with your SurfShark VPN account credentials.
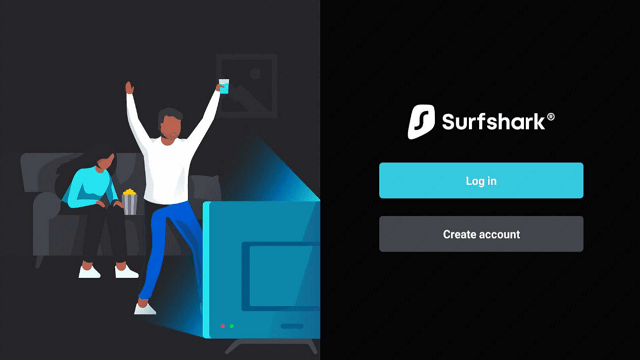
step 10 Install Surfshark VPN on Firestick

Learn more about Surfshark and Grab the Best Surfshark Deal Now!


Install Surfshark on Firestick
Best Surfshark Deal


Other VPNs to Consider

NordVPN (Best for Streaming)

Best Features

  • 5000+ Server in 50+ Countries 
  • Military-Grade Encryption
  • Fast Connection Speed
  • Suitable to a lot of devices
  • No-Log Policy

Prices
  • Complete $5.89 per month (64% Discount)
  • Plus $4.59 per month (56% Discount)
  • Standard $3.69 per month (55% Discount)

Best Features

  • 750+ High-speed VPN Servers in 43 Locations
  • Military-Grade Encryption
  • Fastest HD Streaming and Gaming
  • 30-Day Money-Back Guarantee
  • Unlimited Data & Devices
  • No-Log Policy

Prices
  • 3 Years $1.99 per month (82% Discount)
  • 1 Years $3.29 per month (70% Discount)
  • 1 Month $10.99 per month

IPVanish VPN (Most Secure)

Best Features

  • 1200+ Servers in 60+ Countries around the world
  • Unlimited Connections
  • No-Log Policy
  • Top Notch Military-Grade VPN Protocols and Encryptions
  • 100% Safe and Secured
  • Most Trusted VPN
  • Best VPN for Firestick
  • 30-Day Money-Back Guarantee

Prices
  • Yearly $3.99 per month (63% Discount) – 30 days risk free + Ransomware & Malware Protection
  • Quarterly $5.32 per month (51% Discount)
  • Monthly $10.99 per month


For more VPN discounts, go to ReviewVPN Deals and purchase the best VPN for you.

Click here to get the lowest price on Surfshark through our exclusive limited-time offer.


Install Sports World Kodi Addon

Sports World Kodi Addon

Sports World Image

Source:  http://lvtvv.com/repo 

Sports World Kodi Addon has been around since 2017 and comes from the well know Stream Army Repository and is still going strong in 2019.

They cover a massive range of sport and have a great hit rate for getting HD quality feeds on sports channels and live matches. The fact that the scrapers will also arrange titles in each category depending on subsections of MMA or Baseball is helpful and a step further than we have seen from many other applications.

When it first came around in 2017, Sports World replaced a massive gap in live sports add ons after several wells know names were taken down. It has held its own and stayed stable for a significant amount of time and is only really rivaled by Sports Devil when it comes to the range of content and quality.


Common Errors 

There are 3 common errors that you can expect to come up against with Sports World:

  • Stream not working/ Not available: When looking for working sports streams be prepared to find a lot of dud links. Firstly, are you using a VPN with Kodi? If not, many of the links may not work. But not because they are broken, but because your ISP is blocking your access to the content, as it is being streamed illegally. When connecting to a stream bear in mind it can take up to 10 seconds for the stream to start working. Also, if the match you are watching is popular the server may be overrun with requests and some will time out.  If none of that works, then try our more in-depth fix guide for streams linked above.
  • Could not Download/ Web URL failure: Make sure that you are downloading Sports World from the Stream Army repo which we have linked to above. Many add ons get put into other repos, but the files could be corrupted, or the add on are no longer being updated. Also, it may seem silly but check that you have copied the URL exactly. If neither of those fixes work, then read more of our guides linked above.
  • Kodi error checks log: An error in your Kodi check log is really nothing for you to worry about. Most of the time it just means that your cache is full and needs to be cleared. Just like the internet, every piece of media you watch has parts of it cached to make it load quickly if you choose to watch it again. Media files are large and over time this eats all your storage space. To find out other fixes read our guide linked above.


ANONYMOUSLY


Review

Sports World in terms of looks is nothing to write home about. It looks basic as all hell, but the streams work and they work consistently.

The fact that the add on has stayed updated, with a working scraper for over 2 years is a testament to the commitment of the developer which bodes well for the future.

Much live streaming add ons have come and gone in that time, and an add on with a committed developer is worth downloading and betting on.

Sports you can find on Sports World:

  • Sports Channels
  • UFC
  • Football
  • NBA
  • NFL
  • Rugby
  • Golf
  • Boxing
  • Tennis
  • Baseball
  • Cricket
  • Wrestling
  • Live Matches


YOUR INTERNET ACTIVITY IS BEING WATCHED

ReviewVPN cannot attest to the legality, security and privacy of the applications discussed on this site. It is highly recommended that you use a VPN service while streaming or using Kodi.

Currently, your IP 216.73.217.150 is visible to everyone and your Browser is being tracked by Advertisers & ISP Provider.

Save 65% Now

Limited Time Offer

Here are the main reasons why you must use a VPN:

  • Your activities are hidden from your ISP, the government, and from the apps you are using.
  • You can access additional movies and TV streams.
  • ISP attempts to throttle are thrwarted thus reducing buffering issues.
  • Geographically restricted content like Netflix and Hulu can be unblocked.

A VPN works be replacing your ISP-assigned IP address and creating an encrypted tunnel. We recommend the no log service offered by IPVanish. It works well on a Firestick and offers the fastest possible speeds.

Special Limited Time Offer - Get IPVanish


When the Sports World scrapers fetch links by sport’s category, they will also return subcategories based upon the links. So, football would be arranging by English Premium League, Champion’s League etc.

How to Install Sports World Addon on Kodi with Screenshots

  1. From the home screen, select the cogwheel at the upper left.

Step 1 Installing Sports World addon on Kodi

2. Select System in the bottom right corner.

Step 2 Installing Sports World addon on Kodi


3. Select Add-ons on the left side of the screen.

Step 3 Installing Sports World addon on Kodi


4. Select Unknown sources.

Step 4 Installing Sports World addon on Kodi


5. Click Yes to allow unknown sources.

Step 5 Installing Sports World addon on Kodi


6. Select File manager.

Step 6 Installing Sports World addon on Kodi


7. Click Add source.

Step 7 Installing Sports World addon on Kodi


8. Click on <None>.

Step 8 Installing Sports World addon on Kodi


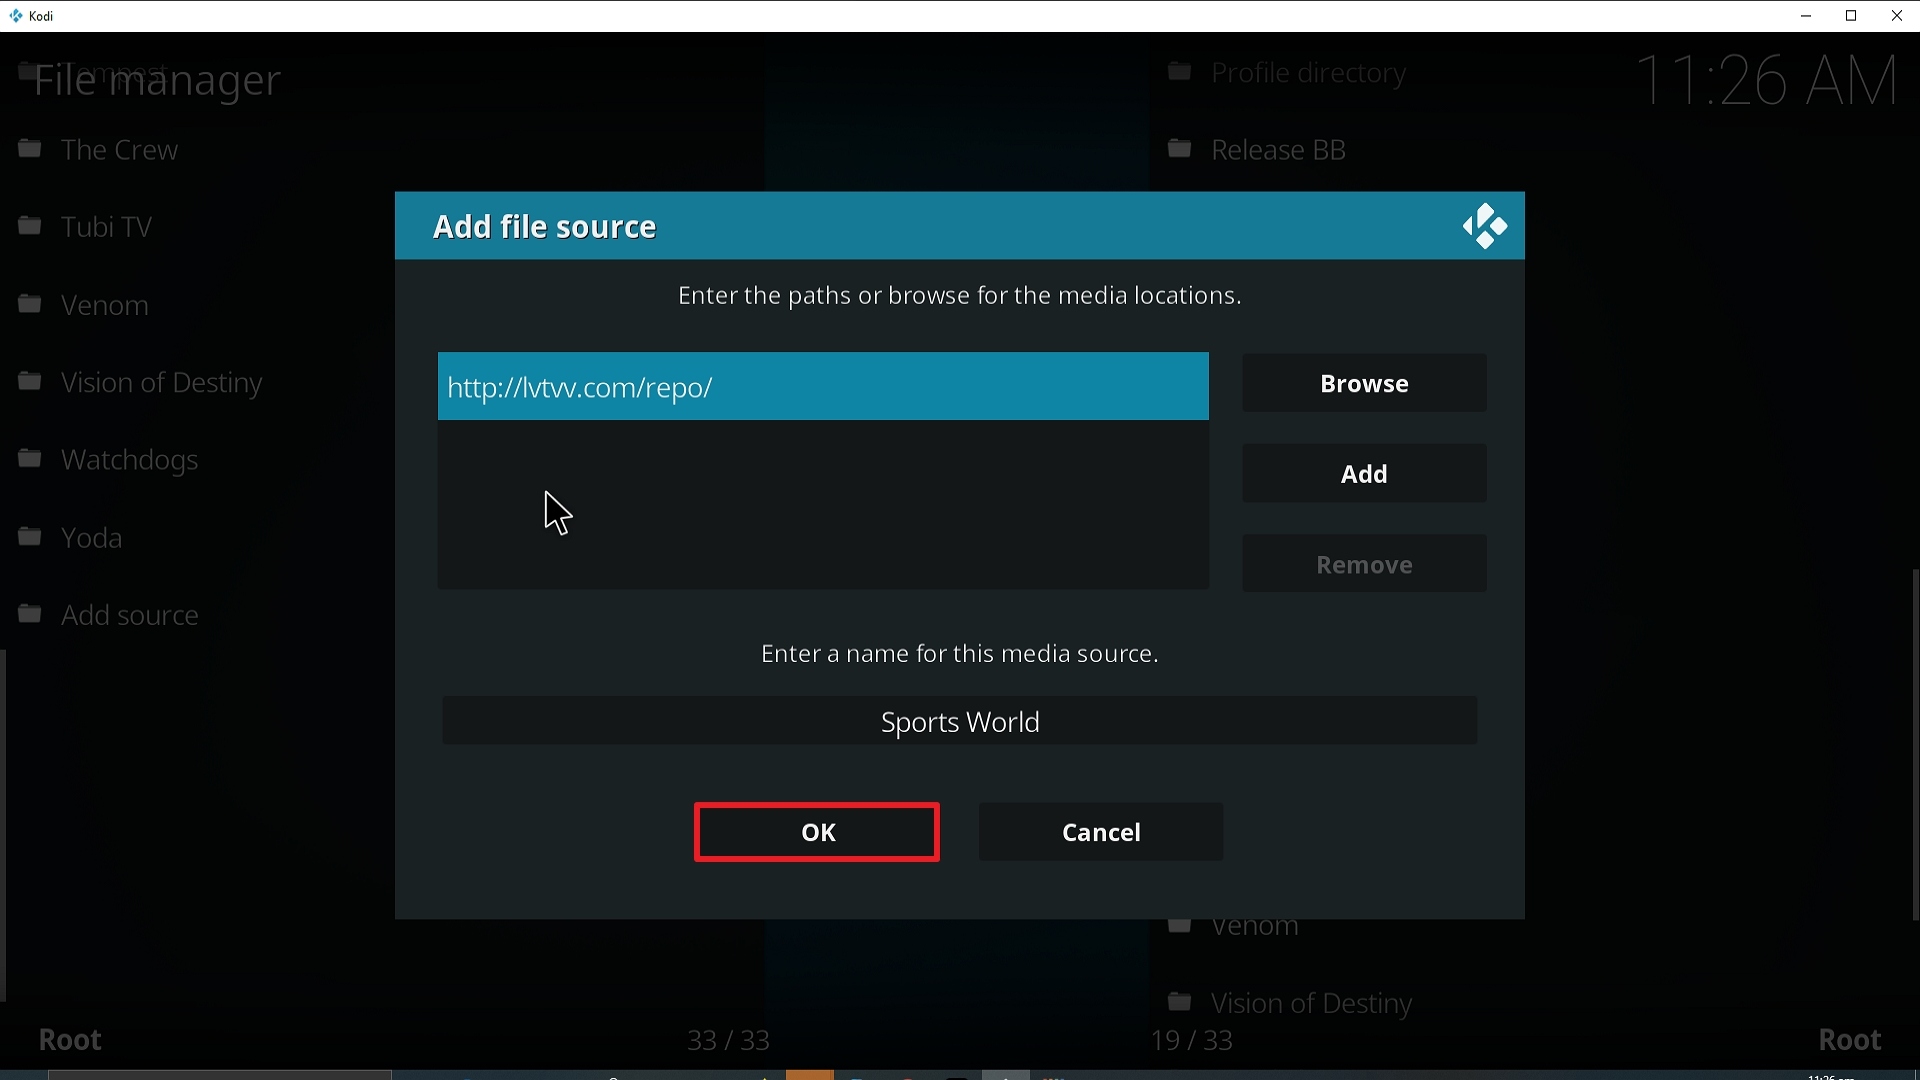
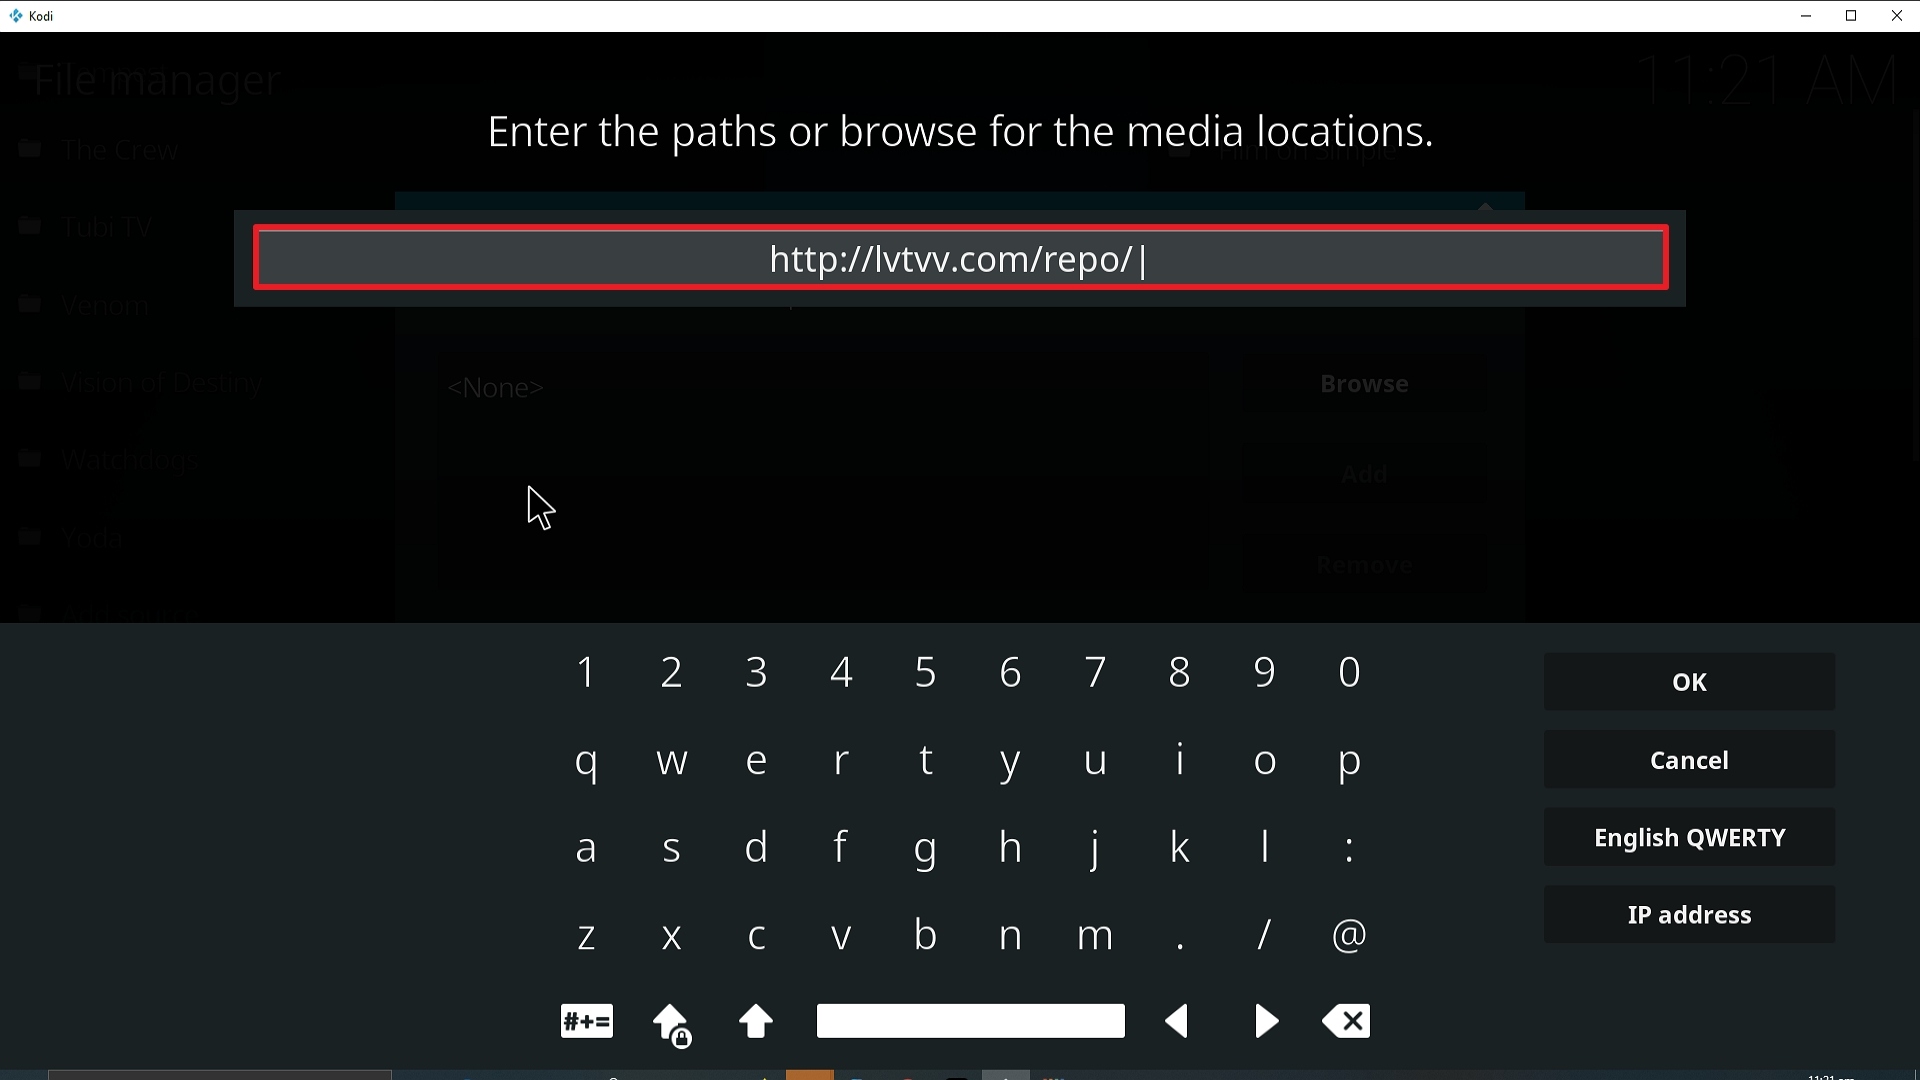
9. Type exactly: http://lvtvv.com/repo/

Step 9 Installing Sports World addon on Kodi


10. Click on OK.

Step 10 Installing Sports World addon on Kodi


11. Select enter a name for this media source.

Step 11 Installing Sports World addon on Kodi


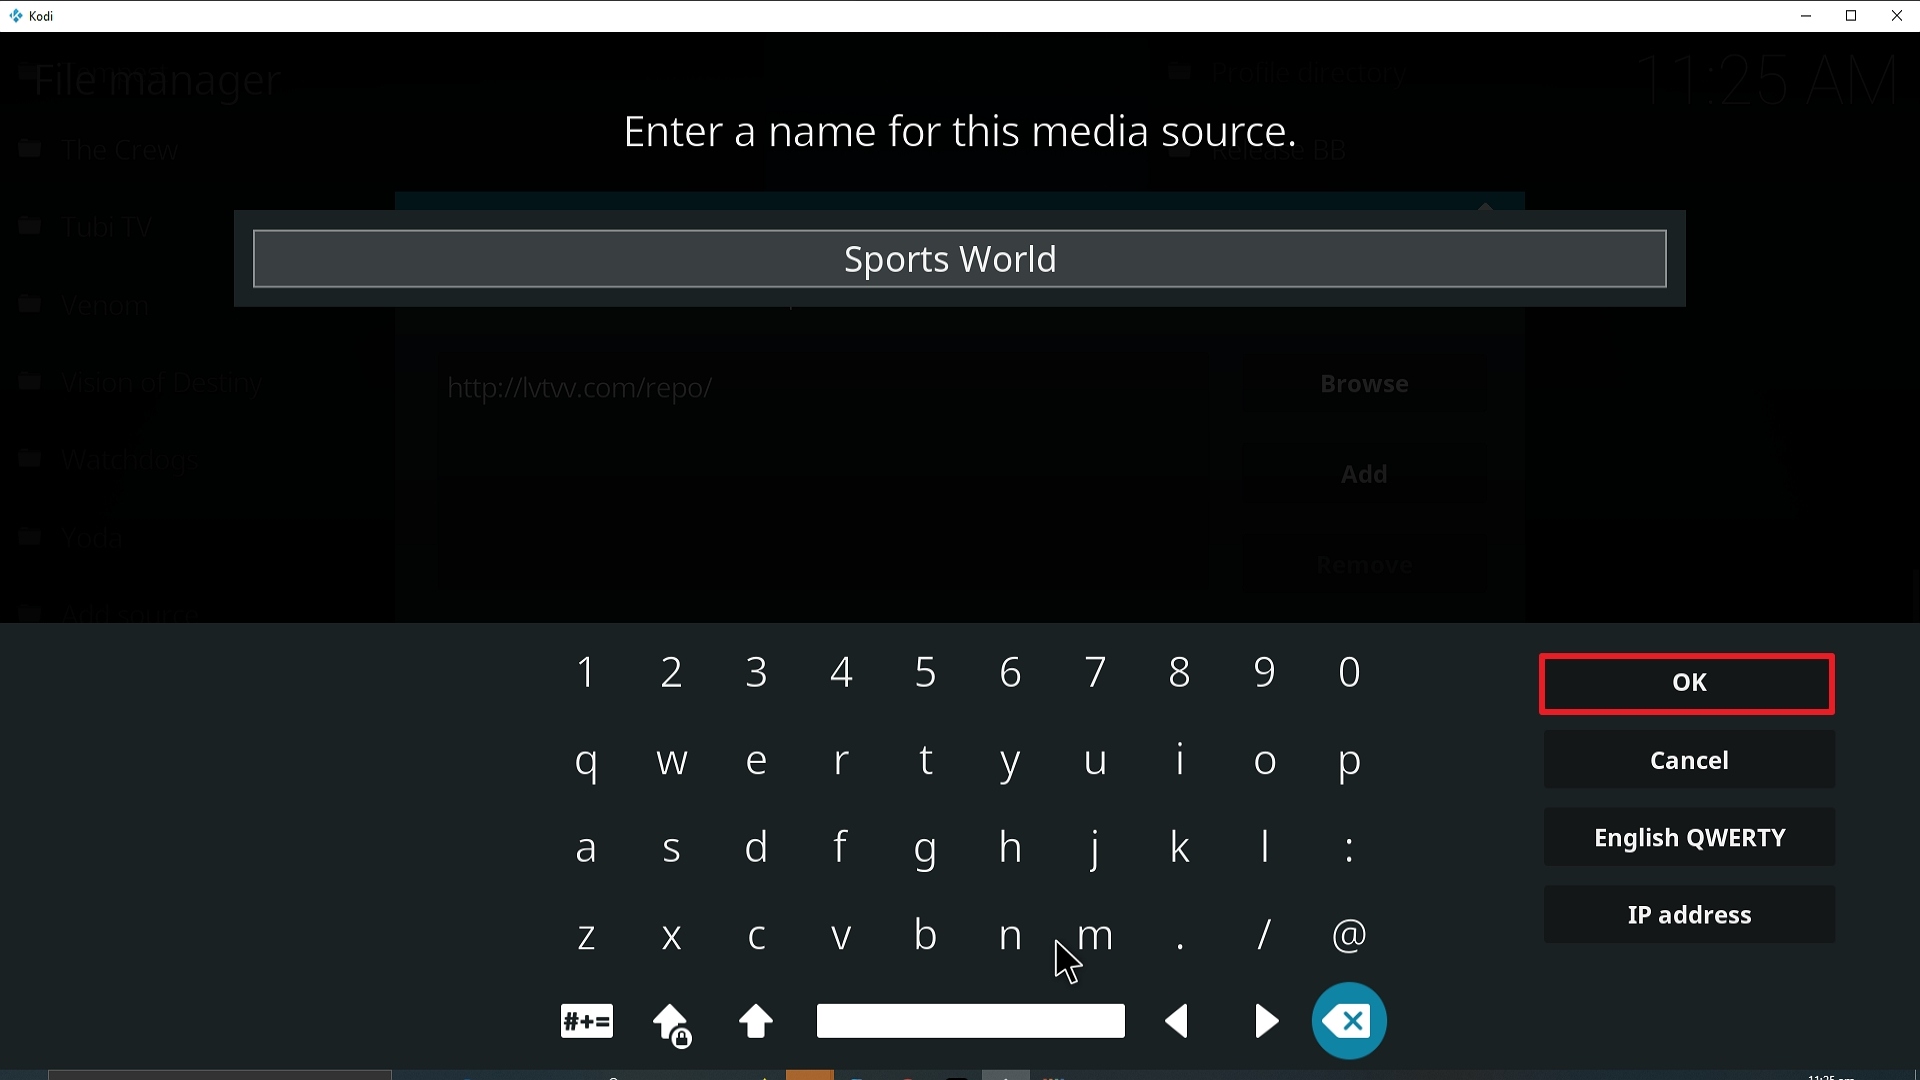
12. Name is Sports World (this part isn’t critical as long as your remember the name).

Step 12 Installing Sports World addon on Kodi


13. Click on OK.

Step 13 Installing Sports World addon on Kodi


14. Click on OK.

Step 14 Installing Sports World addon on Kodi


15. Take one step back and click on Add-ons.

Step 15 Installing Sports World addon on Kodi


16. Select install from zip file.

Step 16 Installing Sports World addon on Kodi


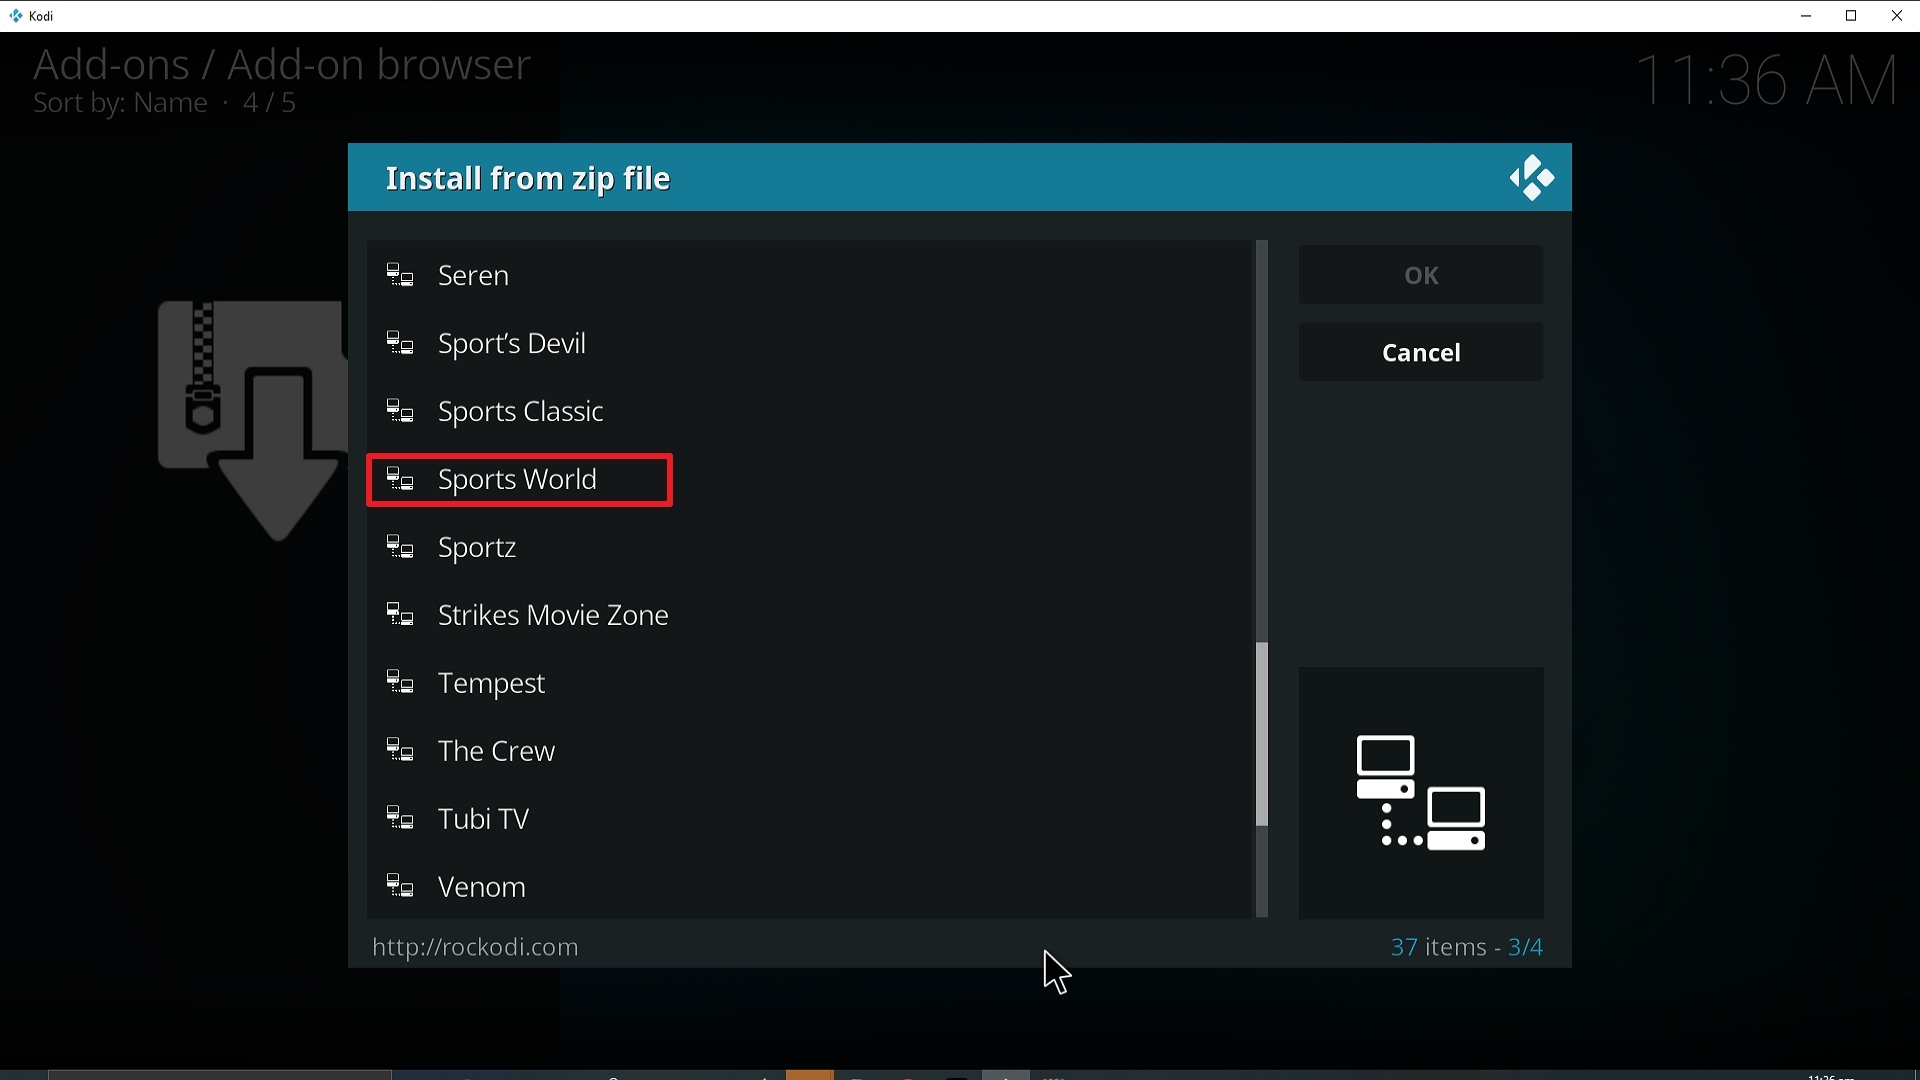
17. Click on Sports World (or whatever you named the source).

Step 17 Installing Sports World addon on Kodi


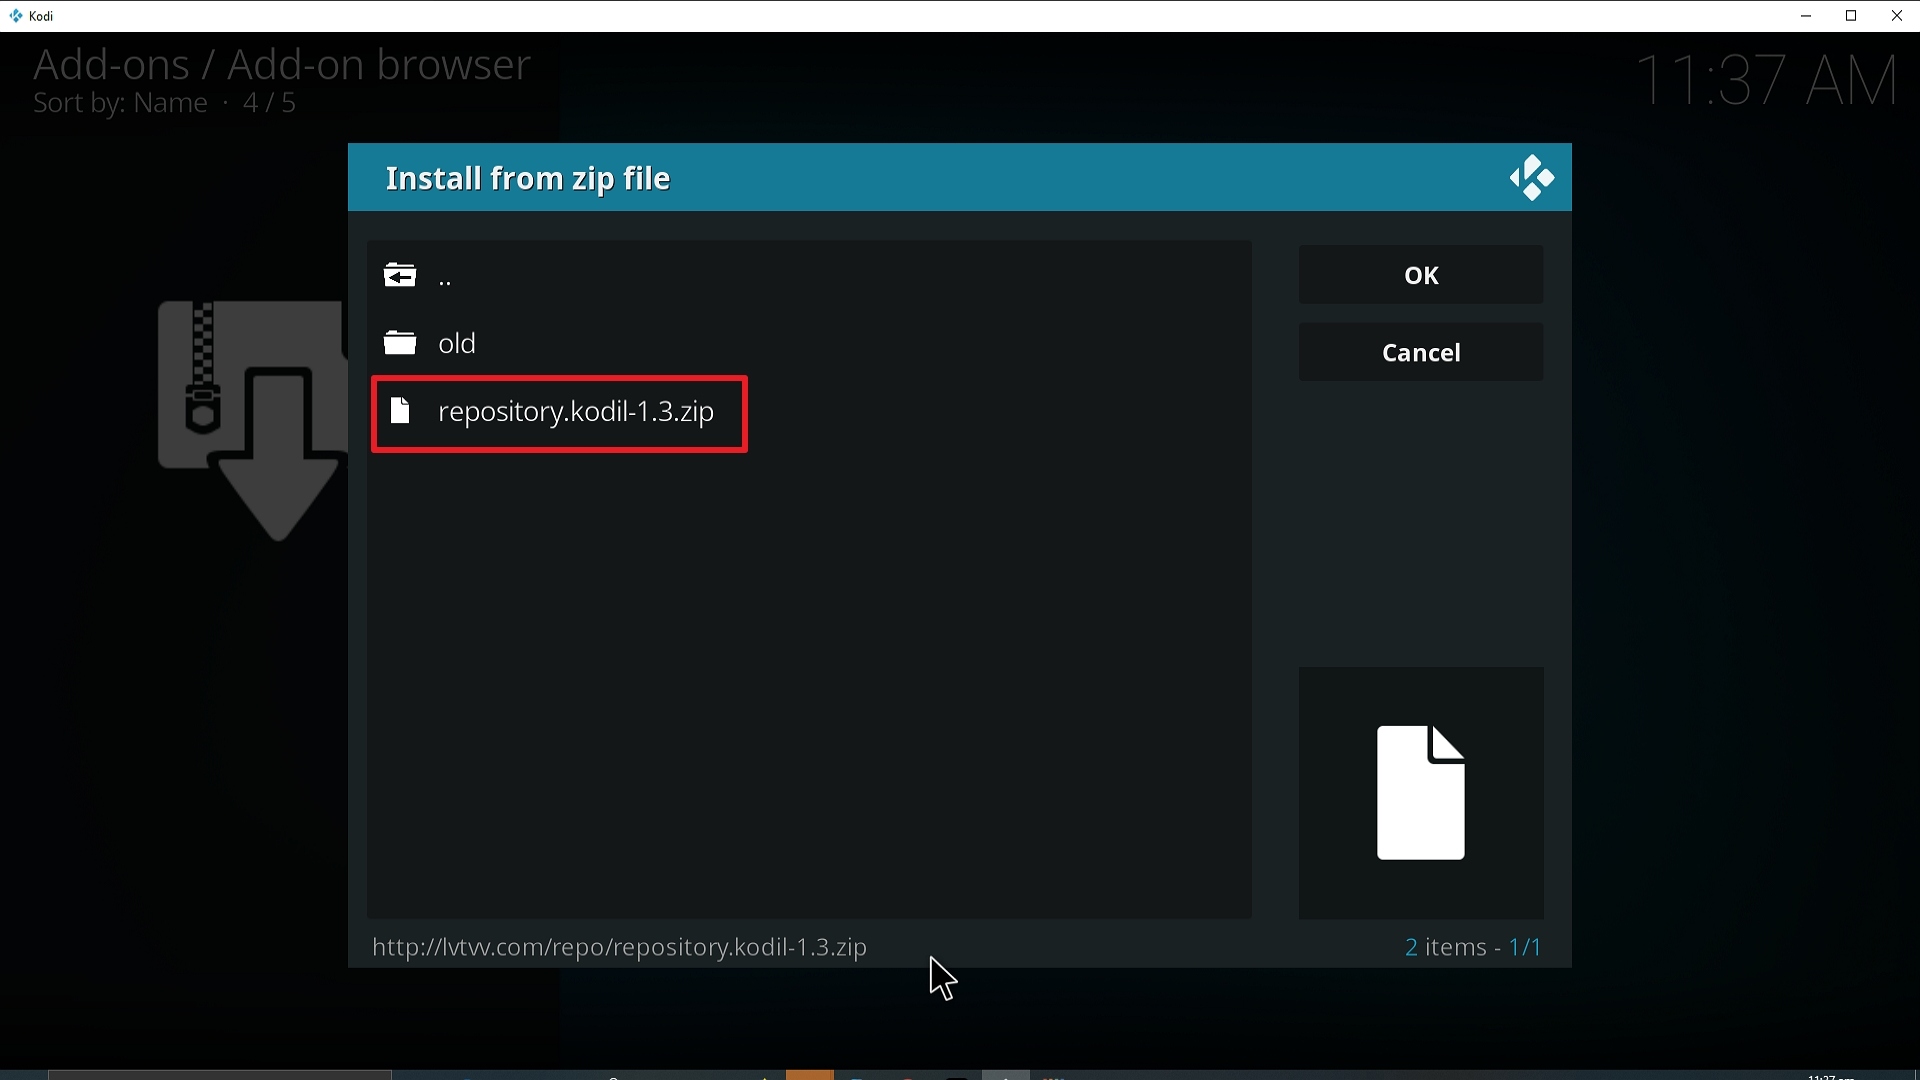
18. Click on repository.kodil-1.3.zip.

Step 18 Installing Sports World addon on Kodi


19. Select on Install from repository.

Step 19 Installing Sports World addon on Kodi


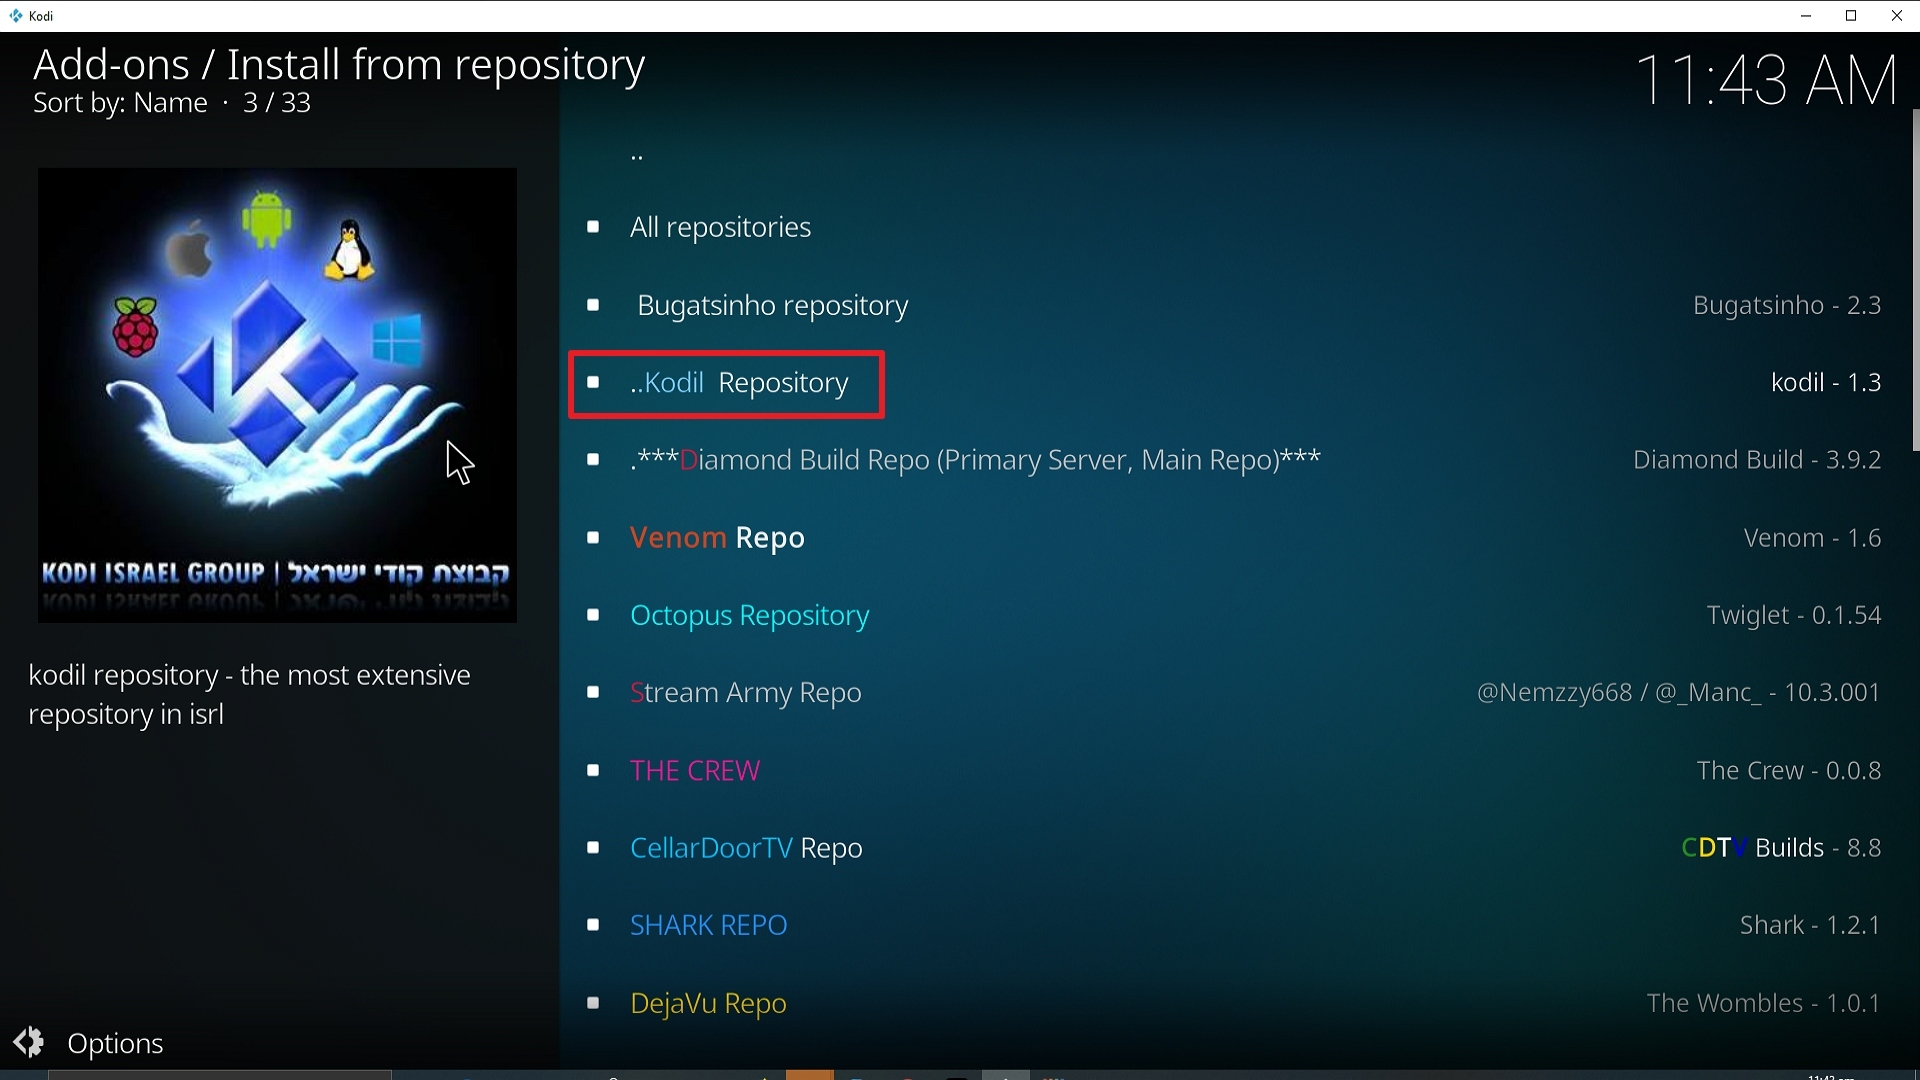
20. Click on kodil Repo

Step 20 Installing Sports World addon on Kodi


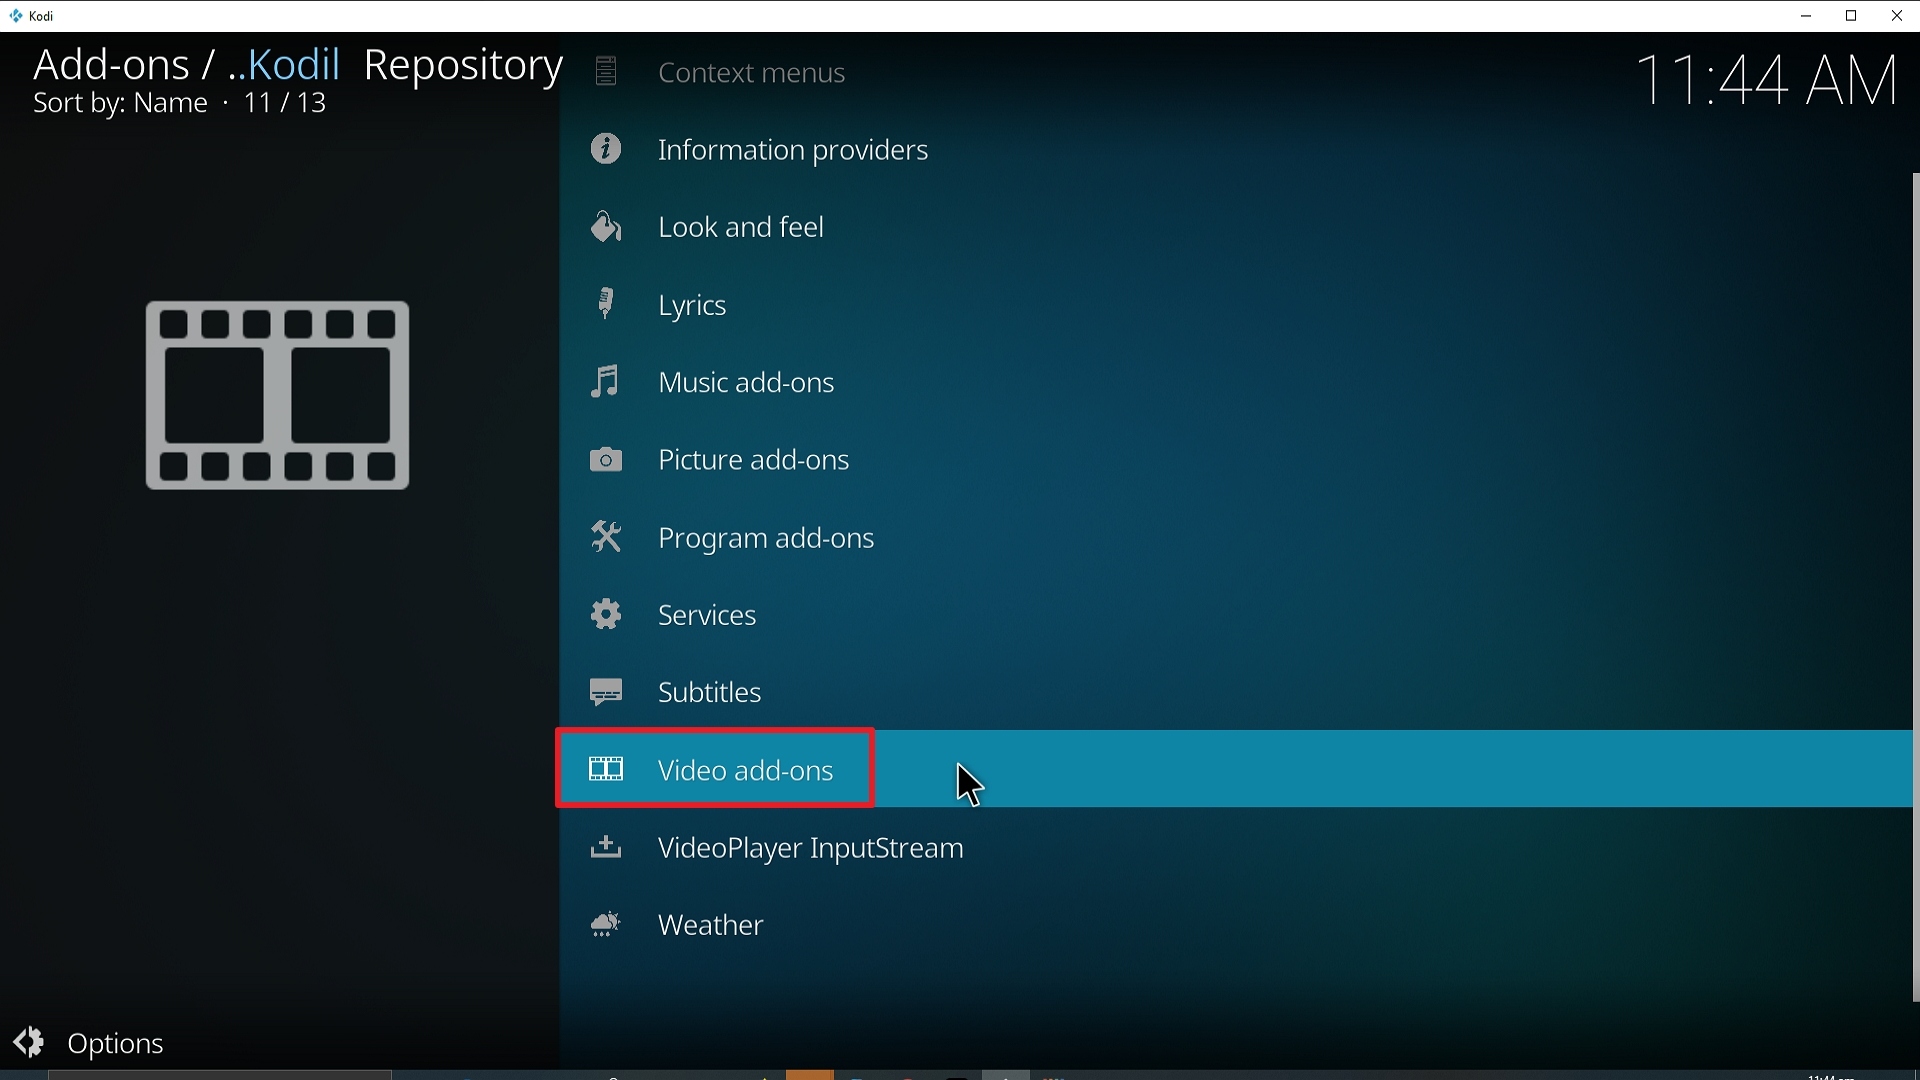
21. Pick Video add-ons.

Step 21 Installing Sports World addon on Kodi


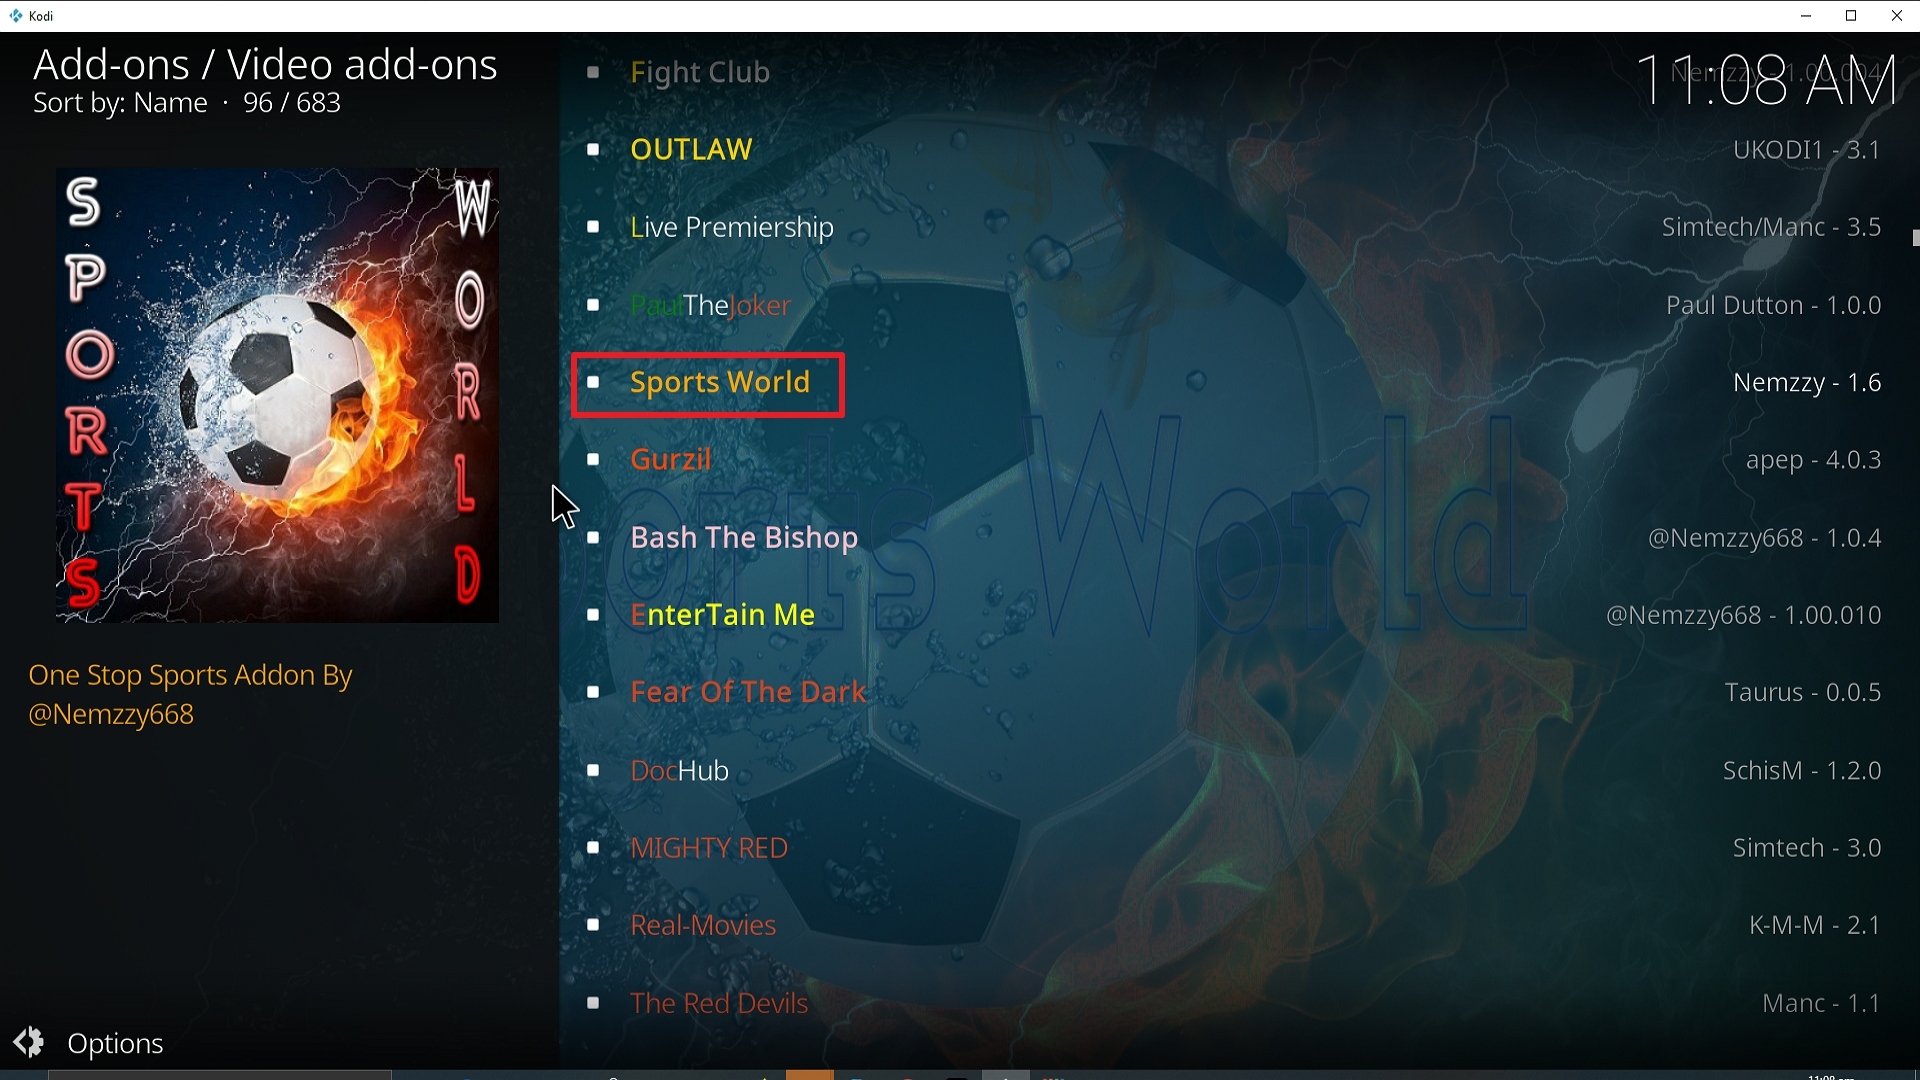
22. Select Sports World again.

Step 22 Installing Sports World addon on Kodi


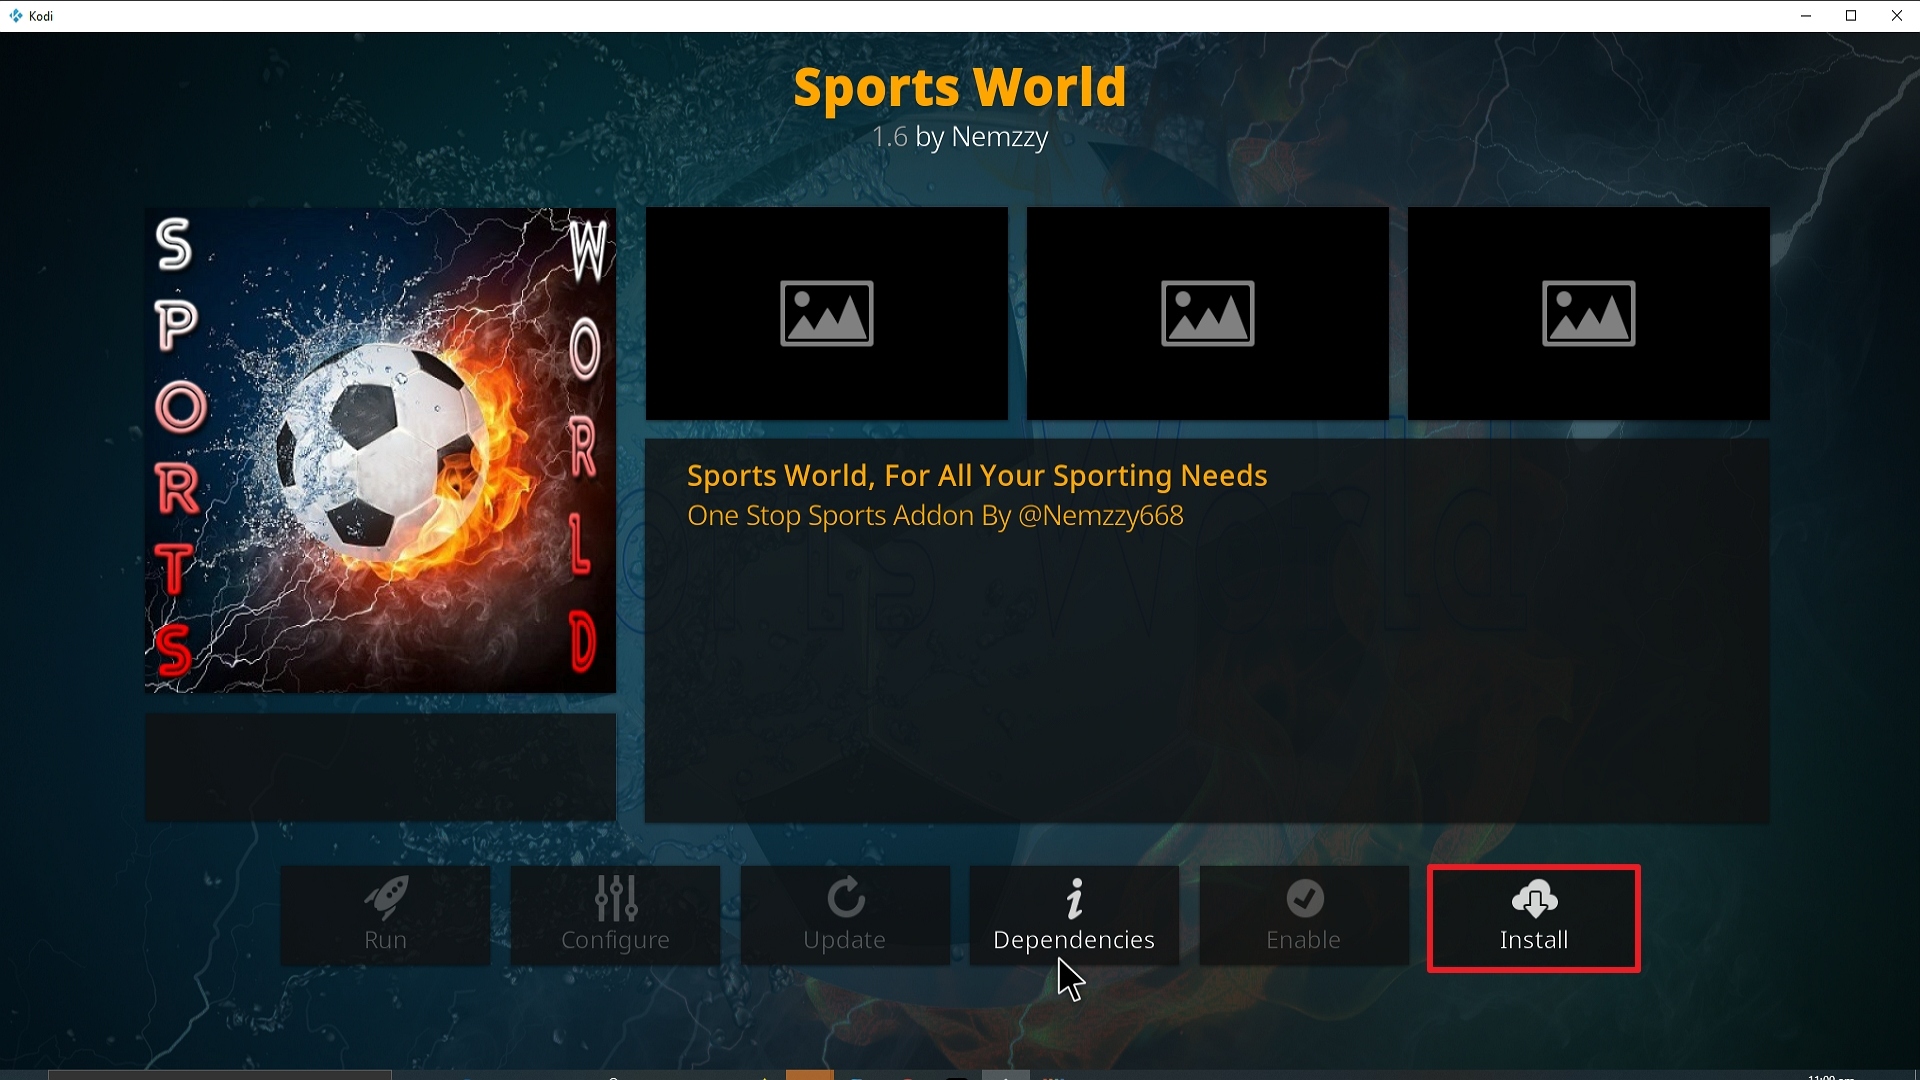
23. Click on Install. 

Step 23 Installing Sports World addon on Kodi


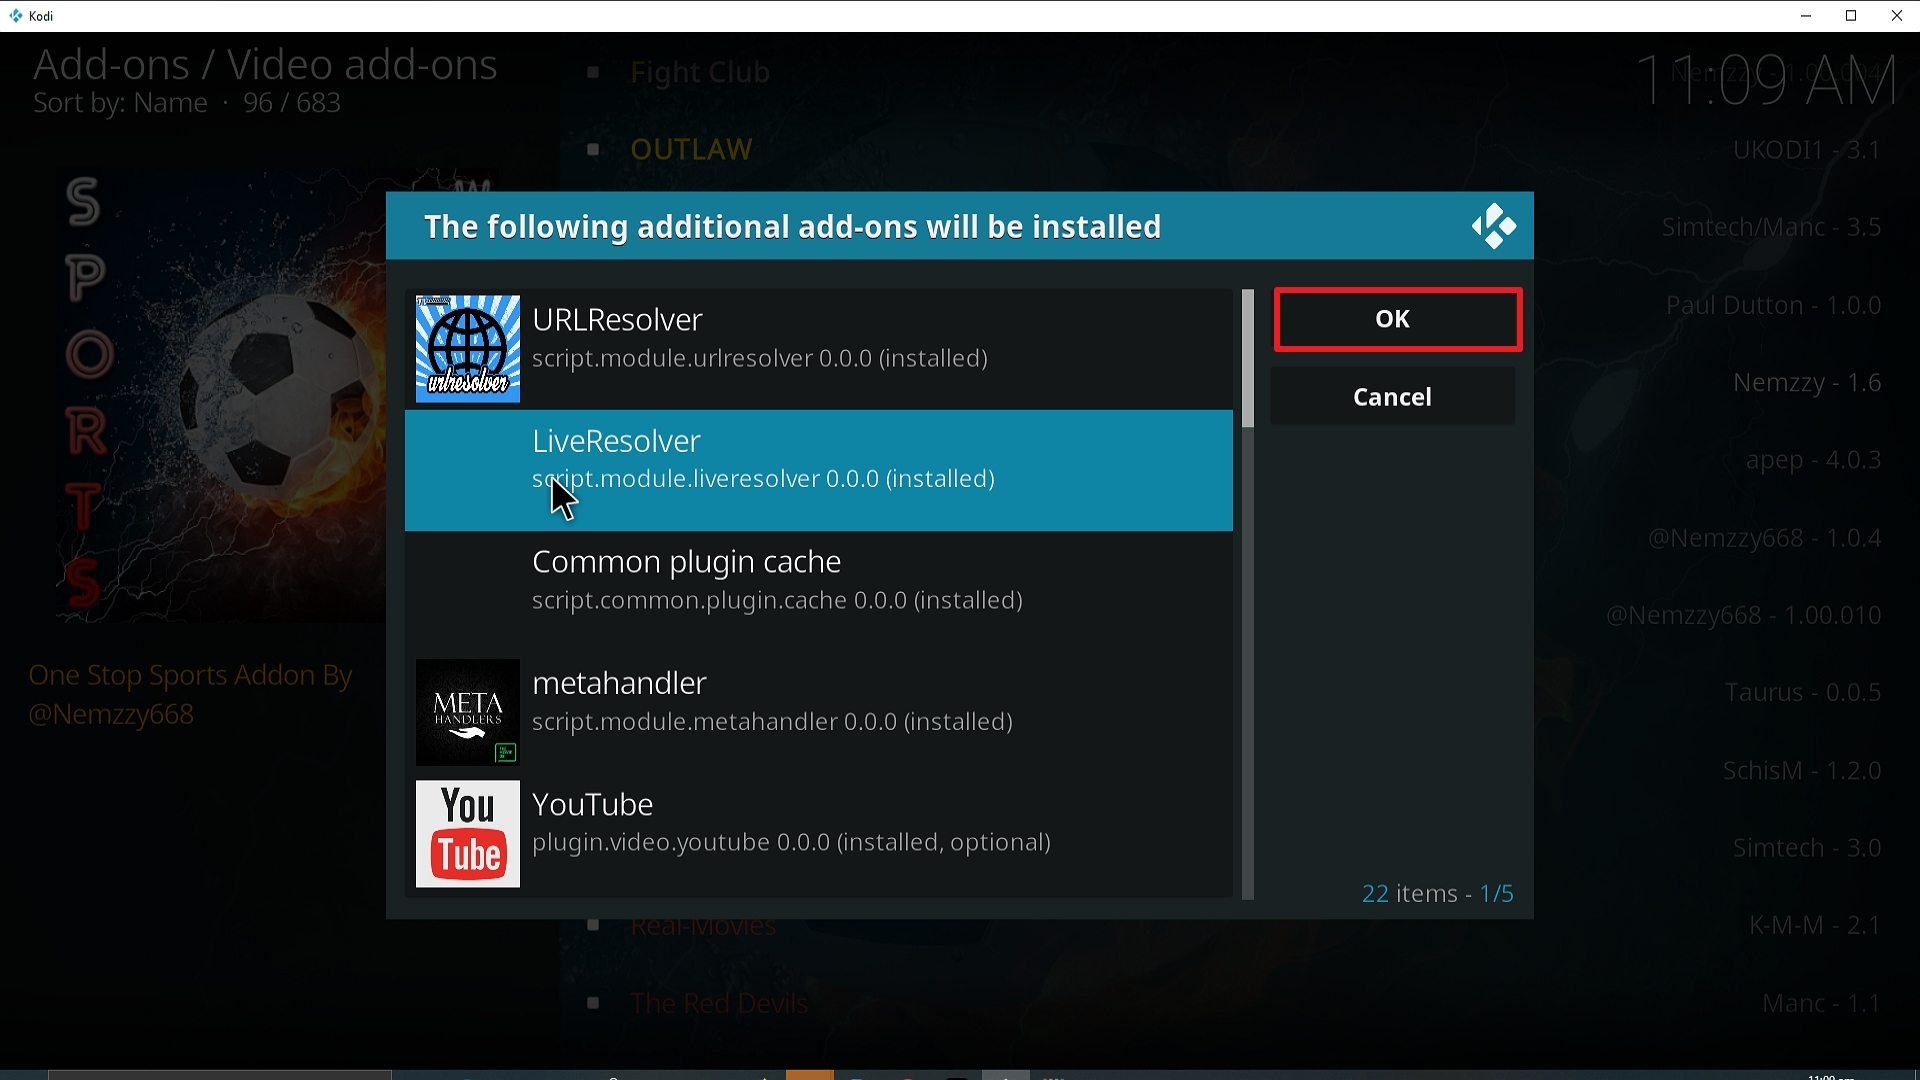
24. Select OK after reviewing the add-ons that will be installed.

Step 24 Installing Sports World addon on Kodi


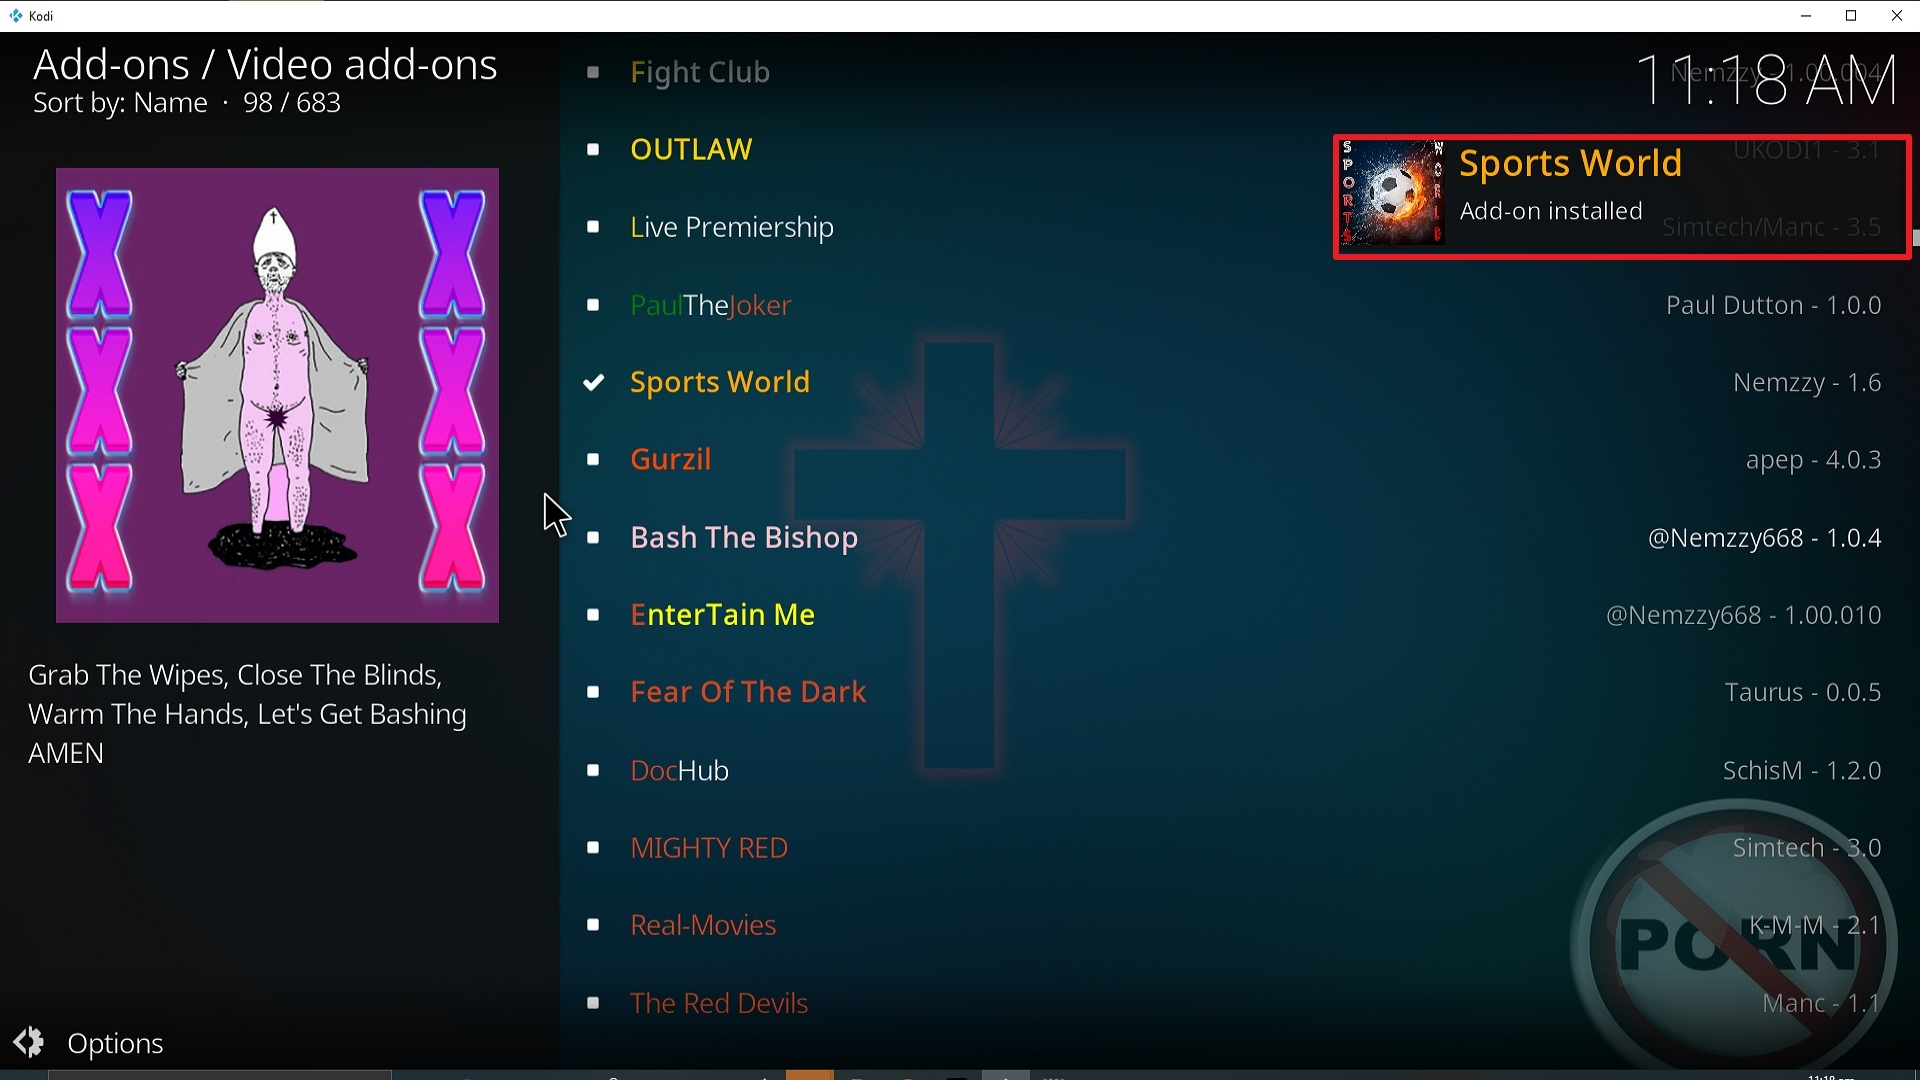
25. You should see a popup in the upper right corner saying Sports World has installed. There will actually be multiple popups for the various components.

Step 25 Installing Sports World addon on Kodi


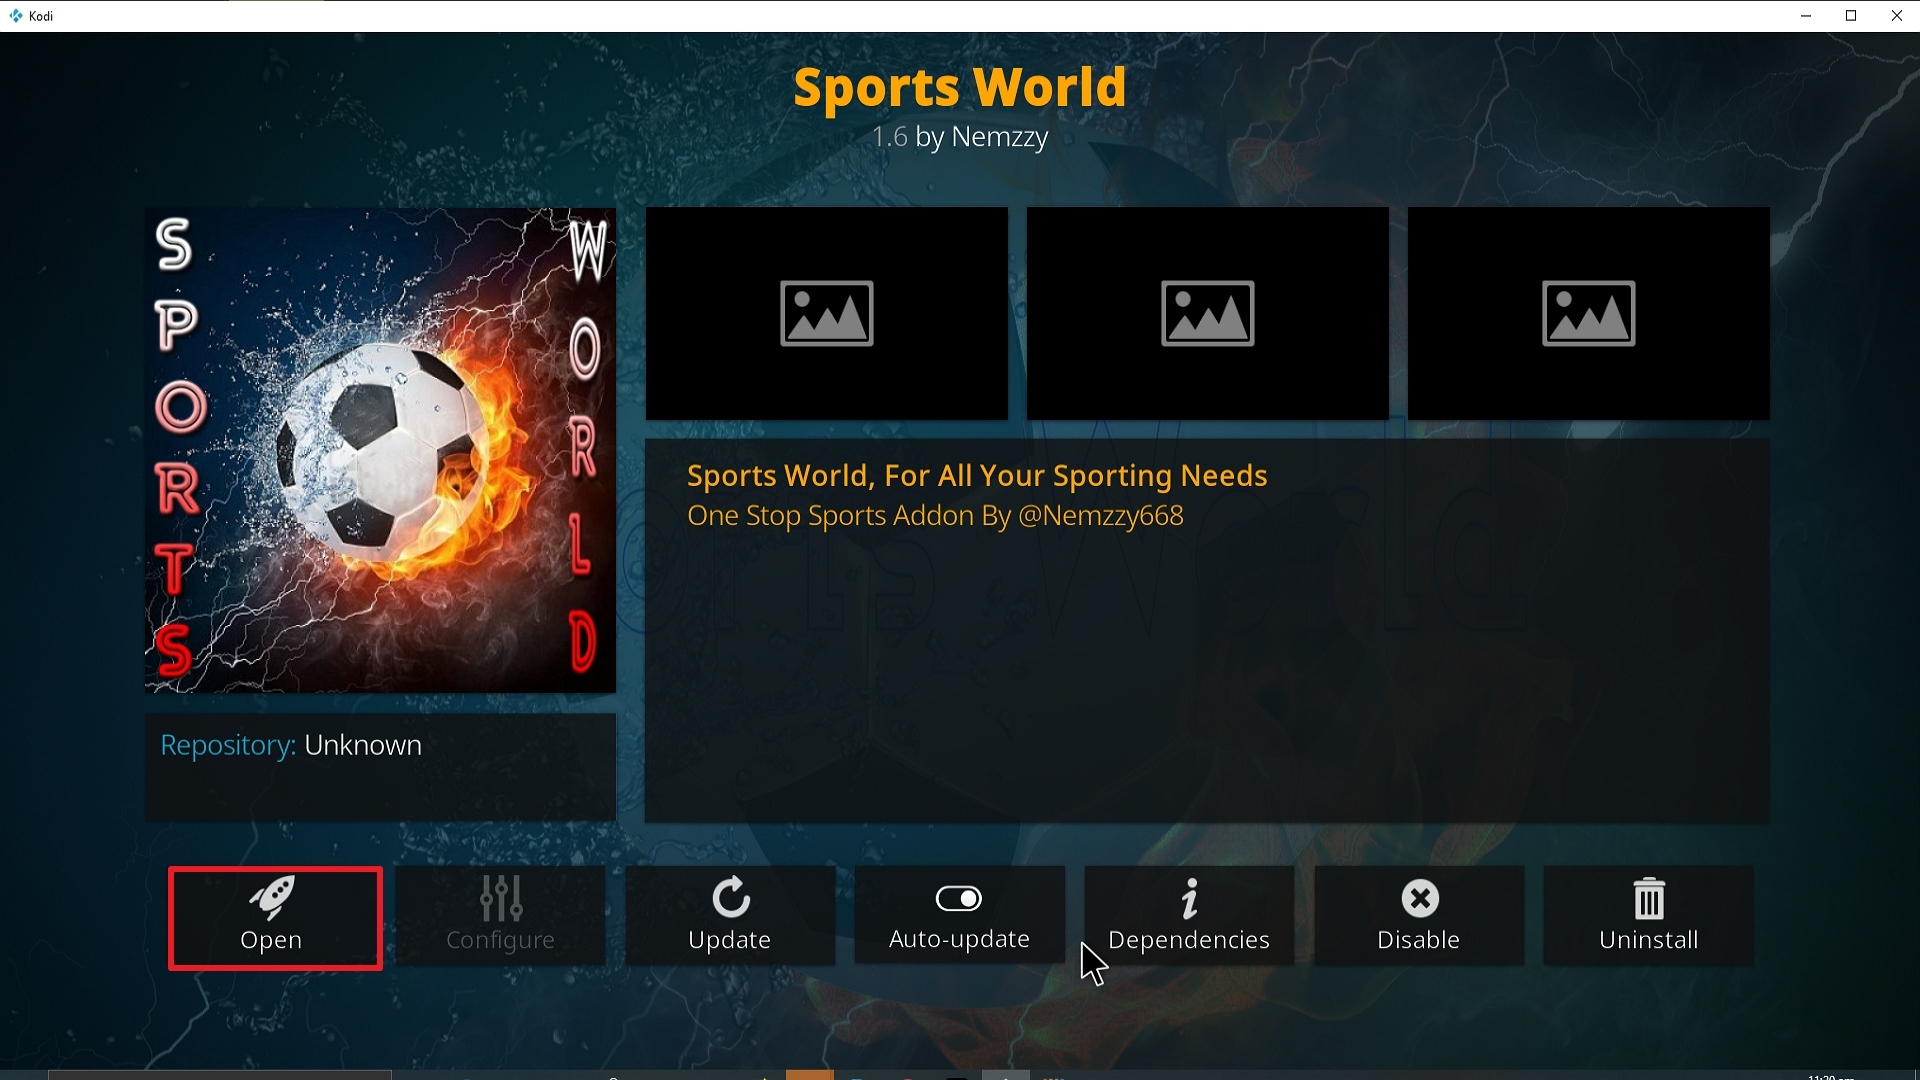
26. Click on Open to start the Sports World add-on.

Step 26 Installing Sports World addon on Kodi


Install Surfshark on Firestick

Best Surfshark Deal


How to Install Surfshark VPN on Firestick

If your Firestick still has the older interface, read this article to learn how to update it: Update Firestick Interface.

Follow our screenshots below to install the SurfShark VPN app on your Fire TV stick.

1. Go to the Home screen of your Firestick.

step 1 Install Surfshark VPN on Firestick


2. Navigate towards the Find tab. Press the Search button from the resulting dropdown.

step 2 Install Surfshark VPN on Firestick


3. Type in the keyword of SurfShark and select from the suggestions that will appear.

step 3 Install Surfshark VPN on Firestick


4. Click the official SurfShark icon from your search results.

step 4 Install Surfshark VPN on Firestick


5. Press the Download (You own it) button.

step 5 Install Surfshark VPN on Firestick


6. The SurfShark VPN installer will download on your device.

step 6 Install Surfshark VPN on Firestick


7. SurfShark VPN’s app will automatically install itself on your Fire TV stick.

step 7 Install Surfshark VPN on Firestick


8. Press the Open button after completing SurfShark VPN’s installation process.

step 8 Install Surfshark VPN on Firestick


9. Please wait for the SurfShark VPN to load its user interface.

step 9 Install Surfshark VPN on Firestick


10. You can now log in with your SurfShark VPN account credentials.

step 10 Install Surfshark VPN on Firestick

Learn more about Surfshark and Grab the Best Surfshark Deal Now!


Install Surfshark on Firestick

Best Surfshark Deal


Other VPNs to Consider

NordVPN (Best for Streaming)

Best Features

  • 5000+ Server in 50+ Countries 
  • Military-Grade Encryption
  • Fast Connection Speed
  • Suitable to a lot of devices
  • No-Log Policy

Prices
  • Complete $5.89 per month (64% Discount)
  • Plus $4.59 per month (56% Discount)
  • Standard $3.69 per month (55% Discount)

Best Features

  • 750+ High-speed VPN Servers in 43 Locations
  • Military-Grade Encryption
  • Fastest HD Streaming and Gaming
  • 30-Day Money-Back Guarantee
  • Unlimited Data & Devices
  • No-Log Policy

Prices
  • 3 Years $1.99 per month (82% Discount)
  • 1 Years $3.29 per month (70% Discount)
  • 1 Month $10.99 per month

IPVanish VPN (Most Secure)

Best Features

  • 1200+ Servers in 60+ Countries around the world
  • Unlimited Connections
  • No-Log Policy
  • Top Notch Military-Grade VPN Protocols and Encryptions
  • 100% Safe and Secured
  • Most Trusted VPN
  • Best VPN for Firestick
  • 30-Day Money-Back Guarantee

Prices
  • Yearly $3.99 per month (63% Discount) – 30 days risk free + Ransomware & Malware Protection
  • Quarterly $5.32 per month (51% Discount)
  • Monthly $10.99 per month


For more VPN discounts, go to ReviewVPN Deals and purchase the best VPN for you.

Click here to get the lowest price on Surfshark through our exclusive limited-time offer.


Install Planet MMA Kodi Addon

Planet MMA Kodi Addon


planet-mma-kodi-addon image

Source:  http://www.onenation.info/ 

Planet MMA is your number 1 add on when it comes to everything UFC. Previously known as UFC Finest, the add on went dark and then was renamed and rebranded with a better UI and even more sections and streams.

Up until recently, Planet MMA was hosted on the well-known Supremacy repo, until the man in charge was arrested in the UK. But you can now find it in the excellent One Nation repo.

This is another add on just like Golden Gloves or WWE on Demand which has been made by a fan for the fans. You can see just how much this developer loves the UFC with the depth of content and the tonnes of old and classic fights.


Common Errors

Find out how to fix the 3 most common errors that you might come across with WWE on Demand:

  • Add on won’t install/start: Planet MMA is not long back from a period of being offline after the Supremacy repo went down. If the add on doesn’t start, then try and wait or give it a fresh install. Otherwise, you may just need to be patient or find an alternative. If Planet MMA doesn’t install, then first check the URL has been typed correctly and that you have linked to the One Nation repository. That is the official source for this add on. For more fixes read our guide linked above.
  • Source not working/slow/frozen: When dealing with Live TV and PPV matches you are going to have to contend with links that just don’t seem to work. Planet MMA tends to be good for the quality of the links, so here are a few simple steps. First, give it 10 seconds for the link to fully load, connect and buffer. Second, if the match is popular you may need to reload the stream a few times to get a connection. Also, check your internet connection and that you are trying to access the link using an encrypted connection with a VPN. Otherwise, your ISP may be blocking your content. Check here for the best VPN deal. For more fixes read our guide linked above.
  • Kodi check log error: Everything that you stream is cached, generally the first couple of seconds of each program, so you can easily start it next time around. Over time all these caches build up. This is the most probable reason for a check log error. To find out how to clear cache and other fixes read our guide linked above.


ANONYMOUSLY

Review

Planet MMA is a fantastic add on with a great selection of content, including a What’s new section and a UFC calendar so you can see what fights are coming up. Great addition on any fight nuts Kodi installation.

What makes Planet MMA particularly attractive is that its been going for so long, the add on is almost 3 years old including the time it was UFC Finest and has kept up to date and relevant as many add ons have come and gone. You’re always going to get a working stream with Planet MMA.

You might get a wider selection of Sport on Sportowa TV or Sports Devil but nowhere are you going to get the depth and level of focus on MMA that you get with this add on.

Planet MMA has the following categories:

  • What’s new
  • Search
  • UFC Calendar
  • Fight Night Live
  • The Pioneers of MMA
  • MMA Movies
  • UFC Retro
  • Ultimate Fighter
  • YouTube
  • Documentaries
  • UFC Open load
  • MMA Open load
  • UFC Fight Night
  • MMA Fight Night
  • Fights Spotlight
  • Fighters Collection
  • Where Are They Now


YOUR INTERNET ACTIVITY IS BEING WATCHED

ReviewVPN cannot attest to the legality, security and privacy of the applications discussed on this site. It is highly recommended that you use a VPN service while streaming or using Kodi.

Currently, your IP 216.73.217.150 is visible to everyone and your Browser is being tracked by Advertisers & ISP Provider.

Save 65% Now

Limited Time Offer

Here are the main reasons why you must use a VPN:

  • Your activities are hidden from your ISP, the government, and from the apps you are using.
  • You can access additional movies and TV streams.
  • ISP attempts to throttle are thrwarted thus reducing buffering issues.
  • Geographically restricted content like Netflix and Hulu can be unblocked.

A VPN works be replacing your ISP-assigned IP address and creating an encrypted tunnel. We recommend the no log service offered by IPVanish. It works well on a Firestick and offers the fastest possible speeds.

Special Limited Time Offer - Get IPVanish


Legal Disclaimer: ReviewVPN.com does not encourage or endorse any illegal activity involved in the usage of services and applications referenced on this site. We do not verify the licensing agreements of services. The end-user is wholly responsible for ensuring that any media accessed through these services does not violate copyright and/or licensing laws. ReviewVPN does not promote, link to, or receive compensation from any Apps and IPTV services.


Install Surfshark on Firestick

Best Surfshark Deal


How to Install Planet MMA Addon on Kodi with Screenshots

  1. From the home screen, select the cogwheel at the upper left.

Step 1 Installing Sportz Planet MMA on Kodi

2. Select System in the bottom right corner.

Step 2 Installing Sportz Planet MMA on Kodi


3. Select Add-ons on the left side of the screen.

Step 3 Installing Sportz Planet MMA on Kodi


4. Select Unknown sources.

Step 4 Installing Planet MMA addon on Kodi


5. Click Yes to allow unknown sources.

Step 5 Installing Planet MMA addon on Kodi


6. Select File manager.

Step 6 Installing Planet MMA addon on Kodi


7. Click Add source.

Step 7 Installing Planet MMA addon on Kodi


8. Click on <None>.

Step 8 Installing Planet MMA addon on Kodi


9. Type exactly: http://www.onenation.info/

Step 9 Installing Planet MMA addon on Kodi


10. Click on OK.

Step 10 Installing Planet MMA addon on Kodi


11. Select enter a name for this media source.

Step 11 Installing Planet MMA addon on Kodi


12. Name is Planet MMA (this part isn’t critical as long as you remember the name).

Step 12 Installing Planet MMA addon on Kodi


13. Click on OK.

Step 13 Installing Planet MMA addon on Kodi


14. Click on OK.

Step 14 Installing Planet MMA addon on Kodi


15. Take one step back and click on Add-ons.

Step 15 Installing Planet MMA addon on Kodi


16. Select install from zip file.

Step 16 Installing Planet MMA addon on Kodi


17. Click on Planet MMA (or whatever you named the source).

Step 17 Installing Planet MMA addon on Kodi


18. Select Repo.

Step 18 Installing Planet MMA addon on Kodi


19. Click on repository.onenation-1.0.5.zip.

Step 19 Installing Planet MMA addon on Kodi


20. Select on Install from repository.

Step 20 Installing Planet MMA addon on Kodi


21. Click on OneNation Repo

Step 21 Installing Planet MMA addon on Kodi


22. Pick Video add-ons.

Step 22 Installing Planet MMA addon on Kodi


23. Select Planet MMA again.

Step 23 Installing Planet MMA addon on Kodi


24. Click on Install. 

Step 24 Installing Planet MMA addon on Kodi


25. Select Version 4.3 (OneNation Repo)

Step 25 Installing Planet MMA addon on Kodi


26. Select OK after reviewing the add-ons that will be installed.

Step 26 Installing Planet MMA addon on Kodi


27. You should see a popup in the upper right corner saying Planet MMA has installed. There will actually be multiple popups for the various components.

Step 27 Installing Planet MMA addon on Kodi


28. Click on Open to start the Planet MMA add-on.

Step 28 Installing Planet MMA addon on Kodi


Should I use a (VPN)?

A VPN on your device offers many benefits, such as the security and privacy you needed. A VPN also reduces the risk of being hacked and monitored online by various potential hackers. As a result, whenever you do anything online, it is much safer to use a VPN.

The Surchshark is one of the top VPNs that we highly recommend because it is known for being the most reliable with high-quality security features. Surfshark also employs a high level of encryption to protect your web traffic and personal information, ensuring that you keep it secure online.

Note: For more information about Surfshark, please read our Surfshark Review.


Install Surfshark on Firestick

Best Surfshark Deal


How to Install Surfshark VPN on Firestick

If your Firestick still has the older interface, read this article to learn how to update it: Update Firestick Interface.

Follow our screenshots below to install the SurfShark VPN app on your Fire TV stick.

1. Go to the Home screen of your Firestick.

step 1 Install Surfshark VPN on Firestick


2. Navigate towards the Find tab. Press the Search button from the resulting dropdown.

step 2 Install Surfshark VPN on Firestick


3. Type in the keyword of SurfShark and select from the suggestions that will appear.

step 3 Install Surfshark VPN on Firestick


4. Click the official SurfShark icon from your search results.

step 4 Install Surfshark VPN on Firestick


5. Press the Download (You own it) button.

step 5 Install Surfshark VPN on Firestick


6. The SurfShark VPN installer will download on your device.

step 6 Install Surfshark VPN on Firestick


7. SurfShark VPN’s app will automatically install itself on your Fire TV stick.

step 7 Install Surfshark VPN on Firestick


8. Press the Open button after completing SurfShark VPN’s installation process.

step 8 Install Surfshark VPN on Firestick


9. Please wait for the SurfShark VPN to load its user interface.

step 9 Install Surfshark VPN on Firestick


10. You can now log in with your SurfShark VPN account credentials.

step 10 Install Surfshark VPN on Firestick

Learn more about Surfshark and Grab the Best Surfshark Deal Now!


Install Surfshark on Firestick

Best Surfshark Deal


Other VPNs to Consider

NordVPN (Best for Streaming)

Best Features

  • 5000+ Server in 50+ Countries 
  • Military-Grade Encryption
  • Fast Connection Speed
  • Suitable to a lot of devices
  • No-Log Policy

Prices
  • Complete $5.89 per month (64% Discount)
  • Plus $4.59 per month (56% Discount)
  • Standard $3.69 per month (55% Discount)

Best Features

  • 750+ High-speed VPN Servers in 43 Locations
  • Military-Grade Encryption
  • Fastest HD Streaming and Gaming
  • 30-Day Money-Back Guarantee
  • Unlimited Data & Devices
  • No-Log Policy

Prices
  • 3 Years $1.99 per month (82% Discount)
  • 1 Years $3.29 per month (70% Discount)
  • 1 Month $10.99 per month

IPVanish VPN (Most Secure)

Best Features

  • 1200+ Servers in 60+ Countries around the world
  • Unlimited Connections
  • No-Log Policy
  • Top Notch Military-Grade VPN Protocols and Encryptions
  • 100% Safe and Secured
  • Most Trusted VPN
  • Best VPN for Firestick
  • 30-Day Money-Back Guarantee

Prices
  • Yearly $3.99 per month (63% Discount) – 30 days risk free + Ransomware & Malware Protection
  • Quarterly $5.32 per month (51% Discount)
  • Monthly $10.99 per month


For more VPN discounts, go to ReviewVPN Deals and purchase the best VPN for you.


Install Sports Classic Kodi Addon

Sports Classic Kodi Addon

In this article, we will help you install Sports Classic Kodi Addon on Firestick.


Sports Classic Image

Source:  http://shark55.com/reef/sharkrepo/ 

Sports Classic is a Kodi addon bringing historical and Live sporting Tv together in one add on. It covers all the major sports, as well as the biggest sporting events from around the world.

The interface is simple, but the streams are high quality as it takes feeds directly from Sports Devil


ANONYMOUSLY

Common Errors

Here we look at fixes for the 3 most common errors you might come across with Sports Classic;

  • Kodi check log error. You will start to see this error as you use Kodi more often. To enable you to have a better experience watching content, Kodi will cache the first few seconds of every piece of media you ever watch. This means you don’t have to watch a blank screen while the title is buffering. Over time this cache of media snippets builds up. The smaller the storage space on your device, the sooner you get the error message. Your check log error can be several things, but in most cases, it just means you need to clear your cache. To learn how to clear cache, download system tools and other fixes read our guide linked above.


  • Add on won’t install/start: When you download an add on in Kodi, always make sure you have typed the right URL. Try to connect a few times to check that it’s not the server becoming overloaded. You can then type the URL into a web browser and see if it works there. If all these steps work and you are still having trouble installing your add on, then read our full fix guide linked above.


  • Source not working/slow/frozen: Watching Live TV you are going to click and find a lot of dead streams or ones that don’t work. It can be notoriously difficult to find working streams for big matches. First, make sure you have given enough time for the stream to load. You need to leave it up to 10 seconds, next refresh the stream to check it’s not a server error. Finally read throughout the guide for more fixes linked above.


Review

Sports Classic has got a great range of older content and Live TV, as well as a hook into Reddit through Black Sheep channel which is always good for staying in touch with the community.

As you watch Live TV through the add on you will need f4m tester and Sports Devil installed as well to get hold of the feeds. Like a lot of sports add ons, Sports Classic gets most of its feeds through Sports Devil.

Sports Classic is good for having all major sports under one roof with positive reviews about the quality of the streams. The interface looks dated, but it does the job. We also like how obvious it is to see the new and updated content and streams based upon the biggest sporting events from around the world.

A well thought out add on with history that deserves to be on anyone’s Kodi who is serious about sports.

Categories include:

  • Football
  • NFL
  • MLB
  • NBA
  • Sports Class TV (Live TV)
  • Live Events
  • Sports Classic Pass
  • Black Sheep
  • The Ace
  • Replays
  • All Sports
  • World of Dirt
  • Shifting Gears
  • Movies
  • VOD Movies

Through the Sports Class Pass and add ons within Sports Classic, you can access many more sections including:

  • Various special events which change based upon the time of year and what is on
  • Sky Sports F1
  • NFL streams by team
  • MLB streams by team
  • Little Sports Devil Inside
  • Guzril
  • Bennu
  • Fark Love
  • Insigo
  • Salts
  • Bob Unleashed
  • Aliunde


YOUR INTERNET ACTIVITY IS BEING WATCHED

ReviewVPN cannot attest to the legality, security and privacy of the applications discussed on this site. It is highly recommended that you use a VPN service while streaming or using Kodi.

Currently, your IP 216.73.217.150 is visible to everyone and your Browser is being tracked by Advertisers & ISP Provider.

Save 65% Now

Limited Time Offer

Here are the main reasons why you must use a VPN:

  • Your activities are hidden from your ISP, the government, and from the apps you are using.
  • You can access additional movies and TV streams.
  • ISP attempts to throttle are thrwarted thus reducing buffering issues.
  • Geographically restricted content like Netflix and Hulu can be unblocked.

A VPN works be replacing your ISP-assigned IP address and creating an encrypted tunnel. We recommend the no log service offered by IPVanish. It works well on a Firestick and offers the fastest possible speeds.

Special Limited Time Offer - Get IPVanish


Legal Disclaimer: ReviewVPN.com does not encourage or endorse any illegal activity involved in the usage of services and applications referenced on this site. We do not verify the licensing agreements of services. The end-user is wholly responsible for ensuring that any media accessed through these services does not violate copyright and/or licensing laws. ReviewVPN does not promote, link to, or receive compensation from any Apps and IPTV services.


Install Surfshark on Firestick

Best Surfshark Deal


How to Install Sports Classic Addon on Kodi with Screenshots

  1. From the home screen, select the cogwheel at the upper left.

Step 1 Installing Sports Classic addon on Kodi


2. Select System in the bottom right corner.

Step 2 Installing Sports Classic addon on Kodi


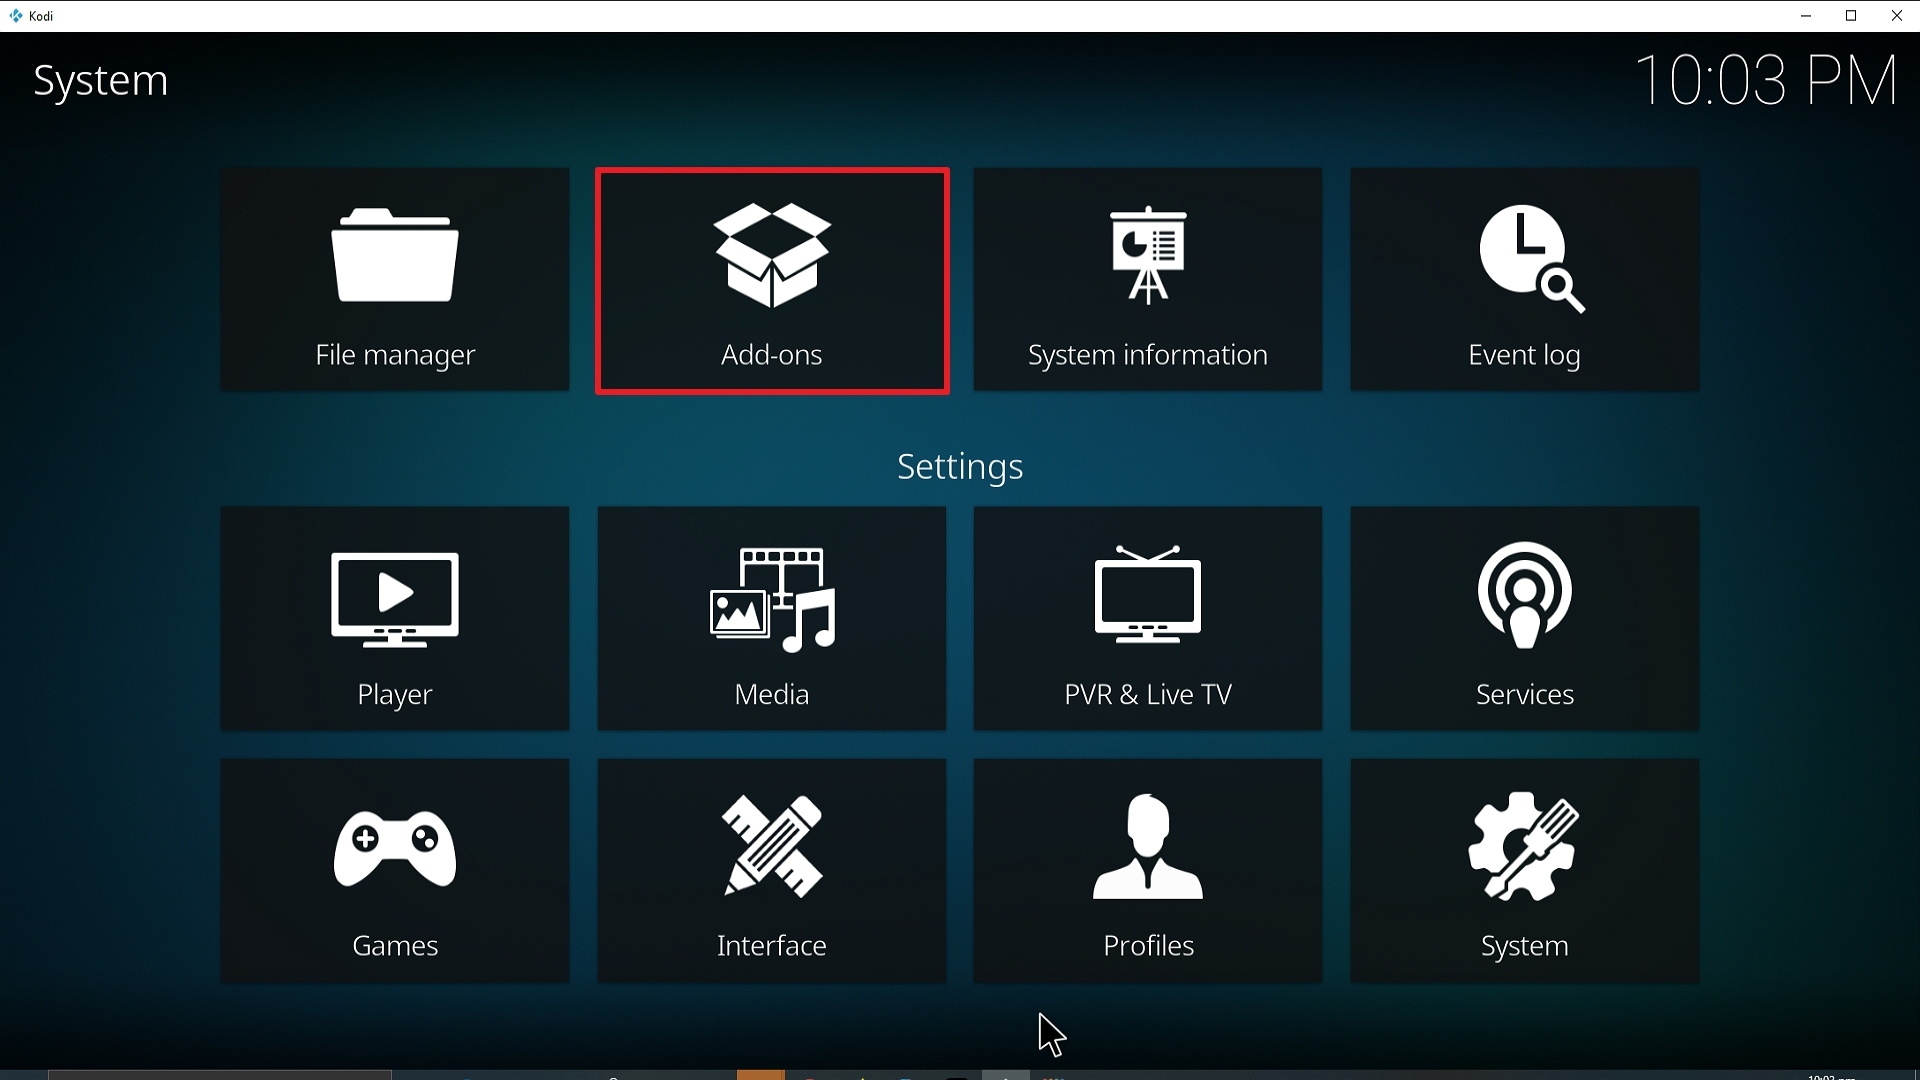
3. Select Add-ons on the left side of the screen.

Step 3 Installing Sports Classic addon on Kodi


4. Select Unknown sources.

Step 4 Installing Sports Classic addon on Kodi


5. Click Yes to allow unknown sources.

Step 5 Installing Sports Classic addon on Kodi


6. Select File manager.

Step 6 Installing Sports Classic addon on Kodi


7. Click Add source.

Step 7 Installing Sports Classic addon on Kodi


8. Click on <None>.

Step 8 Installing Sports Classic addon on Kodi


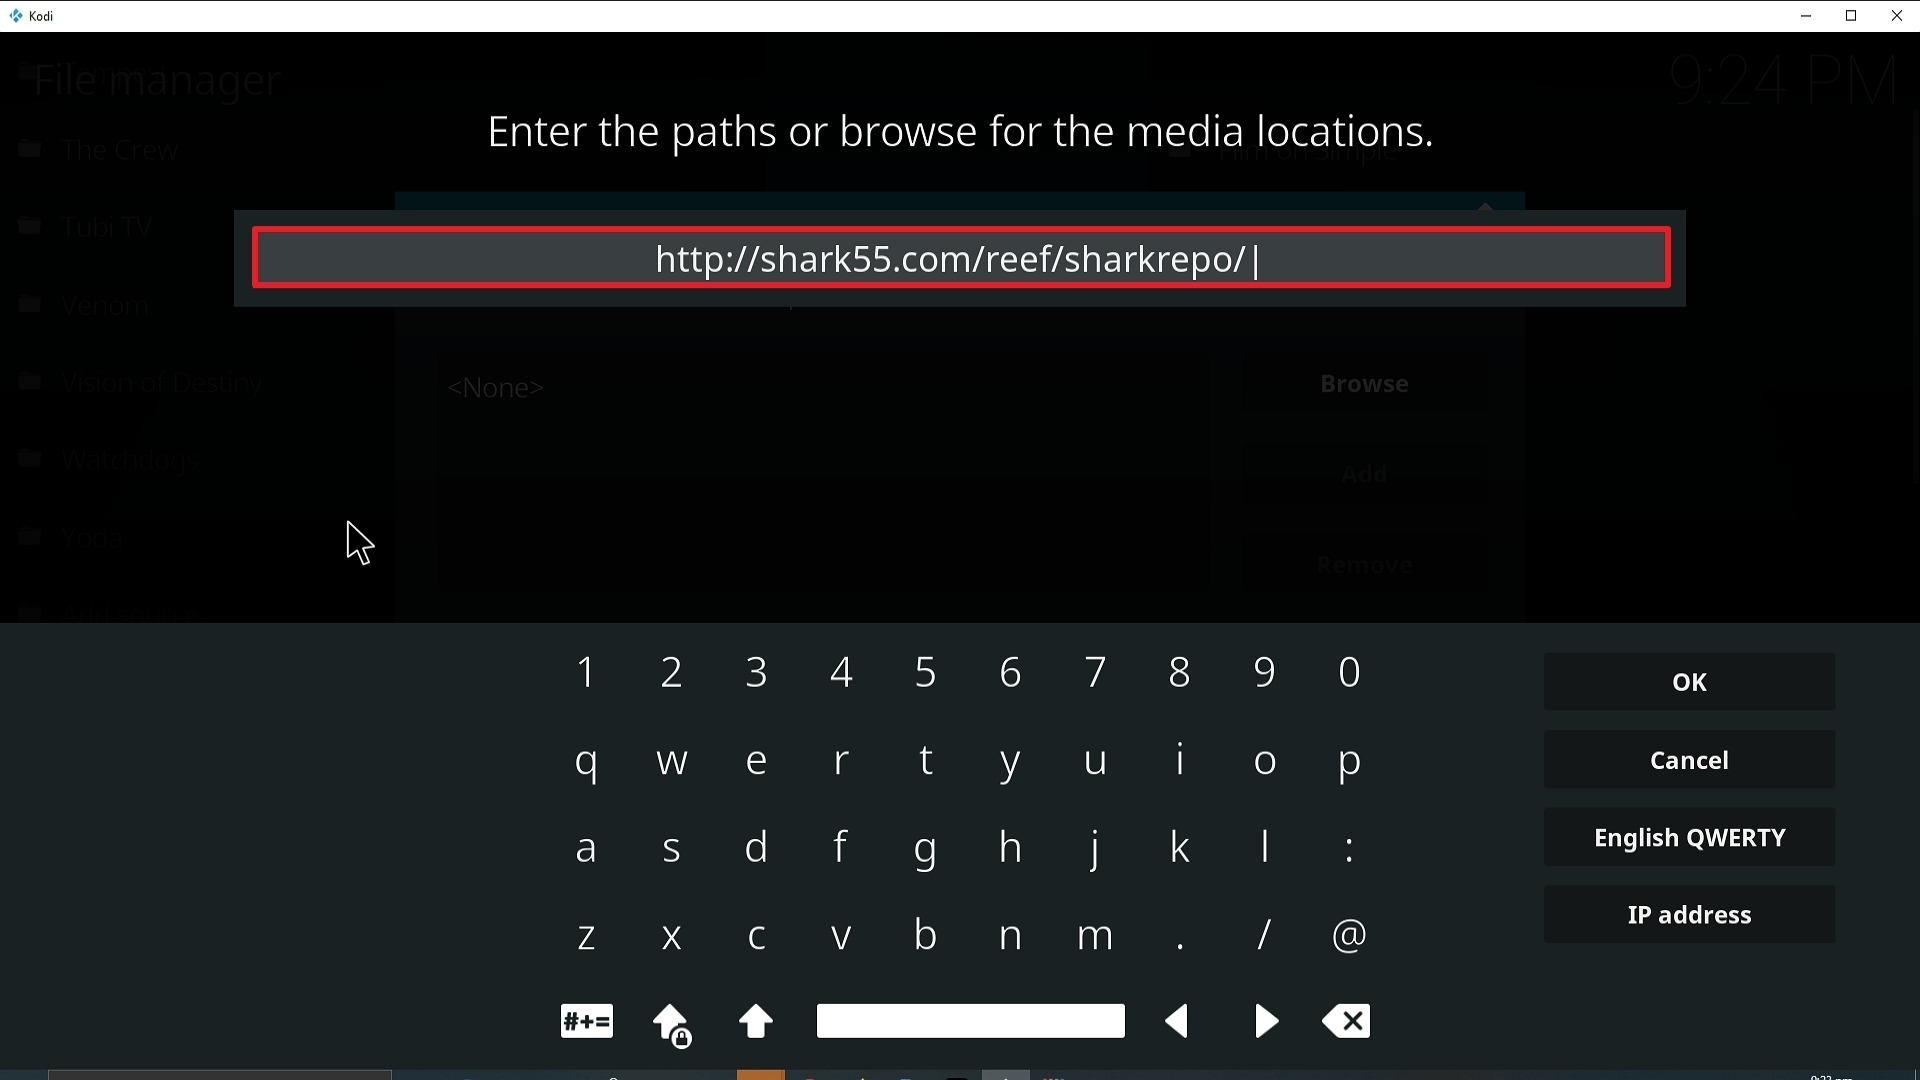
9. Type exactly: http://shark55.com/reef/sharkrepo/

Step 9 Installing Sports Classic Kodi


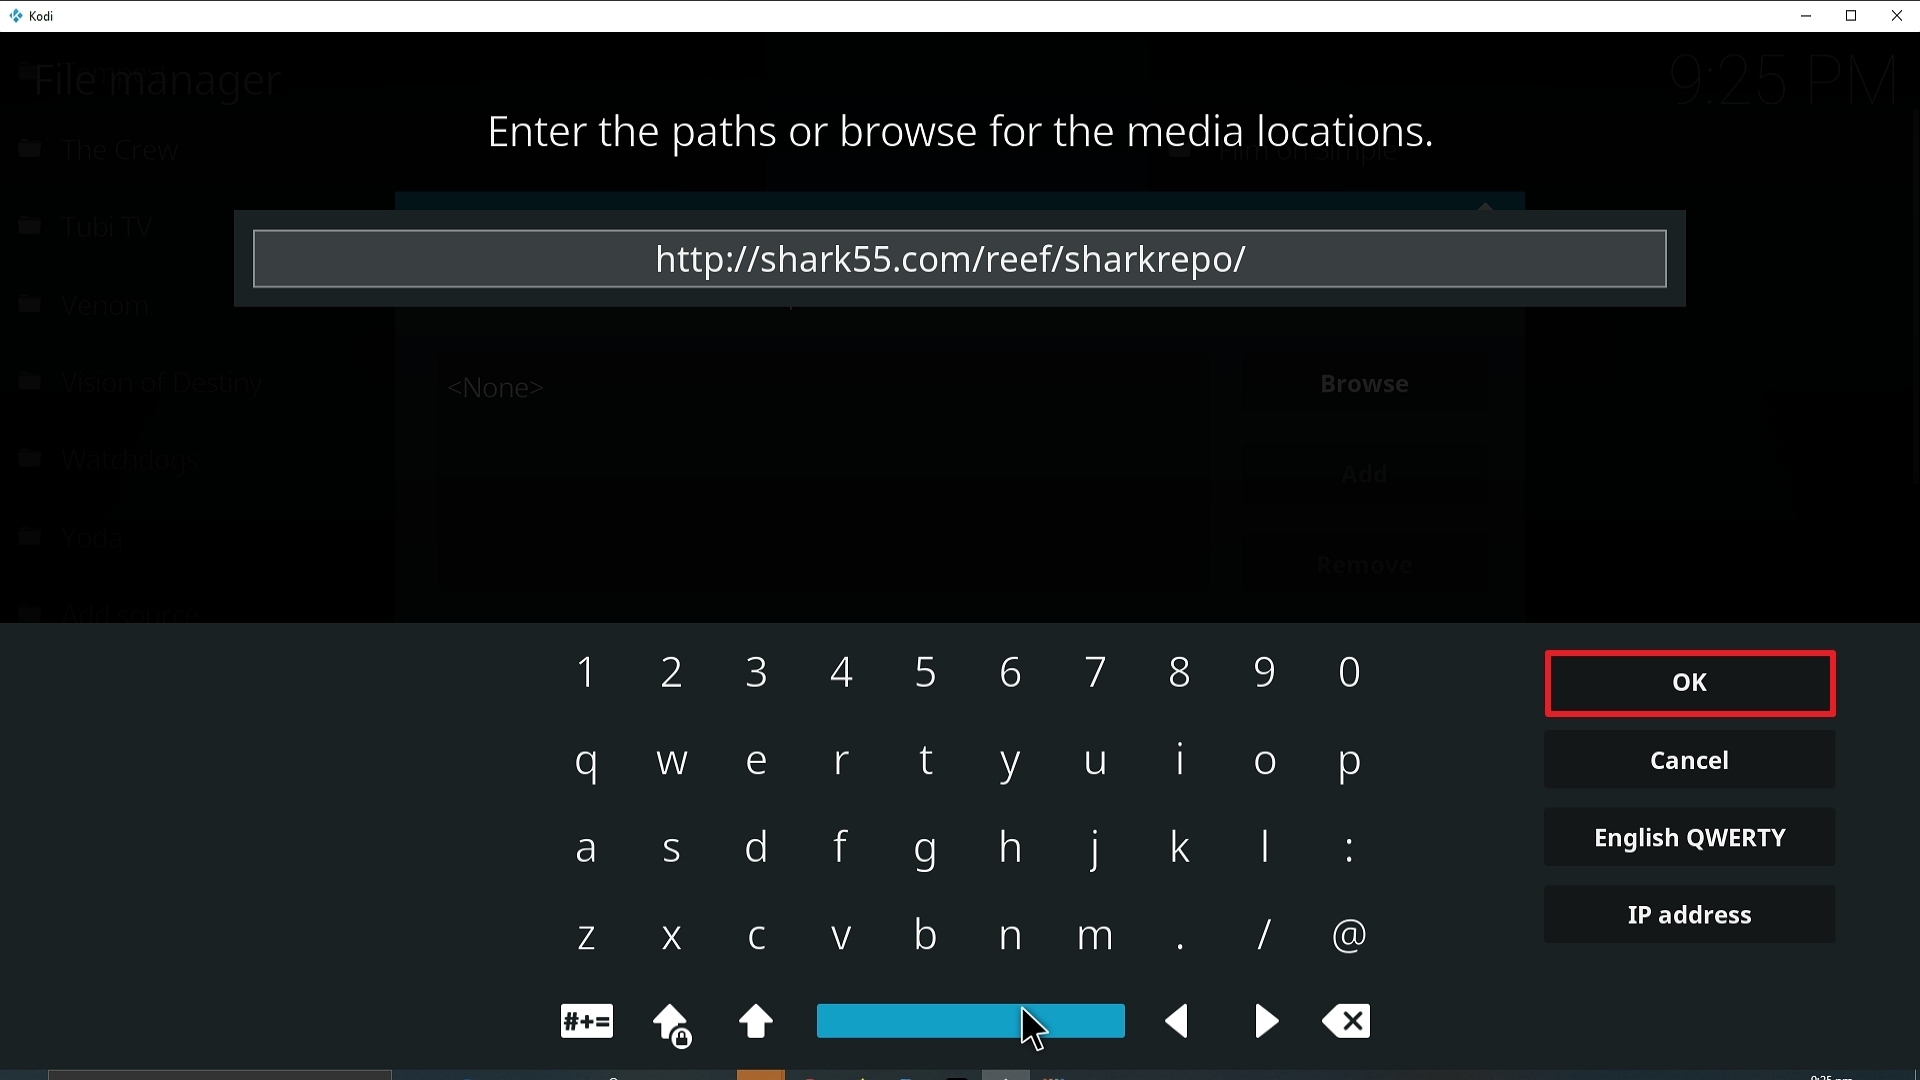
10. Click on OK.

Step 10 Installing Sports Classic Kodi


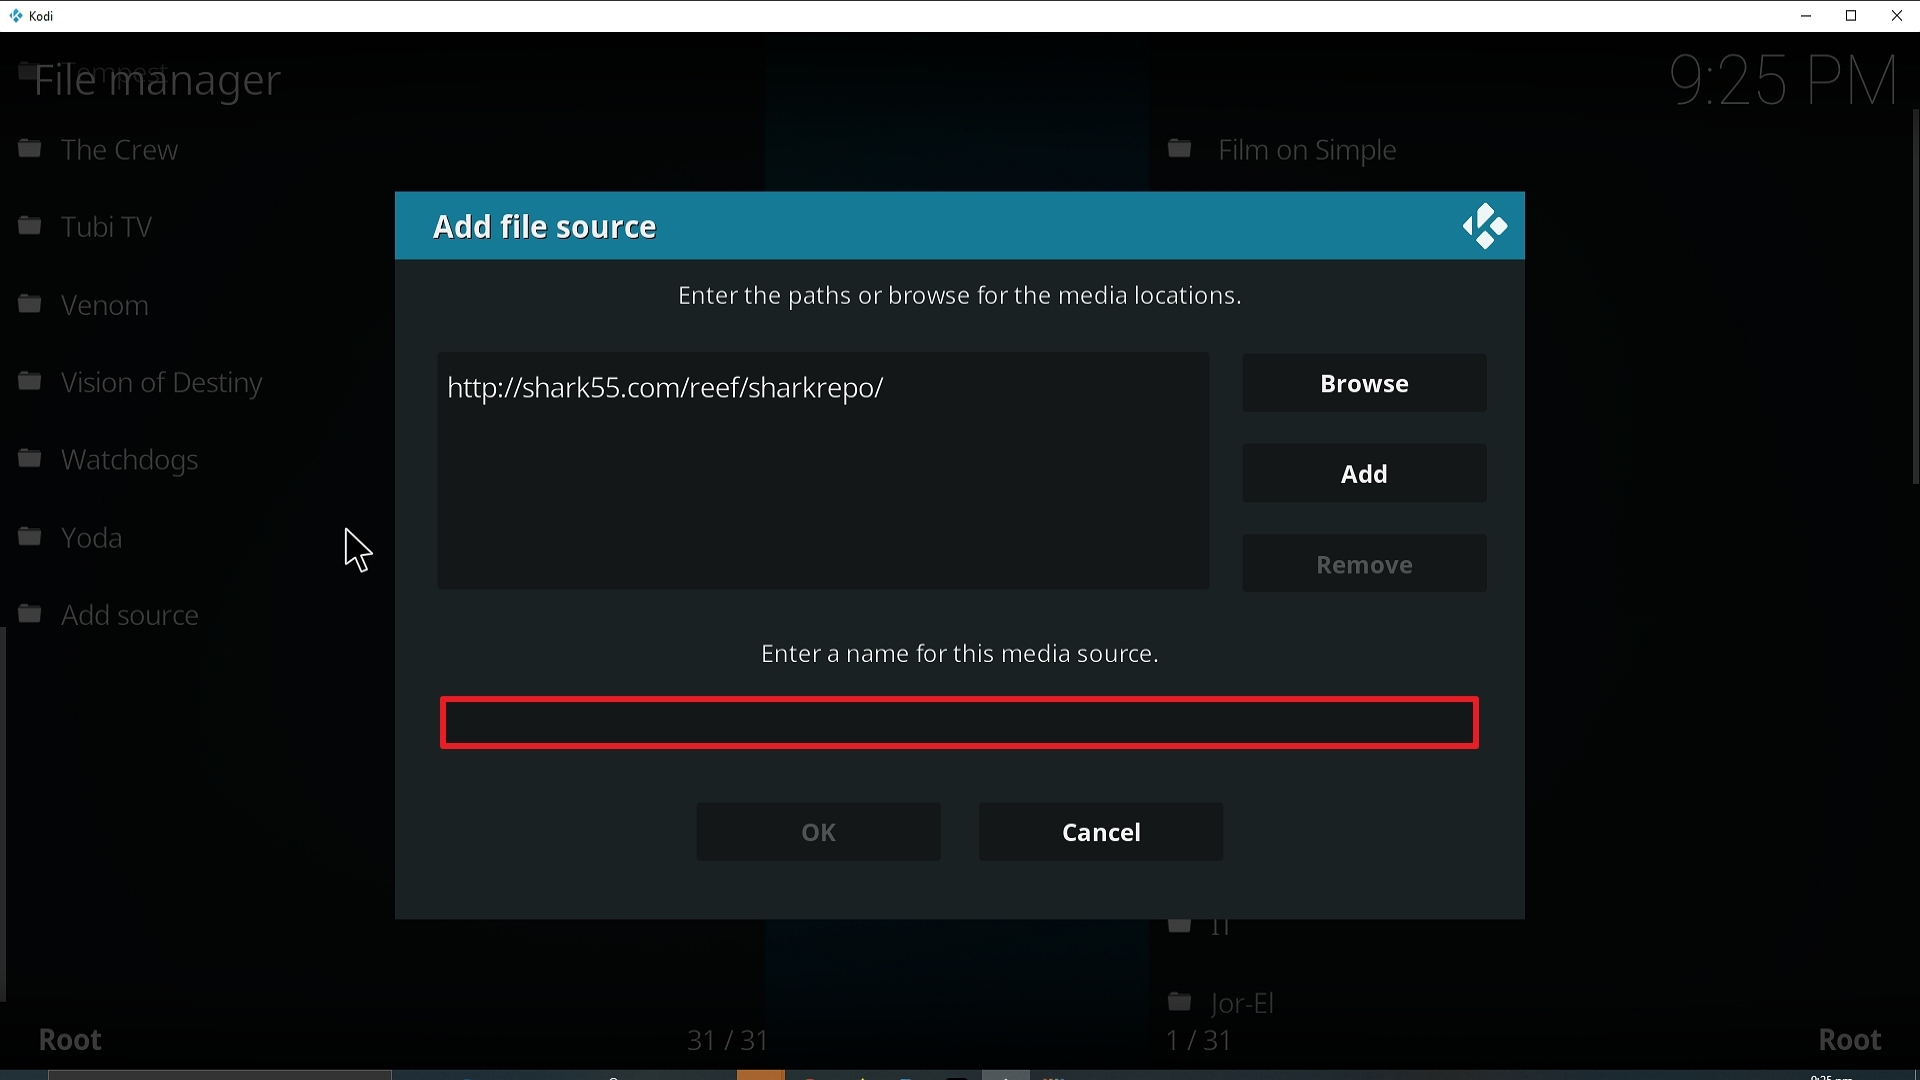
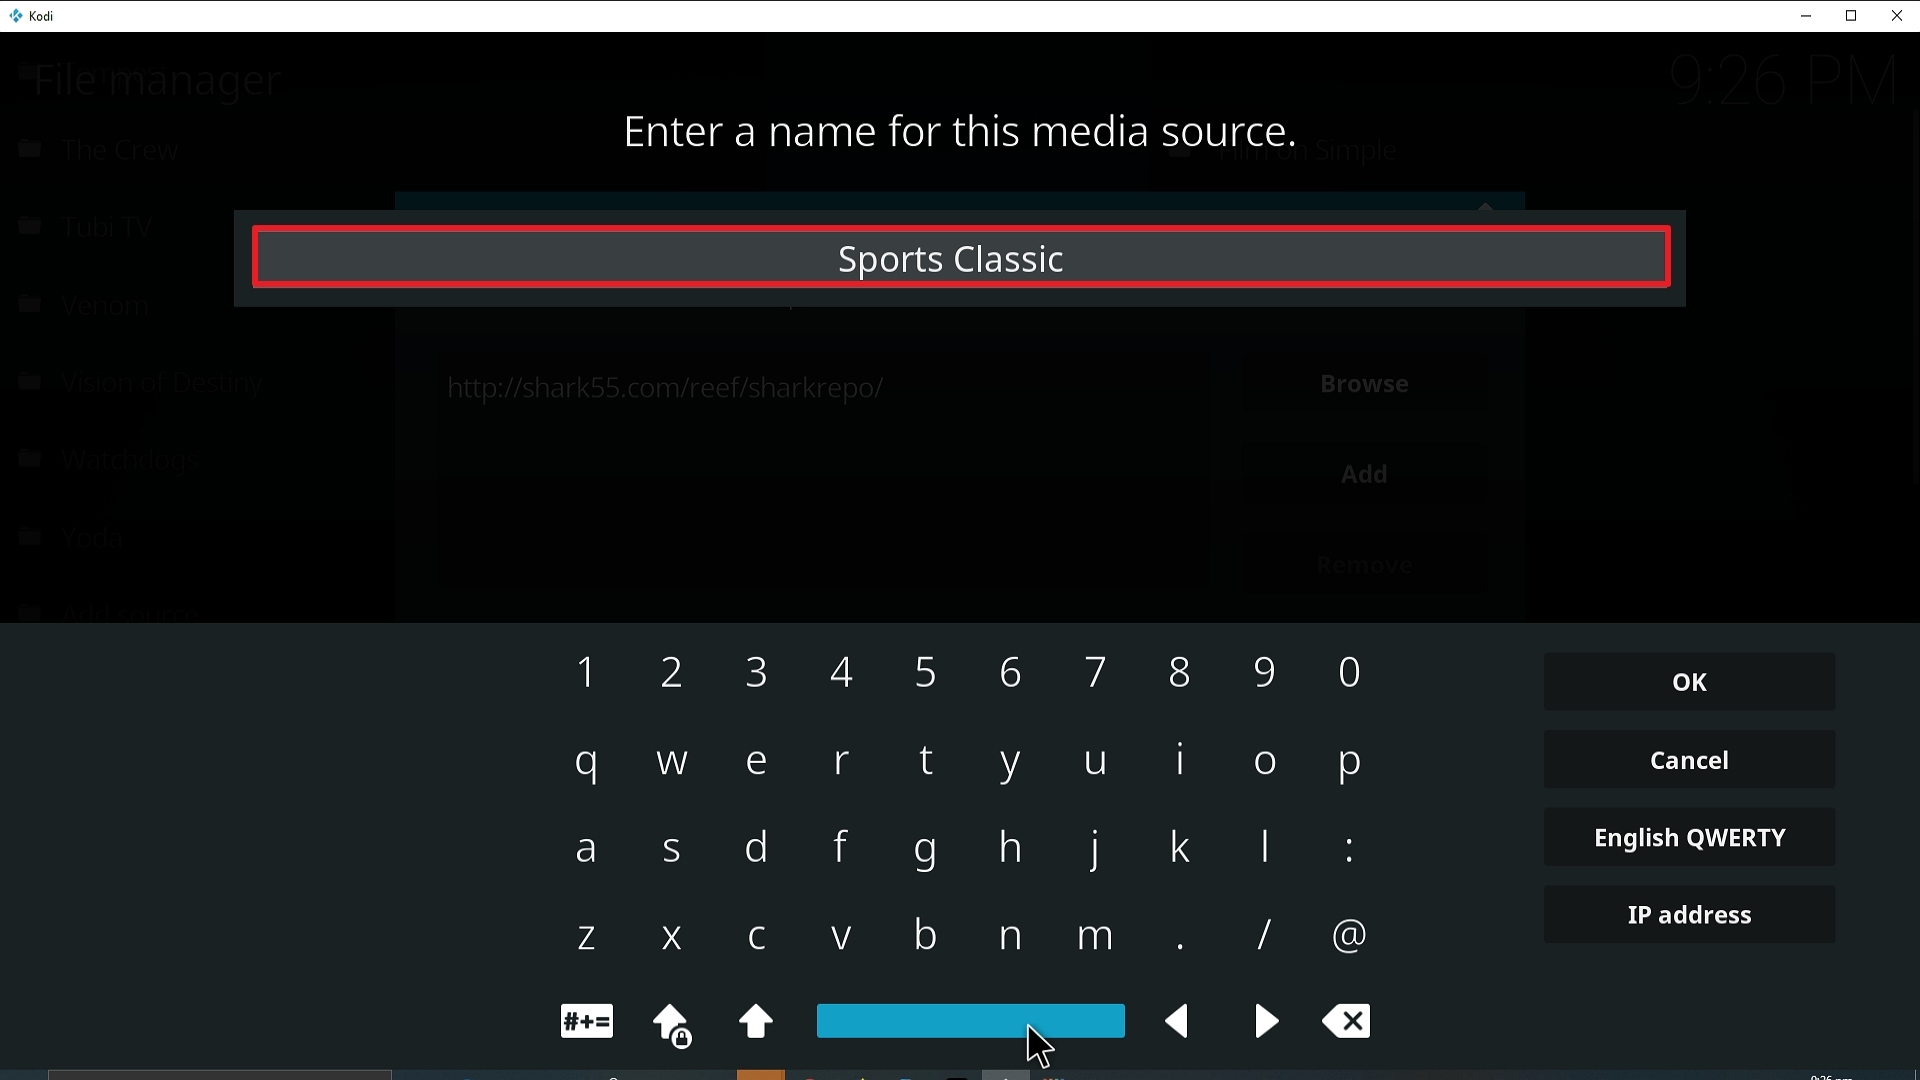
11. Select enter a name for this media source.

Step 11 Installing Sports Classic Kodi


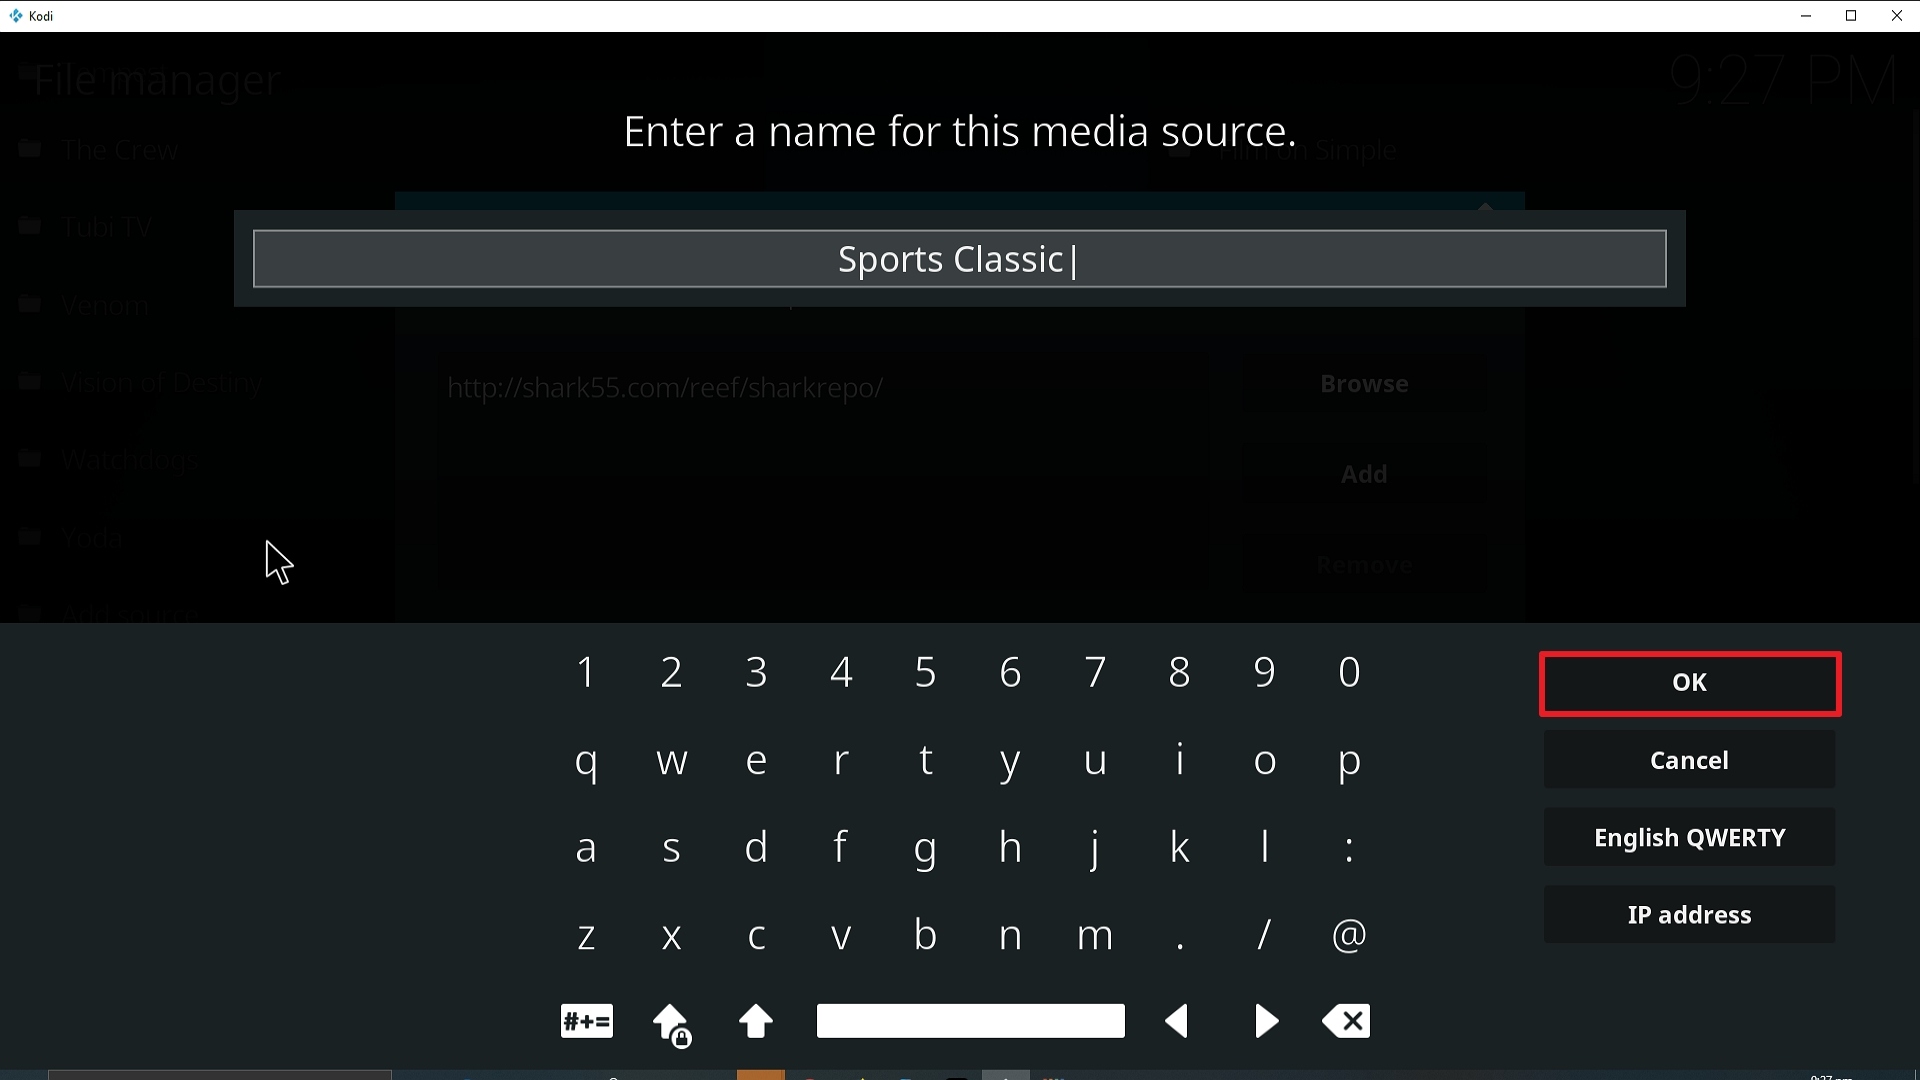
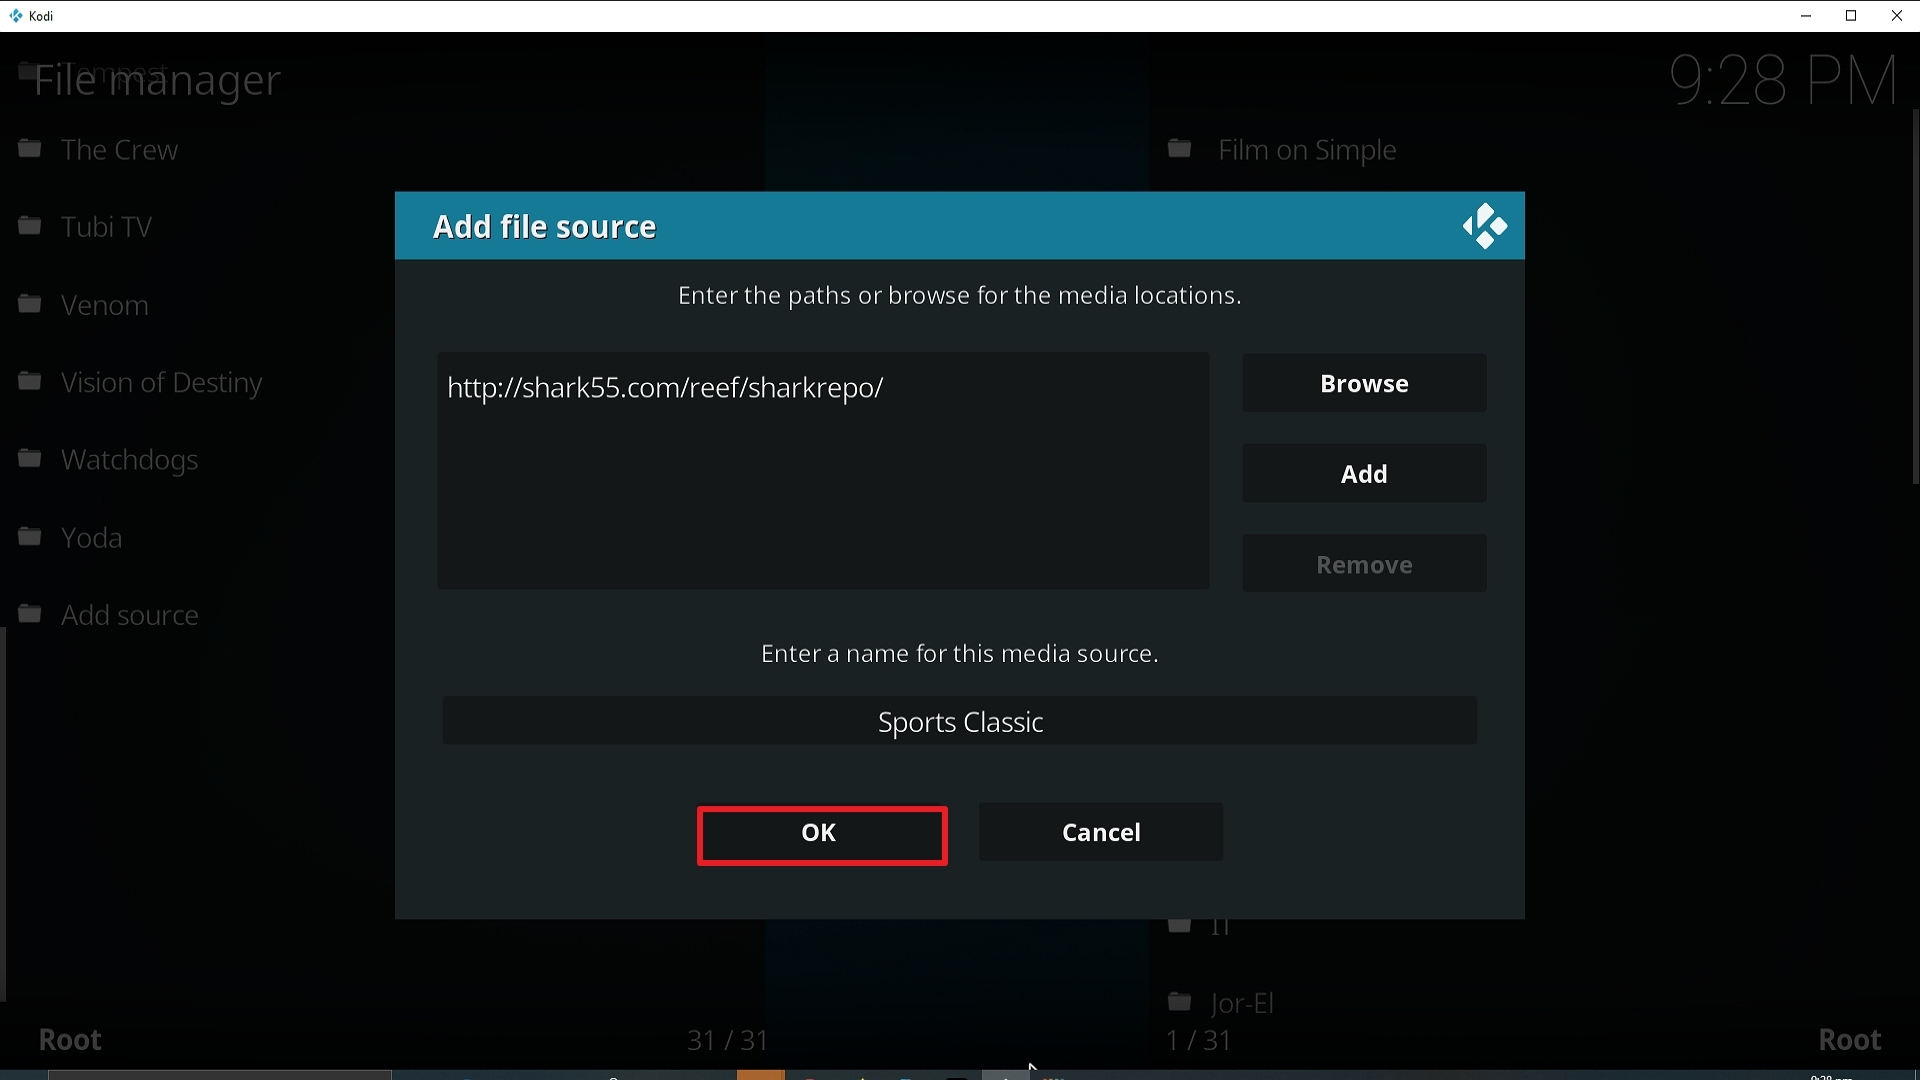
12. Name is Sports Classic (this part isn’t critical as long as you remember the name).

Step 12 Installing Sports Classic Kodi


13. Click on OK.

Step 13 Installing Sports Classic Kodi


14. Click on OK.

Step 14 Installing Sports Classic Kodi


15. Take one step back and click on Add-ons.

Step 15 Installing Sports Classic Kodi


16. Select install from zip file.

Step 16 Installing Sports Classic Kodi


17. Click on Sports Classic (or whatever you named the source).

Step 17 Installing Sports Classic Kodi


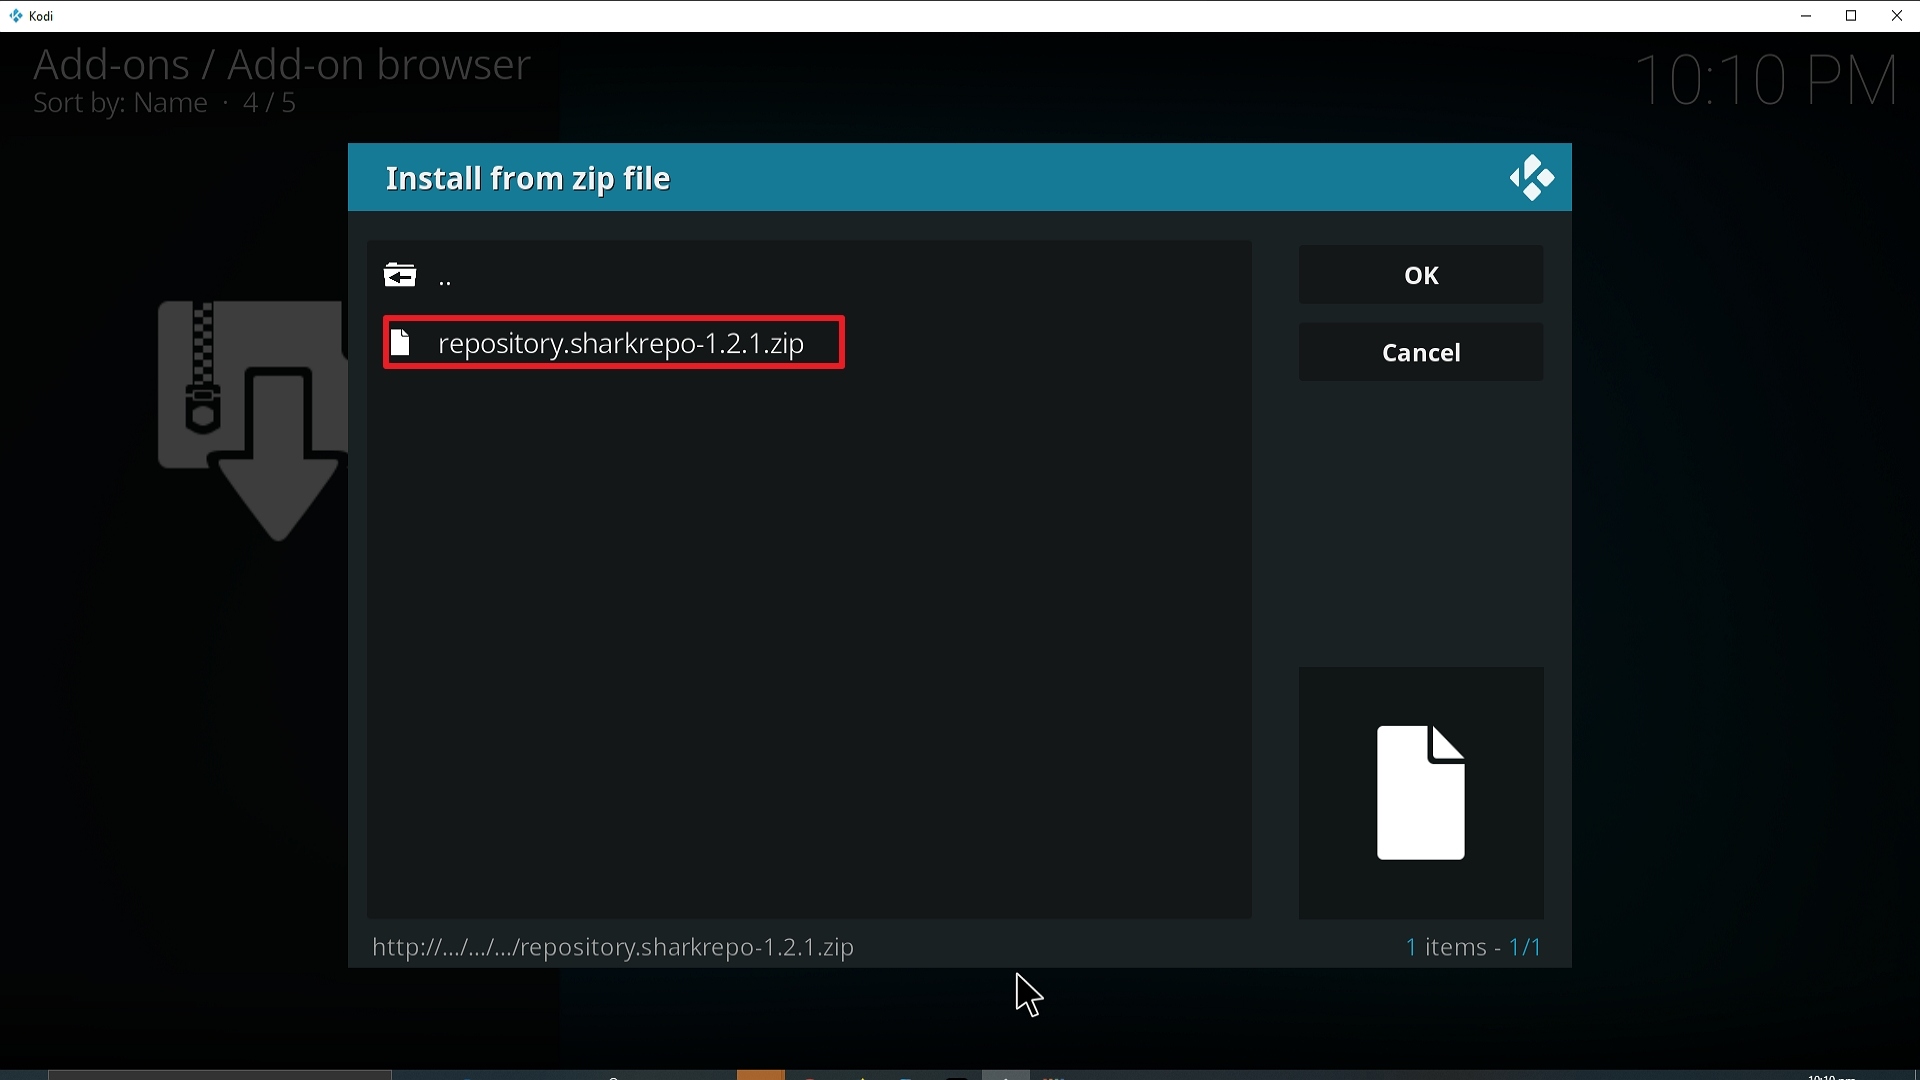
18. Click on repository.sharkrepo-1.2.1.zip.

Step 18 Installing Sports Classic Kodi


19. Select on Install from repository.

Step 19 Installing Sports Classic Kodi


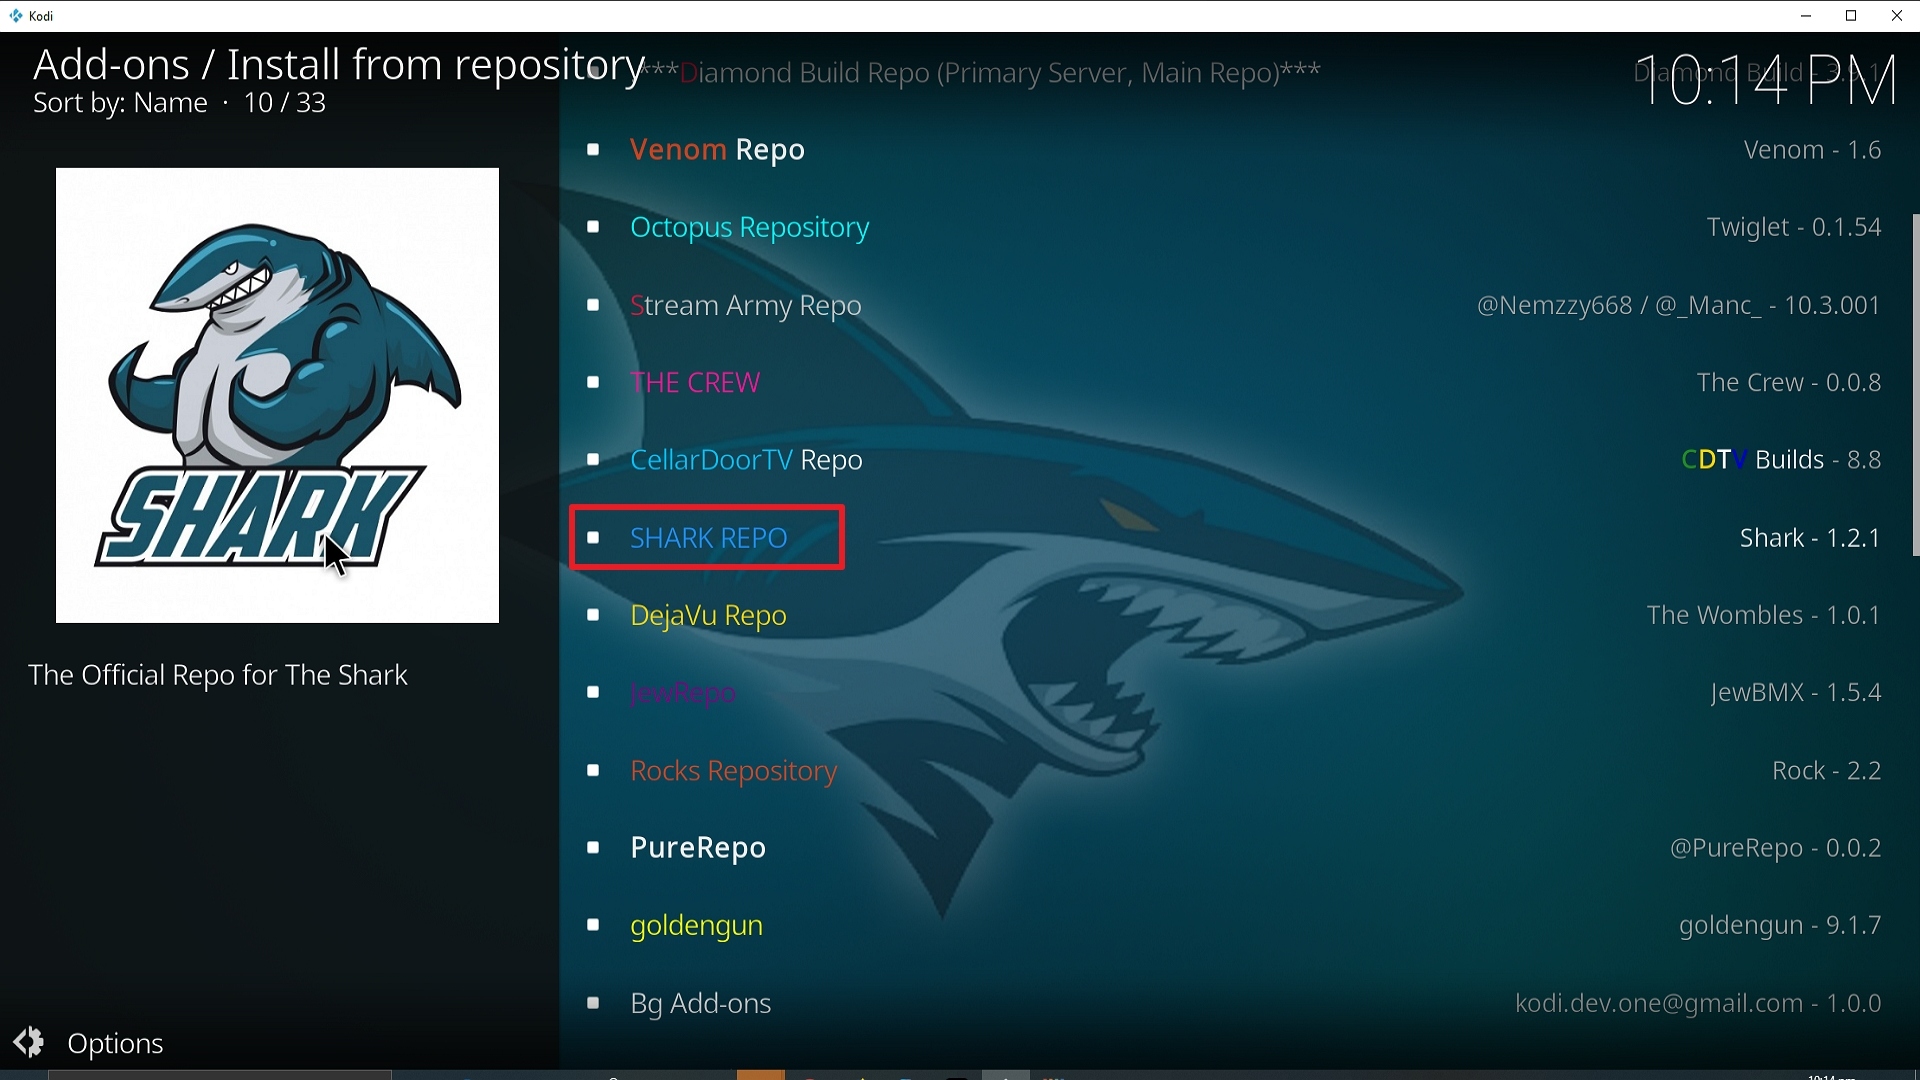
20. Click on Shark Repo

Step 20 Installing Sports Classic Kodi


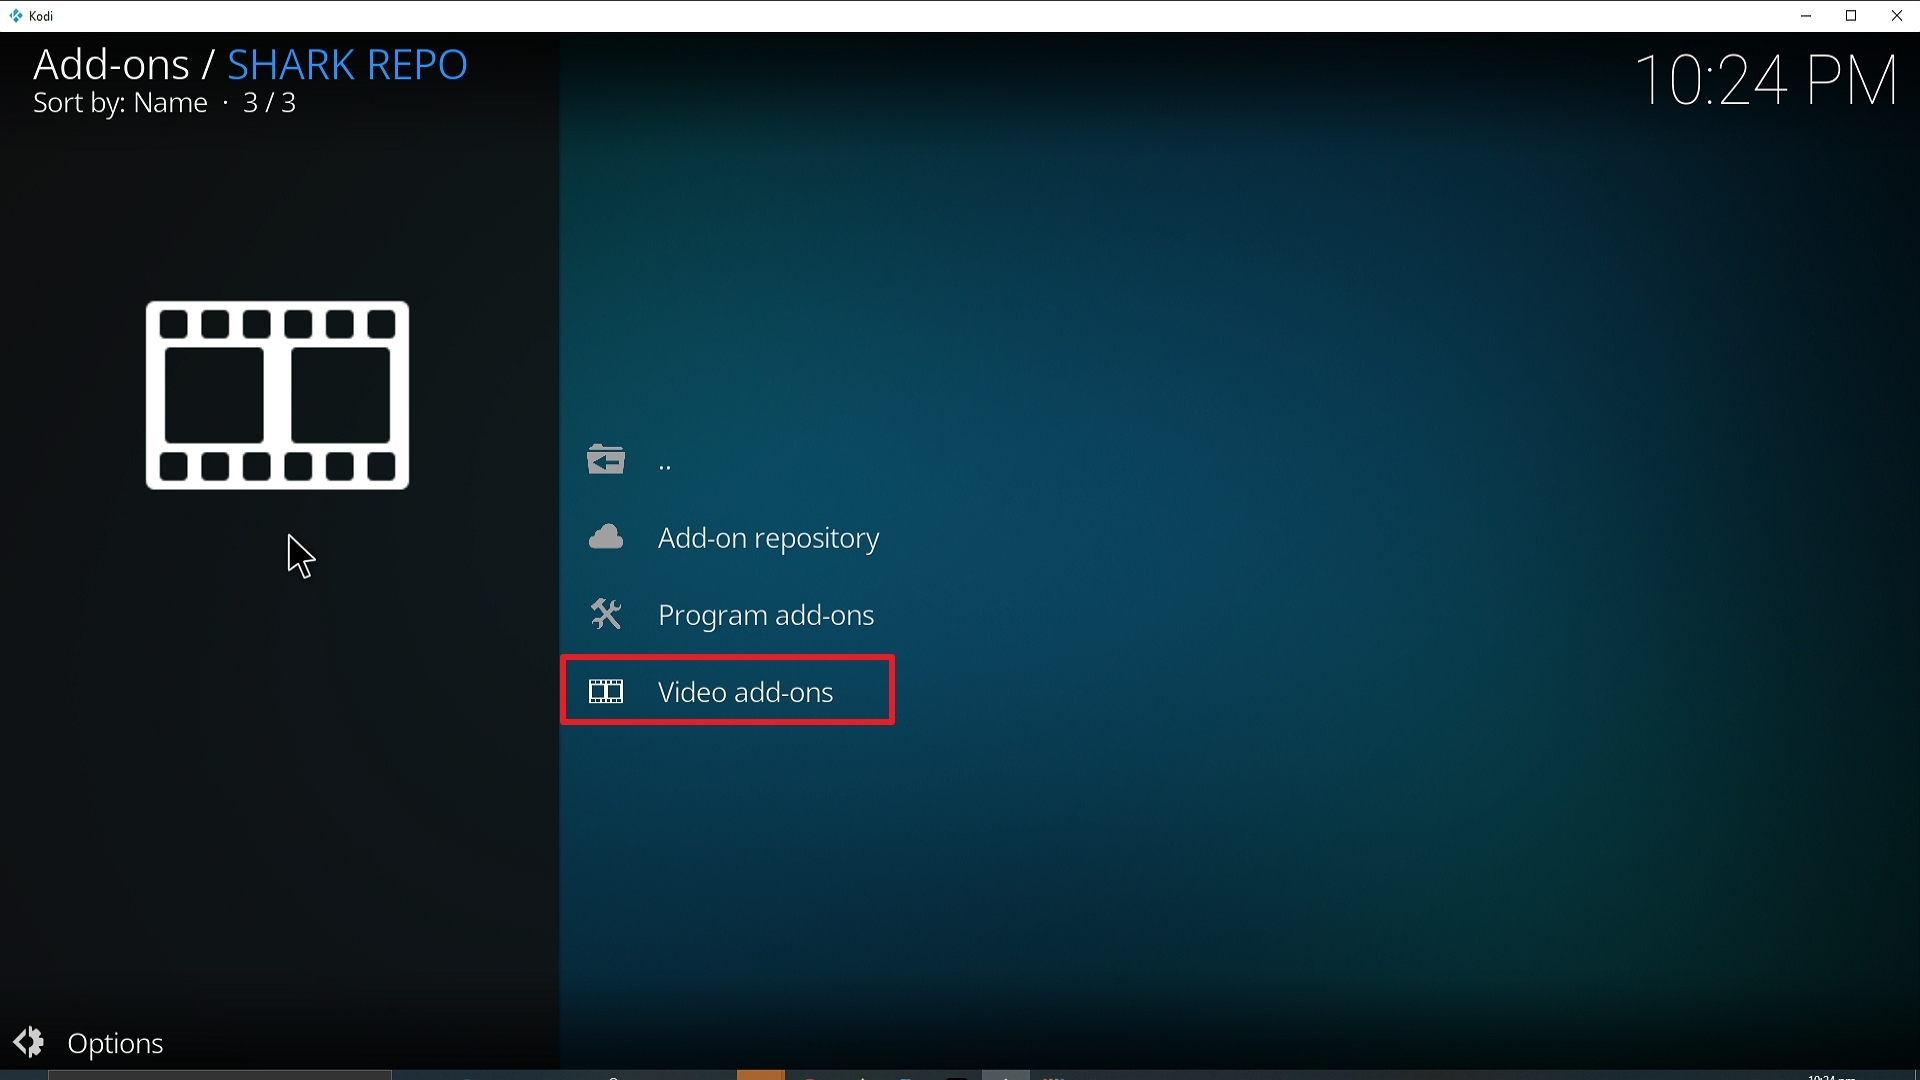
21. Pick Video add-ons.

Step 21 Installing Sports Classic Kodi


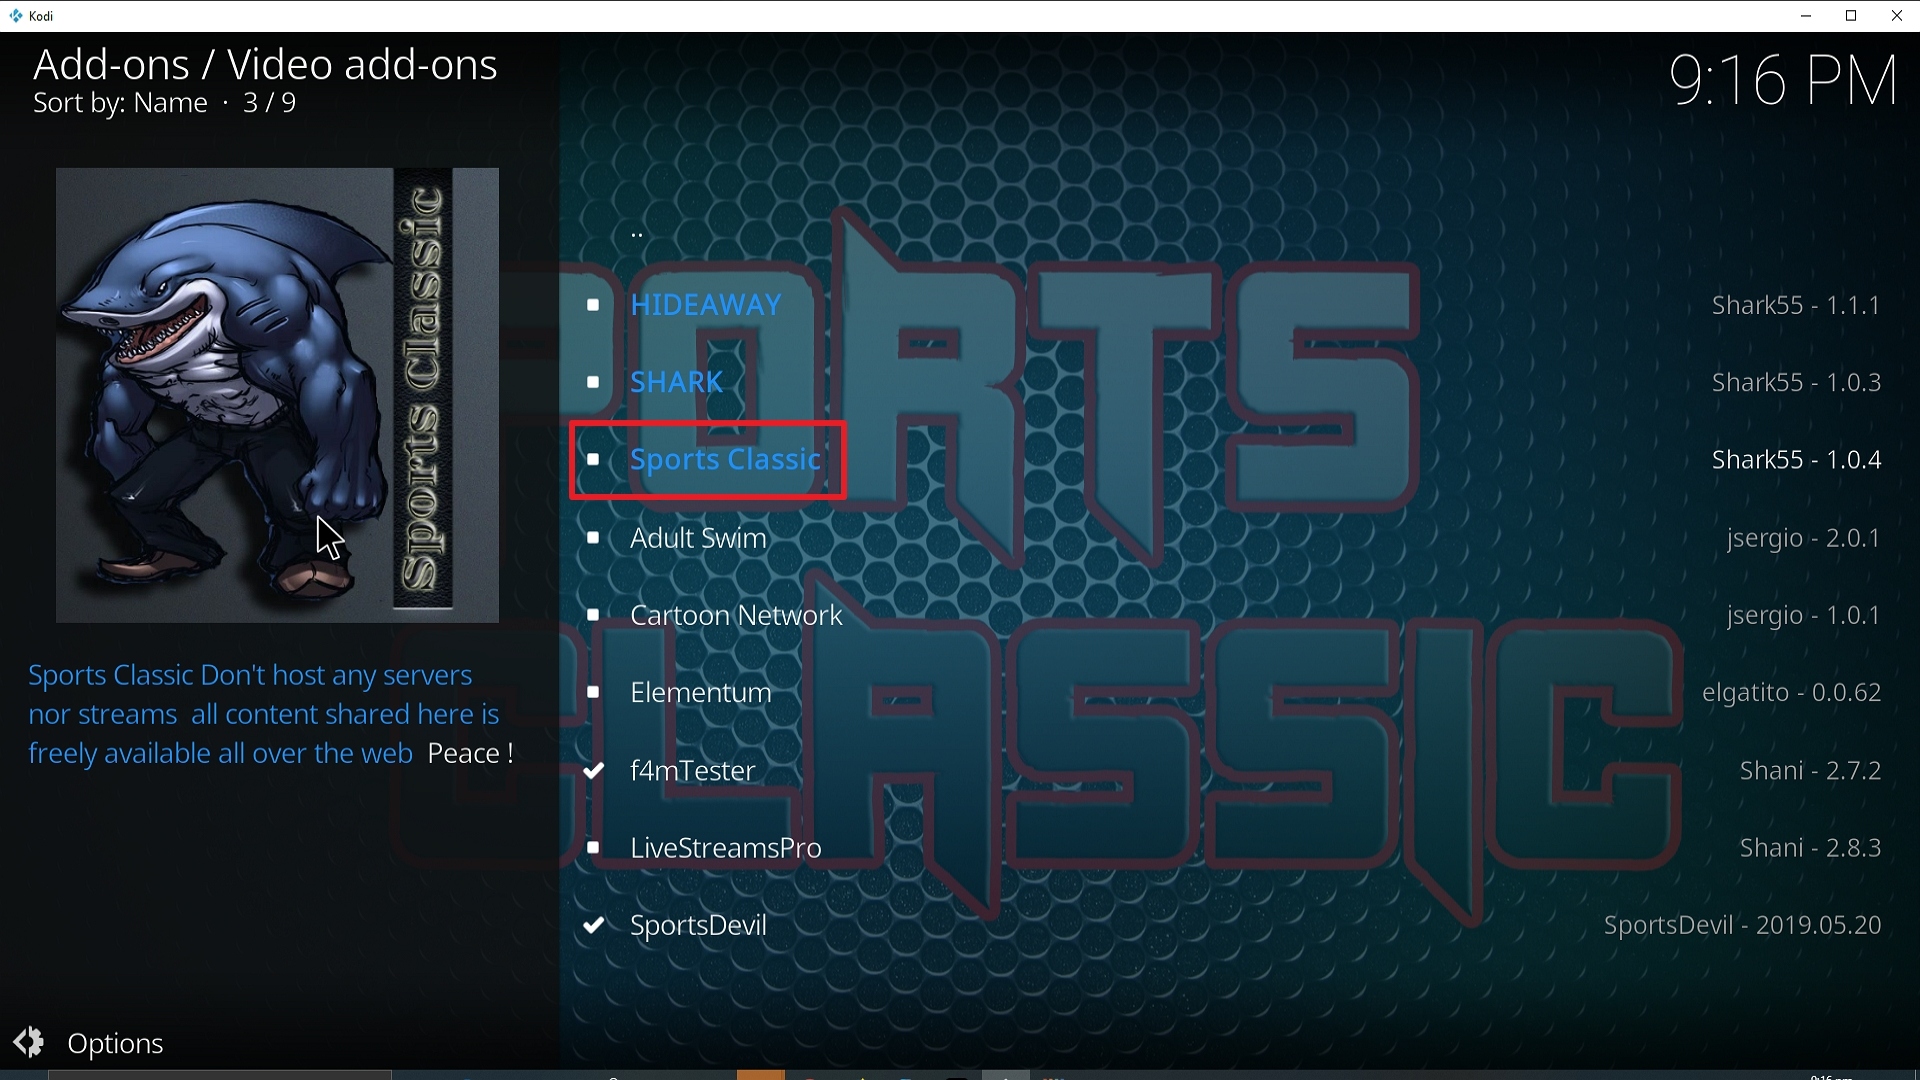
22. Select Sports Classic again.

Step 22 Installing Sports Classic Kodi


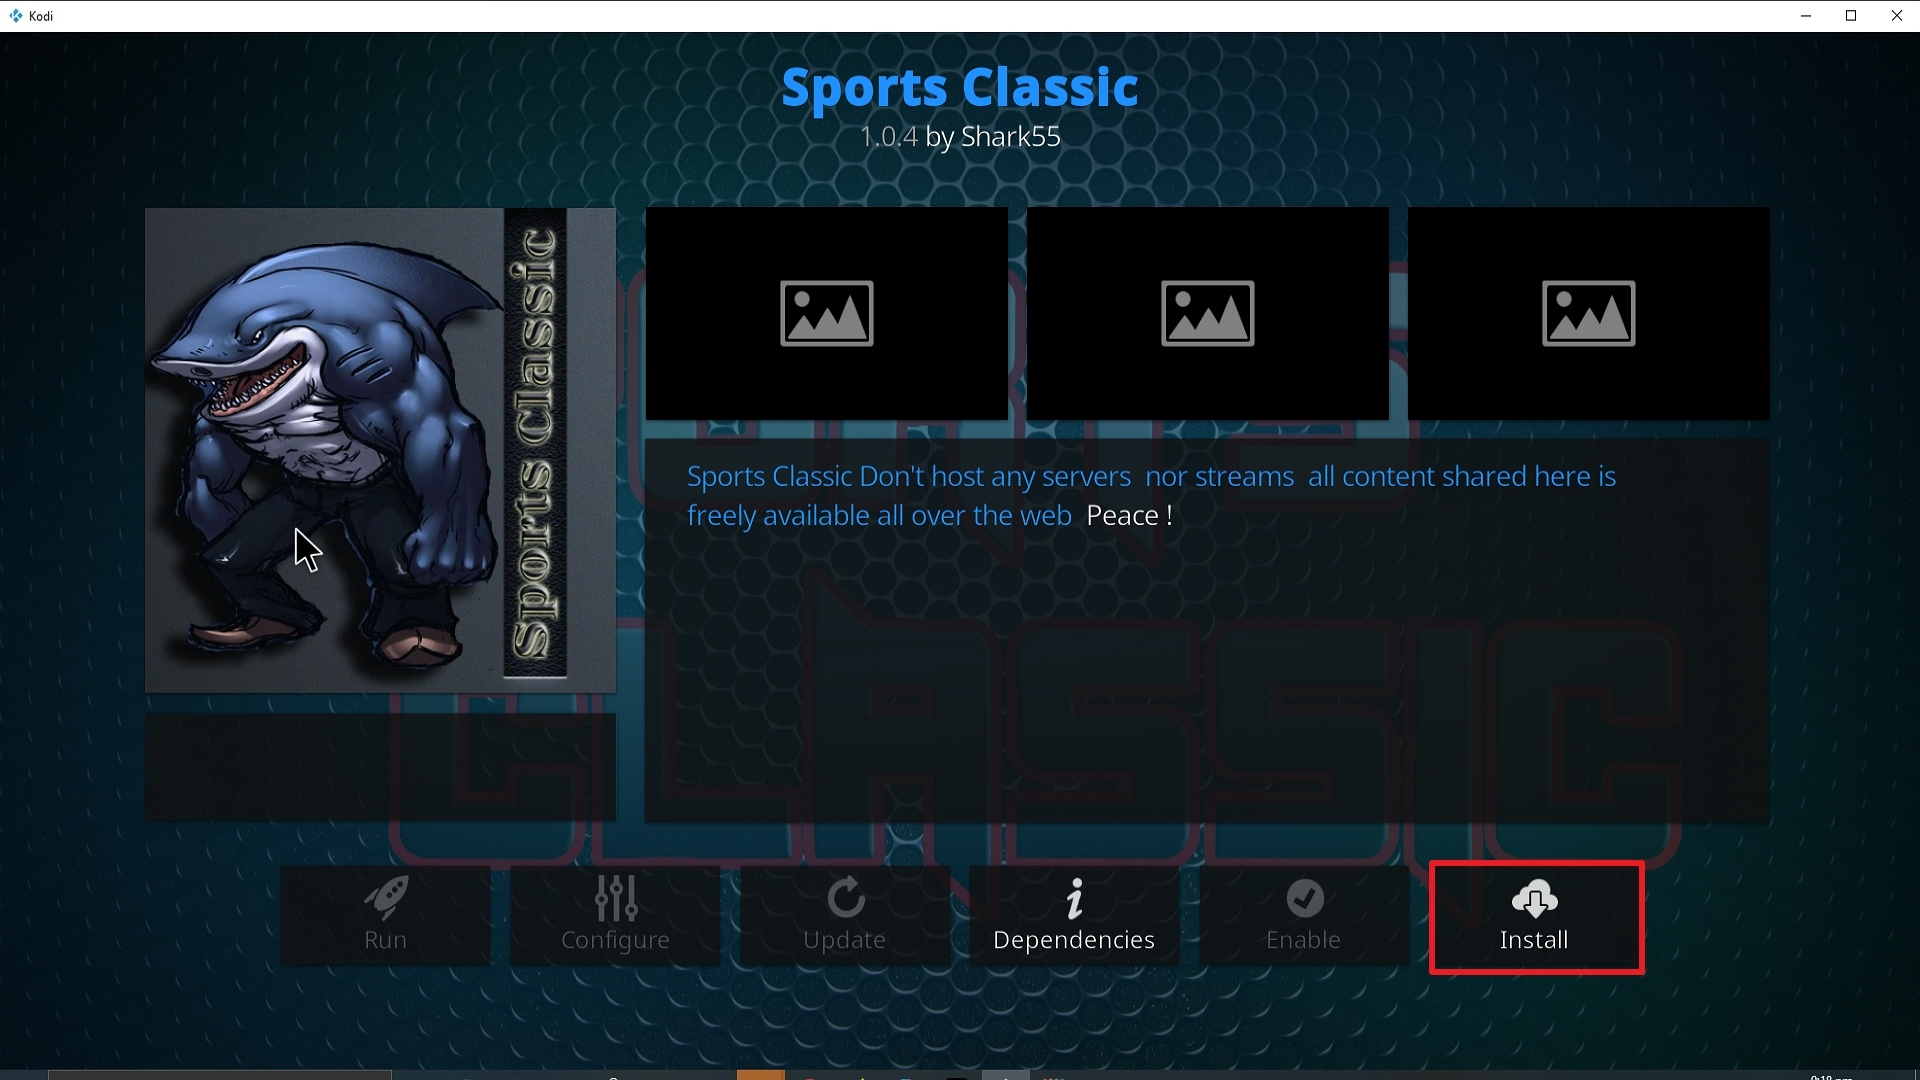
23. Click on Install. 

Step 23 Installing Sports Classic Kodi


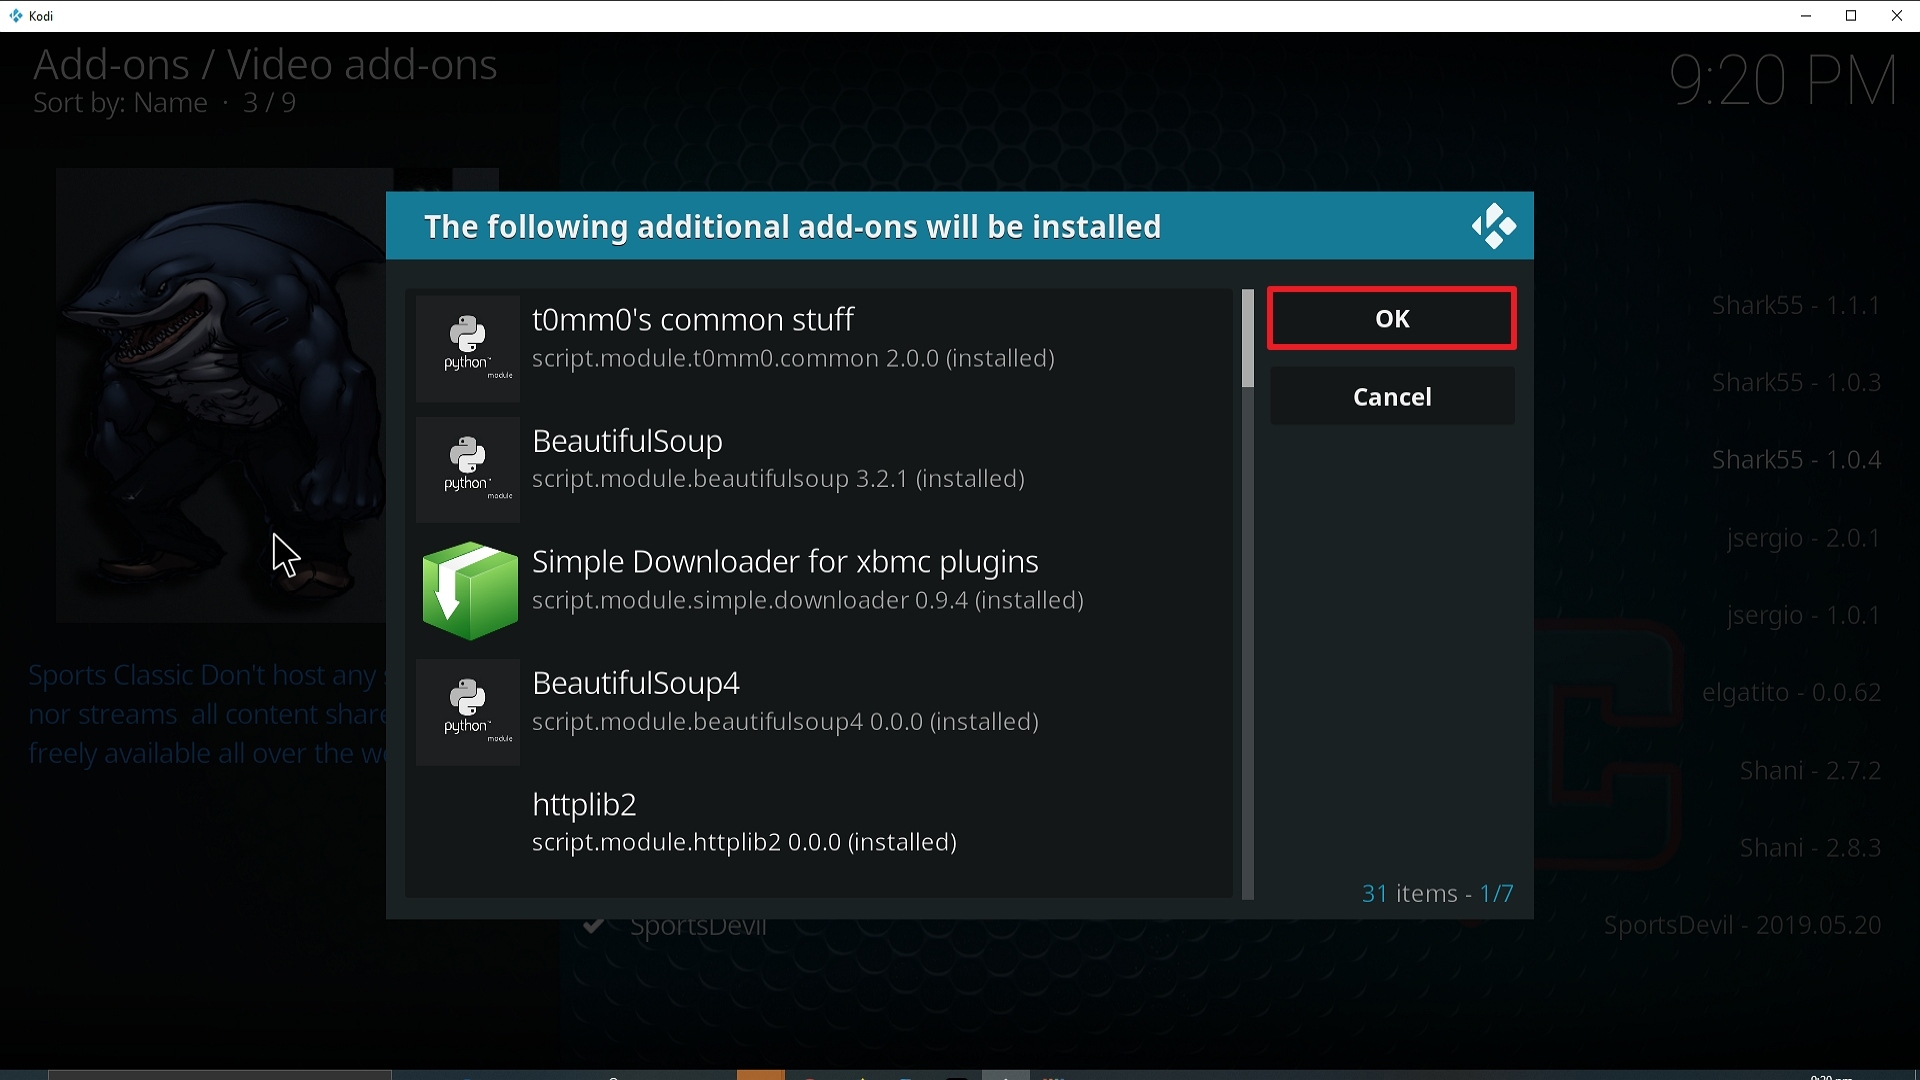
24. Select OK after reviewing the add-ons that will be installed.

Step 24 Installing Sports Classic Kodi


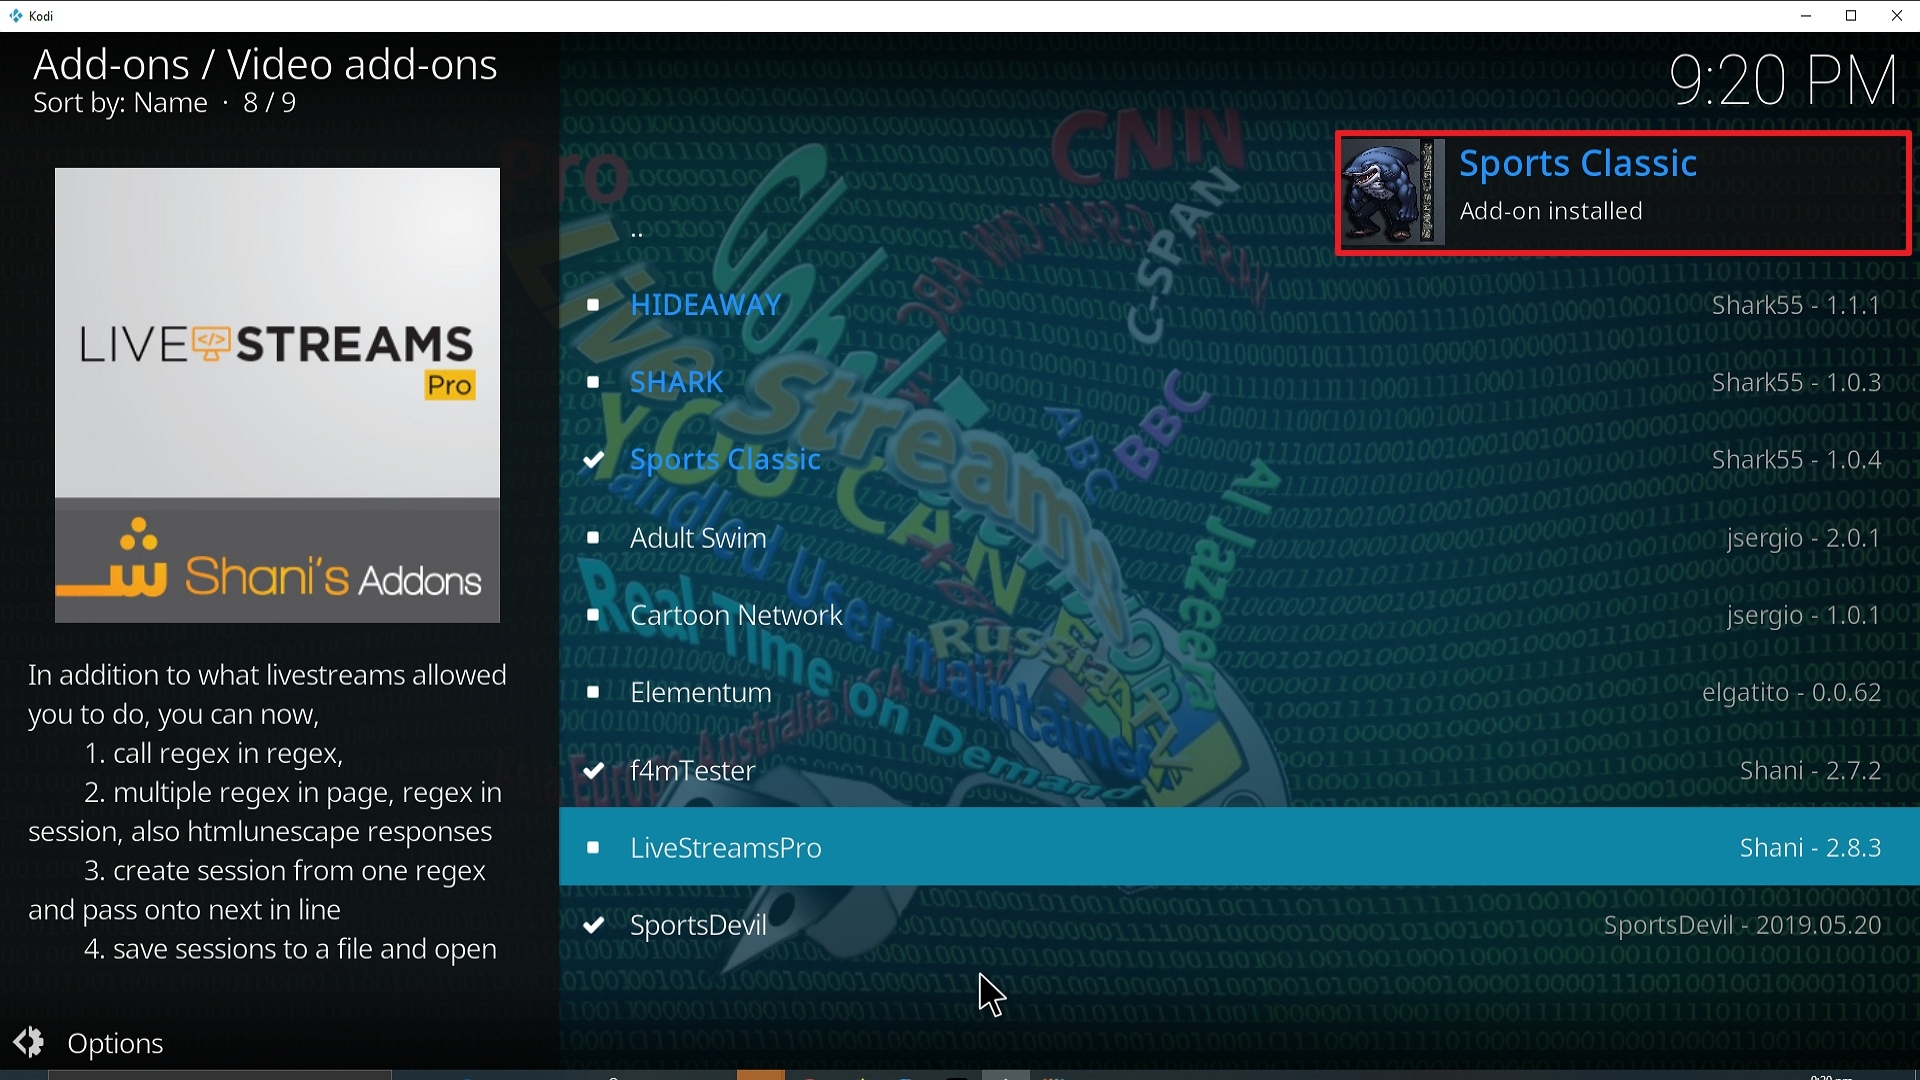
25. You should see a popup in the upper right corner saying Sports Classic has installed. There will actually be multiple popups for the various components.

Step 25 Installing Sports Classic Kodi


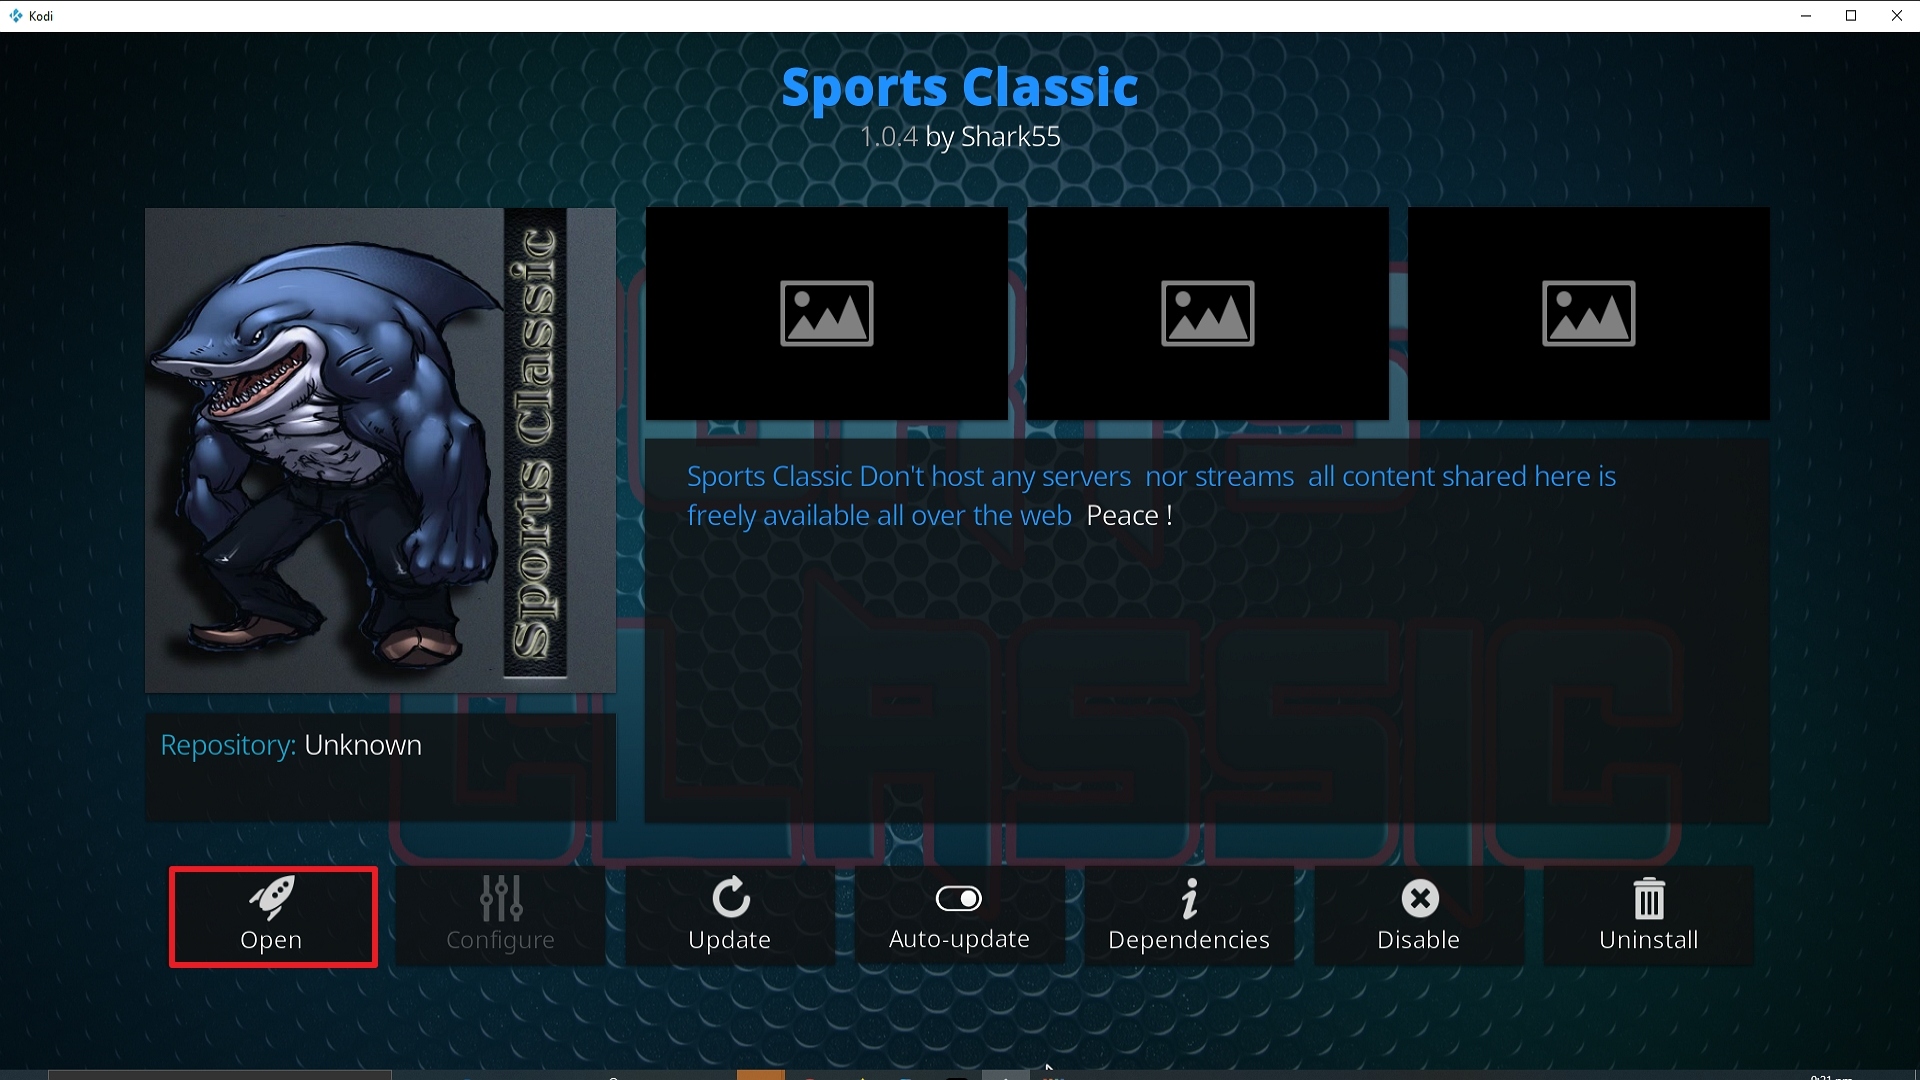
26. Click on Open to start the Sports Classic add-on.

Step 26 Installing Sports Classic Kodi


Always Use a VPN On Kodi

It is advisable to install a VPN on your streaming device. This is because any time you are streaming content online, your online data is vulnerable and you are being monitored on the internet service provider’s network. 

Not only that, but you will also experience location restrictions. Using a VPN will save you that headache and stress and you will be safe and secure while streaming content online. We recommend Surfshark as it offers high security and privacy with a zero-log policy with DNS leak protection. 

Note: For more information about Surfshark, please read our Surfshark Review.


Grab your subscription now!


How to Install Surfshark VPN on Firestick

If your Firestick still has the older interface, read this article to learn how to update it: Update Firestick Interface.

Follow our screenshots below to install the SurfShark VPN app on your Fire TV stick.

1. Go to the Home screen of your Firestick.

step 1 Install Surfshark VPN on Firestick


2. Navigate towards the Find tab. Press the Search button from the resulting dropdown.

step 2 Install Surfshark VPN on Firestick


3. Type in the keyword of SurfShark and select from the suggestions that will appear.

step 3 Install Surfshark VPN on Firestick


4. Click the official SurfShark icon from your search results.

step 4 Install Surfshark VPN on Firestick


5. Press the Download (You own it) button.

step 5 Install Surfshark VPN on Firestick


6. The SurfShark VPN installer will download on your device.

step 6 Install Surfshark VPN on Firestick


7. SurfShark VPN’s app will automatically install itself on your Fire TV stick.

step 7 Install Surfshark VPN on Firestick


8. Press the Open button after completing SurfShark VPN’s installation process.

step 8 Install Surfshark VPN on Firestick


9. Please wait for the SurfShark VPN to load its user interface.

step 9 Install Surfshark VPN on Firestick


10. You can now log in with your SurfShark VPN account credentials.

step 10 Install Surfshark VPN on Firestick

Learn more about Surfshark and Grab the Best Surfshark Deal Now!


Install Surfshark on Firestick

Best Surfshark Deal


Other VPNs to Consider

NordVPN (Best for Streaming)

Best Features

  • 5000+ Server in 50+ Countries 
  • Military-Grade Encryption
  • Fast Connection Speed
  • Suitable to a lot of devices
  • No-Log Policy

Prices
  • Complete $5.89 per month (64% Discount)
  • Plus $4.59 per month (56% Discount)
  • Standard $3.69 per month (55% Discount)

Best Features

  • 750+ High-speed VPN Servers in 43 Locations
  • Military-Grade Encryption
  • Fastest HD Streaming and Gaming
  • 30-Day Money-Back Guarantee
  • Unlimited Data & Devices
  • No-Log Policy

Prices
  • 3 Years $1.99 per month (82% Discount)
  • 1 Years $3.29 per month (70% Discount)
  • 1 Month $10.99 per month

IPVanish VPN (Most Secure)

Best Features

  • 1200+ Servers in 60+ Countries around the world
  • Unlimited Connections
  • No-Log Policy
  • Top Notch Military-Grade VPN Protocols and Encryptions
  • 100% Safe and Secured
  • Most Trusted VPN
  • Best VPN for Firestick
  • 30-Day Money-Back Guarantee

Prices
  • Yearly $3.99 per month (63% Discount) – 30 days risk free + Ransomware & Malware Protection
  • Quarterly $5.32 per month (51% Discount)
  • Monthly $10.99 per month


For more VPN discounts, go to ReviewVPN Deals and purchase the best VPN for you.

Click here to get the lowest price on Surfshark through our exclusive limited-time offer.


Install Sportz Kodi Addon

Sportz Kodi Addon

Source: http://j1wizard.net/butter/ 

Sportz Kodi Addon is a brand new addon in 2019, with a wide range of sports, though mainly concentrated on what we would categorise as manly America sports! So, you can come here for your daily fix of fishing, hunting and wrestling.

A relatively basic looking add on with some good working streams, coming from the well-respected Butter Fingers repository, so let’s see what happens!


Common Errors

These are the 3 most common errors you might see with Sportz:

  • Add on won’t install / start: There are a couple of reasons why an add on won’t install or start. Firstly, make sure that you have typed in the exact URL. Next check that the URL is working on an internet browser. Also have a look through Google and Reddit and see if you can find any recent threads about the add on being down or not working. If those fixes don’t work, read on our guide linked above.
  • Source not working/slow/frozen: When trying to find live sport streams, you are going to run up against a lot of problems, including broken links, degraded streams or just poor-quality watching. Always bear in mind you must be patient when trying to stream Live TV. Wait a full 10 seconds for the stream to connect and refresh the stream a few times, in case there has been an error connecting you to the streaming server. If none of these fixes work, then try and read through more guides linked above.
  • Kodi check log error. You’re unlikely to get this error if you have only just started using Kodi, but you will become more used to it as time goes on. To make sure that you don’t spend time staring at a blank screen while your content buffers, Kodi will cache the first couple of seconds of every piece of media to watch. So, if you returned to it later, you would only have to wait for it to buffer once. Over time your media cache will fill and need to be emptied. To find out how to do this and other ways to fix check log errors, read on our guide linked above.


ANONYMOUSLY

[videopress HuFOKiYR]

Review

Sports is a sound add on, being fresh and new it as that on its side. Now we just need to wait and see whether the add on gets enough users to make it worthwhile for the developer to stay for the ride.

The nature of the sports streamed is widespread, we don’t often see fishing.

Honestly if you want something potentially a bit more stable, with the provenance of having history on its side we recommend using Sports Devil for now. That or Mobdro. Between there isn’t a channel or a sport that they wouldn’t cover.

Sportz is a good add on to have as a backup, but there isn’t enough on it, to let us know whether it’s a good add on that’s going to stay or one that will go dark in a few months.

Or you can pay $7+ a month and get yourself a premium IPTV provider like Player’s Klub, Helix or Sports TV. All offering at least 3,000+ channels in glorious HD and you will never have to worry about whether your stream will be working again.

Categories include:

  • Game Sports
  • Motor Sports
  • Euro Sports
  • Women’s Sports
  • Combat Sports
  • Sports Documentaries
  • Wrestling
  • Women’s Wrestling
  • Fishing
  • Hunting


YOUR INTERNET ACTIVITY IS BEING WATCHED

ReviewVPN cannot attest to the legality, security and privacy of the applications discussed on this site. It is highly recommended that you use a VPN service while streaming or using Kodi.

Currently, your IP 216.73.217.150 is visible to everyone and your Browser is being tracked by Advertisers & ISP Provider.

Save 65% Now

Limited Time Offer

Here are the main reasons why you must use a VPN:

  • Your activities are hidden from your ISP, the government, and from the apps you are using.
  • You can access additional movies and TV streams.
  • ISP attempts to throttle are thrwarted thus reducing buffering issues.
  • Geographically restricted content like Netflix and Hulu can be unblocked.

A VPN works be replacing your ISP-assigned IP address and creating an encrypted tunnel. We recommend the no log service offered by IPVanish. It works well on a Firestick and offers the fastest possible speeds.

Special Limited Time Offer - Get IPVanish


Legal Disclaimer: ReviewVPN.com does not encourage or endorse any illegal activity involved in the usage of services and applications referenced on this site. We do not verify the licensing agreements of services. The end-user is wholly responsible for ensuring that any media accessed through these services does not violate copyright and/or licensing laws. ReviewVPN does not promote, link to, or receive compensation from any Apps and IPTV services.


Install Surfshark on Firestick

Best Surfshark Deal


How to Install Sportz Addon on Kodi with Screenshots

  1. From the home screen, select the cogwheel at the upper left.

Step 1 Installing Sportz addon on Kodi

2. Select System in the bottom right corner.

Step 2 Installing Sportz addon on Kodi


3. Select Add-ons on the left side of the screen.

Step 3 Installing Sportz addon on Kodi


4. Select Unknown sources.

Step 4 Installing Sportz addon on Kodi


5. Click Yes to allow unknown sources.

Step 5 Installing Sportz addon on Kodi


6. Select File manager.

Step 6 Installing Sportz addon on Kodi


7. Click Add source.

Step 7 Installing Sportz addon on Kodi


8. Click on <None>.

Step 8 Installing Sportz addon on Kodi


9. Type exactly: http://j1wizard.net/butter/

Step 9 Installing Sportz addon on Kodi


10. Click on OK.

Step 10 Installing Sportz addon on Kodi

11. Select enter a name for this media source.

Step 11 Installing Sportz addon on Kodi


12. Name is Sportz (this part isn’t critical as long as you remember the name).

Step 12 Installing Sportz addon on Kodi


13. Click on OK.

Step 13 Installing Sportz addon on Kodi


14. Click on OK.

Step 14 Installing Sportz addon on Kodi


15. Take one step back and click on Add-ons.

Step 15 Installing Sportz addon on Kodi


16. Select install from zip file.

Step 16 Installing Sportz addon on Kodi


17. Click on Sportz (or whatever you named the source).

Step 17 Installing Sportz addon on Kodi


18. Click on repository.butter-0.9.6.zip.

Step 18 Installing Sportz addon on Kodi


19. Select on Install from repository.

Step 19 Installing Sportz addon on Kodi


20. Click on Butter Fingers Repo

Step 20 Installing Sportz addon on Kodi


21. Pick Video add-ons.

Step 21 Installing Sportz addon on Kodi


22. Select Sportz again.

Step 22 Installing Sportz addon on Kodi


23. Click on Install. 

Step 23 Installing Sportz addon on Kodi


24. Select OK after reviewing the add-ons that will be installed.

Step 24 Installing Sportz addon on Kodi


25. You should see a popup in the upper right corner saying Sportz has installed. There will actually be multiple popups for the various components.

Step 25 Installing Sportz addon on Kodi


26. Click on Open to start the Sportz add-on.

Step 26 Installing Sportz addon on Kodi


Why Should You Use A VPN On Your Fire Stick?

If you are dealing with geo-restrictions trying to stream the entertainment content on your Fire Stick, a Virtual Private Network or VPN is the best solution. Even though the Amazon Fire TV and Fire Stick have built-in Virtual Private Network services, you can still acquire all of the Surfshark service’s advantages. The Surfshark service will encrypt the internet traffic of your Fire Stick and hide your location to go around geo-restrictions. Thus, you can easily stream your favorite videos, movies, and TV shows on your Fire Stick even if the content isn’t available in your region, regardless of where you are. 


Best VPN Deal

The first thing a VPN service asks for is a username and a password. Surfshark is a premium service but it has an exclusive discount that offers 83% OFF. To obtain the user name & password and avail of the huge discount, type https://reviewvpn.com/deal into any browser.

Note: For more information about Surfshark, please read our Surfshark Review.


Install Surfshark on Firestick

Best Surfshark Deal


How to Install Surfshark VPN on Firestick

If your Firestick still has the older interface, read this article to learn how to update it: Update Firestick Interface.

Follow our screenshots below to install the SurfShark VPN app on your Fire TV stick.

1. Go to the Home screen of your Firestick.

step 1 Install Surfshark VPN on Firestick


2. Navigate towards the Find tab. Press the Search button from the resulting dropdown.

step 2 Install Surfshark VPN on Firestick


3. Type in the keyword of SurfShark and select from the suggestions that will appear.

step 3 Install Surfshark VPN on Firestick


4. Click the official SurfShark icon from your search results.

step 4 Install Surfshark VPN on Firestick


5. Press the Download (You own it) button.

step 5 Install Surfshark VPN on Firestick


6. The SurfShark VPN installer will download on your device.

step 6 Install Surfshark VPN on Firestick


7. SurfShark VPN’s app will automatically install itself on your Fire TV stick.

step 7 Install Surfshark VPN on Firestick


8. Press the Open button after completing SurfShark VPN’s installation process.

step 8 Install Surfshark VPN on Firestick


9. Please wait for the SurfShark VPN to load its user interface.

step 9 Install Surfshark VPN on Firestick


10. You can now log in with your SurfShark VPN account credentials.

step 10 Install Surfshark VPN on Firestick

Learn more about Surfshark and Grab the Best Surfshark Deal Now!


Install Surfshark on Firestick

Best Surfshark Deal


Other VPNs to Consider

NordVPN (Best for Streaming)

Best Features

  • 5000+ Server in 50+ Countries 
  • Military-Grade Encryption
  • Fast Connection Speed
  • Suitable to a lot of devices
  • No-Log Policy

Prices
  • Complete $5.89 per month (64% Discount)
  • Plus $4.59 per month (56% Discount)
  • Standard $3.69 per month (55% Discount)

Best Features

  • 750+ High-speed VPN Servers in 43 Locations
  • Military-Grade Encryption
  • Fastest HD Streaming and Gaming
  • 30-Day Money-Back Guarantee
  • Unlimited Data & Devices
  • No-Log Policy

Prices
  • 3 Years $1.99 per month (82% Discount)
  • 1 Years $3.29 per month (70% Discount)
  • 1 Month $10.99 per month

IPVanish VPN (Most Secure)

Best Features

  • 1200+ Servers in 60+ Countries around the world
  • Unlimited Connections
  • No-Log Policy
  • Top Notch Military-Grade VPN Protocols and Encryptions
  • 100% Safe and Secured
  • Most Trusted VPN
  • Best VPN for Firestick
  • 30-Day Money-Back Guarantee

Prices
  • Yearly $3.99 per month (63% Discount) – 30 days risk free + Ransomware & Malware Protection
  • Quarterly $5.32 per month (51% Discount)
  • Monthly $10.99 per month


For more VPN discounts, go to ReviewVPN Deals and purchase the best VPN for you.


Install Fight Tube Kodi Addon

Fight Tube Kodi Addon

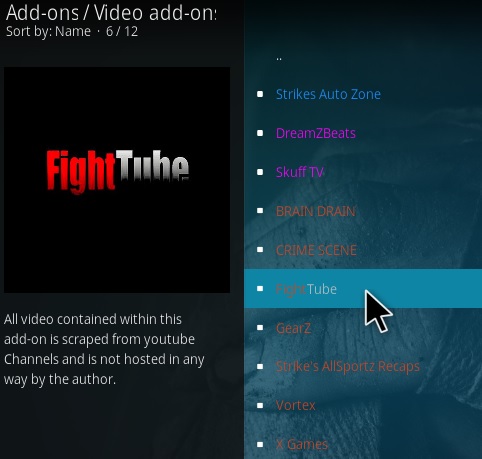
Fight Tube Image

Source: http://rockodi.com 

If you love watching fighting and don’t care about the format, the place or fighting style then Fight Tube Kodi addon is for you. We can’t think of an add on which has the same range of different fighting types as Fight Tube, with well over 30 categories of different types of fighting.

Fight Tube has several great streams and comes with the YouTube Kodi add on which it will automatically install, to enable you to watch fights and streams through YouTube in HD.

It’s a great add on for aggregating amateur and professional content in the same place, with tonnes of hype videos, fight previews and streams from martial arts and boxing events across the world.


Common Errors

Here are the 3 most common errors you will come across with Fight Tube:

  • Source not working/slow/frozen: Fight Tube pulls in videos and live links from across the web. When accessing a source always leave Fight Tube for up to 10 seconds to find the source, connect to the server and buffer the connection. Many people expect a connection to happen instantaneously, but you must be patient when connecting to live feeds. It’s also worth reloading the source and trying a few others. If none of the sources work, then you may have a bigger problem. Read our in-depth guide to find more fixes linked above.
  • Kodi check log error: A check log error can happen for several reasons, but in most cases, it’s as simple as your media cache needing to be cleared. Every piece of content you watch has a few seconds at the start of the video cached. So, if you watch it again, you don’t need to wait for it to load again. While this is great for saving time, over time this file builds up until it’s full. It happens sooner with low-storage devices. To find out how to clear cache and more fixes check our guide linked above.
  • Add on won’t install/start: When installing an add on, if you run into a problem check you have typed the URL in properly, also check the source for the add on. If the problem persists even after a few tries then read more fixes in our guide linked above.


ANONYMOUSLY


Review

Fight Tube is unrivaled when it comes to the sheer selection of fight-related content on offer through the add on. Not even Sports Devil can offer this depth of content. 

Fight Tube also has a good mix of Boxing, MMA, and WWE. Though you could probably get more in-depth content for MMA and WWE with their respective specialized add ons.

A high-quality addon that always seems to have working streams, and more content than you could ever watch.

Categories include:

  • GLORY Kickboxing
  • HBO Boxing
  • IAF – International Aikido Federation
  • Bare Knuckle Gypsies
  • Behind the Gloves
  • Bellator MMA
  • BKB Official
  • Box nation
  • Boxing Legends
  • Kungfu Life
  • Kung Fu Magazine
  • MMA Digest
  • MMA Fighting on SBN
  • Thai Boxing Voice
  • The Ultimate Fighter
  • UFC On Fox
  • UFC – Ultimate Fighting Championship
  • VIP Boxing Promotion
  • WAKO Kickboxing
  • World Karate Federation
  • MMA Junkie
  • MMA Weekly
  • Portland Wrestling
  • Pro Fight League
  • Seconds Out
  • Shaolin Kung Fu
  • SHOWTIME Sports
  • British Boxers
  • England Boxing
  • IFL TV
  • Impact Wrestling
  • International Federation of Muay Thai
  • Irish BKB
  • JetLi
  • Jiu Jitsu World League
  • Judo
  • World Taekwondo
  • Wrestling Hub
  • WWE


Install Surfshark on Firestick

Best Surfshark Deal


Legal Disclaimer: ReviewVPN.com does not encourage or endorse any illegal activity involved in the usage of services and applications referenced on this site. We do not verify the licensing agreements of services. The end-user is wholly responsible for ensuring that any media accessed through these services does not violate copyright and/or licensing laws. ReviewVPN does not promote, link to, or receive compensation from any Apps and IPTV services.


YOUR INTERNET ACTIVITY IS BEING WATCHED

ReviewVPN cannot attest to the legality, security and privacy of the applications discussed on this site. It is highly recommended that you use a VPN service while streaming or using Kodi.

Currently, your IP 216.73.217.150 is visible to everyone and your Browser is being tracked by Advertisers & ISP Provider.

Save 65% Now

Limited Time Offer

Here are the main reasons why you must use a VPN:

  • Your activities are hidden from your ISP, the government, and from the apps you are using.
  • You can access additional movies and TV streams.
  • ISP attempts to throttle are thrwarted thus reducing buffering issues.
  • Geographically restricted content like Netflix and Hulu can be unblocked.

A VPN works be replacing your ISP-assigned IP address and creating an encrypted tunnel. We recommend the no log service offered by IPVanish. It works well on a Firestick and offers the fastest possible speeds.

Special Limited Time Offer - Get IPVanish


How to Install Fight Tube Addon on Kodi with Screenshots

  1. From the home screen, select the cogwheel at the upper left.

Step 1 Installing Fight Tube addon on Kodi

2. Select System in the bottom right corner.

Step 2 Installing Fight Tube addon on Kodi


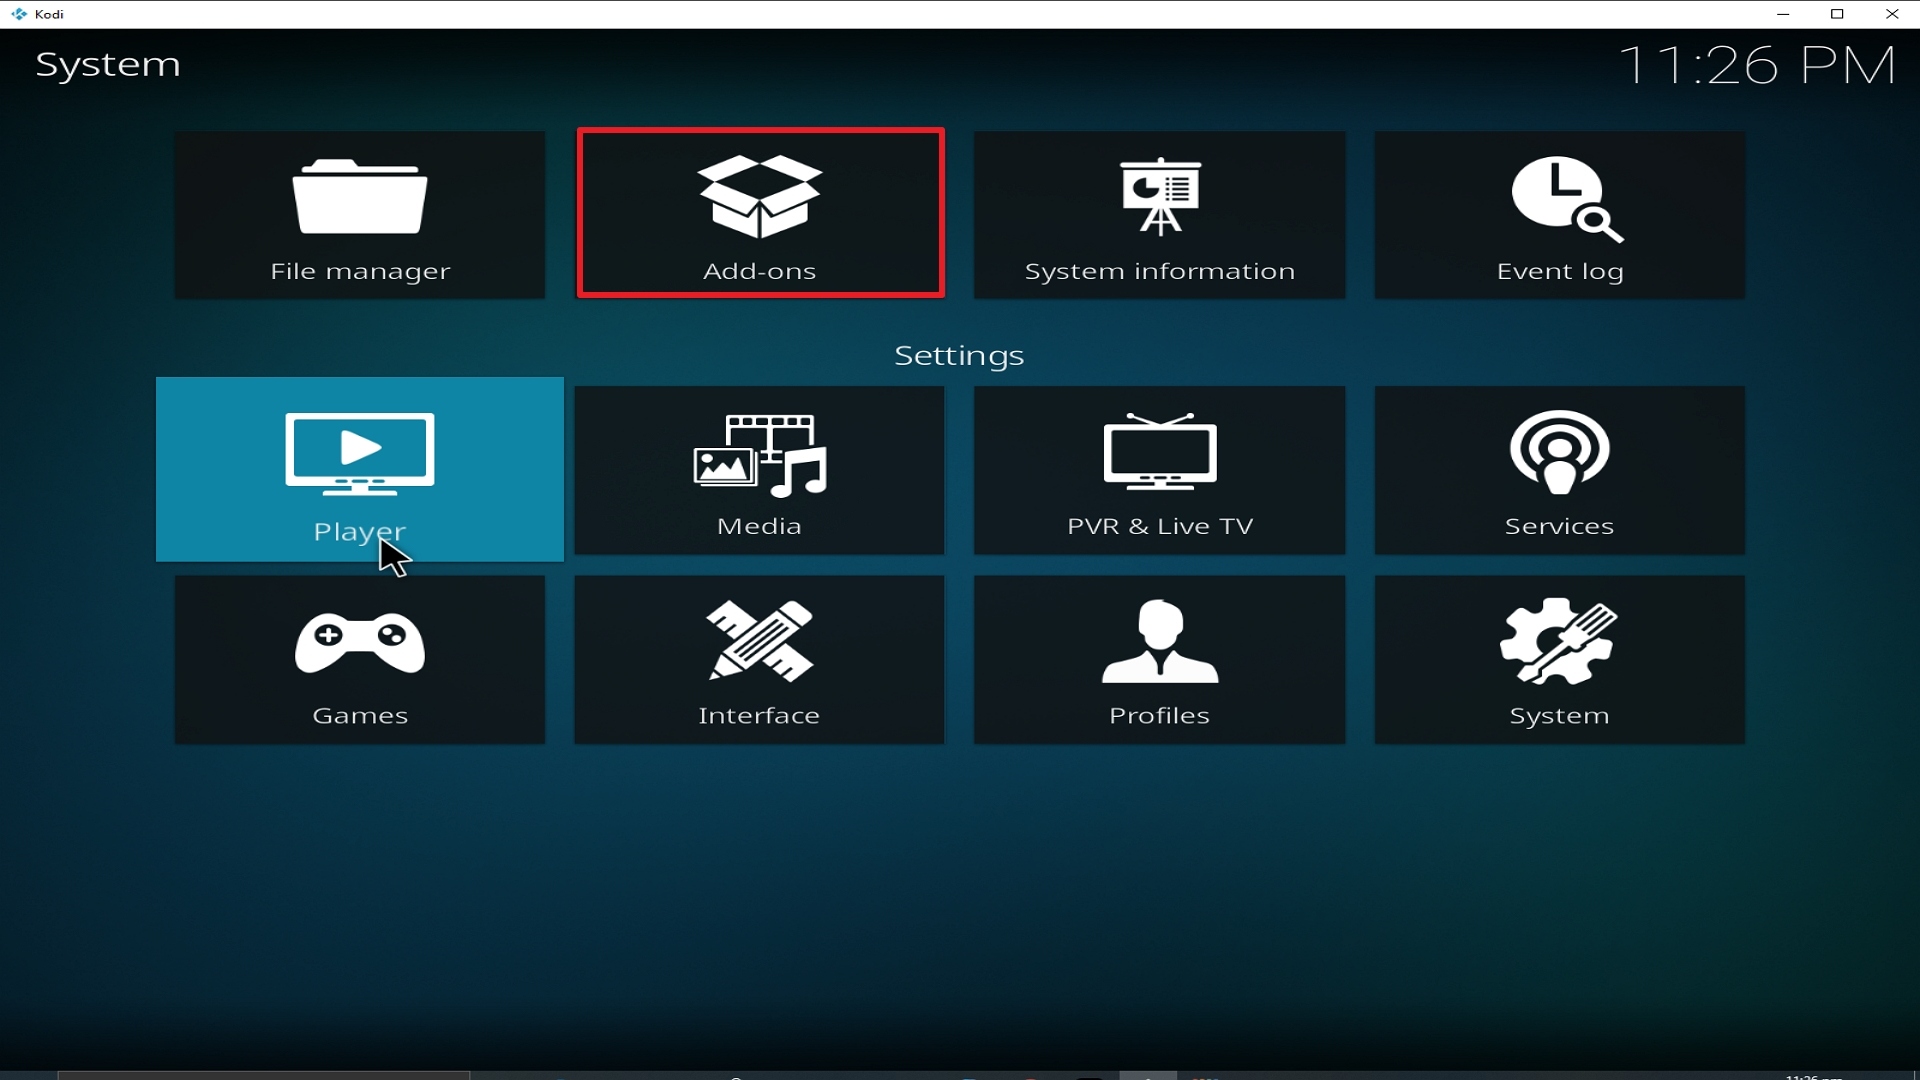
3. Select Add-ons on the left side of the screen.

Step 3 Installing Fight Tube addon on Kodi


4. Select Unknown sources.

Step 4 Installing Fight Tube addon on Kodi


5. Click Yes to allow unknown sources.

Step 5 Installing Fight Tube addon on Kodi


6. Select File manager.

Step 6 Installing Fight Tube addon on Kodi


7. Click Add source.

Step 7 Installing Fight Tube addon on Kodi


8. Click on <None>.

Step 8 Installing Fight Tube addon on Kodi


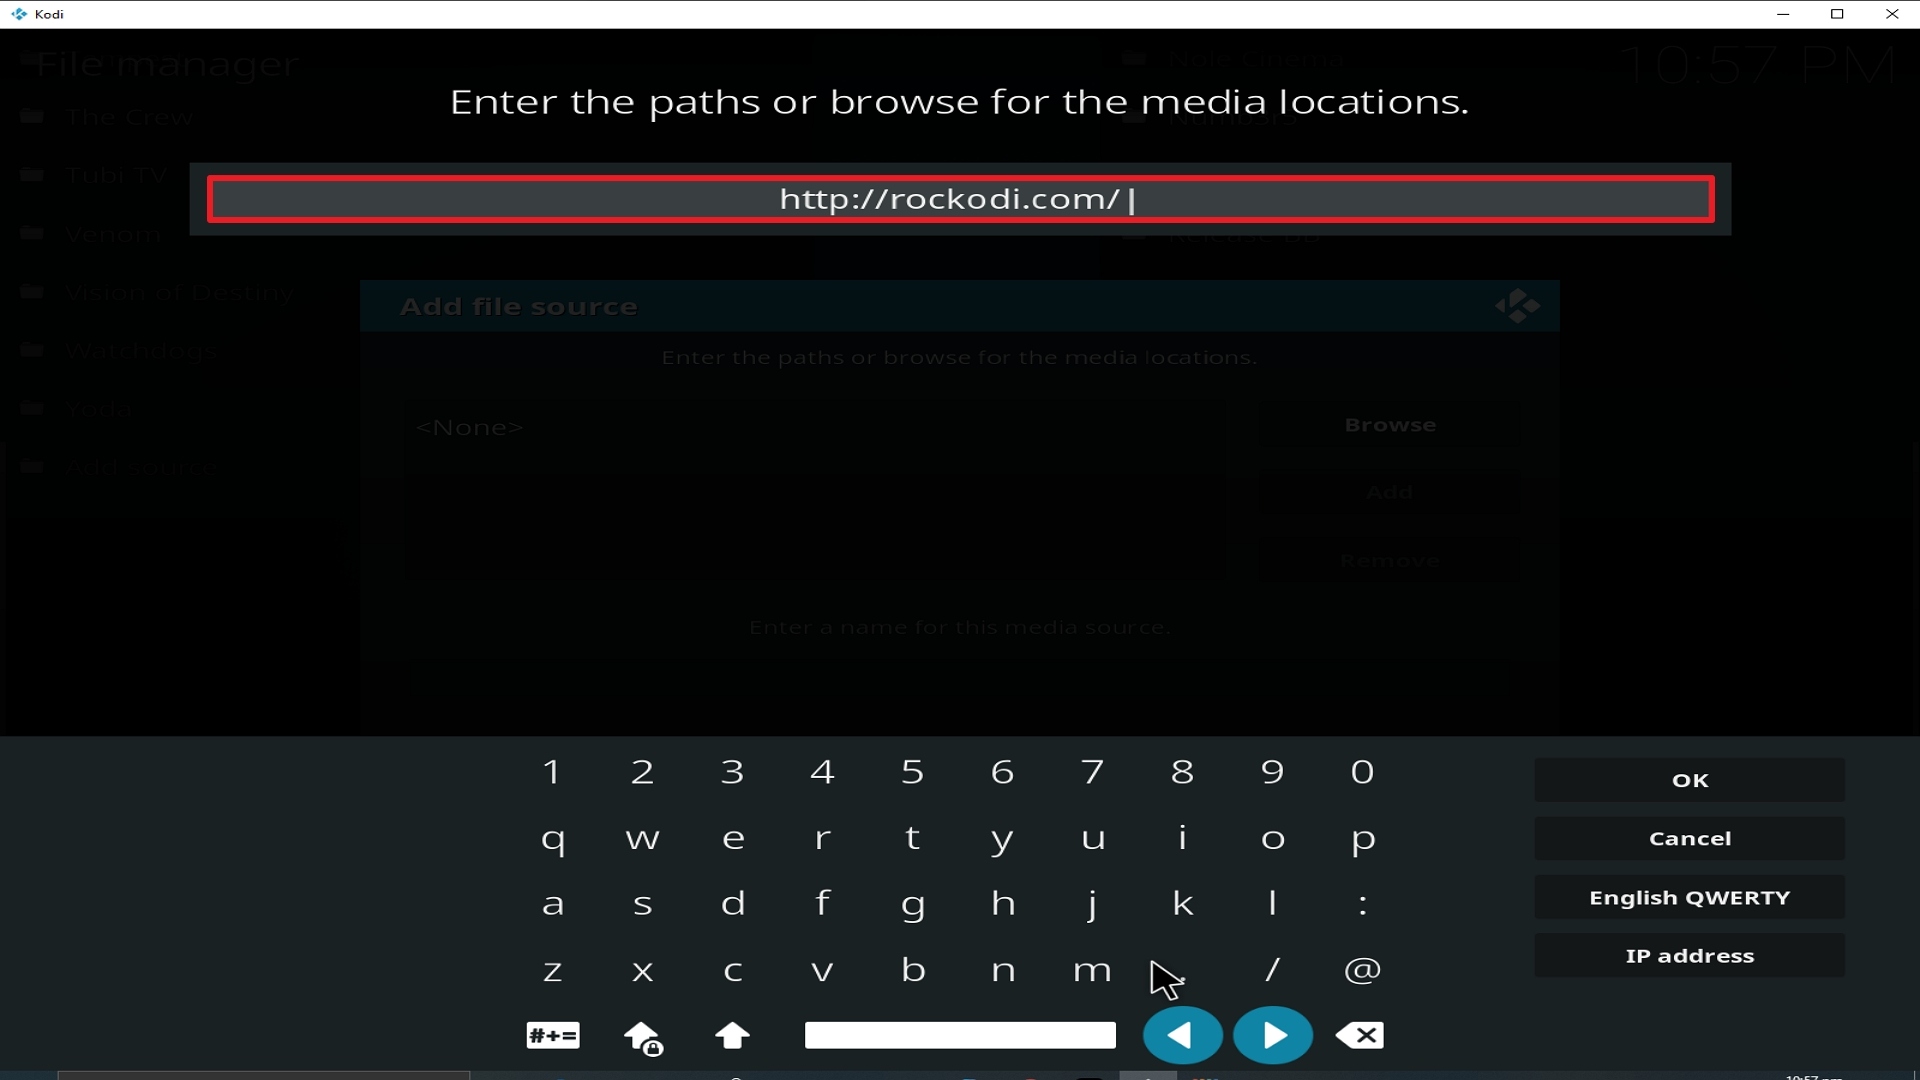
9. Type exactly: http://rockodi.com/

Step 9 Installing Fight Tube addon on Kodi


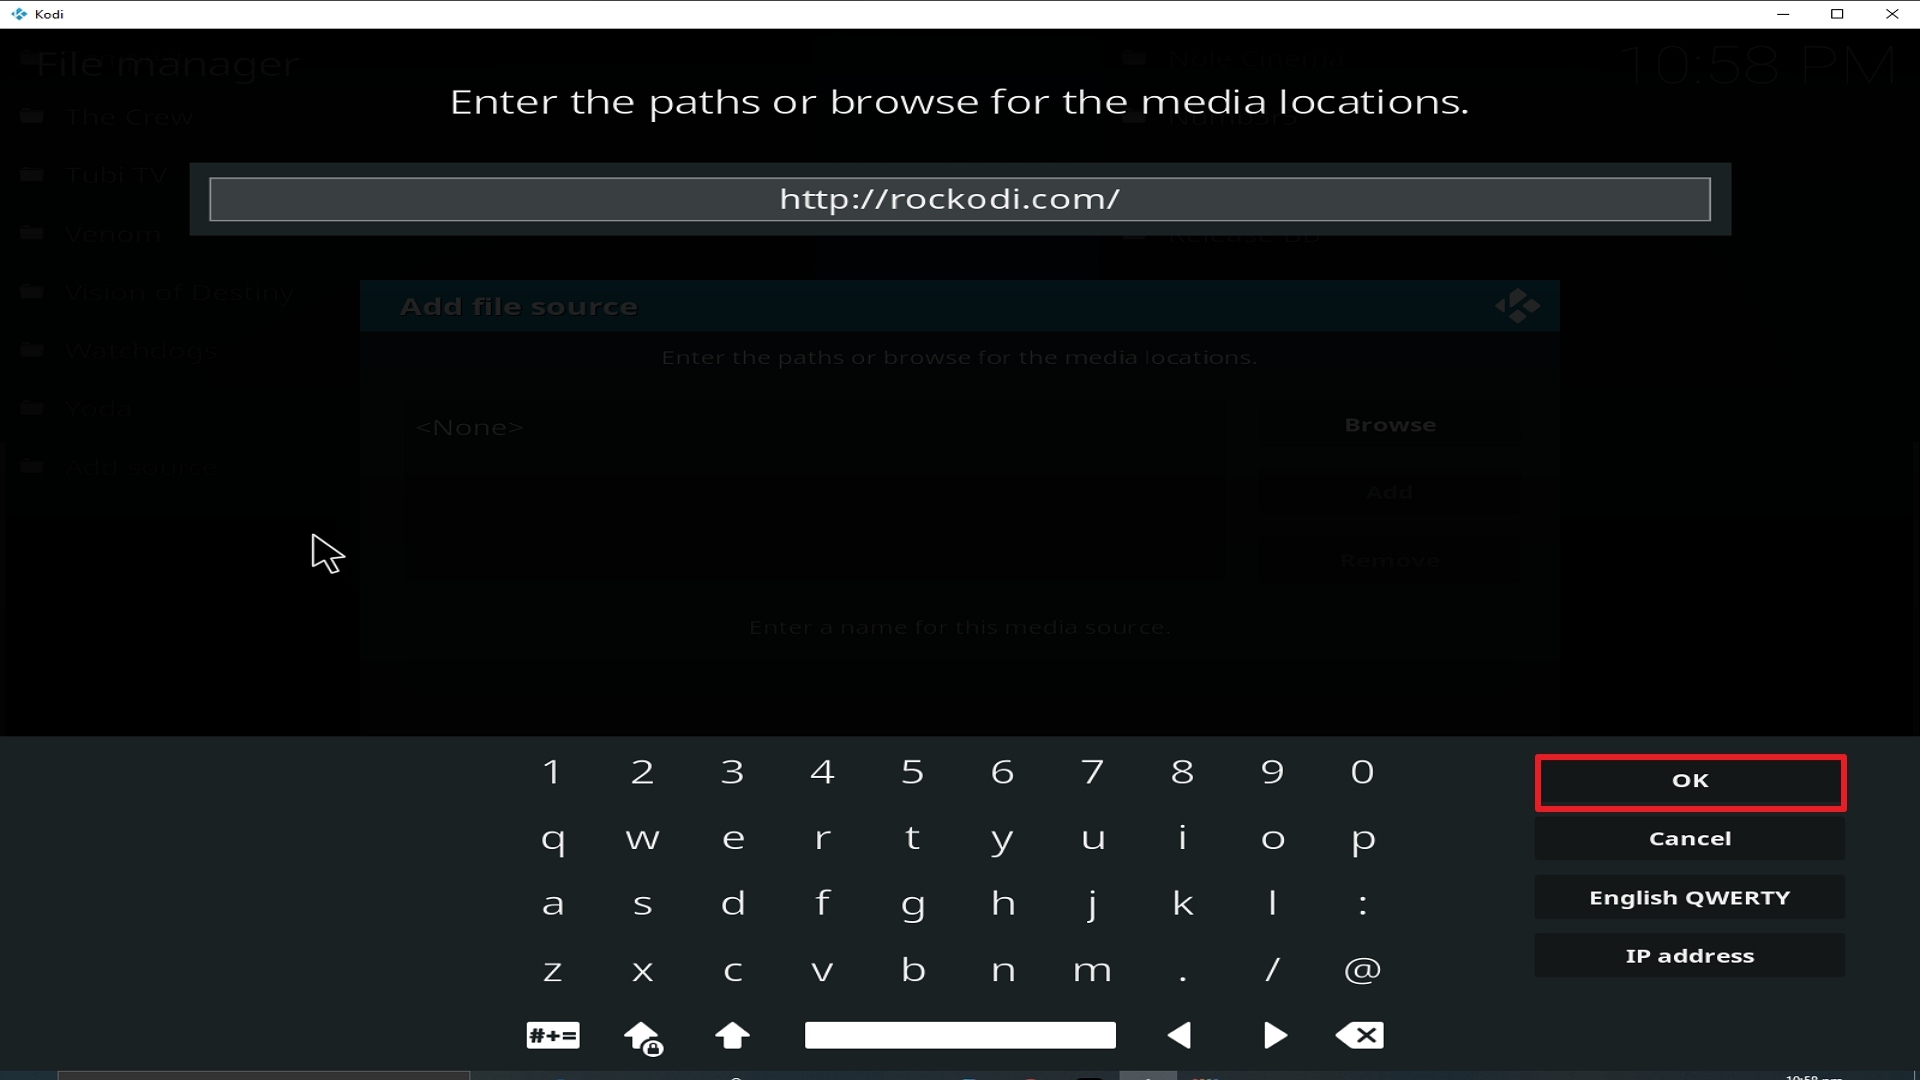
10. Click on OK.

Step 10 Installing Fight Tube addon on Kodi


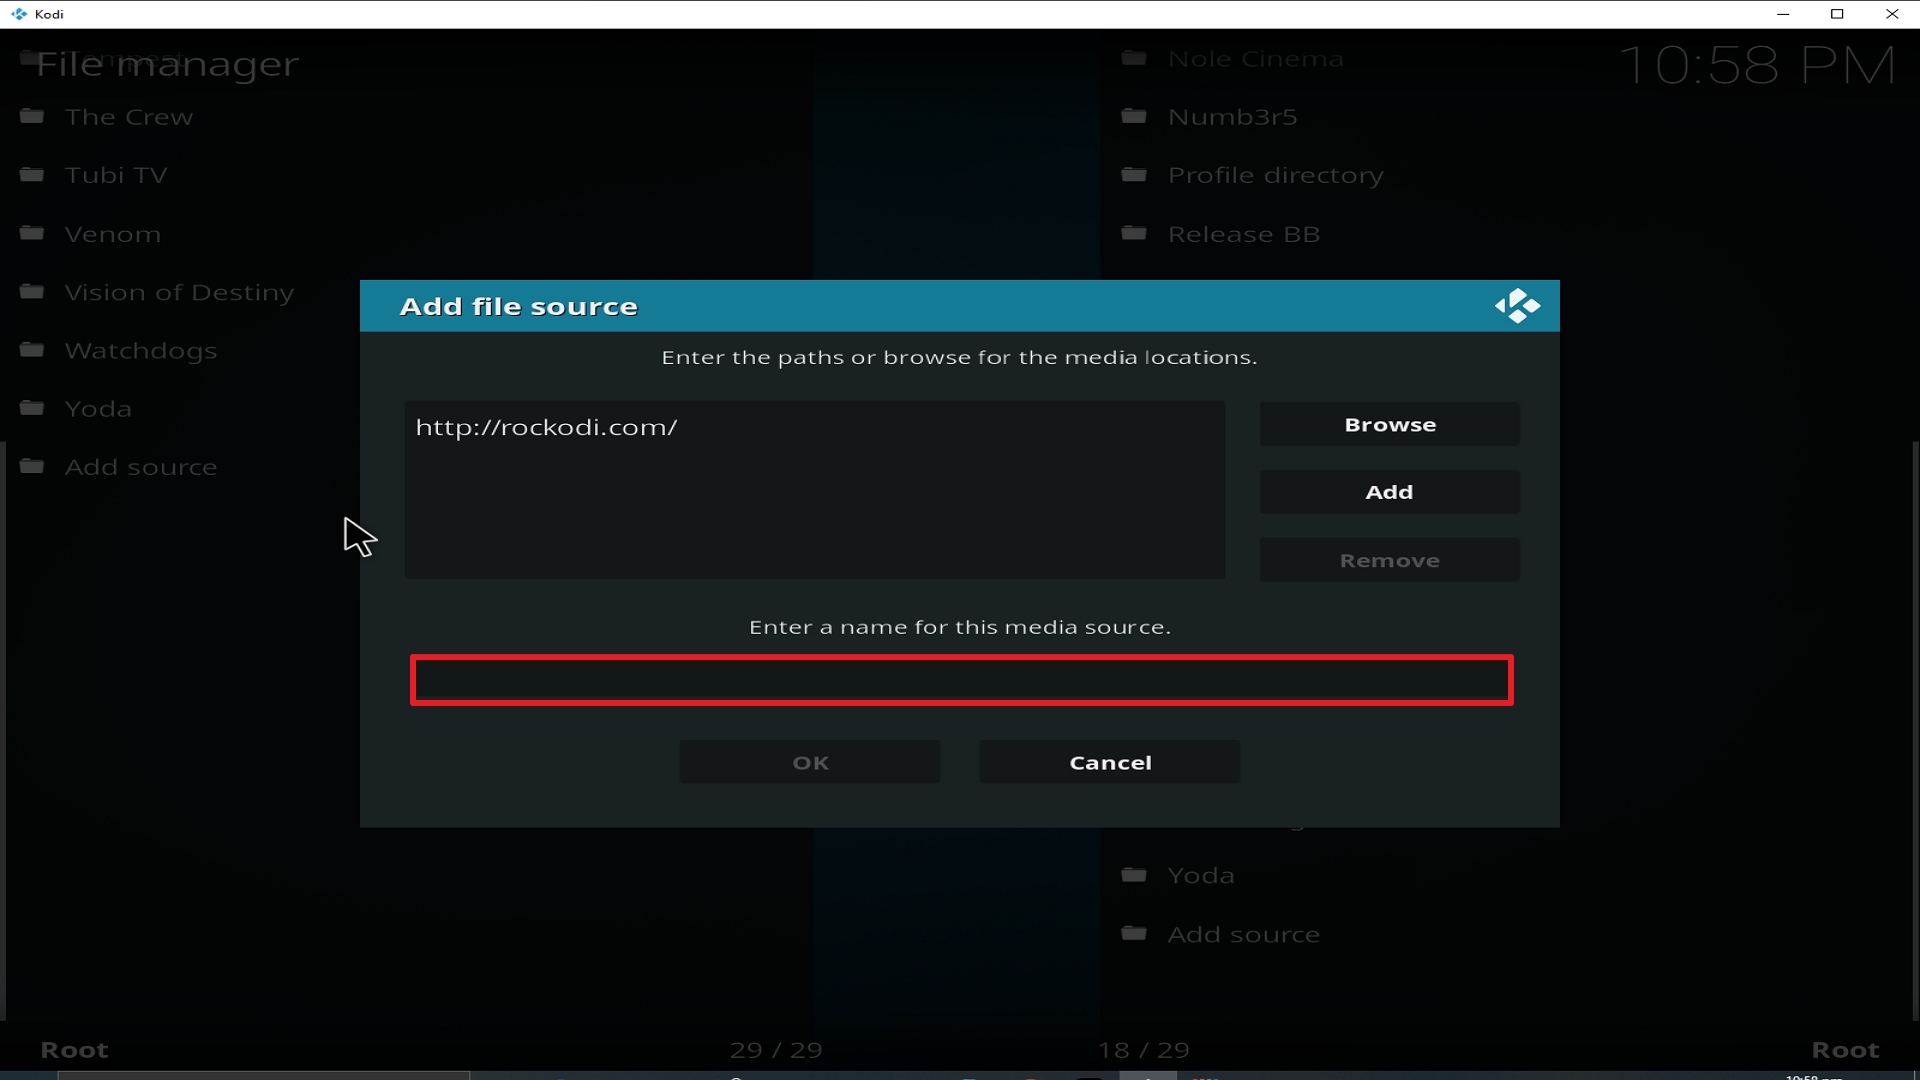
11. Select enter a name for this media source.

Step 11 Installing Fight Tube addon on Kodi


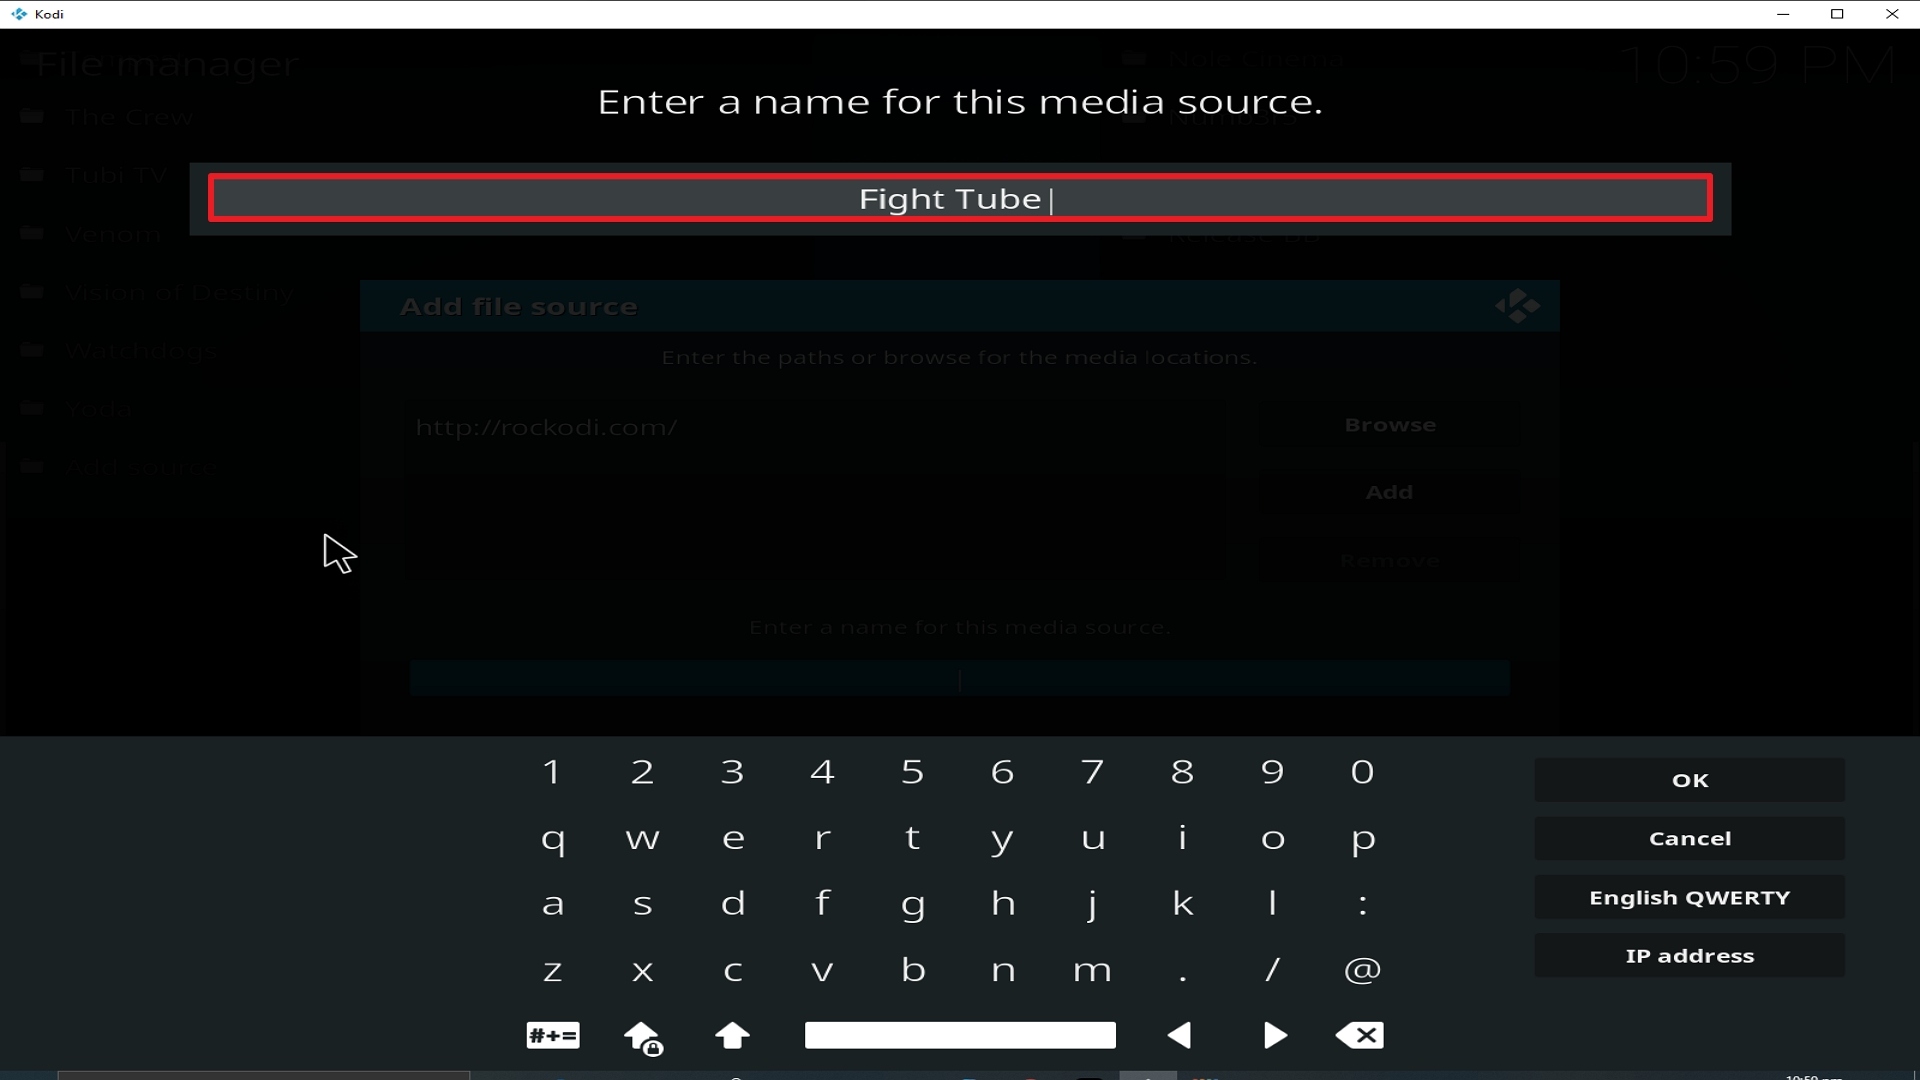
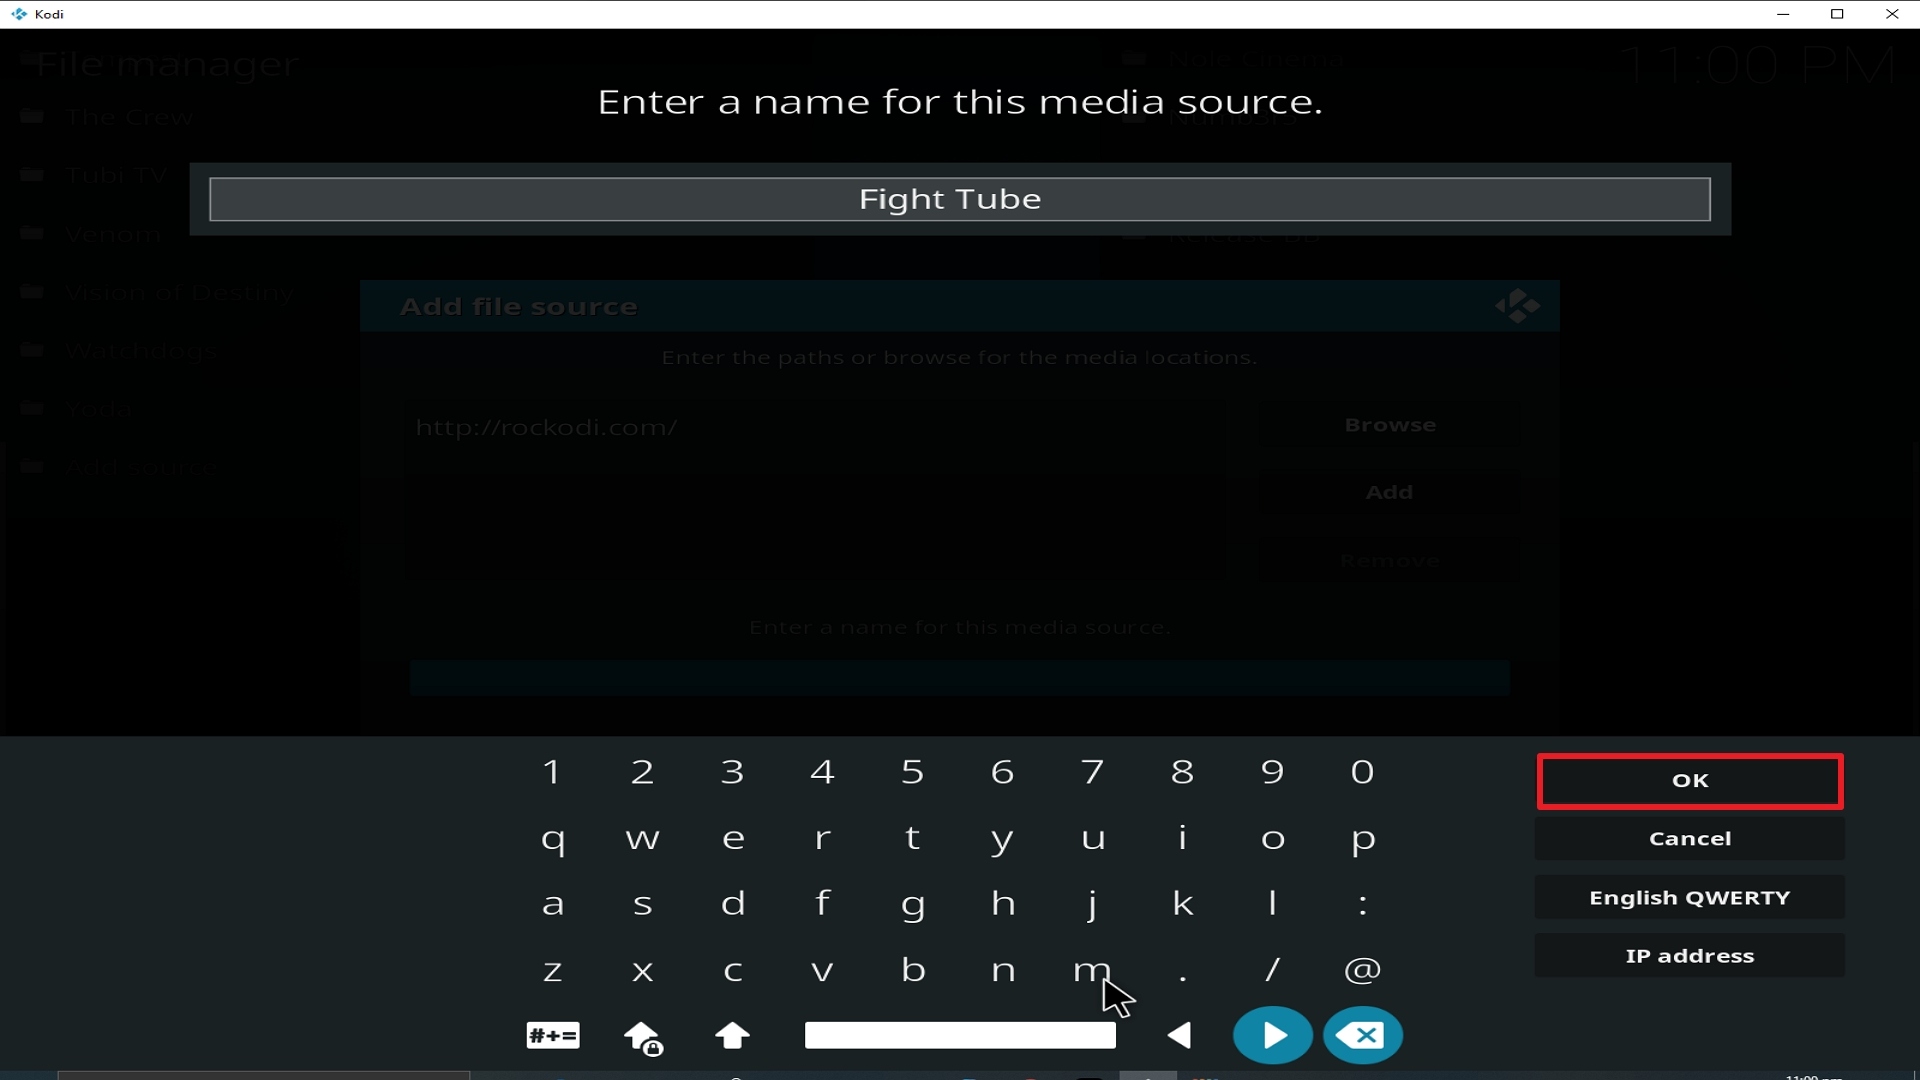
12. Name is Fight Tube (this part isn’t critical as long as your remember the name).

Step 12 Installing Fight Tube addon on Kodi


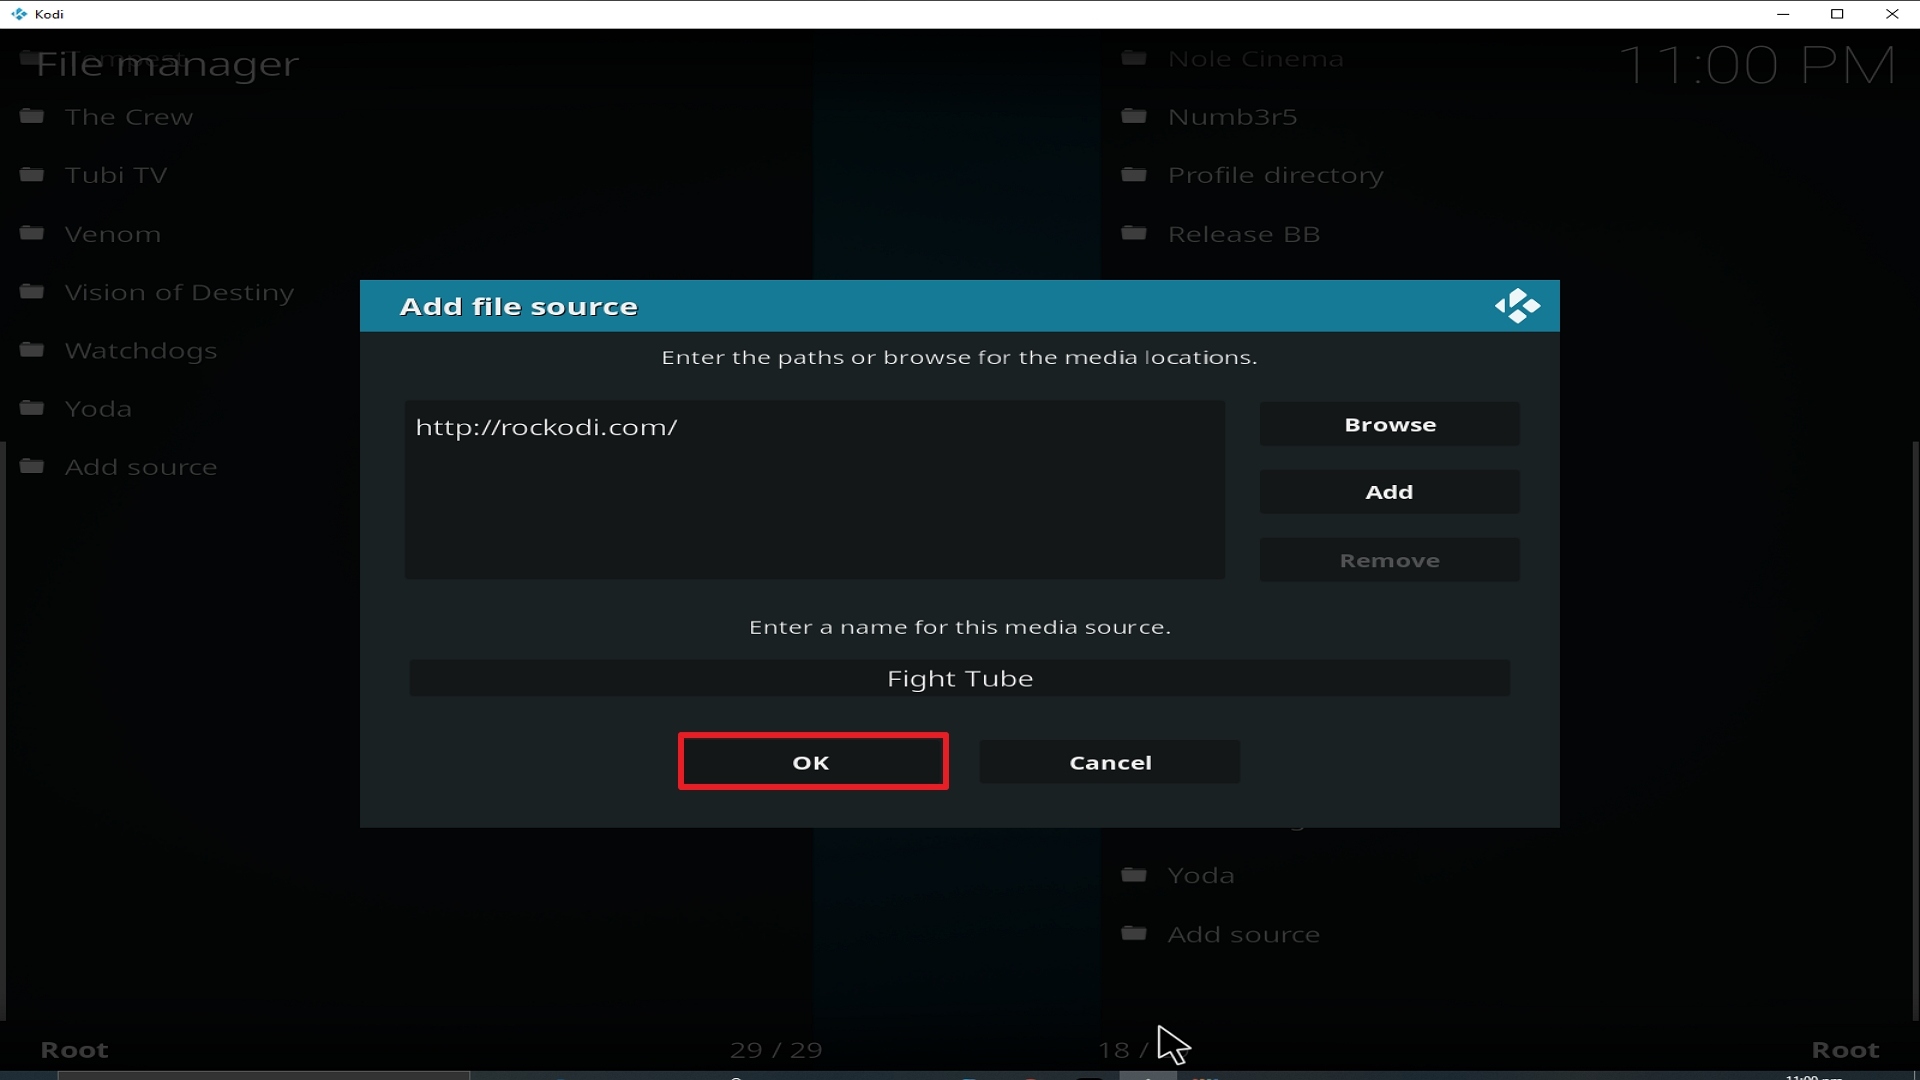
13. Click on OK.

Step 13 Installing Fight Tube addon on Kodi


14. Click on OK.

Step 14 Installing Fight Tube addon on Kodi


15. Take one step back and click on Add-ons.

Step 15 Installing Fight Tube addon on Kodi


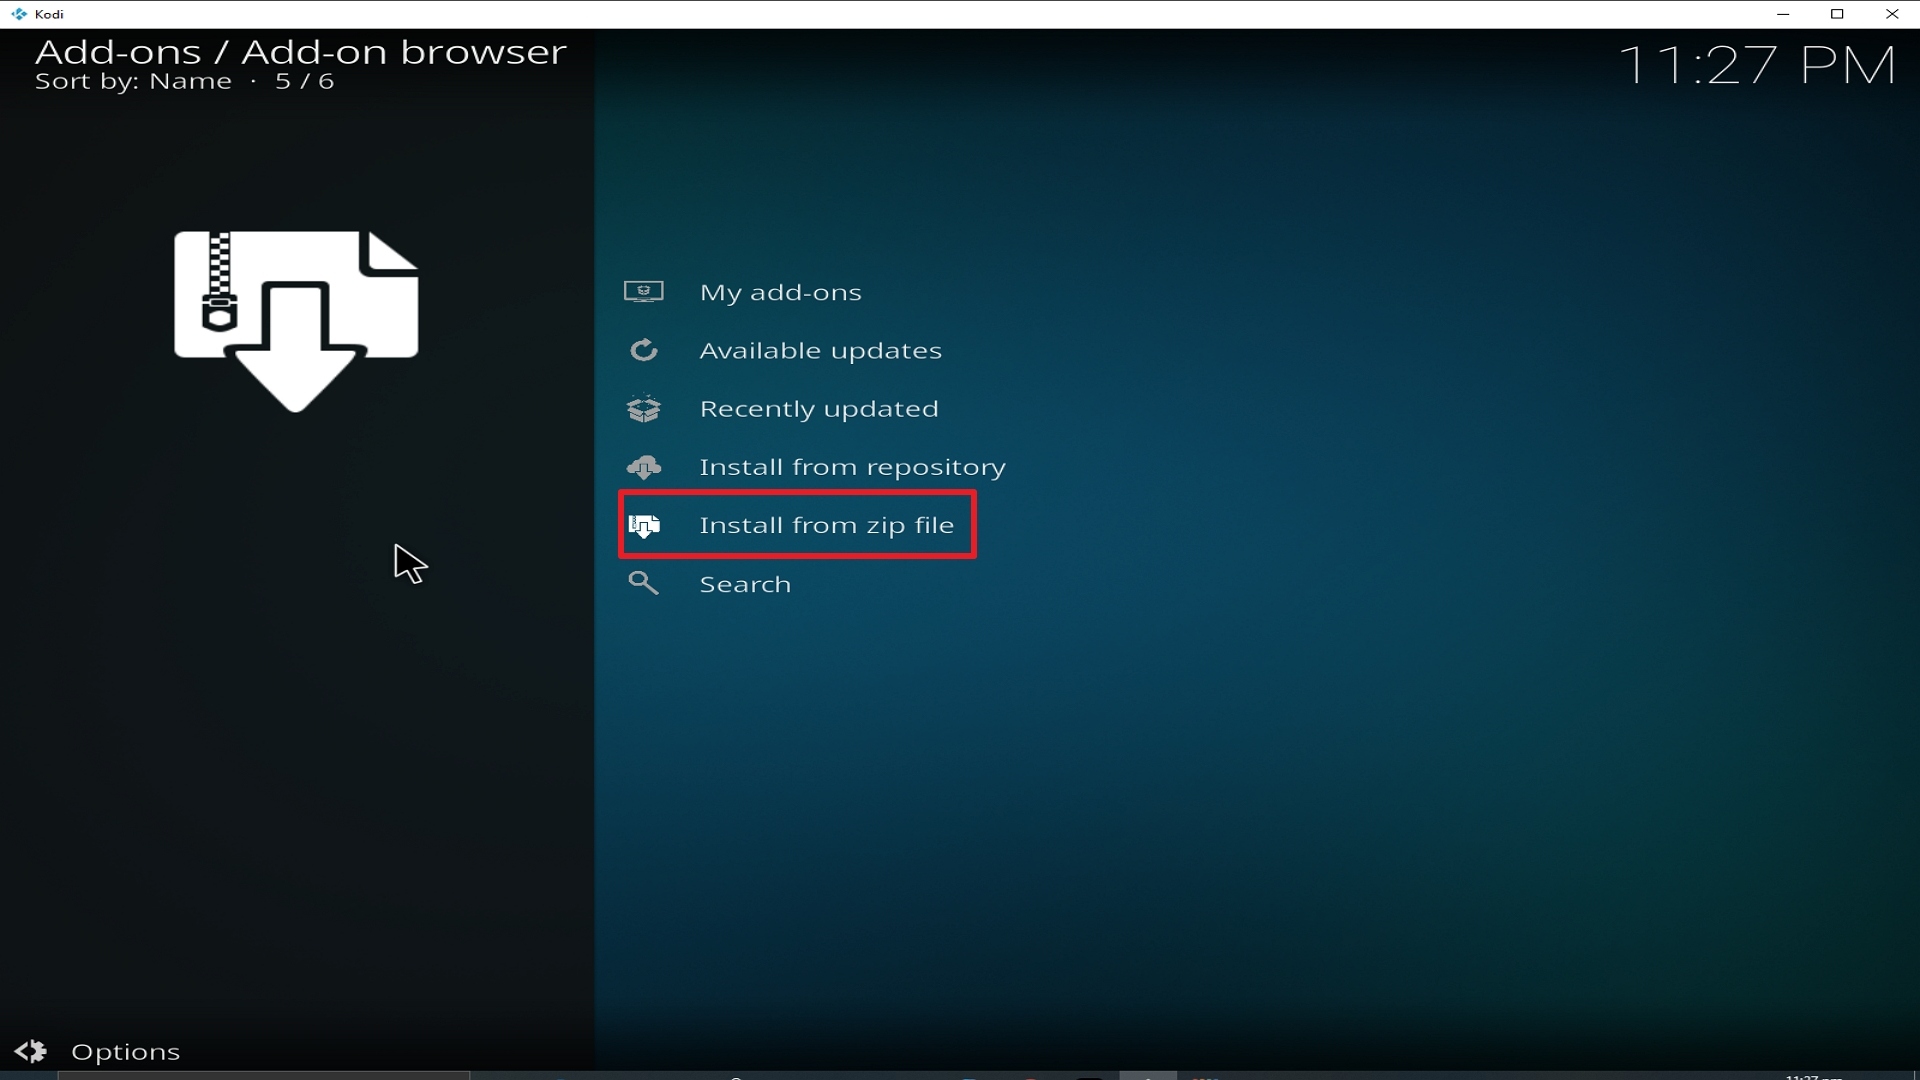
16. Select install from zip file.

Step 16 Installing Fight Tube addon on Kodi


17. Click on Fight Tube (or whatever you named the source).

Step 17 Installing Fight Tube addon on Kodi


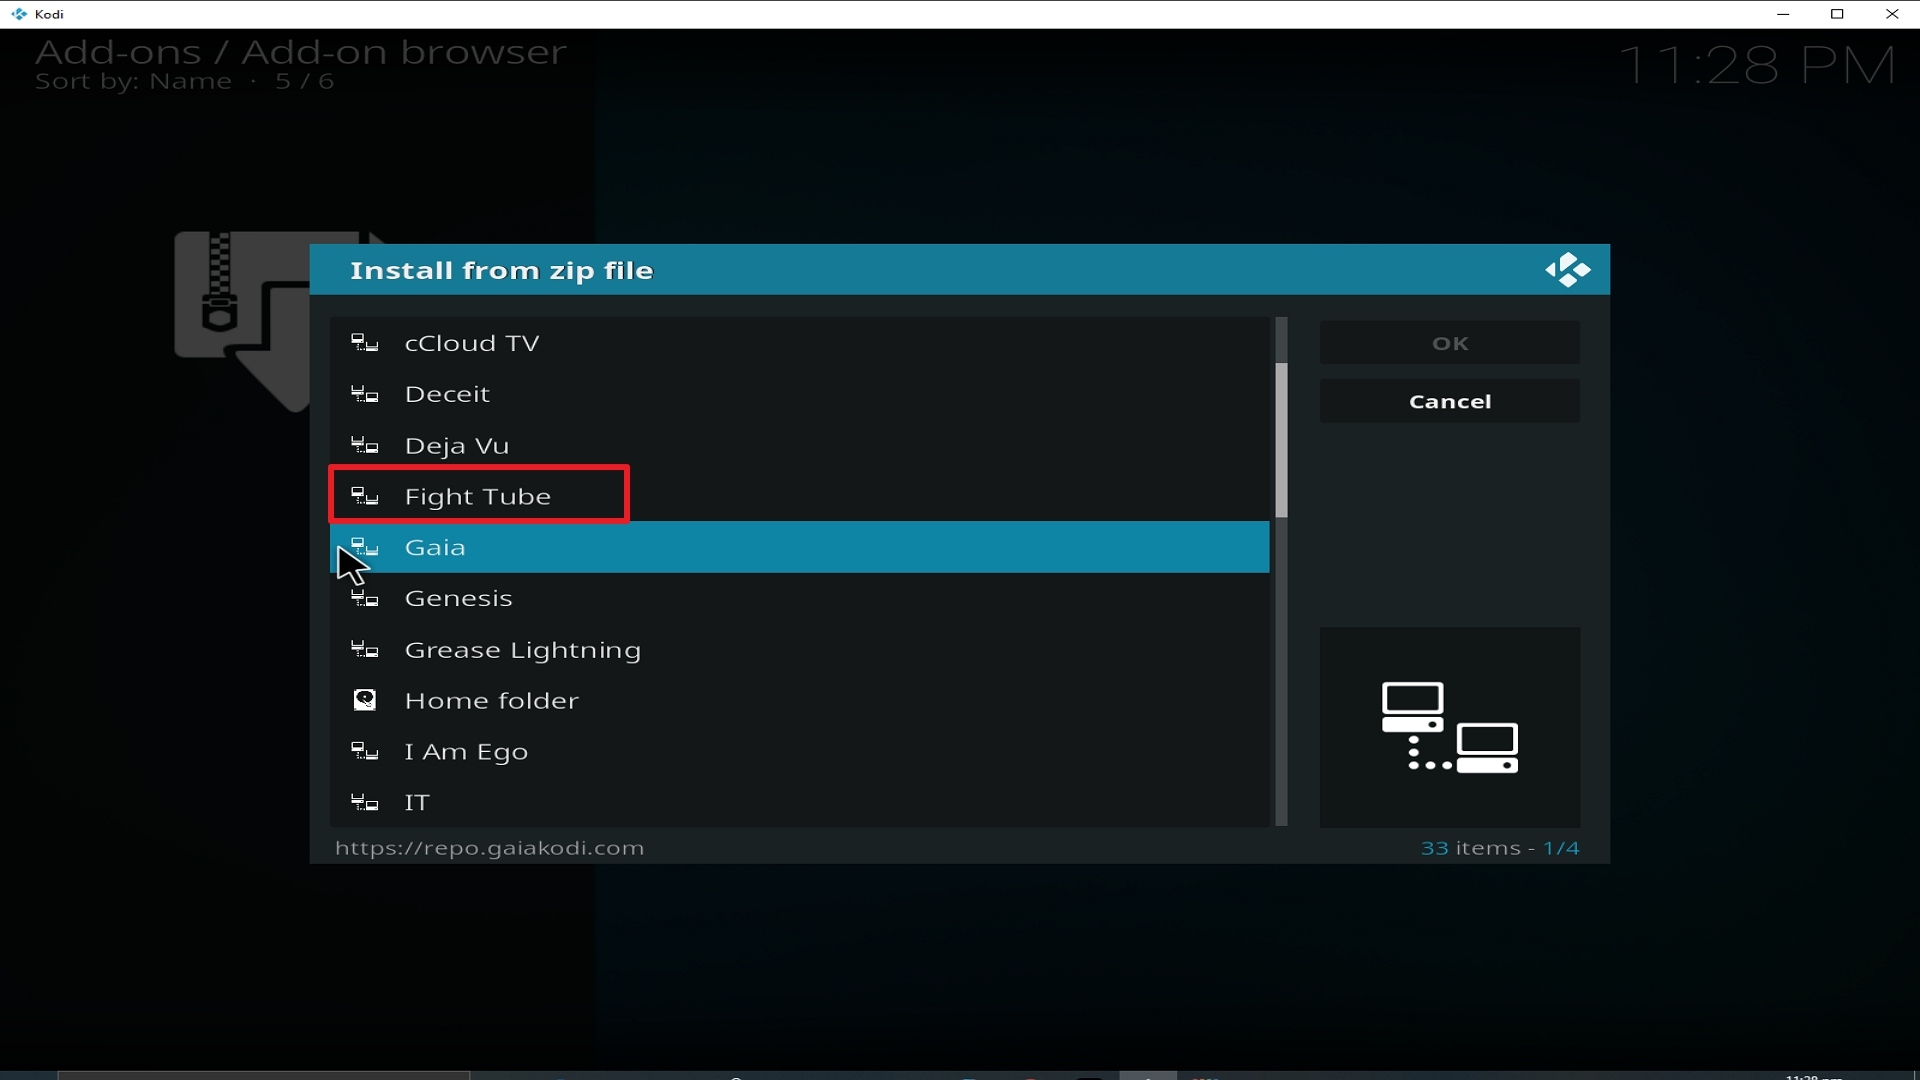
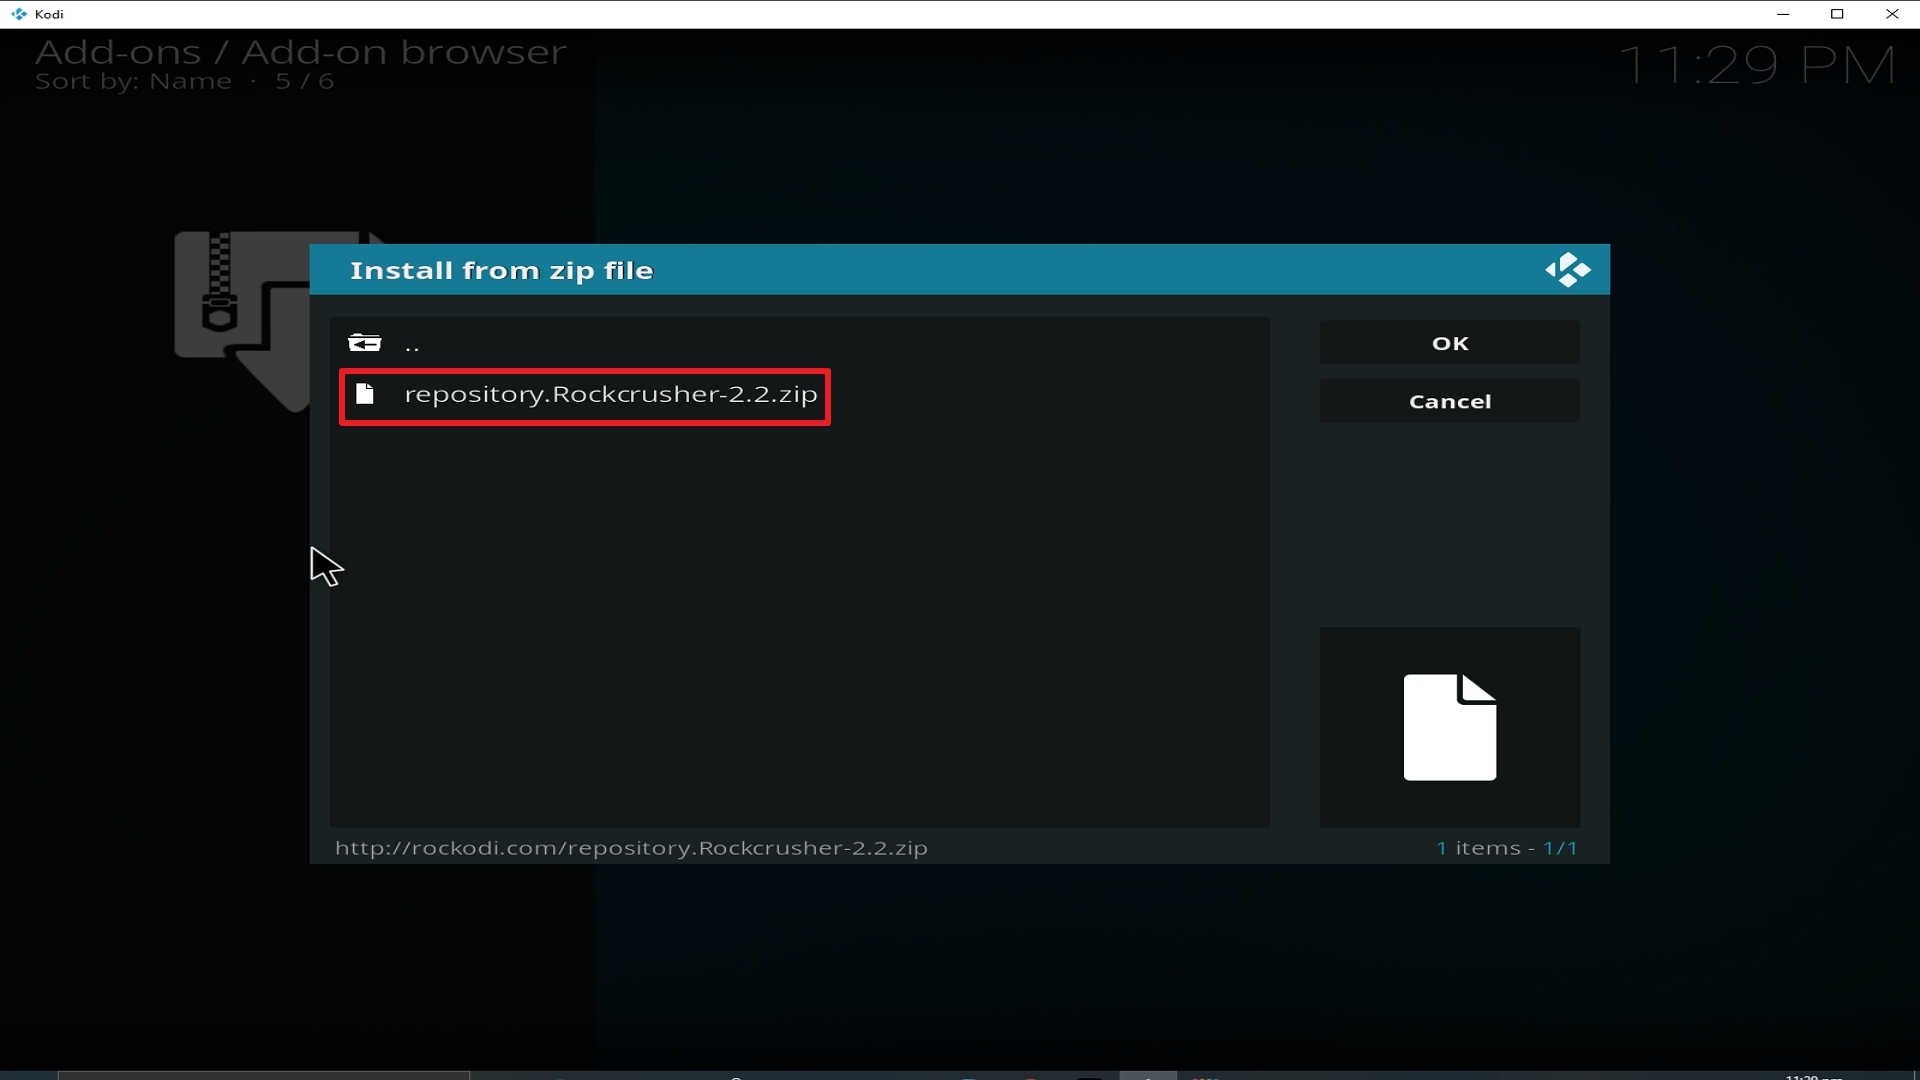
18. Click on repository.Rockcrusher-2.2.zip.

Step 18 Installing Fight Tube addon on Kodi


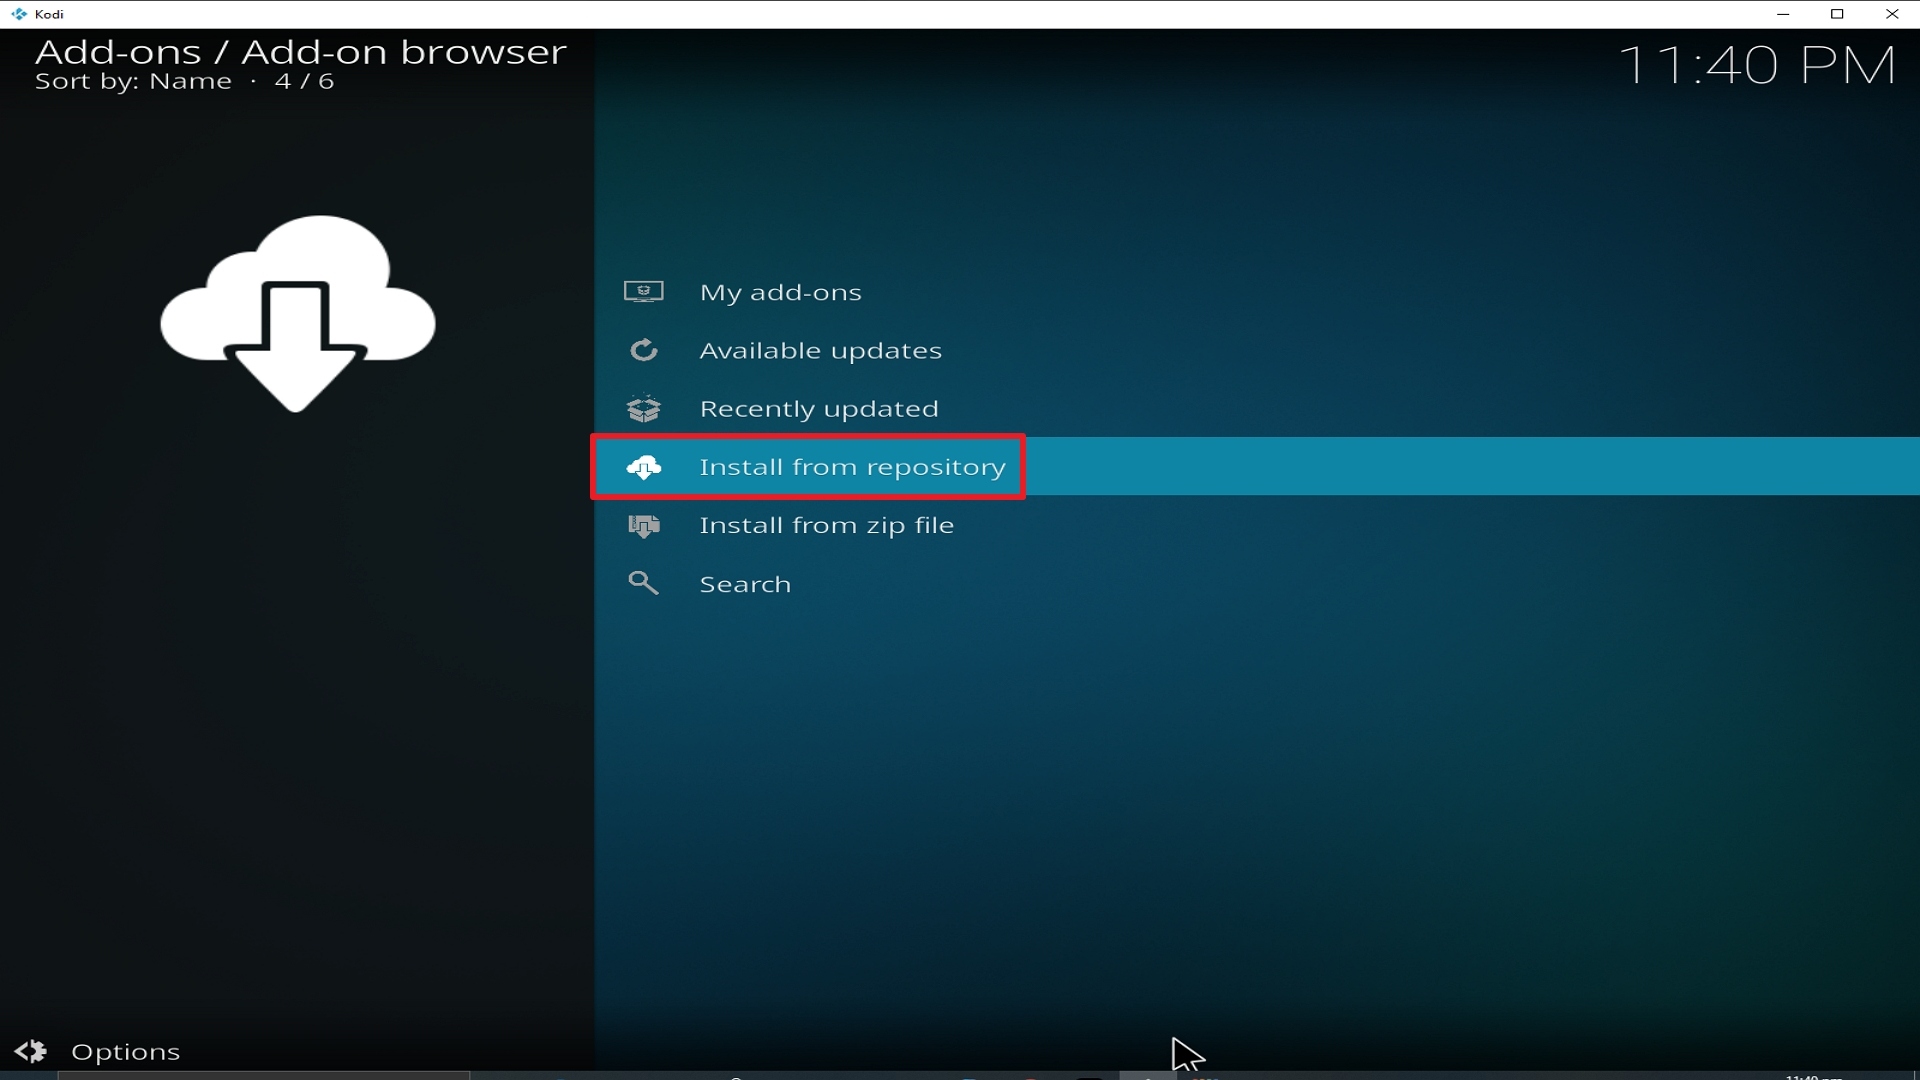
19. Select on Install from repository.

Step 19 Installing Fight Tube addon on Kodi


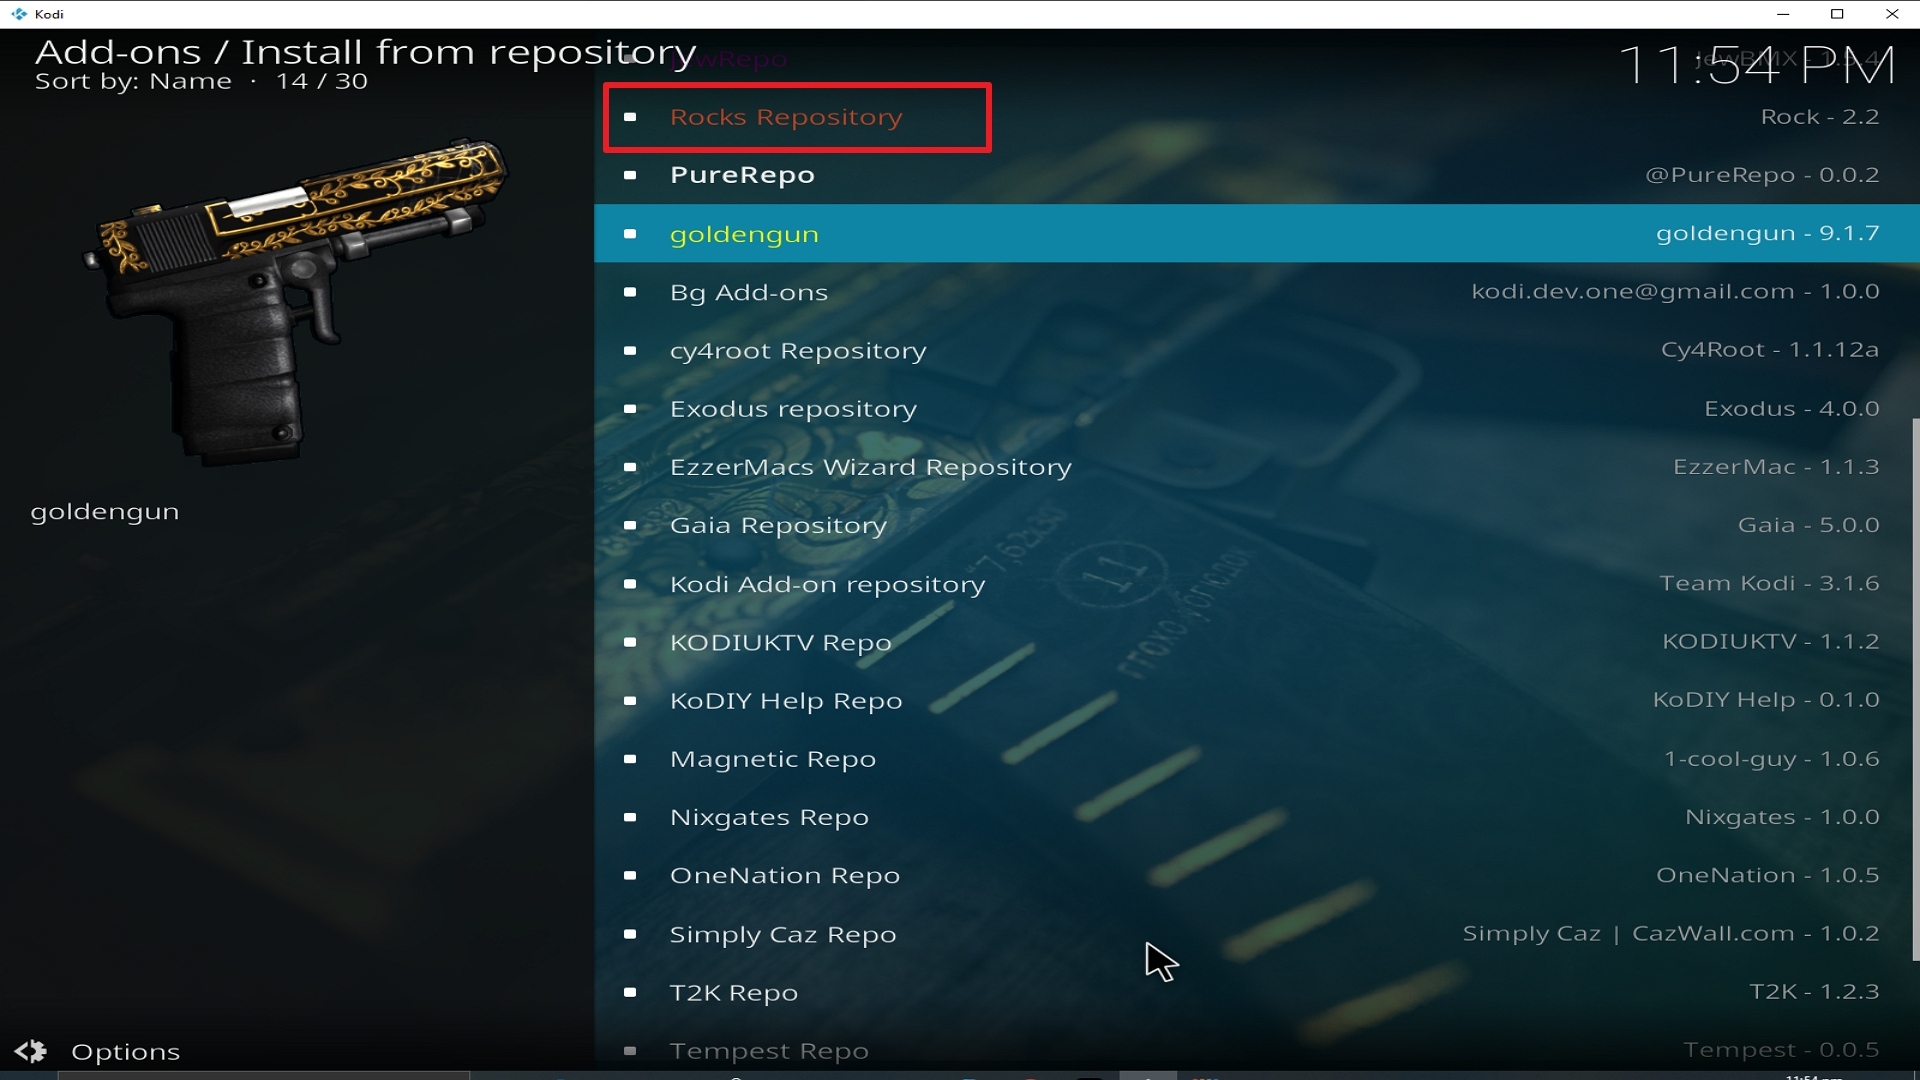
20. Click on Rocks Repo

Step 20 Installing Fight Tube addon on Kodi


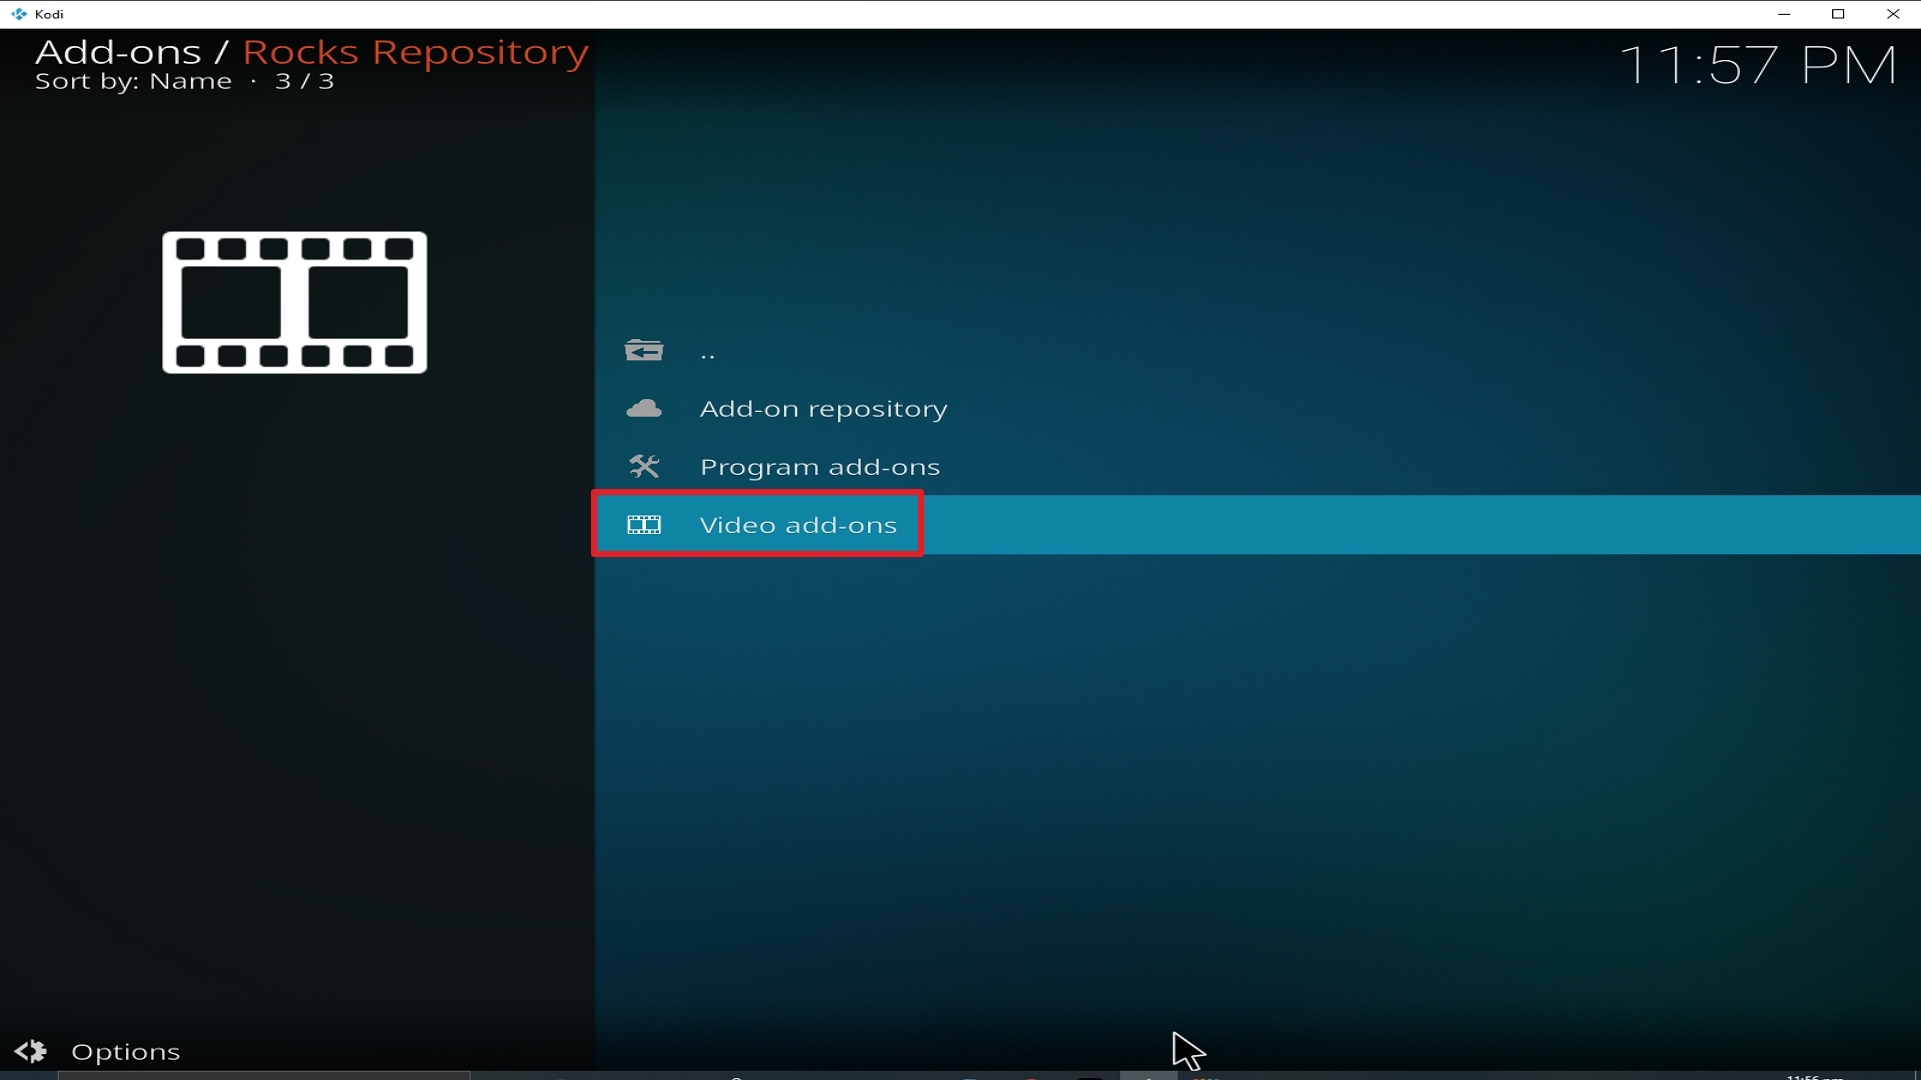
21. Pick Video add-ons.

Step 21 Installing Fight Tube addon on Kodi


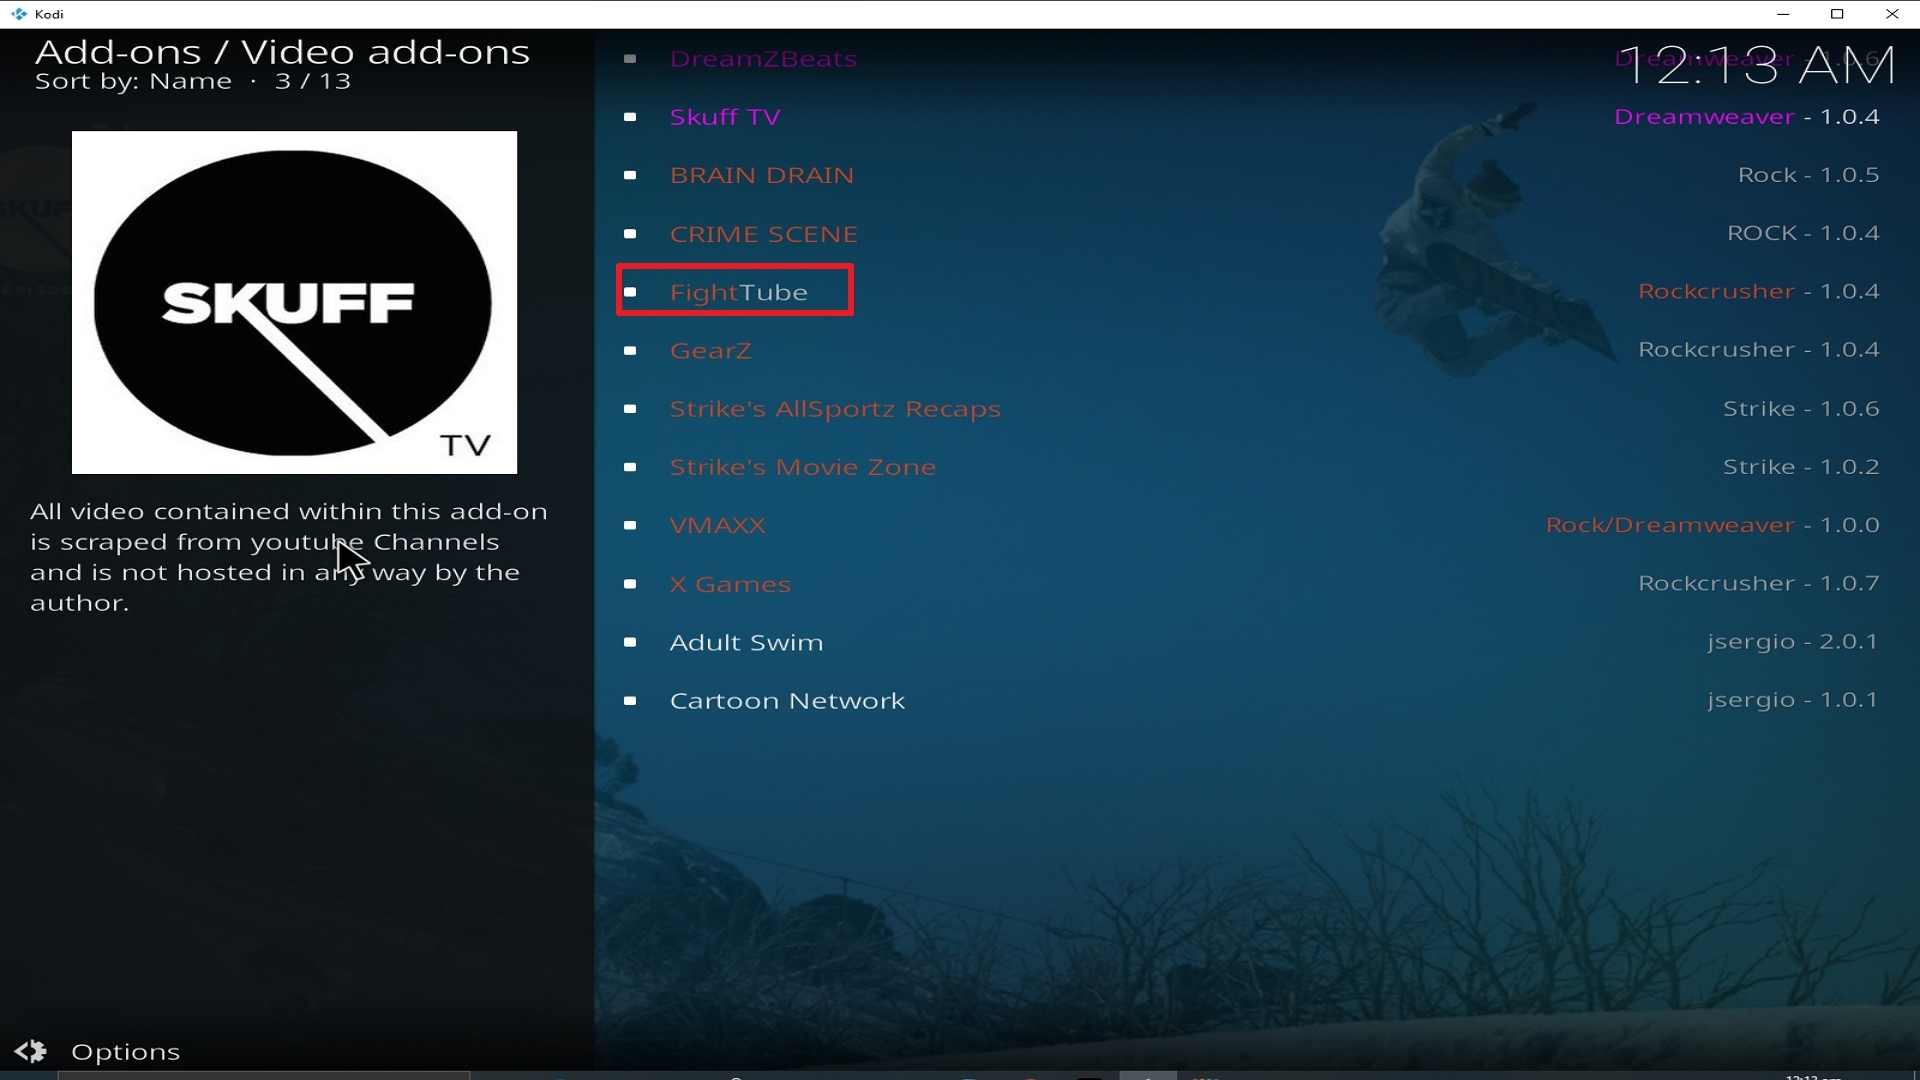
22. Select Fight Tube again.

Step 22 Installing Fight Tube addon on Kodi


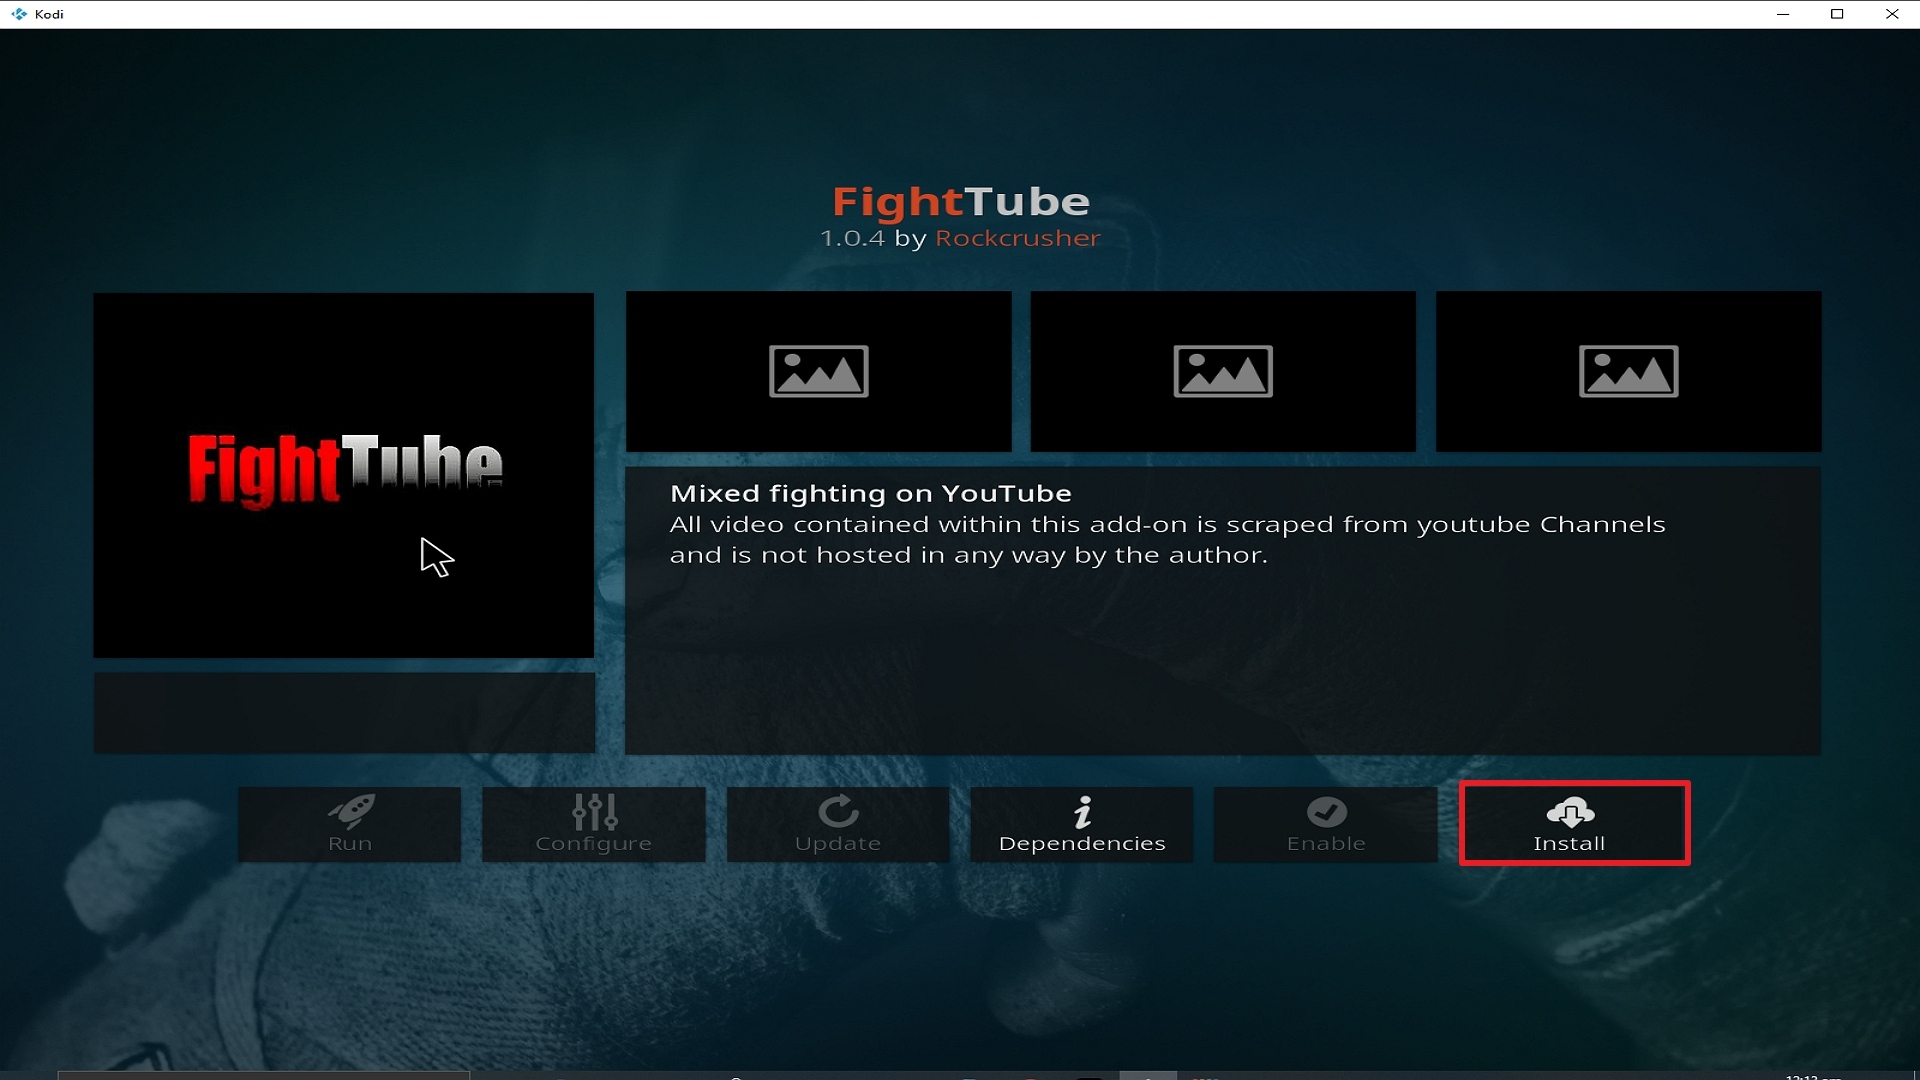
23. Click on Install. 

Step 23 Installing Fight Tube addon on Kodi


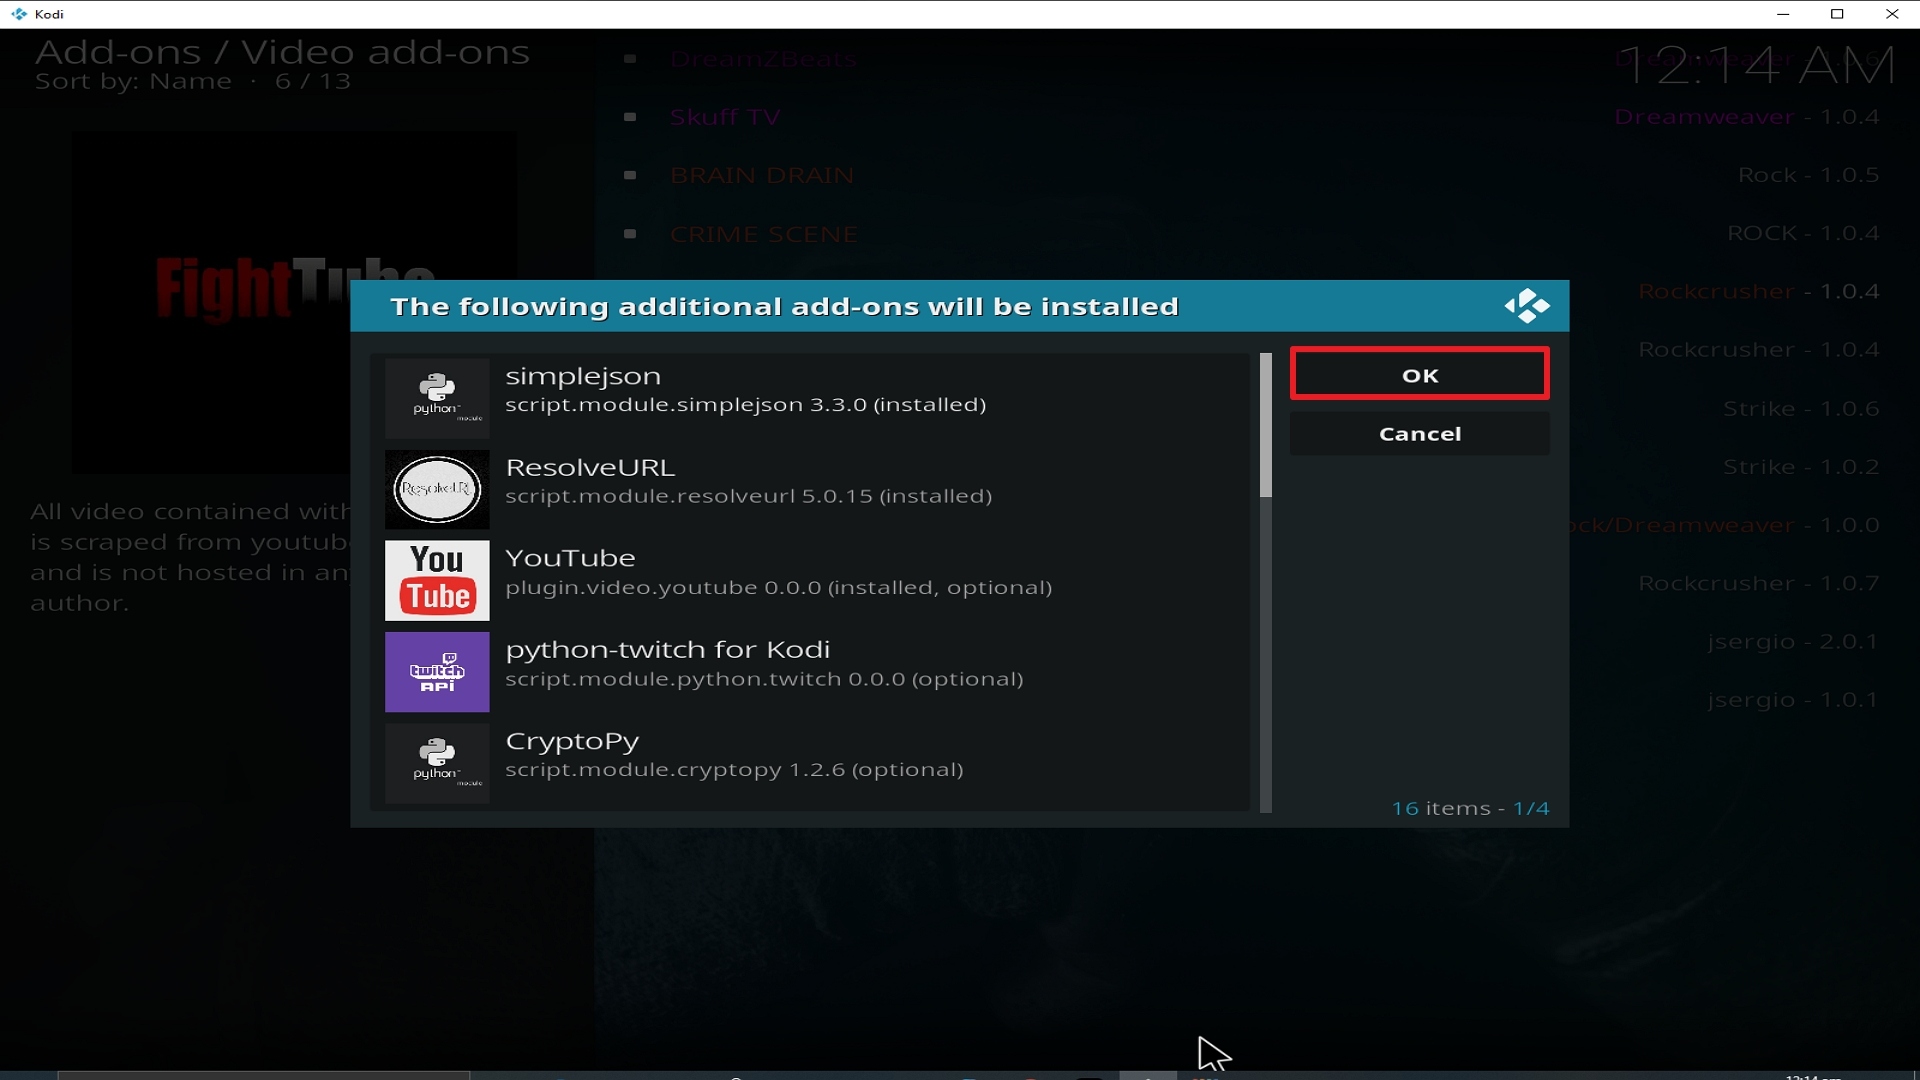
24. Select OK after reviewing the add-ons that will be installed.

Step 24 Installing Fight Tube addon on Kodi


25. You should see a popup in the upper right corner saying Fight Tube has installed. There will actually be multiple popups for the various components.

Step 25 Installing Fight Tube addon on Kodi


26. Click on Open to start the Fight Tube add-on.

Step 26 Installing Fight Tube addon on Kodi


Grab your subscription now!

Click here to get the lowest price on Surfshark through our exclusive limited-time offer.


How to Install Surfshark VPN on Firestick

If your Firestick still has the older interface, read this article to learn how to update it: Update Firestick Interface.

1. Go to the Home screen of your Firestick.

step 1 Install Surfshark VPN on Firestick


2. Navigate towards the Find tab. Press the Search button from the resulting dropdown.

step 2 Install Surfshark VPN on Firestick


3. Type in the keyword of SurfShark and select from the suggestions that will appear.

step 3 Install Surfshark VPN on Firestick


4. Click the official SurfShark icon from your search results.

step 4 Install Surfshark VPN on Firestick


5. Press the Download (You own it) button.

step 5 Install Surfshark VPN on Firestick


6. The SurfShark VPN installer will download on your device.

step 6 Install Surfshark VPN on Firestick


7. SurfShark VPN’s app will automatically install itself on your Fire TV stick.

step 7 Install Surfshark VPN on Firestick


8. Press the Open button after completing SurfShark VPN’s installation process.

step 8 Install Surfshark VPN on Firestick


9. Please wait for the SurfShark VPN to load its user interface.

step 9 Install Surfshark VPN on Firestick


10. You can now log in with your SurfShark VPN account credentials.

step 10 Install Surfshark VPN on Firestick

Learn more about Surfshark and Grab the Best Surfshark Deal Now!


Install Surfshark on Firestick

Best Surfshark Deal


Other VPNs to Consider

NordVPN (Best for Streaming)

Best Features

  • 5000+ Server in 50+ Countries 
  • Military-Grade Encryption
  • Fast Connection Speed
  • Suitable to a lot of devices
  • No-Log Policy

Prices
  • Complete $5.89 per month (64% Discount)
  • Plus $4.59 per month (56% Discount)
  • Standard $3.69 per month (55% Discount)

Best Features

  • 750+ High-speed VPN Servers in 43 Locations
  • Military-Grade Encryption
  • Fastest HD Streaming and Gaming
  • 30-Day Money-Back Guarantee
  • Unlimited Data & Devices
  • No-Log Policy

Prices
  • 3 Years $1.99 per month (82% Discount)
  • 1 Years $3.29 per month (70% Discount)
  • 1 Month $10.99 per month

IPVanish VPN (Most Secure)

Best Features

  • 1200+ Servers in 60+ Countries around the world
  • Unlimited Connections
  • No-Log Policy
  • Top Notch Military-Grade VPN Protocols and Encryptions
  • 100% Safe and Secured
  • Most Trusted VPN
  • Best VPN for Firestick
  • 30-Day Money-Back Guarantee

Prices
  • Yearly $3.99 per month (63% Discount) – 30 days risk free + Ransomware & Malware Protection
  • Quarterly $5.32 per month (51% Discount)
  • Monthly $10.99 per month


For more VPN discounts, go to ReviewVPN Deals and purchase the best VPN for you.

Click here to get the lowest price on Surfshark through our exclusive limited-time offer.

 

Install Genesis Kodi Addon

Genesis Kodi Addon

Genesis Image

Source: http://kodiuk.tv/repo

Genesis is one of the most well know Kodi addons, and continues to be active but has since been replaced with a newer version of the add on by the famous team Lambda who have since released Exodus, which has been forked to make probably the best add on for Kodi in 2019 Exodus Redux.

Note: Use Kodil Repo, not working on KodiUKTV Repo


However in 2018, the original Genesis team updated the add on, so it’s back alive and kicking. Renaming the add on in Genesis Reborn.

In 2019, access to Genesis Reborn is patchy at best, but the original Genesis has returned new and updated. Exodus Redux is also a really good alternative if you are looking for a great option for watching movies and TV Shows.

Genesis used to be one of the best add ons for accessing movies and TV shows. Before it went dark, Genesis has received 5 major updates and was at the cutting edge of streaming and cord cutting in 2015.


ANONYMOUSLY


Common Errors

These are the most common errors you might come across with Genesis:

  • Could not connect to URL/Download: Genesis has been up and down frequently over the past 4 years, and can’t be counted on as the most reliable add on. Check that you have entered the right URL and you are pulling from the well-known Kodi UK repository. Also try the link a few times, just in case there is a glitch with a server. You can try the next day, or find a more in-depth fixes guide linked above.


  • Source not working/slow/frozen: When Genesis 5.0 was released there were a lot of reported problems with the streams. The reason being was that lambda has set the timeout for 40 seconds, you can change this down to as low as 15 seconds. It’s important to understand that streaming content on Kodi is not like TV. As well as reloading the link and trying an alternative. Also, a VPN will eliminate the chances of your IP being blocked by your internet provider. Check here for the best VPN deal. For more fixes read our guide linked above.


  • Kodi check log error: A Kodi check log error is nothing to worry about. This has no relation to a corrupted script, or a missing dependency, and will only happen once you have installed Genesis and are streaming content within the add on. A check log error in most cases simply means that your media cache is full and needs to be emptied. Just like your web browser, Kodi will cache snippets of content, to make loading instant the next time you try to watch it. Over time this cache fills up. To learn how to empty your cache, download helpful system tools, and more read our guide linked above.


Review

The return of Genesis in 2019 was a welcome surprise. After Genesis Reborn went dark in 2018, most people assumed that was the last we would hear of it.

Genesis truly was cutting edge in 2015. You could sort by year, search shows by channel, had a TV calendar, and download content, and all of those features have stayed and been featured in the new Genesis.

A great add on, but probably not better than Exodus Redux and some of the later add ons that lambda developed.

Still a great back up to have.

Categories include:

  • TV Shows
  • Movies
  • Channels
  • My genesis
  • Latest Movies
  • Latest Episodes
  • Tools
  • Search


YOUR INTERNET ACTIVITY IS BEING WATCHED

ReviewVPN cannot attest to the legality, security and privacy of the applications discussed on this site. It is highly recommended that you use a VPN service while streaming or using Kodi.

Currently, your IP 216.73.217.150 is visible to everyone and your Browser is being tracked by Advertisers & ISP Provider.

Save 65% Now

Limited Time Offer

Here are the main reasons why you must use a VPN:

  • Your activities are hidden from your ISP, the government, and from the apps you are using.
  • You can access additional movies and TV streams.
  • ISP attempts to throttle are thrwarted thus reducing buffering issues.
  • Geographically restricted content like Netflix and Hulu can be unblocked.

A VPN works be replacing your ISP-assigned IP address and creating an encrypted tunnel. We recommend the no log service offered by IPVanish. It works well on a Firestick and offers the fastest possible speeds.

Special Limited Time Offer - Get IPVanish


How to Install Genesis Addon on Kodi with Screenshots

  1. From the home screen, select the cogwheel at the upper left.

Step 1 Installing Genesis addon on Kodi

2. Select System in the bottom right corner.

Step 2 Installing Genesis addon on Kodi


3. Select Add-ons on the left side of the screen.

Step 3 Installing Genesis addon on Kodi


4. Select Unknown sources.

Step 4 Installing Genesis addon on Kodi


5. Click Yes to allow unknown sources.

Step 5 Installing Genesis addon on Kodi


6. Select File manager.

Step 6 Installing Genesis addon on Kodi


7. Click Add source.

Step 7 Installing Genesis addon on Kodi


8. Click on <None>.

Step 8 Installing Genesis addon on Kodi


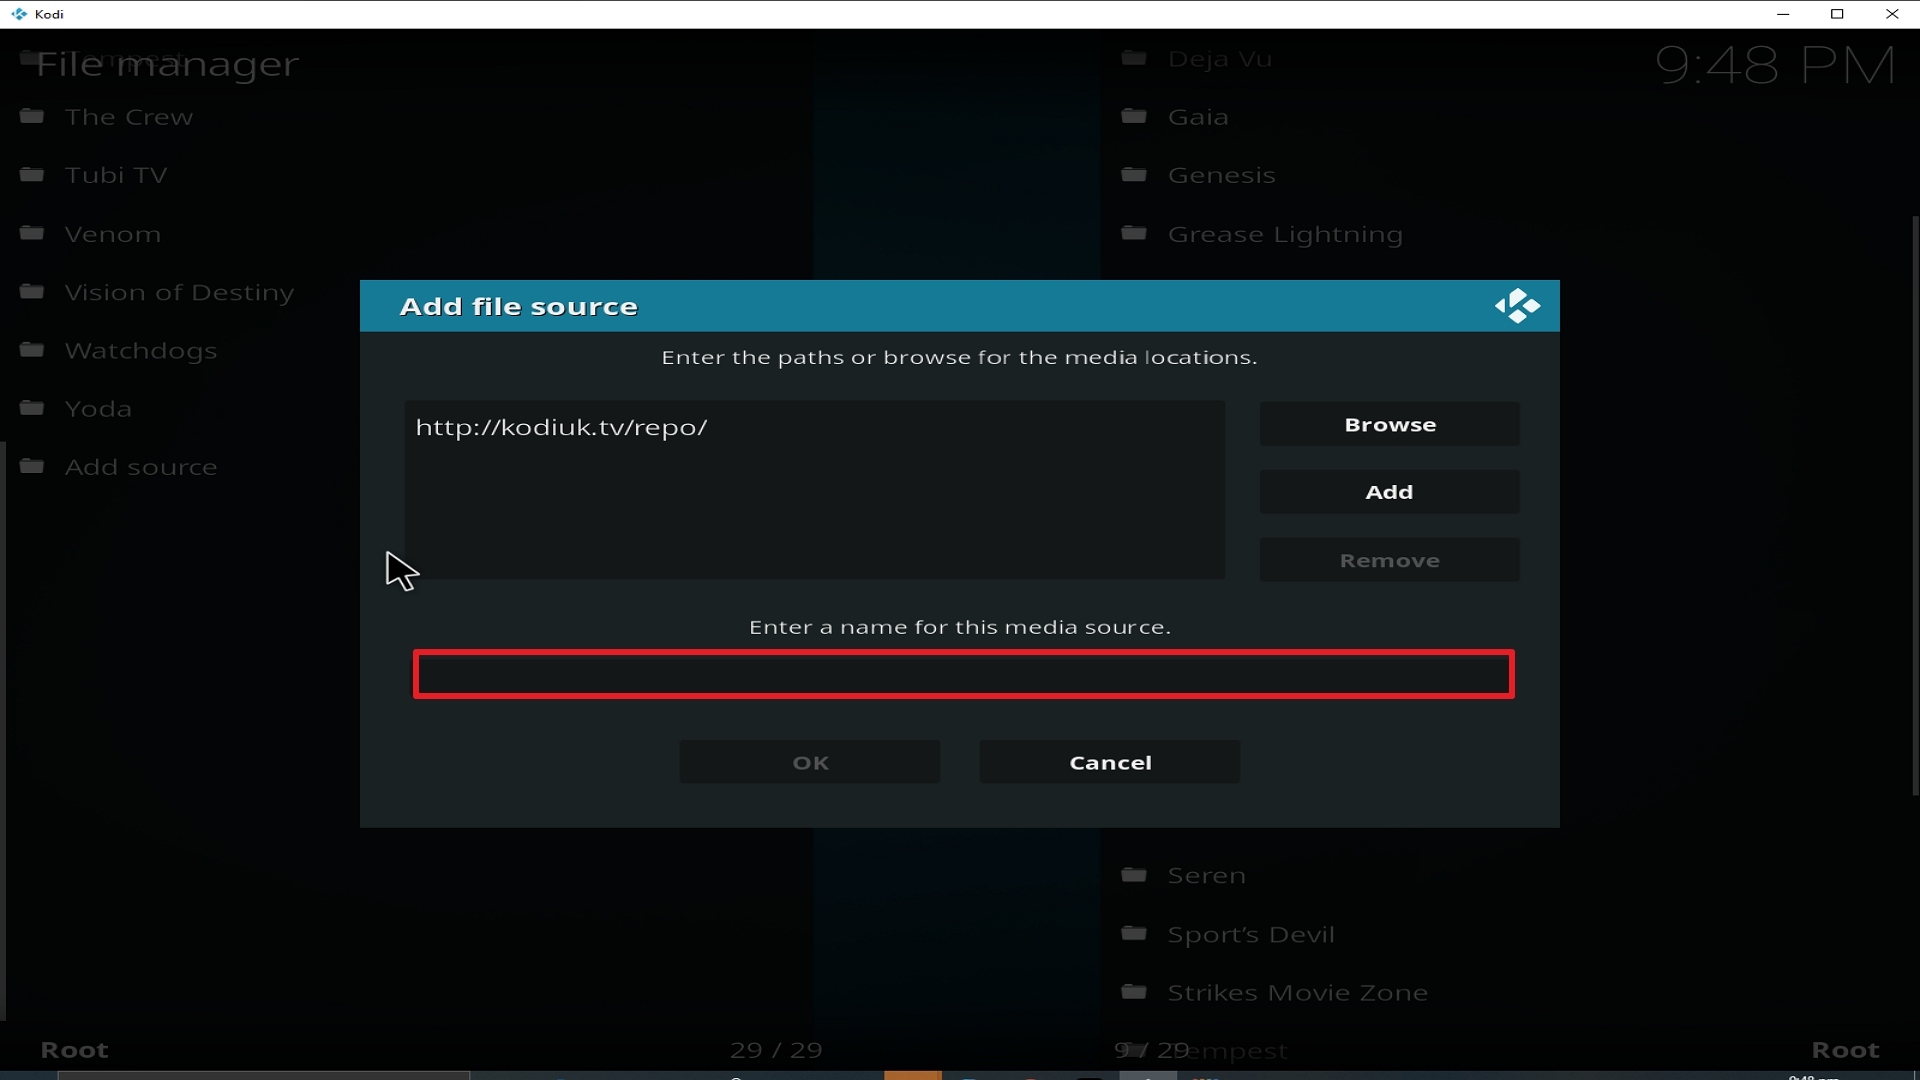
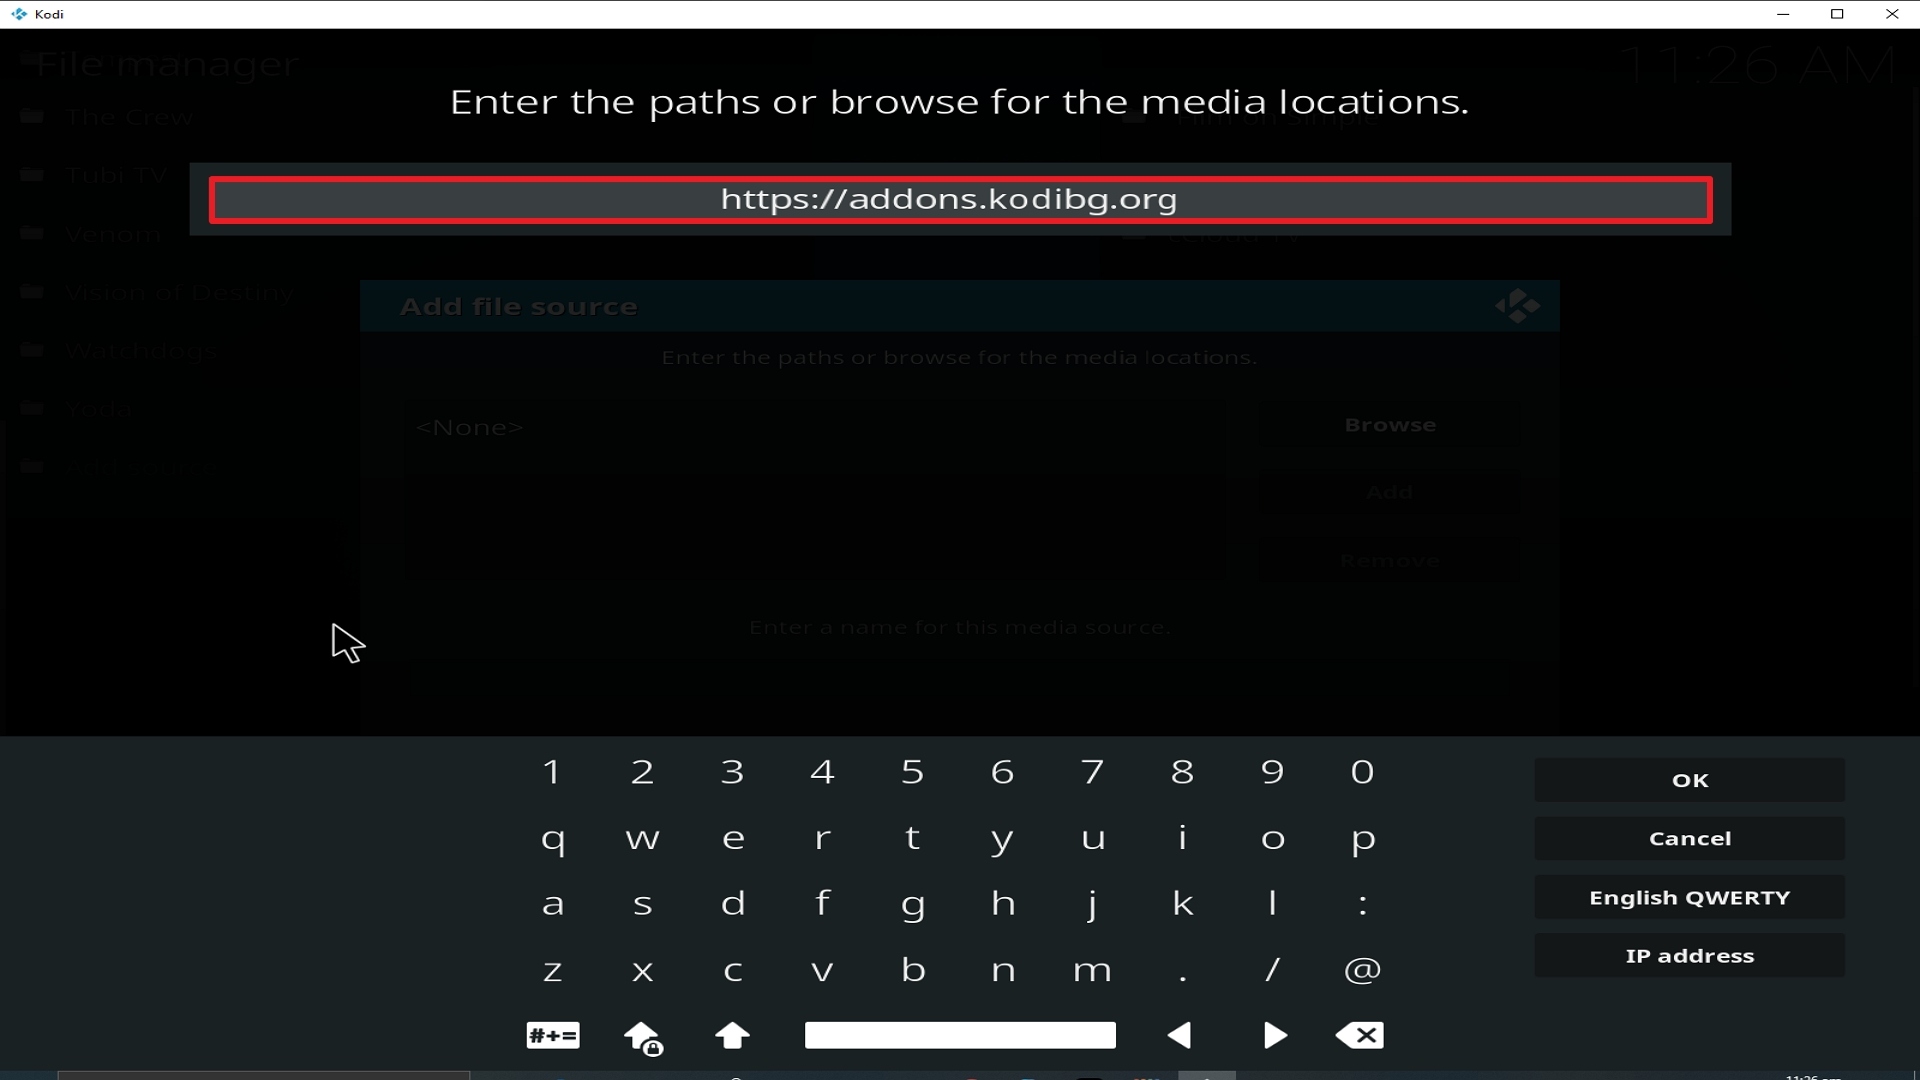
9. Type exactly: http://kodiuk.tv/repo/

Step 9 Installing Genesis addon on Kodi


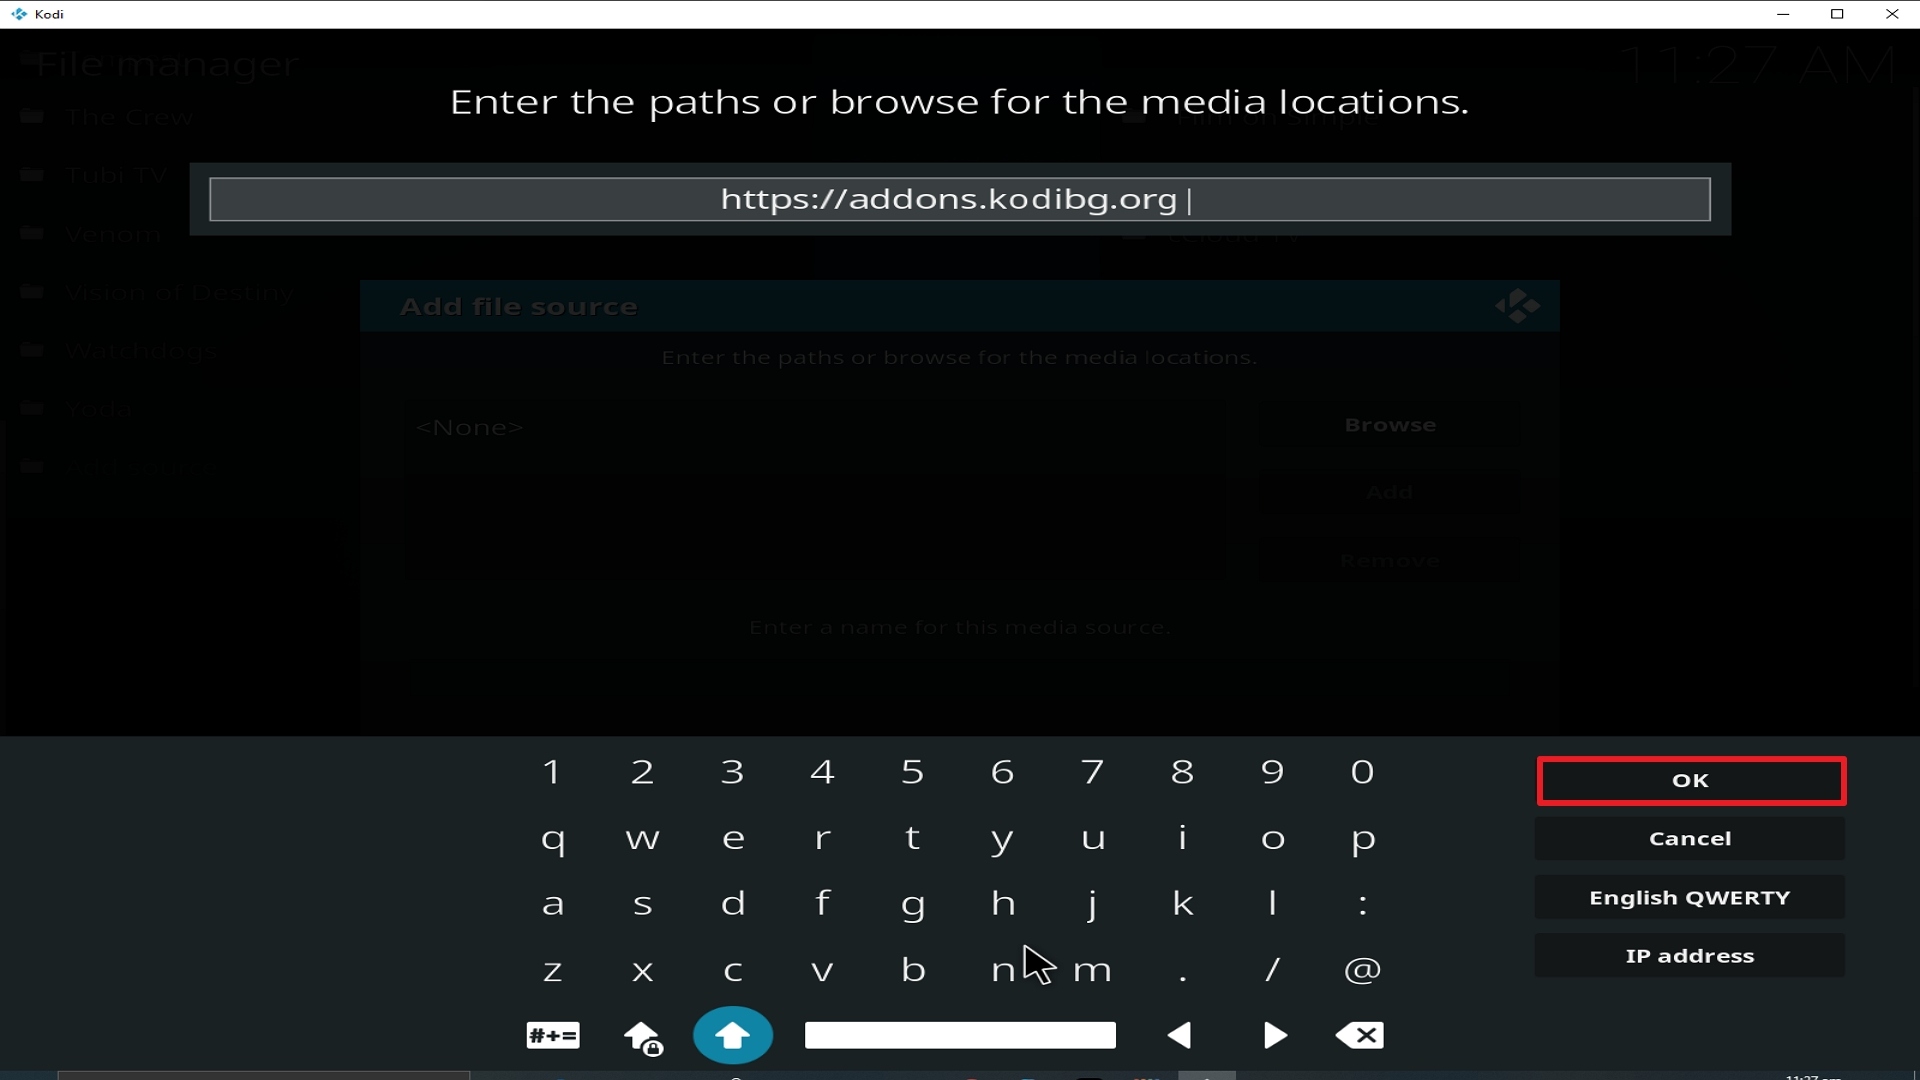
10. Click on OK.

Step 10 Installing Genesis addon on Kodi


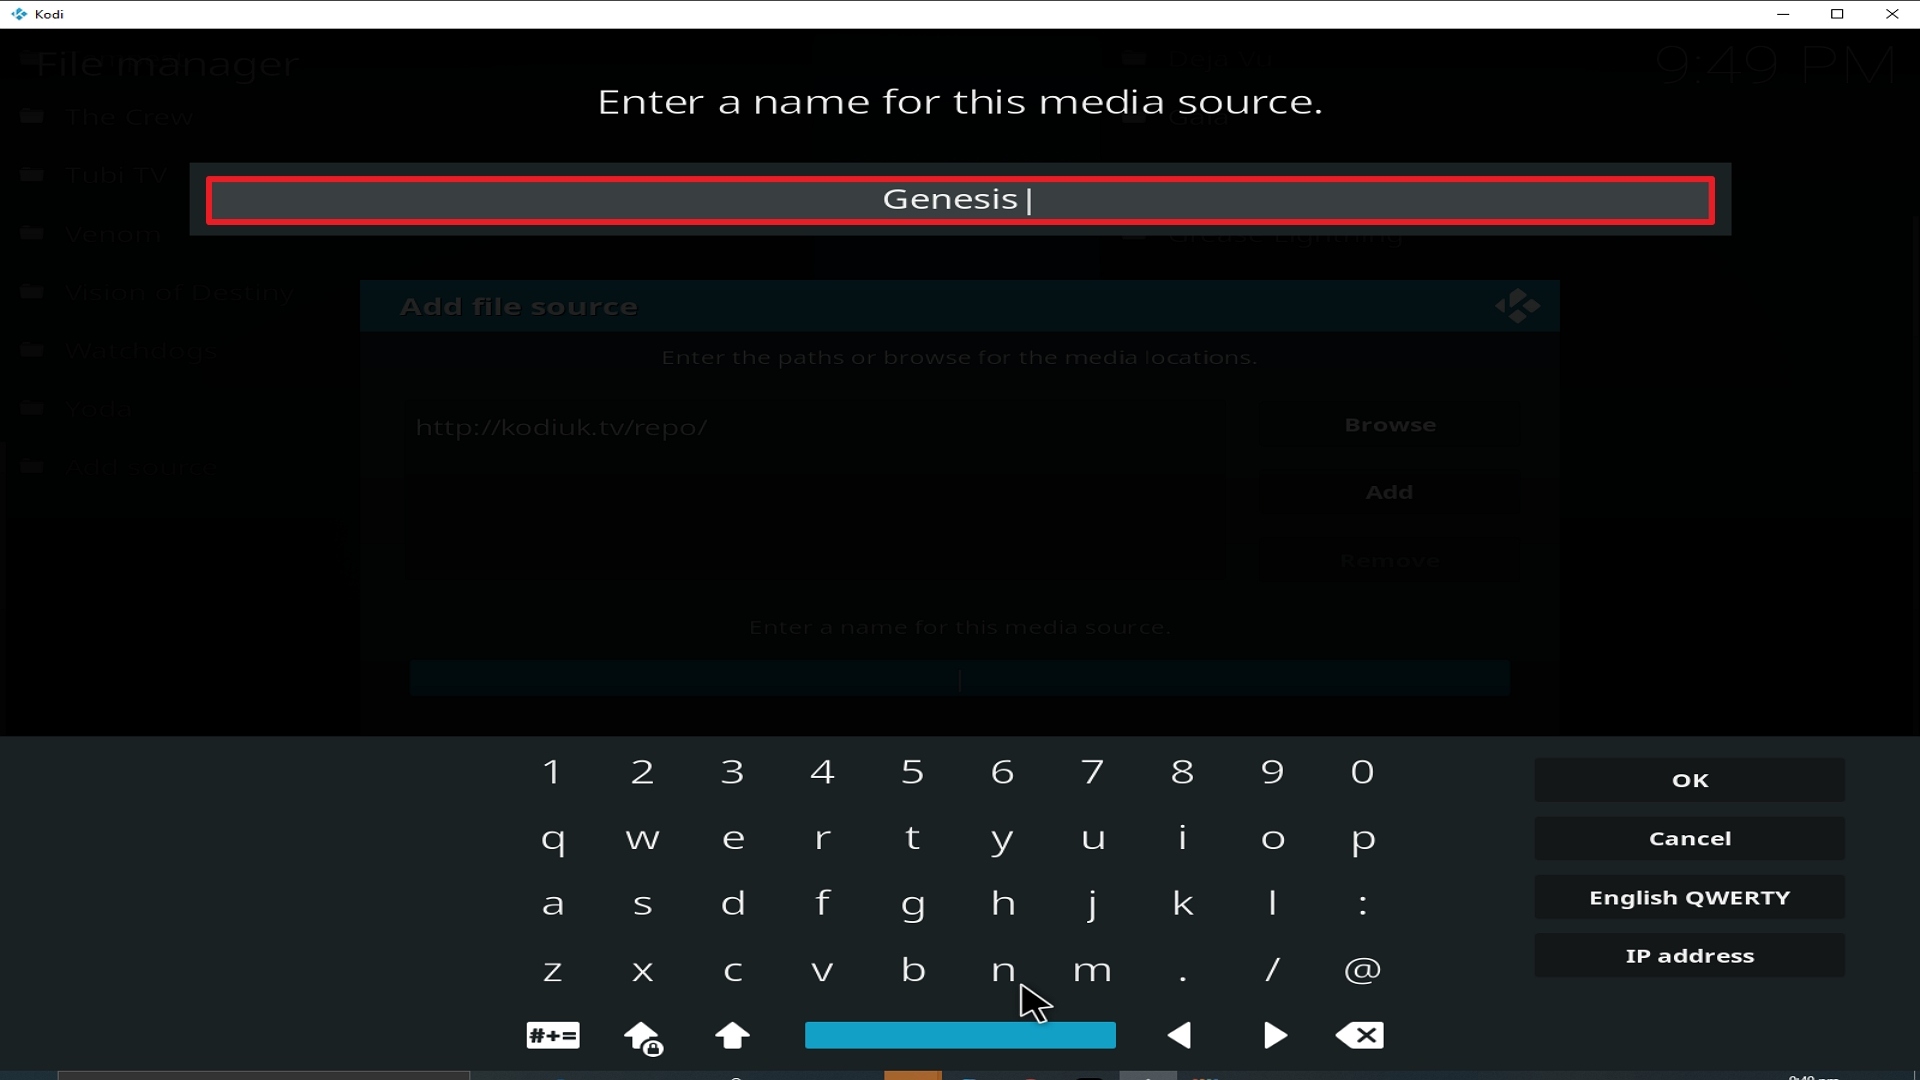
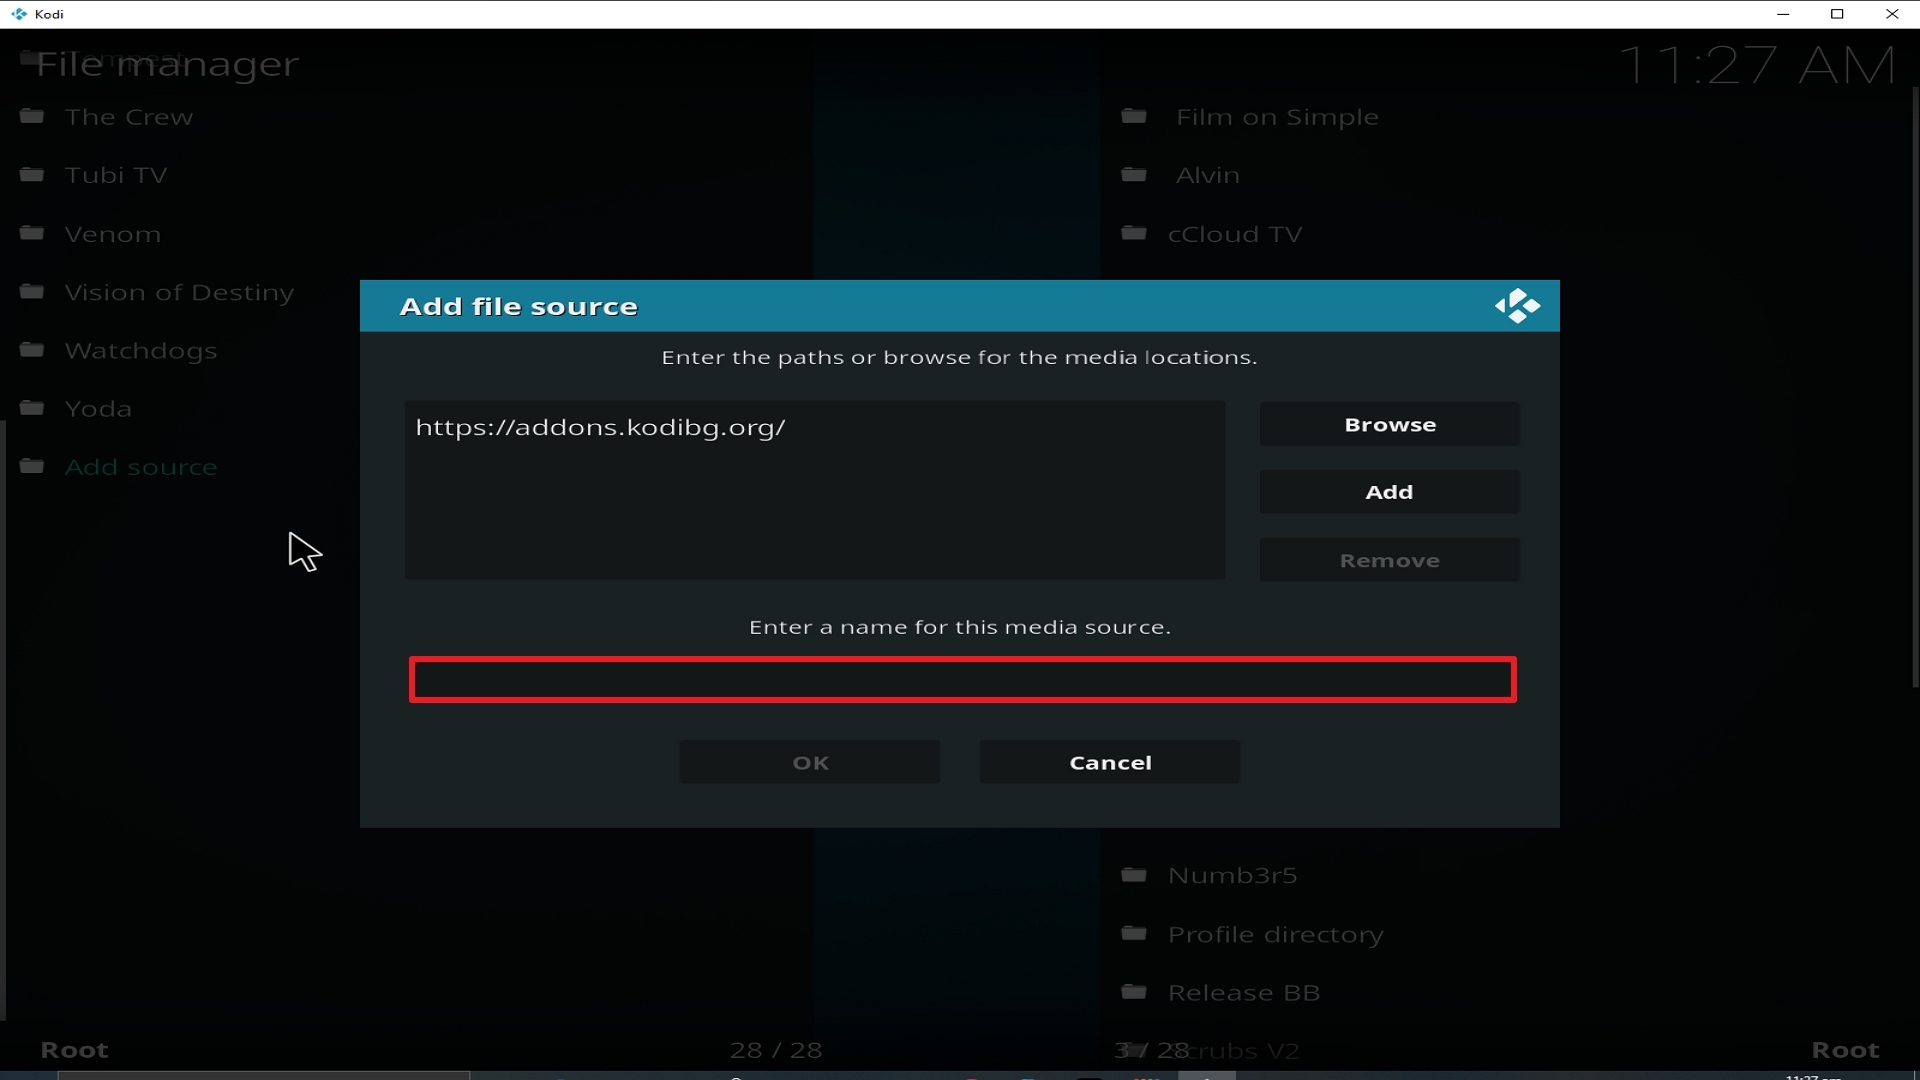
11. Select enter a name for this media source.

Step 11 Installing Genesis addon on Kodi


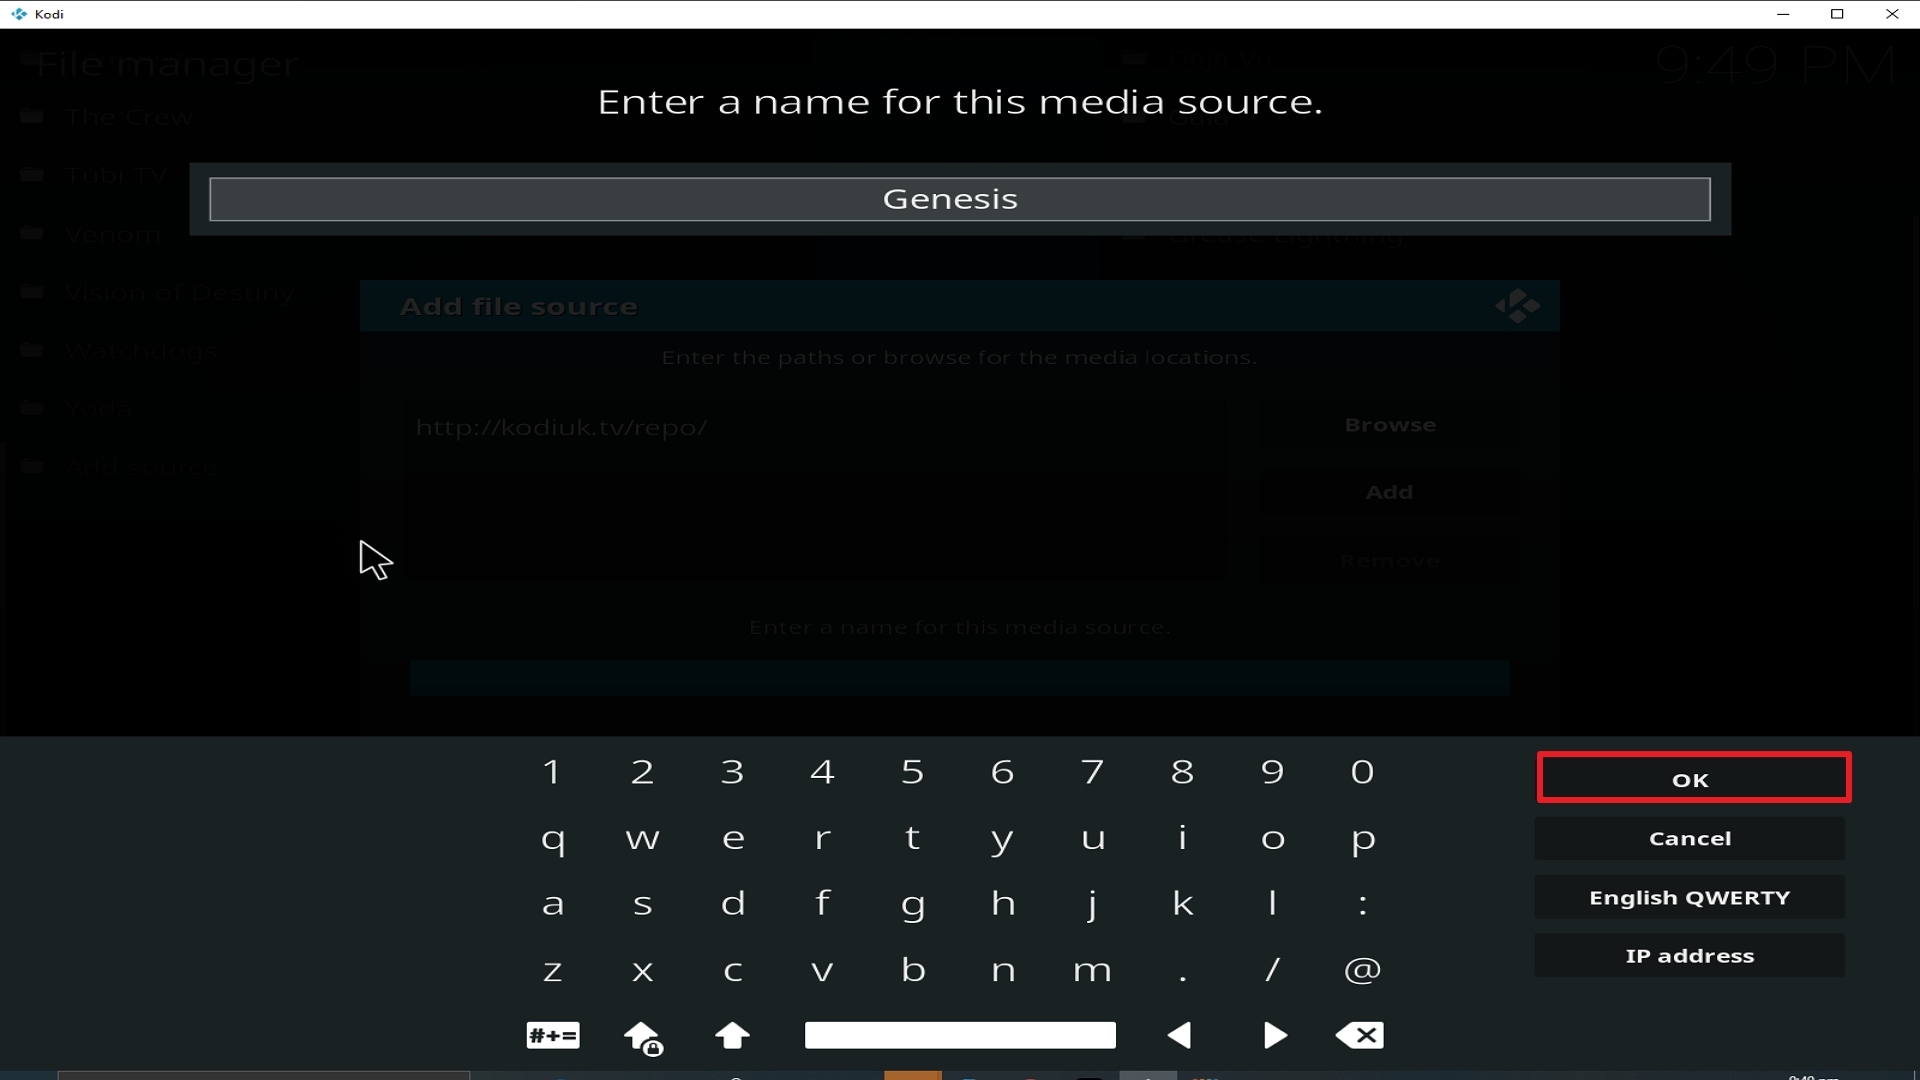
12. Name is Genesis (this part isn’t critical as long as you remember the name).

Step 12 Installing Genesis addon on Kodi


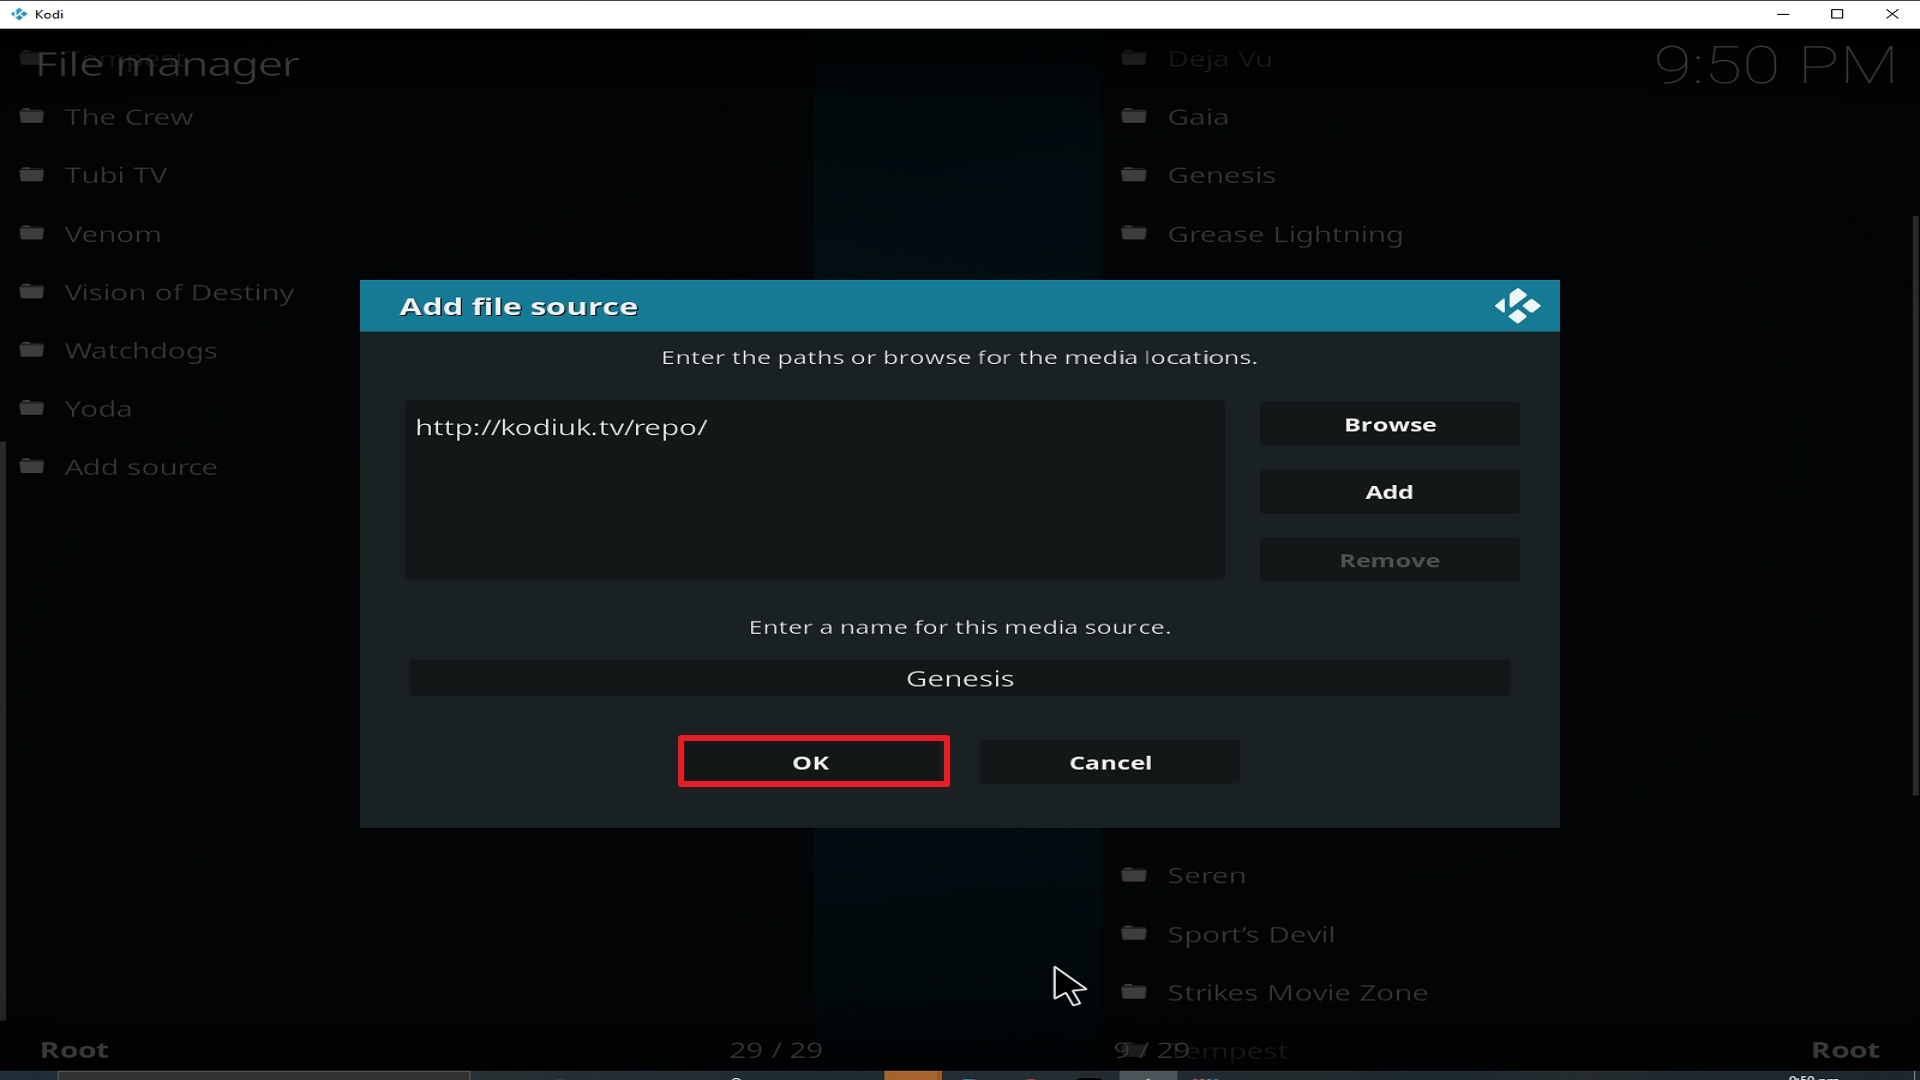
13. Click on OK.

Step 13 Installing Genesis addon on Kodi


14. Click on OK.

Step 14 Installing Genesis addon on Kodi


15. Take one step back and click on Add-ons.

Step 15 Installing Genesis addon on Kodi


16. Select install from zip file.

Step 16 Installing Genesis addon on Kodi


17. Click on Genesis (or whatever you named the source).

Step 17 Installing Genesis addon on Kodi


18. Click on repository.kodiuktv-1.1.2.zip.

Step 18 Installing Genesis addon on Kodi


19. Select on Install from repository.

Step 19 Installing Genesis addon on Kodi


20. Click on KodiUKTV Repo

Step 20 Installing Genesis addon on Kodi


21. Pick Video add-ons.

Step 21 Installing Genesis addon on Kodi


22. Select Genesis again.

Step 22 Installing Genesis addon on Kodi


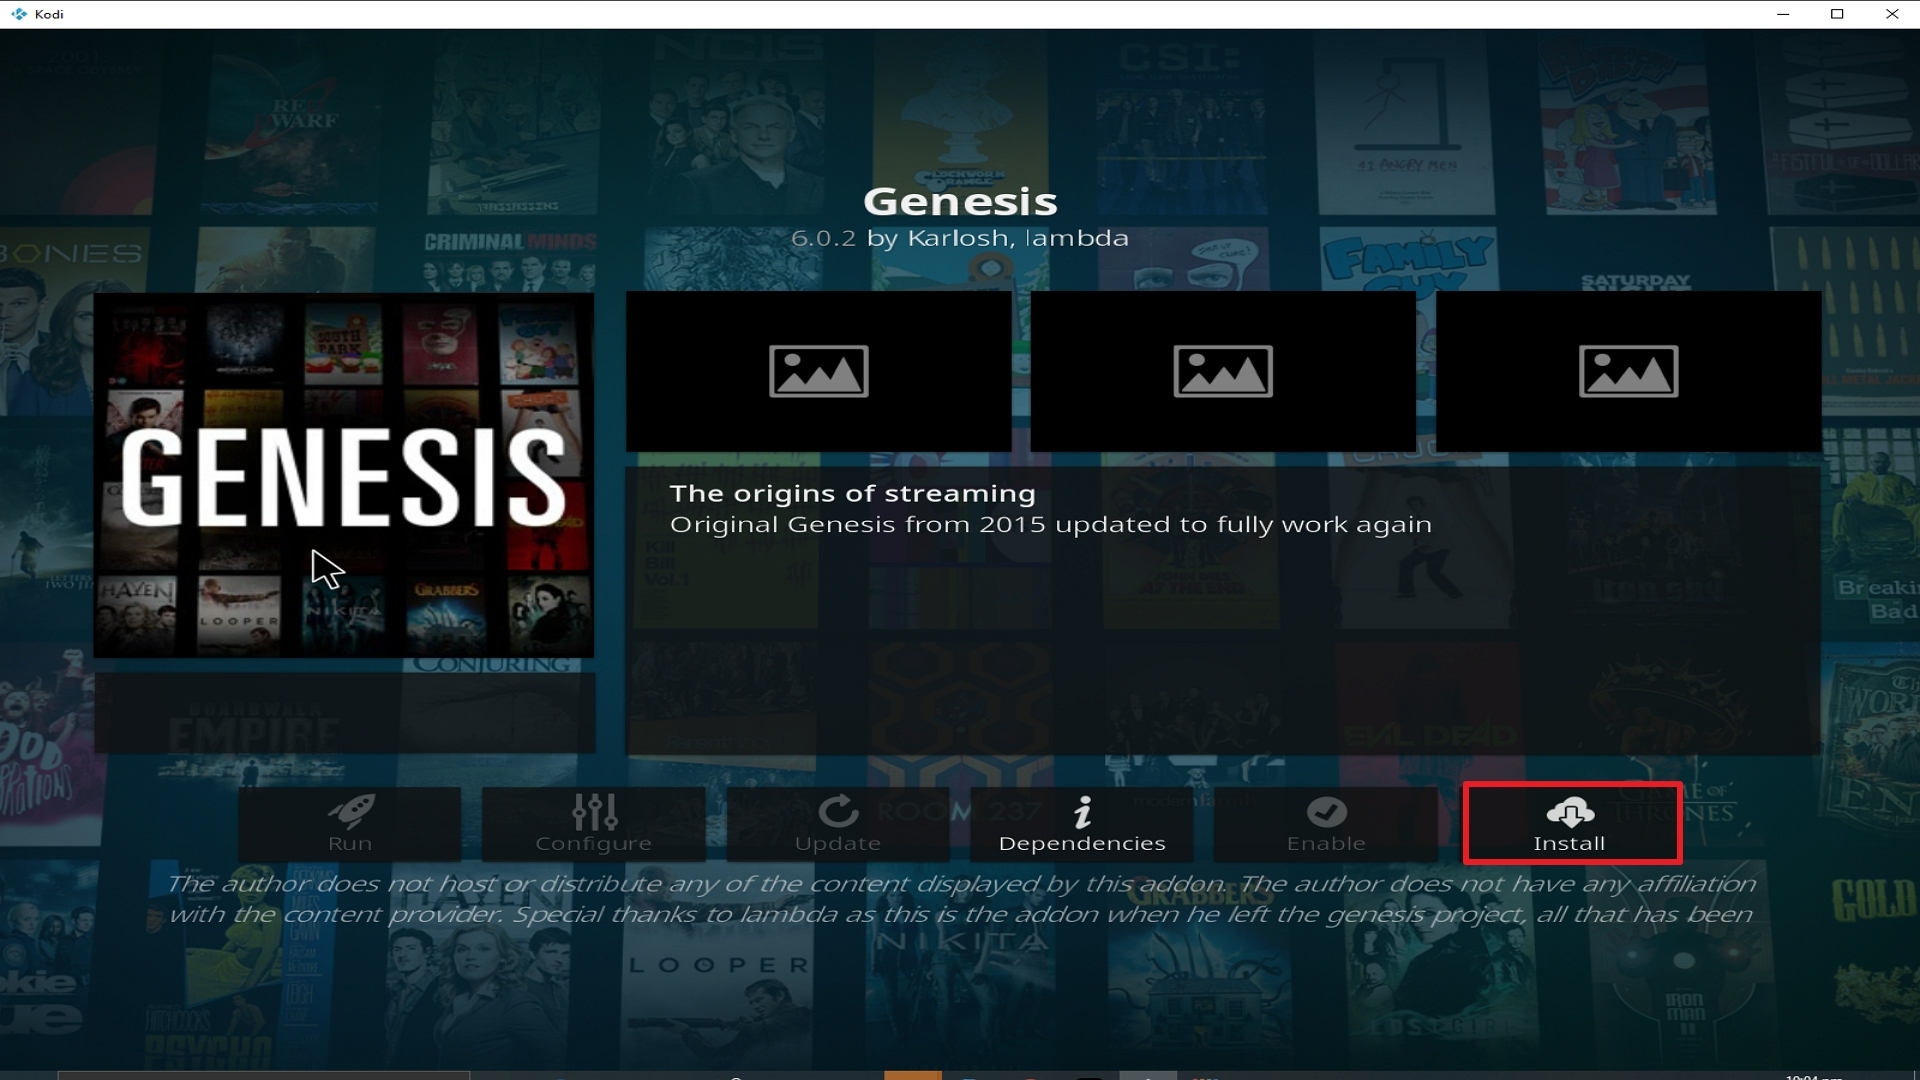
23. Click on Install. 

Step 23 Installing Genesis addon on Kodi


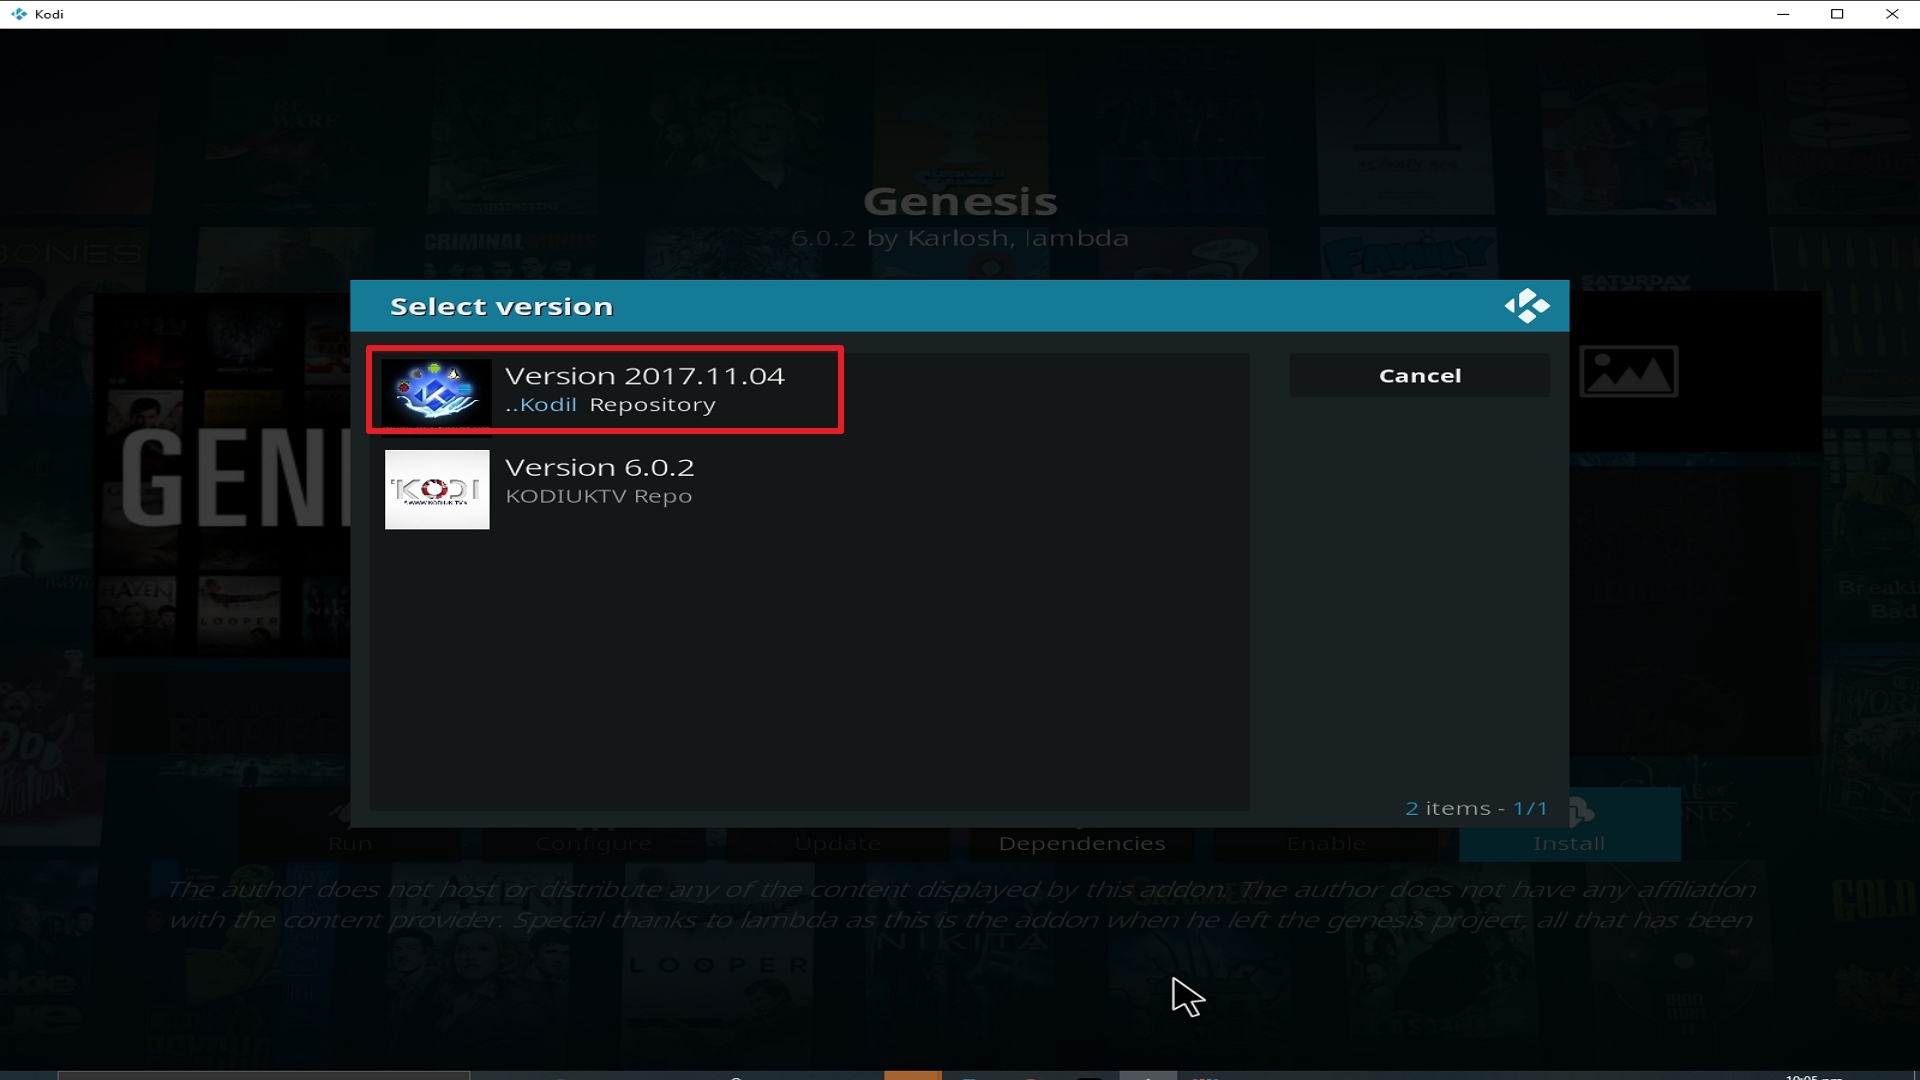
24. Select Version 2017.11.04

Step 24 Installing Genesis addon on Kodi


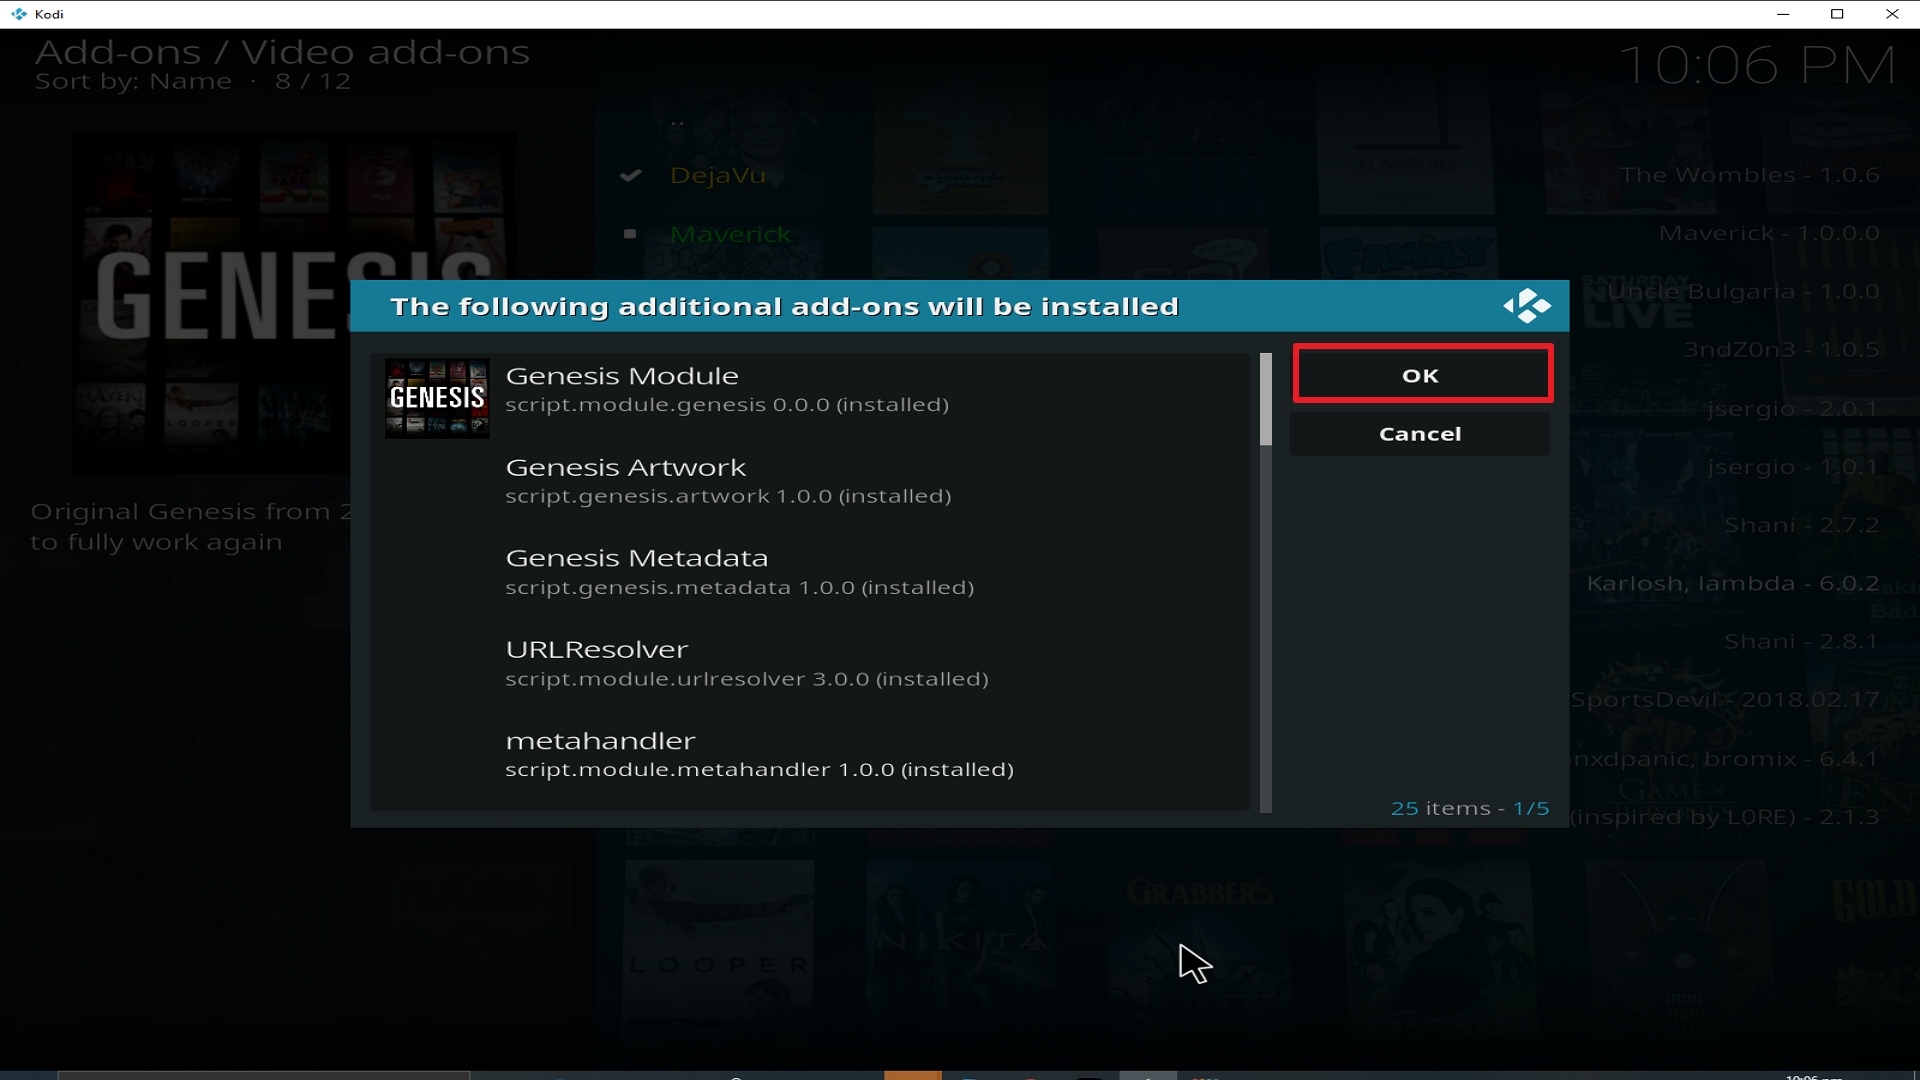
25. Select OK after reviewing the add-ons that will be installed.

Step 25 Installing Genesis addon on Kodi


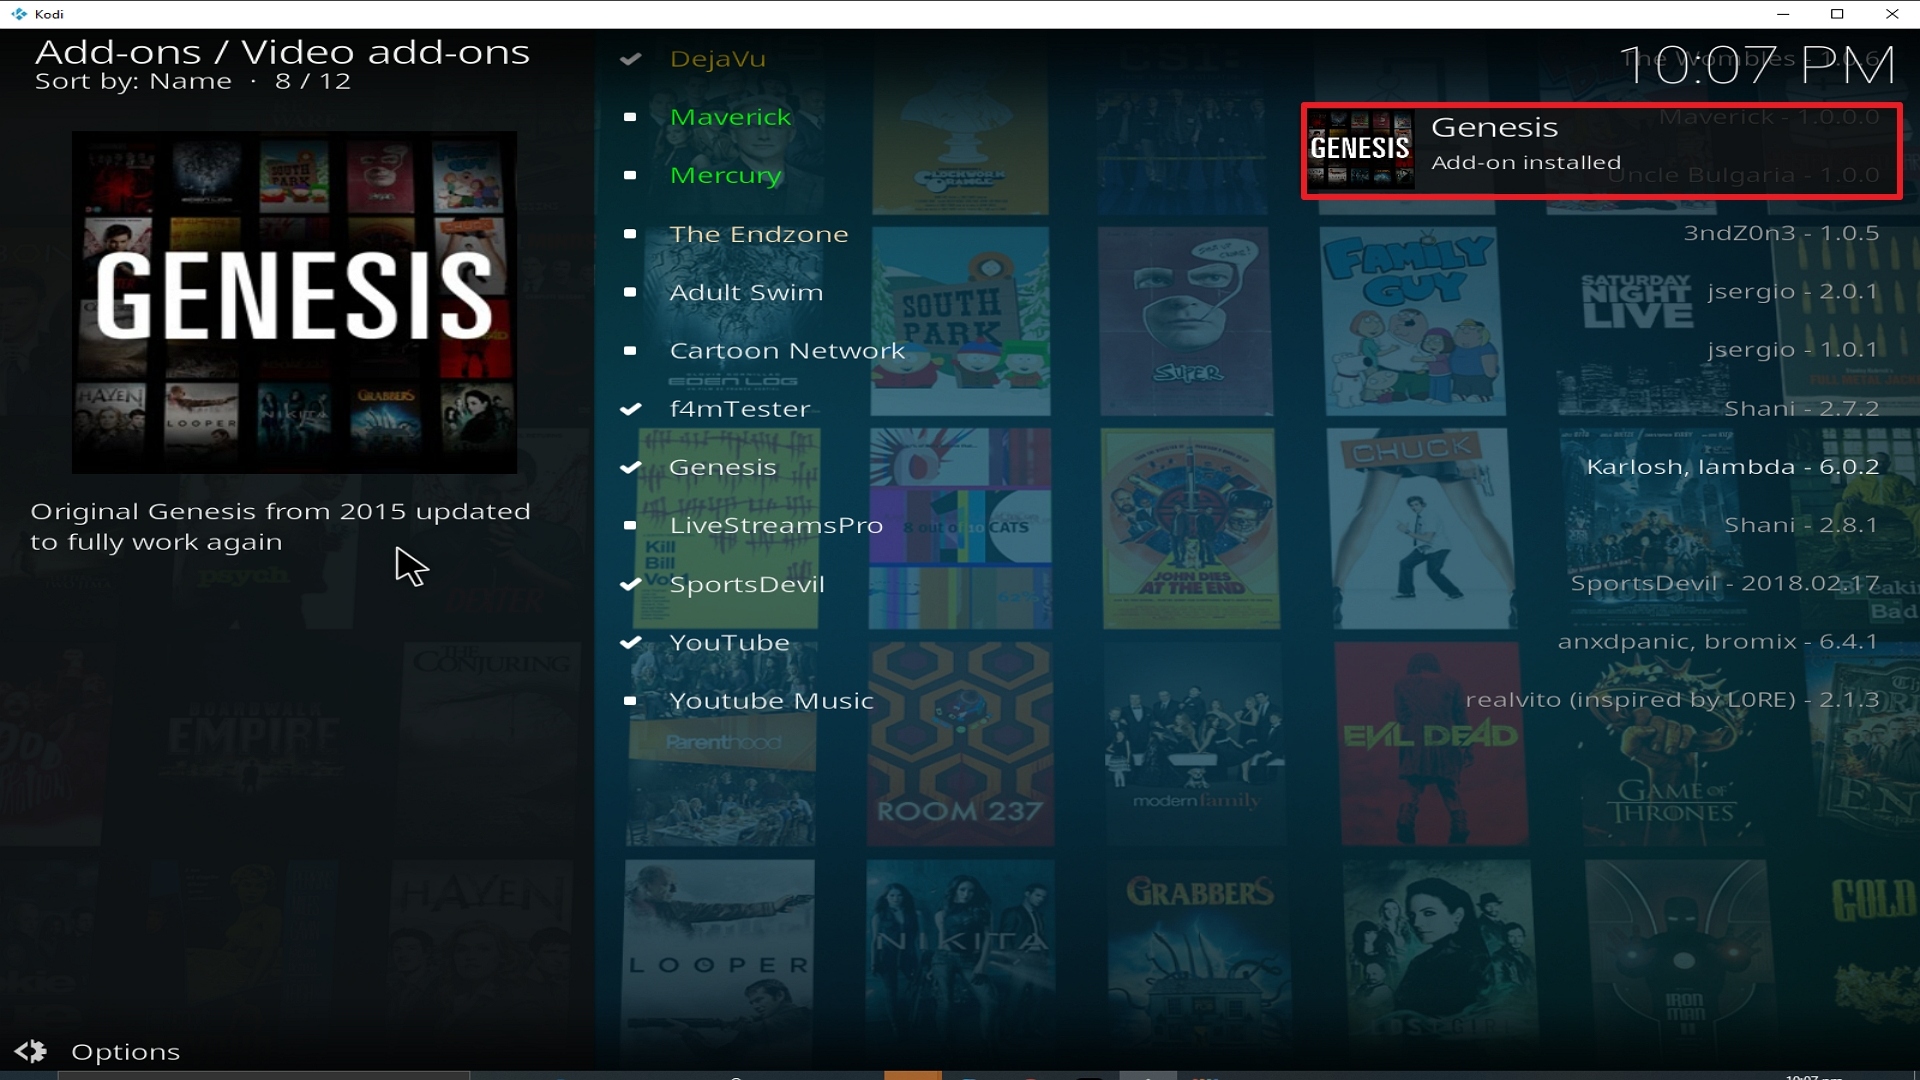
26. You should see a popup in the upper right corner saying Genesis has installed. There will actually be multiple popups for the various components.

Step 26 Installing Genesis addon on Kodi


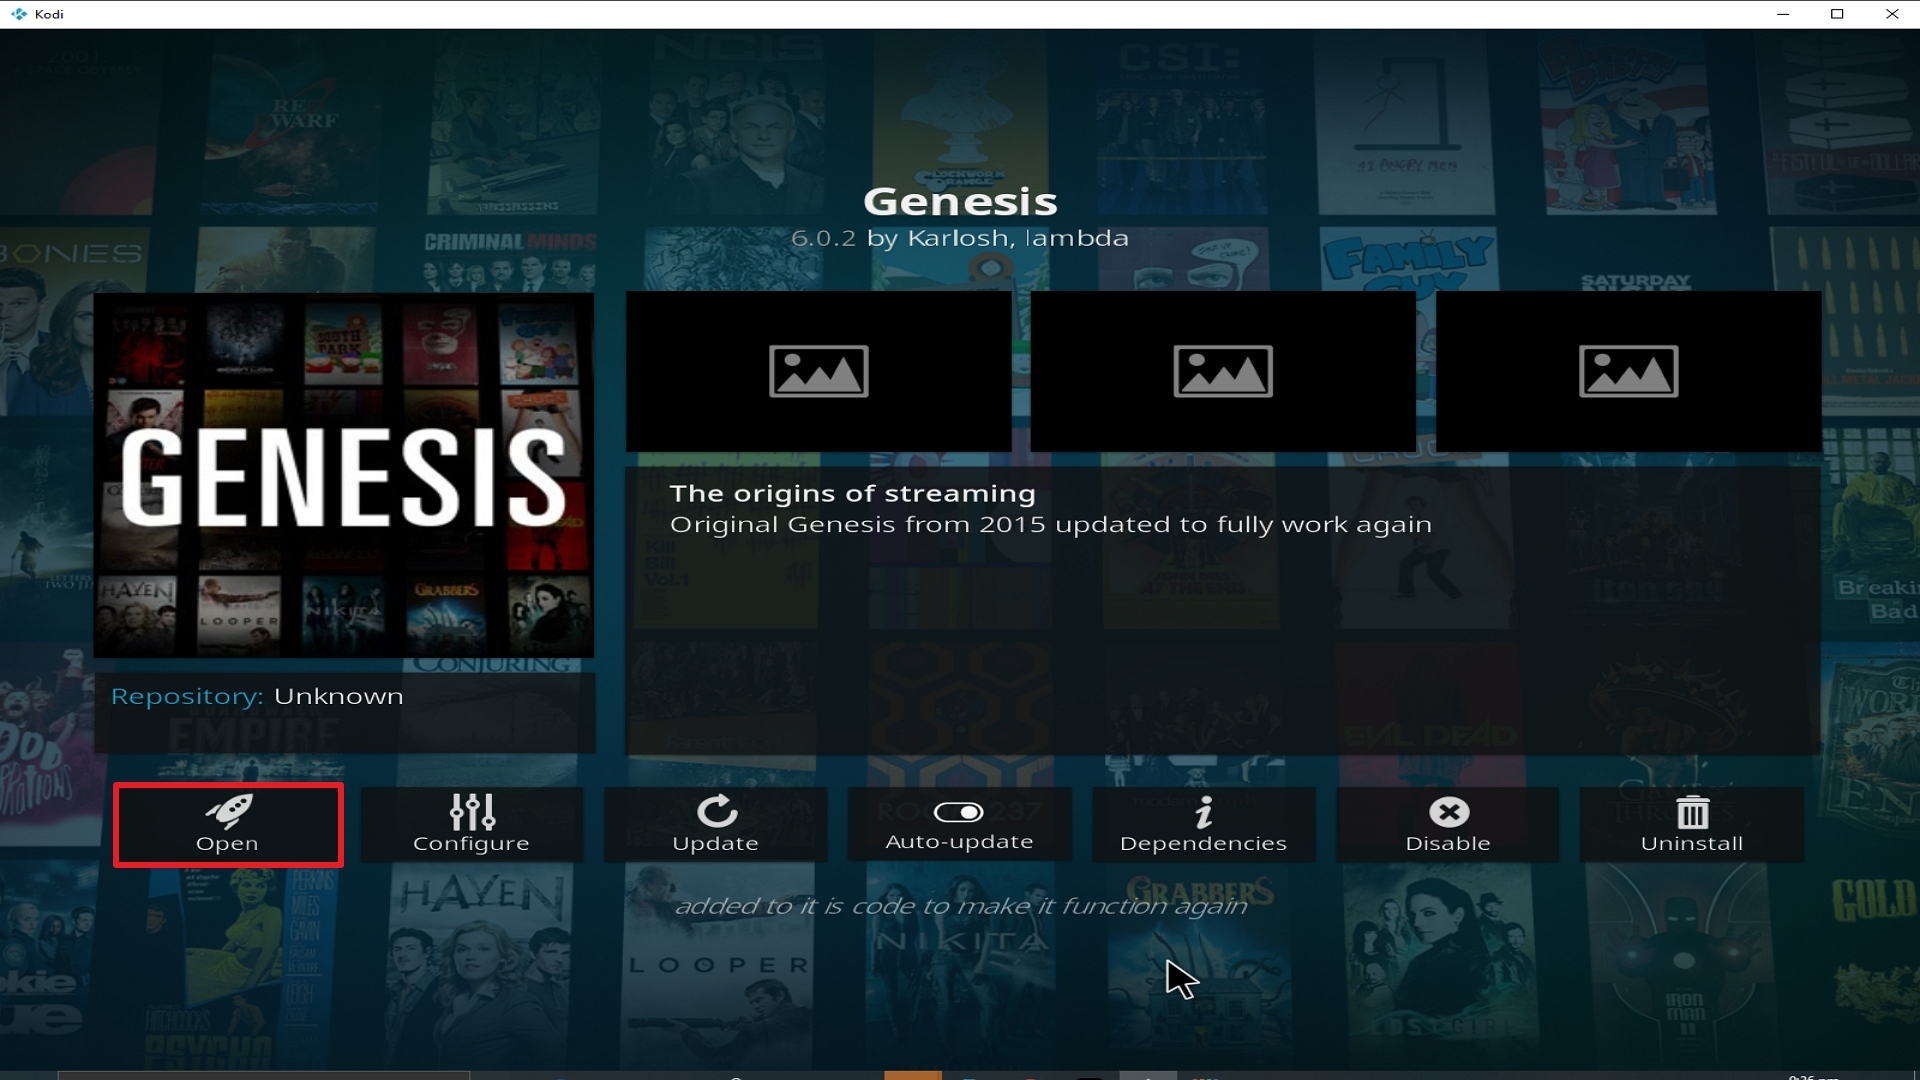
27. Click on Open to start the Genesis add-on.

Step 27 Installing Genesis addon on Kodi


Install Surfshark on Firestick

Best Surfshark Deal


Legal Disclaimer: ReviewVPN.com does not encourage or endorse any illegal activity involved in the usage of services and applications referenced on this site. We do not verify the licensing agreements of services. The end-user is wholly responsible for ensuring that any media accessed through these services does not violate copyright and/or licensing laws. ReviewVPN does not promote, link to, or receive compensation from any Apps and IPTV services.


How to Install Surfshark VPN on Firestick

If your Firestick still has the older interface, read this article to learn how to update it: Update Firestick Interface.

You can download Surfshark directly from the Amazon App store. It will be easy for you to find Surfshark with your Firestick’s Find feature. Refer to our screenshots below.

1. Go to the Home screen of your Firestick.

step 1 Install Surfshark VPN on Firestick


2. Navigate towards the Find tab. Press the Search button from the resulting dropdown.

step 2 Install Surfshark VPN on Firestick


3. Type in the keyword of SurfShark and select from the suggestions that will appear.

step 3 Install Surfshark VPN on Firestick


4. Click the official SurfShark icon from your search results.

step 4 Install Surfshark VPN on Firestick


5. Press the Download (You own it) button.

step 5 Install Surfshark VPN on Firestick


6. The SurfShark VPN installer will download on your device.

step 6 Install Surfshark VPN on Firestick


7. SurfShark VPN’s app will automatically install itself on your Fire TV stick.

step 7 Install Surfshark VPN on Firestick


8. Press the Open button after completing SurfShark VPN’s installation process.

step 8 Install Surfshark VPN on Firestick


9. Please wait for the SurfShark VPN to load its user interface.

step 9 Install Surfshark VPN on Firestick


10. You can now log in with your SurfShark VPN account credentials.

step 10 Install Surfshark VPN on Firestick

Learn more about Surfshark and Grab the Best Surfshark Deal Now!


Install Surfshark on Firestick

Best Surfshark Deal


Other VPNs to Consider

NordVPN (Best for Streaming)

Best Features

  • 5000+ Server in 50+ Countries 
  • Military-Grade Encryption
  • Fast Connection Speed
  • Suitable to a lot of devices
  • No-Log Policy

Prices
  • Complete $5.89 per month (64% Discount)
  • Plus $4.59 per month (56% Discount)
  • Standard $3.69 per month (55% Discount)

Best Features

  • 750+ High-speed VPN Servers in 43 Locations
  • Military-Grade Encryption
  • Fastest HD Streaming and Gaming
  • 30-Day Money-Back Guarantee
  • Unlimited Data & Devices
  • No-Log Policy

Prices
  • 3 Years $1.99 per month (82% Discount)
  • 1 Years $3.29 per month (70% Discount)
  • 1 Month $10.99 per month

IPVanish VPN (Most Secure)

Best Features

  • 1200+ Servers in 60+ Countries around the world
  • Unlimited Connections
  • No-Log Policy
  • Top Notch Military-Grade VPN Protocols and Encryptions
  • 100% Safe and Secured
  • Most Trusted VPN
  • Best VPN for Firestick
  • 30-Day Money-Back Guarantee

Prices
  • Yearly $3.99 per month (63% Discount) – 30 days risk free + Ransomware & Malware Protection
  • Quarterly $5.32 per month (51% Discount)
  • Monthly $10.99 per month


For more VPN discounts, go to ReviewVPN Deals and purchase the best VPN for you.

Click here to get the lowest price on Surfshark through our exclusive limited-time offer.
 

Install Tubi TV Kodi Addon

Tubi TV Kodi Addon

Tubi TV Image

Source: http://addons.kodibg.org 

Tubi TV is a free and legal Kodi addon that comes from a reputable US company. Tubi was started in 2014 and has gained traction by offering over 50,000 titles completely for free. The catch is you need to watch the adverts. So, it’s basically like TV used to be before the internet. Expect adverts about every 15 minutes for TV shows and 30 minutes for movies. Though it varies based upon the popularity of the title.

Tubi offers titles from major American TV networks and is run by several former senior executives in the industry.


Tubi TV claims to have the second-highest amount of content behind only Netflix, but you can guess that what you watch isn’t going to be that recent. But it provides a good solution for people who want to watch TV for free and legally and get a wider selection of content than they may currently get with their Cable or TV provider.

As of June 2019, Tubi TV has over 20 million subscribers, mostly based in the US. Tubi is also available via a web browser, but we recommend using the Kodi add-on for those based in Europe, as Tubi isn’t available due to GDPR restrictions.


ANONYMOUSLY


[videopress 6gFLPQ1j]


Common Errors

Here are the 3 most common errors you might encounter with Tubi TV:

  • Could not connect to URL/Download: Tubi TV unlike many of our other Kodi add ons is run by a full-fledged professional team of developers. So, if the problem arises with you being unable to download the add on, check the URL, and the source. If all seems fine, then look for Tubi forums and see if you can find an alternative link which there should be plenty of. If the problem, persist read more fixes guide linked above.


  • Source not working/slow/frozen: Again, Tubi TV’s sources will all come from legal and paid-for high-speed servers. If you are having problems with the link, then the error most likely lies with you. Check your internet connection and speed is over 10mbps, also you may need to use a VPN if you are trying to watch the content from outside the US. Check here for the best VPN deal. Tubi only works in the US so you may need to access a US-based server. If the problem continues read the fix guides linked above.


  • Kodi check log error: Kodi caches any media that you watch, and this is the most likely cause of your check log error. Clear the cache yourself or read how to in our guide linked above.


Review

Tubi TV is an innovative business and is like Pluto TV, but Pluto does not have the width and breadth of content as Tubi. It is a great source of movies and TV shows particularly older titles.

A solid add on if you can suffer the adverts. Tubi TV also hosts a lot of original content that you cannot find anywhere else due to the exclusivity deals they have signed. So, a good add-on to have in your library to give you access to the widest range of titles.

Tubi TV has the following categories:

  • Search
  • Featured
  • Most Popular
  • New Arrivals
  • Action
  • Classics
  • Comedy
  • Documentary
  • Drama
  • Family Movies
  • Horror
  • Romance
  • TV Dramas
  • Reality TV
  • Kids Shows
  • Preschool
  • Black Cinema
  • Comic-Con HQ on Tubi
  • Cult Favourites
  • Fan Favourites
  • Foreign Favourites
  • Indie Films
  • Highly Rated on Rotten Tomatoes
  • Martial Arts
  • Clips
  • Special Interest
  • Sci-Fi & Fantasy
  • Stand Up Comedy
  • Thrillers
  • Anime
  • TV Comedies
  • Crime TV
  • Docuseries


YOUR INTERNET ACTIVITY IS BEING WATCHED

ReviewVPN cannot attest to the legality, security and privacy of the applications discussed on this site. It is highly recommended that you use a VPN service while streaming or using Kodi.

Currently, your IP 216.73.217.150 is visible to everyone and your Browser is being tracked by Advertisers & ISP Provider.

Save 65% Now

Limited Time Offer

Here are the main reasons why you must use a VPN:

  • Your activities are hidden from your ISP, the government, and from the apps you are using.
  • You can access additional movies and TV streams.
  • ISP attempts to throttle are thrwarted thus reducing buffering issues.
  • Geographically restricted content like Netflix and Hulu can be unblocked.

A VPN works be replacing your ISP-assigned IP address and creating an encrypted tunnel. We recommend the no log service offered by IPVanish. It works well on a Firestick and offers the fastest possible speeds.

Special Limited Time Offer - Get IPVanish


How to Install Tubi TV Addon on Kodi with Screenshots

  1. From the home screen, select the cogwheel at the upper left.

Step 1 Installing Tubi TV addon on Kodi

2. Select System in the bottom right corner.

Step 2 Installing Tubi TV addon on Kodi


3. Select Add-ons on the left side of the screen.

Step 3 Installing Tubi TV addon on Kodi


4. Select Unknown sources.

Step 4 Installing Tubi TV addon on Kodi


5. Click Yes to allow unknown sources.

Step 5 Installing Tubi TV addon on Kodi


6. Select File manager.

Step 6 Installing Tubi TV addon on Kodi


7. Click Add source.

Step 7 Installing Tubi TV addon on Kodi


8. Click on <None>.

Step 8 Installing Tubi TV addon on Kodi


9. Type exactly: https://addons.kodibg.org

Step 9 Installing Tubi TV addon on Kodi


10. Click on OK.

Step 10 Installing Tubi TV addon on Kodi

11. Select enter a name for this media source.

Step 11 Installing Tubi TV addon on Kodi


12. Name is Tubi TV (this part isn’t critical as long as you remember the name).

Step 12 Installing Tubi TV addon on Kodi


13. Click on OK.

Step 13 Installing Tubi TV addon on Kodi


14. Click on OK.

Step 14 Installing Tubi TV addon on Kodi


15. Take one step back and click on Add-ons.

Step 15 Installing Tubi TV addon on Kodi


16. Select install from zip file.

Step 16 Installing Tubi TV addon on Kodi


17. Click on Tubi TV (or whatever you named the source).

Step 17 Installing Tubi TV addon on Kodi


18. Click on repo.bg.plugins.zip.

Step 18 Installing Tubi TV addon on Kodi


19. Select on Install from repository.

Step 19 Installing Tubi TV addon on Kodi


20. Click on Bg Add-ons

Step 20 Installing Tubi TV addon on Kodi


21. Pick Video add-ons.

Step 21 Installing Tubi TV addon on Kodi


22. Select Tubi TV again.

Step 22 Installing Tubi TV addon on Kodi


23. Click on Install. 

Step 23 Installing Tubi TV addon on Kodi


24. You should see a popup in the upper right corner saying Tubi TV has installed. There will actually be multiple popups for the various components.

Step 24 Installing Tubi TV addon on Kodi


25. Click on Open to start the Tubi TV add-on.

Step 25 Installing Tubi TV addon on Kodi


Legal Disclaimer: ReviewVPN.com does not encourage or endorse any illegal activity involved in the usage of services and applications referenced on this site. We do not verify the licensing agreements of services. The end-user is wholly responsible for ensuring that any media accessed through these services does not violate copyright and/or licensing laws. ReviewVPN does not promote, link to, or receive compensation from any Apps and IPTV services.


Install Surfshark on Firestick

Best Surfshark Deal


How to Install Surfshark VPN on Firestick

If your Firestick still has the older interface, read this article to learn how to update it: Update Firestick Interface.

You can download Surfshark directly from the Amazon App store. It will be easy for you to find Surfshark with your Firestick’s Find feature. Refer to our screenshots below.

1. Go to the Home screen of your Firestick.

step 1 Install Surfshark VPN on Firestick


2. Navigate towards the Find tab. Press the Search button from the resulting dropdown.

step 2 Install Surfshark VPN on Firestick


3. Type in the keyword of SurfShark and select from the suggestions that will appear.

step 3 Install Surfshark VPN on Firestick


4. Click the official SurfShark icon from your search results.

step 4 Install Surfshark VPN on Firestick


5. Press the Download (You own it) button.

step 5 Install Surfshark VPN on Firestick


6. The SurfShark VPN installer will download on your device.

step 6 Install Surfshark VPN on Firestick


7. SurfShark VPN’s app will automatically install itself on your Fire TV stick.

step 7 Install Surfshark VPN on Firestick


8. Press the Open button after completing SurfShark VPN’s installation process.

step 8 Install Surfshark VPN on Firestick


9. Please wait for the SurfShark VPN to load its user interface.

step 9 Install Surfshark VPN on Firestick


10. You can now log in with your SurfShark VPN account credentials.

step 10 Install Surfshark VPN on Firestick

Learn more about Surfshark and Grab the Best Surfshark Deal Now!


Install Surfshark on Firestick

Best Surfshark Deal


Other VPNs to Consider

NordVPN (Best for Streaming)

Best Features

  • 5000+ Server in 50+ Countries 
  • Military-Grade Encryption
  • Fast Connection Speed
  • Suitable to a lot of devices
  • No-Log Policy

Prices
  • Complete $5.89 per month (64% Discount)
  • Plus $4.59 per month (56% Discount)
  • Standard $3.69 per month (55% Discount)

Best Features

  • 750+ High-speed VPN Servers in 43 Locations
  • Military-Grade Encryption
  • Fastest HD Streaming and Gaming
  • 30-Day Money-Back Guarantee
  • Unlimited Data & Devices
  • No-Log Policy

Prices
  • 3 Years $1.99 per month (82% Discount)
  • 1 Years $3.29 per month (70% Discount)
  • 1 Month $10.99 per month

IPVanish VPN (Most Secure)

Best Features

  • 1200+ Servers in 60+ Countries around the world
  • Unlimited Connections
  • No-Log Policy
  • Top Notch Military-Grade VPN Protocols and Encryptions
  • 100% Safe and Secured
  • Most Trusted VPN
  • Best VPN for Firestick
  • 30-Day Money-Back Guarantee

Prices
  • Yearly $3.99 per month (63% Discount) – 30 days risk free + Ransomware & Malware Protection
  • Quarterly $5.32 per month (51% Discount)
  • Monthly $10.99 per month


For more VPN discounts, go to ReviewVPN Deals and purchase the best VPN for you.

Click here to get the lowest price on Surfshark through our exclusive limited-time offer.
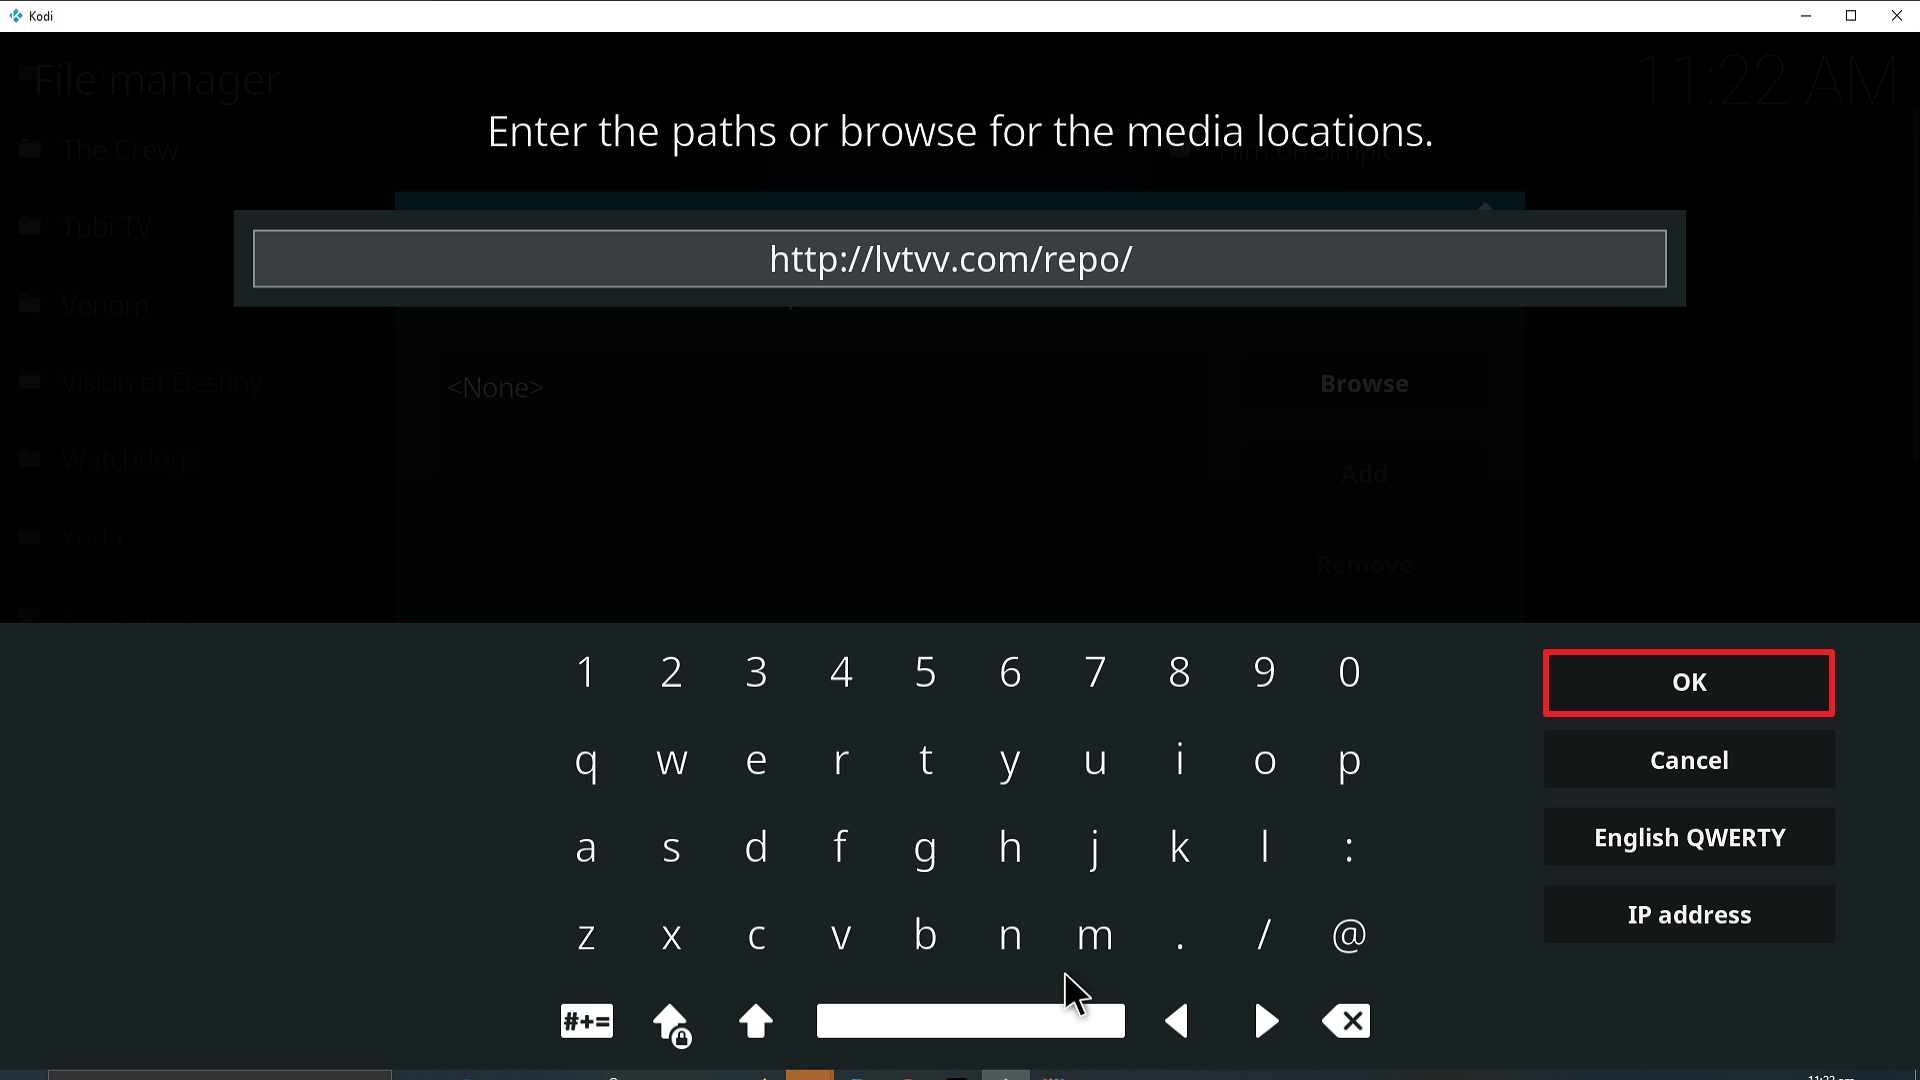
 

Install Nole Cinema Kodi Addon

Nole Cinema Kodi Addon

Nole Cinema Image

Source: http://magnetic.website/repo

Nole Cinema is a great example of a Kodi addon that does 1 thing and does it well. You can just find movies on Nole Cinema. What we love about Nole is that it doesn’t try to do everything like lots of other add ons.

Kodi is inundated with add on which want to do Live TV, Movies, Tv Shows, Sports and everything else, and just end up doing them all poorly.


Nole Cinema is probably one of the best add ons, on Kodi when it comes to cinema. Not only do you have the latest releases and easy to navigate categories, but you have tonnes of fantastic box sets relating to franchises so you can binge-watch one after the other.

If you really want to get the best out of Nole Cinema we recommend paying for a Real Debrid subscription, which will give you greater access to high-quality links as well as 4K quality streams. However even without Real Debrid, Nole Cinema works great and uses an Auto Play function like Movie Theatre Butter.

This means it will simply find the best link and start playing straight away, so you don’t have to sift through working links. Links will generally be in 720p or 1080p quality.


ANONYMOUSLY


Common Errors

Here are the 4 most common errors you might encounter with Nole Cinema:

  • Could not connect to URL/Download: If you have a problem connecting to the URL source for the add on, first check the spelling and the repository. Next try again, just in case there is a glitch with the server. If the problem persists go through our guide linked above.


  • Source not working/slow/frozen: When you have autoplay enabled, Nole Cinema will find a working link for you automatically. However, if you always want to get an HD or 4K link you may need to switch off autoplay and go hunting for the link yourself. Give 10 seconds for the link to load and refresh the link a few times to see if that gets it working. If that still doesn’t fix the problem, then read about more fixes guide lined above.


  • Kodi check log error: After you have been using Kodi for a while you may start getting check log errors. Generally, this means you just need to clear your cache. To find out how to clear cache, and download system tools to clean up Kodi read on the guide linked above.


  • Script error: A script error means either the add on or your Kodi install is corrupted. Check the add on and if the problem persists you may need a fresh install of Kodi. To learn this and more fixes read on the guide linked above.

Review

Nole Cinema is a fantastic add on and so simple to use. When you click on a movie title all you must do is choose between 720p, 1080p, and HD quality and then play. Nole will do everything else.

To get the best out of Nole Cinema and have it running as fast as possible, we recommend you turn off metadata processing, which you can do by:

  1. Going to the Kodi Home screen
  2. Click Add ons and then video add ons
  3. Select Nole Cinema and then click settings
  4. Click customization and then turn off the setting for enable metadata

Nole Cinema should run much smoother, which is handy if you are using a lower RAM device like an Amazon Firestick.

Nole Cinema has the following categories:

  • Romance
  • Sci-Fi
  • Adventure
  • Animation Domination
  • Comedy
  • Crime
  • DC Comics
  • Drama
  • Thrillers
  • War
  • 4K Community
  • New Releases
  • Classics
  • Action
  • Fantasy
  • Gangster
  • Horror
  • International
  • Marvel Universe
  • Mystery
  • Sports
  • Collections


YOUR INTERNET ACTIVITY IS BEING WATCHED

ReviewVPN cannot attest to the legality, security and privacy of the applications discussed on this site. It is highly recommended that you use a VPN service while streaming or using Kodi.

Currently, your IP 216.73.217.150 is visible to everyone and your Browser is being tracked by Advertisers & ISP Provider.

Save 65% Now

Limited Time Offer

Here are the main reasons why you must use a VPN:

  • Your activities are hidden from your ISP, the government, and from the apps you are using.
  • You can access additional movies and TV streams.
  • ISP attempts to throttle are thrwarted thus reducing buffering issues.
  • Geographically restricted content like Netflix and Hulu can be unblocked.

A VPN works be replacing your ISP-assigned IP address and creating an encrypted tunnel. We recommend the no log service offered by IPVanish. It works well on a Firestick and offers the fastest possible speeds.

Special Limited Time Offer - Get IPVanish


How to Install Nole Cinema Addon on Kodi with Screenshots

  1. From the home screen, select the cogwheel at the upper left.

Step 1 Installing Nole Cinema addon on Kodi

2. Select System in the bottom right corner.

Step 2 Installing Nole Cinema addon on Kodi


3. Select Add-ons on the left side of the screen.

Step 3 Installing Nole Cinema addon on Kodi


4. Select Unknown sources.

Step 4 Installing Nole Cinema addon on Kodi


5. Click Yes to allow unknown sources.

Step 5 Installing Nole Cinema addon on Kodi


6. Select File manager.

Step 6 Installing Nole Cinema addon on Kodi


7. Click Add source.

Step 7 Installing Nole Cinema addon on Kodi


8. Click on <None>.

Step 8 Installing Nole Cinema addon on Kodi


9. Type exactly: http://magnetic.website/repo

Step 9 Installing Nole Cinema addon on Kodi


10. Click on OK.

Step 10 Installing Nole Cinema addon on Kodi


11. Select enter a name for this media source.

Step 11 Installing Nole Cinema addon on Kodi


12. Name is Nole Cinema (this part isn’t critical as long as you remember the name).

Step 12 Installing Nole Cinema addon on Kodi


13. Click on OK.

Step 13 Installing Nole Cinema addon on Kodi


14. Click on OK.

Step 14 Installing Nole Cinema addon on Kodi


15. Take one step back and click on Add-ons.

Step 15 Installing Nole Cinema addon on Kodi


16. Select install from zip file.

Step 16 Installing Nole Cinema addon on Kodi


17. Click on Nole Cinema (or whatever you named the source).

Step 17 Installing Nole Cinema addon on Kodi


18. Click on repository.Magnetic-1.0.6.zip

Step 18 Installing Nole Cinema addon on Kodi


19. Select on Install from repository.

Step 19 Installing Nole Cinema addon on Kodi


20. Click on Magnetic Repo.

Step 20 Installing Nole Cinema addon on Kodi


21. Pick Video add-ons.

Step 21 Installing Nole Cinema addon on Kodi


22. Select Nole Cinema again.

Step 22 Installing Nole Cinema addon on Kodi


23. Click on Install.


Step 23 Installing Nole Cinema addon on Kodi


24. Select OK after reviewing the add-ons that will be installed.

Step 24 Installing Nole Cinema addon on Kodi


25. You should see a popup in the upper right corner saying Nole Cinema has installed. There will actually be multiple popups for the various components.

Step 25 Installing Nole Cinema addon on Kodi


26. Click on Open to start the Nole Cinema add-on.

Step 26 Installing Nole Cinema addon on Kodi


Grab your subscription now!

Click here to get the lowest price on Surfsharkthrough our exclusive limited-time offer.


How to Install Surfshark VPN on Firestick

If your Firestick still has the older interface, read this article to learn how to update it: Update Firestick Interface.

Follow our screenshots below to install the SurfShark VPN app on your Fire TV stick.

1. Go to the Home screen of your Firestick.

step 1 Install Surfshark VPN on Firestick


2. Navigate towards the Find tab. Press the Search button from the resulting dropdown.

step 2 Install Surfshark VPN on Firestick


3. Type in the keyword of SurfShark and select from the suggestions that will appear.

step 3 Install Surfshark VPN on Firestick


4. Click the official SurfShark icon from your search results.

step 4 Install Surfshark VPN on Firestick


5. Press the Download (You own it) button.

step 5 Install Surfshark VPN on Firestick


6. The SurfShark VPN installer will download on your device.

step 6 Install Surfshark VPN on Firestick


7. SurfShark VPN’s app will automatically install itself on your Fire TV stick.

step 7 Install Surfshark VPN on Firestick


8. Press the Open button after completing SurfShark VPN’s installation process.

step 8 Install Surfshark VPN on Firestick


9. Please wait for the SurfShark VPN to load its user interface.

step 9 Install Surfshark VPN on Firestick


10. You can now log in with your SurfShark VPN account credentials.

step 10 Install Surfshark VPN on Firestick

Learn more about Surfshark and Grab the Best Surfshark Deal Now!


Install Surfshark on Firestick

Best Surfshark Deal


Other VPNs to Consider

NordVPN (Best for Streaming)

Best Features

  • 5000+ Server in 50+ Countries 
  • Military-Grade Encryption
  • Fast Connection Speed
  • Suitable to a lot of devices
  • No-Log Policy

Prices
  • Complete $5.89 per month (64% Discount)
  • Plus $4.59 per month (56% Discount)
  • Standard $3.69 per month (55% Discount)

Best Features

  • 750+ High-speed VPN Servers in 43 Locations
  • Military-Grade Encryption
  • Fastest HD Streaming and Gaming
  • 30-Day Money-Back Guarantee
  • Unlimited Data & Devices
  • No-Log Policy

Prices
  • 3 Years $1.99 per month (82% Discount)
  • 1 Years $3.29 per month (70% Discount)
  • 1 Month $10.99 per month

IPVanish VPN (Most Secure)

Best Features

  • 1200+ Servers in 60+ Countries around the world
  • Unlimited Connections
  • No-Log Policy
  • Top Notch Military-Grade VPN Protocols and Encryptions
  • 100% Safe and Secured
  • Most Trusted VPN
  • Best VPN for Firestick
  • 30-Day Money-Back Guarantee

Prices
  • Yearly $3.99 per month (63% Discount) – 30 days risk free + Ransomware & Malware Protection
  • Quarterly $5.32 per month (51% Discount)
  • Monthly $10.99 per month


For more VPN discounts, go to ReviewVPN Deals and purchase the best VPN for you.

Click here to get the lowest price on Surfshark through our exclusive limited-time offer.
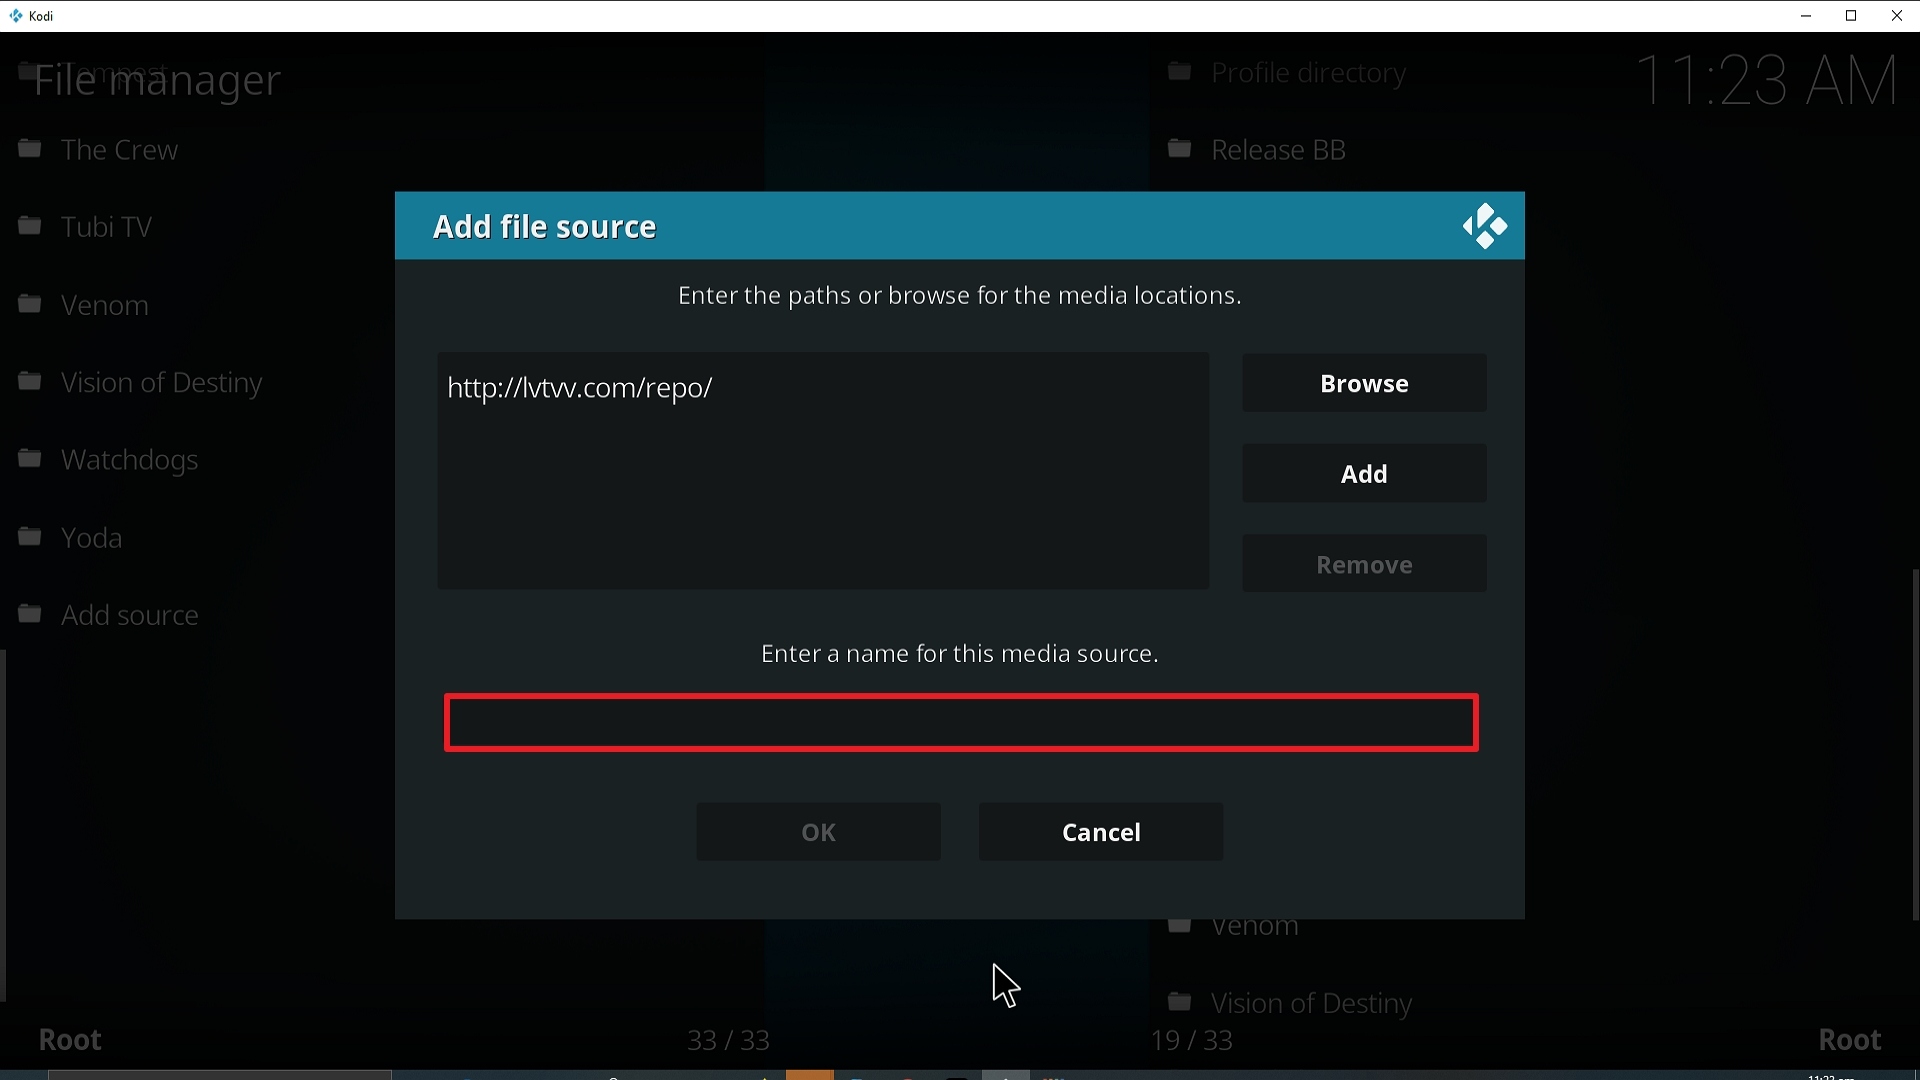
 

Install Scrubs V2 Kodi Addon

Scrubs V2 Kodi Addon

Scrubs V2 Image

Source: https://jewbmx.github.io/ 

Scrubs is a great add on, which concentrates on Movies and TV Shows. You can access masses of content through the add on, and top sites consistently vote Scrubs as one of the 20 best add ons to have on your Kodi box.

Originally an Exodus Redux fork, Scrubs has grown in popularity due to its stability and trustworthy developers who keep the lights on, and the content updated.


ANONYMOUSLY


Common Errors

These are some of the most common errors you might encounter when installing or using Scrubs V2:

  • Could not connect to URL/Download: When downloading the add on, first make sure you have correctly typed the URL, and that you have tried both the URL’s we have provided. Another factor to be aware of is that as a popular Kodi add on which allows its users to stream and watch illegal content, your Internet Service Provider (ISP) may be blocking the link. To get around this we always recommend that you use a VPN with Kodi, so that you don’t have any content censored. Check here for the best VPN deal. If none of these fixes work, please read our full-length fix guide linked above.


  • Source not working/slow/frozen: Unlike other Kodi addons, Scrubs doesn’t have an autoplay function. But it does have a good reputation for finding working links. We recommend you wait up to 15 seconds for the source to connect and start buffering. Another factor is whether you are using a VPN. Without a VPN the content may be blocked by your ISP, so make sure you have that on. If none of that works read our full-length guide linked above.


  • Kodi checks log error: You’re unlikely to get this error if you have just started watching content on Kodi. But if you have been using Kodi for some time, you are going to come across a check log error. Every piece of media that you stream gets cached, which means that over time your cache grows larger. Media files are large and chunk. If you have a low storage device once this gets full it will start throwing up errors. To learn how you can clear the cache on any Kodi device and other fixes for the Kodi log check error read the guide linked above.

Review

Scrubs is a solid add on and has been in the top 10 list of Kodi add ons for months now. As a fork of Exodus Redux, it to some extent acts and looks the same, but the developers have kept on top of keeping content updated and scrapers working which makes a big difference to any add on.

Scrubs has hardly been down and been shown to be consistent and stable over the years it’s been out.

A must-have addon for anyone with Kodi

Scrubs V2 categories include: 

  • Movies
  • TV Shows
  • My Movies
  • My TV Shows
  • New Movies
  • New Episodes
  • Documentaries
  • Networks
  • Tools
  • Search


YOUR INTERNET ACTIVITY IS BEING WATCHED

ReviewVPN cannot attest to the legality, security and privacy of the applications discussed on this site. It is highly recommended that you use a VPN service while streaming or using Kodi.

Currently, your IP 216.73.217.150 is visible to everyone and your Browser is being tracked by Advertisers & ISP Provider.

Save 65% Now

Limited Time Offer

Here are the main reasons why you must use a VPN:

  • Your activities are hidden from your ISP, the government, and from the apps you are using.
  • You can access additional movies and TV streams.
  • ISP attempts to throttle are thrwarted thus reducing buffering issues.
  • Geographically restricted content like Netflix and Hulu can be unblocked.

A VPN works be replacing your ISP-assigned IP address and creating an encrypted tunnel. We recommend the no log service offered by IPVanish. It works well on a Firestick and offers the fastest possible speeds.

Special Limited Time Offer - Get IPVanish


How to Install Scrubs V2 Addon on Kodi with Screenshots

  1. From the home screen, select the cogwheel at the upper left.

Step 1 Installing Scrubs V2 addon on Kodi

2. Select System in the bottom right corner.

Step 2 Installing Scrubs V2 addon on Kodi


3. Select Add-ons on the left side of the screen.

Step 3 Installing Scrubs V2 addon on Kodi


4. Select Unknown sources.

Step 4 Installing Scrubs V2 addon on Kodi


5. Click Yes to allow unknown sources.

Step 5 Installing Scrubs V2 addon on Kodi


6. Select File manager.

Step 6 Installing Scrubs V2 addon on Kodi


7. Click Add source.

Step 7 Installing Scrubs V2 addon on Kodi


8. Click on <None>.

Step 8 Installing Scrubs V2 addon on Kodi


9. Type exactly: https://jewbmx.github.io/

Step 9 Installing Scrubs V2 addon on Kodi


10. Click on OK.

Step 10 Installing Scrubs V2 addon on Kodi

11. Select enter a name for this media source.

Step 11 Installing Scrubs V2 addon on Kodi


12. Name is Scrubs V2 (this part isn’t critical as long as you remember the name).

Step 12 Installing Scrubs V2 addon on Kodi


13. Click on OK.

Step 13 Installing Scrubs V2 addon on Kodi


14. Click on OK.

Step 14 Installing Scrubs V2 addon on Kodi


15. Take one step back and click on Add-ons.

Step 15 Installing Scrubs V2 addon on Kodi


16. Select install from zip file.

Step 16 Installing Scrubs V2 addon on Kodi


17. Click on Scrubs V2 (or whatever you named the source).

Step 17 Installing Scrubs V2 addon on Kodi


18. Click on repository.jewrepo-1.5.4.zip.

Step 18 Installing Scrubs V2 addon on Kodi


19. Select on Install from repository.

Step 19 Installing Scrubs V2 addon on Kodi


20. Click on JewRepo

Step 20 Installing Scrubs V2 addon on Kodi


21. Pick Video add-ons.

Step 21 Installing Scrubs V2 addon on Kodi


22. Select Scrubs V2 again.

Step 22 Installing Scrubs V2 addon on Kodi


23. Click on Install. 

Step 23 Installing Scrubs V2 addon on Kodi


24. Select Version 4.6.1

Step 24 Installing Scrubs V2 addon on Kodi


25. Select OK after reviewing the add-ons that will be installed.

Step 25 Installing Scrubs V2 addon on Kodi


26. You should see a popup in the upper right corner saying Scrubs V2 has installed. There will actually be multiple popups for the various components.

Step 26 Installing Scrubs V2 addon on Kodi


27. Click on Open to start the Scrubs V2 add-on.

Step 27 Installing Scrubs V2 addon on Kodi


Install Surfshark on Firestick

Best Surfshark Deal


How to Install Surfshark VPN on Firestick

If your Firestick still has the older interface, read this article to learn how to update it: Update Firestick Interface.

Follow our screenshots below to install the SurfShark VPN app on your Fire TV stick.

1. Go to the Home screen of your Firestick.

step 1 Install Surfshark VPN on Firestick


2. Navigate towards the Find tab. Press the Search button from the resulting dropdown.

step 2 Install Surfshark VPN on Firestick


3. Type in the keyword of SurfShark and select from the suggestions that will appear.

step 3 Install Surfshark VPN on Firestick


4. Click the official SurfShark icon from your search results.

step 4 Install Surfshark VPN on Firestick


5. Press the Download (You own it) button.

step 5 Install Surfshark VPN on Firestick


6. The SurfShark VPN installer will download on your device.

step 6 Install Surfshark VPN on Firestick


7. SurfShark VPN’s app will automatically install itself on your Fire TV stick.

step 7 Install Surfshark VPN on Firestick


8. Press the Open button after completing SurfShark VPN’s installation process.

step 8 Install Surfshark VPN on Firestick


9. Please wait for the SurfShark VPN to load its user interface.

step 9 Install Surfshark VPN on Firestick


10. You can now log in with your SurfShark VPN account credentials.

step 10 Install Surfshark VPN on Firestick

Learn more about Surfshark and Grab the Best Surfshark Deal Now!


Install Surfshark on Firestick

Best Surfshark Deal


Other VPNs to Consider

NordVPN (Best for Streaming)

Best Features

  • 5000+ Server in 50+ Countries 
  • Military-Grade Encryption
  • Fast Connection Speed
  • Suitable to a lot of devices
  • No-Log Policy

Prices
  • Complete $5.89 per month (64% Discount)
  • Plus $4.59 per month (56% Discount)
  • Standard $3.69 per month (55% Discount)

Best Features

  • 750+ High-speed VPN Servers in 43 Locations
  • Military-Grade Encryption
  • Fastest HD Streaming and Gaming
  • 30-Day Money-Back Guarantee
  • Unlimited Data & Devices
  • No-Log Policy

Prices
  • 3 Years $1.99 per month (82% Discount)
  • 1 Years $3.29 per month (70% Discount)
  • 1 Month $10.99 per month

IPVanish VPN (Most Secure)

Best Features

  • 1200+ Servers in 60+ Countries around the world
  • Unlimited Connections
  • No-Log Policy
  • Top Notch Military-Grade VPN Protocols and Encryptions
  • 100% Safe and Secured
  • Most Trusted VPN
  • Best VPN for Firestick
  • 30-Day Money-Back Guarantee

Prices
  • Yearly $3.99 per month (63% Discount) – 30 days risk free + Ransomware & Malware Protection
  • Quarterly $5.32 per month (51% Discount)
  • Monthly $10.99 per month


For more VPN discounts, go to ReviewVPN Deals and purchase the best VPN for you.

Click here to get the lowest price on Surfshark through our exclusive limited-time offer.
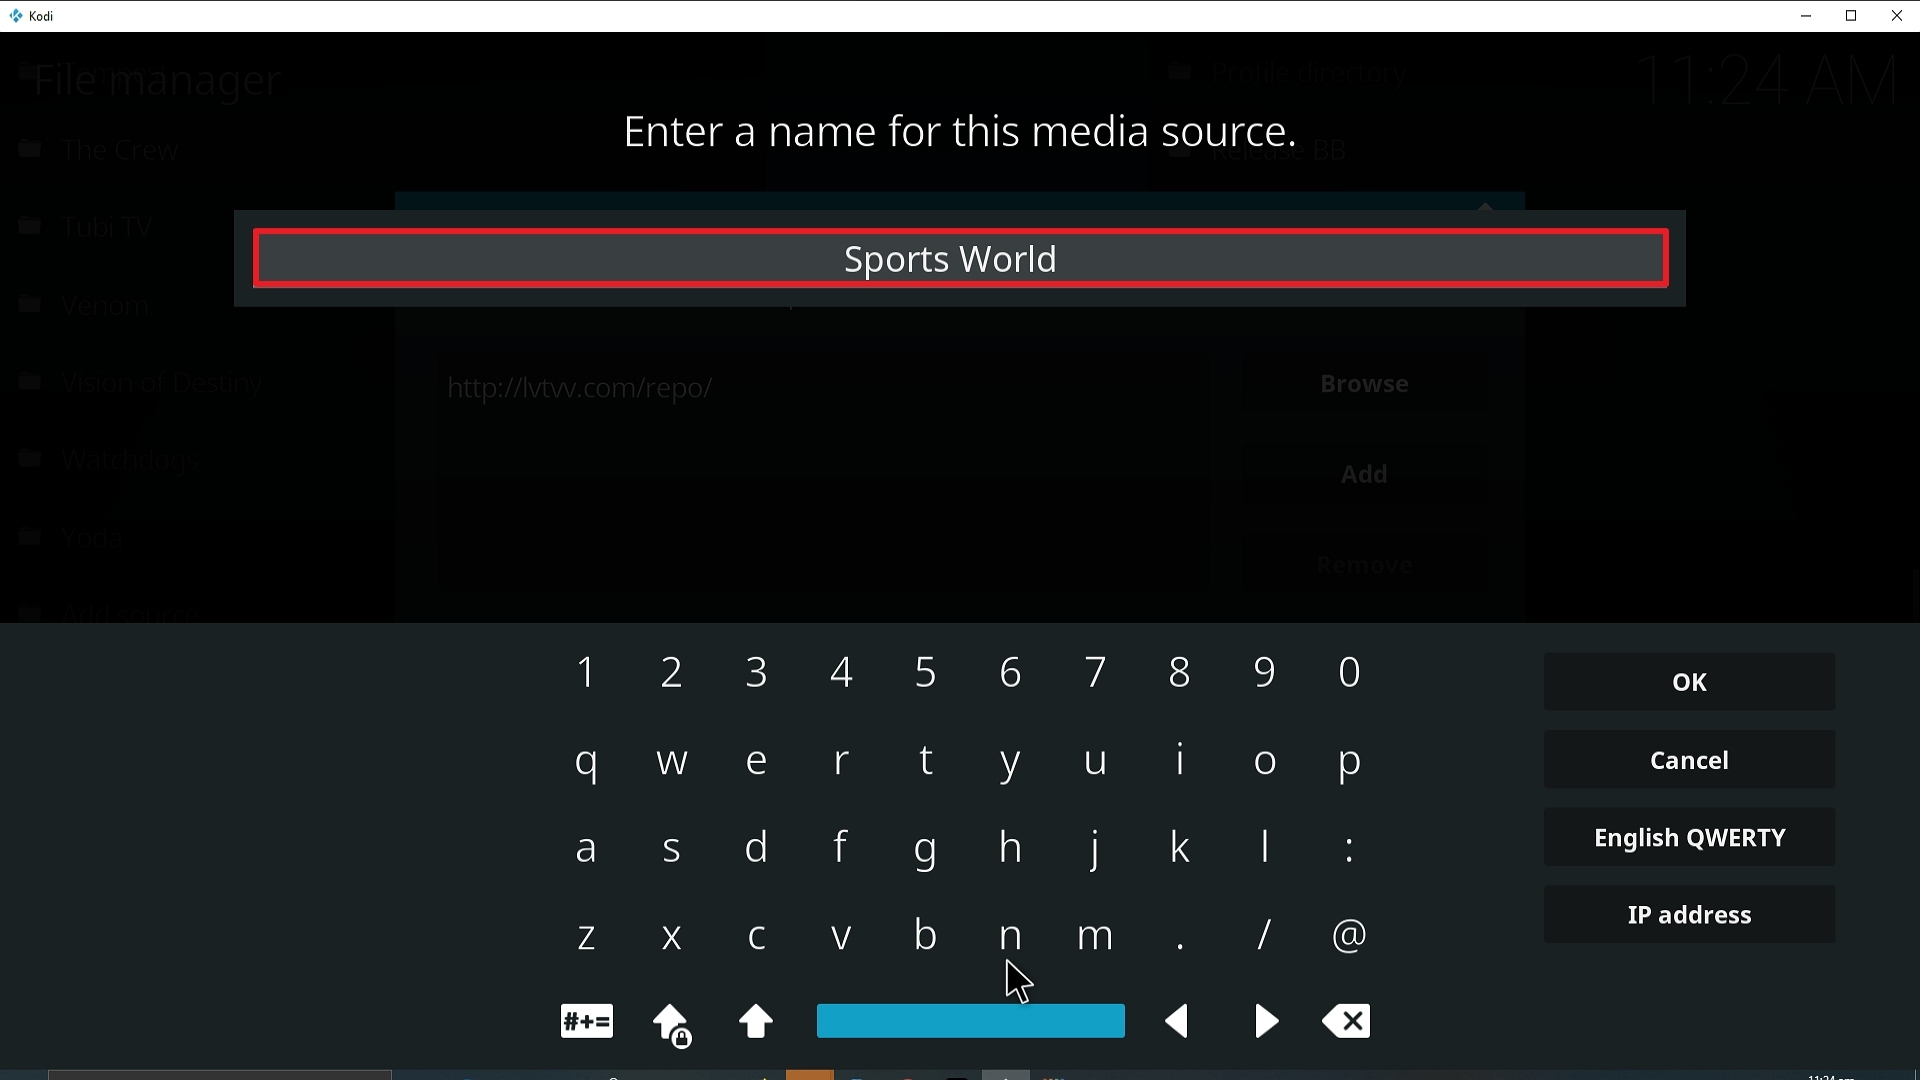
 

2