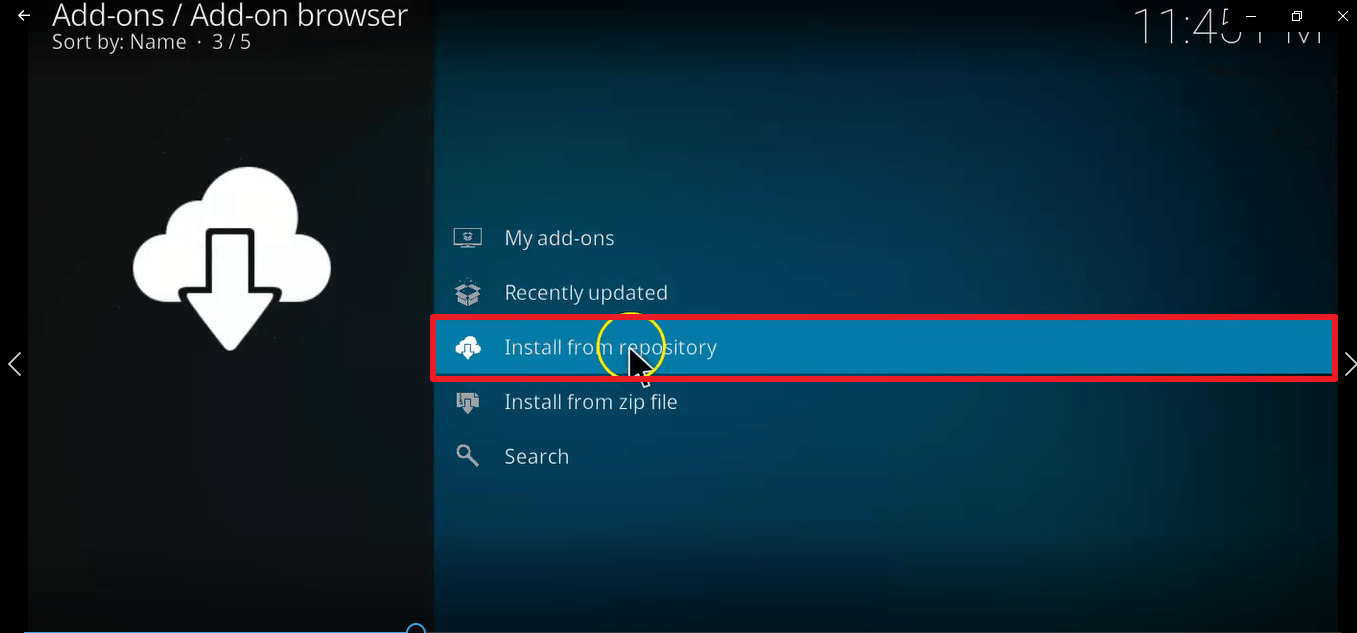
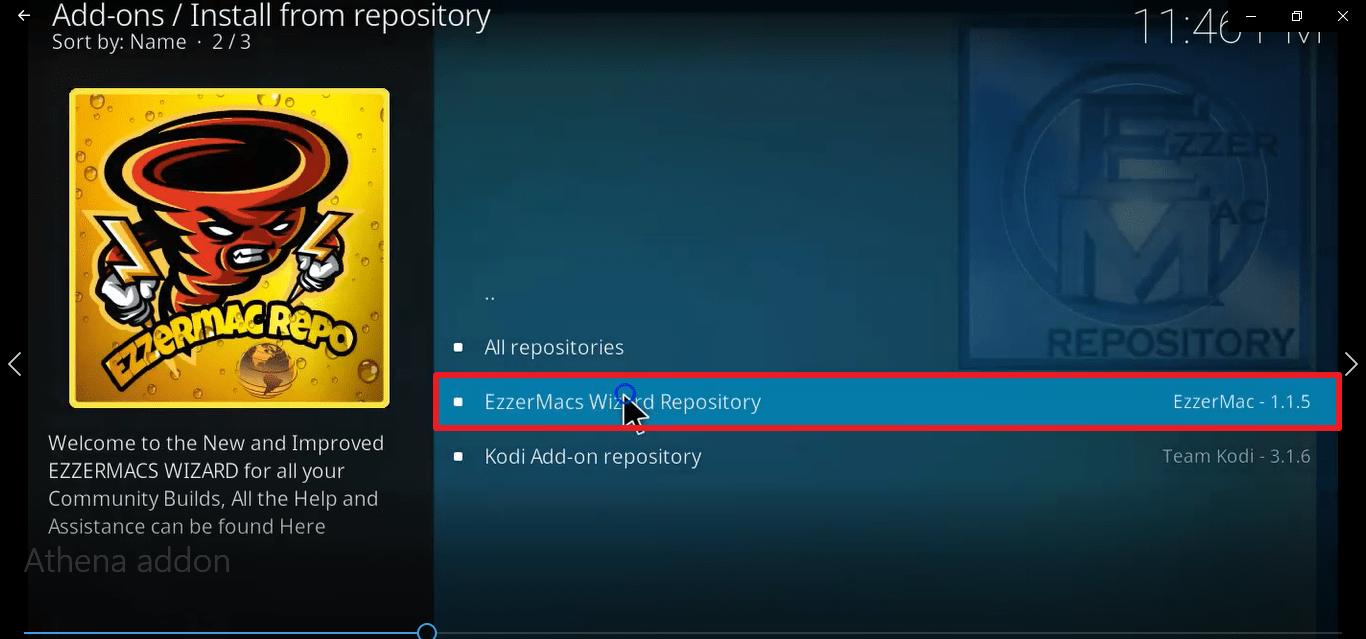
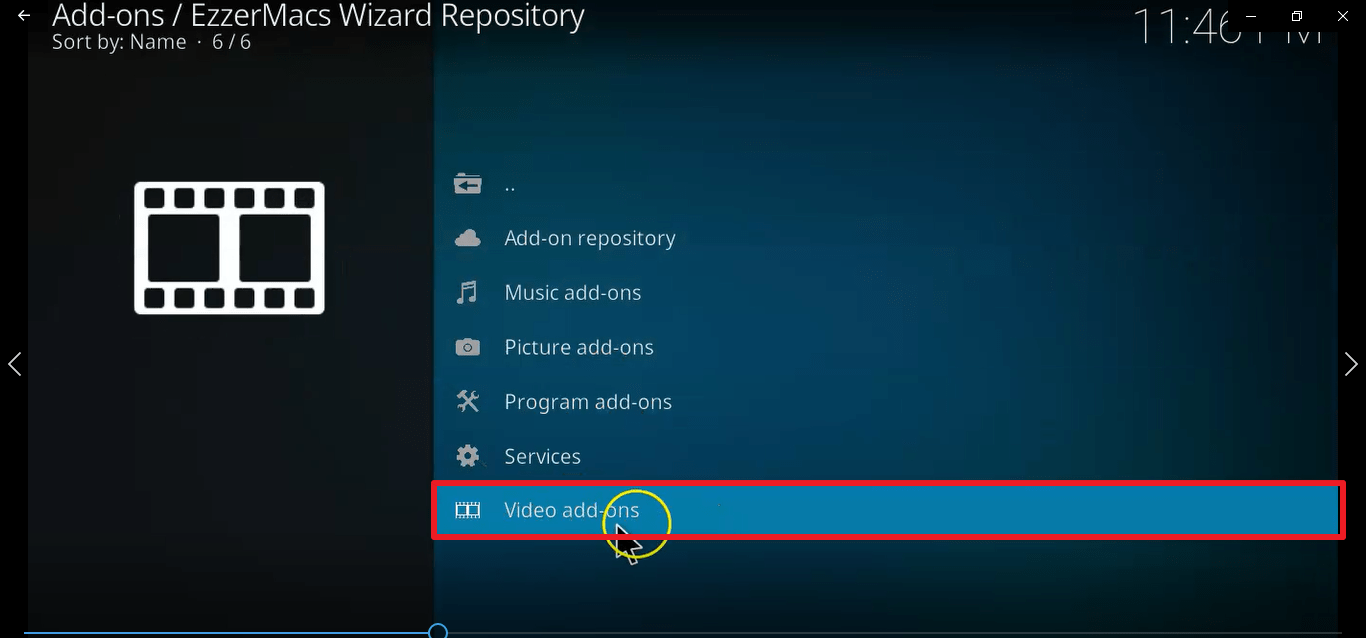
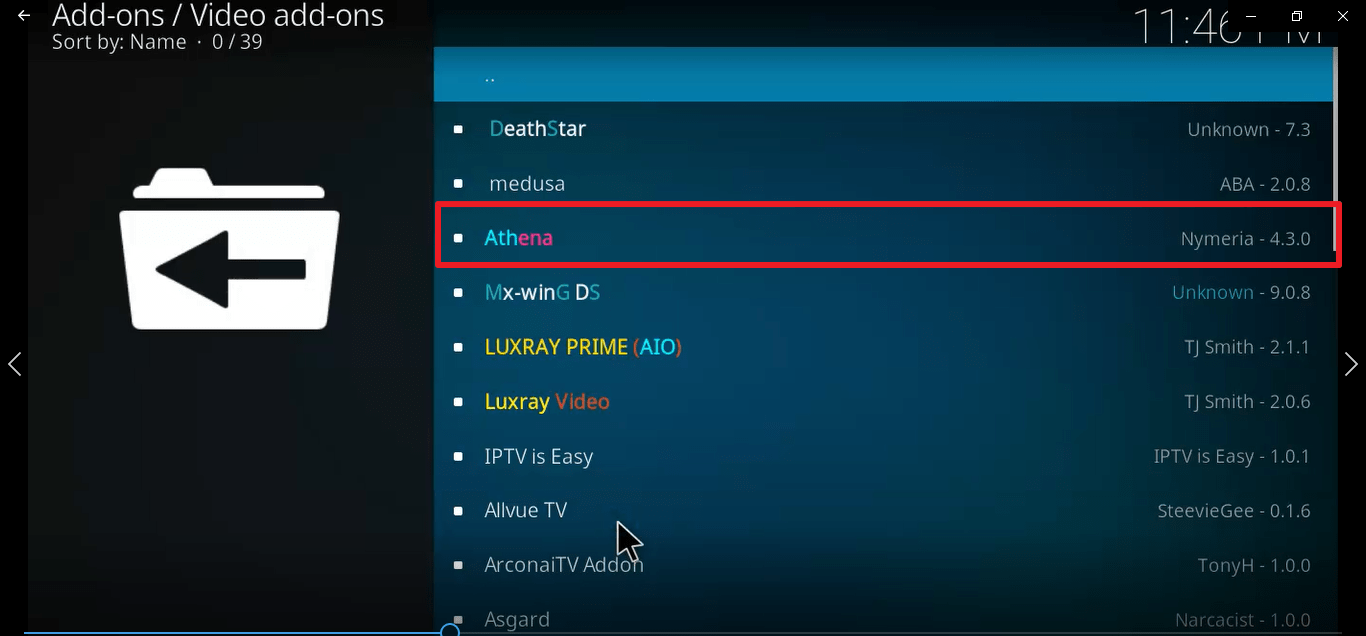
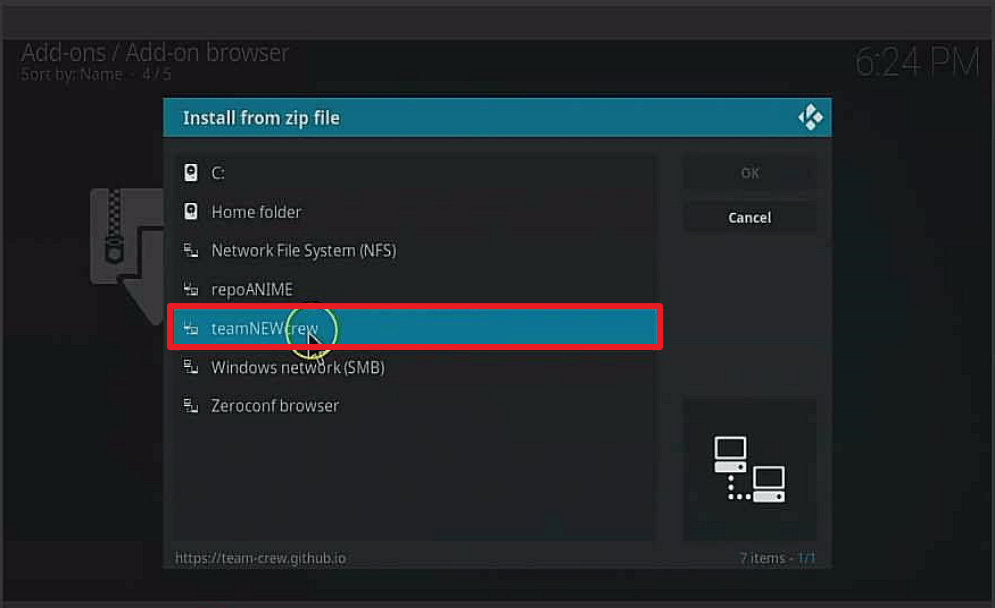
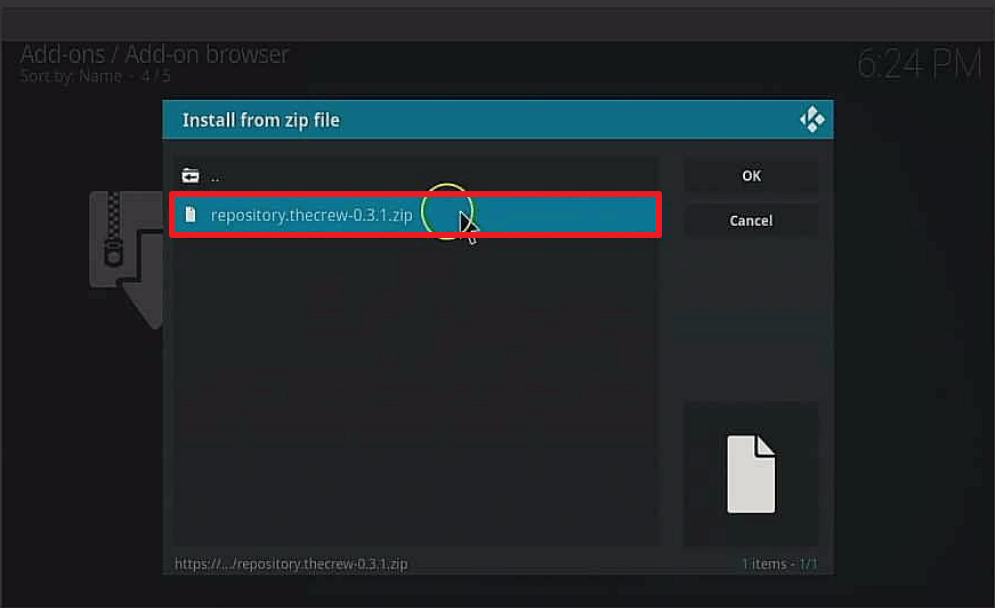
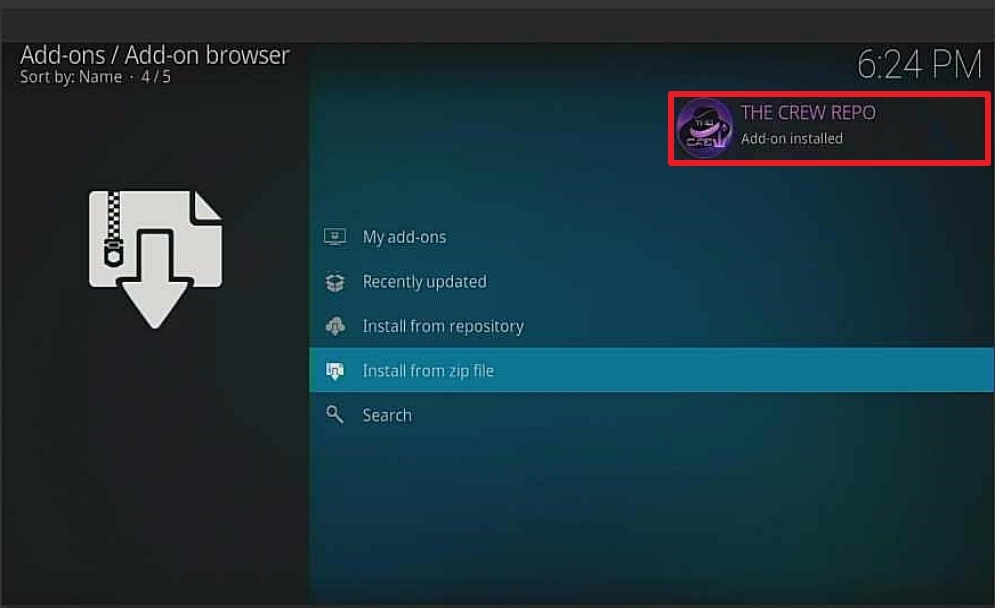
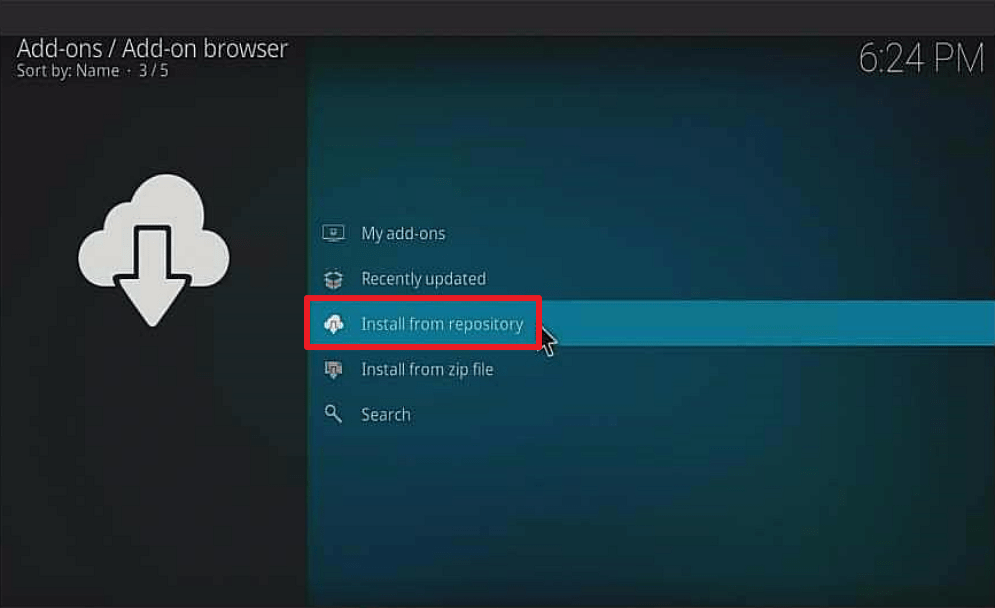
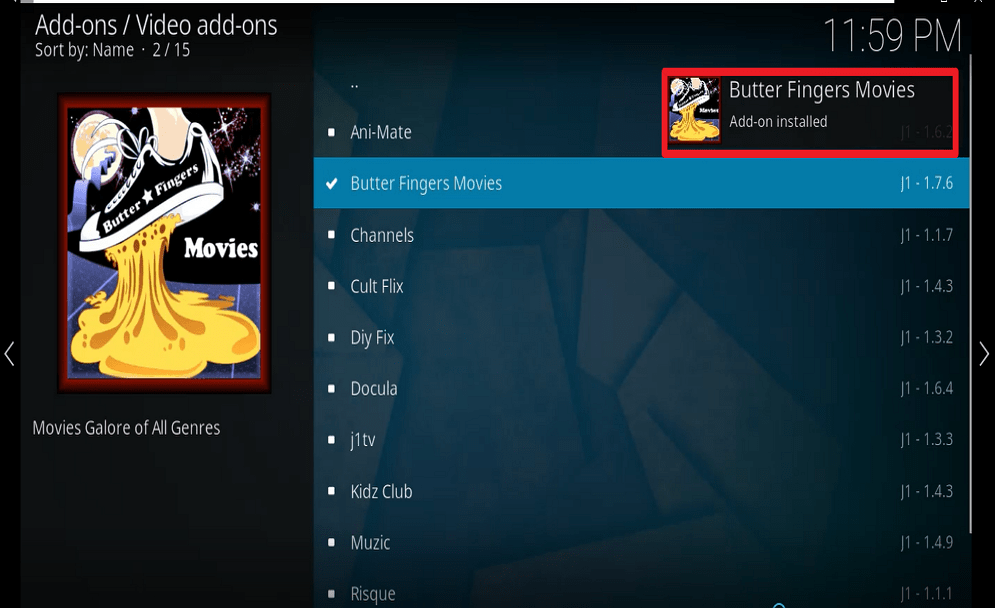
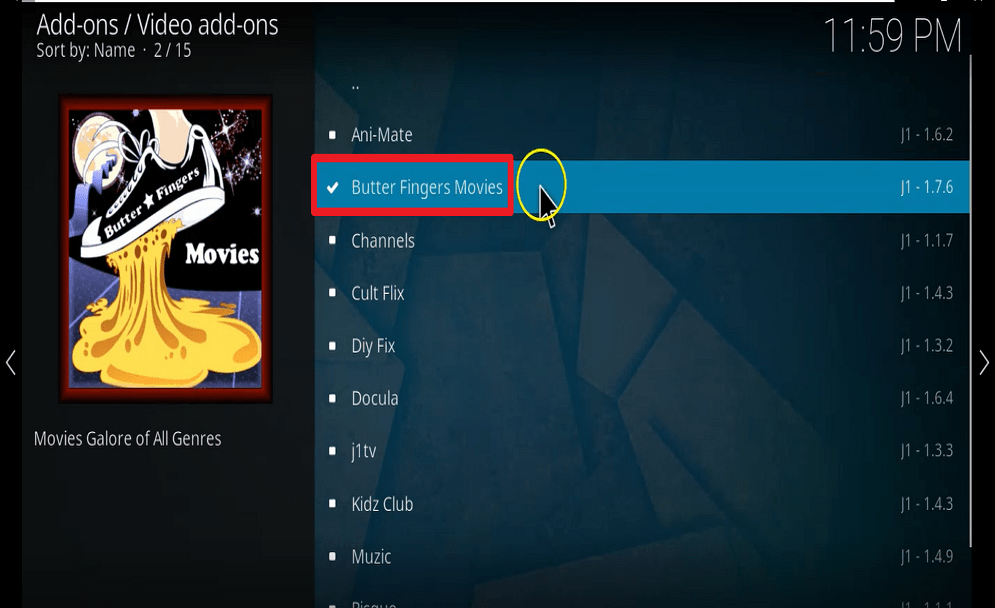
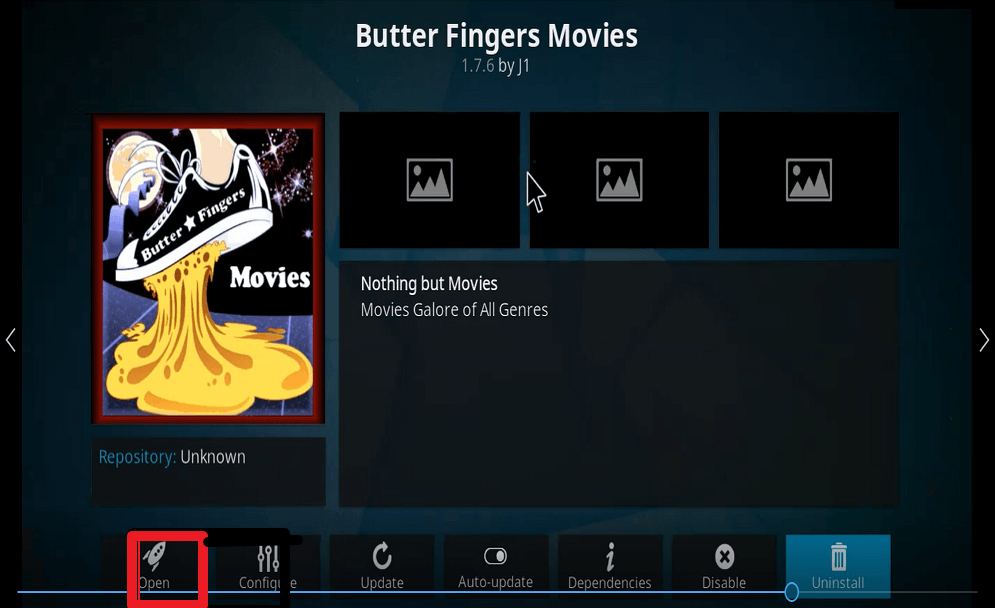
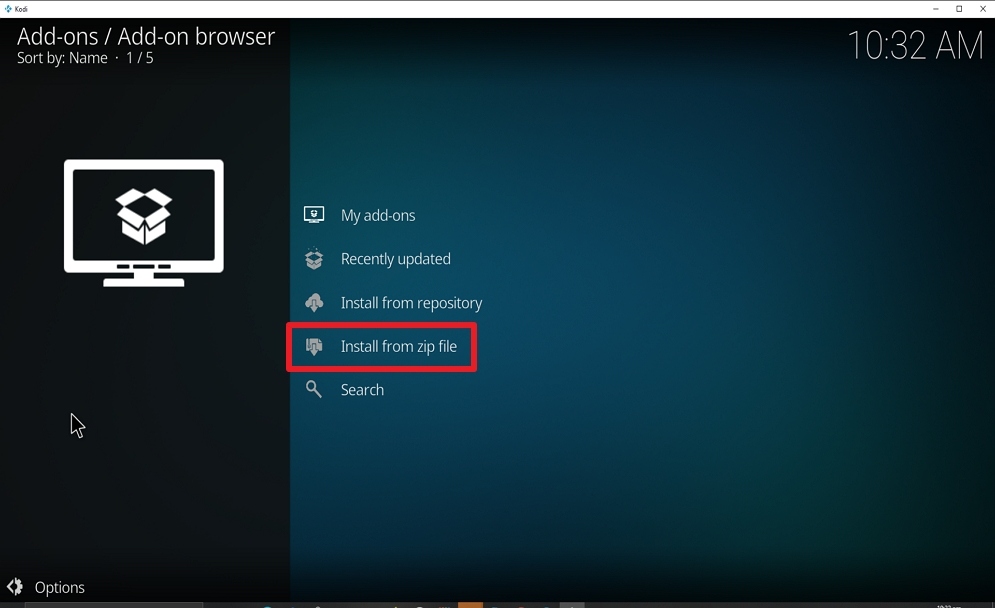
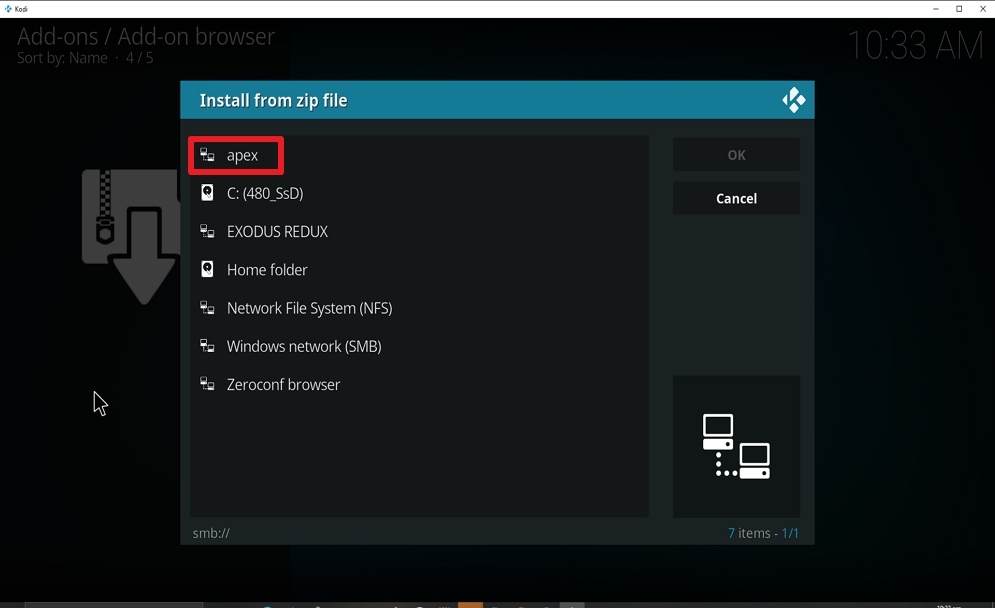
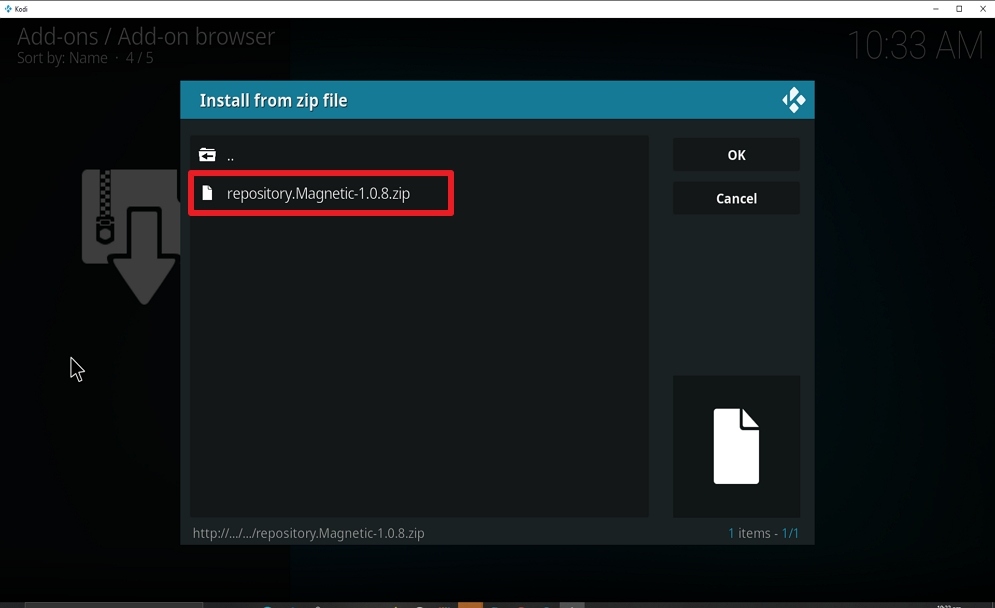
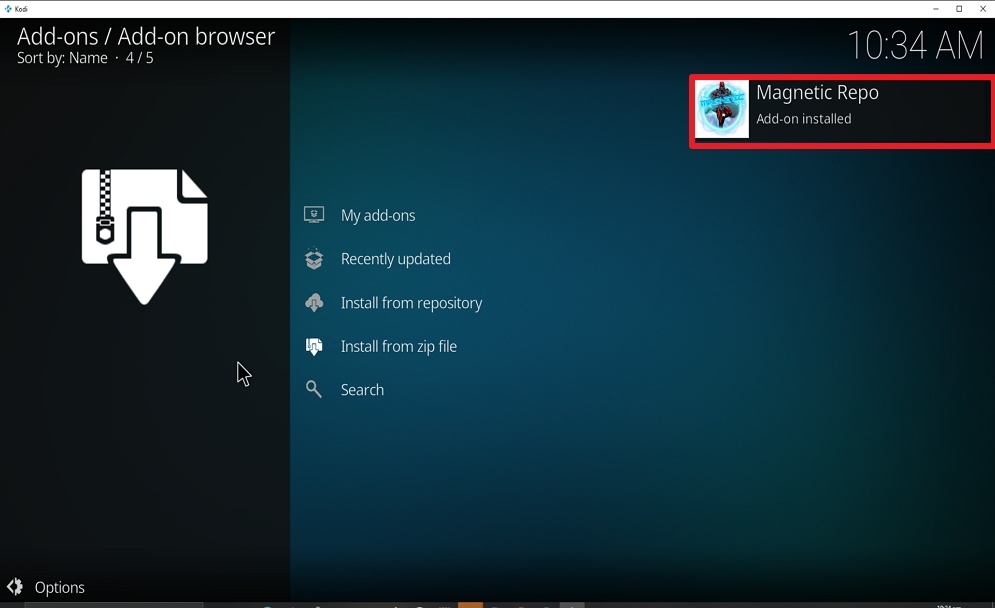
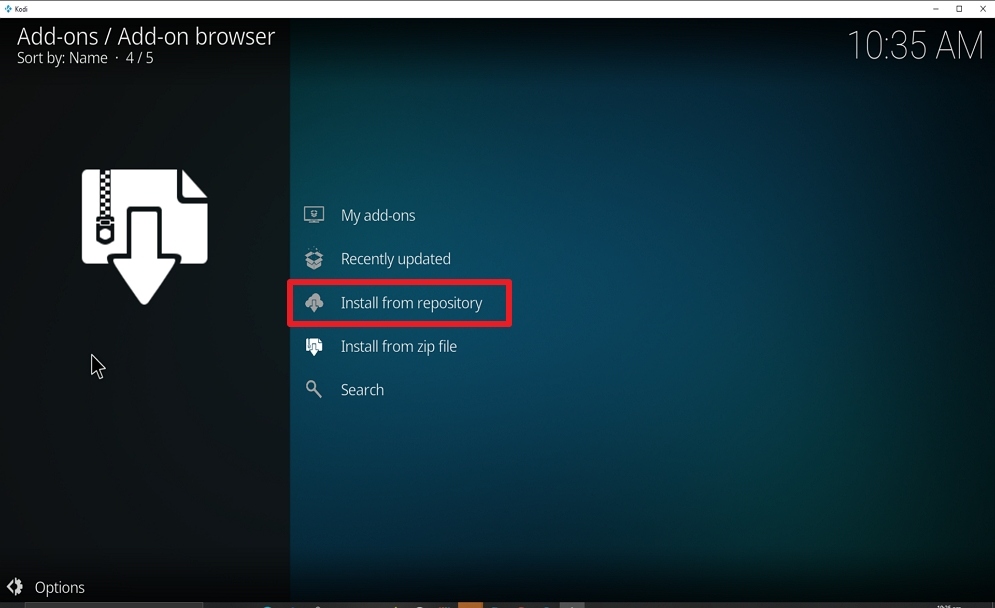
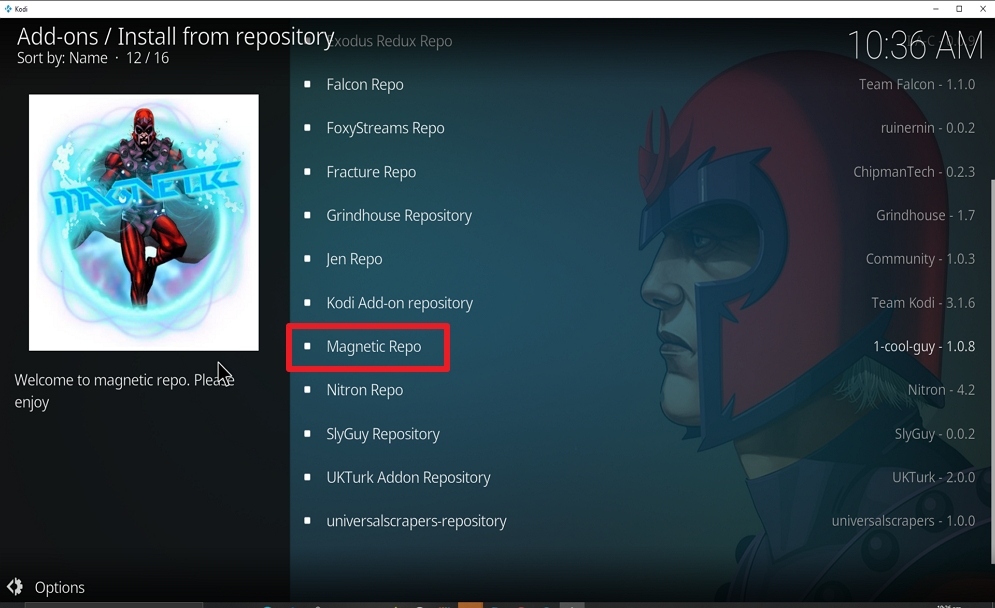
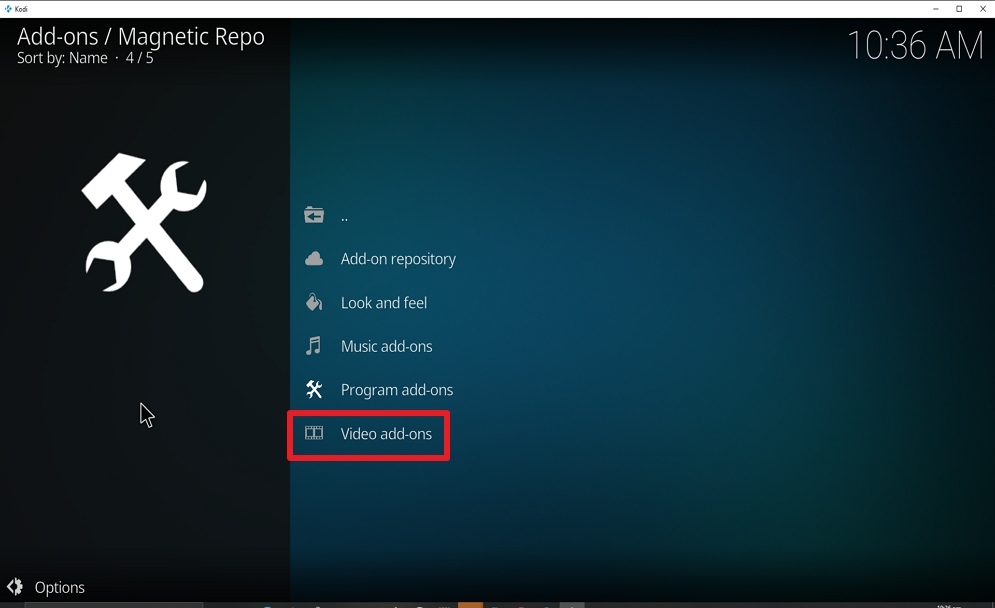
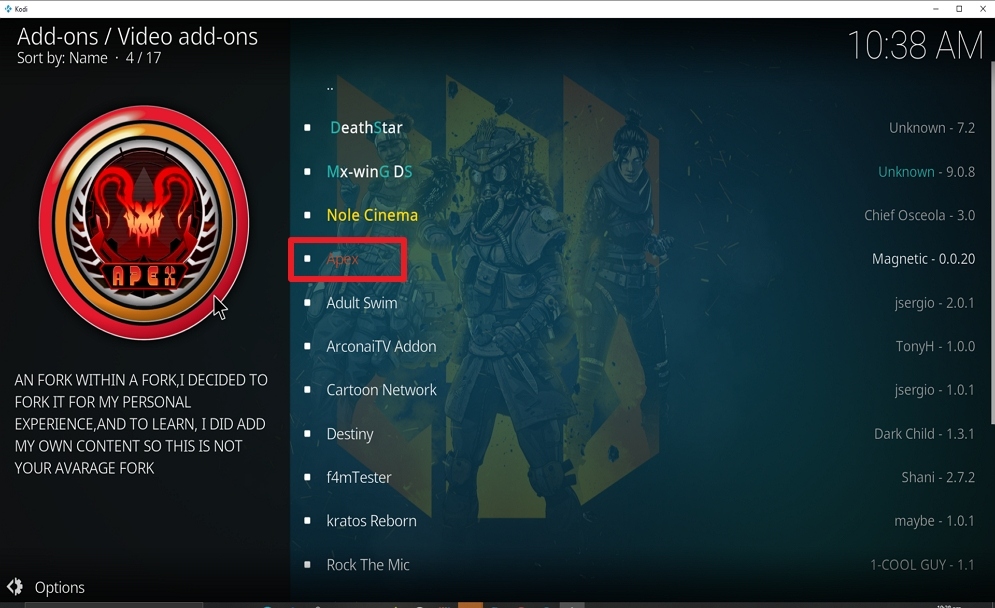
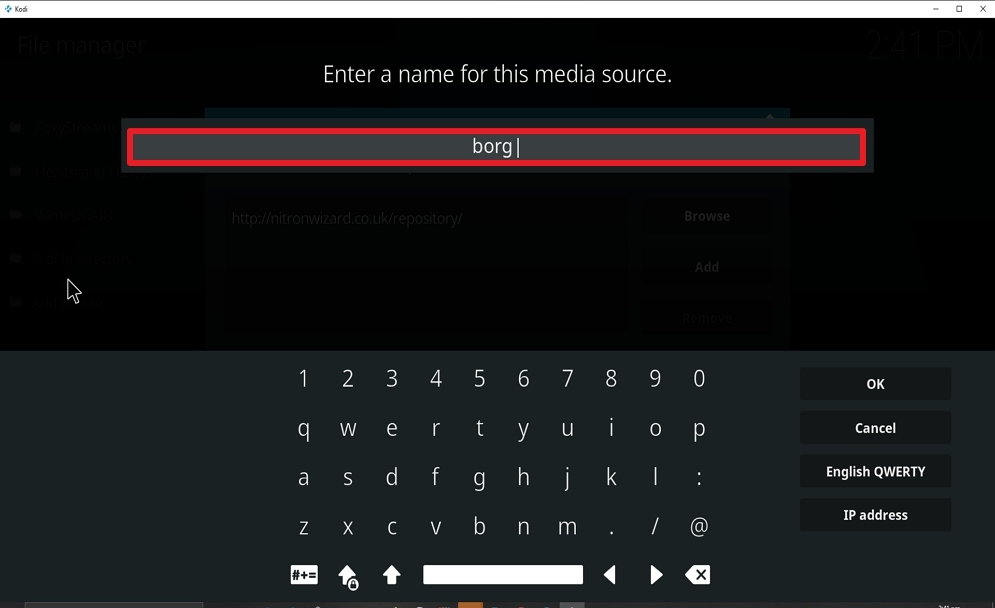
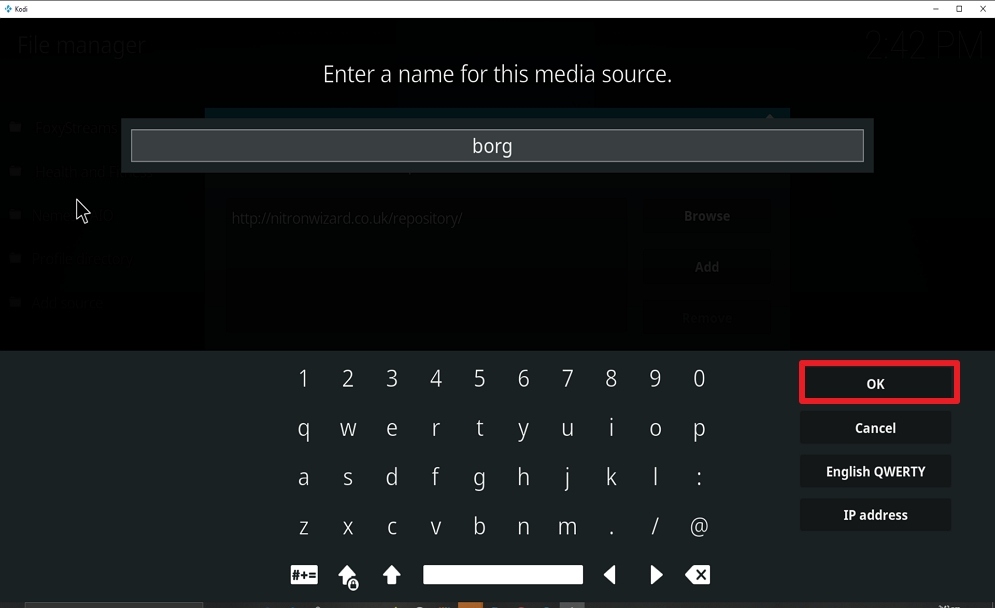
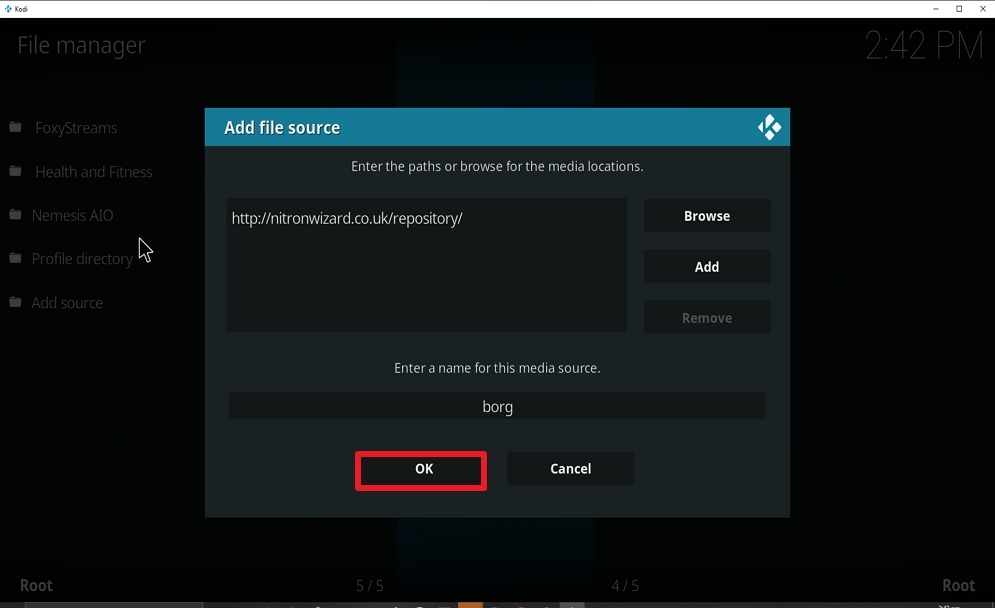
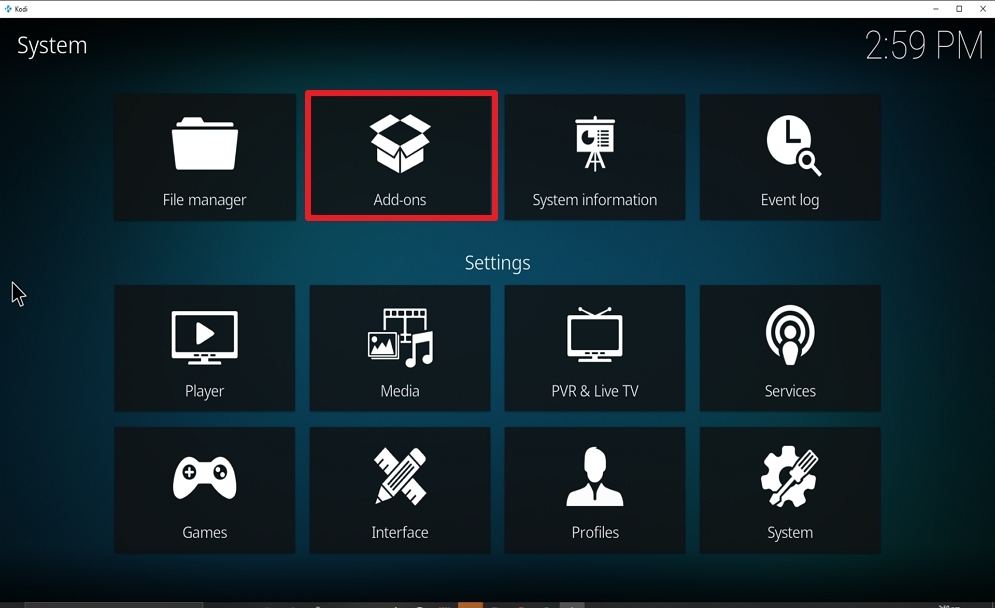
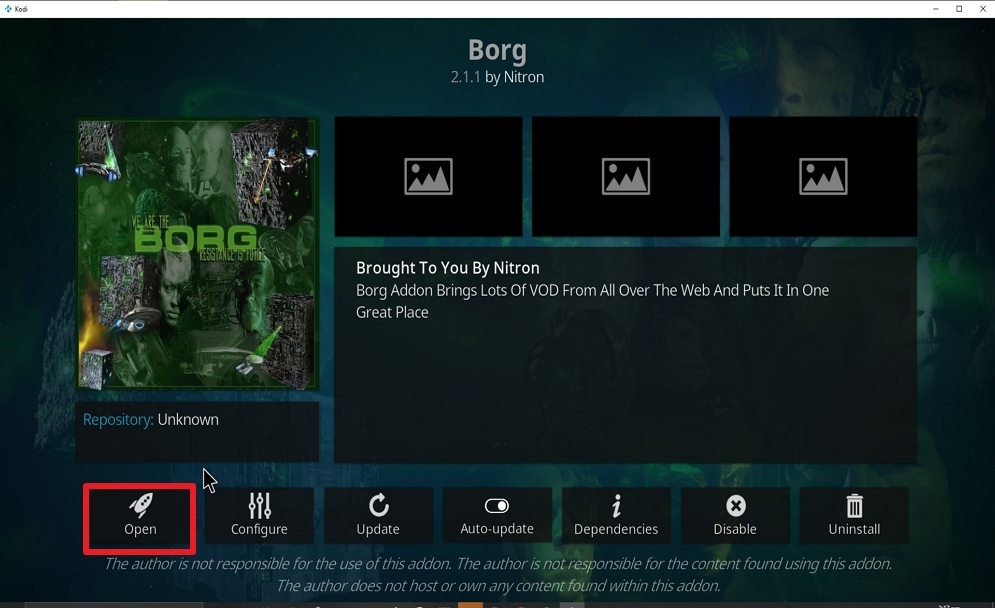
How to Install Fido Kodi Addon

Fido Kodi Addon

Fido Addon is a third-party Kodi add-on. This add-on has sections such as Movies, TV Box, Live TV, Faith in Humanity, Fitness, Need for Speed, Classic Movies/TV, 24/7 shows, Stand Up Comedy, Kids Area, Music and lots more. Follow the below steps to install Fido Kodi addon.
 

Install Surfshark on Firestick

Best Surfshark Deal


Legal Disclaimer: ReviewVPN.com does not encourage or endorse any illegal activity involved in the usage of services and applications referenced on this site. We do not verify the licensing agreements of services. The end-user is wholly responsible for ensuring that any media accessed through these services does not violate copyright and/or licensing laws. ReviewVPN does not promote, link to, or receive compensation from any Apps and IPTV services.


ANONYMOUSLY


Step by Step Guide on How to Install Fido Kodi Addon

The installation process of this add-on involves the following:

  • Enabling the unknown source 
  • Installing Fido repository 


Enabling the unknown sources

Step 1. Open your Kodi App and scroll up to the setting icon and click on it.

Step 2. On the setting menu, scroll down to locate the system option and click on it

Step 3. On the system menu, scroll down to find “add-ons” and click it.

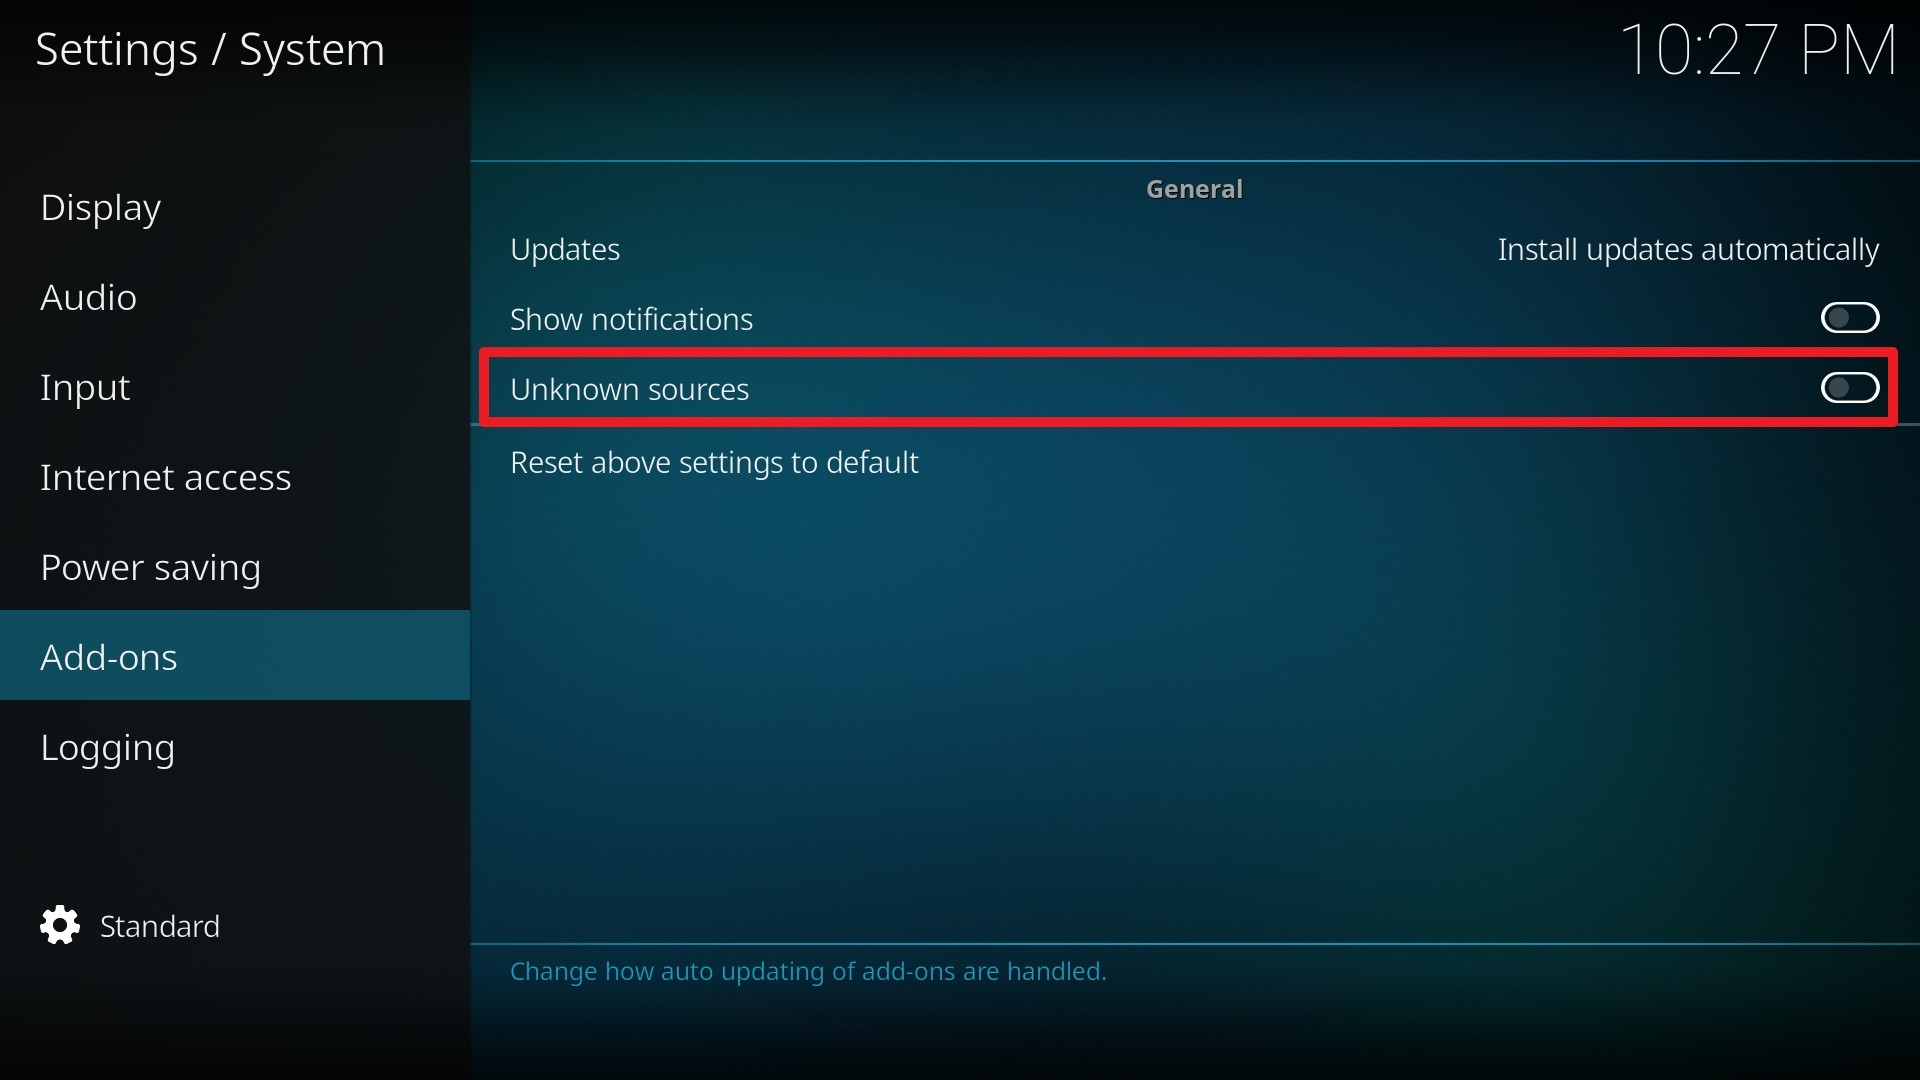
Step 4. Navigate to unknown sources and hover on it. Select YES on the warning message that will appear.

Step 5. Return to the home menu or start menu by tapping the back/arrow button on your remote or the backspace/escape key on your keyboard.


Installing Fido Kodiadd-on

Step 1. From the home menu or the start menu, click again on the setting icon located at the top left corner of your screen 

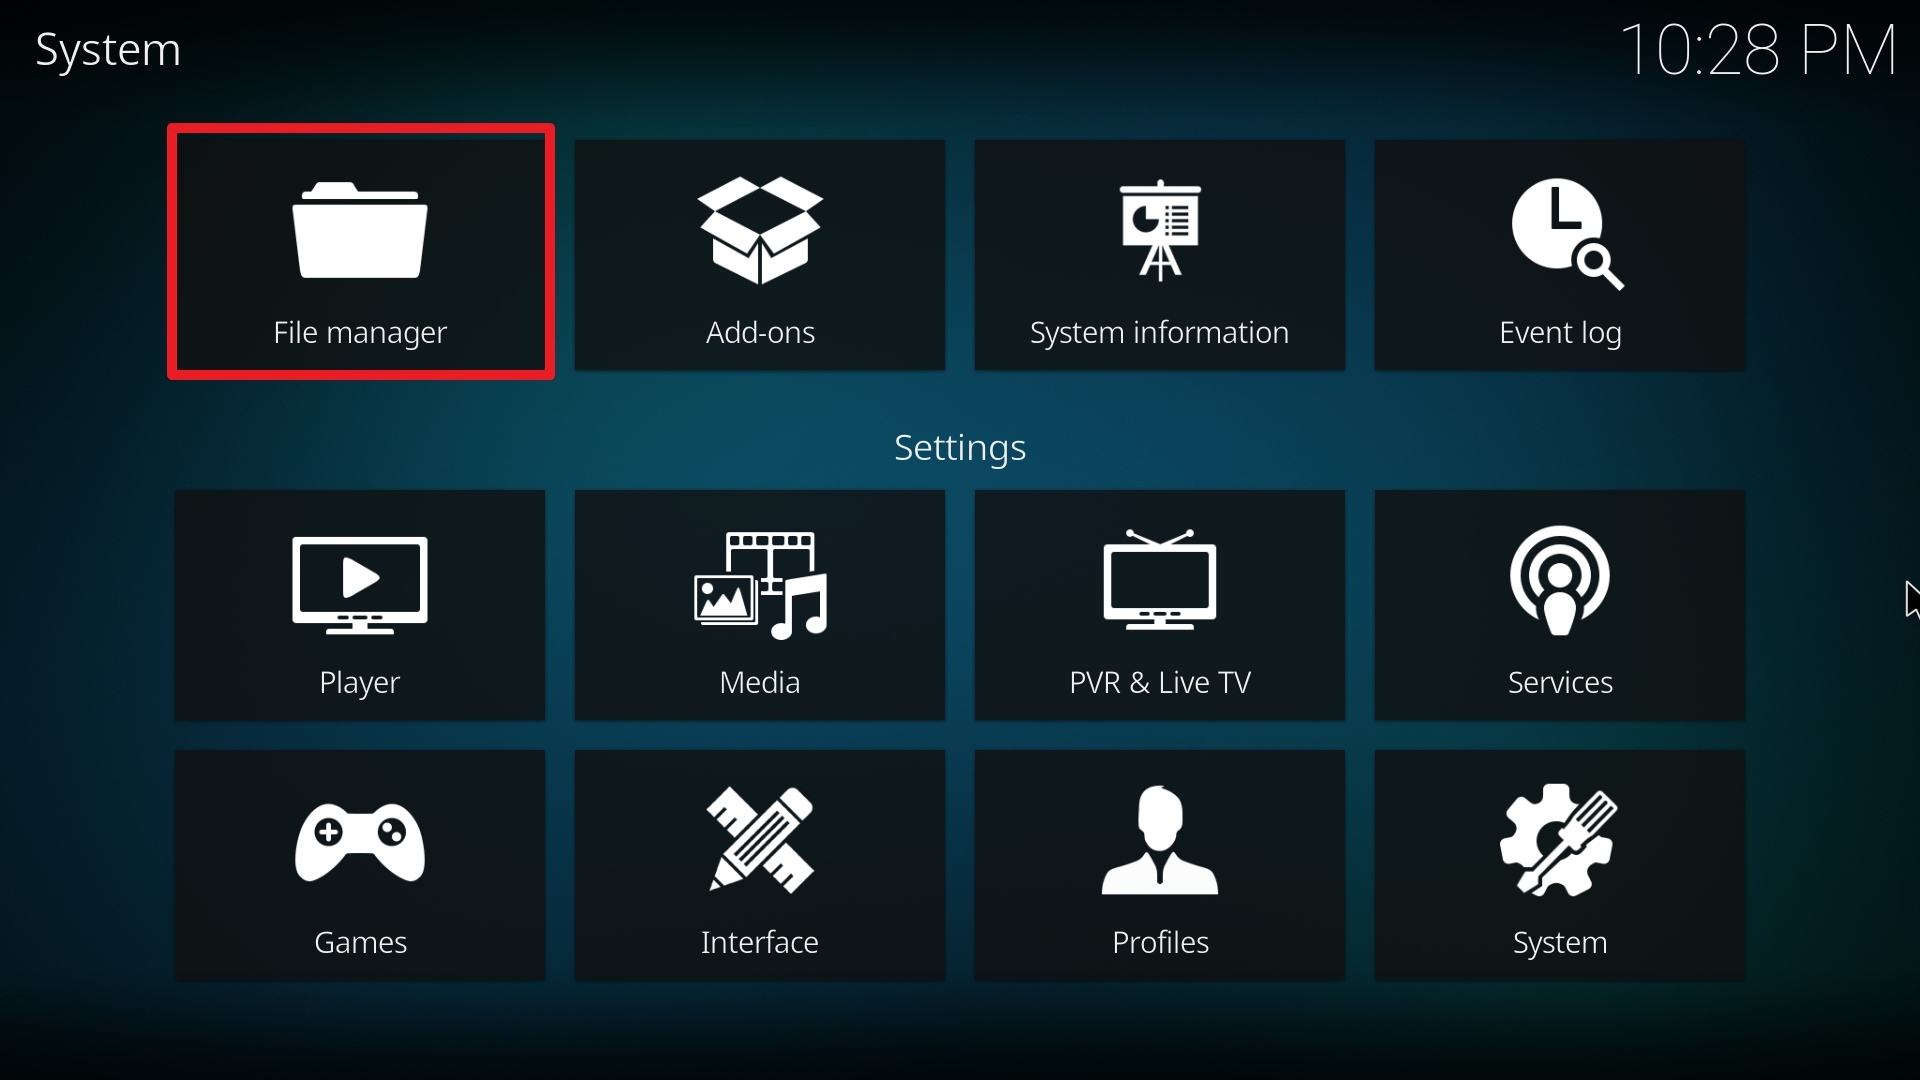
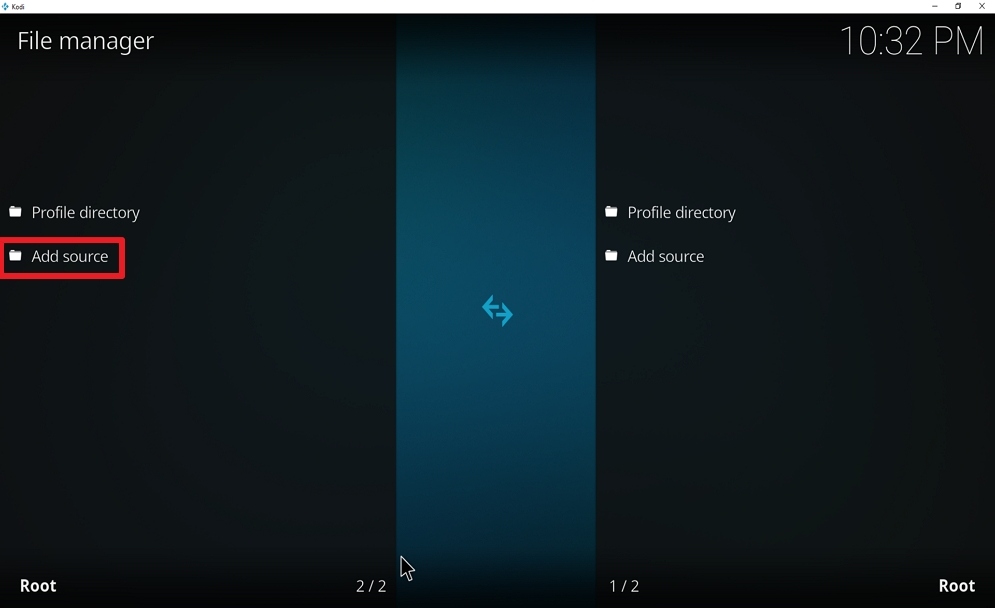
Step 2. On the setting menu, scroll to file manager and click on it. 

Step 3. Next, on the new window, navigate to add source and click on it.

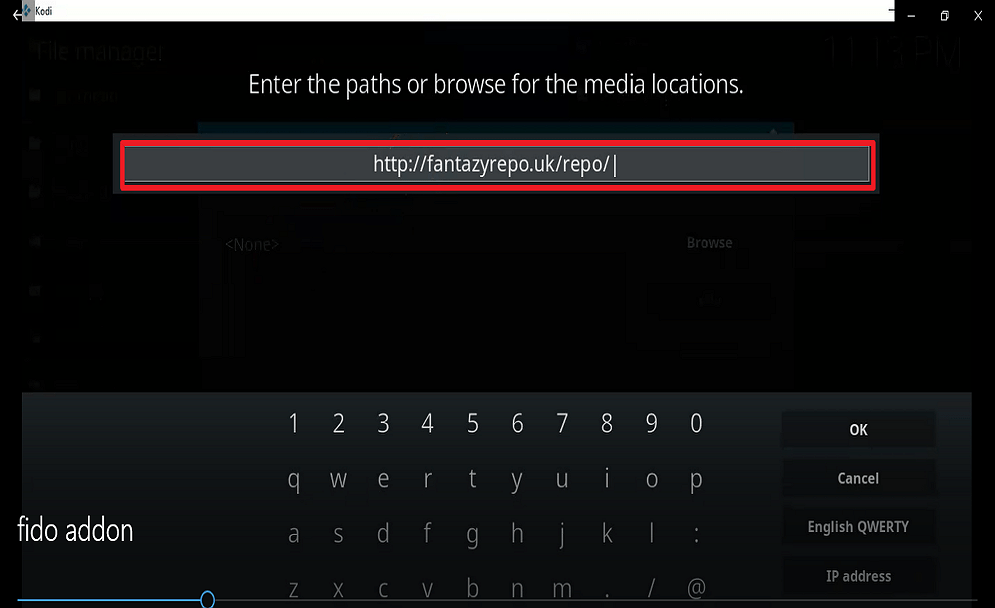
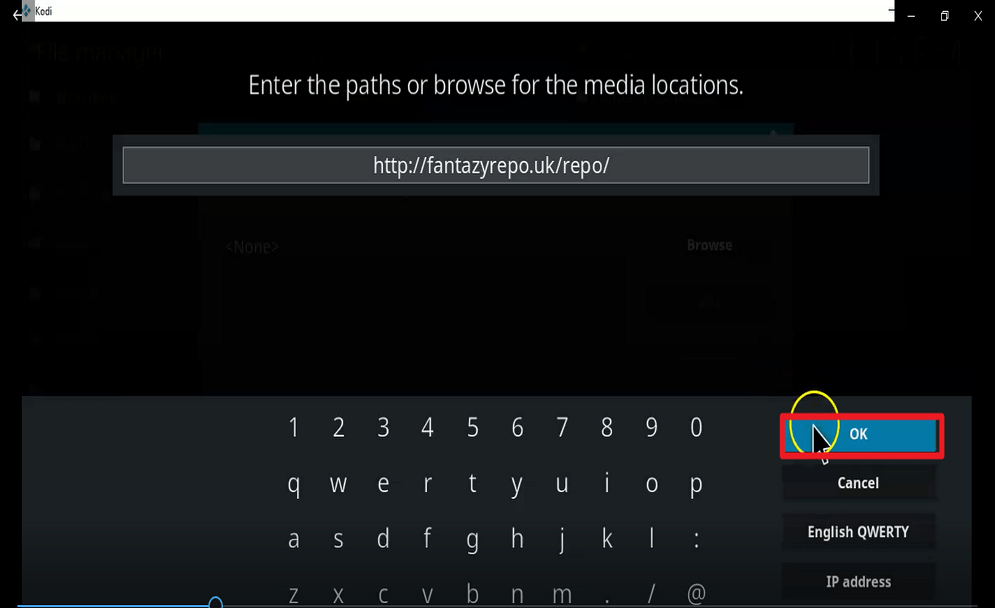
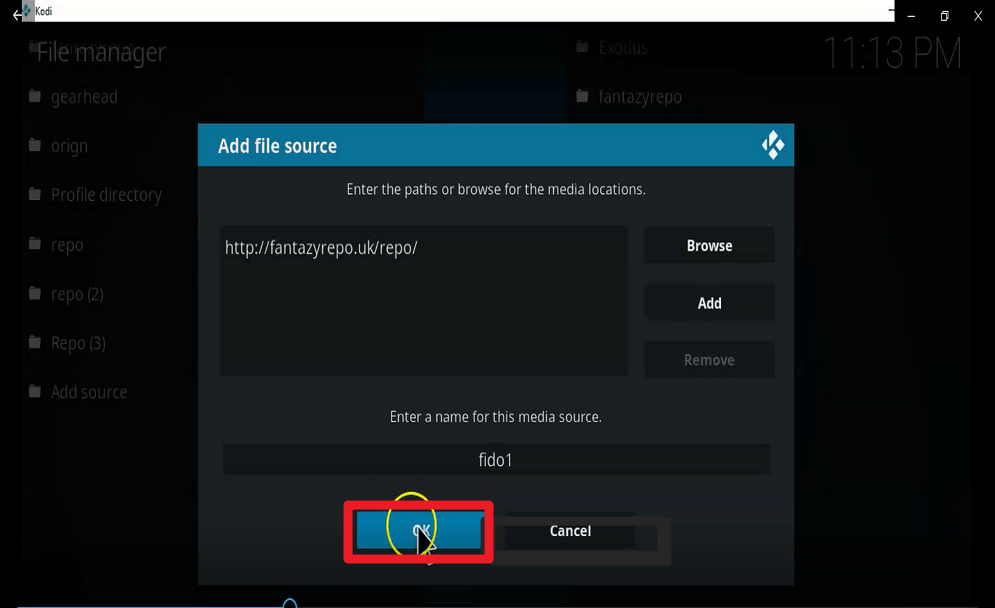
Step 4. On the new dialog box that will appear, select <NONE> and then enter the media source URL: http://fantazyrepo.uk/repo/ and select OK. 

Note: carefully enter the media source URL to avoid any typo error.

Step 5. Highlight the box where you will be prompted to enter a name for this media source file. Here we will use “fantasy” and click OK.

Note: if Kodi auto-populates a name for this add-on on your device, just click on OK to continue the installation process.

Step 6 hit the back/arrow button on your remote or escape/backspace key on your keyboard to navigate back to the home menu or start menu.

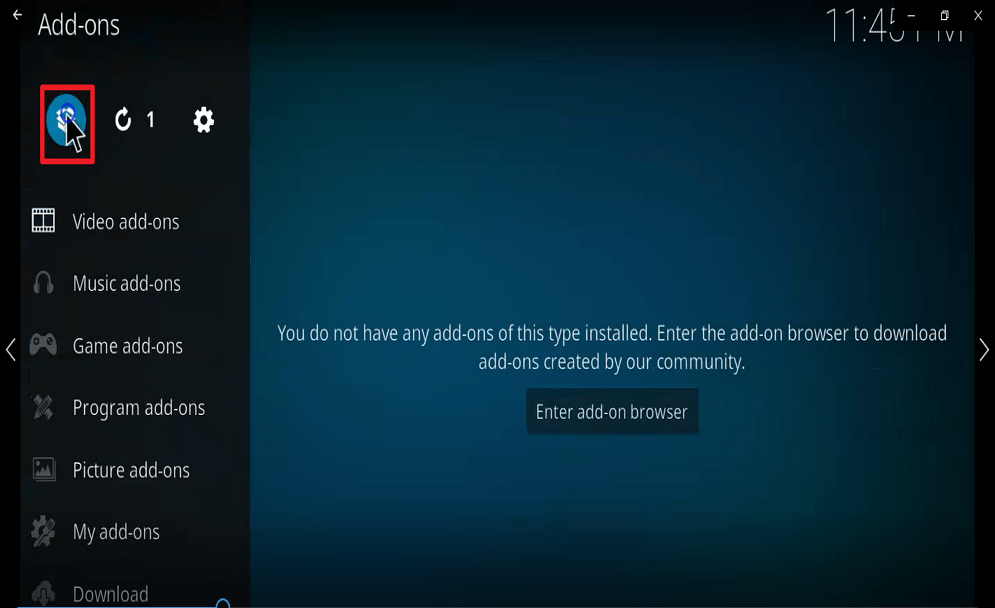
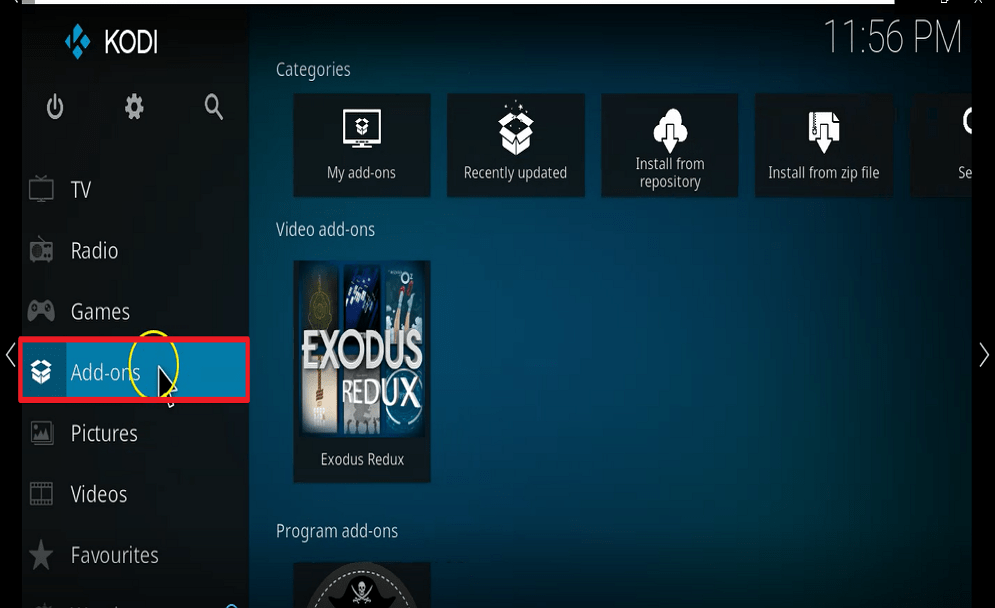
Step 7. From the home menu, click on add-ons, and on the new window of add-ons menu, scroll upwards to locate the add-on package installer.

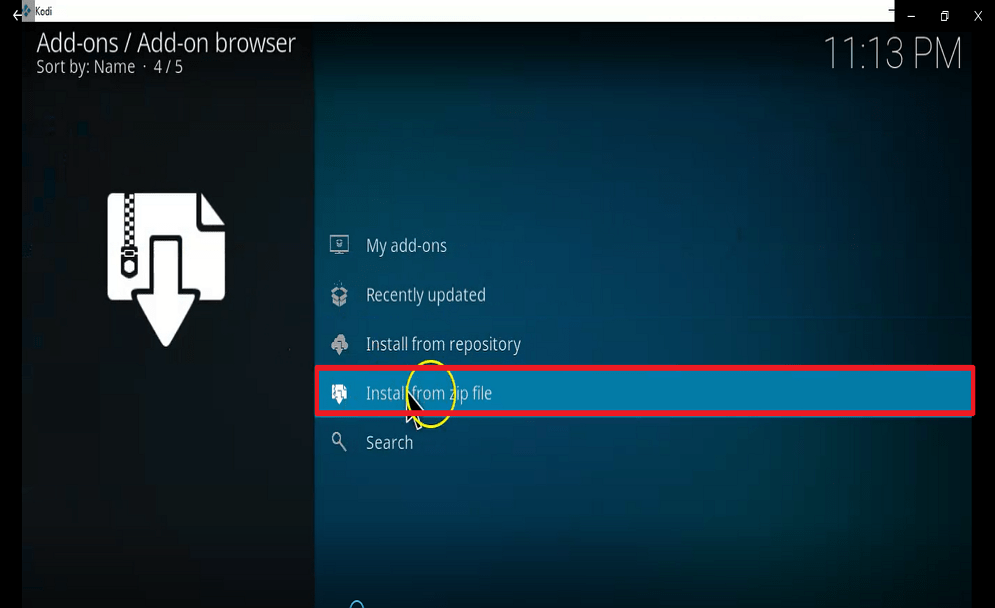
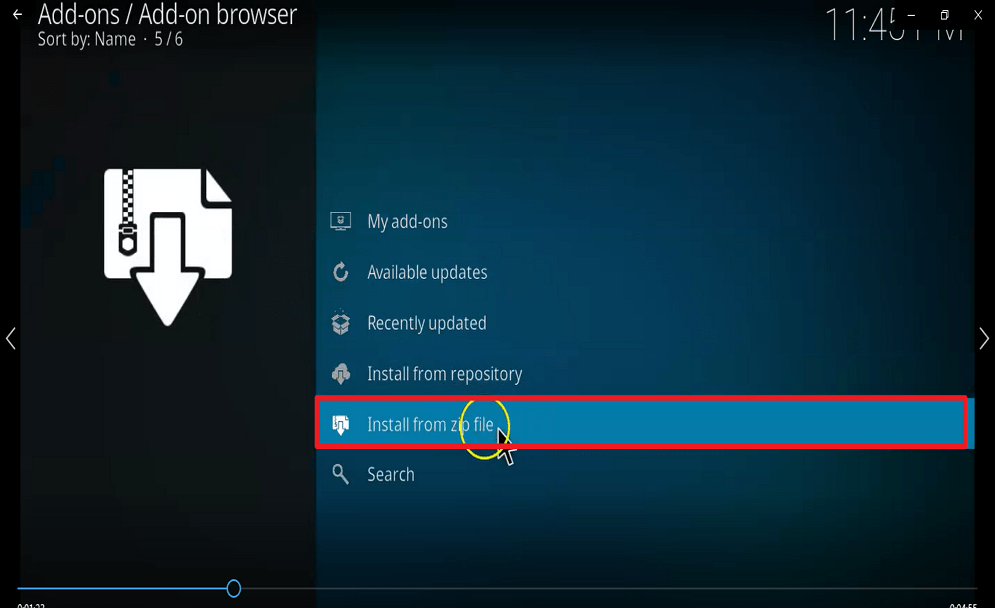
Step 8. Once you locate the ad-on package installer, click on it and the new dialog box, scroll downwards to find the option that says “install from zip file.

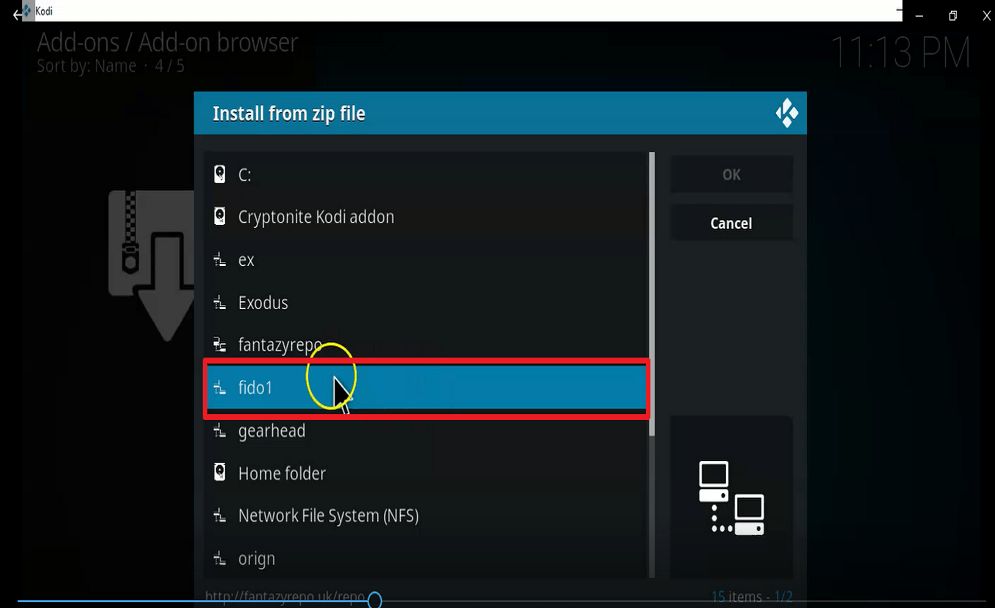
Step 9. Click on install from zip file and on the new window, scroll down to locate the name you saved the media source file with and click on it. Here we used Fantasy, so click on Fantasy.

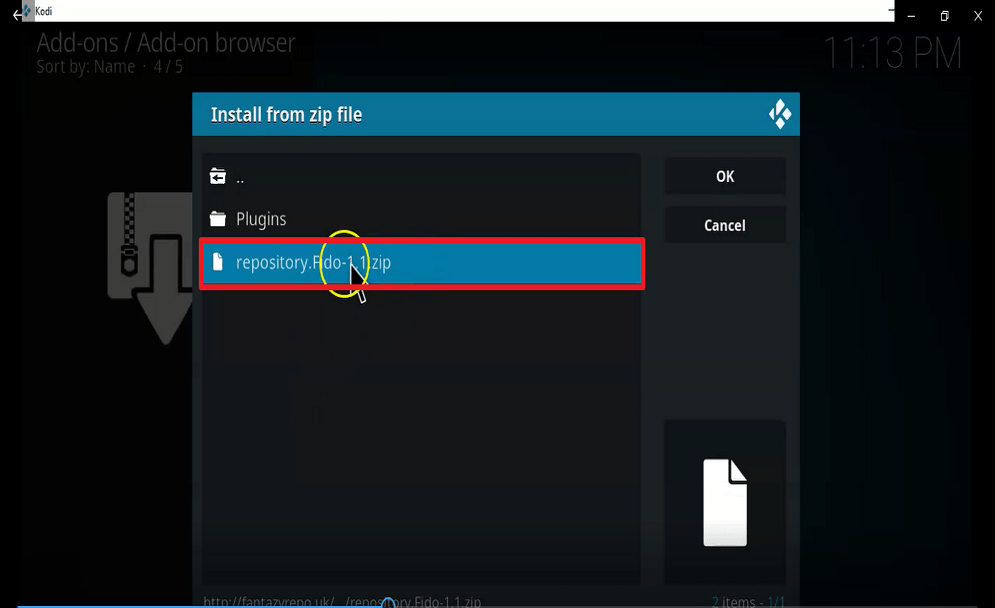
Step 10. Next, on the new dialog window, click on repository.Fido-1.1.zip and wait for the repository to complete its installation. You will receive a notification at the top right corner of your screen.

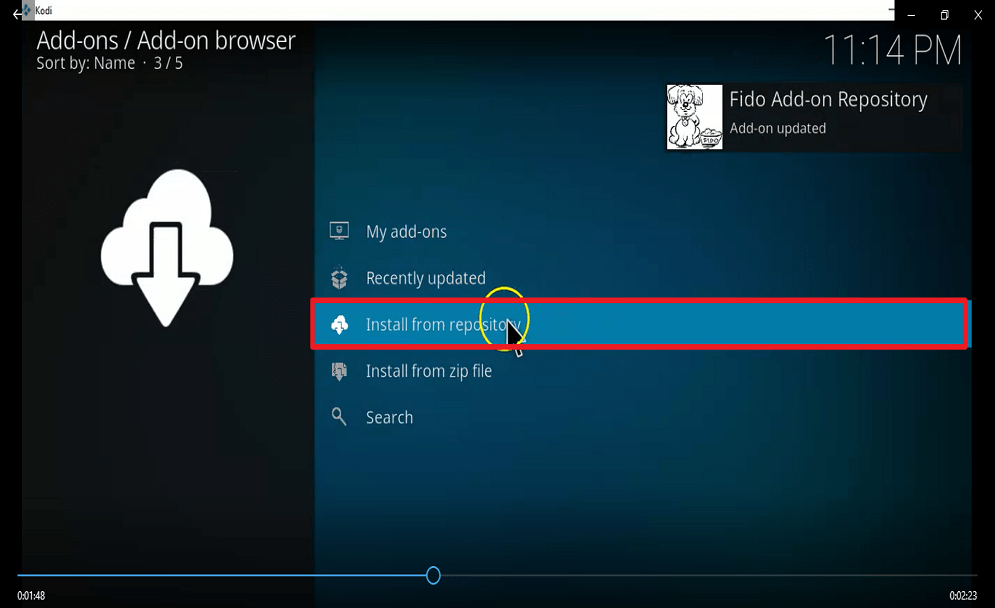
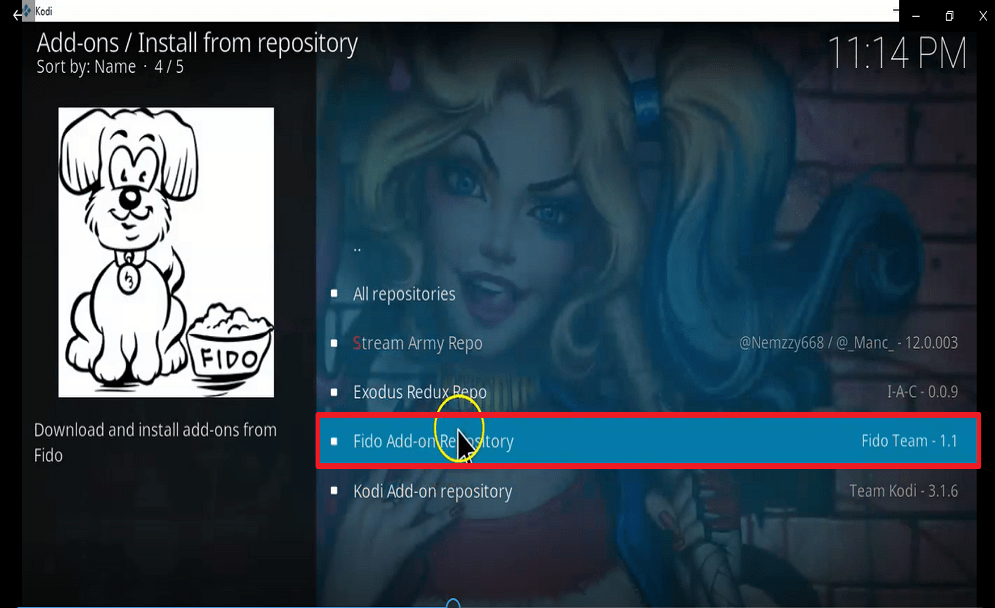
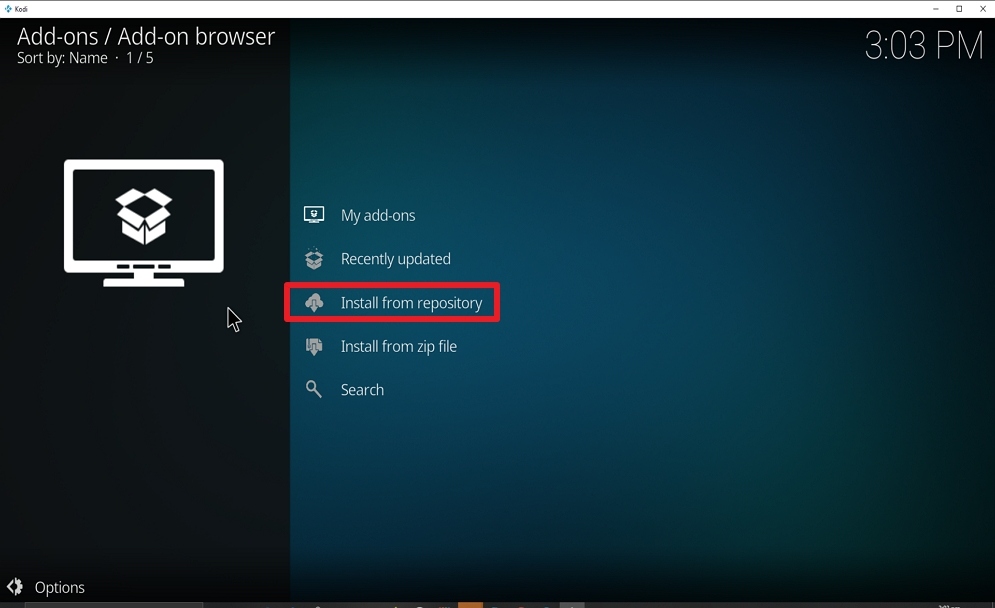
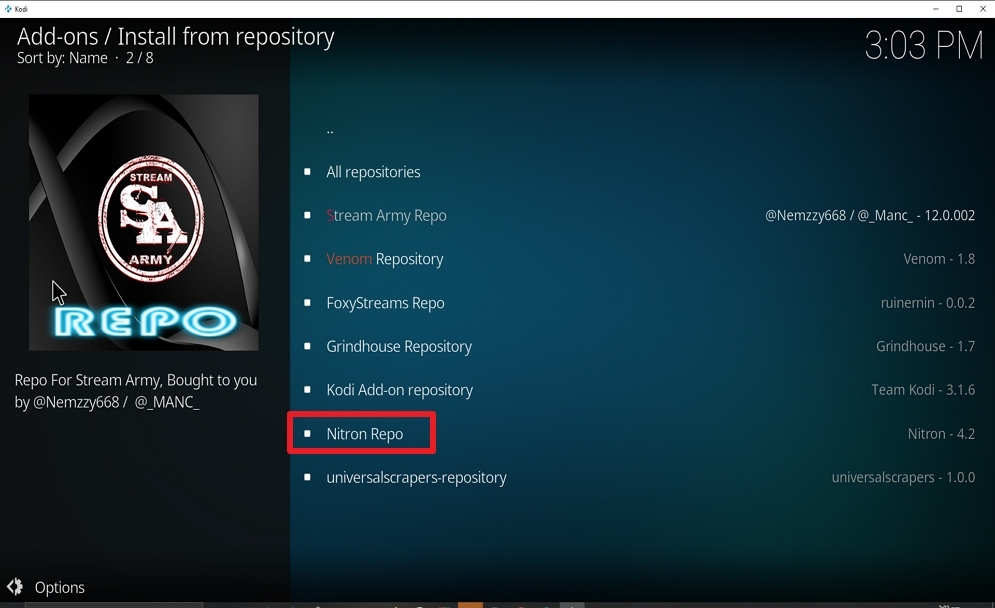
Step 11. click on install from repository and on the new window, select  Fido Add-on Repository.

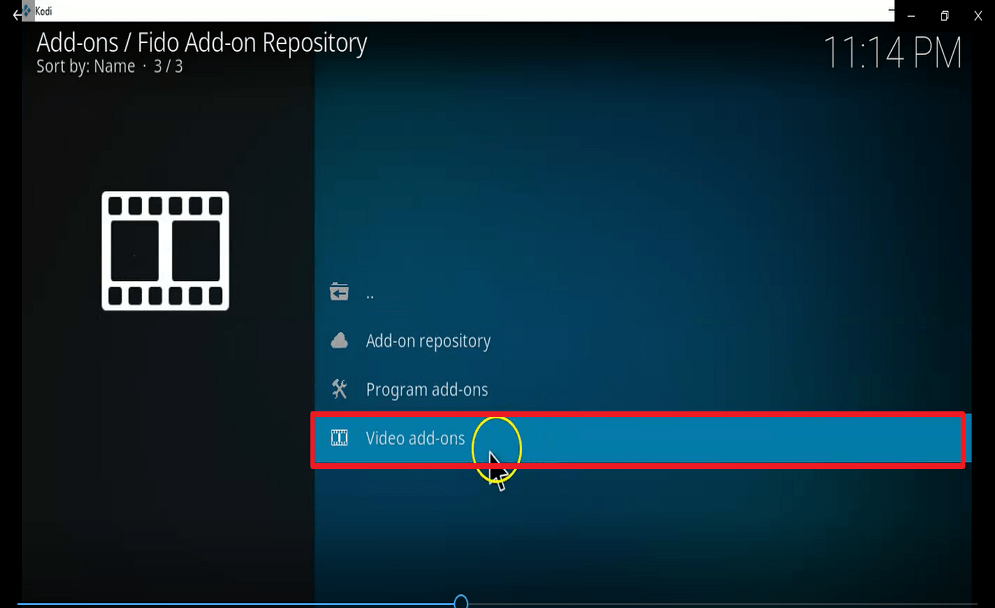
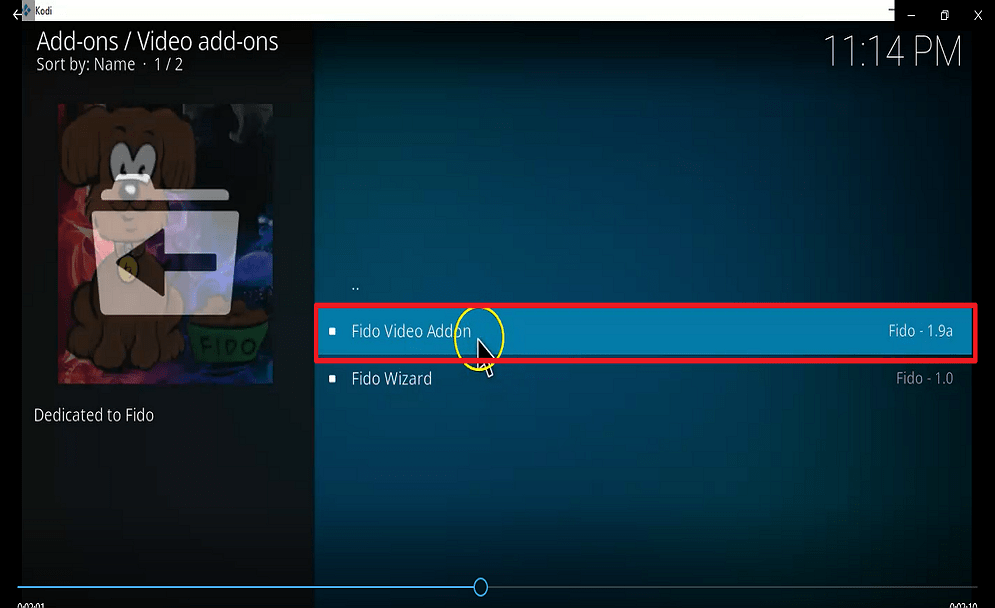
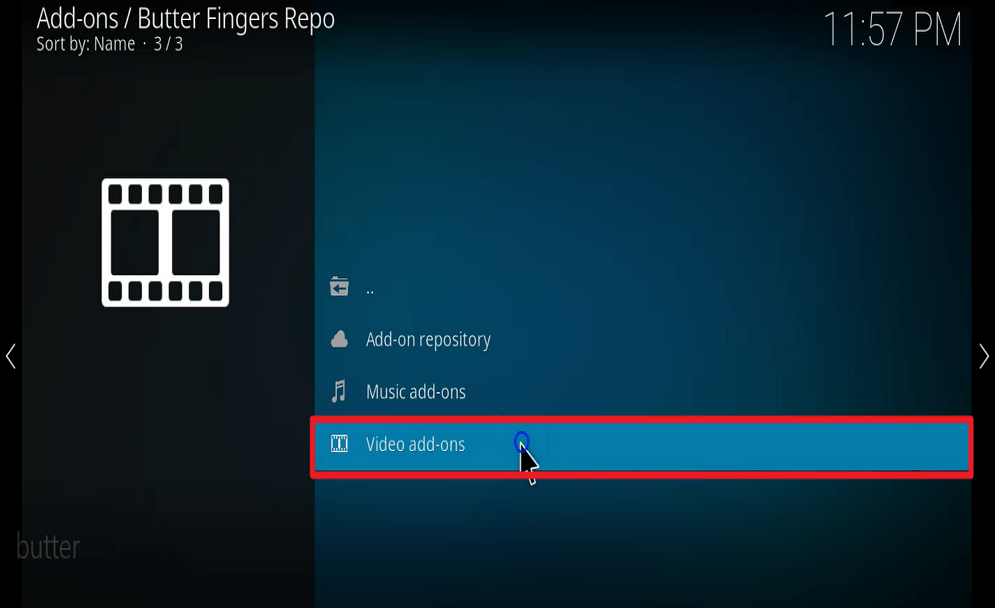
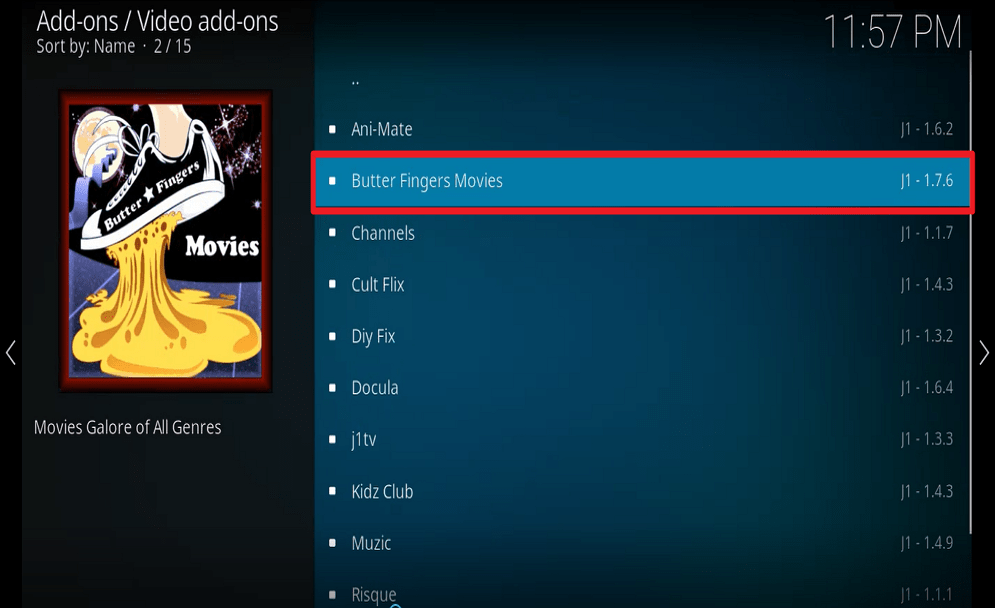
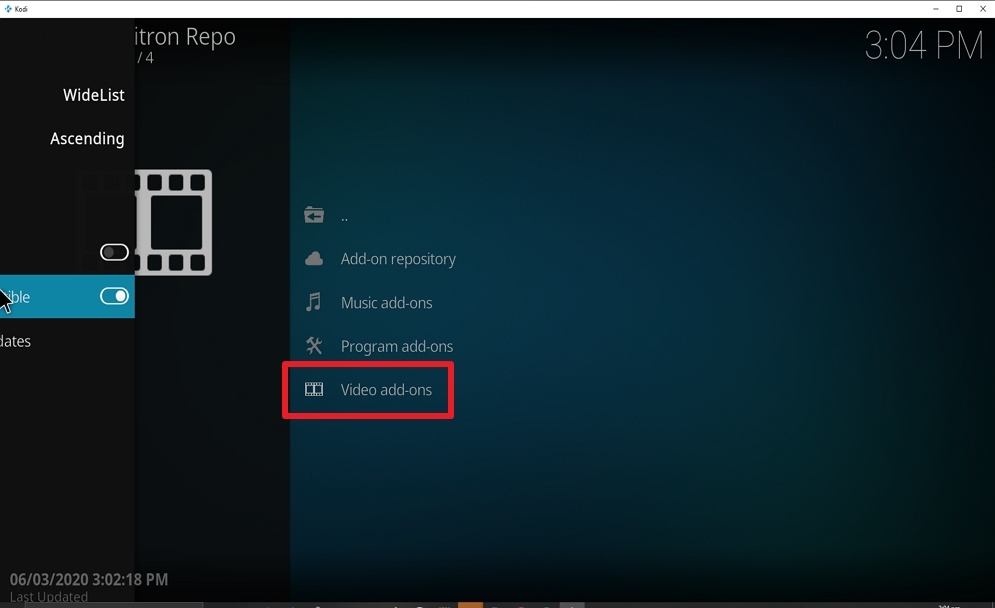
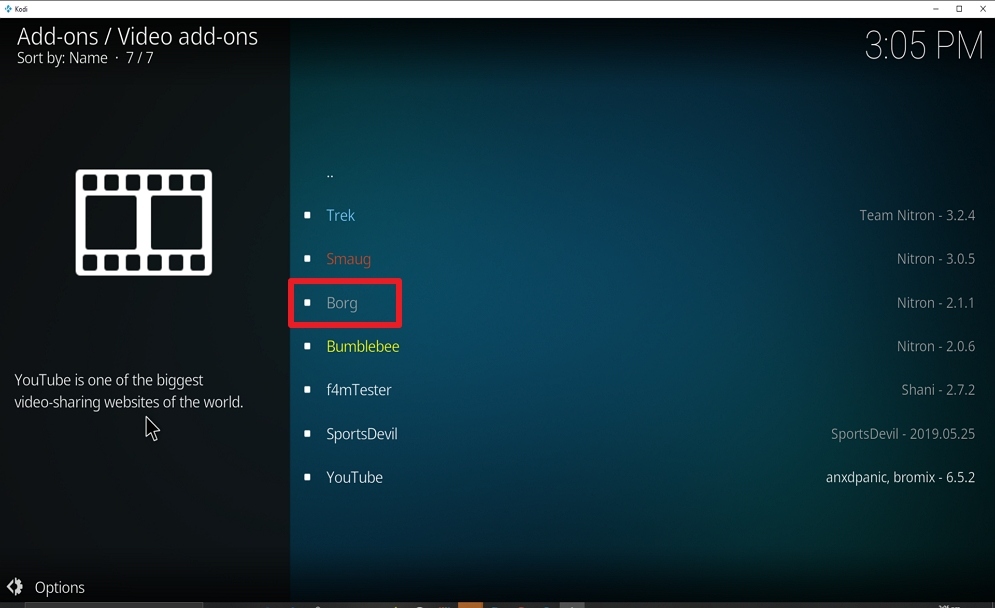
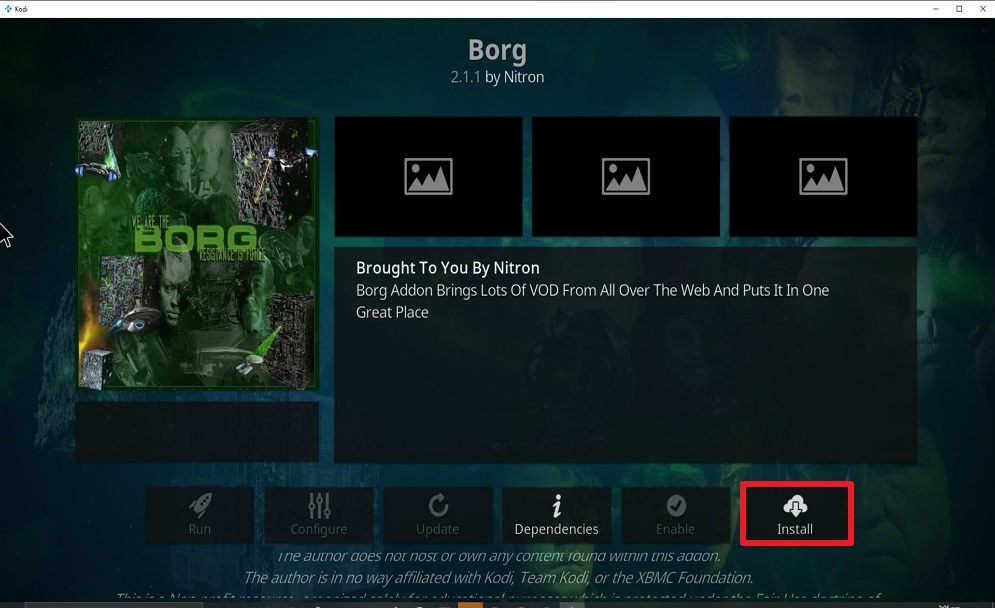
Step 12. Next, click on video add-ons and on the video add-ons menu, scroll to locate “ Fido Video Add-on” and click on it

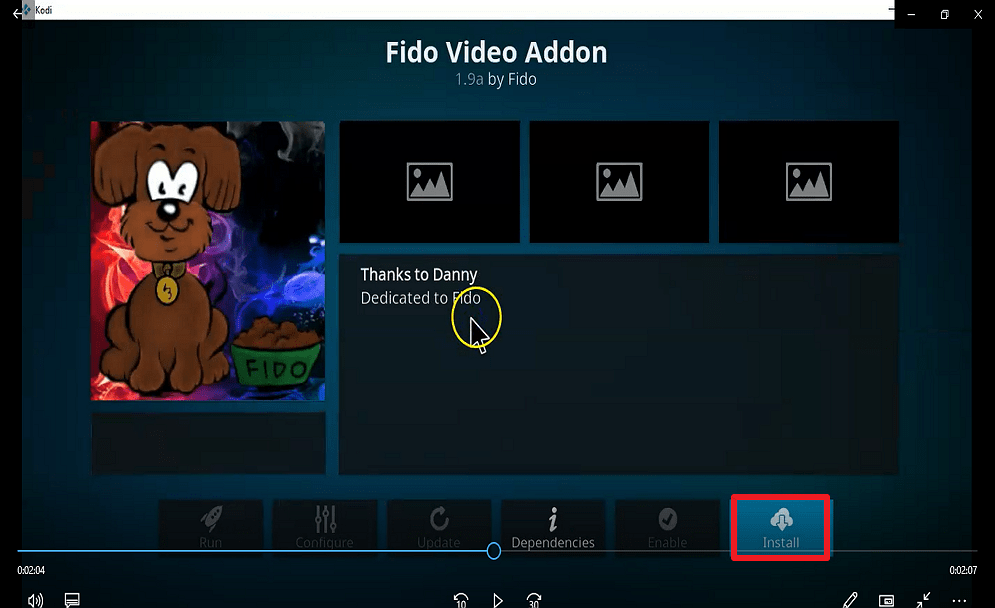
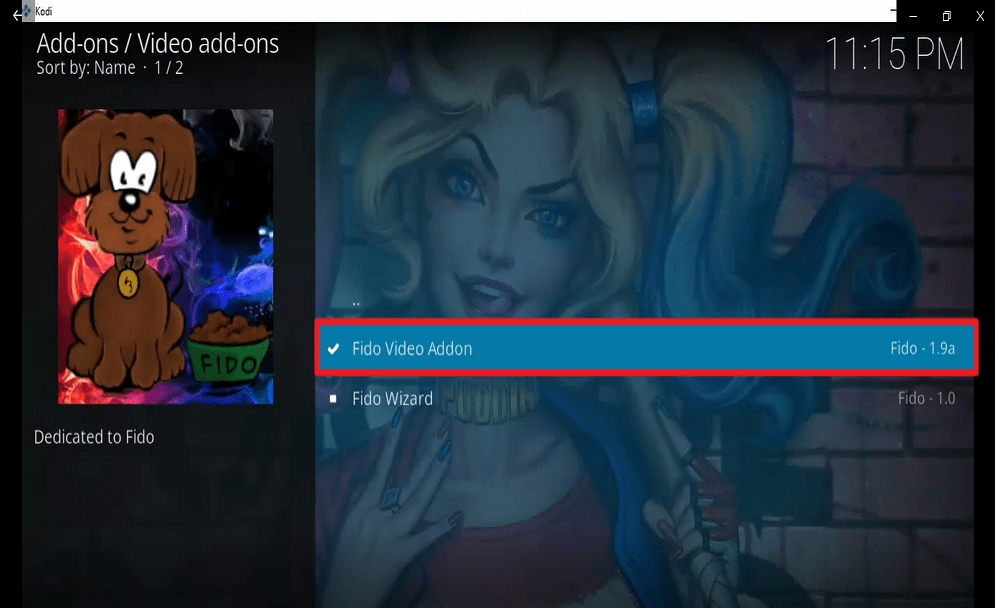
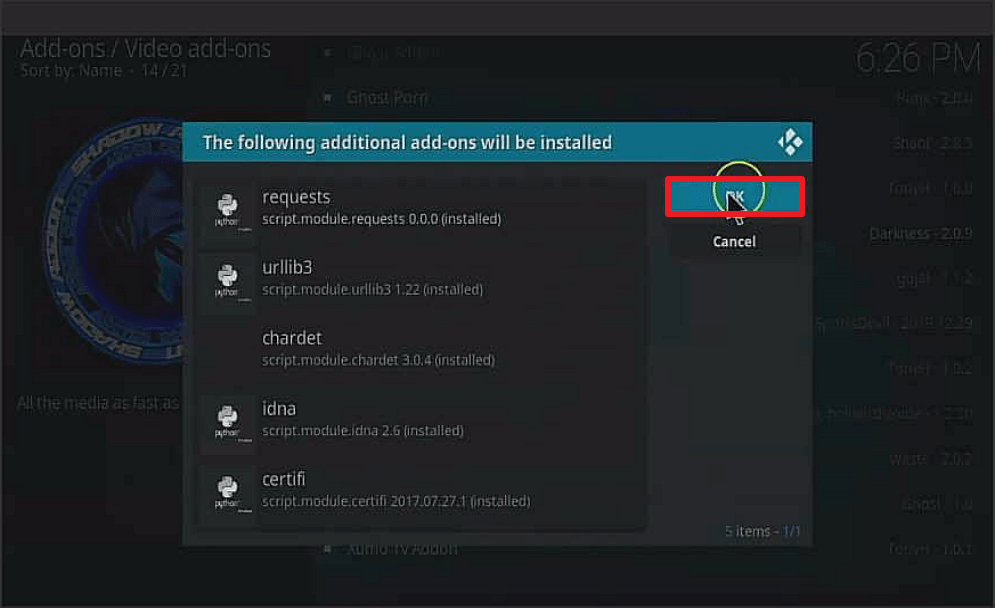
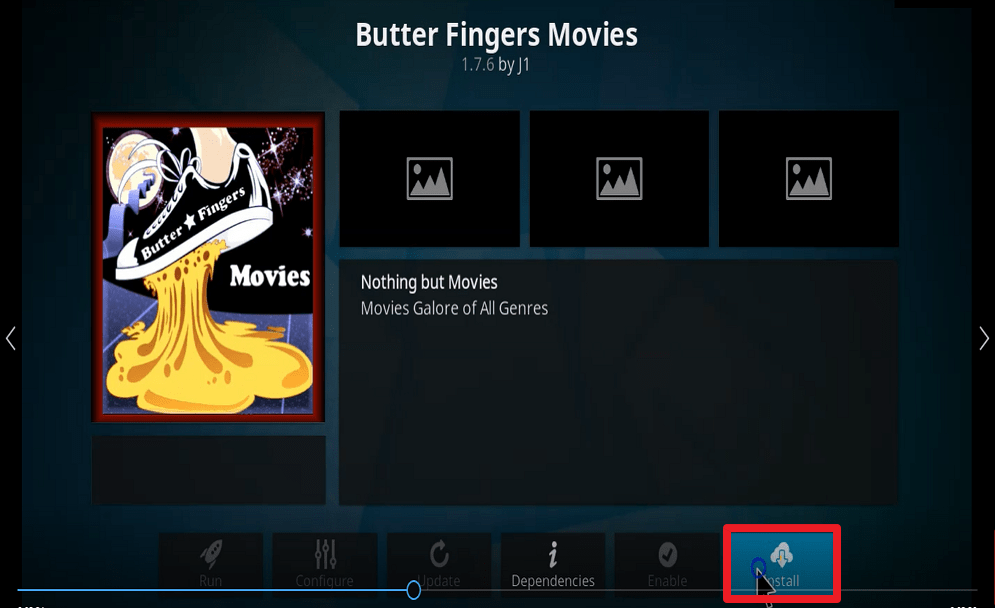
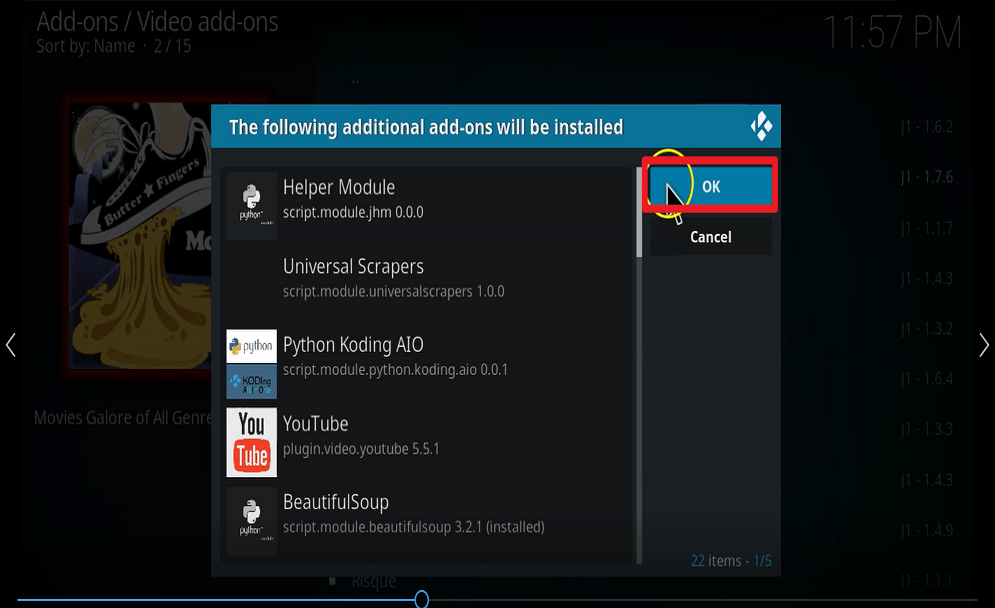
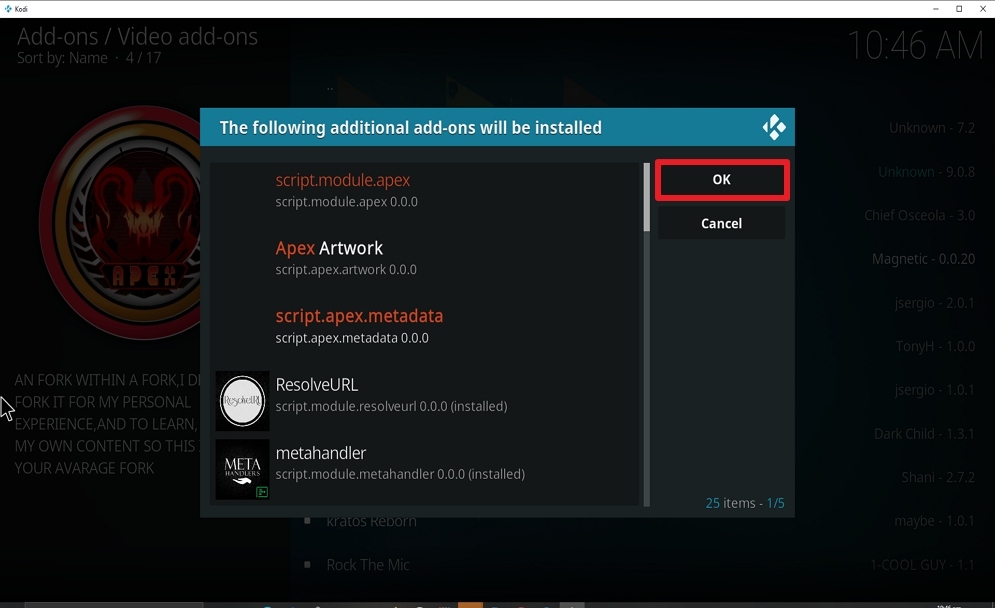
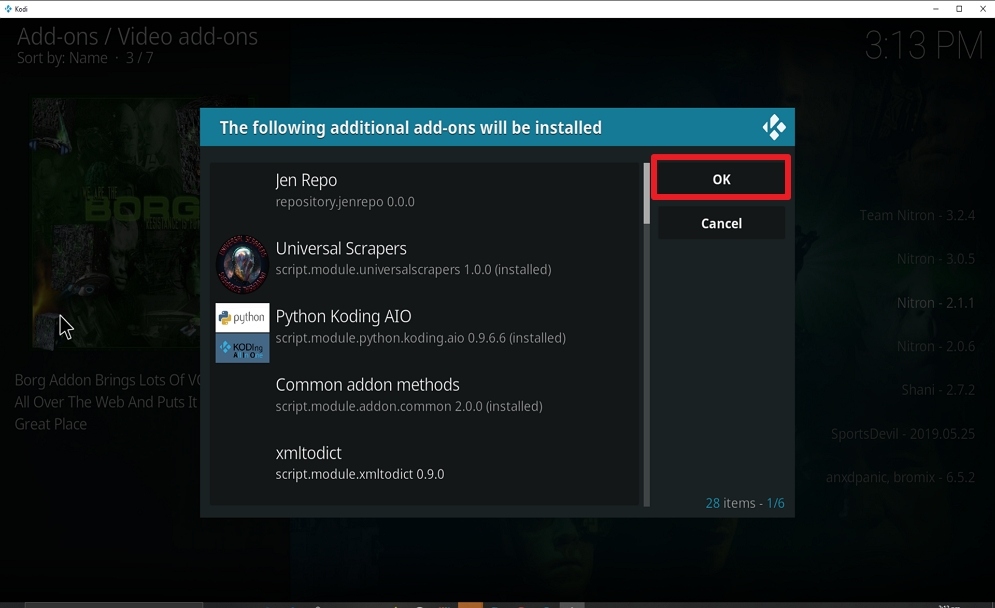
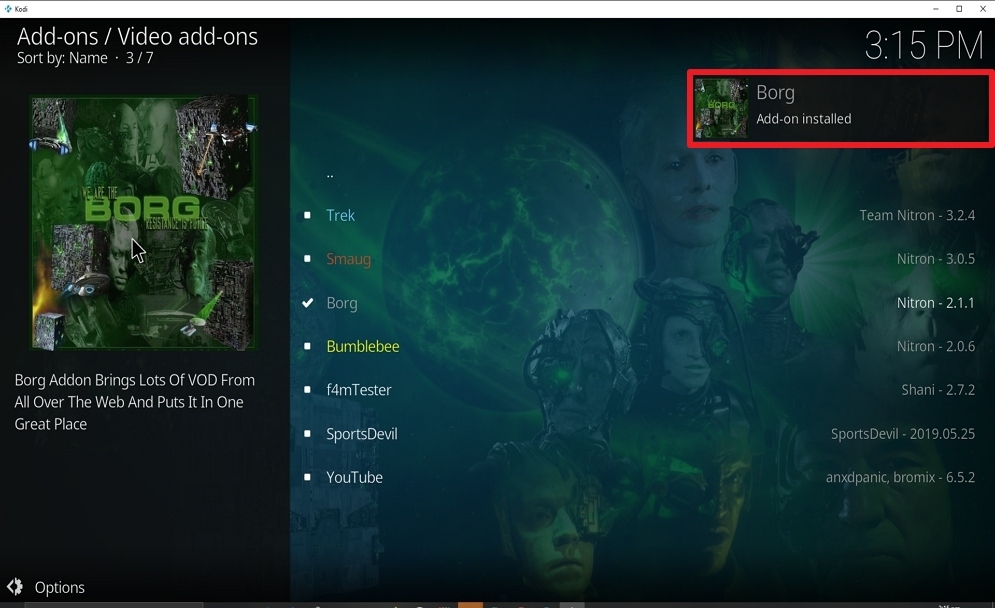
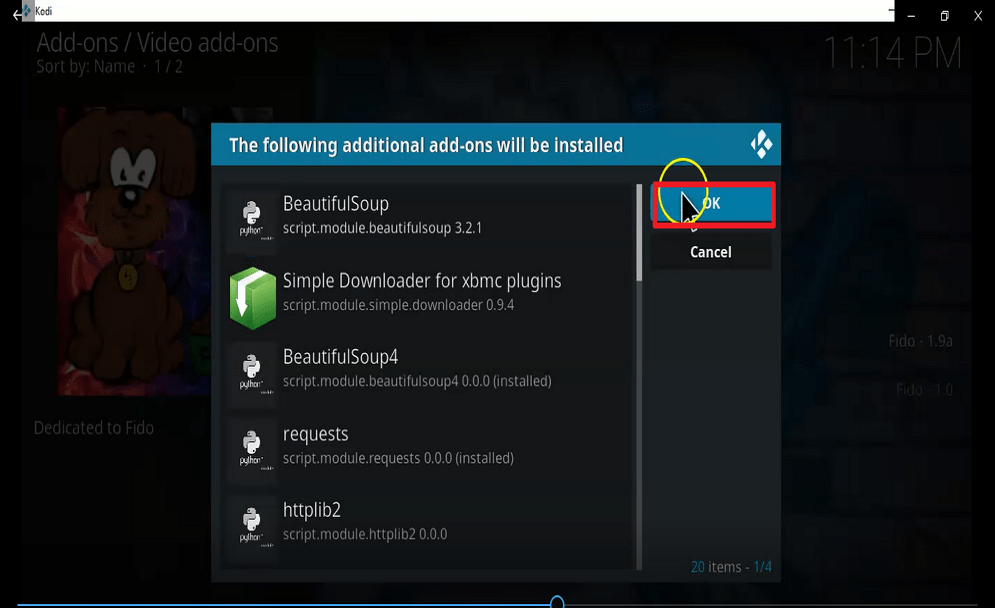
Step 13. On the new window, select install and on the new dialog box with “the following additional add-ons will be installed” click on OK and wait for the installation to complete.


YOUR INTERNET ACTIVITY IS BEING WATCHED

ReviewVPN cannot attest to the legality, security and privacy of the applications discussed on this site. It is highly recommended that you use a VPN service while streaming or using Kodi.

Currently, your IP 216.73.217.150 is visible to everyone and your Browser is being tracked by Advertisers & ISP Provider.

Save 65% Now

Limited Time Offer

Here are the main reasons why you must use a VPN:

  • Your activities are hidden from your ISP, the government, and from the apps you are using.
  • You can access additional movies and TV streams.
  • ISP attempts to throttle are thrwarted thus reducing buffering issues.
  • Geographically restricted content like Netflix and Hulu can be unblocked.

A VPN works be replacing your ISP-assigned IP address and creating an encrypted tunnel. We recommend the no log service offered by IPVanish. It works well on a Firestick and offers the fastest possible speeds.

Special Limited Time Offer - Get IPVanish


Screenshots on How to Install Fido Kodi Addon

  1. Select the cogwheel in the upper left corner

Step 1 Install fido kodi addon

2. Select System on the bottom left

Step 2 Install fido kodi addon


3. Hover over or select Add-ons on the left.

Step 3 Install fido kodi addon


4. Select Unknown sources to enable

Step 4 Install fido kodi addon


5. Click Yes to enable third-party addons

Step 5 Install fido kodi addon


6. Click on the File manager

Step 6 Install fido kodi addon


7. Click on Add source

Step 7 Install fido kodi addon


8. Click on None to add the URL path source

Step 8 Install fido kodi addon


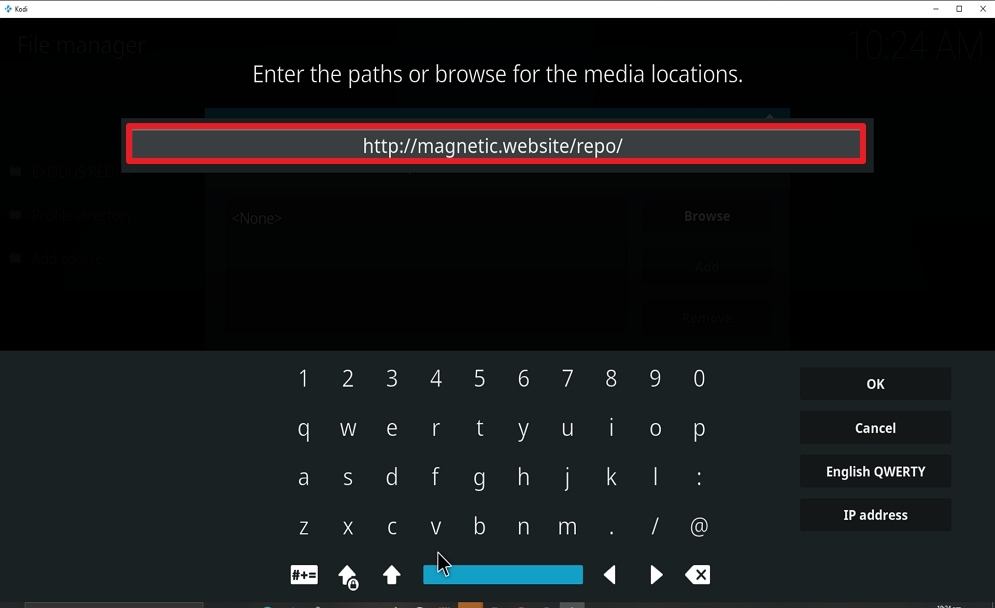
9. Type http://fantazrepo.uk/repo/

Step 9 Install fido kodi addon


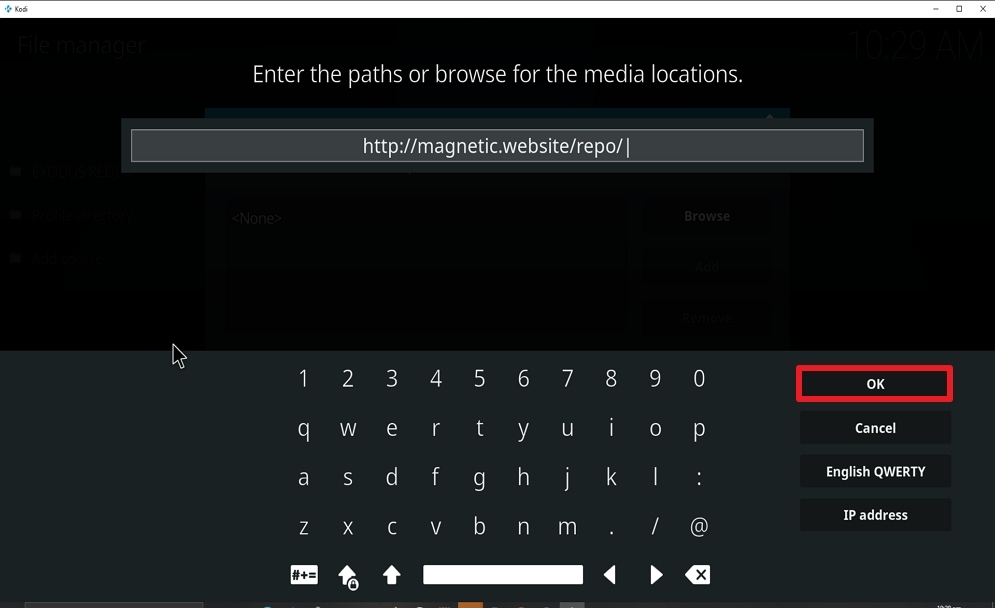
10. Select OK

Step 10 Install fido kodi addon


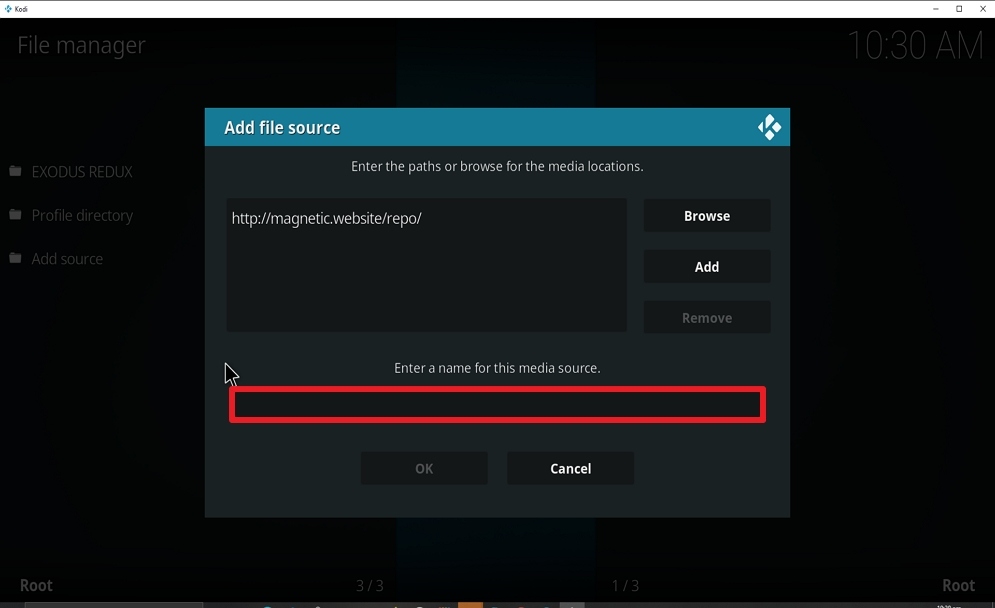
11. Select enter a name for this media source
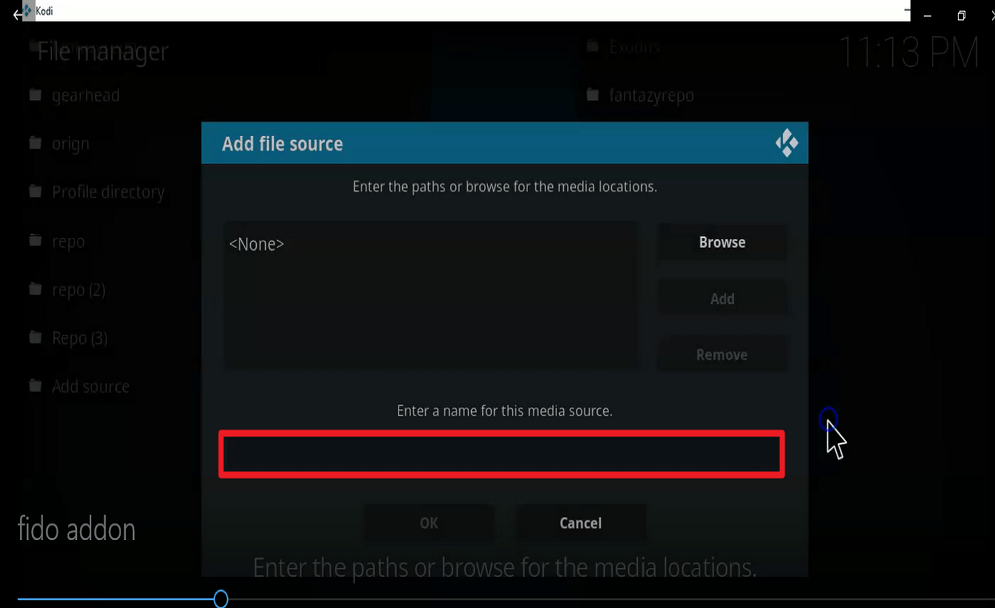
Step 11 Install Fido kodi addon


12. Name fido1 (this part isn’t critical as long as you remember the name). Click OK.
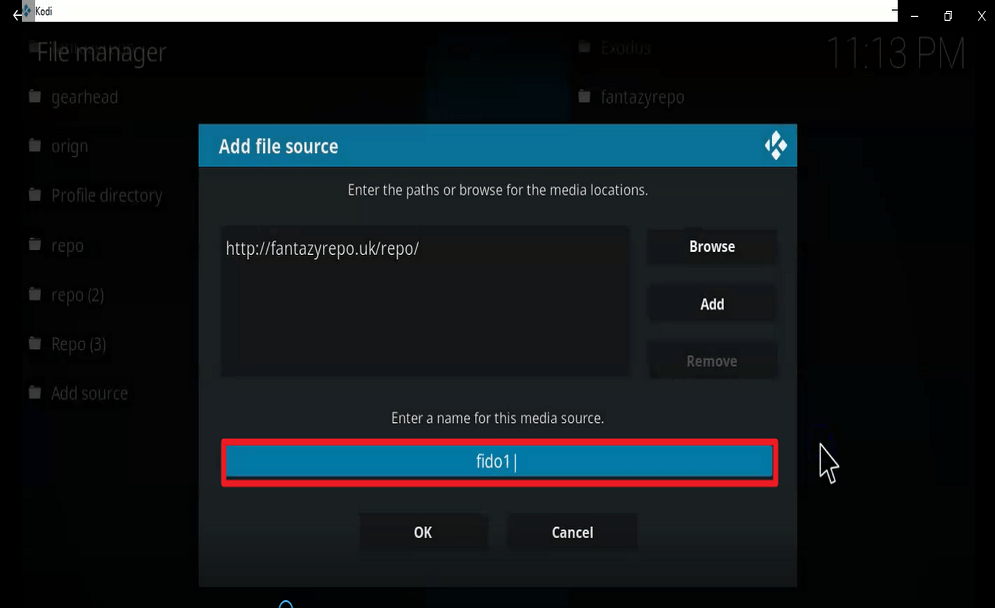
Step 12 Install fido kodi addon


13. Select OK.

Step 13 Install fido kodi addon


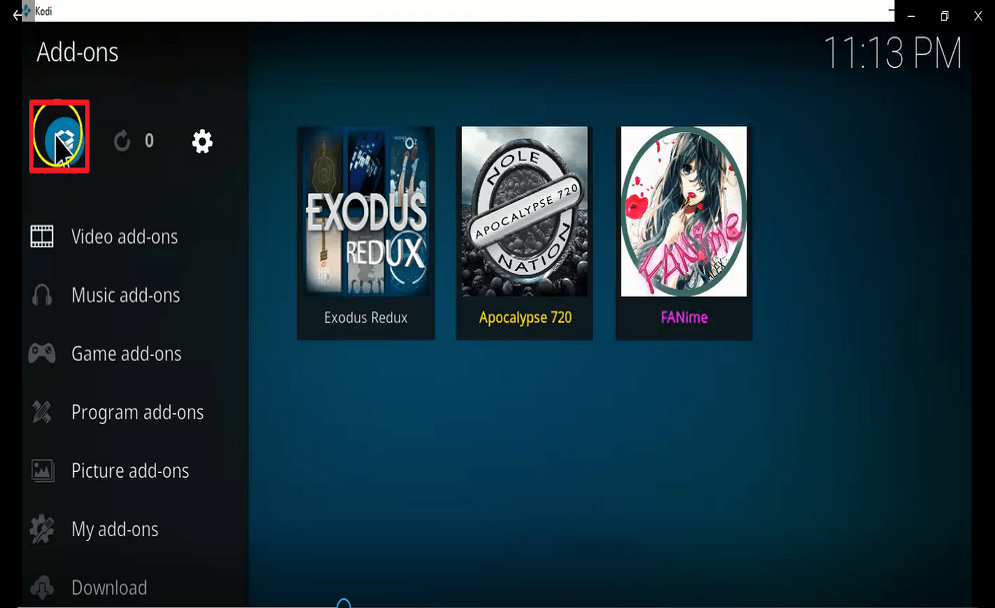
14. Return to home screen and Select Add-ons
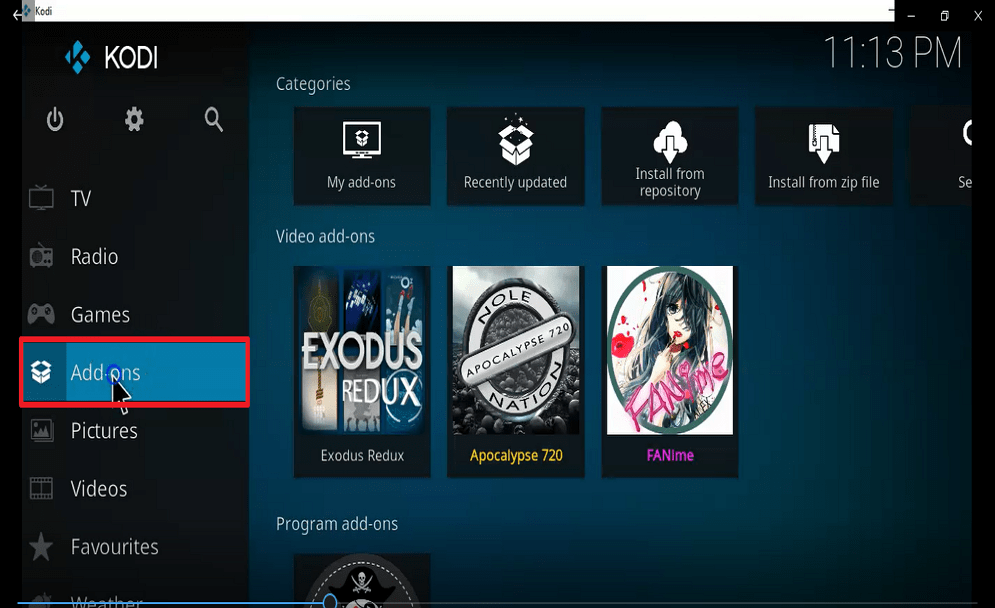
Step 14 Install fido kodi addon


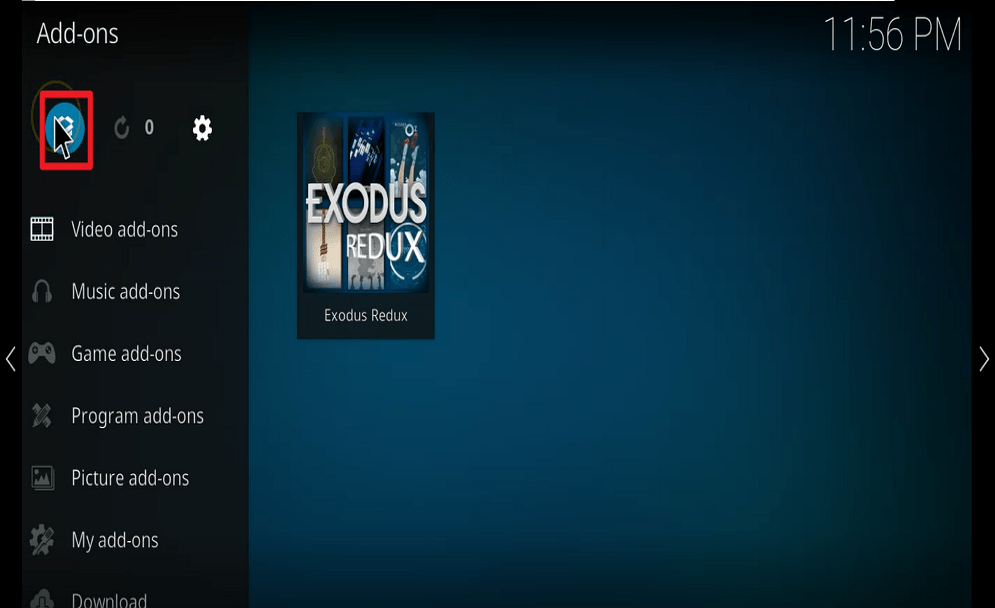
15. Select the add-on browser icon

Step 15 Install fido kodi addon


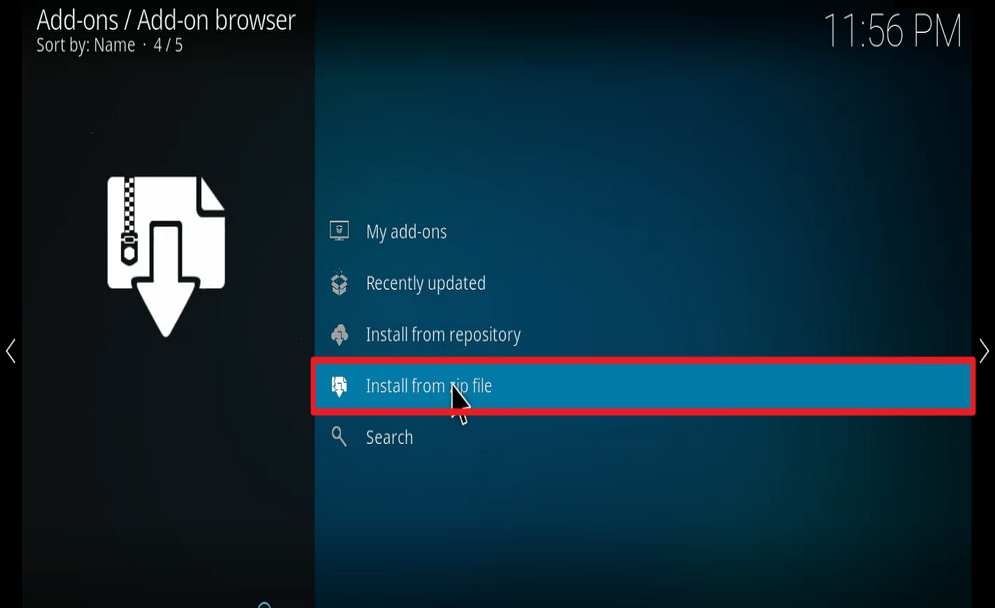
16. Select install from zip file

Step 16 Install fido kodi addon


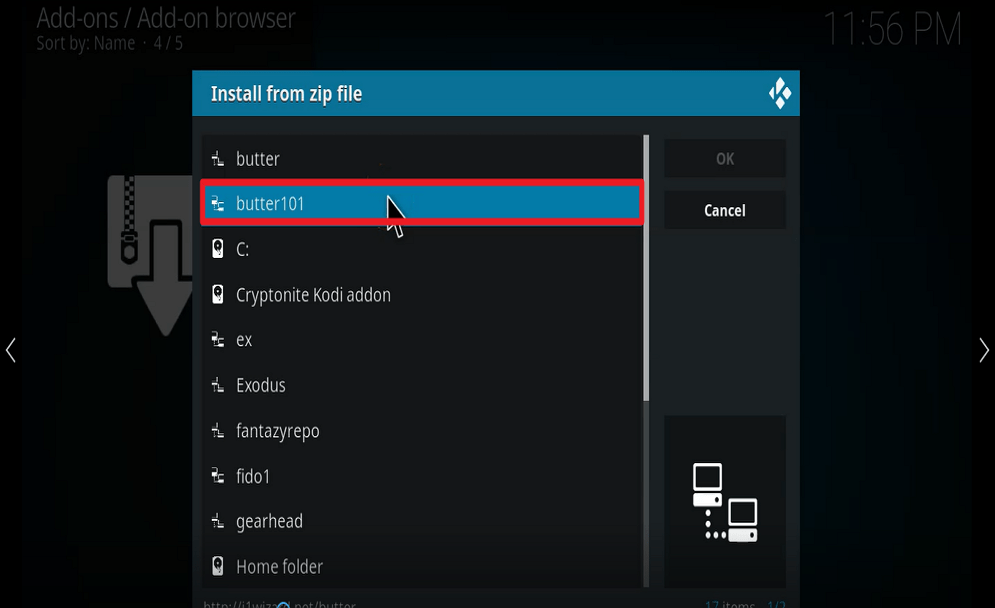
17. Select Fido1

Step 17 Install fido kodi addon


18. Select repository.Fido-1.1.zip

Step 18 Install fido kodi addon


19. Wait for Add-on installation notification
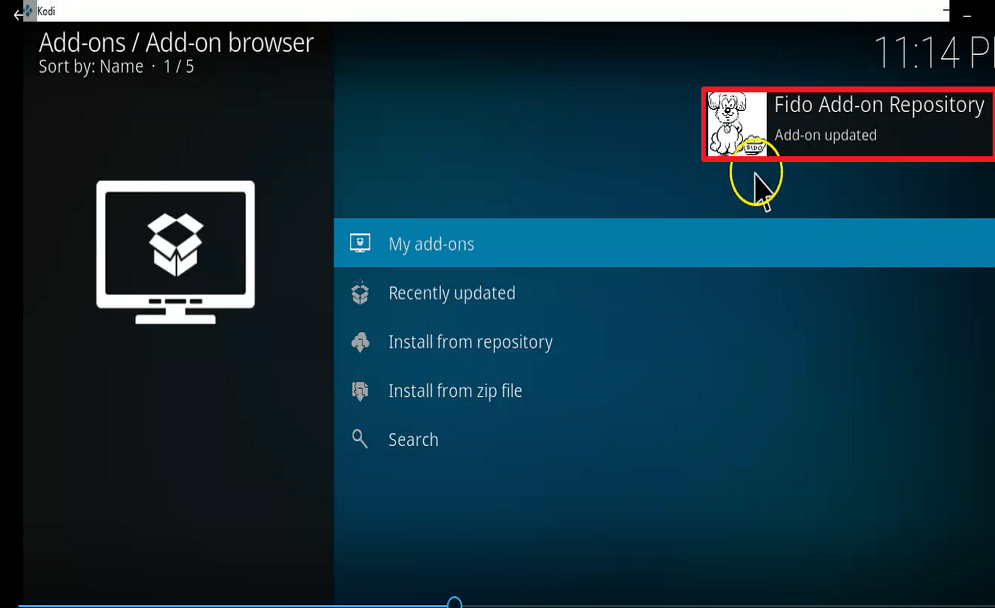
Step 19 Install fido kodi addon


20. Select install from repository

Step 20 Install fido kodi addon


21. Select Fido Add-on repository

Step 21 Install fido kodi addon


22. Select video add-ons

Step 22 Install fido kodi addon


23. Select Fido video add-on

Step 23 Install fido kodi addon


24. Select install

Step 24 Install fido kodi addon


25. Select OK and wait for add-on isntalled notification at the top right corner of your screen.
Step 25 Install fido kodi addon


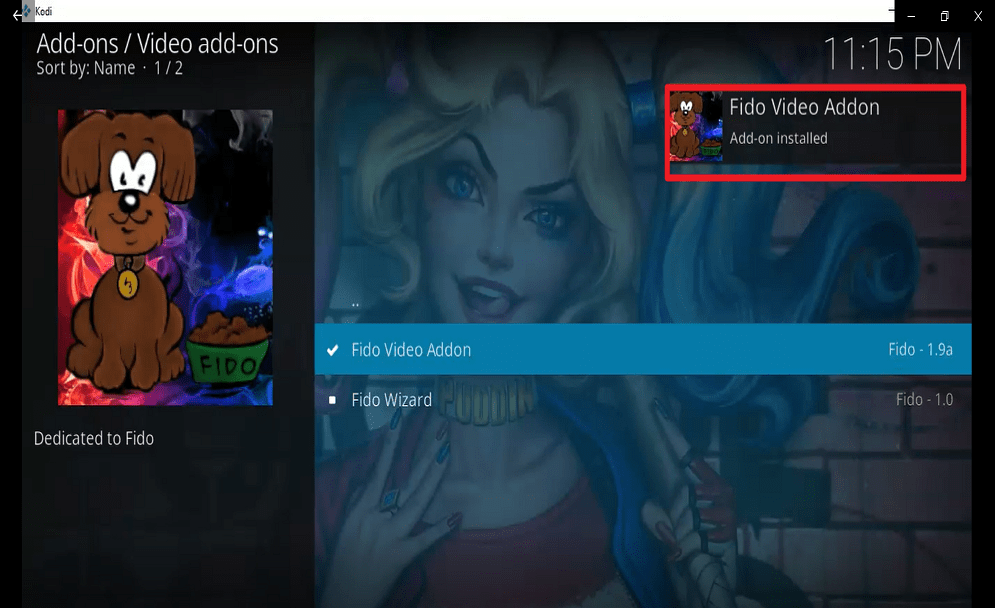
26. You should see a popup in the upper right corner saying Fido addon has installed. There will actually be multiple popups for the various components
Step 26 Install fido kodi addon


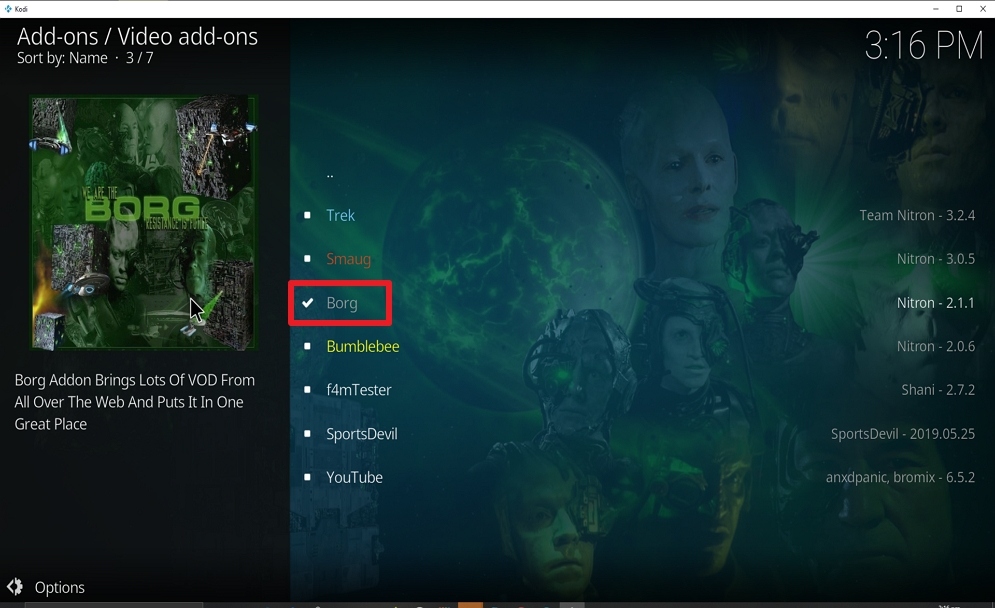
27. Click Fido

Step 27 Install fido kodi addon


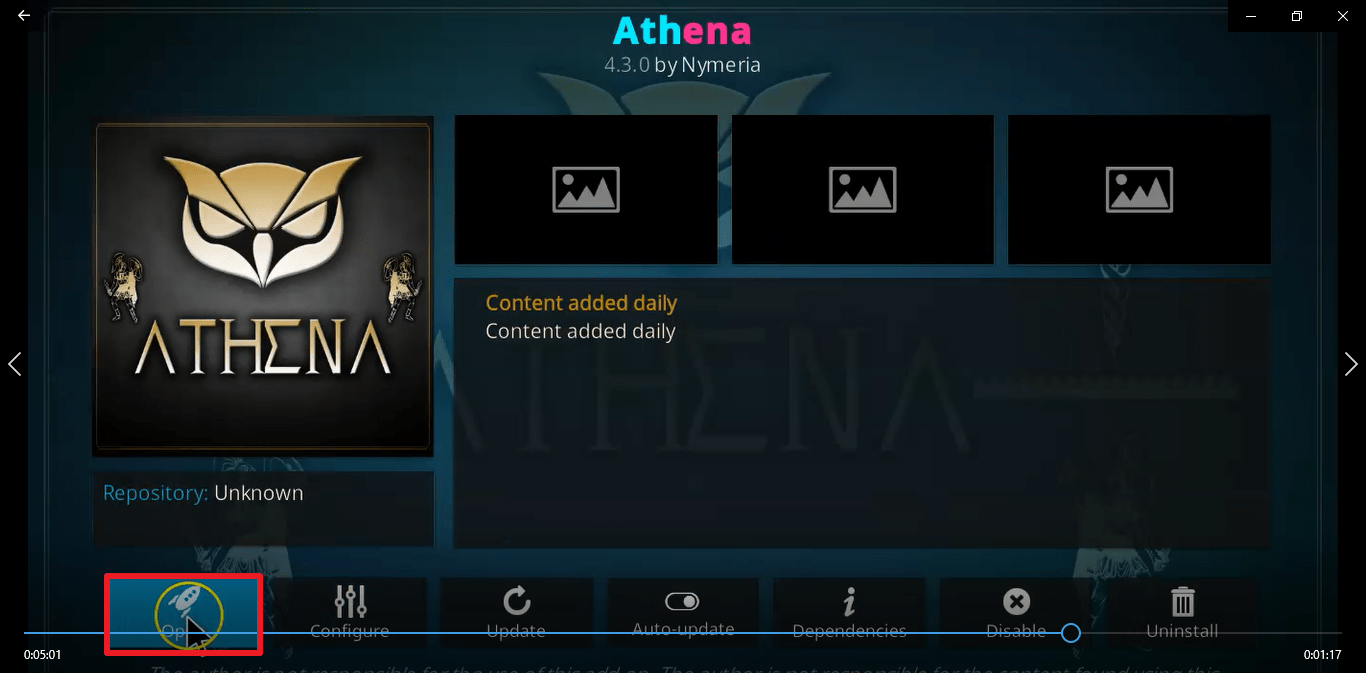
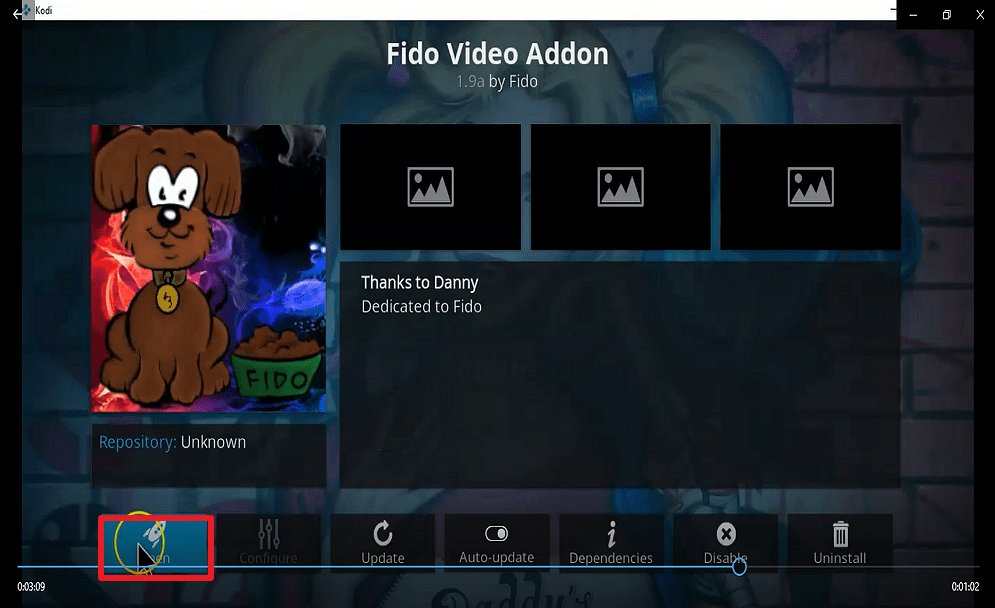
28. Select Open to enjoy your add-on.
Step 28 Install fido kodi addon


Use a VPN

Accessing the internet or streaming on  Kodi especially with third-party addons like the Fido add-on requires the use of a VPN. We recommend using Surfshark while streaming on  Kodi. It encrypts and masks your IP address thereby making your online data appear anonymous on the internet service provider network (ISP). With Surfshark, you will be able to bypass geolocation and internet service provider throttling. 

If you want to know more about this VPN, kindly read our Surfshark Review.


Here are some of the services Surfshark offers:

  • This VPN will definitely hide all of your online activities. 
  • Unlimited simultaneous devices
  • 24/7 customer support. 
  • It also supports P2p file-sharing activities which makes it applicable to torrenting
  • Strictly follows No-Log Policy.
  • Has a total of 3200+ servers in 65 countries to choose from
  • DNS Leak Protection is active by default.
  • Military-grade AES-256 encryption follows FIPS (Federal Information Processing Standards) that oversees the handling of sensitive data.
  • It follows a strict No-Logs Policy
  • No Bandwidth limits – you can enjoy a full-speed VPN connection without any throttling.


Grab your subscription now!

Click here to get the lowest price on Surfshark through our exclusive limited-time offer.


How to Install Surfshark VPN on Firestick

If your Firestick still has the older interface, read this article to learn how to update it: Update Firestick Interface.

Follow our screenshots below to install the SurfShark VPN app on your Fire TV stick.

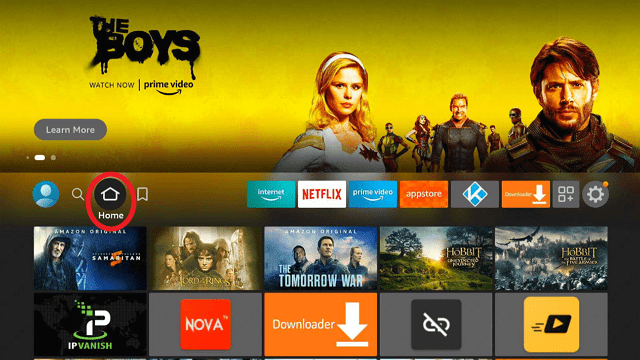
1. Go to the Home screen of your Firestick.
step 1 Install Surfshark VPN on Firestick


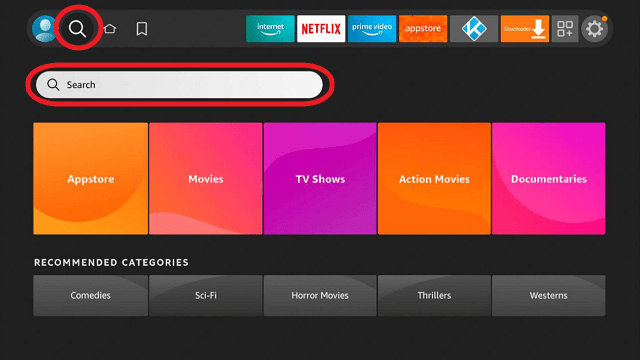
2. Navigate towards the Find tab. Press the Search button from the resulting dropdown.
step 2 Install Surfshark VPN on Firestick


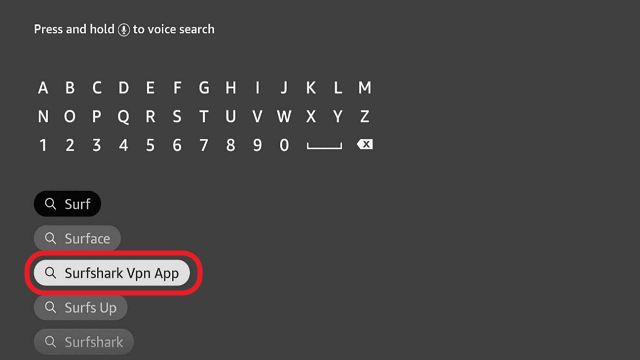
3. Type in the keyword of SurfShark and select from the suggestions that will appear.
step 3 Install Surfshark VPN on Firestick


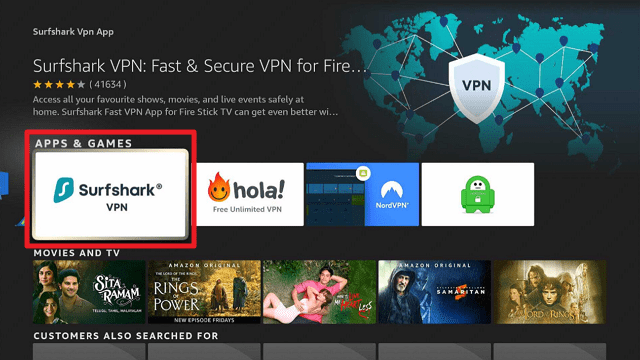
4. Click the official SurfShark icon from your search results.
step 4 Install Surfshark VPN on Firestick


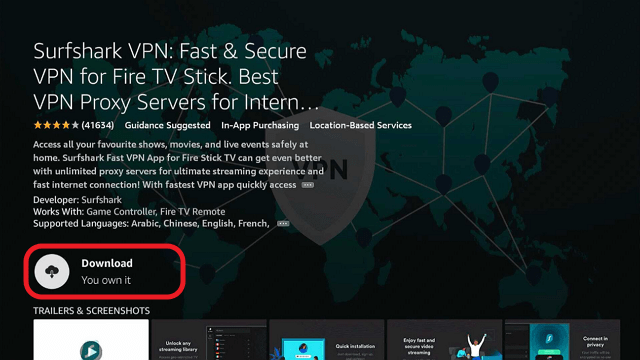
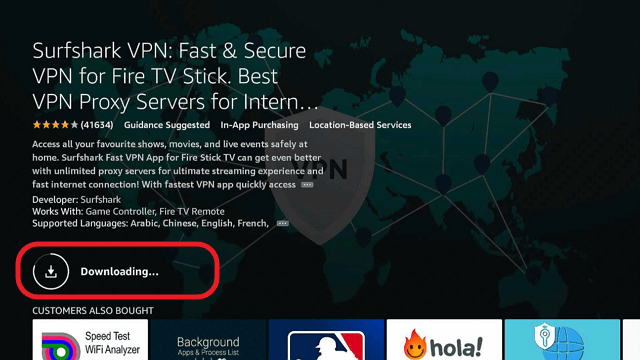
5. Press the Download (You own it) button.
step 5 Install Surfshark VPN on Firestick


6. The SurfShark VPN installer will download on your device.
step 6 Install Surfshark VPN on Firestick


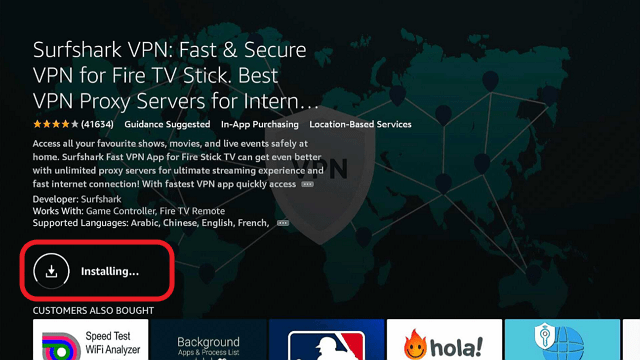
7. SurfShark VPN’s app will automatically install itself on your Fire TV stick.
step 7 Install Surfshark VPN on Firestick


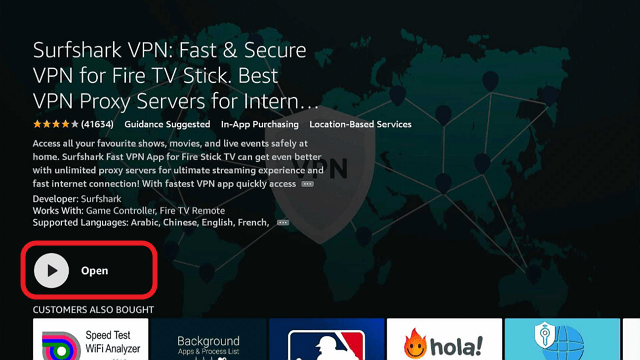
8. Press the Open button after completing SurfShark VPN’s installation process.
step 8 Install Surfshark VPN on Firestick


9. Please wait for the SurfShark VPN to load its user interface.

step 9 Install Surfshark VPN on Firestick


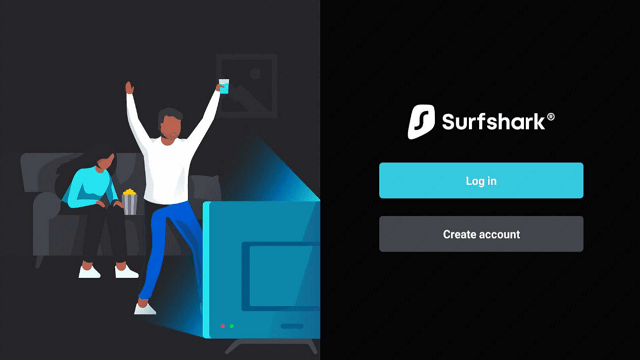
10. You can now log in with your SurfShark VPN account credentials.
step 10 Install Surfshark VPN on Firestick

Learn more about Surfshark and Grab the Best Surfshark Deal Now!


Install Surfshark on Firestick
Best Surfshark Deal


Other VPNs to Consider

NordVPN (Best for Streaming)

Best Features

  • 5000+ Server in 50+ Countries 
  • Military-Grade Encryption
  • Fast Connection Speed
  • Suitable to a lot of devices
  • No-Log Policy

Prices
  • Complete $5.89 per month (64% Discount)
  • Plus $4.59 per month (56% Discount)
  • Standard $3.69 per month (55% Discount)

Best Features

  • 750+ High-speed VPN Servers in 43 Locations
  • Military-Grade Encryption
  • Fastest HD Streaming and Gaming
  • 30-Day Money-Back Guarantee
  • Unlimited Data & Devices
  • No-Log Policy

Prices
  • 3 Years $1.99 per month (82% Discount)
  • 1 Years $3.29 per month (70% Discount)
  • 1 Month $10.99 per month

IPVanish VPN (Most Secure)

Best Features

  • 1200+ Servers in 60+ Countries around the world
  • Unlimited Connections
  • No-Log Policy
  • Top Notch Military-Grade VPN Protocols and Encryptions
  • 100% Safe and Secured
  • Most Trusted VPN
  • Best VPN for Firestick
  • 30-Day Money-Back Guarantee

Prices
  • Yearly $3.99 per month (63% Discount) – 30 days risk free + Ransomware & Malware Protection
  • Quarterly $5.32 per month (51% Discount)
  • Monthly $10.99 per month


For more VPN discounts, go to ReviewVPN Deals and purchase the best VPN for you.

Click here to get the lowest price on Surfshark through our exclusive limited-time offer.


How to Install Athena Kodi Addon

Athena Kodi Addon

In this article, we will show you how to install the Athena Kodi Addon on your Fire TV stick.


In this tutorial, you will learn how to install Athena Kodi Addon. Athena Kodi add-on is a third party add-on on Kodi. this add-on is within the EzzerMacs Wizard repository. Athena Kodi add-on offers the following music, British sitcoms, movies, documentaries, Debrid, Tv shows, TV series, made in the 80s, musicals, Kids, and lots more.

Athena requires Real Debrid integration for the best streaming experience.


ANONYMOUSLY

Features of Athena Kodi Addon

  • Large collections of documentaries, made in the 80s, musicals, Kids, Debrid, music, British sitcoms, movies, Tv shows, TV series, and lots more.
  • real-Debrid integration for optimal streaming
  • Daily add-on update
  • Huge library of categories and subcategories.
  • User-friendly interface with a customizable search box for popularity, category, trending, rating, and new releases.


Steps on How to Install the Athena Kodi Addon

  1. There are two steps to follow in installing Athena Kodi add-on.
  2. First, enable the unknown source
  3. Second, installing Athena Kodi add-on.


Enable the Unknown Source

Before proceeding to the installation of Athena addon, checking if the unknown source of your Kodi app is enabled or turned ON. If it is not enabled, follow the below steps to enable it:

Step 1. Launch your Kodi app and scroll up to the setting icon and click on it.

Step 2. On the setting menu, scroll down to the system and click on it.

Step 3. On the system menu, scroll downwards to add-on and select it.

Step 4. Hover on the unknown sources option and on the warning message that will appear, select YES and hit the back button on your remote or escape/backspace key on your keyboard to return back to the home menu.


Installing Athena Kodi Addon

Step 1. From the home menu, click on the Settings icon which is located at the top left corner of your screen.

Step 2. Click on File Manager

Step 3. Next, on the file manager menu, click on Add Source

Step 4. On the new window select <None>

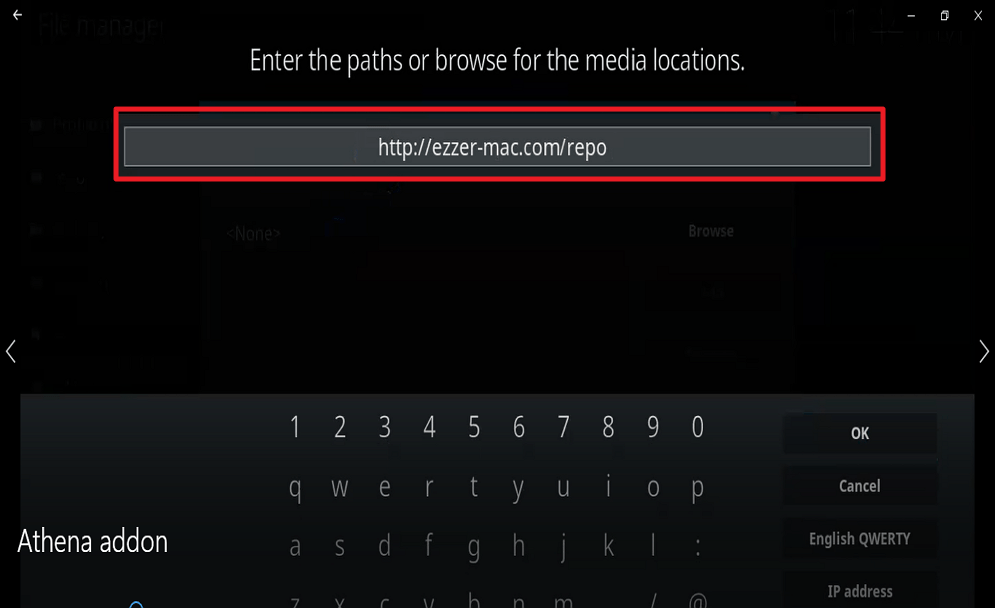
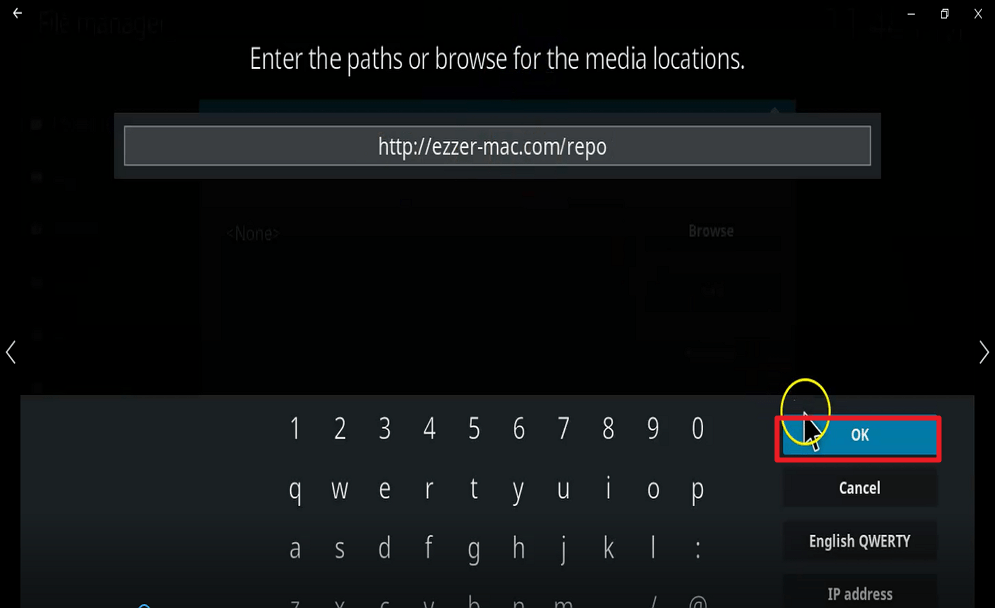
Step 5. Now, enter the media source URL http://ezzer-mac.com/repo/ and tap on OK.

Note:

Ensure you enter the media source URL correctly. Double-check to avoid any typo errors.

Step 6. After entering the media source URL, you will have to enter a name for this media source; click on the “Enter a name for this media source” option.

Note: if Kodi auto-populates a name, just click OK to continue. Here we going to use “ezz” as our media source name. 

Step 7. Hit the back/arrow button on your remote or the backspace/escape key on your keyboard to go back to the home menu or home screen.

Step 8. Next from the home menu or the home screen, scroll down to  Add-ons and click on it.

Step 9. On the add-on menu, scroll up to locate the add-on package installer found at the top left side of your screen.

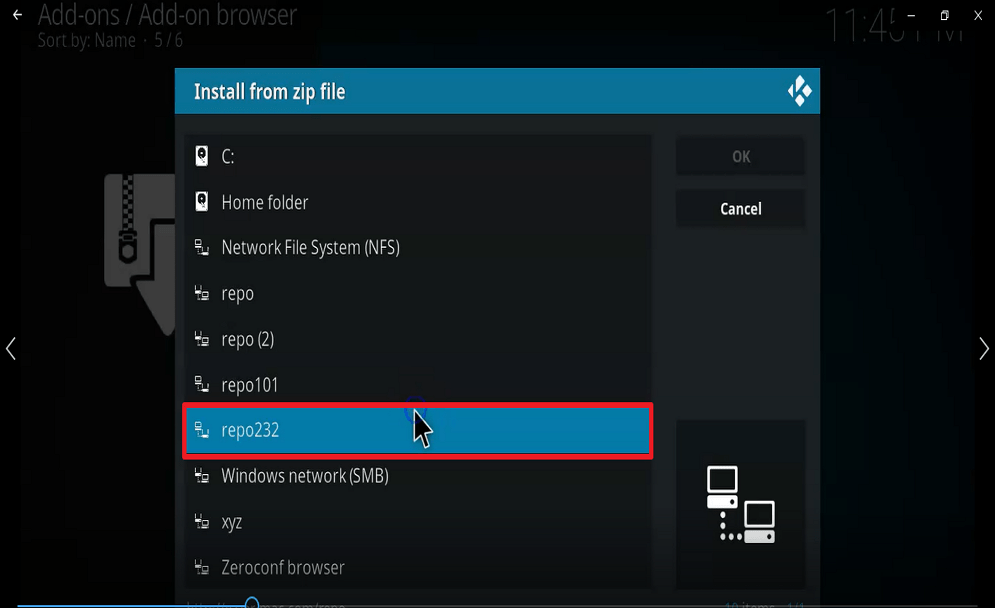
Step 10. On the new window, click on Install from zip file

Step 11. Navigate to “ezz”

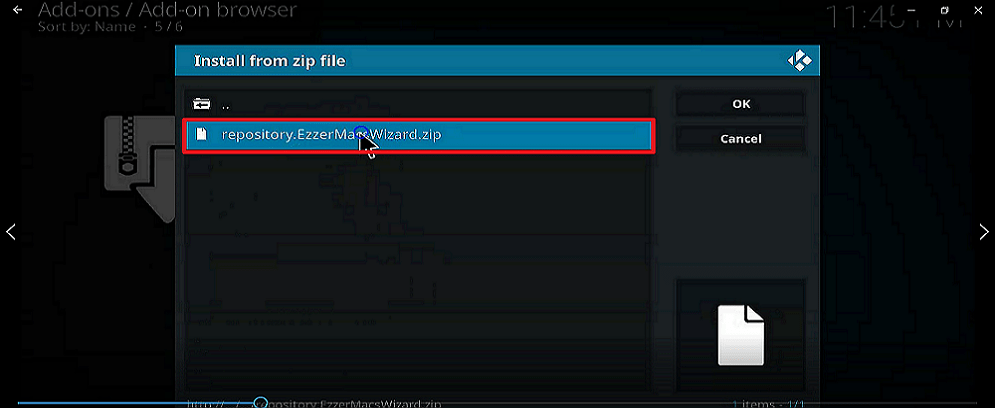
Step 12. Click on repository.EzzerMacsWizard.zip

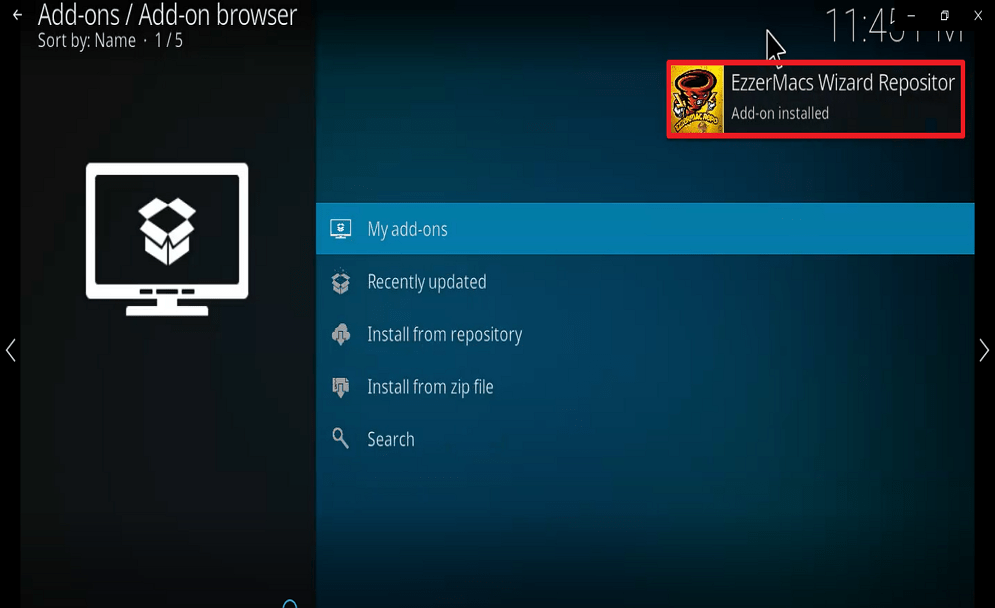
Step 13. Next, wait while the add-on repository installs. You will get a notification that says “Add-on enabled” at the top right corner of your screen.

Step 14. Next click on Install from Repository

Step 15. Scroll down to locate the name you used to save the media source file. Here we use “EzzerMacs Wizard Repository”

Step 16. On the new window, click on Video add-ons

Step 17. Click on Athena

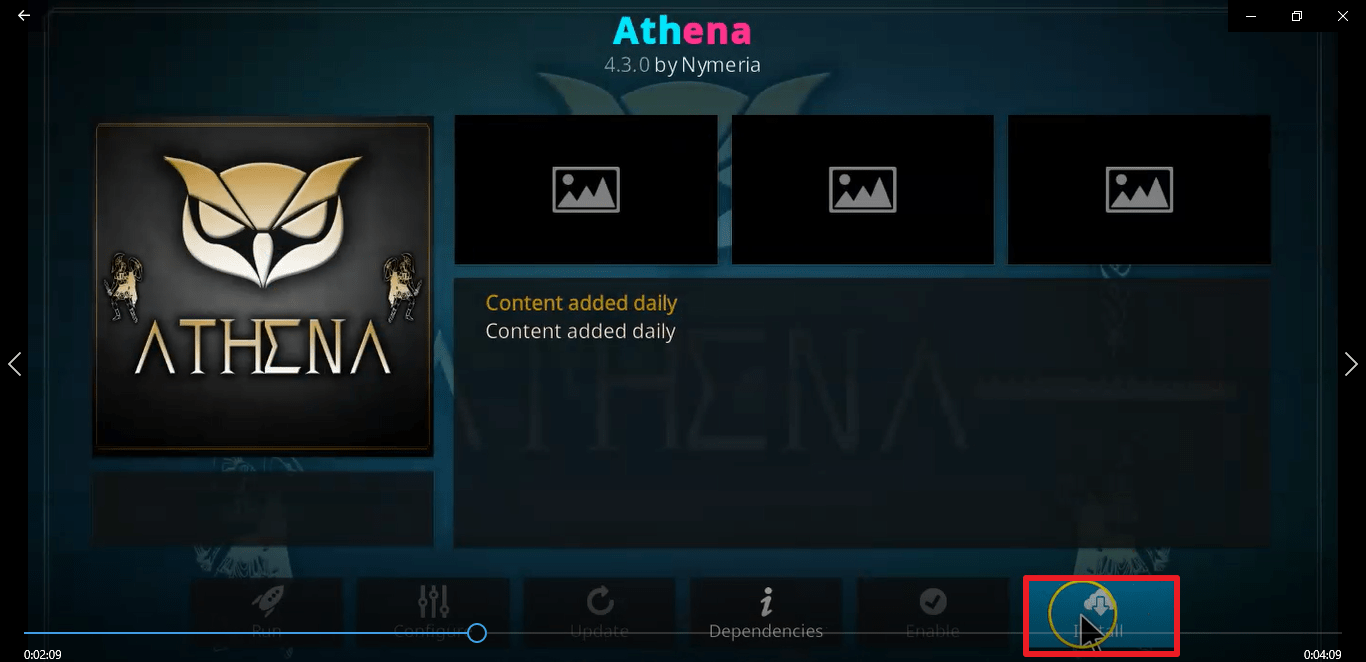
Step 18. Click on Install. 

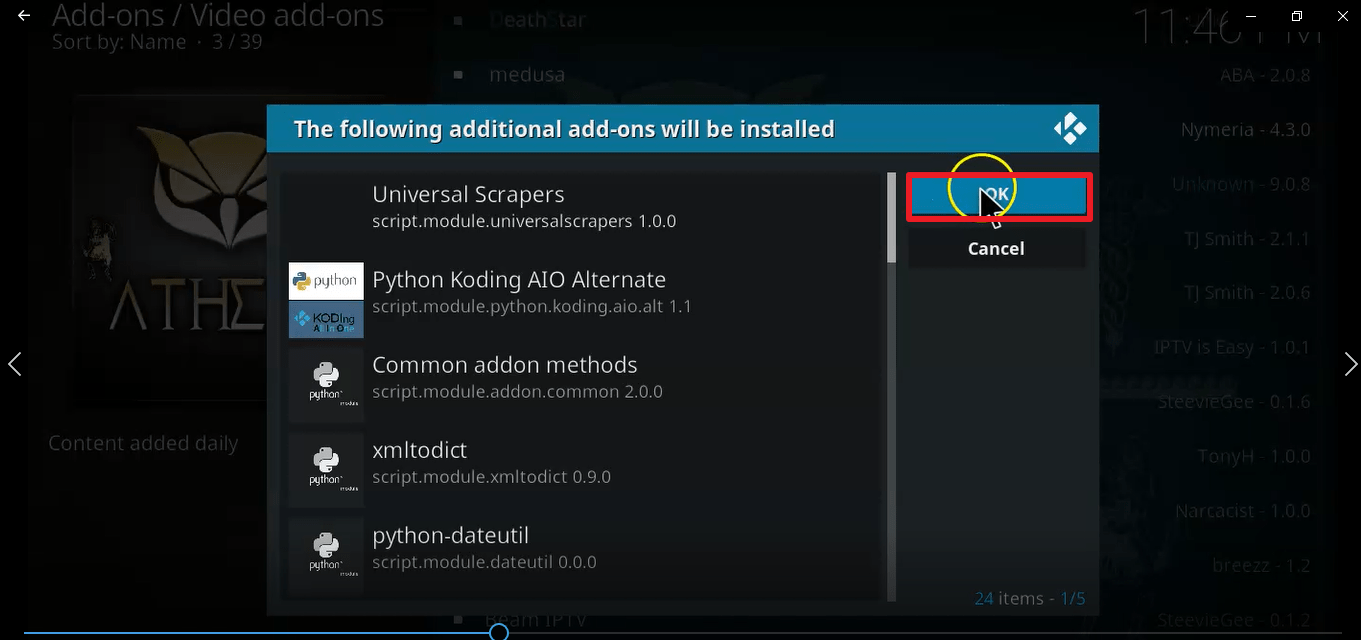
Step 19. Click OK on the new dialog box with “THE FOLLOWING ADDITIONAL ADD-ONS WILL BE INSTALLED”

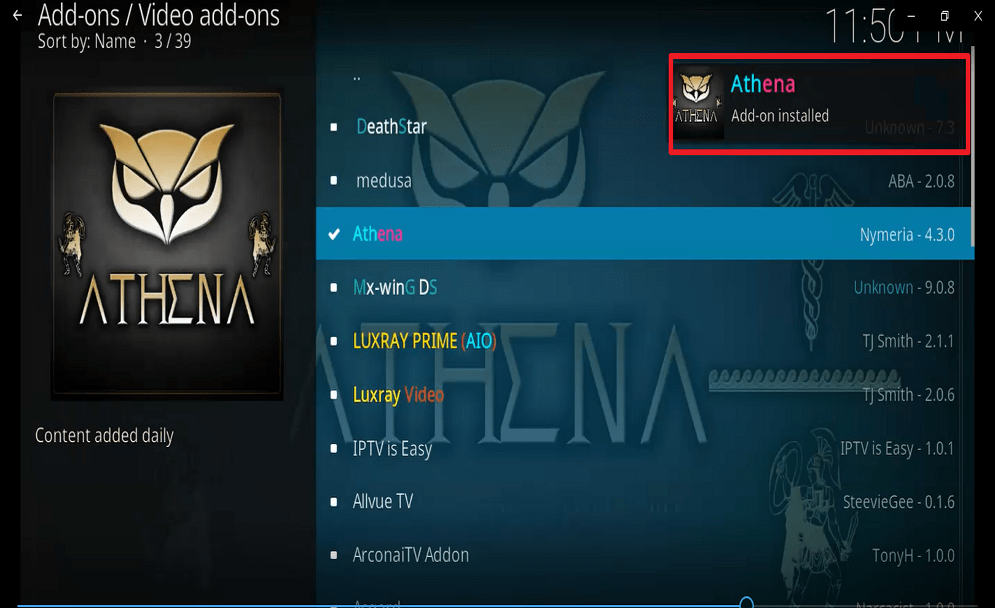
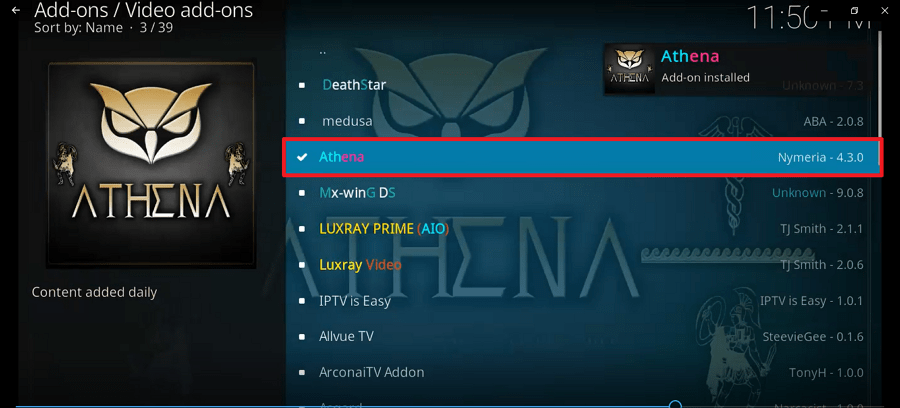
Step 20. Once the installation is completed, you will receive a notification at the top right corner of your screen.


YOUR INTERNET ACTIVITY IS BEING WATCHED

ReviewVPN cannot attest to the legality, security and privacy of the applications discussed on this site. It is highly recommended that you use a VPN service while streaming or using Kodi.

Currently, your IP 216.73.217.150 is visible to everyone and your Browser is being tracked by Advertisers & ISP Provider.

Save 65% Now

Limited Time Offer

Here are the main reasons why you must use a VPN:

  • Your activities are hidden from your ISP, the government, and from the apps you are using.
  • You can access additional movies and TV streams.
  • ISP attempts to throttle are thrwarted thus reducing buffering issues.
  • Geographically restricted content like Netflix and Hulu can be unblocked.

A VPN works be replacing your ISP-assigned IP address and creating an encrypted tunnel. We recommend the no log service offered by IPVanish. It works well on a Firestick and offers the fastest possible speeds.

Special Limited Time Offer - Get IPVanish


Legal Disclaimer: ReviewVPN.com does not encourage or endorse any illegal activity involved in the usage of services and applications referenced on this site. We do not verify the licensing agreements of services. The end-user is wholly responsible for ensuring that any media accessed through these services does not violate copyright and/or licensing laws. ReviewVPN does not promote, link to, or receive compensation from any Apps and IPTV services.


Install Surfshark on Firestick

Best Surfshark Deal


Screenshots on How to Install Athena Kodi Addon

  1. Select the cogwheel in the upper left corner

Step 1 Install Athena kodi addon


2. Select System on the bottom left

Step 2 Install Athena kodi addon


3. Hover over or select Add-ons on the left.

Step 3 Install Athena kodi addon


4. Select Unknown sources to enable

Step 4 Install Athena kodi addon


5. Click Yes to enable third-party addons

Step 5 Install Athena kodi addon


6. Click on the File manager

Step 6 Install Athena kodi addon


7. Click on Add source

Step 7 Install Athena kodi addon


8. Click on None to add the URL path source

Step 8 Install Athena kodi addon


9. Type  http://ezzer-mac.com/repo

Step 9 Install Athena kodi addon


10. Click OK.

Step 10 Install Athena kodi addon


11. Select enter a name for this media source


12. Name repo232 (this part isn’t critical as long as you remember the name). Click OK.


13. Return to home screen and Select Add-ons

Step 14 Install Athena kodi addon


14. Select the add-on browser icon

Step 15 Install Athena kodi addon


15. Select install from zip file

Step 15 Install Athena kodi addon


16. Select repo232

Step 16 Install Athena kodi addon


17. Select repository.EzzerMacsWizard.zip

Step 18 Install Athena kodi addon


18. Wait for Add-on installation notificationStep 19 Install Athena kodi addon


19. Select install from repository

Step 20 Install Athena kodi addon


20. Select EzzMacs Wizard repository

Step 21 Install Athena kodi addon


21. Select video add-ons

Step 22 Install Athena kodi addon


22.  Select Athena

Step 23 Install Athena kodi addon


23. Select install

Step 24 Install Athena kodi addon


24. Select OK and wait for add-on isntalled notification at the top right corner of your screen.

Step 25 Install Athena kodi addon


25. You should see a popup in the upper right corner saying Athena addon has installed. There will actually be multiple popups for the various components


26. Click Athena


27. Select Open to enjoy your add-on.

Step 26 Install Athena kodi addon


Use Kodi With a VPN

We recommend installing Surfshark on your device. This is to keep your online activities private and secure. Surfshark masKs and does encryption on your IP address and as such, your IP address will appear on the internet service provider network as a private user in that way, whatever activity you are doing online becomes private, anonymous, and secure. Also installing Surfshark on your Kodi helps you to bypass location restrictions and unnecessary Internet service provider throttling.

Note: For more information about Surfshark, please read our Surfshark Review.


Install Surfshark on Firestick

Best Surfshark Deal


How to Install Surfshark VPN on Firestick

If your Firestick still has the older interface, read this article to learn how to update it: Update Firestick Interface.

Follow our screenshots below to install the SurfShark VPN app on your Fire TV stick.

1. Go to the Home screen of your Firestick.

step 1 Install Surfshark VPN on Firestick


2. Navigate towards the Find tab. Press the Search button from the resulting dropdown.

step 2 Install Surfshark VPN on Firestick


3. Type in the keyword of SurfShark and select from the suggestions that will appear.

step 3 Install Surfshark VPN on Firestick


4. Click the official SurfShark icon from your search results.

step 4 Install Surfshark VPN on Firestick


5. Press the Download (You own it) button.

step 5 Install Surfshark VPN on Firestick


6. The SurfShark VPN installer will download on your device.

step 6 Install Surfshark VPN on Firestick


7. SurfShark VPN’s app will automatically install itself on your Fire TV stick.

step 7 Install Surfshark VPN on Firestick


8. Press the Open button after completing SurfShark VPN’s installation process.

step 8 Install Surfshark VPN on Firestick


9. Please wait for the SurfShark VPN to load its user interface.

step 9 Install Surfshark VPN on Firestick


10. You can now log in with your SurfShark VPN account credentials.

step 10 Install Surfshark VPN on Firestick

Learn more about Surfshark and Grab the Best Surfshark Deal Now!


Install Surfshark on Firestick

Best Surfshark Deal


Other VPNs to Consider

NordVPN (Best for Streaming)

Best Features

  • 5000+ Server in 50+ Countries 
  • Military-Grade Encryption
  • Fast Connection Speed
  • Suitable to a lot of devices
  • No-Log Policy

Prices
  • Complete $5.89 per month (64% Discount)
  • Plus $4.59 per month (56% Discount)
  • Standard $3.69 per month (55% Discount)

Best Features

  • 750+ High-speed VPN Servers in 43 Locations
  • Military-Grade Encryption
  • Fastest HD Streaming and Gaming
  • 30-Day Money-Back Guarantee
  • Unlimited Data & Devices
  • No-Log Policy

Prices
  • 3 Years $1.99 per month (82% Discount)
  • 1 Years $3.29 per month (70% Discount)
  • 1 Month $10.99 per month

IPVanish VPN (Most Secure)

Best Features

  • 1200+ Servers in 60+ Countries around the world
  • Unlimited Connections
  • No-Log Policy
  • Top Notch Military-Grade VPN Protocols and Encryptions
  • 100% Safe and Secured
  • Most Trusted VPN
  • Best VPN for Firestick
  • 30-Day Money-Back Guarantee

Prices
  • Yearly $3.99 per month (63% Discount) – 30 days risk free + Ransomware & Malware Protection
  • Quarterly $5.32 per month (51% Discount)
  • Monthly $10.99 per month


For more VPN discounts, go to ReviewVPN Deals and purchase the best VPN for you.


How to Install FANime Kodi Addon

FANime Kodi Addon

In this guide, you will learn how to successfully install FANime Kodi Addon. 


FANime Kodi add-on is a third-party Kodi add-on within the stream army repository. FANime Add has sections such as Genres, new seasons, movies, A to Z, recently added, recent release, popular, ongoing series, documentaries, tv shows, search, and lots more.


ANONYMOUSLY

Step by Step Guide on How to Install FANime Addon

The installation process of FANime involves two procedures:

  1. Turning ON the unknown source
  2. Installing FANime add-on


Turning ON the Unknown Source

Before proceeding with the installation of this addon, ensure that the unknown source of your Kodi app is enabled. If not, you can enable it by going to:

Step 1. Launch your Kodi app

Step 2. Scroll up to locate the setting icon and click on it

Step 3. On the setting menu, scroll down to system option and click on it

Step 4. On the system menu, scroll to locate the “add-ons” option and select it.

Step 5. Navigate to the unknown sources option and hover over it. Select YES on the warning message that will appear 

Step 6. Hit on the back button or the escape/backspace key on your keyboard to return to the home menu or home screen.


YOUR INTERNET ACTIVITY IS BEING WATCHED

ReviewVPN cannot attest to the legality, security and privacy of the applications discussed on this site. It is highly recommended that you use a VPN service while streaming or using Kodi.

Currently, your IP 216.73.217.150 is visible to everyone and your Browser is being tracked by Advertisers & ISP Provider.

Save 65% Now

Limited Time Offer

Here are the main reasons why you must use a VPN:

  • Your activities are hidden from your ISP, the government, and from the apps you are using.
  • You can access additional movies and TV streams.
  • ISP attempts to throttle are thrwarted thus reducing buffering issues.
  • Geographically restricted content like Netflix and Hulu can be unblocked.

A VPN works be replacing your ISP-assigned IP address and creating an encrypted tunnel. We recommend the no log service offered by IPVanish. It works well on a Firestick and offers the fastest possible speeds.

Special Limited Time Offer - Get IPVanish


Legal Disclaimer: ReviewVPN.com does not encourage or endorse any illegal activity involved in the usage of services and applications referenced on this site. We do not verify the licensing agreements of services. The end-user is wholly responsible for ensuring that any media accessed through these services does not violate copyright and/or licensing laws. ReviewVPN does not promote, link to, or receive compensation from any Apps and IPTV services.


Install Surfshark on Firestick

Best Surfshark Deal


Installing FANime Addon 

Step 1. From the home menu or home screen, scroll up to the Settings icon found at the top left corner of your screen and click on it.

Step 2. Click on File Manager

Step 3. Next, on the file manager menu, click on Add Source

Step 4. On the new window that will appear, click on <None>

Step 5. On the dialog box, enter exactly the media source URL: http://streamarmy.co.uk/repo and click on OK

Step 6. Next, you should enter a name for this media source file. Click on the “Enter a name for this media source” and enter a name.

Note: if Kodi auto-populates a name for this add-on on your end, just click on Ok to continue with the installation process. Here we used “stream” as the name for this media source and select OK

Step 7. Hit the back button or the backspace/escape key on your keyboard to go back to the home menu or home screen.

Step 8. click on Add-ons found at the left side of your screen

Step 9. On the new window that will appear, click on the add-on icon located at the top left corner of your screen

Step 10. Next, click on Install from zip file

Step 11. On the new window, scroll down to locate stream or if you used a different name, navigate to locate it.

Step 12. click on repository.StreamArmy-x.x.x.zip

Step 13. Wait while the installation is completing. Once it is done, you will receive a notification at the top right corner of your screen that says “stream army repo Add-on installed. 

Step 14. click on Install from Repository

Step 15. Next on the new window, navigate to Stream Army Repo and click on it.

Step 16. On the new dialog box that will appear, click on Video add-ons

Step 16. click on FANime

Step 17. Next, on the new window, click on Install

Step 18. If you are using the latest version of Kodi, you will receive a dialog box with “THE FOLLOWING ADDITIONAL ADD-ONS WILL BE INSTALLED” click OK.

Step 19. Wait while the installation is completing. Once the installation is finished, you will receive a notification that says “Add-on installed.

Step 20. Hit the back button on your remote or the backspace or the escape key on your keyboard to return to the home screen.


Always use a VPN

We recommend using Surfshark on your Kodi App. this is because each time you stream on the Kodi app, especially with the third-party add-on, your online activities will be public on the internet service provider network, and as such you are prone to the attacks of hackers and might be monitored by the government. 

Surfshark also helps you to bypass internet service provider-induced throttling and geo-locations. A streaming platform like NetFlix has location restrictions which means that if you are not from a particular region, you will be restricted from accessing some of its content. Also, Surfshark mas and encrypts your IP address for maximum online security, privacy, and anonymity.

Note: For more information about Surfshark, please read our Surfshark Review.


Grab your subscription now!


How to Install Surfshark VPN on Firestick

If your Firestick still has the older interface, read this article to learn how to update it: Update Firestick Interface.

Follow our screenshots below to install the SurfShark VPN app on your Fire TV stick.

1. Go to the Home screen of your Firestick.

step 1 Install Surfshark VPN on Firestick


2. Navigate towards the Find tab. Press the Search button from the resulting dropdown.

step 2 Install Surfshark VPN on Firestick


3. Type in the keyword of SurfShark and select from the suggestions that will appear.

step 3 Install Surfshark VPN on Firestick


4. Click the official SurfShark icon from your search results.

step 4 Install Surfshark VPN on Firestick


5. Press the Download (You own it) button.

step 5 Install Surfshark VPN on Firestick


6. The SurfShark VPN installer will download on your device.

step 6 Install Surfshark VPN on Firestick


7. SurfShark VPN’s app will automatically install itself on your Fire TV stick.

step 7 Install Surfshark VPN on Firestick


8. Press the Open button after completing SurfShark VPN’s installation process.

step 8 Install Surfshark VPN on Firestick


9. Please wait for the SurfShark VPN to load its user interface.

step 9 Install Surfshark VPN on Firestick


10. You can now log in with your SurfShark VPN account credentials.

step 10 Install Surfshark VPN on Firestick

Learn more about Surfshark and Grab the Best Surfshark Deal Now!


Install Surfshark on Firestick

Best Surfshark Deal


Other VPNs to Consider

NordVPN (Best for Streaming)

Best Features

  • 5000+ Server in 50+ Countries 
  • Military-Grade Encryption
  • Fast Connection Speed
  • Suitable to a lot of devices
  • No-Log Policy

Prices
  • Complete $5.89 per month (64% Discount)
  • Plus $4.59 per month (56% Discount)
  • Standard $3.69 per month (55% Discount)

Best Features

  • 750+ High-speed VPN Servers in 43 Locations
  • Military-Grade Encryption
  • Fastest HD Streaming and Gaming
  • 30-Day Money-Back Guarantee
  • Unlimited Data & Devices
  • No-Log Policy

Prices
  • 3 Years $1.99 per month (82% Discount)
  • 1 Years $3.29 per month (70% Discount)
  • 1 Month $10.99 per month

IPVanish VPN (Most Secure)

Best Features

  • 1200+ Servers in 60+ Countries around the world
  • Unlimited Connections
  • No-Log Policy
  • Top Notch Military-Grade VPN Protocols and Encryptions
  • 100% Safe and Secured
  • Most Trusted VPN
  • Best VPN for Firestick
  • 30-Day Money-Back Guarantee

Prices
  • Yearly $3.99 per month (63% Discount) – 30 days risk free + Ransomware & Malware Protection
  • Quarterly $5.32 per month (51% Discount)
  • Monthly $10.99 per month


For more VPN discounts, go to ReviewVPN Deals and purchase the best VPN for you.

Click here to get the lowest price on Surfshark through our exclusive limited-time offer.


How to Install Shadow Kodi Addon

Shadow Kodi Addon

In this article, we will help you install Shadow Kodi Addon on Firestick.


This tutorial will teach you how to install and set up the Shadow Kodi addon. Shadow add-on is a third-party Kodi addon. This add-on is within the Crew repository. Shadow Kodi addon has sections such as movies, tv-series, tv shows, documentaries, and lots more.


ANONYMOUSLY

How to Install Shadow Kodi Addon

To install Shadow Kodi addon, you must first of all, check if the unknown source of your Kodi app is enabled. In case it’s not enabled, follow the below steps to enable it.


Step 1. Open your Kodi app

Step 2. From the home menu or home screen, scroll upwards to locate the setting icon and select it.

Step 3. On the setting menu, scroll down to the system and click on it

Step 4. Next, on the system menu, scroll down to locate the addon option and click on it

Step 5. Next, navigate to unknown sources option and click on it

Step 6. Select YES on the warning dialog box that will appear.

Step 7. Tap on the escape/backspace key on your keyboard or the back button on your remote to go back to the home menu.


Installing Shadow Kodi addon

Step 1. From the home menu or start menu of your Kodi app, scroll up to locate the setting icon option and click on it. The setting icon option is found at the top left corner of your screen.

Step 2. On the setting menu, scroll to File Manager and click on it

Step 3. Next, on the file manager menu, scroll down to locate Add Source and select it.

Step 4. On the new window, click on <None>

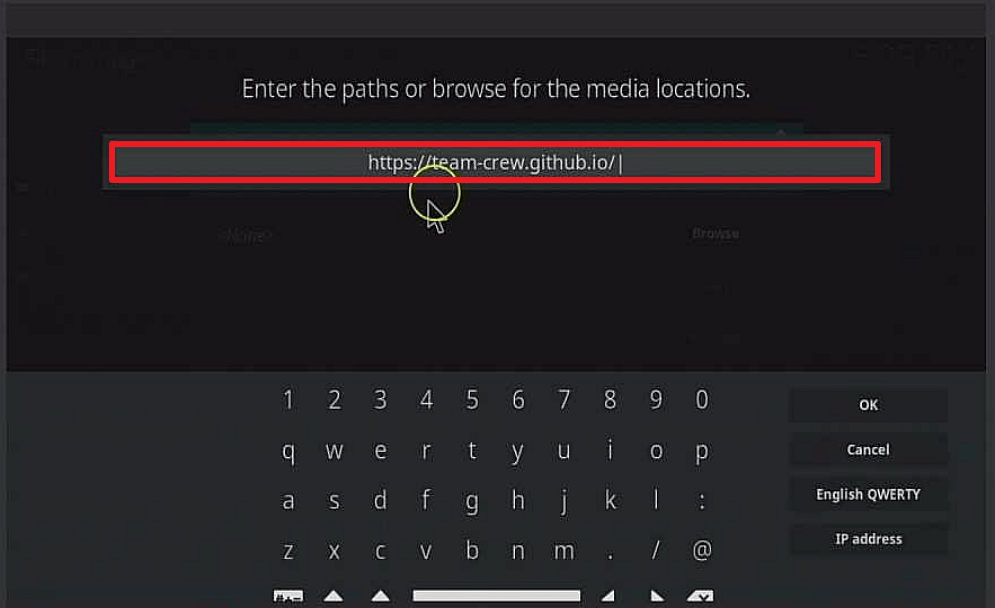
Step 5. Proceed to enter the media source URL: https://team-crew.github.io and click on OK once you are done with entering the media source URL.

Note: double-check the media source URL after entering it to avoid any typing errors.

Step 6. On the next dialog box, click on the box with “Enter a name for this media source” and enter a name for the media source file and click on OK. In this tutorial, we are going to use “ezz” as our media source file name. 

Step 7. Use the back button or the escape/backspace key on your keyboard to return to the home menu.

Step 8. Next, from the home menu, click on Add-ons which is located at the left corner of your screen.

Step 9. On the addon menu, scroll up to the addon icon found at the top left side of your screen and click on it. 

Step 10. On the new window, click on Install from zip file

Step 11. Scroll down to select the name you used to save the media source file. Remember, we used “ezz” for this installation. Once you found it, click on it

Step 12. click on repository.thecrew-x.x.zip and wait for a notification message to appear at the top right corner of your screen.

Step 13. Next, click on Install from Repository

Step 14. Scroll to THE CREW Wizard Repository and click on it.

Step 15. On the new window, click on Video add-ons

Step 16. On the video add-ons menu, click on Shadow

Step 17. On the new window, click on Install.

Note: if you are using the latest version of Kodi Leia 18, you will get a dialog box with the “the following additional addons will be installed; click on OK to complete the installation.

Step 18. Use the back button or the backspace on your keyboard to return to the home menu


YOUR INTERNET ACTIVITY IS BEING WATCHED

ReviewVPN cannot attest to the legality, security and privacy of the applications discussed on this site. It is highly recommended that you use a VPN service while streaming or using Kodi.

Currently, your IP 216.73.217.150 is visible to everyone and your Browser is being tracked by Advertisers & ISP Provider.

Save 65% Now

Limited Time Offer

Here are the main reasons why you must use a VPN:

  • Your activities are hidden from your ISP, the government, and from the apps you are using.
  • You can access additional movies and TV streams.
  • ISP attempts to throttle are thrwarted thus reducing buffering issues.
  • Geographically restricted content like Netflix and Hulu can be unblocked.

A VPN works be replacing your ISP-assigned IP address and creating an encrypted tunnel. We recommend the no log service offered by IPVanish. It works well on a Firestick and offers the fastest possible speeds.

Special Limited Time Offer - Get IPVanish


Legal Disclaimer: ReviewVPN.com does not encourage or endorse any illegal activity involved in the usage of services and applications referenced on this site. We do not verify the licensing agreements of services. The end-user is wholly responsible for ensuring that any media accessed through these services does not violate copyright and/or licensing laws. ReviewVPN does not promote, link to, or receive compensation from any Apps and IPTV services.


Install Surfshark on Firestick

Best Surfshark Deal


Screenshots on How to Install Shadow Kodi Addon

  1. Select the cogwheel in the upper left corner

Step 1 Install Shadow kodi addon


2. Select System on the bottom left

Step 2 Install Shadow kodi addon


3. Hover over or select Add-ons on the left.

Step 3 Install Shadow kodi addon


4. Select Unknown sources to enable

Step 4 Install Shadow kodi addon


5. Click Yes to enable third-party addons

Step 5 Install Shadow kodi addon


6. Click on the File manager

Step 6 Install Shadow kodi addon


7. Click on Add source

Step 7 Install Shadow kodi addon


8. Click on None to add the URL path source

Step 8 Install Shadow kodi addon


9. Type  https://team-crew.github.io/

Step 9 Install shadow kodi addon


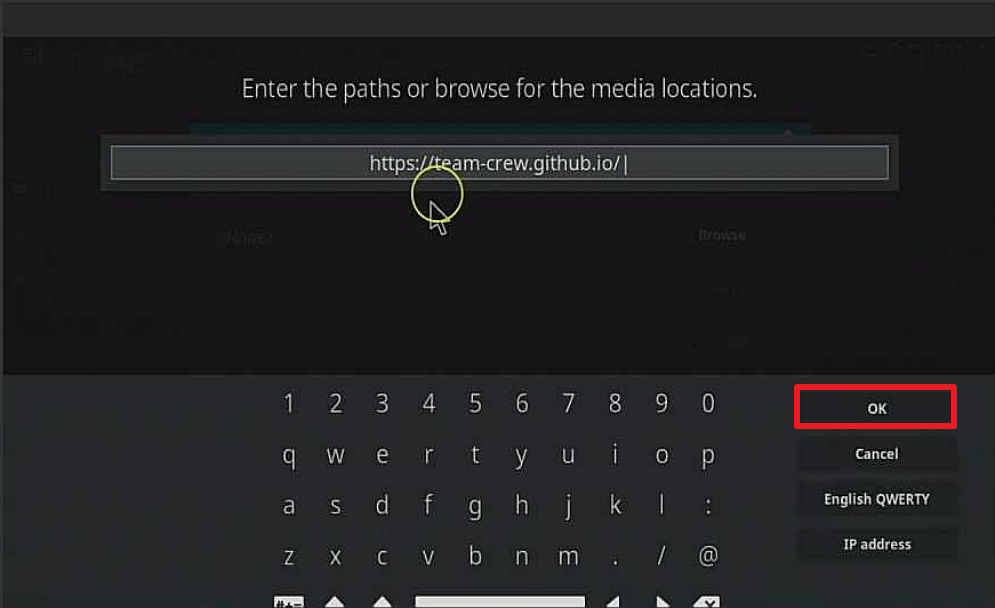
10. Click OK.

Step 19 Install shadow kodi addon


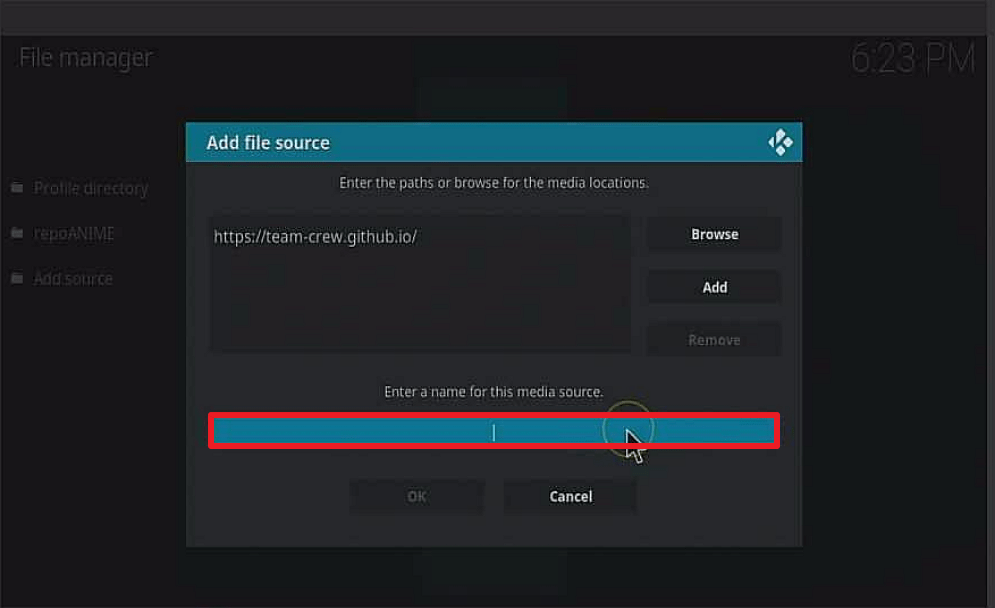
11. Select enter a name for this media source.

Step 11 Install shadow kodi addon


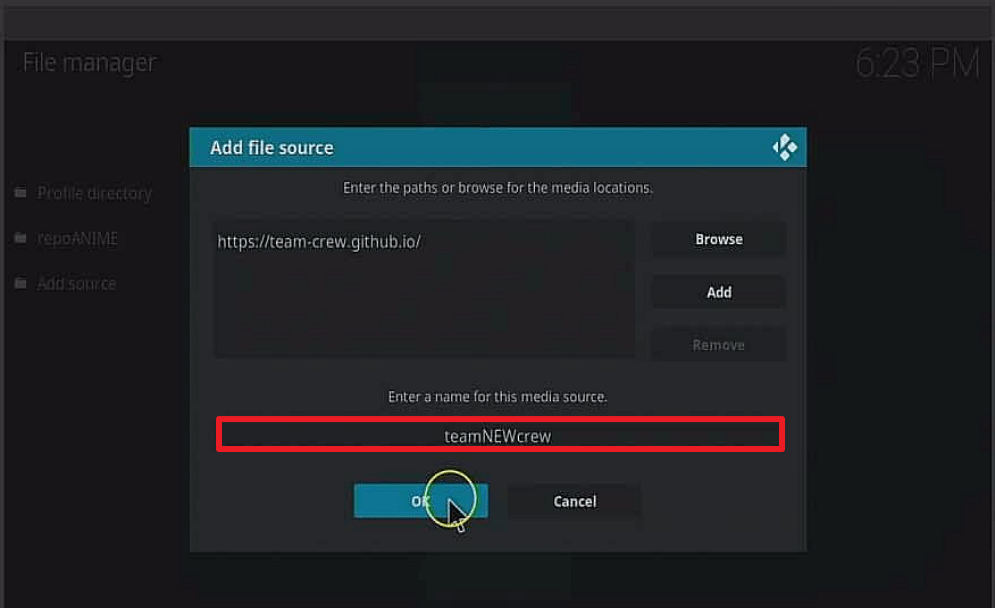
12. Name teamNEWcrew (this part isn’t critical as long as you remember the name). Click OK.

Step 12 Install shadow kodi addon


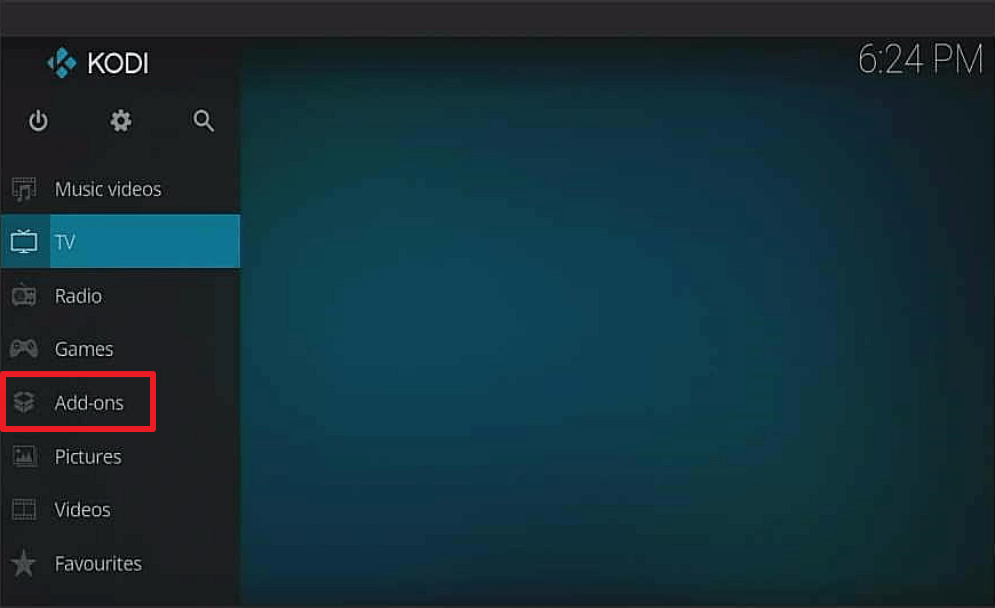
13. Head back to the Homescreen. Click Addons.

Step 13 Install shadow kodi addon


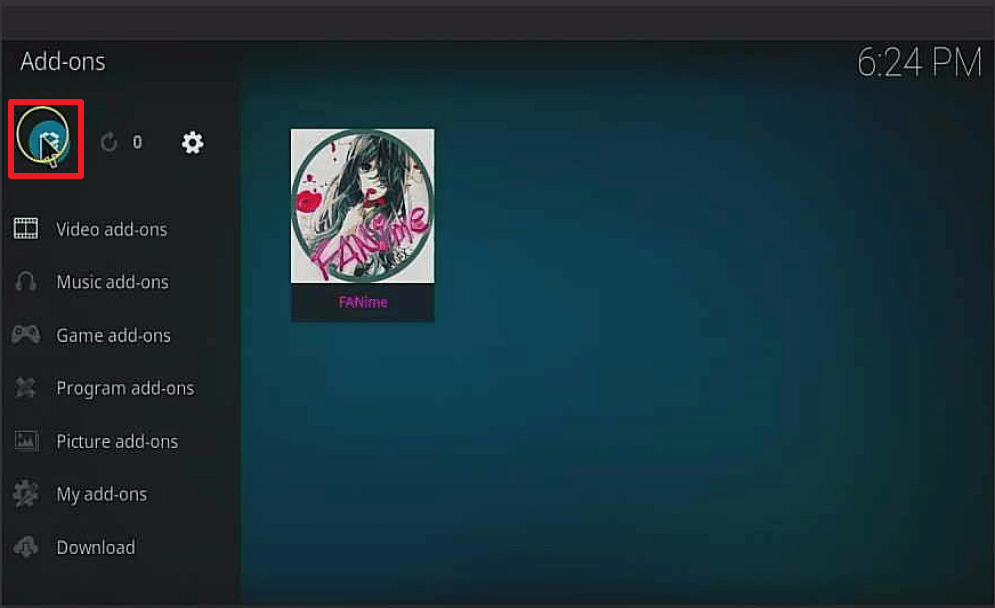
14. Click Box Icon.

Step 14 Install shadow kodi addon


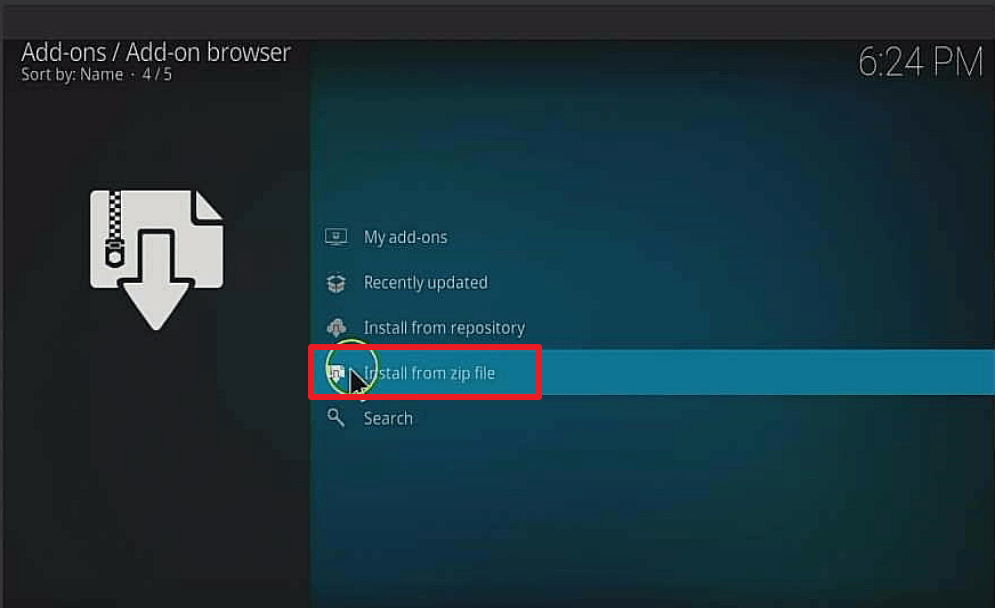
15. Select install from zip file.

Step 15 Install Shadow kodi addon


16. Click on teamNEWcrew(or whatever you named the source).

Step 16 Install Shadow kodi addon


17. Click repository.thecrew-0.3.11.zip

Step 17 Install Shadow kodi addon


18. Popup in the upper right corner saying The Crew Repo  Addon installed..

Step 18 Install Shadow kodi addon


19. Select install from Repository.

Step 19 Install Shadow kodi addon


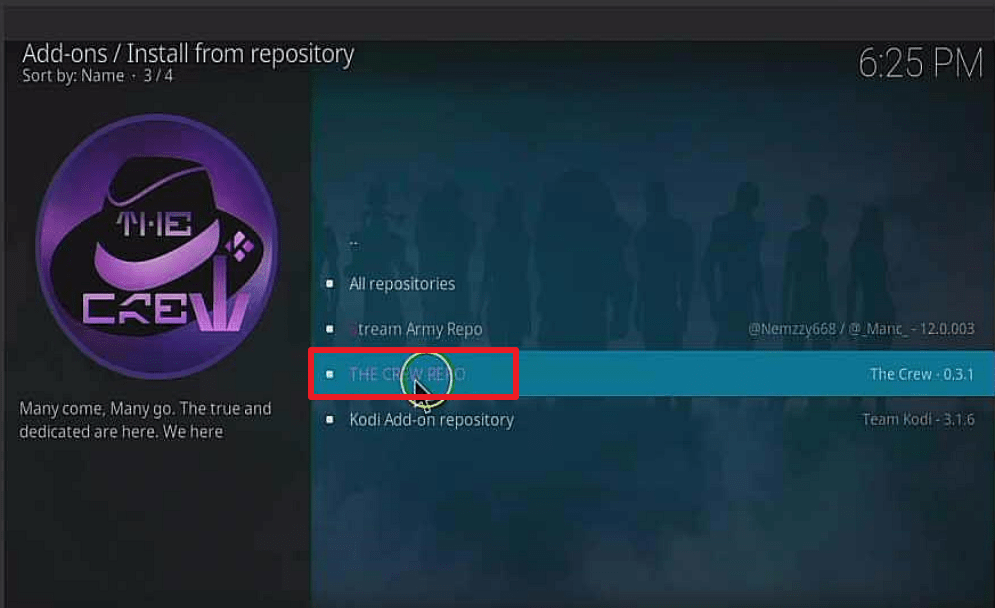
20. Click The Crew Repo

Step 20 Install Shadow kodi addon


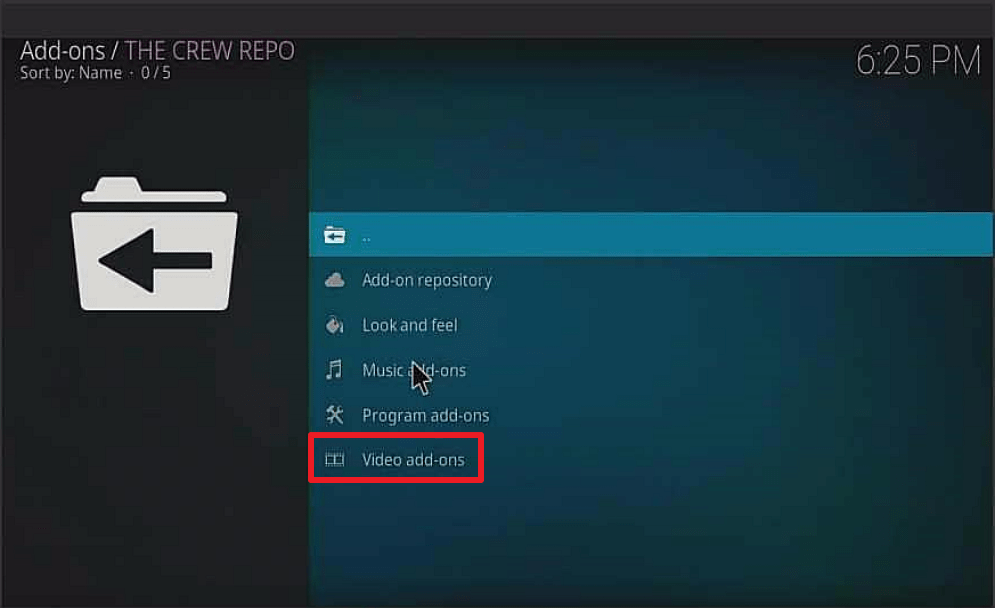
21. Click Video Addons.

Step 21 Install Shadow kodi addon


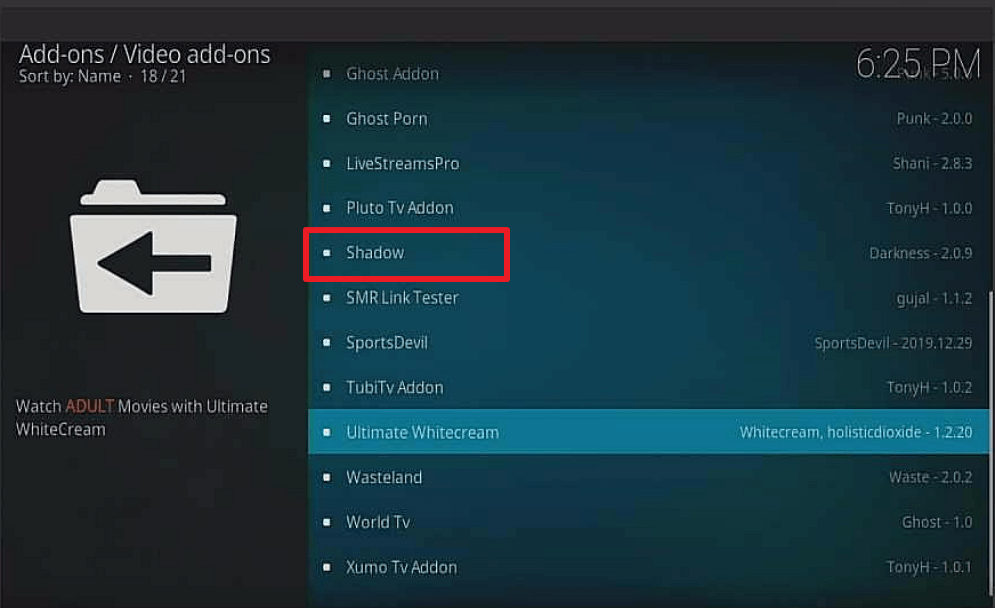
22. Click Shadow.

Step 22 Install Shadow kodi addon


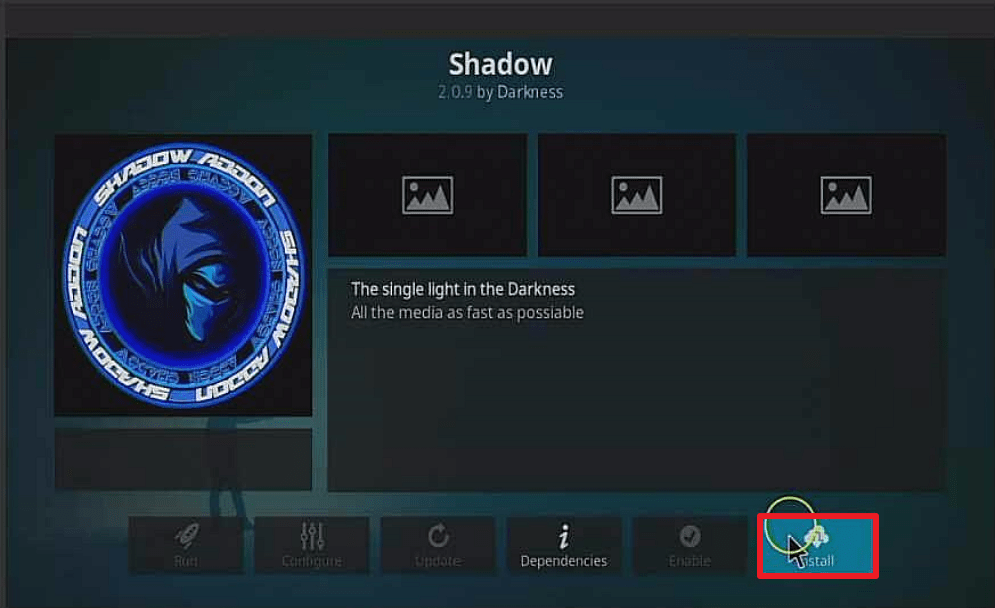
23. Click Install.

Step 23 Install Shadow kodi addon


24. Click OK.

Step 24 Install Shadow kodi addon


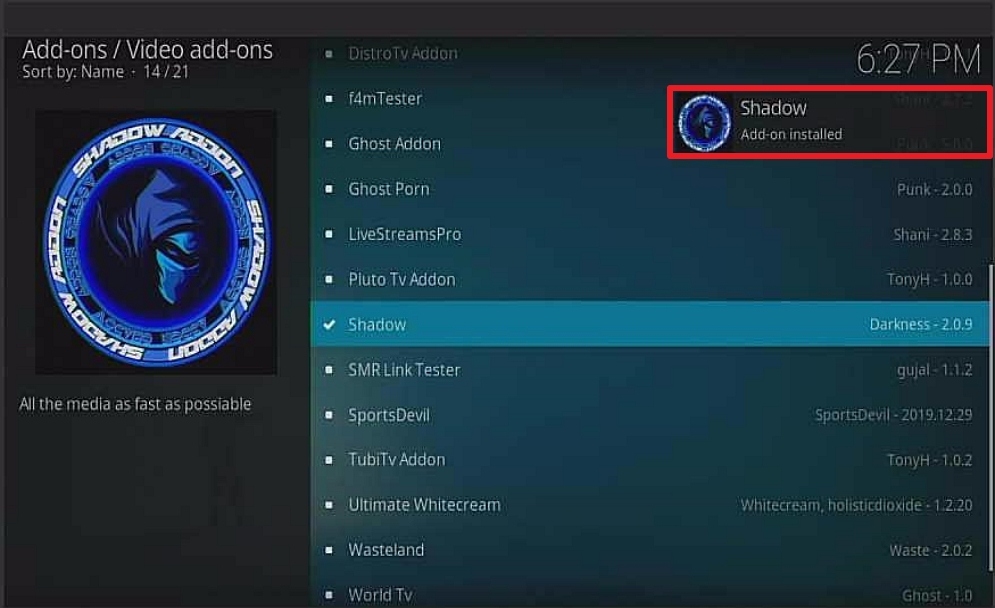
25. You should see a popup in the upper right corner saying Shadow addon has installed. There will actually be multiple popups for the various components.

Step 25 Install Shadow kodi addon


26. Click Shadow.

Step 26 Install Shadow kodi addon


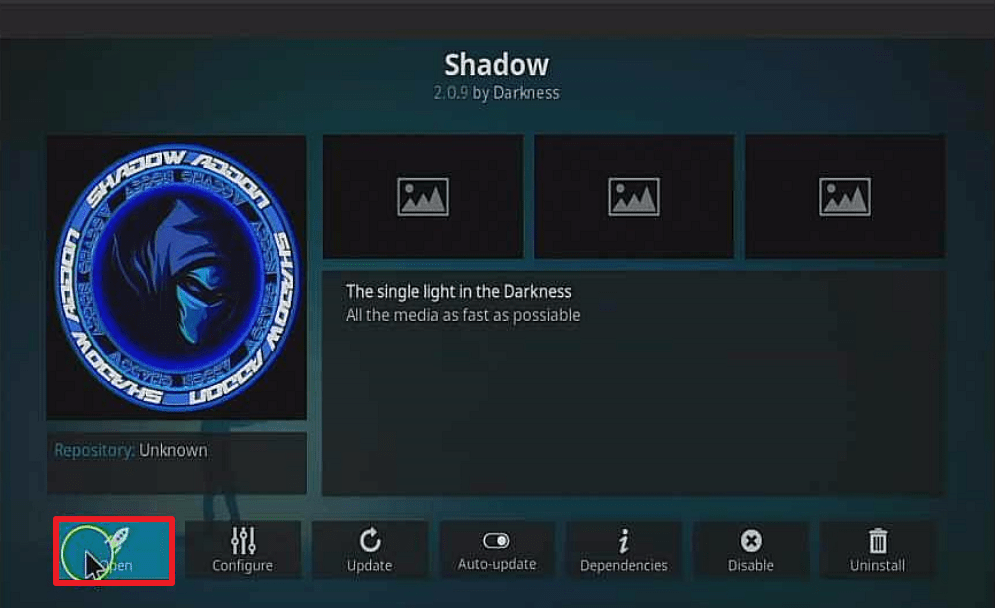
27.  Click OPEN.

Step 27 Install Shadow kodi addon


Use a VPN

Never access the internet or stream on the Kodi app, especially with third-party addons like Shadow addon without a VPN. This is because VPN encrypts and masks your IP address to appear as a private user on the internet service provider network. 

We recommend using Surfshark as it offers the safest online security and privacy. Also, with Surfshark, you can bypass location restrictions and ISP throttling. Surfshark offers a 30-day money-back guarantee. 

Note: For more information about Surfshark, please read our Surfshark Review.


Install Surfshark on Firestick

Best Surfshark Deal


How to Install Surfshark VPN on Firestick

If your Firestick still has the older interface, read this article to learn how to update it: Update Firestick Interface.

Follow our screenshots below to install the SurfShark VPN app on your Fire TV stick.

1. Go to the Home screen of your Firestick.

step 1 Install Surfshark VPN on Firestick


2. Navigate towards the Find tab. Press the Search button from the resulting dropdown.

step 2 Install Surfshark VPN on Firestick


3. Type in the keyword of SurfShark and select from the suggestions that will appear.

step 3 Install Surfshark VPN on Firestick


4. Click the official SurfShark icon from your search results.

step 4 Install Surfshark VPN on Firestick


5. Press the Download (You own it) button.

step 5 Install Surfshark VPN on Firestick


6. The SurfShark VPN installer will download on your device.

step 6 Install Surfshark VPN on Firestick


7. SurfShark VPN’s app will automatically install itself on your Fire TV stick.

step 7 Install Surfshark VPN on Firestick


8. Press the Open button after completing SurfShark VPN’s installation process.

step 8 Install Surfshark VPN on Firestick


9. Please wait for the SurfShark VPN to load its user interface.

step 9 Install Surfshark VPN on Firestick


10. You can now log in with your SurfShark VPN account credentials.

step 10 Install Surfshark VPN on Firestick

Learn more about Surfshark and Grab the Best Surfshark Deal Now!


Install Surfshark on Firestick

Best Surfshark Deal


Other VPNs to Consider

NordVPN (Best for Streaming)

Best Features

  • 5000+ Server in 50+ Countries 
  • Military-Grade Encryption
  • Fast Connection Speed
  • Suitable to a lot of devices
  • No-Log Policy

Prices
  • Complete $5.89 per month (64% Discount)
  • Plus $4.59 per month (56% Discount)
  • Standard $3.69 per month (55% Discount)

Best Features

  • 750+ High-speed VPN Servers in 43 Locations
  • Military-Grade Encryption
  • Fastest HD Streaming and Gaming
  • 30-Day Money-Back Guarantee
  • Unlimited Data & Devices
  • No-Log Policy

Prices
  • 3 Years $1.99 per month (82% Discount)
  • 1 Years $3.29 per month (70% Discount)
  • 1 Month $10.99 per month

IPVanish VPN (Most Secure)

Best Features

  • 1200+ Servers in 60+ Countries around the world
  • Unlimited Connections
  • No-Log Policy
  • Top Notch Military-Grade VPN Protocols and Encryptions
  • 100% Safe and Secured
  • Most Trusted VPN
  • Best VPN for Firestick
  • 30-Day Money-Back Guarantee

Prices
  • Yearly $3.99 per month (63% Discount) – 30 days risk free + Ransomware & Malware Protection
  • Quarterly $5.32 per month (51% Discount)
  • Monthly $10.99 per month


For more VPN discounts, go to ReviewVPN Deals and purchase the best VPN for you.


How to Install Butter Fingers Movies Kodi Addon

Butter Fingers Movies Kodi Addon

Butter Fingers Movies is a third-party Kodi addon within the Butter Fingers Repository. This addon has sections such as Troma, Classics, Crime, Horror, Sci-fi, Movie Mix, Documentaries, Comedy, Action, Animated, Sports, Featured, Music Video, and lots more. 


Butter Fingers Movies Kodi add-on has a huge database of movie genres from YouTube. Butter Fingers Movies Kodi add-on has no buffering and lagging issues when tested. This addon is updated daily to offer you the best addon experience. In this tutorial, you will learn how to install the Butter Finger Movies addon.


ANONYMOUSLY


Legal Disclaimer: ReviewVPN.com does not encourage or endorse any illegal activity involved in the usage of services and applications referenced on this site. We do not verify the licensing agreements of services. The end-user is wholly responsible for ensuring that any media accessed through these services does not violate copyright and/or licensing laws. ReviewVPN does not promote, link to, or receive compensation from any Apps and IPTV services.


YOUR INTERNET ACTIVITY IS BEING WATCHED

ReviewVPN cannot attest to the legality, security and privacy of the applications discussed on this site. It is highly recommended that you use a VPN service while streaming or using Kodi.

Currently, your IP 216.73.217.150 is visible to everyone and your Browser is being tracked by Advertisers & ISP Provider.

Save 65% Now

Limited Time Offer

Here are the main reasons why you must use a VPN:

  • Your activities are hidden from your ISP, the government, and from the apps you are using.
  • You can access additional movies and TV streams.
  • ISP attempts to throttle are thrwarted thus reducing buffering issues.
  • Geographically restricted content like Netflix and Hulu can be unblocked.

A VPN works be replacing your ISP-assigned IP address and creating an encrypted tunnel. We recommend the no log service offered by IPVanish. It works well on a Firestick and offers the fastest possible speeds.

Special Limited Time Offer - Get IPVanish


Step by Step Guide on How to Install Butter Fingers Movies Kodi Addon

To install this addon, first, check if the unknown sources of your Kodi app are enabled or not. If it’s not enabled, follow these steps to enable it.

Step 1. Open your Kodi app

Step2. Scroll up to the setting icon found at the top left side of your screen and click on it.

Step 3. On the setting menu, navigate downwards to locate the system option and click on it

Step 4. Next, on the system menu, go down to add-ons and click on it

Step 5. Scroll to unknown sources and then click on it. Select YES on the warning message that will appear.

Step 6. To return to the home menu, hit on the back button on your remote or the escape or backspace key on your keyboard.


Install Surfshark on Firestick

Best Surfshark Deal


Follow the below steps to install Butter Fingers Movies Kodi add-on

Step 1. From the home menu or start menu of your Kodi app, scroll up and select the setting icon found at the top left-hand side of your screen. 

Step 2. On the setting menu, go to file manager and click on it

Step 3. Next, when the file manager menu opens up, click on add sources which are located at the bottom of the file manager menu. 

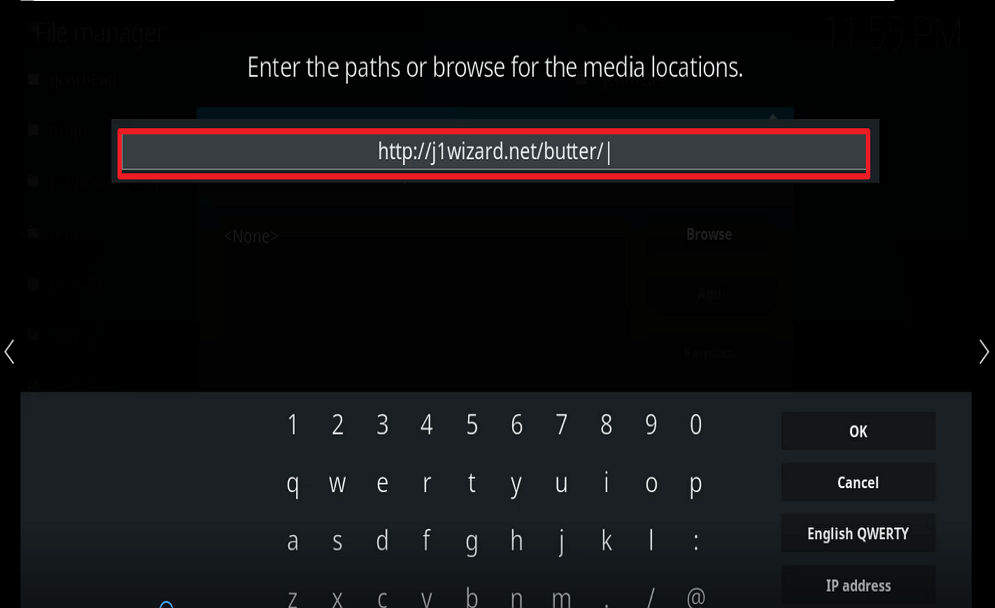
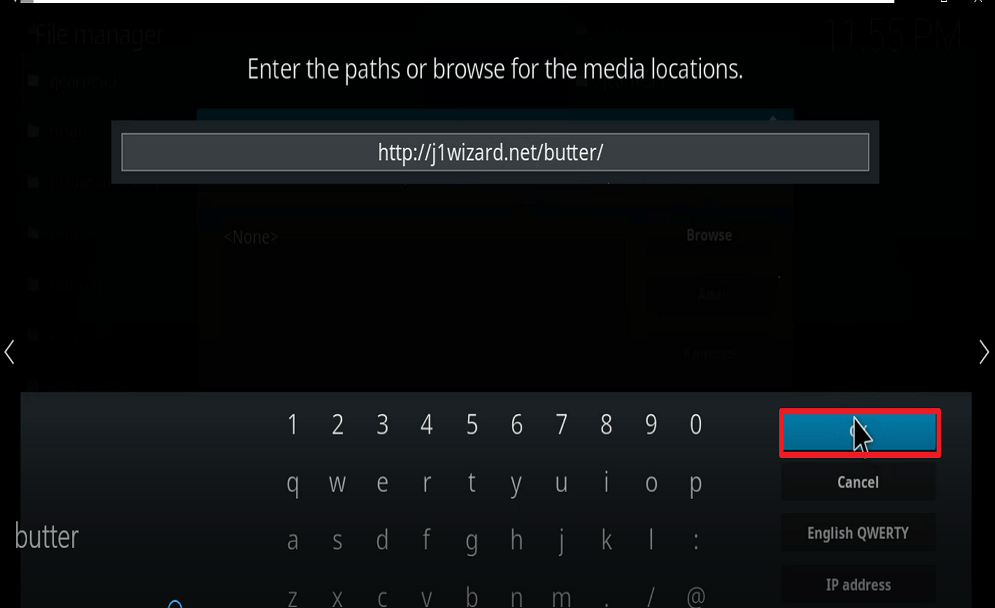
Step 4. On the new window, click on <none> option and hover over the dialog box that will appear. Carefully enter the media source URL: http://j1wizard.net/butter/ and click on OK once you are done.

Note: double-check the media source URL to avoid any typo errors. 

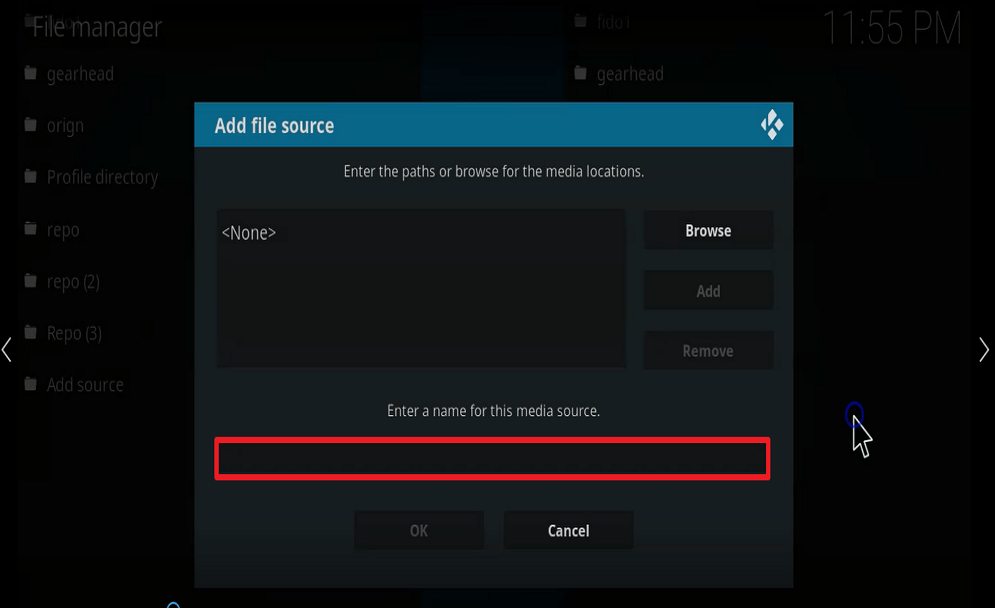
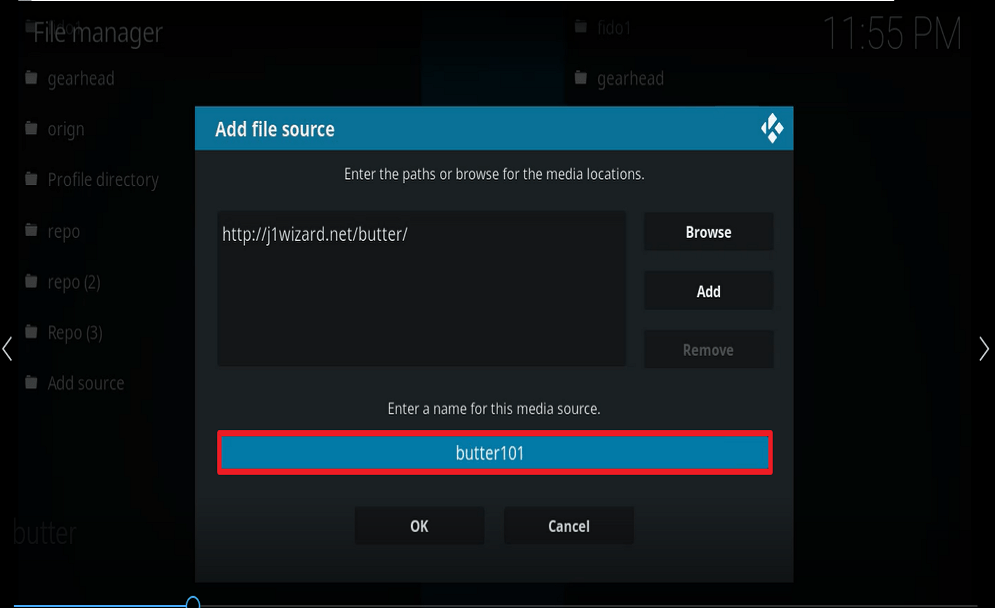
Step 5. Enter a name for this media source file. Note if Kodi auto-populates a name for this media source at your end, just click OK to continue with the installation process. For this installation, we are going to use BUTTER.

Step 6. Hit the back button on your remote controller or the escape or backspace key on your keyboard to return to the home menu.

Step 7. From the home menu, scroll down again to addon and click on it. 

Step 8. On the new window that will come out, click on the addon icon 

Step 9. On the addon browser menu (add-on icon menu), scroll down to locate the install from the zip file option.

Step 10. Next, on the new window that will come out, select Butter, or if you saved the media source file with a different name, scroll down to select that. 

Step 11. On the new dialog box, click on http://repository.butter-x.x.x.zip

Step 12. Wait while the installation is going on. Once it’s done, you should receive a notification at the top right corner of your screen.

Step 13. Next, click on the install from the repository option and scroll down to locate the butterfingers repository.

Step 14. On the new window, scroll down a bit and select video addons and then click on butter fingers movies on the new dialog box that will come up.

Step 15. Next, click on the install option, and a dialog box will appear with “the following additional addons will be installed”, click OK, and wait for the installation to complete.


Screenshots on How to Install Butter Fingers Movies Kodi Addon

  1. Select the cogwheel in the upper left corner

Step 1 Install Butter fingers movies kodi addon

2. Select System on the bottom left

Step 2 Install Butter fingers movies kodi addon


3. Hover over or select Add-ons on the left.

Step 3 Install Butter fingers movies kodi addon


4. Select Unknown sources to enable

Step 4 Install Butter fingers movies kodi addon


5. Click Yes to enable third-party addons

Step 5 Install Butter fingers movies kodi addon


6. Click on the File manager

Step 6 Install Butter fingers movies kodi addon


7. Click on Add source

Step 7 Install Butter fingers movies kodi addon


8. Click on None to add the URL path source

Step 9 Install Butter fingers movies kodi addon


9. Type  https://j1wizard.net.butter/

Step 9 Install Butter fingers movies kodi addon


10. Click OK

Step 10 Install Butter fingers movies kodi addon


11. Select enter a name for this media source.

Step 11 Install Butter fingers movies kodi addon


12. Name it “butter101” (this part isn’t critical as long as you remember the name). Click OK.

Step 12 Install Butter fingers movies kodi addon


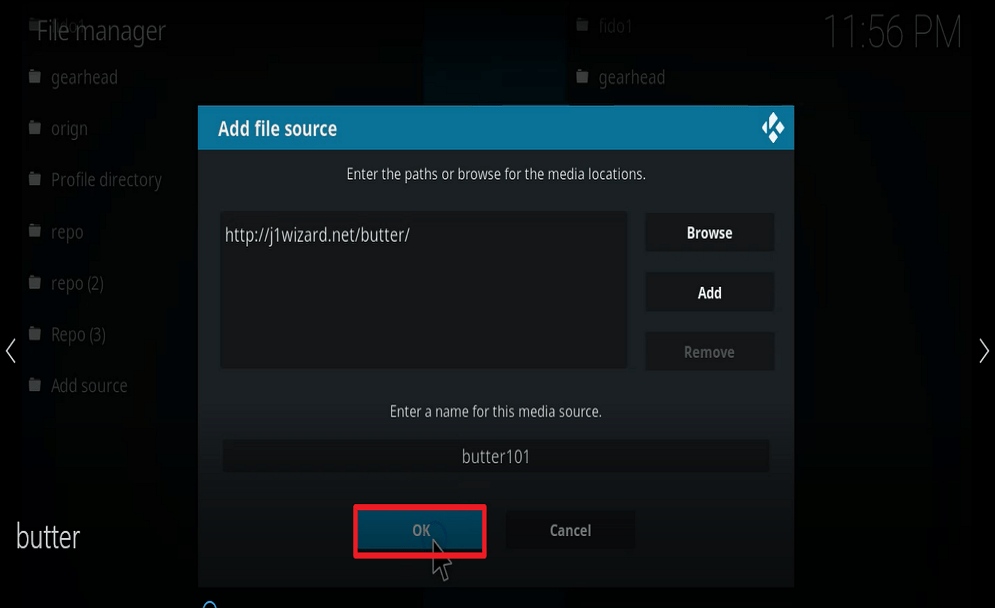
13. Click OK.

Step 13 Install Butter fingers movies kodi addon


14. Head back to the Homescreen. Click Addons.

Step 14 Install Butter fingers movies kodi addon


15. Click Box Icon.

Step 15 Install Butter fingers movies kodi addon


16. Select install from zip file.

Step 16 Install Butter fingers movies kodi addon


17. Click on butter101 (or whatever you named the source).

Step 17 Install Butter fingers movies kodi addon


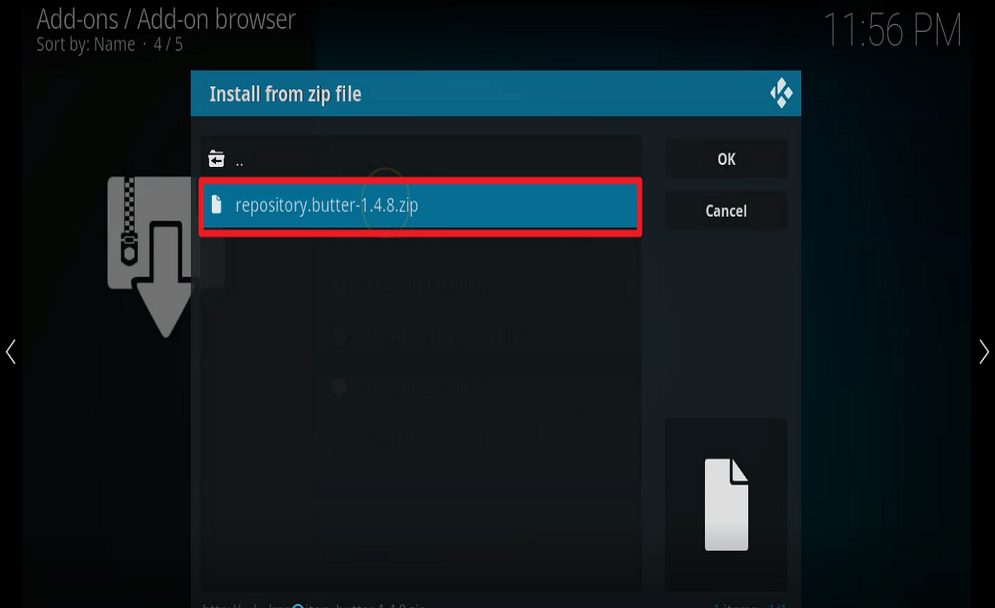
18. Click repository.butter-1.4.8.zip

Step 18 Install Butter fingers movies kodi addon


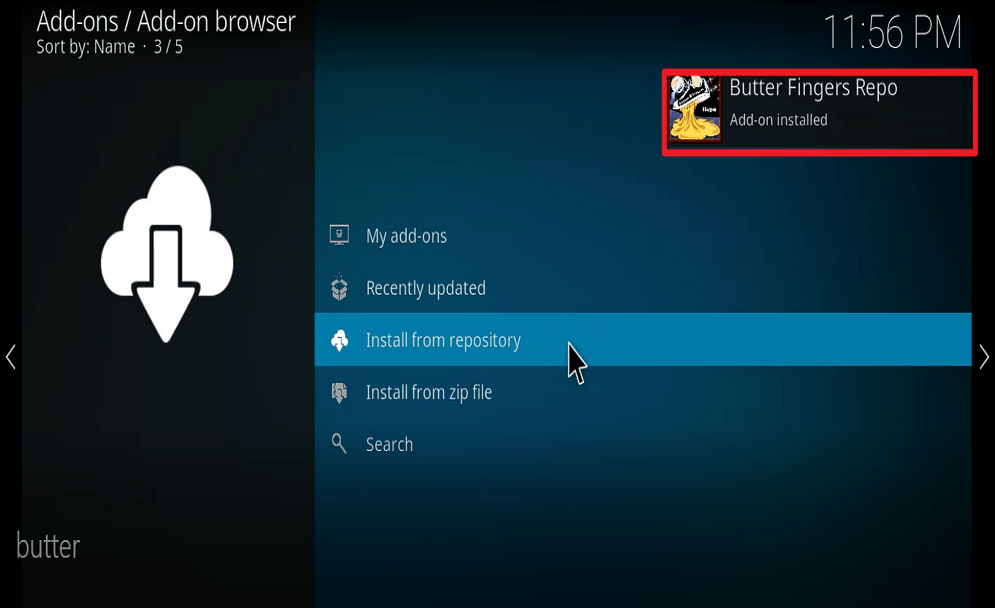
19. Popup in the upper right corner saying Butter fingers Repo  Addon installed.

Step 19 Install Butter fingers movies kodi addon


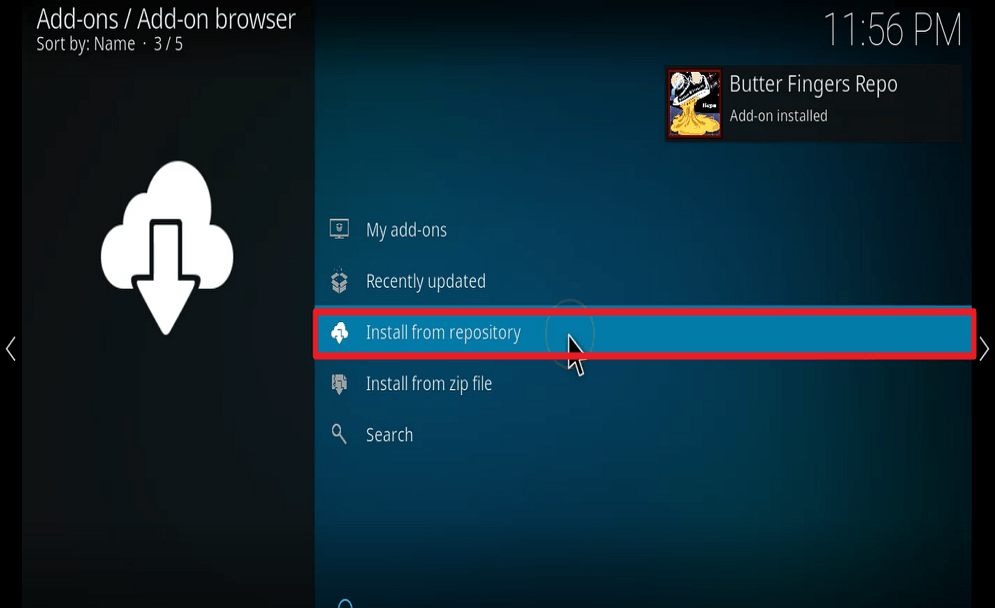
20. Select install from Repository.

Step 20 Install Butter fingers movies kodi addon


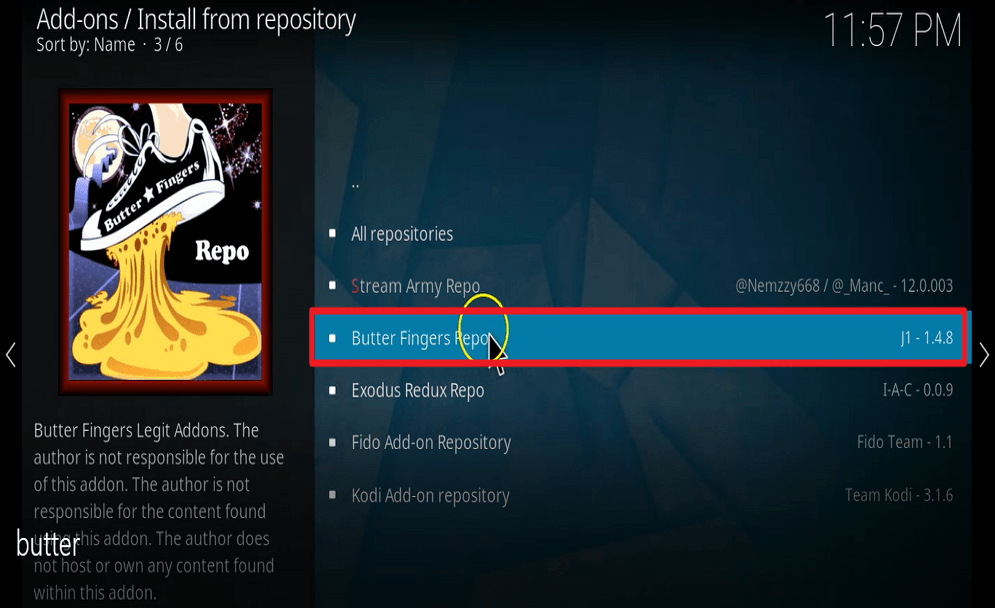
21. Click  Butter fingers Repo

Step 21 Install Butter fingers movies kodi addon


22. Click Video Addons.

Step 22 Install Butter fingers movies kodi addon


23. Click Butter fingers movies.

Step 23 Install Butter fingers movies kodi addon


24. Click Install.

Step 24 Install Butter fingers movies kodi addon


25. Click OK.

Step 25 Install Butter fingers movies kodi addon


26. You should see a popup in the upper right corner saying Butter fingers Movies addon has installed. There will actually be multiple popups for the various components.

Step 26 Install Butter fingers movies kodi addon


27. Click Butter fingers Movies.

Step 27 Install Butter fingers movies kodi addon


28. Click OPEN.

Step 28 Install Butter fingers movies kodi addon 

Use Butter Fingers Movies Kodi Addon with Surfshark

We recommend using Surfshark anytime you are streaming on Kodi or accessing the internet. Surfshark masks and does encryption on your IP address to ensure maximum online security and privacy. With Surfshark, you need not worry about your online activities being monitored or tracked. Surfshark has a zero-log policy and helps to minimize ISP throttling. Also, Surfsharkenables you to bypass location restrictions to stream from anywhere around the world. 


Note:  Our Surfshark Review will give you a piece of detailed information regarding a premium VPN service.


How to Install Surfshark VPN on Firestick

If your Firestick still has the older interface, read this article to learn how to update it: Update Firestick Interface.

Follow our screenshots below to install the SurfShark VPN app on your Fire TV stick.

1. Go to the Home screen of your Firestick.

step 1 Install Surfshark VPN on Firestick


2. Navigate towards the Find tab. Press the Search button from the resulting dropdown.

step 2 Install Surfshark VPN on Firestick


3. Type in the keyword of SurfShark and select from the suggestions that will appear.

step 3 Install Surfshark VPN on Firestick


4. Click the official SurfShark icon from your search results.

step 4 Install Surfshark VPN on Firestick


5. Press the Download (You own it) button.

step 5 Install Surfshark VPN on Firestick


6. The SurfShark VPN installer will download on your device.

step 6 Install Surfshark VPN on Firestick


7. SurfShark VPN’s app will automatically install itself on your Fire TV stick.

step 7 Install Surfshark VPN on Firestick


8. Press the Open button after completing SurfShark VPN’s installation process.

step 8 Install Surfshark VPN on Firestick


9. Please wait for the SurfShark VPN to load its user interface.

step 9 Install Surfshark VPN on Firestick


10. You can now log in with your SurfShark VPN account credentials.

step 10 Install Surfshark VPN on Firestick

Learn more about Surfshark and Grab the Best Surfshark Deal Now!


Install Surfshark on Firestick

Best Surfshark Deal


Other VPNs to Consider

NordVPN (Best for Streaming)

Best Features

  • 5000+ Server in 50+ Countries 
  • Military-Grade Encryption
  • Fast Connection Speed
  • Suitable to a lot of devices
  • No-Log Policy

Prices
  • Complete $5.89 per month (64% Discount)
  • Plus $4.59 per month (56% Discount)
  • Standard $3.69 per month (55% Discount)

Best Features

  • 750+ High-speed VPN Servers in 43 Locations
  • Military-Grade Encryption
  • Fastest HD Streaming and Gaming
  • 30-Day Money-Back Guarantee
  • Unlimited Data & Devices
  • No-Log Policy

Prices
  • 3 Years $1.99 per month (82% Discount)
  • 1 Years $3.29 per month (70% Discount)
  • 1 Month $10.99 per month

IPVanish VPN (Most Secure)

Best Features

  • 1200+ Servers in 60+ Countries around the world
  • Unlimited Connections
  • No-Log Policy
  • Top Notch Military-Grade VPN Protocols and Encryptions
  • 100% Safe and Secured
  • Most Trusted VPN
  • Best VPN for Firestick
  • 30-Day Money-Back Guarantee

Prices
  • Yearly $3.99 per month (63% Discount) – 30 days risk free + Ransomware & Malware Protection
  • Quarterly $5.32 per month (51% Discount)
  • Monthly $10.99 per month


For more VPN discounts, go to ReviewVPN Deals and purchase the best VPN for you.

Click here to get the lowest price on Surfshark through our exclusive limited-time offer.

 

How to Install Marauder Kodi Addon

Marauder Kodi Addon

In this tutorial, you will learn how to install Marauder Kodi addon.

Marauder Kodi addon is a third-party Kodi addon within The Crew repository. Marauder Kodi addon has sections such as Boxsets, Channels, Search, TV Shows, Movies, Hack the Planet, IMDB Top 250, The Movie Chest, New Movies and lots more.


Legal Disclaimer: ReviewVPN.com does not encourage or endorse any illegal activity involved in the usage of services and applications referenced on this site. We do not verify the licensing agreements of services. The end-user is wholly responsible for ensuring that any media accessed through these services does not violate copyright and/or licensing laws. ReviewVPN does not promote, link to, or receive compensation from any Apps and IPTV services.


ANONYMOUSLY


[videopress Xr988PTG]


Install Surfshark on Firestick

Best Surfshark Deal


YOUR INTERNET ACTIVITY IS BEING WATCHED

ReviewVPN cannot attest to the legality, security and privacy of the applications discussed on this site. It is highly recommended that you use a VPN service while streaming or using Kodi.

Currently, your IP 216.73.217.150 is visible to everyone and your Browser is being tracked by Advertisers & ISP Provider.

Save 65% Now

Limited Time Offer

Here are the main reasons why you must use a VPN:

  • Your activities are hidden from your ISP, the government, and from the apps you are using.
  • You can access additional movies and TV streams.
  • ISP attempts to throttle are thrwarted thus reducing buffering issues.
  • Geographically restricted content like Netflix and Hulu can be unblocked.

A VPN works be replacing your ISP-assigned IP address and creating an encrypted tunnel. We recommend the no log service offered by IPVanish. It works well on a Firestick and offers the fastest possible speeds.

Special Limited Time Offer - Get IPVanish


Note:

Before installing Marauder Kodi addon, you need to enable the unknown sources of your Kodi app.

You can do so by following the below steps:

Step 1. Open your Kodi app

Step 2. Scroll up to where the setting icon is located and click on it

Step 3. On the setting menu, scroll downwards to system option and click on it

Step 4. Next, on the system menu, you should scroll down to add-ons and click on it

Step 5. On the add-ons menu, navigate to unknown sources and click on it. Next on the warning message, select Yes to turn ON the unknown source.

Step 6. Hit the backspace or escape ey on your keyboard twice or the back button on your remote to return to the home menu.

Follow these steps to install Marauder Kodi Addon

Step 1. From the start menu, click on the Settings icon located at the top left corner of your home menu

Step 2. Next, click on File Manager

Step 3. On the file manager menu, scroll down to Add Source and click on it

Step 4. On the new window, click on <None> 

Step 5. Next, carefully enter the media source URL: http://team-crew.github.io and then click on OK

Step 6. After entering the media source URL, click on the box with “Enter a name for this media source” and enter an easy to remember the name for this media source file. Here we used “crew”. Once you are done, select OK

Step 7. Use the back button on your remote to go back to the home screen.

Step 8. From the home menu, click on Add-ons 

Step 9. Navigate upwards to locate the add-ons icon found at the top left corner of your screen.

Step 10. Next, on the new window, click on Install from zip file

Step 11. click on crew

Step 12. Choose the “repository.thecrew-x.x.x.zip”

Step 13. Wait while the installation of the repository is downloading. Once it is done, you will receive a notification at the top right corner of your screen.

Step 14. click on Install from Repository

Step 15. Next scroll down to locate “The Crew”

Step 16. On the new window, click on Video add-ons

Step 17. Choose Marauder

Step 18. click install

Step 19. If you are using Kodi Leia 18, on the dialog box that will appear with this message; the following additional addons will be installed, click O to continue with the installation process. Wait for the installation to complete.

Once the installation is finished, you will receive a message at the top right corner of your screen.

Step 20. Use the back button on your remote to return to the home menu.

Step 21. From the home menu, scroll down to addon and click on it. Then on the new window, click on video addons, and on the new window that will appear, you will find Marauder addon ready for use.


Use Marauder Kodi Addon with Surfshark

Always use the Kodi app with Surfshark. This is because streaming on Kodi especially with a third-party addon makes you vulnerable to attacks from hackers and your activities will be public on the internet service provider network.

With Surfshark, you will be able to bypass geolocation and internet service provider throttling. Surfshark offers 30 days money-back guarantee and provides you with the needed maximum online security and privacy you always wanted.  


Note:  Our Surfshark Review will give you a piece of detailed information regarding a premium VPN service.


Grab your subscription now!

Click here to get the lowest price on Surfshark through our exclusive limited-time offer.


How to Install Surfshark VPN on Firestick

If your Firestick still has the older interface, read this article to learn how to update it: Update Firestick Interface.

Follow our screenshots below to install the SurfShark VPN app on your Fire TV stick.

1. Go to the Home screen of your Firestick.

step 1 Install Surfshark VPN on Firestick


2. Navigate towards the Find tab. Press the Search button from the resulting dropdown.

step 2 Install Surfshark VPN on Firestick


3. Type in the keyword of SurfShark and select from the suggestions that will appear.

step 3 Install Surfshark VPN on Firestick


4. Click the official SurfShark icon from your search results.

step 4 Install Surfshark VPN on Firestick


5. Press the Download (You own it) button.

step 5 Install Surfshark VPN on Firestick


6. The SurfShark VPN installer will download on your device.

step 6 Install Surfshark VPN on Firestick


7. SurfShark VPN’s app will automatically install itself on your Fire TV stick.

step 7 Install Surfshark VPN on Firestick


8. Press the Open button after completing SurfShark VPN’s installation process.

step 8 Install Surfshark VPN on Firestick


9. Please wait for the SurfShark VPN to load its user interface.

step 9 Install Surfshark VPN on Firestick


10. You can now log in with your SurfShark VPN account credentials.

step 10 Install Surfshark VPN on Firestick

Learn more about Surfshark and Grab the Best Surfshark Deal Now!


Install Surfshark on Firestick

Best Surfshark Deal


Other VPNs to Consider

NordVPN (Best for Streaming)

Best Features

  • 5000+ Server in 50+ Countries 
  • Military-Grade Encryption
  • Fast Connection Speed
  • Suitable to a lot of devices
  • No-Log Policy

Prices
  • Complete $5.89 per month (64% Discount)
  • Plus $4.59 per month (56% Discount)
  • Standard $3.69 per month (55% Discount)

Best Features

  • 750+ High-speed VPN Servers in 43 Locations
  • Military-Grade Encryption
  • Fastest HD Streaming and Gaming
  • 30-Day Money-Back Guarantee
  • Unlimited Data & Devices
  • No-Log Policy

Prices
  • 3 Years $1.99 per month (82% Discount)
  • 1 Years $3.29 per month (70% Discount)
  • 1 Month $10.99 per month

IPVanish VPN (Most Secure)

Best Features

  • 1200+ Servers in 60+ Countries around the world
  • Unlimited Connections
  • No-Log Policy
  • Top Notch Military-Grade VPN Protocols and Encryptions
  • 100% Safe and Secured
  • Most Trusted VPN
  • Best VPN for Firestick
  • 30-Day Money-Back Guarantee

Prices
  • Yearly $3.99 per month (63% Discount) – 30 days risk free + Ransomware & Malware Protection
  • Quarterly $5.32 per month (51% Discount)
  • Monthly $10.99 per month


For more VPN discounts, go to ReviewVPN Deals and purchase the best VPN for you.

Click here to get the lowest price on Surfshark through our exclusive limited-time offer.
 

How to Install Troma Films Kodi Addon

Troma Films Kodi Addon

This tutorial will teach you how to install the Troma Films Kodi Addon. 


Troma Films add-on is a Kodi add-on within the Butter Fingers repository and has a huge collection of movies, TV series, TV shows, and lots more. This add-on has more horror and sci-fi movies.


ANONYMOUSLY

Features of Troma Films Kodi Addon

  • A large collection of Troma entertainment sections such as horror, movies, and sci-fi movies
  • Categories and subcategories
  • User-friendly and customizable search bar for trending movies, popular and new release
  • A huge database of TV shows, TV series, radio and lots more


Step by Step Guide on How to Install Troma Films Kodi Add-on

Installing Troma Films Kodi add-on involves two major process

  1. Enable unknown sources
  2. Installation of Troma Films Kodi add-on


Enable unknown sources 

Before installing Troma Films Kodi add-on, ensure that the unknown sources are enabled on your Kodi app. If it is not enabled; follow the below steps to enable unknown sources

Step 1. Launch your Kodi app and go to the setting icon and click on it.

Step 2. Next, on the new dialog box that will come out, scroll down to the system option, and click on it.

Step 3. On the system menu, scroll to add-on and click on it.

Step 4. Navigate to unknown sources and on the new dialog box, select YES on the warning message that will appear.

Step 5. Tap on the back button on your remote or escape or backspace key on your keyboard to go back to the home screen or main menu.


Installation of Troma Films Kodi add-on

Step 1. From the home screen or main menu, click on the setting icon found at the top right corner of your screen.

Step 2. On the settings menu, navigate to the file manager and click on it.

Step 3. Next, on the file manager menu scroll down to add source and click on it.

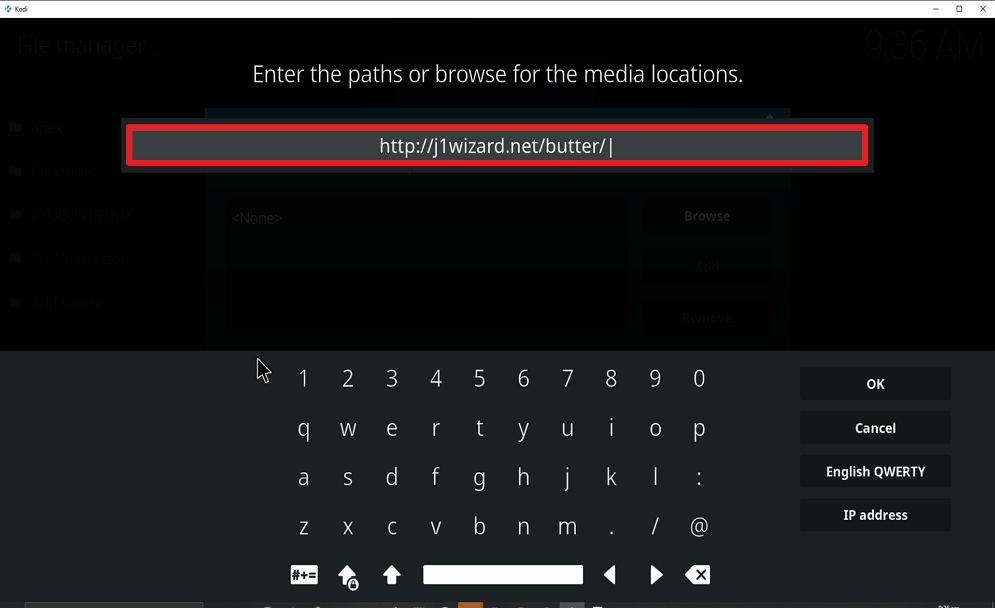
Step 4. Select <NONE> on the new window and enter the media source URL: http://j1wizard.net/butter/ and click Ok (Crosscheck the URL to ensure correctness)

Step 5. On the second dialog box, enter a name for the media source and click Ok.


Note:

If Kodi already auto-populates a name for this media source, just click Ok but if not you should enter a name you wish.

Step 6. After entering the name, use the back button on your remote or escape or backspace key on your keyboard to go back to the start menu or home screen. 

Step 7. Next, from the start menu, click on add-on and the add-on menu, scroll up to add-on package installer and click on it.

Step 8. On the new window, scroll down to install from the zip file and click on it

Step 9. Next, navigate to the name you used to save or the auto-populated name for the media source URL. Here we used “butter”. Click on the name and select the repository zip file: repository.butter-0.9.6.zip

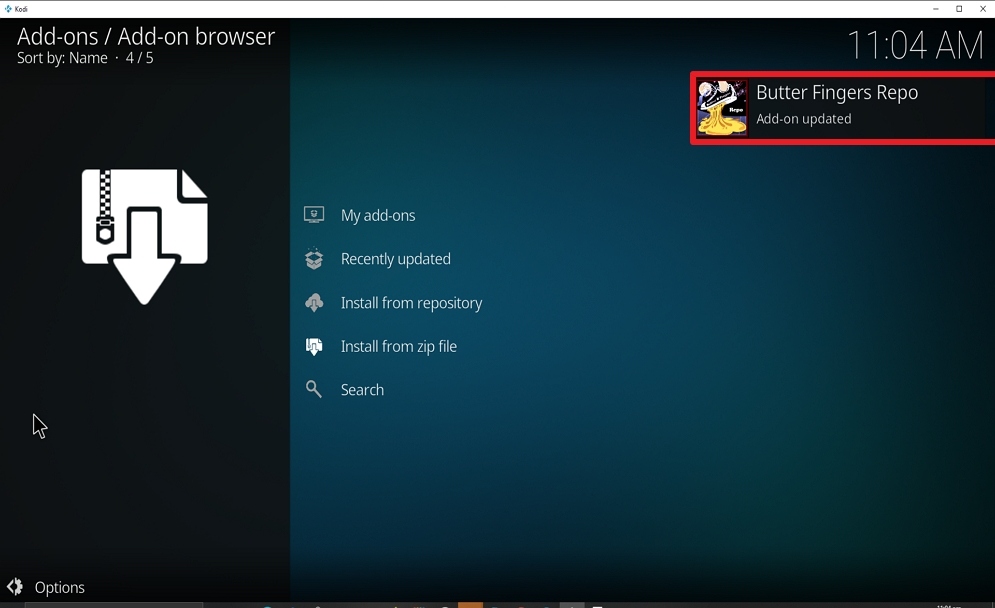
Step 10. Wait for the repository file to complete the installation. You will receive a notification at the top right corner of your screen that says “Butterfingers repo add-on installed

Step 11. click on install from repository. On the new window, scroll down to Butter Fingers Repo and click on it. 

Step 12. Select videos add-on on the new window that will appear.

Step 13. Scroll down to select “Troma Films”

Step 14. click on install. 

Note: if you using the latest version of Kodi which is Kodi Leia 18, you will see a dialog box with “THE FOLLOWING ADDITIONAL ADD-ON WILL BE INSTALLED” select OK and wait for the installation to complete.


YOUR INTERNET ACTIVITY IS BEING WATCHED

ReviewVPN cannot attest to the legality, security and privacy of the applications discussed on this site. It is highly recommended that you use a VPN service while streaming or using Kodi.

Currently, your IP 216.73.217.150 is visible to everyone and your Browser is being tracked by Advertisers & ISP Provider.

Save 65% Now

Limited Time Offer

Here are the main reasons why you must use a VPN:

  • Your activities are hidden from your ISP, the government, and from the apps you are using.
  • You can access additional movies and TV streams.
  • ISP attempts to throttle are thrwarted thus reducing buffering issues.
  • Geographically restricted content like Netflix and Hulu can be unblocked.

A VPN works be replacing your ISP-assigned IP address and creating an encrypted tunnel. We recommend the no log service offered by IPVanish. It works well on a Firestick and offers the fastest possible speeds.

Special Limited Time Offer - Get IPVanish


Legal Disclaimer: ReviewVPN.com does not encourage or endorse any illegal activity involved in the usage of services and applications referenced on this site. We do not verify the licensing agreements of services. The end-user is wholly responsible for ensuring that any media accessed through these services does not violate copyright and/or licensing laws. ReviewVPN does not promote, link to, or receive compensation from any Apps and IPTV services.


Install Surfshark on Firestick

Best Surfshark Deal


Install Troma Films Kodi addon with Screenshots

1. From the home screen, select the cogwheel at the upper left.

Step 1 Install Apex on kodi


2. Select System in the bottom right corner.

Step 2 Install Apex on kodi


3. Hover Add-ons on the left side of the screen.  Select Unknown sources.

Step 3 Install Apex on kodi


4. Click Yes to allow unknown sources.

Step 4 Install Apex on kodi


5. Take one step back, Select File manager.

Step 5 Install Apex on kodi


6. Click Add source.

Step 6 Install Apex on kodi


7. Click on <None>.

Step 7 Install Apex on kodi


8. Type exactly: http://j1wizard.net/butter/

Steps 8 Install Troma Films Kodi add-on


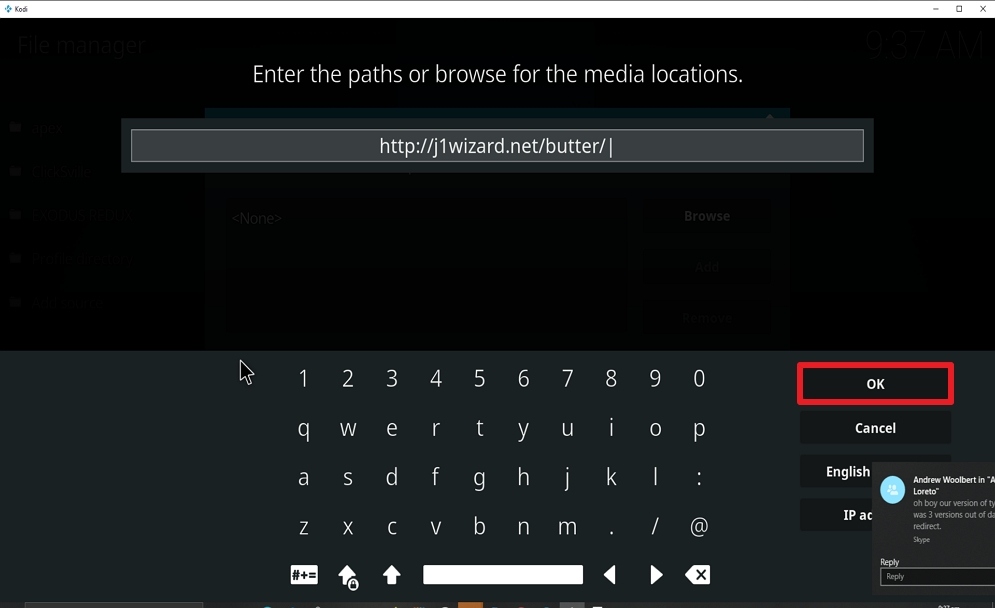
9. Click on OK.

Steps 9 Install Troma Films Kodi add-on


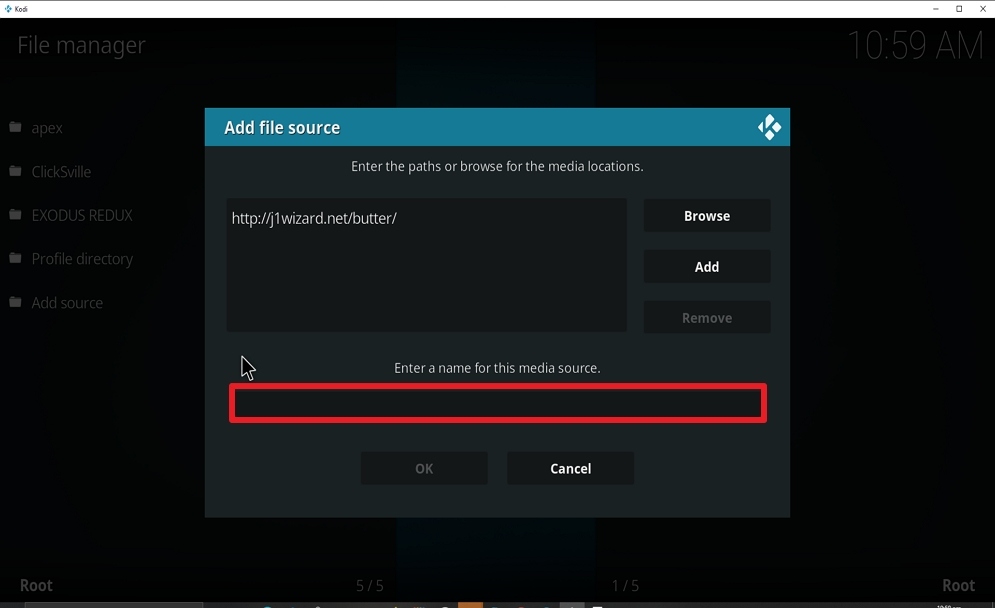
10. Select enter a name for this media source.

Steps 10 Install Troma Films Kodi add-on


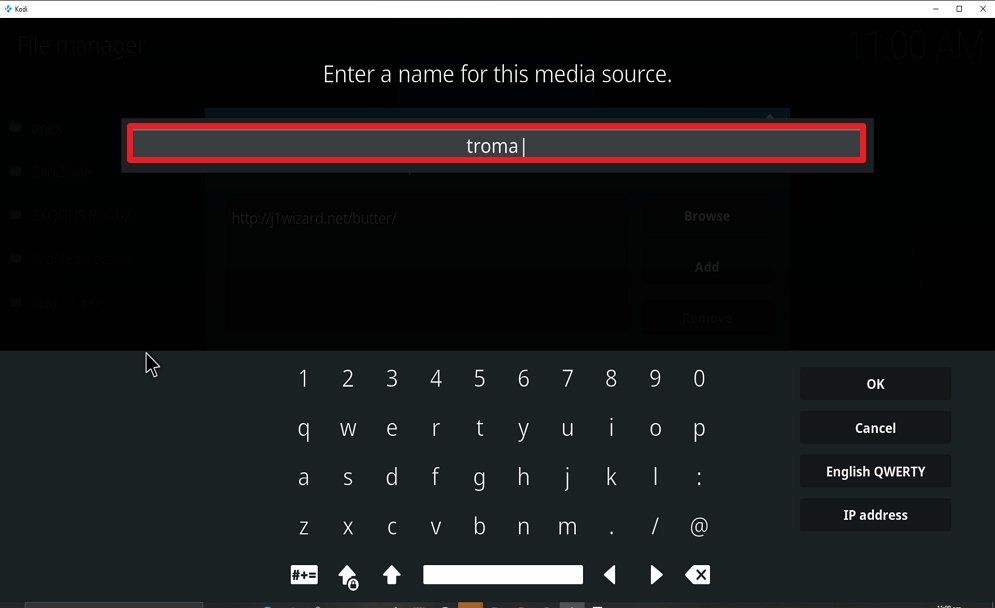
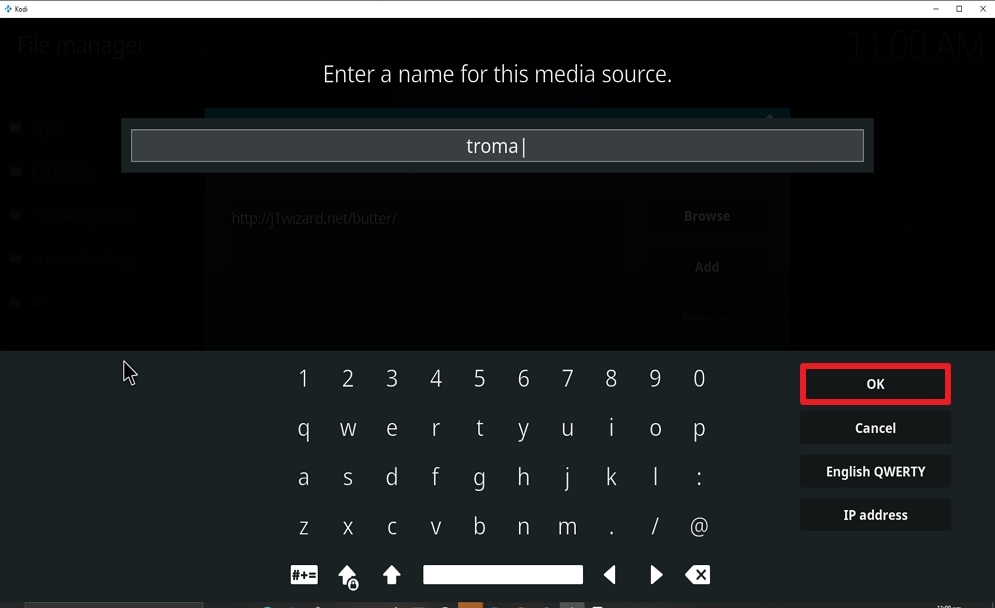
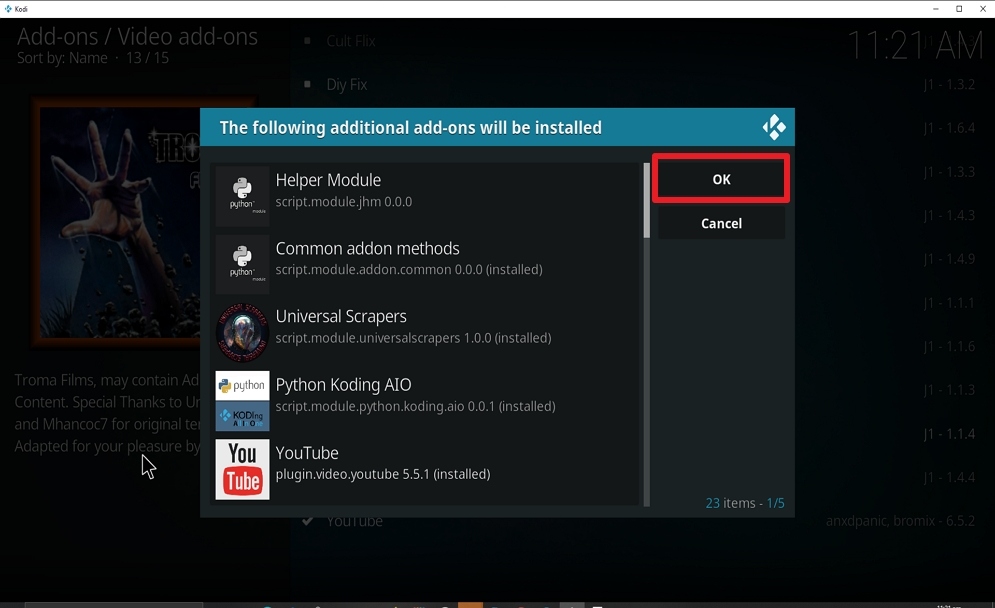
11. Name is Troma (this part isn’t critical as long as you remember the name).

Steps 11 Install Troma Films Kodi add-on


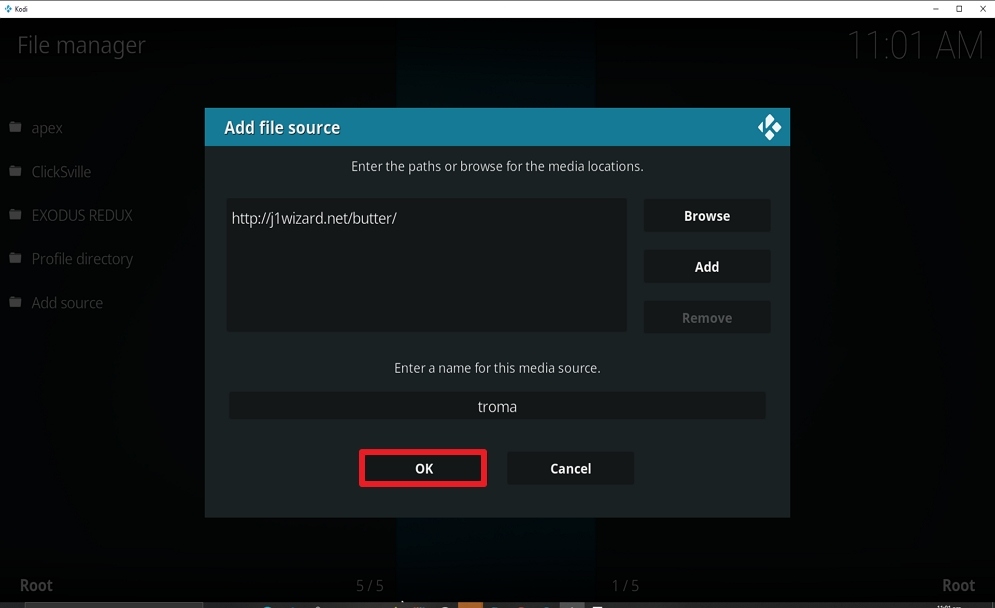
12. Click on OK.

Steps 12 Install Troma Films Kodi add-on


13. Click on OK.

Steps 13 Install Troma Films Kodi add-on


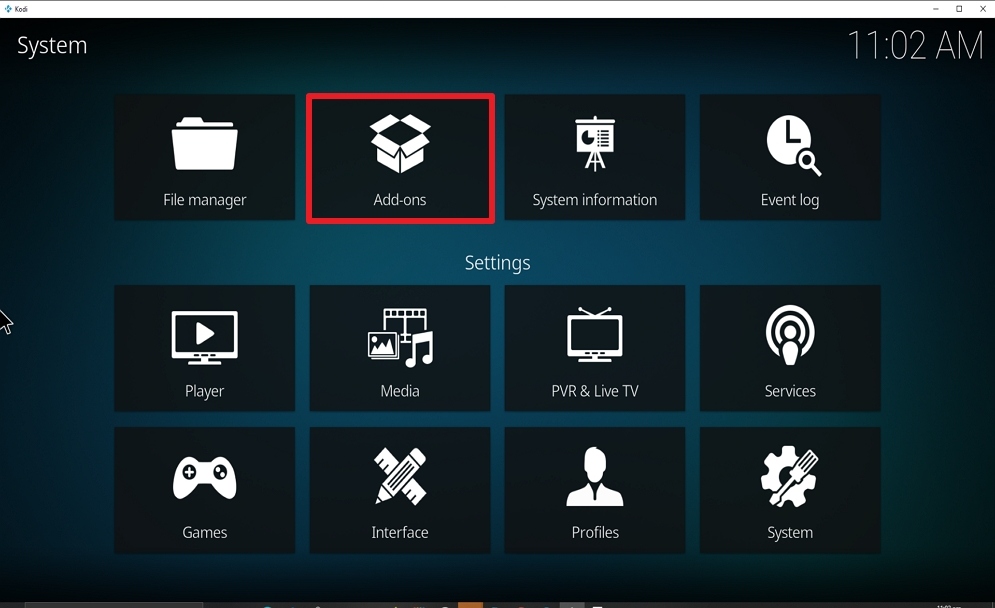
14. Take one step back and click on Add-ons.

Steps 14 Install Troma Films Kodi add-on


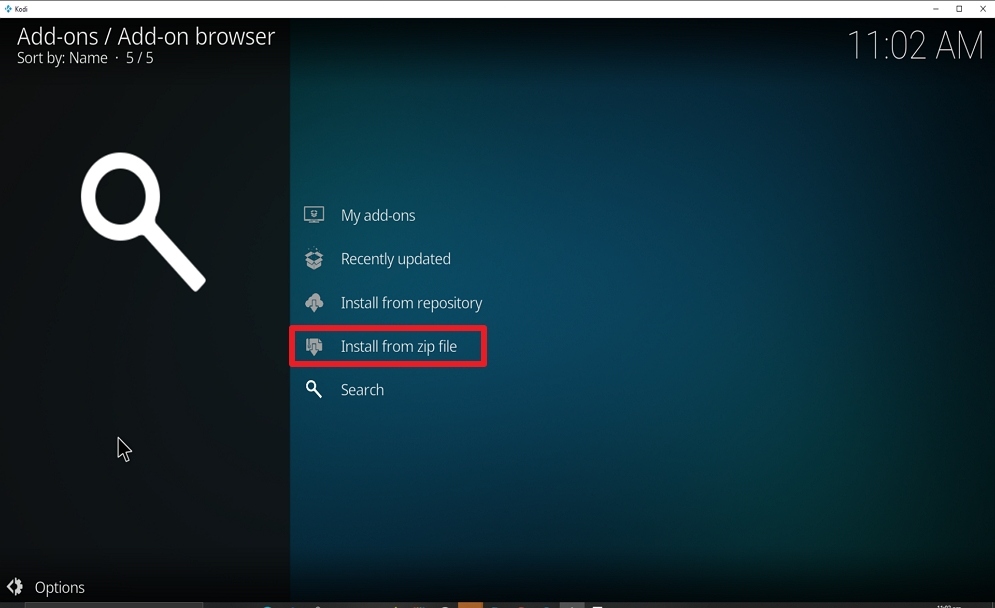
15. Select install from zip file.

Steps 15 Install Troma Films Kodi add-on


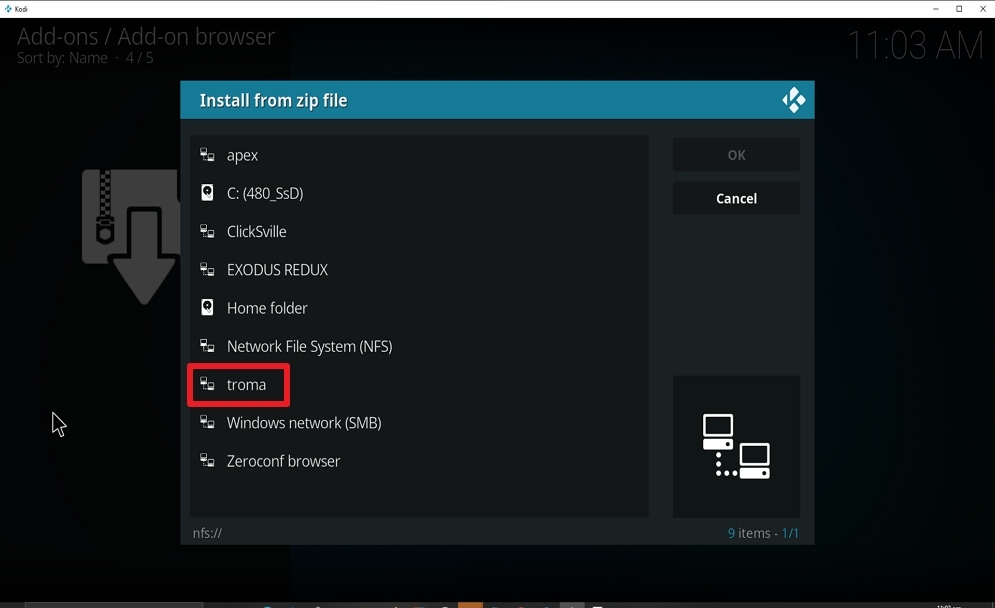
16. Click on Troma (or whatever you named the source).

Steps 16 Install Troma Films Kodi add-on


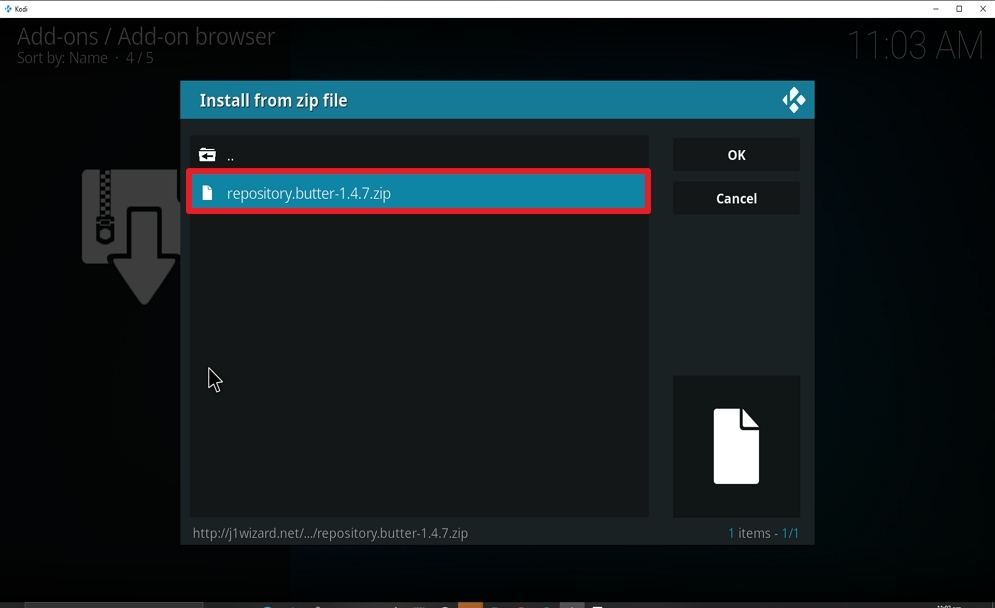
17. Click on repository.butter-1.4.7.zip

Steps 17 Install Troma Films Kodi add-on


18. Once the installation is completed, a pop message will appear.

Steps 18 Install Troma Films Kodi add-on


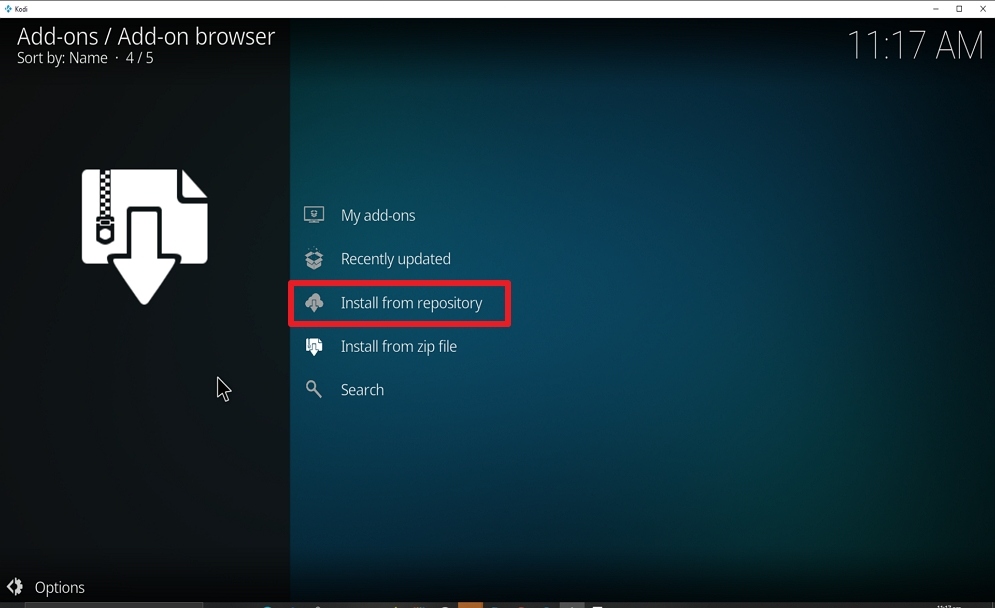
19. Select on Install from repository.

Steps 19 Install Troma Films Kodi add-on


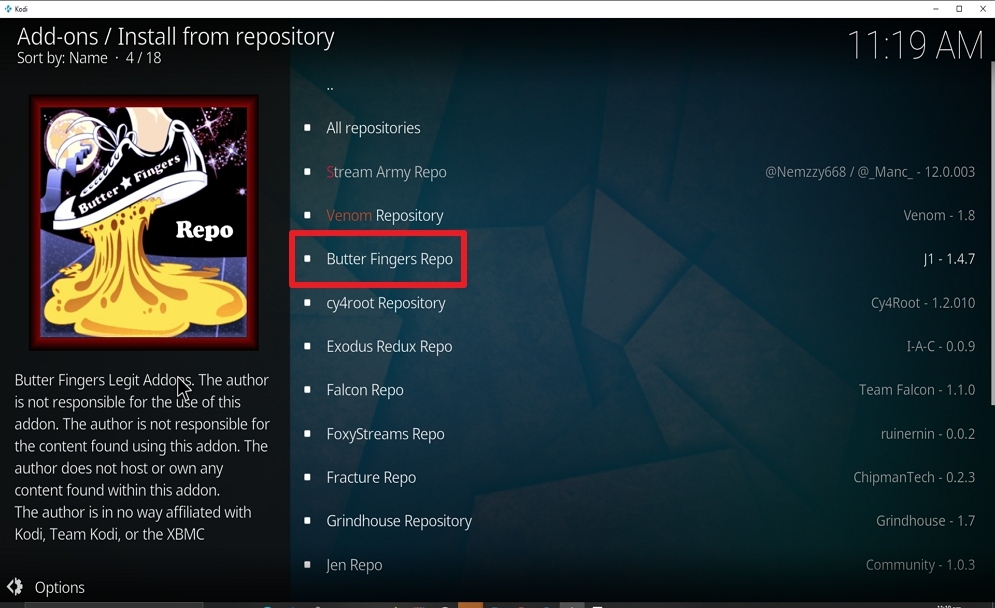
20. Click on Butter  Fingers Repo.

Steps 20 Install Troma Films Kodi add-on


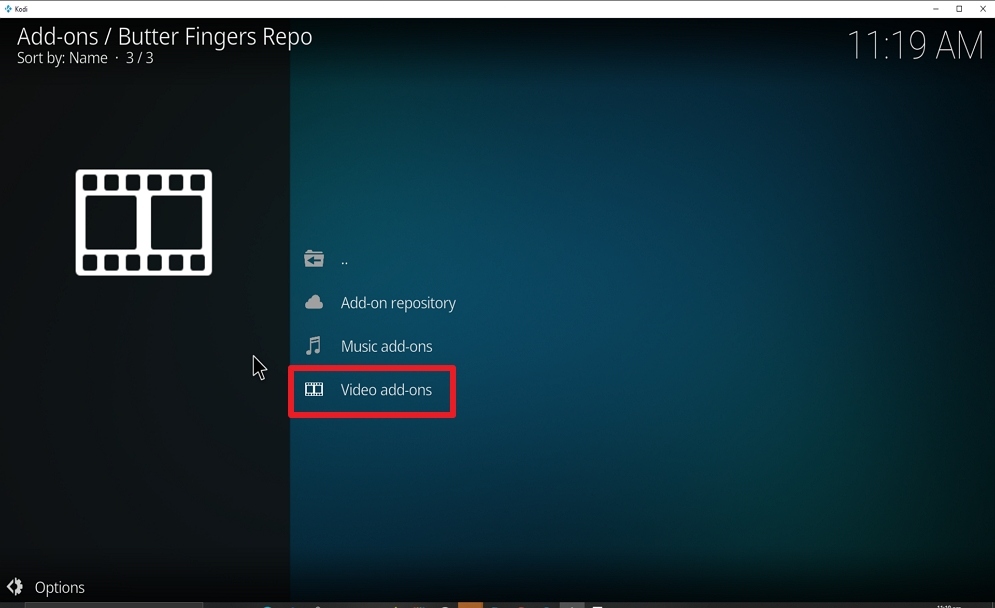
21. Pick Video add-ons.

Steps 21 Install Troma Films Kodi add-on


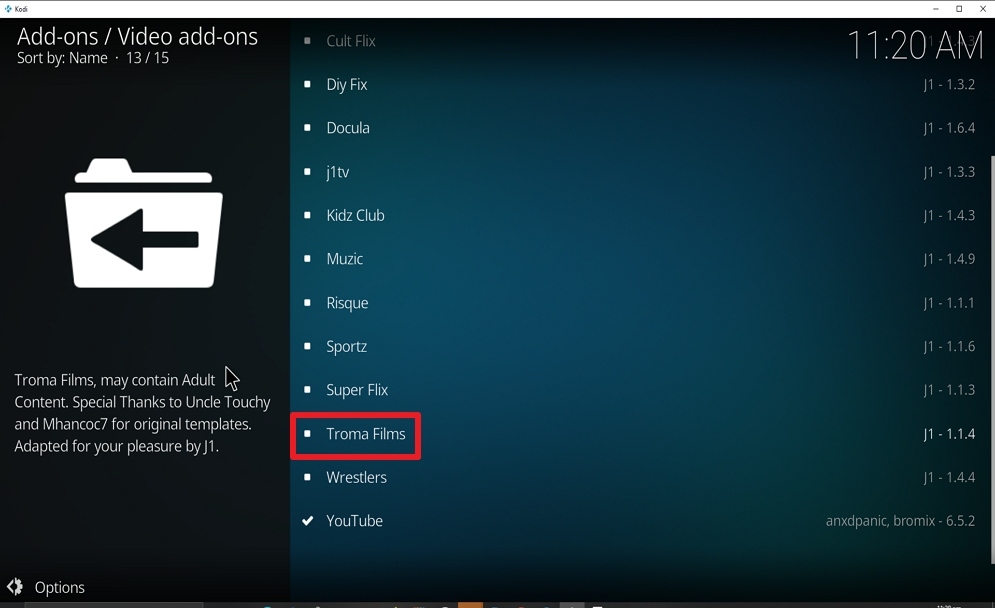
22. Select Troma.

Steps 22 Install Troma Films Kodi add-on


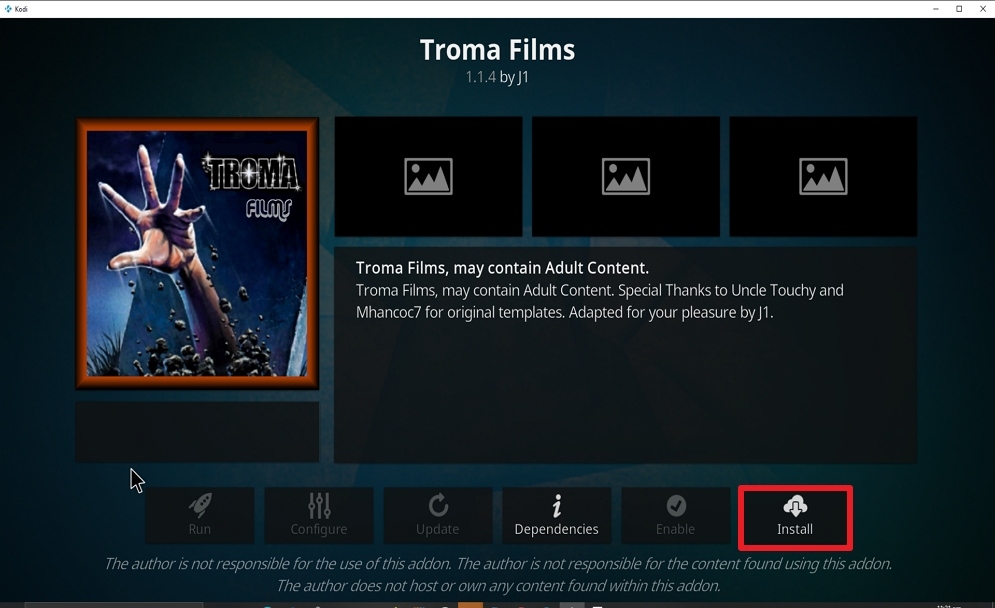
23. Click on Install.

Steps 23 Install Troma Films Kodi add-on


24. Select OK after reviewing the addons that will be installed.

Steps 24 Install Troma Films Kodi add-on


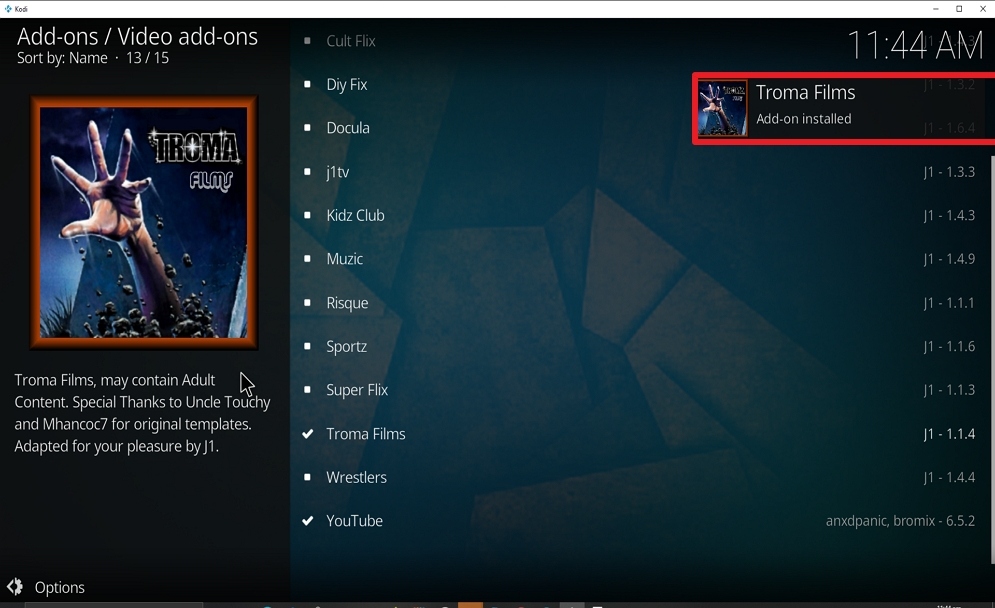
25. You should see a popup in the upper right corner saying Troma has installed. There will actually be multiple popups for the various components.

Steps 25 Install Troma Films Kodi add-on


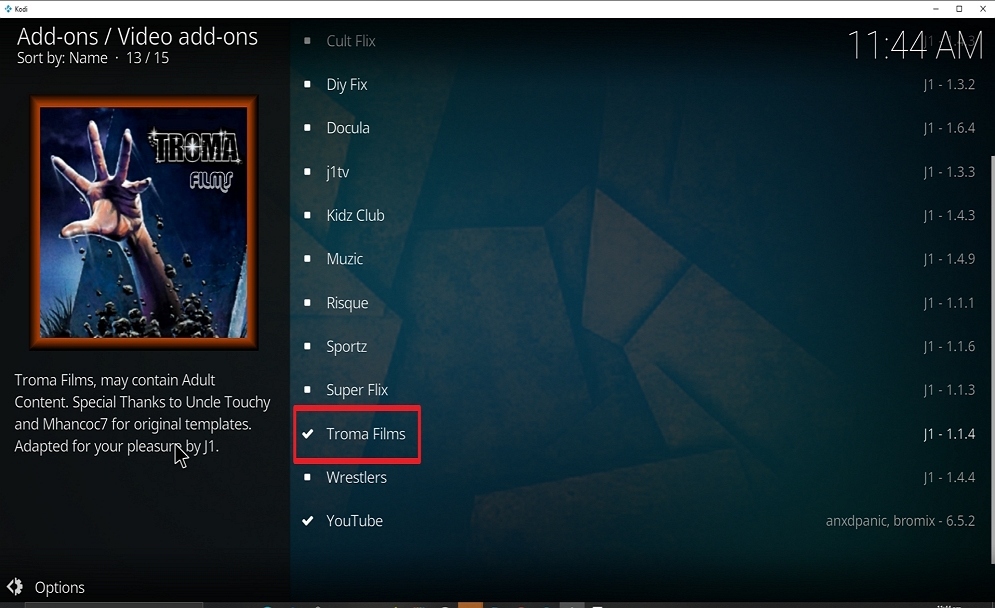
26. Click on Troma.

Steps 26 Install Troma Films Kodi add-on


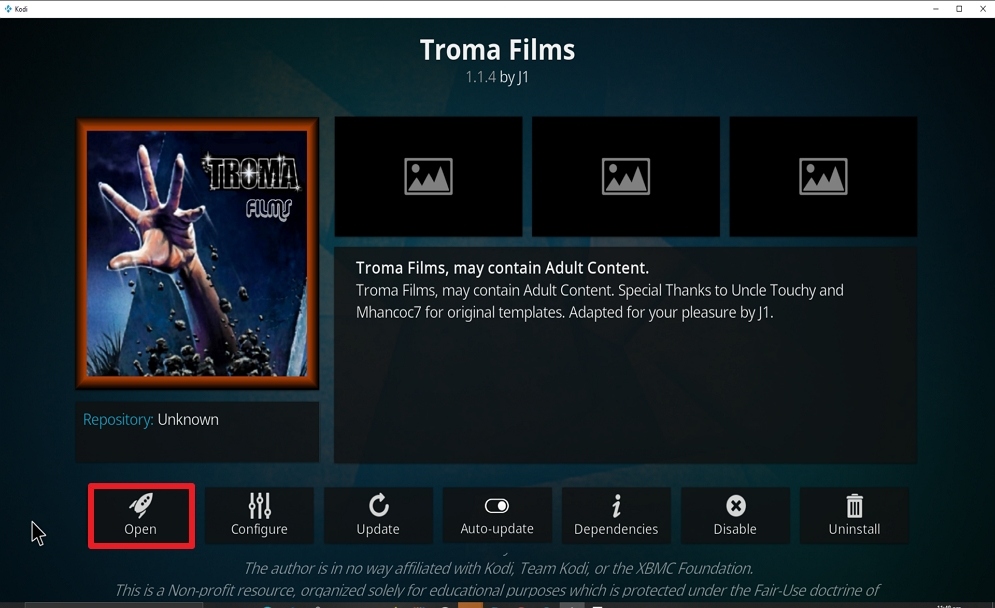
27. Click on Open to start the Troma addon.

Steps 27 Install Troma Films Kodi add-on


Don’t Use Kodi Without a VPN

To stream content on Kodi, we recommend installing Surfshark on your device. Surfshark encrypts your IP address and as such, your online information will be anonymous and private on the internet service provider. Most streaming platforms or magnet links has geo-location and installing Surfshark helps you to bypass geolocation and internet service provider (ISP) throttling.

Note: For more information about Surfshark, please read our Surfshark Review.


Grab your subscription now!


How to Install Surfshark VPN on Firestick

If your Firestick still has the older interface, read this article to learn how to update it: Update Firestick Interface.

Follow our screenshots below to install the SurfShark VPN app on your Fire TV stick.

1. Go to the Home screen of your Firestick.

step 1 Install Surfshark VPN on Firestick


2. Navigate towards the Find tab. Press the Search button from the resulting dropdown.

step 2 Install Surfshark VPN on Firestick


3. Type in the keyword of SurfShark and select from the suggestions that will appear.

step 3 Install Surfshark VPN on Firestick


4. Click the official SurfShark icon from your search results.

step 4 Install Surfshark VPN on Firestick


5. Press the Download (You own it) button.

step 5 Install Surfshark VPN on Firestick


6. The SurfShark VPN installer will download on your device.

step 6 Install Surfshark VPN on Firestick


7. SurfShark VPN’s app will automatically install itself on your Fire TV stick.

step 7 Install Surfshark VPN on Firestick


8. Press the Open button after completing SurfShark VPN’s installation process.

step 8 Install Surfshark VPN on Firestick


9. Please wait for the SurfShark VPN to load its user interface.

step 9 Install Surfshark VPN on Firestick


10. You can now log in with your SurfShark VPN account credentials.

step 10 Install Surfshark VPN on Firestick

Learn more about Surfshark and Grab the Best Surfshark Deal Now!


Install Surfshark on Firestick

Best Surfshark Deal


Other VPNs to Consider

NordVPN (Best for Streaming)

Best Features

  • 5000+ Server in 50+ Countries 
  • Military-Grade Encryption
  • Fast Connection Speed
  • Suitable to a lot of devices
  • No-Log Policy

Prices
  • Complete $5.89 per month (64% Discount)
  • Plus $4.59 per month (56% Discount)
  • Standard $3.69 per month (55% Discount)

Best Features

  • 750+ High-speed VPN Servers in 43 Locations
  • Military-Grade Encryption
  • Fastest HD Streaming and Gaming
  • 30-Day Money-Back Guarantee
  • Unlimited Data & Devices
  • No-Log Policy

Prices
  • 3 Years $1.99 per month (82% Discount)
  • 1 Years $3.29 per month (70% Discount)
  • 1 Month $10.99 per month

IPVanish VPN (Most Secure)

Best Features

  • 1200+ Servers in 60+ Countries around the world
  • Unlimited Connections
  • No-Log Policy
  • Top Notch Military-Grade VPN Protocols and Encryptions
  • 100% Safe and Secured
  • Most Trusted VPN
  • Best VPN for Firestick
  • 30-Day Money-Back Guarantee

Prices
  • Yearly $3.99 per month (63% Discount) – 30 days risk free + Ransomware & Malware Protection
  • Quarterly $5.32 per month (51% Discount)
  • Monthly $10.99 per month


For more VPN discounts, go to ReviewVPN Deals and purchase the best VPN for you.

Click here to get the lowest price on Surfshark through our exclusive limited-time offer.


How to Install ClickSville Kodi Addon

ClickSville Kodi Addon Overview

In this article, we will help you install ClickSville Kodi Addon on Firestick.


ClickSville is a new TV show and Movie addon within the last kingdom Repository. It has a “One-click” feature for free streaming links. ClickSville works on different devices such as Fire TV, Fire TV Cube, Android TV Boxes, NVIDIA Shield, and Amazon Firestick 4k.


ANONYMOUSLY


Steps on How to Install ClickSville Kodi Addon

Installing ClickSville Kodi Addon entails two processes:

First, enabling the unknown sources on your Kodi App

Second, installing of the ClickSville Kodi Addon


Enabling the unknown source on your Kodi App

Step 1. Launch your Kodi App and from the home menu or start menu, scroll upwards to locate the setting icon at the top left-hand side of your screen, and click on it.

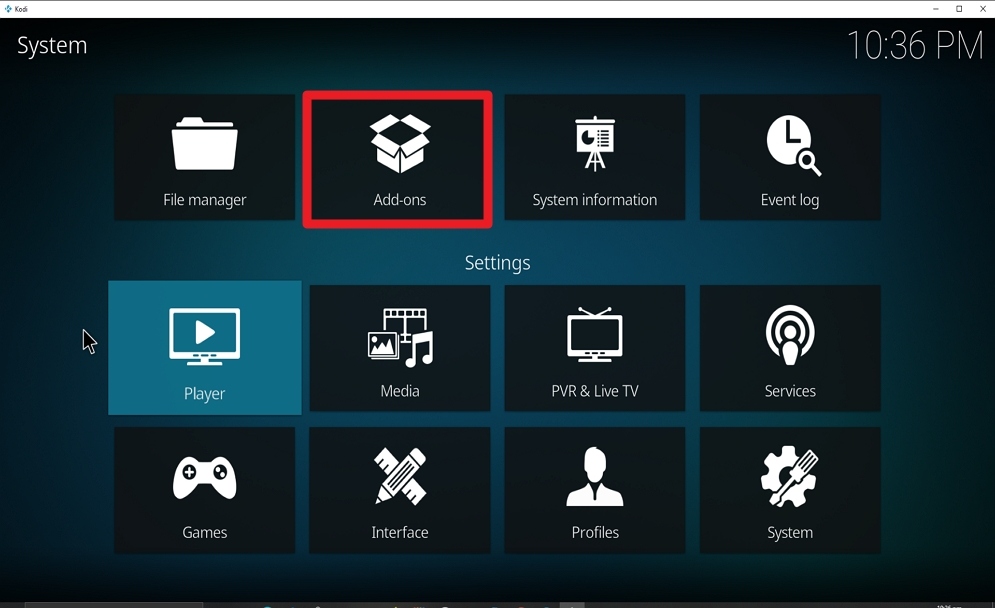
Step 2. Next on the new window, navigate downwards to System and click on it. On the system menu, scroll down to add-on and click on it.

Step 3. Hover on Unknown source and on the warning message that will appear select YES.

Step 4. Return to the home menu or start menu by hitting the escape/backspace key on your keyboard or back button on your remote.


Installing ClickSville Kodi Addon

Step 1: from the home screen, scroll to the top left and select the System Settings Icon

Step 2: Next, on the new window Select File manager.

Step 3: On the file manager menu, scroll down to the left and select Add Source.

Step 4: On the new dialog box, Select <NONE>

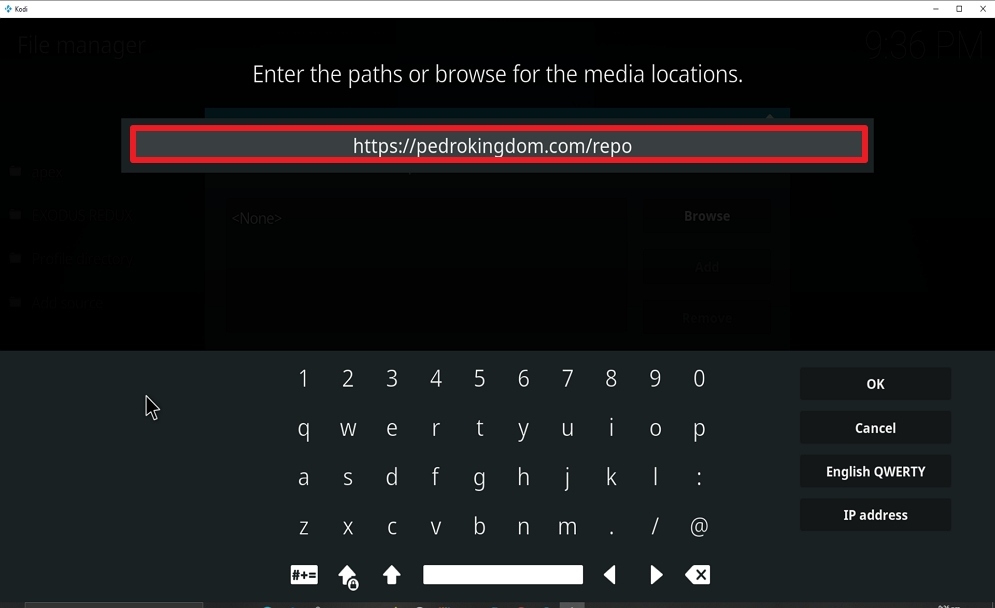
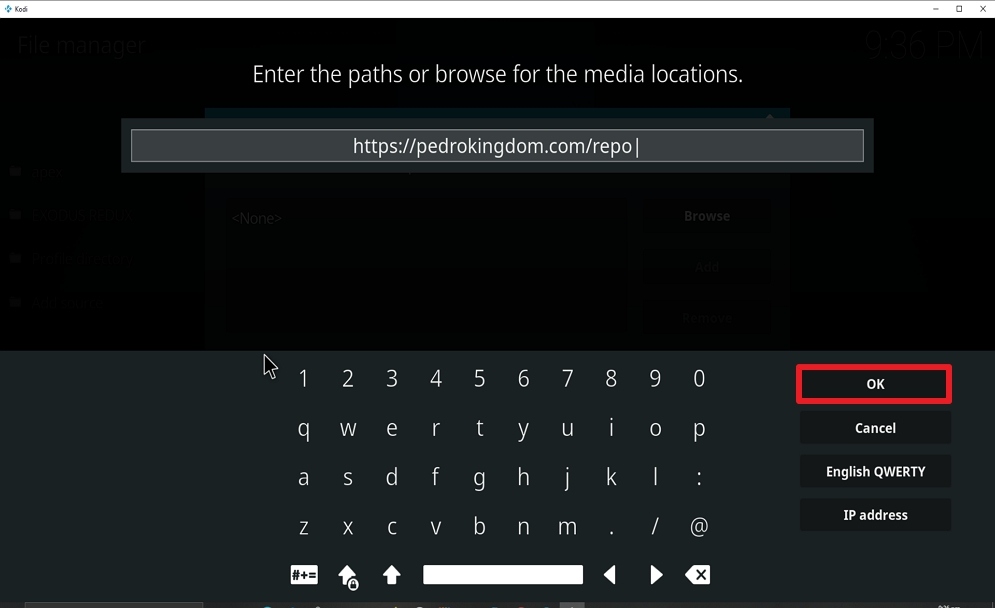
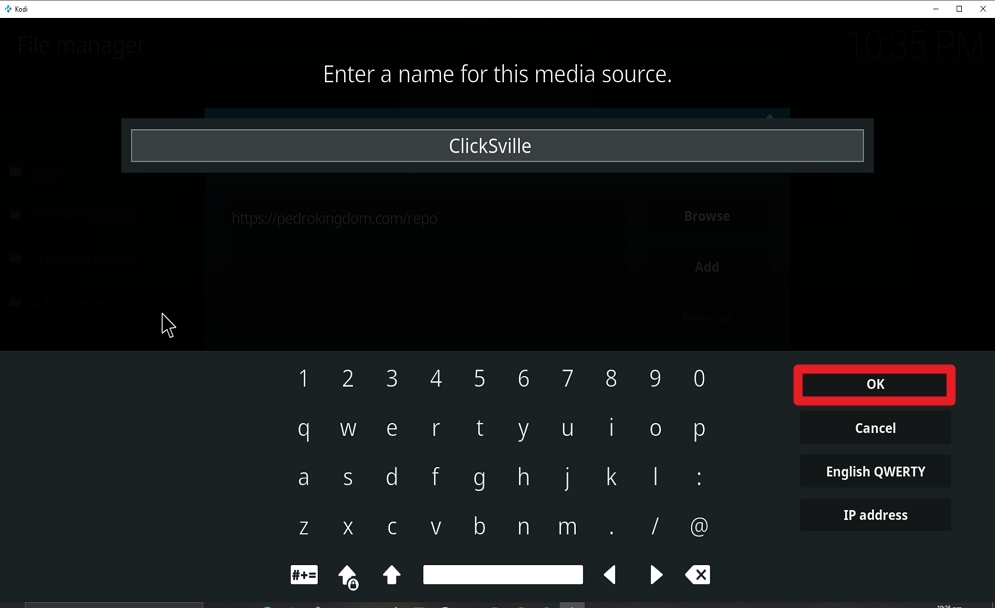
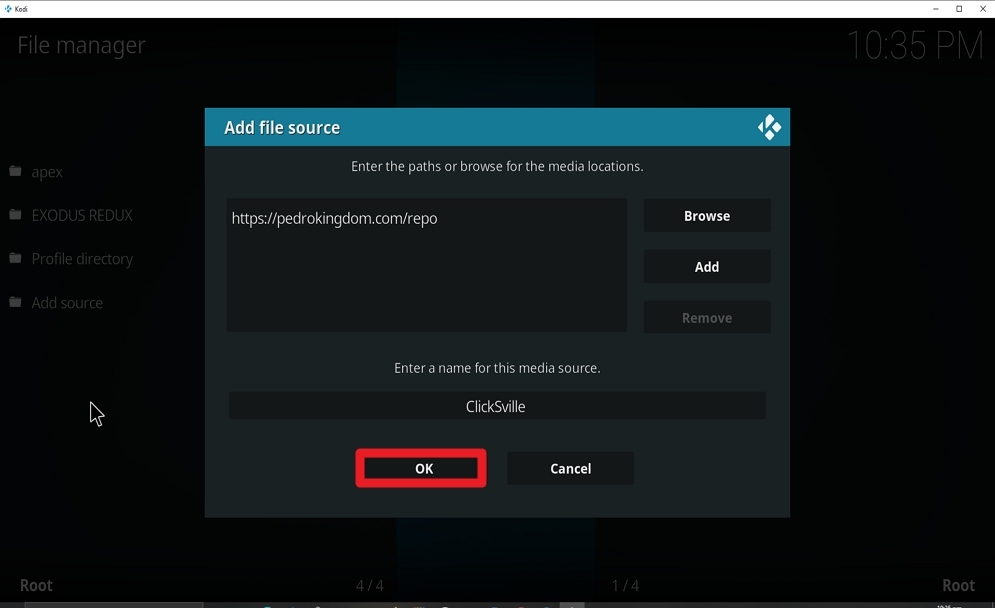
Step 5: on the <NONE> menu, enter the media source URL: https://pedrokingdom.com/repo

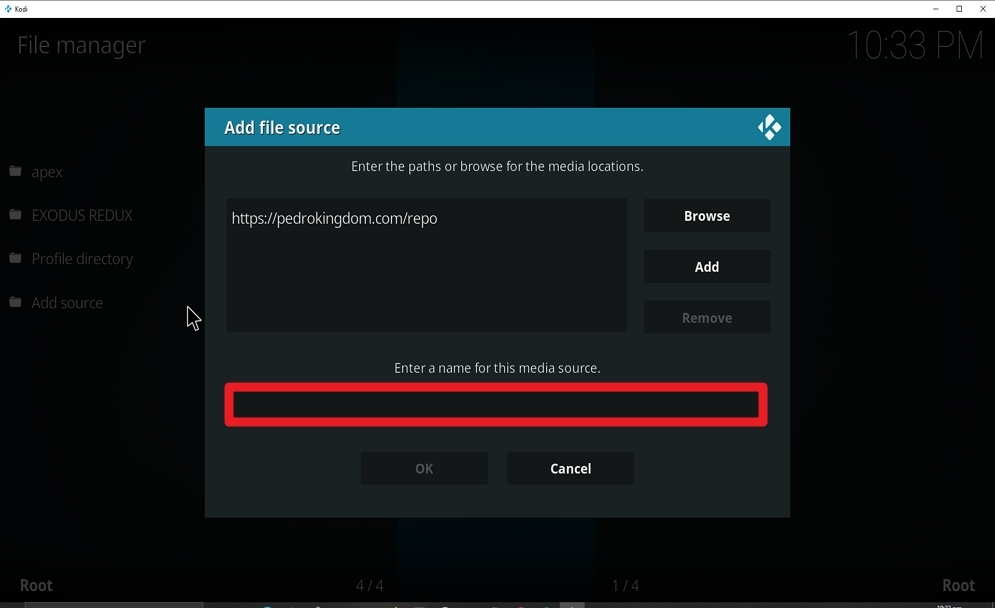
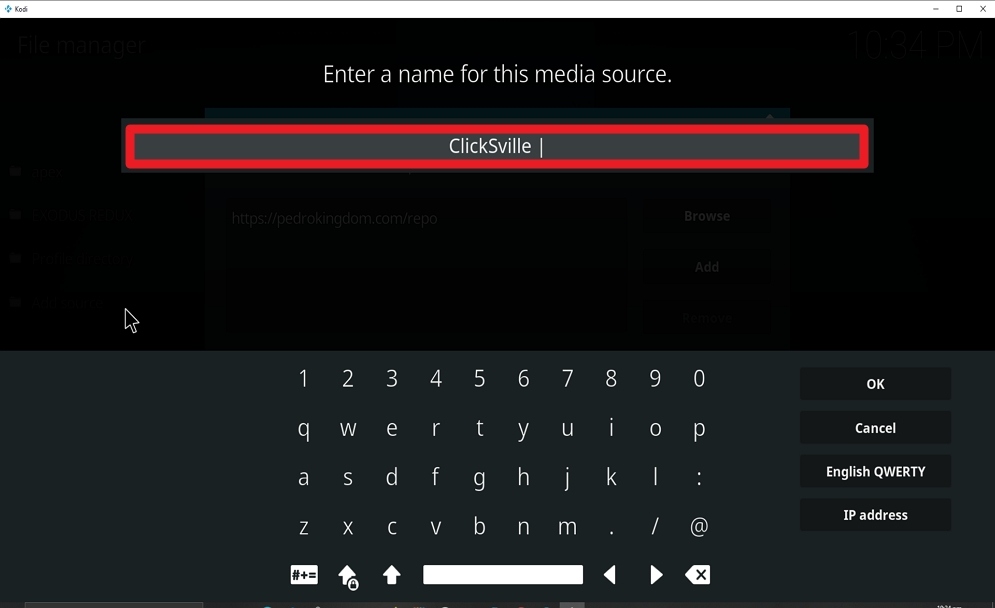
Step 6: Next, go down to the next box and enter a name for this media source. Here we used Kingdom and select OK.


Note:

If Kodi auto-populated a name for this media source at your end, just click OK to continue with the installation process. Ensure that the media source URL is correct.


Step 7: Hit the escape/ backspace key on your keyboard or the back button on your remote to return to the home menu.

Step 9: Next, form the home menu, click on the add-on, and Scroll to the top left and click on the Add-on Package Installer Icon.

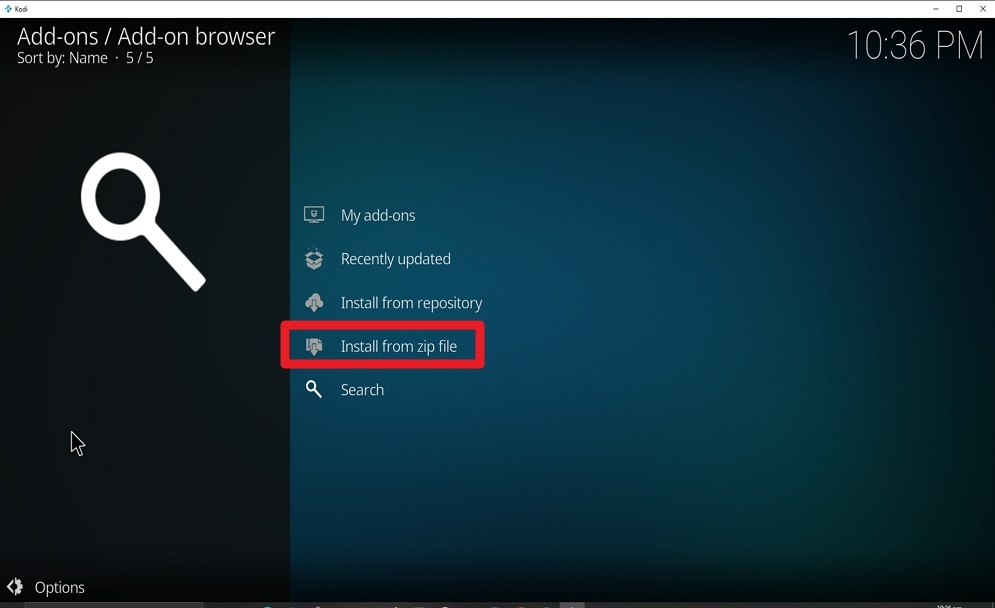
Step 10: On the new window, select Install from zip file

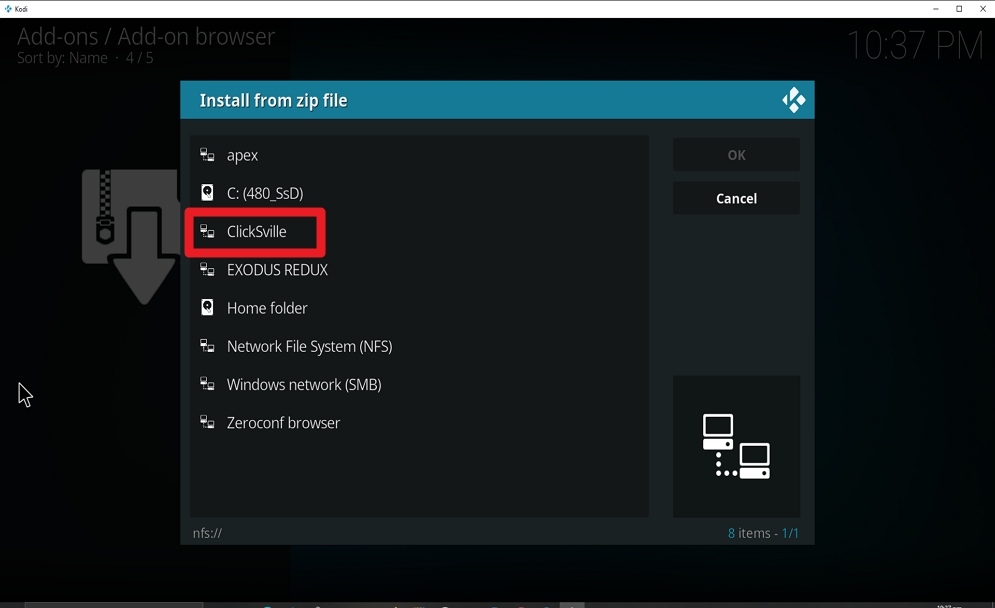
Step 11: Next, on the dialog box, navigate down to locate the name you saved the media source file with. Remember here we used Kingdom. click on Kingdom

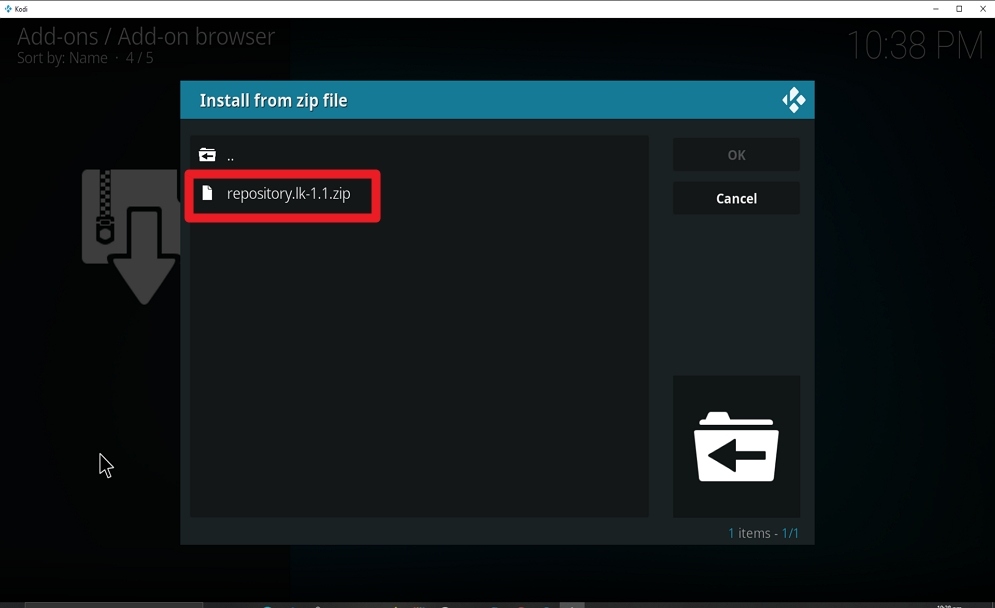
Step 12: On the new window that will appear, Select repository.lk-1.1.zip

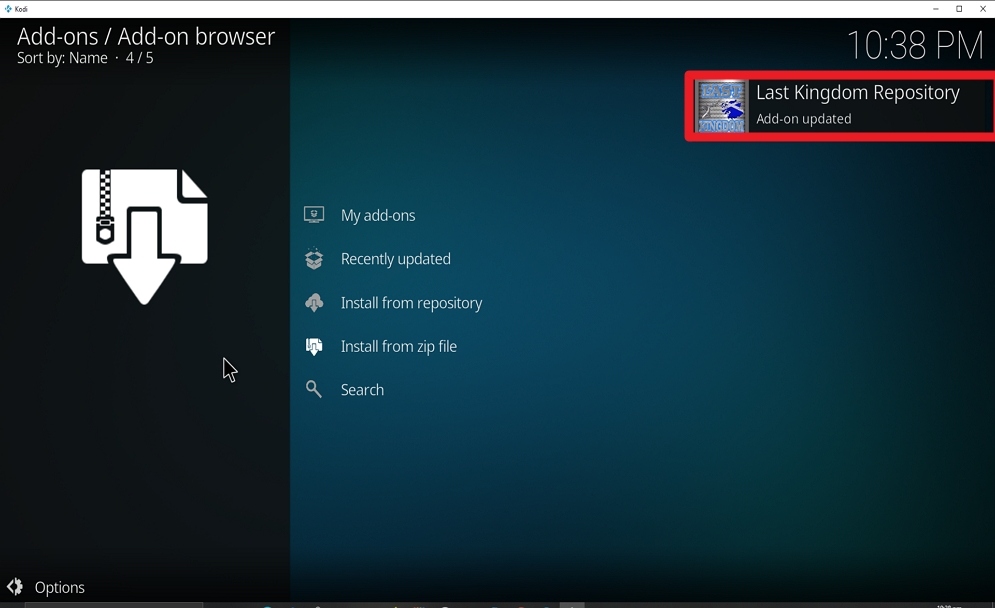
Step 13: wait while the repository is downloading. You will get a notification message at the top right corner of your screen that says; Repo Installed

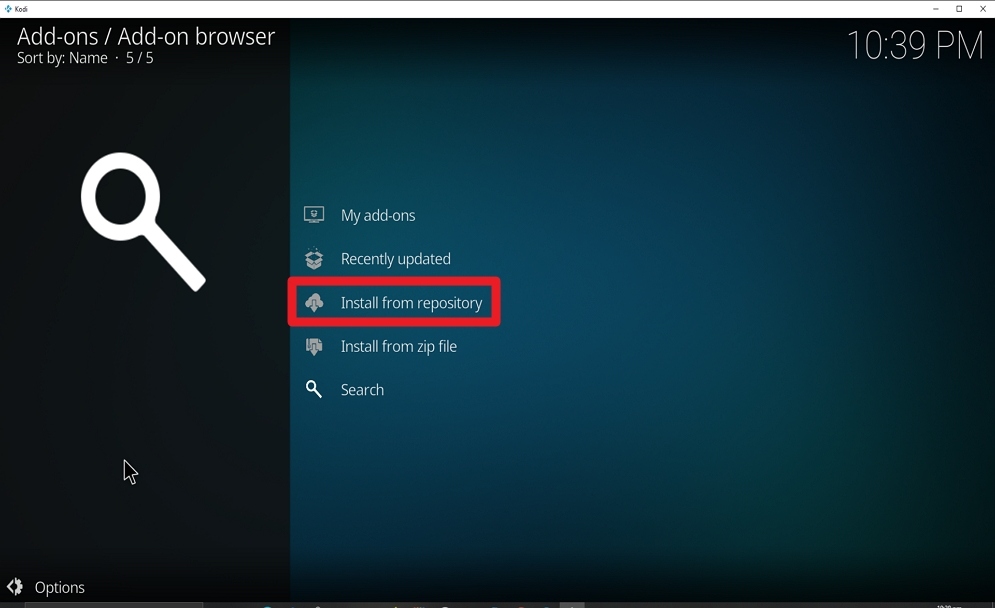
Step 14: Next, select Install from the repository.

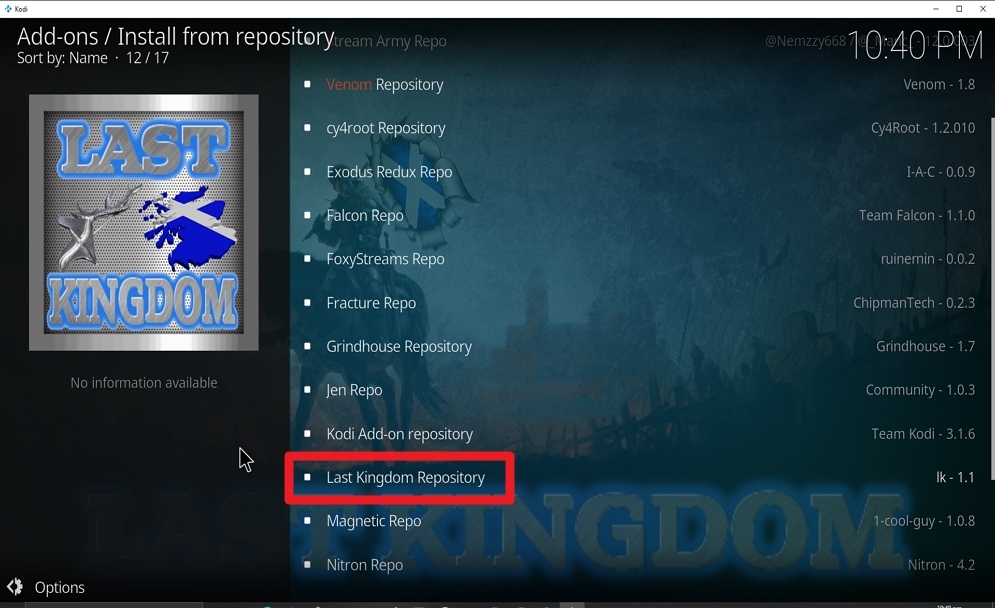
Step 15: On the install from the repository, Select the Last Kingdom Repository.

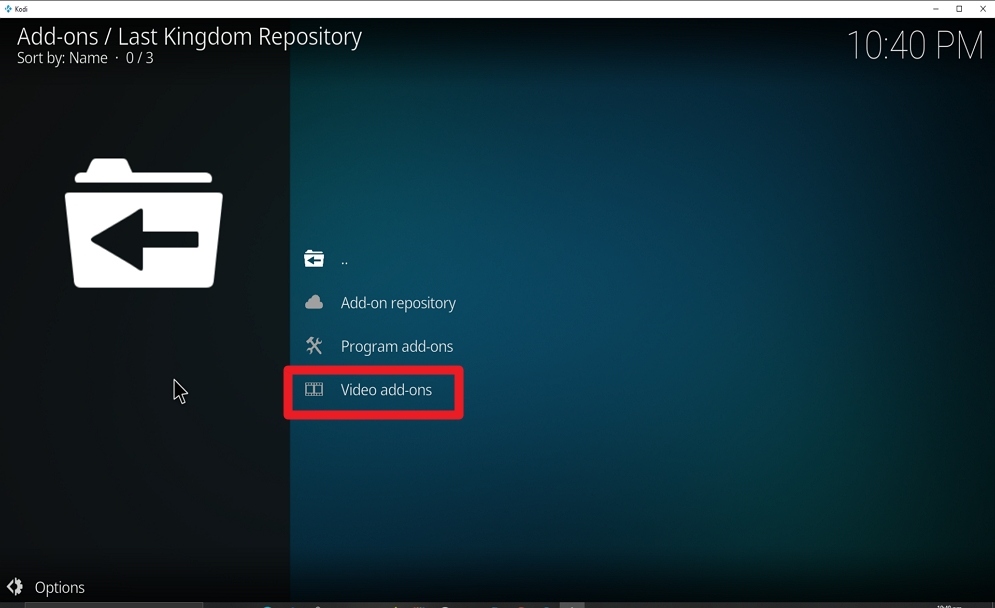
Step 16: Click Video add-ons

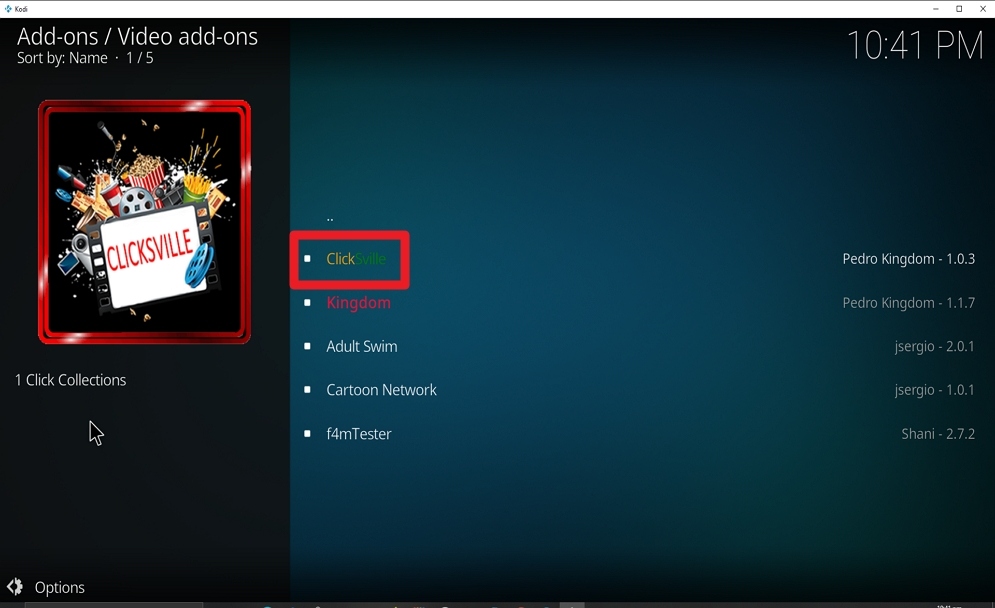
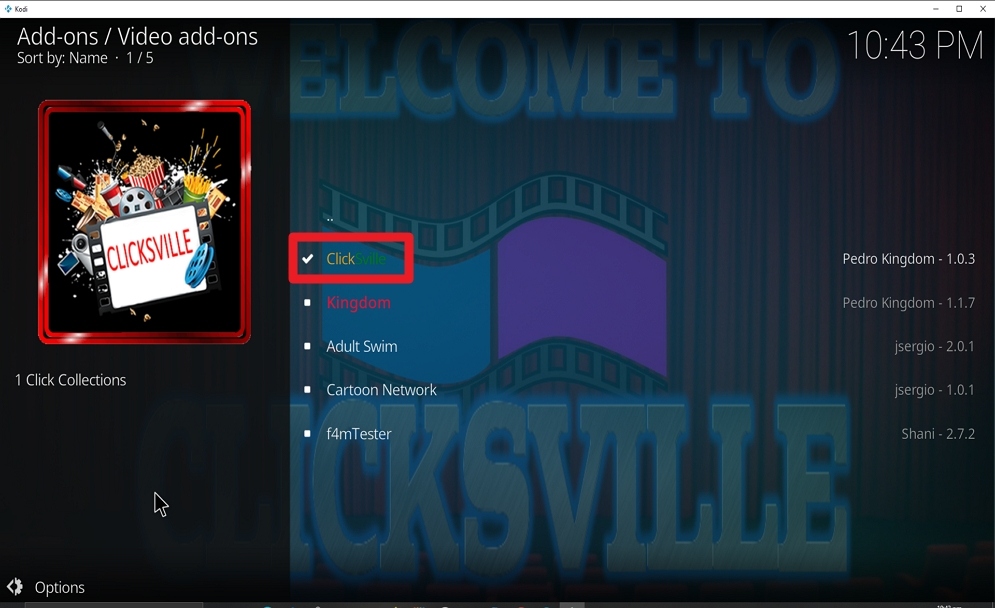
Step 17: On the video, add-ons menu scroll down to Select ClickSville and click on it.

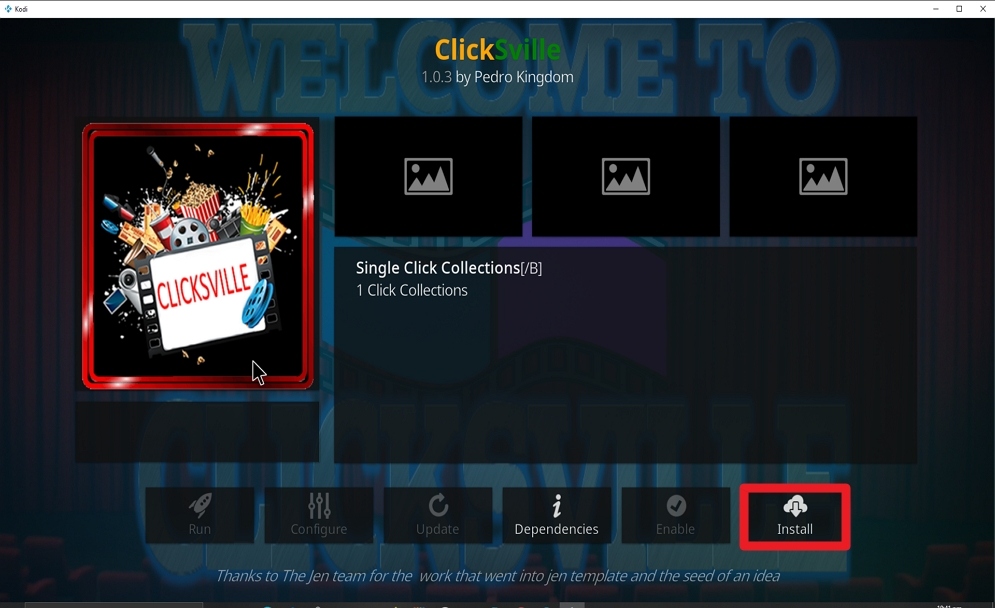
Step 18: Next, on the new window, select the install option.

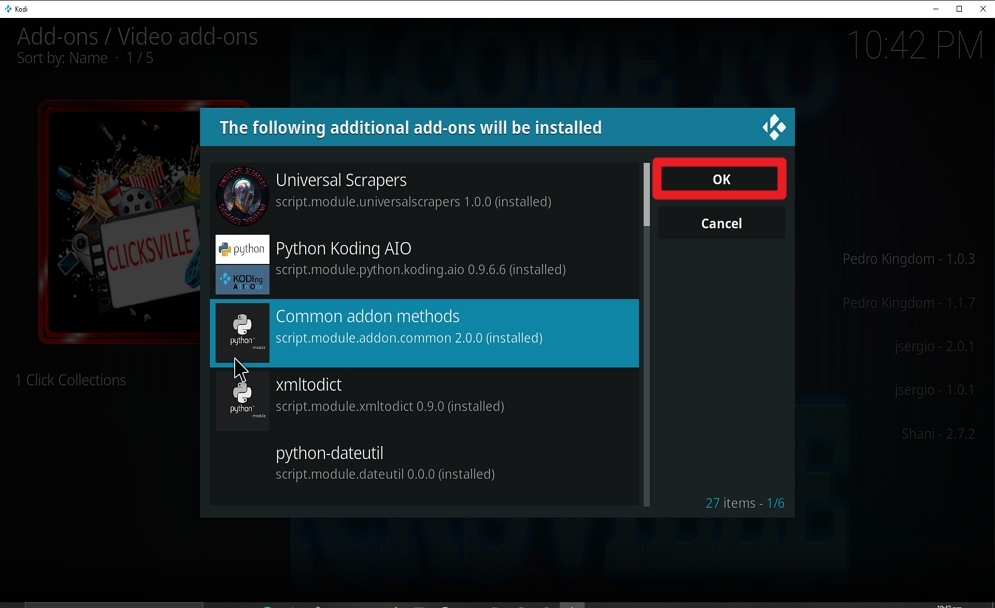
Step 19: If your Kodi App is the latest version, you will see a pop-up dialog box with “THE FOLLOWING ADDITIONAL ADD-ON WILL BE INSTALLED click on OK and wait for the installation to complete.

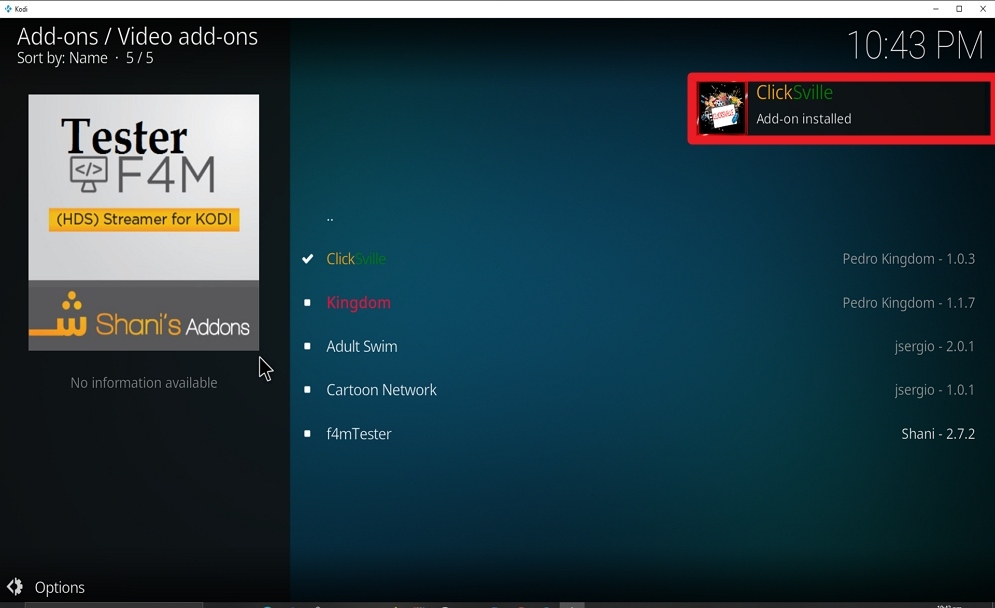
Step 20. Once the installation is completed hit the escape/backspace key on your keyboard or the back button to return to the home menu.


YOUR INTERNET ACTIVITY IS BEING WATCHED

ReviewVPN cannot attest to the legality, security and privacy of the applications discussed on this site. It is highly recommended that you use a VPN service while streaming or using Kodi.

Currently, your IP 216.73.217.150 is visible to everyone and your Browser is being tracked by Advertisers & ISP Provider.

Save 65% Now

Limited Time Offer

Here are the main reasons why you must use a VPN:

  • Your activities are hidden from your ISP, the government, and from the apps you are using.
  • You can access additional movies and TV streams.
  • ISP attempts to throttle are thrwarted thus reducing buffering issues.
  • Geographically restricted content like Netflix and Hulu can be unblocked.

A VPN works be replacing your ISP-assigned IP address and creating an encrypted tunnel. We recommend the no log service offered by IPVanish. It works well on a Firestick and offers the fastest possible speeds.

Special Limited Time Offer - Get IPVanish


Legal Disclaimer: ReviewVPN.com does not encourage or endorse any illegal activity involved in the usage of services and applications referenced on this site. We do not verify the licensing agreements of services. The end-user is wholly responsible for ensuring that any media accessed through these services does not violate copyright and/or licensing laws. ReviewVPN does not promote, link to, or receive compensation from any Apps and IPTV services.


Install Surfshark on Firestick

Best Surfshark Deal


Install ClickSville Kodi addon with Screenshots

1. From the home screen, select the cogwheel at the upper left.

Step 1 Install Apex on kodi


2. Select System in the bottom right corner.

Step 2 Install Apex on kodi


3. Hover Add-ons on the left side of the screen.  Select Unknown sources.

Step 3 Install Apex on kodi


4. Click Yes to allow unknown sources.

Step 4 Install Apex on kodi


5. Take one step back, Select File manager.

Step 5 Install Apex on kodi


6. Click Add source.

Step 6 Install Apex on kodi


7. Click on <None>.

Step 7 Install Apex on kodi


8. Type exactly: https://pedrokingdom.com/repo

Step 8 Install ClickSville Kodi Addon


9. Click on OK.

Step 9 Install ClickSville Kodi Addon


10. Select enter a name for this media source.

Step 10 Install ClickSville Kodi Addon


11. Name is ClickSville (this part isn’t critical as long as you remember the name).

Step 11 Install ClickSville Kodi Addon


12. Click on OK.

Step 12 Install ClickSville Kodi Addon


13. Click on OK.

Step 13 Install ClickSville Kodi Addon


14. Take one step back and click on Add-ons.

Step 14 Install ClickSville Kodi Addon


15. Select install from zip file.

Step 15 Install ClickSville Kodi Addon


16. Click on ClickSville (or whatever you named the source).

Step 16 Install ClickSville Kodi Addon


17. Click on repository.lk-1.1.zip

Step 17 Install ClickSville Kodi Addon


18. Once the installation is completed, a pop message will appear.

Step 18 Install ClickSville Kodi Addon


19. Select on Install from repository.

Step 19 Install ClickSville Kodi Addon


20. Click on Last Kingdom  Repo.

Step 20 Install ClickSville Kodi Addon


21. Pick Video add-ons.

Step 21 Install ClickSville Kodi Addon


22. Select ClickSville.

Step 22 Install ClickSville Kodi Addon


23. Click on Install.

Step 23 Install ClickSville Kodi Addon


24. Select OK after reviewing the addons that will be installed.

Step 24 Install ClickSville Kodi Addon


25. You should see a popup in the upper right corner saying ClickSville has installed. There will actually be multiple popups for the various components.

Step 25 Install ClickSville Kodi Addon


26. Click on ClickSville.

Step 26 Install ClickSville Kodi Addon


27. Click on Open to start the ClickSville addon.

Step 27 Install ClickSville Kodi Addon


Use a VPN

Never stream videos on Kodi or access the internet without installing a VPN on your device. We recommend Surfshark. Surfshark has a zero log policy and offers the best IP address encryption and masing.

With Surfshark installed on your device, you need not worry about your online data being monitored or recorded by the internet service provider. Surfshark also enables you to bypass geolocation and internet service provider throttling.

Note: For more information about Surfshark, please read our Surfshark Review.


Grab your subscription now!


How to Install Surfshark VPN on Firestick

If your Firestick still has the older interface, read this article to learn how to update it: Update Firestick Interface.

Follow our screenshots below to install the SurfShark VPN app on your Fire TV stick.

1. Go to the Home screen of your Firestick.

step 1 Install Surfshark VPN on Firestick


2. Navigate towards the Find tab. Press the Search button from the resulting dropdown.

step 2 Install Surfshark VPN on Firestick


3. Type in the keyword of SurfShark and select from the suggestions that will appear.

step 3 Install Surfshark VPN on Firestick


4. Click the official SurfShark icon from your search results.

step 4 Install Surfshark VPN on Firestick


5. Press the Download (You own it) button.

step 5 Install Surfshark VPN on Firestick


6. The SurfShark VPN installer will download on your device.

step 6 Install Surfshark VPN on Firestick


7. SurfShark VPN’s app will automatically install itself on your Fire TV stick.

step 7 Install Surfshark VPN on Firestick


8. Press the Open button after completing SurfShark VPN’s installation process.

step 8 Install Surfshark VPN on Firestick


9. Please wait for the SurfShark VPN to load its user interface.

step 9 Install Surfshark VPN on Firestick


10. You can now log in with your SurfShark VPN account credentials.

step 10 Install Surfshark VPN on Firestick

Learn more about Surfshark and Grab the Best Surfshark Deal Now!


Install Surfshark on Firestick

Best Surfshark Deal


Other VPNs to Consider

NordVPN (Best for Streaming)

Best Features

  • 5000+ Server in 50+ Countries 
  • Military-Grade Encryption
  • Fast Connection Speed
  • Suitable to a lot of devices
  • No-Log Policy

Prices
  • Complete $5.89 per month (64% Discount)
  • Plus $4.59 per month (56% Discount)
  • Standard $3.69 per month (55% Discount)

Best Features

  • 750+ High-speed VPN Servers in 43 Locations
  • Military-Grade Encryption
  • Fastest HD Streaming and Gaming
  • 30-Day Money-Back Guarantee
  • Unlimited Data & Devices
  • No-Log Policy

Prices
  • 3 Years $1.99 per month (82% Discount)
  • 1 Years $3.29 per month (70% Discount)
  • 1 Month $10.99 per month

IPVanish VPN (Most Secure)

Best Features

  • 1200+ Servers in 60+ Countries around the world
  • Unlimited Connections
  • No-Log Policy
  • Top Notch Military-Grade VPN Protocols and Encryptions
  • 100% Safe and Secured
  • Most Trusted VPN
  • Best VPN for Firestick
  • 30-Day Money-Back Guarantee

Prices
  • Yearly $3.99 per month (63% Discount) – 30 days risk free + Ransomware & Malware Protection
  • Quarterly $5.32 per month (51% Discount)
  • Monthly $10.99 per month


For more VPN discounts, go to ReviewVPN Deals and purchase the best VPN for you.

Click here to get the lowest price on Surfshark through our exclusive limited-time offer.
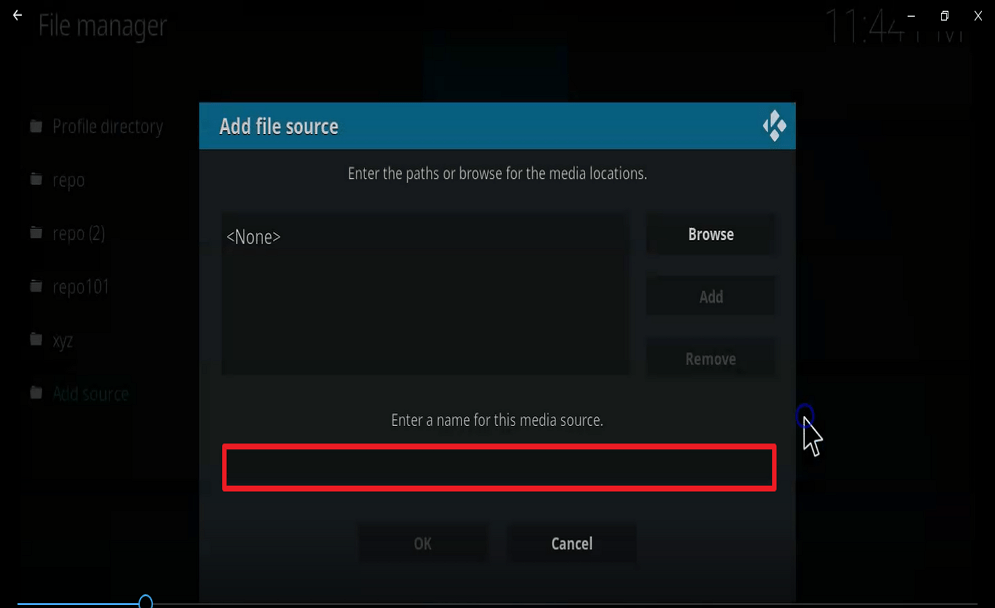
 

How to Install Apex Kodi Addon

Apex Kodi Addon Overview

In this guide, you will learn how to install Apex Kodi Addon.


Apex add-on is a Kodi Addon within the Magnetic Repository. This Kodi Addon requires you to have a Real Debrid account and has sections such as movies, documentaries, TV series, TV shows, and lots more.


ANONYMOUSLY

Features of Apex Kodi Addon

  • Real Debrid integrate for best streaming experience
  • Categories and subcategories
  • Daily add-on update
  • User-friendly interface and customizable search bar for rating, popularity, and trending.
  • A huge database of movies, entertainments and lots more


Step by Step Guide on How to Install Apex Kodi Addon

The installation process of Apex Kodi Addon involves:

  1. Enabling the unknown sources
  2. . Installation of Apex Kodi Addon


Enabling the unknown sources

To enable the unknown sources;

Step 1. Launch your Kodi app and scroll up to the setting icon from the home menu or start menu and click on it.

Step 2. Next, on the new window that will appear, scroll down to locate the System icon and click on it.

Step 3. On the dialog box that will scroll down to add-on and click on it

Step 4. Navigate to unknown sources and click on it.

Step 5. On the warning message that will appear, select YES and hit the escape or backspace key on your keyboard or the back button on your remote to return to the home menu or start menu/


Installation of Apex Kodi Addon.

Step 1. From the home menu or start menu, scroll up to setting icon and click on it

Step 2. On the new window that will appear, navigate to file manage, and click on it.

Step 3. Next, on the dialog box that will come out, scroll down to add source and highlight the <NONE> option.

Step 4. Clic on <NONE> and enter the media source URL: http://magnetic.website/repo/ and select OK.

Step 5. Enter a name for this media source file. Note, however, if Kodi auto-populate a name already, just click on OK and continue. Here we will name this media source file “APEX”

Step 6. Next, hit the backspace or escape ey on your keyboard or the back button on your remote to return to the home menu. From the home menu, click on add-ons

Step 7. Scroll up to locate the add-on icon at the top left corner of your screen and click on it.

Step 8. On the new window that will appear, scroll down to INSTALL FROM ZIP FILE and click on it. Navigate to the name you saved the media source with (here we used “Apex) and click on it.

Step 9. Select “repository.Magnetic-1.0.7.zip” (Note; the version may vary) and wait to a notification message to appear at the top right corner of your screen.

Step 10. click on INSTALL FROM REPOSITORY and scroll down to “Magnetic Repo” and on the new window, select videos add-on.

Step 11. click on “Apex”

Step 12. On the new window that will appear, click on INSTALL, and on the dialog box with “THE FOLLOWING ADDITIONAL ADD-ONS WILL BE INSTALLED” select OK and wait for the installation to complete.

Step 13. Use the bac button or escape or backspace key on your keyboard to return back to the home menu.


YOUR INTERNET ACTIVITY IS BEING WATCHED

ReviewVPN cannot attest to the legality, security and privacy of the applications discussed on this site. It is highly recommended that you use a VPN service while streaming or using Kodi.

Currently, your IP 216.73.217.150 is visible to everyone and your Browser is being tracked by Advertisers & ISP Provider.

Save 65% Now

Limited Time Offer

Here are the main reasons why you must use a VPN:

  • Your activities are hidden from your ISP, the government, and from the apps you are using.
  • You can access additional movies and TV streams.
  • ISP attempts to throttle are thrwarted thus reducing buffering issues.
  • Geographically restricted content like Netflix and Hulu can be unblocked.

A VPN works be replacing your ISP-assigned IP address and creating an encrypted tunnel. We recommend the no log service offered by IPVanish. It works well on a Firestick and offers the fastest possible speeds.

Special Limited Time Offer - Get IPVanish


Legal Disclaimer: ReviewVPN.com does not encourage or endorse any illegal activity involved in the usage of services and applications referenced on this site. We do not verify the licensing agreements of services. The end-user is wholly responsible for ensuring that any media accessed through these services does not violate copyright and/or licensing laws. ReviewVPN does not promote, link to, or receive compensation from any Apps and IPTV services.


Install Surfshark on Firestick

Best Surfshark Deal


Install Apex Kodi addon with Screenshots

1. From the home screen, select the cogwheel at the upper left.

Step 1 Install Apex on kodi


2. Select System in the bottom right corner.

Step 2 Install Apex on kodi


3. Hover Add-ons on the left side of the screen.  Select Unknown sources.

Step 3 Install Apex on kodi


4. Click Yes to allow unknown sources.

Step 4 Install Apex on kodi


5. Take one step back, Select File manager.

Step 5 Install Apex on kodi


6. Click Add source.

Step 6 Install Apex on kodi


7. Click on <None>.

Step 7 Install Apex on kodi


8. Type exactly: http://magnetic.website/repo/

Step 8 Install Apex kodi addon


9. Click on OK.

Step 9 Install Apex kodi addon


10. Select enter a name for this media source.

Step 10 Install Apex kodi addon


11. Name is Apex (this part isn’t critical as long as you remember the name).

Step 11 Install Apex kodi addon


12. Click on OK.

Step 12 Install Apex kodi addon


13. Click on OK.

Step 13 Install Apex kodi addon


14. Take one step back and click on Add-ons.

Step 14 Install Apex kodi addon


15. Select install from zip file.

Step 15 Install Apex kodi addon


16. Click on Apex (or whatever you named the source).

Step 16 Install Apex kodi addon


17. Click on repository.magnetic-1.0.8.zip

Step 17 Install Apex kodi addon


18. Once the installation is completed, a pop message will appear.

Step 18 Install Apex kodi addon


19. Select on Install from repository.

Step 19 Install Apex kodi addon


20. Click on Magnetic  Repo.

Step 20 Install Apex kodi addon


21. Pick Video add-ons.

Step 21 Install Apex kodi addon


22. Select Apex.

Step 22 Install Apex kodi addon


23. Click on Install.

Step 23 Install Apex kodi addon


24. Select OK after reviewing the addons that will be installed.

Step 24 Install Apex kodi addon


25. You should see a popup in the upper right corner saying Apex has installed. There will actually be multiple popups for the various components.

Step 25 Install Apex kodi addon


26. Click on Apex.

Step 26 Install Apex kodi addon


27. Click on Open to start the Uranus addon.

Step 27 Install Apex kodi addon


Don’t Use Kodi Without a VPN

We recommend using Surfshark while accessing the internet or streaming with the Kodi app. This is because each time you access the internet without a VPN, your IP address is public on the internet service provider network, and as such whatever activities you are doing might be monitored by your ISP government. Surfshark encrypts your IP address and makes you appear secure and private on the ISP network. Surfshark also helps to bypass geo-location and ISP throttling.

Note: For more information about Surfshark, please read our Surfshark Review.


Grab your subscription now!


How to Install Surfshark VPN on Firestick

If your Firestick still has the older interface, read this article to learn how to update it: Update Firestick Interface.

Follow our screenshots below to install the SurfShark VPN app on your Fire TV stick.

1. Go to the Home screen of your Firestick.

step 1 Install Surfshark VPN on Firestick


2. Navigate towards the Find tab. Press the Search button from the resulting dropdown.

step 2 Install Surfshark VPN on Firestick


3. Type in the keyword of SurfShark and select from the suggestions that will appear.

step 3 Install Surfshark VPN on Firestick


4. Click the official SurfShark icon from your search results.

step 4 Install Surfshark VPN on Firestick


5. Press the Download (You own it) button.

step 5 Install Surfshark VPN on Firestick


6. The SurfShark VPN installer will download on your device.

step 6 Install Surfshark VPN on Firestick


7. SurfShark VPN’s app will automatically install itself on your Fire TV stick.

step 7 Install Surfshark VPN on Firestick


8. Press the Open button after completing SurfShark VPN’s installation process.

step 8 Install Surfshark VPN on Firestick


9. Please wait for the SurfShark VPN to load its user interface.

step 9 Install Surfshark VPN on Firestick


10. You can now log in with your SurfShark VPN account credentials.

step 10 Install Surfshark VPN on Firestick

Learn more about Surfshark and Grab the Best Surfshark Deal Now!


Install Surfshark on Firestick

Best Surfshark Deal


Other VPNs to Consider

NordVPN (Best for Streaming)

Best Features

  • 5000+ Server in 50+ Countries 
  • Military-Grade Encryption
  • Fast Connection Speed
  • Suitable to a lot of devices
  • No-Log Policy

Prices
  • Complete $5.89 per month (64% Discount)
  • Plus $4.59 per month (56% Discount)
  • Standard $3.69 per month (55% Discount)

Best Features

  • 750+ High-speed VPN Servers in 43 Locations
  • Military-Grade Encryption
  • Fastest HD Streaming and Gaming
  • 30-Day Money-Back Guarantee
  • Unlimited Data & Devices
  • No-Log Policy

Prices
  • 3 Years $1.99 per month (82% Discount)
  • 1 Years $3.29 per month (70% Discount)
  • 1 Month $10.99 per month

IPVanish VPN (Most Secure)

Best Features

  • 1200+ Servers in 60+ Countries around the world
  • Unlimited Connections
  • No-Log Policy
  • Top Notch Military-Grade VPN Protocols and Encryptions
  • 100% Safe and Secured
  • Most Trusted VPN
  • Best VPN for Firestick
  • 30-Day Money-Back Guarantee

Prices
  • Yearly $3.99 per month (63% Discount) – 30 days risk free + Ransomware & Malware Protection
  • Quarterly $5.32 per month (51% Discount)
  • Monthly $10.99 per month


For more VPN discounts, go to ReviewVPN Deals and purchase the best VPN for you.

Click here to get the lowest price on Surfshark through our exclusive limited-time offer.
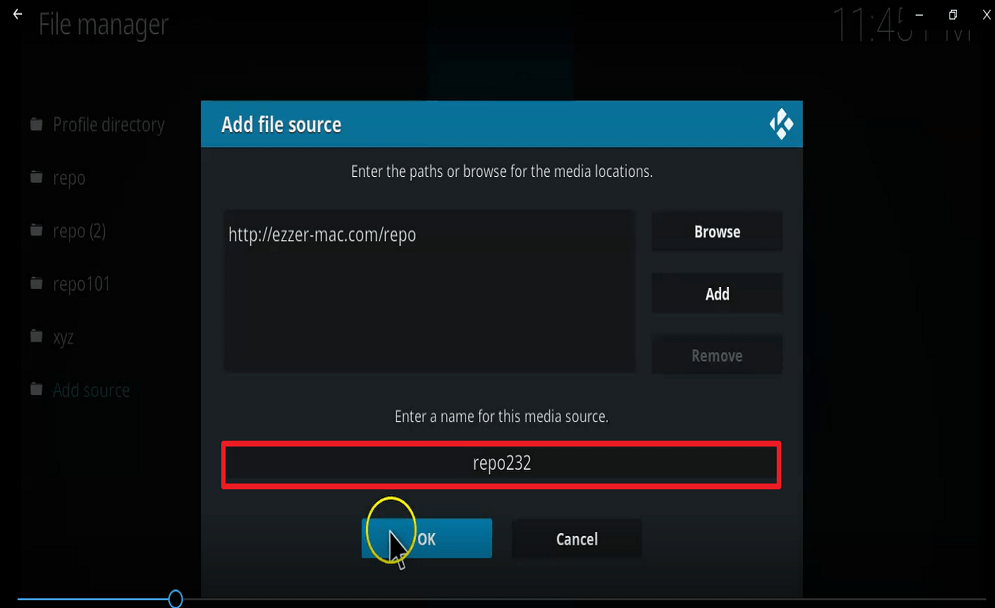


How to Install BORG Kodi Addon

BORG Kodi Addon Overview

In this article, we will help you install BORG Kodi Addon on Firestick.


In this tutorial, we will teach you how to install the Borg Kodi addon. Borg Kodi addon offers fast streaming of videos and has a huge database of TV shows, TV series, documentaries, Live sports, Kids shows and so much more. Borg Kodi addon does not provide extras and special liKe other add-ons but it has tons of episodes, movies and provides a different array of streaming linKs. We recommend using Borg Kodi addon with Real-Debrid.


ANONYMOUSLY


Features of Borg Kodi Addon

  • Real-Debrid: we recommend integrating Real Debrid while using this add-on
  • Borg Kodi addon offers live radio, live TV, live sports and so much more
  • Borg Kodi addon has a large database of movies, Kids shows, entertainment; music videos, documentaries and lots more
  • Categories and subcategories of video contents (Allows you to navigate between categories and subcategories)
  • Easy to use interface with a customizable search box; allows search by category, popularity, rating, and trending
  • Daily Kodi addon update


Steps to Install Borg Kodi Addon

The first thing to do when installing Borg Kodi addon is to allow the UNKNOWN SOURCE. You can turn ON the unknown source by; launch your Kodi app. Once you are done with opening your Kodi app, from the home screen, click on the setting icon that is located at the top left side of your screen. On the new window that will appear, click on SYSTEM and navigate to ADD-ON and click and then turn on an unknown source. A warning message will appear, click YES, and press the ESC or BACKSPACE key twice to return to the home screen. 


  1. Again click on the setting icon found at the top left side of your screen and scroll to FILE MANAGER.
  2. Click on FILE MANAGER and select ADD SOURCE
  3. Click on ADD SOURCE and click on <NONE>. Once you click on <NONE>, a new dialog box will appear where you will enter the source link or URL. Enter this: http://nitronwizard.co.uk/repository/ (ensure you enter the URL correctly) and click OK. Enter a name for this media source (you can choose any name that is easy to remember) and click OK.
  4. Press the ESC or BACKSPACE ey thrice to return to the home screen. From the home screen, click on ADD-ONS and scroll up to find the ADD-ON icon which is located at the top left side of your screen. Click on the ADD-ON icon.
  5. Once you click on the ADD-ON icon, a new window will appear. On the new window, navigate to find INSTALL FORM ZIP and click on it. 
  6. Navigate to find the name you used to save the source file/URL earlier and click on it. Click on repository.NitronRepo.zip and wait for a notification message with “NITRON REPO ADD-ON INSTALLED.
  7. Click on INSTALL FROM REPOSITORY and select NITRON REPO
  8. On the new window that will appear, click on VIDEO ADD-ONS
  9. Clic on BORG and on the new dialog box, click on INSTALL
  10. On the new window, you will see a message like THE FOLLOWING ADDITIONAL ADD-ON WILL BE INSTALLED click OK and wait for the installation to complete. Once the installation is completed, you will receive a notification.


YOUR INTERNET ACTIVITY IS BEING WATCHED

ReviewVPN cannot attest to the legality, security and privacy of the applications discussed on this site. It is highly recommended that you use a VPN service while streaming or using Kodi.

Currently, your IP 216.73.217.150 is visible to everyone and your Browser is being tracked by Advertisers & ISP Provider.

Save 65% Now

Limited Time Offer

Here are the main reasons why you must use a VPN:

  • Your activities are hidden from your ISP, the government, and from the apps you are using.
  • You can access additional movies and TV streams.
  • ISP attempts to throttle are thrwarted thus reducing buffering issues.
  • Geographically restricted content like Netflix and Hulu can be unblocked.

A VPN works be replacing your ISP-assigned IP address and creating an encrypted tunnel. We recommend the no log service offered by IPVanish. It works well on a Firestick and offers the fastest possible speeds.

Special Limited Time Offer - Get IPVanish


Legal Disclaimer: ReviewVPN.com does not encourage or endorse any illegal activity involved in the usage of services and applications referenced on this site. We do not verify the licensing agreements of services. The end-user is wholly responsible for ensuring that any media accessed through these services does not violate copyright and/or licensing laws. ReviewVPN does not promote, link to, or receive compensation from any Apps and IPTV services.


Install Surfshark on Firestick

Best Surfshark Deal


Install BORG Kodi add-on with Screenshots

 1. From the home screen, select the cogwheel at the upper left.

Step 1 Install BORG on kodi


2. Select System in the bottom right corner.

Step 2 Install BORG on kodi


3. Hover Add-ons on the left side of the screen.  Select Unknown sources.

Step 3 Install BORG on kodi


4. Click Yes to allow unknown sources.

Step 4 Install BORG on kodi


5. Take one step back, Select File manager.

Step 5 Install BORG on kodi


6. Click Add source.

Step 6 Install BORG on kodi


7. Click on <None>.

Step 7 Install BORG on kodi


8. Type exactly: http://nitronwizard.co.uk/repository/

Step 8 Install Borg on kodi


9. Click on OK.

Step 9 Install Borg on kodi


10. Select enter a name for this media source.

Step 10 Install Borg on kodi


11. Name is Borg (this part isn’t critical as long as you remember the name).

Step 11 Install Borg on kodi


12. Click on OK.

Step 12 Install Borg on kodi


13. Click on OK.

Step 13 Install Borg on kodi


14. Take one step back and click on Add-ons.

Step 14 Install Borg on kodi


15. Select install from zip file.

Step 15 Install Borg on kodi


16. Click on Borg (or whatever you named the source).

Step 16 Install Borg on kodi


17. Click on repository.NitronRepo.zip

Step 17 Install Borg on kodi


18. Once the installation is completed, a pop message will appear.

Step 18 Install Borg on kodi


19. Select on Install from repository.

Step 19 Install Borg on kodi


20. Click on Nitron  Repo.

Step 20 Install Borg on kodi


21. Pick Video add-ons.

Step 21 Install Borg on kodi


22. Select Borg.

Step 22 Install Borg on kodi


23. Click on Install.

Step 23 Install Borg on kodi


24. Select OK after reviewing the addons that will be installed.

Step 24 Install Borg on kodi


25. You should see a popup in the upper right corner saying Borg has installed. There will actually be multiple popups for the various components.

Step 25 Install Borg on kodi


26. Click on Borg.

Step 26 Install Borg on kodi


27. Click on Open to start the Borg addon.

Step 27 Install Borg on kodi


Don’t Use Kodi Without a VPN

Any time you are accessing the internet or streaming videos online, your internet service provider is taking a record of all your online activities and this might be used to monitor or track you. We recommend using a VPN when streaming content online, especially with the Kodi app. This is because VPN encrypts your IP address and as such you will appear on the ISP network as a private user. 

Also using a VPN will help you to bypass location restrictions and ISP throttling. we recommend Surfshark; this is because Surfshark offers the highest online security and privacy. 


Note: For more information about Surfshark, please read our Surfshark Review.


Grab your subscription now!


How to Install Surfshark VPN on Firestick

If your Firestick still has the older interface, read this article to learn how to update it: Update Firestick Interface.

Follow our screenshots below to install the SurfShark VPN app on your Fire TV stick.

1. Go to the Home screen of your Firestick.

step 1 Install Surfshark VPN on Firestick


2. Navigate towards the Find tab. Press the Search button from the resulting dropdown.

step 2 Install Surfshark VPN on Firestick


3. Type in the keyword of SurfShark and select from the suggestions that will appear.

step 3 Install Surfshark VPN on Firestick


4. Click the official SurfShark icon from your search results.

step 4 Install Surfshark VPN on Firestick


5. Press the Download (You own it) button.

step 5 Install Surfshark VPN on Firestick


6. The SurfShark VPN installer will download on your device.

step 6 Install Surfshark VPN on Firestick


7. SurfShark VPN’s app will automatically install itself on your Fire TV stick.

step 7 Install Surfshark VPN on Firestick


8. Press the Open button after completing SurfShark VPN’s installation process.

step 8 Install Surfshark VPN on Firestick


9. Please wait for the SurfShark VPN to load its user interface.

step 9 Install Surfshark VPN on Firestick


10. You can now log in with your SurfShark VPN account credentials.

step 10 Install Surfshark VPN on Firestick

Learn more about Surfshark and Grab the Best Surfshark Deal Now!


Install Surfshark on Firestick

Best Surfshark Deal


Other VPNs to Consider

NordVPN (Best for Streaming)

Best Features

  • 5000+ Server in 50+ Countries 
  • Military-Grade Encryption
  • Fast Connection Speed
  • Suitable to a lot of devices
  • No-Log Policy

Prices
  • Complete $5.89 per month (64% Discount)
  • Plus $4.59 per month (56% Discount)
  • Standard $3.69 per month (55% Discount)

Best Features

  • 750+ High-speed VPN Servers in 43 Locations
  • Military-Grade Encryption
  • Fastest HD Streaming and Gaming
  • 30-Day Money-Back Guarantee
  • Unlimited Data & Devices
  • No-Log Policy

Prices
  • 3 Years $1.99 per month (82% Discount)
  • 1 Years $3.29 per month (70% Discount)
  • 1 Month $10.99 per month

IPVanish VPN (Most Secure)

Best Features

  • 1200+ Servers in 60+ Countries around the world
  • Unlimited Connections
  • No-Log Policy
  • Top Notch Military-Grade VPN Protocols and Encryptions
  • 100% Safe and Secured
  • Most Trusted VPN
  • Best VPN for Firestick
  • 30-Day Money-Back Guarantee

Prices
  • Yearly $3.99 per month (63% Discount) – 30 days risk free + Ransomware & Malware Protection
  • Quarterly $5.32 per month (51% Discount)
  • Monthly $10.99 per month


For more VPN discounts, go to ReviewVPN Deals and purchase the best VPN for you.

Click here to get the lowest price on Surfshark through our exclusive limited-time offer.
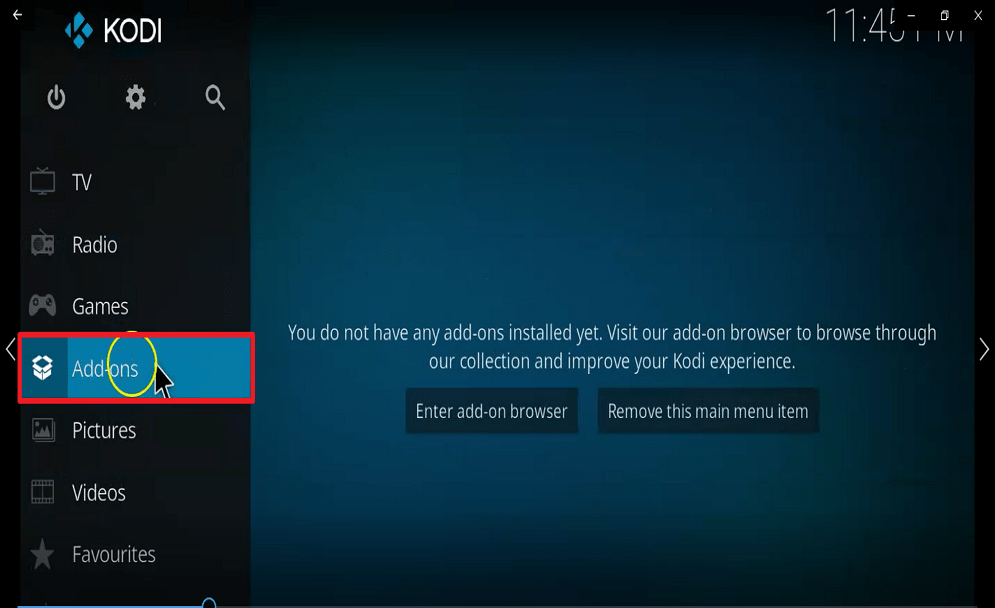
 

2