Maverick Kodi Addon
Quick Navigation
In this article, we will teach you how to install the Maverick Kodi addon.
Maverick is a third-party addon. This addon is found within the Dejavu Repository. In April 2020, this add-on was shut down due to copyright issues. However, its developer did not bow down, they kept working to ensure that Maverick is back and better. You will enjoy the beautiful and amazing features this add-on has to offer.
Sections such as search movies and TV shows, Debrid movies 4K UHD, new movie release, Debrid classic movies HD, Top 250 movies of all time, latest TV shows, one-click TV Shows, and WWE/UFC/sports replays.

Installing Maverick Kodi Addon
Note: enable the unknown sources of your Kodi app before installing any third-party Kodi addon or builds.
Step 1. Launch your Kodi app and on the home screen, scroll up and click on the setting icon.
Step 2. Next, on the setting menu, scroll down and click on systems.
Step 3. Now, on the new window, click on addons and then click on Unknown sources. On the warning dialog box, select Yes to enable the unknown sources.
Step 4. Return to the home screen and then click on the setting icon.
Step 5. Next, click on file manager and then select Add source.
Step 6. On the new window, click on <none> and then type the media source URL: http://thechains24.com/ChainsRepo and then click OK.
Step 7. Click on “enter a name for this media source” and then type ‘Maverick’ and click on OK.
Step 8. Return to the home screen.
Step 9. Click on addons.
Step 10. On the new window, scroll up and click on the addon installer icon.
Step 11. On the new window, scroll down and click on install from zip file.
Step 12. Next, click on Maverick (if you used a different name, click on it)
Step 13. Click on repository.chainsrepo.zip and wait for the Dejavu Repo add-on installed notification.
Step 14. Next, click on install from repository
Step 15. Click on the DejaVu repository
Step 16. Click on Video addons
Step 17. Click on Maverick
Step 18. Click on install
Step 19. Click OK on the textbox with “the following additional addons will be installed” and wait for the installation to complete.
Step 20. Once the installation is completed, return to the home screen and click on add-ons>video add-ons, and the list of installed addons will appear.
Instructions Steps on How to Integrate Real-Debrid
Step 1. You need to create a Real-debrid account here.
Step 2. After creating an account, launch your Kodi app and open the Maverick add-on.
Step 3. On Maverick add, click on the tools option.
Step 4. Next, scroll down and click on ResolveURL settings
Step 5. Now, under the Real-Debrid option, scroll down and click on (Re)Authorize My Account.
Step 6. A code will appear on your screen, copy and paste it on your MS word app or write it down on paper.
Step 7. Now, minimize kodi and open your browser. On your browser, enter https://real-debrid.com/device and click GO.
Step 8. It will take you to a new window where you will be prompted to enter the code you received in step 6. Enter the code and click on Continue. At this point, you will receive a “Real-Debrid successfully approved” notification on your screen.
YOUR INTERNET ACTIVITY IS BEING WATCHED
ReviewVPN cannot attest to the legality, security and privacy of the applications discussed on this site. It is highly recommended that you use a VPN service while streaming or using Kodi.
Currently, your IP 216.73.216.69 is visible to everyone and your Browser is being tracked by Advertisers & ISP Provider.
Here are the main reasons why you must use a VPN:
- Your activities are hidden from your ISP, the government, and from the apps you are using.
- You can access additional movies and TV streams.
- ISP attempts to throttle are thrwarted thus reducing buffering issues.
- Geographically restricted content like Netflix and Hulu can be unblocked.
A VPN works be replacing your ISP-assigned IP address and creating an encrypted tunnel. We recommend the no log service offered by IPVanish. It works well on a Firestick and offers the fastest possible speeds.
Install Surfshark on Firestick
Features of Maverick Kodi Addon
Latest TV shows section:
- Popular TV Shows (updated daily), top-rated TV shows (updated daily), top shows on the air (updated daily), latest TV shows (updated daily), classic British cinema, Bond, James Bond, classic kids TV, kids movie boxset, movie genres, live in concert, the jukebox, mp3 jukebox, online radio, maverick toolbox, and DS9 sports, TV channels, on/demand TV and web channels.
The documentaries and catch-up TV section include
- catch up on the latest TV, iPlayer/ITV player, and catch up and new maverick documentaries,
- HD sports replays (RD only), daily motion TV, documentaries and catch-up TV, Fluxus playlist/TV channels, Maverick world CCTV, maverick movie lists,
Toolbox the following subsections:
- Real-debrid re-authorize, all debris re-authorize, internet sweetest, movie site pairing, clear the cache, and general settings.
Frequently Asked Questions
What is Kodi?
Oftentimes, the amount of money spent on cable TV subscriptions is outrageous. You can cut cords and still enjoy tons of movies documentaries, TV shows, and TV series free by installing Kodi.
Kodi is an open-source media software developed by XBMC Foundation, a nonprofit technology company. It allows you to access and stream free movies, anime, cartoons, sports events, live TV shows, news, xxx and adult content, music and drama, and lots more.
What is Kodi Addon?
An add-on is an application (in .zip) that you can install on Kodi. It provides you streaming links to access and watch free entertainment in various categories and subcategories.
How do I install the Maverick Kodi Addon on my firestick and fire TV?
The above step-by-step installation guide will put you through how to install this add-on on your firestick and fire TV devices.
Is it free to use the Maverick Kodi Addon?
Streaming movies and other entertainment with this add-on are free. All you need is a strong and reliable internet connection.
Is it safe to stream with the Maverick Kodi Addon?
Maverick is a third-party add-on. Installing and using this add-on on your device is safe. However, I recommend installing a VPN Surfshark before streaming with this add-on.
Pros and Cons
Pros
- Allows you to choose the preferred language for subtitles
- User-friendly interface
- Easy installation
- Scrapes streaming links from different sources
Cons
None when I tested this add-on.
Alternative Addon
Add-on comes and goes. The best add-on today may stop working in the next few minutes. Consequently, it is advisable to have alternative add-ons handy just in case. I have correlated the best alternative add-ons for you. Here is the list to check out: Gaia, Venom, and Yoda
Why Do You Need a VPN While Streaming?
A VPN is software that masks and encrypts your IP address to appear on the internet service provider network as a secure, private, and anonymous user.
The sole aim of installing a VPN on your is to keep your identity private while you are streaming or accessing the internet. A VPN will help you to bypass location restrictions and best throttling. We recommend installing Surfshark.
Features of Surfshark:
- Has a total of 3,200 VPN servers in 65 locations to choose from
- Unlimited bandwidth
- Zero log policy
- Military-grade encryption
Click here to get the lowest price on Surfshark through our exclusive limited-time offer.
How to Install Surfshark VPN on Firestick
If your Firestick still has the older interface, read this article to learn how to update it: Update Firestick Interface.
You can download Surfshark directly from the Amazon App store. It will be easy for you to find Surfshark with your Firestick’s Find feature. Refer to our screenshots below.
1. Go to the Home screen of your Firestick.
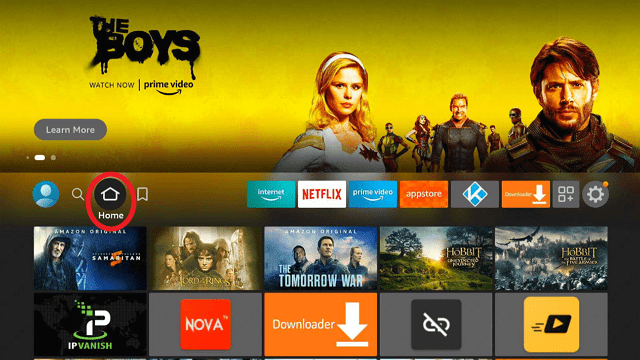
2. Navigate towards the Find tab. Press the Search button from the resulting dropdown.
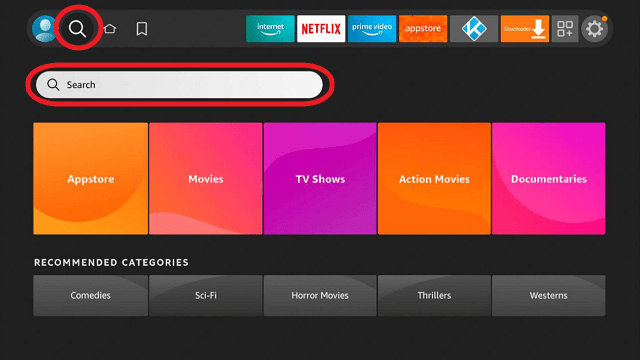
3. Type in the keyword of SurfShark and select from the suggestions that will appear.
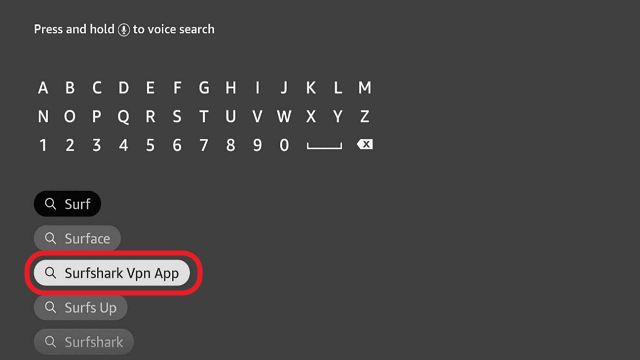
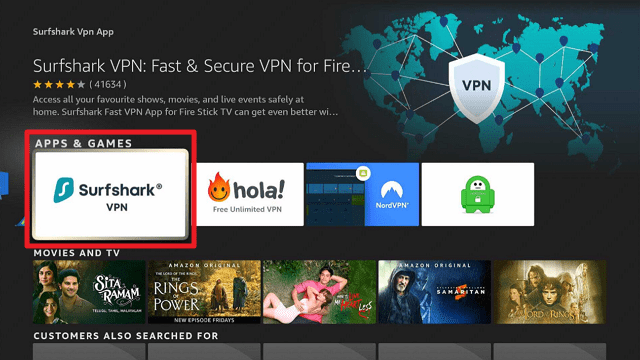
4. Click the official SurfShark icon from your search results.
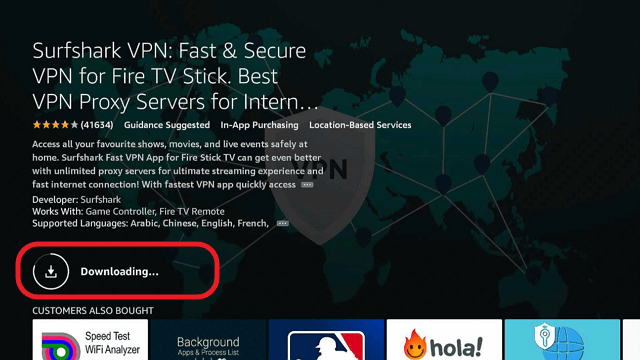
5. Press the Download (You own it) button.
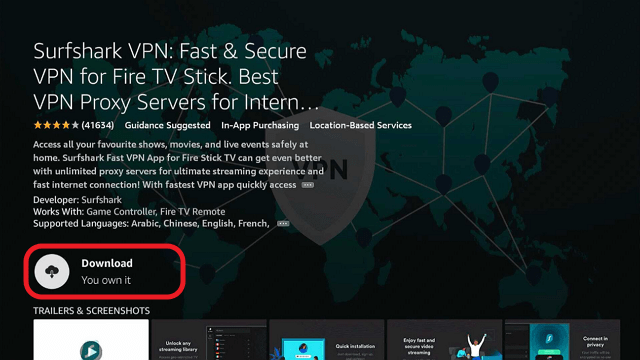
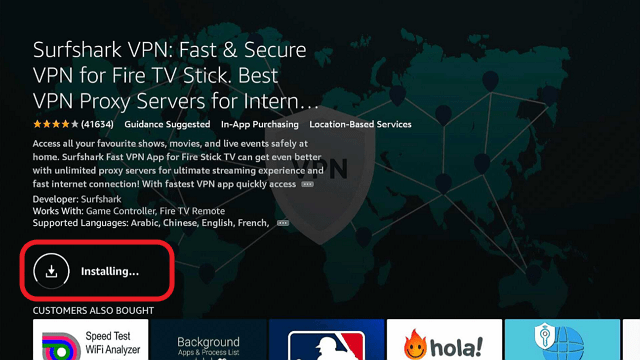
6. The SurfShark VPN installer will download on your device.
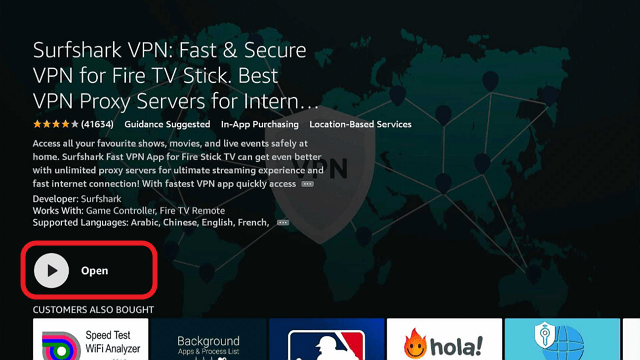
7. SurfShark VPN’s app will automatically install itself on your Fire TV stick.
8. Press the Open button after completing SurfShark VPN’s installation process.
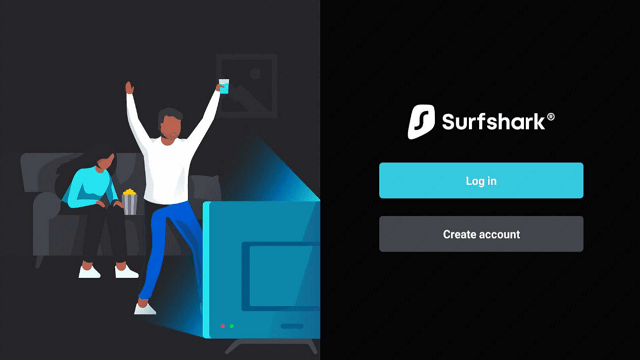
9. Please wait for the SurfShark VPN to load its user interface.

10. You can now log in with your SurfShark VPN account credentials.
Learn more about Surfshark and Grab the Best Surfshark Deal Now!
Install Surfshark on Firestick

For more VPN discounts, go to ReviewVPN Deals and purchase the best VPN for you.
Click here to get the lowest price on Surfshark through our exclusive limited-time offer.
Conclusion
If you are looking for an add-on to stream 24/7 non-stop movies, music, and many more, I recommend installing the Maverick Kodi add-on. It has a user-friendly interface with amazing features. What are you still waiting for? Check this add-on out and let me know your thoughts.