4QED Filters Kodi Addon
Source: http://cellardoortv.com/repository/4qed/
4QED Filters Kodi addon is not explicitly an adult addon, but it can provide you with that content easily. It uses an intelligent system of filters to help you find content from movies and shows, based upon names and keywords.
There is also a dedicated 18+ section with the open password “PORN4ALL”
The limited categories and filter style functions mean this is an addon for users who know what they are looking for. Rather than an addon full of curated content.


Common Errors
Here are the most common errors you will get when running or installing 4QED
- Source not working/slow/frozen: Very few addons store their own content. They tend to use scrapers that fetch links from across the internet. These links tend to be on free servers and may take a while to get connected. You need to wait up to 15 seconds to find out whether a link is working or not. Also, you should always use Kodi with a VPN, as the link may be working but be blocked by your ISP. Particularly if the content you are looking for is being streamed without the owner’s consent. For other fixes and a more in-depth guide linked above. Check here for the best VPN deal.
- Script Error: Script errors occur when there is a missing or corrupted script in either the 4QED add on or your Kodi installation. A script error may prevent the addon from installing or even running. To check the problem doesn’t lie with the add on, try re-installing it and making sure that it is a fresh install. If the problem remains then you may need to either update or freshly install Kodi. Sometimes a previous add on that you have installed may have corrupted important system files on your Kodi application. To find out how to update and reinstall Kodi as well as other fixes read our depth guide linked above.
- Kodi check log error: You won’t get this error if you have just started using Kodi. However, over time as you watch more content, you are increasingly likely to get this. Every time you load a page of an add on, or a piece of content, a little snippet is stored in your media cache. This allows much faster loading the second time around and means that you don’t have to wait every time you want to watch something, particularly if you watched part of it last night. Depending on the storage space of your device, this cache will fill up quickly. When it comes to emptying the cache, it depends on your device. To learn about how to empty the cache of your Kodi and other fixes for the check log error fix guide linked above.
Review
4 QED us unique and we like the filter style, but it’s a bit vague for us. If you are looking for purely adult content, we recommend XXX-O-DUS or the Megatron repository which will give you all these adults addons in the same place:
- Adult Hideout
- XXXtreme
- Empflix
- Fantasti.cc
- Hotgoo
- Just For Him
- Largecamtube
- Lubetube
- Tube8
- Ultimate Whitecream
- VideoDevil
- Wildfire
- YouJizz.
YOUR INTERNET ACTIVITY IS BEING WATCHED
ReviewVPN cannot attest to the legality, security and privacy of the applications discussed on this site. It is highly recommended that you use a VPN service while streaming or using Kodi.
Currently, your IP 216.73.217.1 is visible to everyone and your Browser is being tracked by Advertisers & ISP Provider.
Here are the main reasons why you must use a VPN:
- Your activities are hidden from your ISP, the government, and from the apps you are using.
- You can access additional movies and TV streams.
- ISP attempts to throttle are thrwarted thus reducing buffering issues.
- Geographically restricted content like Netflix and Hulu can be unblocked.
A VPN works be replacing your ISP-assigned IP address and creating an encrypted tunnel. We recommend the no log service offered by IPVanish. It works well on a Firestick and offers the fastest possible speeds.
If you are looking for an addon for movies and TV shows, easy to navigate and find great quality links we would go for Seren or Nole Cinema.
If 4QED had some curated content of its own we think it would be a great addon, but it’s trying hard to not be an adult addon.
Categories Included:
- Movies filters
- TV Shows filters
- Adult filters
- Search and Play
- Tools
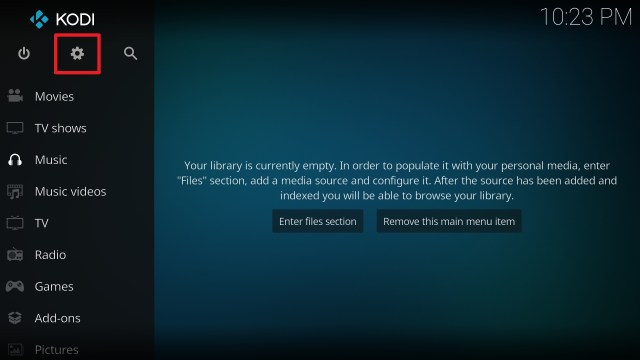
How to Install 4QED Filters Addon on Kodi with Screenshots
- From the home screen, select the cogwheel at the upper left.
2. Select System in the bottom right corner.

3. Select Add-ons on the left side of the screen.

4. Select Unknown sources.

5. Click Yes to allow unknown sources.

6. Select File manager.

7. Click Add source.

8. Click on <None>.

9. Type exactly: http://cellardoortv.com/repository/4qed/

10. Click on OK.

11. Select enter a name for this media source.

12. Name is 4QED Filters (this part isn’t critical as long as you remember the name).

13. Click on OK.

14. Click on OK.

15. Take one step back and click on Add-ons.

16. Select install from zip file.

17. Click on 4QED Filters (or whatever you named the source).

18. Click on repository.eim.forqed-3.6.zip

19. Select on Install from repository.

20. Click on EIM4QED Repo.

21. Pick Video add-ons.

22. Select 4QED Filters again.

23. Click on Install.

24. Select OK after reviewing the add-ons that will be installed.

25. You should see a popup in the upper right corner saying 4QED Filters has installed. There will actually be multiple popups for the various components.

26. Click on Open to start the 4QED Filters add-on.

Click here to get the lowest price on Surfshark through our exclusive limited-time offer.
How to Install Surfshark VPN on Firestick
If your Firestick still has the older interface, read this article to learn how to update it: Update Firestick Interface.
Follow our screenshots below to install the SurfShark VPN app on your Fire TV stick.
1. Go to the Home screen of your Firestick.

2. Navigate towards the Find tab. Press the Search button from the resulting dropdown.

3. Type in the keyword of SurfShark and select from the suggestions that will appear.

4. Click the official SurfShark icon from your search results.

5. Press the Download (You own it) button.

6. The SurfShark VPN installer will download on your device.

7. SurfShark VPN’s app will automatically install itself on your Fire TV stick.

8. Press the Open button after completing SurfShark VPN’s installation process.

9. Please wait for the SurfShark VPN to load its user interface.

10. You can now log in with your SurfShark VPN account credentials.

Learn more about Surfshark and Grab the Best Surfshark Deal Now!
Install Surfshark on Firestick


For more VPN discounts, go to ReviewVPN Deals and purchase the best VPN for you.
Click here to get the lowest price on Surfshark through our exclusive limited-time offer.


