Surfshark VPN Dedicated IP
Quick Navigation
This article wil discuss everything you need to know about Surfshark VPN dedicated IP.

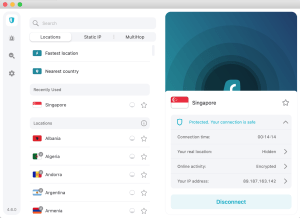
What exactly is dedicated IP? Surfshark VPN recently launched its new and amazing feature called dedicated IP. It is not as hard as its sounds, and better to discuss with a scenario.
For example, you are using a VPN service. Your real IP address will be hidden, which is important cause it makes others track you online. You will then have a new IP address from your VPN service. The concern is you don’t know how many people have the same IP address as you. It could be thousands. Hence the reason why you encounter CAPTCHA when using a VPN. It makes sure that the user behind the IP address is a real person. There is where dedicated IP comes along.
Dedicated IP is a VPN-provided IP address that is only intended for you. This will still hide your real IP address. It will help you get rid of annoying CAPTCHA, access services sensitive to IP addresses, and many more. Continue reading this article to find out more interesting features about Surfshar VPN’s dedicated IP.

Features of Surfshark VPN Dedicated IP
Surfshark VPN’s dedicated IP provides an interesting set of features that you will definitely love.
Works With All Surfshark’s Connection Protocol
There is no need for users to worry about website speed and fixed IP because the dedicated IP works with all connection protocols.
Protects Unlimited Devices
Surfshark VPN has no limits when it comes to the number of connected devices. All of your devices can use a single dedicated IP and assure that all of them are protected by Surfshark.
It Secures Manual Connection
Users can download the available Surfshark dedicated IP configuration files for manual connection to whichever router they are using.
Hinders Other Users In Using and Abusing Your IP
No need for a shared IP address. You don’t have to worry about other users that might have the same IP as you.
Extra Privacy
Surfshark does not record whose dedicated IP it is. You will have the best private network all to yourself.
Helps Access Remote Networks Easily
Dedicated IP has no issue when it comes to networks remotely compared with a shared server.
Avoid CAPTCHA
Captchas are annoying. With a dedicated IP address, you won’t have to deal with any of them anymore.
Improves access to IP-sensitive websites
There are websites that can recognize you changing your IPs when using a VPN with no dedicated IP. With Surfshark’s dedicated IP, it helps you access these websites and still protects your identity.
How to Install Surfshark VPN on Firestick
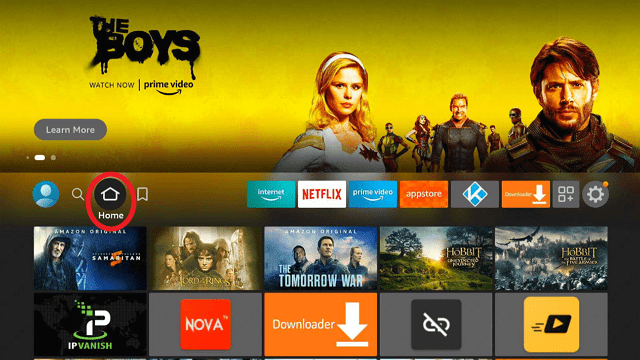
Follow our screenshots below to install the Surfshark VPN app on your Fire TV stick.
1. Go to the Home screen of your Firestick.
2. Navigate towards the Find tab. Press the Search button from the resulting dropdown.
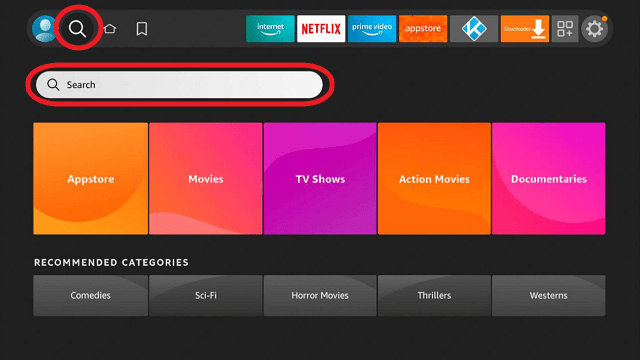
3. Type in the keyword of Surfshark and select from the suggestions that will appear.
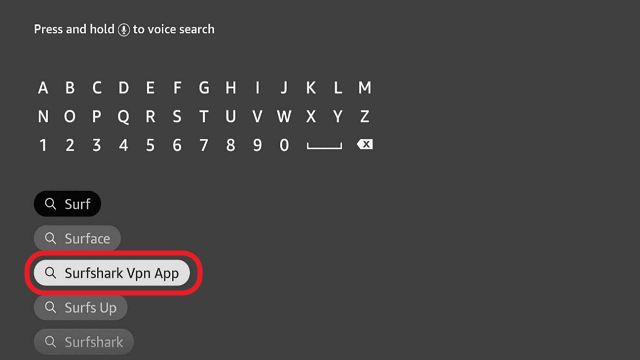
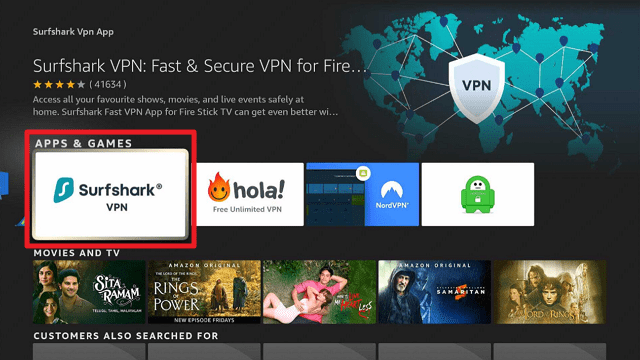
4. Click the official SurfShark icon from your search results.
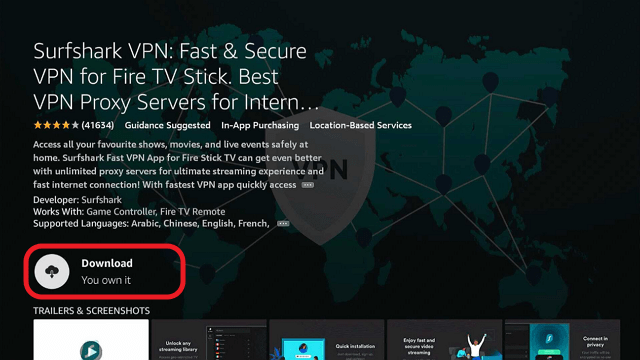
5. Press the Download (You Own it) button.
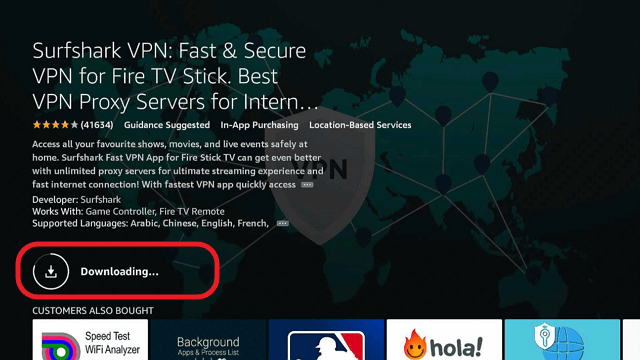
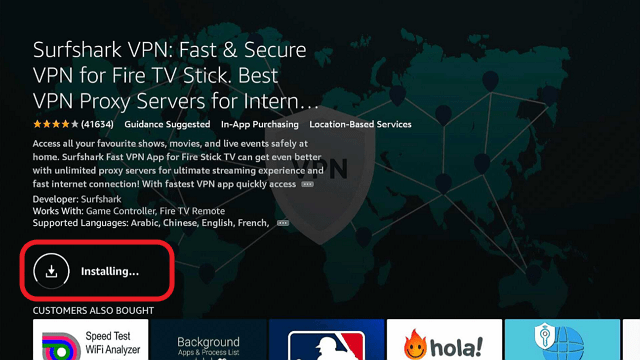
6. The Surfshark VPN installer will download on your device.
7. SurfShark VPN’s app will automatically install itself on your Fire TV stick.
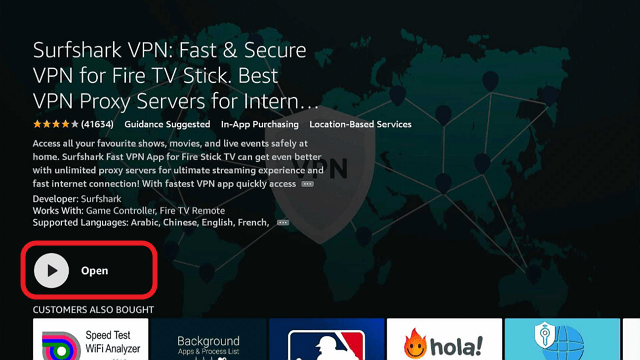
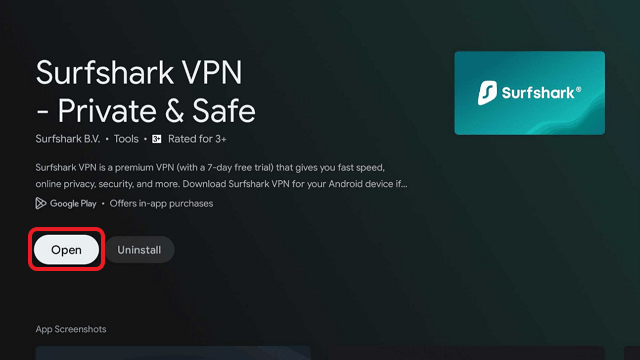
8. Press the Open button after completing Surfshark VPN’s installation process.
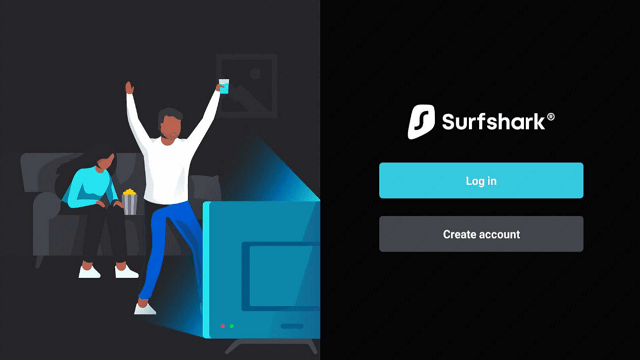
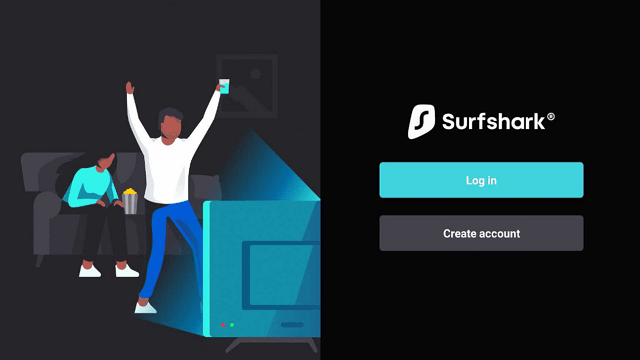
9. Please wait for the SurfShark VPN to load its user interface.

10. You can now log in with your Surfshark VPN account credentials.
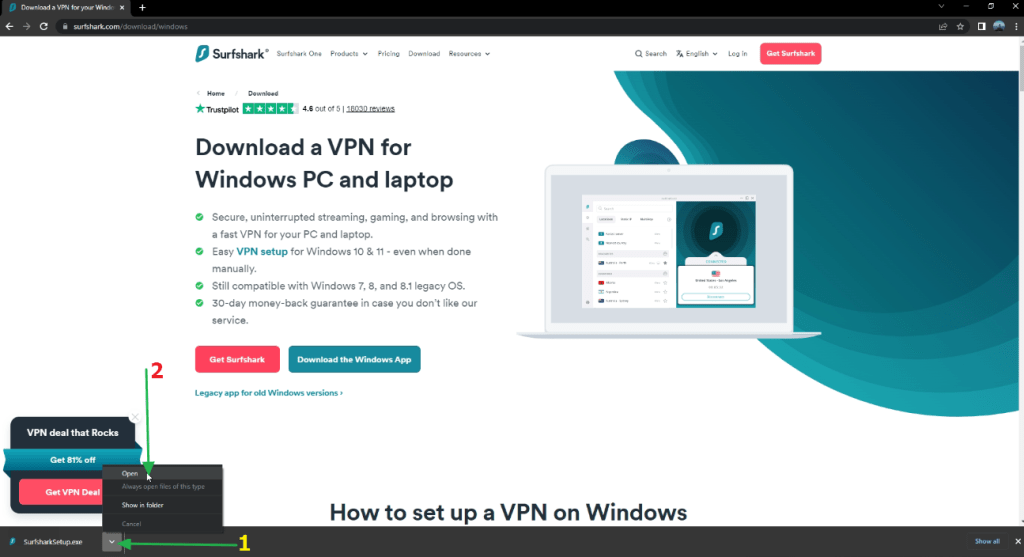
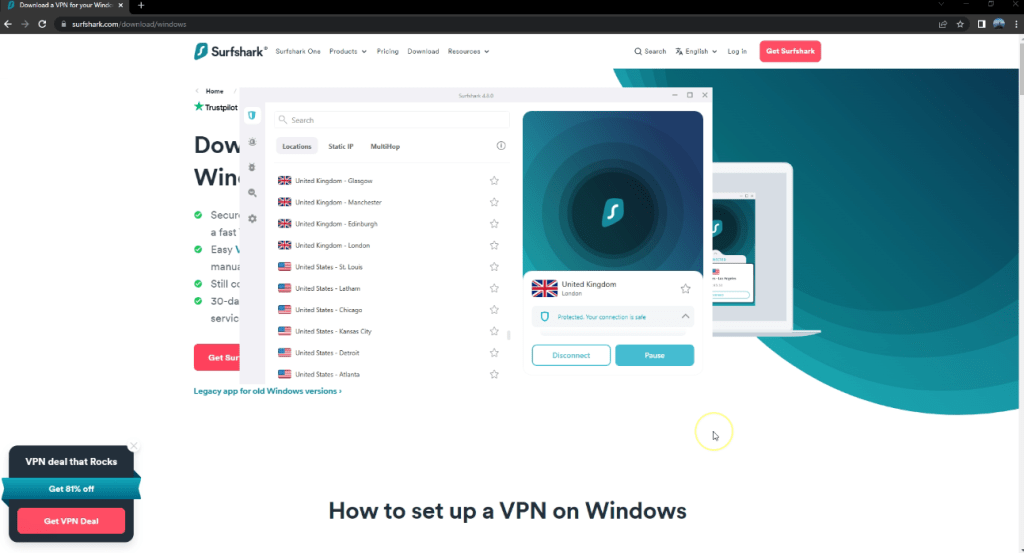
How To Install Surfshark VPN on Windows
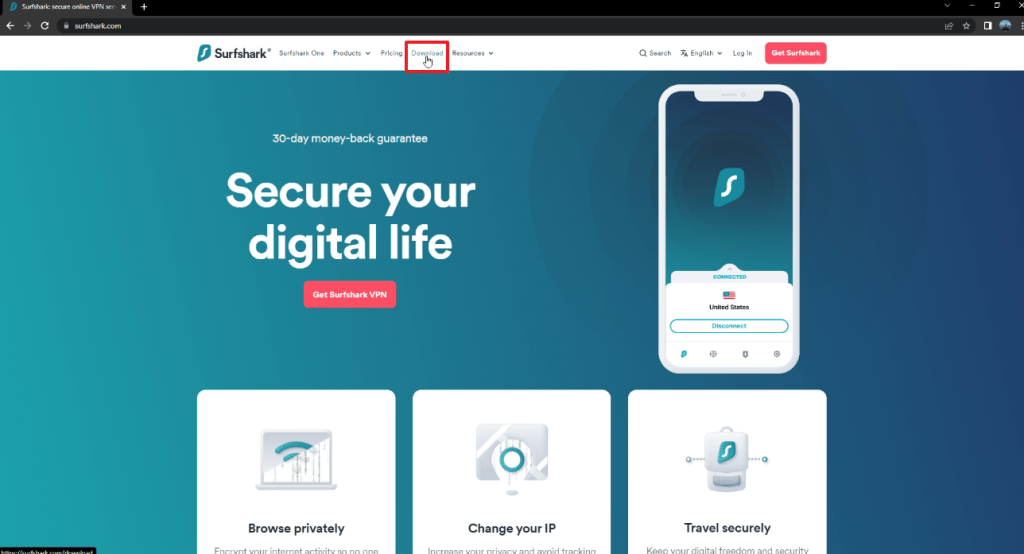
1. Go to https://surfshark.com
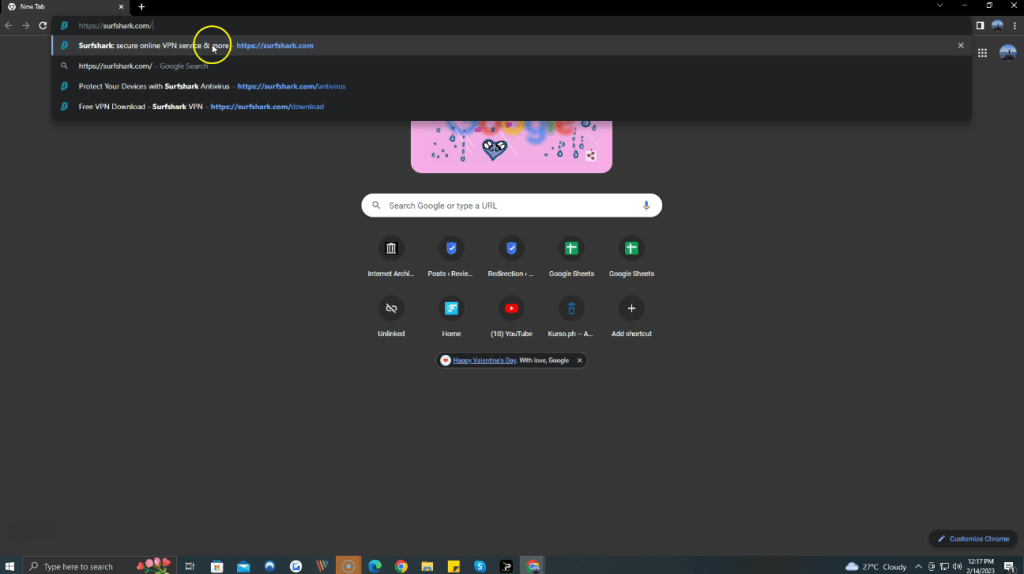
2. Select Download.
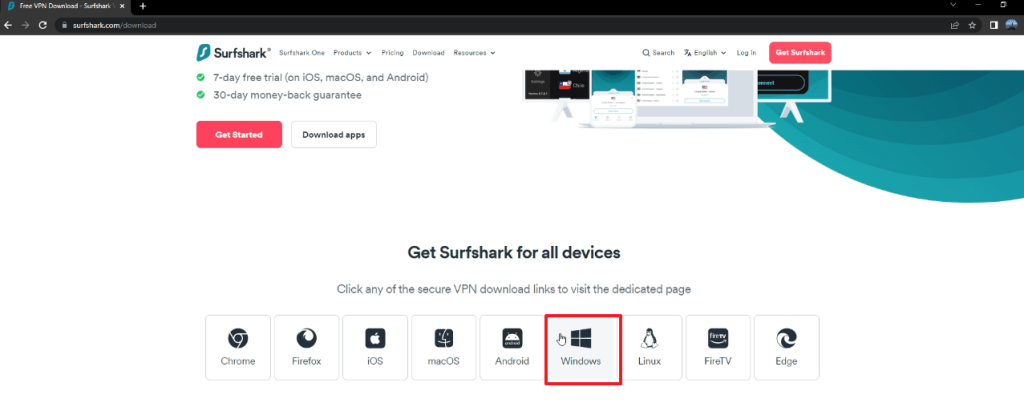
3. Scroll down then choose Windows
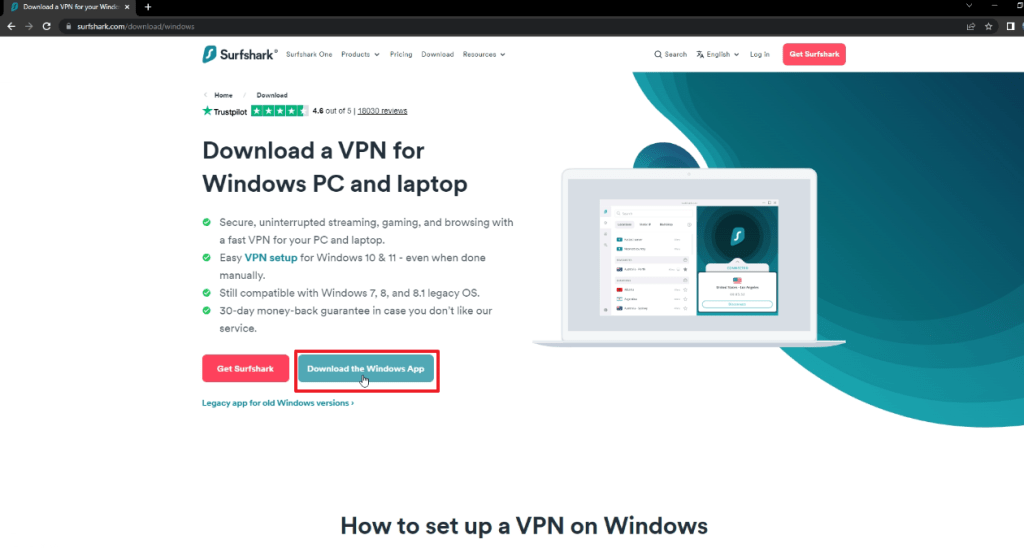
4. Click on Download the Windows App
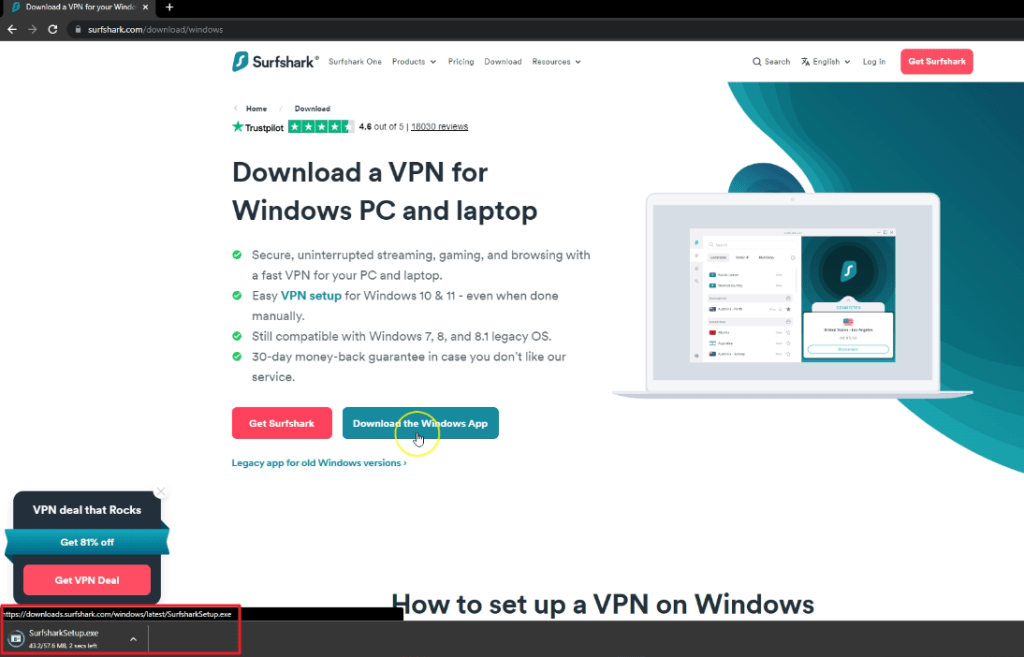
5. You will see then on the bottom side that it is downloading and just wait for it to finish.
6. Just follow the indicated numbers on the arrows
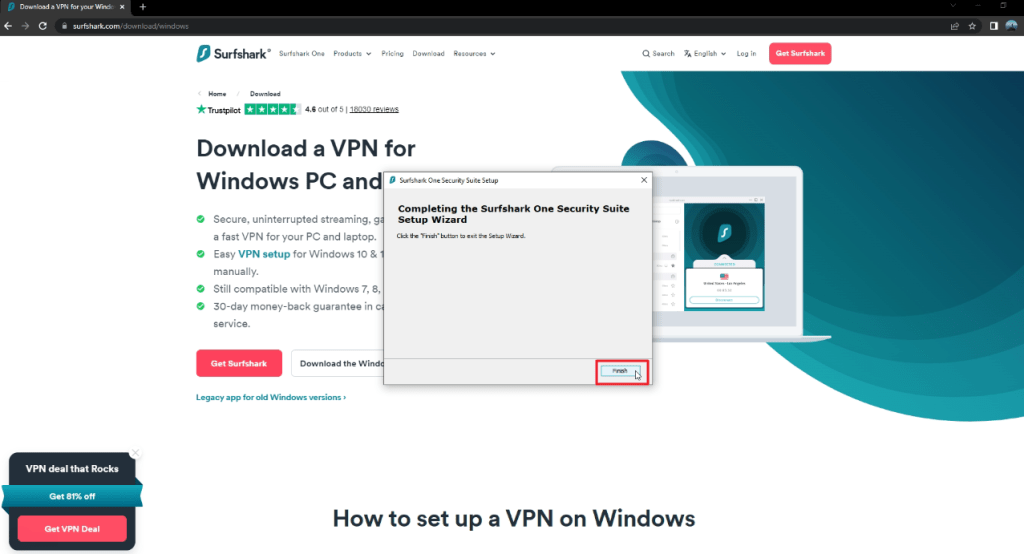
7. Click Install.

8. After installation click on Finish.
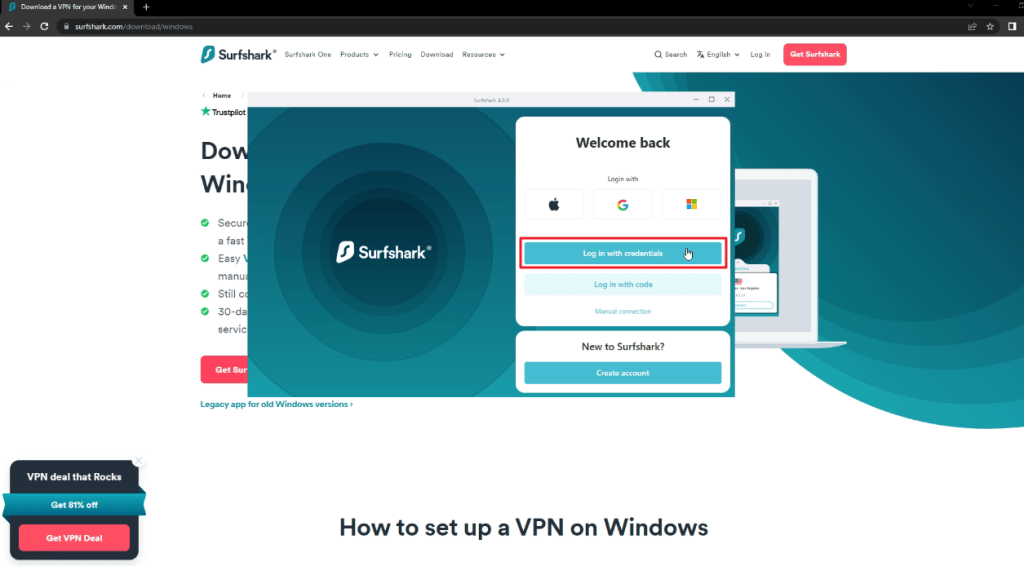
9. Go to the Surfshark App and open then Create an account, Sign Up, or Log In with your Credentials. Then click on Log in.
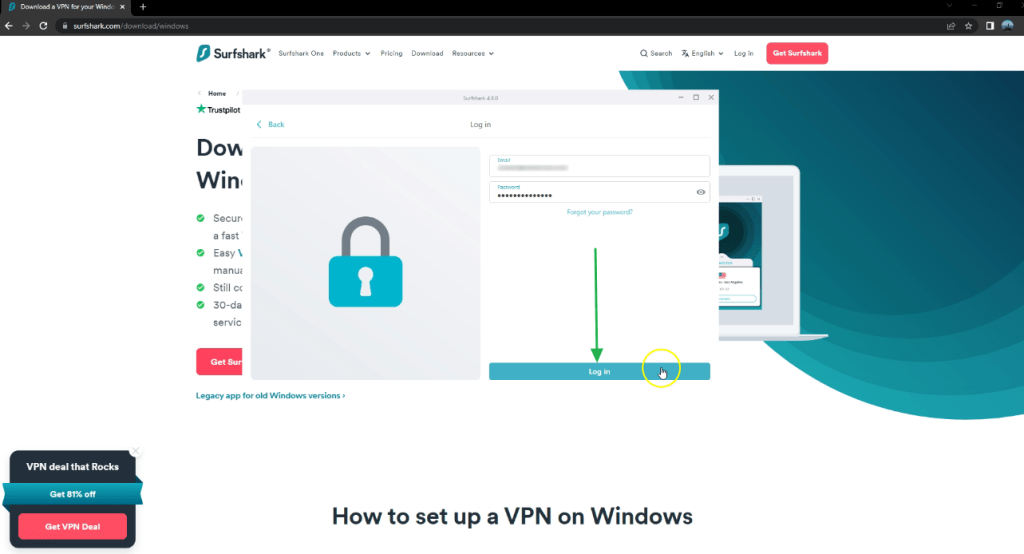
10. Surfshark installed. You can now connect to the server you want.
YOUR INTERNET ACTIVITY IS BEING WATCHED
ReviewVPN cannot attest to the legality, security and privacy of the applications discussed on this site. It is highly recommended that you use a VPN service while streaming or using Kodi.
Currently, your IP 216.73.216.69 is visible to everyone and your Browser is being tracked by Advertisers & ISP Provider.
Here are the main reasons why you must use a VPN:
- Your activities are hidden from your ISP, the government, and from the apps you are using.
- You can access additional movies and TV streams.
- ISP attempts to throttle are thrwarted thus reducing buffering issues.
- Geographically restricted content like Netflix and Hulu can be unblocked.
A VPN works be replacing your ISP-assigned IP address and creating an encrypted tunnel. We recommend the no log service offered by IPVanish. It works well on a Firestick and offers the fastest possible speeds.
Legal Disclaimer: ReviewVPN.com does not encourage or endorse any illegal activity involved in the usage of services and applications referenced on this site. We do not verify the licensing agreements of services. The end-user is wholly responsible for ensuring that any media accessed through these services does not violate copyright and/or licensing laws. ReviewVPN does not promote, link to, or receive compensation from any Apps and IPTV services.
Install Surfshark on Firestick

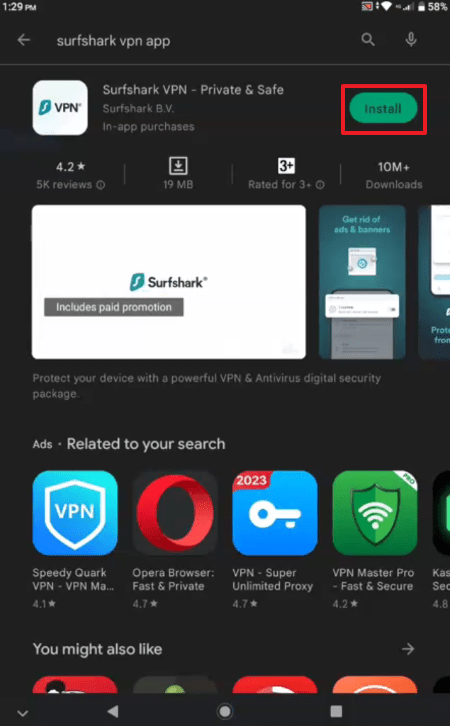
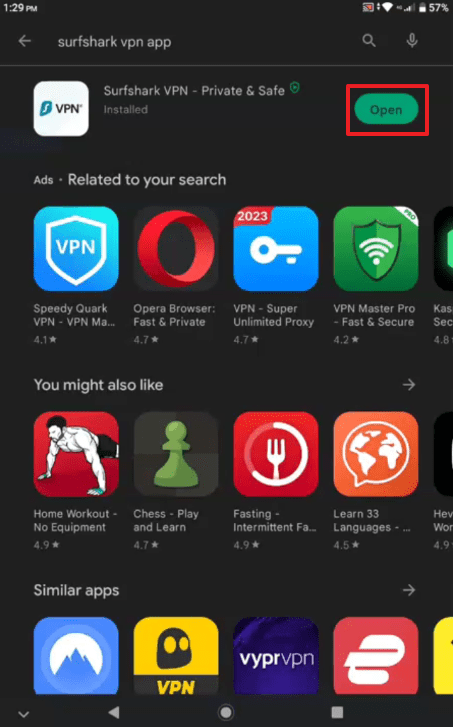
How To Install Surfshark VPN on Your Android Devices
1. Go to your Play Store App.

2. Go to the search bar and type Surfshark VPN App then click Install.
3. After installation click Open.
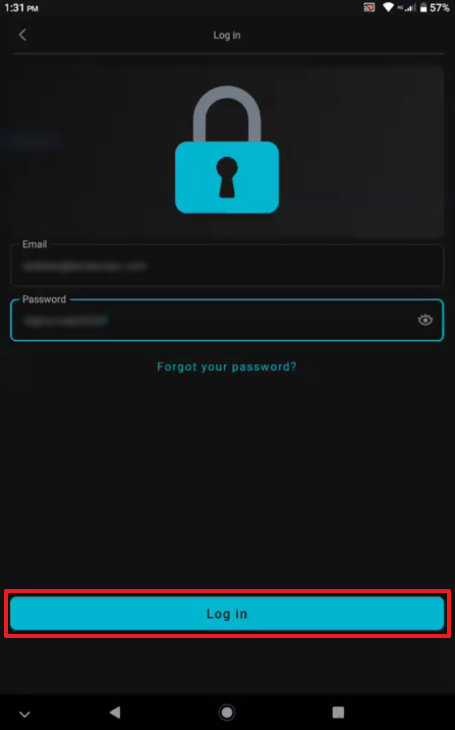
4. Click on login then Log In with your Credentials.
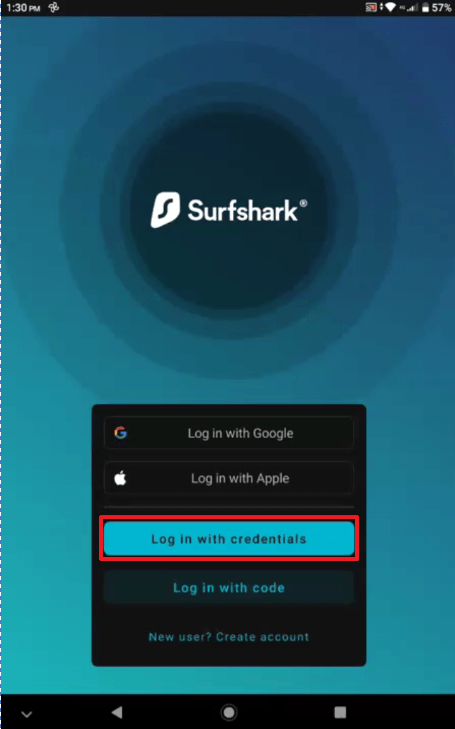
5. Now type in your email and password then click on Log In.
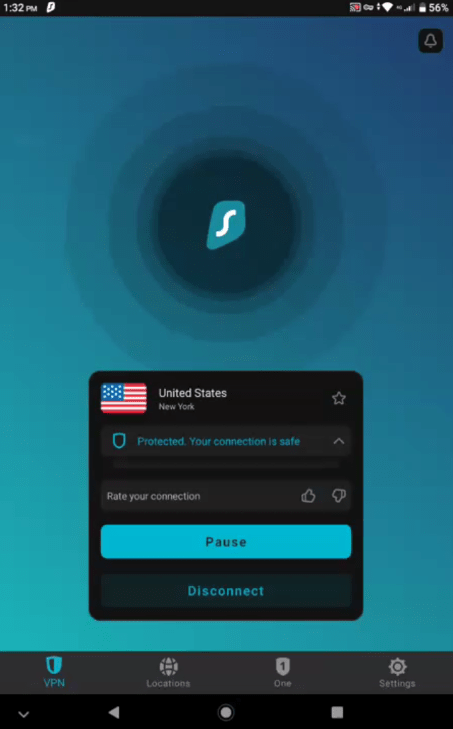
6. Surfshark installed. You can now connect to the server you want.
How To Set Up Surfshark on Mac
The instructions below will walk you through installing and configuring Surfshark on your Mac device.
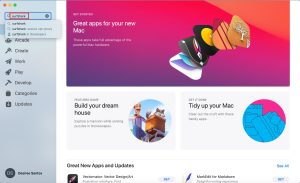
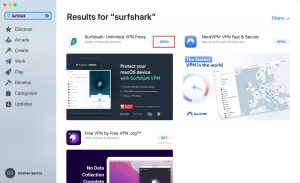
1. On the Apple App store, type in “Surfshark”
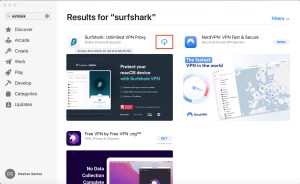
2. When it appears, click “Get”
3. Once the file is installed, click “Open“.
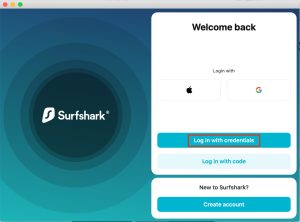
4. Then select “Log in with credentials” or “Log in with code“. Here I’ll be choosing to log in with credentials.
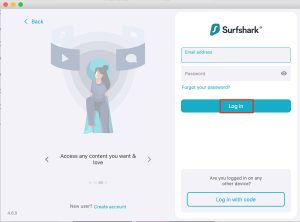
5. Type in your username or email address and password. Then click “Log in“.
6. You can either click “Quick connect” or select your preferred country to connect.
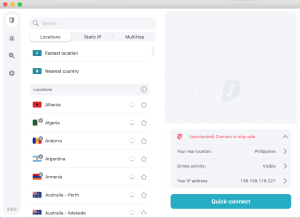
7. That’s it, you’re done with the set-up of your Surfshark account on macOS.
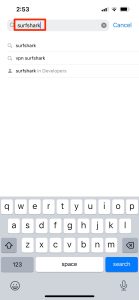
How To Set up Surfshark for iOS
This detailed guide will show you how to install and set up the Surfshark app for iPhone and iPad:
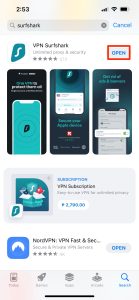
1. On the Apple Appstore, type in “Surfshark”
2. Since Surfshark is already installed on this device, you can tap the cloud icon. Those installing the app for the first time can tap “Get” and then “Install“.
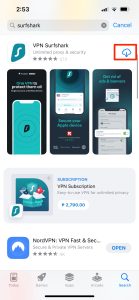
3. The app will then start to download.
4. Tap “Open”.
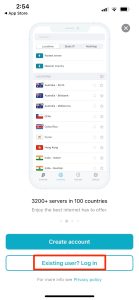
5. Then tap “Existing user? Login”.
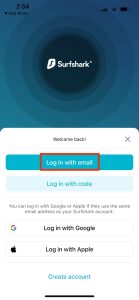
6. You can choose “Log in with email” or “Log in with code”. Here we’ll be selecting to log in with email.
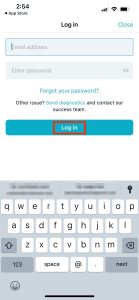
7. Type in your email address and password then tap “Log in” afterward.
8. Tap “Quick Connect” or select from the list of countries available.
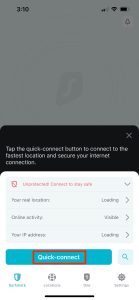
9. Then “Continue”.
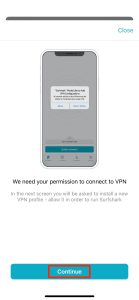
10. Tap “Allow”.

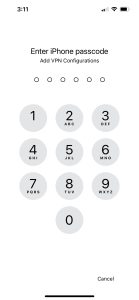
11. Then enter your iPhone/iPad passcode to proceed with the configurations.
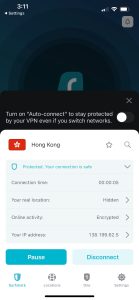
12. That’s it. If you chose the Quick Connect option, you are now connected to the fastest location available.
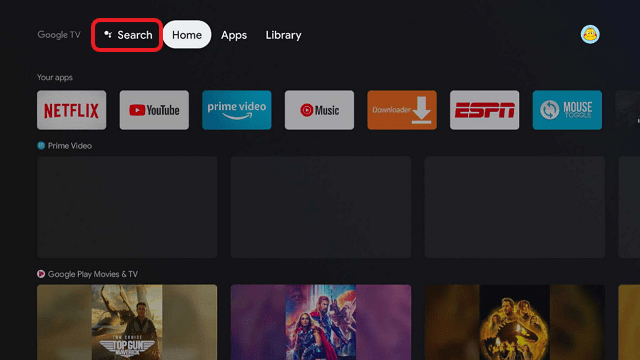
How to Install Surfshark on Google Chromecast
1. Click Home on your remote then select Search.
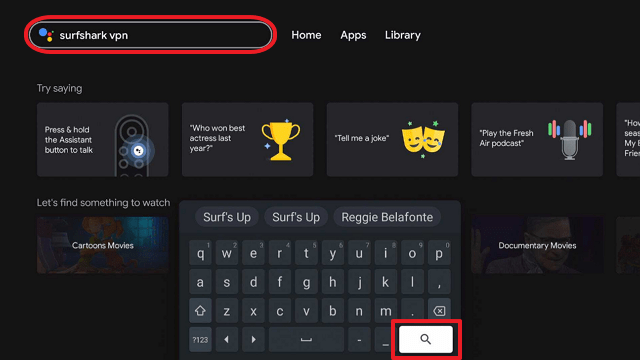
2. On the search bar, you can use the google voice assistant to find Surfshark VPN or by typing it.
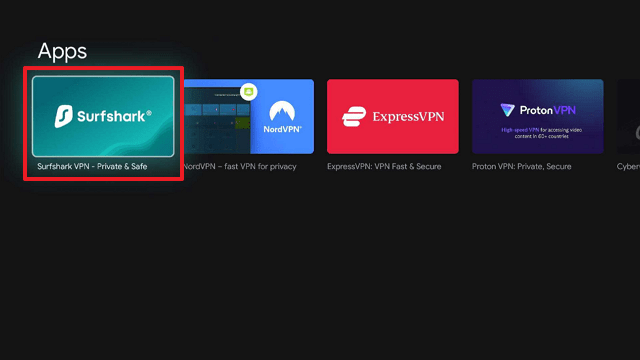
3. Click on Surfshark VPN icon.
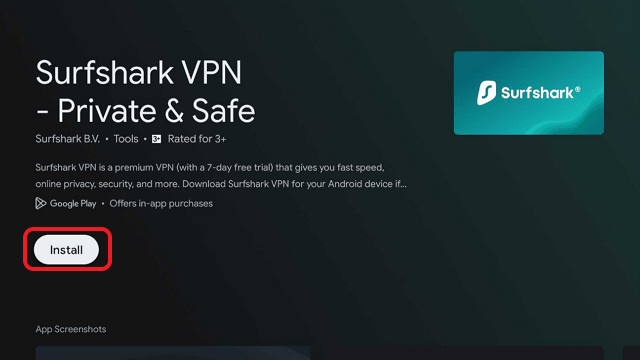
4. Click on Install.
5. Surfshark VPN is now installing just wait for it until it’s done.

6. Click open.
7. Input your username and password to log in
Conclusion
With Surfshark’s dedicated IP, it provides much better protection and privacy to the user. It adds a lot of great functions when using a VPN service like on IP-sensitive websites, annoying CAPTCHA, and more.
We suggest you try out this new feature by Surfshark VPN. If you have more questions, let us know in the comment section below.