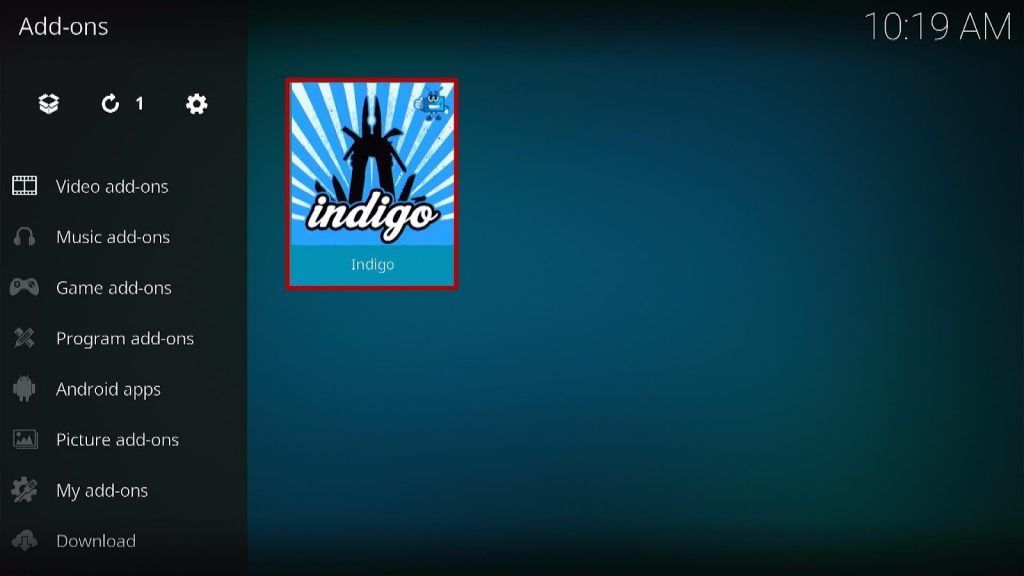
Indigo Kodi Addon
Source: https://fuentekodileia.github.io/
Indigo comes from the highly respected TV Addons repo which has been a Kodi powerhouse for several years.
Many would agree that Indigo is probably the best maintenance addon on Kodi, and one to have in any library.
You can also explore a wide range of addons, it’s an incredibly diverse addon.
Indigo’s uses can be separated into two main categories. First, as an addon installer for the massive range of addons that Tv Addons host and as maintenance and diagnostic tool.
Under the addon sections, you can access popular addons like Newsy and UKTV Play, as well as addons that have been separated into Video, Audio, and Program. Here you can also install skins.
But what most people download Indigo for are the Maintenance tools.

Common Errors
Here are some common errors you may find with Indigo:
- Script Error: A script error could either relate to the download or your Kodi version. Try and reinstall Indigo from the Tv Addons repo, and if you keep getting a script error, check whether you have the latest updated version of Kodi.
- No Link Found: It’s unlikely you can’t download the addon from TV Addons, but you can check the URL in a browser to see if it works there. If it does, then you may need to enable a VPN or check your internet connection for speed and stability. Check here for the best VPN deal. If the problem persists, check Google and Reddit to see if the TV Addons repo is down.
Review
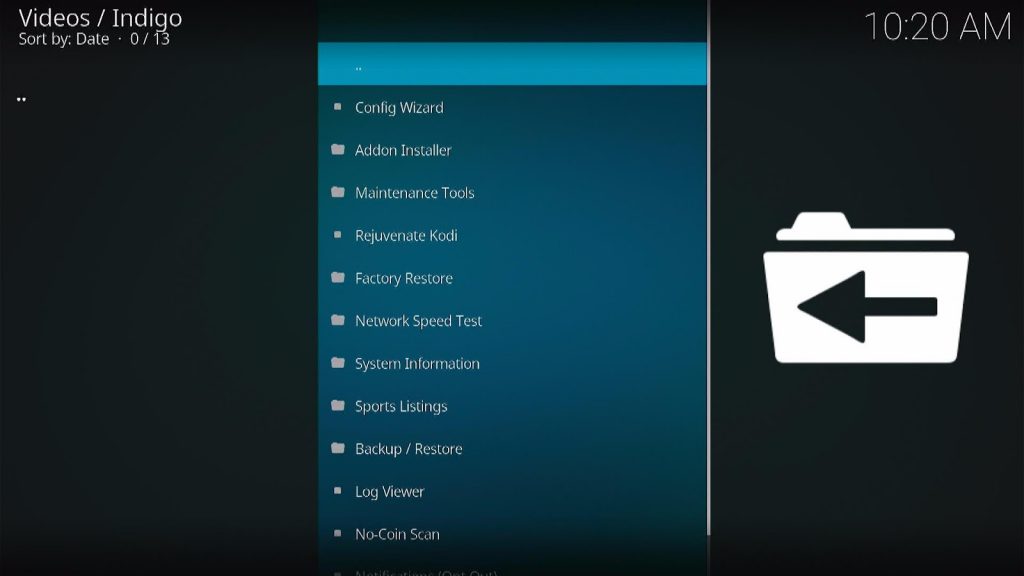
It’s worth us going through just some of the categories on offer in Indigo to allow you to understand what makes it such a valuable tool.
Maintenance Tools
This is an extremely useful category, where you can flush the cache of your device, delete thumbnails, and even packages that you no longer use.
You can even delete crash logs and more obscure files that get overlooked. Kodi is a great piece of software but it lacks a self-corrective and self-cleaning function. This can be remedied using Indigo’s Auto Maintenance tool, which you can tune on start-up or once a week. You also have a debugging mode for when Kodi is starting to go wrong, as well as a malicious script blocker if you suspect that one of the addons you have downloaded has a malicious script.
Log Viewer
Kodi has an error log, but it’s not easily accessible or readable. If you have multiple addons that you have installed and are getting errors that, you cannot trace or figure out then Indigo’s Log Viewer is useful to pinpoint where exactly the error is coming from.
Network Speed Test
A cool inbuilt function, which means you don’t have to run over to an internet browser to check your network speed. You spend so much time thinking the problem is with an addon or source you have forgotten to check the speed and stability of your own network.
The speed test will also tell you what file types will work well on your internet and what won’t.
Backup
The backup function is fantastic. Particularly if you suspect you may need to use a fresh install of Kodi. Without it, you would need to re-upload an addon, but by having a regular back up you can return to older versions of your files. This is useful if you install an addon that turns out to be malware-infected.
Categories Included:
- Config Wizard
- Addon Installer
- Maintenance Tools
- Rejuvenate Kodi
- Factory Restore
- Log/Uploader
- Network Speed Test
- System Information
- Sports Listings
- Backup/ Restore
- Log Viewer
YOUR INTERNET ACTIVITY IS BEING WATCHED
ReviewVPN cannot attest to the legality, security and privacy of the applications discussed on this site. It is highly recommended that you use a VPN service while streaming or using Kodi.
Currently, your IP 216.73.216.208 is visible to everyone and your Browser is being tracked by Advertisers & ISP Provider.
Here are the main reasons why you must use a VPN:
- Your activities are hidden from your ISP, the government, and from the apps you are using.
- You can access additional movies and TV streams.
- ISP attempts to throttle are thrwarted thus reducing buffering issues.
- Geographically restricted content like Netflix and Hulu can be unblocked.
A VPN works be replacing your ISP-assigned IP address and creating an encrypted tunnel. We recommend the no log service offered by IPVanish. It works well on a Firestick and offers the fastest possible speeds.
How to Install Indigo Addon on Kodi with Screenshots
1. On your Firestick, open Kodi and go to Settings.
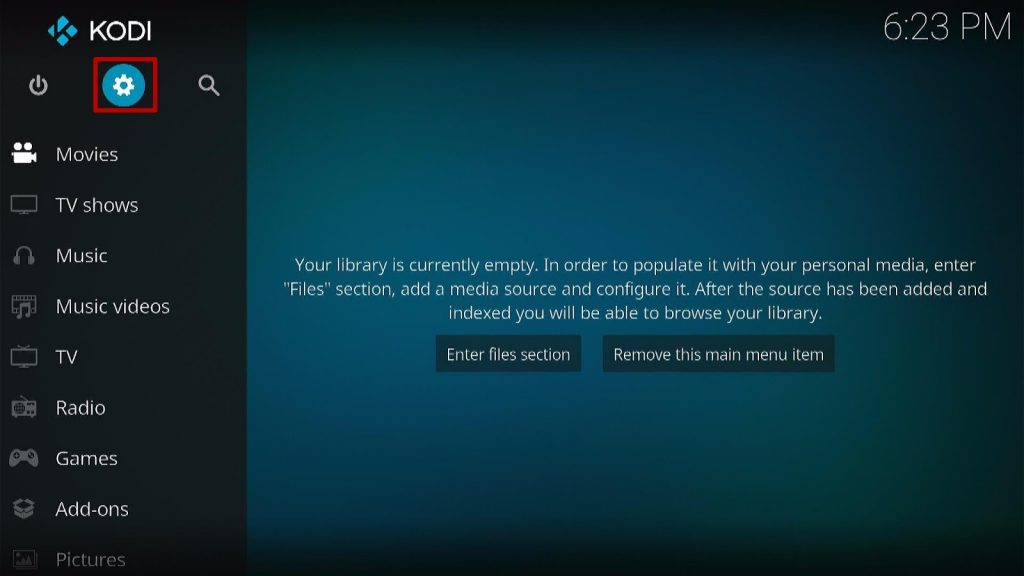
2. Select on System.

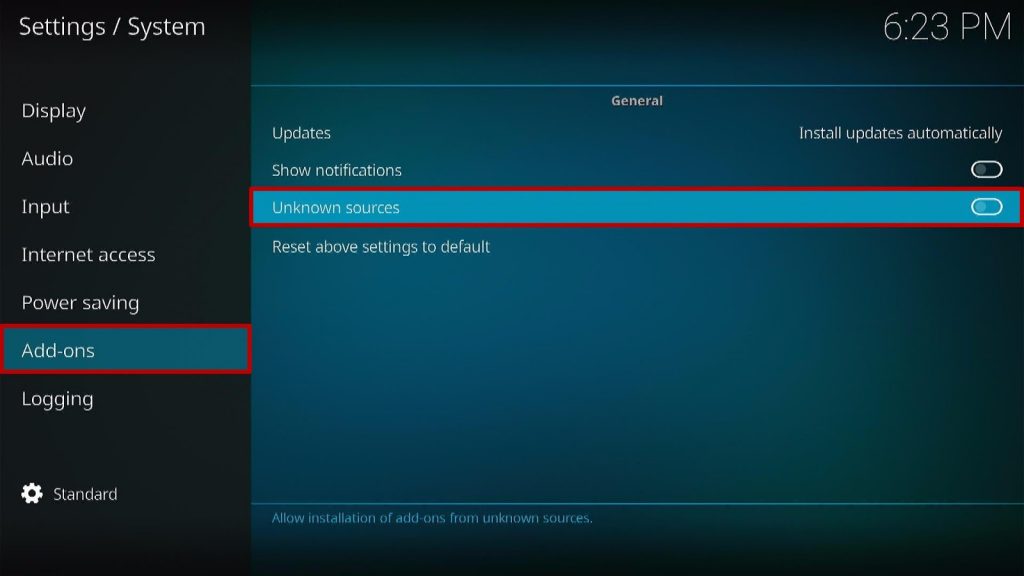
3. Click on the Add-ons menu and Turn ON Unknown Sources.
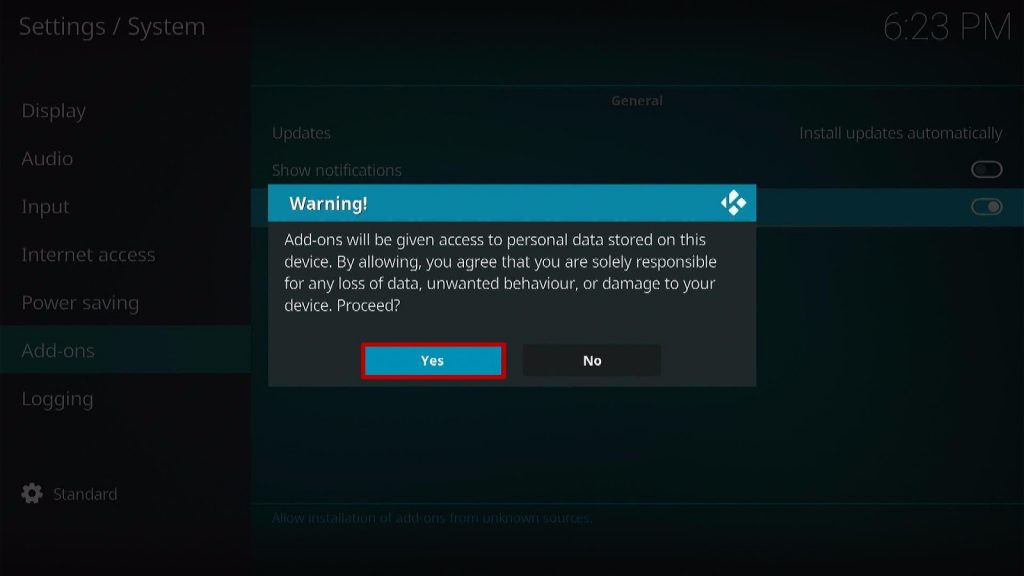
4. Select Yes when the box appears
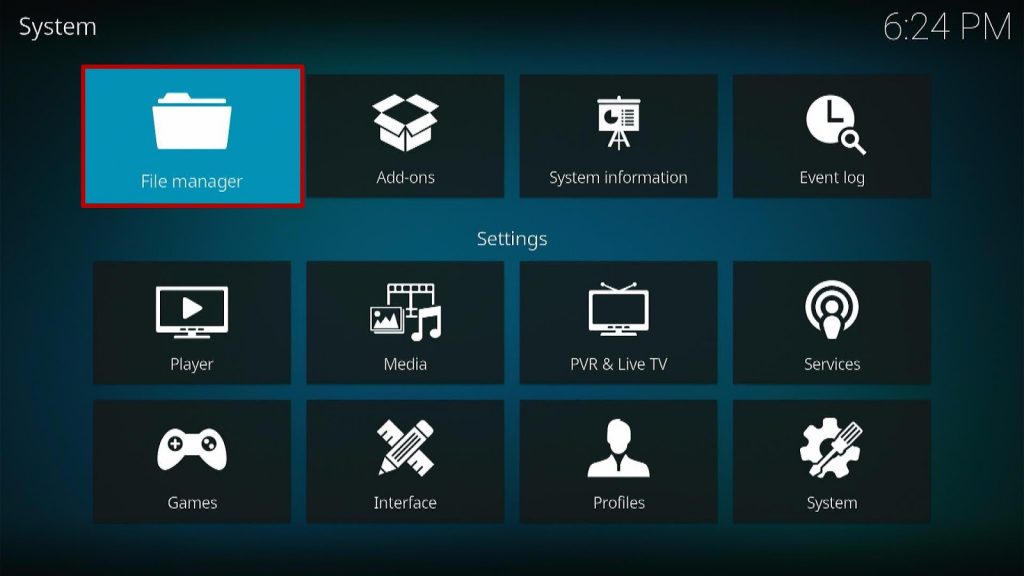
5. Go back one step and click on File Manager.
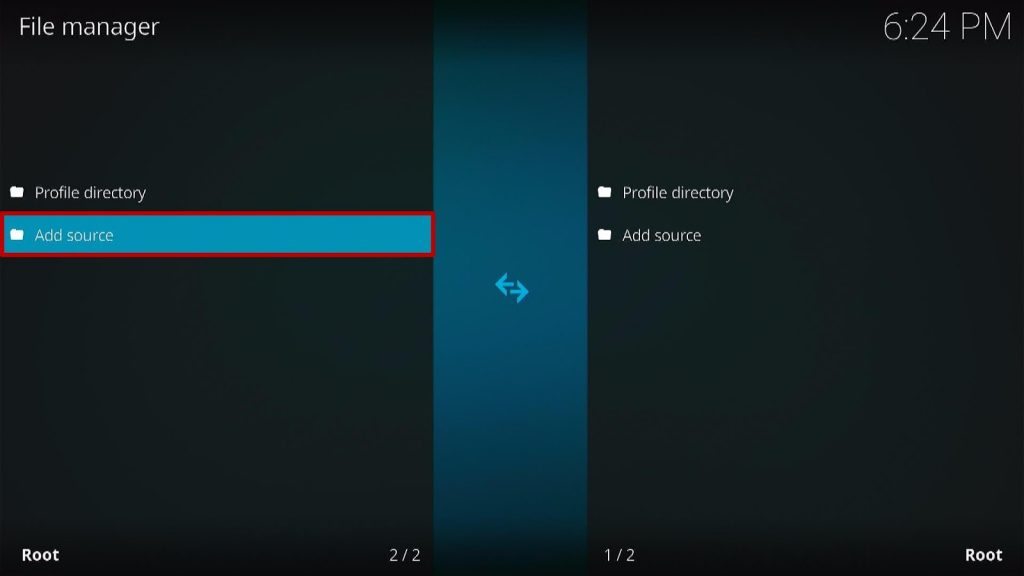
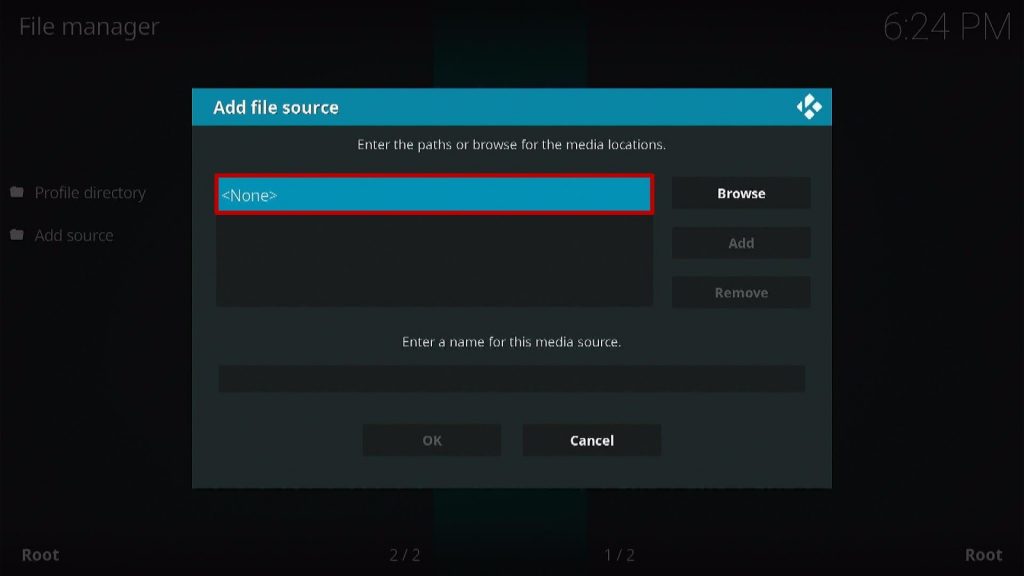
6. Click Add Source
7. A box will pop up, so click on the ‘None’ option.
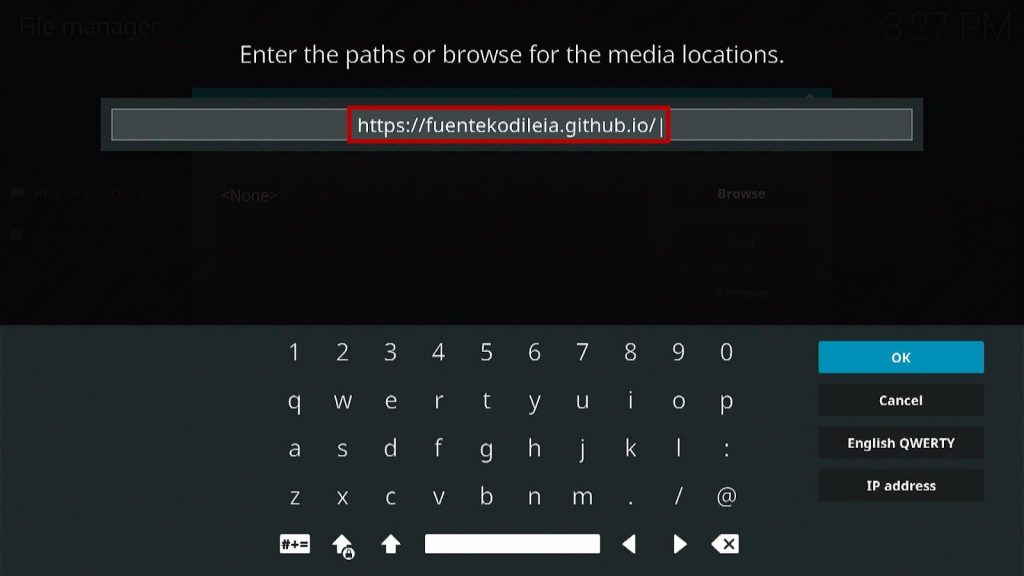
8. Now type in this URL https://fuentekodileia.github.io/ and click OK.
9. Name this URL as fuente and tap OK.

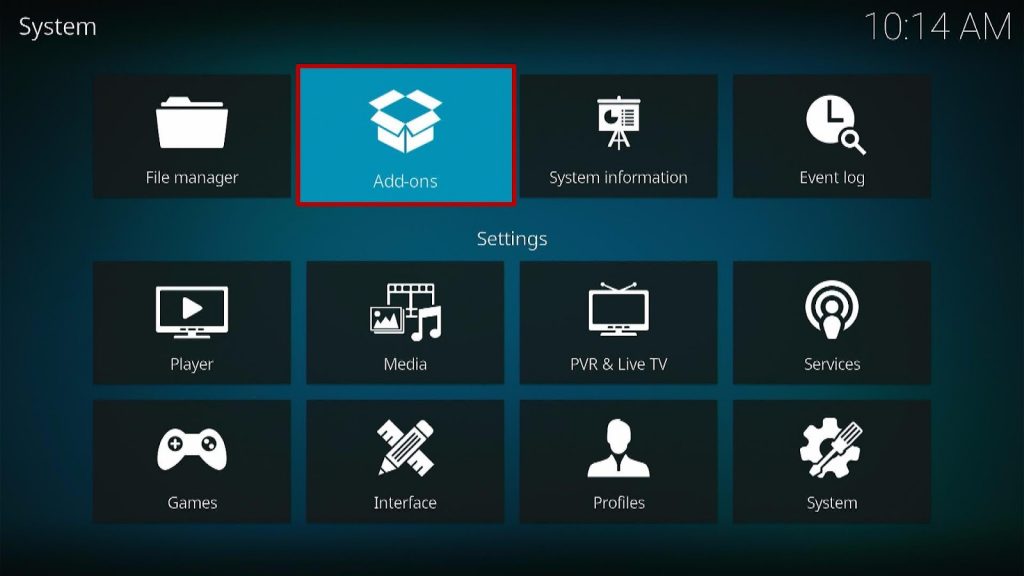
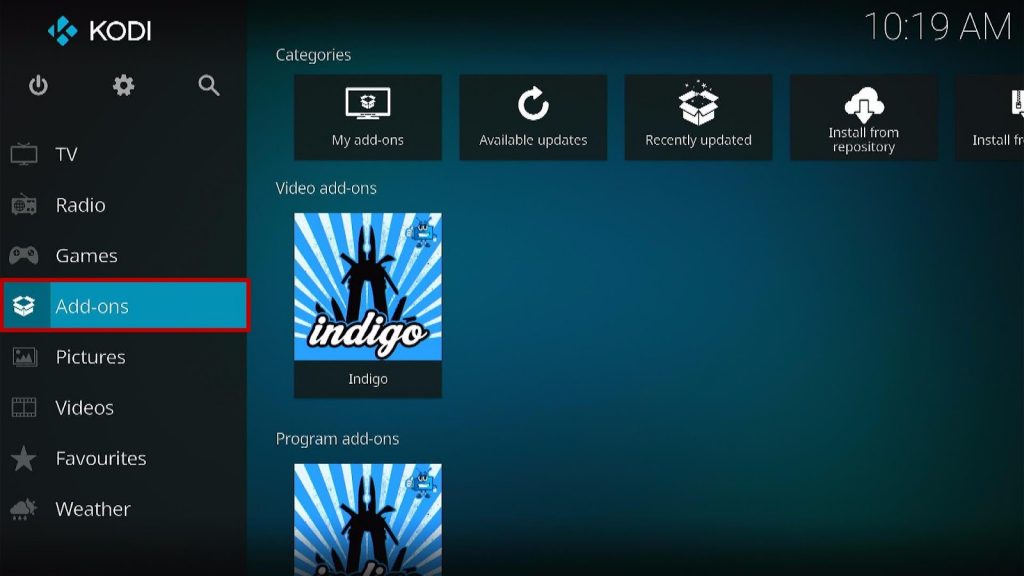
10. After that, go back to the system menu and select Add-ons.
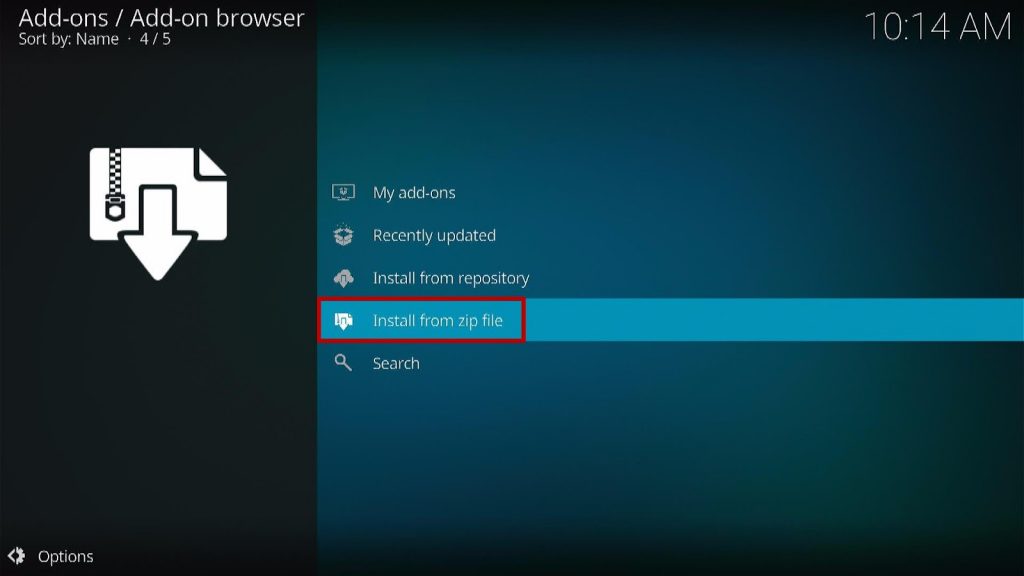
11. Click Install from Zip File.
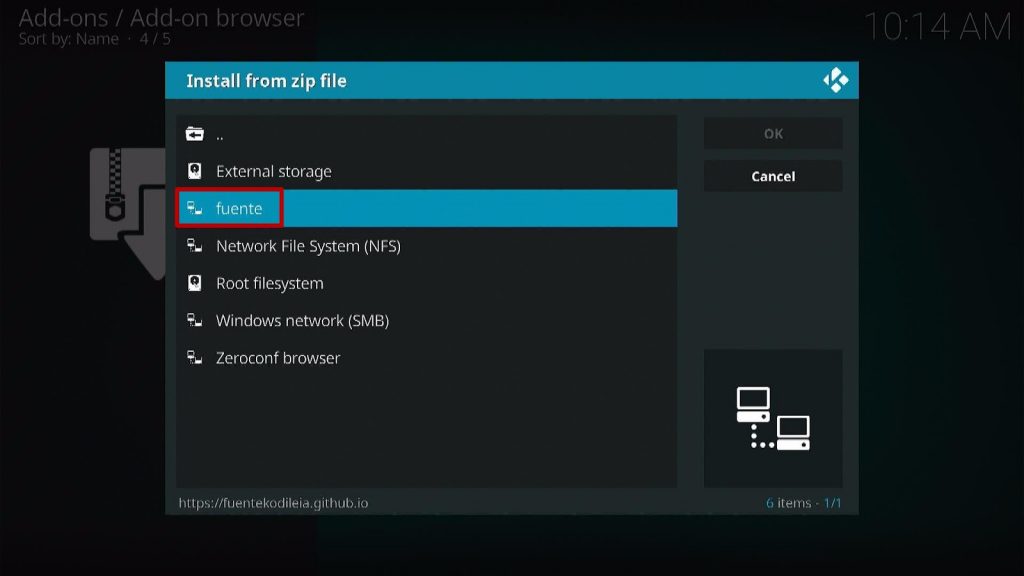
12. When the box pop-up, select fuente or any name you have given.
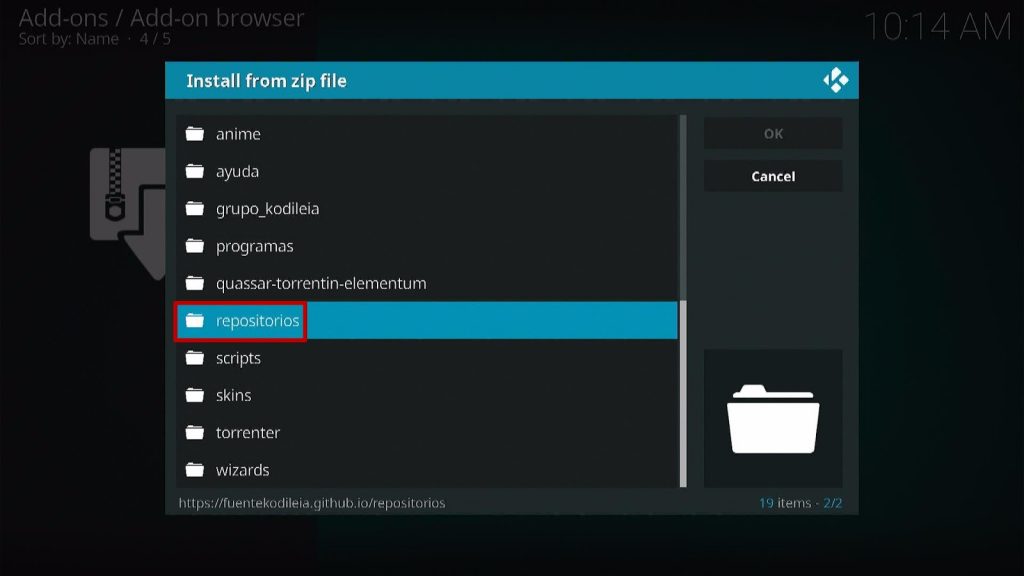
13. Scroll down and choose repositorios.
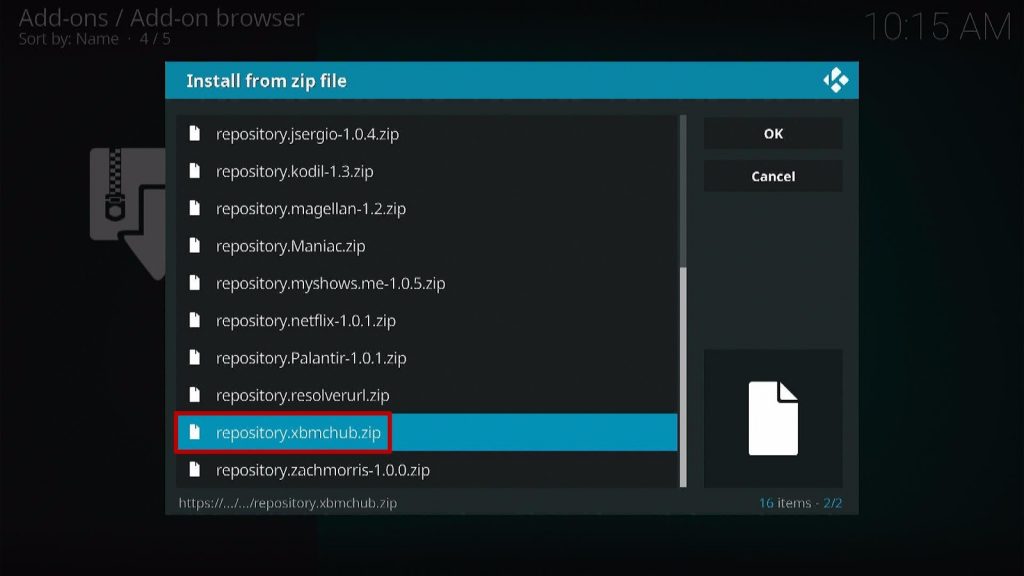
14. Select repository.xbmchub.zip
15. Wait a few minutes for the addon to be installed. After that, an icon will appear at the top menu.
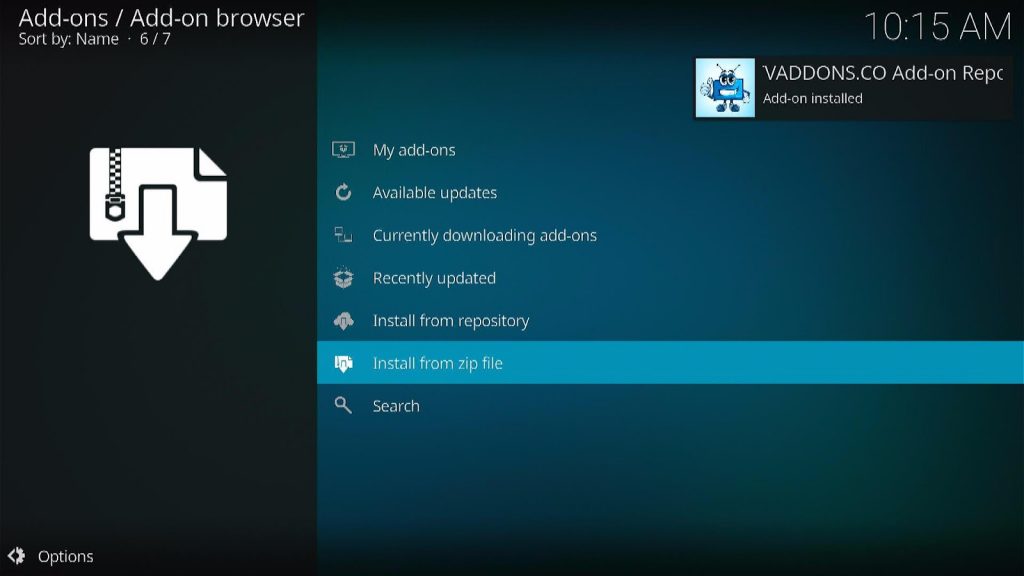
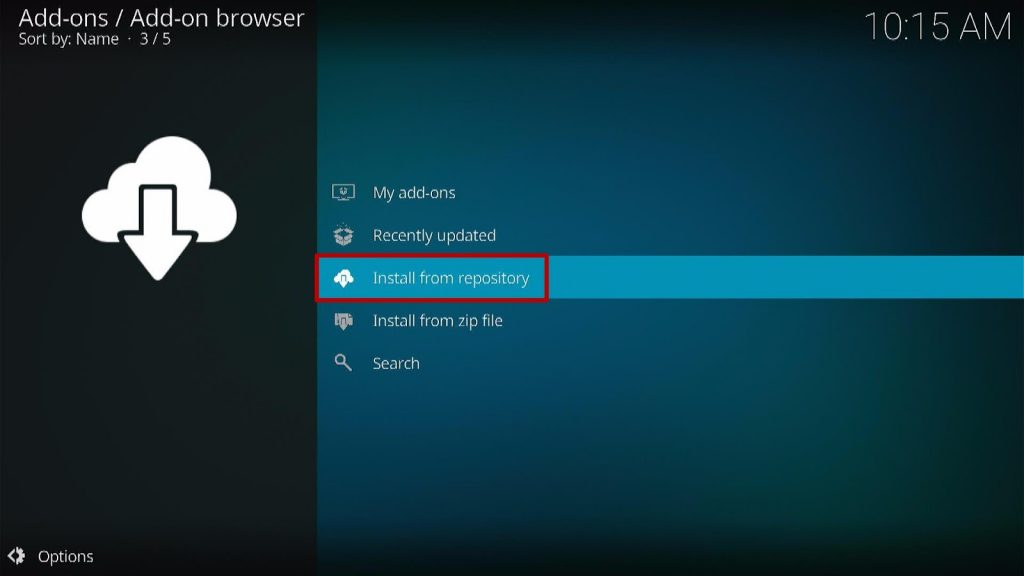
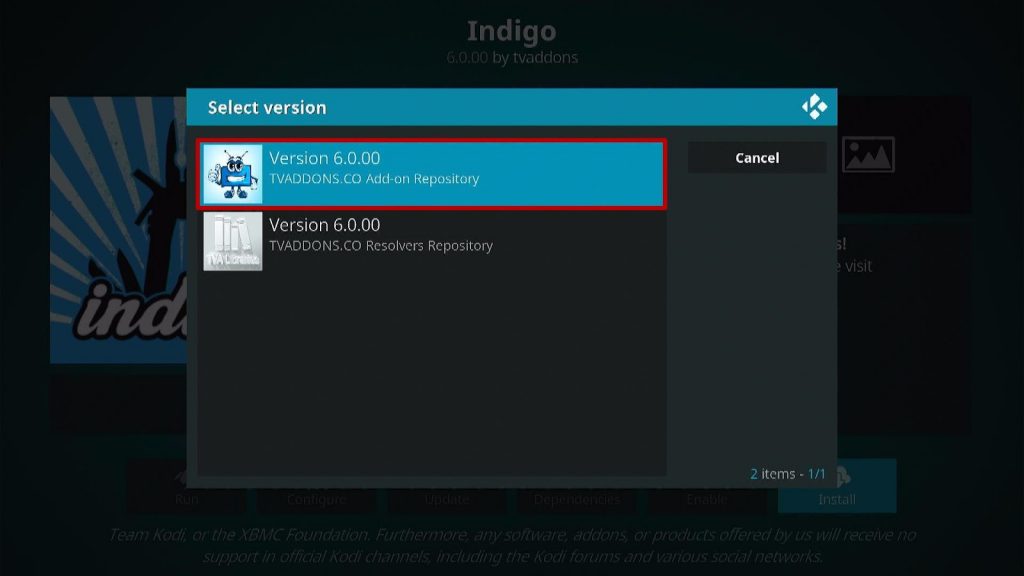
16. Tap the Install from Repository.
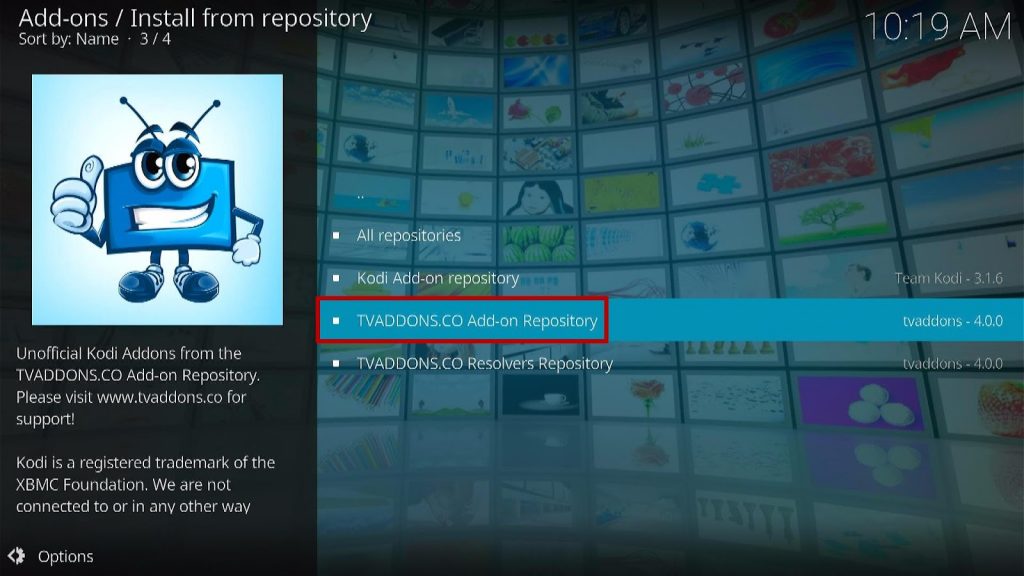
17. Then select TVADDONS.CO Add-on Repository from the list
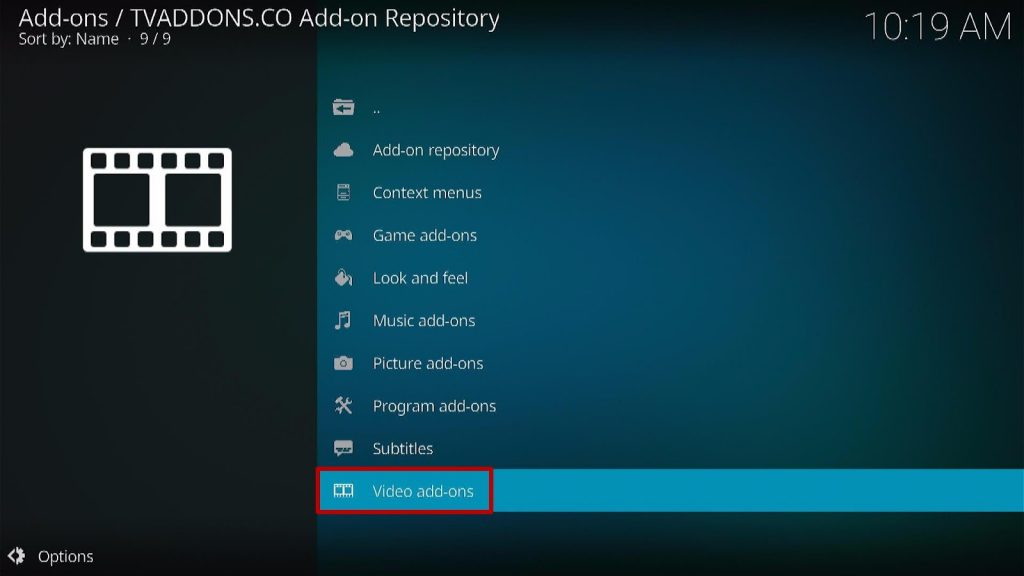
18. Click on Video Add-ons.
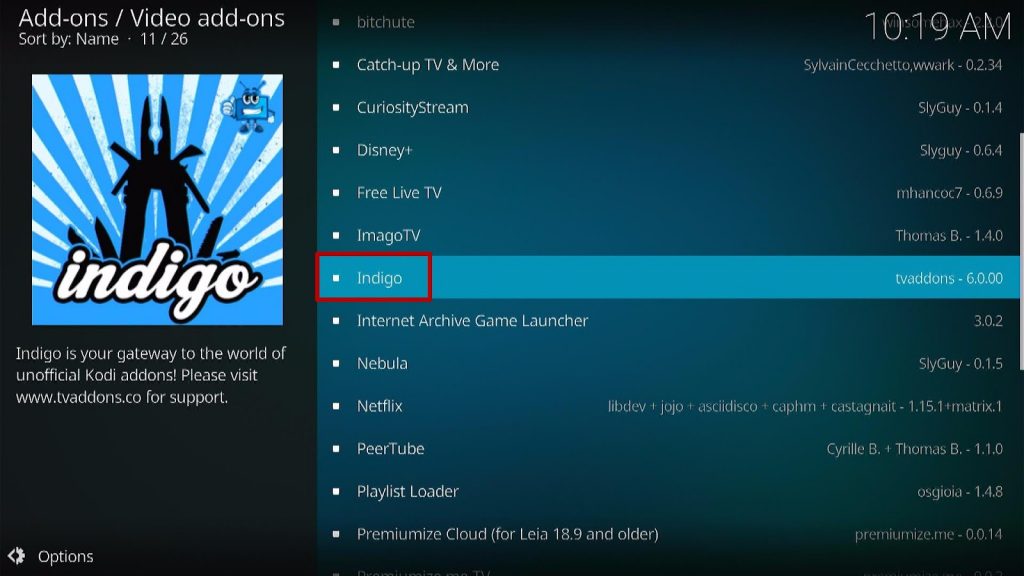
19. Select the Indigo.
20. Click Install button.
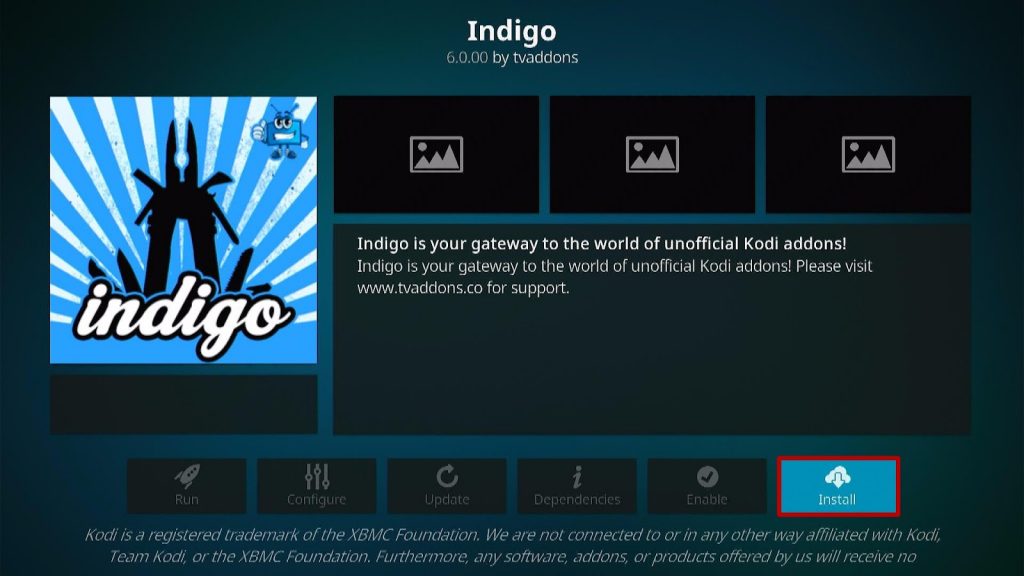
21. When a box Pop up, click OK.
22. Wait for the Indigo Add-on installed message to appear.
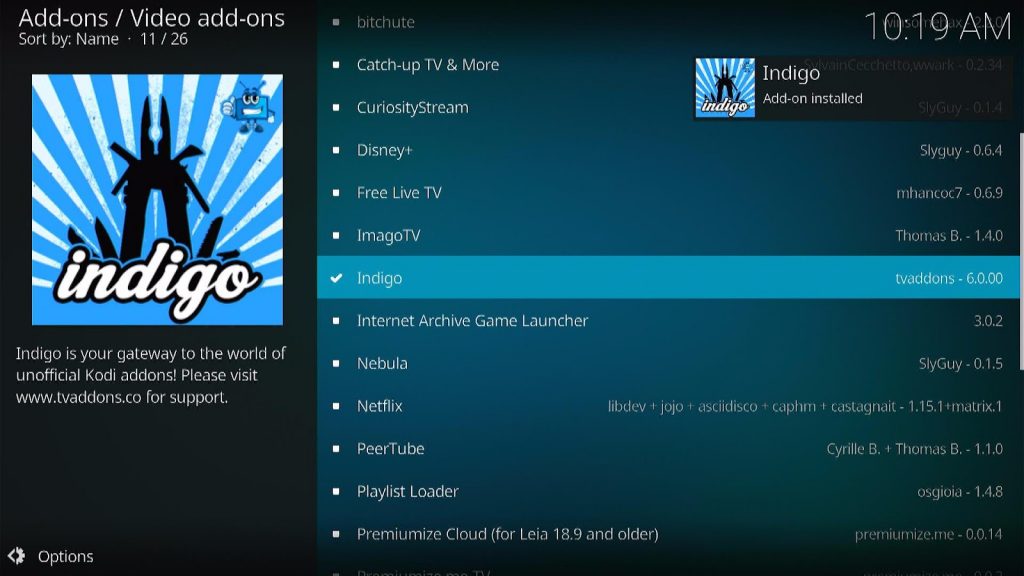
23. Go back to the Kodi home screen and scroll down to Addon.
24. From the Video Add-on, select the Indigo Add-on icon.
25. That’s it! You have successfully install Indigo Addon.
Note: For more information about Surfshark, please read our Surfshark Review.
Grab your subscription now!
Click here to get the lowest price on Surfshark through our exclusive limited-time offer.
How to Install Surfshark VPN on Firestick
If your Firestick still has the older interface, read this article to learn how to update it: Update Firestick Interface.
Follow our screenshots below to install the SurfShark VPN app on your Fire TV stick.
1. Go to the Home screen of your Firestick.
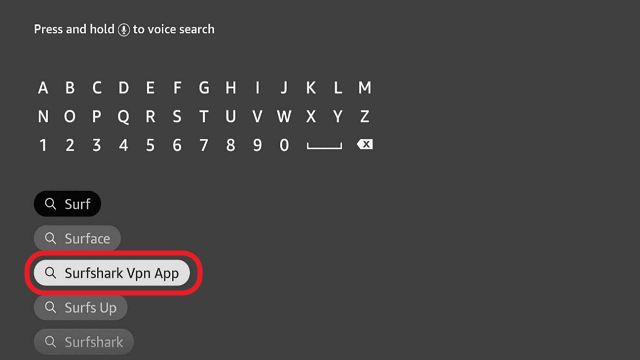
2. Navigate towards the Find tab. Press the Search button from the resulting dropdown.
3. Type in the keyword of SurfShark and select from the suggestions that will appear.
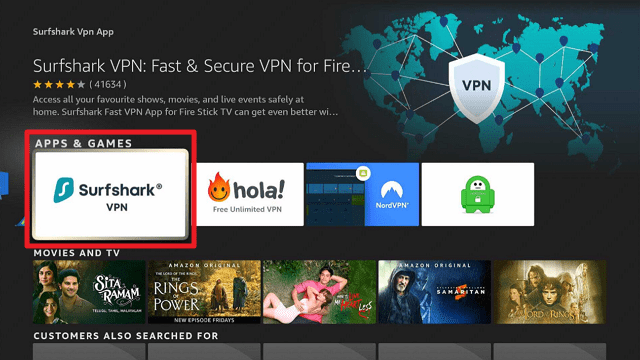
4. Click the official SurfShark icon from your search results.
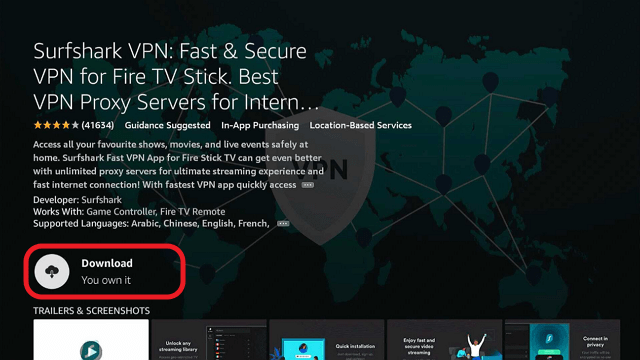
5. Press the Download (You own it) button.
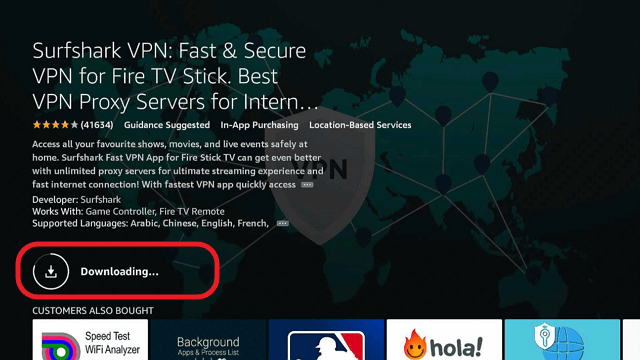
6. The SurfShark VPN installer will download on your device.
7. SurfShark VPN’s app will automatically install itself on your Fire TV stick.
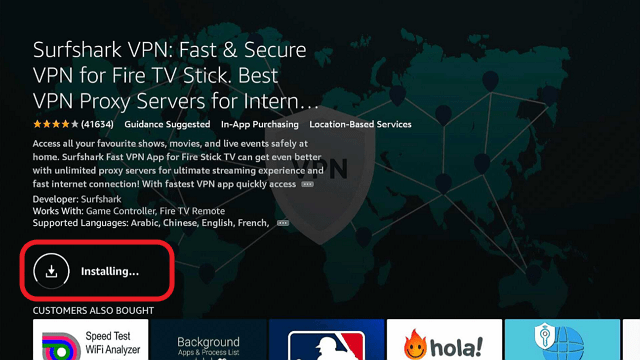
8. Press the Open button after completing SurfShark VPN’s installation process.
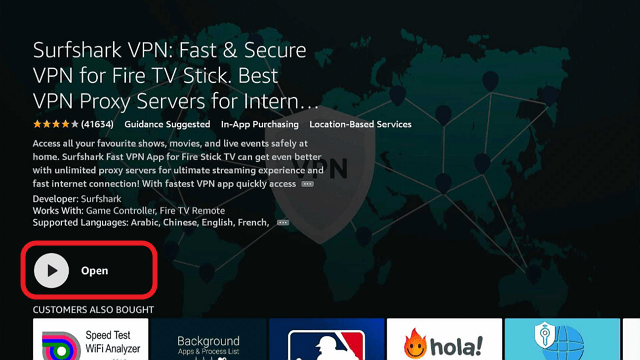
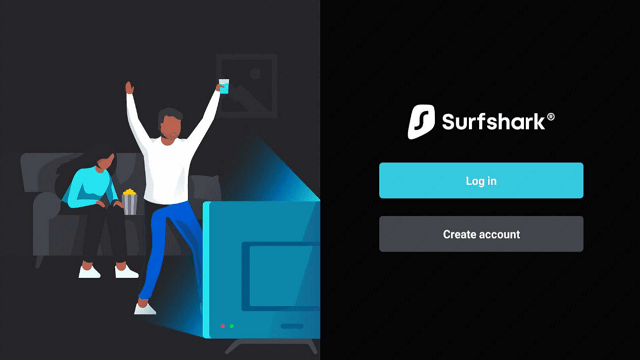
9. Please wait for the SurfShark VPN to load its user interface.

10. You can now log in with your SurfShark VPN account credentials.
Learn more about Surfshark and Grab the Best Surfshark Deal Now!
Install Surfshark on Firestick
For more VPN discounts, go to ReviewVPN Deals and purchase the best VPN for you.
Click here to get the lowest price on Surfshark through our exclusive limited-time offer.