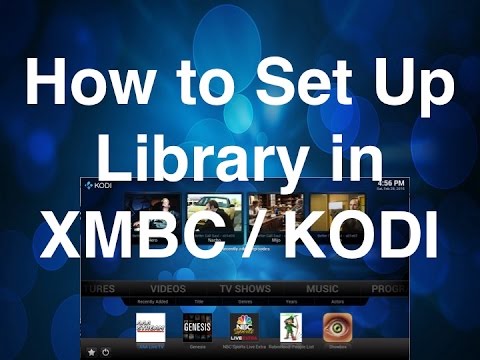
How to Create a Library in Kodi?

In this brief guide, we look at how Kodi creates a library of your content to easily access, search, and play. As well as methods for importing videos, music, and pictures into Kodi. Finally, we look at how to create libraries on your existing addons.
Install Surfshark on Firestick
Legal Disclaimer: ReviewVPN.com does not encourage or endorse any illegal activity involved in the usage of services and applications referenced on this site. We do not verify the licensing agreements of services. The end-user is wholly responsible for ensuring that any media accessed through these services does not violate copyright and/or licensing laws. ReviewVPN does not promote, link to, or receive compensation from any Apps and IPTV services.

How Does Kodi Create a Library?
Before you begin creating a library in Kodi, it’s important to recognize that Kodi does not act as a cloud storage device.
Kodi simply takes what you have on your device, and maps out paths to files and directories, as well as adding additional information. Like, cover art, IMDB rating, length, and other additional information.
If there are no media present on your Android device then Kodi cannot build a library to start with.
Prior to creating a library, try to upload all your relevant media files and organize them into appropriate files depending on the type of media. Kodi will easily be able to categorize them in terms of genre, artist, and so on.
Also, Kodi will arrange media in different libraries depending on the media type. SO, you don’t need to worry about pictures with videos and music.
From the Kodi Home screen you will see the following sections in the left-hand side menu if you are using Estuary:
- Movies
- Tv Shows
- Music Videos
- Tv radio
- Add Ons
- Pictures
- Movies
- Music
You can change the sections and where they are displayed by going into Settings > Skins > Configure Skin, where you can turn icons on and off and change their prominence in the menu hierarchy.
Importing Videos, Music, and Pictures Into Your Library
Here we give a brief overview of each of the main types of media added to your library.
Videos

- Form the main menu navigate down the “Videos” section
- From the right-hand side of the screen click “File”
- Then select “Add Videos”
- You will see a pop-up, where you can browse and add or remove sources
- Navigate to the folder that contains the videos that you want to upload
- Name your media source and then click “OK”
- On the “Set Content” you can manually choose from a number of categories including “Videos”
- Kodi will ask if you want to refresh information for all the files in this path, say yes, so it can fine-tune to pick up only video files
- Give Kodi time to map and categorize all the items of media, most of the time is spent finding title names and cover art
Music

- Click on Music from the Home screen
- Select “Add Music”
- Click “Browse for music”, navigate to the file path containing all your audio files
- Kodi will then categorize all your music and seek out the relevant cover art and details for each album and single
Pictures

- Start on the Kodi Home Screen
- On the left-hand side, menu click “Pictures”
- Select “Add Pictures…”
- You can navigate to browse and find the folder with your image files
YOUR INTERNET ACTIVITY IS BEING WATCHED
ReviewVPN cannot attest to the legality, security and privacy of the applications discussed on this site. It is highly recommended that you use a VPN service while streaming or using Kodi.
Currently, your IP 216.73.217.42 is visible to everyone and your Browser is being tracked by Advertisers & ISP Provider.
Here are the main reasons why you must use a VPN:
- Your activities are hidden from your ISP, the government, and from the apps you are using.
- You can access additional movies and TV streams.
- ISP attempts to throttle are thrwarted thus reducing buffering issues.
- Geographically restricted content like Netflix and Hulu can be unblocked.
A VPN works be replacing your ISP-assigned IP address and creating an encrypted tunnel. We recommend the no log service offered by IPVanish. It works well on a Firestick and offers the fastest possible speeds.
Creating Libraries on Addons
Most addons will allow you to favorite movies, TV Shows, and channels and allow you to create a Library of sorts. But this won’t be accessible from the libraries on your Kodi home screen.
Some addons may even allow you to download and then watch content offline. If you designate a folder that is covered by your library already then you will be able to view this from the library in the main section of Kodi. Just make sure to update your Kodi sources. If you want to know more about this VPN, kindly read our Surfshark Review.
Here are some of the services and impressive features that this VPN offers:
- This VPN uses a high standard of AES-256 encryption and uncrackable security to safeguard your data and activities.
- It destroys Geo-block and bypasses any censorship and restriction by letting you connect to over 3200+ servers in 65 countries
- Surfshark also prevents ISPs from interfering with your connection to avoid lags and buffering. It also stops snooping ISP and keeps you protected while being connected on a public network.
- Keep your identity anonymous by hiding your real IP address and identity to protect you from hackers.
- It gives you unlimited bandwidth and makes your internet speed faster.
Click here to get the lowest price on Surfshark through our exclusive limited-time offer.
How to Install Surfshark VPN on Firestick
If your Firestick still has the older interface, read this article to learn how to update it: Update Firestick Interface.
Follow our screenshots below to install the SurfShark VPN app on your Fire TV stick.
1. Go to the Home screen of your Firestick.

2. Navigate towards the Find tab. Press the Search button from the resulting dropdown.

3. Type in the keyword of SurfShark and select from the suggestions that will appear.

4. Click the official SurfShark icon from your search results.

5. Press the Download (You own it) button.

6. The SurfShark VPN installer will download on your device.

7. SurfShark VPN’s app will automatically install itself on your Fire TV stick.

8. Press the Open button after completing SurfShark VPN’s installation process.

9. Please wait for the SurfShark VPN to load its user interface.

10. You can now log in with your SurfShark VPN account credentials.

Learn more about Surfshark and Grab the Best Surfshark Deal Now!
Install Surfshark on Firestick


For more VPN discounts, go to ReviewVPN Deals and purchase the best VPN for you.
Click here to get the lowest price on Surfshark through our exclusive limited-time offer.


