How to Clear Cache on Kodi?
Quick Navigation
In this quick guide, we cover a fundamental item of maintenance with Kodi. We talk briefly about what a cache is and why it’s important to clear it, and 3 great tools to clear the cache on Kodi whatever device you use.

Install Surfshark on Firestick
Legal Disclaimer: ReviewVPN.com does not encourage or endorse any illegal activity involved in the usage of services and applications referenced on this site. We do not verify the licensing agreements of services. The end-user is wholly responsible for ensuring that any media accessed through these services does not violate copyright and/or licensing laws. ReviewVPN does not promote, link to, or receive compensation from any Apps and IPTV services.
What is a Cache?

When you think of a cache, you think of a web browser. Just like the web, Kodi caches or saves snippets of media so that the second time you load a page, piece of content, or cover art you don’t have to wait.
Caching is crucial to allow you to have a smooth and seamless experience on all your addons.
Why is Clearing Cache Important?
These media snippets will build up over time, and each piece takes up memory. Some caches are bigger than others, as they take up storage space on your device. Your cache is going to be much bigger on an Nvidia Shield than on an Amazon Firestick.
Clearing cache is important as fewer images stored means faster content, loading, and speed for your device. Also left too long your Kodi device will start throwing off error messages, and in the worst case, your addons may be slow, freeze or even stop working once your cache is full.
Often the most space in your cache will be taken up by images, old thumbnails, and addons you no longer use.
Good maintenance every month will ensure Kodi works the best it can, all the time.
3 Tools to Clear Cache on Kodi
Unlike your web browser Kodi, doesn’t have an inbuilt function to clear cache, so here are three great addons you can install to get your Kodi back up to speed.
Indigo Addon
![]()
Indigo is the most popular maintenance addon on Kodi, so should be your first port of call.
-
- Install Indigo from this URL: http://fusion.tvaddons.co , if you don’t know how to install addons you can read our in-depth guide here <LINK>
- Once installed run Indigo
- Click on Maintenance Tools
- You are looking for “Clear Cache” which will list the size of the file within your cache and easily allow you to clear and permanently delete the files
- If you need to free up space you can also delete thumbnails which tend to take up a huge amount of space, and even run “Auto Maintenance” to get the best out of your Kodi
YOUR INTERNET ACTIVITY IS BEING WATCHED
ReviewVPN cannot attest to the legality, security and privacy of the applications discussed on this site. It is highly recommended that you use a VPN service while streaming or using Kodi.
Currently, your IP 216.73.216.76 is visible to everyone and your Browser is being tracked by Advertisers & ISP Provider.
Here are the main reasons why you must use a VPN:
- Your activities are hidden from your ISP, the government, and from the apps you are using.
- You can access additional movies and TV streams.
- ISP attempts to throttle are thrwarted thus reducing buffering issues.
- Geographically restricted content like Netflix and Hulu can be unblocked.
A VPN works be replacing your ISP-assigned IP address and creating an encrypted tunnel. We recommend the no log service offered by IPVanish. It works well on a Firestick and offers the fastest possible speeds.
Supreme Builds Wizard

Supreme is a great wizard which has several good builds as well as an in-depth maintenance section we love because you also get the option to “Fresh Start” reinstall Kodi if nothing else is working.
- Install Supreme Builds Wizard from: http://repo.supremebuilds.com/
- When running through the Install ignore the Builds Menu
- Click on Supreme Builds through the addons menu and navigate to the Maintenance section
- There’s a tonne of the great section here, we want cleaning tools, but you also have lots of miscellaneous fixes, and the ability to show all areas that need maintenance and turn on Auto Clean which will run whenever you start Kodi
- In the Cleaning Tools section click “Clear Cache”, as well as “Clear Thumbnails”
Merlin Wizard
![]()
Merlin Auto Cleaner has been around for a few years, and Supreme Builds also offers an automatic cleaning function whenever you launch Kodi.
-
- Install Merlin Auto Cleaner from: http://srp.nu
- Run the addon and select from all the great sections, you also get a free data backup tool with Merlin, we find it to be the best highly specialized Kodi cleaning addon around. For people who like to tinker.
Use a VPN
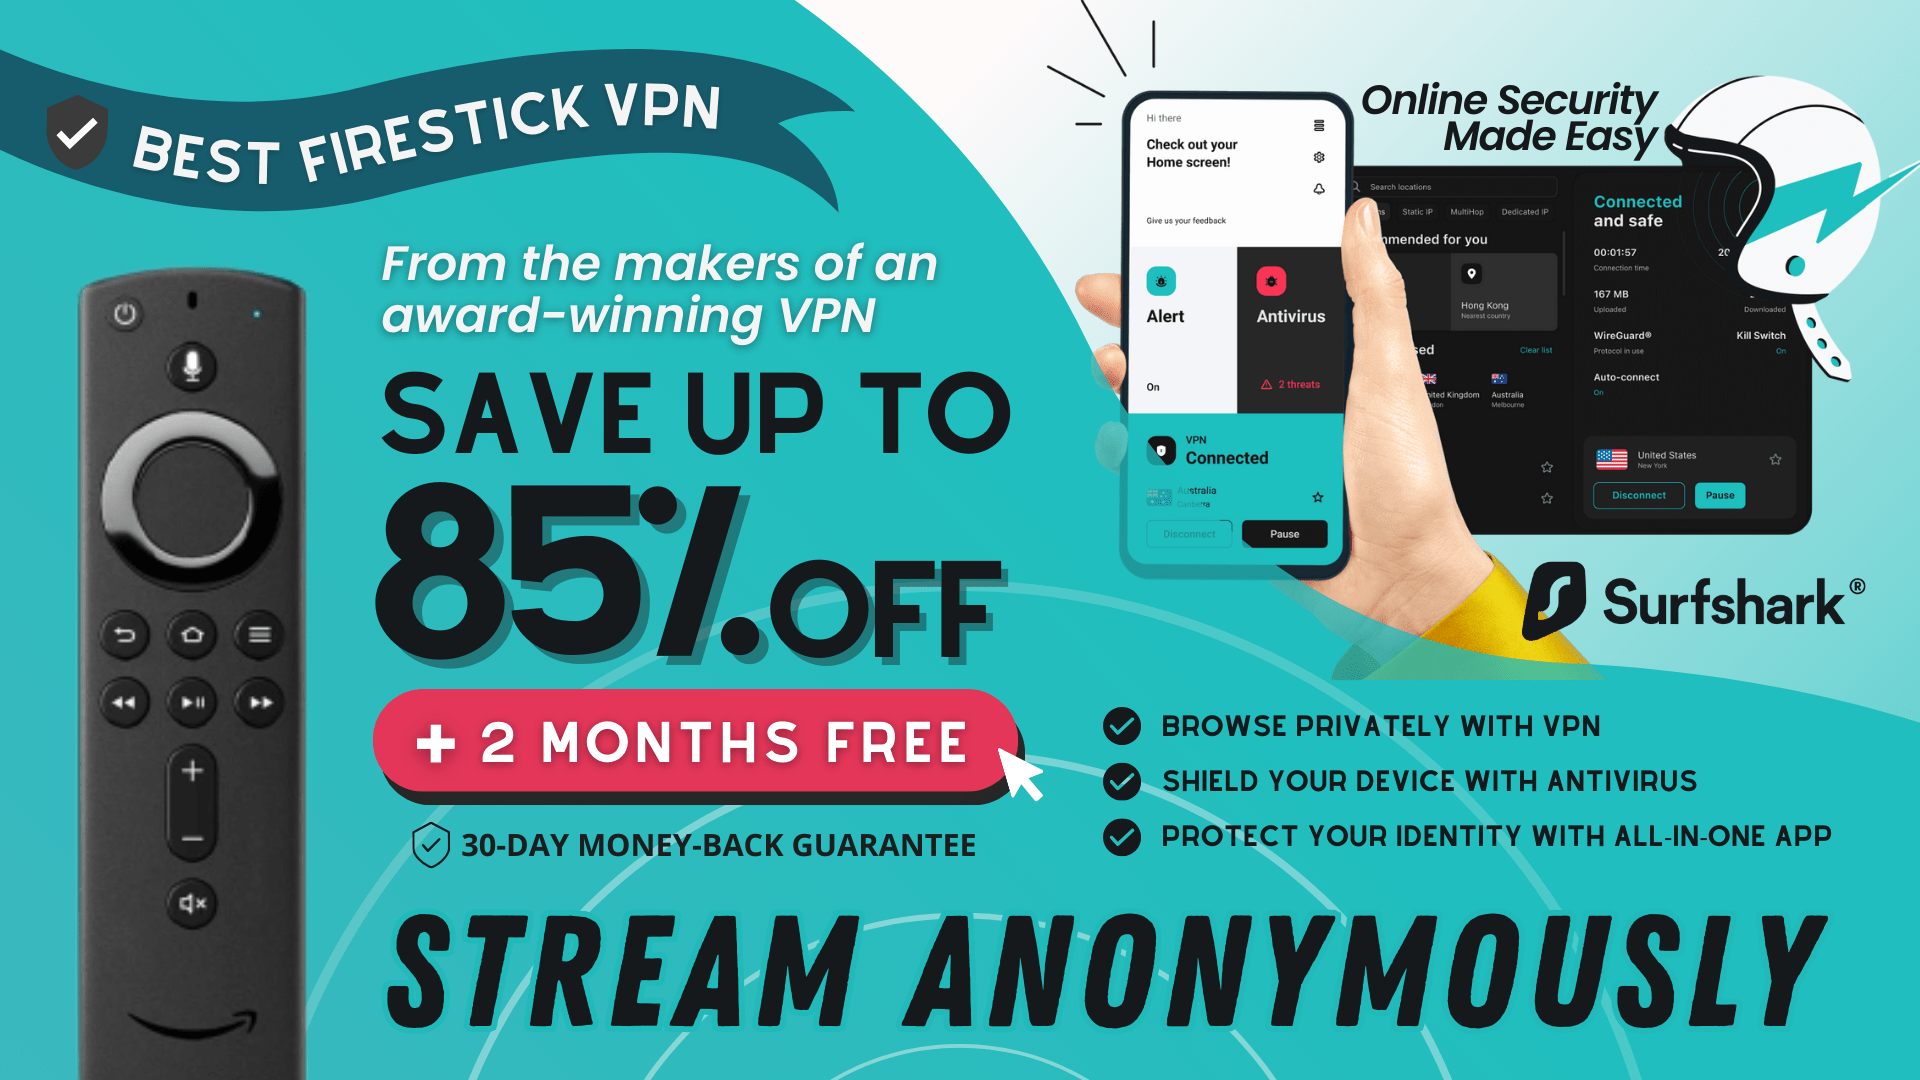
We always recommend using a VPN such as Surfshark to ensure your safety and privacy while doing any activities online. This VPN is one of the most reliable and fastest VPNs that you can rely on. It also offers you a list of impressive features to enjoy. For more information about Surfshark, please read our Surfshark Review.
Here are the reasons why it is our VPN of choice:
- Bypass restrictions and geo-blocks to access lots of content.
- This VPN service has 3,200 VPN servers in 65 locations to choose from.
- Military-grade AES-256 encryption follows FIPS (Federal Information Processing Standards) that oversees the handling of sensitive data.
- It follows a strict No-Logs Policy
- No Bandwidth limits – you can enjoy a full-speed VPN connection without any throttling.
- Unlimited simultaneous devices
- 24/7 customer support.
Click here to get the lowest price on Surfshark through our exclusive limited-time offer.
How to Install Surfshark VPN on Firestick
If your Firestick still has the older interface, read this article to learn how to update it: Update Firestick Interface.
You can download Surfshark directly from the Amazon App store. It will be easy for you to find Surfshark with your Firestick’s Find feature. Refer to our screenshots below.
1. Go to the Home screen of your Firestick.
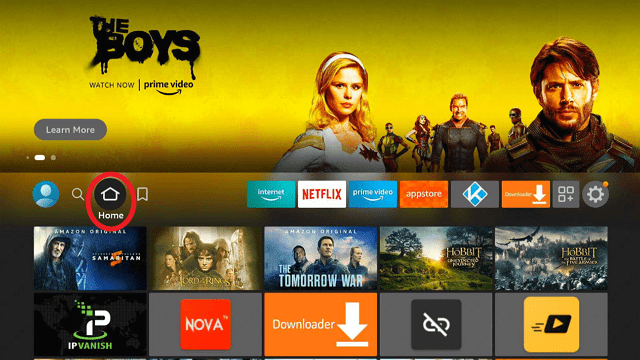
2. Navigate towards the Find tab. Press the Search button from the resulting dropdown.
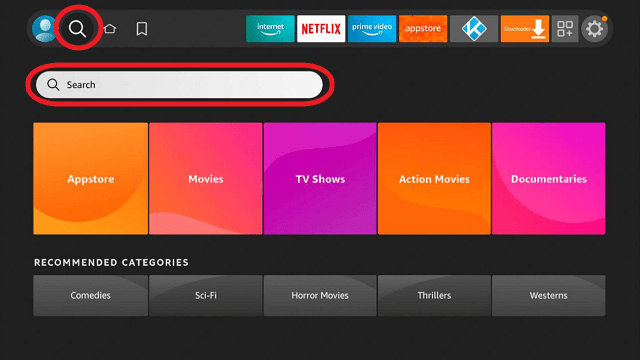
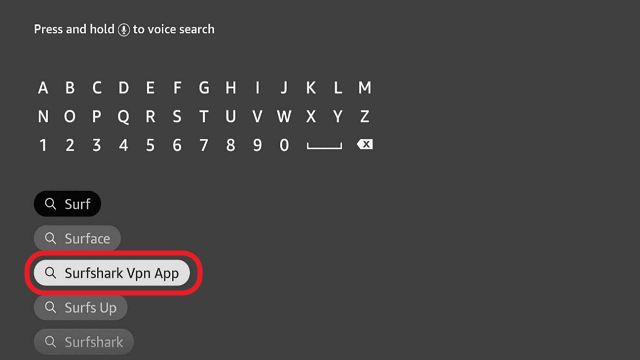
3. Type in the keyword of SurfShark and select from the suggestions that will appear.
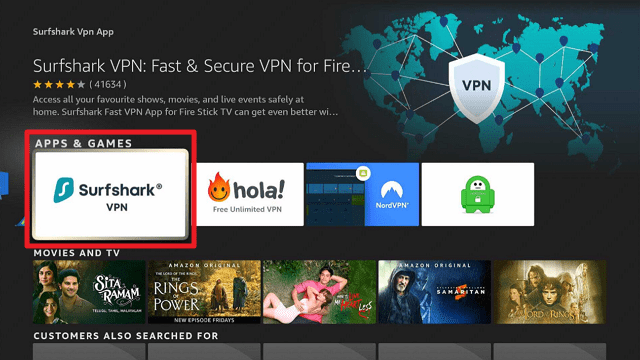
4. Click the official SurfShark icon from your search results.
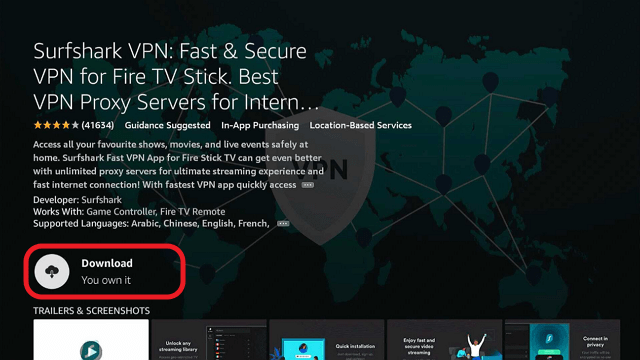
5. Press the Download (You own it) button.
6. The SurfShark VPN installer will download on your device.
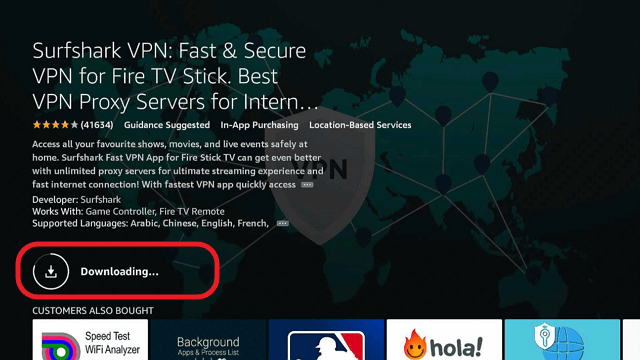
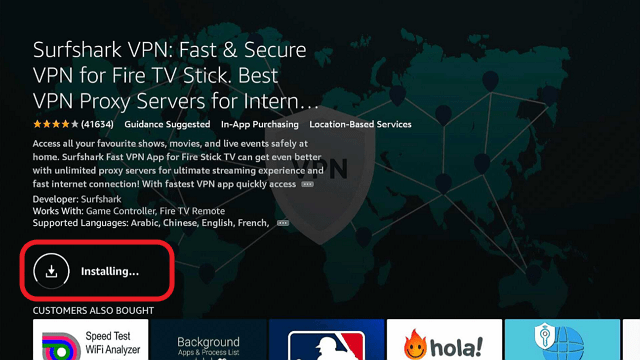
7. SurfShark VPN’s app will automatically install itself on your Fire TV stick.
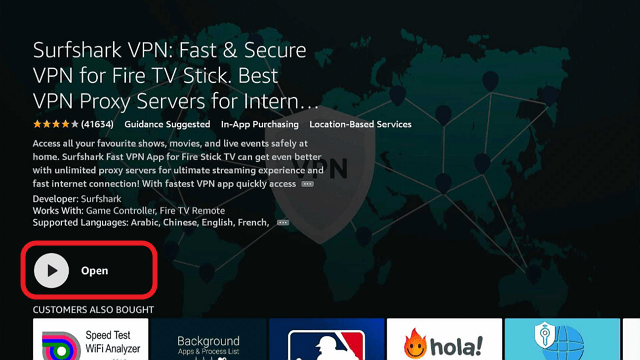
8. Press the Open button after completing SurfShark VPN’s installation process.
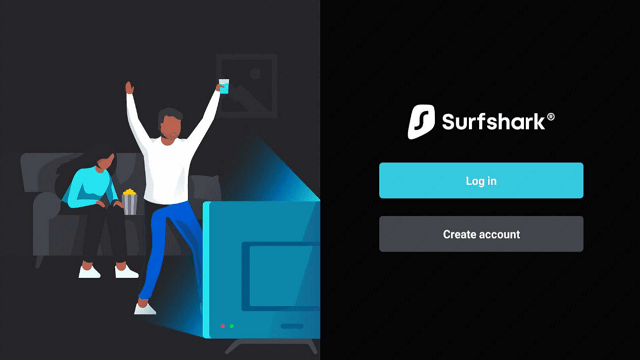
9. Please wait for the SurfShark VPN to load its user interface.

10. You can now log in with your SurfShark VPN account credentials.
Learn more about Surfshark and Grab the Best Surfshark Deal Now!
Install Surfshark on Firestick
For more VPN discounts, go to ReviewVPN Deals and purchase the best VPN for you.
Click here to get the lowest price on Surfshark through our exclusive limited-time offer.