Overview
Quick Navigation
This article is about how to fix Kodi with no sound.

Kodi is one of the best open-source media players that allows you to watch thousands of free content in a less buffering experience. This software supported thousands of addons from different repositories to give you lots of content. Kodi is feature-rich software that gives you an amazing experience in streaming and allows you to play media from your local storage.
However, just like any other platform, Kodi also experiences technical issues such as no sound issues. Whereas, some Kodi users reportedly encountered no sound issue while playing media locally and even through the Kodi addon.
The no sound bug may occur because of multiple reasons, and the good thing is you can also easily fix this kind of issue, which is why this article will help you fix the no sound issue on Kodi.

Reasons behind the No sound Kodi issue
There are multiple reasons why this problem occurs, inducing:
Kodi Audio Setting Problem
The most common reason for this issue is the incorrect audio setting that mostly happens when the audio settings of your Kodi don’t match with the audio output of your device. If the setting has a mismatch there is a huge possibility that it causes no audio output problem.
Outdated Kodi Version
An outdated Kodi version can also cause this issue, where your drivers are also outdated. Kodi is also prone to bugs and technical issues, because of its compatibility, which leads to sound problems. That is why we always recommend updating your Kodi.
Kodi Sound Drivers
There must be problems with your sound drivers, such as outdated drivers, and sometimes “Audio Passthrough can also mess up your sound system.
Corrupt Video File
There are also some cases that the no sound issue was not caused by the Kodi software, but by the video itself. A corrupt file is mostly because of converting a video file from one format to another.
How to Fix Kodi No Sound Issues
There are different ways to fix no sound issue, but before that, you must know what could be the cause of this issue, so you know what steps to follow in troubleshooting this issue.
Restart Kodi
Restarting Kodi is one of the easiest ways to fix this error. You need to force Kodi to stop all of the activities in it. In this way, your Kodi will reboot and remove existing connections. However, you don’t need to worry about any files because rebooting is not the same as reformatting.
Follow the step below:
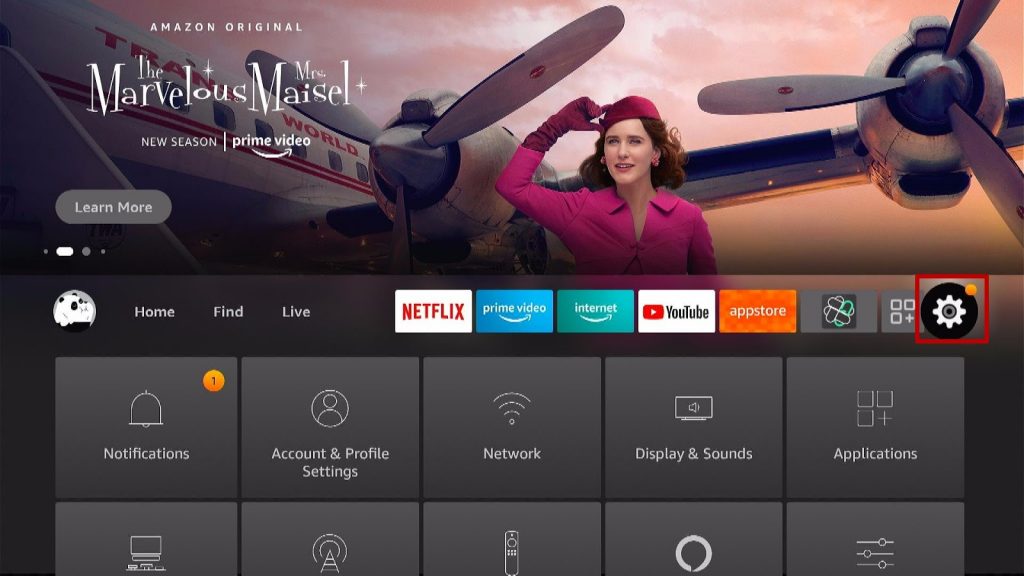
1. On your home screen, click Settings.
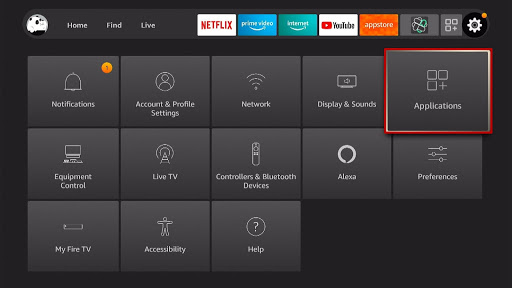
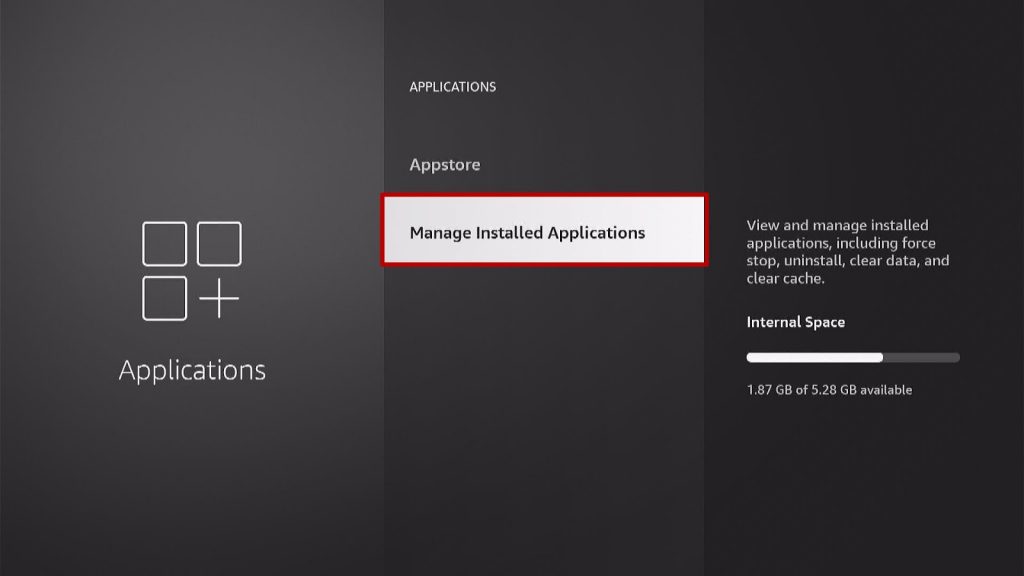
2. Select Applications.
3. Go to Manage Installed Applications.
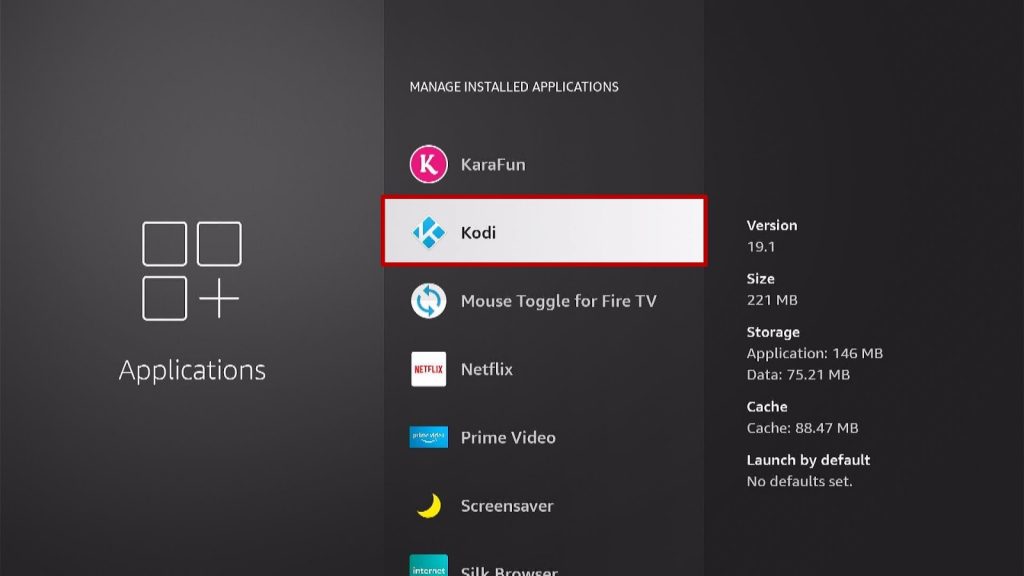
4. Scroll down and choose Kodi.
5. Select Force Stop.
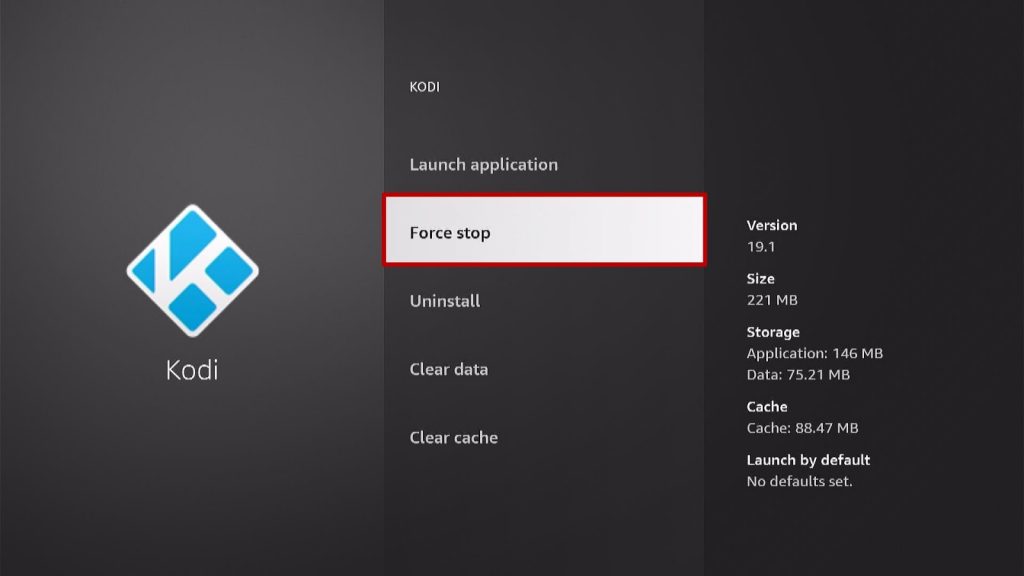
6. After that, click Launch Application.

7. That’s it! Check your audio if it’s now working.
Exit Command
It is the same as rebooting Kodi.
1. On your Kodi home screen, click on the Power button.
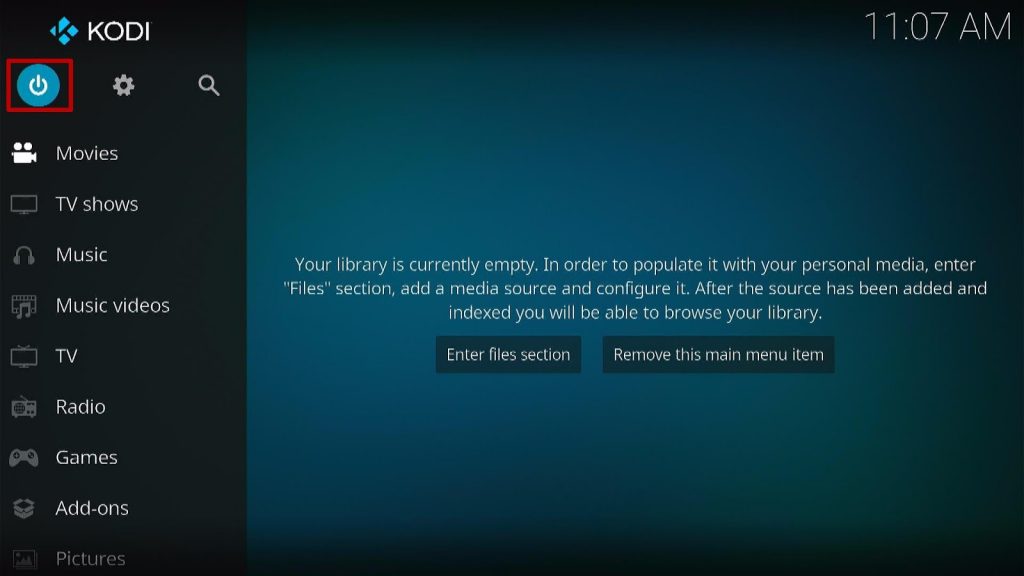
2. Choose Exit. It will automatically exit your Kodi.
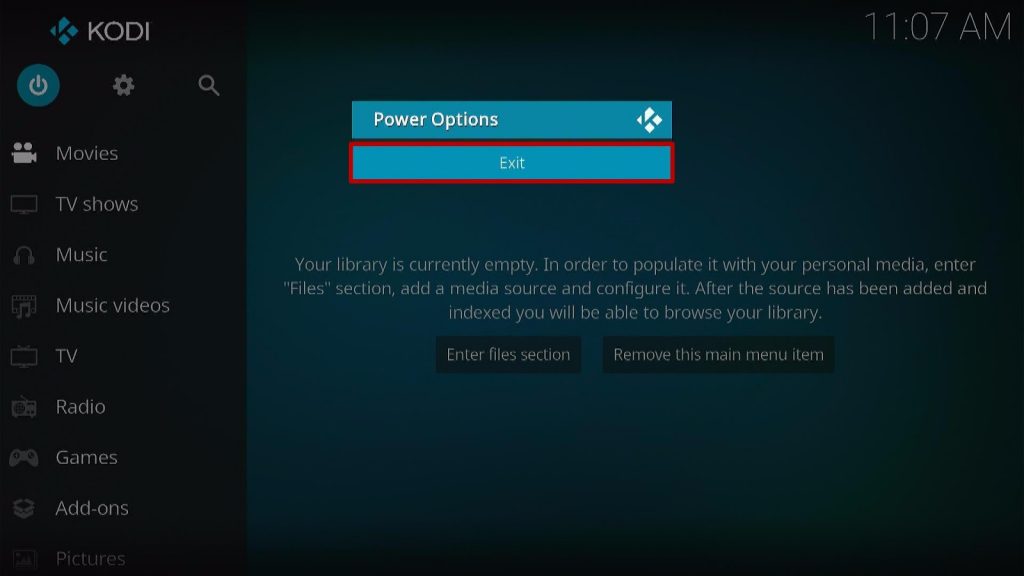
3. After that, check your Audio if it’s now working.
Enable Passthrough
The incorrect audio setting is one of the common causes of no sound error. That is why you must check if your Audio setting is fine. In this method, you will enable the Passthrough to have a better viewing and listening experience.
1. On your Kodi home screen, click Movies.
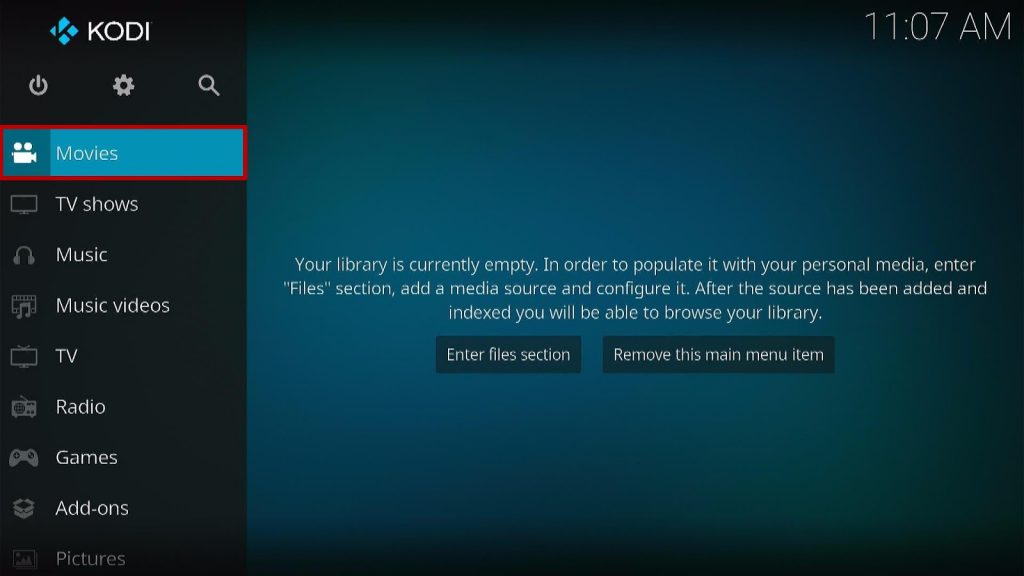
2. Select the folder that contains videos.

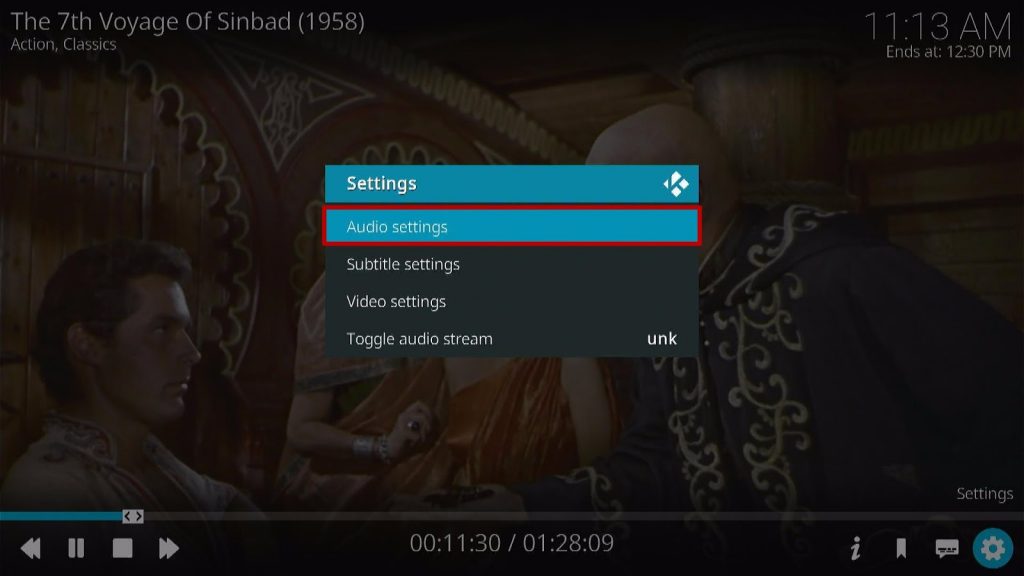
3. Play the video, and if there is no sound. Look for the settings icon at the lower right corner.

4. From the settings section, click on Audio settings.
5. Select Allow passthrough buttons and enable them.
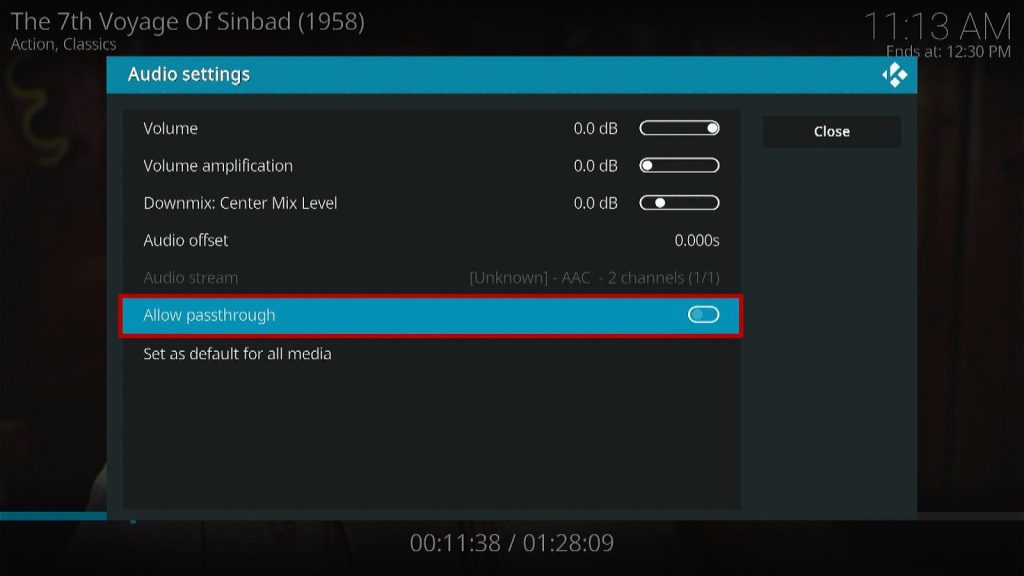
6. Click the close button and play the video again to see if the sound is working.
Audio Setting Checking
This method will change some general audio settings on your Kodi to fix some minor issues. Follow the steps below:
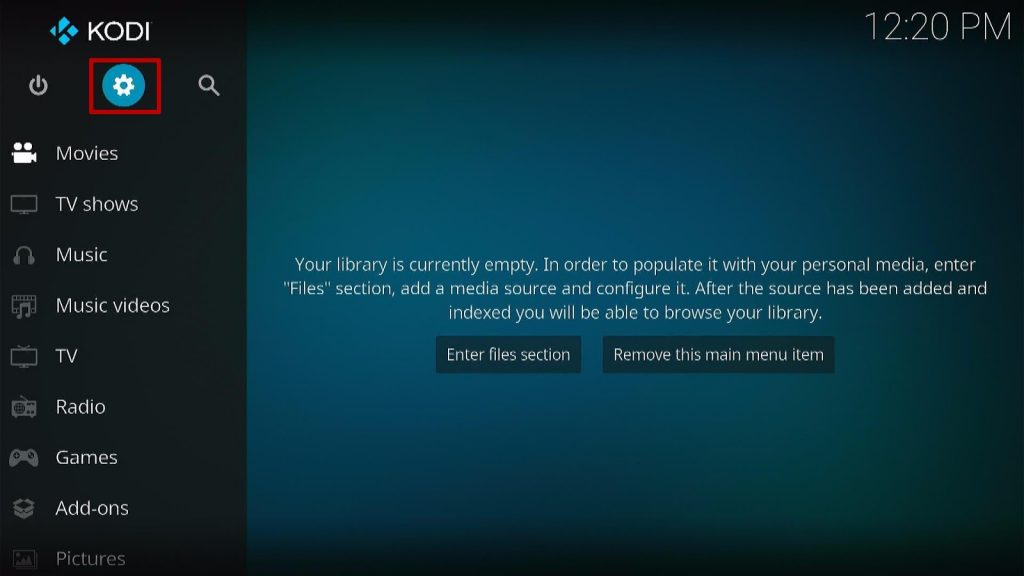
1. On the Kodi home screen, select the settings icon.
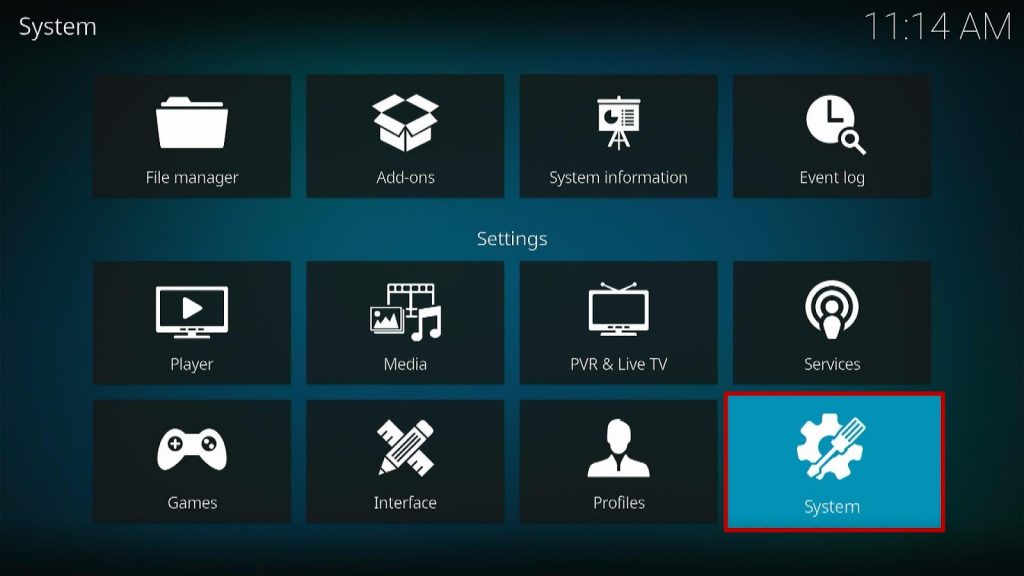
2. Go to the system.
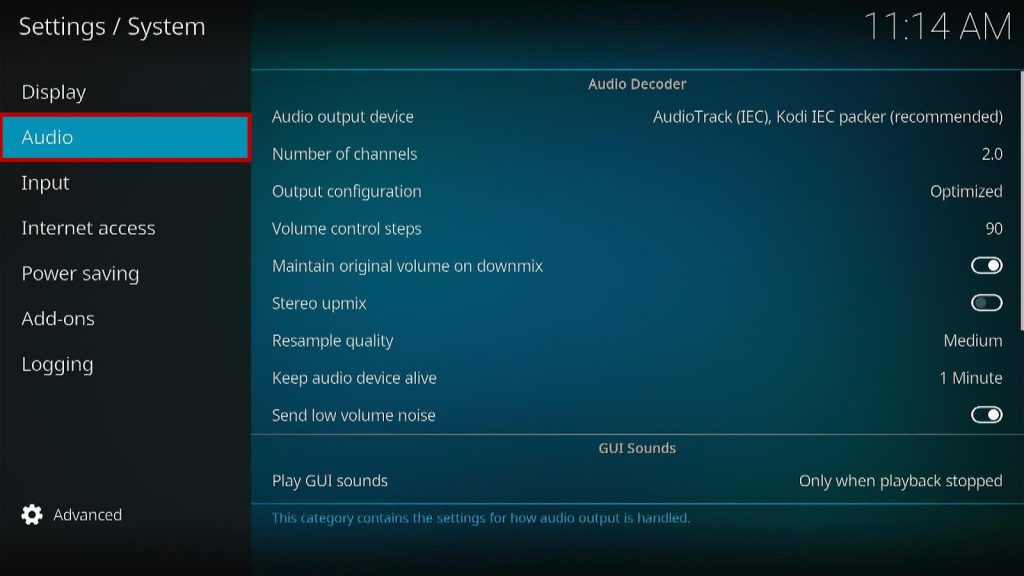
3. Click Audio.
4. On the left corner, you will see “Standard”, click it to change it into “Advanced”.
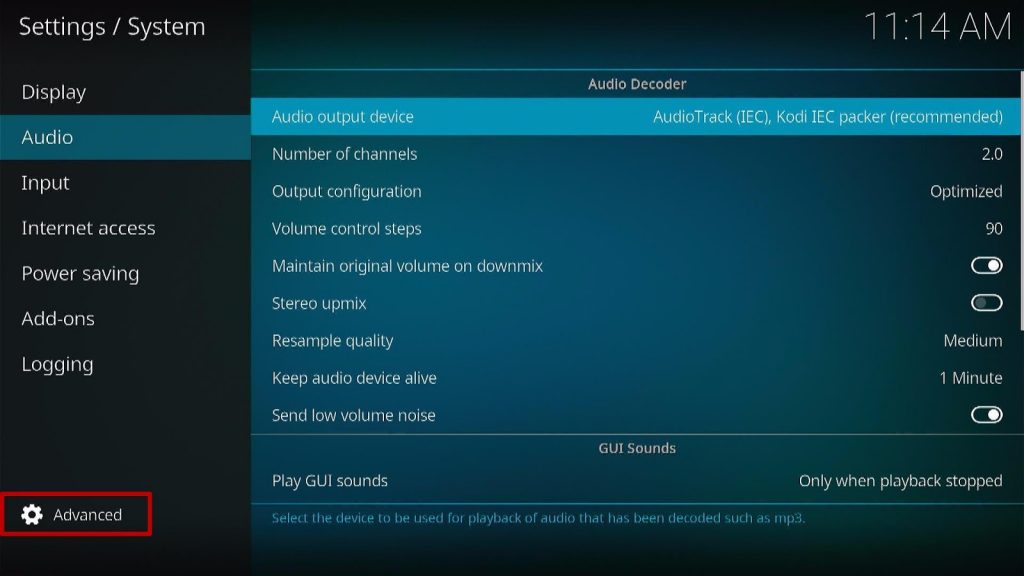
5. After that, you will see options on the right side.
ReviewVPN cannot attest to the legality, security and privacy of the applications discussed on this site. It is highly recommended that you use a VPN service while streaming or using Kodi. Currently, your IP 216.73.216.203 is visible to everyone and your Browser is being tracked by Advertisers & ISP Provider. Here are the main reasons why you must use a VPN: A VPN works be replacing your ISP-assigned IP address and creating an encrypted tunnel. We recommend the no log service offered by IPVanish. It works well on a Firestick and offers the fastest possible speeds.
YOUR INTERNET ACTIVITY IS BEING WATCHED
Legal Disclaimer: ReviewVPN.com does not encourage or endorse any illegal activity involved in the usage of services and applications referenced on this site. We do not verify the licensing agreements of services. The end-user is wholly responsible for ensuring that any media accessed through these services does not violate copyright and/or licensing laws. ReviewVPN does not promote, link to, or receive compensation from any Apps and IPTV services.
Install Surfshark on Firestick

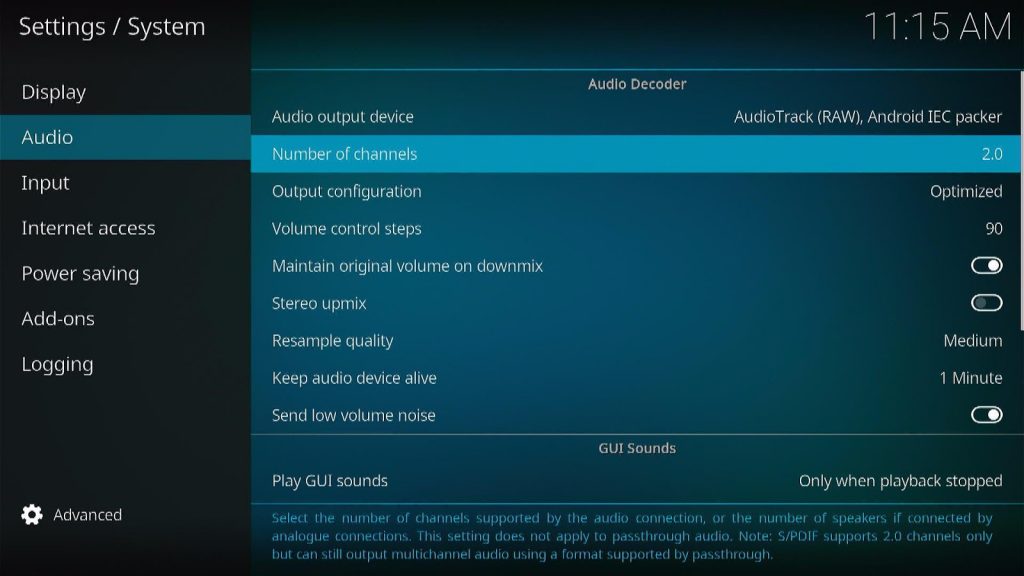
Audio Output Device
It allows you to select the right audio output to use on your device. You can choose any output, but be sure that it is appropriate for your device.
Number of Channels
It helps you to choose your preferred number of channels supported for digital audio connection.
Output Configuration
In this setting, you can configure the properties of the audio output. You can select different options such as:
- Fixed – This allows you to set audio output according to indicated sampling rate or even set the speaker setting accordingly.
- Optimized – You can set an audio output at the start of playback. This will remain the same even if you change the source in the properties.
- Best Match – This is one good option as it allows you to set audio output aligned to the closest match with the source properties.
Volume Control Steps
You can adjust the number of button presses that range from mute to its full volume.
Maintain Original Volume on Downmix
You can balance surrounding channels with this setting. It also allows you to downmix the audio and to restore the volume of the original audio source if your Kodi doesn’t have sounds at all.
Resample Quality
It helps you to resample the audio at various rates of low, medium, and high.
Keep The Audio Device Alive
This setting allows you to set the time for audio devices to wait or sleep. However, Kodi suggests 1 minute time only.
Send Low Volume Noise
You can also send an inaudible noise signal to set the audio devices to stay awake, but this setting can be disabled when using headphones.
Play GUI Sounds
It allows you to set the sound theme. The default setting of it is “only when the playback is stopped”.
Why do I need a VPN?
We always recommend using a Virtual Private Network to ensure safety and privacy. Having a VPN is like having an online companion that will keep you protected from any harm online.
One of the best VPNs that we highly recommend is Surfshark, whereas this VPN has an advanced security feature that will keep you safe from any harm online. This VPN will automatically protect your online activity by keeping you anonymous with its uncrackable security.
Here are the reasons why it is our VPN of choice:
- This VPN will definitely hide all of your online activities.
- It works on all devices and can secure unlimited devices.
- 24/7 customer support.
- It also supports P2p file-sharing activities which makes it applicable to torrenting
- Strictly follows No-Log Policy.
- DNS Leak Protection is active by default.
- Military-grade AES-256 encryption follows FIPS (Federal Information Processing Standards) that oversees the handling of sensitive data.
- It follows a strict No-Logs Policy
- No Bandwidth limits – you can enjoy a full-speed VPN connection without any throttling.
Note: For more information about Surfshark, please read our Surfshark Review.
Install Surfshark on Firestick
How to Install Surfshark VPN on Firestick
If your Firestick still has the older interface, read this article to learn how to update it: Update Firestick Interface.
Follow our screenshots below to install the SurfShark VPN app on your Fire TV stick.
1. Go to the Home screen of your Firestick.
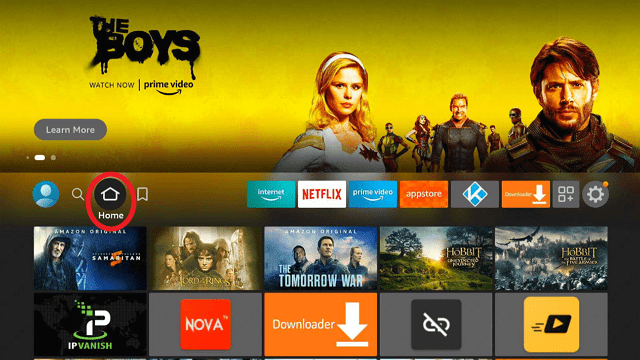
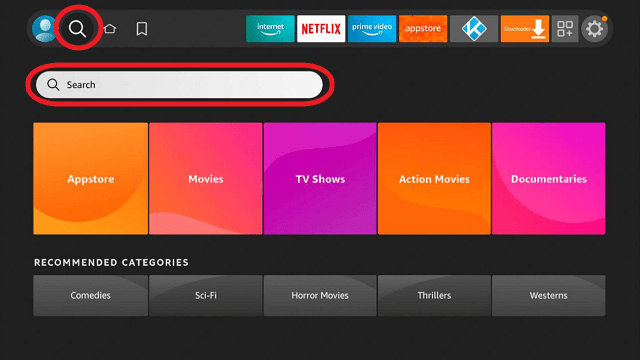
2. Navigate towards the Find tab. Press the Search button from the resulting dropdown.
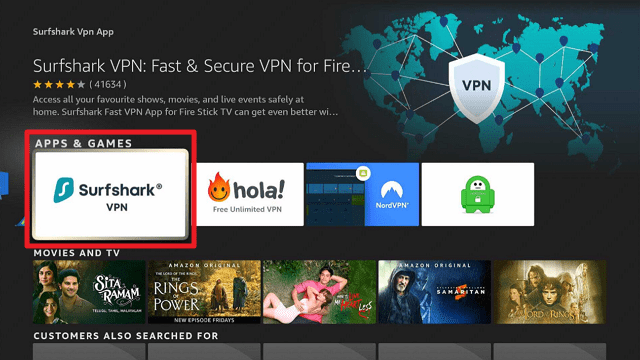
3. Type in the keyword of SurfShark and select from the suggestions that will appear.
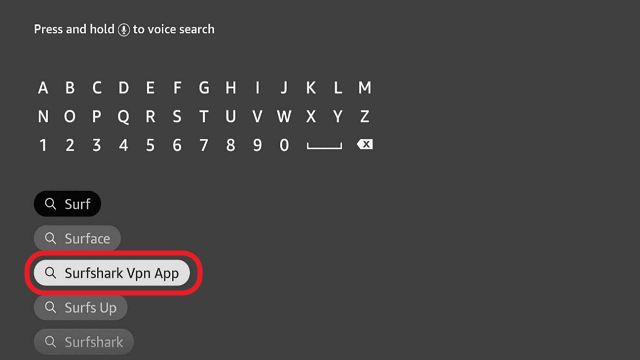
4. Click the official SurfShark icon from your search results.
5. Press the Download (You own it) button.
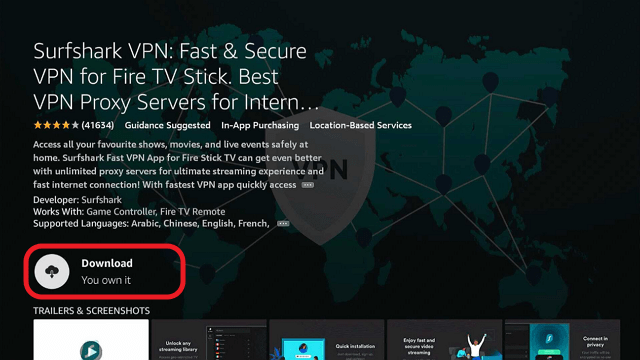
6. The SurfShark VPN installer will download on your device.
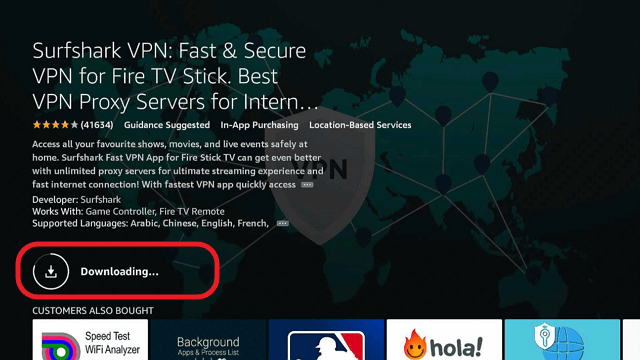
7. SurfShark VPN’s app will automatically install itself on your Fire TV stick.
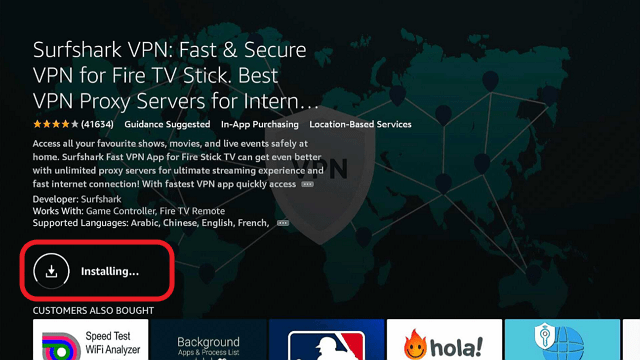
8. Press the Open button after completing SurfShark VPN’s installation process.
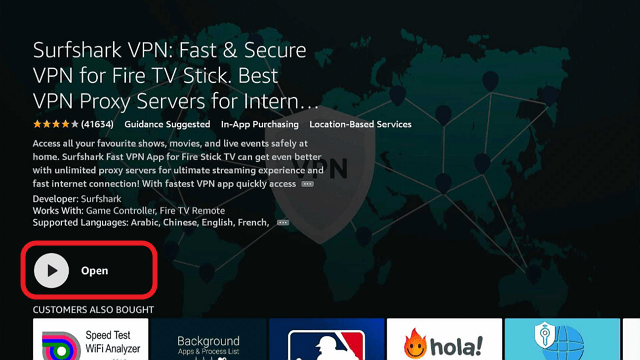
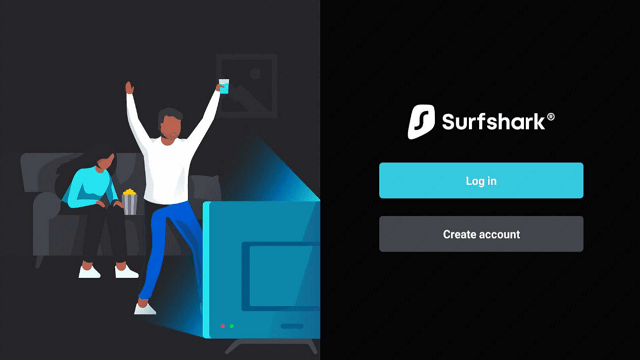
9. Please wait for the SurfShark VPN to load its user interface.

10. You can now log in with your SurfShark VPN account credentials.
Learn more about Surfshark and Grab the Best Surfshark Deal Now!
Install Surfshark on Firestick
For more VPN discounts, go to ReviewVPN Deals and purchase the best VPN for you.
Conclusion
Since no sound issue has been a problem for most Kodi users, we came up with an article that will address these problems. There are lots of methods to fix your Kodi no sound issue, but this article gives you some of the easiest ways to fix this kind of issue. We provide a step-by-step guide for you to fix this issue and enjoy streaming to your Kodi without any hassle. However, we suggest using a VPN such as Surfshark to protect your online activities. We hope this article helps you to fix no sound issues on Kodi.